Unofficial Limbo Guide by Mike Hazleton for
Limbo is a dark and heavily-stylised Xbox Live Arcade game. The story revolves around a young boy struggling to progress through a hostile environment. You control him, and through a series of platforming and puzzle elements, must attempt to reach the final stage of the game. The main draw of Limbo, apart from some tricky puzzle sections, is the animation. Your character is often killed in humorous and gory ways, setting this game apart from any competition. Furthermore, it is completely in black and white, which has allowed the developers to focus solely on animation. The chapters making up Limbo are only revealed once you complete the main game. However, I would suggest only using this guide when stuck on a particular section, or to get the final achievement, where you must complete the game dying five or less times, and in one sitting. This way, you will still enjoy the surprises and shocks that the game has to throw at you. This guide also contains all the achievements and secret egg locations. You will reach a selection of wooden beams and a rope on the precipice of a cliff. Look for the crate beneath the contraption, and pull it to the left (using X/B). It is tethered to the platform, so pull it all the way before climbing over it. Press jump and your character will automatically grab onto ledges. Press it again to pull him up. At the top, jump onto the rope and slide down to the beam. Drop down from this to reach the lower level. Head to the right and jump in the boat. It will take you across the water. Once on the other side, jump out and use the action button (X/B) to grab the boat and pull it to the right. You can then use it to give you a platform to jump up to the next section. Use the ladder slightly hidden to the right to climb up and then jump left to reach the rope. Proceed to the right through the darkness. Head through the first rays of sunlight, but stop when you reach the second, as there are some traps ahead. You can't jump both the traps, so pull the left-hand one away, creating a sufficient gap in between the two to allow you to clear both in two jumps. Continue until you see a rope with an animal carcass hanging from it. Drop into the pit underneath, and pull the trap to the right underneath the rope. Climb back up to the left, and jump on the rope. The carcass will trigger the trap, allowing the rope to reach higher – you can then get to the ledge up to the right. Follow the path until you come to another large log. Jump onto it, and then immediately back to the left. This triggers a boulder to come hurtling towards you, but it will miss you if you are far enough left. Jump over the boulder and continue right. You will eventually come to a crate and pool of water. Drag the crate back to the left, underneath a hanging rope. Use the crate to reach the rope, and swing to the right. You need to create enough momentum to allow you to jump off and reach the right-hand branch. From this branch, jump to the left and follow the branch to the other side of the tree. Jump to the next one on the left and then across to the right. Continue jumping rightwards until you reach a split tree. Push the tree so that the top half breaks off and falls below. Do not jump down yet, as there is an achievement to be had. From the branch leading to the tree you pushed down, jump to the left as high as you can. You should grab onto a rope. Climb about halfway up, then gain some momentum so you can jump to the left and reach the hidden section with the achievement egg inside. Achievement unlocked: Altitude is attitude (5G) Drop back down to ground level, using the branches to get down (or you will die from the fall).

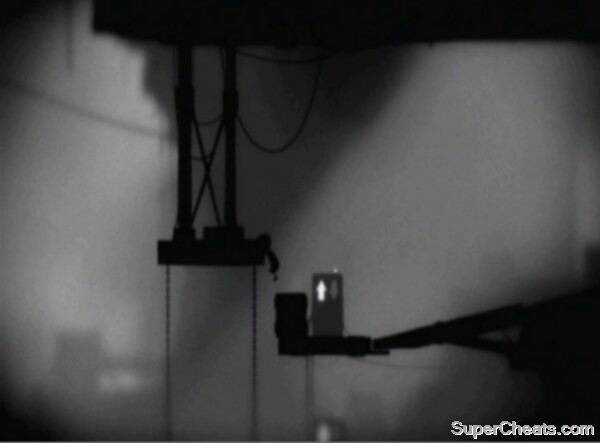
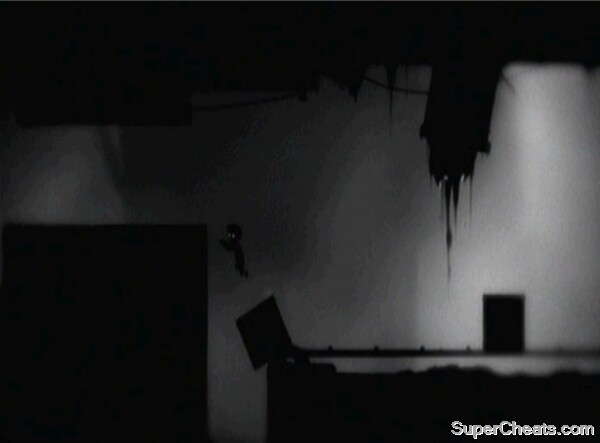
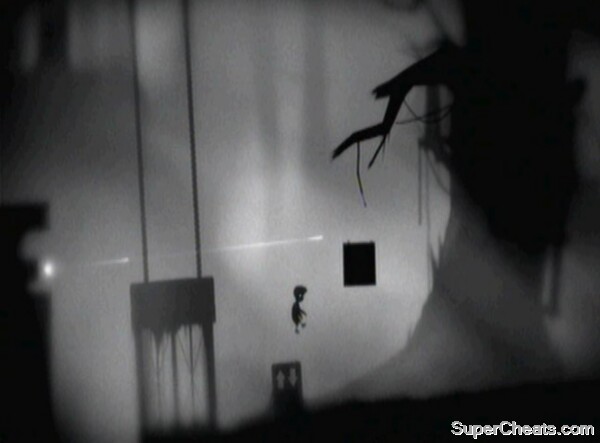
Chapter One
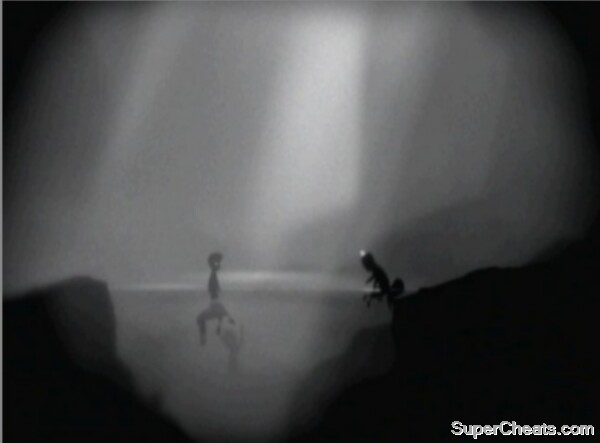
Descend the rope to continue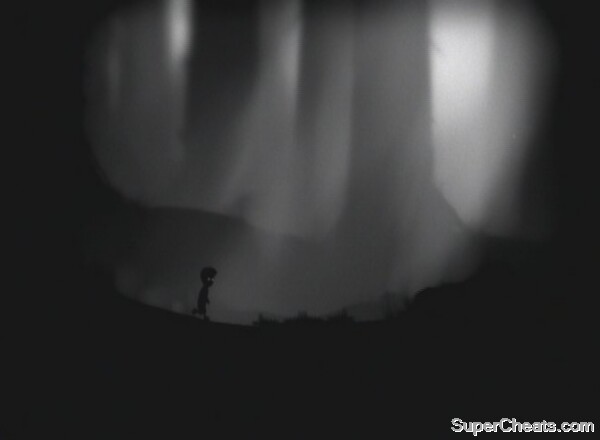
Look out for the bear traps on the ground.
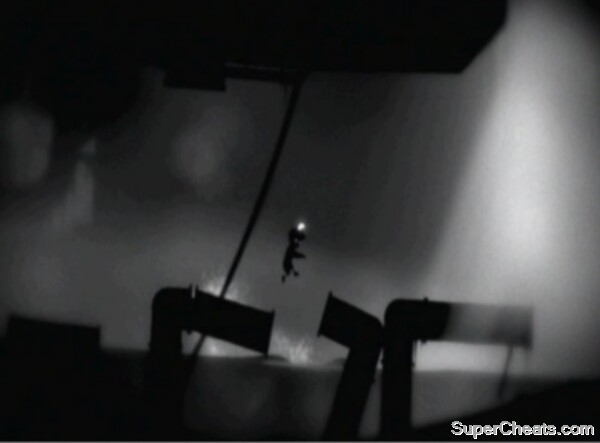
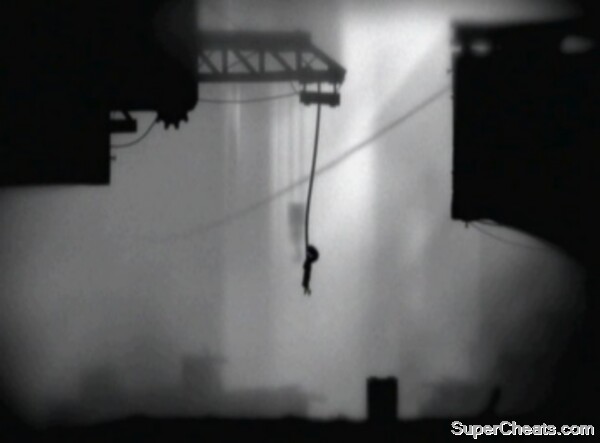
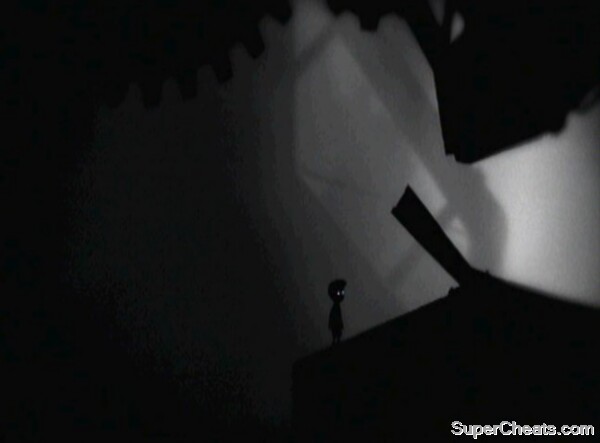
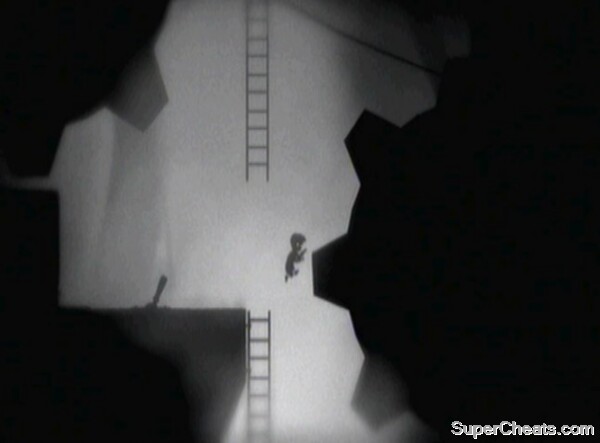
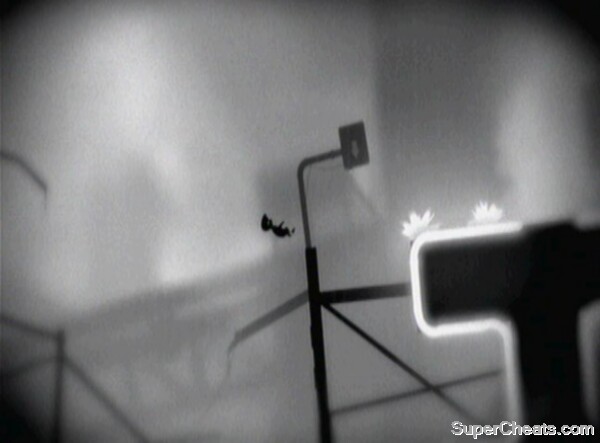
Chapter Two
This is the first real platforming section in Limbo.
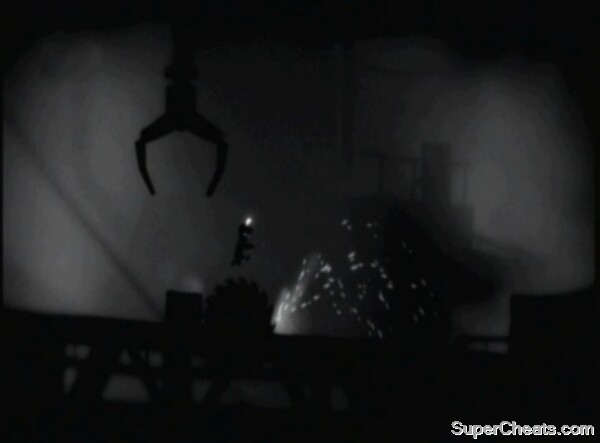
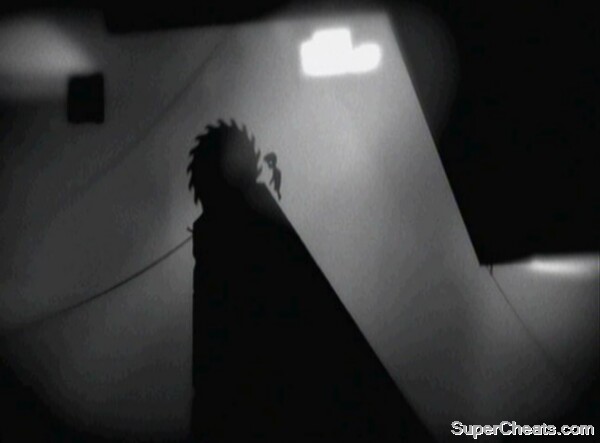
Get this tricky achievement
Once on the ground, push the crate to the right. It will knock into the log. Push both into the water – as far in as you can without risking drowning. You can then use these objects to cross the river and get to the bank on the other side.
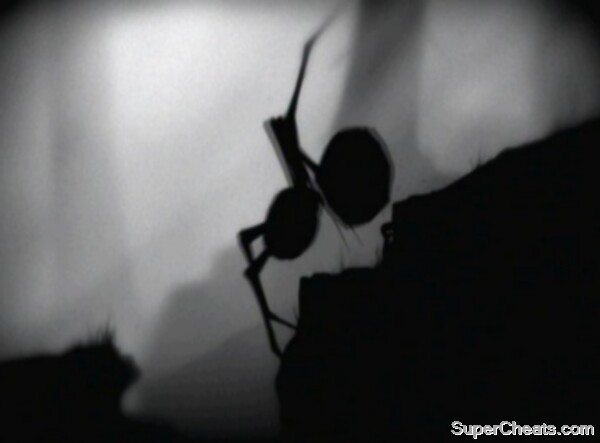
Head right until a spider unfurls its legs in front of you. It will take an early jab at you, which you should dodge. You must then lure further attacks so that the spider slams its legs into the ground twice. It will raise a leg, hovering it over your head, before drawing it back to strike. You should be able to avoid the attacks with relative ease.
Once two attacks have missed into the ground, a trap will have fallen down behind you. Head left and jump over it, before pushing it towards the spider. You must now lure further attacks, but instead of running off to avoid it, pull the trap back so that the spider's legs hit it instead of you. Beware though, you should let go of the trap before the attack hits, as the spider can lash out immediately after losing a leg (particularly after the second one) to take a life from your character.
Take out three of the spider's legs to send it limping away.
Force the spider to retreat
Head right and you will slide down a slope. Continue right until you are stopped by some slime, reducing your character's movement. The spider will make a return, spinning you into a web. Wriggle free and scamper further to the right. Your movement is restricted due to the web, so when you reach the small gap in the level, be sure to jump it carefully.
Soon you will come to a slope, and you must jump before you reach the pit at the bottom to avoid another death.
Push the boulder to the right, into a pit, once you reach it. Immediately run back to the left, as the boulder will send the tree coming crashing down. Use the new bridge to head further right. Once you drop down the small dip you will find yourself on top of a boulder. Move to the right edge and it will begin to move. Continue to move left so as to keep the boulder moving. Beware also, as the spider has returned and is now chasing the boulder. You need to jump from it and onto the stump ahead as quickly as possible.
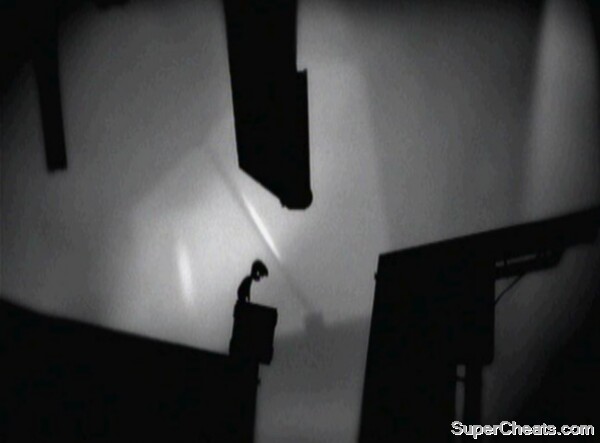
Get over the crest and you will slide down.
Avoid the spider's advances
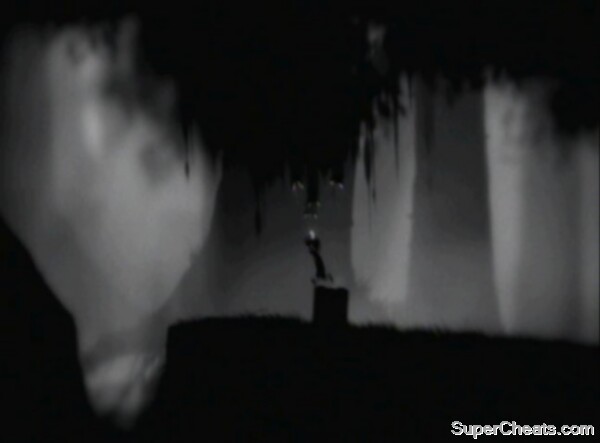
Run to the right towards the character sitting down. The ground will give way, sending you down to a lower section. Once you reach the pit, jump on the rope and immediately let go, swinging to the right. This will allow you to avoid the trap harnessed to the rope. You can then move back left and safely use the rope to swing to the next ledge.
Soon you will reach some tree stumps. Jump between the first four. At the fifth you need to snap the stick supporting a spiky tree ahead. Immediately jump back left to avoid it falling. Use this to cross to the next jump. Having landed on the next tree, it will begin to fall, and you need to jump off quite late to avoid getting impaled on the trunk.
Once you jump to the low, thin stump, a boulder will come swinging towards you. Jump directly up to avoid it.
Jump over the boulder.
Continue to the next tree and down the slope, jumping the spikes at the bottom. Head right and you will reach an artificial spider leg. It is controlled by some of the other characters, but it is easy to avoid its attacks. Head underneath it once the leg is raised, and jump over the watery pit. After a few seconds walking to the right, a flaming tyre will be thrown at you. Move back over the pit to get it out of the equation.
Head right again and a flaming boulder will come rolling. You can jump over this one (jump straight up to ensure you get enough height), and should immediately run to the right under the ledge ahead to avoid another tyre. Climb the two sets of ladders, beginning with the first to the right in the cave.
Walk right once you reach the top and you will come upon a camp filled with characters. Don't enter the area yet. Observe the character up high and the platform just to the left of the one he is standing on. You should be able to see two ropes there with traps on the end.
Once you get beneath the trap platform, the left trap will come swinging towards you. You must move immediately left once you see him going for the rope. You will be safe if you line up with the left edge of the trap platform. Immediately after the first misses you, however, the next will swing from the right, so you need to quickly head right as soon as possible once the first trap goes past.
This is a tricky section to do first time without practice
You can then climb the rope on the left and use the platforms to cross the gap. You will come to a log that you should immediately push into the water. Jump on and again to the rock to the right as quickly as possible – the spider is back and chasing you. Jump from the rock to the next log and climb back onto dry land. Run to the right and stand on the right edge of the log ahead. It will act as a seesaw once the spider steps on the left hand side.
That will raise your end, allowing you to jump to the ledge on the right. Quickly run right and snap the stick next to the boulder. Run back left and shelter in the corner of the dip in the terrain. This will allow the rock to take out the spider and miss you.
Shelter here to avoid the rock and spider.
Move right and jump the gap. Soon you will slide down a slope and find a spike pit guarded by two characters. The spider will come crashing down after you, but it has lost most of its threat. Indeed, the poor critter only has one leg left. Approach it, convincing it to strike at you. Dodge the attack and use the action button to pull off its one remaining leg. With that done, you can climb over the corpse and roll it into the spike pit. Use the body as a platform to reach the next section.
To the right you will find a pair of crates hanging from ropes. Continue down the slope to the right and climb the ladder. Head left and jump on the first crate. The crow will fly off. You can then jump to the second crate and it will fall to the ground. Push it to the right, past the ladder we climbed earlier. Use the crate to clamber up to the next ledge.
Continue right, wading through the first pit of water you come to. The next, with a body floating in it, is too deep. Jump onto the body and stay there until a possessed character walks into the pool and drowns, making another platform for you to use.
Cross this pool using the forlorn bodies of other characters.
There is a third body at the right edge of the pool. Pull it out and drag it up the slope. Get on the other side of it so you are pushing it, before sending it into the gap beneath the large box with a tripwire underneath. This will send the box crashing down.
Slide down the slope to the right and you will come upon a crushing machine. You will notice two indentations in the floor, and one higher square. You can use the higher square to cross, but if you touch the indentations, the machine will crush you. Cross using the square in the middle as a platform.
The next crushing machine shortly after appears to have a similar layout, but this time you can't touch the platform in the middle, so use the indentations to cross. When you get to the spike pit, cross it to see a group of three characters with blowpipes. They will begin to chase you, so jump back to the left across the spike pit. One enemy will fall in. Jump over the trigger of the first machine – the chasing pack do not know how to do it safely, so another enemy will be crushed. Do the same with the second machine to stop the last enemy.
Kill your pursuers
With the machines fixed down, you can now jump safely over them and make your way to the right. Be sure to jump the spike pit again and continue right.
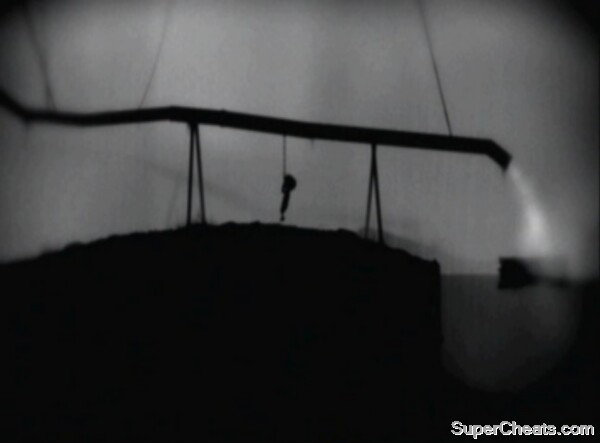
Head down the ladder and pull the cart at the bottom on the left out into the open. Position it as far right as possible, before climbing back up the first ladder. Jump from the ladder to the platform on the right and jump onto the rope hanging down above a pair of cogs. Climb the rope as it falls so you don't get sucked into the cogs.
Secret Egg #1: When the rope stops, quickly head back left, up the ladder, and to the spike pit at the end of Chapter Seven – the spikes will have been removed allowing you to collect the secret egg – but only temporarily – so be quick!
If you collected the secret egg, go back to the rope and climb on. Once it stops, you have a race on your hands. Jump off the rope, head left and jump down to the lower level, ignoring the ladder as it slows you down.
Quickly climb onto the cart and jump onto the bottom of the rope that should still be hanging beneath the cogs. Your weight will pull it down further and stop it lowering one of the blocks in the section to the right. You can stay hanging here as long as you want, but then will need to swing and jump onto the rope on the right, which raises the right hand block (note that once you jump, the left hand block will begin to come down). From this second rope you will be able to see the two blocks moving. Once there is a big enough gap under both of them you can swing off and head through.
Get through the blocks
Continue on, down the slope and over the glowing bugs. Further ahead you will find a bug hanging from a rope. Walk beneath it. These bugs take possession of their host and force them to walk in a particular direction. You can control the speed of your character and jump, but cannot do anything about direction. To begin, they send you to the left. The bugs hate light, and will move away from it, so the idea is to move into the light if you need to change direction.
There is light not far to your left, so before long you will find yourself stumbling to the right. When your character begins slipping down the slope, be aware that you need to jump at the bottom to avoid falling into a pit. Continuing to the right, jump over the crate and you will find more sunlight. It will turn you around, allowing you to push the crate to the left. Once it gets beneath the creatures marked by their yellow beaks, climb onto the crate so that they peck off the bug.
These birds can be used to peck off the mind-control bugs.
You are now able to move to the right freely.
Secret Egg #2: From the start of chapter nine, go to the left and push the crate to the edge. Follow the steps below to chase the creature into the machine and get the rain to begin. You will then be able to return to the crate to find an egg on top.
Climb over the machine and continue, chasing the creature ahead until he runs under a ledge. Climb onto the top of this ledge and jump to the left, onto the platform with the bugs on the bottom. Jump up and down on top of it to send some bugs onto the ground, attracting the creature back out. Fall down to his right and chase him into the machine we passed earlier.
You can then climb back onto the machine and push/pull the lever to the left to start the big cog spinning – with the creature running inside! Soon lightning and rain will kick in, at which point you should head right, climb back up the ledge and continue forwards. Ignore the leaking pipe and proceed into the pit. Drag the log to the centre of the pit, just below the exit of the pipe, and use it to help you climb out using the rope at the side.
You can then move back to the left and jump on the rope that is dangling down from the disjointed pipe section.
Fill up the pool with water.
If done correctly, water should fill the pit and raise the log we moved into the middle. You can then use it to cross safely to the other side (beware as the water level will lower as soon as you let go of the rope). You should then continue right until you come to an oil leak. Grab the rope in front of the leak and climb up.
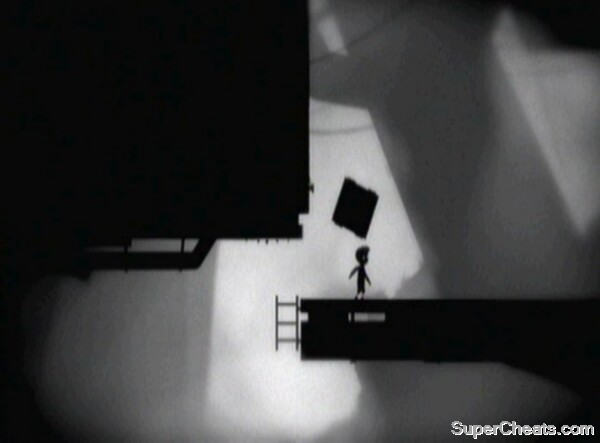
After a short distance you will slip down a slope. Push the crate at the bottom to the right, leaving it in line with the gap in the platform above (see picture).
Position the crate in roughly this position.
You can then pull the lever on the right. This will cause the water level to rise, so climb up the ladder to escape. Once at the top, pull on the platform to the left to open a path through for our crate. Get on board. As it nears the top you will see a spiky ceiling, so jump to the left once you draw up alongside the ladder, and climb up. Immediately head right, as the water is still rising.
Pull the crate here out into the open so that it is not far from the edge of the ledge above. Stand on it and wait for the water to rise. This crate has a hole in it, so is unstable. You need to stand directly in the middle to stop it from tipping over, and it also slowly sinks, so jump off as soon as you are in range of the ledge.
Manipulate the water to move through the level
Head right and jump down onto the slope and hop onto the second platform you pass on your slide downwards. Pull on the platform to the right on this level to open another gap. This will allow a balloon to come popping up. Stay attached to the hook on the platform so that you can shut it quickly as soon as the balloon shoots through. You should then push the balloon to the right so it begins to roll down the slope.
Climb the ladder going up to the top floor. Stand on top of the crate near where the balloon is rising. The balloon will enter the crate and begin to raise it up, bringing you near to the ledge above (make sure you stand in a sensible position on the box so as not to fall off because it is another unstable platform). Jump to it. 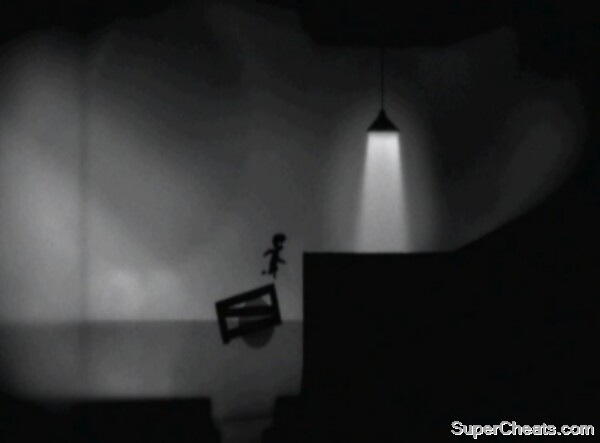
Balance on the crate.
Head right and pull the lever. Wait for the water to rise above you, then push the lever back into its original position (this is important to ensure the next section works as planned). Climb the ladder and jump onto the crate in the water. Continue to the next platform and pull the lever. This will lower a box into the water and allow you to cross. Use the crate on the right to reach the level above.
Head through the light and jump down to the platform below. Pull the crate beneath the glowing bug to the left, and then push it so that it is as far left as it can go. You can then feel free to walk under the bug and get it to latch onto your head. This will send you to the left, so climb onto the crate and then jump to the next ledge. You will enter the light and turn round to the right. Jump back onto the crate and then up onto the first ladder.
Jump to the second ladder, having waited for a stream of rubbish to be thrown between the two. You should then climb down and move to the right. Jump between the pipes avoiding the water. On the first 'n' shaped pipe the ground will give way under you, so beware and jump to the next. This will start the water level rising, so time is of the utmost importance. You will then reach some more light and turn around once again.
Move over the pipes to reach some more sunlight.
Race back over the pipes, bearing in mind the rising water, and rejoin the right-hand ladder. Quickly cross to the left-hand ladder and disembark onto the platform that we have frequently used before. Climb back onto the box and jump left, heading for the sunlight that we made use of earlier. Turning round once again, get back to the ladders. Wait for the rubbish to fall then cross to the right-hand ladder, before climbing up. Wait for the water level to rise which will push a piece of piping up towards your position. Use it as a platform to cross to the next area.
The birds on the roof above will peck off the bug and you will be in control again.
More water and crates!
With the bug removed, move back to the pipe and pull it to the right. Get around the other side so that you can push it to the right, past the ladder and into the open water. You need to line the middle of the pipe up with the end of the gutter above (the one without water coming out of it). Basically the left edge of the pipe should just about be in the open water.
Climb onto the pipe and jump high and to the left. You should grab a rope obscured by the scenery. This will dislodge an achievement egg, sending it to land onto the pipe you had moved beneath the gutter. Pick it up.
Achievement Unlocked: It's Stuck (10G)
You can now climb the ladder to come out into the rain once again. Move to the right and jump the large gap. Continue and you will slip down a rooftop. You should jump soon after you get past the chimney to avoid falling. Jump over the water pit to grab the drainpipe on the wall and climb up. It will dislodge but you should resist the urge to jump off. Get to the top and you can easily jump to the ledge above.
Soon you will come to a HOTEL sign. Some of the letters are electrified, starting with the H. Just after it lights up, you should jump to land on it. If timed correctly, you will land just as the electricity cuts. You then need to quickly jump to the O. It will move, dislodging the T.
Secret Egg #3 (Part one): This egg is not collected until chapter 23, but we have to set it up now. Walk on the edge of the O to spin it round. You should be able to see a line across the centre of the letter. At one end of the line is a handle. You need the O to rotate so that the handle is pointing out of the right hand side of the O. See our Chapter Twenty-Three walkthrough for the conclusion of this egg hunt.
Drop to the rooftop. From the T a rope is hanging that you can use to cross the gap. Swing to land on the other side and make your way to the electricity box. Pull the switch to deactivate the electricity, before heading left using the rope. Grab the drainpipe and climb up to get back to the H, which will now be deactivated.
Make your way across. Once you reach the L, it will move. You should jump onto the arrow before it dislodges too far. The arrow will soon fall to the ground, so jump off and onto the next ledge. Head right until you are able to drop down onto a glass roof. Ignore the cracking and make your way across to the solid ground on the other side. To the right you will find a movable ladder. Pull it from the flat ground to the slight slope and climb on as it begins to roll down. You need to get to the top and jump just as it rolls up and hits the left hand side of the roof. From this distance, you should smash the roof and fall through. You need to time the jump just as the ladder hits the block.
Smash the glass ceiling.
You will begin to slide down a slope. Jump onto the light before you reach the bottom. Jump to the next one which will quickly brake off its ropes and fall, so leap to the hanging rope to the left. It will lower under your weight until it reaches a point not far from the bottom, at which height you can safely jump down.
Head to the left and knock over the scaffolding-type structure by jumping into it and quickly running off so as not to get crushed. Turn around and head right past where you first landed in this area. You will be taken over by a mind-control bug. It will steer you left, past the broken scaffolding into a pool of light – this will turn you to the right once again.
Allow it to take you over all the obstacles until you come to a gap that you are forced to jump over. Use the two platforms to jump to a longer third one. You can then reach solid land again, and will soon naturally step onto a large switch. This will drop a crate in front of you. As soon as you reach the button you should push left on the stick to slow your character down. Once you reach the crate, climb onto it and use the height to jump over the oncoming saw blade.
Avoid the saw.
You then want to climb up to the ledge with some bug-eating birds on, and jump to get nearer their mouths so that they can peck the bug off your scalp. With that done, wait for the saw to get right up to your ledge, before jumping over it to the left. Run back to the left, jumping back onto the long platform. You need to move from the right side to the left, then from the left side to the right and repeat this to create a see-saw effect allowing you to run from the low right to the high left and jump onto the next platform.
Once the momentum gets going, instead of running from side to side, wait in the middle until the left side gets high enough, then quickly jump across.
It can be tricky to get the hang of this
On the right hand platform, use the hook on the left one to pull it and create some all-important momentum. You can then use the momentum to cross back to solid ground on the left.
Continue to the left until you reach the elevator. Head past it until you reach a crate underneath an overhang. Pull it so that it is in the middle of the elevator. You can then interact with the lift controls, marked by two arrows, to begin it moving upwards. Immediately move so that you are back on the elevator as it begins moving up.
Once the elevator gets to the top, push the crate off to the right so that it lands on the ledge above. Send the lift back down using the upper controls. Position the crate near the edge. Call the lift to come back and immediately climb onto the crate and then onto the top of the lift.
Climb on top of the lift
The lift will rise up, moving you close enough to a rope dangling on the left to be able to jump to it. This will drag the gutter above down, sending an achievement egg down to the level below. The height back down will kill you, so you should first swing back to grab onto the top of the lift, before dropping down to the bottom of the lift, and finally back to the ground. Pick up the egg.
Achievement Unlocked: Urban Exploration (10G)
Head back to the lift controls and call it back down. Once on the ground level, send it back up and climb on before it passes you. Once at the top, send it back down, but push the crate into the lift as it goes down. You then want to call it back up, as long as the crate is secure on the lift. Once at the top with crate onboard, send it back down, but pull the lift using the hook on the side so that as you get more chain to work with, you can pull the lift further to the right.
You will now be able to climb on and push the crate off the lift, onto solid ground. Keep pushing to the right until you get to the lever. Pull it to bring a rope down. Position the crate underneath it so that you can climb on board and reach it. Before doing so, however, you need to push the lever back again so that when you climb onto the rope, it will begin moving back up again.
Ascend the rope
Swing to the right and jump off at the top. As you move right, step on the first button. Wait for around three seconds, then step on the right hand, second button. Immediately run back to the left hand crate, and pull it beneath the second one. You need to line it up with the second crate so that when it lands on top, you can climb up to the top and jump off to the ledge above. Of course, while doing this, you need to be quick and avoid the saw blade coming in your direction!
The timing of this puzzle is crucial, and is tough to get right first time
Once up on the ledge, head right, past the ladder and into the darkness. You will go down a slope. There is a small pit at the bottom, but because it is pitch black, it is impossible to spot. Watch for the moment that the ground begins to level out, and jump at that instance. For the exact timing, check the video below. Once over the gap you will come to an achievement egg. Pick it up.
Achievement Unlocked: Alone in the Dark (10G)
Avoid the gap in the pitch black
Secret Egg #5: Continue to go right until you hit another obstacle. Climb up it and continue right until you stop. From here, run for a few seconds and jump to the left and you should break through the floor into an area below. You may have to take a few tries at this to locate the weak area in the floor (listen for a different noise when you land to know you're in the right place). Once in the next area, head to the right to find the egg.
Secret Egg #6: Follow the path further to the right. Once you come to a wall, push down on the control stick to get your character to climb down the ledge. Drop down to another platform. Head right until you reach a blockage. Jump to climb over it. Further right you will see the egg underneath your position. Follow the path until you drop down. Turn around and pull the platform out. You can now climb over it and get to the egg.
With the achievement and eggs in hand, head back to the left (you don't need to worry about avoiding the pit this time) and climb the ladder at the top of the hill.
Continue on and slide down the slope. You will come upon a fly. You need to walk towards it as slowly as possible, and once you reach the edge of the debris it is sitting by, you should jump at it and use the action button to grab onto its wing. Even if you miss you can back off and allow it to settle down again.
Once on its wing, it will carry you up and the leg will detach, dropping you harmlessly down to the ground.
Continue to the right. Follow the path until you get to two ladders. One is further to the left and up high, while the other is to the right and down low. Climb up the lower ladder and position the crate at the top beneath the higher ladder. Climb up. At the top, head left. You will come to a pair of movable platforms. Pull the right hand platform to the right, until it is in the open allowing you to climb over it. You should then pull it to the left so that it is back near its original position.
Climb over the left hand platform. Activate the switch at the far left. This will set a tyre rolling out of a hatch beneath the switch. You should immediately climb over the nearest pillar and push it as far left as possible, so that it provides a continuous surface for the tyre, which will now have emerged, to roll onto.
Line up the platform to give the tyre somewhere to roll
Once the tyre is on the platform, pull it towards the right hand platform. The tyre should be transferred, at which point you need to push the right hand platform as far to the right as possible, so that the tyre reaches the next ledge and rolls away. You should then climb back down the ladder. At the bottom, head left until you come to the tyre which is now on this lower level. Push the tyre to the left, as far as you can.
You should then immediately run to the right, so that the tyre follows your path of its own momentum. When the wheel hits the right hand side of the ramp, the gate to the right will open. Wait for it to do so, then jump through. Get on the right hand side of the crate and push it against the gate, which will now be shut. Luckily, the tyre should have enough momentum to open the gate again. As it does this, push the crate through.
Head back down and pull the crate to the right. Use it to climb up to the platform suspended in mid-air with a lever on it. Ignore the lever, and jump from the platform onto one of the protruding edges of the cog to the right. Climb over it and continue round the cog. There is an achievement egg on the bottom protrusion of the cog on its right hand side.
Make your way to this achievement egg
Achievement Unlocked: Climbing the Cog (10G)
To get back to the lever platform you need to climb the ladder to the right. Underneath the top of the ladder is a crate you need to pull out of its nook. Get on the right hand side of it and push it off the edge and onto the cog. With that, you can make your way back to the lever platform. Now you can pull the lever!
Push the crate you were using to get onto the lever platform into the cog. The idea is to make sure that the crate is carried up by one of the cog's protrusions. Travel on the cog too. Once you get to the other side, you should now find two crates next to each other.
Pull and push the right hand crate over the switch, which activates a lift, as far right as possible. Wait for the lift to go back down again so that the crate is right against the wall. Pull the left hand crate onto the switch so that the lift is raised with the right hand crate on board. Climb onto it as it goes up, and use it to access the ledge above.
Head past the switch box and climb up the chain next to an electrified section of the level. You need to swing from right to left to create momentum on the chain. Once you reach far to the left, jump off and activate the switch box. This will send the chain moving over the electrified floor from left to right. You should be able to quickly jump back onto the now-swinging chain to cross the floor.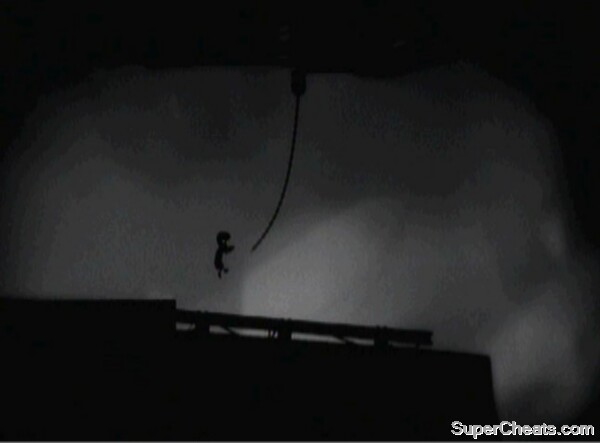
The swinging chain will allow you to grasp onto it as it moves away
Swing on the chain again to ensure that when you jump off, you clear the floor comfortably.
Drop down towards the cogs ahead. Push the smaller cog into the side of the larger one. This will turn the whole level into a large machine, and begin turning it around. As the level begins to move, you need to stand on the left edge of the platform (don't go down towards the electrified floor) so that when the door falls open, it doesn't crush you.
Stay out of the way of this gate as it opens
Once it opens, head through. Walk up to the cog and use its protrusions to carry your character round.
Secret Egg #7: Ride the cog all the way round and navigate to the right to collect a non-achievement egg.
Get back to the cog and up to the level above it. Once on the ledge, drop down to where the magnet switch and a crate are. Push the crate as far to the right as possible. Let go and immediately head to the magnet switch – activate it when the crate, which will now be sliding down, is in the middle of its slope. It should be in a position allowing you to reach the ladder and the ledge to the right.
You can then use the crate to get back up to the ledge on the right. Activate the switch and immediately head back left, using the crate to jump up to the ladder and head through the door before it closes shut again.
Continue to the left. Pull the crate below the saw so that it is below the chain instead. You then need to pull the lever down and immediately climb onto the crate. Latch onto the chain and climb a little way up it. The world will begin to spin, so make sure you are high enough to avoid the saw. Once you clear the first saw, the crate will slide down and begin moving to a position beneath you. As it comes underneath, drop off to land on top.
The crate will continue sliding towards another saw blade. Just as it reaches it, jump to the left to grab the hanging chain. You can then swing into the left hand wall and slide down safely.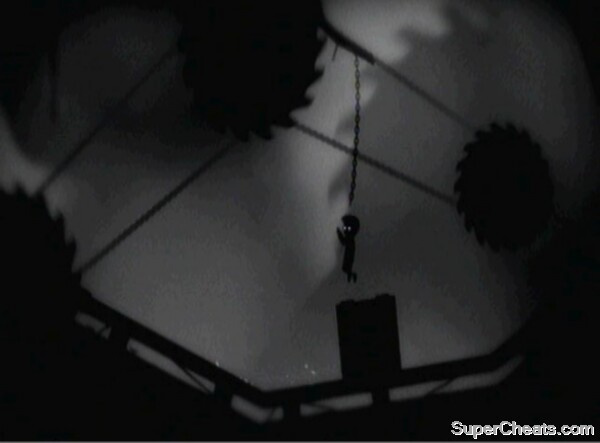
Navigate past the saw blades
Jump over the pit, heading to the right. Push the lever to the right. This will start the world rotating again. Soon, the boulder in the pit will tip out and roll towards you. To avoid this, wait until the crate to the right falls down, before immediately pushing it to the right, all the way along the ledge (but not into the next pit) so that you can climb on it and jump to the next area. The door to this area will slam shut as the world moves, so be sure to move far enough past quickly to avoid it.
Avoid the dangers of a rotating world
Continue to the right and jump onto the cog. Further to the right you will be possessed by another bug. This will move you to the left. Climb over the protrusions of the cog and jump back over the gap to the left. Once in the light you will turn to the right. Repeat your navigation of the cog and you will find that the previous area has changed completely.
Drop down onto the conveyor belt. Move through the first smashing machine, having waited until it shuts before jumping to pass through as quickly as possible. Jump to the next conveyor belt. At the next smasher you should jump to hang onto the left edge of it once it is all the way down. Once it returns to the top and begins to move down again, immediately pull yourself up and cross through. This is necessary to pass through quickly enough.
Jump down onto the next conveyor belt. Climb onto one of the crates to get close enough to the birds so that they peck off your mind-control bug. Having done this, you need to get back through the last smasher. To do this, you must push against a crate on the conveyor belt to change its timings with the smasher – once the machine crashes down and your crate is close enough, climb on and then jump to hang onto the side of the smasher.
Change the timings of the crates by pushing against one to get back onto the machine
Once it opens again, pull yourself up and run through. Jump down to the conveyor belt once through. Once the same machine comes down again, grab onto the left hand edge as before. This time, instead of pulling yourself up, jump to the ladder once at the top.
Climb the ladder and head right. Underneath the cog you will find an achievement egg.
Achievement Unlocked: Backtracking (10G)
Drop down to the next area and pull the lever to the left. This will change the rotation direction of the cogs. Once one of the cog's protrusions approaches the bottom of the ladder, push the lever in the other direction. This will temporarily stop the cog from moving, allowing you to jump up onto one of the protrusions and reach the ladder.
Use the lever to slow down the cog and jump up to the ladder
At the top of the ladder, jump to the left to land on one of the next cog's protrusions. This cog should now be travelling anti-clockwise, carrying you up. Once in range of the ledge above, climb onto one of the protrusions and jump to grab the ledge.
Continue to the right, ignoring the switch and jump past the movable ladder. Once you get to the mine cart, pull it to the left so that it is directly below the lever above (it's above the electrifying sign). Head back to the movable ladder and push it as far right as possible. Immediately climb up the ladder and jump off once it rolls close enough to reach the left hand ledge. Get to the lever but wait for the movable ladder to reach the middle of the track (rolling right to left towards you) before pushing it to the left. This will raise the platform with the ladder on it.
Head back to the edge and it should now be right up against the ledge. Jump on the ladder and then off again to the right, holding onto the platform up high. If done correctly, the platform with the ladder on will have reached its highest point as you are about to jump off. On the next platform, move to the right and jump to the next lever. Press the action button to grab on, opening a door below, before dropping down into the mine cart. The cart will begin to move.
Timing is all important on this one
Soon, the cart will roll past a ladder. Jump up to the platform it leads to, and run to the right, keeping pace with the mine cart. A saw blade will come towards you. Jump over it so that you land back in the mine cart.
Once you reach another electrified platform, allow yourself to be knocked off the cart. Pull the cart to the left up the slope so that you can climb over it and get round the other side. Allow it to roll back towards the button underneath the electrifying sign. You can now push it to the left. Once the right edge of the cart is past the end of the platform above, climb up onto it as it continues to roll uphill. Immediately jump to the right up to the previously electrified platform. You need to be quick to avoid getting hit by the electricity when it reactivates, so run to the right.
You should be able to see when the cart gets near to the button again, so jump to the right as this happens to get off the electric rail.
Avoid the saw in the mine cart
Push the lever to the right once on the safe side of the rail. This will set the world rotating again. The lighting situation also isn't ideal. Walk into the boulder pit as the world rotates. Soon the hanging lamp should shed light on your situation. As soon as you can, climb out of the pit and head to the right. When you come to an incline in the landscape, tread carefully. On the other side of the peak is a slope leading to a pit. Wait at the top of the peak for the world to rotate sufficiently that the light shows the ladder to the right facing straight up.

Wait here for the ladder to come into range
You can then jump for it. Climb up, then wait at the peak shortly after the top of the ladder. You will be able to see sparks from the electrified floor below. Wait until the next platform is safe to land in (i.e. not vertical!) before jumping across. You should then move to the right, pushing the crate as far as it will go (up against an electrified wall). Climb onto the crate. The world will have stopped rotating now, so take your time.
From the top of this crate, jump to the left. You should be able to climb up onto a platform obscured by the darkness. Once up here, jump to the right. You should avoid the electrified wall and land on a new platform to the right. Walk onwards and you should come to an achievement egg.
Achievement: Guided by Sparks (10G)
Jump back down to the crate, avoiding the wall and its electricity. Pull and push the crate to send it off the ledge to the area below (to the left). You can then drop down onto it, avoiding the electric floor, and continue on to the right.
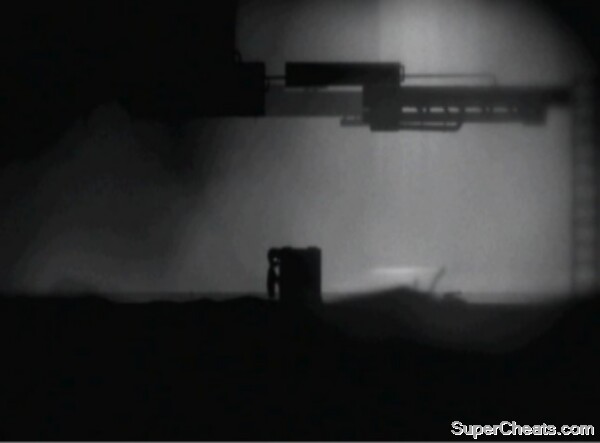
Soon you will come to a machine with a laser beam coming out of it, covering a gap in the level. If you trip the laser beam the machine will activate, firing its gun at you after a short delay. Jump over the gap and you will see another gun with its laser pointing straight downwards from the ceiling. This top gun can track you from right to left, so get in its sights and then retreat to the left back over the gap so that it fires on the left hand gun.
Trick the second gun into firing on the first
Note that it may have stopped firing when it reaches the first gun. In that case, you need to trigger its weapon again so that it destroys the gun completely. You may have to do this a few times to fully render it useless.
With the first gun dealt with, head to the right.
Continue under the small ladder and drop down to the two small crates.
Secret Egg #8: Switch the positions of the left and right crates (the best way to do this is to activate the gravity, and move the right hand box to the left, so that when the original box comes back down, it lands past the second crate). With the new right hand crate, push it up the slope to the far right of the lower level. Let the crate slide and run to the left, climbing up the left hand crate to get back up to the first area. The crate that should now have gone over your head needs to land with two nodules on the top edge. If not, you need to try to manoeuvre it so that this is the way it lands by repeating the previous step when you first switched the crates. With the nodules in the right place, push the box to back to the end of chapter twenty so that it is underneath the gun facing down. Get the turret to fire into the box, making a hole. You can then push it back to the area where you first found the crate and the secret egg will spill out on the way.
With the secret egg in hand, push the right-hand crate as far to the right as possible once again. The switch that you pass activates an anti-gravity force in the area, but you can feel free to step on it for now as you push the crate. Keep pushing up against the wall. Immediately turn back to the left, jump over the switch, and push the first crate as far left as possible.
Climb onto it as quickly as possible and up onto the ledge above. Wait for the sliding second crate to activate the anti-grav and send the left-hand crate up to your level. Push the crate to the left once the anti-grav wears off until it comes underneath the small ladder, allowing you to jump/climb up to the next section. Make sure it is not underneath the ledge itself – you need it to be able to pass to the ceiling freely when the anti-grav is next switched on.
Head to the right and climb onto the ladder at the far end. It will lower, so climb back down to the bottom area. Push the crate to the right, where you did before, and immediately run left and climb back up the hanging ladder. Run to the left once you get to the top and remember that time is of the utmost importance here. Keep going until you get to the small ladder and you should find the crate from before has been lifted up to you with the anti-gravitational forces. Pull it so that it flies up above you before the effects of the anti-gravity wears off (watch out for when it falls back down to ensure that you are not crushed!).
Use the anti-gravity to your advantage
Push the crate to the right until it is just to the left of the gate marking the next section up. Again, you need it to be able to pass freely to the ceiling, so make sure it is not underneath the overhang.
With that in place, head back down the long ladder, push the usual crate to the right once again, and head back left and up the ladder. Climb onto the crate and once the anti-grav kicks in, jump off to go through the open gate and onto the next level. Note that you need to stand in the middle of the crate to avoid it tipping you off. It also rises quickly, so be prepared to jump off suddenly.
Manipulate the crates to get to the next section
Head to the right until you get to the switch box. Here you need to get right to the edge and push down on the control stick. This should get your character to hang onto the ledge, at which point you can jump to the right and climb down a rope. Collect the achievement egg at the bottom.
Achievement: Under Ground (10G)
Climb back up the rope to get out of this chasm. Activate the switch box to call the lift down. Send it back up but climb in as it begins its ascent. Once at the top and on solid ground, send the lift back to the bottom. Call it up again, but climb onto the roof. Once you pass the laser of the weapon to the left, jump down to the right. It should take out the rope holding the crate in midair.
Cut the rope on the crate
Again, send the lift back down. Push the new crate onto the roof of the lift, and send the lift back up. Climb onto the top as it rises. The crate will protect you from the gun if you stand on the right-hand side. Climb onto the top of the crate once the gun has finished firing. Jump to the left to access the territory directly above the weapon (make sure the crate is far enough to the left of the lift to make the jump).
Head to the left. This is a tricky section but there is no risk of dying, so it is just a matter of time. The idea is to use the anti-grav switch box to get the crate out of the nook that it is in to your left. To do this, you need to activate the anti-grav and send the crate to the roof of the cave. From there it will go to the top left corner. You then need to deactivate the anti-grav, sending the crate down and sliding along the ground. Once it is near enough to the opening, reactivate the anti-grav so that the crate rises diagonally due to its sideways momentum, and deactivate it soon after (so it doesn't hit the ceiling), so that it comes out of the cave and into the open allowing you to access it. For specific timings and techniques, see the video below.
Practice makes perfect with this one
Push the crate as far right as possible. Jump down to the right, landing behind the crate on top of the lift. You should then drop to the right and send the lift down. Push the crate from the top of the lift to the right. Soon it will be in a position to block off another weapon to the far right of the level. Position the crate so that you can climb the ladder. Climb up, keeping a quick pace so that you bypass a gun to your left before it can shoot you.
Once at the top, activate the anti-gravity switch up here. This will bring the crate up. Climb over it and head left. You will come to another crate – this is the one we rescued from the cave. Push it to the right until it gets to the position of the second crate.
Secret Egg #9: With the two crates next to each other, you now need to get one on top of the other for this egg. The best way to do this is to have one crate inside the elevator in its raised position, and the other on the ground floor to the left of it. Push the crate from the elevator on top of the first crate. You then need to load the crates, still stacked, into the elevator (now on the ground floor) and raise it up. Push the crates to the far right and turn on the gravity – hopefully the crates will still be in a stack on the ceiling. Push them to the far left now, before using them to climb up (you may need to pull the bottom one out a little to create steps) and reach the previously inaccessible area where the crate was trapped. Locate the egg to the left.
Return to the main room and head right along the ceiling with anti-grav on. You now need to push the right hand crate so that it is lined up with the left edge of the topmost row of blocks below. The left crate needs to be lined up with the left edge of the bottom block (that is the left edge of the block once it has moved as far left as possible).

These are the positions the two crates should be in
You should then head left to the anti-grav switch box on the ceiling. Once the bottom block is halfway along its path from right to left, push the switch. Immediately run to the first crate and climb up onto the bottom block. The second crate should be on the middle block, so use this to climb to the top block. You can then move down the ladder to the right.
Ignore the anti-grav switch you come to and instead activate the magnetic switch. You can then turn on the anti-grav. There are two large blocks in this area – but we only want the left-hand one to be moved out of the way. To achieve this, you need to switch off the anti-grav the second the left block touches the ceiling (the right hand one is slightly slower, so will not be magnetised to the ceiling). This will allow you to climb to the left, jump to the right, and get to the next section.
Activate the anti-grav switch up here. Once on the ceiling, you will notice a machine on the rope to the right come into shot. Soon after this, you should deactivate the anti-grav and run to grab onto the rope hanging from the machine. If timed correctly, it should have continued to roll far enough that you can do this successfully. Once on board, ride it down the rope until you reach the roof with a chimney – as soon as you are there, drop off so as to avoid the spikes if you are too slow.
Head down the zip-line
Slide down the roof and jump to the right at the end. As you pass the arrow on the way, press the action button to activate sideways anti-grav. This will stick you to the structure on the right.
Run to the right away from the saw blade. Watch the ‘H' sign light up with electricity. You need to time your jump off the end of the platform just before the sign lights up, but also before the saw blade reaches you.
Begin your jump just before the electricity comes back on
When you pass the arrow, activate the forces so that you land on the ‘H'. Quickly run to the safe-zone in the middle of the ‘H' before the electricity comes back on.
Secret Egg #10: Once safe in the middle of the ‘H', wait for the saw blade to begin going in the opposite direction. You then need to jump to the left, to land on the top of the wall that you had been previously walking vertically on. Wait until the saw's noise is nearly non-existent, then jump to the left. On the way down, activate the gravity panel. If you have timed it correctly, you will land on the platform in front of the saw, and be able to run back along and get back on the ‘H' as you did before. The odd gravitational forces will have unearthed a secret egg, which you will be able to find once you jump off the 'H'.
Jump off the ‘H' to the right so that you land on a pipe.
Wait for another circuit of electricity and then jump down onto the previously electrified ‘H'. As soon as you land on it, jump to the right to grab a rope before the electricity comes back on. Follow the rope down.
Secret Egg #3 (Part Two): Having moved the O round in chapter twelve, you should now be able to see the handle on the side of the letter from chapter twelve. Jump to the platform to the right of the O and pull out the handle to reveal the secret egg. Note that you need to play chapter twelve and complete it to ensure your actions are replicated later on.
Head to the right and jump off towards the arrow. Press the action button to activate anti-grav and lock yourself to the ceiling. This anti-grav is only temporary, so quickly move the crate that comes to the ceiling to the right, climb over it and wait for the gravity to fail. Ensure you are positioned above the arrow switch so that you can activate the forces again on your way down (to avoid smashing into the floor!). Back on the ceiling, run to the left. Jump off the edge to the left and you should fall upwards into a secret room in the ceiling of the next area. Pull the handle of the container in this room to expose an achievement egg. Drop down and collect the egg.
Achievement Unlocked: Going Up (10G)
Get this tricky achievement
You should then head back into the anti-grav room and push the switch on your way in to land on the ceiling again. Now push the crate as far right as possible, before immediately heading back to a position above the anti-grav switch. Activate it when the gravity fails to return to your location on the ceiling. The idea of this was to buy enough time for the upcoming manoeuvre. You should then climb over the crate and rush to a position past the saw blade so that when the gravity returns, you miss the blade.
Rush past the blade so that you are not sliced up
You will then begin sliding. Jump to the right at the end so that you pass the next arrow. Activate it on your way to return to the ceiling. When the gravity returns, you will drop down onto a platform above the gun.
The gravity now inexplicably turns on and off to a pattern. On the ceiling of the room, position yourself to land on the left edge of the platform above the gun. Once you hit the ground, run to the right and jump. The idea is to reach the magnetic switch, deactivate it, and have the anti-grav kick in to take you to the ceiling out of the way of the gun before it begins firing.
The lack of magnetism will drop the block to your right, allowing you to escape the room. Get past the block and wait for the gravity to come into play to take you back to the ceiling. You are now safe for the time being. Position yourself to land near the right hand side of the platform below. Once you do drop down, head to the right off the platform and quickly jump to the left once you hit the lower ground. If timed correctly, you will be taken out of the reaches of the firing angle of the gun guarding the floor.
The gravity should turn off just before the gun begins firing
From here you have to think quickly. Dash beneath the block to the left so that the resumption of gravity sends you through the gap in the floor. You will slide down a slope to relative safety. Make sure you stand far enough away from the saw blade to ensure you are not spliced on your way to the ceiling.
Drop down to the middle of the straight part of the floor. Immediately run to the right and jump. If done correctly, the anti-gravity will activate just before you hit the lower saw blade, but will take you far enough to the right to avoid the upper one too.
Get to the right hand edge of the ceiling just before the next area. You need to wait until about a second before the gravity comes back on before jumping. The idea is to jump to the right and have the gravity come back before you hit the far ceiling. On the way down, hit the sideways gravity switch to pull you past the saw blade and out of the final section of the game! If you are struggling, try matching the ticking noise in the background to the noise in the video below for exact timings – generally though, it's just as it begins to increase in pace, marking the end of the anti-grav.
The last two gravity puzzles are very difficult to avoid deaths on
Secret Egg #11: Note that this only works if you have completed the entire game without dying and all in one sitting. If you've done that, you are a gaming legend, but also, can gain a secret egg. Once you regain control of your character after this scene, head far to the left. You can then go back to the right where you should find the egg.
Walk to the right when you regain control of your character. With that, Limbo is completed. We'll leave it to you to work out the significance of the final scene.
Wrong Way (5G)
That's not right – From where you start on the prologue level, head to the left.
Altitude is attitude (5G)
Exploration off the ground – See the Chapter Two walkthrough for this.
It's Stuck (10G)
Prepare a dry landing – See the Chapter Eleven walkthrough for this.
Urban Exploration (10G)
Involves heavy lifting – See the Chapter Fourteen walkthrough for this.
Alone in the Dark (10G)
Beneath the arthropod – See the Chapter Fourteen walkthrough for this.
Climbing the Cog (10G)
Don't pull the lever just because you can – See the Chapter Sixteen walkthrough for this.
Backtracking (10G)
Ride the crates – See the Chapter Eighteen walkthrough for this.
Guided by Sparks (10G)
The crate is key – See the Chapter Nineteen walkthrough for this.
Under Ground (10G)
Vertical passageway – See the Chapter Twenty-One walkthrough for this.
Going Up (10G)
Don't let gravity keep you down – See the Chapter Twenty-Three walkthrough for this.
Where Credit is due (100G)
Persistence has its own reward – Complete the game
No Point in Dying (10G)
Complete the game in one sitting with five or less deaths – Good luck! Note that you can pause while doing this, so you could just leave your Xbox on and have a nice long break!
These hidden eggs allow you to get over 100 percent on the game's leaderboards (see the leaderboards section below), but are not to be confused with the achievement eggs. See this guide's main walkthrough for each level listed below for full details of how to get these eggs.
Egg #1: Chapter Eight
Egg #2: Chapter Nine
Egg #3: Chapter Twelve and Chapter Twenty-Three (two parts required for this egg)
Egg #4: Chapter Fourteen
Egg #5: Chapter Fourteen
Egg #6: Chapter Fourteen
Egg #7: Chapter Seventeen
Egg #8: Chapter Twenty-One
Egg #9: Chapter Twenty-One
Egg #10: Chapter Twenty-Three
Egg #11: Chapter Twenty-Four
There are two possible avatar unlocks included with Limbo:
Limbo T-shirt:
You get this with your first achievement.
Mushroom-Eating Creature Pet:
You get this when you first complete the game.
Completing the game will net you a 76 percent rating on the leaderboards. You get 2 percent for each achievement, making a total of 22 percent (if you already have the achievements this is included in the bundle). You are given another 2 percent if it is a second play through, or if you are playing a chapter having already completed the game. Finally, you get 1 percent with each secret egg.
As you mathematicians will have realised, the total adds up to 100 percent not including the secret eggs. That means that if you have already completed the game with all achievements, you are guaranteed to get 100 percent on your next playthrough.
The secret eggs add up to 11 percent, meaning the best you can get on the leaderboards is 111 percent!


 Super Mario Maker: Unlock all Editor Tools / Items quickly
 Improve Privacy & Security with 5 Easy New Year's Resolutions
 WildStar Review: One Month Later
 Pokemon Omega Ruby & Alpha Sapphire Gym Leader Guide
 Nexuiz: A High Quality Futuristic Shooter With Linux, Mac, And PC Support