

Kingdom Hearts: Recoded Guide by swaggers for
Kingdom Hearts - Re:coded tells the story of Sora from a new perspective. A glitch has gotten into the Journal and Mickey must re-create Sora to help him get to the bottom of the problem. You will re-visit old areas but from a new angle in a all new story! Enjoy our walkthrough / game guide and see each battle walked and talked through in our text and video mixed guide. After the opening cutscene you take control of Sora for the first time. Re:coded uses the arrow keys to move Sora around the screen. Walk forward to the center to activate the next scene where you will be presented with 3 choices. Sword, Staff, and Shield. You need to pick one and then a give up the next choice. I choose the staff for mystic power and gave up the shield as you can dodge on your own and not take the hits in the first place. After you make your choice you'll get a scene with Mickey and the gang explaining the situation and then you'll learn the basics of fighting and experience. At the end of the training you'll receive your first LEVEL UP CHIP. This game has a Stat Matrix that you need to fill. To access the Stat Matrix hit ENTER. Now place the LEVEL UP CHIP in the first open slot. This connects the CPU to the next ability. Dodge Roll. It is important to add Chips to the Matrix as soon as you get them to unlock abilities and increase your stats! Then save your game and a new door will appear. Approach it and hit A to enter the door. Another scene and you'll head to Destiny Islands. If you didn't save before entering the door you can now Save right to the left as you enter Destiny Islands. Then head forwards and talk to Selphie. Destroy all the Red Blox in the area for some money and then continue down to beach and talk to Wakka. Use the auto-jump feature to jump from metal blox to metal blox until you reach the prize blow. Hit it three times to get a HP 2 CHIP. Drop down and talk to Wakka again and then equip it in the Stat Matrix. This unlocks the ability Scan. This simply allows you to see the name and HP of your enemies. Now grab the three other Prize Bloxs on the island. Then highest one contains a BLANK CHIP. Although the Blank Chips don't provide a specific bonus they are still important as they fill in spaces in the Stat Matrix. Then use the Metal Blox near the waterfall to climb up on top of the shed and jump over to the next area. You'll see the hooded figure once more and need to chase him into the hidden Backdoor. SYSTEM SECTOR Rewards: System Sectors are small arenas that are multiple floors and are filled with enemies. You must kill all the enemies on each floor before going to the next. At the end of the Sector you will get a chance to buy chips and other items with the points you earned in the Sector. Many Sectors have bonuses for completing them quickly and doing other things. Make sure to destroy all the blox and dodge as much as possible as getting hit reduces your SP. After the Sector is cleared and you've bought all your upgrades you'll be back on the Island and a bridge will appear to take you over to Tidus. You'll have to have a sparing match with Tidus but it's pretty easy. Just keep hitting him and it will be over soon. Grab the FIRE from the prize blox before head back to the main island. Talk to Selphie again before heading to the waterfall to get a DEFENSE 1 CHIP. If you've gotten everything up to this point you'll need to switch out a blank chip for the defense bonus in your Stat Matrix until you open up more of the matrix. Save the game and head to the water fall for the first boss fight. BOSS: DARKSIDE

Station of Awakening
Destiny Islands

System Sector
Power Armlet (Activates the “Attack Boost” ability, which boosts your Strength when you are down to 25% HP) - 90 SP
Strength 1 -- 70 SP
Magic 1 -- 70 SP
Defense 1 -- 70 SP
Blank Chip -- 30 SP
BOSS: Darkside
Stage 1:
In the first stage Darkside will slam its arm down into the ground creating a small shockwave and also releasing several Heartless. Attack the arm to damage Darkside. Randomly Bloxes will spread out that you can destroy while dodging falling magic attacks from Darkside.
Stage 2:
The second stage has Darkside again pounding his arms into the ground, but this time you need to destroy the 3 Bloxes. This will stun Darkside and he will drop his head. Attack his head to damage him. Darkside will also release a volley of Blox at you from his chest, dodge to the side and then use Fire to blow some of them away for bonus points.
Stage 3:
Darkside is reduced to a single blox. Dodge out of the way of the bloxes that cover Darkside. When they expand away from him, run in and hit him hard. As they start to slow down retreat before they collapse on you. Use Fire to destroy blox for bonus points.
First off head down and to the left to the Moggle under the Item sign for this town's store.
STORE:
Quick Blitz -- 400 Munny
Fire Edge -- 1800 Munny
Sliding Dash -- 400 Munny
Heat Dash -- 1800 Munny
Round Blitz -- 400 Munny
Fire -- 800 Munny
Slow -- 800 Munny
Potion -- 120 Munny
Ether -- 200 Munny
You can create more powerful attacks in your Command Matrix by combining items. 2 Fires will take you to Fire lvl 2. Where Sliding Dash plus Fire equals Heat Dash. Mess around with various combinations to find attacks that work for you.
Traverse Town Prizes
Now we want to clear out the Prize Bloxes of this section of town. Head to the back left of the accessories shop and there will be your first Bouncy Blox. Jump onto the Bouncy and over to the Prize Blox hitting it as you come by. There is a second Prize just above that one in the small walled off area. Then head to the right side of the city and climb the ladder and then Bouncy Blox to the right building roof. Jump over to the right to the next Prize, BLANK CHIP and then back to the last building roof. Now head down the roof and use the next Bouncy Blox to get to the final Prize in the area which is a THUNDER. Head through the large double doors in the top left to head to the 2nd section of the town.
There are 4 more Prize Bloxes in this section which are all out in the open. Then head back to the top right to help Huey out with some Heartless. Once they are eliminated you'll get a FIRE for your effort. Talk to Huey and immediately afterwards you'll be attacked by a new Large Body Heartless. Stay back and attack it with your magic attacks. Once it is down you'll get attacked by more standard Heartless and finally one more Large Body. Then Huey will give you the Mystery Piece and tell you to head to the Alley. Before you leave the area though head around the back right of the metal bloxes that Huey was standing on to get a BLANK CHIP.
Head back to the central area and a scene will show you the door to the Alleyway. Head through there for the next area. Work your way through the Heartless to the end of the alleyway and take the only right. Climb the ladder and jump from Metal Blox to Metal Blox until you get to the Prize Blox that contains a HP 2 CHIP. From there jump from balcony to balcony until you reach Dewey. He'll give you a THUNDER. Follow Dewey back to the Second District.
Back in the Second District you and Dewey will get into a fight with a Large Body and some Heartless. Sure your ranged magic on the Large Body and the battle will be over quickly. Then you need to find the next System Sector. It's on the west wall on the ground floor of the main area.

System Sector
SYSTEM SECTOR
Rewards:
Fire Charm (Activates the “No Ignite” abililty, which prevents enemies from igniting you.) -- 300 SP
HP 2 -- 140 SP
Magic 1 -- 140 SP
Fire -- 90 SP (Can buy multiples, price increases each time)
Sliding Dash -- 140 SP (Can buy multiples, price increases each time)
The first room is a Blox Snake. Wait for the tail to become standard Blox to break them off. Then attack the head. Use everything you have. It moves all over the place so be careful not to get hit and rotate your view to keep it in sight the entire time.
Once you leave you'll get the Mystery Piece from Dewey. Then head back to Cid where you started at the very beginning of the main Traverse Town area. After the conversation Cid will give you a new finishing move: SPEED COMBO.
As you head back to Second District you'll find that the door is gone and you need to locate another backdoor / system sector to move on. This one is located right behind you on the door of the accessory store.
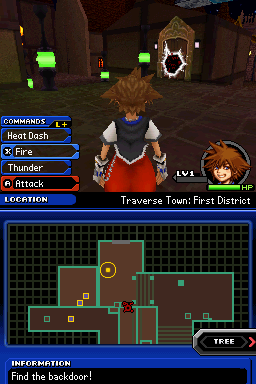
System Sector
SYSTEM SECTOR
Rewards:
Wizard's Armlet (Activates the “Magic Boost” ability, which boosts your Magic when you are down to 25% HP.) -- 280 SP
Strength 1 -- 150 SP
HP 2 -- 150 SP
Heat Dash -- 110 SP (Can buy multiples, price increases each time)
Quick Blitz -- 110 SP (Can buy multiples, price increases each time)
Use the Bounce Blox in front of you to get up to the Metal Blox platform. Make sure to grab the Prize before bouncing up higher. Then bounce up to the highest floor and eliminate all the Heartless. The link is on the ground floor.
Floor 2 introduces the Ghost Blox. These Ghost Bloxes are green and they alternate between empty space and being solid. Just watch for them to appear and make your jumps. When you get to the middle level you can run around the Ghost Bloces to get 2 Prizes Bloxes. Then make your way to the top level and eliminate the Soldier Heartless that is there and get the Prize before falling back to the first level and the exit.
The final floor has a mixture of Ghost Blox and Bounce Blox. There are several Prizes to be had as you make your way around this final floor. The last section has a tower of Ghost Bloxes. Watch the timing and jump just ahead of the change to the get to the top and its 4 Prize Bloxes including one containing a THUNDER. The final enemies are on the Metal Bloxes area just below the final top level.
Now back in Traverse Town the door is back and you can go back to the Second District. Use the Bounce Blox on the left to get to a series of Metal Blox and Prizes. To get to the far roof and it's DEFENSE 1 CHIP you need to jump and then use a Heat Dash or other Dash move to get to the roof. Then head into the Third District via the side alleyway.
When you get to the Third District you'll get attacked by a large group of Soldiers, followed by a Large Body and then many Red Nocturnes. Red Nocturnes float high in the air and fire magic at you. You can hit them with normal attacks though, Sora will launch into the air on his own to attack. After the battle you'll be told to follow the stranger.
Back in the First District you'll see the stranger again and then you'll need to find another backdoor. The door is the door you just came through from Third District.
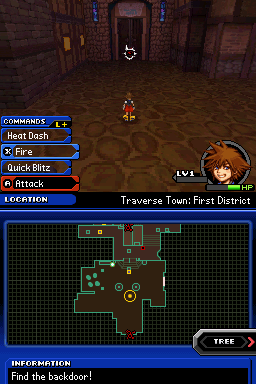
System Sector
SYSTEM SECTOR
Rewards:
Energy Bomb (Surround yourself with orbs of light, then detonate them all at once) -- 300 SP
Magic 1 -- 100 SP
Strength 1 -- 100 SP
Fire Edge -- 70 SP (Can buy multiples, price increases each time)
Round Blitz -- 70 SP (Can buy multiples, price increases each time)
This Sector is one large floor with doors leading to 3 extra areas. Just head to each area and eliminate all the enemies until the floor turns to blue. Once all 4 areas are cleared you can exit the Sector. Make sure to grab all the Prize boxes for added SP to buy your Rewards with.
Talk to Sid and then head into the Second District yet again. Get all the Prizes and then head to the far end of the area to talk to Louie. This will lead to another backdoor. This one is on the west walkway.

System Sector
SYSTEM SECTOR
Rewards:
Blizzard Charm (Activates the “No Freeze” ability, which prevents enemies from freezing you) -- 300 SP
Lucky Strike (Increases your Luck by 1) -- 200 SP
Magic 1 -- 200 SP
Rising Strike -- 200 SP (Can buy multiples, price increases each time)
Thunder -- 200 SP (Can buy multiples, price increases each time)
This Sector introduces Slider Blox. You can move the Sliders with your Keyblade to new positions. Floor two adds Pair Blox. A Blue and Green Blox that when hit together become a Prize Blox. This floor's Pair Blox are pretty straightforward. Floor three has moving Metal Blox. Stat by pushing the Slider to the Red wall and using it to get to the Bounce Blox. Then across the Metal Blox to the next upper area. Fall back to the ground and head up the ladder in the North West corner. If you've gotten all the enemies the exit is up here.
When you are back in Second District jump up the Metal Blox in front of you to get to the roof and ultimately Louie. He'll first give you another Mystery Piece and then a BLIZZARD. Afterwards head back to the First District.
Side Scrolling Area
You'll get another scene and then you are introduced to the side-scolling areas. You don't get your command matrix but every diamond you pick up contains a limited use ability. You lose points every time you fall or get crushed by not keeping up. It's important to get all the abilities as you go since they one hit destroy a large area of bloxes and enemies.
BOSS: Guard Armor
Keyblade -- Wishing Star
BOSS: Guard Armor
Red -- Fire Lunge (A Fire Dash Ability)
Yellow -- Thunder Rain (BEST - A cascading attack in a directions)
Green -- Wind Spin (A whirlwind attack that rises you up)
Blue -- Blizzard Dart (A attack that shoots balls from a blizzard above your head)
The key to these stages is to use the abilities they give you each and every time you get one. You want to rack up as many points as you can as fast as you can. Stage 3 is the boss battle. I would save your ability for Stage 2 of the battle as it's much harder. Stage 1 is a quick beat him up. In Stage 2 the Guard Armor will drop Bloxes and then try to hit you with a Laser Beam. Destroy the Bloxes quickly to get out of the way of the Laser. Then the Guard Armor will hop around. Make sure you are not under foot. Near the end he will summon Heartless to help you. Destroy the Heartless quickly for a minor health boost. After the battle you'll get a Keyblade upgrade and then end up in Wonderland.
After the scene you'll have to defend Alice against some Heartless. Then the Cheshire Cat will tell you need to find everyings memories. These have been spread around Wonderland in the form of Inklings. The first Inkling is in the South East corner from where you start. INKLING: ALICE. Select Alice from the options when you talk to Alice after getting the Inklings.
Leave through the left exit to get to the Hedge Maze. You need to sneak through the maze without getting seen. There is a BLANK CHIP to the middle right and the INKLING: WHITE RABBIT in the top left. Exit via the bottom left of the maze to go to the Lotus Forest. Right away to the left is the INKLING: HEARTLESS. The Blue enemies in this area will freeze you so if you earned the Blizzard Charm now is a good time to use it. Grab the INKLING: PECULIAR HOLE and climb all the ladders to get to all the Prizes including a DEFENSE 1, BLANK, and BLIZZARD.
Now head out the East exit to get to the Aimless Path. 12 more Inklings to go! In the middle left is a BLANK CHIP, and above that is INKLING: CARD SOLDIERS. Then upper right is AERIAL SWEEP. With these three picked up exit out the top middle to the Tea Party Party. You'll have a battle and then the INKLING: UNBIRTHDAY is in the poster in the corner. Get the BLANK CHIP and use the Metal Blox to get on the entrance roof to get the STAR RAVE ability. Then activate the middle table to get the rabbit to show up. You won't be able to help him yet since you don't have the correct Inkling.
Head back to the Aimless Path. It's time for another System Sector. This one is on the right side of the T-shaped hedge near the bottom left of the maze. This System Sector is the first you can bet on. You put a portion of your SP to try to win bonus SP in Trials.

System Sector
SYSTEM SECTOR
Rewards:
D-Fira (Use D=Pad and tap A to repeatedly hammer foes with fireballs) -- 1610 SP
Strength 1 -- 640 SP
Magic 1 -- 640 SP
Lucky Strike -- 640 SP
Cure -- 530 SP (Can buy multiples, price increases each time)
Trials:
Floor 1 -- 1.5x -- Defeat 18 Heartless!
Floor 2 -- 2.0x -- Exit the floor in 200 seconds or less!
Floor 3 -- 2.0x -- Don't use any recovery commands!
Just make sure to go to the third area to get enough Heartless to attack. Then head back to area two to go to floor 2. 200 seconds is pretty long but blaze through the enemies as fast as you can and then head to area 2. Finish everyone and get them get to the exit fast. Floor 3 is simply to not use healing. So if you have Potions or Cure in any of your slots remove them as soon as the floor starts. You get INKLING: WATCH for beating the Sector.
Head back through the top exit to go back to the Tea Part and then select the Watch near the bottom of the menu. You'll get INKLING: TRAIL. Then look at the door to the wood house to get INKLING: MAD HATTER. Now work your wall ALL the way back to Alice at the start. Enter the lower left exit for the Rose Garden.
1) Head through the only Arch to get to the bottom middle square.
2) Go West to the L-Shaped Area.
3) Southwestern Arch.
4) East.
5) East.
One of the Prize Blox here will give you a DEBUG DEVICE:R. You use these to break open section in the Stat Matrix. Then go North to get the INKLING: LOOKING-GLASS. The re-trace your steps until you get to the box in the bottom left with the first choice of path. From there go North to get INKLING: WHITE ROSES and a FIRAGA BURST. Then back South and in the L-Shaped area take the Northeast exit and then go South. INKLING: RED ROSES and a BLIZZARD EDGE. Then back and take the Southeast at the L-Shaped and then exit to the South to the Lotus Forest.
Now exit to the West and reach the Hedge Maze. Talk to the Ace of Spades in the upper right corner and select White Roses. You'll get INKLING: QUEEN OF HEARTS. Then exit to the North to the Bizarre Room.
Fight the the Heartless and then drink the Red Potion. Go around the Metal Blox to get a SLOW. Go to the Southwest corner to get the INKLING: COOKIE. Then head to the ladder in the Northeast and jump off to the INKLING: CHESHIRE CAT. Now climb up the ladder to get several Prize Blox. Then activate the Door Knob to start a System Sector that is located on the table.

System Sector
SYSTEM SECTOR
Rewards:
Safeguard Armlet (Activates the “Defense Boost” ability, which boosts your Defense when you are down to 25% HP.) -- 700 SP
Debug Device: R -- 500 SP
HP 2 -- 400 SP
Fire 1 -- 400 SP
Magic 1 -- 400 SP
Blizzard -- 100 SP (Can buy multiples, price increases each time)
Trials:
Floor 1 -- 5.0x -- Take damage no more than 14 times!
Watch out for the Large Bodies while going for the less then 14 hits. It's a pretty quick Sector though so no real problems. You'll get the final Inkling for completing it. INKLING: DOORKNOB. Exit via the North exit to get back to the Hedge Maze. Another System Sector. This one is in the upper right.
SYSTEM SECTOR
Rewards:
Compass (Activates the “No Flip-Foot” ability, which prevents enemies from flip-footing you.) -- 1200 SP
Teacup -- 700 SP
Defense 1 -- 400 SP
Blizzard 1 -- 400 SP
Black Chip -- 400 SP
Aerial Sweep -- 200 SP (Can buy multiples, price increases each time)
Trials:
Floor 1 -- 2.0x -- Destroy 35 blox!
Floor 2 -- 4.0x -- Destroy 20 blox!
The red blox are Blast Blox. They explode and hurt you so its best to use magic to destroy them. On Floor 2 make sure to allow the head cube to respawn enough bloxs to get the challenge done. Then take out the head to finish the Sector. Make sure to buy the Teacup as you'll need it to complete the land.
Head back out the Southeastern exit to get back to Alice. Pick the options in the following order.
White Rabbit
Peculiar Hole
Cheshire Cat
Queen of Hearts
Then the bottom option, Can you remember more?
Card Soldiers
Trial
Mad Hatter
Unbirthday
Doorknob
After that you'll get a CURE 1. Then its battle time. First you need to hit both sides of the center tower to lower the birdcage then move over there and use the birdcage to get to the keyhole.
BOSS: TRICKMASTER
BOSS: Trickmaster
This section is a side to side action sequence. You hit A to launch magic at the enemies. You can hold down A and lock onto 5 different enemies at once. After 10 quick stages you will fight Trickmaster for the first time. Just jump over the waves of fire and dodge the homing fire. Then 10 more stages and another Trick Master sequence. This second time he adds explosive bloxes and bouncy fireballs. Then stage 3 is just the Trickmaster with all the attacks you've seen only this time he'll flip the world around.
There is a store between each layer.
STORE:
Rising Strike -- 400 Munny
Quick Blitz -- 400 Munny
Fire Edge -- 1800 Munny
Thunder Edge -- 1800 Munny
Sliding Dash -- 400 Munny
Heat Dash -- 1800 Munny
Spark Dash -- 1800 Munny
Round Blitz -- 400 Munny
Fire Blast -- 1800 Munny
Thunder Blast -- 1800 Munny
Aerial Sweep -- 400 Munny
Fire -- 800 Munny
Fira -- 1600 Munny
Blizzard -- 800 Munny
Blizzara -- 1600 Munny
Thunder -- 800 Munny
Thundera -- 1600 Munny
Cure -- 800 Munny
Slow -- 800 Munny
Stop -- 800 Munny
Potion -- 120 Munny
Hi-Potion -- 320 Munny
Ether -- 200 Munny
Panacea -- 160 Munny
Head inside to talk to Phil. You'll then be teleported inside the Coliseum and find a SHRED OF WISDOM. While fighting in the Coliseum you lose most of your deck commands and your shortcut commands.
So this area is more like a traditional RPG. You go first, then the eneimes back and forth. You use your commands to make a stack and then use it all at once. It's also important to destroy ALL the bloxes in each room as these effect the strength level of the enemies and hinder your ability to move on to the next room. Hitting A right before you land an attack will let you attack more in one move. You can also hit Y to Block.
Level 1 (yellow) - Normal
Level 2 (red) - Double Strength
Level 3 (Flashing) - Triple Strength
Keep working your way from room to room making sure to use Potions as needed until you get the large top room. Make sure break all the bloxes to get a STRENGTH 1, MAGIC 1, and HP 2. The Warp to the next layer is in the back corner.
In Layer 2 you will be introduced to Licenses. You'll get a few right away, STRENGTH-L, BREAK-L, DEFENSE- L. Then once you win the battle you'll get a SCOUT-L. After clearing out the entire room head back to the first room to meet up with Hercules. He'll join your party and you'll go into a battle. Now that you have Hercules you can use him to break down all the walls in the layer.
When you get to the next mid stage the Moogle will give you some freebies. CHARGE-L, AUTO-BLOCK-L, REGEN-L, and a AUTO-LIFE-L. The next stage includes spinning vortexes that are high level encounters. You want to make sure you attack first and be ready with the Licenses you want as these can be tough encounters where 5 plus Heartless are attacking at once. Use High Jump to get to the bottom right for some good Prizes. Then do the left side followed by the right side. The top section contains a boss battle after clearing the first area.
BOSS: CLOUD
BOSS: Cloud
This can be a tough battle so using an Auto-Life, Auto-Block and Strength Licenses might be a good idea. Especially considering how long ago you probably saved last. Cloud's big attack is his Omnislash. This attack can hit both of you multiple times. Make sure to time your attacks right for combos and criticals.
Work your way through Layer 4 as you had all the previous layers. You'll find Cloud in the upper right corner. Then head to the lower left to help him with a fight. Stock up and save and then it's on to the final fights.
BOSS: CERBERUS
BOSS: Cerberus
Cerberus attacks the whole party with Fireballs and can do a triple bit attack that hits the whole party also. Luckily you have Cloud on your team so use Cura and keep the pressure up with damage.
BOSS: HADES
BOSS: Hades
You get no rest between battles so Regen-L and Defense-L can mean the difference between living and dying. Blizzard based attacks do the most damage and be careful of the Fire based attacks that will be coming your way with abundance. Hades will also summon extra Heartless and he is immune to Fire damage so don't bother.
STORE:
Rising Strike -- 400 Munny
Quick Blitz -- 400 Munny
Fire Edge -- 1800 Munny
Blizzard Edge -- 1800 Munny
Thunder Edge -- 1800 Munny
Sliding Dash -- 400 Munny
Heat Dash -- 1800 Munny
Ice Dash -- 1800 Munny
Spark Dash -- 1800 Munny
Round Blitz -- 400 Munny
Fire Blast -- 1800 Munny
Blizzard Blast -- 1800 Munny
Thunder Blast -- 1800 Munny
Aerial Sweep -- 400 Munny
Heat Sweep -- 1800 Munny
Ice Sweep -- 1800 Munny
Spark Sweep -- 1800 Munny
Rising Rush -- 10000 Munny
Muscle Strike -- 12000 Munny
Fire -- 800 Munny
Fira -- 1600 Munny
Blizzard -- 800 Munny
Blizzara -- 1600 Munny
Thunder -- 800 Munny
Thundera -- 1600 Munny
Cure -- 800 Munny
Slow -- 800 Munny
Stop -- 800 Munny
Potion -- 120 Munny
Hi-Potion -- 320 Munny
Ether -- 200 Munny
Panacea -- 160 Munny
Talk to the shop owner on the right to get access to the store. Make your way around the plaza getting all the prizes. To get the high Rare Prize jump on the stores roof and use the Bounce to get over to the ELIXIR. Once the Plaza is clear head out the north exit to the Main Street.
Jump up to the right and work your way around the awningsw to a FIRAGA. Use the Metal Bloxs on the other side to get to the top and a CONFUSE. A LUCKY STRIKE in top right corner. Then take care of the enemies below. Go West into the Alley to get a BLIZZARD BUSTER. Then back to the Main Street and head North to the Palace Gates.
Before talking to Aladdin grab all the Prizes including matching the two Pair Bloxes for a BLIZZARD RESISTANCE 2. Once you speak to him, try to leave and you'll be attacked. Watch out for these new Bandits as they pack quite a punch. Go back to the Main Street and exit via the very top the North East to get to the Bazaar. Go to the top and knock the Pair Blox down to the ground to match up with the other one to get a DEFENSE 1. Then head to the Alley to face Jafar.
BOSS: JAFAR
BOSS: Jafar
Jafar is waiting in the Alley with Jasmine. This battle is harder then it should be just because of the horrible camera angles. After your initial battle on the ground Jafar will teleport between the two side ledges. So most of this battle is simply getting the camera to line up properly for you to do anything.

Iago
Afterwards head back to the opening area, The Plaza, and talk to Aladdin. Iago will steal Aladdin's Lamp and he's frozen so you have to get it back. Iago's position is random so just work your way through all of Agrabah until you find him 3 times. Breaking Bloxes and taking out the Heartless gives you more time. Just run from area to area as you'll get a notice if you are in the right room. After getting Iago once Jafar will create Phantom Jafar. If Jafar touches you, you lose time so be careful. Once you get Iago the third time Genie will show up and he'll get rid of Phantom Jafar and send you to the Cave of Wonders. Time for another System Sector. It's on the ground to the left of the cave's mouth.

System Sector
SYSTEM SECTOR
Rewards:
Faith -- 600 SP
Adamant Belt (Activates the “No Defense Cut” ability, which prevents enemies from cutting your Defense) -- 200 SP
HP 2 -- 200 SP
Strength 1 -- 200 SP
Magic 1 -- 200 SP
Fire Resistance 1 -- 200 SP
Sliding Rush -- 100 SP (Can buy multiples, price increases each time)
Trials:
Floor 1 -- 5.0x -- Use your Finish command!
You can make the challenge a lot easier if you have a Ether or 2. Otherwise its best to run around the edges and fire off your magic at the 3 enemies as you get it.
Afterwards jump into the mouth of the cave to continue. The shop has the same items as before. Work your way around the platform until you make it to the boulder traps. It's easy to follow them around just don't run into them when they pause at the corners. To get the Prize on the pillar just go to the end and then do a small jump and launch some Fire or Blizzard over. There are a lot of enemies in this area, but it's open floor plan gives you plenty of chances to retreat, heal up, and then come back when you are ready. Once you get to the waterfall of sand you'll have to retreat to find a backdoor. This one is all the way back on the side by side boulder rolls on the middle left side block of the far western straight track.
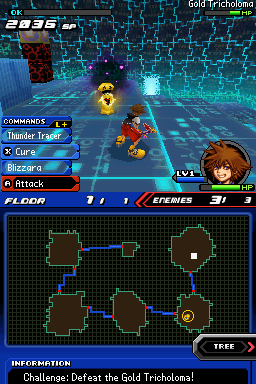
System Sector
SYSTEM SECTOR
Rewards:
CMOS Armlet (Activates the “Clock Boost” ability, which charges up the clock guage faster when you are down to 25% HP) -- 2100 SP
Debug Device: R -- 1000 SP
Fire 1 -- 800 SP
Blizzard 1 -- 800 SP
Thunder Resistance 1 -- 8 00 SP
Aero Resistance 1 -- 800 SP
Aerial Slam -- 500 SP (Can buy multiples, price increases each time)
Trials:
Floor 1 -- 2.0x -- Black at least 10 enemy attacks!
Floor 2 -- 3.0x -- Freeze Heartless 3 times!
Floor 3 -- 4.0x -- Miss with no more than 14 of your attacks!
I am horrible at blocking for the first trials was the only hard one. Use low end Blizzard spells to freeze the Heartless on Floor 2. The secret to Floor 3 is to use your commands only. Missing with commands doesn't count towards the 15 you can miss. This area introduces Magnet Blox. These pull you towards them so watch out while trying to jump.
Back in the “real world” head back to the waterfall and through the opening that is there now. Work your way through timing your jumps. If you fall down the first section before the store and save point you'll have to do a System Sector before you can get back to the top. If you fall down the last section there are a few enemies and some prizes so it's almost worth it to miss a few jumps on purpose to get some extra Chips.

System Sector
SYSTEM SECTOR
Rewards:
Energy Earring (Activates the “Block Charger” ability, which lets you charge up the clock gauge by blocking.) -- 600 SP
Debug Device: R -- 500 SP
Fire 2 -- 400 SP
Blizzard 2 -- 400 SP
Fire Resistance 2 -- 400 SP
Blizzard Resistance 1 -- 300 SP
Aero -- 300 SP (Can buy multiples, price increases each time)
Trials:
Floor 1 -- 5.0x -- Defeat the Gold Tricholoma!

Golden Tricholoma
To get the Gold Tricholoma to spawn simply move back and forth between the rooms. When it appears hit it fast. Not only does it warp away, but if you don't get it within a short period of time then the Tricholoma will disappear.
Once you get to the end of the top area the Metal Blox will start to dissolve as you jump on them so it's easier and safer to get the last two Prize Bloxes with commands. Then at the very end you'll be on a elevator and the Bloxes slowly drop out so keep towards the center.
BOSS: JAFAR
BOSS: Jafar Part 2
Jafar will summon Bug Bloxes and also make copies of himself. Only the original Jafar can be damaged so ignore everyone else and focus on the main Jafar and he'll go down pretty quickly.
After that you'll have to find the keyhole. It's in a random location so just look around as fast as you can until you find it. Busting Bloxes will give you extra time.
BOSS: IAGO
BOSS: Iago
Jafar is now a genie. But the real enemy is Iago. You need to take him out to get the lamp back and end it all. Keep moving to avoid Jafar's attacks and simply work your way around taking command attacks on Iago as you can. Bandits will be added to the mix near the end and just keep the pressure on Iago. In the second stage they will add blocks and Iago will fly up high. Your best bet is to simply use Thuder to hit him from below instead of trying to climb the Bloxes.
STORE (Everything before plus):
Sliding Rush -- 400 Munny
Fire Buster -- 1800 Munny
Blizzard Buster -- 1800 Munny
Thunder Buster -- 1800 Munny
Aerial Slam -- 400 Munny
Fire Slam -- 1800 Munny
Blizzard Slam -- 1800 Munny
Thunder Slam -- 1800 Munny
Air Spiral -- 400 Munny
Heat Storm -- 1800 Munny
Ice Storm -- 1800 Munny
Spark Storm -- 1800 Munny
Hi-Ether -- 640 Munny
Head straight forward past the store to the main Castle doors. They won't open so we need to find all the correct switches. Now head to the far right and ride the Elevator down to the Waterway.
Head to the right and hit the first switch. You then have 10 seconds to hit the next one. Not a big deal since it's about 2 steps away. Next you have to maneuver through the damage blocks to get to the next area. Remember you don't have any commands so be careful. After hitting the next switch you have 20 seconds to get to the far one. This is a little more difficult as you have to jump over the damage Bloxes to get to then. Then make your way to the center button. Once pressed work your way back to the main gates.
You have to dodge in this small arena for about a minute, then Goofy will come and save you. After that you'll be attacked. You'll still be worthless, so use A to get Goofy on attack and just stand back and watch him work. Go to the main middle door and you'll learn you need to get four Emblems so head to the left door and into the Library to get the first piece on the table. When you go back into the Entrance Hall you'll see Donald running out the front door. Put your newly acquired EMBLEM PIECE into the door before heading back through the front gate.
On your way back to the Waterway have Goofy smash all the Bloxes to get your Prizes since you are pretty much worthless. Once he's smashed all the Bloxes use the Bouncy Bloxes to get on the roof and to the other high areas to get some more prizes before you go down to the Waterway again.
Break down the wall of Bloxes and move down to the blue switch. Make sure Goofy is in Blox busiting mode and activate it. You now have 25 seconds to get to the next switch is means Goofy has a lot of Blox to break FAST. The next group is 25 seconds also. Use the Command button to get Goofy to use Tornado or he won't finish in time.
Now that Donald is in your party head all the way back to where you used the Red button the first time and end down the now opened side are to get the second EMBLEM PIECE. Then back to where you got Donald to take this new elevator up.
Head into Library 1 and have Donald use the Red Switch to open a passage. On in Library 3 hit the Blue Switch, wait for the Green Bloxes to switch and then run through and get the Red Switch to gain access to Library 4. Now hit the Blue Switch and use the Ghost Bloxes to get to the upper area and the Red Switch. Make sure to have them break the Rare Prize on the uppers to get a CURE 3. Exit via the top to go to Library 3 and make sure you don't fall as you work your way to a THUNDER 3. Jump down into the top left to get to Library 2.
In Library 2 there are 3 Columns. Once you press the first switch one of those columns will have the button, one with have a MEGA FLARE, and one is just Bloxes. Get the Mega fast and then hit the button. Exit to the Entrance Halls Upper Level and hit that Blue switch. How many switches is that already? A million? Work your way through a LOT of Blox. There are enemies also but just spawn Donald'xs Thunder and it will take care of both. Hit the Red switch and get yourself a EMBLEM PIECE. The drop down and enter the third piece and head out into the Gate area again.
Outside break down the first wall of Blox and Bounce up to the. Wait for it. Blue switch. Then head left and use the Bloxes to get to the other side and the Red Switch. Then jump over to the final EMBLEM PIECE. Then get back to the Gate and put the final piece into the door.
You will now be in a small enclosed area with a TON of enemies. Just run around like the worthless non-attacking Sora that you are and let Donald and Goofy do all the work.
Now out on the High Tower hit the Blue Switch and then book it around to the hopefully final Red Switch. Drop down to the lower area and approach the pipes to discover we have another system sector.
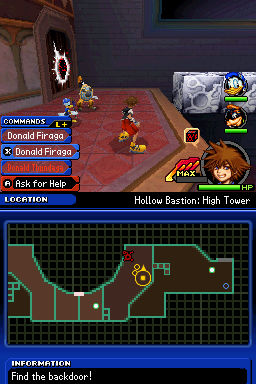
System Sector
SYSTEM SECTOR
Rewards:
D-Blizzara -- 1100 SP
Command Ring -- 900 SP
HP 2 -- 500 SP
Strength 1 -- 500 SP
Magic 1 -- 500 SP
Defense 1 -- 500 SP
Fire Resistance 3 -- 1100 SP
Magnera -- 300 SP (Can buy multiples, price increases each time)
Trials:
Floor 1 -- 4.0x -- Use your Finish command!
Floor 2 -- 5.0x -- Defeat 26 Heartless!
Very easy Trials. Just spam Goofy's and Donald's Commands as they re-load very fast. For Floor 2 simply go back and forth between rooms until you kill 26 if need be but I got over 26 just trying to get the 8 mains required to move on.
Head back through the pipes area and after the scenes you get the Keyblade back! And then fight Pete.
BOSS: PETE
BOSS: Pete
Pete is actually pretty easy and straight forward. He'll roll an ball towards you that cancels all your commands which is very easy to dodge. Pete will also throw some bombs that do very minor damage. This is one of the few fights that you can really just run up there and do some major hand to hand damage. During part 2 he adds a lightning ball that follows you for a while. Again, pretty simple to dodge.
BOSS: RIKU
BOSS: Riku
Right after Pete you need to fight Riku. Riku is a 3 stage boss and it seems he's fighting the enemy control as he's not too hard a boss. Riku has a Dash and Rising Slash attack. In Stage 2 he'll add a strike that throws out Damage Bloxes. In Stage 3 he does a Hyper attack that does a LOT of damage. You need to dodge roll out of the way ASAP and just keep up with commands and attacks.
STORE (Everything before plus):
Aero Edge -- 1800 Munny
Wind Dash -- 1800 Munny
Aero Blast -- 1800 Munny
Aero Buster -- 1800 Munny
Aero Slam -- 1800 Munny
Land Crash -- 400 Munny
Heat Dive -- 1800 Munny
Ice Dive -- 1800 Munny
Spark Dive -- 1800 Munny
Wind Dive -- 1800 Munny
Strike Raid -- 400 Munny
Fire Raid -- 1800 Munny
Blizzard Raid -- 1800 Munny
Thunder Raid -- 1800 Munny
Aero Raid -- 1800 Munny
Wind Sweep -- 1800 Munny
Wind Storm -- 1800 Munny
Aero -- 800 Munny
Cura -- 2400 Munny
Magnet -- 800 Munny
Magnera -- 2400 Munny
Confuse -- 800 Munny
Elixir -- 800 Munny
You will be going to each of the previous world. You need to find Matrix Power to open a System Sector. When you win the System Sector you will get part of your power back and you move on to the next world.
HOLLOW BASTION: DESTINY ISLANDS
Head through the door into the Corrupted Destiny Islands.
3% MATRIX POWER - First up take out the Bugs on the beach to get the first.
3% MATRIX POWER - Prize Blox on the far right side. This is the area that you came in at the start of the game.
3% MATRIX POWER - Up the ladder on the far left side. There is also a DEBUG: R below the ladder.
3% MATRIX POWER - Pair Blox. One of the deck on the left side of the deck and one on the roof of the shed.
3% MATRIX POWER - Prize Blox up to the north section where the door was to Darkside.

System Sector
SYSTEM SECTOR
Rewards:
CMOS Necklace -- 2300 SP
Folding Fan -- 1500 SP
HP 2 -- 1000 SP
Strength 1 -- 1000 SP
Magic 1 -- 1000 SP
Triple Burst -- 700 SP (Can buy multiples, price increases each time)
Land Crash -- 700 SP (Can buy multiples, price increases each time)
Trials:
Floor 1 -- 4.0x -- Don't use any recovery commands!
Floor 2 -- 6.0x -- Take damage no more than 14 times!
Floor one is easy. Floor two is a Blox Snake so focus on the head and you shouldn't have too much trouble getting out of there with less than 14 hits.
HOLLOW BASTION: TRAVERSE TOWN
3% MATRIX POWER - Use the Bounce to the left of where you start to get to the upper level. From there ride the Metal Blox to the thin center with the Pair. Put them together to get a STRENGTH 3. Then get the other 3 Prizes Bloxes up for the matrix, a DEBUG: R and some coinage.
3% MATRIX POWER - Up and to the left of the Accessory Shop is another 3% Prize Blox
3% MATRIX POWER - Go through the door on the right side to now get to the Second District. Oh those bugs, they are crazy. Break the Prize Blox for the 3%.
3% MATRIX POWER - Head out to the main area and take a left. Work your way up the Metal Blox to get to the roof and a Prize. Now jump over to the next roof for your 3.
3% MATRIX POWER - A little farther is a Prize Blox at the end of some Green disappearing Bloxes. Head out to that one for another 3. Then drop the Pair Blox to the ground to match it up for a FIRE RESISTANCE 4.
3% MATRIX POWER - In a Prize Blox at the main gate.
3% MATRIX POWER - Go all the way around and there is the final 3 in a Prize Mimic. Then through the District 1 main door and jump up to the roofs to get a very nice AERO RESISTANCE 4 & HP 6.
SYSTEM SECTOR
Rewards:
Spinner Saw -- 3600 SP
Waistband -- 3000 SP (Item for quest)
Debug Device: R -- 2400 SP
Defense 2 -- 3000 SP
Magic 1 -- 1000 SP
Lucky Strike -- 2400 SP
Fire 4 -- 3000 SP
Firaga Burst -- 2400 SP (Can buy multiples, price increases each time)
Trials:
Floor 1 -- 4.0x -- Jolt Heartless 5 times!
Floor 2 -- 4.0x -- Defeat 5 enemies at MAX overclock!
Floor 3 -- 5.0x -- Miss with no more than 9 of your attacks!
The System Sector is in the small area back in District 1. You Jolt them by using Thunder. Easy as long as you have the right Commands. For Floor 2 use Commands to kill when you get to MAX. You don't need to be 100% MAX just in MAX so it's pretty easy. Floor 3 just use Commands as those don't count as misses.
HOLLOW BASTION: WONDERLAND
3% MATRIX POWER - In the Prize Blox in the north west.
3% MATRIX POWER - In a Mimic in the opening area.
3% MATRIX POWER - In the Prize Blox in the back where you start.
3% MATRIX POWERS - Head through the North gate. Simply break all the Prize Bloxes and attack the Mimics as every else is in this one room.
SYSTEM SECTOR
Rewards:
Payback Ring -- 1900 SP
Red Rose -- 1600 SP (Item for quest)
Debug Device: R -- 800 SP
Blizzard 4 -- 800 SP
Cure 4 -- 800 SP
Blizzard Resistance 3 -- 500 SP
Rising Rush -- 500 SP (Can buy multiples, price increases each time)
Trials:
Floor 1 -- 4.0x -- Take damage no more than 7 times!
Floor 2 -- 5.0x -- Use your Finish command!
The entrance is just to the left of where you spawn into this area. Same as before. Use your commands to hit enemies before they get close enough to hit you. Can can use Ethers if you want, but spawning commands will get you to MAX fast also without costing you any munny. The problem with this Trial is that its a snake level and there are a TON of pathes and no way to get to the upper area so you need to hit the snake hard and fast so you don't lose your MAX waiting for it to come by again.
HOLLOW BASTION: AGRABAH
3% MATRIX POWER - This a very linear world. Simply beat all the Mimics and destroy all the Prize Bloxes and you'll get everything you need. The Sector is in the final room.

System Sector
SYSTEM SECTOR
Rewards:
Immortal Charm -- 5100 SP
Cystal Earrings -- 4000 SP (Item for quest)
Debug Device: R -- 2700 SP
HP 4 -- 2700 SP
Strength 2 -- 2700 SP
Magic 2 -- 2700 SP
Thunder Tracer -- 1000 SP (Can buy multiples, price increases each time)
Trials:
Floor 1 -- 4.0x -- Use your Finish command at least 2 times!
Floor 2 -- 5.5x -- Complete in under 60 seconds or less!
Floor 3 -- 5.0x -- Destroy 30 blox!
The System Sector is on the nose of the cave entrance. Just use the Bloxes to get up there. Standard trials that you have seen many times before.
HOLLOW BASTION: HOLLOW BASTION
You'll go right into a Boss Battle when you go to the final area.
BOSS: DATA RIKU
This battle plays out exactly the same as the last one. Just work the room and try to get in behind Riku to negate his shield.
Escape
You'll be thrust into a side-scrolling platformer. No commands, just jump and hit. Pretty straight forward until the end when you'll have to ride a snake of bloxes to the top. Then on to the next boss.
BOSS: DRAGON MALEFICENT
BOSS: Dragon Maleficent
The battle is side view also. Just two attacks coming your way. She'll jump and land throwing a green shockwave your way. Just have Sora jump over it and hit her. Then she'll spit green fireballs from the air you need to dodge. Look for command cubes in the area to gain special abilities.
After a long series of scenes you'll be in the Grand Hall of Hallow Bastion.
BOSS: INVISIBLE
Another stage area with you jumping around 10 stages before attacking the boss. Same as before. Invisible will launch a series of energy balls towards you and also come straight at you with a sword attack. Dodge left to right and smash that attack button as fast as you can. And I mean really BLAZE on that attack key while jumping and you'll take Invisible down fast.
BOSS: DARKSIDE
BOSS: Darkside
Same attack as before. He'll hit the ground and then come in and do your damage. Watch for the added bonus of ice columns or fireballs so get in, take a few hits, and get out. Then Darkside will launch some thunder attacks. Simply keep running around the outside until it is over. He likes to do it A LOT. His third attack is to disappear and launch his hands up from below. Although you can do damage to the hands they attack very quickly and you're better off just dodging.
BOSS: HEARTLESS SORA
BOSS: Heartless Sora
The first stage is pretty simple. It gets complicated in stage 2 when he will call 2 clones. You have to eliminate the 2 clones before attacking Sora directly. Then he will launch into the air and throw Keyblades at you. Simply dodge until a yellow circle comes up. Go into the circle and fire at Sora. This will make him a standard Heartless. Once he is down you need to do it one more time.
Finally the end game. You need to go back to each and every world yet again. There are 3 endings per world you need to get. Then 1 final battle.
DESTINY ISLANDS
NORMAL -- Talk to Selphie and destroy the Bug Bloxes in the area. Then talk to Wakka and go up to Tidus and fight him. Then talk to the cloaked man for the card.
ALTERNATE -- Talk to Selphie and say No. Then talk to Wakka and say No to him also. Then go to the top and break all the Blox to get the card.
EXTRA -- Talk to Selphie and destroy the Bug Bloxes in the area. Then break the Bloxes near Wakka to get a green star. Use that and fight the Heartless. Then break the bloxes in the lower right for another green star.
TRAVERSE TOWN
NORMAL -- Save them in the order of: Huey, Dewey, Louie.
ALTERNATE -- Huey, Louie, Dewey
EXTRA -- Louie, Dewey, Huey
Louie is in the top northern middle.
Dewey is in the north western corner.
Huey is in the north eastern corner.
WONDERLAND
Cheshire Cat (In the Blox on the left) - CORRECT: D - WRONG: Give Up
Alice - CORRECT: Alice - WRONG: Queen of Hearts
White Rabbit - CORRECT: Talk to Rabbit - WRONG: Take the Watch
Ace of Hearts - CORRECT: Give Potion to Spade - WRONG: Give Potion to Heart
NORMAL -- Do at least 1 thing right and 1 thing wrong
ALTERNATE -- Do everything right
EXTRA -- Do everything wrong
OLYMPUS COLISEUM
This one is a series of trials. Make sure to heal up and get all your commands back before talking to each person. These are actually pretty high end battles so becareful and heal when needed. Make sure to get the AERO 4 & THUNDER 4 from the Prize Bloxes. Getting 30 on the first challenge can be tough. You might want to move on and get some more chips.
NORMAL -- Hercules - >20 & <30 Heartless eliminated, Cloud - Defeat the Heartless, Defeat only the Heartless that attack you, Defeat Hade's trial.
ALTERNATE -- Just let time run out on all 3 trials.
EXTRA -- Hearcules - >30 Heartlessx, Cloud - Pass both - Hades - Defeat in under 20 seconds
AGRABAH
In Agrabah you need to catch Iago. There are many prizes and items hidden in the boxes. If you find Jasmine you get 50 bonus seconds. Aladdin 75. Merchant 25. 3 Bloxes have Jafar illusions that will sap your time and also the genie is in one that will stop the Jafar illusions. Just break ALL the bloxes and don't bother fighting any of the Heartless and you'll beat the time no problem.
NORMAL -- Catch Iago when the timer is between 30 and 60 seconds.
ALTERNATE -- Catch Iago with less than under 30 seconds.
EXTRA -- Catch Iago with over 60 seconds left.
HOLLOW BASTION
Start by doing some of those fun Hollow Bastion Switches we had to do some many of in the main game. The first room just shows you its big flower, then little flower. The second room throws some enemies at you. The Third room puts various bloxes in the way that you need to destroy. Then a boss fight with Pete and a challenge from Maleficent.
NORMAL -- Take longer that 30 seconds to beat Pete or longer than 60 seconds to reach Maleficent but not both.
ALTERNATE -- Take longer than 60 seconds on Pete and also longer than 120 seconds on Maleficent.
EXTRA -- Beat Pete in under 30 seconds and under 60 seconds on Maleficent.
BOSS: ROXAS
You just need to get 1 card per world to get to the final battle. Roxas is a fast attacker with combos, dashes and a rising slash. Just work your Dodge rolling and make sure to get all your attacks in.
Congrats on beating the game!


 Top 5 Legend of Zelda Games: #3
 Until Dawn Guide - How to Find All the 1952 Clues
 3 Games That, Sadly, Weren't At E3 2014
 How to Turn OFF PS VITA Parental Control Locking
 Oculus Reveals The Future of VR with the Consumer Oculus Rift