
The sequel to Epic Game's critically acclaimed third-person shooter has finally arrived on the Xbox 360 platform with a bevy of new features. In Gears of War 2, Marcus Fenix and the rest of the Delta squad return for more Locust-killing action.
If you need help crushing the Locust Horde, look no further than our complete guide to Gears of War 2! Herein you'll find an expansive walkthrough for the single-player campaign, a guide to finding all 41 collectibles, as well as an overview of the weapons, enemies, and multiplayer modes in the game.
Note: This guide was written based on the HARDCORE difficulty setting. The difficulty level affects the amount of damage your character and your enemies can sustain. All control commands mentioned in the text refer to the Gears of Wars DEFAULT control style.
This is an overview of the DEFAULT control style.
R Trigger - Shoot current weapon/throw grenade.
L Trigger - Hold to aim.
R Bumper - Reload (Press again for Active Reload).
L Bumper - See objectives and squad locations.
L Thumbstick - Move character around.
R Thumbstick - Look. Click to zoom.
A button - Evade, Get into/Out of cover, Mantle (climb), Cover slip, Make swat turn, press and hold for Roadie Run.
B button - Melee, hold for chainsaw.
X button - Use/Interact.
Y button - Look at point of interest (Look for the prompt at bottom of screen)
D-pad Up - Switch to Grenade.
D-pad Down - Switch to Pistol.
D-pad Left - Switch to left weapon.
D-pad Right - Switch to right weapon.
L Thumbstick A - Perform an evasive roll.
Start - Pause the game and bring up the pause menu.
Back - Skip cutscenes/view multiplayer scoreboard.
When you press the right bumper to reload your current weapon, you can press the right bumper again when the pointer is along the grey or white portion of the bar at the top right corner of the screen to speed up the process.
If you only press the right bumper once, your character will reload his gun normally. Pressing RB while the pointer is on the grey portion of the bar reloads the weapon slightly faster. Press RB while the pointer is on the black portion and the bar will turn red, causing the weapon to jam.
You want to land the pointer on the small, white sliver for best results. This is referred to as a "Perfect Reload." Doing this will allow you to reload your weapon instantly. The gun also receives a slight damage boost for a short period of time. This added damage is where perfect reloads really shine.
Success is a matter of timing and practice. It may take awhile to get used to the Active Reload system, but don't fret, as you'll more than likely be pulling off Perfect Reloads fairly consistently in no time.
SNUB PISTOL
This is the basic pistol you start off with. You'll begin each multiplayer match with one. Not particularly effective, but good for a quick switch to finish off an enemy rather than reloading your current weapon.
BOLTOK PISTOL
Essentially a magnum. The Boltok Pistol is more effective than the Snub Pistol that you are initially equipped with. Good for killing Wretches if you shoot from the hip. It's also quite easy to pull off a headshot with the Boltok Pistol.
GORGON PISTOL
A burst fire pistol effective at close to medium range. The kickback is somewhat cumbersome, so aim at the at the lower-portion of your target. Kantus use these.
LANCER ASSAULT RIFLE
Standard COG weaponry. The Lancer deals a decent amount of damage at close to medium range. The Lancer also features a chainsaw bayonet. To use the Lancer's chainsaw bayonet, hold down the B button to start the chainsaw. Get close enough to an enemy and if they don't notice you, they're in pieces. You're immune to damage while cutting through an enemy with the chainsaw, making it the perfect weapon to use against the melee-oriented Sires.
A new feature introduced in Gears of War 2 is the chainsaw duel, which is initiated when two characters equipped with Lancer Assault Rifles are facing each other and both press the B button in quick succession. Mash the B button during the duel and the faster tapper will come out on top.
HAMMERBURST
The Hammerburst works a bit differently than it did in Gears of War 1. Now instead of firing in short bursts, its rate of fire is determined by how fast RT is pulled. Not a bad weapon, but given the choice between a Hammerburst and a Lancer, choose the latter.
GNASHER SHOTGUN
The Gnasher is quite powerful at close range, but you'll more than likely want to drop it in favour of a more effective weapon when playing on any difficulty level higher than Normal. For the Gnasher to be truly effective you must be pretty close to your target. While Gears of War isn't really that type of shooter, the Gnasher can be a saviour in certain situations.
LONGSHOT SNIPER RIFLE
This is a truly awesome weapon. Once you get your hands on one, never let it go. To look through the Longshot's Scope use LT, and use the Right Thumbstick to zoom in and out.
The Longshot is noticeably less effective than its Gears of War 1 counterpart, however it is still a powerful weapon. A headshot still instantly kills most of the Drone-type enemies on the Hardcore difficulty setting, save for the Palace Guard.
FRAG GRENADE
The standard Frag Grenade returns in Gears of War 2 with a new proximity mode setting. You can stick a Frag Grenade on walls or other surfaces by equipping one and pressing the B button while facing a surface. When an enemy gets too close, the grenade will explode, hopefully netting you an easy kill.
Of course, the Frag Grenade can still be thrown. While readying a Frag, a visible arc shows the grenade's trajectory, making trying to use one effectively less of a guessing game. Instead of simply throwing this grenade, it is attached to a chain and swung and thrown.
Another feature introduced in Gears of War 2 is the “parting gift,” which can be particularly effective during multiplayer matches. When you're down but not out, select the Frag Grenade and press the B button to detonate yourself when an unwitting foe ventures too close.
SMOKE GRENADE
Only available in the multiplayer mode. Thrown in the same way as a Frag Grenade, but releases a cloud of smoke upon detonation. As with the Frag Grenade, Smoke Grenades can also be stuck to walls, acting like proximity mines.
The Smoke Grenade has been largely upgraded in Gears of War 2 in that it will now knock down characters caught in its blast. This feature can be used quite effectively, as a grounded character is left vulnerable to gunfire, chainsaws, and Frag Grenades.
INK GRENADE
A brand new addition to the game; the Ink Grenade is thrown just like a Frag or Smoke Grenade, but it emits a cloud of poisonous gas when it explodes. Ink Grenades can be stuck to walls and other surfaces, too.
Remaining in the poisonous cloud will lead to a quick death, so if one lands nearby you'll want to quickly clear the area. Kantus carry these.
HAMMER OF DAWN
The Hammer remains unchanged from its predecessor in Gears of War 1. You'll only come across this weapon once in the single-player campaign this time around.
To use this weapon, hold down the Left Trigger to aim and the laser will show you where the beam will strike. You cannot move around too much while the beam is charging or it will cancel. Once it is deployed, however, you are free to move the beam with the Right Thumbstick. This weapon is primarily used in the single player campaign for killing Seeders and Berserkers.
TORQUE BOW
The Torque Bow is used by Theron and some Palace Guards. The bolt sticks into flesh and on many surfaces and explodes a few seconds after impact.
To use the Torque Bow, hold the Right Trigger to charge the bolt, point the laser guide at a target, and release to fire. You can do charge a shot while behind cover, too. You have to hold RT for a long enough time because if you don't, the bolt will simply bounce off the target and not stick. You can't keep the bolt charged forever, either. If you hold down the RT button for too long, the Torque Bow will simply launch the bolt by itself.
BOOMSHOT
All in all, this weapon is not too impressive, even still in Gears of War 2. Splash damage is practically non-existent; nothing short of a straight-on shot will be effective. Your best bet would be to leave this weapon on the ground. The Torque Bow is a much better option.
SCORCHER FLAMETHROWER
This a devastating close-range weapon carried by Flamers and Flame Boomers. Though this is primarily a close-range weapon, it can be used effectively from behind cover to keep rushing enemies at bay. It can be blind-fired like other weapons, making it particularly useful when you're pinned down by enemy fire. Though it has a fairly limited range, achieving a perfect reload will greatly improve it.
MULCHER
This mini-gun is wielded by the Grinder class of Boomer. It is essentially a portable turret and can tear a target to pieces in a matter of seconds. As with the Chain Gun and Troika, the Mulcher eventually overheats when it's fired for an extended period of time. The bar in the top-right corner of the screen indicates the gun's temperature; it rises when the Mulcher fires, and lowers while it's inactive. Holding the RB button will quickly cool down the gun.
The Mulcher can be picked up without having to discard either of your weapons, and can be mounted on the ground or behind a piece of cover (hold LT while behind cover).
MORTAR
Like the Mulcher, the Mortar can be picked up without having to discard either of your weapons, and can be mounted on the ground or behind a piece of cover (hold LT while behind cover). This is a long-range weapon, useful for decimating large groups of enemies in the distance.
To use this weapon, point towards your target and hold RT to start it up. You'll notice a meter that rises as you hold RT. This meter indicates how far the mortar strike will travel. It goes up to 150m, and can be launched at as low as 25m. Occasionally, two white markers will appear on the meter; this indicates how far you must aim to clear your target. These markers don't always appear, so using the Mortar can sometimes be a bit of a guessing game.
BOOM SHIELD
The Boom Shield essentially acts as a piece of deployable cover; it can be set down by pressing the A button while holding LT. The shield can be used to block off narrow stairways and other passages to prevent the big Locust (Bloodmounts, Boomers, etc.) from moving past it. The Drone-type enemies can kick the shield down, however, so setting it down won't keep you completely safe. While carrying the Boom Shield, you only have access to your pistol and melee attacks.
Maulers carry Boom Shields and use them to ward off gunfire, thus requiring a team effort to bring one down.
DRONE
These are the Locust that you will encounter most often. They are the standard, bipedal enemy present in any shooter. There several subtypes of Drone, and each uses a variety of weapons. The most common type of Drone are those that use the Hammerburst or Lancer Assault Rifle.
Grenadier: Wield Gnashers and tend to throw Frag Grenades. Grenadiers are easily discernable from standard Drones due to their lack of chest armour and bulkier frame. Don't get too close to these.
Sniper: Use the Longshot Sniper Rifle. They wear goggles and sometimes head armour.
Bolter: Wields a Boltok Pistol and tends to charge at its target.
Cyclops: Are discernable by their distinctive head armour. They wield the Lancer Assault Rifle and make use of its chainsaw bayonet to cut through enemies.
Flamer: A Drone-sized version of the Flame Boomer. As its name implies, this class of enemy uses the Scorcher Flamethrower. If one of the two tanks on a Flamer's back is punctured, it will begin to emit fire and promptly explode, taking its user with it. Take advantage of this by always concentrating your fire on one of its tanks and then backing off when fire begins to emit from it. one shot with the Longshot is enough is enough to accomplish this.
Troika Gunner: These guys man the Locust Troika emplacements. A well-thrown Frag Grenade or a headshot from a Longshot is enough to put an end to this enemy.
WRETCH
These small, mobile enemies use melee attacks to deal damage, and because they move very fast they can be quite hard to hit. Luckily, they are very weak, and can be killed with one melee attack in most difficulty levels.
TICKER
A small enemy with a sizeable explosive strapped to its back. Tickers explode when killed, and can also self-detonate if they're close enough to you or one of your allies. If you can't kill a Ticker from afar, the best way to deal with one is to melee it—which knocks them away from you and prevents them from detonating—and then fire at it from a safe distance. Don't melee a Ticker while it's down though, as that will just cause it to explode. Just make sure that you don't have your Lancer out before mashing that melee button because using a chainsaw on a Ticker isn't the best idea!
SEEDER
Seeders deploy Nemacyst, which is a slow-moving, flying enemy that explodes when it comes into contact with something
BOOMER
Gears of War 2 introduces a number of Boomer subtypes, all of which are briefly outlined below.
Standard: These guys are deadly. They use Boomshots, and if one manages to clip you, it's over. When you see one, take cover! They usually say "Boom" before they are about to shoot, so if you are aiming at one, duck back behind cover when you hear this.
Grinder: Uses a Mulcher chain gun. They are discernable from the standard Boomer by their square-shaped helmet.
Flame Boomer: Wields a Scorcher Flamethrower and moves about as fast as a standard Boomer. Can sustain more damage than a Flamer, but can also be killed quickly if one the tanks on its back is punctured by gunfire.
Mauler: Carries a flail and a Boom Shield. When the flail comes down, it will incapacitate any character within a certain radius. Maulers use their Boom Shields to ward off gunfire, so take aim and fire at any visible portion.
Butcher: A large Locust that carries a cleaver. These guys move very slowly and don't inflict much damage, so dealing with one is not much of a problem.
KANTUS
A tall, lanky Locust that throws Ink Grenades and carries a Gorgon Pistol. They are quite adept at dodging gunfire and have a large amount of health, making them difficult to take down.
THERON
An upgraded version of the Drone. They usually use Torque Bows so be very careful if there are any Theron around. If you notice that one is aiming a Torque Bow in your direction, get behind a piece of cover and wait until the Theron is forced to release the bolt.
PALACE GUARD
The toughest variant of Drone. They can wield a variety of weapons including the Gnasher, Torque Bow, and Hammerburst.
REAVER
You'll remember these guys if you played through the first Gears of War. Reavers are more commonplace this time around, however, and now have the ability to ground themselves on the battlefield. Reavers require a great deal of gunfire to bring down, and can deal a considerable amount of ranged and melee damage. Most Reavers are controlled by a handler and may also carry a gunner.
BLOODMOUNT
Quick, two-legged creatures that are used as mounts by some Grenadiers. Bloodmounts are quite dangerous up-close, as they can deal a considerable amount of melee damage. Furthermore, its handler can often still hit you while you're behind low cover due to his elevated position atop the Bloodmount. Hitting the Bloodmount with rapid gunfire will cause it to teeter, both stopping it in its tracks and possibly knocking the rider to the ground. You must kill both the rider and Bloodmount separately.
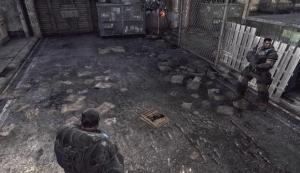
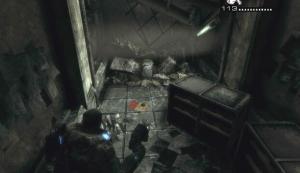
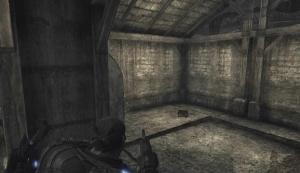
At the start of the game you're given the option to run through a few training exercises, though you can skip the training entirely and jump right into the action. However there are several benefits to choosing the training route. Firstly, the training session is very brief and will serve to familiarize you with the game's basic controls and combat manoeuvres. Secondly, two of the 41 total collectibles in the game are found in the training area. Lastly, completing the training session unlocks the “Green as Grass” achievement.
Collectible (1/2): Select the Training option at the start of the game and walk to the end of the alley once in the training area. Here Jack will continuously saw at the chain link fence until you take cover. Look for The Eagle Newspaper on the ground a few steps across from the dumpster and wooden fence in this area.
Collectible 2/2
The Eagle Newspaper
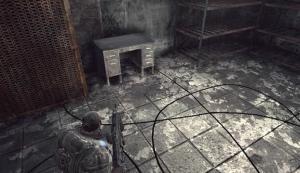
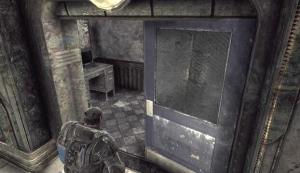
Follow the instructions that appear onscreen and eventually you will come to a ladder, which marks the end of the training session. There is another collectible nearby, so don't start towards the hospital just yet. Slide down the ladder, turn right, and enter the garage there.
Collectible (2/2): Upon entering the garage, turn left and make your way towards the desk at the other end of the room. The collectible (Ambulance Driver's Log) is on the floor in front of this desk.
Collectible 2/2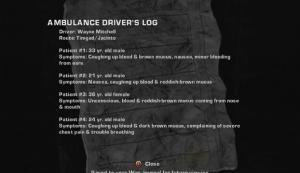
Ambulance Driver's Log
Once you have the collectible, exit the garage and head for the hospital in the distance.
Pass through the blue double door to trigger a brief cutscene. Afterwards, follow Tai up the stairs to reach another double door. Upon entering the next room, proceed through the double door in the northwest corner. Grab the ammo box along the walkway and then take cover along the railing so that you have a clear view of the fuel tanks at the center of the lobby below.
You'll want to keep your head down to avoid being spotted by the Drones entering the lobby. Stay down until you hear the order to detonate the fuel tanks, at which point take aim and fire at them until fire begins to shoot out. Once you've punctured a hole in one of tanks, just sit back behind cover and wait for the tanks to explode, ideally killing each and every enemy in the room below.
There's a collectible in one of the rooms along the walkway, so don't pass through the double door with the ammo box in front of it just yet.
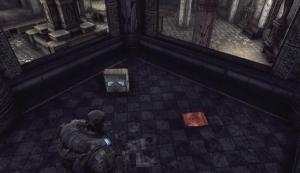
Collectible (1/5): This collectible is in one of the rooms along the long walkway overlooking the lobby where the Drones swarm in. If the one open room along the side of the walkway you are on does not hold the collectible (if you see Frag Grenades, you're in the wrong room), go to the parallel walkway and look in the open room there. The collectible (Doctor's Journal) will be on the floor by some cabinets.
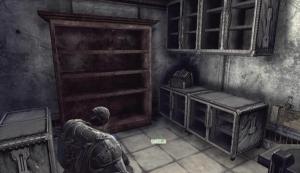
Collectible 1/5
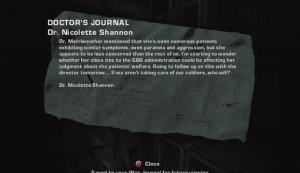
Doctor's Journal
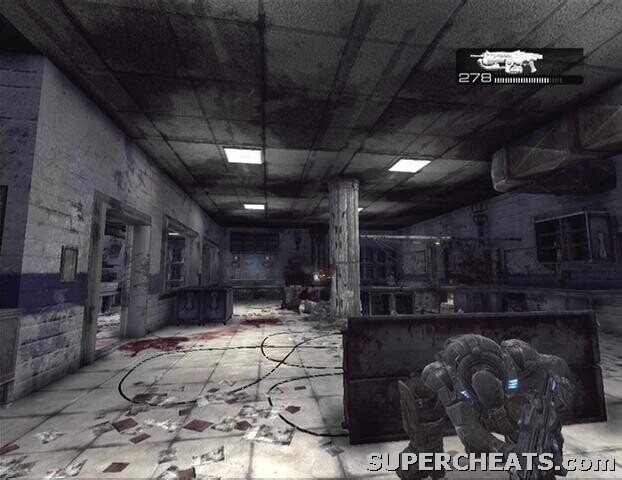
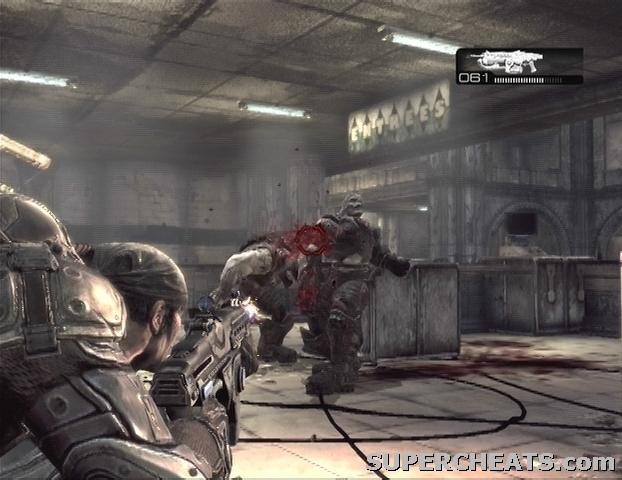
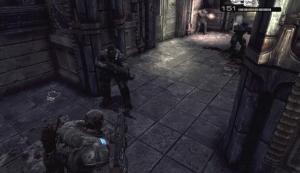
Once you're ready to move on, follow your squad through another double door. You'll meet some resistance along this walkway in the form of two Drones. Let your comrades deal with the enemies in the area below the walkway, and take cover behind one of the white chests to avoid taking fire.. Pick off the two Drones and continue through the double door up ahead. You'll meet a pair of Drones in this hallway as well; just get behind cover and allied helicopter fire will soon take care of them.
A couple of Drones occupy the room at the end of the hallway. Dart towards the standing table in the middle of the room, take cover against it, and then press the A button to have Marcus flip it on its side for use as cover. Take care of the Drones in this room from behind this cover. There are some Frag Grenades in the small room to the left of the table, so head in there and pick them up if you have space in your inventory. When you're ready, continue through the door at the opposite end of the room and head down the stairs.
Take cover by the side of one of the doorways at the bottom of the stairs and clear out the locusts in the room beyond it.
Collectible (2/5): The collectible (Jacinto Medical Center File) is on the floor between the two circular desks at the center of this large room.
Collectible 2/5

Jacinto Medical Center File
Head through the single door on the wall adjacent to the door you used to enter and go through the double door at the end of the hallway you come to. Take cover behind one of the benches at the bottom of the steps and help your allies pick off the enemies in the courtyard. After the skirmish, walk across the courtyard, climb up the steps, and step through the double door there. Move along the hallway here and clear out the two Drones in the large room before stepping in. Follow your squad through the next door and turn right at the split.
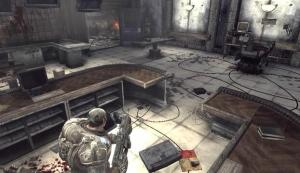
There are a few more enemies to deal with in the cafeteria. Luckily there is plenty of cover to choose from. There's an ammo box in the kitchen freezer that you can pick up if your ammo's low. Be sure not to miss the nearby collectible before moving on.
Collectible (3/5): Enter the small room with the broken double door by the doors to the cafeteria and kitchen. The collectible (COG Letterhead) is on the floor here in front of the desk.
Collectible 3/5
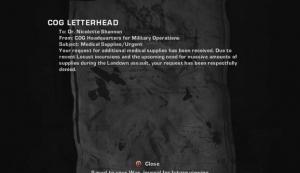
COG Letterhead
Move past the serving counter at the far end of the cafeteria to enter another large room. After a King Raven helicopter crashes through the skylight, a few Drones will appear and fire down at you from an overlooking walkway. Take cover behind one of the shelves and either shoot back at them or lob a Frag Grenade onto the walkway to hopefully take them out. Climb up the stairs at either end of the walkway and head through the double door up top. Some Frag Grenades can be found to your left as you enter the main lobby. Be sure to pick up the collectible here before heading down the stairs.
Collectible (4/5): Upon entering the main lobby, turn right and move to the very end of the walkway. The collectible (COG Proclamation) is there, next to an ammo box.
Collectible 4/5

COG Proclamation
After you've picked up the collectible, take the stairs down to the main lobby and enter the formation of reception desks at its center. Drones will soon appear and attack from all sides, so you'll have to move from cover to cover to avoid taking fire. When the enemies have all been dealt with, head through the recently opened double door to meet up with Carmine. There is yet another collectible nearby, but be sure to kill the enemies up ahead before going for it.
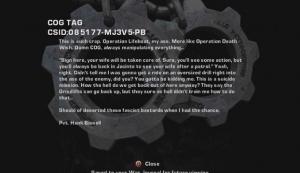
Collectible (5/5): Upon exiting the hospital through its main lobby, turn right and pass under the archway. Turn around and look by the column on the left to spot the collectible (COG Tag).
Collectible 5/5

COG Tag
When a good number of the enemies in the street have been cleared out and the collectible has been picked up, climb down the steps and grab cover behind the cement block there. A couple of Reavers will appear, but remain behind cover and let the allied helicopters deal with them. Once the way is clear, cross the street and hop through one of the store's rectangular windows. If you move to the other end of this room, you can take cover below the window there, likely giving you a clear view of the remaining enemies.
Grab the ammo box across from the window and leave the store when all visible foes have been taken care of. Continue down the street and take cover behind the cars scattered about if need be. You'll clear the chapter and unlock an achievement once the Locust attack force in the street has been eliminated.
Collectible (1/2): At the start of the chapter, turn around and you'll find the collectible (Grindlift Notice) posted next to the ladder at the back of the platform.
Collectible 1/2
Grindlift Notice
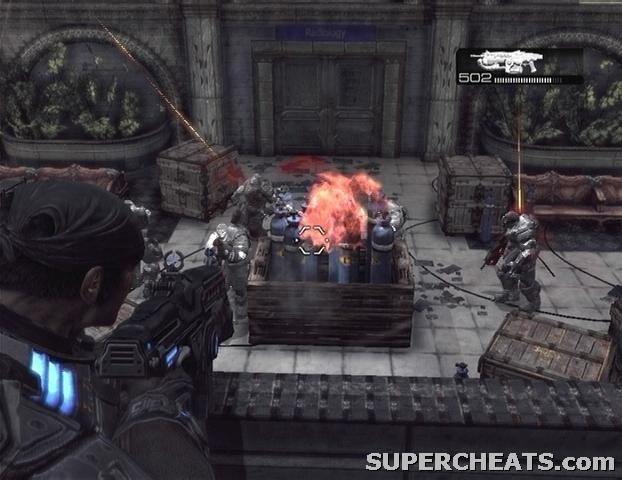
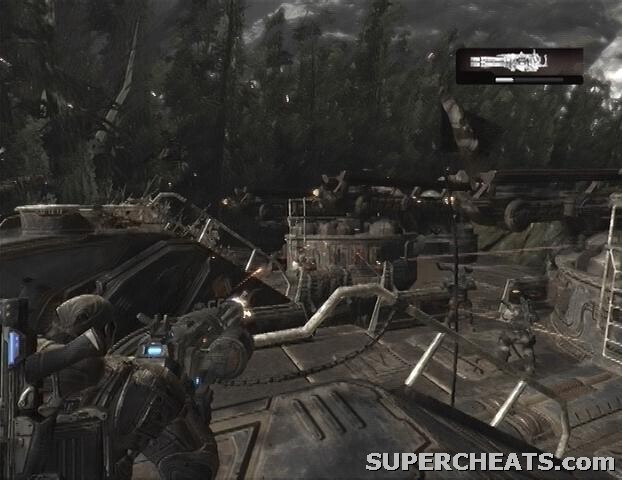
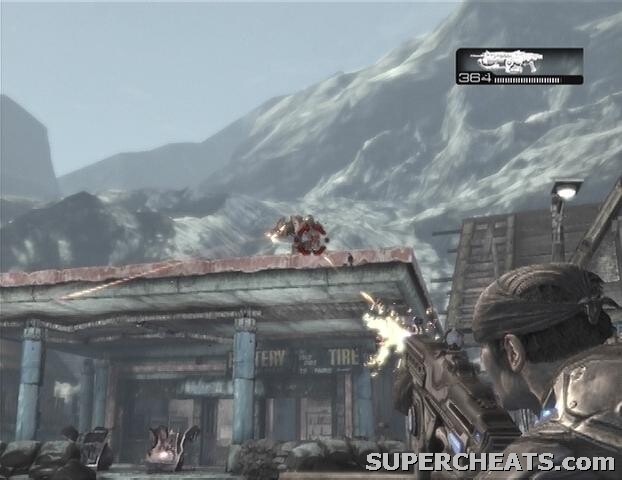
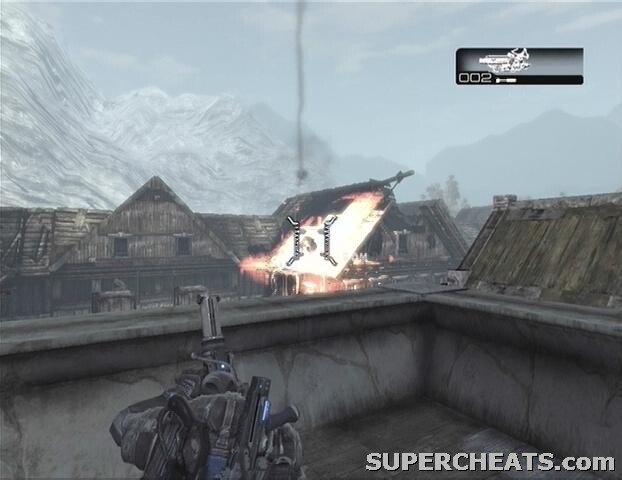
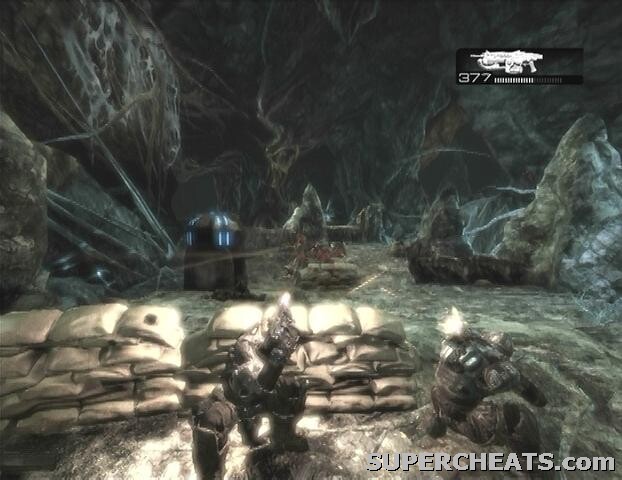
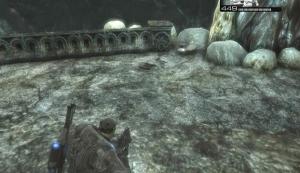
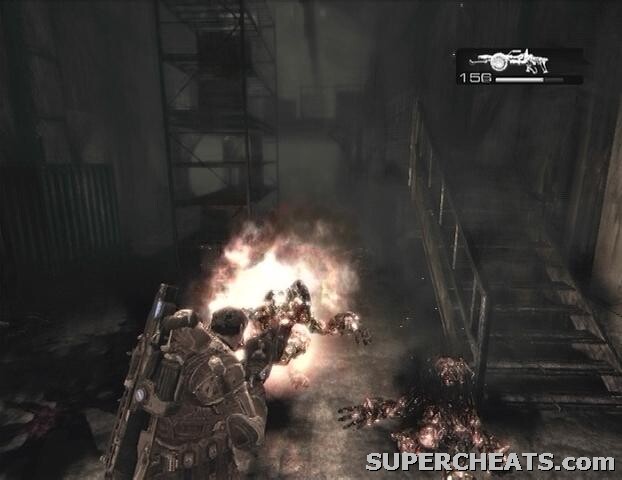
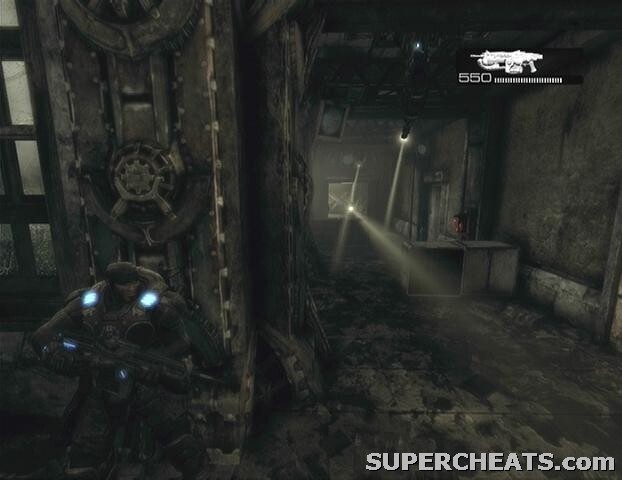
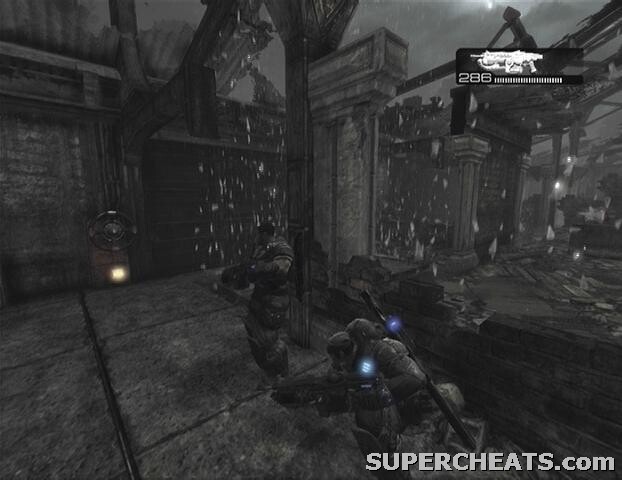
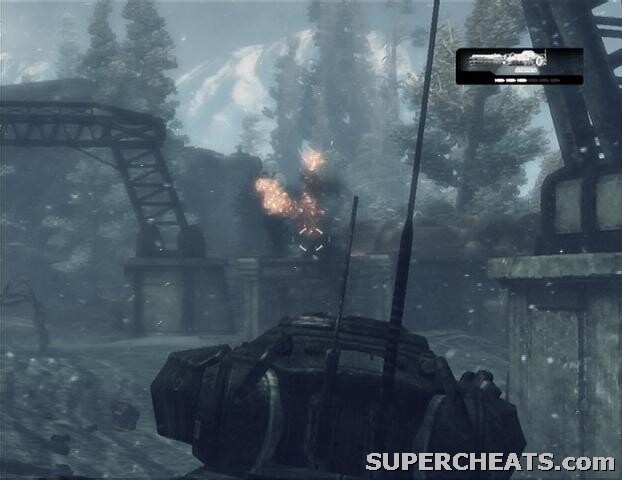
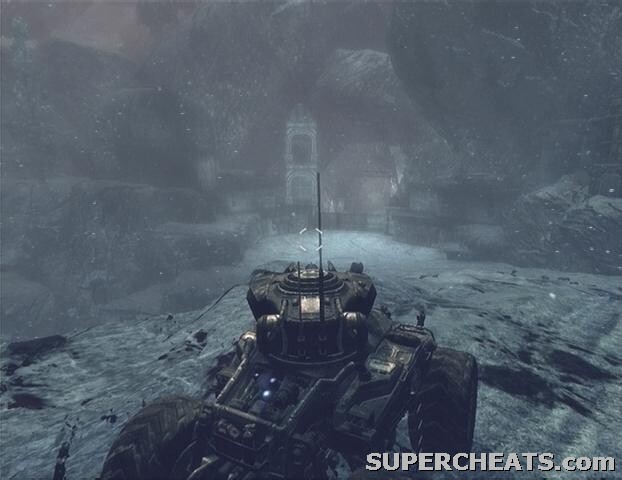
You're job here is to defend Betty the assault derrick from the Locust as you move towards Landown. At first the fleet will come under attack by a Nemacyst Mortar strike. Ignore the Chain Gun for now because it's much easier to shoot down the mortars with a Lancer. Position yourself by to the turret platform and hit the Nemacyst before they reach the vehicle. The assault derrick can only endure a few hits from the mortars, so your aim must be spot on if you're going to make it through this.
[img=a1c3-1.jpg]
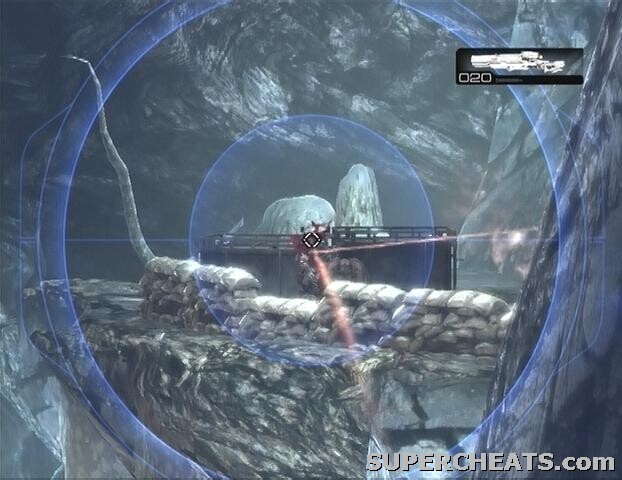
When the Reaver appears, quickly climb up the ramp, hop on the mounted turret and fire at the handler and gunman aboard the Reaver that is flying along the left side of the assault derrick. Pay attention to the bar beneath the gun icon in the top-right corner of the screen. This bar signifies the turret's heat level; when it's full you'll no longer be able to fire until the gun cools down. Holding the RB button quickly empties the bar.
Once the Reaver has been dealt with, the vehicle will come to a stop. Something has gone wrong, so your next task is to protect Dizzy while he tries to repair the assault derrick. There's a collectible nearby and enemies are fast approaching, so you'll have to grab this one quickly.
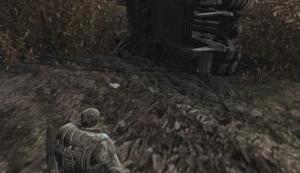
Collectible (2/2): As soon as you gain control over Marcus, turn left and move towards the ammo boxes and overturned truck in the distance. The collectible (Munitions Requisition Form) is nearby.
Collectible 2/2
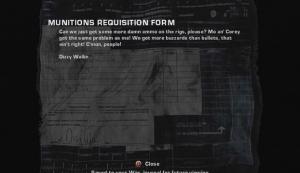
Munitions Requisition Form
Pick up the Frag Grenades near the ammo boxes and collectible before taking cover behind the overturned column by the standing column up ahead. Lob a Frag Grenade in the first emergence hole to seal it up, and then quickly clear out the Locust that managed to climb through before the next hole appears. Another emergence hole will open up nearby, so use your last Frag to quickly close it.
Be sure to steer clear of the standing column, as it eventually falls on its side and will squish you if you're standing in its path. When it does fall however, take cover behind it because some more enemies will than appear on the ridge across from it. Another hole will open up near the closed ones and unfortunately you lack a Frag Grenade to quickly close it. However by this time you should soon hear Marcus yell “Get to the rig!” at which point you can roadie run back to Betty to leave this area and complete the chapter.
Once you gain control over Marcus, get on the mounted turret and fire at the Locust emerging from the large hole to rack up some kills. Don't waste any time firing at the Brumak because he can't harm you.
A hijacked assault derrick will soon pull up alongside your vehicle. Fire at the Drones onboard and try your best to keep the turret on their end clear. When the two assault derricks move apart, a few grapplers will climb aboard yours. Your allies will likely be able to take care of them, but blast any that you can reach with the Chain Gun. When the bulletproof glass protecting the driver of the hijacked vehicle cracks, direct your fire at the driver until you manage to knock him out.
Get back on the Chain Gun immediately after the victory cutscene. Ignore the Brumaks alongside you for now. A Corpser pops up along the way, but it can't harm you. Shortly after the Corpser encounter, a Brumak will appear in your path; you must quickly kill it before it can gib you with its missiles. Focus your fire on the missile battery on the Brumak's back. When it explodes it will take the Brumak with it. Remember to cool down the Chain Gun when it overheats by holding RB. On the Hardcore difficulty setting Marcus can only take two missile blasts from the Brumak before he's blown to pieces, so keep your aim steady and cool down the Chain Gun immediately when it overheats.
You'll complete the chapter and unlock an achievement once the Brumak is dead.
Give the door to the left a few kicks to open it. Take the Gnasher from behind the counter if you aren't already carrying one.
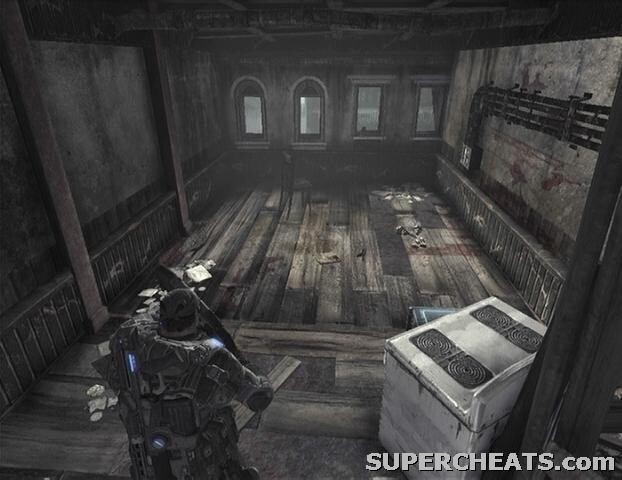
Collectible (1/4): Hop over the counter and climb up the stairs behind it. The collectible (Jacinto Sentinel Newspaper) is on the floor in this room here.
Collectible 1/5
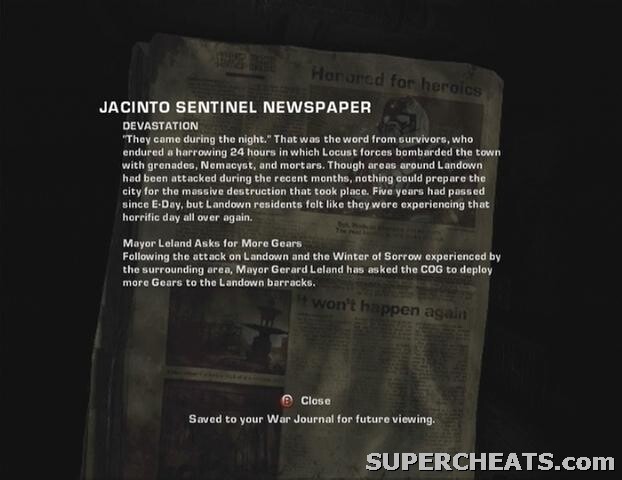
Jacinto Sentinel Newspaper
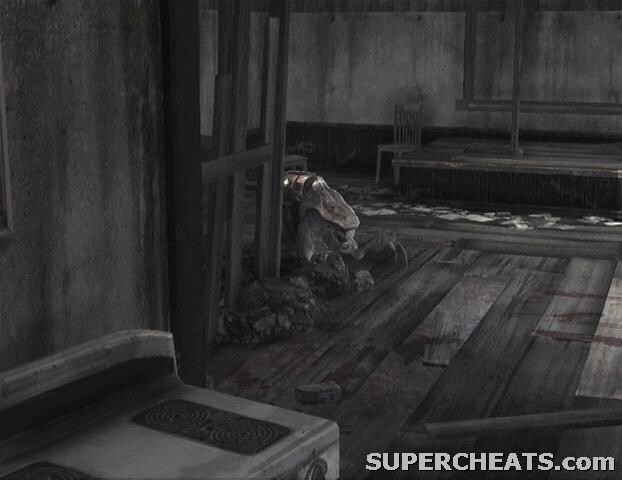
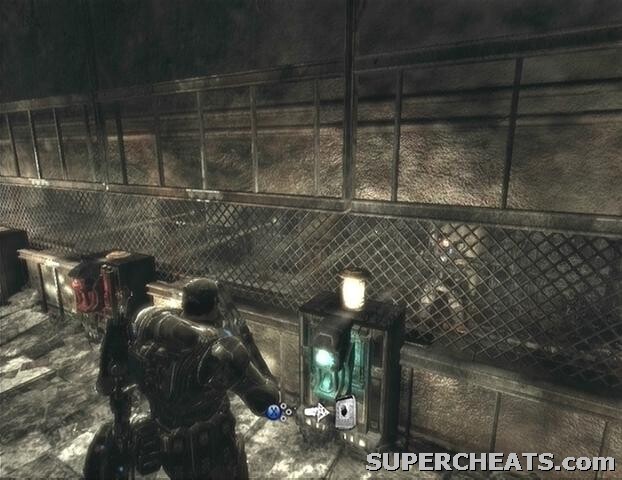
Grab the collectible, Frag Grenades, and ammo box in the room upstairs, and then climb back down the stairs, hop over the counter, and continue on into the next part of the bar to meet some Tickers. These enemies explode when killed, and can also self-detonate if they're close enough to you or one of your allies. If you can't kill a Ticker from afar, the best way to deal with one is to melee it—which knocks them away from you and prevents them from detonating—and then fire at it from a safe distance. Don't melee a Ticker while it's down though, as that will just cause it to explode. Just make sure that you don't have your Lancer out before mashing that melee button because using a chainsaw on a Ticker isn't the best idea!
Take cover beneath the opening in the wall and blast the Tickers with your Gnasher before they can reach the doorway. When the way seems to be clear, step outside, but keep on the lookout for stray Tickers. You'll know a Ticker is in the area due to the distinct ticking sound they emit. A wooden fence on the other side of the road will soon be blown open by a Ticker. Kill the final Ticker to complete the current objective and then continue past the fence. Head down the alleyway between the two houses and use the Lancer's chainsaw bayonet to cut down the wooden planks in your path. If you don't have a Lancer, there is one in on the floor behind the houses, otherwise a few normal melee attacks can accomplish the same.
Take cover behind the sandbags here and fire at the Tickers that appear. You should be safe from their blasts from behind the sandbags, but just don't let one get behind the cover. They tend to self-detonate when they get close enough, even if you're on the other side of a piece of cover, so fighting these guys off shouldn't be too much of a problem.
Collectible (2/4): The collectible (Memorial Inscription) is in the small gravesite across from the start of the path that leads up to the Imulsion station. It is the plaque below the statue there.
Collectible 2/4

Memorial Inscription
Once you have the collectible, head towards the Imulsion station and take cover behind the cement block at the top of the slope to the right. A Troika gunner is soon revealed to be on top of the station. Wait until the gunner takes aim at one of your friends before popping up from cover and firing at his side. With the gunner down and out, sit tight until the tower to the far left with a second Troika gunner in it is demolished by an allied assault derrick.
Collectible (3/4): Enter the small room at the back of the Imulsion station. The collectible (Truck Driver's Note) is on the ground here.
Collectible 3/4
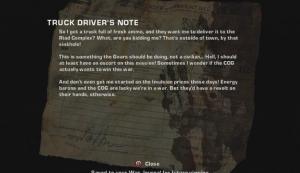
Truck Driver's Note
After picking up the collectible inside the station, hop over the railing along the building next to the station and move through the gap at the other end. Make your way over to the giant tunnel in the distance and pass through the open fence at its mouth. This tunnel is full of Tickers, so switch to your Gnasher and melee away any that get too close for comfort. Your allies will fire at the Tickers too, which can be dangerous since they tend to detonate those nearby. For this reason your best bet upon spotting a Ticker is to simply back away and fire your Gnasher at it.
Keep to the left of the tunnel and eventually you will come to some steps. There's a collectible nearby, so don't head up those steps just yet.
Collectible (4/4): A small room to the left of the steps along the sidewalk holds the collectible (COG Tag).
Collectible 4/4

COG Tag
When you have the tag, continue up the steps, proceed through the doorway, and move through this area and out the doorway at its end. Blast the Tickers as you move down the remainder of the tunnel and take cover behind the car near the exit. A Reaver will soon appear and ground itself at the end of the tunnel; switch to your Lancer and fire at the Reaver until it falls. With the way clear, exit the tunnel and start down the street.
Partway down you're given the choice between the Hotel route and the Rooftops route. For the sake of following this walkthrough, choose the Rooftops path by pulling RT.
Rooftops Path: Get behind a piece of cover and kill off the two Drones at the end of the way Climb up the ladder around the corner and use the Lancer's chainsaw bayonet to silence the Mortar Drone on the rooftop if he hasn't spotted you. Pick up the Mortar and move along the roof until you have a clear view of the bombed out hotel across the street. Take aim at the roof of the building at the far right end, hold the shot with RT until it reaches about 110m, and then release it to create an opening.
With that done, climb back down the ladder and wait while Jack opens the door across from it. Kick open the door, move through the building, and take cover behind the sandbags outside. Kill the Drones in this area and then take up the Mortar on the ground. A Brumak soon emerges from the tunnel; you must defeat it before it manages to destroy Betty with its missiles.
It takes a solid three mortar hits to down this beast, but luckily from this position you're close enough to the Brumak to not have to worry too much about firing distance. Try to time the first mortar strike as the Brumak steps out from the tunnel; don't hold down RT for too long (75m-80m) because you don't need all that much distance. The Brumak will stand on the spot for a moment when it first steps out from the tunnel, so hit it with a mortar strike again here (70m-75m). When the Brumak is right up against your cover (the railing along the rooftop), you need only hold a mortar shot to 55m-60m to reach. If a third mortar strike doesn't bring the Brumak down, either try for another one or quickly switch to your Lancer and hope it's at least close to dying.
The chapter ends once the Brumak falls.
Pick up the Mortar on the platform if you aren't already carrying one and take position along the railing at the front of the assault derrick. A large amount of Locust soon enter the gravesite below. You must defend the assault derrick from this attack until it can deploy the Grindlifts.
While using the Mortar, make use of the white distance markers if it's visible, because it serves as an indication of how far the mortar must travel to reach distant enemies. If the white markers do not appear, hold until anywhere between 70m-105m. Try to only launch mortar to wipe out clusters of enemies and not just one or two; let your teammates pick off the strays. Watch out for grapplers as well, though your allies should be able to deal with them.
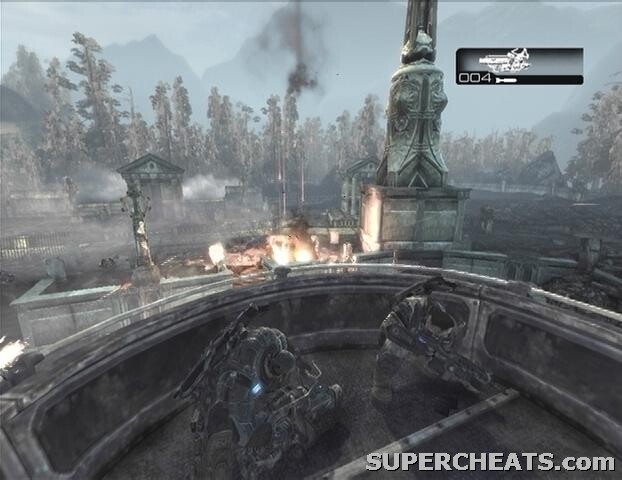
The biggest threat here is the Locust Mortar crew that enters the graveyard from the right side of the screen. Be sure to save at least one mortar strike to wipe out these guys, as a single strike from them can gib you and your comrades. There may still be a Mortar in the middle of the platform if you didn't pick it up at the start of the level, so grab if need be and then return to position. The mortar crew will come shortly after the grapplers come onboard, so keep an eye out for them. If the crew manages to fire off a mortar strike, immediately drop your Mortar by pressing a direction on the D-Pad and rush over to the far end of the platform in an attempt to avoid getting killed.
After the mortar crew a group of Boomers will enter the graveyard. They can be quickly eliminated by a mortar strike. Once the Boomers have been dealt with, a pair of Reavers will appear and ground themselves at the back of the graveyard. They're at the very back of the area, so you'll have to aim a bit farther if you hope to hit one with a mortar strike (around 150m to hit the Reaver across from your cover).
You'll complete the chapter and unlock an achievement when the all of the Locust in the graveyard have been wiped out.
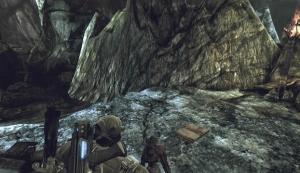
At the start of this chapter, you can either climb up the ladder behind you or go down the trail to the right of it. Both paths eventually converge, so go whichever way you like. When you spot the falling Grindlifts continue down the path to the left. Continue moving towards the skirmish and use the Lancer's chainsaw bayonet to cut down the vine wall that you come to. Grab some cover behind one of the rocks in the next area and gun down the Drones in the distance.
Once you hear the battle end sound effect, start up the slope in the distance towards the two Grindlifts to meet up with Carmine. Pick up the Frag Grenades here and then quickly take cover along the ridgeline. A large number of Drones, and eventually some Tickers, will appear in the area below. Be especially careful of the Tickers, as they tend to dart up behind cover and detonate themselves. Remember to melee them if you aren't using your Lancer, otherwise fallback or roll to avoid taking damage. Switch to your Gnasher if more than one Ticker manages to get up the ramp, then roll away and blast them. Also watch for enemy Frag Grenades landing behind your cover.
When the last Drone falls, move towards the overturned Grindlift by the rock wall and hit the switch on its side to start it up. Afterwards, go through the tunnel that the Grindlift created and start down the path to the area below to assist your comrades. Pick up the two ammo containers strewn about, take cover behind the sandbags up ahead, and then start firing at the enemies in the distance. There are Tickers here too, so keep an eye out and roll away if one manages to gets close to you. Two Boomers will enter the area near the end of the fight; just make sure you duck back down behind cover if one sends a Frag your way. It would be a good idea to pick up those Boomshots after the battle.
Head through the rock archway after the battle and start down the lit path. There are Wretches along here, so switch to your pistol and use that beat them down when they get close. You'll eventually come to another vine wall. If you swapped your Lancer out for another weapon and don't wish to pick up another one, a few normal melee hits will cut through the vine wall too.
The Rock Worm here acts as a moveable cover, though it's not exactly reliable. It feeds on the glowing red bulbs that are strewn throughout the cave. Blasting one of these bulbs, thus dropping it to the ground, will lure the Rock Worm over to it, allowing you to take cover along its solid shell. Shoot the hanging fruit in this area to send the worm over to it.
Collectible (1/2): After crossing a narrow rock bridge over a small body of water, keep an eye out for a vine wall to your left. Use the Lancer's chainsaw bayonet or some normal melee attacks to cut through the vines. The collectible (Gears Journal) is on the ground in front of the Grindlift here.
Collectible 1/2
Gear's Journal
Steer clear of that Rock Worm's mouth, as it won't hesitate to chomp on you if you get too close. Keep an eye out for more hanging, glowing fruit and shoot them down to send the Rock Worm towards them. Start down the path and pick up the ammo box and Frag Grenades by the Grindlift you come to.
Take the high road on the left and grab some cover along the ridge. There is a Troika gunner and some Drones in the small encampment below; try to land a Frag by the Troika gunner to take him, otherwise your AI allies should be able to hold his attention while you gun him down from afar. When the Troika gunner falls, move down to the area below and take cover behind the sandbags. More Drones will soon enter the area using the ladder behind the Troika, so gun them down quickly before they can get behind cover.
After the fight, pick up the two ammo boxes and climb one of the ladders to reach higher ground. There are some Frag Grenades and another ammo box to your left when you reach the top of the ladder. Start down the path across from the ammo and grab some cover behind the Rock Worm when it enters the area. Toss a Frag behind the cover up ahead to hopefully take out the Drones hiding there.
When the way is clear, head towards the Grindlift in the distance. There are a couple of Longshots by the Grindlift further ahead, so swap it with one of your weapons and use it to take out the snipers and Troika gunner on the platform to the right. When using the Longshot, always aim for your target's head for an instant kill against most of the Drone-type enemies. This is a powerful weapon, so keep it in your possession for as long as possible.
A number of snipers will position themselves on the same platform, so continue killing them until they cease. Afterwards, follow the Rock Worm when it enters the area. When you reach the split, take the path to the right. Don't waste any ammo on the Locust patrol group below and instead climb up the ladder here to reach higher ground. Grab some cover behind the trailer once up top and use a Frag Grenade to take out the first Troika gunner behind the sandbags.
With the first gunner down, use your Longshot to pick off the remaining grubs in the encampment. There is another Troika at the right end of the encampment, so switch over to the sandbags to the right of the trailer and pick him off with a headshot if he's preoccupied with your allies. Use your Longshot to take out the remaining Drones, but stay where you are.
Once the camp is clear a Reaver will enter the fray. Remain behind the sandbags and hit the Reaver with Lancer fire, but fallback to a further piece of cover if the beast gets too close. A single pound from one of those claws will turn Marcus to mush, so be careful. Its body will explode once it falls, so make sure you're a safe distance away when the time comes.
Right after the Reaver ordeal, get on the Troika across from the door because a pair of Boomers and some Wretches will enter through the door across from the encampment. Using the Troika here may not work out as planned, since it does leave you open to their Boomshot fire, and one of those to the chest will spell the end for you. However you should have hit a checkpoint after downing the Reaver, so there's no risk in trying for an easy kill.
Collectible (2/2): The collectible (Kantus Scroll) is in the corner across from the Troika emplacement closest to the door.
Collectible 2/2
Kantus Scroll
Pick up the collectible and ammo boxes in this area before proceeding through the door that the Boomers came through. Roadie run down the slope to trigger a brief cutscene. Continue down the winding slope and use you Longshot to eliminate the Locust Mortar squad and Troika gunner that has Alpha pinned down. If you're out of Longshot ammo, move up and take them out from up close using one of the sandbags as cover.
With the Mortar squad taken care of, move up and take one of the Mortars they left behind. Use the Mortar to kill the enemy squad at the right end of the area below. There should be white markers to signify how far you have to aim to reach them. A brief cutscene is triggered when the last enemy falls. Follow your allies down the path to complete the chapter.

Start down the path and eventually you will reach the entrance to a Locust stronghold. Be sure to pick up the Longshot that's on the ground just before the steps. Immediately take cover behind one of the pieces of railing to avoid taking fire. Look up in the left corner of the cave ceiling for a glowing fruit, and shoot it down to lure the Rock Worm into the area. There are some Tickers in this area as well, so don't let one get too close. When the Rock Worm is in view, hop over the railing and take cover somewhere along it.
If you have one or more Frag Grenades, toss them into the two sectioned-off areas on either side of the entrance to take out the grubs hiding there. Eventually the Kantus will come through the front door sided by a group of Wretches. Empty your Lancer into the Kantus until he falls, but divert your attention to the Wretches if they get too close. The Kantus was carrying a Gorgon Pistol, so be sure to pick it up before moving on.
Collectible (1/1): Enter the stronghold once the Kantus has been dealt with and make a hard right. The collectible (Locust Emblem) is on the ground near the ammo box here.
Collectible 1/1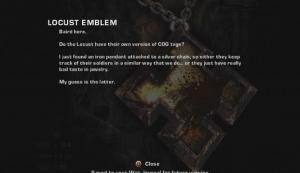
Locust Emblem
Once you have the collectible, start following your allies deeper into the stronghold. You'll come to a ladder, and you then must choose between the Left path or the Right path. You won't miss anything by choosing one path over the other, but for the sake of following this walkthrough, choose the Right path.
Right Path: Grab the ammo box and Frag Grenades in front of you and then immediately take cover behind the Rock Worm. If you have a Longshot with you, this'll be a piece of cake. It's your job to take out the gunners in the Troika nest here. Dom will shoot down a piece of hanging fruit to lure the Rock Worm further into the area, so follow along so you don't lose your cover. Pick off both Troika gunners with headshots from behind the safety of the Rock Worm. If you are out of Longshot ammo, lob a Frag Grenade or two through the windows instead.
Afterwards, enter the building and pull the lever right by the entrance to open the door next to it. Head through the open door, go down the path, climb up the ladder, and take out the Troika gunner behind the sandbags. Toss a Frag Grenade up there if you can spare one. Continue along the path until you reach some sandbags overlooking another Troika emplacement. Take cover behind the sandbags, kill the gunner, and then take care of the Kantus below as well.

Climb down the steps, hop on the Troika, and use it to eliminate the Drones below. A Boomer and some more Drones will enter through the large door on the right, so turn there and gun them down with the Troika.
Walk through the wreckage and pick up any ammo along the way. Take cover behind the broken wall on the right when you spot the first Bloodmount. These guys are tough; you don't want to let one get too close as they can deal a considerable amount of melee damage. Stay where you are and start picking off the first few Drones until the Bloodmount comes closer. Unload your Lancer—or another weapon suitable for this range—into the Bloodmount and rider while it is preoccupied with your teammates. There's a Hammerburst and some Frag Grenades behind the overturned car on the right, so swap a weapon out for that Hammerburst if you lack a long-range weapon.
Move on and eventually you will encounter another Bloodmount. Take him out in the same fashion.
Collectible (1/2): Kill the remaining Drones and keep an eye on the right side of the street for a small area that holds an ammo box (it's just before the ash-covered sports car). Hop over the low wall here and you'll come to an area with an upside-down car, some ammo, and a Gorgon Pistol. There are a couple of snipers in the distance, so be careful. The collectible (Ilima City Help-Wanted Ad) is on the ground next to the upside-down car.
Collectible 1/2

Ilima City Help-Wanted Ad
Once you have the collectible, start towards the low road and brace yourself for a Reaver attack. Fall back if it appears too close to you, as its melee attacks can bring you down quickly. Unload your Lancer into the Reaver and handler, and remember to steer clear of its body when it falls.
Afterwards, start down the low road and continue towards the smoke flare. Take cover behind the railing when the Corpser appears and fire at the Drones coming down the bridge in the distance. There's a Longshot at the far left corner of the railing, so pick it up if you need ammo or swap it with one of your other weapons. Yet another Reaver will soon enter the fray, so if you haven't dealt with the Drones yet, divert your fire in an effort to bring down the Reaver quickly. With the Reaver out of the way, return to firing at the Drones in the ruined building across the street. The building will collapse when the final enemy falls.
Go down the slope, pick up the ammo box in the left corner of this area, and then cross the shoddy bridge over into the next building. Hop over the low wall and enter the mansion on the other side of the street. Some enemies immediately appear on the second floor, so roadie run through the doorway across from the desk and take cover by its side to avoid taking damage. Fight off the Locust here until a cutscene is triggered.
Collectible (2/2): After the cutscene, before leaving the building, go on the other side of the wall to the left of the exit and look for a COG soldier corpse. The collectible (COG Tag) is on the ground next to this corpse.
Collectible 2/2
COG Tag
Grab the ammo box by the doorway and exit the building when you're ready to move on. You'll encounter another Reaver in the gravesite through the arched gateway, so quickly take cover behind one of the gravestones and fire at it with your Lancer. Shortly after, some Drones and Tickers will appear on the bridge, so move up and take them out from behind cover. When the way is clear, cross the bridge to complete the chapter.
Follow your squad until you reach the prisoner containers. Grab the ammo box in the upper-right corner of the first platform before moving on to the upper platform to trigger a cutscene. With Baird in your party, move on to the next area.
Collectible (1/1): Upon entering the next area, make a hard right and follow the path there to its end. The collectible (Stranded's Journal) is in the corner here.
Collectible 1/1
Stranded's Journal
As you move deeper into the next area, you'll spot a Torture Barge in the distance. Roadie run around the corner and take cover behind the stone slab. A couple of Drones and a Boomer will come down from the docked Torture Barge. Eliminate them, grab the ammo box in the far left corner, and then move towards the barge to trigger a brief cutscene.
Once you're aboard the barge, immediately take cover behind one of the crates on the deck, because a Grinder is coming up on the lift at the far right end of the deck. The Grinder wields mini-guns that can tear you up in a matter of seconds if you aren't careful. With the Grinder out of the way, step onto the lift and hit the switch to ride it up to the next level. Pull the lever on the pillar at the other end of the room to open the chambers, revealing no captives. Head up one of the ramps on either side of the pillar and take cover behind the crate at the top.
After killing the two Drones on the upper deck, pull the lever on the contraption in the center, and then quickly take cover behind the crate at the opposite end. The barge pulls up behind another one which you must then board. There's a Troika gunner on this barge, so take him out quickly before he can do any damage. Cross over to the adjacent barge when they clash together. Kill the Drones onboard and take the ramp to the lower level. Pull the lever on the pillar here to trigger a cutscene.
When you regain control over Marcus, take cover behind the railing along the deck and start picking off the enemies on the dock. When the way is relatively clear, cross the bridge and take out the remaining enemies in the area. Start down the sloping pathway and you'll soon encounter a pair of Bloodmounts and some Drones. Roadie run down to some closer cover and gun them down from afar. They'll more than likely be too preoccupied with your allies to notice you. There's a Kantus hanging at the back of the group, so move up when the Bloodmounts are dead and take him down.
Continue moving ahead, past the raised bridge, and you'll encounter yet another Bloodmount and Kantus. Take cover and bring them down, and then follow towards the ruined remains of a city. Don't move too far ahead, because there is another Kantus, some Drones, and a Reaver to contend with. Luckily with four allies you have some considerable firepower on your side, so dealing with these guys shouldn't be too much of a problem.
Once the Reaver falls, move up, but keep an eye on the right side of the road for an ammo box. Continue following your squad down the street and gun down any enemies in your path. After spotting the extraction point, enter the ruined building through the door at the end of the street and make your way to the top floor. Immediately roadie run to the other end of the floor, pick up the ammo boxes there, and take cover behind one of the concrete slabs. Two Drones will enter the area using the nearby stairs, so take them out and then duck back down against the concrete slab. A couple more will enter the area this way during the course of the skirmish, so keep an eye on those stairs. Survive until the counter reaches zero to complete the chapter.
Collectible (1/2): At the start of the level, turn left and look for the collectible (Car Gold Magazine) in the corner.
Collectible 1/2

Car Gold Magazine
Wade through the Riftworm's intestinal juices until you reach the large digestive teeth. The first couple are easy enough to make it past; just wait until right after the tooth has hit the plate before roadie running and rolling to the safe space between teeth. Do the same for the second tooth. The third tooth is placed on an angle, but don't try to cross its length. Stand in the corner and wait for it to chomp down, then roadie run and roll over to the next safe spot.
To cross this next section you must roadie run continuously until you are at the other end. If you run into a wall you're mash, so steer clear of the low walls to avoid getting stuck. The next set of teeth aren't much harder to pass. For the first pair, rush through while they are opening, but do not try to pass the second just yet. Wait until the second tooth begins rising before dashing over. Do the same for the next two teeth to make it out alive.
Once you're through, move on until a cutscene is triggered. Afterwards, stand at the top of the slope and gun down the white critters before they can reach you. Avoid touching the green spikes throughout this level, because you'll take damage while standing on them. Move further ahead to trigger a cutscene.
Collectible (2/2): You'll have to move fast if you're going to escape the wall of debris. As soon as you gain control over Marcus, hug the wall on the left (but avoid the green spikes) and look for the collectible (COG Tag) in the corner. You should have just activated a checkpoint recently, so it's not a big deal if you don't find it before the wall of debris reaches you. If you do die after picking it up, there is no need to pick it up again.

Collectible 2/2

COG Tags
Roadie run away from the tumbling wall of debris until you reach the first flesh opening. Blast the flesh opening with gunfire and then roadie run through. Avoid the green spikes because they'll deal a large amount of damage when touched. Ignore the white critters, but melee them away with your Gnasher if they won't let you through. Use the Lancer's chainsaw bayonet to cut open the flesh wall you come to and then quickly pass through.
When you reach a dead-end, press the Y button to focus on the teetering vehicle up above. Hit it with gunfire to knock it down, creating a bridge over the poisonous spikes. When you reach the second flesh wall, cut it down with the Lancer's chainsaw bayonet to escape the wall of debris.
In the next area, take the path to the left, move up to the first acid nozzle, and shoot it to disable it for a short period of time. The acid jet will soon come back to life, so move past the patch quickly. There are two acid jets blocking the next patch; switch to your Gnasher and blast the two nozzles in quick succession, then roadie run over the acid pool to the next section. Do the same for the next four acid jets to make it across. Pick up the Lancer ammo by the corpse and proceed into the next area.
You have to make it through the stomach fast, since there is poisonous gas in the air that will slowly kill you. The key here is to always head down the lighter path. When you reach the end, use the Lancer's chainsaw bayonet to cut through the stomach lining. Follow this next path to its end and cut open the flesh wall with the chainsaw bayonet. Quickly cut through the two arteries on either side of the Riftworm's heart and then run up the slope across from it. The chamber quickly fills with blood, so you'll drown if you're not quick enough.
Unfortunately the Riftworm has four hearts, and you've only stopped one of them. You'll need to cut down the other three to kill this beast. Continue down the next path and cut through the flesh wall to reach the second heart. There are three arteries to cut with this one; waste no time moving on to the next, because the chamber is quickly filling up with the worm's blood. When all three arteries have been cut, move on down the path. Cut through the flesh wall to reach the final chamber which houses the last two of the Riftworm's hearts.
There are white critters to contend with here, but waste no time with them once you've cut the first artery. As soon as the first heart has been stopped, move on to the next on the other side and cut its arteries as well to complete Act 2.
Walk down the path and eventually you'll come to the abandoned facility. Kick in the front door and step inside. Proceed through the doorway at the other end of the room and walk to the end of the hall to trigger a cutscene. After the cutscene, head through the doorway around the corner and start down the hall. Move through the next few rooms and you'll eventually come across a Flamethrower. If you wish to pick up this weapon (it isn't really necessary here), be sure to keep your Lancer because you'll be needing it soon, and swap out your secondary weapon for it. Flip the switch in the next room to restore power to the warehouse.
Head to the other end of the storage room and hit the switch to the right of the door to open it. Go up the stairs to reach the catwalk and a bunch of Wretches will spawn. Now's the time to put that Flamethrower to good use if you picked it up. Of course if you didn't pick it up you can also take them out with a normal melee hit or shotgun blast. There are a lot of them though, so if you are getting overwhelmed it might be a good idea to pick up the Flamethrower on the catwalk at the top of the stairs. Step off of the catwalk just before the stairs and melee or scorch the Wretches as they come towards you. If Dom is incapacitated, don't bother reviving him until you hear the battle end sound effect.
After the Wretch onslaught, make your way to the other end of the room and use the handwheel to open the roll-up door. After the cutscene, carry the explosive charge over to the lift in front of the open roll-up door and wait for it to rise. Step into the room and wait for the Wretches to appear. If either you or Dom is incapacitated, you're toast, so you'll have to keep these Wretches off of you.
You're able to wield a pistol while carrying the bomb, so use it to either shoot the Wretches before they can get too close, or use it to beat them down while they're right next to you. When the door at the other end of the room opens up, stay put because more Wretches will come through. When the way seems relatively clear, proceed through the open doorway.
Once you're past the doorway, turn right and start down the hall. More Wretches will come down from the ceiling, so don't move too quickly. Continue down the hall until you reach the vault door.
Gears of War 2 Guide - Act 3: Gathering Storm
Chapter 2: Origins
Collectible (1/3): At the start of the level, go through the blasted door, head up the stairs and turn into the small office on the right. The collectible (Interoffice Memo) is in the corner on the right as you enter.
Collectible 1/3
Interoffice Memo
Once you have the collectible, step out of the office and pick up the ammo container by the windows at the end of the platform. Continue through the single door when it opens after the conversation with Colonel Hoffman and head down the hall. After taking some stairs down to another hallway, turn right and kick in the door there to enter the security room. You'll spot a load of Wretches on the other side of the glass at the end of the room. Hit the switch to activate the security system, which quickly obliterates the Wretches on the other side of the glass. Before leaving the room, hit the switch again to deactivate the security system.
Exit the security room, walk down to the other end of the hallway straight ahead, and kick in the double door on the right. Head through the pair of double doors on the other side of the room and turn right at the split.
Collectible (2/3): After passing through the pair of double doors, turn right and walk down the hall until you come to an open door on your right. Head through here and kick in the door you come to. The collectible (Memo) is on the ground by the blocked door in this room.

Collectible 2/3
Memo
After picking up the collectible, continue down the hall. There's a Flamethrower through the door on the right just at the corner; just be sure to hold on to your Lancer if you want to pick it up. As you turn the corner you'll hear a computerised voice say “security system enabled,” which means you're now going to have to avoid the auto-turrets in the facility. Immediately duck by the open door on the right to avoid taking fire from the turret down the hall.
You need to make it through the open doorway up ahead. Wait until the searchlight from the turret passes over you to the left, then hop over the cover and move through the door. Though it isn't necessary, hit the switch below the window to deactivate the turret.
In the room with the switch, head through one of the doorways along the adjacent wall and take cover between the next two doorways. Have your Flamethrower or beatdown weapon ready, because you'll soon encounter a group of Wretches.
When the Wretches have been dealt with, move up and take cover behind the lockers in this room, and then move over to the table to keep out of the turret's sight. When the searchlight of the turret directly in front of you passes over you to the right, hop over the table and hit the switch to the left of the lockers at the back of the room to deactivate the two turrets.
Head through the doorway next to the switch and start down the hall. As you can see there are several turrets in your path, and the switch to deactivate them is by the door up ahead. Take cover against the wall and when you're ready, quickly roll over to the door across from you. One of the turrets will likely spot you, but you should be able to make it through without taking damage. Walk over to the doorway at the other end of the room. The switch is on the wall to your left as soon as you step through this door, so wait until the turrets' searchlights are pointed away before dashing out and hitting it. After deactiving the turrets, continue through the doorway and kick in the double door here.
Get your Flamethrower or pistol ready and fight off the Wretches outside. At the bottom of the steps, turn right and approach the double door straight ahead. A group of Wretches will burst through the door when you near it, so be ready. Proceed through the open door once the Wretches have been dealt with, and then roll past the auto-turret searchlight and into the room across from you.
There are a couple more security turrets in this room, as well as some Wretches. Take cover by the table and kill any Wretches that come near you. Wait until the first turret's searchlight is pointed at the wall to your right before dashing past it to the safe zone between the two turrets. Wait until the second turrets' searchlight is pointed off to the right before dashing for the exit at the other end of the room.
Once you've exited the room, turn right and make your way to the other end of the hall there. After talking to Baird, continue down the hall and you'll soon come to another turret room. Luckily this room is fairly easy to get through, as the switch to deactivate the turrets here is off to the right as soon as you enter. Hit the switch and another group of Wretches will appear, only to be gunned down by the turret in the next room. Be ready to kill any Wretches that do manage to get close to you, however.
Collectible (3/3): Head through the doorway next to the switch. The collectible (New Hope Medical File) is on the ground at the end of this small room.
Collectible 3/3
New Hope Medical File
When you have the collectible, enter the next room and walk around the two active turrets' searchlights. Pass through the two doorways at the other end of the room and head down the stairs. At the bottom of the stairs, proceed through the hallway and you will soon come to a couple of flamethrowers. Some Wretches will burst through the door at the end of this hall, so stand back and take them down. Once they've been dealt with, roadie run past the length of this hallway to avoid the flamethrowers.
At the end of the hall, you'll reach a gate that Jack must open. Pass through the doorway and head down the stairs in this room. You'll then come to a hallway guarded by a number of turrets. Choose the “Turret Controls” path, since it's definitely the more desirable of the two options. All you have to do is hit the switches when they turn green. It's as simple as that.
Hit the switch to open the vault door and reach the laboratory. Make your way to the other end of the lab and move through the doorway. Head up the steps after Jack opens the gate and flip the big switch here to complete the chapter.
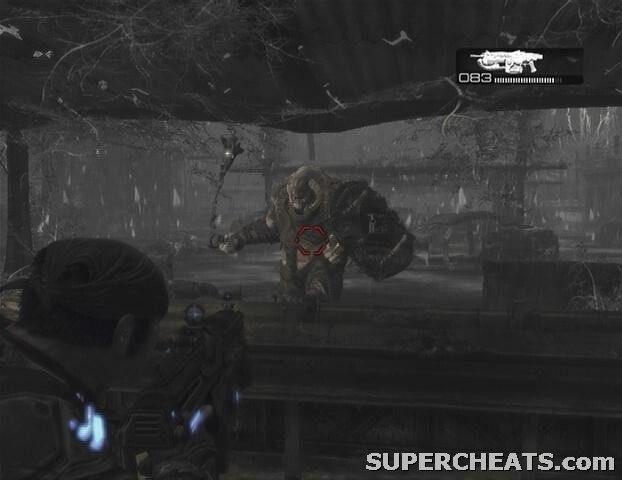
The Sires in the laboratory downstairs have been awakened. If you still have a Lancer Assault Rifle with you, fighting off these creatures will be a cinch since the chainsaw bayonet can easily cut through them. Best of all, while cutting through one Sire you'll be immune to damage any others around you.
When you're ready, head back down to the lab and walk off to the right to trigger a brief cutscene. Ready your Lancer and slice through the first Sire. Move deeper into the lab to trigger more. Make your way into the next room and continue to walk around the cells and chainsaw the Sires as they pop up.
Move on to the final section of the lab and make your way over to the gate. There is a handwheel on either side of this gate, both of which must be turned at once to open it. Wait until the way is clear before grabbing one of the wheels. If you notice a Sire coming up from behind while you're turning the wheel, tap the X button to get off so you can chainsaw the creature. When the gate opens, go down the steps in this room and look for the terminal and lever off to the left. Switch the lever to shut down the facility's security system.
Afterwards, proceed through the doorway and head down the hall to enter the next area. A group of Locust burst through the wall here. Toss a Frag Grenade over if you have one to spare. Shooting at the tanks on a Flamer's back will cause it to explode. You'll know you've done enough damage to the tank once fire is shooting out from it. Just steer clear of the Flamer to avoid taking damage from the explosion that ensues.
Continue on through the hole in the wall once the first batch of enemies has been dealt with. There is another auto-turret down this hall, so after stepping through the work area doorway, turn left and go through the doorway there to reach the switch that deactivates it. Hitting this switch brings up the turret in the work space across the way, likely wiping out the enemies covering there.
Walk down to the end of the hall and grab the ammo box in the storage room on the left. Continue on into the next area to encounter even more Drones. Finish them off and then kick in the double door to reach a circular room with a large skylight. Just sit behind cover and wait for the razorhail to break through the skylight and kill the Grinder and Drones in the center.
As has just been demonstrated, standing in razorhail will get you killed. You're about to head outside, so you'll have to find a way to get to where you need to go while avoiding the hail. Walk around the area below the skylight to avoid the falling hail and head out the door at the other end of the room.
Collectible (1/2): Once you're outside, turn right and roadie run and roll over to the building there. You'll take a bit of damage from the razorhail, but it won't kill you. The collectible (Doctor's Journal) is in the corner at the far end of the building's interior.
Collectible 1/2
Doctor's Journal
When you have the collectible, roll back over to Dom and then over to the building on the left. Next, roadie run over to the train car, tap the cover button to slide over to it, and then climb up onto it. If there's a Drone on the train car, use the Lancer's chainsaw bayonet to kill him. Once you're safely on the train car, pull the lever on the left to start it down the track. Stay behind cover and don't waste your ammo on the enemies along the way.
Once the car comes to a stop, step off and board the next train car at the other end of the area. Head out the other side and take cover behind one of the cement slabs here. Try to toss a Frag Grenade into the emergence hole at the end of the way if you have one to spare. Kill off the Drones up ahead and pick up the Longshot and ammo left by the snipers if you wish. When the way is clear, follow the marquee roof over to a doorway and enter. Immediately take cover behind the low wall and move over to the handwheel and roll-up door.
Kill all nearby Drones in the area first, and then turn the handwheel once to block the razorhail with the roll-up door. Hug the wall, cross over to the next section, and hop over the low wall. Use the handwheel to open the roll-up door here all the way. There are a few locusts on the covered platform across from the roll-up door; use the Longshot to take them out if you're carrying one. Once the locusts on the platform have been dealt with, head outside and hop over the low wall to your right. Use the handwheel to open the roll-up door here and go through.
Stand in front of the doorway at the end of this area and roll over to the concrete slab cover.
Collectible (2/2): The collectible (Captivity Marks) is in the building across from the train car door. Roadie run and roll through the razorhail to avoid taking severe damage. When you enter, turn left and look along this wall for the carving.
Collectible 2/2
Captivity Marks
Get in the train car after Dom and pull the brake release to start moving. There's a Boomer on the platform that you probably won't be able to ignore since he can easily gib you through the train car's windows. You can try to hide at the far right end of the car, however just killing might be your best bet.
When the train reaches the end of the track, get out and climb up the ladder in front of it. At the end of the walkway, roll through the patch of razorhail to the other shelter. Roadie run and roll past the next patch and grab some cover behind the cement slab at the front of the shelter. An emergence hole will open up by the wrecked car up ahead, so use a Frag Grenade to plug it up if you have one to spare. If not, you'll just have to fight off the Drones that climb up until they stop spawning.
After downing the first few enemies, roadie run past the wrecked cars to the next shelter.. Do the same when the enemies under the shelter up ahead have been taken care of. You'll encounter a couple of Mauler Boomers while underneath the next shelter. These guys are really dangerous up close, so be sure to stay behind the railing in the middle of the shelter. The Mauler Boomer wields a flail that can down you with one blow, and carries a deployable shield that can protect him from gunfire. Sit back behind the fence and unload your Lancer into the brutes. If your target crouches down and deploys his shield, shift around until you can get a bead on him.
Once the two Maulers have been dealt with, start roadie running over to the next shelter and the razorhail should cease. Another emergence hole opens up ahead, but you just need to kill a few more Drones to complete the objective. Continue down the path until you reach the Centaur. A couple of Reavers will appear and attack the squad, so be ready. Kill the two Reavers to complete the chapter.
You're both driving the Centaur and manning the guns. Make sure you're familiar with the control scheme before proceeding.
Drive down the path until you reach the first gate. Stop moving forward a few feet from the gate and blast the Boomers and Drones out front, and then destroy the gate. There is a Troika mounted on the small building on the right side of this encampment, so zoom in by holding LT and take out the gunner. You'll also encounter a Reaver here, so blast it with the Centaur's cannon before it can fire any missiles off. Getting a perfect reload with the cannon allows for rapid fire and increased damage, allowing you to down Reavers in no time.
If the Centaur becomes damaged, stop moving forward and Baird will repair it. You'll know that the Centaur is in need of repair when fire is visible. Plow through the camp when the Reaver and Troika are out of the way and continue down the road. You'll come to another gate shortly. There's a Troika mounted at the left end of the archway here, so blast the gunner before he spots you.
Continue through the next archway and you'll then come to another outpost that contains a Reaver, a couple of Boomers, and another Troika gun emplacement on the building to the right. Don't just barrel through the outpost; stay just outside of the entrance and try to blast the Troika and Reaver from there. The Centaur can't sustain a whole lot of damage, especially from Troikas, so you definitely have to take it slow here.
When the way is clear, head through the next archway and about midway down this road, press and hold the A button to activate the turbo and hit the ramp. The next obstacle in your path is a frozen lake. Nemacyst will blast holes in the ice as you cross, so don't just speed to the other side. Drive slowly and steer clear of the holes in the ice as they appear. You'll be greeted by a pair of Reavers when you make it to the other side. The next frozen lake is a bit more treacherous than the last. Make sure that you've taken care of the two Reavers before continuing on to the ice.
This section requires even greater caution. When you spot the Reaver in the distance, stop where you are and kill it before proceeding. If there are still Reavers in the area firing at you, stop what you're doing, determine where the missiles are coming from, and take them out. When you reach the end of the frozen lake, allow Baird to repair the Centaur before moving on.
Blast the Boomers by the outpost up ahead and then drive over the ramp and through the next archway. Continue driving through the next few archways, blasting the Reavers and Boomers in your path, and stop at the archway before the next outpost. Take out the Troika gunner on the smaller building to the right before moving on. You'll meet a couple more Reavers further down the road.
Slow down after reaching the checkpoint. There are a couple of Seeders on the ridge in the distance. They fire Nemacyst which can severely damage the Centaur, so you'll want to keep your distance. Look for a short, round boulder along the left side of the road and position yourself there. Here you'll have a clear view of the Seeders on the ridge, while remaining out of their range. Blast the two Seeders until they fall from the ridge, and then continue down the road.
Position yourself here.
Seeders
You'll meet a pair of Reavers through the next archway, so slow down and blast them before moving on. When you come to the bombed out bridge, drive off to the right of it to spot a natural ramp. Back up to the building across from the ramp, then hold the A button to activate turbo boost and hit the ramp to cross the chasm.
Continue up the slope and three Reavers will appear to block your path. Take them out from afar and then continue down the road to reach the final stretch. Remain on the ridge overlooking the final outpost and blast the Reaver and Boomers below. A Reaver and some Drones will likely be coming up from the slope leading down to the outpost..
There's only one Troika here, which is on the roof below the tower on the left end of the gate, but that's not the major obstacle here. As you go down the slope towards the outpost, you'll start being hit by machine gun fire and missiles from the tower and adjacent building. Unfortunately the only way to silence this fire is to bring the tower down, and doing so is a pain on any difficulty higher than Normal. Furthermore, the tower can only be damaged after Baird yells “Dom, hit the tower!” at which point you'll begin to be hit by gunfire.
Before starting down the slope, first make sure there that are no Reavers or Drones left in the area. When you're ready, slowly descend until you hear Baird yell, and then quickly reverse back up the slope and out of range of the gunfire from the tower. Wait for the Centaur to be repaired and ready a full perfect reload with the cannon. With Centaur fully repaired, move ahead just enough to see the tower, and then blast its base until it falls. Afterwards, proceed down the slope and through the gate to reach the next checkpoint.
Make your way through the cave and you'll eventually hit a ramp, after which the Centaur breaks down momentarily. Once power is restored to the vehicle, you'll be faced with three Corpsers. All you have to do is blast each one when it raises its claws. First the one on the right will raise its claws, then the one in the middle, and finally the one on the left. The Centaur will be crushed if one of the Corpsers manages to bring its claws down, so you mustS act fast.
Continue off to the right once the Corpsers have been dealt with and you'll soon meet three Brumaks. Keep your distance and try to dodge any missiles they send your way. Bring down the three Brumaks to complete the chapter.
Cross the bridge and make your way to the bottom of the slope. You'll soon encounter a Theron Guard, which is a tougher version of the Drone that carries a Torque Bow. The bolts from the Torque Bow stick into flesh and surfaces and then explode, so keep your head down if you spot a Theron charging a shot (you'll be able to see an orange glow at the front of the bow). The Theron will have to release the bolt eventually whether he hits someone or not, so use the time after he fires to move in closer or take him out. Bolts that explode near you still deal damage, so roll out of the way if one sticks into a nearby wall. You're safe if a bolt sticks into the front of your cover, though it may unsteady your aim when it explodes.
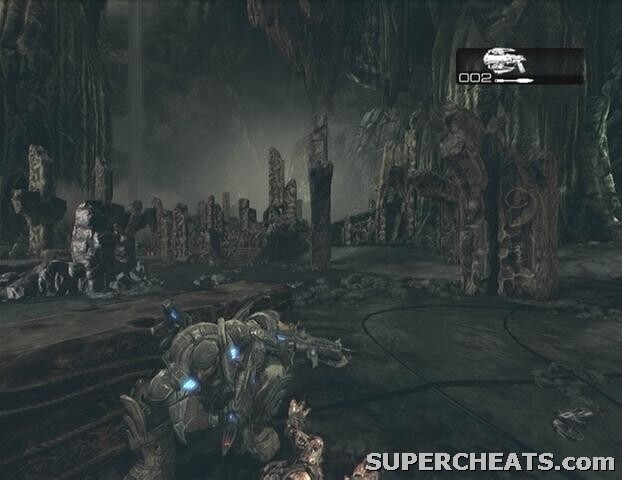
Pick up the Torque Bow once the Theron's down if you wish, and then continue along the path. Some Grenadiers, Wretches, and Theron will ambush you up ahead. There's a gunboat in the nearby waters, but ignore it for now. Remember to stay down if you see a Theron charging a shot in the distance. Be ready to melee the Wretches away should they reach you.
There's an ammo container at the back of the first part of this area, so be sure to pick it up before moving on. The next area contains a Flamer, some Tickers, and a Kantus. At this point you must destroy the Locust gunboat. Luckily, the gunboat appears to be transporting a cache of explosives for whatever reason, so hit one of the tanks to set it off, and then watch as the boat is destroyed.
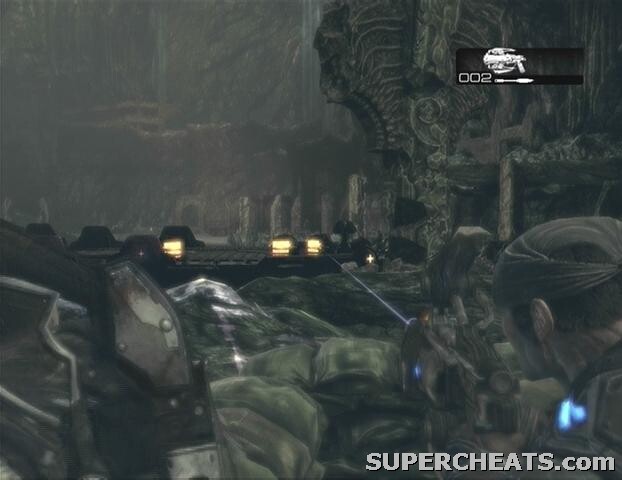
Collectible (1/1): After destroying the Locust gunboat, look around the area for some steps. Climb to the top of these steps and you'll come to a bench. The collectible (Stranded's Journal) is on the ground below this bench.
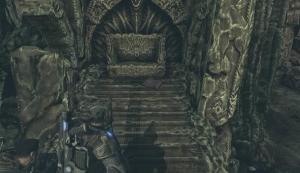
Collectible 1/1
Stranded's Journal
Step onto the wrecked gunboat and cross over to the other side. A short cutscene depicts a gunboat docking up ahead, with some more enemies stepping off. Now there are a couple of Drones, a Kantus, and some Tickers on the pier, as well as another gunboat in the nearby waters. Take cover by the pillar and low wall on the right to get the best coverage. Be ready to melee away or blast the Tickers if they get close.
When the Kantus and Drones have been dealt with, move up and take cover behind one of the collapsed pillars because a Bloodmount will soon appear. Kill off the Bloodmount, grab the ammo box by the pillar, and then move up towards the archway to encounter a couple of Grenadiers and a Kantus. Afterwards, start down the pier and take cover behind one of the crates along the way because another Locust gunboat will soon dock and more enemies will scurry off. There's a Grinder among them, so take him out with a Torque Bow bolt if you're carrying one.
When the enemies on the pier have been defeated, approach the docket boat to trigger a brief cutscene. The end of the pier breaks loose, setting Dom and Marcus adrift. To make matters worse, a couple of Locust gunboats appear and quickly surround the raft. Immediately take cover behind one of the crates on the raft. You'll have to shift around a bit as the gunboat circles to avoid taking fire. Try to lob a Frag Grenade onto their boat if you have one to spare, otherwise just fire back at them from behind cover until they fall.
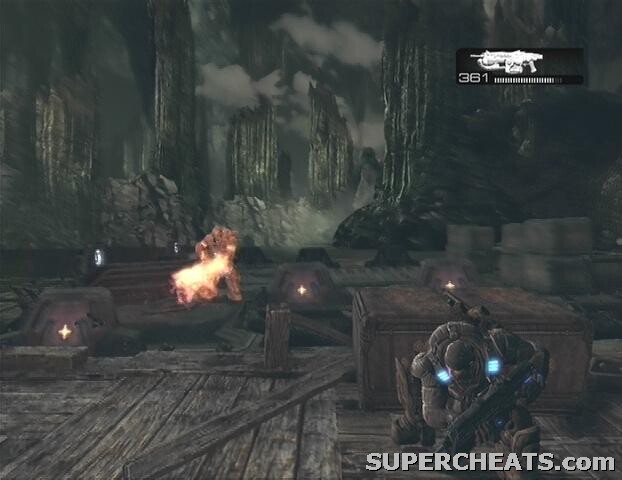
After awhile the gunboats will trail off and leave you at peace for a short while. Another gunboat soon appears, however, and this one has a Flame Boomer onboard. You have to quickly down this guy to prevent him from destroying the raft. Concentrate your fire on the tanks attached to his back to bring him down quickly. Once he has fallen, Marcus and Dom board the vacant gunboat, after which yet another pair of Locust gunboats appears.
Take cover behind one of the metal plates along the side of the boat and try your best to gun down the Drones on the enemy gunboat. When the second gunboat pulls up on the other side, quickly switch over to the metal plate across from you to avoid taking fire. Pay attention to Dom, as he'll usually let you know when to switch over by calling out a side when another gunboat appears.
A third gunboat with a Grinder onboard will pull up along the left side of the gunboat, so make sure you're behind cover for that one. The ammo container by the bridge respawns indefinitely during this portion, so take advantage of this during any downtime to fill up your weapons.
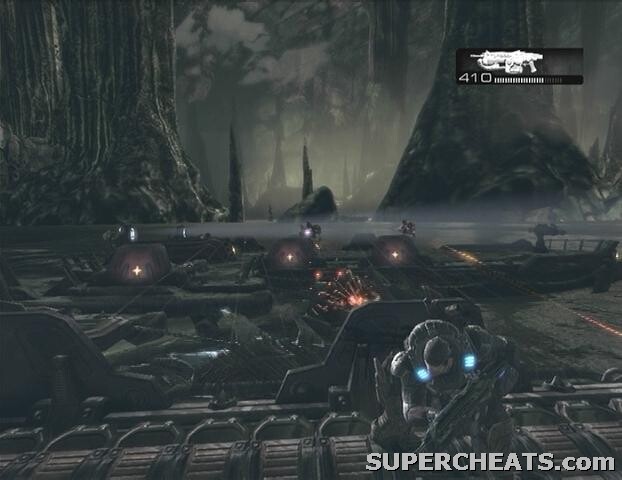
Once you've survived the assault, the gunboat takes a tumble down a waterfall, marking the end of this chapter.
This chapter consists entirely of a battle against the Leviathan, a giant sea monster that is intent on consuming your gunboat. Pick up the Lancer on deck if you don't have one already, as you'll need its chainsaw bayonet for this fight. You'll need Frag Grenades too, and luckily they continuously respawn on deck as well. When one of the Leviathan's tentacles clutches the boat, use the chainsaw bayonet to deter it.
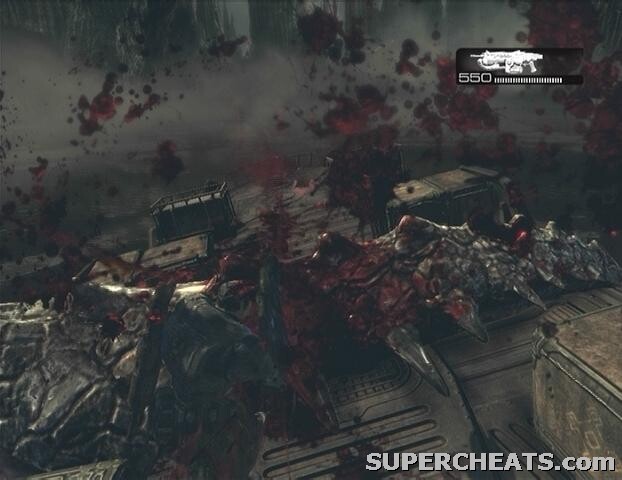
These tentacles can crush you if you aren't careful, so immediately after sawing through the first tentacle, position yourself right between the two crates at the back. Wait here until one of the Leviathan's tentacles clutches the boat, then dash over to it and use the chainsaw bayonet to remove it. Always stand between the crates at the back of the boat to avoid being chomped by the creature when it shows its face.
After sawing through three tentacles, the Leviathan will rear its head and chomp down on the front of the boat. When this happens, get closer to the creature and shoot one of its eyes to cause it to recoil in pain, leaving its mouth wide open. At this point, roadie run and roll to the very front of the boat. If done successfully the creature will bite back down on the front of the boat, leaving you inside of its mouth.
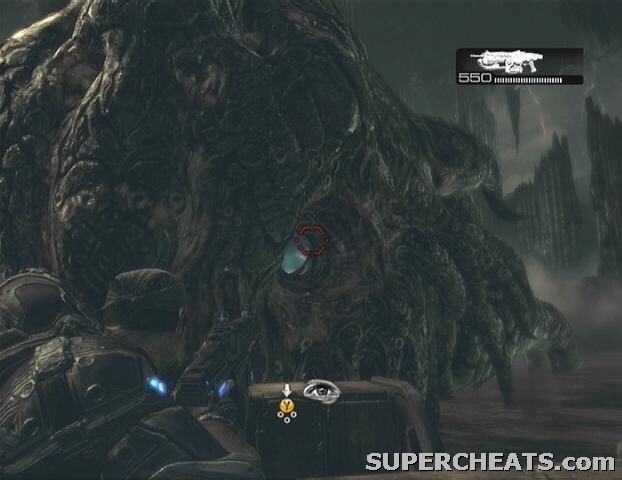
While inside the Leviathan's mouth you must fight off the six tentacles surrounding its throat to open it up. You must shoot a tentacle when its tip turns white and it starts wiggling around. If you're too slow, the tentacle will extend and swipe at you. It's best to shoot from the hip here, since you don't want to waste any time aiming. Just scan over each of the tentacles and immediately concentrate your fire on one when its tip turns white.
After fighting off the Leviathan's inner tentacles for awhile, the tract at the back of its mouth will open up. At this point, equip a Frag Grenade, take aim, and toss it into the opening. If done successfully, the creature will recoil and return to the water. If you fail to land a Frag into the opening, you'll have to fight off its inner tentacles again. All the while, the Leviathan is consuming more and more of the boat, so you have to be quick. If you run out of Frag Grenades, two batches of them should spawn to your left and right.
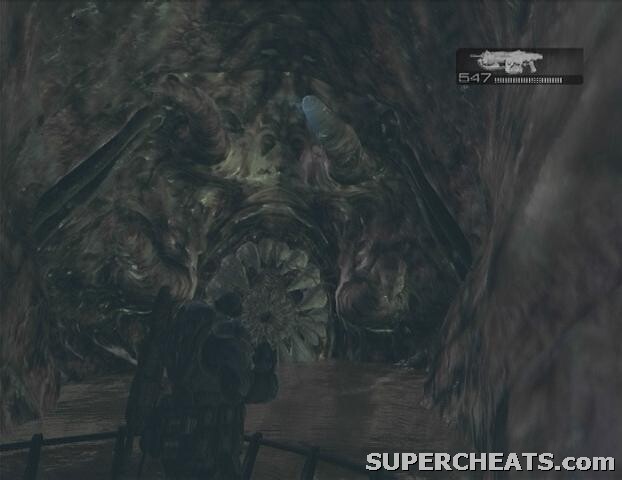
Fallback to the space between the two crates at the back of the boat and wait for the Leviathan to land another tentacle onboard. Use the chainsaw bayonet to remove the tentacle, and then wait for the creature to rear its head again. Shoot it in the eye, roll past its teeth when it opens its mouth, fight off the inner tentacles, and then toss another Frag down its throat.
Toss one more Frag Grenade down the beast's throat to kill it and complete the third act.
Start down the path and you will soon reach a series of archways. Pass through the archways to trigger a cutscene. Afterwards, head through the archway up ahead, walk down the hallway, and hit the switch at its end to activate the lift. You'll come to another lift at the end of this walkway, so hit the switch to take it down to the next area. Turn the handwheel to lower the floodgates in the middle of the room, then hop over the railing and take cover behind one of the platforms.
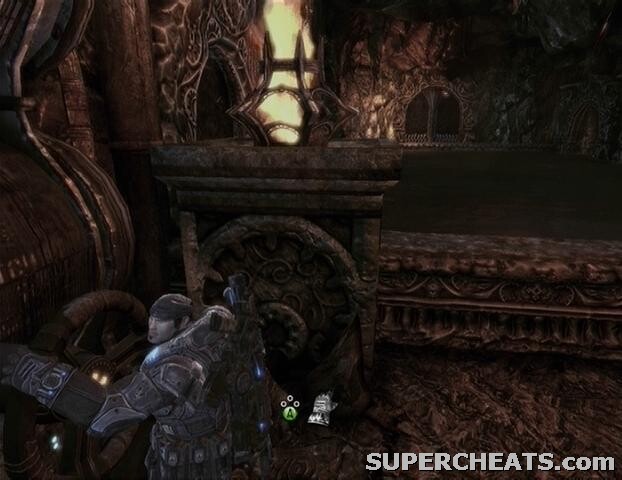
A group of Drones enter through the door at the other end of the room, and one of them immediately takes to the handwheel on the wall to your left. He's trying to open the floodgates. Kill this guy quickly to avoid being washed away. If you have a Frag Grenade on hand, just toss it over to take him out, and hopefully one or more of the others. Once he has been dealt with, duck back behind cover to avoid taking fire from the other Drones that came in with him. When the remaining enemies have been eliminated, make your way over to the other side and walk down the hall to reach another lift.
There's a Longshot and a box of ammo straight ahead as you step off of the elevator. When you're ready, head through the archway and take cover behind the pile of bricks. A few Wretches and a Mauler enter the area. Kill the Wretches and Mauler from afar, and then make your way to the other end of the area. Pick up the ammo container and Frag Grenades at the start of the bridge before taking cover. There is a Troika up ahead, as well as a few Drones and a Theron Guard. Try to blind-throw a Frag Grenade to take out the Troika gunner, and if you succeed, pick off the others with the Longshot. One or more of the Drones may be packing a Lancer Assault Rifle, so back up to avoid being cut in half if one makes a beeline for you.
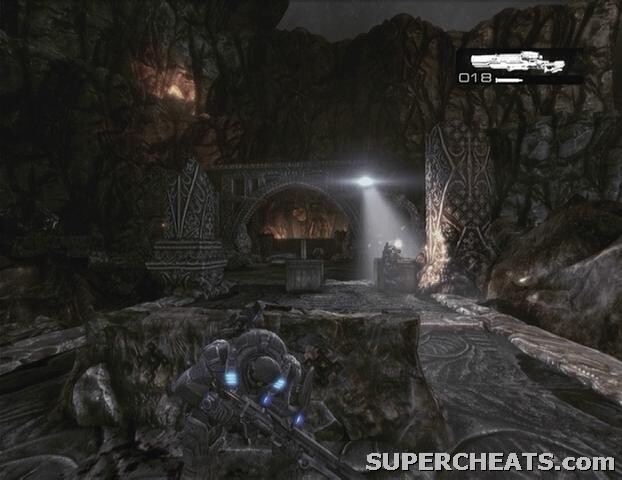
When the enemies have been dealt with, pick up any ammo they left behind, and then pass through the archway off to the left. Do not activate either of the terminals here just yet! One of them serves as a collectible, and if you activate the wrong terminal you'll have to restart the chapter to get it.
Collectible (1/1): After passing through the archway, activate the Locust Terminal to your RIGHT. You'll know it's the collectible because the icon at the bottom of the screen will be a magnifying glass rather than a switch.
Collectible 1/1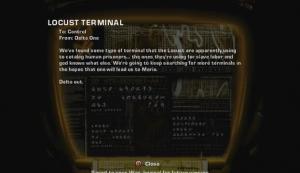
Locust Terminal
Once you have the collectible, activate the Locust Terminal to your left to trigger a cutscene. Study the symbol that is flashed on the monitor during the cutscene, as it marks the section of cells where Maria is being held.
Move up and activate the first terminal you come to. A bit further up you'll meet a Locust patrol group. You can either engage them, or remain behind cover and let them pass by. There's a Theron Guard among them, so it would probably be best to just let them pass unhindered.
Collectible (1/1): Once the Locust patrol group is out of the way, activate the second terminal and then look to the left of the large transport vehicle. The collectible (Prisoner's Journal) is on the ground here.

Collectible 1/1
Prisoner's Journal
After picking up the collectible, move on to the next terminal and activate it. There are more enemies up ahead; again, you can either take cover and let them be or you can kill them. When the patrol group is out of the way, move up to the next terminal and activate it. Once again, there are more enemies up ahead, so either take cover and wait for them to leave or fight them off.
The next terminal is the one you're looking for. Upon activating this terminal, a Bloodmount and some Wretches will appear. After the first batch of enemies, some more will appear off to the left. Once they have been dealt with, a Grinder and some Drones will come from the right. Finally, a pair of Theron and some more Drones will hit you from the left. Remember to keep your head down when you spot a Theron charging a shot.
Collectible (1/2): At the start of the level, move to the end of the first room and head down the steps there. After climbing down the steps, turn right and follow this corridor to its end. The collectible (Locust Jailer Document) is on the ground around the corner.
Collectible 1/2
Locust Jailer Document
Once you have the collectible, continue down the corridor and kick in the large door you come to. After the cutscene, dash ahead and grab some cover below the walkway and leave Dom to deal with the Drones above. If you have a Longshot, sit here and pick off the Drones that rush down the steps up ahead. There's a Theron Guard in the tower across the way; remember to keep your head down if you spot him charging a shot. More Drones will enter through the passage way to the left. Try to use the Locust Explosive there to your advantage by firing at it as they come.
When the way is clear, move out from cover and make your way over to the switch in the tower at the top of the stairs. A pair of Flamers and a trio of Theron come through the door that the switch opens, so take cover along the stair railing. Remember, puncturing one of the tanks on a Flamer's back will cause it to promptly explode, taking the Flamer with it. You'll know the Flamer's time is near when you can see fire emitting from the tank. Be sure to keep your distance to avoid taking damage from the explosion.
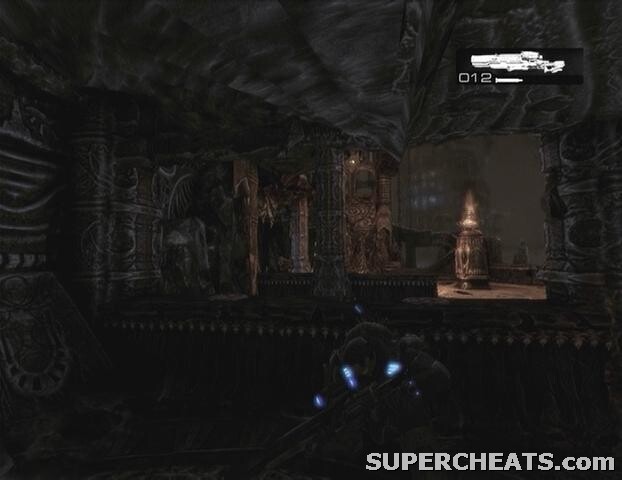
When the way is clear, head down the steps and proceed through the door below the stairway that the switch opened. Pick up the ammo container across from the doorway before taking cover behind the low wall to the left. Kill off the Grenadier and Bloodmount that attack before moving up. Take out the Drone that storms through the doorway and then head through.
In the next area, immediately pull the lever across from the doorway to bring up more cover at your end. A Drone soon appears over on the walkway to the right at the far end of the room (when the POI icon appears); he's going to pull a lever that will lower your cover, so take him out before he succeeds. If he does manage to pull the lever, just pull the lever on your end again to bring the cover back up.
You'll soon be faced with a Reaver, so try to take out the Drones at the other end of the room quickly. Keep behind the tall cover and concentrate your fire on the Reaver until it falls. After the first Reaver, another swoops by and knocks down the tower to the left, scattering rubble across the room. The pieces of rubble fall in a convenient pattern, allowing you to use them as cover.
As the giant door at the other end of the room parts, two Grinders will step through. Move up to one of the closer pieces of cover if you haven't already. Before moving past the giant door, read the paragraph about the collectible below since you'll need to get to this one quickly.
Collectible (2/2): After passing through the giant door, roadie run up the steps, and then turn right and continue up the steps there to spot another lowering door. Roadie run and roll to make it past this door before it closes. The collectible (Human Finger Necklace) is on the floor just beyond this door.
You should have hit a checkpoint just before this area, so if you don't make it past the door, pause the game, reload from the last checkpoint, and try again.

Collectible 2/2

Human Finger Necklace
Once you have the collectible, hit the switch by the door and man the Troika there. Gun down the Butchers, Flamer, and Drones before stepping off of the Troika and moving further up. Another group of enemies will enter the room from the back, so take cover behind one of the cement blocks.
When you hear the battle end sound effect, proceed up the steps at the back of the room. Continue to the end of the hall and turn into the room on the left to find an ammo box and a couple of Frag Grenades.
There's a Flamer on the bridge beyond arched doorway partway down the hall. If you can manage to shoot the tank on his back, it will explode, killing the Flamer and taking the bridge down with it. When the Flamer has been dealt with, head through the archway and crouch behind the railing to avoid taking fire from the enemies to the left. When you hear the battle end sound effect, get over to the other side of the walkway and go up the steps there.
Grab the ammo container along the way and head through the arched doorway. Pull the lever up ahead, and then take the nearby Frag Grenades if you have room in your inventory. Move up to the mechanized cover and start picking off the enemies in the distant fort. Once they've been dealt with, hop into the circular formation of cover to trigger a cutscene.
After the cutscene, quickly pull the lever to bring up some cover, grab the nearby ammo container, and then take cover along the fort and start picking off the Drones in the distance. A Reaver soon enters the fray; immediately fallback if it waltzes up to your cover because it can deal a considerable amount of melee damage. Try to take out the Drones around the fort quickly, because you'll need some room to move around when the second Reaver shows up. After the first Reaver falls, another soon takes its place. Just keep switching from cover to cover as necessary to keep your distance from it.
When the second Reaver falls, a Mortar Drone will appear at the gate behind the fort. Kill this guy off quickly, but if he manages to launch a mortar strike, hop out of the fort and run off to the side to avoid being gibbed. Kill this last Drone, pick up the dropped Mortar if you wish, and then make your way over to the lever in the distance. Pick up the Frag Grenades, pull the lever, and then take cover.
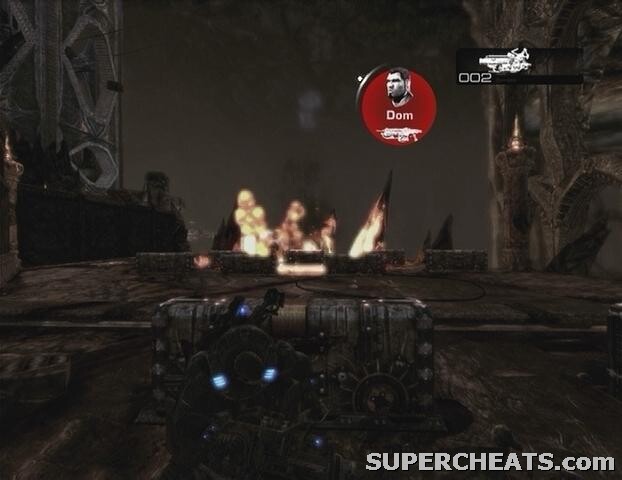
If you brought the Mortar along, launch a strike at around 80m, and another at around 90m to clear the enemies behind the cover up ahead. Be careful though, as there is another Mortar Drone among them. Finish off any enemies that manage to survive the strike before moving up to the next set of cover.
Pull the lever off to the right to bring up some more cover. There is yet another Mortar user at the very last row of cover on the far right here, so take him out with the Longshot if you're carrying one. Hit one of the Locust Explosives to set it off, hopefully taking one or more enemies with it. Don't move too far ahead, because once the enemies in this area are all dead, the gate will lower and you'll be faced with two Grinders. Stay back behind the tall piece of cover with the lever behind it for best results. Keep an eye out for mortar strikes and Tickers as you battle the Grinders.
Once the area is clear, continue up the steps off to the right of the large door. Pick up the ammo container and Frag Grenades at the top of the stairs before pulling the lever next to the gate to complete the chapter.
As the draglift climbs higher, a few Reavers will fly by and attempt to dislodge it from its cable. Take these guys out quickly, otherwise it's game over for you. Luckily the Reavers don't take much to bring down, so just empty a clip into them with your Lancer. Keep an eye out for more Reavers as you ascend. Soon, another draglift will come into sight with a number of Drones onboard. If you have Frag Grenades, toss one over, otherwise take cover along the railing and gun them down before the lift pulls up alongside yours.
Hop over to the adjacent lift before yours gives way. Once aboard, hit the switch in the corner to continue your ascent. A couple more Reavers will attack from the sides, so be ready to fight them off with a full clip. When the lift reaches its destination, head down the hallway up ahead.
Collectible (1/2): At the top of the winding stairway in the next area, turn left and approach the object in the distance. This object serves as the collectible (Locust Calendar).
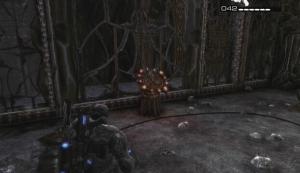
Collectible 1/2
Locust Calendar
Once you have the collectible, take the stairs at the other end of the platform and pull the lever ahead to call up the mechanized cover. Kill the Kantus and Drones in the distance, and then go down the stairs across from the lever. Pull the small lever on the column at the end of the way here. You are then given a choice between the Stairwell path and the “Lift with Troika Turret” path. You won't miss anything by choosing one path over the other, but for the sake of following this walkthrough, take the “Lift with Troika Turret” path.
Lift with Troika Turret Path: Man the Troika on the lift and help Dom and Baird take out the enemies that appear on each level. There are usually explosives scattered about on each floor, so try to use them to your advantage.
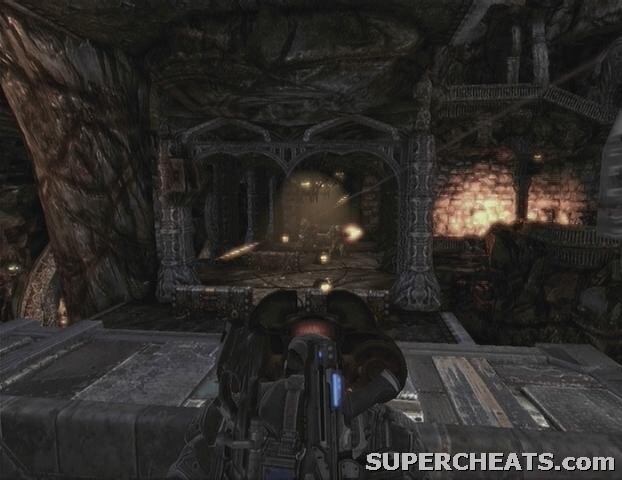
When the three levels of enemies have been cleared, walk across the bridge and make your way over to the door off to the left. Look around for a Mulcher dropped by one of the Grinders on this floor before continuing on. When you're ready, flip the lever to open the door, and then go up the steps to reunite with Dom and Baird. At the top of the steps, turn right and walk down to the doorway there.
You'll find yourself on a walkway overlooking a large room that contains some Drones, Boomers, and a Kantus. If you brought a Mulcher with you, take cover along the railing, mount the Mulcher, and fire down at the enemies below. As with Troikas, holding down the RB button will cool down the Mulcher when it overheats. When the room is clear, head down the stairs to the left and flip the lever to extend a bridge over at the far right end of the walkway you were on.
Collectible (2/2): After crossing the bridge at the far right end of the walkway, turn left and walk towards the ammo container. The collectible (Locust Defense Plans) is on the ground here by the ammo box.
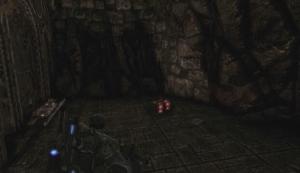
Collectible 2/2
Locust Defense Plans
When you have the collectible, flip the switch here to lower the cover downstairs and raise some stairs outside of this room. Walk to the center of the room to trigger a cutscene. After the cutscene, quickly grab some cover behind the low wall up ahead because a pair of Grinders will soon step through the large door at the far end of the room.
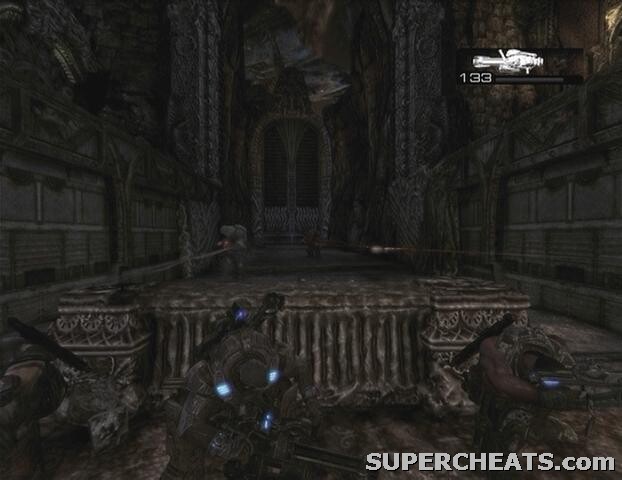
After dealing with the two Grinders, pick up one of their dropped Mulchers and continue on into the next area. Mount the Mulcher along the railing overlooking the enemies below and fire down. Move to the cover below when you can't spot anymore Locust and kill off the remaining enemies in this area. Head through the doorway across from the corpses and take cover behind one of the rock formations at the bottom of the steps.
A pair of Maulers, a Kantus, and a couple of Theron will come up on a lift to your right when you turn the corner. Retreat back up the steps if those Maulers manage to get close, and remember to keep your head down if you spot a Theron charging a shot. There may also be Tickers in the area, so keep an eye out. Kill all of the enemies on the lift to complete the chapter.
Move up to the top of the stairs and grab the ammo box to the left. Start towards the arched doorway to trigger an ambush. Drones and Palace Guards appear in the windows around the center platform, and unfortunately something will drop your cover. Hug up against one of the walls below the first set of attacking enemies and take cover behind the torch by the gate. After killing the enemies on one side, switch over to the pillar at the opposite end and take the others out as well.
After the fight, follow your squad over to a path that runs alongside the palace. Eventually you'll encounter a Bloodmount, a Palace Guard, and some Tickers. Take cover behind something and clear the way before moving on. You'll then come to a lift that brings a Kantus and Palace Guard up to your level.
Palace Guards are the toughest variant of Drone and can wield a variety of weapons including the Gnasher, Torque Bow, and Hammerburst.
Collectible (1/2): Before getting on the lift, continue down the path and look at the foot of the steps in front of the second gated door that you pass by for the collectible (Locust Invasion Map).

Collectible 1/2
Locust Invasion Map
When you have the collectible, step onto the lift and hit the switch to start moving. Ignore the Bloodmounts in the cells and just pull the lever at the gates. Here you can either choose the Upper Path or the Lower Path. You won't miss anything by choosing one path over the other, so for the sake of following this walkthrough, pick the Upper Path.
Upper Path: Help Baird and Dom fight off the enemies below from the windows. Careful though, as there may be a Grinder in one of the windows across the way. Head down the steps at the end of the corridor, move down this hallway and turn into the large room through one of the tall, arched doorways on the right. Stand on the switch in the middle to open the gates and reunite with the rest of your squad.
Follow the others over to a spiral staircase outside.
Collectible (2/2): Go up the stairs across from the spiral staircase, then move through the corridor that you come to and down the stairs at its end. The collectible (Trinity of Worms Artifact) is on the floor at the bottom of these stairs.
Collectible 2/2
Trinity of Worms Artifact
When you're ready to move on, step onto the staircase outside, but collect the two ammo containers in the area to your left before continuing down. You'll meet some Palace Guards and Tickers as you climb down the stairs, so take cover behind the columns on either side of the steps when you meet resistance. Some of the Palace Guards are carrying Torque Bows, so be extra careful.
At the bottom of the stairs you'll come to a large room containing some more enemies. There's a Torque Bow user among them, so if you're carrying a Longshot you may want to hang back outside by the doorway. Clear this room of enemies to complete the chapter.
There is some ammo, Frag Grenades, and a fully loaded Mulcher straight ahead from this chapter's starting point, so grab what you need before continuing up the steps and through the doorway in this room.
Collectible (1/1): When you enter the second room, turn left and walk all the way to the last column in the row. The collectible (Locust Tablets) is on the ground by the base of this column.
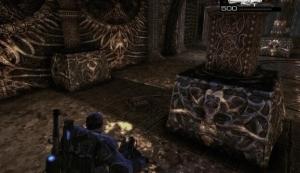
Collectible 1/1

Locust Tablets
Pull the lever along the railing and you'll then have to choose between the Left Hall path and the Right Hall path. Again, you won't miss anything by choosing one path over the other, but for the sake of following this walkthrough, choose the Left Hall path.
Left Hall Path: Move up and take cover behind one of the column bases. Kill the Mauler and Palace Guards that come through the doorway up ahead before moving on. You'll encounter a couple more Palace Guards and some Tickers in the next room, so take cover behind one of the columns. The next room branches off to the right, however there are some Torque Bow users across the pit, so you're going to want to take it slow here to avoid an early end. If you're carrying a Longshot, take cover along the railing and try to pick off the Torque Bow users from your side, otherwise wait for Dom and Baird to kill them before moving on.
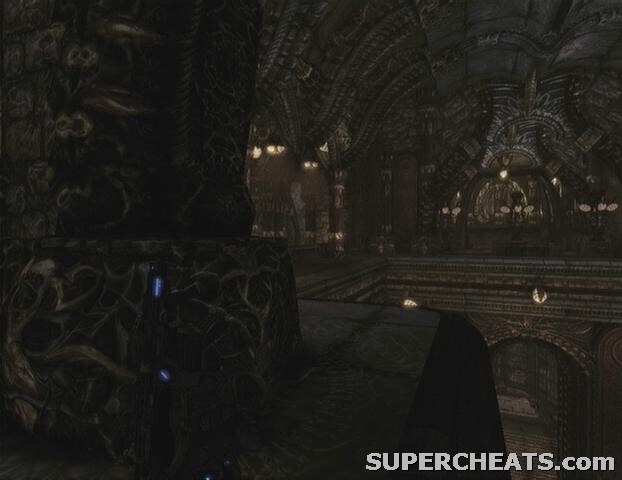
There are Torque Bow-wielding Palace Guards to contend with on your end as well, so once the other half of your squad have taken out the guards on their side, move up and take cover behind the wall before the corner. If you're carrying a Longshot you should have no problem taking them out from here, but just be sure to shift back behind the wall if one of the enemies is readying a shot. When the way is clear, move up, hop over the railing and head through the doorway at the far end of this area.
Continue into the next room to reunite with the other half of your squad. When you're ready to proceed, step onto the lift and pull the lever. In the next room, step on one of the pressure plates to bring up a piece of mechanized cover and start firing at the Palace Guards on the other side of the gap. After the first encounter, move up to the next gap to trigger more enemies. Take cover and kill the Palace Guards on the other side to close the gap.
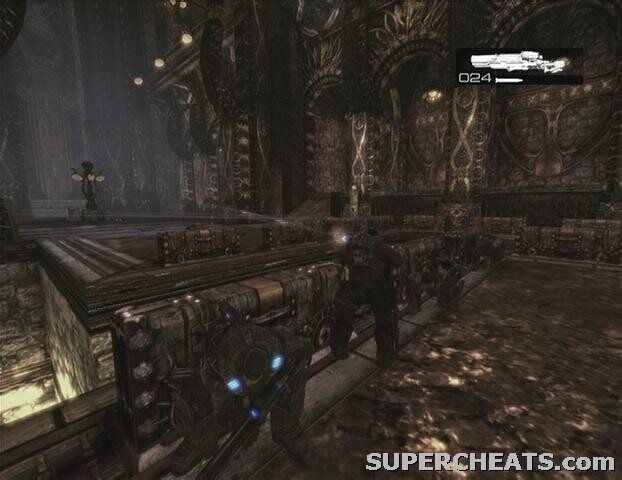
You'll encounter even more enemies at the next gap. The Palace Guards will likely head up the steps to the right and up onto the walkway there, forcing you to hide behind one of the pieces of cover along the side. Make sure you've killed the first batch of enemies on the other side of the gap before switching over, because otherwise you may leave yourself open to Torque Bow bolts.
Kill all of the enemies to open the gap, then step onto the platform up ahead. Unfortunately the platform falls through the floor, leaving you surrounded by more enemies. The two ammo containers here spawn indefinitely, so take advantage of this to fill up your weapons.
When the second batch of Palace Guards funnel through the doors across from the pillar and handwheel, get on the handwheel and turn it until the platform reaches to the floor above.
This is it, there's no turning back now! Head up the steps and through the large door to confront the Locust Queen.
Boss Battle - Skorge: At the start of the battle, Skorge will engage you in a chainsaw duel. Rapidly press the B button to win the duel.
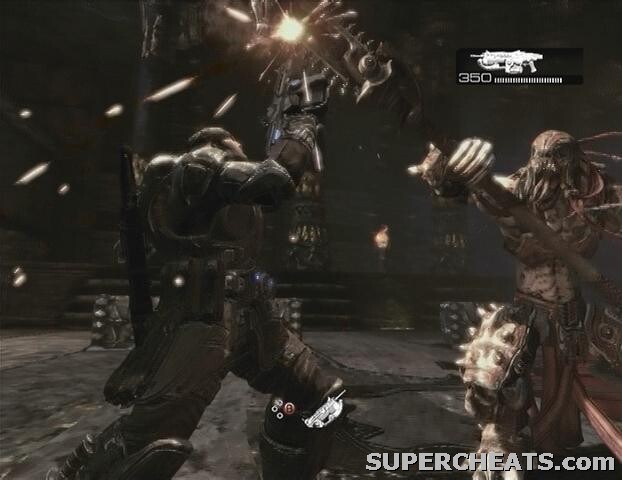
Skorge has three different attacks. The first involves the use of his Gorgon Pistol and Ink Grenades; he'll run along one of the walkways on either side of the arena, firing his pistol and tossing Ink Grenades at you. First you must determine which side of the arena Skorge is on, and then hide behind a piece of cover to avoid taking damage. When the POI icon appears at the bottom of the screen during the battle, pressing it will show you where Skorge is.
If an Ink Grenade lands near you, immediately shift over to one of the other pieces of cover to avoid getting caught in the poisonous fumes it emits. To make matters worse, Tickers also periodically spawn and romp through the Imulsion pools along the sides of the arena; you'll have to do a lot of shifting around during this fight to avoid an early end.
Another method of attack Skorge employs is taking to the ceiling and cutting the stalactites there loose. If one of these stalactites happens to fall on you, you're mush, so dash over to the opposite side of the arena when you spot Skorge up above. If you can see pebbles and sand falling around you, quickly roll to the side to avoid the falling stalactite. After he's cut loose one or more of the stalactites, Skorge will lob three Ink Grenades into the arena, or simply return to the walkway and fire at you with his Gorgon Pistol.
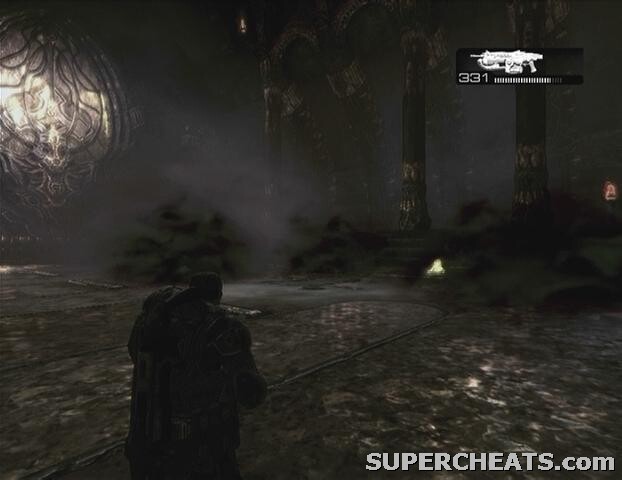
If he does toss the Ink Grenades, steer clear of these and head over to the opposite end of the arena to avoid Skorge's follow-up attack. After throwing a batch of Ink Grenades, Skorge will take to one of the pillars along the arena, cut it down, and send it falling towards you. These pillars won't just fall straight, so move as far away from the site as possible to avoid being crushed.
Don't waste any bullets on Skorge throughout this entire fight, just avoid his attacks and wait until he drops down for another chainsaw duel. He'll also lower the cover in the arena by stepping on the switch at its center when he drops down for a duel, so be sure to bring the cover back up right after the duel by stepping on the switch.
Best Skorge in three chainsaw duels to end this part of the fight. When he runs off, head through the doorway to the right of the throne to reunite with Baird and Cole. Cross the gap when the bridge connects and roadie run over to the Reaver pen at the other end of this area to complete Act 4.
This is an on-rails bit, so you're gunning. You have access to the missiles launcher at the Reaver's front, or the turret on its back which you can switch to either by shifting around with the Right Thumbstick or by pressing the X button. You can also swerve to the side to avoid enemy fire with the Left Thumbstick. As you fly by, keep an eye out for Locust and Troika along the way.
You'll soon come to a firefight between some Locust and Gears. Use the Reaver's missiles to blast the Boomers and Drones on the battlefield, and then look over to the left in preparation for the Brumak that will soon appear there. Blast the Brumak until it falls to trigger a cutscene.
Afterwards, you'll be traveling down a tunnel with Skorge's Hydra in fast pursuit. Remain on the turret, fire into the beast's mouth when it gets close, and swerve out of the way when its missiles are fired. As with the Mulcher and Troika, the turret on the Reaver's back can be cooled down quickly by holding down the RB button.
Once you're outside, fight off the pursuing enemy Reavers and you will eventually encounter the Hydra again.
Boss Battle - Hydra: When the Hydra grabs your Reaver with one of its claws, aim down at the claw and fire at it until it detaches. You only have a short amount of time to get the claw off before it destroys the Reaver. Remember to cool down the turret by holding the RB button before it overheats.
While the Hydra is pursuing you, swerve to dodge the missiles it fires and shoot at its face with the turret until it speeds up and appears in front of you. At this point, you must hit its face with a missile before it collides with the Reaver. Repeat this pattern and eventually the Hydra will fall.
Grab some cover and take down the Reaver in the street below, and then follow your squad up some steps and grab the ammo box to the right. Head through the doorway, stand along the railing up ahead, and start clearing the Locust on the landing platform. When you spot the KR-36 helicopter shortly after the Reaver appears, duck down behind cover while it blasts the remaining enemies on the platform.
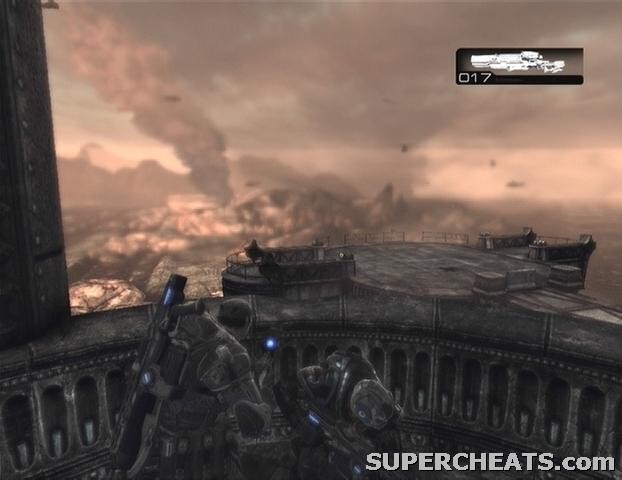
Collectible (1/2): Head through the arched doorway to the right and down the steps there. Move around to the front of the gate where the ammo container is and look for the collectible (COG Recon Report) on the ground here.

Collectible 1/2

COG Recon Report
When you have the collectible, continue on to the right to the next landing platform. Take down the Reaver and then proceed through the now open doorway to the right. Move through this next room and you'll find yourself in a parkade overlooking some Drones in the street.
There's a bunch of ammo in the corner here; a Longshot, two ammo containers, a couple of Mulchers, and some Frag Grenades. Grab a Mulcher, mount it along the railing, and start firing down at the enemies below.
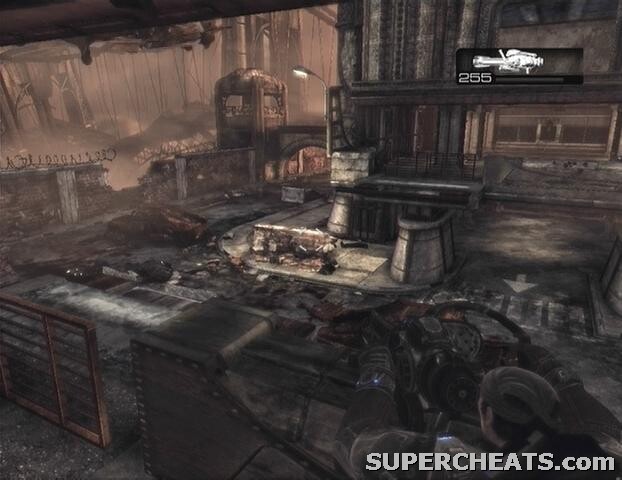
Once all of the Locust in the street below have been killed, a bridge will extend to the parkade across the street. Cross the bridge, head up the steps at the other end, and make your way over to the satellite tower. Here you must kill six Reavers to prevent them from destroying the Comm-Sat Array. This task can be quite a challenge on anything higher than the Normal difficulty level due to what appears to be a glitch.
As of this writing, there seems to be an issue with the Reavers never landing, instead continuously swooping around the tower and making things a great deal more difficult. If this is the case during your attempt, making it past this section on the Hardcore or Insane difficulty level will require a bit of luck. The Reavers are much easier to deal with while they're grounded, as shooting them out of the air can be tough on the higher difficulty levels due to their increased health. If only one or a couple land during the course of this assault, you're going to have a much harder time reaching the quota before the Comm-Sat Array is destroyed. Luckily you just hit a checkpoint, so you can try again if you fail.
If you're having trouble shooting down the flying Reavers, try setting the Look, Target, and Zoom Sensitivity to High via the Xbox 360 Controller Settings menu in Options. Doing so will make it a bit easier to track the Reavers as they swoop by. The Chain Gun on the right side of the satellite tower seems to provide more coverage here, so immediately hop on and start firing. Always focus on killing grounded Reavers first, and remember to press and hold the RB button to cool down the turret when it overheats.
Proceed through the open door to the right of the Comm-Sat Array once you have succeeded in killing six Reavers. Head through the gate here when it opens. Leave the Mortar up ahead alone for now.
Collectible (2/2): Walk through the arched doorway at the far end of the walkway and go down the steps to the left. The collectible (COG Tag) is at the end of this platform, on the ground by the ammo container. Don't wait too long to grab this one; go and grab it when the Brumaks arrive if you haven't already.
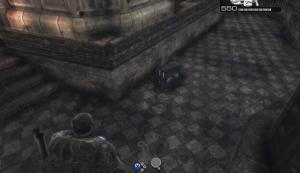
Collectible 2/2

COG Tag
After the Drones, Grinders, and Boomers have been taken care of, a pair of Brumak enter the fray. Grab the Mortar by the monitors and wait for them to get close before launching a few mortar strikes to take them out.
Take cover behind the sandbags and wait for the Drones coming out of the archive building at the other end of the area to near. If you have a Longshot, start by taking out the snipers on the balcony, then stay where you are and start picking off the other enemies in the area. If you don't have a Longshot, there's one by the barricade off to the right of the statue.
When the first batch of enemies has been taken care of, Flame Boomers and Drones will enter the area through the two doors on the left and right side of the archive building. One or more of the Drones may be carrying a Lancer Assault Rifle; they can use the Lancer's chainsaw bayonet to score an easy kill if you aren't careful, so keep an eye out for rushing enemies to prevent this from happening.
Once the outside is clear, enter the archive building through the door to the right of the main entrance. Clear the first floor and then take the stairs up onto the walkway. There's a Kantus up here, so be ready to dodge if it throws an Ink Grenade your way. There may also be Tickers up here. When the way is clear, turn the corner up ahead and be ready for a rush of Grenadiers. When you spot the Grenadiers running up the steps, fallback to avoid being blasted apart by their Gnashers.
After the Grenadier rush, a Grinder will enter through the door on the first floor. Take cover behind the railing and kill the Grinder, then head down the stairs and through the front door. Be sure to grab that Grinder's Mulcher on your way out.
In the courtyard, position yourself behind one of the statues by the stairs. If you have a Longshot, use it to pick off the Troika gunner in the center. There are some Drones, Tickers, and Kantus to deal with initially. Afterwards, some Wretches and a couple of Maulers will spawn. Remain on the platform and fight off the Wretches when they climb the stairs, and then prepare for the Maulers.
A couple of Bloodmounts spawn once the Maulers and Wretches have been dealt with. Take cover behind the crates in front of the door and use the Grinder's Mulcher to quickly down the Bloodmounts when they come up the stairs. If you're out of Mulcher ammo, switch to your Lancer or Gnasher, but don't hesitate to retreat if the Bloodmounts get too close. Kill the two Bloodmounts and their handlers to secure the courtyard.
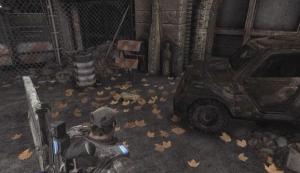
Head up the steps at the other end of the courtyard and get on one of the handwheels in front of the gate. Turn the handwheel to raise the gate, and then move up to the cover in the street. There's a Grinder to your right, and a bunch of Drones scattered about.
Collectible (1/2): When the street is clear, move past the wall off to the right where the Grinder was and turn right once you pass by the columns. The collectible (Jacinto Sentinel Newspaper) is on the ground by the rusted car, covered by some leaves.
Collectible 1/2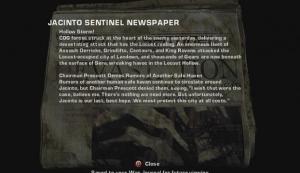
Jacinto Sentinel Newspaper
Once you have the collectible, continue down the alley and you'll come to a split. For the sake of following this walkthrough, choose the “Garage” path.
Garage Path: Head up the steps and kill the sniper by the window if he hasn't been taken care of already. Be sure to pick up the sniper's Longshot for ammo, or swap out one of your other weapons for it if you aren't already carrying one. There's an ammo container in the corner across from the window as well. When you're ready to move on, head down the hall and you'll reach the parking garage.
A few Drones and a Flamer will appear on the opposite side of the fence. Try to shoot one of tanks on the Flamer's back if you can to set him off. When the garage is clear, move towards the teetering car by the window and give it a kick to send it down to the street below. Hop over the low wall and make your way to the other end of the garage. Head down the ramp to return to the street and meet up with Dom.
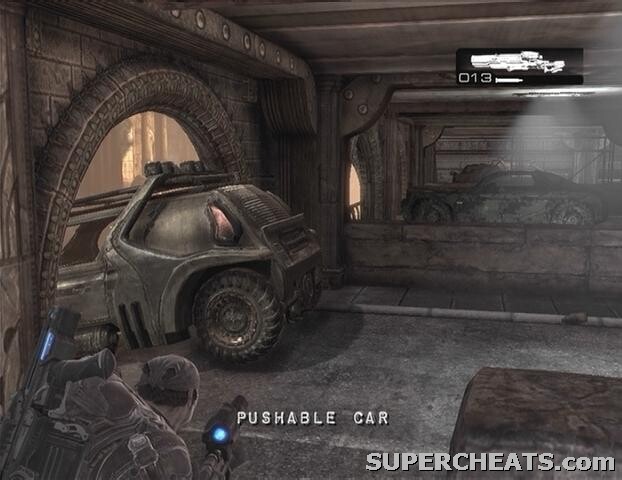
You'll encounter a Grinder at street level, so duck down behind one of the cars to avoid being shredded. Look for a COG soldier corpse by a car on the left side of the street. There's a Hammer of Dawn by this corpse, so swap out one of your weapons for it and continue on your way. Use the Hammer to obliterate the Reaver and Mauler that soon appear.
Collectible (2/2): Just beyond the collapsed tower, look for a hole in the first building on the left side of the street. The collectible (COG Tag) is on the ground through this hole.

Collectible 2/2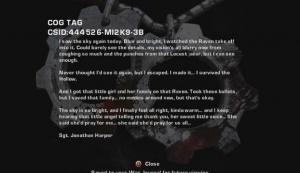
COG Tag
Continue down Cooper Street to complete the chapter.
Pick up the Longshot before making your way over to the crane. Move the platform down and over to the left so Dom can get on, and then shift it over to the building on the right. When Dom steps off, head over to the left. The crane on the other side soon collapses, creating a bridge for you to cross. Before crossing, however, use the Hammer of Dawn to clear the rooftops of Locust.
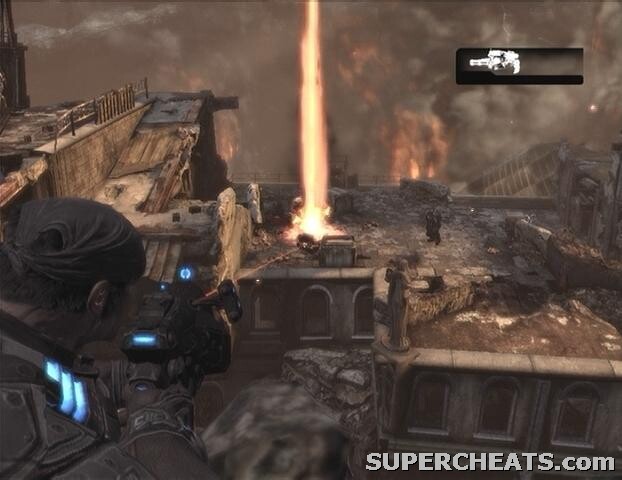
When the roof appears to be clear, cross over the bridge, but don't head down the ramp just yet. Use the Hammer of Dawn to kill the grapplers below, and then walk down the ramp to face a Mauler. Retreat back up the ramp and use the Hammer of Dawn to eliminate the Mauler. A Reaver will then appear at the other end of the rooftop, so hit it with the Hammer.
Head down the ramp and walk along the building. Kill the Tickers, Flamer, and Drone that appear around the corner, and then proceed through the two doorways. Blast the Tickers along the way and proceed down the wooden ramp connected to the nearby rooftop. Take cover behind the pipes to the right and use the Hammer to fry the grapplers as they come.
Collectible (1/1): After the roof collapses, jump through one of the windows and look in the top-right corner of the floor. The collectible (Stranded's Journal) is on the ground here. That's the last one!
Collectible 1/1
Stranded's Journal
When you have the collectible, look over the railing and use the Hammer to blast the enemies down below before heading down the stairs. Use the Lancer's chainsaw bayonet to cut the cables on the roof below. If you aren't carrying a Lancer, a few regular melee attacks will also do the trick.
Start through the cage bridge and it will promptly collapse.
Use the Hammer to take out the Kantus and Drone up ahead, and then go through one of the windows of the nearby building. You can't do anything right now, but you may as well use the Hammer to rack up some kills on the approaching Locust army outside.
After the building collapses, hop over the columns and hit elevator door switch to escape. When the elevator comes to a stop, jump out and roadie run through the gunfire. Then, move over to the window frame and blast the Brumak pilot.
This is the last stretch, and luckily you have the strength of a Brumak on your side. The Brumak can take quite a beating, but he isn't invincible, so you'll have to keep an eye out for Boomers, Troikas, and Reavers. When you reach the first gate, use a melee attack to throw it open, and then blast the two Troikas in the towers on either side of the room.
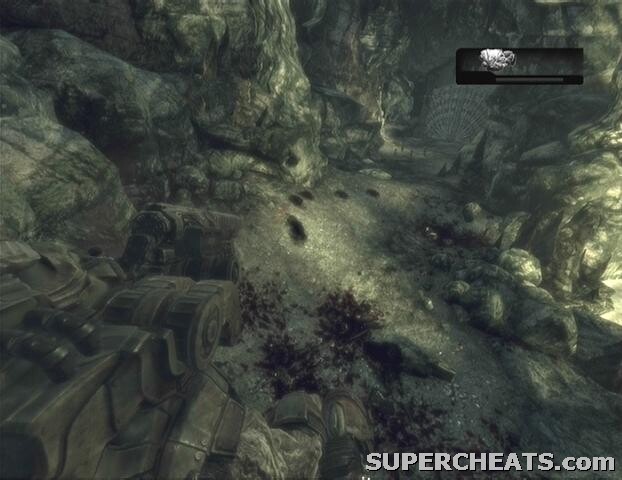
At the end of this area you'll come to a Corpser. All you have to do here is mash the B button and the Brumak will kill the Corpser. Use the Brumak's machine guns to blast any explosives you see, otherwise just use your missiles to wipe out the large groups of enemies.
After destroying the torture barge, bash open the gate and kill the Reavers and Seeder here. Use the Brumak's missiles to destroy each of the three support columns. Zoom in with LT if you're having trouble spotting the last column.
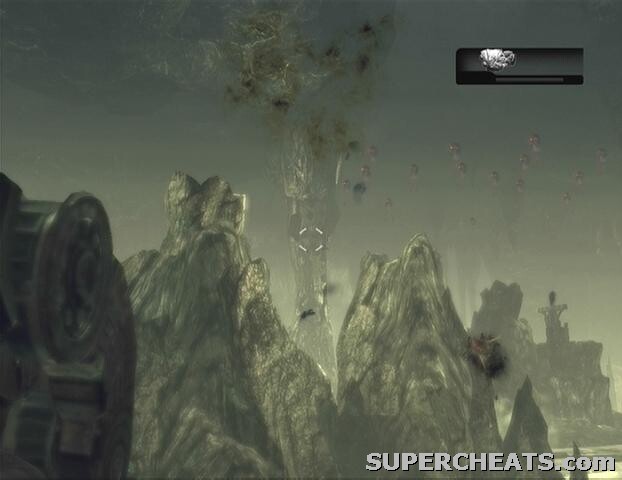
After the cutscene, just keep your Hammer of Dawn trained on the giant creature for as long as possible. There's nothing to it.
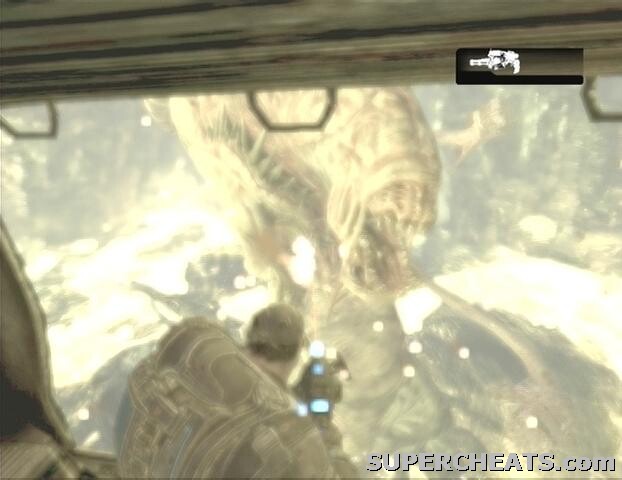
You've completed Gears of War 2 and unlocked the Insane difficulty level! Now just sit back and enjoy the ending cutscene!
Collectible (1/2): Select the Training option at the start of the game and walk to the end of the alley once in the training area. Here, Jack will continuously saw the chain link fence until you take cover. Look for the collectible (The Eagle Newspaper) on the ground a few steps across from the dumpster and wooden fence in this area.
Collectible 1/2
The Eagle Newspaper
Collectible (2/2): When you reach the ladder at the end of the training session, slide down and turn right. Upon entering the garage, turn left and make your way over to the desk at the end of the room. The collectible (Ambulance Driver's Log) is on the floor in front of this desk.
Collectible 2/2
Ambulance Driver's Log
Collectible (1/5): This collectible is in one of the rooms along the walkway overlooking the lobby where the Drones swarm in. If the one open room along the side of the walkway you are on does not hold the collectible (if you see Frag Grenades, you're in the wrong room), go to the parallel walkway and look in the open room there. The collectible (Doctor's Journal) will be on the floor by some cabinets.
Collectible 1/5
Doctor's Journal
Collectible (2/5): You'll eventually come to a large room with a pair of circular desks facing each other at its center. The collectible (Jacinto Medical Center File) is on the floor between the two desks.
Collectible 2/5
Jacinto Medical Center File
Collectible (3/5): Enter the small room with the broken double door by the doors to the cafeteria and kitchen. The collectible (COG Letterhead) is on the floor here in front of the desk.
Collectible 3/5
COG Letterhead
Collectible (4/5): Upon entering the main lobby (the room reached after a King Raven helicopter crashes through a skylight), turn right and move to the very end of the walkway. The collectible (COG Proclamation) is there, next to an ammo box.
Collectible 4/5
COG Proclamation
Collectible (5/5): Upon exiting the hospital through its main lobby, turn right and pass under the archway. Turn around and look by the column on the left to spot the collectible (COG Tag).
Collectible 5/5
COG Tag
Collectible (1/2): At the start of the chapter, turn around and you'll find the collectible (Grindlift Notice) posted next to the ladder at the back of the platform.
Collectible 1/2
Grindlift Notice
Collectible (2/2): This one is found in the area where you must defend Dizzy while he repairs the assault derrick. As soon as you gain control over Marcus, turn left and move towards the ammo boxes and overturned truck in the distance. The collectible (Munitions Requisition Form) is nearby.
Collectible 2/2
Munitions Requisition Form
Collectible (1/4): At the start of the chapter, turn left and give the door there a few kicks to open it. Hop over the counter and climb up the stairs behind it. The collectible (Jacinto Sentinel Newspaper) is on the floor in this room here.
[15c1.jpg title=Collectible 1/5][15c1-2.jpg title=Jacinto Sentinel Newspaper]
Collectible (2/4): After using your chainsaw bayonet to cut through some wooden planks, look for a small gravesite across from the start of the path that leads up to the Imulsion station. The collectible (Memorial Inscriptions) is the plaque below the statue there.
Collectible 2/4
Memorial Inscription
Collectible (3/4): Enter the small room at the back of the Imulsion station. The collectible (Truck Driver's Note) is can be found on the ground here.
Collectible 3/4
Truck Driver's Note
Collectible (4/4): Near the end of the Ticker-filled tunnel, you'll come to a car blockade and some steps. Before heading up, look to the left of the steps along the sidewalk for a doorway and head through. The collectible (COG Tag) is on the ground in this room.
Collectible 4/4
COG Tag
Collectible (1/2): At the start of the chapter, after crossing a narrow rock bridge over a small body of water, keep an eye out for a vine wall to your left. Use the Lancer's chainsaw bayonet or some normal melee attacks to through the vines. The collectible (Gears Journal) is on the ground in front of the Grindlift here.
Collectible 1/2
Gear's Journal
Collectible (2/2): You eventually climb a ladder and reach an area with a bunch of Drones and two Troika surrounded by sandbags. After the first batch of Drones you then have to face a Reaver. The collectible (Kantus Scroll) is in the corner across from the Troika emplacement closest to the door in this area.
Collectible 2/2
Kantus Scroll
Collectible (1/1): Enter the stronghold that you come to near the start of the chapter once the Kantus and supporting enemies have been dealt with and make a hard right turn. The collectible (Locust Emblem) is on the ground near the ammo box here.
Collectible 1/1
Locust Emblem
Collectible (1/2): Near the start of the chapter after killing the two Bloodmounts, keep an eye on the right side of the street for a small area that holds an ammo box (it's just before the ash-covered sports car). Hop over the low wall here and you'll come to an area with an upside-down car, some ammo, and a Gorgon Pistol. The collectible (Ilima City Help-Wanted Ad) is on the ground next to the upside-down car.
Collectible 1/2
Ilima City Help-Wanted Ad
Collectible (2/2): After the cutscene with Cole, before leaving the building, go on the other side of the wall to the left of the exit and look for a COG soldier corpse. The collectible (COG Tag) is on the ground next to this corpse.
Collectible 2/2
COG Tag
Collectible (1/1): Upon entering the area immediately after the cutscene with Baird, make a hard right turn and follow the path there to its end. The collectible (Stranded's Journal) is in the corner here.
Collectible 1/1
Stranded's Journal
Chapter 6: Intestinal Fortitude
Collectible (1/2): At the start of the level, turn left and look for the collectible (Car Gold Magazine) in the corner.
Collectible 1/2
Car Gold Magazine
Collectible (2/2): After the cutscene with Carmine, hug the wall on the left (but avoid the green spikes) and look for the collectible (COG Tag) in the corner. You should have just activated a checkpoint recently, so it's not a big deal if you don't find it before the wall of debris reaches you. If you die after picking it up you won't need to pick it up.
Collectible 2/2
COG Tags
Collectible (1/3): At the start of the level, go through the blasted door, head up the stairs and turn into the small office on the right. The collectible (Interoffice Memo) is in the corner on the right as you enter.
Collectible 1/3
Interoffice Memo
Collectible (2/3): After moving through the room that contained the Wretches that could be killed using the security system, head through the pair of double doors at the other end of the room. Turn right and walk down the hall until you come to an open door on your right. Head through here and kick in the door you come to. The collectible (Memo) is on the ground by the blocked door in this room.
Collectible 2/3
Memo
Collectible (3/3): This collectible is found in the second turret room after you've passed through the courtyard. You'll reach it shortly after talking to Baird over the radio. Head through the doorway next to the switch that deactivates the turrets in the room. The collectible (New Hope Medical File) is on the ground at the end of this small room.
Collectible 3/3
New Hope Medical File
Collectible (1/2): Once you're outside, turn right and roadie run and roll over to the building there. You'll take a bit of damage from the razorhail, but it won't kill you. The collectible (Doctor's Journal) is in the corner at the far end of the building's interior.
Collectible 1/2
Doctor's Journal
Collectible (2/2): This one is found shortly after the building in which you must use the handwheels to open the roll-up doors to be used as shelter from the razorhail. The collectible (Captivity Marks) is in the building across from the train car door in the next area. Roadie run and roll through the razorhail to avoid taking severe damage. When you enter, turn left and look along this wall for the carving.
Collectible 2/2
Captivity Marks
Collectible (1/1): After destroying the Locust gunboat, look around the area for some steps. Climb to the top of these steps and you'll come to a bench. The collectible (Stranded's Journal) is on the ground below this bench.
Collectible 1/1
Stranded's Journal
Collectible (1/1): This collectible is at the very end of the chapter. After crossing the bridge with the Troika gunner, Drones, and Theron on it, do not activate either of the terminals beyond the archway. One of them serves as a collectible, and if you activate the wrong terminal you'll have to restart the chapter to get it. After passing through the archway, activate the Locust Terminal to your RIGHT. You'll know it's the collectible because the icon at the bottom of the screen will be a magnifying glass rather than a switch.
Collectible 1/1
Locust Terminal
Collectible (1/1): At the start of the chapter, after the Locust patrol group passes by, activate the second terminal and then look to the left of the large transport vehicle behind it. The collectible (Prisoner's Journal) is on the ground here.
Collectible 1/1
Prisoner's Journal
Collectible (1/2): At the start of the chapter, move to the end of the first room and head down the steps there. After climbing down the steps, turn right and follow this corridor to its end. The collectible (Locust Jailer Document) is on the ground around the corner.
Collectible 1/2
Locust Jailer Document
Collectible (2/2): This one is in the area beyond the giant door that two Grinders come through. After killing the Grinders and passing through the giant door, roadie run up the steps, turn right, and then continue up the steps there to spot another lowering door. Roadie run and roll to make it past this door before it closes. The collectible (Human Finger Necklace) is on the floor just beyond this door.
You should have hit a checkpoint just before this area, so if you don't make it past the door, pause the game, reload from the last checkpoint, and try again.
Collectible 2/2
Human Finger Necklace
Collectible (1/2): Shortly after the draglift reaches its destination, you'll watch a brief cutscene and then come to a winding stairway. At the top of these stairs, turn left and approach the object in the distance. This object serves as the collectible (Locust Calendar).
Collectible 1/2
Locust Calendar
Collectible (2/2): You'll eventually find yourself on a walkway overlooking a large room that contains some Drones, Boomers, and a Kantus. When the room is clear, go down the stairs to the left and flip the lever to extend a bridge over at the far right end of the walkway you were on. After crossing this bridge, turn left and walk towards the ammo container. The collectible (Locust Defense Plans) is on the ground here by the ammo box.
Collectible 2/2
Locust Defense Plans
Collectible (1/2): On the side path along the palace you'll eventually come to a Locust Lift. Before getting on the lift, continue down the path and look at the foot of the steps in front of the second gated door that you pass by for the collectible (Locust Invasion Map).
Collectible 1/2
Locust Invasion Map
Collectible (2/2): When the squad reunites after splitting up, you'll come to a spiral staircase leading outside. Go up the stairs across from the spiral staircase, then move through the corridor that you come to and down the stairs at its end. The collectible (Trinity of Worms Artifact) is on the floor at the bottom of these stairs.
Collectible 2/2
Trinity of Worms Artifact
Collectible (1/1): When you enter the second room of the chapter, turn left and walk all the way to the last column in the row. The collectible (Locust Tablets) is on the ground by the base of this column.
Collectible 1/1
Locust Tablets
Collectible (1/2): After the KR-36 helicopter blasts the Reaver on the landing platform, head through the arched doorway to the right and down the steps there. Move around to the front of the gate where the ammo container is and look for the collectible (COG Recon Report) on the ground here.
Collectible 1/2
COG Recon Report
Collectible (2/2): This one is found after you have to defended the Comm-Sat Array from the Reavers. When you reach the large, open area through the gate that Hoffman opens, walk through the arched doorway at the end of the walkway and go down the steps to the left. The collectible (COG Tag) is at the end of this platform, on the ground by the ammo container.
Collectible 2/2
COG Tag
Collectible (1/2): After securing the courtyard, open the gate by turning the handwheels and clear the next area. When the Grinder and Drones have been dealt with, move past the wall off to the right where the Grinder was and turn right once you pass by the columns. The collectible (Jacinto Sentinel Newspaper) is on the ground by the rusted car, covered by some leaves.
Collectible 1/2
Jacinto Sentinel Newspaper
Collectible (2/2): Shortly after you collect the Hammer of Dawn, a building in the distance will collapse. Kill the enemies that appear before moving on. Just beyond the collapsed tower, look for a hole in the first building on the left side of the street. The collectible (COG Tag) is on the ground through this hole.
Collectible 2/2
COG Tag
Collectible (1/1): After the roof collapses, jump through one of the windows and look in the top-right corner of the floor. The collectible (Stranded's Journal) is on the ground here. That's the last one!
Collectible 1/1
Stranded's Journal
Insane Difficulty - Complete the game once on any difficulty level.
The following 5 characters can be used in multiplayer matches once they have been unlocked:
Character: “Dizzy Wallin” - Complete Act 1 on any difficulty level.
Character: “Kantus” - Complete Act 2 on any difficulty level.
Character: “Tai Kaliso” - Complete Act 3 on any difficulty level.
Character: “Flame Grenadier” - Complete Act 4 on any difficulty level.
Character: “Skorge” - Complete Act 5 on any difficulty level.
To unlock the three following characters for use in multiplayer matches, you must sign into Xbox Live with a gamertag that has the corresponding achievements from the Xbox 360 version of Gears of War 1:
Character: “Anthony Carmine” - Have any of the “Completed Act 1” achievements from Gears of War 1.
Character: “RAAM” - Have the “A Dish Best Served Cold” achievement from Gears of War 1.
Character: “Lt. Minh Young Kim” - Have the “Time To Remember” achievement from Gears of War 1.
Gears of War 2 features a total of 50 achievements. Each achievement that you unlock contributes a certain amount of points to your overall gamerscore. You can acquire a grand total of 1000 points by playing Gears of War 2.
 1. Green as Grass
 2. It's a Trap!
 3. Escort Service
 4. Girl About Town
 5. That Sinking Feeling
 6. Freebaird!
 7. Heartbroken
Complete Act 3, Chapter 3.
7. Heartbroken
Complete Act 3, Chapter 3. 9. Tanks for the Memories
 10. Water Sports
 11. There's a Time for Us
 12. Better Wrapped in Beacon
 13. Have Fun Storming the Castle
 14. And the Horsey You Rode in On
15. You Are the Support, Son
14. And the Horsey You Rode in On
15. You Are the Support, Son 16. Brumak Rodeo
 17. Does This Look Infected to You?
 18. Tourist of Duty
 19. Guerilla Tactician
20. Artist of War
19. Guerilla Tactician
20. Artist of War 21. Suicide Missionary
 22. Collector
 23. Pack Rat
 24. Completionist
 25. One-Night Stand
 26. Open Relationship
 27. Friends with Benefits
 28. Crossed Swords
 29. Pound of Flesh
 30. Organ Grinder
 31. Shock and Awe
 32. Said the Spider to the Fly
 33. Crowd Control
 34. Smells Like Victory
 35. Once More, With Feeling
 36. Takes a Licking
 37. Variety Is the Spice of Death
 38. Kick 'Em When They're Down
 39. Seriously 2.0
 40. Photojournalist
 41. Standing Here, Beside Myself
 42. Beat the Meatflag
 43. It's Good to be the King
44. You Go Ahead, I'll Be Fine
43. It's Good to be the King
44. You Go Ahead, I'll Be Fine 45. Back to Basic
 46. A Parting Gift
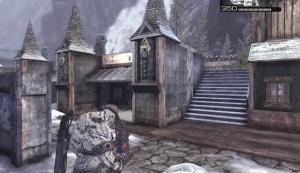 47. Party Like It's 1999
 48. Around the World, Again
 49. Dirty, Dirty Horde
 50. Hoard the Horde
Below is a brief overview of each multiplayer match type in Gears of War 2.
Warzone: The basic Team Deathmatch mode. Anything goes.
Execution: Similar to Warzone, but downed enemies can only be finished off at close-range. Firing at a downed enemy from afar will result in no damage. Players can get back up after being incapacitated (the process can be quickened by mashing the A button), however there is a limit to the number of times one can get back up.
Wingman: Up to five teams of two. Uses Execution rules. The first team to reach the score limit wins.
Annex: Teams fight to gain control over a point zone that constantly shifts around the map. Each team accumulates points by capturing a zone and holding it for as long as possible. The team that reaches the point limit first wins. Players on both teams respawn after being killed.
King of the Hill: Similar to Annex, but with a single, static point zone that at least one player must stand in to accumulate points for their team. Players on the team that is not in control the hill do respawn, while players on the team in control of the hill will not respawn until after the other team captures the hill. The team that reaches the point limit first wins.
Submission: Similar to a One Flag gametype, but with a human “meatflag” that fights back. The meatflag wields a Gnasher and will attack both teams. When the meatflag has been incapacitated, teams must take him hostage and then bring him over to their spawning area to win the round.
Guardian: One player on each team is appointed as the “guardian” at the start of each round. Both teams must kill each other's guardian player to win the round. The player who kills the opposing team's guardian will be their team's guardian the following round. Furthermore, non-guardian players will respawn while their leader is still on the battlefield.
Horde: A co-operative game type that pits a team of up to five players against wave after wave of Locust. The Locust Horde's strength, accuracy, and health stats are boosted after every tenth round.
The human players must kill all of the enemies on the map to progress to the next wave. A bar in the top-left corner of the screen indicates the number of Locust left to deal with. Dead players respawn at the start of every round. Teammates can help each other up after being incapacitated, but this can only be done a certain number of times.
Public Horde matches do not allow the team to restart a failed wave, while Private Horde matches do. Furthermore, in Public Horde matches the difficulty level is set to Normal, while the difficulty level in a Private Horde match is selected by the party leader.
There are 50 waves total.
Although it is impossible to craft an unbeatable strategy for besting any opponent due to variations in circumstance and play style, here are five tips to keep in mind when considering the multiplayer portion of Gears of War 2.
The Golden Rule: Take cover or die. Gears of War is not a “run-and-gun” shooter, but rather a “stop-and-pop” affair. Running at your enemies with guns blazing is a good way to get cut down; you’ll have to use your surroundings as cover if you’re going to survive on the battlefield. Know when to keep your head down and when it is ok to pop up and fire (ex., if there’s a sniper across from you, or if there’s an enemy is charging a Torque Bow bolt, stay down). You first must learn how to use the cover system effectively to really excel.
Be a team player: One of the worst types of player in any team-based shooter is the Rambo; you know, the guy who goes off on his own at the start of the match seemingly convinced that he can single-handedly dismantle the entire opposing team. More often than not the lone wolf doesn’t succeed and is quickly killed off, leaving his team down one for the remainder of the round.
Teamwork is essential in Gears of War 2. A team won’t get very far if they all head off in different directions at the start of a round. Support each other. Communication is a must if a team is to work as efficiently as possible. Tell your allies when you spot an enemy; tell them where you saw this enemy, and what weapon they were carrying if you can. If you’re going to split off from the group to pick up a weapon, let them know that you no longer have their back.
Of course, a team that travels in a tight formation leaves itself open to total obliteration from a well-aimed Boomshot round or other explosive. For this reason, efficient formation is key; when you reach a chokepoint, spread out so you can hit your enemies from multiple directions. Be sure that one or more players are actively watching back entrances to avoid being blindsided by a cunning enemy.
Know the maps: Knowing the layout and weapon locations of each map is an important aspect of any competitive shooter. If need be, spend time away from ranked play to explore each map, taking note of the available weapons and where they spawn.
Knowing where you need to go to get your hands on some firepower is not the only benefit of memorising the weapon spawn points; it can also help you pinpoint an enemy’s location. A notification will appear in the bottom-left corner of the screen when an ally or enemy picks up a weapon, so you can determine the whereabouts of an enemy if you know where all of the weapons spawn.
This guide contains a section devoted to the weapon spawn locations on each and every map available as of this writing. Check out this section to better familiarize yourself with the weapons available on each map and their locations.
Know the hazards: There’s little worse than meeting an early end not by the hands of another player, but by an environmental hazard. Several maps have such hazards, which can easily quash players unfamiliar with the territory. The aptly named “Avalanche” is a good example of this; random avalanches will occur during some game types. When snow starts falling and the screen begins to shake, you’d better be in one of the spawning areas or on the main road to avoid being buried in the snow.
A yellow flash indicates that razorhail is on its way on the “Hail” map. Quickly get beneath some shelter to avoid being torn apart by the razor-sharp shards of ice. The laser grid in “Security” will dismember any player that it comes into contact with. The freight train that travels through the middle of “Tyro Station” is not just for show; stand in its way and you’re mush. The rising Imulsion levels in “Flood” will force players to seek higher ground to avoid being burned alive by the corrosive substance.
Choosing the wrong piece of cover can also lead to an easy kill for an opposing player; taking cover behind a truck that is carrying a fuel tank is not the brightest idea.
Get some experience: Even if you’ve played the prequel extensively, immediately hopping into an online multiplayer match after first opening Gears of War 2 may not be in your best interest. The new weapons and features introduced in the sequel have altered the multiplayer experience considerably. For this reason, it’s best to play through the campaign mode first to better familiarize yourself with the new weapons and features before delving into the multiplayer mode. It’s much tougher to learn how to use something in the heat of battle.
Gears of War 2 ships with 10 multiplayer maps on disc. The location of every weapon on each one of these maps is described below, as well as any environmental hazards that may be present.
Note that some weapons share spawn points, meaning when you find the location, the weapon there could be one or the other.
Read on through the following pages for details and images from each map.
Note: Random avalanches will occur on this map in certain game types. Rumbling and snow falling indicates that an avalanche is soon to occur. The only safe areas to be during the avalanche are either of the spawning areas or on the road. If you are in the area at the center of the map, or in the area with the turreted platform, flee quickly when you see signs of an avalanche to avoid being buried in the snow.
Available Weapons: Gorgon Pistol, Boltok Pistol, Frag Grenades, Ink Grenades, Mortar, Mulcher, Boom Shield, Boomshot, Torque Bow.
Boltok/Gorgon Pistol x2: There are two of these spawn points on the map. A Boltok or a Gorgon Pistol can be found in the two enterable buildings on either end of the road.
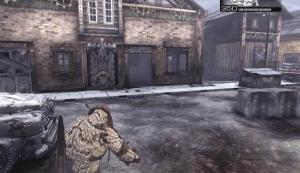

Boom Shield: The shield spawns in the back of the truck that is parked in the middle of the road.
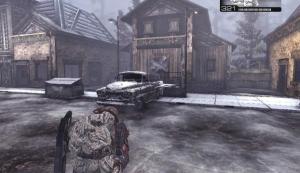
Mulcher/Mortar: One of these weapons will spawn in the middle of the raised platform behind the turreted buildings. There are stairs on both sides of the platform.
Frag/Ink Grenades: Grenades spawn inside the gazebo in the area at the center.
Boomshot/Torque Bow: This weapon spawn is only acquirable after a random avalanche occurs and fills up the area at the center of the map. The weapons spawns on a rooftop there.
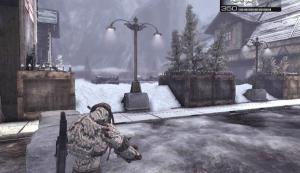
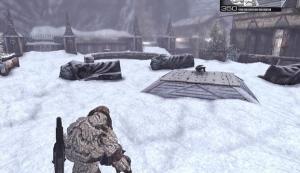
The two spawn points are at the north and south ends of the map. For the purpose of following this walkthrough, if the exit of your spawning area is on the left, you are at the north end. If the exit of your spawning area is on the right, you are at the south end.
Available Weapons: Gorgon Pistol, Boltok Pistol, Frag Grenades, Ink Grenades, Scorcher Flamethrower, Longshot, Torque Bow.
Boltok Pistol/Gorgon Pistol x2: A Boltok or Gorgon Pistol can be found at the end of a small corridor across from the exit of each team’s spawning area. Either weapon is a nice substitute for the Snub Pistol each player is initially equipped with.
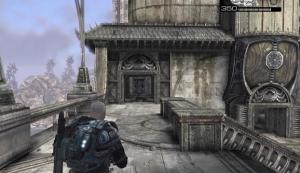
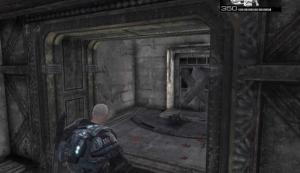
Frag/Ink Grenades x2: Either Frag or Ink Grenades can be found through the doorway after the first set of steps on either side of the map. Look for the entrance to the hospital at the left or right end of the platform as you go down the stairs. Once through the doorway, turn right (if the doorway was on the left) or left (if the doorway was on the right) to spot the grenade spawn by the window.
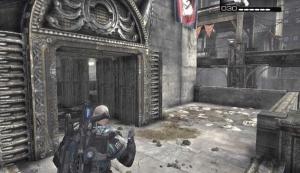
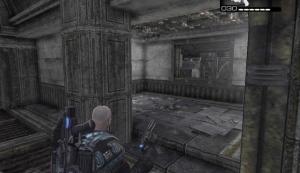
Scorcher Flamethrower: The Scorcher can be found by the three stacked, concrete blocks in the area at bottom of the steps that are on both sides of the map. The blocks will be below the east end of the track if you spawned at the north end of the map, or below the west end of the track if you spawned at the south end of the map.
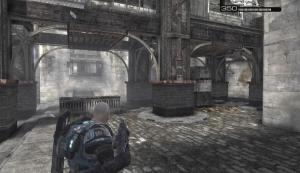
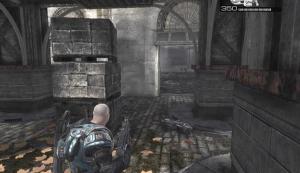
Longshot/Torque Bow: A Longshot or Torque Bow spawns in the area at the bottom of the steps that are on both sides of the map. The weapon spawn will be below the west end of the track that runs above the area if you spawned at the north end of the map, or below the east end of track if you spawned at the south end of the map.
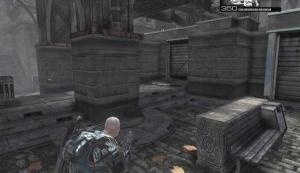
The two spawn points are at the north and south ends of the map. For the purpose of following this walkthrough, if the “Playland” arcade is visible on the left side of the street when you spawn, you are at the north end of the map. If you spawn by two long, chain link fences, you are at the south end.
Available Weapons: Gorgon Pistol, Boltok Pistol, Hammer of Dawn, Mortar, Longshot, Torque Bow, Boom Shield.
Bolotok/Gorgon Pistol x2: These weapons occupy two different spawn points on the map. A Boltok or Gorgon Pistol will spawn in the fenced-in, sheltered area across from the stairs that lead up to the arcade building’s awning and the two parallel fences at the southern spawning area.
The other pistol spawn is in the sheltered area across from the “Family Fun Center” sign at the front of the Playland arcade building, so this spawn is closest to the northern spawning area.
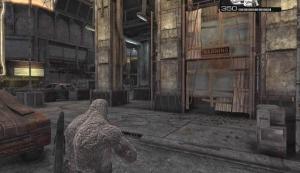
Boom Shield: The shield can be found in front of the counter in the “Playland” arcade, which is closest to the north spawning point.
Hammer of Dawn/Mortar: One of these weapons will be in the middle of the walkway that can be reached by climbing the steps alongside the building with the large fluorescent “REGENCY” sign attached to it.
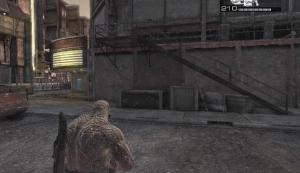
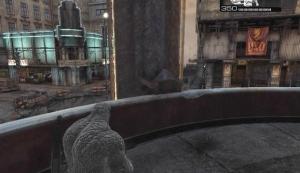
Longshot/Torque Bow: Either a Longshot or Torque Bow will spawn at the end of the awning attached to the “Playland” arcade. There are some steps alongside the building that lead up to the awning.
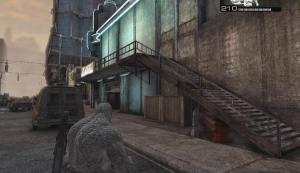
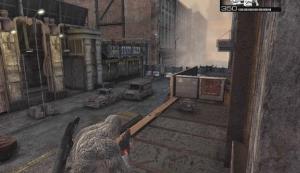
The two spawn points are at the north and south ends of the map. For the purpose of following this walkthrough, if you spawn in a large room with a high-ceiling, some columns, and a curved stairway, you are in the northern camp. If you spawn in a small room with a low-ceiling and some crates, you are in the southern camp.
Note: When you are outside and see a yellow flash, this is an indication that razorhail is on its way. Seek cover quickly to avoid taking environmental damage.
Available Weapons: Gorgon Pistol, Boltok Pistol, Frag Grenades, Ink Grenades, Boomshot, Mulcher, Longshot, Torque Bow.
Boltok/Gorgon Pistol x2: These weapons occupy two different spawn points on the map. A Boltok or Gorgon Pistol spawns outside by a car nearest to the southern starting area. If you spawn in the southern camp you’ll be able to see the car beyond some steps when you first step outside.
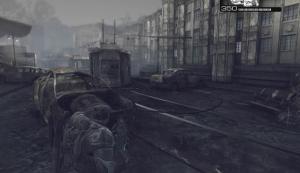
The other pistol spawn is just outside of the northern starting point. If you spawn in the northern camp, head through one of the square archways at the bottom of the steps and look by the car to your right to spot the weapon.
Frag/Ink Grenades x2: Grenades occupy two different spawn points on the map. The grenade spawn closest to the southern camp is at the end of the covered bridge at the top of the curved stairway in the spawning area.
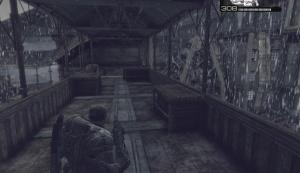
The second batch spawns in the warehouse that is connected to the southern starting room. If you spawn in the southern camp, head through one of the doorways that lead into the warehouse and look for the grenades by the two tables at the top of the second set of steps.
Longshot/Torque Bow x2: These weapons occupy two different spawn points on the map. Either a Longshot or Torque Bow can be found inside of the middle trailer along the street outside.


One of these weapons also spawns above the southern starting room. If you spawn in the southern camp, enter the warehouse attached to the spawning area, head up the stairs to reach the platform with the fountain in the middle, and walk over to where the starting area is below to spot the weapon.
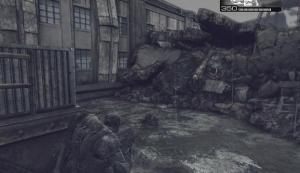
Boomshot/Mulcher: One of these weapons will spawn in the broken fountain (with the tall pedestal and statute protruding from it) on the raised platform at the center of the map.
Available Weapons: Gorgon Pistol, Boltok Pistol, Frag Grenades, Ink Grenades, Boomshot, Hammer of Dawn, Mortar, Longshot, Torque Bow.
Frag/Ink Grenades x2: Grenades spawn in the towers at the top of the three sets of steps outside of the spawning areas on both sides of the map.

Boltok/Gorgon Pistol x4: There are four pistol spawn points on this map. A Boltok or a Gorgon Pistol spawns in the small room at the top of the first two sets of steps outside of the spawning areas on both sides of the map.
The other two pistol spawn locations are on either end of the courtyard in the small, sheltered areas.
Boomshot/Hammer of Dawn: One of these weapons spawns in the gated structure at the back of the courtyard.
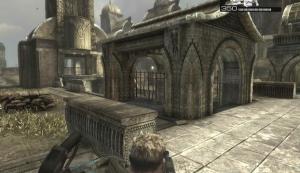
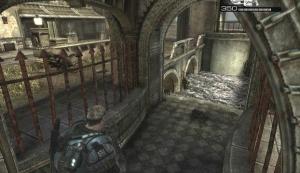
Longshot/Torque Bow: A Torque Bow or Longshot can be found on a platform in the area between each team’s spawning points at the northeast and southeast ends of the map.
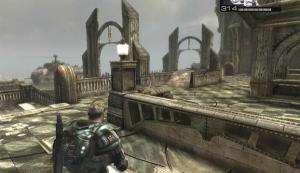
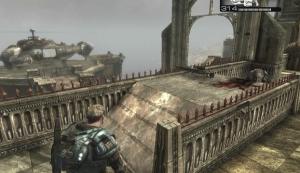
Mortar: This weapon spawns in front of the helicopter landing site.
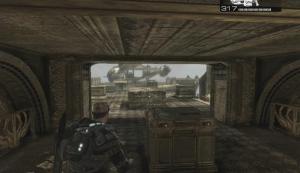
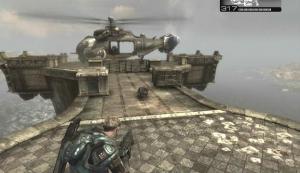
Available Weapons: Gorgon Pistol, Boltok Pistol, Frag Grenades, Ink Grenades, Boomshot, Mulcher, Mortar, Boom Shield.
Frag/Ink Grenades x2: Grenades spawn behind the large statue at the bottom of the steps in both of the starting areas.
Boltok/Gorgon Pistol x2: These weapons occupy two different spawn points on the map. A Boltok or Gorgon Pistol will spawn in both of the small rooms on either side of the large building outside.
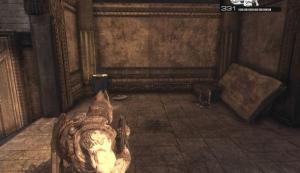
Mulcher: The Mulcher spawns in the sandbagged gazebo on the upper level of the outside area.
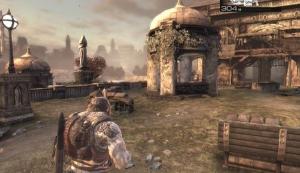

Mortar: The Mortar spawns inside of the gated gazebo on the lower level of the outside area. There is a switch on the side of the gazebo that opens the gate, allowing the weapon to be collected.
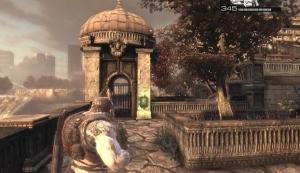
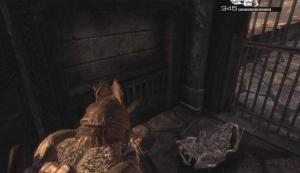
Boom Shield: The shield spawns in the small, boxed-in area behind the headless statue outside. It can be reached through the half-circle doorway in front of the large building that is visible in the background.
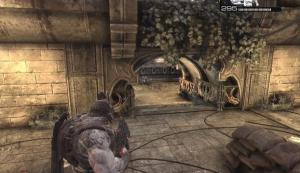
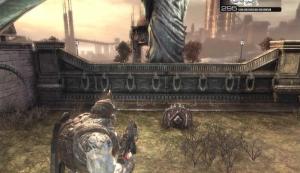
Each team spawns on a different side of the river. The weapon placement on the two sides of this map is identical.
Available Weapons: Gorgon Pistol, Boltok Pistol, Frag Grenades, Ink Grenades, Boomshot, Longshot, Torque Bow, Mortar.
Frag Grenade/Ink Grenade x2: Grenades occupy two different spawn points on the map. The grenades closest to the southern spawn point are found in the cabin on the right side of the road.
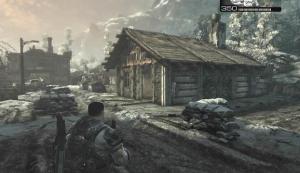
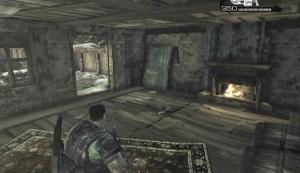
The grenades closest to the northern spawn point are also found in a cabin on the right side of the road.
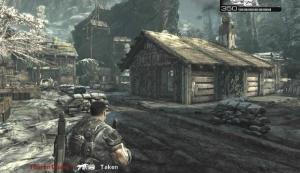
Boltok/Gorgon Pistol x2: One of these weapons can be found on either side of the river. The pistol spawn closest to the southern camp is at the north end of the road on the east side of the river, between the two army vehicles on the right side of the road.
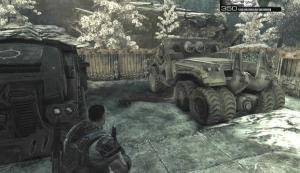
Likewise, the pistol spawn closest to the northern camp is between the two army vehicles on the right side of the road, at the south end of the road on the west side of the river.
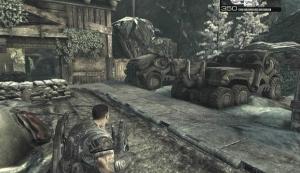
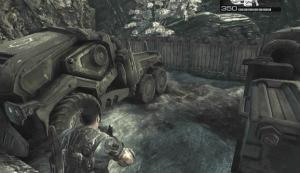
Longshot/Torque Bow x2: One of these weapons can be found in each of the bombed out buildings at the north and south ends of the roads on the east and west sides of the river. Head up the stairs in either building and you’ll find the weapon at the end of the walkway by the broken section of the wall. Always watch out for a sniper in the building across the way before moving in to pick up the weapon.
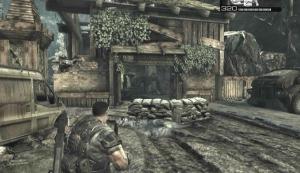

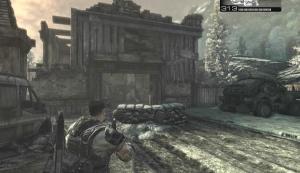
Mortar: This weapon spawns in the middle of the bridge that connects the two sides of the map.
Boomshot: A Boomshot can be found underneath the bridge that connects the two sides of the map. There is a decline on each side of the map that leads down to the stream.

The weapon placement on the two sides of this map is identical.
Available Weapons: Gorgon Pistol, Boltok Pistol, Frag Grenades, Scorcher Flamethrower, Longshot, Torque Bow, Boom Shield.
Scorcher Flamethrower: The Flamethrower spawns in the middle of the bridge that is accessible on both sides of the map.
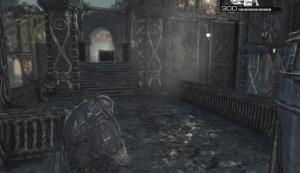
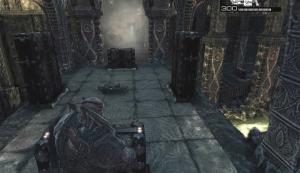
Boom Shield/Frag Grenades x2: Either a Boom Shield or some Frag Grenades spawn below the bridge on either side of the map. When you reach the start of the bridge, go down the steps on the right instead and walk along the side of the bridge until you reach the opening that leads into the small space beneath it.
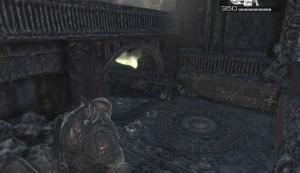
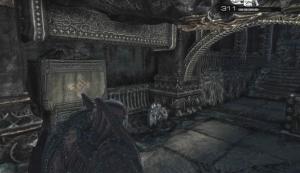
Boltok/Gorgon Pistol x2: These weapons occupy two different spawn points on the map. Each spawn point is in the lower areas on the west and east side of the bridge that splits the map. A Boltok or Gorgon pistol can be found in the upper-right corner of both areas (next to the blocks by the arched doorway).
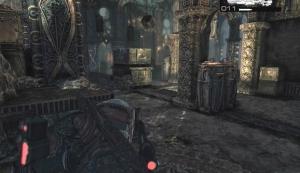
Longshot/Torque Bow x2: There are two different spawn points for these weapons on the map. A Longshot or Torque Bow can be found through the arched doorways at the end of the lower areas on the west and east side of the bridge that splits the map.
The two starting areas are in the southwest and southeast corners of the map. If there is a wall to your left when you first step outside, you spawned at the southwest camp. If there is a wall to your right when you first step outside, you spawned at the southeast camp.
Note: The two laser grids on this map will kill any player that comes into contact with them. Active laser grids can be deactivated by pressing one of the two switches on the map when it is green. (One of the switches is on the column across from the sandbags on the platform at the top of the map, the other is on the balcony across from the flamethrower in the hallway between the two starting areas.)
Available Weapons: Gorgon Pistol, Boltok Pistol, Frag Grenades, Ink Grenades, Scorcher Flamethrower, Mulcher, Mortar.
Frag/Ink Grenades x2: Grenades spawn on both ends of the walkway that is connected to the main platform with the sandbags and Mulcher. The steps that lead up to the walkway are straight across from each starting area. Head up these steps and turn left if you spawned at the west end of the map and right if you spawned at the east end of the map to spot the grenades.
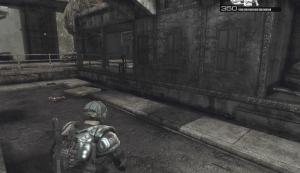
Boltok/Gorgon Pistol: Either a Boltok or Gorgon Pistol can be found on the grate in the middle of the map. It is across from the main steps that lead up to the sandbag formation on the center platform.
Mulcher/Mortar: One of these weapons spawns behind the sandbags on the middle platform (the one surrounded by the three laser grids) at the top of the map.
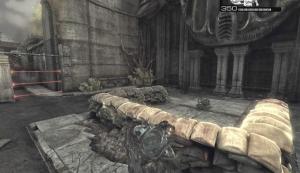
Scorcher Flamethrower: The flamethrower spawns behind the laser grid in the indoor area next to each team’s starting area. The switch on the balcony outside lowers the laser grid.

The weapon placement on both sides of the map is identical.
Available Weapons: Gorgon Pistol, Boltok Pistol, Frag Grenades, Ink Grenades, Boomshot, Longshot, Torque Bow, Mulcher.
Frag/Ink Grenades x2: There is a grenade spawn on both sides of the map. After exiting your spawning area, look in front of the pipe gateway to spot Frag or Ink grenades on the ground.
Boltok/Gorgon Pistol x2: A Boltok or Gorgon Pistol will spawn in two different places. To reach the pistol spawn from your starting area, head off to the left after exiting.
Boomshot/Mulcher: One of these weapons will spawn on the catwalk at the center of the map. There are steps that lead up to the catwalk on the left and right sides of the middle room. To reach the steps from your starting point, head off to the right after exiting the spawning area.
Longshot/Torque Bow: One of these weapons will spawn at the base of the catwalk’s support column in the main room.

The Flashback Map Pack comes free with every new copy of Gears of War 2. A card inside of the game’s case contains a code for the pack to be used on the Xbox Live Marketplace along with instructions on how to download it.
You will need access to Xbox Live to download these maps (an Xbox Live Silver membership will suffice).
As of this writing, the only way to obtain these maps is to buy a brand new, sealed copy of Gears of War 2.
The pack contains updated versions of five classic maps from the first Gears of War. These updated versions stay true to their predecessors for the most part, however some of the weapons introduced in the sequel have been added to weapon spawn point cycles.
The location of every weapon on each one of these maps is described below. Note that some weapons share spawn points, meaning when you find the location, the weapon there could be one or the other.
Read on for full details of weapons on each of the individual maps.
Available Weapons: Longshot, Boltok Pistol, Gorgon Pistol, Frag Grenades, Ink Grenades, Torque Bow, Boomshot.
Longshot x2: A Longshot spawns on each of the bridges closest to the teams’ starting areas.
Frag/Ink Grenades: Grenades spawn on the middle bridge.
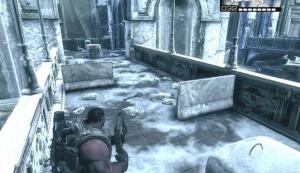
Boltok/Gorgon Pistol: One of these weapons will spawn in the sandbags by the steps that lead up to the middle bridge.
Boomshot/Torque Bow: One of these weapons will spawn beneath the middle bridge.
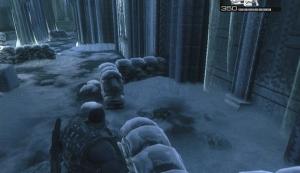
Available Weapons: Longshot, Torque Bow, Boltok Pistol, Gorgon Pistol, Ink Grenades, Boom Shield, Boomshot.
Ink Grenades/Boom Shield: A Boom Shield or Ink Grenades will spawn in the middle of the ring of wrecked cars at the center of the map.
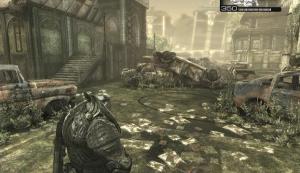
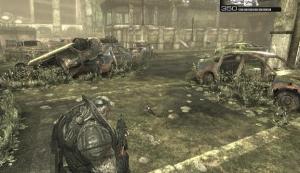
Longshot/Torque Bow: One of these weapons will spawn on the covered platform that has the ring of wrecked cars and white van in front of it.
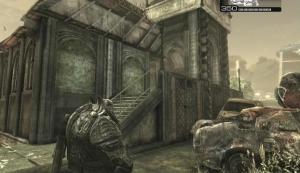

Boomshot: Between the two archways that across from the ring of wrecked cars in the middle of the map.
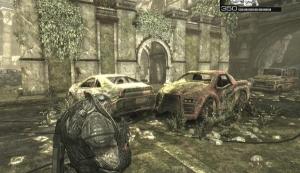
Boltok/Gorgon Pistol x2: On the platforms at the top of the stairs that lead up to either of the two structures that sandwich the two archways.
Available Weapons: Boomshot, Longshot, Boltok Pistol, Gorgon Pistol, Frag Grenades, Ink Grenades.
Boltok/Gorgon Pistol x2: Both of these spawn locations are in the corners of the small patches between the gates and the walls on both sides of the courtyard.
Boltok Pistol: A Boltok Pistol can be found inside of the mansion, between the two statues below the second floor walkway.

Frag/Ink Grenades: The grenades spawn on the platform right outside the mansion’s main entrance.
Boomshot: This weapon spawns behind the piece of concrete beyond the statue in the courtyard.
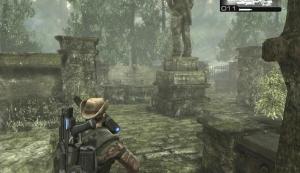
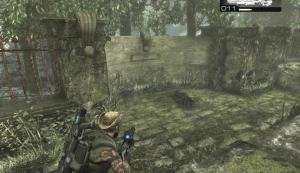
Longshot/Torque Bow: One of these weapons can be found in the middle of the mansion’s second floor walkway.
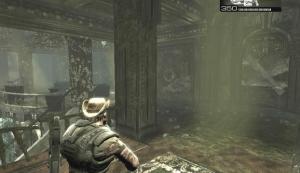
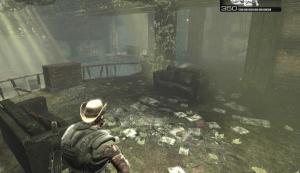
Available Weapons: Frag Grenades, Ink Grenades, Scorcher Flamethrower, Torque Bow, Mulcher, Longshot.
Scorcher Flamethrower: Spawns by the notice board across from the main stairs in the subway.
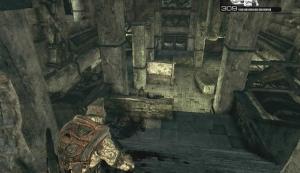
Torque Bow/Mulcher x2: One of these weapons will spawn in the open train car next to the base of the main stairs in the subway.
Frag/Ink Grenades x2: Grenades spawn by the wall across from the main stairs in the subway.
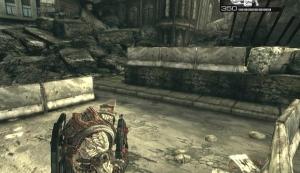
The other grenades spawn on a raised platform outside. The platform is across from the top of the main stairs that lead down into the subway.
Torque Bow/Longshot: Spawns outside in the area around the corner behind the flatbed truck (the one off to the right of the main stairs that lead down to the subway; off to the left if you spawn outside).
Available Weapons: Torque Bow, Longshot, Boltok Pistol, Gorgon Pistol, Frag Grenades, Ink Grenades, Hammer of Dawn.
Longshot/Torque Bow x2: One of these weapons spawns on both sides of the tracks at the end of the walkway.

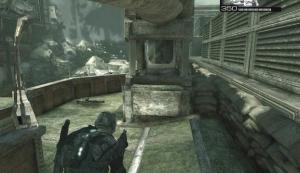
Hammer of Dawn: The Hammer spawns in the middle of the train track. It’s sitting above the stairway that leads underground.
Frag Grenades/Ink Grenades: The grenades spawn in the area below the train track.
Boltok Pistol/Gorgon Pistol x2: Pistols spawn behind the dumpsters that are between the two ramps that lead up to the train track on both sides of the map.

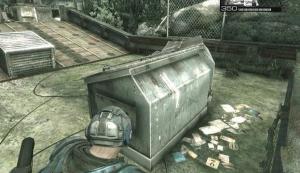
The Combustible Map Pack is available on the Xbox Live Marketplace for 800 Microsoft points as of this writing.
The location of every weapon on all three maps included in the download are described below, as well as any environmental hazards that may be present. Note that some weapons share spawn points, meaning when you find the location, the weapon there could be one or the other.
Read on for full details on all the weapons available in each of these maps.
Note: Standing in Imulsion (the bright, yellow substance) causes damage and will eventually lead to death. Imulsion levels rise throughout each round, but will reset at the start of the next round. The screen shaking is an indication that the Imulsion is rising, so seek higher ground if you’re standing near the substance.
Available Weapons: Boltok Pistol, Gorgon Pistol, Ink Grenades, Frag Grenades, Boomshot, Torque Bow, Mortar, Hammer of Dawn.
Boltok/Gorgon Pistol x2: One of these pistols will spawn in front of the two arched doorways at either end of the map.
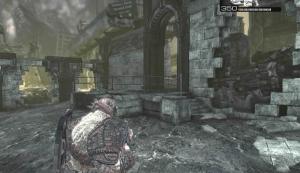
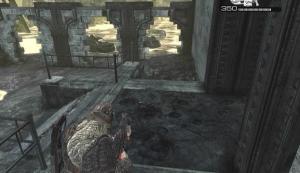
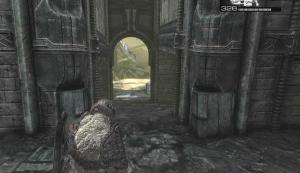
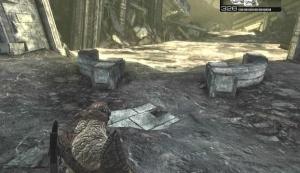
Frag/Ink Grenades x2: Grenades will spawn by the Imulsion beyond the two pieces of half-circle cover on the outskirts of the map. The grenades here will likely get covered by Imulsion after the first rise.
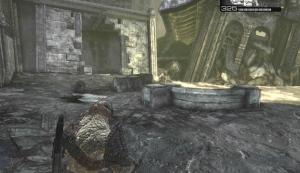
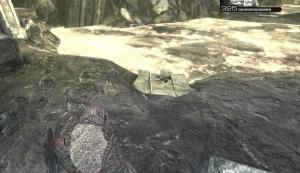
Another batch spawns off to the right of the arched doorway with the long piece of cover in front of it.
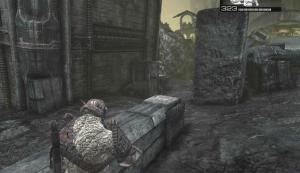
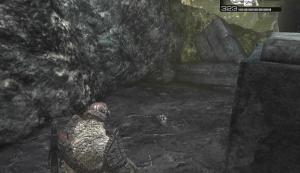
Mortar/Hammer of Dawn: One of these weapons will spawn on the ruined onramp in the area at the center of the map.

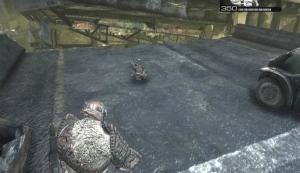
Boomshot/Torque Bow: Spawns between the two standing columns across from the ruined on-ramp in the area at the center of the map.
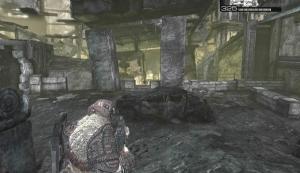
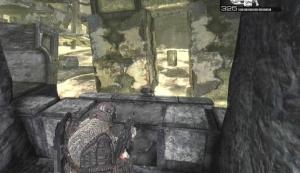
Note: The trucks carrying large, blue fuel tanks will emit a large explosion when destroyed, stunning or gibbing players in the vicinity.
Available Weapons: Boltok Pistol, Gorgon Pistol, Scorcher Flamethrower, Mulcher, Mortar, Frag Grenades, Ink Grenades.
Boltok/Gorgon Pistol: One of these weapons will spawn in front of the low clearance gate in the parking lot next to the fuel station.
Frag/Ink Grenades: Spawn by the fuel truck left of the Imulsion station entrance
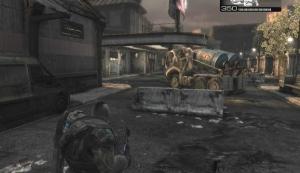
Mulcher: Spawns in front of the Imulsion station entrance.
Scorcher Flamethrower: Spawns on the Imulsion station rooftop. There are stairs along the back of station that lead up to the roof. The lift inside the station can also be used.
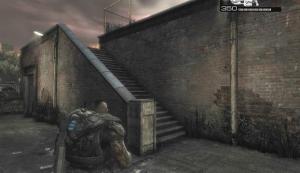
Mortar: This weapon spawns on the side of the high road across from the front of the Imulsion station.
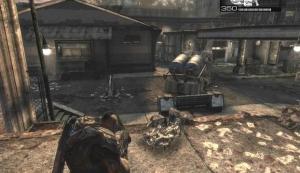
Available Weapons: Longshot, Boomshot, Mortar, Torque Bow, Gorgon Pistol, Boltok Pistol, Frag Grenades, Ink Grenades.
Boltok/Gorgon Pistol x2: Pistols spawn in the areas at the top of the steps at both ends of the upper level.

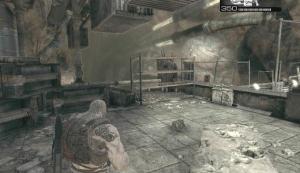
Frag/Ink Grenades: The grenades spawn at the back of the lower level, behind the machinery there.
Longshot/Torque Bow: One of these weapons will spawn behind the machinery near the center of the upper level.
Mortar/Boomshot: One of these weapons will spawn on the platform near the center of the lower level.
Dark Corners is the fourth downloadable content released for Gears of War 2. It includes seven new multiplayer maps, as well as an additional chapter for the campaign mode, titled “Road to Ruin.” This deleted scene begins after Marcus and Dom find Maria and then set their sights on the Locust Hive. The pair must decide whether to take the cautious route and sneak past the locusts between here and there, or to go about it like they always do—with guns blazing.
To commemorate the success of Gears of War 2 and the Gears of War franchise, Microsoft Game Studios and Epic Games have released the Gears of War 2: All Fronts Collection. This bundle contains the Dark Corners DLC (which includes the “Road to Ruin” deleted scene), as well as the Flashback, Combustible, and Snowblind map packs. If you’re a fan of the game and have yet to purchase any of the previous map packs, the All Fronts Collection is a deal you shouldn’t pass up.
This guide contains a walkthrough covering both the guns blazing option and the stealth option of the Road to Ruin deleted scene. To give you an edge over your opponents online, we’ve also included text descriptions and images of the weapon placements on every new multiplayer map. As well, you’ll find a complete listing of the added Xbox 360 achievements.
Notes: This guide was written based on the HARDCORE difficulty setting. The strategies and instructions contained within will still apply to a playthrough on any other difficulty level, however the difficulty level affects the amount of damage your character and your enemies can sustain. All control commands mentioned in the text refer to the Gears of Wars 2 DEFAULT control style.
The Gears of War 2: Dark Corners DLC contains the “Road to Ruin” deleted scene, which was cut from the original release of Gears of War 2, as well as a brand new map pack consisting of seven new multiplayer maps. This content is available for purchase on the Xbox Live Marketplace for 1200 Microsoft Points ($15.00 USD).
Gears of War 2: Dark Corners includes the following:
*Road to Ruin deleted scene (campaign chapter).
*Dark Corners multiplayer maps – Allfathers Garden, Memorial, Sanctuary, War Machine, Highway, Way Station, and Nowhere.
To commemorate the success of Gears of War 2 and the Gears of War franchise, the Gears of War 2: All Fronts Collection has been made available. This bundle contains the Dark Corners DLC (which includes the “Road to Ruin” deleted scene), as well as the Flashback, Combustible, and Snowblind map packs—all for just 400 points more at 1600 Microsoft Points ($20.00 USD). If you have yet to purchase any of the previous map packs and enjoy the multiplayer, the All Fronts Collection is a deal you shouldn’t pass up.
Gears of War 2: All Fronts Collection includes the following:
*Dark Corners – Road to Ruin deleted scene (campaign chapter). Allfathers Garden, Memorial, Sanctuary, War Machine, Highway, Way Station, and Nowhere multiplayer maps.
*Flashback Map Pack – Canals, Gridlock, Mansion, Tyro Station, and Subway multiplayer maps.
*Combustible Map Pack – Flood, Fuel Station, and Gold Rush multiplayer maps.
*Snowblind Map Pack – Courtyard, Grind Yard, Fuel Depot, and Under Hill multiplayer maps.
Choose the “Go in Guns Blazing” option following the opening cutscene to approach this chapter as you would any other in Gears of War.
Objective: Proceed through the next set of gatehouse doors.
Climb up either of the ladders on the sides of this area and pull the lever at the top. Dom will automatically climb up the opposite ladder and pull the lever on that side to open the gate below. With that done, drop down the ladder and Roadie Run to one of the pieces of cover beyond the gate.
You’re outfitted with a Lancer, a Gnasher Shotgun, a Snub Pistol, and two Frag Grenades. Use your Lancer to blast any Drones visible from your cover, and then move up to one of the torches. There’s a Flamer among the enemies in this area; he’s likely to charge your cover, so gun him down before he can get close enough to roast you, falling back if necessary. Aim for the tank strapped to his back if possible; by doing so, you can puncture the tank, causing it to eventually explode.
When all of the nearby Drones have been dealt with, move up to the container just beyond the first torch. You’ll have to kill the Drone on the Troika emplacement in the middle of this area to move on. Ensure that there aren’t any Drones nearby before moving up to the second torch up ahead. Whilst the gunner is not focusing on you, move again to the container just up ahead. From here, you should be able to land a Frag Grenade just below the Troika on the platform. With any luck, the launched Frag Grenade will blow the gunner apart when it goes off.
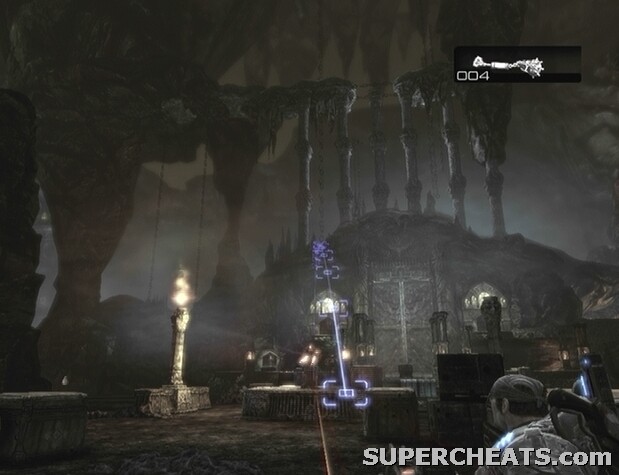
Lob a Frag Grenade below the Troika on the platform to blast the gunner to pieces.
With the gunner down, proceed past the platform to trigger the appearance of another group of enemies from the gatehouse at the opposite end of the area. Though you can climb up onto the platform and man one of the Troika emplacements yourself, doing so may not be in your best interest, as there’s a Boomer among the enemies, and you would be a sitting duck if on the platform. Take cover behind one of the containers further up, and hit the Boomer with a Lancer while he’s reloading. If you have a Frag Grenade left, you could throw that, too. Keep an eye out for Bolters.
Once the Boomer and accompanying Drones have been taken care of, strongly consider swapping your Gnasher for the Boomshot, and proceed through the first gatehouse door at the far end of the area. When you reach the door, climb up the ladder to your right and pull the lever at the top. Look around for a box of ammo before dropping back down. If you head up the opposite ladder, you can find some Frag Grenades as well.
Objective: Cross the river to the next set of gatehouse doors.
When the door opens, gun down the standing Grenadier further ahead, and then Roadie Run to the stack of bricks on the right. You don’t want to go in too deep yet, as there’s a Flamer behind the railing further up. Use your Lancer to kill the Flamer and Drones behind the railing up ahead. There should be a Grinder coming up the steps by the time you’ve dealt with them, so if you picked up that Boomshot in the previous area, switch to it now and blast him when he gets a bit closer to your cover.
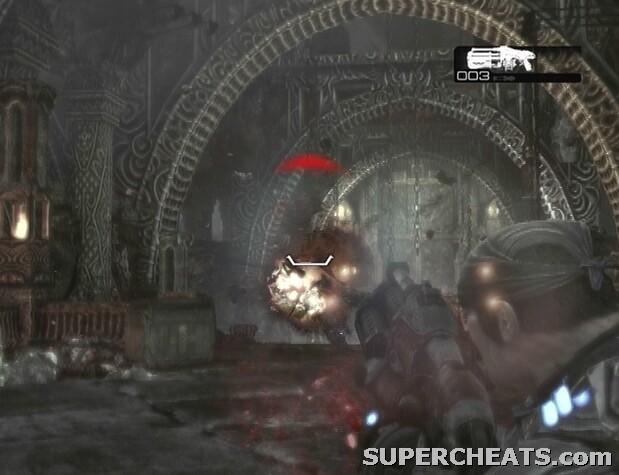
Use your Boomshot to take out the Grinder.
Once the area is clear, look around for the Longshot dropped by one of the Drones and swap it with your Boomshot. When you have the Longshot, pick up the ammo container to the left of the stairs. Make your way over to one of the low walls further down the steps and use your Longshot to pick off the Drones across the river. When the stairs at the other end are clear, move down to the Turn Wheel at the bottom of the steps. Grab hold of the Turn Wheel and use it to raise a bridge across the river.
Before crossing the bridge, head back up the steps and pick up the Grinder’s Mulcher. Then, cross the bridge to trigger another batch of enemies. Two Bloodmounts, a Grinder, and some Drones will come through the gatehouse door. Not a good combination. Rather than continuing up the steps to face them, fall back to the other side of the bridge and take cover behind the low rock wall across from the Turn Wheel. Hold LT to mount the Mulcher on the cover, and wait for the Bloodmounts to appear. Continuously fire at the Bloodmounts while they descend the stairs and attempt cross the bridge. Keep an eye on the bar in the top-right corner of the screen and be sure to press and hold the RB button before the Mulcher gets too hot.
With the Bloodmounts out of the way, you can either wait for the Grinder to appear so you can use the last bit of Mulcher ammo to kill him, or move up to a closer piece of cover and take him down from there. If you have any Longshot ammo left, use it to pick off the Drones from across the bridge.
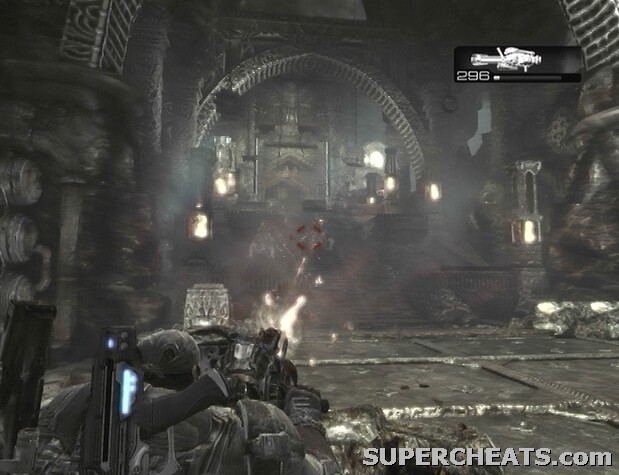
Use the Mulcher to kill the Bloodmounts before they can cross the bridge.
When the stairs are clear, make your way to the top. Before heading through the gatehouse door, turn left to spot a lever. Pull the lever to lower a piece of cover that was blocking the way into an area with an ammo container. Grab the ammo container, and then proceed through the door, climb up the ladder to your right, and pull the lever at the top. You can find a Boltok Pistol up here as well.
Objective: Proceed through the locust torture area to the next set of gatehouse doors.
After pulling the lever, drop down the ladder and wait for the door to open. Then, immediately Roadie Run to one of the pieces of railing beyond the door. Use your Lancer to gun down the Drones in the opening area, and then switch to your Longshot. Head back to the start of the area, turn right at the door, and look across the Imulsion; you should be able to spot some Drones across the walkway, particularly a Flamer. Hit the tank strapped to the Flamer’s back with your Longshot to set it off.
Keep your Longshot equipped and use it to pick off the Drones across the section of the walkway further up. You’ll likely be able to spot an approaching Butcher, but don’t waste any ammo on him, as he can be dealt with easily enough using the Lancer once he’s close. When there aren’t any enemies in sight, proceed down the walkway. Remain vigilant, as there may be one or two you’ve missed. As you move down the walkway, look around for the Flamer’s Scorcher; when you’ve found it, swap it with your Longshot. There are a couple of ammo containers along the way, so keep an eye out and pick them up to fill your Lancer.
Continue down the walkway, keeping an eye out for any Drones, and fall back when you spot the Bloodmounts and Boomer coming from the door to the left of the next gatehouse. Head back down the walkway and be ready for them with your Lancer equipped. Try your best to knock off the two Beast Riders from before they get too close, ideally while they’re preoccupied with attacking Dom. Alternatively, if you have a Frag Grenade, you could try throwing one as they approach.

Roast the Bloodmounts with the Scorcher.
If one or both of the Bloodmounts get dangerously close, switch to the Scorcher and use it to roast the creature. Continuously back away to keep out of range of the Bloodmount’s swipes. On the Hardcore or Insane difficulty levels, a single slash from a Bloodmount is enough to do you in, so be especially careful. Killing a Bloodmount with a Scorcher is significantly more difficult if the rider is still in place, as he will fire at you incessantly while you back away. However it doesn’t require much fire from the Scorcher to kill the mount, and once the rider is on the ground, you can fry him, too.
With the two Bloodmounts out of the way, take cover along the walkway and wait for the Boomer to appear, if he hasn’t already. Equip your Lancer and hit the Boomer with blindfire from behind cover to bring him down. Swap your Scorcher for the Boomshot, and continue to the gatehouse door at the other end of the walkway.
Both Dom and Marcus must pull the levers on the Locust emblem panels to open the gate. Unfortunately, a Drone appears from the outlook above, and pulls a lever to drop the two into the Locust jail below.
Objective: Fight your way out of the Locust jail.
While Jack works to unlock the door, take cover below the barred window on the right and fire at the Butcher and Drones when they appear. If you have a Frag Grenade, you can throw it through the bars as well. Once Jack has unlocked the door, make sure the cell block is clear, and then kick it open. A group of Wretches will appear, so equip your Pistol and use your melee attack to beat them down. When the way is clear, be ready with your Boomshot equipped, and head up the curved steps. If you don’t have a Boomshot, Frag Grenades will suffice.

Fire at the Butcher and Drones through the barred window.
When you reach the narrow corridor, fire the Boomshot at the Drones coming down the stairs at the other end. With any luck, the shot will have taken out two or three of them. More are on their way, so take aim with the Boomshot, or be ready with a Frag Grenade. Once all of the Drones have been dealt with, head up the steps and wait for Jack to unlock the door. Kick open the door, and then proceed into the next area.
Objective: Get past the Brumak on the bridge.
Start toward the bridge; as soon as you see the door at the other end of the bridge begin to open, turn back and take control of the nearby Troika. Aim at the Brumak’s face and continuously fire until the bar in the top-right corner of the screen is nearly full. At that point, release RT and hold RB. While holding RB to cool the Troika, hold down RT to start it up to begin firing again immediately after. Continue doing this, and you should be able to bring the beast down before it sends a barrage of missiles your way.
The Brumak’s corpse is blocking the way, so you’ll have to find another way around. Head down the curved steps at the other end of the walkway. Move through this empty area and you will eventually encounter an ally.
After the brief cutscene, pick up the Mulcher by the doorway. Proceed through the doorway, and take cover behind the barrier. Hold LT to mount the Mulcher, and fire at the Drones and Wretches coming down the walkway. Take the time to shred the Wretches crawling along the ceiling, as you’ll have to get out of cover to kill them if they manage to get behind the barrier. When all of the enemies on the walkway have been dealt with, turn back to the door your came through. Use what’s left of the Mulcher to kill the Butcher and Drones that appeared, and then follow your allies to a ladder.
Objective: Follow the Locust highway.
Once up the ladder, move closer to the Drones in the distance and get behind cover. Use your Lancer or other weapon to clear away the Drones, and then look among the bodies for a Longshot. Swap your secondary weapon for the Longshot, and proceed into the next area. Take cover behind one of the columns along the corridor, and use your Lancer or Longshot to pick off the Drones at the other end.
Fight your way to the next area.
When the corridor is clear, move to the other end, and pull the lever to lower the barrier blocking the way. Pick up the ammo container along the way, and continue into the next area. Pick up the ammo container and Frag Grenades, and then pull the lever to lower the tall pieces of mechanized cover.
Objective: Fight your way into Nexus.
Pull the lever up ahead to raise the cover nearby, and hang back here with your Longshot. Pick off the Drones as they pop out from the cover at the other end of the area. Soon, a Kantus will appear. At this point, you’ll have to watch out for the Tickers he summons, as they’ll most likely make a beeline for you. When a Ticker is nearing, switch to your pistol and bat the creature away with a melee attack. Then, shoot the overturned Ticker to set it off.
Once the first batch of enemies has been cleared, another Kantus and a couple of Drones will appear from the doorway on the far right. The Gnasher-wielding Drones may take cover along the railing across from your cover giving them a clear shot, albeit with a weapon that’s inaccurate at long-range.
Hang back with your Longshot and kill the enemies by the gatehouse in the distance.
When there is only one or two enemies left, move up to some cover closer to the gate. A sizeable group of enemies will appear when the large, adjacent door opens. You’ll need to pull the lever to bring the cover back up, as all of it will lower once that door opens. There are two Bloodmounts among the enemies; if you’ve taken cover far enough from the gate, you should be able to take them out with your Lancer. As soon as they appear, concentrate your fire on one of them and don’t let up, as they will likely be distracted by your allies. If you’re low on Lancer ammo, an ammo container can be found in the area to the left of the gatehouse.
As the reinforcements dwindle, a Reaver will appear and land in the middle of the area. Get behind one of the low, mechanized pieces of cover and blindfire at the Reaver with your Lancer equipped. With your allies’ gunfire combined with yours, the Reaver should fall in no time.
Select the “Use Stealth” option following the opening scene to sneak your way through this chapter. Marcus and Dom will don Theron Guard armour, allowing them to pass through the Locust ranks undetected. Drones have a strong sense of smell, however, and are able to distinguish human from Locust by scent, so you’ll have to keep your distance throughout.
Choose the “Use Stealth” option to sneak through the proceeding areas.
Important Note: To unlock the “My Way or the Highway” achievement, you must remain undetected until a certain point. If you are detected and wish to unlock this achievement, you’ll have to pause the game and revert to the last checkpoint. Eventually, you’ll be forced to go in with guns blazing; as long as you have made it undetected up until this point, the achievement should be yours upon completion of the chapter.
Objective: Proceed through the next set of gatehouse doors.
Sneaking through this first area is simple. Just follow Dom, take cover when he takes cover, move up when he moves up, until you’re at the gatehouse door. Once you’ve made it to the door, pull one of the levers, and Dom will automatically pull the other to open the door.
Through the first gatehouse door, climb up one of the ladders on either side of the room, and pull the lever at the top. Dom will automatically climb up the ladder and pull the lever on the opposite side, opening the second gatehouse door.
Objective: Cross the river to the next set of gatehouse doors.
There are too many Drones patrolling this next section to sneak through, so you’ll have to find some way to cause a distraction. Once through the door, turn right to spot a Turn Wheel. Grab hold of the Turn Wheel and use it to drop the ornate stone that’s hanging from a chain nearby. When the stone hits the floor and breaks, the Drones patrolling the area will run over to investigate, allowing you to slip by.
A Grinder sits at the bottom of the steps beyond the first batch of guards. As the Grinder climbs up the steps, hug the side opposite and duck behind one the railings partway down to allow him to walk by. He may get a scent, but if you passed by quick enough, he should lose interest and continue up. Once past the Grinder, grab hold of the Turn Wheel by the river and use it to raise the bridge.
Wait for the Grinder to pass by before heading up the steps across the bridge.
Cross the bridge, and approach the steps on the other side. A Grinder is on the way down, so take cover behind the railing next to the steps and wait for him to pass. Then, move back onto the steps and make your way to the top. While heading up, hug the left side to avoid alerting the patrolling Drones.
At the top of the steps, take cover behind the stack of bricks. A patrol group will come through the first gatehouse door. Stay behind cover until they pass by, and then Roadie Run through the open door. Climb up one of the ladders on either side of the room, and pull the lever at the top. Dom will climb up the opposite ladder and pull the lever there, opening the second gatehouse door.
Objective: Proceed through the Locust torture area to the next set of gatehouse doors.
When the second door opens, move up and take cover by the end of the railing on the left. Wait for the Drone patrolling this section of the walkway to pass by, and then follow Dom to the next piece of cover. After witnessing the man being struck, turn left and Roadie Run to the Turn Wheel at the other end of the walkway. Grab hold of the Turn Wheel and use it to drop the stone slab that’s hanging from a chain nearby. The slab will hit the table below it with a loud bang, effectively distracting the patrolling Drones in the area.
Slip past the Drones and take cover behind the stacks of bricks further up. Wait until the Butcher moves further down the walkway, and then move out and take cover behind one of the low walls further up. When you’re just short of the door, wait until the Butcher moves off to the side, and then get out of cover and Roadie Run to one of the levers.
Pull the levers with Dom to open the door and proceed through. Head up the ladder on the left side of the room, and pull the lever at the top to open the second gatehouse door. There’s a Torque Bow up here as well; swap your Gnasher for it, as you’ll be needing it soon.
Objective: Get past the Brumak on the bridge.
The Brumak can be taken down using the Troika emplacement nearby, but it would be best to move past it. Continue down to the end of the walkway, past the bridge, and head down the curved steps there. Once you’re past the Brumak, make your way through this empty area and you will eventually encounter an ally.
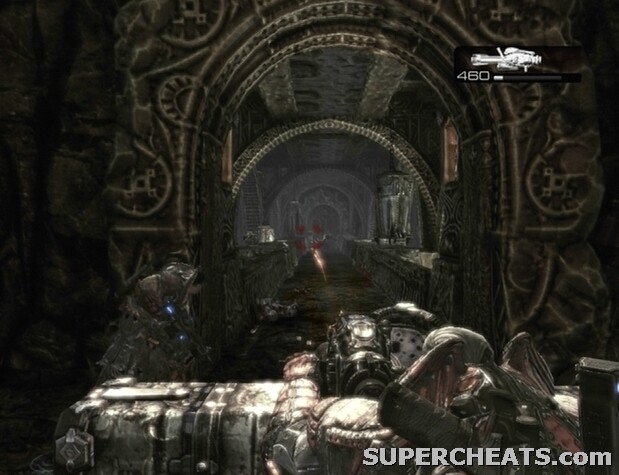
Once Frankie is in your party, discard any notion of being stealthy.
After the brief cutscene, stealth mode is off; it’s guns blazing from here on out. Pick up the Mulcher by the doorway. Proceed through the doorway, and take cover behind the barrier. Hold LT to mount the Mulcher, and fire at the Drones and Wretches coming down the walkway. Take the time to shred the Wretches crawling along the ceiling, as you’ll have to get out of cover to kill them if they manage to get behind the barrier. When all of the enemies on the walkway have been dealt with, turn back to the door your came through. Use what’s left of the Mulcher to kill the Butcher and Drones that appeared, and then follow your allies to a ladder.
Objective: Follow the Locust Highway.
Once up the ladder, move closer to the Drones in the distance and get behind cover. Use your Lancer or other weapon to clear away the Drones, and then look among the bodies for a Longshot. Swap your secondary weapon for the Longshot, and proceed into the next area. Take cover behind one of the columns along the corridor, and use your Lancer or Longshot to pick off the Drones at the other end.
When the corridor is clear, move to the other end, and pull the lever to lower the barrier blocking the way. Pick up the ammo container along the way, and continue into the next area. Pick up the ammo container and Frag Grenades, and then pull the lever to lower the tall pieces of mechanized cover.
Objective: Fight your way into Nexus.
Pull the lever up ahead to raise the cover nearby, and hang back here with your Longshot. Pick off the Drones as they pop out from the cover at the other end of the area. Soon, a Kantus will appear. At this point, you’ll have to watch out for the Tickers he summons, as they’ll most likely make a beeline for you. When a Ticker is nearing, switch to your pistol and bat the creature away with a melee attack. Then, shoot the overturned Ticker to set it off.
Once the first batch of enemies has been cleared, another Kantus and a couple of Drones will appear from the doorway on the far right. The Gnasher-wielding Drones may take cover along the railing across from your cover giving them a clear shot, albeit with a weapon that’s inaccurate at long-range.

Target the Bloodmounts with your Lancer to kill them before they get too close.
When there is only one or two enemies left, move up to some cover closer to the gate. A sizeable group of enemies will appear when the large, adjacent door opens. You’ll need to pull the lever to bring the cover back up, as all of it will lower once that door opens. There are two Bloodmounts among the enemies; if you’ve taken cover far enough from the gate, you should be able to take them out with your Lancer. As soon as they appear, concentrate your fire on one of them and don’t let up, as they will likely be distracted by your allies. If you’re low on Lancer ammo, an ammo container can be found in the area to the left of the gatehouse.
As the reinforcements dwindle, a Reaver will appear and land in the middle of the area. Get behind one of the low, mechanized pieces of cover and blindfire at the Reaver with your Lancer equipped. With your allies’ gunfire combined with yours, the Reaver should fall in no time.
The Dark Corners Map Pack is available for purchase on the Xbox Live Marketplace for 1300 Microsoft points at this writing, but is also included in the Gears of War 2: All Fronts Collection, which is priced at 1600 Microsoft Points.
Becoming familiar with the layout and weapon locations of each map is important in any competitive shooter. Knowing where you need to go to get your hands on some firepower is not the only benefit of memorizing the weapon spawn points; doing so can also help you pinpoint an enemy’s location. A notification will appear in the bottom-left corner of the screen when an ally or enemy picks up a weapon, so you can determine the whereabouts of an enemy if you know the weapon spawn points well.
The location of every weapon on all seven multiplayer maps included in the download are described in the following sections. Note that some weapons share spawn points, meaning when you find the location, the weapon there could be one or the other, and will change to the other weapon the following round.
Available Weapons: Boltok Pistol, Gorgon Pistol, Boom Shield, Frag Grenades, Ink Grenades, Torque Bow, Boomshot, Scorcher Flamethrower, Longshot.
Boltok/Gorgon Pistol x2: These weapons occupy two different spawn points on the map. One of these weapons can be found through the archway across from each spawn point, behind the headless statue.
Boom Shield x2: The Boom Shield occupies two different spawn points on the map. One can be found through the archways across from each spawn point, behind the headless statues and Boltok/Gorgon Pistol spawns.
Frag/Ink Grenades: In the enclosure at the center of the map.
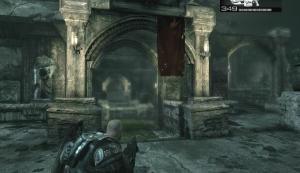
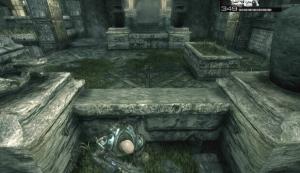
Torque Bow/Boomshot: One of these weapons can be found in the area between the two Boltok/Gorgon Pistol spawn points at either end of the map. Look on the platform at the edge of this area.
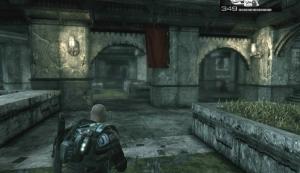
Scorcher Flamethrower: This weapon can found in the area between the two Boltok/Gorgon Pistol spawn points at either end of the map. Look across from the platform where the Torque Bow/Boomshot spawn point is.
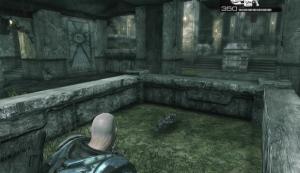
Longshot x2: This weapon occupies two different spawn points on the map. Each rifle can be found up the steps across from either side of the Frag/Ink Grenade spawn at the center of the map. Once up the steps, head straight to the end of the walkway to find the rifle.
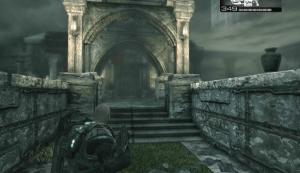
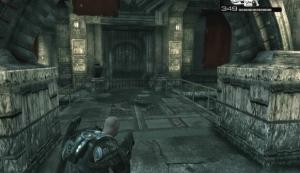
Available Weapons: Boltok Pistol, Gorgon Pistol, Frag Grenades, Ink Grenades, Mortar, Boomshot, Hammer of Dawn, Longshot.
Boltok/Gorgon Pistol x2: These weapons occupy two different spawn points on the map, both near the player spawns. At the top of the steps at each player spawn area, turn left or right (depending on the side of the map you are on), and head through the archway there. Continue straight past the sandbag and look at the bottom of the circular steps to spot one of these weapons.
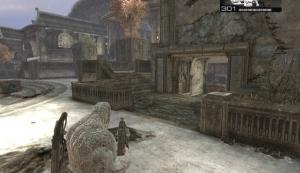
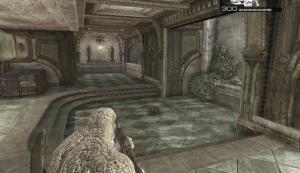
Scorcher Flamethrower/Boomshot: At the top of the steps at each player spawn area, turn left or right (depending on the side of the map you are on), and head through the archway there. Continue straight past the Boltok/Gorgon Pistol Spawn and follow the path here to reach the weapon.
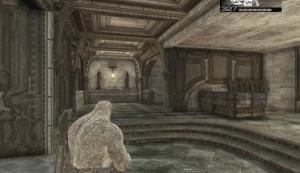
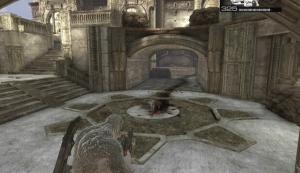
Mortar/Hammer of Dawn: Behind the small, bulbous-roofed structure beyond the steps at each player spawn point.
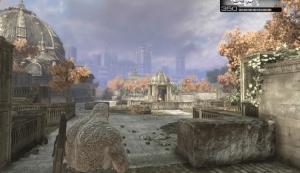

Frag/Ink Grenades: At the bottom of the steps across from the small, bulbous-roofed structure beyond the steps at each player spawn point.

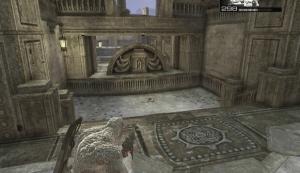
Torque Bow/Longshot: At the top of the steps at each player spawn area, turn left or right (depending on the side of the map you are on), and head through the archway there. Continue straight past the Boltok/Gorgon Pistol Spawn and follow the path here to the Scorcher Flamethrower/Boomshot spawn. Head up the steps behind the weapon, and then to the second set of steps. One of these weapons can be found by the tall statue along the walkway at the top of the steps.
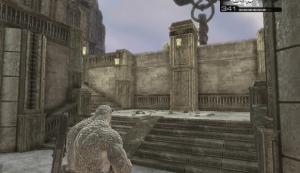
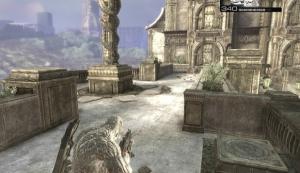
Available Weapons: Boltok Pistol, Mortar, Frag Grenades, Ink Grenades, Mulcher, Boomshot, Torque Bow, Longshot.
Boltok Pistol: By a statue along the trench. If your team spawns by two sets of steps, turn left and head straight to spot the weapon and the statue.
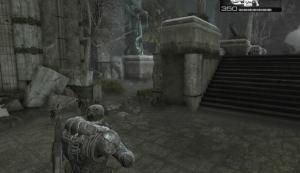
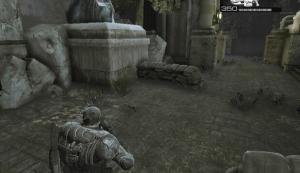
Mortar: Between some sandbags along the trench. If your team spawns by a single set of steps, turn right and head straight to spot the weapon.
Frag/Ink Grenades: By a tree in the middle of the trench. If your team spawns by a single set of steps, turn right and continue heading in this direction until you reach the grenades. If your team spawns by two sets of steps, turn left and continue heading in this direction to reach the grenades.

Mulcher/Boomshot: By the statue between the two walkways on the top level of the map.
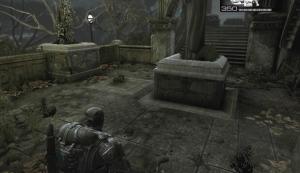
Torque Bow/Longshot: In the building at the center of the map on the mid-level.
Available Weapons: Frag Grenades, Ink Grenades, Boom Shield, Torque Bow, Boomshot, Longshot, Mulcher.
Frag/Ink Grenades x2: Grenades occupy two spawn points on the map. At the bottom of the steps, turn left or right (depending on the side of the map your team spawned on) to spot the grenades on the platform.
Boom Shield: On the center platform, across the tracks from the middle section of the walkways on both sides of the map.
Torque Bow/Boomshot: On the center platform, next to the Boom Shield.
Longshot: In the sandbag enclosure at the end of the center platform.


Mulcher: On the outlook in the middle of the upper walkway. To reach the walkway, head down the steps at the bottom of your team’s spawning area and turn left or right (depending on the side of the map your team spawned on) to spot some steps.
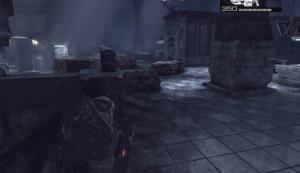
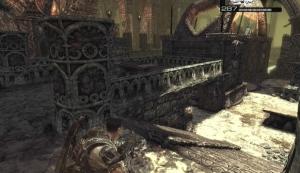
Available Weapons: Boltok Pistol, Gorgon Pistol, Mulcher, Mortar, Scorcher Flamethrower, Boomshot, Frag Grenades, Ink Grenades, Longshot, Torque Bow.
Boltok/Gorgon Pistol x2: These weapons occupy two spawn points on the map. Head up the steps near either player spawn point and look along the walkway to spot one of these weapons.
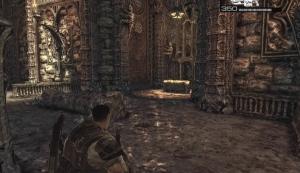
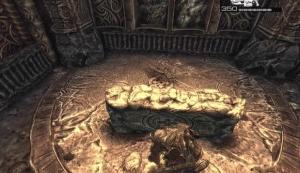


Mulcher/Mortar: Look for one of these weapons behind the low piece of cover along the upper walkway. The piece of cover is across from the two sets of steps that lead down to the area at the center of the map.
Scorcher Flamethrower/Boomshot: Below the bridge between the two sets of steps that lead down to the area at the center of the map.
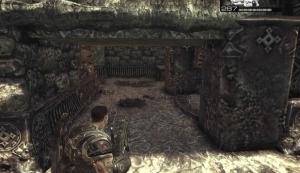
Frag/Ink Grenades: On the floor at the center of the map.
Longshot/Torque Bow x2: This weapon spawns in two different spots on the map. One of these weapons can be found on both of the platforms across from the Frag/Ink Grenades spawn. Both platforms are across from the two sets steps that lead down to this area.
Available Weapons: Frag Grenades, Ink Grenades, Scorcher Flamethrower, Mulcher, Boltok Pistol, Gorgon Pistol, Torque Bow, Longshot.
Frag/Ink Grenades x2: Grenades occupy two different spawn points on the map. They are beyond the archways across from each team spawning area. Once through the square doorways beyond the archway, look for a small alcove (to your left or right, depending on which side of the map your team spawned) to spot the grenades.
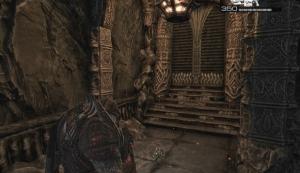
Scorcher Flamethrower/Mulcher: On the platform at the end of the rail line. Head up the steps at the end of the rail line to reach the platform.
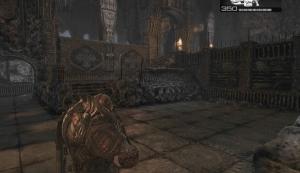
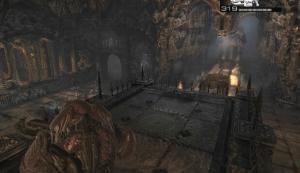
Boltok/Gorgon Pistol x2: One of these weapons will spawn in two different spots on the map. Look in either of the far corners on the upper level at the other end of the map. Head up the steps at the end of the rail line to reach this area.
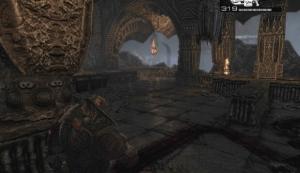
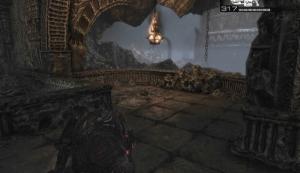
Torque Bow/Longshot x2: These weapons occupy two different spawn points on the map. Head through the archway next to the steps at the other end of the rail line; one of these weapons will be on the ground in this area.
Available Weapons: Boltok Pistol, Gorgon Pistol, Frag Grenades, Ink Grenades, Mulcher, Mortar, Torque Bow, Longshot.
Boltok/Gorgon Pistol x2: Grenades occupy two different spawn points on the map. One batch can be found behind counter in the Auto-Tire Center shop. The other can be found behind the counter in the shop that has a “Dead End” sign above the door.
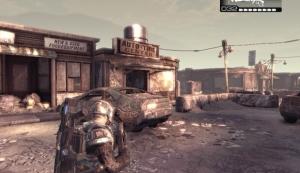
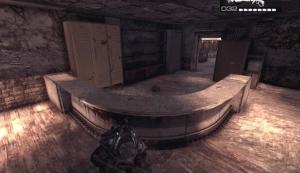
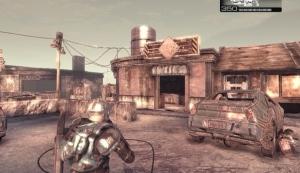
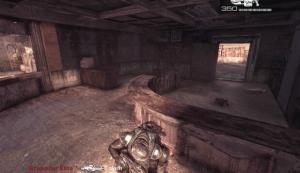
Frag/Ink Grenades: In the middle of the small clearing at the center of the map.
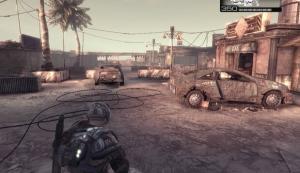
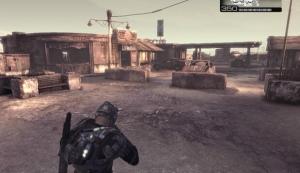
Mulcher/Mortar: On the roof of the Diner along the side of the road, across from the Frag/Ink Grenades spawn. A ramp along the side of the building leads up to the roof.
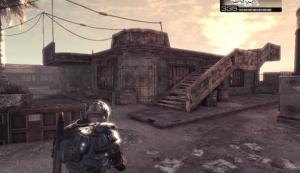
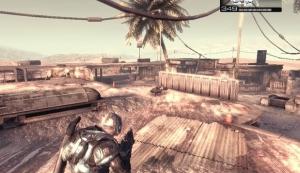
Torque Bow/Longshot: Behind the large, steel structure across from the Diner and Frag/Ink Grenades spawn.
The Snowblind Map Pack is available for purchase on the Xbox Live Marketplace for 800 Microsoft points at this writing, but is also included in the Gears of War 2: All Fronts Collection, which is priced at 1600 Microsoft Points.
Becoming familiar with the layout and weapon locations of each map is important in any competitive shooter. Knowing where you need to go to get your hands on some firepower is not the only benefit of memorizing the weapon spawn points; doing so can also help you pinpoint an enemy’s location. A notification will appear in the bottom-left corner of the screen when an ally or enemy picks up a weapon, so you can determine the whereabouts of an enemy if you know the weapon spawn points well.
The location of every weapon on all four maps included in the download are described in the following sections. Note that some weapons share spawn points, meaning when you find the location, the weapon there could be one or the other, and will change to the other weapon the following round.
Available Weapons: Mortar, Longshot, Boltok Pistol, Gorgon Pistol, Torque Bow, Boomshot.
Boltok/Gorgon Pistol x2: These weapons spawn at two different locations on the map. One of these weapons can be found by the headless statue at the bottom of the steps on either side of the map.
Mortar/Longshot: Across from the gatehouse along the walkway.
Frag/Ink Grenades: In the middle of the tunnel below the walkway. There are two entrances to this tunnel, one near either of the headless statues at the bottom of the steps on both sides of the map (at the Boltok/Gorgon Pistol spawns).
Torque Bow/Boomshot: Near the headless statue and sandbags at the back of the lower level of the map.
Available Weapons: Boltok Pistol, Gorgon Pistol, Frag Grenades, Ink Grenades, Mulcher, Boomshot, Scorcher Flamethrower.
Boltok/Gorgon Pistol x2: At the top of the ramps across from the elevated cabins just beyond the team spawning areas.
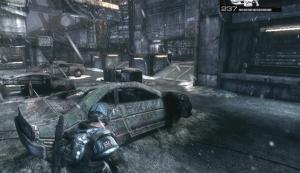
Frag/Ink Grenades: Between the two pieces of cover across from the space below the elevated cabin in the middle of the map.
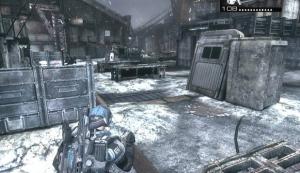
Mulcher/Boomshot: In front of the elevated cabin in the middle of the map. There are a couple of ramps that can be taken up to the cabin.

Scorcher Flamethrower: At the top of the ramp across from the space below the elevated cabin in the middle of the map. The ramp is just beyond the Frag/Ink Grenades spawn.
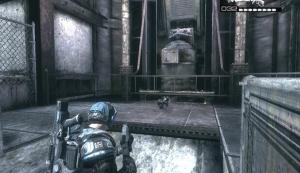
Available Weapons: Boltok Pistol, Gorgon Pistol, Longshot, Torque Bow, Frag Grenades, Ink Grenades, Mortar, Hammer of Dawn.
Frag/Ink Grenades x2: Grenades occupy two different spawn points on the map, both of which are near the team spawning areas. If your team spawns outside, grenades can be found near the gas station up ahead and off to the left. If your team spawns inside of a warehouse, grenades can be found in the space that’s surrounded by the piping on the machinery (turn right upon exiting the warehouse).
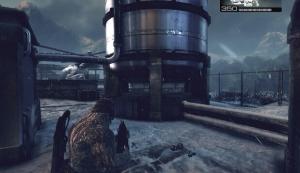
Boltok/Gorgon Pistol x2: These weapons can be found at two different spots on the map. Look for one of these weapons at the top of the ramp by the back door of the depot.

Longshot/Torque Bow x2: There are two of these weapons on the map. Both are inside of the trailers along the sides of the depot.

Mortar/Hammer of Dawn: One of these weapons will spawn inside of the depot, at the center of the floor.

Available Weapons: Frag Grenades, Ink Grenades, Boltok Pistol, Gorgon Pistol, Scorcher Flamethrower, Boom Shield, Longshot, Torque Bow.
Frag/Ink Grenades x2: Grenades occupy two different spots on the map. Look for grenades across from the steps that lead up to the tunnel entrance.
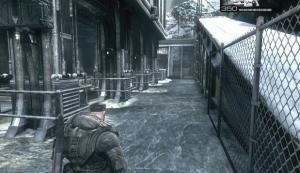
Boltok/Gorgon Pistol x2: A pistol can be found in two different spots on the map. Both are inside of the tunnel, across the street on the walkways alongside the center platform.


Scorcher Flamethrower: Just before the gate at the front of the center platform in the tunnel.
Boom Shield: At the back of the center platform in the tunnel.
Longshot/Torque Bow: In the space between both lanes at the start of the bridge.
Mortar: In front of the car barricade on the bridge.
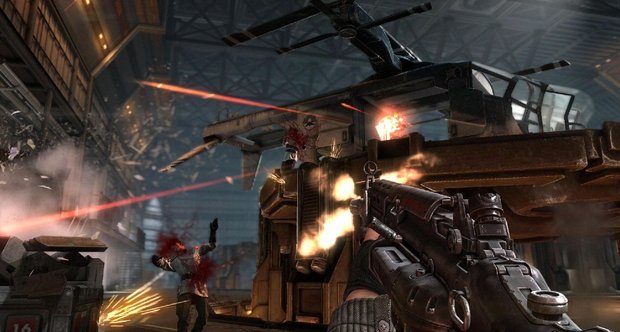


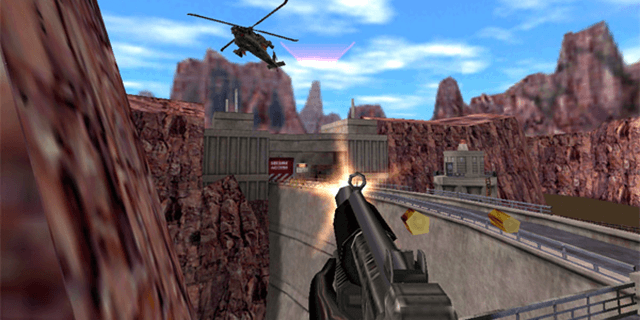 7 Most Useful Video Game Cheats Ever
 Aarklash Legacy Preview
 Fallout 4 - Taboo Tattoos Magazine locations
 Pokémon Omega Ruby (3DS): get every Pokemon you like
 Guide To Affinity Victories In Civilization: Beyond Earth