From the guys behind Black, this spiritual successor aims to add new meaning to the term “gun porn”, which the guys behind Black probably made up themselves. In this FPS murder-a-thon, take control of a former soldier recruited by a secret organization to fight in a series of tiny wars across the globe. The real claim to fame in Bodycount is the destructible environment — blow away every roof, wall, and piece of cover to ferret out your enemies or just enjoy laying waste to everything around you in explosive style. Don’t let the counter pass you by, keep an eye on this Bodycount. Below you’ll find a full walkthrough covering the main campaign. If you’re into the extras, check out Game Front’s achievements, trophies, and cheats. Check back after release for new updates.
Mission 1 – Tesanga City Streets
After you land in a castle tower, head down the stairs until you see a door opening with wooden planks in the way. Shred the wood by pressing R2 and proceed to “Observe the Battlefield”.
You will then be promtped to press L2 to zoom and take out two guards. If you hold L2, you’ll be stationary, but you’ll be able to peek. If you hold L2 about halfway, you can move while zoomed in. In either case take out the two guards up ahead.
Head inside the next tower and turn right to view the battlefield again. The game will tell you to press R1 to toss a grenade at an enemy. After the foe has been dispatched, the game will then tell you that if you double tap R1 you’ll throw an impact grenade that explodes on contact. Try it out on the enemy behind cover up ahead.
After he’s been taken care of, a marker will appear. Head toward the marker, through the building in front of you. Once you trigger the marker, you’ll then be tasked with destroying a comms dish, for which another marker will appear.
As you head out onto the street, make a right, toward enemy fire and past the burning cars. There will be a group of enemies up ahead with one perched on some scaffolding. You can head inside some of the open rooms to flank them, or you can shoot some explosive barrels to thin out the herd. Once you reach the end of the street, take a left.
There’s some choice here as you can take the street on the far left where it says “Road Closed”, use the building for higher ground or head far right, into the alleyway. It’s your choice, so use the structures as you see fit. There should be two enemies in your way, so take them out quickly as you keep heading toward the marker.
All roads should lead to a market area with a fountain in the middle. Take cover as there are another group of enemies up above using the sandbags as cover. Once they have eaten hot lead, proceed into the building with the arched doorways and take the stairs on the right or left.
As you head up, you’ll see the aftermath of all the enemies you killed behind the sandbags, and also, staring right in front of you, is the comm tower. Destroy it with a grenade and wait for your next objective.
When the objective marker appears, head toward an arched doorway on the same floor, where you blew up the comm tower. Make a sharp left from the door way. As you make your way straight through, the hallway turns into a shallow balcony. You’ll soon see an orange/red building up ahead. There will be foes waiting below. Take them out. If you stayed above, the building next to you on your left should have a blown out wall you can enter to access the objective. If you dropped below, follow the marker until you get to your goal.
The building contains a power source, which you’ll need to activate. Once activated, you’ll get a small cut-scene showing where the next power source is, by following an electrical line. Make your way out of the building where you’ll need to fight a larger group of enemies. Once they’re down and out, you can either head toward the road that curves toward the right side or just enter the orange/red building in front you by way of a broken wall that’s on the left side. If you head that way, you should see some rubble up ahead.
Inside the building, find the next power source and activate it. The support link should now be active, so make your way toward the next objective marker. Leave the orange/red building and head into another orange/red colored building that’s adjacent to the one you just occupied. The one you need to enter has white pillars that decorates it’s entrance. Once you find it, follow the stairs up.
When you reach the marker, a pair of blue doors will open showing the goodies inside, namely some C4. Pick it up and head out toward the extraction point marker. If you make a left from the blue doors, you can take out some guards on the balcony, but be careful if you do because some enemies will climb the stairs after you. In any case, head back out the way you came. Once you reach the road, make a right past the yellow building, then make a quick left, where the burning cars were. Take out some enemies as you move forward.
There’s a sign straight ahead, up above, that says “R.K.D. Checkpoint”. Enter the only door that’s open on the left side. Follow the room until it leads outside and into another gunfight. Once that’s finished, head down the street until you see some palm trees. More enemies will come out from inside the gray wall adorned with posters. Take care of them and as you go past the gray wall, some enemies might be left behind so bullets in the head for everyone!
Follow the marker down the small flight of stairs and plant the C4 on the grated door with the lock on it by holding the “Square” button. Get out of the explosion radius and head in when the door has been obliterated. You’ll then get a debrief. This mission is now over.
Achievements
Welcome to Africa – Tutorial
Possible Achievements
Hitman (Get 10 headshots)
Mission 2: Tesanga Republic – Locate the Militia Warlord
Before the mission even begins, you should be notified of the “Bullet Repellent” achievement. This means you get a new ability called Adrenaline where you’ll be invulnerable from gunfire for a short period of time. Notice those circles enemies drop once you kill them? It’s called intel and you need those to fill your bar (O.S.B.) on the bottom left, so you can use these abilities over again. To use this ability press up on the d-pad.
You start off in a tunnel with a weapon’s cache in front of you. Here you can choose weapons in your arsenal, one primary and one secondary. If you change weapons or not, once you’re finished, follow the tunnel toward the exit.
There will be a large amount of enemies in this vicinity and some will run up toward you once you start firing so be ready. Use cover, peek out and move, if you get into trouble. Once they’ve all been killed or thinned out, head toward the marker by following the broken freeway up above.
There are two paths. On the left is a more or less a dirt road and on the right along the wall will be a small shanty town. If you head left, watch out for enemy planted mines. Keep going toward the marker by following the freeway until it triggers your mission to assassinate the target. It should happen when you reach a much more open area. You should also notice a huge copper pipe on your left when it happens.
Keep moving forward. There are a large amount of enemies here, so be careful and take cover, lean from cover, and run away from grenades when you see them. To crouch, press R3 and to run press L3.
As you head toward the marker, by slowly killing the enemy population, shred some walls to get inside buildings and basically use the structures to your advantage. Also, don’t forget about the use of your adrenaline skill.
As you get closer to the objective, more enemies will swarm you. Once you hit a certain point, past the copper pipe buried in the ground if you hugged the right side wall, or if you’re about 30 to 40 yards away from the marker, the Militia Commander Boss will appear, shredding through poor a wall.
To take him out, you can either a) keep firing until he dies, or b) follow the prompt and lay down around 4 to 5 mines using the L1 button. Once the boss enters your minefield, he should be toast. If he’s not, he’s close to it and send him on his way with a spray of bullets. Once he’s defeated, kill the rest of the enemies in the area if you didn’t do so already, and head to the next marker.
Find a way up to where the signal marker is coming from and start shredding a wall for you enter, to reach the objective. When the wall comes down take a look around, and the signal should be on a desk next to a computer monitor. Hold square to scan the objective and the exit marker should appear. Follow the marker. You’re almost done.
It’s probably best to take the high ground, but it’s up to you. If you want the high ground, follow a ramp up to the huge copper pipe that you saw earlier (not the buried one). You should reach a platform with some tires in the middle you can use for cover. You’re now a bullet magnet, but once you think you’ve killed enough enemies head down onto the bridge and look for the marker. Also, toward the right is a path you can take that hugs the wall, which you can use to flank. Either way, more enemies will be on their way. Take care of them.
Once you pass by the wrecked yellow bus follow the dirt road toward the marker, where the blue doors are, and you should be home free.
Possible Achievements
Hot Potato (10 grenade kills)
Mission 3: Tesanga Republic – Investigate Power Signature
Before the mission starts, you’re given a new ability to use in the form of incendiary rounds. To use this ability, press right on the d-pad when you have enough intel in your O.S.B. bar. You’ll also get the achievement “Lighting Their Fire”.
You begin this mission on the side of a cliff. Follow the path past all the rocks. When you reach the end you should see a sign above that says “Blasting Area”. There’s a weapon’s cache here (with a new silenced pistol) as well as an enemy directly in front of you. Take him out, and bring his friends along for the ride when they see what the commotion is all about. They will come in a swarm.
When you reach first objective marker, it will scan the power source and the marker will move once again to the next power source for tracing.
Move straight into the building that says Janux on the front. There will also be a sign that says loading bay underneath it if it’s hard to see. Head inside along the dirt and you’ll see a forklift. To the right of it are a set of stairs, head up. Alternatively, there are stairs to the left as well, that leads you to the marker.
As you head up, you should be now on the second floor. You should see some blue walls. There are another flight of stairs that leads to the top, take those and get ready for some bullets going your way.
Once the enemy is done for, head straight up the stairs into a hole in the wall, make a right and climb some more stairs, where it will now tell you to scan another power source.
When you’re at the top of the stairs, make a right and another right. You’re in a room with a computer and filing cabinets. Head out the door with the sun’s light shining on the ground and head left as you step across a rooftop. The marker should be in front of you, and as you head forward the objective is updated.
More enemies will flood the area, so if you want to, take the set of stairs up ahead and wait until they come up one by one. Once you’re finished using the stairs to your advantage, climb down and head forward toward the building holding the structure up with brown pillars. There will be more enemies lying in wait.
Keep moving straight past the pillars and once they end, make a left and activate the power source. It looks like a fuse box, like the first one you activated. You’ll now get a new objective tasking you to assassinate militia agent.
Follow the marker down the set of stairs and along the way, pop any bad guys you see. You should pass by some buildings and immediately to the right are stairs that lead down. If you go past the chain-link fence, you’ve gone too far.
Head down the stairs, make a left, and follow the wooden ramp as you keep going down. Enemies will pop out, so pump them full of bullets. There are some explosive barrels you can utilize as well.
More stairs await, so head down until you reach a dirt patch. Shoot any bad guys along the way. Watch out for suicide bombers. If you get in trouble, take some cover and don’t forget to use your adrenaline and incendiary abilities.
Continue to follow the way point and head up another set of stairs. Your objective should update and it tells you once again to assassinate militia agent. Once you’re up the stairs, head left into the boss room.
The marker will come closer and when it’s close enough the boss will smash through the wall, ready to take your life, but that’s not about to happen. Use the cover provided for you to maneuver around the boss. Just like the last boss fight, you can shoot the crap out of him, or use your mines to take care of him easily.
Once the boss has been defeated, head to the marker and a door should open, blinding you. The white door ahead leads into an underground bunker. It’s time to head in Alice, down the rabbit hole.
Possible Achievements
Multi-Boom Doom (Kill 3 enemies with one grenade)
Robert Ford Style (Kill 10 enemies from behind)
Boombastic (Kill 10 enemies with explosives)
Mission 4: Tesanga Republic – Gather Intelligence on Hidden Bunker
You begin inside the underground facility that ended the last mission. Head forward inside this shiny new place and the doors outlined in neon red, should open as you get near them. Once you pass three doors, there should be a small room to the right. Head inside.
Once you enter the room, swing right and your objective will get updated telling you to override a security terminal. The switch is behind glass, but you can smash through them with your gun or you can use your knife by pressing circle. Run up to the terminal and your objective should be updated tasking you to explore the facility.
If you turn around and face the wall opposite the terminal, there’s a weapon’s cache you can use to change your weapons if you please. Choose your loadout, and head out the small room. Once you’re out, make a right down the corridor and a door will open like a deck of shuffled cards. Follow the marker. It should be right below the sign that says “A1″. Keep walking as you pass by the “A1″ sign. Up ahead is a another sign that says “01″. Head through the door.
You’ll get mini cut-scene where you see doors closing and a bunch of troops heading down the stairs in room “01″ Get ready for a firefight. Take some cover, because these foes are a bit harder than the ones you’re used to fighting. I’d recommend using grenades and your abilities to thin them out and finally finish them off with gunfire. Once they’re eliminated, head toward the middle of the room, down the stairs and through another corridor.
You’ll hit a room with stairs that wind down. Enemies populate this area, so take them out as you head down. When you reach the bottom, look for the marker and head through the door as you face another corridor. Keep going straight. When you’re down far enough, you’ll see an enemy run across from right to left. Follow him down where you’ll meet two of his friends. Neutralize them.
Keep going straight through the corridor, keeping the marker in mind. When you enter the next room, past the room where you killed the last group, cover pops up at a right angle to the wall. Use it to block the enemy fire coming from two enemies on the balcony above, and one on your level. Once that’s done, keep going straight, up the stairs and past the opened, red-outlined door. The room ahead will contain some enemies to dispatch.
From the room’s entrance, head right and follow the marker to pick up some gel charges. Head back out where you came from and head straight following the marker. Head down the set of stairs you came out from before, and there will be a group of enemies waiting for you.
Once they’re down for the count, follow the corridor down until you reach the marker. When you reach the marker, your objective will update telling you to destroy a reinforced door. Quickly turn left and you should see the door up ahead with an “X” and panel in the middle. Plant the bomb and clear the blast radius.
When the door gets decimated, your objective will update and will tell you to scan weapons crates. Head in the room, and jump off the glass railing. The weapons crates are below. Once you find it, scan it and a cut-scene will appear with a door opening and some troops pouring out. Some troops will nest upstairs. Also, there are some boxes you can use, that show up during the cut-scene, to blow up. Utilize all your weapons and abilities to take out these foes.
When most of the foes are taken out, head up the stairs near the wall that says “45″. When you make it up, swing left into the room, and your objective tells you to escape the bunker. Once you enter the room, look to your left and enter a dark narrow hallway with a neon red line on the floor. Follow that corridor out and head straight for the marker. Once you reach the marker, the door will open and you’re out of the rabbit hole.
Mission 5: Tesanga City – Contact Major of Local Platoon
You’re back in the same area where you started your tutorial mission, only you begin at a different insertion point. But before you can get to the Major you need to secure the Network Support Point or NSP, by defusing bombs that are spread across the orange/red building where you first got your slab of C4.
On the ground, follow the street forward, past the rubble. You should see an archway over the street on the left and an entrance to a building on your right. You can take either way. The street that curves right let’s you face a group of enemies and the building lets you take cover from the outside gunfire. It also has a weapons cache with a new weapon called a Tavor. It uses a 3-shot burst. Take whatever path you feel more comfortable with and head toward the marker.
When you get close to the marker, you should see the familiar orange/red building you entered in the first mission, decorated with white pillars at the entrance. There will also be an enemy that walks up to the balcony on the top floor, which you can take out. When you get close enough your contact will tell you that the militia has rigged the building to blow. It’s up to you to defuse the explosives.
The first explosive is actually on the wall behind the pillars near the entrance. It’s attached in front of a wall of posters. When you defuse the bomb, it will take some time, and as this happens, enemies will try to swarm you. Defend this area until the defuse meter fills up.
The next explosive is around the corner from the first explosive. Face the street and you should see a yellow building. Head toward the yellow building and make a right on the street. The bomb should be attached to the side of the orange/red building. When you get close, it should say explosives. Once you start defusing, just like the last explosive, a meter will appear until the bomb is defused and a wave of enemies will come at you where the palm trees are. If you leave the vicinity of the bomb, the meter will stop, but will start again where it last left off when you enter it’s radius.
To find the final explosive, orient yourself from the second explosive. Face the street where the burning cars are, and make a right on the street as you turn the corner of the orange/red building. Follow the marker and you should see the explosive. Disarm them and get ready for another firefight. There’s a lot of cover here, so use it to your advantage. Once the bomb threat is over, the marker will move, so head toward the building made of bricks.
When you reach it you realize you can’t enter that way by shredding through the planks. Instead you need to go around. Turn left where the wood planks are and run straight into the door way where you’ll see a “Keep Clear” sign on the top right. Go inside the building past the stairs on the right hand side. Turn slight right until you see another door past the cash register.
When you enter the next room, all the doors and the parts of the floor are blue. Go straight and turn right down the stairs. Turn right again, down another set of stairs. When you reach the bottom as you make it outside, there are two palm trees. Past those trees is an arched doorway. Head through there to the other side. Make a right and climb the stairs, then make another right climbing over rubble. Turn right again and the bridge should be upon you. The marker will be dead ahead.
When you get close a cut-scene will trigger and a new objective is tasked. You need to now kill the Major. If you equipped the Tavor, the Major should be easy to pick off, if you equipped other weapons it might be a little harder. In any case when you get close enough, snipers and militia will appear, so you’ll need to take care of them. I recommend standing behind the dumpster on the left hand side. Once they’re done, head to the extraction point.
Head toward the tower. Enter the tower and make a left. Stay on the right hand side where the canons are and there are a set of stairs leading down. Head down to end the mission.
Possible Achievements
Stealing is Wrong Kids (kill 10 scavengers)
Mission 6: Tesanga Republic – Assassinate the General
You get a new ability this round called the Pulse Wave, which highlights enemies allowing you to identify them once they are close enough, which is helpful if they are hidden. You can use this new ability by pressing left on the d-pad. When you start you also get the achievement “Finger on the Pulse”.
You start on the port. Head straight past the cargo containers, hang a right and up the ramp. There’s a tower you can blow up and once you do, some enemies will start firing upon you. Once they’re finished, head toward the tower and next to the tower are a set of stairs leading up on the right. Climb up and you’ll see a weapons cache.
If you went to the weapons cache, head back down to where the tower is. There is a wooden bridge that hovers over the metal port doors below. Cross it, then make a right past a second tower. Go straight as you pass by all the buildings to the objective. Alternatively, there are set of stairs that go down to the littered sandy goodness below. As you make your way across the cargo containers, boxes and ships, you should see a boat above, held up in mid-air by a harness. Go up the ramp to the objective.
When you get close to the marker, you’ll be notified of scavengers present in the building where the marker is. When you get close enough the marker will shift leaving you to take care of the enemies inside.
Once they are laid to waste, head toward the new marker. Near the building where you took out the scavengers, there is a green truck. Near that green truck is an open gate. Go through the gate toward the marker. As you enter the gate, there will be some fighting up ahead, scavengers versus militia. Take them all out.
Head toward the building with the two smoke stacks and run up to the big metal doors. After a cut-scene, you need to figure out a way to blow them open, and to do that, you’ll need to hack a SAM site that’s across the way. Make your way toward the marker past the bridge above and turn slight left, then follow the road.
The marker will take you to a green jeep parked under a bridge. The marker will then shift to your left as enemies start swarming in. Kill them all and follow the road that’s at a 90 degree angle from the green truck. Follow that road past another green truck and you should see a crane on top of a building up ahead. Enter that building using the staircase and take some shots from the roof. You should be able to see the SAM from here.
When you feel the coast is clear, jump down the building toward the SAM site and enter the building where the SAM is housed. Head up toward the second floor using the stairs that are attached to the side of the building. Go past the yellow grates and turn slight left to a door that leads outside. From there swing right, past the blue door, and head up more stairs.
When you hit the top of the stairs turn right and start hacking the SAM using it’s red panel. Hold square to hack the site and the missiles will blow up the metal door. It’s now time to assault the warehouse. Make your way to where the doors were blown up, but as this happens, enemies will be converging on your position. Cut a swath through them on your way to the next marker.
When you reach the next marker, enemies will be running from left to right, so it’s prime time to get some back-stab kills. You’ll also get a notification to kill General Okoro.
When you enter the building with the smoke stacks, General Okoro will flee. You’ll need to chase him down. When this happens snipers will also appear along with more troops. Once you kill General Okoro, you’ll need to find the encryption key. It’s upstairs in the warehouse on a desk with filing cabinets and two computer monitors. Pick it up and proceed to the extraction point.
Go downstairs from the warehouse through the blown up doors via SAM site, and make a left around the building. Run through two markers as it heads up the road and you’re out of there.
The start of this mission equips you with the WMD airstrike, which you can use by pressing down on the d-pad. You also get the achievement, “Planes and Flames”.
You begin this mission with a weapons cache right in front of you as well as a handful of enemies. Take them out if you wish, but to the right of where you spawned, near the weapons cache, is a hole in the wall that you’ll need to enter. Climb up over the barrel and box and head up the stairs. Once you reach the top of the stairs, find the door that leads out and immediately look to your right. On top of the copper pipe is where you need to go.
Follow the path of the copper pipe. When you reach the top you should see a pile of tires. Remember this area? It’s from mission 2. Now orient yourself toward the marker. You can drop down if you like, but there will also be some enemies that will flank you (the ones you may have missed, by taking this shortcut). Regardless, you’ll need to take everyone out. As you keep following the marker, there will be two towers ahead hugging the wall toward the right. Take them out with gunfire by shooting the conveniently placed barrels, and blow the bad guys to smithereens.
When the coast is clear follow the road, past the wrecked yellow bus, and enter the door way on the right with the “Health Centre” in full view. There will be enemies in the windows firing on you, so answer back with your own hail of bullets. Once the gunfire has settled down, make your way through the building on the other side, taking out any stragglers along the way.
When you reach the end, a cut-scene will trigger featuring the Nexus tower as it rises up from the ground. Head to the marker toward the double doors and you’ll see a cinematic.
When the cinematic ends, it’s boss fight time. Your bullets won’t have much effect on the boss, but your contact says that you’ll need to destroy 3 comms towers to help out on the matter. You can’t destroy the towers with your grenades or bullets, you’ll need to use your WMD Airstrike. To do this, when you shoot the boss, she drops intel. Grab it when it drops or else she’ll take it for herself. Enemies will also periodically drop in when the boss isn’t around. Kill them to take their intel as well. The boss however, gives the most intel. You need to keep doing this to fill up your O.S.B. bar so you can use your WMD Airstrike 3 times.
Once you’ve WMDed all 3 comms towers, immediately run for the marker and you’ll get a nice little cut-scene. You’ll also get the achievement “A Very Bad Feeling”. You bastard!
Mission 8: Tesanga Republic – Destroy the Target’s African Operation
You’re now inside the Nexus Tower that follows the same decorative properties as the hidden bunker you investigated in Mission 4. Head down the corridor, past the red highlighted doors toward the lit up sign that says A4. Once you reach A4, you also reach a T intersection. Head left where the marker is located.
Follow the marker down the hallway toward a door. It’s locked. Your way point then shifts. Turn right and follow the new heading. Keep going straight past the shiny corridors, until you reach some stairs. Go up the stairs and head into the door with the red, neon edges. When you enter the room, head right, as you admire the glass, and press the button to bypass the security door. Leave the way you came.
As you leave, the alarm will trigger and before you head back down the steps, two walls will explode with troops emerging from them as they try to stop you. Tell them no. Once they’re dead, climb down the stairs, into the corridor. As you move forward, two troops will ambush you. Let them know who is boss, then make a right through the white pillars.
You’ll be led into a room with a winding staircase that goes down. As you twist your way to the bottom, take care of any enemies along the path. As you reach the bottom, your objective will update requiring you to locate the data center. Enter the next room when you reach the bottom.
In the room, four enemies will be waiting for you. You can pick them off one by one behind the doorway. When they’re not moving, get a move on to the next marker. When you run past the red terminal on your right, 2 enemies positioned above will fire on you. Take cover and shoot out their own cover. Keep moving forward and take cover where it says “HC3″. Snipers and more troops will enter the area.
A little before the wall that says “HC3″ is an opening that leads upstairs. Head up and surprise your enemies. You can take the next set of stairs going up to get the high ground, but watch out for flanking maneuvers. You’ll soon get an objective to take out 6 troopers.
From the first flight of stairs you went up, accessed from the little door before “HC3″, go down the stairs where it says “40″ in bright lights directly above. Head down and turn right. Most of the troops should be there. If they are not, some of them got split up. Once you find all of them, it’s off to find the Data Center again.
Follow the marker. If you get lost, remember where it said “HC3″? Keep following the corridor down where it says “HC2″, “HC1″, then “HC0″. When you run past “HC0″, turn right and walk into a narrow hallway with a neon, turquoise line on the floor. Follow the passage way into the Data Center.
It’s time to upload a worm, so from the door way, head left and move along the path of the railings in a U shape. There are three enemies here to contend with along with 4 more that appear once you enter the terminal room. Once your obstacles are dead, upload the worm.
Once it’s uploaded, the alarm sounds and you have one minute to high tail it out of there. If you look at the terminal and face left, there are a set of stairs that lead down. Follow the path all the way to the bottom and kill any enemies that get in the way. Most you can run past or will get blown up.
When you get to the bottom, keep an eye on the marker. Head left through the blown up wall, and run for the exit. If you left immediately after the countdown and bypassed enemies along the way, you should be good to go.
Possible Achievements
Nowhere to Hide (kill 10 enemies through cover)
Mission 9: Escape Africa
At the outset of the mission, you get an upgrade to your adrenaline ability, which means you
can withstand more damage from bullets.
The mission begins with an explosion. You can now head out through the wall and enter a room where the second boss fight took place. Move forward toward the blue pipe and head left. Make a right through the door and head down the stairs. You’ll see some enemies fleeing as well as taking shots at you. Finish off those annoying little bugs.
From the bottom of the stairs keep straight ahead. Turn slight right past the forklift (there is a weapons cache near the forklift with a new gun, the Kaluka) and up the stairs hugging the right side wall. As you head up the stairs, you’ll be notified to destroy SAM sites. Keep following the stairs up. You’ll hit a ramp and when you hit the top, ignore the stairs to the right and keep going straight heading down the stairs in front of you.
Follow the stairs down until you reach a dirt road and head right past the gate. Keep going straight as the yellow and blue pipe pass above you. You’ll then get a notification of where the first SAM site is. Follow the marker.
Head slight left toward the door with a street light fixed on green above. Run through the building past the forklift and when you reach the huge opening, the SAM site should be on your left hand side. There are ton of enemies here. If you get in trouble don’t forget to use your upgraded adrenaline ability. You’ll need to take down all the troops surrounding the SAM site.
When they’re all eating dirt, head toward the SAM site and press square when you’re near it’s red panel to plant a charge. Get out of the way. The next marker should appear and it shows up behind you. Head toward the Janux building and take the stairs on the left.
Enter the first doorway you see on the left, then head straight. Make a right at the next door way and run toward the far railing up ahead where you can see the red light shooting up into the sky. Make a right and head up the stairs into the room and take another set of stairs up on the right next to the sign saying “Workers”. When you reach the top, make a right and head out to the door that leads outside. Swing left and walk across the rooftop.
Enemies are swarming here, and there’s one with a gatling gun. Take them out, head straight onto the dirt path and head right past the pillars holding up one of the buildings. You should be notified that you’re near the SAM site. Go straight, past the pillars on your left and take care of the sniper in the distance as well as some assault troops.
Once they’re dead, run to the SAM site and plant a charge. Once it’s gone, it’s time to head to higher ground. Near the blown up SAM site are a set of stairs that lead up. It’s to your right if you were facing the red panel. Go there. When you reach the entrance to the building, turn right and up the stairs. When you reach the next floor, stay on this floor, and look for the marker and head out of the doorway. You’re then tasked to assault the crane. Troopers will then start spewing out. Kill them all.
When you exit the doorway, take the small set of stairs down on the left. If you look up, you can see the crane. From the stairs, turn left and follow the dirt road as it wraps around the crane. Eventually, as you turn right, you’ll see some stairs that lead up to the crane. Follow the stairs and you’ll get an objective that says to defend the crane arm. Follow the stairs up until you can actually walk on the crane itself. When you reach the marker, you’ll need to defend the crane for a minute and a half before your rescue arrives.
Your best bet to survive is to head toward the end of the crane and shoot at any enemies heading for you. Since it’s pretty much a narrow hallway, you shouldn’t have any problem surviving this stand off. When the time is up, jump off the crane where the marker tells you to and enjoy the cut-scene.
Achievements
Wind of Change (achieve all objectives in Africa)
Mission 10: Asia – Investigate Connection with the Target
At the beginning of this mission, your incendiary ammo is upgraded to version 2.
You start off in the rain on a road paved with cobblestone. Follow the road down until you reach some stairs heading down on the left. Once you head down, head straight along the wooden platforms crossing three boats. There should be a bridge to the left. Cross it. It should lead you past an archway.
After the archway, the road turns right. Look for two red glowing lanterns and go there, in-between the building. You should be in a small alley way with a dumpster and two more glowing red lanterns. Turn right around the house and you should see a weapons cache. Choose your loadout. An objective should now appear.
Opposite of the weapons cache, follow the marker past the cart and the fence, and head onto the street. Head straight onto the street passing by the building to your left. Up ahead you should see another cart and on the right hand side, a spot light is shining directing you toward the opening in the wall. When you enter, turn left and into another opening that leads into an alley.
Head toward the entrance on the left with the light highlighting where to go. When you enter the room immediately turn right toward the objective. There are enemies roaming around, so take them out. When it’s clear, go to the computer and hack it. Once you hack it, you need to defend it against a swarm of troops. Take them out when they come in and watch out for the heavy unit. Plant some mines for him just in case. When the dust settles, plant C4 on the computer.
After it’s been blown up, head into the adjacent room with the red hue. There’s a door leading out to the next marker. You can also use the second floor to your advantage and take out enemies from there. When you head from the bottom floor or the balcony, expect some gunfire and take out the enemies accordingly.
Head out of the building and you’ll pass a white sign up above that says “ask”. Go past that and notice the green dragon decorations on two buildings up ahead? Move in-between the two buildings with the dragon decorations and keep straight onto the bridge.
When you reach the bridge your objective updates and tells you take out the target. He’ll be on the balcony above. Either shoot him or take him out with one grenade. You’ll then have to chase down scavengers that have stolen the intel.
Move forward past the bridge passing by a green car on the right. Up ahead should be a spotlight. Head toward it and follow the road down. Also, when there is no objective marker, check your mini-map and look for a pulsing hexagon. That’s where you should head to next.
Keep following the road and as you get closer to the hexagon, enter the room with the red outlined door with three vendor stands right outside. Head inside that building and you’ll be warned of mines. Follow the next hexagon. Exit the building by leaving through the opposite door, and immediately enter the gray building on the right. A scavenger should be there, but he’s not the one carrying the intel.
Use your radar to locate the next scavenger. Exit the building where you entered when you killed the scavenger, then head right along the road. When you reach a T intersection turn right down the road, then immediately head left past the dragon statues. You should see some stairs heading up. Follow those stairs.
When you get to the top, a boss fight will ensue. Use your mines, abilities, guns and grenades to kill this foe. Incendiary ammo helps a lot. You’ll also be notified that it’s not the scavenger you’re looking for. It’s time to follow the radar once again and head down the stairs, only this time, enemies are lying in wait. Take them all down.
As you make your way down, make a slight left past the open temple in the courtyard and go down the small set of stairs. Then move slightly right past the dragon statue and onto the street. You’re heading the right way if you can see the blinking neon sign in the distance.
When you see the green three wheeled vehicle, turn left, then use the bridge to get across. Enemies will ambush you, so back up, take some cover, and take them out as they come. When they’re all dead, continue across the bridge and make a left on the first street you see. A bridge should be up ahead. Cross the bridge and when you’re about half way on it, a group of enemies will appear. Take them out. One of them should be a possible scavenger with the intel. Unfortunately, he’s not.
Turn around the way you came and make a left on the first street after the bridge. Run down the street and hang a right where the light hits the wall opening. You’ve been here before. When you reach the entrance, head left, back into the building where you hacked the computer. Take care of a few baddies and head upstairs all the way to the top floor. Your last scavenger should be there. Take out the snipers on the rooftops in the distance to make things easier. Get the intel and head toward the exit.
Exit the building toward the marker and run past the metal fence. Follow the street hugging the buildings on the left. The street turns left past the boxes. Head toward the gate and you’re home free.
Mission 11: East Asia – Find Target Bunker Entrance
You begin the mission on a rain soaked dock with a weapons cache directly in front of you. Switch your weapons now if you so choose. When you’re finished deciding, make your way off the dock by heading toward the neon signs.
When you reach the Pink Pearl Oyster Bar, there will be two enemies near the front entrance. Take them out if you wish, but if you do, more enemies will come to their aid. When you’re done, turn right past the bar, then immediately turn left, past the building with the neon lady on top of the roof, on the right.
Follow the path down. You should see vendor tables and neon signs above, to your left and right. Keep going forward until you pass the buildings. A wooden fence should be in front you. Turn right and make your way to the marker. There’s a bridge up ahead with a spotlight shining down from the top left. Move along the bridge.
When you reach the end of the bridge, some enemies will be in the vicinity. The first one will have his back turned away from you. If you have a silenced weapon, shoot him in the head. If you don’t, get ready for a firefight. Once they’re gone, there’s a small path to the left, right after the bridge you just crossed. Follow that path and the marker shifts.
Turn right from the building on your left and you should see a red lantern in the distance. Head toward that and swing left past the blue barrels. Directly in front of you is a ramp with a spotlight hitting it. Cross that ramp.
Make your way across the dock and turn slightly left. There’s another spotlight up ahead. But before you run to it, there will be two snipers in the distance. Take them out then march yourself down the ramp toward the marker.
When you reach the marker, keep heading straight with the water positioned on your right side. There should also be two red lanterns in front of you. Move forward toward the lanterns.
Hang a slight left and you should see a garbage pile with flies buzzing around. Run left past the garbage and toward the way point. Up ahead you should see a spotlight near the way point marker. Run past the spotlight toward the marker on the right. Your objective will update telling you activate the terminal. Enter the building with the spotlight attached to it and activate the terminal.
Once the terminal is activated, a new way point will appear and a group of enemies will ambush you, including one with a gatling gun. Once they’re not breathing anymore, collect all that lovely intel and follow the marker and move forward along the wooden platforms. As you move forward more enemies will be on the rooftops trying to take you down. Let them know who is boss. Once you pass another garbage pile, you’ll be closer to the next terminal.
When you get close to the marker, there will be a wooden ramp you’ll need to climb onto a barge. Enemies will be lying in wait, so take them out accordingly. Once that’s over, climb the ramp if you haven’t already, and to your right is another ramp you’ll need to climb.
Move along the rooftops toward the marker. There will be ramps connecting each rooftop, but the problem is a small army has amassed and their guns are all pointing at you. Get ready for snipers and a lot of ground troops. Be careful, use your abilities and since you’re on the rooftops, take advantage of the limited cover provided for you.
Follow the ramps across the rooftops until you get to the marker and take out anyone stupid to be alive along the way. The final ramp leads you to the rooftop of the building housing the terminal. You’ll need to jump down, but watch out for mines. There’s also a lone gunman inside so take care of him.
When you activate the terminal, a new marker appears. Face the marker and exit the building on the right side. There are ramps that lead to more rooftops. Follow the rooftops until you reach a stone wall. Drop down and make a right, then make a left. Move forward a bit and on your left are set of tall stairs leading up. Give your legs a workout and give them a climb. When you reach the top of the stairs, enter the building in front of you. A cut-scene will occur.
When the cut-scene is over, get ready for a fight. It’s another ambush. During the fight, you’ll be poisoned and you’ll get a shock every few seconds or so. I would recommend heading outside of the building just so the enemies will come to you so you can pick them off easily. When they’re dead, enter the building, if you’re not already in it, and follow the marker to a basement downstairs. You should see a stone archway leading down.
When you reach the bottom, move straight ahead and shred through the wall directly in front of you. Move inside and immediately to your left, is a terminal. Activate it and the doors will open. 3 guards will be waiting. Take them out, head for the door, and it’s mission over.
Possible Achievements
Leg Frag (Kill 10 enemies with mines)
Last Breath Death (Kill 10 enemies while low on health)
Mission 12: East Asia – Deactivate Termination Chip
It’s another romp through these shiny bunkers to find a medical bay. When you’re ready, run straight past the red, neon-lit doors and into the black door. It will open like a shuffled deck of cards. Hang a right and head into the transport, then activate it. Keep in mind you’re still poisoned, so you’ll suffer shocks from time to time.
When the door opens, run straight for the weapons cache located below the sign that says “01″, and head left through the foreboding corridor. When you reach the end of the hallway, you’ll enter a room which is labeled “01″ that looks like it came straight from the movie, TRON. There will be enemies up above on the balcony, so take them and keep in mind your shocks.
Once they’ve been dispatched, run straight to the door directly below the “01″ sign and collect some much needed intel. The room you enter will be white and a door on the right will open up. Enter the next room labeled “04″. Quickly head to the way point and the marker will shift to where the door lock panel is. More enemies will appear. Take them out and follow the marker to the door lock. Push the button and head back out the way you came toward the white room, with a newly opened door.
Enter the unlocked room and follow the path that leads straight toward the glass cube housing the door lock. But before that happens 5 enemies will try to stop you, but you won’t let that happen. When all 5 are killed you’re able to access the next door lock. Run back to the white room again and enter the last room to unlock. Run straight into the next door to enter the MedBay.
Follow the path toward the marker and access the body scanner. Once you’re done being scanned, head toward the marker to exit the MedBay. As you move out, 6 enemies will run through the door. A well placed impact grenade should take them out in one hit. Exit the MedBay and hang a left.
Down the hall you should see some stairs in the distance. Before you climb them, more enemies will appear so you’ll need to shut them up. When you make it up the stairs turn left and up another flight of stairs with a huge door ahead. Unfortunately the door won’t open so head back down, turn left, and down another corridor with some stairs in the distance.
When you reach the top, blaze a path to the marker where you’ll need to access a door lock. More troops will appear, but these troops are bit different since they glow red. In any case, make them bleed red and hit the panel. After that’s done, follow the next marker to your assassination target across the room. Remove him from existence, then enter the room behind him to take the encryption key. Now it’s time to get the hell out of there.
Head back out the way you came, down the stairs, and through the door. Once you pass the door, hang a right and up stairs to the previously inaccessible door. Follow the marker past the bridge and across the walkways, taking care to remove any enemies as you continue. When they’re all dead, run to the marker past the exit door and down the stairs. You’re now tasked to obtain a mission ledger.
Move straight ahead from the bottom of the stairs until the hallway forces you left. The marker should be directly in front of you. Run toward it. A bunch of enemies will try to take you down here, so be careful. As you run through this hallway, there are rooms you can enter on the side for a brief respite from the gunfire. After sending the troops away, exit the hallway and enter the next room.
The way point is downstairs, so make your way to it, to access the data terminal. Once it’s activated, you’ll need to hold off the incoming troops as the database is accessed. If you have any mines, plant them on the balconies above to take care of the first wave. The later enemies will take more hits, so I’d find a nice spot to camp. Once that’s done, head to the middle of the room and run down the stairs.
Then just run straight ahead until you reach the exit to finish the mission.
Mission 13: East Asia – Locate Target Nexus
At the start of the mission you get an upgrade to your WMD Airstrike.
You begin the mission near some railroad tracks in the bright afternoon sky. Follow the train tracks down toward the marker. As you move forward, watch out for mines and you’ll notice the huge industrial building with a star on it.
As you move down the tracks toward the building, you’ll pass some train cars on the right and face some enemies. Nothing a few bullets can’t handle. Follow the marker into the building. You’ll now be inside the train depot with a handful of bad guys on the catwalks and some on ground level. Shoot them dead and follow the marker through the depot. When you reach the marker, head through the red doors that lead outside.
As you head out, you’ll get a notification to eliminate all resistance in the area. There are a total of 12 enemies you need to eliminate and some of them include snipers as well as medics that heal fallen foes. Hunt them down and make them pay. Use cover and if you can, try to take out the snipers first and kill anyone stupid enough to try and kill you at medium to close range. Take your time and think about when it’s safe to move up because after you kill around 6 enemies you’ll need move forward to kill the rest.
When all 12 enemies are eliminated you’ll then have to contend with two gatling gun bad guys. This can really be a tough fight, but use your explosive rounds when you can, and gather up intel from fallen enemies so you can keep using them. If you have mines and grenades, use them up. When they’re eating dirt, run to the marker to exit the location and kill any remaining bad guys along the way or if there aren’t too many left, make a run for it.
When you reach the way point, walk through the broken fence and turn left as you see another set of red doors. There will be enemies in the distance so try to take them out before they get any closer. As you move your way forward you’ll get a nice view of the Nexus Tower. Keep moving straight. There will be a cluster of enemies near the entrance to the tower. Take them out from a distance if you can. There are plenty of spots where you can gain a height advantage.
When all enemies are dead, run through the tunnel as you look at the entrance to the Nexus Tower. Head toward the doors and it’s the end of the mission.
Mission 14: East Asia – Retrieve Datacore
As the mission begins you’re given an upgrade to your pulse wave. The ability will now resonate a high frequency e-signal which will terminate anyone with a chip inside them. It will deplete your entire O.S.B. bar.
Welcome to the inside of a Nexus Tower. Move straight ahead past a hallway of neon, red outlined doors and before you reach the black door, turn right into the room. Turn right again toward the marker and use the panel to deactivate the security. Head back out the way you came and enter the previously inaccessible door. As you leave the room there’s a weapons cache if you would like to change your weapons.
Enter the next room and it leads into a short hallway labeled “A1″. Follow the hallway down to the right and the next room ahead will have two enemies. Take care of them anyway you wish, then enter the room where their bodies are lying. You’ll see a set of stairs. Follow them down.
When you reach the bottom, enter the door that leads into a hallway that turns right. Cover will pop up for you and enemies will be waiting down the hall. Dispose of them, then continue down the hall as it swings left. When you reach a certain spot, the tower goes into self destruct mode with the walls now bathed in a red hue.
Enter the room that leads out of the hallway and you should see some red electricity coming from the power stations. Find the stairs and head down, while facing the marker. There’s an opening that leads into a room with orange, dangerous looking pillars. Run past them to the marker and hit the switch on the panel. You’ll get a cut-scene.
From the panel, head right into the newly opened door where some bad guys will want to put the hurt on you. Don’t let them. Enter the door, and follow the marker to the room ahead with more orange cylinders. Run up to the panel, activate it and take some cover. A big group of enemies will be firing on your from your level and the balcony above. Take them out and move toward the marker once again. If you’re still standing near the panel, the marker is directly in front of you.
Keep moving toward the marker and you should once again enter a room with orange cylinders. There are enemies here as well, so you’ll need to remove them to make your life easier. If you would like you can take the stairs up and overlook the room with the orange cylinders. In any case, once no one is moving, hit the switch on the panel.
Enemies will then pour of the door on your right along with some taking positions up above. Take some cover, and when you’re done, head out toward the door where the enemies came from. Follow the marker and move into the next room with a group of orange cylinders. As you would expect enemies are guarding it, so let them know there won’t be any need to guard it, using your guns as an example. Use the panel and you’ve successfully prevented self destruction. A new marker will appear.
Head straight into the room directly in front of you, passing the orange cylinders along the way and take the stairs up to the hallway where the marker is facing. Two enemies will appear. Make them disappear. Enter the hallway and follow it until you reach a set of stairs that go down. An enemy will be waiting. Make a left down another set of stairs, then head right when you reach the bottom. You’ll be entering a huge hallway full of bad guys. They’ll be gunning for you so use your skills.
Leave the huge hallway and keep moving forward until you reach a smaller hallway. As you turn right, pairs of pillars will raise up from the ground and more enemies will start charging at at you. Kill them. Keep following the corridor where two more baddies await you. When you reach the big room, a cut-scene will commence along with a bit of narrative.
When it’s finished, you’ll need to fight three waves of enemies inside the room to advance, with the last group consisting of heavy troops with energy based weapons. I’d recommend to get some distance between you and the enemies, by running around, so you can pick them off one at a time. With the heavy troops use the same strategy. They take a lot of bullets.
When it’s over, run through the opened door and follow the corridor into another room where you’ll to take out some enemies. Use the doorway for cover and once you enter the room, immediately turn left and down the stairs. More enemies will be here as well. Once they’re down for the count, forever, access the terminal to “Deactivate Target Island Defense Links”. It’s time to exit.
Turn around from the panel and take the stairs on the left. When you reach the top of the stairs, head left and it will lead you right to the exit.
Achievements
Wishing This was Vegas (Achieve all objectives in Asia)
Mission 15: East Asia – Assault Target Weapons Facility
You start the mission in a tunnel. Head out and make a left and start walking down the cat-walks toward the objective to the sand below. Before you hit the marker however, there’s a weapons cache ready for you. When you do reach the marker head up the ramp and straight ahead is the next marker where part of the ship’s hull is still being constructed. Head there where there will be enemies.
When they’re gone, as you head across the belly of the ship you should notice the next ship ahead labeled 73. When you head out toward the marker however, there will be snipers in the vicinity too, so take them out. Make your way to ship 73 by moving past the cargo containers littered about. You’ll need to enter one to get inside the entrance.
Once you’re inside, take care of the enemy population first, then immediately head left up the stairs, turn right on the cat-walk, then left along the cat-walk to another set of stairs that lead all the way down. When you reach ground level, maneuver your way to the next way point.
When you enter the room, you’ll notice the rotating ship part, up above. There will also be 3 enemies which you’ll need to take care of. When that’s finished, run across the room to the next way point. You’ll need to corkscrew your way through the hallways to get to the marker. There are a set of stairs leading up to get to it, once you’re past the narrow corridor.
When you reach the top a lone gunman will be there. Once that’s over, head straight into the door he was blocking. Follow the hallway toward the next way point. It should lead outside with more enemies to deal with. When the bullets have stopped flying, keep heading straight and you’ll see a huge tower up ahead. Use this door for cover and as a height advantage to take out any enemies on the ground, which there will be a lot of.
When the coast is clear, head down to ground level following the marker. The building that says “Pier 15″ with a red star on top, leads you there. When you approach the building, you’ll see more enemies climb down the stairs, along with a medic. Take out the medic if you see him, then take out the rest. If you’re having trouble, run back to the barricades, and get some distance. When they’re done head up the stairs next to the Pier 15 building.
When you get closer to the stairs, a swarm of enemies will head toward your position. There will also be snipers. Take them out and your objective will update telling you to assault target position. When you reach the top, expect more snipers along with a contingent of enemy reinforcements. Use the stairs for cover because this fight could last a little while. The marker is just up ahead through the tunnel.
After the lengthy firefight, run into the tunnel and the doors will open, revealing 11 troops out to get you. If you can throw a well placed grenade, try and take them out in one blow. If not, head back out, get some distance, use your abilities, and take them out from far away. Once they’re dead, head into the entrance.
Achievements
You FTW (Break into the Target’s Weapons Nexus)
Possible Achievements
Bad Medicine (Take out 10 medics)
Distance Warfare (Take out a sniper with a grenade)
Network Weapon (Skillkill 10 enemies in a row)
Mission 16: East Asia – Locate Datacore, Destroy Target Base
Run straight until you reach the door on the end. When you enter the room, stairs will be leading down, but enemies will be on your right side. Take them out before you head down.
Once they’re kaput, head down the stairs where it will turn you left and take out an enemy. When you try to get through the door ahead, it will close. Turn around and look for the new marker. Run down the hallway until it forces you left. A multitude of enemies will appear. Show them what bullets can do.
Follow the hallway into a room where the security terminal is. Take out the lone guard. Run up to the terminal and activate it. Now, go back the way you came from. Exit the room and take the hallway. The door that was locked before is now open.
Head into the room and the door will close behind you. The marker is on the right, but before we head there, a ton of enemies are in this room, including a sniper up above. Head to a safe place with cover and take out the enemies. When the coast is clear, run for the marker.
When you reach the marker, you’ll be notified to retrieve the data core. Follow the hallway to the next marker. There will be some glass barring your way, so shatter it with your choice of weaponry. A single enemy will also be in the vicinity so take him out. When you reach the doors, a cut-scene will ensue.
The game will drop you back before the door and you’ll have to contend with a room filled with snipers. They shouldn’t be too hard, so take them out how you see fit. Once that’s done, smash the glass and grab the core. When you do this however, you’ll need to defend the area until the bar fills up. Find yourself some cover and hold out until the meter gets full. This fight can get fairly hectic. Once the meter is full, run for the panel and hold the square button to access it, then when the marker shifts, run to the newly opened door, go up the stairs, and make a path to the marker.
When you reach the marker, you’ll now need to access four panels. You’ll need to hold down the square button for each one. One guard is protecting each panel. Make your rounds, while taking care of any bad guys walking around the halls and once you’re finished, follow the marker upstairs.
When you reach said marker, follow the hallway down and you’ll get a notice telling you to high tail it out of there. You’re on a timer, so quickly follow the marker down the stairs. When you reach the bottom, it’s a straight shot to the exit.
Mission 17: East Asia – Final Objective
It’s time to defeat the Nemesis. To do this, you’ll need use your pulse wave to stun her, then use the SAM site to target her when she’s stunned.
First, shoot her enough times so that she drops intel. You’ll need it to fill up your bar all the way up to use the pulse wave. Keep running around the second floor in a circle and shoot her from a distance. As you make your way around, you can collect the intel.
There will also be a group of 3 enemies that will appear periodically, which you’ll need to take out, so the Nemesis can appear again.
Also, when Nemesis is stunned, air-strikes will be targeted toward you, so avoid them. You can see the striped pattern of where they will land, so use this as a gauge of when to run away, but in any case, once she’s stunned, run to the SAM site.
Every time you use the SAM site on her, she’ll lose health. You’ll need to do this 3 times. When she has one hit to go, the troops that arrive will be the heavy troops, so be ready for them.
When she’s finally defeated, you’ll get a cut-scene. Congratulations, you’ve just beaten Bodycount! Watch those credits roll!
Achievements
Easy-peasy (Complete single-player campaign on easy)
Bullet Dodger (Complete single-player campaign on normal)
Sleep When I’m Dead (Defeat the K-8 Nemesis Widowmaker)
Possible Achievements
Bullet with Their Name on it (Kill 10 enemies using the last round on your weapon)
 From the guys behind Black, this spiritual successor aims to add new meaning to the term “gun porn”, which the guys behind Black probably made up themselves. In this FPS murder-a-thon, take control of a former soldier recruited by a secret organization to fight in a series of tiny wars across the globe. The real claim to fame in Bodycount is the destructible environment — blow away every roof, wall, and piece of cover to ferret out your enemies or just enjoy laying waste to everything around you in explosive style. Don’t let the counter pass you by, keep an eye on this Bodycount. Below you’ll find a full walkthrough covering the main campaign. If you’re into the extras, check out Game Front’s achievements, trophies, and cheats. Check back after release for new updates.
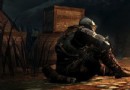


 How I Learned to Stop Worrying and Love LA Noire
 Check Out These Animated Easter Eggs Hidden in Google Hangouts
 Mortal Kombat X Guide: How to Play Ermac
 Fix for Xbox 360 Slim Flashing red light on power button
 Call Of Duty: Modern Warfare 3 Intel Locations Guide