Halo: Reach is slated as the farewell to the Halo franchise, which is bittersweet news for gamers the world over. Featuring augmented single-use abilities, new game modes, and customizable loadouts, Reach (like all Halo games) is centered squarely on multiplayer, a fact that will come as no surprise to those who participated feverishly in the Beta.
This is not to say that the single-player campaign has gotten short shrift, however. The game’s plot is centered on a rich and tragic epoch in the series’ history, and countless hours have been expended revamping the graphics and redesigning key elements. Some people will still see it as a formality, however — a sort of amuse bouche for the frag-fest to come — and it’s with them in mind that we offer this walkthrough, which will enable gamers to jet through the singleplayer missions with stunning speed. Check back soon for the first installments.
Check out our Halo: Reach Review!
Get a leg up on your competition with these other Halo: Reach Cheats!
Note: Reach considers its opening cinematic to be “Mission 1.” This guide is synced with the achievement descriptions in the game, which refer to each level by number starting with “Winter Contingency” as Mission 2.
Contents
Mission 2: Winter Contingency
As the choppers circle the outpost you’re investigating, you’ll have a chance to calibrate your controls. When you’re done, hit A.
LEGENDARY DATA PAD: This is ridiculous, but as soon as you start the mission, run straight for the path that leads way from the structure up ahead. There’s an invisible elite that looks like a weird floating white shape. He runs down the hill away from you. You have to find him, shoot him as you run, and chase him down. He runs away down the path and it’s incredibly easy to fail to stop him.
Exit the helicopter when it lands by holding X, and follow your squad down to the flaming, wrecked warthog. After Noble Team checks things out, you’ll advance toward another flaming structure.
Follow your team as they head west. You’ll follow them down the cliffside to the interior of the structures, and before long, you’ll run across some farms.
TIP: Push Left on the D-Pad to activate Night Vision as you enter the structure. It’ll help you see a little better in the darkened house.
After a brief conversation, the team will follow the road toward another structure. You’ll learn to sprint by holding LB along the way.
ACHIEVEMENT: See those big ostrich-looking birds? Shoot down seven of them and the “KEEP IT CLEAN” Achievement is yours.
Enter the small barn ahead. You’ll find some bodies, then go right with Carter through the structure. Your motion tracker will fire up as you exit the building. Bear right to the next one.
As you go through this last building, you’ll come across a window to your left. Outside, you’ll see Covenant forces. You can shoot from here, but your weapons aren’t too reliable at this range, so take the stairs in front of you.
Downstairs, a mess of Covenant troops are waiting for you. Hit them with a grenade (Left Trigger) and open up with your weapon while staying behind cover as much as you can. Remember that your shields will recharge if you stop taking fire.
Clear the interior area and head outside. Watch for grenades as you go and clear the field out front.
TIP: If you stay inside, you can high-tail it to the left to a staircase that leads outside on a higher level. Up here, you can jump up on the overhanging roofs above the center section and shoot down on enemies from relative safety.
Run through the field after you clear the way, toward the next structure to the right. You’ll see a drop ship beyond it — go through and stay behind the rocks to avoid taking too much fire from the grunts beyond.
ACHIEVEMENT: Pull out your alternate weapon, the M6C pistol, and blast 10 enemies with it to unlock the “I See You Favor a .45″ Achievement.
Stick with the team as they push through the field. Note that you don’t have to follow them too closely– as long as you’re moving in the direction of the enemy on your tracker, you can flank to the sides to get around them.
This next group includes a couple of elites among the grunts, and a rocky outcropping that provides cover to the elites. Watch for grenades — the area’s a little tighter than the field leading up to it.
If you can, fight through the grunts and try to make it up to the rocks. You can use them to protect you on the right, or get on top of them to get a clear shot on the elites up ahead.
When you’ve finished the fight, Carter will order you to continue with him on foot, further down the hill. Go with him and you’ll come across a truck you can drive just ahead.
ACHIEVEMENT: You can drive, but if you choose not to, you’ll earn the “They’ve Always Been Faster” Achievement.
Rebels Don’t Leave Plasma Burns
Follow the path as you drive down. You’ll encounter a few Covenant troops as you turn right to go parallel to the river. Run them over or let Jorge blast them.
Continue down the road and cross the bridge. Keep going forward and you’ll hit a structure you need to investigate. You could head left at the bridge and find more structures and Covenant, but it isn’t strictly necessary.
Hop out and investigate the structure. There are Covenant troops, including elites, in the main courtyard. You can strafe them with the truck, but a straight fight will be quicker.
If you cut through the building, you can use it for cover, so take the lower door to the left and go through. The Covenant shouldn’t give you too much trouble. If they do, look for a health pack on the wall of the lower floor kitchen.
ACHIEVEMENT: Snag that health pack after taking some damage and you’ll unlock the “Doctor, Doctor” Achievement.
DATA PAD: When you’re done fighting, check the building marked 02 for a weird Datapad. It’s separate from the two-level structure.
You’re done here. Jump back in the truck and drive to the next waypoint. Cross the river and fight toward the building there. You’re sweeping out a small Covenant squad.
This building shouldn’t challenge you. Kill the grunts from a distance and move in to finish the elite inside. If you need health, check the back wall for a pair of packs.
Look for a vehicle as you move toward the next waypoint if you don’t still have your truck. It’s parked near the bridge you have to cross in order to advance.
Head up the hill to the left. You’ll face a few straggling Covenant units on the way up. As you get to the top, turn right into the structure (or go around the outside edge) and go through to find the stranded troopers.
There are only a few grunts attacking these guys. Finish them off to have the marines join up with you. You’re about to face a counter attack, so get ready.
ACHIEVEMENT: Hold X in front of one of the marines to swap weapons with him. This nabs you the “Swap Meet” Achievement.
TIP: Near the troopers’ position is an entrance to the adjacent building. Look for a green marker that says “Ordinance” on your HUD to find a DMR.
Right after you’re informed of incoming enemies on the radio, you’ll be knee-deep in a Covenant strike. The drop ship lands right in front of you — twice. Find some cover.
TIP: Head up to the left or go inside the building and use the stairs. From the high ground, look for a pair of barrels in front of the building, over the entrance. This makes a great place to sit with the DMR and snipe away.
ACHIEVEMENT: The “An Elegant Weapon…” Achievement is unlocked if you can tag 10 kills with the DMR in one play session.
Keep hacking away at the Covenant. You’ll face a few elites, so keep your head down and try to take them out quickly. There are also armored grunts in the mix, and they’ll require two headshots to bring down.
After you’ve cleared the LZ, a couple of helicopters will show up to evac you. Board the one with the rest of Noble Team. After a few seconds, you’ll be dropped into a fight at the relay post.
You’re flanking a group of attacking Covenant, so just grab some high ground and have at it. This is a good spot to take out a lot of little guys with a grenade. Fight through to the entrance, then get ready to defend against a counterattack.
This is ground you have to hold for a few seconds, but a drop ship follows you in almost immediately. Another follows it, and after a second you’re pretty flooded with enemies.
Stay in the entrance to the outpost and watch the sides. Skirmishers – fast-moving jackals — like to hop up on the second level to the right. Don’t let them get an angle on you. Likewise, the interior section to the right is a conduit for grunts to enter the battle.
You can run around outside, but on higher difficulties, you might be better off staying in the entrance and hammering away with your DMR. There’s also an assault rifle and health pack behind you, out of harm’s way, if you need them.
There’s no winning this fight. Listen for Carter to start talking to Kat, who will acknowledge that she’s finished the hack. Haul back to the entrance and get inside as the doors close, ending the battle. If you’re there already, just keep the Covenant back a few seconds.
As you go inside, you’ll find a body when the path forks left. Check it to trigger a cutscene. After that, you and Jorge have elites to take out.
To your left is a forklift you can drive straight away. You can use it to barrel through cover, but it’s actually a death trap.
Leave it and head up to the left instead, where you can fire down on the Covenant from the side while Jorge blasts them with his cannon.
Keep moving forward along the side and you’ll hit a bend. There are only a few more enemies to clear there. Check for ammo in the back right corner and head left.
Jorge has a good spot to cover you, so work around to the right and onto the big platform ahead. There’s a mess of grunts, as well as a couple of dangerous elites — one has a sword, the other, a fuel rod gun. Stay away from them.
Try to stick the grunts with a plasma grenade while you have the element of surprise, then unload on them as they scatter. When you see the sword elite, stay well back and lay into him from a distance. If he approaches you, retreat. Quickly.
Knock out the elite’s shield and he’ll run away. That’s when you follow him and keep firing. When he’s dead, you can snag his sword and try to get the other elite, who appears after the first goes down.
Watch out for that cannon he carries. Get close and use jumping and cover to avoid getting blasted, then hit him when the reticule goes red. You might need two lunges on higher difficulties.
That’s the last of the enemy forces. Hit the switch marked with a waypoint to trigger another cutscene, and end the mission.
ACHIEVEMENT: The “We’re Just Getting Started” Achievement is yours for completing the mission.
Mission 3: ONI: Sword Base
The Best Defense
Grab cover and start using your DMR to clear the way just ahead of you. The Covenant are set up in the courtyard, past the ramp, but they’re also up on the catwalk above, mostly to your left.
When the ground troops you can see are dead, take that ramp and use your assault rifle (hit Y) to clear the grunts and elites up there. From the upper floor, you’ll be in a much better position to fire down on the ground troops below.
Watch for the enemy ships descending and dropping off more troops — they fire extremely powerful weapons that can wipe you out in a hurry. Use the structures for cover until it flies off.
You can use the upper level to keep moving behind the Covenant and shooting down on them. There’s a ton of firepower down there, though, so be careful. Watch out specifically for the elite carrying the explosive fuel rod gun.
TIP: Move up on the left side of the courtyard’s upper level. As you approach the back ramp, check the corner to the right — you’ll find a sniper rifle standing there.
Using the sniper rifle (and standing well back), take out the elite in white to seriously change the tide of this fight.
After that, you should be able to just pick off the remaining enemies over time, especially with the sniper rifle. Clear them all out and head down to the waypoint with Kat.
You’ll be facing down a ramp now, which is littered intermittently with Skirmishers. The DMR should work nicely against these little guys. Just stay under cover.
Head down into the building below. Grab the Target Locator from the crate to your left — marked with a green waypoint — before continuing. You can also grab the Armor Lock armor upgrade from another nearby crate.
Get the Hell Off My Lawn!
Wraiths — I hate those guys. They’re what you’re dealing with as soon as you step out of the structure and look down the hill. There’s two of them, and if you let them, they’ll drop explosive flaming plasma death right on you, without fail.
There are also a few infantry troops, but you’re going to have to do your best to ignore them. Instead, whip out that Targeting Locator and aim it at the first Wraith. You need to hold the trigger down for a few seconds to get a lock — a red outline will appear around the Wraith when you’ve acquired the target.
ACHIEVEMENT: The Targeting Locator zeros on a position, not an enemy. It’s tough to do, but try to put the lock right between those two Wraiths. Knock out both with one strike to get the “Two Corpses in One Grave” Achievement.
You CANNOT stand still against these Wraiths — they’ll zero in on you immediately. Nail a target lock on one as soon as you can and keep moving to avoid blowing up.
TIP: If you think you’re about to explode or can’t run, hold LB to use your Armor Lock ability, if you picked it up. It renders you invulnerable, although also unable t0 move.
Thrash both Wraiths — keep moving and you should be okay — and you’ll be able to easily mop up the remaining ground forces. After that, a Pelican comes by to drop off your transportation. Hop in the driver’s seat.
Heading left takes you to the Comms Relay; right, to the anti-aircraft gun. You’re going to do both objectives eventually. We’ll start out heading left.
The Comms Relay
Drive around the path to the left. You’ll encounter some grunts and a Ghost along the way, but they shouldn’t pose much threat.
When you hit the structure, use your car to pin down and kill the Brute in the Revenant. He’s your primary concern at first.
The main building — marked with a waypoint — is your goal, but it’s heavily guarded by elites. Instead, go into the other building to the left if you’re facing the main one. Inside, you’ll find health and weapons, including a rocket launcher on the upper floor.
From the top of this building, you can use your DMR effectively to mop up little guys. This is also a good spot to lob rockets at the enemy, then kill them when their shields are down from the explosion with the DMR.
When the building is clear, go ahead and enter. Get up to the waypoint, which marks the generator, but watch out for a small Covenant squad — some grunts and an elite — just out the door from the generator room. Kill them and head back down.
You’re dealing with enemy reinforcements coming off a drop ship. They’re setting up to guard the Comms Relay building, the one you just came from. Get in the car and drive around to eliminate all the guys on the ground, letting your allies use the minigun.
When it’s safe, head into the building and fight your way up. There are mostly just grunts and skirmishers inside, so you should be okay.
LEGENDARY DATA PAD: Standing on this roof and facing away from the button, you’ll see a wooden platform on the edge of the building on the left, and a corresponding platform on the cliff across from it. Using Sprint, jump from the building to the cliff. Run along the cliff’s right side toward the water. You’ll see the rock rising up on your left and the cliff side on your right. The Data Pad is right at the base of where the rock rises above you.
Get to the button at the top and hit it. You’ll receive another warthog if you need one. Hop in and take the road that leads past the generator building, up the hill.
The AA Gun
You’ll run into a drop ship just past the Comms Relay base, with ghosts as well as ground troops. Use your car to strafe the ghosts, which can only fire in the direction their facing.
You shouldn’t struggle too hard to clear the way. Keep going on the road when you’re clear (you can always just blow by the enemy as well).
The AA gun installation isn’t far, but it’s a mess. There are a bunch of enemies around the outside, a few inside, and one annoying elite on top. This guy’s weapon packs a serious punch — you need to get rid of him.
Start by staying back and letting your gunner clear grunts and the two elites that are down to the left as you approach the building. They’ve got an empty warthog there and they won’t hesitate to use its Gatling gun on you. Kill them first, and fast.
Next, head to the outbuilding to the left as you fight the grunts on the ground. Inside, you’ll find a couple of armor upgrades and a sniper rifle.
Find a shady spot and use that sniper rifle to kill the elite on the roof. It’ll take some work and you want to do it fast — right after you clear most of the enemies form the building, a drop ship comes by to give you more reinforcements to deal with.
TIP: Go inside the building and you’ll find health and DMRs on the left of the ramp; at the bottom, more health and weapons to the right.
TIP: If you can get up to the roof, kill the elite and reactivate the automated AA gun — you’ll give yourself some serious help in the ground war here. Do it fast — get inside and take the stairs outside the building to the right. That elite’s tough, so be ready.
The last drop ship to come by, if you let it, brings a couple of Ghosts to mess with you. You can fight them in the Warthog if you still have it — if not, try boarding one with X when it approaches you. You can use it to kill its counterpart pretty easily.
Minimum Safe Distance
Time to head back to Sword base. You should get a new warthog for your trouble, and this one has the illustrious Gauss cannon, which minces enemy vehicles and infantry alike. Just put the hammer down.
Sword Base isn’t far away. When you get to a blank wall, jump out and hit the button to open the gate and drive inside. Be careful – you’re likely being pursued by all manner of crazy Covenant enemies by now.
Inside, drive the car to the barricade so you can use the Gauss on the enemies up the ramp ahead. There are a few elites and some grunts, but nothing you can’t handle. The Gauss cannon should keep things from getting out of hand.
Push forward and clear out the enemies all the way up to Sword. You’ll fight through the courtyard and find the door open. Descend the ramp and check the median section for ammo and health as you go.
Ahead are a few infantry units and a pair of Hunters. These guys are a pain — inflict some damage from a distance with the sniper rifle and DMR if you have them.
Let your allies distract the Hunters while you circle around and hit them as hard as you can. Use the outer edges of the room they’re in to do s0 — you may have to clear out grunts and an elite in the meantime. Watch out for explosive green plasma from the Hunters.
When the room is clear, you can concentrate on the Hunters. Run back and forth until they’re not paying attention to you, or stand in the ramp leading out of the room, and put rounds into their orange backs to down them.
The door opens when you’ve finally killed these two. Head to the waypoint with Kat. Take the elevator up to the atrium.
You’ll enter the Office of Naval Intelligence next. In the lobby, you can use the walls of the walkways to protect you going forward. There’s an elite and a few grunts: S nipe them as best you can from a distance.
Next, run up through the door on the left to flank the whole group. If you’re using a shotgun, enjoy its destruction at close range. Clear the room and move on.
You’ll meet up with Jorge just ahead and recruit some marines. Kill the enemies in this room to clear the way to move upstairs. There, you’ll find some grunts in disarray.
Head left and you’ll pretty much walk right up to a white-clad elite. Shotgun him in the face and do it quickly to avoid letting him melee you. He’ll retreat if you don’t kill him here.
Move forward, following the ramps upward. You’ll have to clear a handful of enemies from the next level before moving up. This is pretty much a constant fight – keep your gun loaded and move up slowly, using cover.
DATA PAD: Look for a group of marines standing in a room, shooting up a ramp at a white elite. The pad is in that room — you’ll know it because it will have a walkway out front and three big square windows on the right of the opening. Go in there, kill the elite, and walk to the back wall. You should see a ramp leading up to the next level to your right. Go under that to find the Data Pad.
Keep pushing forward. Watch out for an elite with a fuel rod gun on the level above you — he’ll keep retreating upward and unloading on you as he goes.
Before long, the constant pressure will get you up to the top. It’s a fight the whole way, and that fuel rod elite will be irritating if you don’t deal with him. Be careful, he likes to hide around corners.
You’ll hit the top — which is ripped open and exposed to the outside — not long after. A Phantom is dropping elites into the room and there are jackals scattered around. Use the corners for cover as you move in, and try to even the odds quickly.
TIP: There are two health packs on the wall just outside the door leading into this room. Use them.
A nice trick here is letting Jorge do the heavy lifting. After all, that’s his job. Let him go up and take the brunt of the attack while you support him.
Now run up to where all the dead elites are and look on the ground on the right for a rocket launcher. Then double time it to the left to avoid taking aircraft fire.
Get some cover and place the rocket launcher reticule over the Phantom. When you see it lock on, let loose. Knock that thing out, and the two Banshees supporting it, and it’s objective complete.
ACHIEVEMENT: The “Protocol Dictates Action” Achievement is yours for completing the mission.
Mission 4: Nightfall
DATA PAD: You start on an empty cliff, following the narrow path to the right. Keep an eye on the wall to your right and look for an opening. Step inside to find the Data Pad.
Follow the path around the cliff until you come across an elite with his back to you. Melee him in the back to perform an Assassination.
ACHIEVEMENT: You get the “That’s a Knife” Achievement for your first assassination.
Continue on the path to the right and melee kill the two sleeping grunts. You can now shoot down on the enemies below you. Wipe them out and hit the ground below to grab some armor upgrades. The climb back up the rocks.
Climb back up the rocks and follow Jun along the cliff. Ahead, you’ll find a Covenant stronghold. Orders will come down to start blasting. Find an elite to make the element of surprise count.
Watch for jetpack elites scattered around the outside edge of the area. They’re concentrated on rooftops to the left and at the far side of the compound. Knock them all out.
Next, a Phantom flies in with reinforcements. Dodge its fire and look for the elites. Drill some holes in them with your rifle.
After a bit, you’ll probably just want to go down with an assault rifle and finish the job. Kill everything in the compound and go into the building on the right side. It’s the one with the bridge leading to the silo in the center of the area.
TIP: Check the buildings for health packs if you need them.
Through the building, you’ll reach another big yard area with structures ringing it. It’s full of enemies — pick a good sniper position and back up Jun from his spot on the center silo.
There are elites scattered all over, including a leader or two. Keep your head down and try to catch them unawares. Active camo is good for this if you picked it up. They’ll lose you if you use it, giving you time to pick your shots.
Empty the area of enemies and proceed down the hill, into a small canyon area. A couple of grunts and jackals wait down there.
Let Sleeping Dogs Lie
Round the corner and you’ll see a Phantom just finishing business and flying off. Below, you’ll see a couple of big lizard things fighting Covenant troops.
Wait for the Covenant to finish getting ravaged, then lay into the lizards yourself. They should take much more than a few sniper rounds or a well-placed plasma grenade.
Follow Jun as he moves up. You’ll come to a fork, but which way you take doesn’t matter. Ahead is a pumping station where civilians are fighting Covenant. Pull your rifle and start scanning for elites.
The militia fighters are keeping the elites busy, which means you should have an easy time sniping them out. When they’re gone, you can mop up grunts as you go forward without trouble.
Meet up with the militia after you clear the center section of the station. They’ll show you some weapons, including sniper ammo, a DMR and a rocket launcher. There are also ammo upgrades. Use them at your discretion.
You might want to get up to the rooftops for the next set of fights. You’ll be dealing with three drop ships’ worth of reinforcements, one after the other. The roofs expose you to fire from the ships, but give you better angles on the enemies. Try to stay far away from them to avoid taking return fire from the ground.
Watch for elites and eliminate them first. The ships come in along the outer edges of the compound, so try to take cover on the roofs to put shots on the elites without them dropping you.
Keep moving around the compound, taking out the enemies as they disembark from the drop ships. There’s not a lot of strategy except to use the sniper rifle to full advantage from distant high ground. Avoid being a target if possible.
Follow the troopers and Jun after the fighting through the center of the compound, onto the dam. They’ll lead you down to the river bed below.
LEGENDARY DATA PAD: You’ll need the Sprint ability for this one from back at the compound. When you enter the river bed, you’ll see green glow sticks illuminating the path. Count the first five — when you get to the fifth, look right for some rocks you can climb. Climb up and you’ll get up on a ledge along the right wall of the canyon. Keep moving until you hit a flat part with a tree. Now you’ll have to sprint from this flat part and jump to the ledge across from it, on the left wall of the path. Make that jump and you can walk along that ledge until you see a rock bridge below. Drop down to that and cross it, past the tree, then look right. There’s ANOTHER ledge you can jump to. Hop across to that — it’s green — and snag the Data Pad.
Follow the river bed until a Phantom flies overhead. Beyond that is a Covenant structure.
I’ll Just Leave This Here…
Stick to the cliff until you approach a bridge. Find the elite and snipe him — your allies will mop up the little guys.
Next, put some fire on the structure itself. Look for mounted turrets manned by grunts. You’ll want to clear or destroy those before advancing.
Knock out the defenses around the tower and you can use the beam down the center of it to float up to the second level. There, the mounted turrets make for decent weapons against coming attacks.
More Covenant troops will try to retake the structure from the west. Pop one of those turrets off — it makes a pretty good mobile cannon. Just keep shooting until you’re out of guys to kill.
As soon as the area is clear, two drop ships appear from the east and west. They pin you down and pummel you, so abandon whatever you’re doing on the structure and bail. Run to the buildings south of you and take cover.
TIP: Up those stairs right in front of you, you’ll find the Hologram armor upgrade, a shotgun rack, grenades and health.
The eastern drop ship unloads two hunters, which are going to be irritating. The one to the west leaves a few invisible elites. They suck and they’re dangerous — take them out first.
If you’re on the second floor of the building, you can jump down into the water in the circular room to the left. This is where the elites inevitably head in order to flank you. Use your motion tracker to keep an eye on them and peg them with a couple head shots to bring them down.
Now get back outside and fight the Hunters. You can pretty effectively use the Hologram upgrade to distract the Hunters and put a few rounds into them. Be careful of their weapons, though — a direct hit and that’s lights out on harder difficulties.
Try to keep your distance whenever possible. Shoot from far away and let Jun distract the Hunters while you deal with them. Your hologram can buy you a couple seconds to get clear of an attack as well.
A few minutes of sniping at the Hunters from the high ground of the building should be enough. When they fall, Jun will finish planting the charge. Go to the waypoint after that.
Through the gate, you’ll see a Phantom dropping off troops. Snipe them immediately as they drop and the Phantom will disengage. Make sure you use the walls for cover.
Beyond that are a pair of ridges that are outfitted with rotating heavy turrets. These things are nasty, so try to keep your head down. They’re hard to destroy if you’re using a head-on approach.
Start by putting down all the ground forces you can. To approach and clear the first turret, you’ll have to work up behind cover along the right side.
The front turret is covered by the one behind it, so don’t think you’re safe even as you get alongside the first one. Get up there and kill the grunts to make it through the first area. A sticky grenade works well, but any enemy can man the turret.
TIP: Beyond the first turret, on the high ridge just past it, is some ammo and a health pack.
In order to get to the second turret, you’ll have to kill most or all of the elites in the area. They’re just too strong and agile to allow you to get close to the turret, or take cover from it without getting flanked.
Search the area that you’ve already made safe — along the edges close to the cliff — for ammo and health. You can also look up on the high ridge, near where you started. Use the DMR as much as you can.
Before long, you should get down to just the white-clad elite. Finish him — if you get close, he’ll leave the turret and chase you — and you’re through.
Advance along the path toward a group of jackals and grunts. Squash them and round the bend left to finish up.
ACHIEVEMENT: The “I Need a Weapon” Achievement is yours for your efforts.
Mission 5: Tip of the Spear
Tempest Perimeter
Right after the crash, you need to get to cover. The whole area is full of Covenant annoyances, including mounted turrets with explosive weaponry, and an elite who’s not messing around.
Move up on the right and kill everything you can, using either your grenade launcher or DMR. There’s a path on the left of the area you can use to flank — get ready to sprint over there when the coast is clear.
The goal here is to stay away from Kat. Let her draw fire while you flank and vice versa. Take that left path when you’ve killed enough guys and get around the side of the turrets. Watch for the elite with the big gun to be shooting at Kat, and kill him, quickly.
Put a launcher grenade into each of the turrets to kill their gunners. That should do the job for this section. Enjoy your checkpoint.
A Pelican will drop you a warthog on the road to your left when the area’s clear. Climb in — you should drive.
Follow the road and let your gunner devastate anything in your path with the warthog’s mounted rocket launcher. It won’t take you long to pass through ghosts and enemy troops to find the huge AA gun.
First, circle around, using the rockets to clear out all the enemies you can. There are some stationed outside, but most of the Covenant come streaming out from inside the gun emplacement.
The most troublesome is an elite carrying an explosive weapon that’ll flip you, so strafe by quickly. The rockets should do a lot of damage, and when the enemy’s numbers are depleted, hop out and mop up.
With that done, go into the gun’s base and stay on the ground floor. Use a plasma weapon to zap the blueish field surrounding the beam in the center of the room — it’ll look different than the rest of the outer casing. Then shoot the beam itself.
Quickly get the hell out of there and head back to the car. The gun’s about to explode and it’ll take you with it if you’re not fast.
You’re free to go. Follow the road around the bend to the right and into “enemy territory.” You’ll circle up the hill and then to a bridge. A Wraith shows up right near you — ignore it, as it will probably kill you if you try to take it on. Just drive.
Drive into the canyon once you get over the bridge. You’ll encounter one or two stragglers, but nothing dangerous. On the other side are new orders.
Hand Over Fist
Drive the car up to the edge of the cliff beside the mining facility and use the rocket launchers to annihilate the Covenant turret on the other side. Vanquish the other enemies and cross the bridge.
Head up the stairs. Grab health from the wall at the corner if you need it and start killing the small groups of bad guys as you encounter them. Skirmishers, jackals and grunts await.
Follow the path up until you get to a walkway that wraps the outside of the building. You’ll come up the steps into a fight with an elite.
Be careful of this guy’s little buddies — he has a tendency to monopolize your attention while his jackals hit you for the real damage.
Around the corner to the left is another elite. Push through him and you’ll come to a gap. If you have sprint, you can jump it and land on the debris on the far side, from where you can engage the jackals and the souped-up elite. If you don’t, drop down and take to the stairway in the back corner. Watch for grunts and fire from above.
Up the stairs, finish off the jackal and elite. If you need health, get it from the room on the left that has the Sprint upgrade in it. Then look for a hole.
Aim down the hole and start dropping soldiers. That elite you were fighting — he’s the Zealot Noble One mentioned — has retreated down here and is trying to tag you from a distance. Clear out his friends before dropping down.
ACHIEVEMENT: If you can kill that Zealot before the end of the mission, the “Your Heresy Will Stay Your Feet” Achievement is unlocked.
Drop down the hole when it’s clear and chase the Zealot on his way out. You can snag a Plasma Launcher along the way, but just outside, the Zealot will cloak himself and escape. If you get too close, he might pull his sword, so be careful as you try to finish him.
DATA PAD: Stop for a second. Turn around from the door that leads out of the garage, the one you just chased the Zealot through. You should see two metal shelves along the far wall. Check the right shelf for the Data Pad.
Go back outside and jump in a vehicle — there’s a Revenant there if you want it — and follow the road. You’ll encounter two Ghosts that need dismantling, but the Revenant should make short and flaming work of them.
Keep to the road and you’ll emerge before another AA gun. Stop at the broken bridge if you’re on Legendary, because there’s a…
LEGENDARY DATA PAD: On the far side of the broken bridge. Drive your vehicle down and park it beside the broken bridge column on your left. Jump on top of the vehicle for a boost, then up to the column. Use it to jump to the broken portion of bridge to find the Data Pad, plus some DMR ammunition.
There are two Wraiths flanking the AA gun, and they’re extremely annoying if you’re on foot. In your Revenant, however, you should be able to pummel them with your increased maneuverability.
First, drive down along the right side of the gun. Take out the ground troops, then get just out of range of the Wraith’s energy cannon — you want it shooting mortars at you only.
Now just strafe back and forth, returning fire. You’re faster and more agile than the big Wraith, so you should be able to just dodge its fire all day long while you keep blasting it until it explodes.
Do the same with the other Wraith, on the other side of the gun. Kill the ground troops or at least flush them from the area around you so you can deal more effectively with the Wraith.
When that’s dead, use your Revenant to murder anything that’s still moving. There are grunts and an elite or two scattered around the area. Take them out and approach the AA gun’s base.
Next, you’ll be confronted by Hunters. You can, and should, try to kill them with the Revenant. You can more easily dodge their fire and inflict a lot of pain with it. But instead of hitting them head on, try to hit just behind or beneath the Hunters. That way you’ll damage their vulnerable backs.
Before long, with some good accuracy, the Hunters go down too. The last line of defense on the AA gun is a set of flying Drones. Drive away some, hop out of the vehicle, and use a DMR if you have one, or similar rifle. It makes short work of these guys.
You’re clear to the gun now. Park the vehicle and go inside to blow it the way you did the first one. Then evac the hell out of there before it explodes.
Get in the Revenant again. A Phantom drop ship is coming in behind you, on the left side of the gun, and you need to kill everything in the area to clear an LZ.
Use the Revenant to squash all the little grunts while also scaring off the drop ship. When they’re all gone, you’ll get picked up by a helicopter.
The Spire
You’re manning the helicopter’s gun. It’ll fire faster if you pump the trigger, so keep that in mind.
First you buzz past a bridge. Open up on the elites trying to cross it — they’re on both ends. Don’t be stingy.
Next, as you approach some structures, two turrets will start to unload on you. A couple shots each blows them apart.
Around the corner of the building is a Wraith, which is your next priority. Hit it really hard with a bunch of fast shots and you’ll take it out without issue. Then you can mop up the two turrets on the road and the random, straggling ground units.
A cutscene is next. When you’re back on your feet, you’ll have to push through to the Spire and get inside. Start sniping out ground units, and grab health and a Jetpack add-on while you’re here.
The best way to approach the Spire is by taking the path to the left. Fight through the first group of Covenant forces and you can get on the path that goes around the hill on the left side. There’s a truck there that’s ideal for getting through here quickly.
With Jorge on the back of the truck, gun it for the Spire. You should hit the front door without too much incident. Feel free to hop out and run inside, and jump in the white beam of light — it’ll carry you like an elevator to the top section.
At the top of the elevator, step out and turn left. Grab a gun if you need it and chew up the first two grunts you come across. Up ahead are the real threats — a grunt carrying a fuel rod gun and a pissed-off Zealot with a sword.
Kill the grunts with grenades and weapons — whatever you can. If the Zealot comes after you, you’ll probably be pretty screwed — but that’s why you brought that jetpack. Use it to fly clear of the range of his sword.
When the Zealot lays off, you can head back in. Snag a Plasma Pistol if you can — the grunts carry them — and charge it up to full. When the Zealot comes back after you, let him have it in his face. Then switch to your other weapon and unload on him.
That should put down the Zealot. Finish off the rest of them — including that pesky grunt, and get up to the red button just ahead. Slap it to end the mission.
ACHIEVEMENT: You get the “To War” Achievement for your performance.
Mission 6: Long Night of Solace
First Floor: Aliens, Beaches, Secret Launch Stations
Follow Noble Team along the beach. You’ll see a drop ship and come across an enemy staging area — with elites dropping in inside orbital launch pods.
Use the rocks for cover and open up on them. With three other Spartans, this should be a cakewalk compared to the other firefights you’ve been in.
Another two elites drop in just a little further up. Kill them (a well-placed grenade could knock out both shields), then watch for the white-suited elite from farther down.
Around the bend is another group, nearer the facility. In the rocks on the left, to the east, are a couple of Skirmishers with nasty needle rifles. If you run over there and hop onto the rocks, you can flank them and snag their weapons.
From up on the rock, you have a good shot at the rest of the Covenant force that’s distracted fighting the rest of your squad. Clean them out.
Stick with the team as they head into the facility when you’re done fighting. There are weapons racks on the walls just outside, so grab anything you need or want.
Once you go past the troopers fighting the Wraith below, you’ll see a soldier get thrown through a doorway, then encounter an elite. Drop him and stick with the team as they move deeper into the building.
DATA PAD: Next is a room with a blue holographic display in the middle, and red lights on the sides. Go up alongside the holo display and turn left. You’ll see stairs. Go up the steps into the slightly raised area and spin 180 degrees so you’re facing the consoles. The Data Pad is on the ground beside a body.
Keep moving toward the Sabre. You can grab weapons and armor upgrades as you go. Right outside of it are a pair of staircases.
LEGENDARY DATA PAD: Stop here at the stairs. Climb only the first flight — the second leads right up to the ship — and turn left so you’re facing the gap. Jump across to that platform with the light on it. Go around the light so you’re beside the slanted piece of metal leading upward. Use a grenade to give yourself a boost in your jump and reach the edge of the ledge. Follow that section to the Data Pad. It’s a pain, but it’s there.
Take the stairs to the top to board the Sabre and head into orbit.
Operation: Upper Cut
You’ve got a few seconds to get acquainted with the controls of the Sabre. It handles much like driving a Ghost.
Within a few seconds, some Banshees appear in the distance. Follow the waypoint markers and engage them. It’s pretty simple — just dodge enemy fire when it comes your way and keep lining your sights up with Covenant ships.
The first wave goes by without much difficulty. The second wave, consisting of Seraphs, is a little different. These ships are shielded, and thus harder to kill.
Fall in behind a Seraph and plug it with your guns until its shield goes down. When that happens, hit Y to switch to missiles. Wait for a lock and let them fly. You can kill Seraphs with your guns all the way, but it takes longer and is less effective.
Kick down these few Seraphs and you’ll get a brief respite before a third attack wave shows up. This one includes Seraphs and Banshees, and for the first time, they kind of mean business. Keep moving to stay clear of fire and leave the battle if your shields go down.
Keep moving and make heavy use of missile locks to take out enemies you might not be able to pursue. There’s not a lot you need to do as far as strategy. Make wide circles of the battlefield so you can keep arcing through, taking out ships as you pass, and flying clear again.
That wave shouldn’t be too hard either. After that, a group of something like six or eight Phantoms warp in, with the goal of docking with the space station. You need to take them out.
Your best strategy here is to come from a great distance, advance slowly, and unload with missiles. Try to stay clear of the Phantoms’ fire and hit them from one side or the other, rather than crossing through the targeting solutions of multiple ships.
The Phantoms should go down with two or three volleys of missiles — just pour it on and try not to die. As you approach, you’ll take all kinds of damage, so circle back when it gets too hot. The further back you can start your attack from, the better.
There’s not much too this except pummeling the Phantoms. Watch out for straggling fighters — Banshees and Seraphs — during this battle, but for the most part, you’ll just have to put your head down and power through to take out all the ships.
After you’ve cleared them, you’re free to dock with the space station and catch a quick cutscene.
Take the Corvette
You’re now going to try to disable, board and capture a Covenant Corvette cruiser. First, you have to keep it from running away. The ship unloads on you during this fight, so try to stay clear of the gun batteries along its sides.
The first order you receive is to go to the back of the ship and take out its engines. It’s easy enough — give yourself some room as you approach from straight behind the Corvette, and unload on it with missiles and machine gun fire.
There are four engines and they should light up without a lot of provocation. As soon as they’re blown, fly clear and start dog-fighting with Covenant fighters in the area. Act fast and take them out quickly so they can’t escape.
ACHIEVEMENT: The “Wake Up, Buttercup” Achievement is yours if you can destroy the engines and the entire group of Covenant fighters in under three minutes on Heroic difficulty or higher. It actually isn’t that difficult.
You’ll hear your orders on the radio — time to land on top of the Corvette. Fly to the waypoint.
Be careful — if you wander as you’re being told to “find a way in,” you’ll notice you can fall right through that blue force field in the floor, and onto a group of EVA elites. Hit Y to pull your shotgun. Introduce them to it.
Luckily, the element of surprise is apparently extremely surprising, and you should be able to knock out the elites before they can get their act together. Note that if you get into trouble, the low gravity makes it possible to jump high and far.
With the room cleared out, follow your team to the door on the bottom level and head for the hangar bay. The door opens at the far end on a group of Covenant grunts and elites who you’re catching unawares. Snipe a few with your DMR.
Watch for the elites — many are EVA and can use jetpacks, and lots have high-accuracy rifles. Take them out with head shots and keep under cover.
There’s not a lot to this. You can take the ramps beside you to high ground — highly recommended — where you can see everything and get some other armor upgrades if you like. Also useful up here are Needle Rifles for your sniping needs.
EVA troops are on the far left and far right, so keep them in mind. Also watch for floating Engineers around the glowing energy columns in the center of the room. They have to die as well.
After you’ve killed everyone in the hangar – there are quite a few soldiers – run to the red waypoint to the left and hit the button there.
Cutscene. Afterward, follow the fire team and get behind cover. The doors ahead open to shower you with Covenant attack troops.
Start by gunning down all the grunts that are streaming toward you. They’re easy and a well-placed grenade will grind up most of them. Note that there are doors on either side that have enemies coming out of them as well.
Inside are a couple of Zealots for you to deal with. Stay back and snipe their heads with whatever you’re bringing with you- – no reason to invite them to kill you. Keep clear of their grenades and push in when the coast is clear.
Head down the ramp and enter the next room. You’ll run up against another elite and some little guys. Use the various bits of cover everywhere and squash ‘em.
Move down and continue to the right. Just beyond is the bridge, and the hardest fight you’ve faced on the ship yet.
Take the Bridge
TIP: I had serious success with the Drop Shield in this fight. It heals and protects you and creates a little island of safety in the middle of a fairly intense battle.
Again, you’ve got surprise on your side — ID an elite as you enter and take it down with sniper fire fast.
That one guy was the least of your worries. You’ll have somewhere between two and four cloaked elites running around (mostly in the lowered areas on the sides) during this fight, plus a regular elite or two, some grunts, and a Zealot hurling explosives.
To start, steer clear of the Zealot. Snipe his grunts — you don’t want to stumble on a random grenade — and kill the other elites. Spend some time finding and dropping the cloaked guys.
Use the Drop Shield liberally here. If you get into trouble at all, anywhere, you should be able to throw it down, heal up, and generally be left alone by enemies until it drops. Take a second to identify where you want to head next and go there.
Keep running around behind cover, finding weapons if you need them, and cutting out the support troops helping the Zealot. When they’re all dead, you can finally approach him.
He’s got that hand-cannon, so use jumping to make him miss and move fast. The thing is deadly. You’ll want to get in close, hopefully with a shotgun or similarly powered weapon, but really the key here is constant pummeling and dodging.
It’s tough, but if you can get in close and melee the Zealot, you’ll be a lot better for it. A melee attack knocks out an elite’s shields in most cases (butter him up with your gun just in case), and sends him retreating to wait for it to recharge. Track him down and put one in his brainpan.
You did it — bridge cleared. Go to the red button on the left side and hit it. Then get ready for a counterattack.
The goal is to fight back to the hangar, but a group of Covenant just arrived to stop you. It includes jackals and an elite. If you can take them out from afar, do it.
Keep hammering away. Be aware that those jerks will retreat if their force is cut in half, and they’ll regroup in the room with the ramp, between you and the hangar.
When you reach that room, you’ll face more grunts and jackals, plus two Zealots. Look for a concussion rifle in the box to your right as you enter — it’s useful.
Clear out the little guys and try to damage the two elites so they fall back. If you can sneak up on them near the ramp on the left, you can shotgun them from the side before they see you, but it’s a long shot. Instead, just try to get close and hit them with concussion blasts. Hide in your bubble if you must.
You’re clear back to the hangar. Get there and you’ll find Jorge, under fire. Start killing stuff.
You can be really effective here if you run back behind the Pelican, grab sniping weaponry, and then head up the big ramp to the top level to the left of the Pelican. From here, you can snipe the hell out of all the Covenant forces.
Watch for enemies flanking you and just fire away. Reserve sniper rounds for elites when possible, and save a few if you can, because you’ll need them shortly.
After you’ve busted through this wave and cleared the hangar, ammo up and get to the top level again. Look across the Pelican at the far door — you’ll see a whole squad of Zealots enter, and these guys are here for business. This will be hard.
These are the Zealots that can take a plasma grenade stick and not die. It’ll take at least three melee strikes to kill one, but you can still assassinate them, so keep that in mind.
Quickly pull your sniper rifle and and put three rounds in the first elite skull you can. It’ll take around that many to drop him. If you can, grab weapons and anything else you need, and watch for an elite sneaking up behind you.
You can take this guy. Stick him with a grenade, shoot him in the face, break his skull with your gun butt — whatever. But kill him. At the very least, drop clear and form up with Jorge, and use him to divide the elite’s attention and finish him.
There are a few more left after that guy. Be careful entering the center section of the room — that’s mostly Jorge’s territory, and he’ll likely be baiting elites toward him. If you can, get behind one and assassinate it.
The rest of the fight is just your guts and ingenuity working for or against you. Don’t let any of them melee you — you won’t wake up again. And avoid taking one of those plasma launcher rounds to the chest. Those are the big thick globs of energy that explode a second after they land. If that hits you, you die.
Keep fighting and stick close to Jorge for support. Use your Drop Shield and hammer away. Before long, you should emerge victorious. Head over to the Pelican to celebrate.
ACHIEVEMENT: For not dying, the “You Flew Pretty Good” Achievement is yours.
Mission 7: Exodus
Hey, not dead. Congrats. Make for that waypoint — hopefully someone there will have a gun you can borrow.
The waypoint leads you to a broken door. Go through and head up the stairs — stop when you see Skirmishers. Start popping them. Then go up and left to find the next door.
Down the stairs to your left is a squad of grunts bent on blowing themselves up — but next to you. Shoot them in the face and stay clear of their grenades.
Go through that area and take the ramp down. As you descend, watch for a Needler you can grab. Around the corner, you’ll see a couple more grunts.
TIP: Down here you’ll see on your right, an area with a chain link fence in front. Step inside and check the right wall for a health pack.
Follow the waypoint. You’ll step into a room with lots of catwalks, filled with suicidal grunts. Shoot the ones you can as you retreat out of there. Let them all explode before advancing.
TIP: The center catwalk that leads to a closed door, and a body, has pistol ammo.
Keep moving forward. The next area is an anteroom to one with ramps. The ramp room has an elite and something like a million grunts. Take them out first, then go back in for the elite.
Remember that Needler? Apparently it’s not useless in this game. Aim it at the elite and watch it shred him.
Keep moving. You’ll see humans, and a drop ship — avoid its fire — and then meet up with some marines. They’re fighting Brutes, which used to be scary but aren’t because your Needler just manhandles them. Take out any that you see.
You’re joining up with the marines to help them evac survivors. Basically, you get to run around killing Brutes. Move forward along the street and take out the two or three ahead of you.
When you see stairs and a raised area to the left, get up there. Just as you kill the last of the Brutes and take the high ground, another squad — two Brutes and a few Skirmishers — come out by way of the door you want to use just ahead. You’re in position already, so flank them.
You should squash that group with almost zero effort. Grab ammo and weapons and make for the door.
Take the steps up to the left and start killing grunts. You’ll have a newly filled fire squad as you get into the big lobby, but it’s filled with Brutes, grunts and jackals.
The trick here is hit-and-run. Don’t over-commit, as there are a lot of troops that will fry you. The stairs to the left provide decent high ground, but you’ll have to kill two Brutes to get to them. There also is a health pack in the area below, and weapons in the corresponding area on the right side of the room.
Take this kind of slow. Kill the ground troops toward the front of the room, retreating when they get too far back, in order to keep them from rallying around the Brute Chieftain at the back, near the waypoint.
If you kill off the minions first, your battle with the Chieftain will be a lot easier, as you can focus on him with no worries. He’s a bit of a pushover anyway — thrash him with a any Spike Rifle you snag from a Brute carcass, and stick him with a grenade for extra insult.
Spin around — you’ve got defense to run. Brutes are landing in drop ships in the courtyard over the left-side wall. A door opens to show you where they’ll be coming from — that’s your choke point.
Grab a health pack from the walls in front of the elevator if you need one — there are two — and turn your attention back to that doorway. Kill the Brutes first, then the grunts as they stream in. You shouldn’t have much difficulty.
After that wave is down, however, two Chieftains with Gravity Hammers show up from where you entered the room. These guys must die fast or you’re in trouble. Unload on the first one you see with everything you’ve got until you finish him.
Now you can grab the hammer and use it yourself. Smash the second Chieftain with the hammer and you get a one-hit kill. Continue to employ it against the remaining Brutes and Skirmishers. Watch for them to show up behind the elevator, from the staircases there.
Mopping up should be easy. When you’re done, board the elevator and hit the button to descend.
Too Close to the Sun
Move through the lower floor until you get outside. You’ll see Banshees approaching. Stay out of their way, since you can’t do anything about them from here.
Grab guns from the weapon rack on the left wall. As usual, the DMR is suggested. It owns Brutes faces in a very effective, very literal way.
Follow the soldier on the bridge to the right. You’ll meet up with some ODSTs that will direct you to a jetpack. Grab it and follow them across the big gap.
On the far side is a mess: lots of Brutes and grunts, including a Brute Chieftain. Snipe what you can as you approach and get into the fight before the ODSTs get wiped out.
ACHIEVEMENT: If you can manage a triple kill while you’re in the air with your jetpack, you get the “Lucky Me” Achievement. This is a good place to give it a shot.
TIP: If you have the DMR, you can literally stay back under cover in the first building you get to and snipe away. Brutes die in two or three head shots every time. There’s a huge force up there, and attacking it head-on is tough. But whittling it down goes really easy.
As you fight the Brutes and grunts, be aware that there are a whole lot of them. And among their ranks is a Chieftain carrying a Gravity Hammer. He’ll be a problem if you let him be one.
Sit back and snipe if you can, but be wary of grenades the Brutes like to huck at you. Keep firing away and you’ll do fine. If you feel like it, you can advance up the ramp.
Clear this area and you can then walk (or fly) up to the level above. If you go up on the left side, near the top of the ramp where you first entered here, you’ll face a few Brutes ahead, grunts across to your left. Use cover.
Snipe away at the Brutes and be careful of them coming up for a closer look. The ODST guys might deal with the grunts for you if you can keep them alive, so try to draw the Brutes’ fire. Kill the standard troopers and look for a Chieftain, who’s carrying a Concussion Rifle.
The trick to dealing with this Chieftain is distance, if you can snipe him. If you have the DMR and it’s got rounds, just pop him in the head till he goes down. If you do it from far enough away, he won’t even fire back. Fly to a good spot.
If you can’t shoot him from afar, you’ll need to get in close. Employ the same tactics as against the elite on the bridge of the Corvette — jump to avoid his fire, unload at point-blank range.
DATA PAD: Stand where you killed the Chieftain. If you’re facing what was forward when you first flew up here, then you should see a scaffold and walkway above to your left. Fly up to it and you’ll find a body and the Data Pad. It’s in the back left corner of this area. It’s also directly before the doorway with the arrow pointing up (forward) above it.
Ascend up the stairs ahead, then fly to the top of the room and go through the green door. It’s right over top of the door you came in by. Head through and you’ll be outside again. Grab the rocket launcher from the case right in front of the door and ammo up.
Step outside and back up the marines fighting on the path in front of you. After that, turn your attention left — there’s a Skirmisher sniping from across the way, and a mess of jackals below you. Kill them from here to save yourself trouble later.
Cross the bridge and take cover. Use your DMR (you got one, right?) and snipe away at the Brutes on the upper floors of the building ahead. You should be able to lay waste to them from here.
Be careful of straggling jackals and grunts as you move up. Drop them all, including the Brutes, and you can climb the stairs.
Reinforcements are being deployed above you as you climb, including a Brute Chieftain with a Gravity Hammer. If you get into trouble, hop backward off the building and use your jetpack to escape.
Following the two Brutes, a couple of suicide grunts will try to throw you a curve ball. Again, retreat is your friend with the jetpack.
LEGENDARY DATA PAD: Okay, you’ve cleared the enemies out, right? Look up the building and turn right. You should see two roundish vents sticking out from the wall. They’re gray with fans and grates on the front. The data pad is up there. To get there, go as far right as possible, then jump out and fly to the inset part of the wall with the vertical beams going across it. Jump out and fly up to the next horizontal beam, then up to the next one. When you get to the top, look for the vent. You’ll have to very carefully fly between it and the overhang just above it, because you can’t land on it from above. It’s tough, but the Data Pad waits right there.
Continue up the stairs, clearing the building of enemies. Above somewhere is a Chieftain with a Concussion Rifle, so watch out.
Fight up the stairs — there are a few more scattered forces as you go — and you’ll hit a bridge. Look for DMR rounds in a rifle leaning against a wall as you approach it, and use it to snipe all the little guys ahead.
You need to fight into the building just ahead, but it’s full of grunts and Brutes. Be careful of the Chieftain carrying a fuel rod cannon inside. He’s really irritating.
It’s possible to fight through this area fairly, winning every foot of space with a lot of skill. Or you can use the jetpack to totally flank the enemy – fly up to the third floor from outside and you can do some serious damage.
Go around the outside to the waypoint when it comes up. It marks some turrets that need taking out.
Remember that rocket launcher you picked up some time ago and haven’t used? Use it now. Shoot down on the turrets (save ammo if you can — use grenades) to clear them.
A second later, a Phantom appears. Snipe its side gunner and wait for Brutes to deploy out of it — including one with a hammer. Feed them a rocket and you can blast all of them at once.
Okay, they’re dead. Should just be the Chieftain with the fuel rod cannon, who also happens to be shielded — an epic badass. But he can’t fly and you can. Wait for him to come out (or draw him out) and hit him with whatever rockets you have left.
There’s also an assault rifle here. If you’re short on ammo, grab it and use the jetpack to fly above the Chieftain and blast him. Keep on the move from his fuel rod gun and fly overhead to fight him. You’ll be extremely hard to hit, and should emerge victorious.
After that guy, it’s just a matter of mopping up a few Brutes. In fact, grab that fuel rod gun to do so.
I Should Have Become a Watchmaker
When your evac vehicles show up, board the one with the waypoint. You get to play chopper gunner again.
Shoot down what you can — it actually doesn’t matter what you do. You have the opportunity to try to assist some soldiers along the way, so basically just watch your motion tracker for movement and blast it.
Eventually, you’ll land. Use the chopper’s gun to clear the Covenant off the path ahead. Hop out, grab some weapons (DMR) and health, and follow the troops up the path.
Up ahead is a warthog you can take. Grab it, get a gunner, and drive along the path a little way until you get to a ghost. Use the gunner to clear it.
Park the car up by the structure so the troops use the Gatling gun on the enemies that are entrenched there, then head back toward your original LZ. In fact, go down into the water and look for a steep cliff on your right.
You should see the waypoint just beyond this cliff. Fly up to it and you can now snipe from cover and relative safety against the Brutes guarding the first AA gun. One’s a Chieftain, but you should have little problem.
TIP: Be aware of falling mortar fire from two Wraiths over by the other AA gun. It always has you zeroed and it WILL kill you.
Just knocking out these two or so Brutes should clear the way to the AA gun. If not, you can always double back and drive the ghost around for a bit, clearing out enemy troops. Either way, get to the gun and hit the button on it.
Keep moving. There’s mortar fire coming your way. Another couple of armor upgrades wait here, and there’s a rocket launcher behind the metal cover stand to the left of the gun. Grab the launcher, but if you keep the jetpack, you can do a hit-and-run on the second gun without too much bother.
Fly up into the middle of the structure in front of you, headed toward the other AA gun. You should see a bridge across the gap that has a Chieftain, wielding a Concussion Rifle. Drill him in the head with your DMR until he’s dead and cross.
On the far side, look for Brutes. There’s at least three, one of which is a Chieftain with a Gravity Hammer. But you have rockets. So use them.
Clear the ground around the AA gun and run up to the button. Hit it, grab health, and get out of there before a Wraith pounds you.
TIP: If you’re really tricky, you can turn toward the east complex and grab the sniper rifle that’s behind the metal cover facing the building on your way out. Might be handy in a minute.
You need to get back to the east complex — the building you passed earlier. Instead of going in the front door, where a Covenant dropship is laying down troops, you should run all the way to the south, to the original path you took from where you landed.
Turn and face the east complex. You should see stairs and your waypoint — right in front of you. Minimal fighting required.
It’s tempting to just blast inside there, but it’s impractical — forces here are minimal, but stronger, and include two or three Chieftains. Instead, sit back and snipe anything that gets in your sight with the DMR.
You can pull some underhanded stuff from here. Climb up on the rocks behind you and snipe with your rifle at some of the bigger baddies in there — put a couple in the head of the Chieftain with the fuel rod gun and you’ve just changed the battle.
When you’ve thinned them out, fly up and get on the overhang above the staircase on the far right. Here the hammer Chieftain has trouble getting to you and you can hit him with the DMR. Clear any other Brutes, butter up the Chieftain, then get in for the kill.
Slap the red button as soon as you can get close to it. That rearms the defenses and ends the mission.
ACHIEVEMENT: Protect the evac ships’ escape to unlock the “Into the Howling Dark” Achievement.
Mission 8: New Alexandria
Hooray, more vehicle-flying. Get inside and lift off with LT. Lock your altitude when you’re happy with it with RB.
Note that you’re coming under attack almost immediately from enemy air patrols. Your two marines will shoot at them, but the best way to deal with Banshees is to shoot them yourself with the Falcon’s main cannon, with RT.
LEGENDARY DATA PAD: Lift off in the Falcon and turn so that you’re flying over your building. Immediately past it is another building — you’ll recognize it for what look like ribs or ridges running down the side. Approach the closest side — the vertical ribs should be on the right — and descend until you see a wider horizontal black or dark gray portion. The game will warn you to pull up, and the altimeter on the right side of your reticule will say something around -130 or so. This wider horizontal portion on the building is actually a thin ledge, and if you go to the far left corner, you’ll see the Data Pad. Fly your Falcon so that you’re pressing the left side of the ship against the building, above the ledge, and hop out. You’ll land on the ledge as you get out on the left side of the Falcon — it will fall. Walk along the ledge to the Data Pad, then call an Emergency Evac with Down on the D-Pad.
Wait for Kat to give you a waypoint then head out. You need to attack the landing pad of the building, land the plane, and destroy the jammer in the tower.
DATA PAD: First, lets go track this down. Board the Falcon and scan the New Alexandria skyline. You’re looking for a building whose top terminates in a sharp triangular shape, jutting into the sky. It’s the only building like that around. To the left of that building is another, more squarish high-rise, with a rounded, slightly sloping roof, and a gap in its center running vertically. You’ll see it as you fly closer to the spear-looking building. When you’ve identified the right one, fly around the back of the roof and carefully land on the side of the building, on an air conditioning unit or something. You want to make sure you’re on the back side. Hug the left wall until you find the Data Pad in a doorway.
You’re sent to several locations to eliminate jammers, but in exactly what order seems to be random. What follows is the order in which I was assigned objectives.
ACHIEVEMENT: Some of the buildings have landing pads and those are usually outfitted with single-man anti-aircraft turrets. You can shoot these — kill three of them to get the “I Didn’t Train to Be a Pilot” Achievement. You’ll rack up a ton by the end of the mission — just go looking for them when you’re attacking a stronghold, and shoot them down yourself.
The Hospital
The hospital has fewer forces guarding it than the other buildings. Destroy the turret on the building to the left, land and you’ll see why — sleeping guards.
Kill as many as you can while they’re sleeping and work your way down, sniping away with the DMR and mopping up with your secondary weapon (keep your eyes peeled for a shotgun). There are armor upgrades, health packs and weapons scattered on each level as you go down.
You won’t be really challenged until you hit the ground floor, where there’s a Brute. Again, use your high ground and DMR to snipe his face and the faces of all his compatriots, then follow the waypoint. You’ll encounter an Engineer — kill it.
Turn left into the large atrium once you go through the door at the bottom of the descent. A bunch more Brutes are here, but once again, you have an advantage in range and intelligence. Just keep shooting heads until there are no more to be shot.
Head to the waypoint. You’ll find another Engineer to do away with, and then you can overload the jammer itself by holding X.
As soon as you do, though, jetpack-wearing elites show up to give you a hard time. These guys are irritating, but somehow they have it less together than ordinary elites. They have a tendency to run from you, or to be confused when they land next to you and you fight back.
Aggressive tactics seem to work on these guys. Get in close, hit them with the shotgun if you have it, follow it up with a melee strike. If you can snipe them, great, but if not, chase them around to put them down.
You’ll fight back into the larger, ascending section of the hospital. There’s a Zealot out here who’s carrying a Concussion Rifle, which is irritating. He’s backed up by two Needle Rifle-bearing Skirmishers, which is also irritating.
Use your DMR if you have it to take out the little guys. This takes the pressure off and lets you rush in and fight the elite head-to-head. You need to get close and avoid that Concussion Rifle so you can do some damage.
That’s the last of the major threats. Ascend back out and reboard your Falcon.
The Rooftop
Next I was sent to another waypoint, but this one is much simpler. It’s basically a single rooftop, with a few infantry troops guarding the jammer.
First, circle the rooftop so you can see where additional defenses are. There’s an AA turret on an adjacent roof that you’ll want to smoke out before you commit to the roof.
After the air around you is clear — you’ll probably have a couple waves of Banshees to deal with — start strafing the rooftop and killing everything on it. It shouldn’t take long or be especially arduous.
Land when you’re done, overload the jammer, and hop back in the Falcon to await your next waypoint.
The Tower
My next waypoint put me at the tower, which is pink and looks like a rave. It’s also heavily defended on the outside, with two AA turrets stationed on it.
Buzz the tower the way you did the rooftop — clearing the turrets first, then just unloading on anything that looks nonhuman. Keep an eye out for pesky Banshees approaching you from behind.
When you’ve cleared the dock, land and hop out. Inside, you’ll descend a bunch of stairs to where the marines are pinned down by two Hunters — with four more above them.
This is ridiculous. Your best bet here is to blow off the marines, run past everything, and head straight to the jammer. Deactivate it as you run by and haul ass out of there.
However, that leaves five soldiers to die — and, granted, most or all of them WILL die anyway. Even so, you can fight the Hunters if you want. There’s a rocket launcher in the center of the room under the orange hologram, and a shotgun in the back of the club, opposite the soldiers.
Take the Hunters one at a time, one-on-one, and try to just strafe around them and outsmart them. It’ll eat up all your ammo and lots of your time, but with the rockets, the extra shotgun ammo, and some assault rifles lying near the other troops, you should be able to do it.
When you’re done, head back up to your helicopter, satisfied with the lives you saved, or smugly laughing at those poor suckers who distracted the enemy while you accomplished your objective.
Assist the Pelican
This one’s like a milk run. Just fly to the waypoint where the Pelican is and you’ll see your objectives: three turrets.
The turrets surround the Pelican but the gunners are barely awake. Fly in and blast each one.
TIP: This should net you your “I Didn’t Train to be a Pilot” Achievement if you don’t have it already.
Sinoviet Industries
The last objective has a few turrets and other troops outside, and lots inside. You can park your helicopter in the air in front of the slightly blocked opening and shoot a few. This should make life easier on the ground.
Inside, expect to run into Brutes and grunts, many of which carrying heavy firepower. Stay back and use cover, and try to eliminate the big guys one at a time.
Kill the first two Brutes and then move up. Try to get the jackals from a distance; one level higher is a Chieftain with a Concussion Rifle, and you don’t want to be in his range.
When you’re ready, grab a strong weapon and charge the Chieftain. Jumping will throw off his aim so you can pummel him as you arrive.
Get in the elevator and ride it up. At the top, get out and look around. There’s no one here, except one distraught marine.
TIP: Not really a tip, but you may recognize the layout of this place — it’s a replica of the Halo 2 multiplayer map Ivory Tower. It’s weird with the different color scheme, but if it feels hauntingly familiar and you expect find a sword in the water feature on the lower floor, that’s why.
Anyway. Head to the bottom floor and you’ll find the jammer. Pick up weaponry and ammo before you hit the button (does it seem weird to you that there’s health literally everywhere around here?) so you’re prepared for what comes next.
Actually, don’t worry about it. In what could possibly be the worst trap ever, the enemies that attack you are the toned-down, brain-damaged flying Drones. They’re irritating, yes. Are they going to trap you? No. Shoot them if you must, ignore them if you want to just move on.
Run back to the elevator. Hit the button. Trap over. When you get back down, get to your helicopter and head to the next waypoint.
Last One Out…Turn Out the Lights
Book for the waypoint. As you approach the Oni Tower (it’s the sharp one), Kat will ping six turrets for you to destroy.
There are Banshees all over you, but they don’t actually matter. Ignore them.
Instead, just fly around and take out the turrets. It couldn’t be simpler.
And none of the things around are actually a threat. Once you’ve destroyed all the turrets, the Pelicans will evac successfully.
Land at the new platform to end the mission.
ACHIEVEMENT: For your time, the “Dust and Echoes” Achievement is yours when the mission ends.
Mission 9: The Package
You need to take out this first stronghold area as stealthily as possible — basically, you’ll want to either get in close and blow those two turrets, or start sniping from a distance.
Either way, use the buildings for cover when you drop down into the water. There isn’t much here but grunts, so nothing should be too difficult. Beware the Ghost and the turrets and you’ll do fine.
Fight through and eliminate everyone in the camp. With the DMR, you won’t struggle too hard.
When it’s over, head down the road and you’ll stumble across a Scorpion tank. Jump in — you’ll be using it for the duration.
ACHIEVEMENT: The “Tank Beats Everything” Achievement is yours if you can make it through the mission on Legendary difficulty without scrapping your Scorpion.
Right around the corner from where you get the tank, you’ll encounter Ghosts, infantry and turrets. Try to line them up and hit them with the tank cannon fast to destroy them.
Keep moving. You’ll start up a hill where two Ghosts will attack you. Blast them, and before long, you’ll see the AA guns in the distance.
As you approach the AA guns, you’ll see some jackals near a rock. Kill them and the Ghost supporting them, then turn your tank against the Banshees strafing you.
Park the tank in front of the two guns so that the machine gunner can support you. Grab an energy weapon and just run into the first gun. Don’t bother with any enemies that aren’t actively attacking you.
Blow the gun quickly and get out. The explosion will take care of the baddies. When enemies come out of B Gun to investigate, you can take them on with the help of your conveniently stationed machine gunner support.
Head back to the tank. Shoot down any annoying Banshees and keep following the road. You’ll come around another bend and face more turrets and vehicles. Use the rocks for cover as you dispatch them.
Just past these rocks, you’ll come up against a Revenant. These guys are nasty. They’re quick and equipped with a mortar cannon similar to that of a Wraith. You need to knock him out fast and avoid taking damage from that cannon.
Beyond the Revenant are a bunch of distant turrets, but they’re firing stronger ordinance than you’ve yet faced. Again, use the rocks for cover, or leave the tank where it can be protected and get out to snipe at the turrets. If they draw on your tank, though, they can squash it pretty quickly.
This valley sucks. There are turrets all over the place, often behind things so you can’t see them. Try to move up slowly — first get the two in the center while they’re distracted shooting at something else. The green-firing one is the priority.
Keep an eye out for the roving Revenants way in the distance, too. If you can tag them from here, they won’t even see you.
Next, hug the wall to your left and track up to take out the turret to the right. It’s behind a tree. Just splatter that whole area as best you can.
Okay. One, maybe two more in the rocks to the left. It’s hard to tell. Troll forward from the corner of the wall to draw fire from the turret, then back up so it hits the wall. When you’ve got it zeroed, roll out a bit and blast the turret. Repeat the process.
After you’ve definitely cleared all the turrets, even the one way in the back, take the road to the left. Keep your eyes peeled for a Revenant, right at the top of the hill, playing hide-and-seek behind some rocks. Kill him or he’ll make you sad you didn’t.
Get up to Sword Base at the top of the hill. You’ll have to ditch the tank to get inside. Check the left wall of the gate for health if you need it.
Latchkey
Head up the hill and you’ll be flanking a group of elites as they fight the rest of Noble Team. Stay behind cover and inflict as much damage as you can. It’s best to try to work in tandem with the sniping from Noble, by head-shotting any elites with their shields down.
Stay down and keep mopping up. Eventually Noble will push down and join you in the court yard, and you can then head down into Sword Base’s entrance. Watch out for the mounted turret at the bottom of the ramp.
After you’ve cleared the room out, go through the lit door. You’ll head up a ramp, where you’ll find a shotgun and some armor upgrades. In the next room is a Covenant ambush.
Right inside the doorway of the room with the ramps, to the left, is a rack of DMRs. Grab one and use it to pick off the sniping Skirmishers on the floor above you. Clear the first floor, and note the free Energy Sword in the back right corner.
Keep climbing. You’ll have clutches of jackals to deal with the whole way up. None should really test you. Continue sniping them as you have been.
You’ll leave the room into another ramped hallway. At the top is the ONI entrance, which is a mess. Follow Noble Team as they advance.
Go to the waypoint, and take anything you need along the way. Keep an eye out for weapons racks for fresh guns and ammo.
You’ll enter the atrium next, and it’s full of cloaked elites. Use cover and grenades to knock out their weakened shields, then headshot them. You’ve got Noble’s back up, so it should be easy.
Also snipe that Engineer floating the back of the room. He’s probably up to no good.
As you approach the ramp, a Zealot carrying a Concussion Rifle steps out to give you the business. Jump and hit him with in the head to take him down. Be careful not to get pinned up against any debris, or he’ll make you pay for it.
Head up the ramp. The waypoint guides you to the elevator, which is your goal. Hang back just outside.
DATA PAD: As you go through the doorway toward the elevator button, Don’t Touch It! Instead, whip around and check the corner behind you, to the left of the door as you enter.
Now you can hit the elevator button. Cutscene time.
This Cave is Not a Natural Formation
Advance into the cave. In a second, you’ll be told to run around, firing up defense turrets. There are four of them — ignore the dropping Covenant and go activate them all.
Now head back to the waypoint. Set up shop near it so you can defend the entrance and help the turrets if they go down. You’ll need to reactivate them if they take too much damage.
Get back up by the door. There are weapons — a Spartan Laser and a grenade launcher, among others — as well as armor upgrades and Mongoose bikes, so you can get to the turrets to reset them quickly.
TIP: There are also jetpacks on the wall, although they’re not highlighted. They’re to the right of the door to the lab. You’ll need one to get the Legendary Data Pad later.
Sit back with the team and start killing Covenant soldiers. Brutes and jackals are among the first. There’s not a ton of good cover here, but try to keep from getting too hurt. If you do, there are a lot of health packs on the wall behind you.
After the first big wave, there’ll be a brief respite and then another attack. This one includes elites, and they’re much more dangerous.
Use the Mongoose and the jetpack to keep the turrets running. You can use them to hide behind when you get to them, and you can activate them from any side — meaning you can land behind the turret, turn it on, and use it for cover as it fires.
Keep putting out fires and using the grenade launcher to disperse groups of Covenant near the door. A DMR will make dealing with elites a little easier, although you wouldn’t be remiss in relying solely on the grenade launcher.
You’ll deal with Zealots last. Look for them. When they’re down — it won’t be too hard — the Phantom will drop troops right at your front door. Make sure your turrets are up and your grenade launcher is stocked and it’ll go down easy.
The doors open right after that. If you’re on Legendary, it’s time to get a Data Pad.
LEGENDARY DATA PAD: Head over to turret C with the jetpack equipped and use it to fly onto the rocks behind it. Walk all the way until you’re standing on a metal, squarish-looking structure just beyond the rocks, and turn to look over the gap to the south. You’ll see a building across from you. It’s northeastern edge is a sheer cliff into the abyss below — except it’s not sheer, there’s a ledge there. Jump across the gap and carefully burn your jetpack so that you land on the tiny ledge on the northeastern wall on the other side. The Data Pad is on the ledge. Fly up to the ledge just above you to get back across.
Back at the door, hit the button to open the way through. It’s marked with a waypoint. A cutscene is your reward.
ACHIEVEMENT: The “This is Not Your Grave…” Achievement is unlocked when you finish the mission.
Mission 10: The Pillar of Autumn
Follow Emile until you spot the Pillar of Autumn. The path continues down the hill to the right.
At the bottom, you’ll see a bridge guarded by Covenant troops. You can engage them or try to slip or run by.
It really is much easier to get down to the far right wall and activate sprint. Jump a little to avoid enemy fire, run right by the Zealot, and make for the building just beyond the bridge. Inside, grab the DMR and some health if you need it.
Look right just outside the door for a pair of Mongoose bikes. Snag one and get the hell out of there.
Floor it. Stick to the road and it’ll lead you east through a canyon. On the other side, though, a Scarab is being deployed, along with orbital drop pods. It’s a dangerous mess — you should leave.
Driving straight through is hard — instead, ditch off the cliff to the left. You’ll land on a road below where there’s another Scarab, and you can drive right under it.
The road bends into a tunnel, and then along a cliff with a Phantom firing on you. Ignore it. Your bigger issue is the broken bridge ahead. Gun the engine and you’ll make the jump. Ditch the Mongoose and get inside.
This Town Isn’t Big Enough
There’s a sizable Covenant force blocking the road ahead of you. Duck inside the building to the right of the barricade and grab anything you need, like health or a shotgun.
Go around the barrier and hang to the left. There’s a Wraith ahead that’s a headache from any other position. From here, try to DMR a few enemies, especially Brutes, of which there are quite a few.
Use the structure up ahead on the left for cover and rearming. There’s health inside, but watch out for Brutes to toss grenades just inside the doorways. They love that.
Take your time and make good shots, specifically from the rocks on the left side back where you started. Get the two Skirmisher sharpshooters on the floating platform to the right, and all the Brutes below you. From here, you can do all the fighting on your terms.
As you move up, the Wraith becomes more of a threat. Concentrate on any remaining ground troops and use all the debris as cover from the mortars. Keep moving or they could kill you.
When it’s just you and the Wraith, stand back and snipe the Brute running the gun. Now you can sprint up between mortar shots and hold X to board the tank. Follow the prompt to plant a grenade and get away before the tank blows.
Take a breath and ascend the hill toward the waypoint. Get ready for — Grunt suicide squads! Retreat and snipe them — don’t get caught among the rocks or they’ll get you.
That is, they’re suicide squads if they catch you unawares. Otherwise they just fire on you. Be most careful of the Skirmishers with rifles at the back of the group.
Clear out the little guys and keep moving. Go through the caves for a cutscene. Follow Emile and a little further on you’ll find a health pack, ammo, weapons and dead marines.
When the cave opens up into a bigger room, you’re about to be ambushed. A handful of drones populate the area. Double back into the entrance and use it for cover to snipe the bugs out of the air.
Clear those guys and push forward. You’ll be on a slight ridge when you’re attacked by Drones again, but this time there are Skirmishers below. Use your high ground to DMR the snipers while you exterminate the bugs.
Push down and around the corner. You’ll hit some armor upgrades — take what you want (the Drop Shield is among them, my current favorite) and continue out of the cave toward the ship yard ahead.
The Ship Yard
Descend the hill. If you need ammo (and even if you don’t), drop further down to the building on the lower left. Inside are health and DMR ammo.
From the doorway of that building, snipe Skirmishers and, more importantly, the elite Zealot in white that’s out there. You can kill him easily if Emile is distracting him.
Get outside when you’re ready and mop up. There are two more elites to the right, but they should be easy at this distance. After that, a few jetpack elites arrive, but again, head shots with the DMR win the day.
Go through the big structure ahead. If you go to the right and go through the bottom, you’ll find health and ammo. Take the steps up and go through to the other side, where at the opening is a sniper rifle.
Even better: Go all the way to the left and find the Spartan Laser. Use it against the three Shade turrets below and you’ll destroy them instantly, making everyone’s life much easier.
Use the last of the laser on one of the Ghosts and try to snipe the driver of the other. When you’ve gotten rid of them, you can drop down or snipe the rest of the grunts and few straggling elites. Then head toward the structures on the other side of the yard.
LEGENDARY DATA PAD: From outside, facing toward your next objective, look left for a big orange structure with stairs. Climb it — you’ll be on the roof of the building. Turn right from there and walk along the roof to the far right, or south, end. Pass the covers over the skylights and hop onto the platform above, then turn the corner to the left to find the Data Pad.
Head inside. You’ll find Covenant in the big room in the middle — go up the steps you find before you get there to use the high ground against them. Use your DMR and sniper rifle, if you still have it, to kill the elites, then mop up everyone else.
Drop down and go through the door. You’ll enter a hallway and soon see some glass windows. You can enter the room on the left (there’s ammo), but there are no doors on the right side.
DATA PAD: Go to the second window you pass and break it in. Jump through and go to the back left corner to find the Data Pad on a shelf.
Continue through the hallway and you’ll meet up with some marines. Below, elites and jackals are engaging a group outside as well as yours. Snipe them from a safe distance.
After a bit, you may have to drop down and engage them directly. Use grenades to flush the elites into your waiting attack. It’s surprisingly effective.
There’s also a staircase that can lead you down, where you can get another angle on the enemy.
Once they’re finished, you’ll proceed outside. Follow the path to the right and you’ll get grenades. Around the next corner, Hunters and Skirmishers are waiting.
Kill the Skirmishers first. You’ll get a check point and have an easier time. After that, let Emile draw the Hunters while you flank around and put your shotgun (or similar weapon) right in their gelatinous, vulnerable backs. Repeat the process until they’re dead.
The door at the far end of the area opens with your victory. It’s to the right. Go through and get ambushed by the Covenant almost immediately.
Sit tight a second. A Zealot with a sword is headed your way — wait for him, engage him while he’s distracted, and take his sword.
With the major threat dismantled, you can carefully head around to the right to the stairs that lead to the upper level. Fight through the jackals — the sword cuts through their shields — and make for the group that’s guarding the door out.
If you’re low on ammo, it’ll take some doing, but get close enough to sword-lunge the last elite and you’ll throw the remaining forces into disarray. Finish them all off and get out of there.
The hall leads upward, where you’ll meet up with some marines. Help them fight through grunts and jackals to continue forward.
There’s an ammo rack just ahead. Take what you need from it and get set. A grenade launcher is among the spoils.
You have to hold and clear this position. Go outside and head to the building sort of in the middle — it’s got a sniper rifle against the right wall.
From here, feel free to snipe all the Brutes that come in on the approaching Phantoms. The grenade launcher can be useful against the smaller units.
Clearing the first wave triggers a second drop, with more Chieftains and at least one with a hammer. Get more ammo from the level immediately below the one where you found the sniper rifle — there are some weapons in there that will help you with the Brutes. You also get some marine reinforcements.
Keep an eye for another Chieftain with a fuel rod gun. He’s deadly and you’ll want to deal with him early.
There are more Brutes all over the place, but mostly they’re concentrated at the far side of the platform, near the cliff. Shoot down on them from above with grenades to take out a few. Basically, you’re roving around this battle, knocking out anyone you can.
Things might get a little dire after this wave. The third is stronger, with even more Chieftains, and things get messy. They have a Plasma Cannon now, which sends bolts of plasma with a delayed explosion.
Kill any little guys you can. It’ll be easier with them dead. Keep your eyes open for a grunt with a fuel rod cannon. You’ll want it.
Find a place, probably on the far side of the battlefield where the land wraps around the building, where you can retreat and heal. If you have the Drop Shield, this is especially perfect — you can restore your health without getting annihilated.
Try to take each battle one at a time. Kill a few grunts, retreat. Kill a Brute or two, retreat. Wait till you have the firepower and a decent checkpoint, then make a run for the center building.
You want to go through the building so the Brutes see you and look for you on the side away from the cliff. If you have something strong, the fuel rod gun being ideal, you can sneak up the back stairs and ravage all the Chieftain Brutes at one time with explosives.
It can be a tough fight, but with a decent gun, you’ll get through. Mop up the remaining enemies with whatever you can find, and Keyes will show up. Run to his Pelican and deliver the package.
Man the Mass Driver
Keyes departure re-opens the building with the mass driver cannon. Head that way now. You’ll run into some grunts at the entrance.
Inside are some more grunts, but much worse, several strong elites. One carries a fuel rod gun. It’s going to be tough.
Check the corner to the left, right when you walk in through the door.There’s a DMR lying on the floor. It’ll be extremely useful. Look for bodies to find it. Go left into the small room, where you’ll encounter that first elite. You’ll have to kill him one-on-one.
There’s more ammo in the counterpart room across the way from here for your DMR. Problem is, that fuel rod gun guy is in the way. Still, make a break for that other location and try to draw the other elite down into a fight there. If you can kill him away from his backup, you’ll have an easier time.
Ammo up, heal up, and get ready to fight the last elite. Range is your ally — find a distant corner and you might be able to freak out his AI, pounding him with DMR head shots while he tries to hide, but is unable to return fire.
This guy’s a Zealot, so if you hurt him, make sure you kill him. Do enough damage and he’ll pull his sword — let him get away and you’ll have to fight him with shields up, too.
When he’s dead, you’re clear to the MAC gun.
Save the Autumn
Jump in the gun and ignore the big cruiser moving into position entirely. You can’t hurt it — not even a little.
Instead, watch for enemy craft coming your way. Phantoms will appear basically at your 11 o’clock, your 3 o’clock, and dead ahead. Shoot them all down.
You should be constantly firing. The Phantoms are bad, but they take a while to start opening up on you — except the ones that appear right over your head, those need to be dealt with faster than fast.
Banshees also are a big priority. They fire faster and from further away than Phantoms. They also only appear generally right in front of you.
Your goal is to hold off the smaller ships long enough for the cruiser to get into position and charge its main cannon. As it does so, let a shot rip through that glowing red heart it has and you’ll destroy it, and end the mission.
ACHIEVEMENT: The “Send Me Out … With a Bang” Achievement is yours for destroying the cruiser.
ACHIEVEMENT: Depending on your difficulty level, you’ll earn “The Soldier We Needed You to Be,” “Folks Need Heroes,” or the “Gods Must Be Strong” achievements. If you beat Legendary all alone, you’ll also earn the “A Monument to All Your Sins” Achievement.
Stick around after the credits. It’s not quite over.
Mission 11: Lone Wolf
Get acquainted with your surroundings. There’s not much to do here except get ready to fight, and then fight. Get down lower and you’ll find ammo and weapons all over the place, as well as countless Spartan bodies.
LEGENDARY DATA PAD: The final Data Pad is due east of the starting platform. Go down the hill and you’ll see a Drop Shield and a big pile, with columns rising out to the left of it, suspended in the air. Jump onto the various debris and construction equipment to reach the pipe and the Data Pad just inside.


 Fallout 4
 BioShock Infinite Collectibles: Voxophones, Infusion Upgrades & Sightseer
 Phils Story Corner – On StarCraft 2: Heart of the Swarms Hub World Story Structure
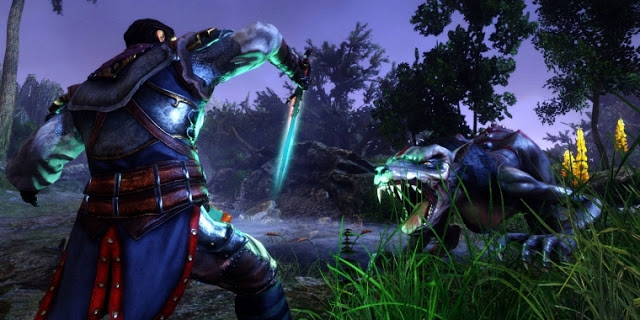 Risen 3: Enhanced Edition - all features and release date
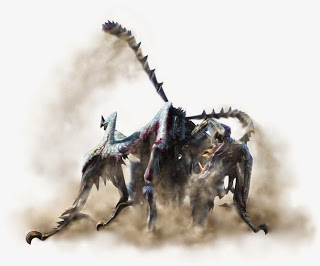 Monster Hunter 4U defeat Camouflaged Nerscylla, White Monoblos