Patapon’s stylized graphics and unique gameplay mechanic have made the series a cult hit on the PSP, and Patapon 3 promises to pick up where its predecessor left off. Gameplay will stay effectively the same — players will use the PSP’s face buttons to give different rhythmic instructions to their armies of Patapons, which come in a variety of different flavors.
The big innovation this time around is multiplayer, which can be played either locally or via the internet. A brand-new experience points system will enable players to compare the scores they attain while playing the game‘s many levels. If you run into trouble (or want an extra leg up in multiplayer competition), take advantage of our full walkthrough. We also have a cheats page, which collects useful Patapon 3 information.
Earthend
Introduction
Welcome to Patapon 3! If you’re an old player, prepare for some new things. If you’re new to the Patapon world, just try to keep your head above water.
Your first challenge is to beat your “Pon” drum in rhythm with “Pata” “Pata” “Pata”. In Patapon 3, every command is issued through four beats to every one measure. On your handheld, the beat translates to “Square” “Square” “Square” “Circle”. For now, you’re only focusing on “Circle”. After three beats, finish the measure with a press of “Circle”.
Keep in rhythm as you move across the desolate field and collect some extra Patapons into your group. Use the white border around the screen as a visual guide.
With every completed measure, you’ll build up a combo meter called your Fever Meter. Try to complete four measures in a row to activate Fever Mode. Fever Mode provides your Uber and the Patapons with a boost in their stats, so try to keep it up as much as possible throughout the game.
Once the introduction is finished, you’ll have a chance to explore your Hideout. The Hideout is your base of operations. As the game continues, more features will unlock inside the Hideout, so stop and click on any of the buildings inside for an explanation.
When you’re done, choose the Master Obelisk. The Master Obelisk is where you deploy for quests. Select the Master Obelisk and select the Patapon Training Grounds.
Patapon Training Grounds
Advance! Attack!
For your first training mission you’ll have a chance to practice the Onward and Attack commands. These are the most basic and your most important commands, so get to know them.
Commands work differently in Patapon than in must games. First of all, commands are issued through fours beats making one measure. The four drum beats are made by pressing one of the four face buttons on your PSP.
Everything occurs in measures – practice the timing of the beats. You don’t have to be perfect, not yet anyway. For now, input the commands to see how timing works. You’ll often have to put in commands under pressure.
In Patapon 3, timing is everything. The game play moves in measures; one measure to input a command, one measure for the Patapons to act, then one measure to input a command. Wait for the action before putting in another command.
Use the Onward command and Attack any of the stone structures or rocks blocking your way. This is practice, so you won’t be under any pressure.
Defense Practice
Your first test! This quest will teach you to use the Defend command. This command is more complicated than Onward or Attack, but just as useful. Mastering this command early will help you later in the game.
Once the quest begins, several cannons will begin firing on your Uber. Command your team to Defend, followed by another Defend, and so on.
Go ahead and complete the second level of the course. Don’t risk continuing into the third level unless you picked a Shield.
After this quest, the Field of Angry Giants will become available for questing. Go ahead and finish the remaining two practice quests unless you’re a Patapon veteran.
Attack and Dodge Practice
This quest teaches the Attack and Retreat commands. A canon will appear and begin to charge. To dodge its shot, input the Retreat command. Some enemies do so much damage or are so powerful a Defend command won’t cut it. Retreat makes your Patapons run just off screen for one measure before returning to their previous position.
After retreating, input the Attack command to destroy the cannon. If it begins charging again, order a Retreat. After the retreat, attack again.
March and Jump Practice
Another new command, this time it’s Jump. The Jump command is not one of the most widely used commands, but it will come into play in several missions.
For this quest, you’ll be challenged to move as far across the field as possible under a time limit. To accomplish this, you’ll need to march forward and jump to catch red or blue orbs. Red orbs give you extra time, while blue orbs make you march faster.
To collect the orbs, wait for them to appear just onscreen. When your Patapons stop the action, order a Jump. Remember, inputs take time, and actions don’t occur right away. It will take one measure and one beat for the Patapons to jump before inputting a new command.
Move as far as you can to finish this quest. That’s it for the Patapon Training Grounds.
Field of Angry Giants
Traverse the Field of Giants
The first quest of the Field of Giants is where the game really begins. This is where you’ll be fighting enemies and learning new strategies. Deploy your team and prepare for battle.
First you’ll be blocked by rocks on the road. Use the Attack command to order your team to destroy the rocks. Practice correct command inputs, trying to continuously input commands correctly after every other measure. Remember, correctly inputting commands four times in a row will activate Fever Mode.
Fever Mode stays active as lone as you continue to correctly input commands. Fever Mode energizes the Patapons, making them stronger and tougher. Try to keep Fever Mode going at all times, you’ll need it.
After destroying the rocks, move Onward to face off against the Bonedeth Brigade. These guys are you main adversary throughout the game and show up in just about every level. They’ll appear in various classes carrying an array of weaponry, but for now they’re a push-over. Attack to take care of them.
Just ahead you’ll run into a fortification. Bonedeth bad guys usually sit on top to pelt your Patapons with arrows or spears. To quickly take them out, use the Charge command followed by Attack.
The Charge command is one of the most useful in the game. Using Charge will consolidate the Patapons and stop them for one measure. While the Patapons are vulnerable for that measure, the next order will be energized. Use Charge then Attack to make your Attack more powerful, or use Charge then Defend to block even the strongest attacks.
Later in the game, Charge will become central in your strategy for victory. For now, just attack and you’ll do fine. Continue forward to run into a Cyclops.
The Cyclops is your first dangerous opponent. Approach him quickly; usually the Cyclops will reach into the ground to throw a boulder. Just keep moving forward to move Onward underneath his throw. When you’re directly in front of the Cyclops, he’ll begin to rear back for one measure.
Enemies, just like your Patapons, always move in measure increments. They’ll usually prepare an attack, then attack. Watch every enemy for signs on how they’ll attack. Most large enemies have two basic attacks to look out for. Almost always a Charge command followed by a Defend command will save your Patapons. There are exceptions, but don’t worry about that yet.
Defend or Retreat just as the Cyclops attacks. If the Cyclops pauses or moves around, go ahead and Charge, then Attack. Preparing a Charge can be useful, if you have an opening to attack, go ahead and Attack, but if it looks like your opponent will attack, go ahead and Defend. Charge energizes both commands, so you’ll be safe. Your Patapons don’t take much damage before dying, so always play cautiously rather than overzealously. Take your time, Defend, Retreat, and then Attack when you’ve got the chance.
Defend as the Cyclops taps his foot. When a Cyclops taps his foot, he’s preparing to swing his massive club. After defending, the Cyclops will flip up his eye protection, making him weak to attacks. Attack him while his eye is vulnerable to do extra damage.
Fight some more Bonedeth, they won’t slow you down. Another Cyclops will block your path, so Charge and Attack or use your Uber’s Special Command.
A Special Command will activate an Uber’s Hero Mode. Every class in the game has one Special Command that is unique to each particular class, so be sure to check them out in the Barracks.
Special Commands are not like other commands, you have to perfectly match your beats with the rhythm while inputting the commands. This can be tricky, especially under pressure. Practice makes perfect, the Special Commands are absolutely essential and can only be input during Fever Mode. Active Fever Mode and perfect command inputs are vital in Patapon 3.
Special Commands can be activated as many times as you want with no penalties, as long as you’re in Fever Mode. Special Commands are always simple commands like Attack or Defend; some of them are combinations, such as Charge followed by Attack. If the Special Command is a combination, only the final command needs to perfectly match rhythm.
At last, you’ll run into a Bonedeth structure. Bonedeth buildings spawn Bonedeth soldiers and monsters, so you’ll often need to press forward just to stop the growing tide of enemies. Destroy the building like anything else, by using Attack. Your Patapons will do the rest.
Continue forward to reach the glowing Totem. Cross it to complete the quest.
After every quest you’ll be rewarded experience points and the ability to open the treasure chests you’ve collected. If you die during any quest, you’ll keep any of the ka-ching ($) or experience you’ve earned, but will lose the treasure. Finding treasure is the best way to get new equipment for your Patapons. Conversely, choosing a quest above your current level is a great way to gain experience for your under leveled classes.
Ragewolf and the Mysterious Birch Grove
Ragewolf is your first rival. Instead of an Uber, Ragewolf is a Dark Hero working for an Archfiend. The Dark Heroes pose a threat whenever they’re on the field against you, often using very powerful Special Command attacks. Play carefully around these evil Heroes.
When you begin, march Onward and Attack the debris and Bonedeth building blocking your path. Past the first building is another large Bonedeth building.
The second larger one will require a charge or a Special Command to destroy safely before the archers above you do damage. Bonedeth troops will continuously spawn out of their buildings, so destroying them quickly is always helpful.
After destroying the large Bonedeth building, Ragewolf will attack. Ragewolf usually begins by defending himself, which is your chance to Charge and Attack. When he puts his guard down, that means he’s preparing an attack. Defend against his attack, and attack him while he’s defending to safely beat Ragewolf. The tricky part is in the timing.
After Ragewolf retreats, move Onward to reach a large tree. By now you might be noticing fire. Fire is started by fire-type weaponry or armor. Brush will begin to burn if they’re attacked by a fire-type weapon, fire will damage your enemies and you. While fire isn’t incredibly damaging, it does have a chance to burn your Patapons. A burning Patapon will run uncontrollably back and forth, often into harms way or simply not attacking or defending when you need the Patapon to. Burning Patapon do not follow orders, and slowly take damage.
There are three ways to prevent status effects: the first is to avoid the cause of the status effect. Touching fire will burn Patapons, getting hit with poison or ice attacks will poison and freeze your Patapons, etc. Retreat, Jump, or Defend to avoid dangerous status effects.
The second way is to equip weapons and armor that increase your Patapon’s resistances. The better the resistance a Patapon has, the less chances they’ll be affected. Defend, or Charge then Defend will also boost their chance of successfully fending off a status. Staying in Fever Mode will also boost Patapon resistances while active.
The third method does not prevent status effects, but cures them. When your Patapon are afflicted by freeze, poison, burnt, sleep, or any of the others – use the Party command. Party will consolidate your team and cure status effects. Party also increases the Fever Meter, but that won’t come into play until later.
The large tree will jump to life when it begins to burn. There’s no strategy, just Attack, Charge Attack, or use your Hero’s Special Command to finish it off fast.
Fight the Bonedeth troops and destroy their building to clear the way to the exit.
Hunt the Cyclops
Birch Bonedeth Brigade
These optional quests are available for gaining experience, ka-ching ($) and treasure chests. You’ll want to complete every open quest, or try them all. Gaining experience is vital to your success in Patapon 3, so no amount of experience grinding is too much.
Arena of Valor
Proving Grounds and Crescent Moon
The first duel is also one of the most difficult. You’ll face Ragewolf in an arena suspiciously similar to one of Patapon 3’s multiplayer modes. The objective here is to move forward, capturing neutral buildings (White) and destroying enemy buildings (Red), or racking up more points than Ragewolf before the time limit.
Essentially, it is impossible to outlast Ragewolf. The Dark Hero will respawn when defeated, and will also use the Summon command to do damage to any of your captured buildings. Captured buildings never respawn if destroyed and you only have one life.
If Hatapon, your flag-bearer dies, it’s game over. Hatapon is invincible as long as your shield class Patapon lives. I recommend playing as a Shield class Patapon Uberhero in the beginning of the game for beginners, but anyone can win with enough trial and error.
What this means is that Hatapon can take damage if your shield class Patapon dies.
You may need to level up to complete this quest. I recommend reach at least level 5 before attempting it.
First, march Onward to the center of the arena. You’ll meet Ragewolf there. If you’re quick, you’ll be able to capture the central tower and use it to help take down Ragewolf. Use Uberhero Special Commands and Charge Attack to defeat Ragewolf and his army.
Ragewolf will begin to respawn, so march Onward to destroy his first tower. You’ll need to move fast, but move carefully. Keep your distance from the towers if you can and prepare a Charge Attack to destroy them fast. When one tower is down, continue toward the second tower.
Depending on Ragewolf’s mood, he’ll either attack you near the second tower or third. Play defensively this time, as he’ll likely has his army of Bonedeth soldiers and a tower backing him up. If Ragewolf prepares a Summon, Charge Defend to save your keisters.
Remember that Bonedeth and Ragewolf can walk by their own towers, while you’re blocked by them. If they’re behind a tower, you’ll need to destroy it just to get a shot at attacking them. In these cases, play defensively. If you have too, Defend will slowly chip damage off a tower while keeping your army safe.
If you’re fast, Ragewolf’s second defeat will be his last. Destroy the third tower and stomp your army Onward into his base to complete this quest.
Keeping Fever Mode on is essential, and using your Uberhero’s Special Commands will save your life. Patapon 3 has no mercy from this point on.
Cave of Valor
Archfiend of Valor
As the quest title implies, this is where you’ll face off against the Archfiend of Valor. Every Archfiend is hiding on the third level of a three level dungeon. These dungeons are always difficult, and can be a slog if you’re not prepared.
If you haven’t already, sell your unneeded equipment at the Armory and start purchasing upgrades to your equipment at the Blacksmith.
Also, take a look at what classes are available to you. Team synergy isn’t just a corporate buzzword; you’ll need a team that works together well. The basic beginning classes will only get you so far. Depending on your Uberhero, any number of class combinations will help you in this game. Grinding is important, but so is experimentation. Play around with every new class to see how it changes your team dynamic.
Every team has four elements; the shield class, the spear class, the support class, and the Uberhero. Your Uberhero is obviously the backbone of every team, and whatever class you choose for him he’ll excel at. The trick is learning where your team is weak. A good shield class is a must; if your shield class units die, Hatapon becomes vulnerable.
Before entering the Cave of Valor, take some time to learn what classes are available and how they might help your team.
You’ll need to be at least level 5 to complete this dungeon.
Floor 1:
Move Onward and Attack through the door and debris. You’ll face Bonedeth groups and Cyclops. A good Charge Attack should easily take care of any Cyclops.
Push forward, destroying the door, debris, and Cyclops blocking your path. That’s it for Floor 1. In most dungeons, the first floor will serve as practice while the second floor is the real challenge. Often, the second floor is more difficult than the actual boss on the third floor.
Before continuing onto Floor 2, you have two options. You can either continue or return to your hideout. If you return to your hideout, you keep whatever treasure you found but will have to restart from the beginning of the dungeon.
Choose to return to your hideout. Either die or return to your hideout, it’s the only way to unlock a new command.
As you return to the HQ, a mysterious creature will ask if you’ve lost any treasure. Be honest and tell him you haven’t lost anything – it’s the third option. For your honesty, you’ll be rewarded a new command and a new ability called Summon.
Summon is a one-per-quest command that revives any of your fallen Patapons, heals the others, and unleashes a powerful attack. Under normal circumstances, your Uberhero will revive after several seconds, but he will not revive in a dungeon. The only way to revive during a dungeon is by finishing a floor or by using Summon.
Summon can only be activated by filling up your Fever Meter. The fastest way to fill your Fever Meter is with the Party command. If you need to build your Fever Meter and enemies aren’t harassing you, just order your Patapons to Party a few times.
This is why keeping Fever Mode going is so important. Summon isn’t just helpful, it is required to complete required quests. Take some time to practice Summon before returning to the dungeon.
Floor 2:
In the top left corner of the screen you’ll see a blue symbol. The blue symbols denote how many Summon commands are available to you. In a normal quest, you’ll always only have one, but in a dungeon you’ll gain one for every floor completed. If you save them, you’ll have three Summon charges for the boss. One is usually enough, though.
March Onward until you reach a large gate with a switch above it. Jump to flip the switch, opening the door. March past it before it closes again. There will be times when the gate may close before all your Patapons can make it through. If this happens, order another Jump and the stragglers will return to the group.
Past the gate, you’ll run into Bonedeth Tribe members and a lot of debris. Start attacking to destroy all of it. Take down the Cyclops while clearing away the debris – watch out for the Cyclops’ rock throw, if you attack before moving close enough, your support Patapon will be in danger.
Destroy the door in your path; soon you’ll need to destroy more Bonedeth and debris. After the rocks are cleared, you’ll reach a dragon.
Dragons are dangerous opponents, although they essentially only have one attack. As you approach Onward, the dragon will roar and move around. The dragon is the toughest opponent you’ve faced yet, he’ll soak up plenty of damage and can wipe out your Patapons with one good attack.
The dragon will raise its head and pause for one measure. That’s your sign that the dragon is about to breathe fire. With a powerful shield class Patapon, you’ll be able to absorb the flame no problem while the rest of your Patapons can hit the dragon with spears and arrows. If you’re focused on melee, you’ll need to Defend or order a very precisely timed Retreat. The flame-breathe will either last one measure or longer, so Defend will save you. After the flame attack, the Dragon won’t attack for two or three measures. Take that time to Charge Attack and prepare a Defend order.
If you’re in a tight spot, save a Summon for this dragon. Your Summon will raise any fallen Patapons and defeat the dragon. Try to only use Summons when absolutely necessary, the more hurt an enemy becomes, the more erratic their attack pattern becomes. Save your Summons for when you’ve done a good amount of damage.
With the dragon defeated, destroy the door and cross the totem to finish this floor.
Floor 3:
The third floor is where the Archfiend will always be hiding. March toward the large door to fight the boss.
This is Dodonga, a kind of T-Rex looking creature. First, he’ll begin to walk toward you. Use this time to Charge Attack.
Dodonga has three attacks. He’ll always prepare attacks by bending over slightly and squinting. Dodonga will head butt your Patapons away at close range, spit flame, or eat one of your Patapons. Prepare to Defend whenever Dodonga is about to attack, it will prevent your Patapons from being eaten.
When you do some damage, Dodonga will run away. March after him and just keep attacking. Wait for him to attack, and then hit him hard with a Charge Attack or with Hero mode. Dodonga, after attacking, will rest for three measures.
Get Dodonga to half health and use your Summon. If all your Patapons are alive, go ahead and save it.
That’s all the strategy for this boss. Most bosses can be defeated through brute force and tenacious defense. They will always give you time to Defend, but they do get tougher from here.
With Dodonga defeated, you’ll find the key. March to the exit to finish this quest.
Snow Field of Sullied Tears
Big Chills in Pure Snow
Before taking on this quest, you’ll want to equip your Patapons with fire-based gear. Flame armor and weapons will increase your resistance to freeze. In this frigid environment, freeze is a problem. Flame gear will also do extra damage to ice-based enemies. Try to keep at least one piece of gear of every elemental type and only sell copies you find.
Your first challenge will be to overcome some fortifications protecting a snowball cannon. A Bonedeth building is just on the other side spawning Bonedeth soldiers, so work fast. Charge Attack the fortifications, if your Patapons are frozen in the attack, fix them with a Party order. Use Hero Mode here to quickly take down the cannon.
More fortifications protect a large Bonedeth tower. Another snowball cannon continuously shoots just past that. Use the same strategy here as before, Charge Attack out of the cannon’s range to destroy the tower, then focus on the cannon.
Another large Bonedeth building spawning soldiers is ahead, protected by another snowball cannon. Destroy it like the rest and move Onward.
Continue down the path to find a new enemy. The Golem is a very dangerous enemy you’ll find throughout the game. It will always appear as debris in the ground until it begins to move around. While it is burrowing underground it is invulnerable. Once its head pops out of the ground, then you’ll be able to damage it.
The Golem has two attacks. When it leans back and raises its head for a measure, it will use ice-breath. If it leans forward and lowers its head for a measure, it will perform a sweeping attack with its arm.
Attack when the Golem prepares ice-breath, as it isn’t very dangerous and can be shielded by a good shield class without defending. Defend if you need to. After an attack, the Golem will burrow again. Prepare a Charge while it is burrowing and Attack the following measure. Even if the Golem hasn’t risen yet, he will as you Attack. Then Defend against its next attack.
If the Golem prepares an arm sweep, you’ll want to Defend. This is a very powerful attack, and can wipe out your team in two swipes.
Charge Attack and Hero mode will take down the Golem with the right timing. Once the creature is defeated, continue Onward.
Save your Summon, because you’ll be facing another Golem. Fight it the same way or use Summon if you’re low on Patapons. Beyond the Golem is the final Bonedeth building and the exit totem.
Naughtyfins and the Ice Forest of Introversion
March forward; you’re in a blizzard this time, so your Patapons will spontaneously freeze without the proper protection. Keeping Fever Mode going will help raise Patapon resistance to freezing.
Ahead, you’ll find a new enemy called a Salamander. The Salamander grows stronger the more damage you do to it, and explodes when defeated. The explosion will instantly kill even if you order your Patapons to Defend, so consolidate your army with Charge or Party if you’re at long range or Retreat if you’re close. You’ll have more than a measure to escape the explosion, so if any of your Patapons freeze, Party then Retreat.
To fight a Salamander, try to do as much damage as quickly as possible. The Salamander has a weak attack; they’ll raise their heads and bend forward to strike your team. It isn’t very dangerous, a Defend will shield you. Use Charge Attack and Hero mode to defeat the Salamander quickly, the Salamander will only grow in strength between measures. Don’t give it the chance and attack.
Ragewolf will retreat beyond the fortification. Destroy it and march Onward to fight Bonedeth Brigade and another Salamander waiting amidst rubble. Use Charge Attack or Hero mode to quickly clear away the rubble and attack the Salamander. Remember to always keep your distance, usually Patapon can charge into battle from a distance or fire long range projectiles, either way don’t march right into the Salamander’s face – that’ll make escape difficult.
With two Salamanders down, destroy rocks in your way until finding the third Salamander. At this point, you know what to do. Just play defensively and don’t use your Summon command yet.
After defeating the third Salamander, push forward until you reach the Ice Tower. You’ll face off against Ragewolf and the new Dark Hero Naughtyfins. Together they’re dangerous, march Onward and activate your Summon to destroy the Tower and both heroes easily. Otherwise, you’ll need to play defensively as the Bonedeth archers, Ragewolf, and Naughtyfins pelt you with nonstop attacks. Defend, Defend, Defend and you’ll eventually do enough damage to win.
One final Bonedeth building is in your way. Smash it and cross the exit totem.
Racing Alley of Purity
A Mermaid’s Tears and the Great Snow Race
In this duel, you’ll need to make it to the finish line first. As difficult as it sounds, you don’t actually have to be especially fast to win this duel. Just like the Jump training on the training grounds, you’ll be able to snatch speed power-ups to boost your Onward command.
Just like the previous duel, there are two teams. Blue and Red, blue only needs to destroy red buildings and neutral buildings, while red only needs to destroy blue building and neutral buildings.
Start the race by marching Onward. Be perfect and get Fever Mode going, then use a Special Command to quickly destroy the red fortifications blocking your way. The ice cave ahead is protected by a snowball cannon. Destroy it, and remember that Charge Attack is far more powerful than two Attack orders in a row. Use it to speed through fortifications.
Destroy the ice blocking your path in the cave. Outside, another red fortification, followed by a neutral tower protecting a snowball cannon. Steamroll your way through, and don’t worry if you’re a little behind. One major roadblock will always stall both of your teams into a standstill later on.
Beyond the snowball cannon is a huge golem. This thing takes plenty of punishment while following the same pattern as a normal golem. If you’ve been slow so far, don’t worry, the opposing team cannot defeat this golem alone.
Charge while the golem is underground and Attack. Don’t bother using your Summon, it will slow your team down too much to be effective.
Wait for the golem to either retreat or for it to move forward then back. If you’re patient, the golem can actually kill Ragewolf and Naughtyfins, but don’t count on that. Wait for the golem to push your parties back and retreat. You’ll be able to march Onward and finish off the golem with the Dark Heroes one step behind.
Only one obstacle left; fortifications. They’re set up in a helpful way, allowing your team to gain one Onward length over the Dark Heroes. Charge Attack the fortifications and march forward to the exit totem to win this duel.
Tower of Purity
Archfiend of Purity
Floor 1:
You’ll need your Patapons at level 9 or 10 to succeed here. Make sure to bring strong defense. The white magician support class can heal, create ice barriers, and shield your team during Defend to provide extra defense.
If you haven’t already, level up your other classes to unlock new classes and experiment to find a good balance of attack and defense for your Patapon team. Remember, endurance is important for dungeons, so a team with high defense is important.
March Onward and take down the door with an Attack. A Salamander behind debris is ahead, with a group of Bonedeth spearmen. Behind them is yet another Salamander. Always keep your distance and regroup with Party or Charge to stay out of range of an exploding Salamander.
Smash the door to fight yet another Salamander. A Salamander may walk towards you, it has no long range attacks so don’t be afraid to be cautious. Expect a Salamander to close some distance before attacking, and don’t march closer if you’re already close enough to see it. The Salamander’s explosion covers about half the screen, so one half screen length is all the distance you need to stay safe.
Past the Salamander, Bonedeth, and debris, you’ll run into a Golem. Unlike the Salamander, you won’t want to go on an all out attack. Play safe and defensively, the Golem’s arm sweep is very dangerous if you haven’t ordered your Patapons to Defend.
Destroy the door to fight a huge Golem. These guys are twice the size, twice the health, and twice the damage. Take your time and save your Summon. Use Charge then Attack while the Golem is burrowing to do some damage.
Crush the Golem, finish off the Bonedeth soldiers, and destroy the door to reach the exit totem.
Floor 2:
This floor shows no mercy, come prepared with two Summon commands. You’ll need both of them.
March Onward towards the gate. Jump underneath the platform holding a treasure chest twice to get your hands on it. Then move closer to the door and Jump to flip the switch.
Beyond the gate you’ll meet a dragon. Take him down cleanly and march to the next gate switch. Jump to open the gate and get yourselves through. Beyond you’ll reach a Salamander. Crush it and continue to open another gate.
A giant dragon is waiting for you. Don’t disappoint by opening up with Charge Attack and Hero mode to devastate its health. The dragon’s breath lasts longer and does more damage, so always Defend. A Charge Defend is even better if you have two measures to prepare it.
Keep fighting until one or more of your Patapons fall. That’s your cue to activate Summon. Hopefully that will take care of the dragon. If not, Defend, Defend, Defend to whittle away the dragon’s health and finish it off.
After your victory, march Onward and Jump to activate the gate switch. You’ll face another Salamander, just destroy it before it starts walking forward. If it begins walking forward, you’ll be stuck with you back against a wall unable to retreat. Charge Defend if that happens, otherwise, keep your distance and destroy the monster.
Open the gate to find a giant Golem. The giant golem is even more dangerous than the giant dragon, Defend while it’s above ground and Charge as it burrows followed by an Attack as it pops back up. Use your Summon here if you’re in trouble.
With the Golem defeated, open the gate ahead and exit through the final door.
Floor 3:
The Archfiend is just through the boss door. Meet Gaeen, a stone goliath. Like the previous boss, he has two major attacks, but he’ll start by roaming towards your team.
Prepare a Charge Attack to do some damage to Gaeen as he reaches you. He’ll either attack by raising his arms behind his head and pounding your team with them, or fire a laser from his mouth. Both attacks can be easily blocked with a simple Defend order, don’t get ahead of yourself and Attack while he’s preparing to attack.
Defend before he attacks, and Attack with Special Commands after he finishes. The best time to attack a boss is when he’s moving or milling around, he’s preparing an attack when he stops in place and moves to the beat. That’s your cue to Defend.
Use your Summon if your Shield class dies in battle, any one of Gaeen’s attacks can kill Hatapon instantly, so don’t risk fighting without a Shield class.
Do enough damage and Gaeen will run away. This will give you time to Party and build up the Fever Meter. Heal now if needed, and then march Onward toward Gaeen to engage him.
Keep plugging Gaeen with Charge Attacks after his attack, and you’ll take care of him. After completing Floor 2, Gaeen isn’t so bad. Destroy him for the key, march to the door, and leave via the exit totem to complete this quest.
Plateau of Pompous Wings
Underworld Guard Dog of the Pass
In the deployment menu, switch out your anti-freeze equipment for anti-burn equipment. The plateau is a dry place filled with brush that will burn easily. If you don’t want your Patapons running around wildly on fire, try to fit them with some Ice-based gear.
Once the quest begins, you’ll face a large Bonedeth building. The building spawns a Bonedeth rider and several horn-blowers. The horns don’t do much damage and have a small chance to stagger your Patapons. They aren’t much to worry about, focus on smashing the barricades shielding the Bonedeth building.
The field of fortifications is covered by brush that will easily burn and do some damage to your Patapons. Try to keep from taking too much damage by waiting for the brush to burn out.
The large Bonedeth building is covered with archers. Charge Attack to destroy it as quickly as you can and continue the quest Onward.
Ahead you’ll face another new enemy, the Wolf. Wolves have two attacks; they’ll spray poison knockout gas from their mouths and pounce on Patapons in an attempt to eat them. When the Wolf raises its head, it will breathe poison. If it lowers its head, it will pounce.
When a Wolf pounces on a Patapon, jam on all the face buttons quickly to prevent one of your team members from being eaten. This will end your Fever Mode streak, but losing a Patapon is worse.
Use Defend, the poison will have less effect and the pounce will not work. Wait for the Wolf to attack, then follow up with your own Attack to defeat these creatures.
Smash your way through the debris and brush, fighting the infinitely spawning Bonedeth soldiers. Bonedeth soldiers are just a nuisance, pushing forward is your only challenge. Eventually you’ll reach another Wolf, handle him carefully and remember to pound the face buttons if the Wolf pounces on a Patapon.
Fight a third Wolf and you’ll be on your way to the Bonedeth building near the exit. This is where all those Wolves are spawning from, so use your Summon to smash the place and any reinforcement quickly.
With Bonedeth defeated, continue to march Onward to reach the exit totem.
Standoffish Sonarchy and the Perilous Mist
During this quest, a thick fog will limit your vision. With a strong team, you’ll be able to fight through the mist, but if you’d rather have a good look at your surrounding bring a Piekron class with you.
Piekron, after some experience, can summon rain. Any increment weather condition will change to rain, which gives Piekron a special bonus to his stats. You don’t need the spear class Uberhero to get a Piekron to summon rain, your normal spear class Patapon will do. Select the “Summon Rain” skill in the “Set Skill” menu, and rain will appear while you’re in Fever Mode.
March Onward until you reach fortifications. Bonedeth formations will harass you, but they won’t be able to slow you down. Destroy the fortification and the Bonedeth building behind it. Moving on, destroy the debris and brush blocking your path ahead.
Eventually you’ll reach a double fortification blocking another Bonedeth building guarded by Ragewolf. As the quest progresses, you’ll face more Dark Heroes, so save your Summon for later. For now, keep your distance and destroy the fortifications from afar to expose Ragewolf to your attacks.
Once Ragewolf is exposed, move Onward to face him. He’ll warn you when he plans to attack, that’s when you should defend. His drill punch is powerful, and the stream of Bonedeth horn blowers and riders pose a threat. Charge Attack while he guards to destroy everything in your way and keep moving closer, that way your attacks will cause collateral damage to the Bonedeth building while you hurt Ragewolf. Like always, stay in Fever Mode and use Hero Mode to fight Dark Heroes.
Do enough damage and Ragewolf will retreat. March after him!
Just ahead you’ll run into four fortifications in your path. Bonedeth goons will keep coming, so clear these forts away and watch out for burning brush. Ahead you’ll face Naughtyfins and Ragewolf together guarding a Bonedeth structure.
Destroy each set of fortifications from afar and take your time to enter Fever Mode, healing or preparing however you can for this next fight. Save your Summon for later still, this one you’ll have to finish the hard way.
When you’re ready, march toward the Bonedeth building guarded by two Dark Heroes. The battle quickly becomes chaotic; both Dark Heroes will attack in staggered patterns while Bonedeth horn blowers hit your team from afar.
Stay in fever mode and use your Hero Mode powers whenever you have the chance. Chaotic battles require you to stay in rhythm more than any other time, if you’re kicked out of Fever Mode, you lose all the benefits.
Charge Attack when you’re close enough, and Defend when either Dark Hero calls out their special move. Do enough damage to one and both will retreat. If you’re weak or long range, hang back and attack Ragewolf as he tries to close in on you.
With the Dark Heroes retreating, destroy the Bonedeth structure and continue Onward. Ahead you’ll contend with more Bonedeth soldiers and brushfires. Eventually you’ll see a large wall in the distance.
Make sure your Fever Meter is completely full before getting too close to the black and orange wall. If you’re a powerful long range Uberhero, stay away and destroy the wall before moving forward. If you’re a powerful melee player, march right up to it.
When you’re close to the fall, a trap will spring. Another wall will rise up behind your Patapons and being to close in. Destroy the wall ahead with Charge Attacks as quickly as possible. As you try to escape, all three Dark Heroes will attack while Bonedeth archers and horn blowers will attack.
This is why you need to save a Summon. If your Patapons are dying, go ahead and Summon here, otherwise wait until the wall is destroyed, then Summon to do a healthy dose of damage to all three Dark Heroes and destroy the Bonedeth structure.
With that encounter done, march forward, fighting off Bonedeth stragglers and looking out for burning brush. Finally, you’ll reach a small Bonedeth building before the exit totem. Destroy it and march to the totem to finish this quest.
Range of Justice
Bird or Beast? Offense or Defense?
Patapon 3 gives you a break for once in a simple duel. Bring with you some high defense melee fighters to make this duel trivial.
The goal of this duel is to attack a switch on your side of the range. Attack the switch to activate a missile that will strike your opponents. After the switch is flipped, it will swing back and smack your Patapons.
If you bring melee fighters armed with shields or heavy Patapons, the switch won’t do much damage at all. Just order Attack over and over to activate the switch. You’ll destroy the other side in less than a minute.
Consult the video for more tips.
Castle of Justice
Archfiend of Justice
Floor 1:
Level up your Patapons to 12 or 13 at the lowest to finish this dungeon. By now you’ll have many class options and even some skills to set for your team. Spend time experimenting to find a team that works for you and your play style. Every time needs a strong shield class to keep Hatapon safe, other than that, you’re free to experiment.
At level 15 you’ll be able to change your Uberhero to one of the other two classes; that opens up your options considerably. For now, focus on unlocking every class – check the tips screen in the armory to see what level you need to be to unlock every class.
Starting up the dungeon, you’ll be given a cryptic clue. Don’t worry, you’ll get the solution when it comes up.
March towards the gate and jump to flip the switch. March Onward through to fight a Cyclops matched with Bonedeth archers. Charge Attack, he should be no challenge to your Patapon team. Jump underneath the switch and cross the second gate.
The next room contains a Cyclops, Bonedeth archers and spearmen. Fight them off like only you can and flip the switch. The following room features the same encounter again. Open the gate to face the same encounter a third time.
Inside the next room is the same encounter again! Only this time they have a Golem. This new Golem shoots rocks instead of ice, otherwise he fights exactly the same way. He’s still nasty, and with so many enemies on screen, play defensively to keep from taking an arm-sweep to the Patapon face.
Charge Attack when the Golem is at range or is burrowing, the Golem should be your main concern. Make use of Hero Mode to protect your Patapons or crush your enemies. Take it slow and you’ll eventually destroy these bad guys.
Once the room is all clear, do a little celebratory dance. That’s right, Party. You’ll notice the ceiling rumble as rocks fall on your Patapons. Keep it up, continue to Party measure after measure, and you’ll be rewarded with a key appearing above you. Jump to smash the blocks holding the key up and march towards the door. Jump to flip the switch and continue on your way.
Beyond the first Golem fight, you’ll fight a second Golem with a Cyclops and Bonedeth archers. These guys are a pain, just keep a cool head and use all your power to defeat them.
Flip the next switch, go through the gate, and march Onward to reach the locked door. Your key will open it. Just ahead, you’ll find the exit totem.
Floor 2:
Destroy the door and march Onward. In the field of brush and rubble you’ll find a new enemy. This is the Fire Salamander. He works like the old ice-based Salamanders, except he spits fire. Obviously he’s higher level as well, but they aren’t too tough. Use the right weapons and they can be staggered, completely interrupting their attacks.
This floor is an endurance test, an endless stream of Salamanders, Cyclops, Bonedeth spearmen and archers will harass you every step of the way. Move fast and fight efficiently through perfect command inputs and a steady Fever Mode.
Focus on destroying the Salamanders quickly, doing damage to them fast won’t allow them to grow in size and power. The smaller they are, the smaller their explosion will be. Use the measures waiting for Salamanders to pop to Charge or heal your Patapons.
Past the initial Salamanders, Cyclops, and Bonedeth troops you’ll fight a giant Salamander. Use the same tactics, just be wary of its increased power and durability. It will take longer to take down, but if you’re aggressive it won’t be able to fight back.
March forward, fighting the infinite spawn of Bonedeth and monsters until you reach a door. Past the door are more Bonedeth troops and monsters in a field of brush and debris. Keep pushing forward, destroying the monsters quickly with Charge Attacks and decimating the junk blocking your path.
The number of Salamanders and Cyclops gets ridiculous as you continue. Use Summon if you’re in a tight spot, use it both times if you have to. The stream of monsters just keeps coming, so don’t stay put for too long.
You’ll know you’re near the end of this floor when you run into two Salamanders at once – one normal size, the other huge. If you have one, use a Summon here to really damage both of the Salamanders and speed things a long. The huge Salamander will drop a key.
Fight off waves of Bonedeth and Cyclops ahead to finally reach a locked door blocking the exit totem. Reach the exit totem, and you’ve made it to Floor 3.
Floor 3:
The Archfiend of Justice is waiting ahead. March to the Boss door for a short cutscene.
War-giant Kanogiad is a big mean monster that offers a few new tricks. Like the previous bosses, you’ll begin the fight in the back of the room as the boss approaches. Take this time to Charge and Attack once it’s in your range.
Kanogiad offers three special attacks. When he lowers his wrecking ball, he’ll swing it across your team at melee range. This is his most powerful attack, so defend when you see it coming. His other attacks are harder to predict.
When his mouth closes, he’s preparing to spit out a bomb at you. To dodge the bomb, you’ll have to Retreat or Defend as his mouth closes, if you see the bomb, it’s already too late to shield. Luckily, the bomb is fairly weak and mainly hits your team with a status effect. Shake off the status effect with a Party and continue to fight.
If Kanogiad stands still, he’s about to fire his cannons. While not incredibly strong, this attack is hard to predict and can really hurt your weaker Patapons.
Like every boss and large enemy, the safest way to fight is through patience. Wait for Kanogiad to prepare an attack, Defend against it and launch into your own Charge Attack to do serious damage.
Summon is surprisingly ineffective against the War-giant Kanogiad. Use it to revive fallen teammates but don’t expect to destroy the boss with a Summon. Kanogiad is more resilient than previous bosses as well; you’ll need to Charge Attack to do any kind of reasonable damage.
Plug away at Kanogiad, while he has high hit-points, none of his attacks are devastating. Once he’s defeated, he’ll drop a key. Exit the back door to reach a totem. Quest complete!
Greedy Mask Jungle
Man-eating Shark of Nuchara Swamp
New locations lead to new enemies, so be on the lookout. Ahead, destroy the debris to find a field of brush. Across the field you’ll encounter a Bonedeth structure spawning groups of soldiers.
Before reaching the Bonedeth building, you’ll fight a new enemy. Meet the Land Sharks, they burrow through dirt, with only their fins showing. Unlike the Golems, the Sharks are vulnerable even while underground. Fight the sharks with either overwhelming force or from a distance.
Sharks have only one attack. From afar, they’ll pop out of the dirt and charge with their mouths open. Any poor Patapons in their way will be instantly eaten. Clearly, that’s a problem. Dealing with Sharks is tricky, and predicting their attack in enough time to avoid it is even harder. The easiest way to handle them is with a mess of melee unit striking their fins before they get a chance to attack. Any quick melee fighters can get in and take care of business before the Sharks become a problem.
Lucky for everyone, the Sharks will often drop purple potions which revive any fallen Patapons. Expect to find at least two in this quest alone.
Defeat the Land Sharks and the Bonedeth building behind them. You’ll be constantly harassed by horn-blowers and riders, but they shouldn’t be an issue. If Bonedeth soldiers are dangerous, that’s your cue to grind for experience.
Smash through the debris ahead to face another patch of Land Sharks. Deal with the same way, by Charge Attacking relentlessly to pull the sharks out of the ground.
Ahead you’ll run into a larger Bonedeth structure guarded by a fortification lined with spear-throwers. Charge and Attack to smash the buildings to dust. Now just clean up the stragglers.
Cross the exit totem to claim victory over this quest.
Duel with Ravenous in Tahi-Tahi Forest
Rain, rain, go away. Seriously, rain is the last thing you want. Trees, called Treants, guard the way Onward in this quest. Treants regenerate in rain, their health increases significantly every few seconds. Their weakness is obviously fire, attacking them will set them on fire and half their regeneration rate.
Even on fire, Treants can be a pain. Equip as many flame-based weapons as possible and Charge Attack combined with Hero Mode. Keep a combo going with Hero Mode. Treants will throw embers on your team, but with enough melee fighters attacking you’ll be able to stagger the Treant to stop their attacks.
Beyond the first Treant is a wall. Destroy it to face off against another Treant. Nicely, Naughtyfins leaves a purple potion behind to heal your Patapons. Use the same methods against the second Treant. Past another fortification you’ll find a third Treant.
After the third Treant, you’ll find another fortification blocking your way to a pillbox filled with every Dark Hero you’ve faced so far, plus Ravenous. Prepare for a fight by using the Party command.
Stay away from the pillbox and attack from range if you can. The Dark Heroes will pummel you with their special moves up close, so stay as far away as possible. Charge Attack the pillbox and get into a good groove with your Hero Mode combos.
At long range the Dark Heroes can put plenty of status effects on your Patapons, but can’t do much damage. Use that to your advantage. If you’re tough enough, charge headlong into the fray. Equipping the Patapons with poison and sonic resistance will help.
You’ll also have to deal with Blue Cyclops spawning from behind. The Blue Cyclops will raise their clubs to smash the ground, but will follow-up with several more ground pounds. Stay back if you’re at range or try to Defend, Retreat won’t last long enough to escape the Blue Cyclops’ club attack. Otherwise, attack the Cyclops like normal.
The Dark Heroes will retreat once their pillbox is destroyed. Onward you’ll contend with yet another regenerating Treant, only Cyclops will fight as well. Horizontal long-range attacks come in handy here.
Defeat the Treant and any number of infinitely spawning Cyclops and you’ll be free to reach the exit totem.
Arena of Earnestness
A Greedy Raven Spies Three Outposts
Prepare for another tough duel. Like the first duel with Ragewolf, you’ll face Ravenous on opposite sides of a battleground. Various neutral towers cover the expanse begging to be captured.
For this quest, construct a balanced team with good defensive and offensive capabilities. Equip items with sonic and poison resistance will help but aren’t necessarily required to win.
Your first goal is to capture the central tower. March forward, you’ll capture the tower on your way to the middle while marching by. Ragewolf will likely beat you to the center, so charge in and push him back. Continue to march so that all of your Patapons are on or near the capture area.
Ragewolf and the Dark Heroes will try to push you out. This is where Hero Mode and a steady combination of attacks will win you the day. If you’re at the suggested level of 15, you’ll likely spend this quest’s time limit vying over the central tower. Thankfully your Patapons are tough enough to sustain prolonged abuse, so winning in a Perfect Victory isn’t necessary here.
Wait to activate the Summon command when you’re low on Patapons or your shield class unit has fallen. The chaotic series of attacks coming from the Dark Heroes will be hard to dodge with Hatapon exposed, so don’t let that happen.
March into the central tower and capture it if you can. The central tower is especially tough, if you’re able to capture it you’ll be able to hunker down with Defend until the time limit ticks to zero.
If Ragewolf and the Dark Heroes are proving difficult to push out of the central tower, just stay grouped near your first captured tower. Use it to help stand and defend yourself. Defeat the Dark Heroes and move forward to destroy the central tower to get extra points.
Move quickly and capture the center base for a victory in this duel.
Estate of Earnestness
Archfiend of Earnestness
Floor 1:
March forward and jump to open the first gate.
A new enemy awaits, a plant-type that spews spores. To stop the poisonous spores, level up your support type Patapon. Pick the Alosson class and level up for a special skill called “Tailwind”. During Fever Mode this skill will generate wind that blows with your Patapons. With “Tailwind” set as an active skill, you’ll blow the spores safely away.
Although you don’t have to contend with spores, you will have to contend with the monsters the plant creature spawns. Treants and Bonedeth tribe will appear when the creature stops. Attack quickly and chase after the creature to kill it before it spawns more enemies.
Make sure you remove any active skills that create rain during Fever Mode. There is no rain here, so the Treants will not regenerate unless you create rain yourself. This makes them easier, but equipping flame imbued weapons will still help. Fire weapons will especially hurt the spore-spawning creature and the boss.
Chase after the creature, destroying the Bonedeth it spawns. After three Treants, the creature will be trapped and you’ll have a chance to finish it off for good if you weren’t able to previously.
Take the key and march through the locked door to reach the exit totem.
Floor 2:
Here is the real challenge of the estate. The free guide states that you’ll have nine minutes to cross the level. Some designer got the clever idea that nine minutes was just too easy, so you really only have seven.
Prepare with fast melee fighters that quickly dish out damage. Go on the offensive, you won’t have time to Defend, Retreat, or Jump. Even destroying each enemy in a minimum amount of time, it takes several minutes just to walk the length of the level.
Keeping Fever Mode on and using Hero Mode is absolutely essential. Consider grinding extra levels out of your characters to increase your chances. The enemies may no be difficult, but defeating them with enough time to spare will be.
To begin, step onto the platform. Seven minutes will begin to countdown. Start by attacking the door in front of you while the cutscene is still playing. March Onward to fight your first Treant.
The brush can be a problem on this level. Equip yourself with Fire weapons but Ice armor to raise your resistance to Burn. Burn is the most common status effect in the entire game; make sure your resistance is at least over 60%. All that annoying charging back and forth gets old fast.
With the Treants, you’ll also run into Salamanders. The Salamanders infinitely respawn, but also take less damage than the Treants. Using horizontal long range attacks will help destroy both enemies faster, though you’ll still have two wait three measures for the Salamanders to explode.
Onward you’ll find a door. Smash it and fight the Treants beyond with the spawn of Salamanders.
March Onward to reach two Treants. If you’re quick, you won’t have to fight another Salamander until you reach the second Treant. Remember, a Charge Attack is much more effective and powerful than two Attack orders.
With those two Treants down, you’ll march into the big problem. A Huge Treant blocks your way. Attack and he’ll explore into purple fire. It is essential you do not have any sort of rain generating skills active and are equipped with flame-based weapons. Fire, Fever Mode, and Hero Mode combined will eventually take down this goliath.
With any luck, you’ll have at least two minutes to fight the Huge Treant. Salamanders will continue to harass you, but surviving is more important than speed. Stand back out of range of the Salamander’s explosions, and keep hitting the Huge Treant. Do enough damage to keep him reeling after continuous Hero Mode attacks. Keep chaining together Attack commands after Charge Attack to put the pain on.
Destroy the Huge Treant, and step onto the platform beyond to turn off the time limit. For additional help, refer to the video guide.
Continue forward until reaching the exit totem.
Floor 3:
March Onward to the boss door, you know the drill.
This is Shookle, another plant-type monster. Fire is always helpful against obviously flammable plants, but Tailwind won’t help against these spores. Shookle has two main attacks – first is an unexpected spray of poison spores. The poison will knock out any Patapons nearby, and Defend won’t help. If you’re able to see this coming, Retreat. Shookle launches spores quickly, and with little warning, so shake off the sleep with a Party.
The second, and more dangerous attack, is Shookle’s vine-grab. At points, Shookle will lower its vines and expose them to attack at melee range. Long range Patapons can also destroy the extra vines. Why destroy the vines? When Shookle rears back and raises its vines, it will reach down and grab any Patapons nearby. Grabbed Patapons will take damage for several seconds before being thrown back down for extra damage – often leaving Hatapon vulnerable.
Shookle’s grab attack makes it very dangerous, fight at range and with Charge Attack to stun the boss. Retreat is the only effective way to dodge attacks, Defend won’t help here.
If you were able to finish Floor 2 under the time limit, you’ll be able to do heavy damage to Shookle. Charge Attack and activate Hero Mode to stun Shookle as it prepares to grab. Keep plugging away, and use your Summons if the Patapons are grabbed.
With Shookle defeated, march Onward to the exit totem. Quest complete.
Bottomless Stomach Desert
No Heavenly Bounty on a Scorched Desert
Beware of dust storms, they block your vision. To clear up the dust, activate a rain generating skill given by Piekron. Make sure you remove any Tailwind skills, as those will kick up even more dust during this quest.
Get into the groove and activate Fever Mode for a clear view of the environment with a rain-bringing skill. March Onward towards the rock pile guarded by Bonedeth Bridge spearmen.
Beyond you’ll run into another enormous Blue Cyclops. Remember, they’re tougher and stronger than a normal Cyclops. They also pound the ground several times in succession during their club attack – as opposed to a regular Cyclops’ single ground pound. Charge Defend to safely ride out their attacks.
After destroying the Cyclops, march Onward and smash the rocks blocking your path. Just past the blocks is a Bonedeth structure spawning archers. A good Charge Attack will clear the way.
Continue forward to find more Bonedeth spearmen and archers. They’re bringing a new friend this time, Death.
Death carries a huge scythe while floating around the screen. He’s quick, so catching up to him can be a problem. Fast melee fighters or a strong long range support can take care of Death quickly, otherwise prepare to chase Death down.
Death has two moves; he’ll raise his scythe and bring it down on your Patapons, or open his mouth to breathe poison. The scythe attack can be guarded with a Defend order, but the poison breathe requires a retreat. Death’s poison breathe can be devastating, so make sure to shake off the status effect with a Party right away if you don’t have time to Retreat.
Be patient and eventually you’ll overcome Death, you’ve faced more difficult opponents already. Destroy the rocks and Bonedeth to find another Blue Cyclops. Second verse, same as the first.
Keep breaking down rock piles while fighting Bonedeth. You’ll reach the final Bonedeth structure for this quest. Beware, this one not only spawns Bonedeth soldiers, but also a Blue Cyclops periodically. Most likely you’ll run into another Blue Cyclops while attacking the Bonedeth castle.
Otherwise, this encounter is nothing new. Use your Summon command if you have it, why let it go to waste?
March Onward to reach the exit totem and complete this quest.
Buzzcrave and the Oasis of Eternal Sleep
You’ll be facing even more Dark Heroes on this quest, so come prepared for a fight. Upgrade equipment and bring your heavy-hitters. Destrobo is useful for his ability to smash buildings quickly. Units with smash-damage weapons, such as clubs, axes, and arms are also useful here.
Right away you’ll get a good look at the field. Your first challenge is overcoming a row of cannon fortifications capped by a tower guarded by spear-wielding Bonedeth tribe. Charge Attack forward with disregard for your own safety, bring shield-carrying classes or the white mage armed with defense spells.
Destroying the Bonedeth tower, you’ll be shot at by three more cannons. At the end of this row is another Bonedeth building spawning troops while archers shoot down at you. This is chaotic, Defend won’t get you very far. Simply Charge Attack to smash down the barricades and destroy the Bonedeth structures.
The real challenge lies ahead. A grove of brush sits ahead of another Bonedeth tower covered by spearmen. Be careful as you march through the brush, especially without adequate burn resistance. Don’t ignore status effects, Party!
Smash through the Bonedeth tower and cannon barricades, but keep your distance from the final tower. Attack from the back of the screen if possible, the fewer Dark Heroes you fight at once the better.
At range, the Dark Heroes in the back of the group often will not join in on the fight. Even while using melee fighters, just keeping Hatapon far away is enough – about two Onward march lengths.
An absolute onslaught of attacks will hit your Patapons. Sonic and Poison defense are useful here, make sure to Party when in trouble, and activate Summon only if your shield class or your party is seriously suffering.
With enough damage, the Dark Heroes will retreat. Of course the quest isn’t over. March forward to fight a Blue Cyclops, because why not? The Blue Cyclops spawns from one last Bonedeth building inches from the exit totem. Destroy it and march Onward to victory.
Racing Alley of Restraint
All-out Desert Drag Race
This is a racing duel, joy. Actually, this racing duel is heavily weighted in your favor. Bring Destrobo or any other class that can dish out smash damage – anything that wields axes, clubs, hammers, or arms will do.
As the race begins, march Onward and smash through the first red barricade. Charge Attack then March. Continue past the blue cannon tower and dismantle the red barricade followed by a red cannon tower.
After destroying the cannon tower, you’ll run into a red wall. Hero Mode and combos are your friends. This is where the enemy team will get ahead of you. All may look lost, but they’ll be stalled later. For now, destroy the wall by plugging away and march forward.
While grabbing the blue floating balls with a jump to boost your march Onward speed, it isn’t necessary. Destroying buildings quickly is your best bet on gaining time in this duel.
After smashing the cannon tower and the wall, you’ll be behind. Yet another cannon tower is blocking your way. Smash it and march forward, but don’t worry, you’ll be ahead of the Dark Heroes in no time.
If you’re quick, the Dark Heroes will be stalled by a blue wall. March on by, until finding a red wall. Charge Attack, Hero Mode, Fever Mode – smash that wall. The Dark Heroes may gain on you some here, but they have yet another wall to smash.
March Onward, all that’s left is an open field and some red debris. Clear the way, Jump to take a power-up, and you’re home free.
Labyrinth of Restraint
Archfiend of Restraint
Floor 1:
Notice the huge roaring fire behind your Patapons. This flame will chase you throughout the level, making this floor a race against time. Begin marching right away, and prepare to fight. Retreat isn’t an option on this floor. Remember to save your Summon charges for the third floor.
Beyond the huge geiser of flame, this floor isn’t too difficult. Keep marching and be aggressive, you should easily outrun the fire.
March a few steps forward and destroy the doors. Regular Cyclops and debris will block your path, but they’re no problem for your powered-up Patapons. Continue until you reach another door, ripe for the smashing.
Ahead is another Cyclops, followed by his big blue brother. Take your time and fight a touch carefully against the Blue Cyclops, his smash attack can hurt even your Patapons, so a quick Defend won’t slow you down too much.
Smash through the next door to fight another Blue Cyclops. Again, don’t waste too much time. Just fight aggressively and get in those Perfect Command Inputs. Because another Blue Cyclops is waiting ahead.
Smashing through yet another door, you’ll face another Blue Cyclops. You’ve got plenty of practice by this point, you know what to do. If the enemies are taking too long to defeat, it may be time to grind for experience. Sadly, in Patapon 3 gaining levels is often the only option.
More regular Cyclops and Blue Cyclops, one of each specifically. With those two down, you’re free to march to the exit totem.
Floor 2:
No chase this time. March Onward and jump to activate the switch. March under the open door and start breaking rocks.
Bonedeth archers and Death are waiting, don’t disappoint them. Horizontal attacks from the black mage or cannon-wielder can clear large groups of enemies and debris.
After defeating Death and his minions, you’ll march into a Fenrir with his own group of Bonedeth. The large wolf is dangerous for his poison breathe and pounce attack, especially his pounce attack. Retreat will dodge both moves, and to escape the pounce pound on the face buttons.
With the Fenrir down, march to the next gate. Flip the switch to continue forward. Beyond the gate you’ll find more rocks with brush. Brush always equals burn damage, so take your time or Party hard to shake off status effects.
A second Death is waiting. Charge Attack, Death can’t protect himself for long. A red dragon is waiting for you, but like all dragons, he’s a slow attacker. He’ll roar when he sees you, giving you plenty of time to Charge Attack. The dragon’s only attack is breathe, but it lasts for over a measure, so the only good option is to Defend and Party in the aftermath.
Defeat the dragon and march to the locked door. Just through the door you’ll find the exit totem.
Floor 3:
Ragewolf found the Ultimate Weapon! Okay, so the Ultimate Weapon isn’t so ultimate – it is incredibly resilient though. At first, Ragewolf won’t know how to turn the tank on. Use this time to march forward and Charge Attack.
The Ultimate Weapon, once activated, has two attacks. It will charge an Ice Blast or fire a volley of cannon balls. Defend against the volley, and Jump over the Ice Blast as it lands on the ground.
Take your time, and use Summons as your Patapons are worn down. Don’t worry about using all three here. Keep doing damage, Defend and Retreat when necessary, Party to shake off freeze effects, and keep attacking.
After a very long time, the Ultimate Weapon will fall. Unfortunately, the Labyrinth isn’t over yet. There are still two floors to go.
Fortunately, the Patapons unlock a shortcut from Floor 1 to Floor 4. Finishing Floor 1 will warp your team to Floor 4 instead of Floor 2. Thanks to the shortcut, don’t feel bad about returning to your Hideout. I recommend returning. If you feel up for it, continue to Floor 4.
Floor 4:
Notice the flames behind your Patapons? This floor, like Floor 1, is a race against time. This floor throws some dirty tricks at you, so come prepared with Burn resistance.
Smash the door ahead, where you’ll find another huge wall of fire. The quench the flames, you’ll need to cross over and attack the door. Use heavy-hitters or long range attacks, either way make sure Hatapon does not march into the flames – shield or no shield.
The flames themselves don’t do as much damage as you would expect. The real problem is their high burn rate making melee difficult. Take it easy, Charge Attack and smash the door while in Fever Mode to boost your resistance.
Past the first fire geiser, you’ll meet another Death. Defeat Death and the rocks around him, you’ll eventually find another door. Try to be quick; the sacrificial flames will be slowly following you.
Through the next door is another wall of fire. Brave it and destroy the door across to stop the flames. Just beyond the fire you’ll find a second fire. Destroy the door and continue your march.
A waiting Cyclops will greet you in the next room, backed up by Death. Blitz them both until reaching another doorway blocking another three flame walls. It’s a pain, but take each door down.
The Blue Cyclops ahead shouldn’t be any problem to your Patapons at this stage in the game. A flurry of attacks will wipe out big Blue and the regular sized Red at once.
Death and a Cyclops round out the enemies on this floor. With those two down, the path to the exit totem is safe.
Floor 5:
Time for another Archfiend battle on the final level of the dungeon. Ciokina is a crab monster and a serious pain to fight. You’ll see why soon.
At the onset of the fight, Charge and Attack to get in some damage on Ciokina. First of all, the boss is armored and takes very little damage. The problem alleviates as you fight, but for now don’t be discouraged.
Ciokina’s first attack is telegraphed by raising its claws up, followed by shooting poisonous bubbles onto any frontline Patapon. The poison bubbles can be guarded against with a Defend, but Retreat works as well, or Jump. The attack is very fast and hard to predict. It does little damage, but will often put your Patapons at risk of its second attack.
If your Patapon falls asleep, quickly Party to wake them up. Keeping Hatapon near the back of the screen is also a good idea, so that when your Patapons Party, they will converge on Hatapon – out of Ciokina’s range.
Ciokina’s second attack is a wide claw swipe. Predict the claw swipe when the boss raises its claws vertically high over its head, with one claw bending backwards. This is a powerful strike, and it’s recommended you try to Defend.
The boss’ final attack is a grab – this attack is difficult to predict, it will quickly snatch your front Patapon and kill it instantly. This is why you should save up your summons, most likely your Shield class will be taken, if that happens, immediately use a Summon command to bring him back. All of Ciokina’s attacks can reach Hatapon once close enough, putting you in danger of an instant failure.
Once Ciokina’s armored shell begins to break, it will take far more damage. That brings the added benefit of making interrupting its attacks easier.
Keep pummeling the boss until it is finally defeated. Congratulations, the labyrinth is finished. March to the exit totem to finish the quest.
Volcano Zone of the Lazy Demon
World’s First Hoshipon Convention
Still have all that fire resistance? Keep it, you’ll need all the burn resistance you can get in this Hellish world.
Begin by marching towards a fortification. Smash it up, past that you’ll find a Salamander and a Bonedeth building. Keep clear of the Salamander’s explosion, and take out those Bonedeth tribals.
The way forward is riddled with rocks and Bonedeth soldiers. Attack, Attack, Attack, and keep marching Onward. Eventually, you’ll find a dark shrine. Dark Hoshipon will call a demon to do its bidding, so prepare for a new enemy type.
The Balrog is a morbidly obese demon that eats to heal himself. He’ll ignore you at first, eating the chunk of meat on his pitchfork. Each bite will heal him significantly. Once his meat is depleted, he’ll begin to attack in one of two ways.
Balrog will either raise his stomach or lower his pitchfork. If it raises its stomach, it will attack with a freezing shockwave. If the Balrog attacks with his pitchfork, it will shoot forward and snatch any unlucky Patapon in the way. Mash on the face buttons of the PSP to free your Patapon before Balrog takes a bite and heals itself.
Lucky for all Patapons, both of his attacks can be predicted. Simply Jump to dodge either of his attacks. The only problem is how tough the Balrog can be. It is slow and a large target, just keep ordering Jump whenever the Balrog is about to perform an attack.
Salamanders, Bonedeth, and rocks block your path forward. Go to town, they’ll spawn infinitely until you reach their castle and destroy it. Lookout for the spawning Salamanders from the castle, and make sure to hang back when they’re about to blow.
Past the Bonedeth castle, you’ll find the exit totem. March near it, but don’t leave just yet. The Hoshipons will talk amongst themselves for awhile, wait and listen until Gold Hoshipon leaves you the reward he promised – a Jewel chest and a new defensive Summon!
Black Hoshipon Strikes Back
March Onward, fighting Salamanders and Bonedeth soldiers. Ahead you’ll find a Bonedeth castle guarded by a Dark Hero of the Guardira class. His huge shield provides powerful protection, and he can generate a shield protecting anyone inside from arrows and magic.
A strong defense can’t do much to your Patapons, so hit the Dark Hero with an all-out attack, but save your Summon for later. Keep up a withering offense and eventually the Dark Hero will retreat. Destroy the Bonedeth castle and follow.
Down the field, the entire Dark Hero party is waiting for the Patapons near a Bonedeth Castle. This is another good time to keep your range, use the right and left should buttons to scout ahead and stop the march Onward when you see the Dark Heroes. Keep Hatapon at a distance and attack with melee classes at range, any of spear class or support class will do. Attack the Dark Hero in front, and the back Dark Heroes won’t even pay attention.
If your defense is high, just march into their full onslaught to a large battle. This fight requires stamina and resistance to stagger and poison. The Dark Heroes will hit you with everything they’ve shown so far. Not only that, Dark Hoshipon summons a Balrog.
This is where range is important. If the Patapons are standing two march lengths away from the Dark Heroes, they can safely draw the Balrog forward into a fight. Charge Attack, Hero Mode, pull out all the stops. Summon will help hurt all of the collected Dark Heroes, too.
Destroy the Balrog and the Bonedeth castle. Most of the Dark Heroes will retreat, but there may be a few stragglers. Alone, or even just two or three, should be much easier to defeat. Steamroll those jerks and march to the exit totem.
Range of Adamance
Slogturtle the Mobile Shelter
Another missile range duel – though this one is more difficult than your previous duel. Here, a wall and fortification block most missiles from destroying each others’ base. The goal here is to rack up more points than your opponent.
Bring all melee heavy hitters with good defense. Your support Patapon should be something that can lob a lot of damage into the air, either a heavy archer, a cannon-wielder, or a black mage. You’ll need your support to destroy incoming missiles.
Your major goal is to simply be perfect. Charge Attack the lever on your side of the range, and get into a groove to chain as many Attack orders while in Hero Mode as possible. Don’t let up, the Dark Heroes will almost certainly match you missile to missile for some time before you pull ahead.
Keep trying, with some luck and determination the Patapons will succeed.
Evilmass of Adamance
Archfiend of Justice
Floor 1:
In this hellish domain, bring burn resistant equipment. Inside you’ll have to navigate traps, so be wary. Low ceilings mean archers will not be able to lob arrows easily, cannon-wielders, horn-blowers, or magicians are more effective here.
Inside, the Patapons will encounter a new soldier-type that look vaguely like evil Patapons. They are powerful, sustained damage will eventually hurt the Patapons, press the attack.
Take note of the countdown at the top of the screen. It counts down to when the guillotine trap will fall. To be safe, only cross the guillotine traps when you have a good thirty seconds to cross underneath. Wait at the sidelines until the trap falls, then march Onward across. Anything struck by these blades is instantly killed.
The first guillotine trap is ahead. Archer demons won’t be able to hit the team while under the guillotine trap. Wait for a safe moment, then cross over and destroy the rocks blocking your path.
Salamanders and rocks will block you in. In case of a hurry, it may be better to Charge Defend and absorb a Salamander’s explosion than to Retreat.
Evil Patapon will harass the team closer to the second guillotine trap. Chase them under the blades, and cross as the blades begin to rise back up. Charge and Attack to smash through the many rocks in your way.
Two Salamanders are waiting, as strong as ever. Destroy them quickly to prevent any spontaneous growth spurts, and stand back to avoid explosion damage. Ahead you’ll find the third guillotine trap. If you’re fast, you should have enough time to hurry through.
Beyond the third guillotine trap is a Balrog and Salamander. This combination can be a pain, but just remember to Jump over every Balrog attack to make defeating him trivial with the proper timing.
Continue under the fourth guillotine trap. One large Salamander, one regular sized Salamander, and another Balrog are waiting. Be patient, Attack carefully and Charge Defend to stave off too much explosive damage. Try to save your Summon charges for the next floor.
Defeating that terrible trio means only rocks and debris block your path to the exit totem.
Floor 2:
This short floor might just be the worst in the game so far. Tricky timing and instant death, the boons of any Hoshipon-fearing Patapon.
Start by destroying the door. March Onward and clear away the debris and brush in your path. A dragon, with evil demonic Patapon archers waits ahead along with a new enemy type.
Baby Dragons are small versions of the dragon; they charge and push back your frontline while dealing consistent melee damage. A Charge Attack with Hero Mode active should clean them up without a problem.
After defeating the dragon, begin marching Onward. Don’t stop for anything. Keep marching toward the guillotine trap. This trap is a serious pain, but there are several methods to complete it without dying.
The intended method is: as you approach the guillotine trap, a Baby Dragon and several evil Patapon will walk onto the push plate beneath it. Depressing the push plate drops the guillotine trap. After the trap falls, it will begin to rise again. As it rises, your Patapon need to march onto it. As long as your Patapons have the plate pushed down, the trap will not activate.
Your goal is to march toward the trap, wait for an enemy to activate the trap, then march onto the trap as the guillotine blades are rising. If you’re lucky, this will work.
Most often, the Baby Dragon and the evil Patapon will step onto the trap and die off screen. If you’re slow, the evil Patapon and Baby Dragon will simply cross the trap unharmed and attack you.
If the enemies activate the trap while you’re near it – go for it. Step onto the trap. If not, you have some options.
If the Baby Dragon or evil Patapons are attacking you, fight back weakly using Defend, do not Charge, and try to stay in place. Bring weapons with Knockback qualities, or bring a Guardira class to push the frontline of your enemies back without killing them. The goal is to force your enemies to step back onto the pressure plate, activating the trap. Precisely issue a March order as the blades begin to rise, don’t worry about keeping your Fever Mode active.
The other option is to sacrifice your shield class. March onto the plate, the blades will fall and kill your shield Patapon. Stand and wait until the blades begin to rise. Order your Patapons to march onto the plate.
On the opposite end of the trap you’ll be blocked in by rocks and debris. Destroy them, as long as Hatapon is still on the plate the trap will not activate. Before marching forward too much, stop under the treasure chest. Jump to destroy the blocks, one of the blocks will drop a purple potion – reviving any lost Patapons.
With that diabolical trap past, you’ll have a real fight on your hands. A Dragon and a huge Balrog. Charge Attack, use your Summons, do anything to push past these monsters. Remember to Jump over any and all of Balrog’s attacks.
Destroy the scattered evil Patapons and take the key. Smash the rocks in your way until reaching the locked door. Now that the door is unlocked, march to the exit totem.
Floor 3:
Another day, another dungeon, another Archfiend. He summons Dettankarmen. The shape-shifting demon looks fearsome, but take it easy and you’ll make it through this battle.
For once, you’ll have a chance to build up your Fever Meter. Party several times in a row until the meter is full. Then approach with the Onward command. When you’re close enough, Charge Attack.
The boss will change forms, but he is susceptible to sustained damage through combo chains of Hero Mode Attack orders. Keep up the Perfect Command Inputs to keep this boss constantly staggered, it won’t be able to fight back.
After all you’ve been through, be thankful for an easy boss. Deal heavy melee damage and use Summon if the boss manages to grab any of your Patapons. A good Jump command works wonders dodging the boss’ many attacks.
Keep up the attack, and you’ll have this demon defeated in no time. March to the exit totem to move onto the final zone of Patapon 3.
Savannah of Envious Eyes
Ravenous: Duel of Fate
Hit-and-run melee fighters and long range heavy-hitters are the most useful in this quest. The big challenge is in defeating Ravenous and his enormous green dragon. Bring whatever high level classes you can, anything around level 27 at least.
March Onward one step and attack the white fortification ahead. Attacking this fortification will activate the green dragon, and it will slowly begin to walk towards you. Stand still and wait, it may take a minute or two, but the green dragon is incredibly tough. Just wait for it to come to you.
Once the green dragon’s head inches into view, start attacking and don’t bother using Hero Mode combo Attack orders. Charge and Attack repeatedly, every time the dragon is stunned it will rear back onto its haunches and drop back down to damage anyone in melee range. This move is a pain.
If your Patapons are taking too much damage, wait and defend until the green dragon weakens and begins to retreat. Attack while it is retreating; stop one the dragon is at half-health, it won’t take more damage until later.
Wait for the dragon to retreat, and attack the Bonedeth fortifications until they’re all destroyed. These Bonedeth troops are more powerful than before, so don’t let them land a sustained stream of arrows on your Patapons.
Chase the dragon until it eventually stops. Here is where you’ll need to finish off the dragon for real. Poison, ice, fire, electricity; any elemental attacks will do real damage to the green dragon while everything else barely scratches him. Load up on elemental damage dealers and order Charge Attacks.
If the dragon lowers its head, it will launch a stream of poison breath. It lasts for two meters, making Jump or Retreat useless. Defend or Charge Defend is possible, but the best way to counter this attack is with an onslaught of attacks of your own. Enough damage at once will stagger the dragon.
Unlike the Japanese version, the North American release is much more difficult. The dragon will not retreat, you have to defeat it. Leveling up is difficult at this stage of the game, so consider using the online component for extra help.
Blue Cyclops will spawn out of a Bonedeth structure behind the dragon to add to the annoyance. Pick them off while fighting the dragon.
Eventually the dragon will fall. If your shield class is hurt or unconscious, use a Summon before engaging Ravenous. The Dark Hero is a pushover after that dragon. Steamroll him and march Onward.
Only a Bonedeth structure spawning Blue Cyclops is in your way now. Crush it and march onto the exit totem.
Covet-hiss Loves Cannons
A small army of Bonedeth troops awaits just forward your position. Shields, archers, spears, and riders are all waiting to fight. For once, the Bonedeth brigade put up a respectable fight, they’ll more than a single Charge Attack to defeat.
If the Bonedeth brigade are giving you trouble, wait for a tank to reinforce your Patapons. It will fire blasts of energy at the ground and stay relatively near Hatapon.
Once the Bonedeth soldiers are finished, approach the tall fortification. Just behind that are five cannons firing in a row. If you bring any classes that are vulnerable to long range attacks, this part can be a problem. If you’re patient, the tank will do most of the work for you.
Keep a relative distance away from the cannons as you destroy them. Move forward slowly, you don’t want to activate the Dark Heroes any sooner than you need to. Usually some of the Dark Heroes will begin to attack as you destroy the final cannon.
The Dark Heroes, with Bonedeth archers backing them up, are a tough nut to crack. Keep plugging away at them with Charge Attack orders, and use the Summon command if your Patapons start to fall.
The Bonedeth structure protecting the Dark Heroes will also spawn an Ice Salamander, which won’t put up much of a fight at all. Just attack and consolidate before it explodes. If you’re near a Salamander, Jump will also dodge an explosion.
Take apart the fortress, just go all out. The structure won’t stand a chance; this mission is refreshing compared to the duel with Ravenous. Just march onto the exit totem once all is clear.
Arena of Tolerance
Dark Heroes’ Last Stand
The final duel challenge is a difficult but fair fight. Four Dark Heroes against your Patapon heroes on an even battleground. Just bring your highest level Patapons to succeed.
March forward, capturing the first three towers on your end of the field. Wait for the Dark Heroes to start attacking on your end, using your captured towers and their cannons to back you up.
Fight off their initial attack with Charge Attack orders, Super Hero mode and Fever Mode are mandatory. Once the majority of Dark Heroes fall and respawn at their base, march Onward while fighting to push them back, giving you a chance to demolish their base.
After the green dragon, these guys are no problem. March into their base for a perfect victory.
Tomb of Tolerance
Archfiend of Tolerance
Floor 1:
This is it. If you defeated Ravenous’ green dragon, you’re ready for anything. Right away you’ll see a timer ticking down and a bloody pendulum blade near a switch. Ignore the switch and the pendulum blade for now, instead smash open the door.
This is where the difficulty of the stage lies. Every sixteen (16) seconds the pendulum blade will swing down and massively damage your Patapon team. Timing is everything, practice it, and know how long your command inputs take. Try to begin inputting a command with three (3) or four (4) seconds on the timer. Every meter is roughly two seconds, and starting an order too early or too late is deadly.
I won’t lie, this stage is violently aggravating. To dodge the swinging blades, march underneath them and issue a Jump order before they fall. Don’t worry about Fever Mode or Hero Mode, just worry about timing.
Give yourself plenty of time to march under the blade, if you’re not directly under the focal point of the swing, one or more of your Patapons is likely to die. Retreat is also an option in some limited cases.
Stand under the first swinging pendulum, issuing a Jump order before it falls. A Gargoyle carrying a treasure blocks your path. This is a new enemy, but it won’t stand a chance, just attack. Stop attacking if you’re nearing the eight (8) or six (6) second mark on the timer to prepare another Jump. Remember not to Jump too early.
Either defeat the Gargoyle, or do enough damage to make it run away. When you have more than ten (10) seconds, march Onward to safety between the two blades.
At the second blade, you’ll be blocked by a Fire Salamander and an Ice Salamander. These Salamanders are trouble, for now wait until the blade is about to drop, Jump, then Charge Attack while you have seconds to spare.
Wait for the Salamanders to explode, and march onto their position. Soon you’ll see, just across the next pendulum blade a Bonedeth structure that spawns the two Salamanders. Right after they die, another will take their place.
Use long-range attacks, Hero Mode special moves, or Summon to destroy the Bonedeth structure from afar to stop the tide of spawning Salamanders. If you only have melee, march under the blade and destroy the Salamanders up close – a Jump can dodge the ensuing explosion even in very close range.
Destroy the Bonedeth structure for the key. March past another blade to find the locked door. Give yourself some time, another blade is swinging directly above the locked door. Unlock the door and March to the exit totem to continue.
This quest is very difficult, there’s no way around it. With some luck and patience, you’ll be able to make it through.
Floor 2:
This quest starts with an unfair trap. To open the door forward, you’ll have to Jump to flip a switch, activating a swinging pendulum. One of your Patapons will take a hit, no matter what. Try to position your shield class to flip the switch, as that Patapon is most likely to survive.
With the door open, quickly march Onward across and press against the debris blocking your path. Attack the debris, hopefully with all your Patapons across before the door closes again. Above is a purple potion, Jump to get it and revive any Patapons that fell during the previous trap.
A Gargoyle, Death, and a Balrog block your path. Gargoyle don’t put up a fight, their poison breath can do damage, but destroying them fast is better. Remember to Jump over all of Balrog’s attacks to escape any damage.
Past this first encounter of three is a lone Balrog. Finish him off and move Onward until reaching a door. Smash through it to face another Balrog teamed with Death. A Blue Cyclops will try to get in on the action, but he’s a pushover compared to the damaging Death and enormous Balrog.
Beyond those enemies is your nightmare; another green dragon. This thing is exactly the same as Ravenous’ green dragon; it is just as dangerous and tough. Elemental attacks will do major damage, while everything else barely scratches it. A strong support class is your best bet. Save a Summon for this battle, remember to Charge then Attack, and don’t go crazy with Attack combos. The best way to fight this dragon is with hit-and-run attack to avoid damage.
Take his key and fight any remaining Blue Cyclops as your march toward the locked door. Open the door, grab a treasure, and walk onto the exit totem.
Floor 3:
Take a deep breath, you’re on the final floor of the game. The last boss is just through the next door. Wipe the flop sweat off your brow, because it’s time to finish this once and for all.
Don’t let Arch Pandara intimidate you just because he’s a huge creepy monster, there are plenty of other reasons to be intimidated. In his normal form, Arch Pandara attacks using three methods. He will hold out one hand forward as a creature below appears underneath. To dodge this attack, order a Jump.
If Arch Pandara releases eyeball shaped projectiles, continue to attack normally, these projectiles are weak. If Arch Pandara bends backwards, he’ll launch his dagger-shaped guts into the ground – Charge Defend, or Defend.
Keep his attacks in mind and fight carefully. Order your Patapons to Party as he slowly floats towards you, and Charge Attack once he’s close enough. Do enough damage and Arch Pandara will transform into a flock of bats.
The bats do not attack, just wait for Arch Pandara to take the shape of a vessel. He will emanate elemental damage; Ice, Fire, Lighting, or Poison. Keep your distance if you have low resistance to status effects. Eventually Arch Pandara will change forms again.
In a flash, your Patapons will appear three or four march lengths away from the glowing vessel while Arch Pandara hovers overhead as a chaotic scramble of nightmarish goo. In this form, you’ll need to march under blasts of lightning shooting from the Archfiend crests. Just take the damage and rush to the glowing vessel.
After a few meters, Arch Pandara will begin to charge an attack. He attacks by pounding his cyclopean flesh into the ground. Either Defend, or destroy the vessel before he attacks. Try to destroy the vessel before he attacks – take four marches Onward and Attack. Not only must you destroy the vessel, but a Patapon must also touch it.
Once the vessel is destroyed and touched, Arch Pandara will revert to his vessel form. Charge Attack or Defend until he finally returns to his normal form. This is your chance to do the must damage.
Once Arch Pandara’s health is low enough, or after an amount of time passes, it will change back into a vessel. Eventually, it will also turn into its giant form again, requiring you to attack and touch the vessel with a Patapon. Use a Summon if you’re low on Patapons, use two if you’re in trouble again.
Keep attacking after Arch Pandara reverts to his regular form to finally defeat the Archfiends once and for all.
Earthend
Press “O” in rhythm with the beat.
Afterwards, you’ll be given the final choice of the game. These three choices determine an ending, so choose wisely.
With that, you’ve finally finished Patapon 3! Give yourself a pat on the back.

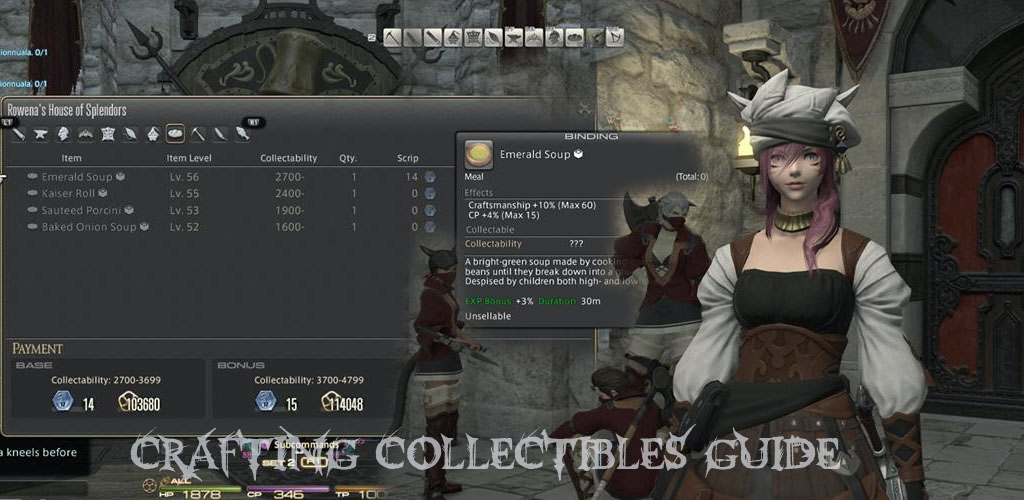


 Top 5 Legend of Zelda Games: #1
 MGS V: Metal Gear Online Enforcer Class Tips and Tricks
 20+ Fun Ways to Start a Lifelog in 2016
 Death and Games: How Loss Puts Lifelong Hobbies into Perspective
 COD Advanced Warfare: Supremacy Trophies, Achievements, Easter Eggs