
Survive the terror of The Evil Within on GameFront’s monstrous walkthrough, with strategies and tactics to keep you alive.
As a spiritual successor to the Resident Evil 4 formula, you’ll have to explore ruins while dodging crowds of mind-bending beasts. Upgrading weapons and skills is necessary for survival — learning how to exploit your enemy’s weaknesses doesn’t hurt either. Get all our fearful knowledge in the massive guide here to access the true evil within.
For even more knowledge of Bethesda’s next, check out The Evil Within cheats list for trophy guides, collectible locations, and any other secrets, unlockables, and extras we can uncover. For GameFront’s early take, explore the depths of darkness on The Evil Within preview for a better understanding of the survival horror gameplay on display.

The asylum looms in the distance as you stand in for Detective Sebastian Castellanos. Mysterious, all the cars are empty. Take a look around, but there’s nothing to learn here.
Follow your partners to the front entrance. The inside isn’t much better…

Approach the doors to go inside. There’s blood everywhere, with dead patients littering the floor. To figure out what’s going on, check out the security room in the back left corner.

After finding the survivor, check the security camera terminal for a shocking surprise. Whatever is going on here, it isn’t good. A cloaked man is killing everyone in his path, and gets the jump on Sebastian.

When he wakes up, you appear in a strange basement, hanging upside down as a butcher drags a body away.
Follow the prompt when the killer leaves, moving backward and forward until Sebastian can reach the knife. Useful for cutting yourself from, but not so great at defending yourself.

Sneak up to the wall and wait for the brute to wander away. The key to escape is hanging from a chain right near the table with the body. Grab it, then sneak backward and look against the left wall for the exit door.
Don’t try to stab him. It won’t work! Leaving through the door, walk upstairs and around the corner until an alarm goes off. Not great, because the butcher appears right behind you.

Just keep running until he inevitably catches up and cuts through your ankle. Hobble forward – there’s a hatch down the hall! Beware the spinning blades and keep your trajectory straight. Interact with the hatch like a door to jump inside.
Going down the slide, move left to right to avoid the extra blades or you’re dead.

Inside the vat of blood, use the ladder to climb out and exit to the sewer. Jump into the water and use another ladder to continue toward some barred doors. Don’t worry, it’s safe down here.
The exit door is on the right side, near two fences. Yet another leads a step closer to salvation – or atleast to the surface.

There’s a note in the office up the ladder. Something about a STEM system? Take note of that for later, then press the glowing button to continue into the decrepit hospital.
In the lit room, the chainsaw maniac will return. Sneak toward the large locker to hide inside until the psycho leaves.

There’s nothing you can do to fight this guy. For now he’s unstoppable. He’ll throw a tantrum, destroying everything before smashing through the door on your right.
As scary as it seems, follow him. In the next room, he’ll patrol around in search for prey. Wait for him to turn, then sneak around this door to the shadows on the left where there are bottles to pick up.

Making noise is the only way to live. Aim the bottle and throw it through the open shaft vent and he’ll run to the noise. Now stand up and move to the next room, ducking behind the half-wall on the left. There’s another bottle here.
Wait for the psycho to stampede into this second room, then throw the battle into the first where he was patrolling. While he goes nuts, continue through the third door and down the hallway. You’re almost home free through a very tricky section.

In the final hallway, just keep running forward! Sebastian will stumble and climb over any objects in his way, and you’ll just make it inside the elevator.
To complete the chapter, run down the hall and turn right to get to the front entrance of the asylum. All Hell is breaking loose in the city!

After the crash, Sebastian wakes up in a cell. Grab the newspaper and the strange container of green stuff on the desk. That’s “Green Goo” – a form of currency used to upgrade Sebastian’s abilities throughout the game. Find it off enemies or in secret areas to improve your skills, increase health and stamina, hold more items, or upgrade guns.
Look through the cell door and a nurse will stop by to let you out. This strange asylum is kind of a hub, where you can save and upgrade. Save the game, the use the bizarre chair to start the chapter proper.

Waking up at the crash site, grab the syringe nearby. Now you should see a health bar and stamina bar. As long as you stand still health will regenerate up to the white line. To heal more you’ll need syringes. Go ahead and use the one you picked up, then follow the dirt path.
There’s a dead body on a stump, and a cliff ahead of that. Don’t miss out on crates, either. They drop randomized items. Destroy wooden crates with a melee attack.
Melee attacks are good at knocking enemies away, but not much else. Unless you’ve got a melee weapon in-hand, don’t try to take on enemies with just your fists!

Grab the lantern from the cliff, and Sebastian will climb down to speak with a stranger in the distance. Sneak up behind the man and grab the gun off the ground.
You only have six shots, so make them count. Guns are your primary weapon in The Evil Within, and ammo is hard to find. Put three in this guy’s skull to end the encounter.

A patient, Leslie, is near a strange line ahead. The tether is part of an explosive trap. Sneak under it to disarm it. Always be on the lookout for traps, they’re everywhere, and disarming them provides scrap which can be very useful later in the game.

Out of the cave, you’ll find a box of matches near a corpse. Matches are plentiful but still rare enough you can’t use them on every enemy. If a stunned enemy is on the ground, you can finish it with a match.
Choose wisely when to use matches and when to move on. If you don’t plan on staying in an area for long, don’t bother using matches on downed enemies.
Over the hill, look for a small shack. Go inside, this is a save/upgrade location. Take the glowing badge, then us the mirror to return to the asylum. Or keep plugging on ahead.

Ahead, Leslie ducks inside a building while a creature pounds on the door. Sneak up behind it and stab the thing in the skull for an instant defeat.
Jump out the window and follow Leslie to the open gates.

See the strange statue on the stone wall? Destroy it with a melee attack to find a key. Goddess Statues are hidden all throughout The Evil Within, and their keys unlock special rewards later in the game. Grab them whenever you can!
Kick open the gate and you’ll enter the first major combat area in the game. Zombies mill about all over the ruined town. Now you can choose to fight or sneak past the enemies within.

While sneaking is effective, I find it’s just as useful to fight. Use the bottle to distract them, then shoot or sneak-stab these two. Get inside the house to get bullets, matches, and a syringe. This should get you started off right.

Deeper in town, the road splits. Go left or right. Up the right road there’s a large building with plenty of supplies, but the exit is to the left.
Watch out for traps, including bear traps. Sneak to disarm them, or lead zombies straight into them for an easy kill.
Take them on one at a time or you’ll be overwhelmed. They don’t bunch up in packs here. Noise doesn’t alert others, so you’re free to take them out one monster at a time.

Be on the lookout for creatures with torches. Kill them and grab the torch – these melee weapons kill your enemies and burn them in one hit!
At the large gate, use the crank to open the door. Just burn the two bodes nearby first, just to be safe.

Things get tricky in the field again. Move left to a cabin with supplies, then sneak through the tall brush, sticking to the left boundary of the area. There are just way too many of these things to deal with.
If you’re spotted, run forward and turn left at the bridge! Run for the door, and don’t turn back. Keep going and you’ll be home free to finish the chapter.

Check the table to the right of the dock for a syringe, then enter the archway for a stairwell leading up and around the locked gate. Use the provided matches to burn through the pile of bodies in your way. Sebastian lives a charmed life.

There are multiple paths to take now, but most lead you astray. Let’s start with the windows on the right. Smash them open with a melee attack and crawl into the kitchen area.
Don’t move too much! Duck after jumping through, and approach the red glowing bomb. These bombs are easy to avoid if you simply sneak, but disarming them rewards Sebastian with two scrap.
Here, take the stairs to go on the correct path, or enter the adjacent room on the same floor to find a mirror room.

In the asylum, the nurse will open a door to the back room, giving Sebastian access to the lockboxes. Each key you find opens one of these boxes. There’s some good stuff to find here, so check back with new keys often.

Continuing upstairs, follow the path around until you encounter a doctor looking for his patient Leslie. He’ll move to a balcony and show you the rest of the chapter.
Use the crank on the balcony to open the gates and he’ll lead some of the zombies away, giving you a chance to fight through them.
Go left through the halls, downstairs, and out through the trapped window to exit near the barn stairs. Enemies will jump through the windows on the way there. Take care of them and burn the bodies. You’re going to be in this area for awhile.

Take the stairs into the barn, and try to ignore the load moaning coming from the chained creature inside. Don’t even attempt to get close to the wooden beams keeping him inside yet.
On the barn second floor, disarm the trap and climb the ladder for a nice cache of supplies. Then circle around to the opposite side and climb down to the ground.
Don’t even attempt to go out through the front. A sniper will try to put you down.

Instead, go through the back door. There’s a treasure chest near the door, so loot it – and open it carefully – to get the contents. Then continue down the path to a large house filled with traps.
Don’t get close to the zombie near the lever. It will activate a spike trap – just shoot it from the window, and watch out for more on the exit door. There’s a Shotgun to collect on the bottom floor, so don’t miss it.

The zombie sniper is standing watch on the terrace upstairs. He’s an easy mark to sneak up on. Put him down and check the gate mechanism when it’s clear.
On the second floor of the burning house, you’ll also find the Agony Crossbow around the corner. Grab it! This deadly weapon can be equipped with several useful ammo types.
The gate itself won’t budge until the chain is cut. Sebastian says he needs a chainsaw. Ask and you shall receive.

Clear the rest of the town of zombie enemies, collect some items, and backtrack to save. When you’re ready, enter the barn and approach the moaning creature. It’s your old friend the chainsaw psycho from Chapter 1!
Lead him to any remaining traps and unload explosive arrows, shotgun shells, and pistol shots into his head. Use stairs – he’s agonizingly slow on stairs.
If you’ve found explosive arrows, build more in the inventory menu using scrap parts. They’ll make taking him down much easier.

When the big guy is down, you can freely explore for supplies. There’s a Medical Kit on the second floor of the building where the doctor escaped. Grab it for a full health recharge and an increase to your max HP.
If you’re ready to go, interact with the chain near the gate to chainsaw right through it.

This is a very short chapter – if you know exactly what to do. Follow the doctor up and to the back cottage up the hill, past the hospice to find Leslie.
But there’s also plenty of places to explore here. There’s a shack to the right of the hospice entrance you can stop by to save or upgrade.

On the left path, there’s a shack on stilts. Take out the fat afflicted creature and grab the Agony Bow arrow inside. There’s also a treasure chest, just open it slowly or the booby trap will hurt!

The hospice itself holds some extra green goo, a syringe, and a creepy cutscene as your doctor companion encounters his brother.
Kill the poor guy, and look on the X-Ray. There’s a key inside this body! Interact and cut into him for a quick scare and a bonus mirror asylum key.

When you’ve explored the hospice, Leslie will yell outside. Head up the hill, following the right-path to a house where Leslie and the Doctor retreat into.
Inside, go downstairs to the inexplicably large creepy basement. There’s a red room in the back right where he’s hiding.

Equip a Flash Arrow in the Agony Crossbow and prepare for a fight. Sebastian hears something and turns to the door, which opens… but nothing come through?
No, something comes through. It’s just invisible! Shoot the group with the Flash Arrow to stun the creature, then crouch and interact to perform an instant kill. This is a safe strategy for taking them out, but shotguns are also effective.
When the creature is dead, return to the doc and follow him to the hallway. But the stairs are nowhere to be found. The strange will appear, and Sebastian has no choice but to follow him through an endless hallway.
Waking up, you’ll appear in a disgusting chamber full of dead bodies and blood. There’s a lit door in the back, but don’t go there yet.
Instead, start stocking up on items. There’s ammo and arrows in the back chamber, as well as in the piles of dead bodies.

Take note of the booby traps, oil slicks, and hanging fire barrels. When you approach the exit door, enemies will swarm in.
Retreat and lead the gang of creatures into oil slicks or explosives to get free kills. When the area is clear, you can leave through the door.

The next hallway leads into a blood room with a nasty surprise. A terrifying four-armed monstrosity spawns from the corpse. Run!
Retreat down the hallway and wait. A creature will jump out through a locked door, becoming the nightmare’s next victim. Run through the now-open door and into a square room. Climb down the ladder in the back left for a momentary reprieve.

Downstairs, there are tripwires along the way. Duck under them and don’t bother disarming. She appears again, so get moving.
When the elevator stops, run and kick through the door on the left. Spikes will stop your progress as a gate slowly lowers ahead. When the spikes drop, sprint toward the door and you’re home free!

Not quite yet. Downstairs you’ll meet up with our old pal the cloaked stranger. Don’t even try to fight him, just run back up!
Touch the shutter, and the catwalks will drop away, dumping Sebastian into the asylum halls once again.

Right at the start, there’s a mirror directly to your right but the way forward is straight ahead. Beware of the invisible stalker in the back.
Get rid of it, and go through the blood-filled bathroom. Jump down to the lower floor, and smash through the boards in your path.

There’s a locked door ahead and even more invisible stalkers. Carefully walk through the ward – stalkers splash through the water and knock over physics objects. Shoot Flash Arrows or use the Shotgun to reveal them.
Fight off two of them to the dead doctor in the office. He’s carrying the keycard you need. Return to the locked door to continue forward.

Ahead, Sebastian will find himself inside a tiled room with no exits. Interact with all three peep-holes, then enter each of the three rooms. Push one of the two buttons to kill the patient, and a blood exit will appear in the hub.
In the gray cell, choose the left button. In the operating room, use the right button. In the bird cage room, use the left button.

Sebastian reunites with Joseph in the tub room, and learns how to heal partners. Joseph is a useful ally, and he comes armed with a gun.

In the ward ahead, place Sebastian between you and the afflicted. Light it up and watch as most of the enemies here run into the flames.
Downstairs, Joseph can disarm the complicated bomb. He takes it apart in no time, but he begins to turn in the washroom. Luckily he comes around, but things aren’t about to get better for either detective.

Use the save room before moving through the double doors. Ammo and matches are inside the cabinets too. Stock up because a big fight is brewing through those two doors.
Downstairs, swarms of turned will arrive through locked gates. Keep Joseph alive, and scavenge ammo in the side rooms as they open.

Don’t get surrounded, and use grenades to wipe out groups of enemies. If you can, knock a turned down and light them on fire to burn nearby standing enemies too.
Keep killing and turned with dynamite will appear. Shoot the dynamite or shoot their arms to keep these enemies from blowing Sebastian to bits.

When the area is clear, talk to Joseph at the trap mechanism where Kidman is trapped. The camera focuses on the gate ahead – run through it. You’re timed, so move fast!
Run through the cells and kill any enemies fast. Shoot their heads off with the Shotgun and circle around to the control room. At the dials, set the top dial to 22 and the bottom dial to 5.
Kidman might be free, but the floor disappears beneath both of your partners. They’re gone, but now you can explore the area and collect any items you’ve missed.

When you’re ready, jump down and fight to your partners down the straight hallway. Bodies will drop near the combat area, burn them before they get up then clear out the rest.
Approach Joseph after the room is clear and Kidman will unlock the gate blocking your path. The reunion doesn’t last.

Waking up somewhere new, use the door straight ahead to access the mirror asylum. Watch out for the tripwire, and find a secret cache by climbing down the ladder in the doorway on the right. Just stop after hearing the alarm in the underground path.
On the main path, two Turned will appear around the back right corner. Continue on until you spot an oil slick in the floor.

In the room ahead, the bloody woman will return. Retreat to the oil slick and set it on fire. The creature will retreat after burning – fire is it’s only weakness.
Remember that, because the boss fight begins next.

There are two explosive barrels and two incinerator rooms in this area. Shoot the barrels as the creature draws near, then retreat to the incinerators. When you enter the incinerator, she’ll spawn on one of the dead bodies. That should give you time to pull the lever and drop it into the fire.
When you’re not burning her, shoot her with whatever you have. Fire does the most damage, but guns work too.
Just don’t ever let her touch you! One swipe and Sebastian is dead. Don’t sprint too long – if Sebastian runs out of breath, he’s dead.

Shoot her while she burns, and it should only take two or three fires to bring her down. You’ll need some ammo for the next room, so smash the crates down the exit hallway.
Inside the strange experimentation chamber, shoot each of the Turned and pull the tubes from their heads when they’re on the ground.
Bring down all three, and you’ll start the next chapter.

Sebastian starts in the strange asylum. Use up any extra green goo, save, and leave to get the chapter proper started. This is an action-heavy section, so upgrading weapons or abilities is going to help.
The exits to the asylum won’t appear until after studying the photos taken on the desk. The lights will go out, forcing Sebastian to use his lamp to see.
Go down to the end of the ward hallway, and a new path will materialize. Follow it downstairs into the old ward. Approach Leslie in his room, and…

You’ll appear in small room. Climb out and go upstairs to get a good view of the church in the distance. That’s your objective, but there are a few places to stop along the way to collect bonus items.
Stock up, because when Sebastian passes through the gate, you’ll have to fend off swarms of enemies. They’re basic, so keep circling and stand back. Check the cabinets for extra ammo, and try to burn bodies if they’re knocked down.

One useful trick to use when groups of enemies are after you; burn a dead body while a living enemy is standing on top of it. They’ll both burn, giving you a free kill and saving some ammo.
The creatures only go after Sebastian, so don’t worry about your partner while he works. Just survive long enough until the doors open. When they do, run and you won’t have to deal with the remaining killers.
Downstairs, don’t miss the Ice Arrow. Use it against bunched enemies and blast them all at once, or save it for fat enemies. If you’ve got plenty of matches, aim for the legs to trip enemies up then burn them while they’re on the ground to save bullets.

Through the second door, check the gun case to gain the Sniper Rifle. This weapon is essential for the coming section. There are four turret boxes you need to destroy guarding the tower entrance.
Before all that, grab the gun and enter the mirror. Leaving this starting room will cause it to break. There are two paths you can take – circle around the zone, looking for bloody streaks with harpoon bolts sticking in the ground. Walk over them to lure the turret boxes into opening.
When they do, put a rifle bullet through their chest. It doesn’t matter where you hit them, as long as you hit them. And do it fast! The stream of bolts don’t take long to land.

While you’re doing this, you’ll also have to face swarms of spawning enemies. Every time a gun box is destroyed, a zombie will try to pull a red switch to the left of large yellow doors. Kill him with a sniper bullet to stop a swarm of new enemies from appearing.
Pull the switch in the left room to activate two more switches on the right path. Pull the left switch out of the two to get a nice reward – two treasure chests!

Approach the doors when the guns are down, just be prepared. You’ll be locked inside a small area with a chainsaw maniac. Use flash arrows or shock arrows to stun him, then unload with grenades, shotgun shells, or even the very powerful rifle while he’s reeling.
Ahead, climb upstairs and burn the body blocking up the elevator. There’s a save room here too that’ll provide some small respite.

At the top of the tower, your partner rushes ahead in an attempt to save someone. He’ll get captured, and now you’ve got to save him. Grab the rifle bullets on the wooden walkway and run to the left to get a good view of the guillotine.
Shoot both of the monsters in the head and Joseph will be safe. He’ll create a bridge to his position, but the calm doesn’t last. Hold them off until Joseph cranks the gate open.

The marketplace, thankfully, is free of enemies. There’s a lot of crates to smash here, so stock up on ammo before entering the cemetery.
Don’t miss the save room after regaining control following the cutscene with Joseph. Down in the tombs, Joseph will watch over Sebastian with a Sniper Rifle. Watch out, because some of the turned in this area are also armed with rifles.

If you’re low on ammo, take cover behind the gravestones and Joseph will kill the enemy snipers for you. Don’t hide underneath a lantern, they’ll drop them right on Sebastian’s head.
Clear the area and step on the switch to open the next door. Here you’ll have a much bigger problem to contend with.

Grab the spare shotgun ammo laying around and brace yourself. These giants will charge right through you, so keep them pinned with shock bolts or freeze bolts. A second one charges in after taking out the first.
They follow a simple pattern. Keep sprinting away from their attacks and run by when you’re pinned to a wall, then shoot. Take out both of the giants and you’re free to go.
Meet up with Joseph and he’ll unlock an underground passage. Instantly, Sebastian returns to the asylum. Save and leave when you’re ready to continue.

In the underground passages you’ll find a strange sacrificial chamber. To lower the spikes and not spring the trap, lower bodies onto the front-left and back-right slabs. The back-left slab already has a body on it and can’t be raised or lowered.
Also, raise the body on the front-right slab. That way it should match the symbol on the wall. Any number with a cross through it signifies the body needs to be lowered onto the slab.

Enter the disgusting lift as it raises out of the bloody water to find a strange experimentation room. Grab the note and ammo then move into the Sentinel’s pen.
Eventually you’ll reach the locked gate, but the Sentinel isn’t letting you go without a fight.

Any weapons will work, but the freeze and shock bolts will make this guy significantly easier to deal with. Stun him then unload with the Sniper Rifle or Shotgun at close range. If you can, throw a grenade at it’s feet.
It’s very fast, and it’s paramount to keep track of it’s movement through the tall brush to avoid being ambushed.

Defeating it isn’t enough. After putting the beast down, you’ll need to go back in and grab Joseph’s lost glasses.
To make this section easier, craft a Shock bolt and grab the extra syringe on the safe side of the fence. Sneak into the bushes and line up a shot – stun it, grab the glasses, then run for the exit.

Raid the church of items before talking to Joseph. His cutscene drops Sebastian into the catacombs, where the whole chapter takes place.

Past the burial chamber, you’ll find a hallway patrolled by ugly turned. Sneak up and stab them or put them down with standard weapons. Down the hallway, there’s a lithograph Sebastian can pry open to reveal a secret path.
Downstairs, you’ll find the Catacombs Hub. Insert the lithograph into the stone relief in the center to open two doors. Each path contains another lithograph to collect. Get all three and the stone relief will raise up, opening the way forward.

Grab any ammo here and stop by the save room to the right of the relief. Starting with the left passage, turn the crank to drain the deadly gas. Staying in gas increases a meter – when it’s in the red zone, Sebastian starts to take damage.
In the hallway of prison cells, you’ll encounter a new enemy type. These dual-faced abominations spit acid at range, and they’re far tougher than regular zombies. Use a shotgun to the head and aim for the monstrous side to put them down.
Don’t let the spike trap between the two pairs of cells get you. The creature on the hook wakes up when you get close, setting off the instadeath spikes.

Down the ladder, the chamber will flood with gas. Quickly turn the crank straight ahead, then sprint to the second crank. Take out the two-faced beast, then use the crank to clear the room, making it so Sebastian can climb down the ladder.
Have a weapon ready down below. Shoot the explosive charge as the two-heads stalk by to dish out easy damage.

In the crank passage, a trap will trigger and flood the hall with gas. Run through the streams of purple toxin to reach another crank. Turn it to block the passage up.
The ladder leads up to the second lithograph. Prying it out returns you to the hub, where you can save and collect any item you missed or were over-stocked on.

The right path leads into a torture chamber room. Cut the explosive trap in the hall, then stand outside the large square room and shoot both red cranks. A giant spiked platform will drop – step on and take a ride upward.
Kill the two-face and the door will open into another room with a spike-trap. This one only activates when you pull the switch, so use it to take care of some friends later.

Instead of walking under the spikes, sneak through the passage on the left. Be prepared for a fight when you turn the crank, several more enemies will burst out. Abandon the crank and take them out!
The next room forces you into a tight space with several more monsters. Lead them all under the spikes, then pull the switch for an easy kill. When they’re gone, grab the lithograph and you’re home free back to the hub.

Insert the last lithograph, and you’re free to go downstairs to face off against the Keeper. Bring plenty of shock arrows if you can spare the scrap, because the boss battle ahead is extremely stressful if you can’t stun.
That isn’t your immediate problem, though. Cut Sebastian free from the barbed wire mine – they don’t hurt you, just hold you in place. Stepping onto even just one as the spikes fall is fatal. You have infinite sprint here, so hold the button down and stay in the center of the path.

Meeting Leslie is what summons the Keeper. You cannot kill the Keeper, he can only be slowed down. Break the chains with a melee attack, turn the crank and prepare to fight.
Don’t bother shooting him in the head. Sprint away and blast his chest with the shotgun. For this part of the fight, you need to kill him.
Like other killer opponents, your best strategy it to play it safe. Sprint away when he’s close, and keep running when he rampages with his sack.

Put him down, and a door will open while gas flood in. Go through the new opening and take note of the handle on the table. Grab the syringe and ammo before venturing deeper in, because the Keeper will be back.
Turn the crank around the corner as the Keeper regenerates from another lockbox. If you’re fast, you ca complete turning the crank before he can reach you.
Run through the open doorway after turning the crank to escape for now.

The Keeper can’t get you now. Turn the valve to close more gas vents, but the Keeper won’t let you off. He tears off his own head and regenerates on your side.
Put him down again and the safe door will open. By now, he’ll likely drop more barbed-wire mines. Don’t get caught in them, or you’ll be stunned for several seconds.

Leaving, the Keeper smashes the handle off a valve. Return to the first doorway to grab a spare, then put it back onto the valve to turn it – just make sure the current Keeper is dead to give yourself enough time to crank.
When the valve is off, the remaining gas will dissipate. Now run down the stairs to the left and through the safe door.

Upstairs, another locker will attach to Sebastian. Shake it off, and you’ll finally bring this monstrosity down.

After that grueling battle, you’ll still have to deal with two-face creatures at the start of the chapter. Not only that, but these creatures will spawn a tentacle from their chests. Don’t let it touch you, or it’s an instant death for Sebastian.
Clear the area ahead and turn the crank to get past the gate, leading into a different sort of challenge.

This cavern has a hazardous arrow trap. Wait for the bolts to fly by, then hurry to the rocks to take cover.
Have some patience and you’ll reach a narrow passage. Crawl through, and turn the crank to continue. There are some items to the right, but picking them up triggers a -very- creepy surprise.
Twitching, crawling corpses pop out of the wall. Kill them with melee attacks if you spawn them to save ammo! They also appear after turning the exit crank, so be prepared.
Through the water, hop over the low wooden fence to deal with more crawlers. Stomp them or just run for it. Another two-face is waiting with yet another swarm – sprinting will instantly kill the tiny crawlers.

The puzzle ahead looks intimidating, but it isn’t so hard. Pick up the tablet next to the body, then turn it so the clean-side is showing when you insert it.
In the cave passage ahead, Sebastian will fall back into the asylum.

Sebastian meets up with the doctor again down the hallway, but as the cutscene ends you’ll appear in an empty chamber. When the giant creature appears, hold down sprint and run! You have infinite sprint, so dash directly into the next chapter.

The chapter starts in the asylum, where you’re trapped for now. Leave Sebastian’s room, the check your neighbor. Who could it be?
Step out into the lobby and walk toward the new family portrait. Take a good long look, and you’ll find the asylum transformed.
The chapter only starts once Sebastian returns to the cell block. He’ll appear in a monotone forest, and finally outside the mansion itself.

The goal of the mansion is to find three hidden experiments, complete the puzzles, and the locks on the central hub door will release. There’s a lot to do inside the mansion, and Ruvik will cruelly appear periodically to murder you with a touch.
Use the central hub save point often. For now, let’s start down the left path into the dining room.

In the back of the stock room, you’ll find a head with it’s brain revealed. In the audio log, Ruvik mentions that probing the “Pain” region doesn’t work. Look down and left for a map of the brain.
Move the probe over the green area of the brain (Consent) to finish the first stage of the puzzle. If Ruvik appears, just run! Don’t shoot him or he’ll teleport straight for you. If he reaches out to touch you, sprint away.

Next, let’s go through the first-floor right path to the piano parlor. First there are two items you’ll need. Get the tumbler handles in the center upstairs gallery, and the upper library walkway through the doors on the left at the top of the steps.
With the dials collected, insert both into the safe in the back corner of the parlor down the first-floor right path. Turn the dials so the top number is 11 and the bottom number is 2.

For the second puzzle, place the probe in the green zone of the frontal cortex. That’s the “Trust” center. Complete this experiment, and you’ve only got one more to go.

Return to the library and turn right. Hurry down the hallway and turn right. Be prepared, as you enter the bedroom, a trap will catch Sebastian. Aim for the red glowing section of the grinder and you’ll be free.
Return to the bedroom and crawl under the fireplace for the final puzzle. Don’t miss the Medical Kit in Laura’s room. It’s the second bedroom down the hall from the library.

For the third puzzle, move the probe over the red (Fear) region and insert. The audio log confirms this is the correct section.
Now that you’re clear, dash back downstairs and enter through the open passage to avoid another intrusion from Ruvik. He gets faster with each unlocked section of the safe.

The endless hallway leads into Ruben’s personal torture room. Follow the particles through the halls and eventually you’ll face Ruvik’s deadly particle form. Getting close to this monster hurts, but if you stand near too long, it’s an instant death.
Don’t bother fighting it. Dash down the hall on the right, and you’ll face a new challenge. Spikes are lowering from the ceiling and trip-wires appear throughout the room. Duck and sneak through the wires with your lantern on to see them.

Don’t worry if you’re slow, just keep sneaking. As long as you don’t touch a wire, Sebastian has time to escape. Things only get freakier ahead.

Inside the endless hall of mannequin heads, dash away from the particle creation. It can walk straight through walls, but it only hurts if touches you. Don’t stun yourself with too much sprint, and shoot (or melee) the locks off each door blocking your path.
Manage to escape, avoid the spinning spikes, and run as the heads smash together to reach a field of sunflowers.

Someone is trying to show you something. Approach the barn and search the exterior for items before going inside.

When the place bursts into flames, you’ll need to escape using the two cranks. Use the large wheel first to move the platform toward the upper level landing, then turn the red crank to lower it. Stand on the platform and short the crank to ride up.

Of course it isn’t as easy as just climbing out. The blood particle creature reappears and summons several Turned into the area. Grab the extra ammo and arrows in the barn, blast the zombies, and burn their bodies.
Ignore the giant Ruvik creature, you can’t hurt it. Defeating it’s minions will destroy it.
Afterwards, you’ll return to the mansion. Crawl though the narrow bookshelf opening to complete the chapter.

There’s only one way to go, and that’s down. Past the save room, climb the ladder down and disarm the trip-wire or you’ll lose access to a small cache of items.
The real fun doesn’t start until you enter the bizarre funhouse chamber. You can sneak through, or just start shooting. I chose the shooting route, one false move into a trip-wire activates a giant spinning blade.
Stay low with sneak and reach the first exterior room. If any enemies come after you, sneak away and wait for the giant blade to cut them apart.

When you’re inside, snipers will start to shoot out the windows. Stay low and dash down the hallway between shots. Climb up the ladder in the back to reach the second floor where you have a better chance at spotting the shooters.
Upstairs, two zombies patrol the room. Sneak close and you can seriously damage or kill them by shooting the proximity bomb on the wall.

From this door, you should be able to get good shots on the hiding snipers on the balcony opposite. Take them both out if you’ve got rifle shells to spare, then continue on.
Grab the battery pack from the office interior, then go back down to the main chamber below. You’ll need to jump a low wall without barbed wire to reach the second interior area across the path.

Approaching the door, two zombies will rush out. One has a gun, but he stays low. Kill him and don’t risk burning the body, just sneak into the interior room where the giant blade won’t get you.
Insert the battery pack into the generator to open the exit doors and get out of this place.

The bloody tunnels leads into a locked room with a door to the left. This next section is brutally difficult if you’re not stocked up with items, so smash the nearby crates and prepare for a fight.
Enter the blue door on the left when you’re ready. This area is patrolled by zombies, again, but there are plenty of traps you can use to exploit them.

Sneak in and watch out, there are traps everywhere. Try to disarm as many as possible for the scrap, or just set them off if you’re low on health. Remember to hit the stop button a little before when you want to stop to make disarming easier.
Follow the left path to get the glowing blue battery pack. Continue deeper in – there aren’t any enemies yet, so you’re free to pillage this area for items.

Crawl through the broken fence and insert the battery pack to get the trap labyrinth active. Now you’re going to have to fight your way out.
Around the corner, prepare for several enemies to jump you. Back away and use the ammo laying around. Prepare shock or freeze arrows after rounding the corner with the wall-mounted spinning blades.

These lumbering bound-up creatures charge forward and deal serious damage. Keep them held down, then use some of the providing Sniper Rifle ammo to hit them hard. If you can, circle around and shoot the weak point on their backs.
After they charge and hit a wall, they’ll be stunned for a moment. Use this opportunity to shoot their weak point or you’ll waste ammo.

Pull the switch behind the prisoner creature and a new path will open. Wait for the spinning blades and heat lamp crushers to slide back before dashing through.
In the hallway ahead, wait in the doorway until all the crushers are flat against the wall. Sneak to the right to find a hidden ladder and climb up for a short reprieve from the action.

Jumping down through the vent, grab the syringe and prepare for a fight. Two of the giant prisoners are in the area ahead, along with proximity mines. Save those freeze arrows, shock arrows, and grenades for this area.
There’s a low grinder on the left side of the room. If you can trick the prisoners into charging into it, you’ll save yourself a lot of ammo. When the room is clear, use the crank to open the gate. Pull the switch ahead and crawl under the blades to finally escape this nightmarish place.

Back in the hub, pull the lever by the double doors and run down the hall for another encounter with the amalgam monster. He’ll roar and summon Sebastian into another creepy building. Where are we now?
Where ever it is, Laura is back. Continue to the save room and keep going past the elevator shaft. Downstairs, grab the ammo in the corner if you’re low – you’ll need it.
Pull the lever when you’re ready. Laura tears through the chain link barrier. Don’t waste ammo on her yet, just sneak under the rising gates and sprint away. There’s enough time to escape the first section without firing a shot.

Round the corner and keep running though the asylum halls. Stay away from the grabbing hands and turn right. Another zombie will burst out in your path, but ignore it for now. Run by and through the doors to escape.
In the next elevator shaft, you’ll find two fire obstructions. To escape from Laura, you’ll need to find switches or valves. Pull the switches and shoot the valves to shut off the fire blocking your way.
Make sure you’re safely away from Laura before pulling valves. It takes some time, so use shock or ice arrows, or just shoot her until she retreats.

When Laura returns, run left and into the brick room. Duck to avoid setting off proximity mines – try shooting them while Laura is near to stun her.
In the room ahead, pull the lever and stall her until the fires are gone. There’s a fire valve you can shoot to burn her and a proximity mine. Shotgun shells are also good at making her flinch during a charge.

Up the ladder, run ahead and turn around to shoot the valves, spraying her with fire and slowing Laura down. When you’re clear, hit the switch and keep sprinting to stall her while the valves shut off.

Inside the fire-chamber, you’ll be trapped. Look up at the ceiling and shoot the valve handle to escape before being burned alive.
In the next chamber, shoot the two valves on both sides of the room, then a final third directly left of the fire blocking your exit.

Still more! Down below, you’ll need to shoot the valve near the hole you dropped in from to reveal a lever. Use the fire-valves on both corners of the room to stun Laura, then pull the switch.
Once the final wall of flames is gone, you’re home free. Sprint for the elevator and get away from this abomination.
The elevator goes down, and down, and down. Finally you’ll arrive back in the mansion.

Continue through the halls until you’re interrupted by the amalgam monster. Appearing in an underground parking lot, stop by the save room to talk with your mysterious cell neighbor. After that, return to the lot and crawl through the vents.
As if Laura wasn’t enough, now you’ll have to fight the amalgam creature.

This is a brutal and grueling fight. First thing’s first, stay hidden and turn the lamp off. Wait for the boss to wander down to the opposite end of the arena.
When it’s gone, move right and grab as much ammo as possible. There are two rooms on each side of the arena full of items to collect. Go inside the one on your right and grab everything.
Now lay in wait for the boss to return. When it does, hit it with a freeze or shock arrow and aim for the searching eye stalk.

It’ll charge right for you. Hide in a side room and throw grenades as it claws at the door. When it backs up, run out to get clear before it destroys the room.
Do enough damage and the boss will glow purple. Save a shock or freeze arrow for this moment. Hit it and shoot the exposed weak point until the creature is finally dead.

It really helps to save a stun arrow for this point. When it begins glowing purple, it pounces and kills in one hit. While you can dodge it, it’s always better to play it safe.
When it’s finally dead, pillage the arena to re-stock and leave through the elevator.

Welcome back to Krimson City. After escaping the elevator, swim out of the water to get a good view of the surroundings. The place is wrecked, and you’re about to face a new breed of Haunted.
Head down the street until you find a destroyed wall past the crashing yellow bus. There’s an “Open” sign to mark the way. Don’t miss the Magnum in the gun case!
The magnum’s ammo is incredibly rare, so save it for only the toughest enemies. There are some crazy monsters you’ll face in this chapter, so you’ll know when to use it. Try not to waste it on everyday threats!

After crawling through the alleyway as it closes in, you’ll find a market table on the right with a medical kit. The first enemies of the area are waiting ahead.
The Firefighter Haunted has an explosive tank on his back you can use if you’re fighting groups. In the area ahead, you can sneak up and stab most of the enemies here before attempting to open the exit door.
An alarm will go off and Haunted will begin pouring into the area. Take care of the first group, and grab the key off the body. Leaving, swiftly take down the SWAT Haunted. Use a stun arrow, explosive, or the magnum for an instant kill.

Enemies will keep coming, so make a run for the fire escape on the opposite end of the street. The zombies won’t keep following you there.
In the watery area below, you’ll have to deal with an aquatic killer. Shoot the hanging dead bodies and it’ll go straight for the bait, giving you time to swim across.
Swim to the car ahead and wait. Another shark-face will knock Sebastian off the platform – just swim for the other side! Go fast and you’re home free.

Prepare a freeze bolt or get the magnum ready for the street as it glows blue. Ruvik appears to summon a deadly clone of himself.
Ruvik Doppelgangers are an incredibly deadly version of the Haunted. They’re tough, their head is immune to damage, and they summon Laura claws from the ground. Get caught by those? Instant death.
Put him down with a powerful weapon fast and spring to dodge the claws. The faster you kill these opponents, the better. They’ll spawn armies of Haunted to go their bidding as well. Kill the clone, and the spawned Haunted will also die.

In the area ahead, Sebastian will automatically return to the asylum. Take this chance to stock up on lockbox items and upgrade, because the next combat section is brutal.
Here, waves of Haunted will drop down and appear from the metal shutter. Grab the grenade on the platform and save it, but be prepared. The first wave may include zombies with shotguns, so be prepared to take cover and aim for the legs to knock them down.

The third wave includes a dynamite guy and a sniper. Don’t let the sniper climb up to his perch, and shoot the dynamite out of the Haunted’s hand to quickly kill one or two of them.
A SWAT zombie hides behind the shutter between gunshot bursts. Use the grenade, or fire an explosive arrow as the door opens.

Climb into the tower and pillage the concrete area of items before climb up and turning the generator crank. Two SWAT Haunted and a group of other randoms will jump down into the area. One of the SWAT stays on his perch, while the other runs down to get you.
Don’t stay up high. Run down and make your stand beneath the concrete platform in the center. Use a grenade or freeze arrow, or even a shock arrow, to get in control of the situation.

Stock up in the booth ahead and step inside. Try to heal fully, because the next gauntlet is tough. Haunted will spawn on both sides. SWAT and molotovs should be your first priority – especially molotovs. Duck to avoid machine-gun or thrown weapons.
Enemies standing near the edge will trip and fall if they’re shot with anything. Use the Pistol or even a single Shotgun pellet will drop them off.

There’s a save point in the office building ahead. Thankfully you’re free to search and gather items here. Just watch out for the soda machine. Three presses and you’ll get a bomb for your troubles.
Up ahead, you’ll find Kidman in a little trouble. But, there’s water in the way. Use the fallen van to get closer.

The water is infested with killer monster-sharks, but there’s nothing you can do yet. Wait for the yellow gate to partially open, then swim through before it closes. Start swimming as it raises and you should make it through before the lurker gets you.

In the next alley, climb up the fire escape for some extra ammo and take out the sniper on the car to the left of the next yellow gate. Return to the white car below, then shoot the body across. Just as the body falls, swim to the second white car in the alley.
Swim to the third car, then shoot the body just as the yellow gate begins to open. Get the timing right, and you’ll be behind the locked door and safely inside the warehouse with Kidman.

There are a lot of Haunted banging on Kidman’s door. Use a flash or explosive arrow for crowd control, or lead them near a proximity bomb and set it off for an easy few kills.
When Kidman’s out, the doors will open and bring more shambling monsters. She’s armed and ready to defend herself, so use the distraction to your advantage.

The partnership doesn’t last long. Inside the factory, you’ll part ways. Hear that scratching? The disgusting mangled monsters from Chapter 10 return. Explosive gas inundates the area. Try to fire any weapon at all and you’ll instantly die from the explosion.
Wait for the lumbering creature to walk to the opposite end of the room before sneaking toward the shelves of mannequin parts. Wait under the missing section to hide, then sneak to the second pair of cabinets.

If he spots you, just run straight down the path to the ladder and climb up. He can’t follow.
In the second area, several suited Haunted patrol up and down. They can’t see well in the gas, so sneak to the dark left side and use the stacks of parts as cover. Slowly move across, then pull the switch to remove the gas.
Now you can enter the container, kill the feeding Haunted, and grab the exit key.

Outside, you’ll spot Joseph working on a bus. Watch out for the Haunted in the factory office, but otherwise you’re home free. Use this opportunity to stock up, save the the mirror room, and cross the gap to meet Joseph.
Don’t miss the ammo in the blue shipping container! You’ll need it for Chapter 11.

This chapter is short but heavy on action. As it starts, collect all the ammo you can from the bus. There isn’t much, but every shot counts here.
Heresy rips off the bus roof straight away, leaving you exposed to it’s claw attacks. Retreat away from the raised claws, and shoot the explosive larvae it spawns to get extra ammo.

Aim for Heresy’s disgusting face. The thing where all the tubes are coming from? That’s your target. Keep blasting until it falls off.
When it falls off, don’t bother shooting it. You’ll lose it around the corner and face another Haunted barrage.

Swarms of enemies spawn from the burning fires of the building. Use explosive barrels to wipe enemies out, and especially watch for the snipers. If they’re aiming at you, run over to the driver’s seat to avoid getting shot.
Save the explosive barrels for when the camera shifts forward to show three hiding snipers. Blast a barrel to clear them all out instantly.

Once you finally escape the ambush, Heresy returns. Just like last time, he’ll spawn creepy crawlers while striking with his deadly claws. Unload buckshot into his face until the fat spider lets go of the bus.
Just like before, once it’s off the bus you don’t want to waste ammo shooting it. There’s still a challenge waiting ahead.

The bus stops at the highway intersection when Joseph is shot. You’re going to need to navigate the dangerous streets to get to the ambulance in the back. Watch out, there are traps everywhere.
Use the Sniper Rifle to clear the area if you want to be really safe, or stay low and sneak behind the enemies here. Most are armed with shotguns or pistols, so watch out.
There’s a sniper on the over-turned white truck to the right of the ambulance. Take care of him when you’re halfway down the street.
On the return trip, a military vehicle pulls up to lay down covering fire. Use the Sniper Rifle or sneak close and drop a grenade next to the car. Watch out, his cannon can destroy cars!

When the gunner is dead, run over to the vehicle and hop into the turret! Prioritize Haunted armed with dynamite or SWAT first, then clean up the rest.
Once they’re all gone, Kidman will call you over. But it isn’t over yet. One final wave of Haunted appears from all sides. Lead them away from the military jeep, then jump back onto the gun to mop up.

Jump into the bus when they’re all clear, and Sebastian will take the wheel. Avoid the burning car wrecks and have fun mowing over Haunted down the street.
Unfortunately Ruvik is waiting to ruin your fun. The bus crashes into an apartment building, splitting the group up and leading into the next creepy chapter.

Opening in a ruined apartment, grab the personal document to the right of Joseph to create a mirror portal to the asylum, then collect all the ammo and items inside the home.
When you’re ready to move on, jump down to the acid trap ahead. It takes a long time to disarm these things, so make sure the area is clear when you see them later.

After spotting the subway train bridge, shoot the frayed wire of the elevator and climb down the shaft. This leads to Joseph and Sebastian splitting up, so be prepared to go forward alone.
The Keeper ahead marks your first enemy encounters. He leaves, but Haunted patrol the halls. Grab a bottle and hide behind the hamper, drawing the shotgun enemy toward the trip-wire bomb for an easy kill.

Around the corner, you’ll find a Ruvik Clone. These guys are incredibly deadly, so take him out fast. There are more Haunted in the open room to your right, so watch out if you plan on following him inside. Use a freeze arrow or a magnum shot, then run back to the maintenance room and hide.
Most of the enemies here are armed and protected with metal masks. Aim for the legs in combat and burn them while they’re down, or use crowd control arrows like flash or shock.

Disarm the acid trap when the area is clear then climb down the stairs to see one of the distinctive Keeper barbed-wire mines. Disarm that too, then sneak along the right-path instead of moving forward. Watch out for the trip-wire or you’ll alert the Keeper! Sneak too, eventually the Keeper will leave.
Get rid of the barbed-wire mines and acid-sprayer to follow the Keeper. Go through the destroyed wall and crawl through the vents.

Don’t miss the Magnum case after crawling through the wreckage and stepping down to the lower floors. Look in the save room door to instantly appear in the mirror asylum, then leave when you’re ready for a new door to open.
Dropping down into the hallway, grab some bullets in the lower room. There’s a syringe here too. Stock up, because there’s a suicide bomber ahead. Shoot him, and then quickly shoot the second bomber as he pops out of the doors to the right.

This is where things get tricky. Disarm the two mines to the left and collect the scrap before entering the hellish kitchen. This place is absolutely full of deadly traps, so take it slow and don’t panic.
Take the shock arrow on the counter with the opening forward. You’ll need it.

Inside the kitchen proper, green-glowing killer Rhumbas will bounce around the room. They don’t have a set trajectory and will move completely at random.
Use that to your advantage, slowly back away and wait for the things to pass by. If you absolutely can’t get through them, shoot the machines with a shock arrow. It’s the only way to destroy them.
Take the left-most path, disarm the trap, and run by the fire once they lower. Next, you’ll want to move from the left wall all the way to the right.

In the center there’s a spike-traps that activates as you pass by. Sneak under the spikes or it’s instant death. For this, make sure now bots are nearby. If they hit Sebastian, he’ll stand up and get impaled.
A third spike trap activates just before reaching the right wall. Wait for it to retract, then run past it. Disarm the wire before the flame wall, then get by the wall. You’re almost clear.
Once you’re past the fire, run to the alcove to the left of the acid-sprayer. Disarm it, then get the hell out of the kitchen.

In the meat locker, you’ll have to face the regenerating Keeper once again. This is a small room, so stay out of the meat in the center to keep away from the brute.
Stay alive until the small elevator in the back corner opens. Kill him once, and rolling spiked bots will litter the floor too.

You’re almost out. Once the elevator doors open, grab all the goodies the head outside to the exit door.

Sebastian finds himself in an abandoned subway after another violent event. Go downstairs and you’ll find a save point to the left, in the hallway leading to the bathrooms. Ignore the soda machines, there’s nothing good in them this time.
Enter the security office and look on a back wall to grab another medical kit. There’s a bathroom filled with explosive bolt traps, so if you’ve got ammo to shoot the bombs you can collect extra green goo.

Further downstairs you’ll encounter a patrolling Ruvik Clone. Watch out for the zombie cop on the ground, he’ll wake up and attack. Take care of the clone with stealth or just use the Magnum, Sniper Rifle, or any other took for a quick kill.
Disarm the trap around the lower corner and watch out for the Haunted as he comes to live. Grab the two arrows, then pull up the shutter to continue deeper into the station.

The next area features a Ruvik Clone, SWAT, and a Sniper. There are two Haunted hanging from alarm traps – if they go off, swarms of Haunted will rise up from the water.
Sneak into the train car across from the entrance and collect some extra Sniper Rifle ammo. Use the rifle to pick off the Sniper and SWAT in the opposite car, then take down the clone with two or three shots to the chest. Head shots don’t work on clones.

Don’t bump into the hanging bodies or they’ll come to life. Sneak close to the alarms and disarm them to get through this area without having an army of enemies rushing you.
Move down the subway cars until you can get a view of a car filled with explosive bolts. There’s no way to disarm these, so you need to avoid or shot them. Wait near the window and shoot the bombs near the patrolling Haunted to take care of him.

Weave through the trapped car and outside until you’re stopped by a gross membrane wall. These have to be burned with matches. Grab a nearby match and rush through once it dissolves.
The underground sewers are full of disgusting AlterEgos. Aim for the monster-head and watch out if a tentacle springs from their chests. That’s another instant death for Sebastian.

Watch out for trip-wires over the item room in the chainlink fence hallway. They set off alarms, drawing in any waiting AlterEgos.
Electricity arcs through the opening hallway. Duck under the first, then burn the body on the ground before pulling the switch to deactive the electricity. If you’re feeling adventurous, you can knock enemies into the traps.

Pull the switch downstairs, but rush through. The membrane of flesh will grow back eventually. Step into the save room, load up, and leave. On your way out, an AlterEgo will burst from a vent. Burn him before he gets up!
Crawl through the vent and drop into the high water. There’s another AlterEgo around the corner, but an unseen creature takes care of it for you.

Exiting into another canal, make sure you disarm the trap along this path. Setting it off leads into a deadly ambush where you’ll waste ammo.
More AlterEgos are hanging from the ceiling in the alcoves ahead. Stay away, go straight for the exit, and you can avoid more combat here.

Remove the junction box from the panel, the turn the valve to lower the water level to create a new path. Up the ladder, there’s another harmless AlterEgo beneath a pipe. Once again, an unseen monster snatches him up, leaving the way forward clear.

The tunnel beneath is filled with AlterEgos, so be prepared for combat. After burning through the membrane and squeezing through more of that weird disgusting flesh, you’ll come face to face with enemies hanging from the ceiling.
Take it slow, because every single one of the hanging monsters will come to life.

Remove the junction box from the panel at the end of the hall to turn off the currents. This allows the flesh to grow, but uncovers a valve you’ll need to turn. Be prepared to face an AlterEgo around every single fleshy corner.
Get to the valve and turn it to lower the water level, allowing Sebastian deeper into the sewer through the well-lit entrance on the right side of the tunnel.

In the grated pathway, the tentacled creature will finally reveal itself. When you’re grabbed, aim for the toothy-head and keep shooting until you’re free! Don’t worry, this won’t cost any of your precious handgun bullets.
Up ahead, stop at the save room and collect the ammo on the hand-carts around the door.

Across from the buzzing generator, you’ll find an electrical box. Right now, Sebastian only has two of the three needed items. Grab the third one from a box further down the path.

Place each of the boxes into the slots pictured above. Once you do, the generator will go dead. Turn the crank until a nasty surprise shows up.
The boss throws Sebastian into a large empty arena. There’s no ammo inside so don’t bother scrounging. There is a way to get more bullets, but we’ll cover that ground later.
It slides around the ground, swinging it’s tentacles, charging, or spewing purple smoke. When it takes enough damage, it jumps into the ceiling pipes and hides.
This is when it begins to spawn explosive slugs. Kill them with a bullet or even flash arrows. They’ll always spawn more ammo. Find the source of the slugs, and look up to find the hiding mother.

One bullet is enough to force it out. Try using shock arrows to slow it down, then toss grenades or unleash you Magnum.
If you’re caught in the purple smoke, it’ll hide against a wall or surface, laying in wait to strike. Look for the shiny outline and keep your lantern on to spot it easier.
When it’s down, turn the crank again and the supply room door will open. There’s tons of ammo in there to resupply, so grab all you can before pulling the elevator shaft lever.
Up above, you’ll finally reach the subway train car bridge. Go ahead and attempt to cross it to reach the final challenge.

Back at the STEM prototype, knock down each of the three shambling Haunted enemies and pull the plugs from their heads.
If you’re low on ammo, aim for their legs and pull the plugs when they’re on the ground.

Waking up in the asylum, enter the lobby and grab the glowing diary on the desk. Leslie reappears down the passage – approach him and follow his path. It’s straight forward, and thankfully safe from enemies. At the end of the line, you reappear outside.
Welcome back to the place where this all began. Beacon Mental Hospital looms ahead. Collect items along the way, and walk into Leslie to speed up the trip – he teleports you closer and closer to your destination.

Back inside the dark hallways, return to the security office and enter the back door. Open the gate in the back of the stockroom and press the button. Follow the underground passage right back to the sewer from Chapter 1.

Smash open the gates leading into the huge metal doors. Take the path to the spiral staircase, to the elevator, and finally to the rainy courtyard. Cross the path, and you’ll find an office on the right with an upgrade machine and save point.
Look inside the pounding cell doors and the journalist inside will warn Sebastian about Ruvik’s eyes. What does that mean? Ruvik shows up to right afterward to demonstrate.

Welcome to Ruvik’s eye. There’s nowhere to hide now. Enemies will spawn from above, so scrounge for items along each raised platform and load up for a big fight.
This is one of the toughest sections of the game, so don’t be afraid to use lots of your ammo and scrap here.

Especially look out for the Haunted armed with guns. A SWAT Haunted comes with the second wave, so pick him off first and stay out of his line of sight. Grenades from areas above work well.

A Ruvik Clone appears after the first set of Haunted. Get out the Magnum, freeze him, shock him, or do whatever it takes to kill him right away. He summons claws in the cutscene, so start sprinting.

Kill enough of the fatties and pistoleers and the Sadist will make an appearance. Save those Magnum shells, and be prepared to sprint. The rockets he fires are extremely slow, so stand far back and take pot-shots at him until he drops the explosives for a chainsaw.

Once he grabs a chainsaw, use shock arrows to slow him down while unloading shotgun shells, pistol shots, arrows, grenades, or whatever you’ve got. It’s almost over, so play it safe and jump the low barriers to quickly get away from him.
When you’re out, climb out and enter the next combat arena.

Get out the Sniper Rifle and take cover below. On the left and right, a pair of Haunted are waiting. One has dynamite, the other a rifle. They usually alternate, so try to shoot the dynamite enemy after he lights it to clear each duo.

Inside the asylum itself, you’ll enter a dangerous arena. Here, two Keepers spawn at the same time. Use the spike switch in the center to separate them for an easier fight.
There are some traps to use, but it might be better to disarm everything before the battle begins and building yourself explosive, freeze, or shock arrows. Anything to help control these lumbering monsters.
Killing one causes the water level to rise up, giving you even less room to manuever. Don’t enter the high water – Keepers can walk through it just fine, Sebastian is slowed down to a crawl.

Defeating both reveals the exit door.
Inside the… intestinal hallway, Sebastian will need to dodge the lights. If you’re caught, he teleports back to the start of the zone.
No need for stealth here, just stay out of the light. Dash by, and in the narrow hallway use the alcoves to inch past the eye spotlights.

There’s a checkpoint halfway through, after pulling one of the two levers. At the last light challenge, if you’ve got ammo to spare, you can shoot the barbed-wire traps to make it much easier.
After escaping the spotlight maze, a giant crusher will spawn behind you. Sprint away from it, staying out of the blood pools!

When you’re out, Sebastian returns to the courtyard. Stop at the save point, upgrade one final time, and take the elevator up to the true STEM system in the tower.
Follow the circular room counter-clockwise, and Sebastian eventually learns the truth. He’s connected to the machine.
Everyone is, but it’s too late. Ruvik takes on his Amalgam form.

Run! Ruvik tears into the ground with his titanic claws. The first comes from the right side, then left, then right and left in quick succession. Get through the passage and you’ll reach the safety of a building.
Nothing to do but run until Ruvik finds you!

Luckily, Sebastian grabs hold of a military vehicle. Use the turret to target the dangerous claws marked with a red reticule. These are coming in for the kill.
Once the claws are temporarily stunned, aim for the glass case holding in Amalgam Ruvik’s brain. Keep plugging that case until you’re thrown across the city.

Next, use the handy Rocket Launcher! Don’t just randomly shoot, you need to hit Ruvik’s brain case even more. Aim for the body until it’s stunned, then zoom in and target the brain.
If you’re low on ammo and it’s still coming, wait for Ruvik to get close and just shoot the glass until it finally shatters.

When Ruvik finally shows himself, plug the true body to bring this beast down for good. When Sebastian wakes up, stalk toward the central brain case, smash it, and stomp Ruvik to bring an end to all this.
With that Sebastian escapes the nightmare. But, Ruvik’ brain and Leslie are gone. Did they escape? Did Sebastian really get unplugged? Who was Kidman working for?
Whatever it all means, the game is complete. For your troubles New Game+, Nightmare mode, the Machine Gun and Rocket Launcher are unlocked to use.


 Xbox One vs. PlayStation 4 Controller Challenge
 3 Cat and the Forty Thieves Walkthrough
 Syndicate Preview, Plus Ten Minutes of Raw Gameplay Footage
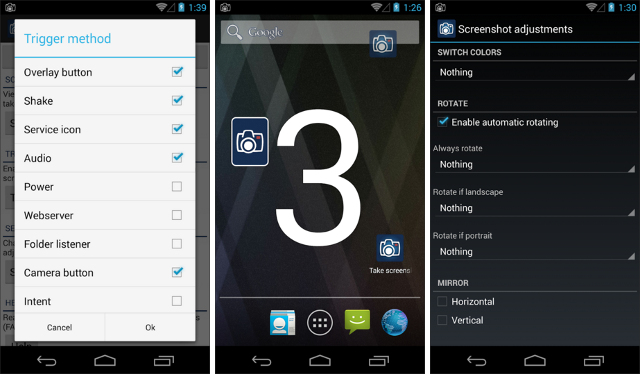 5 Best Android Apps for Taking Better Screenshots
 How to Get More Supply Drops in CoD Advanced Warfare