For more Slender cheats, easter eggs, secrets and video guides download Game Front’s video walkthrough apps.
Video Walkthroughs app on iOS
Video Walkthroughs app on Android
Boasting one of the best looking game engines on the market, Crysis 2 is hoping to make a big splash in the world of first-person shooters. With more graphical bells and whistles than you can shake a stick at, plus full 3D support, the game will deliver as immersive and realistic an experience as you could ever hope to get. Fans of first installment, as well as FarCry, will know what to expect.
The nanosuit back and better than ever, sporting a wide variety of augmentations. They’ll come in handy, because the story (by sci-fi author Richard K. Morgan) will put you in the middle of an alien invasion in New York City. Of course, you’ll be heavily armed, but that doesn’t mean that the aliens won’t occasionally be able to get the best of you. That’s why we’re preparing this full text and video walkthrough. Check back soon for the first updates. We also have lists of achievements and trophies, and a cheats page which compiles useful Crysis information.
NOTE: this game guide is a work in progress. It will be updated continually as we play through the game. Check back later for more content.
In at the Deep End
Second Chance
Sudden Impact
Road Rage
Lab Rat
Gate Keepers
Dead Man Walking
Seat of Power
Dark Heart
Semper Fi or Die
Corporate Collapse
Train to Catch
Unsafe Haven
Terminus
Power Out
Eye of the Storm
Masks Off
Out of the Ashes
A Walk in the Park
Achievement Walkthroughs
In at the Deep End
Second Chance
After you pick up the gun on the floor, walk over to the door and break the padlock using the the toggle stick. Head through the hallway and pick up the glow stick on the table.
Press B to crouch under the door. In order to get some background on the story, walk over to the desk (near the dead body) and press X to use the laptop. Head up the stairs and hold A to perform a power jump over the break in the catwalk.
Move through the two sets of doors, then turn to the right and hold A to grab onto the ledge. Head through the exit door to lead you outside. Follow the on-screen instructions and test out the innovative features of your visor suite.
Jump down to the lower ledge, hop down to ground level and pick up the ammo in the green crates just up ahead. Move around to the right and take out the two enemies surveying the premises.
Pick up one of their rifles, then head back to the green crates and resupply with ammo. Cut back through the middle of the garden area and head for the blue light on your map. Head up the stairs and through the double doors.
Turn right through the doorway. Follow on the on-screen instructions and hit RB to activate cloak mode. This will come in handy whenever your yellow stealth meter gets too high.
After the soldier turns around, sneak up behind him and perform a stealth kill to take him out. Head through the exit and head outside. Make your way around and use cloak powers to take out the two guards in the center area.
Follow the blue dot on your map by performing a power jump up the green crate and onto the large yellow object. Jump again to get over the wall.
Walk off the roof. Before heading downstairs, take cover behind the wall and take out the small group of soldiers down in the street. Turn right down the road and make your first left toward the ambulance.
Turn left at the ambulance (past the EMAT building), turn right and head up the steps behind the yellow container. Move straight along the brick wall and engage in cloak mode as you cross over towards the tower.
Move around the back, climb up the yellow container and if the guard is close enough, perform a stealth attack. Look left and take out the trio of soldiers behind the barricade.
This may alarm a few of the surrounding soldiers. Look to the right of the tower towards the humvee and take them out if you feel fire from this area. With the area clear, get down and head for the blue dot on your map.
After an alternate route gets calculated for you, turn right through the steel frames then head through the opening in between the concrete barriers. Kill the two soldiers, then continue to the left and head through the EMAT entrance.
After you reach the checkpoint, engage cloak mode and perform a stealth kill on the nearby soldier. Quietly head town the tunnel and do the same with the next soldier.
ACHIEVEMENT: Turn right into office and use the laptop to restart the system. Head into the room and after the system shuts down, press X to pry open the doors and earn the “Foreign Containment” Achievement.
Move out into the city. Grab some ammo from the green crates to the left, then advance down the street. Make a left at the end, and then a right into the building. Pick up the miniature Statue of Liberty and use the laptop.
Walk out to the alley, then use the dumpster to get up on the ledge. Follow the on-screen instructions and engage in armor mode, then take out the two soldiers across the way.
Power jump over the gap and head up the stairs. Drop onto the roof of the donut shop and pick up some grenades from the crates. Peek over the roof and chuck a grenade by the soldiers near the ambulance.
Wait for more guards to move out into the open, then hurl another grenade in their direction. You’ll be out in the open on the roof, so quickly drop down and head inside the store.
Turn out the back of the store (near the big rig) and engage in cloak mode. Turn left and run past the ambulance towards the building and drop inside the sewer tunnel. Walk through the tunnel and power jump to pull yourself out (make sure your cloak is on before you do).
Head up the ramp to the right and perform a stealth kill on the soldier when he turns his back to you. Take cover behind the barricade and take out the remaining soldiers in the area.
Advance down the street on the left side of the big rig. Take out the soldiers behind the barricade, then head down the stairs leading to the subway. Press X to lift up the gate and head down the subway.
Crouch under the gate and walk past the bathrooms. After you lift up the next gate, power jump to get through the hole in the ground and head up the stairs.
Sudden Impact
Head through the hallway in the office. Following the explosion and after nearly getting killed by that spaceship, get back to your feet and head down the street.
Turn left through the parking garage and lift up the closing gate. Perform stealth kills on the first two soldiers, then shoot the guard on the other side of the bay door.
Turn left and head down the garage, killing the two soldiers at the other end. Before you head up to the next level, watch out for the rolling self-detonating bombs, then head up.
Shoot the red gas can in the right corner to kill the guards behind the barricade. Turn right out the open gate to head outside. Walk through the next doorway and head upstairs. Walk through the window and onto the roof.
If you want to have a little fun, power kick the car off the roof to create a diversion, then take out the unsuspecting soldiers below. However, keep in mind that they are a lot of soldiers in this area.
For a more subtle approach, drop off onto the lower section of the roof. Hop over the ventilation ducts and crouch alongside the “Post No Bills” signs. Use your cloak as you move alongside the signs to stay out of sight (bullets can penetrate the signs).
Head down the ramp and perform a stealth kill on the nearby soldier. Walk over the rails and advance all the way down past the flatbed truck. If at any point your cover is blown, you can find somewhere to hide and wait for the red icons on your map (the alerted enemies) to turn back to white.
If a large group of soldiers are nearby, engage your cloak and continue around to the left. Move along the building and head toward the blue icon on your map.
Before you investigate the crash site, move to the back corner of the map. Take out the soldier manning the jeep and move to it. If the coast is clear (even if its not) engage in cloak mode and run for the first pod.
The pod will be empty, so move into the building to the right to avoid being seen before your cloak wears off. Move back out and to the right. You’ll have to walk all the way around the back side of the crash.
The next pod won’t have anything either. So turn left and drop down into the wreckage. Pick up the JAW in the green cases to the right of the window. Turn back up towards the hole in the street and fire a rocket at the helicopter overhead.
Climb back up and head through the doorway to the left. Head up the two flights of stairs, then pry open the elevator doors to the left. Drop down through the shaft and crouch to crawl through the crawl space.
Use your visor to scan the biomass near the crash site. Head towards the blue light. Jump through the window and up the concrete slope.
After you get mauled by that alien, use your Nanovision to tack its heat signature. He moves pretty quick, but a few rounds of ammo will take him out. Once he’s dead, walk up to his body and pick up a tissue sample.
Head up the path from the crash site and straight for the blue icon on your map. After you pass through the container with the ammo, sprint down the tunnel and kill the two soldiers at the end.
Head outside, hop over the train car and kill the three soldiers on the other side. Hold your position and take out the two aliens that show up as well. Use the red gas can to inflict a little damage.
Continue down the left side of the tunnel (through the container). Crouch under the platform and kill the alien on the other side of the gate. As soon as he’s dead, back up because another three are going to make a mad dash for you.
After you take them out, continue down the sewer. Once you reach the end, turn right through the doorway and head up the stairs to the left.
Road Rage
Head down the tunnel. Jump up the scaffolding to the left and then up onto the ledge. Follow the path around and jump through the hole to get back to ground level.
Following the cutscene, head out the doorway (pick up the shotgun in the corner if you want), engage your cloak and drop down. Walk up the broken railway bridge and sprint down the tracks.
At the break, drop off and run behind the building to the left to avoid being seen. If the coast is clear, head under the freeway toward the blue icon on your map. Turn left up the rock path to get up to the road.
Head up the road. Grab the ammo on the left side of the big rig. Before you move around to the left, engage your cloak to sneak around the group of soldiers at the barricade.
Continue to advance down the street and use your cloak to avoid having any altercations. As you approach the tunnel entrance of the freeway, several soldiers will rappell down in front of you—take them out and hop over the white container and head down the tunnel.
Following the tectonic shift, drop back down. Switch to Nanovision to view the nearby soldiers’ heat signatures. Continue down the freeway. Once you reach the sign on the floor, move to the right off the freeway and continue forward.
The path will lead you down under the freeway. Engage your cloak and perform a stealth attack on the soldier behind the police car. You definitely don’t want to be spotted here: soldiers with RPGs at the end of the street will unload on you if you create a scene.
Turn right at the break towards the blue icon on your map. Engage your cloak, jump up on the white container, then jump over the wall. Kill the nearby guard on the steps, then head over to the vehicle and hop inside.
Blow up the wall directly in front of you to create a path to get out. Don’t worry too much about the other attacking vehicles—you won’t be able to inflict too much damage and neither will they.
Turn right up the road. Destroy the vehicle coming out of the tunnel, then head inside. Destroy the vehicle in front of the barricade, then shoot down the chopper to the left with a few rockets.
Climb over the median to the left side and move right past the shooters at the barricade. Continue down the tunnel, using rockets to destroy attacking vehicles along the way.
Once you come out of the tunnel, destroy the two armored vehicles and turn to the right corner through the gates. Shoot and kill the soldiers in the back left corner, then hop out. Kill the soldier that opens the blue door and head inside.
Lab Rat
Move close to the open window and perform a headshot kill on the lone soldier just below you. Engage you cloak, drop down and pick up his sniper rifle (you’ll need it later).
Hide behind the air conditioning unit to the left. Wait for your energy to recharge, use your cloak, peek around to the right and take out the soldier across the way.
The best way to get through this area is to pick soldiers off, one by one. After you take down one soldier, another one will usually come to check out the situation. Use your cloak and the air conditioning units to your advantage.
After you pick off every visible soldier, move to the left and drop off the roof down to ground level. Go all the way to the left and move along the wall, either use your cloak or staying in a crouched position.
The long path will lead you to a set of stairs. Be careful after you ascend them because this section will have more soldiers. Carefully make your way across, drop down on the yellow containers, then turn left into the doorway.
Be advised: This building will be full of soldiers. Head down the hallway. There will be as soldier around the turn—take him out, as well as the soldier in the first room to your right.
Resupply in this room, then turn right as you exit. Take out the soldier behind the cover, then move past the stacks of boxes and turn left into the elevator. Engage your cloak and perform a stealth kill on the soldier standing guard.
There will be two soldiers in the greenhouse. Take them out stealthily, then shoot and destroy the terminal.
This is where that sniper will come in really handy. Once the chopper shows up, crouch behind the crate on the left side of the green house. Wait for the chopper to fly around to the north side of the building, then take out one of the gunners to cause it to retreat.
You’ll then be ambushed by soldiers on every side of you (including the ceiling!). Take the two out who come in from the door behind you first, then kill the ones up on the glass ceiling.
Unfortunately, the chopper will circle back. Take cover behind the servers and engage in armor mode to further protect yourself. There will also be another wave of soldiers that will come in through the back door and on top of the roof.
Kill all of the soldiers, then look around near all of the bodies—one of them should have been carrying a JAW rocket launcher. Pick it up, locate the chopper, then take it down with one shot.
Drop down through the hole created by the crash. Walk around the chopper, head through the walkway and head downstairs. When you reach the end, shoot the padlock on the gate on the floor.
Drop down the opening and head up the nearby stairs. Walk across the yellow truss and move around the pathway to the left. Drop down to the grassy area. When you see the stairs, there will be a soldier waiting for you around the corner to the left—take hime out and head up.
ACHIEVEMENT: Engage in cloak mode and get behind all three soldiers, then take them out. Shoot the padlock, head through the doors and make your way to the elevator. Meet up with Nathan and follow him into his room to earn the “False Prophet” Achievement.
After Nathan learns that you are not Prophet, follow him into the next room. After his apartment gets ambushed, move over to the window in front of the telescope. Take out the soliders on the ledge using your sniper, then head out the front door that Nathan holds open for you.
Turn right and wait for a soldier to open the door; when he does, light him up. Turn to the right and take out the soldier standing in the doorway to the right. Head toward the blue icon on your map which will lead you to an open to an area with boarded up windows.
Gate Keepers
Advance across the roof and jump across to the other side. Power jump toward the break in the wall and pull yourself up onto the roof. Hop over the rail (with the mattress leaning on it), then turn left and jump onto the roof with the skylight.
Walk across and hop down onto the roof with the grassy area. Drop down the series of decks. When you get to the last one, hop over onto the wall onto the metal scaffold, which will fall to the ground.
Walk down the road with the taxi and take cover behind it. These guys are going to be a little bit tougher with those crazy blue lasers they shoot at you. If you don’t want to mess with them, use your cloak to sneak past them and move right up the road.
Hop over the roadblock and turn right up the steps into the store. Kill the soldier in the back of the store, then turn left and kill the soldier in the doorway. Pick up the ammo on the counter, then take out the guard in the armored vehicle off in the distance.
Turn right and head up the steps into the next building. Engage in cloak mode and quickly head outside into the right in the corner near the scaffolding.
Once your objectives get updated, use your cloak, walk across the street and head through the entrance to the left of the deli entrance. Kill the three guards up the stairs and move up.
Pick up the ammo on the floor, then jump through the hole and head up the stairs outside. Walk up the long set of stairs to the left and move across the grassy area to the right.
Snipe the lone guard on the rail, then take your position there. Use your cloak and your sniper to take out the group of guards across the way. With the area clear, drop down to the right and get down to ground level.
Jump up onto the scaffolding, then move down the ramp (past the porta-potties), turn left after the first container, then right into the caged area with the green tarp. Walk to the back corner and light the fuse on the bombs to create a diversion.
After it blows up, engage your cloak, exit the cage and turn left along the wall of the building. Move through the brick walkway and take cover between the container and the wall to the left before your cloak wears off.
Wait for your energy to recharge, then cloak up again and cut across the yard (pass the gazebo) and head up the two sets of stairs to the right. Follow the path around and head down the stairs (under the tunnel) and into the courtyard.
Turn left past the caged area with the green tarp. Engage your cloak, then walk all the way around and inside. Light the fuse on the bomb, engage your cloak again and head into through the entry way after you exit the gate.
Use your cloak again to sneak past the soldiers and exit back the exact same way you came to the area before. When you arrive, the area should be mostly clear. Head inside the red portable and pull the lever on the wall to the left.
Engage your cloak to make a safe exit and head down the stairs around back that will lead to the street. Walk along the left side and take out the nearby guard. Walk through the cage door and open the door inside.
Don’t be freaked out by the alien down here. Just walk to the back left corner of the room and down the hallway to complete the level.
Dead Man Walking
Walk to the ledge and use your sniper to take out the soldiers in the surrounding area. You’ll see them on the roof to the north and on the roof down and to the left (by the air conditioning units).
Drop down to the next ledge. Drop down the huge drop to the left to get down to ground level. Take out the soldiers up ahead, switch to cloak mode and head across to the blue icon on your map.
Turn left, walk up the east side steps and power jump up the scaffolding to the left. Walk up the slope and power jump up the “Post No Bills” sign. Turn right, grab onto the ledge, turn left onto the deck and then head up the steps to the left.
From here, clear out the soldiers on the deck, then head through the blue double doors up ahead. Kill the soldiers downstairs, then head into the computer room to the left. Hop over the desk, grab the ammo in the back corner, then shoot the keypad next to the drawer on the desk.
Head into the elevator and head downstairs. Head down the hallway to meet back up with Nathan.
Following the long and incredibly intense cutscene, once you get back to your feet, quickly find some cover and take out the surrounding aliens.
If you haven’t yet, update your weapons because you’ll need to here. You’ll have very little health and won’t be able to withstand that much damage. Once you get your objective of escaping the alien spore, quickly turn around and head for the blue icon on your map.
Seat of Power
Head down the path and drop down onto the street. Turn left down the tunnel and jump up over the scaffolding. Turn left past all of the infected humans and head through the EMAT building.
After you head up the stairs and walk over the catwalk, drop down into the war-torn area outside. Jump up and head up the stairs that lead into the building on the right. Squash those tiny littler critters for Nano catalyst points and head inside.
Continue to head for the icon on your map. Once you reach the room with the statue in the middle, take the stairs up to the third floor. Load up on ammo and grenades out in front of the door, then head inside.
Engage your cloak and turn left through the doorway. Drop down of the stairs (past the unsuspecting aliens) and move along the steps to your left. Once your suit reenergizes, head across towards the blue icon on your map.
Again, the aliens are a bit tougher to handle than the soldiers, so use your cloak and the surrounding environment to remain undetected as you move across the area.
Once you reach the steps in the left corner of the level, walk up them and head into the room. Head into the next room, resupply (make sure to take the shotgun) and head through the hole in the wall. Turn right down the steps, then left toward the drop-off.
Move right along the drop-off to the end. Engage your cloak and drop down. This area will be crawling with aliens, so cut straight across as quickly as possible and take cover behind the pods after you cross the area of water.
Move along through the pods as you make your way toward the blue icon on your map. After you ascend the ramp, grab the ammo in the room to the left and continue around the path.
Stick to the left side of the walkway after you make the turn. Use the broken walls and your cloak as cover as you make your way across. Once you pass the taxi, turn left and held down the tunnel.
Dark Heart
Jump up on the sidewalk to the left, then head down the tracks. After you pass the the train that crashes, switch to Nanovision to see the heat signature of the aliens. Kill the one off to the distance that is holding the human, then continue up the slope.
Kill the alien down the tacks and the one on the pathway down and to the left. Walk down that pathway. Grab the ammo to the right of the stairs, then continue down the tunnel to the right.
Here’s where your shotgun will come in handy. Use your cloak to sneak up on aliens down the tunnel, then fire a couple shots to their heads to take them out.
After you turn right down the tunnel, make a left through the fire escape door. Head up the stairs and crouch to get under the ventilation unit (don’t be scarred by the huge spider shadow on the wall—it’s just one of those little bugs).
Head through the door. Move along the right side of the tunnel where you will find a pile of weapons and ammo (including a new one, the CellMike) past the orange scaffolds.
Continue down the tunnel and light the fuse on the bomb at the end. Enter through the newly formed hole. After you pass the destroyed subway car, turn left into the tunnel (it will be glowing orange).
After you get outside, drop off onto the tendril (?) to the right of the car. Follow it down and power jump up onto the pathway. Turn left and take out the two aliens up ahead, then press X when to interact with the first spore vein.
Break right and head through the tunnel just to the left of the derailed subway car. Drop down from the ledge and head over to the right. Take out the two nearby aliens, then follow along the stream.
Cut to the right. After you pass the subway car torn in half, turn right and move past the taxi. Power jump up the back of the rock, move around to the left (so the alien standing guard won’t see you) and break the second spore vein.
Turn right, jump up onto the container and head down the path. Use the tendril to the left to cross the gap. Turn left and walk past the taxi. Use your cloak to sneak past the alien to the left (or annihilate him) and drop down to the section below.
Once you get to the area with the trees, cut left down through the little pool of water. Use your cloak and if you are super stealthy, walk up and destroy the third spore vein and slowly walk back to the pool of water without being detected. (This part has one of those huge robot guys and you don’t want to mess with one of them again.)
ACHIEVEMENT: Move right (past the tendril in the ground) and walk all the way around the spore and down the pathway. Once you reach the doors, wait for them to open and walk inside to earn the “Into the Abyss” Achievement.
Once the thing throws you out, sprint up the street and drop down into the lower level. Sprint down the street for the helicopter.
Semper Fi or Die
Follow Delta Company down the grassy path. Cross the stream and head up the path on the left. Pick up a rifle and some ammo, then follow your team down the stream.
Once the aline ship flies overhead, take cover under the structure to the right. Peek out and take out the aliens in and around the derailed subway car.
Head down the path past the tracks. Join your team and take cover around the yellow container to the right. Grab the ammo near the trash bin, then take out the two aliens on the train car off in the distance.
ACHIEVEMENT: Once you clear the area, stay with your team and follow them through the subway car. Kill the aliens down the path and get to the hole in the building up ahead. If all of the marines stay alive thus far, you’ll earn the “Band of Brothers” Achievement.
Walk around the desk, pick your choice of weapons, then continue around to the right (past the elevator) and through the exit. Turn left through the next doorway and take cover behind the yellow container.
Engage your cloak, walk over to the left wall and take out the large group of aliens with a couple grenades. With them dead, engage your cloak and power jump over the river to the other side.
Stealthily make your way around to the left and drop down in the water. Take cover behind the yellow container, engage your cloak again, then hop up onto the container and walk out onto the road.
Head through the tunnel to your left. Use your cloak to sneak past the group of alines and keep to the left as you advance. Once you reach the checkpoint, drop down to the road below.
Continue all the way down the path (using your cloak if you don’t feel like having a gun battle). Once you reach the turn, take cover behind the left side of the humvee. Press X to hop inside, then hit the gas and floor hit.
Ride the humvee all the way down the street and use your momentum to clear the gap and land on the lower street. Hop outside and turn to the right. Grab some ammo and head down past the waterfall.
Once you meet up with your team, follow them over the hill. Grab some ammo by the bus, then go to town on the group of aliens up ahead. Clear the area, then head over the stream and up the road.
Resupply with your team. Somewhere in the pile of weapons you’ll find the SWARMER. I highly recommend finding a nice spot for cover and using this to inflict a tone of damage on the drop ship of aliens (keep in mind that they’ll be up on the railway as well).
If you walk up the path behind you, you’ll also find a badass turret gun that will pack a punch. Once you clear the area of the aliens, you have to take down the ship that will fly overhead.
ACHIEVEMENT: In order to take it down, you’ll need the JAW (the laser guided rocket launcher). Use the JAW to fire several rockets at the ship and you’ll earn the “Once a Marine, Always a Marine” Achievement.
Turn right down the path and follow your team through the tunnel.
Corporate Collapse
Follow Chino and head down the path. Once you get to the drop-off, take cover behind the barricades and kill the aliens down on the grass area. Cross over the steam and continue along the path.
Drop down into the stream and follow it down. Grab the sniper and pick up some ammo. Hop over the barricade and cross the collapsed green bridge to the left. Turn right and head up the stairs in front of the yellow container.
Engage your cloak, drop down over the wall to the right and walk toward the garage door. Once you learn that you have to blast your way through, spread out three bricks of C4 along the door, move up the road a bit, then blast it.
ACHIEVEMENT: Head down and into the water. Swim through the wreckage to the other side and earn the “Hung Out to Dry” Achievement.
For this next part, since you are in tight quarters with little cover, you are going to want to sneak past these soldiers using your cloak. Head through the gate and turn left around the barricade.
Since you don’t want to be seen, use the cars as cover while your suit reenergizes. Head down the hallway (past the humvee), be careful as you turn left around the barricade, then hop over the two barricades and down the hallway.
Grab the ammo in the room to the left and again, since there is so little room in this level, use your cloak to stealthily maneuver around the soldiers.
After you walk through the hallway with the plants (carefully walking in between the two soldiers), make two quick lefts and head for the elevator straight ahead. Use the keypad to the left to open the door.
Turn down the right hallway and follow it around. Walk down the steps and press X to use the computer on the desk. As soon as that general comes on the screen, go into cloak mode and run up the stairs to the right to avoid being ambushed.
With the unsuspecting soldiers looking around toss a few grenades, then run around and take them out. Once they are all dead, go back to the computer to reboot the system.
After you get back to your feet, head down the tunnel up ahead. Turn left and follow the stream around. Power jump up into the next tunnel, then jump up onto the street. After the explosion, follow your team through the opening in the brick wall.
Turn right and and head into the building. Engage your cloak and run straight through the laser blasts of that huge alien vehicle, a la Star Wars AT-AT Walker. Jump up on the sloped container that leads into the apartment room.
Pick up the JAW behind the couch, then with the huge alien vehicle facing its back toward you, aim for the bright red section and fire three or four rockets to destroy it.
Head back outside and meet up with Chino’s group.
Train to Catch
Drop down into the road. Head straight through the break in the wall and pick up the nearby ammo. Take out the alien behind the barricade down below, then hop down and head through the doorway.
Grab a few grenades and pick up the MK.60. Head down the hallway and through the door. Once you get outside, pick up the JAW sitting on the stack of green crates and use it to take down the alien gun ship.
Drop down and head through the evacuation gates. Kill the unsuspecting alien fighting behind the barricade, then engage your cloak and turn down the street to the right.
Move past the yellow containers and once you get to the gate, walk around the back and press X to bring the batteries back online. Cut across the field and move along the big white building with the columns.
Hop over the break in the EMAT wall, head diagonally across toward the cage and press X to switch the next battery back on.
Head back along the white building and break through the front doors. Turn left up the stairs. Activate armor mode before you cut through the flames and head for the blue icon on your map.
After you head through the next door and head upstairs, drop down off the edge. Turn left through the doorway and head outside. Drop off the ledge near the flag and take cover behind the yellow containers.
Clear the area of all aliens, then regroup with the marines. Follow them through the rubble and onto the next area. Head up the ramp to the left, take out the lone alien and use the wall as cover to take out the aliens down below.
Clear the area, then follow the marines to the next spot. Resupply after you head up the steps, then kill all of the aliens surrounding the water fountain. There will be one of those armored aliens here, so use you cloak if you need to elude him from time to time.
Resupply, then join the marines in the EMAT building. Exit the building and take cover behind the humvee. Use your cloak to get over to the gunner located about 10 M to the left of the blue icon on your map.
ACHIEVEMENT: Take out the surrounding aliens in the area to earn the “Fire Walker” Achievement.
Tun left toward the gate and press X to use the keypad and open the gates. Wait for the humvees to come rolling through, then hop inside the lead humvee.
Unsafe Haven
Resupply, then exit the building with the marines. Head over to the right of the garage and press X to open the gate to the right. Turn left and kill the two aliens next to the yellow containers.
After you’ve cleared the area, head down the street. After you meet up with the other marines, hop up and over the right side of the barricade. Move across to the left and hop over to the platform.
Walk through the gate, resupply, then head out into Central Station. Turn right and drop down onto the street below through the break in the wall. Turn left under the bridge, then make a right through the chain-link gate.
Walk up the ramp to the left and proceed forward. Turn left down the street, then make a right and hop up through the break in the wall. Use your cloak to sneak past the aliens and walk past the lighted up statue.
Move past the tendril through the ground and into the parking garage. Walk up the steps with your cloak on, then make a quick left through the doorway. You can pick up the collectible souvenir on the right side of the desk, then press X on the “Lock” button to unlock the garage door.
Head down into the underground parking garage. The first detonator will be on the pillar right in front of you. For the second one, hop over the rail to the left and head inside the caged area at the end of the garage.
For the third one, turn left out of the cage and make a right past the tendril. Stay to the left and head down to the lowest level. You’ll find it on the nearby pillar to the left.
After the lights go out, switch to Nanovision to help you see and sprint up and out of the parking garage. Turn left under the partially collapsed subway tacks and straight head for the blue icon on your map.
Once you reach the wall, hop over the left side, engage your cloak, turn left and jump up through the window. Make your way around to the other side of the building. Once you are right under the blue icon, turn right through the doorway and pry open the first set of elevator doors.
Turn right and power jump up to the next level. Walk around to the corner of the office and pick up the detonator out of the fallen marine’s hands.
After you get back to your feet, sprint down the street to meet up with the other marines at the terminal. Once you arrive, you’ll have to defend the area from alien forces—that is, one of those huge armored aliens.
After you take care of him, head through the entryway in the building leading to the terminal.
Terminus
Turn right and head through the barred door. Follow the marine to Colonel Barclay. After Barclay gives you orders to defend the people outside, head up what will seem like an endless flight of stairs.
Jump across the gap on the last flight of stairs, then follow the marine outside. Move to the right and take out the attacking aliens. (You’ll find tons of ammo and weapons up the nearby stairs to the right. Make sure you grab the L-TAG because you’ll need it later.)
Move across to the left side of the building and take out the aliens over there as well. You’ll also have to fight off one of those heavily armored aliens again. Once the huge AT-AT Walker-like machine comes bashing through the building, take out the aliens that drop from the ceiling first.
Next, use the L-TAG to shoot the back of machine. You will also find a SWARMER up on the third level in the far right corner of the room, as well as a JAW on the first level in the near corner of the room. The JAW will work best, but being on the third level will give you a better angle.
You’ll notice that this machine is going to be a lot harder to defeat than the previous one. Use your cloak to your advantage and keep moving around to find good spots to hit its back. If you get discouraged, head down to ground level and throw a couple of bricks of C4 at its back, then detonate him.
After you finally destroy the big beast, wait for the humvee to arrive, then hop inside.
Power Out
Head down the path after the marine. Walk down the slope and turn left under the bridge. Sprint up the road, then drop off and join the marines in the middle of the street.
The first part of this level is easy: shoot everything that moves. If you stay outside with the marines you’ll be a sitting duck. Keep moving around through the peripheral buildings and destroy all aliens in this area.
After you clear the area and the street goes dark, you’ll have to fight off a few more aliens and then…you guessed it, another one of those huge machines.
Down the street across form the diner you’ll find a JAW next to car. You’ll also find some C4 in the NYC Police building. Use your cloak to sneak behind the machine and like before, take shots at its back to destroy it.
ACHIEVEMENT: After you destroy it, head for the blue icon on your map to head to the EVAC site and earn the “Crossroads of the World” Achievement.
Following your near death experience after entering the spear, turn around and crawl towards the EVAC plane. Jump over the barricade and onto the plane.
Eye of the Storm
Once you get to the steps of the light tower, engage your cloak and perform a stealth kill on the soldier by the railing. Head up the steps and pick resupply near the green crates.
Turn left down the steps and perform another stealth kill on the nearby soldier. Use your cloak to easily make your way down the path. Once you reach the building, head through the doorway on the left side.
Turn right through the hole in the wall and head up the cement slope to the next level. Turn right and perform a stealth kill on the soldier near the window.
Head through the doorway and jump up onto the ledge in front of you. Head through the doorway, walk along the ledge to the right, then drop off down to the doorway below.
Walk down the pathway and crouch through the crawl space. Move left through the doorway, then power jump up on the ledge to the left. Walk through the doorway around to the other doorway and jump across to the adjacent ledge.
Head through the doorway, turn left and drop down through the next doorway. Head up the slope and follow the path around that will lead you outside.
Wait for the two soldiers to walk by, then engage your cloak, drop down and head for the break in the wall up ahead. Head up the steps to the right and walk through the generators.
Move to the right of the rail and hop over. Make sure you don’t get caught in the search light as you sprint for the doorway to the left of the stairs. Walk through the next doorway to the right and turn right into the old elevator.
Turn left through the doorway after you exit the elevator. Perform a stealth kill on the soldier facing the window. Before you head out the doorway, engage your cloak, then walk out into the catwalk, turn left and hop over the edge.
Walk through the generators, turn right and sneak around the soldier doing electrical work and head through the doorway.
ACHIEVEMENT: Sprint down the hallway and press B to slide under the electrical currents. Pull down the power switch against the wall to earn the “Stealth Assassin Achievement.
Activate Nanovison to see and head back down the pathway. Since the soldiers won’t be able to see you, take them out with your gun and head for the stairs in the generator room.
Head for the blue icon on your map and get to the elevator. Turn left through the doorway and head outside. Engage your cloak and move to the right around the soldiers standing around the humvee.
Head through the open gates and down the road. Slide under the closing gate where you will be trapped. After they cut the lights and Hargreave tells you about the drainage ditch, switch to Nanovison and head through the open door.
Break off the padlocks on one of the grates and hop down. Turn left (towards the blue icon) and head out into the water. Swim over to the stairs and head up.
Walk past the ramp on the right and continue forward. Make a right at the next ramp, hop over the barricades and turn right at the end of the building up the stairs.
Stay stealthy here, so use your cloak and move around the guards up here. After you make the right, head in through the doorway with the green frame on the right wall. From there, head upstairs.
Perform a stealth kill on the soldier overlooking the rail, then burst in through the door across the way. After you throw that guy out the window, engage your cloak and hop through the left window.
Turn left and jump over the rail and onto the street. Follow the street all the way around to the door to the prison.
Masks Off
Following that revealing cutscene, follow Tara through the double doors. Exit the elevator and use your cloak as you move past the guards to the left and through the door straight ahead.
Head up the steps in the room with all of the boxes and then through the doorway. Perform a stealth kill on the soldier to the right, then if you can, speak past the other guards and head upstairs.
Continue up the stairs to the top floor. Engage your cloak before you walk through the doorway, then move around to the left. Continue straight down the hallway (past the bookshelves and the hallway to the right).
ACHIEVEMENT: Turn right through the middle of the next room and turn right at the wall. Wait for any nearby soldiers to disperse, then turn left and take out the lone guard down the hallway before heading through the double doors to earn the “Theseus at Last” Achievement.
After the long-winded speech, press X to grab the syringe on the desk.
Once the building begins to go up in flames, turn left, sprint up the stairs and head through the doorway. Head up the next set of stairs and kick the object blocking the next doorway.
Use the keypad to get through the door on the right. Activate Armor mode, sprint through the water and open the next door in the back left corner. Pick up some ammo and grenades before kicking in the door that will lead outside.
Drop down on the vents to the left, then drop down on the narrow area to the left. Hop over the rail to the catwalk below and head down the stairs. Engage your cloak and stick to the wall as you make your way around to the left.
Cut down through the grassy area, then head back up onto the road. With your cloak on, stick to the perimeter of the area as you make your way toward the blue icon on the map.
Once you see the huge armored alien, turn left and jump over the barrier into the building with the big “HR” on the wall. Head up the stairs, turn left at the top and head down the hallway past the elevator.
Head through the door at the end of the hallway. Engage your cloak and head downstairs. Head outside and hop over the wall where the soldiers are taking cover.
Head up to the stairs to the left. Take out the two aliens and head around to the steps on the other side. After you walk down them, drop off the roof to the right. Crouch and walk under the partially opened bay door.
Turn left and move to the right side of the grassy area. Continue down (past the big rigs), hop over the wall and head straight for the elevator.
After you take the next elevator up, cross over the median to the other side of the freeway, then head up the slope to the top of the bridge. You won’t encounter too much enemy fire, so make your way down the bridge without worry.
Out of the Ashes
After talking with Nathan and Tara, hop onto the tank. As you guys make your way through the city, shoot and destroy any alien vehicles/droids.
After your tank gets hit, walk straight to the green cases and pick up the K-VOLT on the ground. Engage your cloak, turn left and cut through the rubble and up into the building.
Turn right through the doorway and take out the nearby alien. Head left through the next doorway and press X on the elevator panel to call for the elevator.
Turn left and follow the pathway all the way around to the doorway (across from the tipped over vending machine). Use your cloak to sneak around the two aliens in the room, then walk out onto the ledge in between the aliens firing down on the street.
Use your visor to lock on to the alien gunship flying around in the distance. Head back inside, turn right and jump through the hole to the right of the broken “hotels” sign.
Head around the railing and walk up the stairs. Drop down onto the roof through the hole in the wall. Walk to the edge and use your visor to tag the aliens on the roof across from you.
Drop down and cut around to the right. Sprint for the stairs. With your cloak on, jump onto the vents, then the next set of stairs—successfully sidestepping the armored alien.
Drop down on the ledge to the right, then perform a power jump down onto the next roof.
A Walk in the Park
ACHIEVEMENT: Once you touch down you’ll earn the “Home Stretch” Achievement.
Follow the path all the way around to the bedrock. Follow the bedrock path around to the left. Use your cloak to sneak past the first two aliens on the ridge, then cut through the grassy area to the right.
After the drop off, look for cover and keep your cloak on when you move around; this area is loaded with aliens. After you passed through the break in the gate, turn left and head around the vehicle standing straight in the air.
Continue around and head up the steps to the right of the columns, but be careful, there will be aliens waiting for you at the top. Make a u-turn, jump over the rocks and walk across the bridge.
Walk down the path in between the U.S. flags. You can pick up a JAW to use on the armored alien below, or just go stealth. After you head between the arches, cut right and head for the opening in the rock wall.
Head around to the spear on the other side. Once you reach it, destroy the spore vein inside. Next, jump down and head through the tunnel to the right of the yellow container.
Move along the pathway and head for the next spear. Like the other one, it will be heavily guarded, so either take out the surrounding aliens, or allow your energy to recharge and use your cloak to sneak down and get it.
After you destroy it, walk around and cross over the gap by walking along the spear. Jump over the wall and destroy the third spore vein. Walk around and head inside the partially broken spear.
After you exit the spear and tun left. Pick up some ammo, as you will need to do some killing here. Cloaking aliens! If you stay back, you’ll only have to kill one at a time. Nanovision will help a little bit in spotting them.
ACHIEVEMENT: Once you kill them off, sprint for the opening in the spore. Once inside, hit LB to activate Armor mode. Follow the onscreen instructions to beat the game and earn the “Start Spreading the News” Achievement.


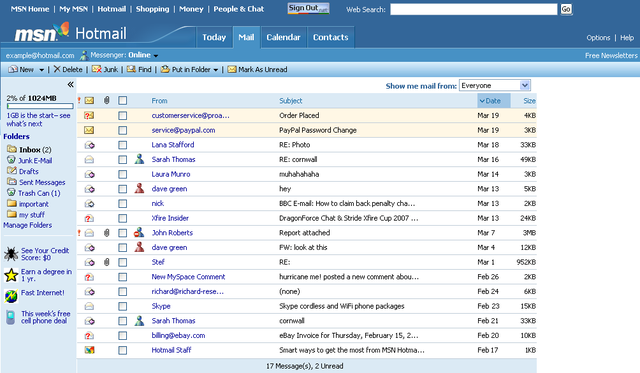 Hotmail No More! Microsoft Outlook Email Services Explained
 Titanfall Guide, Tips and Tricks: How to Dominate in Every Map
 11 Immersion Shattering Moments in Gaming
 Why Hatred Doesnt Deserve a Platform on Steam
 Max Payne 3 Glitches: Zombies, GTA Free Roam & More