Rage is a first-person shooter video game by id Software which was released on October 4, 2011 in North America. It uses the company’s new OpenGL based id Tech 5 engine. The game was first shown as a tech demo on June 11, 2007, at Apple’s WWDC, and was officially announced on August 2, 2007, at QuakeCon.
The game takes place in a post-apocalyptic world somewhat similar to the movie Mad Max 2 and that of other popular video games such as Fallout. In an interview with GameSpot, designer Tim Willits revealed that the game is set in the near future following the impact of the asteroid 99942 Apophis. Matthew J. Costello, who worked on the plot of Doom 3, also worked on the Rage plot. Influences on the driving and racing gameplay include games such as MotorStorm and Burnout. Players can upgrade their cars with racing certificates won from races.
There are a total of fifty achievements / trophies total in Rage. A bit numerous so to say but that just means more fun for us. This page will guide you through how to conquer all the achievements in the game. So lets get started shall we?
Jump to Content
The main goal of this achievement is to kill at least three enemies using the Sentry Bot. The Sentry Bot has somewhat of a similarity with the turret but whats better is that this baby can move! Bot is a shortened term for robot so it is basically a robot equipped with a gun, hence, a moving turret. In this game, it’s features are of that of a spider.
1. First of all, you must purchase the Sentry Bot Schematic from the outfitters in Wellspring for $175. Then gather the requirements for creating a Sentry Bot.
2. After you visit Wellspring, go west across the broken highway. You are now heading to the bash TV show. You will have to play the show during a main plot quest and it is available to replay anytime.
3. Upon entering the Chamber of Laughs, use your Sentry Bot on the first wave of enemies.
Note: It is best to do this on easy mode in order for your Sentry Bot to deal with the damage taken from the enemies if some have the chance to do so. You can change the difficulty when you press the start button, pausing the game. It is located in the settings tab and the difficulty.
4. When your Sentry Bot kills at least three enemies, wait for the achievement to pop out and kill the rest of them. There you have it!
Here’s the video version of this guide:
Three Brids, One Bomb Car
This page will guide you on how to obtain the Three Brids, One Bomb Car achievement in the game. Follow the simple steps below in order to do so.
1. First, it is recommended to do this on easy mode for those enemies do hurt on hard or nightmare mode and for decreasing the chances of dying.
2. Once you enter the chamber or so called Chamber of Laughs, do not kill any enemy first. You must wait until at least three enemies spawn.
3. So when they appear, these aggressive beasts will attack you ferociously. They attack quickly for their agility build and it will not be that easy to lure them. Just try to get all three on position, have them move close to one another.
4. After doing so, you can now use the RC bomb car and detonate it to kill them all at once.
5. Kill all the remaining wave of enemies and you’ll get the achievement!
Here is the video version of the guide:
The goal is to kill at least five enemies using only one deployed sentry turret. Turrets are designed to kill numbers for they are built with special devices which detects enemies upon their reach. In order to have this achievement, simply follow the guide below:
1. Before anything else, you must purchase the Sentry Turret Schematic from the outfitters in Wellspring. Then gather the requirements for creating a Sentry Turret.
2. After you visit Wellspring, go west across the broken highway. You are now heading to the bash TV show. You will have to play the show during a main plot quest and it is available to replay anytime.
3. Upon entering the Chamber of Laughs, deploy your sentry turret on the first wave of enemies.
Note: It is highly recommended to set the difficulty to easy in order for your turret to withstand the damage taken from the enemies if ever some would approach it.
4. Now, lure these monsters towards you. Hoping that the enemies will see you as prey instead of the turret.
5. When your turret kills at least five enemies, wait for the achievement to pop out and kill the rest of them. There you have it!
If you want to view this guide through video streaming, play this below:
The objective is to kill at least three enemies using only one mind controlled enemy.
1. Before anything else, you must acquire the Mind Control Darts and their Schematics. You can get this through accepting the Secret Delivery quest for Dr. Kvasir. Now upon entering the Chamber of Laughs, wait for an enemy to spawn.
Note: Replay the bash TV show and set the difficulty to easy.
2. Once this certain enemy approaches you, aim at it, shooting your Darts and controlling him, thus killing him and the rest of his pals.
Note: Mobbing is the key on getting this. For those who doesn’t know what mobbing is, it is simply taunting your enemies and once a mob of enemies are close to you, that’s the time you strike. This is very useful not just on quests but all throughout several games. It lets you save ammo and time.
3. Just wait for the achievement to pop out and then you can kill the rest of the enemies.
Here is the video version of the guide:
This page will show you the trick on how to accomplish the Just a Flesh Wound achievement. This is known to be the hardest mini-game but actually, this can be accomplished if you do it twice. You play it once then, jot down the patterns but this works only from rounds one to four. The last round might be frustrating as it is very random. Some players find this impossible to accomplish for the speed on round five is quite fast, faster than our naked eye to catch up.
So, follow the patterns for rounds one to four below and then I’ll teach you how to accomplish the final round.
1. Enter the Wellspring second chance bar. There inside, you will find a man sitting alone. His name is Abbott. He will challenge you on a five finger fillet game.
For those who aren’t familiar what this is, the five finger fillet is also called the Knife game basically putting your hands on the line for some cash. You put one hand down and spread your fingers flat on the table, then using a sharp object, popularly a knife, you stab back and forth between your fingers and trying to avoid not hitting one.
Same as the mini game, Abbott will pay cash for every successful attempt per round.
So, let’s start with round one! Here is the pattern:
6-1-6-2-6-3-6-4-6-5-6
2. The speed gradually increases so you need to catch up fast.
Here’s the pattern for the second round:
6-5-6-4-6-3-6-2-6-1-6-2-6-3-6-4-6-5-6
3. Now for the third round! It is actually the same as the second one but in a much faster pace.
The pattern is as follows:
6-5-6-4-6-3-6-2-6-1-6-2-6-3-6-4-6-5-6
4. Here’s the fourth one.
The fourth round has a different pattern so follow this:
6-5-6-4-6-3-6-2-6-1-5-1-4-1-3-1-2-1-3-1-4-1-5-1-6
5. Finally round five. This has a random pattern and quite impossible to accomplish normally. If you fail, you have to start from scratch. Let me say this straight, the only person who can finish this final round is someone who can slow time. Since this is the only solution so far, let’s do it! The trick is to press the Start Button at the same time you hit a target with your knife, once you do this, the pause menu will appear. Now, you can see where the next target will be! So that’s it. Hope this trick helps you.
To view the video version of this guide, play this below:
The objective is to score each of the three field goals from the ATV. This however can be done after destroying the giant gate to the south of the Hagar Settlement which would happen automatically during an early main plot quest. It’s a really fun quest to do as the player’s scream would make you giggle.
1. At the north of the Hagar Settlement the first field goal is found. When you are at this area shown at the screen shot below, move forward and you’ll be entering the Hagar Territory. In the long run, you’ll be reaching a place where a bridge is above you. Now, you’ll have to turn to your left. A the end of that, you’ll have to turn right and there you should see the first field goal. You’ll need to use your dexterity now to shoot yourself to the goal. As you aim straight towards the goal, move backwards and then go full speed ahead! Your character will be flying as the mobile gets stuck and hope you’ll shoot yourself exactly into the field goal.
2. Now, heading to the southwest of Hagar Settlement, we’ll find the next goal. When you reach this area as show on the screenshot below, move past Durar’s Repair Shop then turn left, you’re now entering the Wasted Territory. You’ll come to a crossroad, head to your right. You will get spotted by some enemies and they will shoot you but just by-pass them. You’ll encounter another crossroad near them, just head to your right. And there you’ll see another crossroad, now head to your left. At the end of it, you’ll see the second field goal.
3. We’re at the last field goal and this is located at the northwest of Wellspring. As you reach this area, move forward. Now you’ll find two ways, turn towards your right. Just move all the way in the same direction and you’ll enter the Shrouded Territory. You’ll pass below a bridge where some enemies will open fire from the top of it. Enter the left part of the bridge as there are two entries, then move forward as your enemies will shoot at you. Then you’ll have to go up a bridge as you go to your left. Move along and at the end, turn to your left. Another crossroad will appear. Turn now towards your right, you’ll be entering the Northern Watch Tower. There you will see the final field goal! Aim well and if you shoot yourself to it correctly, you’ll just have to wait for a few seconds for the achievement to pop out. There you have it!
Below is the video version of the guide:
The objective is to find the Secret Developer Graffiti Room.
1. First, you’ll have to search for Dietrich. He is located on the upper floor of Subway Town. Upon meeting him, he will give you a side quest. You will be told to go to the abandoned distillery.
2. Now, the abandoned distillery is located behind a cave near the Subway Town. Just follow the Guide Marker in order to make your way through the cave and in to the distillery.
3. Once you’re in, you’ll see a window. Turn left and you’ll see a door-like entrance blocked with some wood nailed on it. Just break your way through and continue.
4. Then turn right. You will now need a Lock Grinder to open the entrance door.
5. Enter and then turn left. You’ll see an exhaust fan, and just when you turn to your right, an enemy will jump down smashing the wood, leaving the floor unsealed. Jump inside.
6. You will now see a narrow pipe tunnel. Enter and not far you’ll see some enemies. Kill all of them before proceeding.
7. After doing so, go to your right. Move a bit forward and again turn to your right. There you will see a stairway. Eliminate the enemies you’ll encounter as stated above.
8. There you will see an entrance, enter it and then turn to your right. You will see lots of file drawers. Move forward and at the end at your left, you will see an open window. Creep in. You’ll fall down and encounter an enemy. Kill it first then move forward.
9. Now move to your left, there you will encounter some enemies. They are sneaky so you must be alert. Upon moving forward and exterminating all the enemies, you will see a locked door on your left. Behind that door is the Secret Developer Graffiti Room.
10. In order to open that door, first go down to your right. Move forward and again turn to your right. At the end you will see a valve which you have to turn in order for the locked door to open.
11. Go back up, to the door and then enter. Let a few seconds pass and then you’ll have the achievement!
Here is the video of this guide:
Note: Below are the rest of the achievements that can be earned as you routinely play the game, some have videos provided as well.
1. Arts and Crafts – Construct 10 Engineering Items.
2. Tinkerer – Construct 50 Engineering Items.
3. Mechanocide – Kill 100 Enemies with Sentry Bots, Sentry Turrets, or RC Bomb Cars.
4. Jetpacker – Kill an Authority Enforcer during Jetpack descent.
5. Silent But Deadly – Stealth kill 10 Enemies with the Striker Crossbow.
6. Decapathon – Get 10 Headshot kills with the Wingstick.
7. Open Minded – Get 10 Headshot kills with the Sniper Rifle.
8. Master Chef – Collect all Recipes and Schematics in one play-through.
9. Hardest Deck – Beat Teague’s hardest Deck.
10. JACKPOT! – Roll 4 Targets in the first round of Tombstones.
11. Deliverance – Complete the final round of Strum.
12. Minigamer – Win all Minigames.
13. Lead Foot – Win a Race in the Campaign.
14. Rage Cup – Win all Races in the Campaign.
15. Demolition Man – Destroy 100 Enemy Cars.
16. Roadkill – Run over 10 Mutants.
17. Ghost Buster – Complete Ghost Hideout in the Campaign.
18. Waste Management – Complete Wasted Garage in the Campaign.
19. Gladiator – Complete Mutant Bash TV in the Campaign.
20. It’s Alive! – Complete Dead City in the Campaign.
21. Wellness Plan – Complete The Well in the Campaign.
22. Debunked – Complete Shrouded Bunker in the Campaign.
23. ytiC DaeD – Complete Dead City Reverse in the Campaign.
24. Jail Break – Complete Authority Prison in the Campaign.
25. Vault Assault – Complete Gearhead Vault in the Campaign.
26. Power Struggle – Complete Power Plant in the Campaign.
27. Decrypted – Complete Jackal Canyon in the Campaign.
28. Mutie Blues – Complete Blue Line Station in the Campaign.
29. Bringin’ Home the Bacon – Earn 750 Dollars in one episode of Bash TV in the Campaign.
30. Mr. Oddjob – Complete 5 Job Board Quests in one play-through.
31. Hey, Not Too Rough – Finish the Campaign on any difficulty.
32. Hurt Me Plenty – Finish the Campaign on at least Normal difficulty.
33. Ultra-Violence – Finish the Campaign on at least Hard difficulty.
34. RAGE Nightmare – Finish the Campaign on Nightmare difficulty.
35. Obsessive Compulsive – Reach 100% Completion in the Campaign.
36. The Legend Begins… – Complete a Legend of the Wasteland.
37. Anthology – Complete all Legends of the Wasteland.
38. A True Legend – Complete a Legend of the Wasteland on Nightmare difficulty.
39. No Room For Sidekicks – Complete a Legend of the Wasteland without any player(s) becoming incapacitated.
40. Fresh Meat – Complete a public Road RAGE match.
41. MVP – Get first place in a public Road RAGE match.
There you have it, all the achievements/trophies for RAGE.


 5 Games That Remind Us That Video Games Are Art
 5 Video Games From 2013 That Did Things Differently
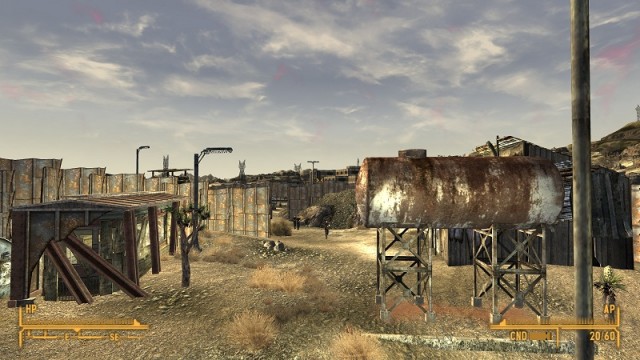 Fallout 4: The Molecular Level - Find the Railroad, Road to Freedom, Build and Power up the Signal Interceptor
 Top 25 Best Horror Games of All Time
 Dark Souls 2: Dual Wielding and how to use Power Stance