The first DLC pack for Call of Duty: Black Ops II was “Revolution”, adding new multiplayer maps, a new multiplayer weapon, and a brand new Zombies map filled with secrets. This guide will go over the multiplayer maps, the Zombies map, and offer other hints, tips, secrets, and whatever else there is to know about Revolution.
In the meantime, check out all our other content, both for Black Ops II and this Revolution DLC. You’ll find a full achievement guide for Black Ops II – Revolution on the standard Black Ops II cheats page.
Call of Duty: Black Ops II page
Call of Duty: Black Ops II – Revolution Review
===================
=TABLE OF CONTENTS=
===================
1. Multiplayer Maps
Downhill
Grind
Hydro
Mirage
Peacekeeper SMG
3. ZombiesDie Rise
Turned
—————————–
1. MULTIPLAYER MAPS
—————————–
The Revolution DLC map pack adds four new multiplayer maps. As of the time of this writing, they all are featured in their very own playlist separate from the other maps in the game.
—>DOWNHILL<—
The first new multiplayer map is called Downhill. This map is a throwback to the snow maps from past Call of Duty games that have proven popular with the fans.
RECOMMENDED WEAPON: Machinegun
—>GRIND<—
Perhaps paying homage to Activision’s blockbuster Tony Hawk franchise, Grind takes place in a skate park. The new geometry of this map results in a lot of curves, and in turn, an excessive amount of camping.
RECOMMENDED WEAPON: Shotgun or Sniper
—>HYDRO<—
This map has its own gimmick. In the center is a waterway that will occasionally be filled with, well, water. The water can wash you away and kill you, so whenever the sirens start blaring, get out of the water way area. The main fighting will never take place in this center area because of that gimmick, so the teams often find themselves on one side of the dam or the other.
RECOMMENDED WEAPON: Machinegun or Sniper
—>MIRAGE<—
Mirage is by the far the most diverse new map of them all. Featuring a variety of different locations that lend themselves to a variety of different play styles, any weapon can find use in Mirage. There are wide courtyards that lend themselves to sniping when you’re in the towers that are above them, plus there are plenty of inside areas that are designed for more close-quarters combat.
RECOMMENDED WEAPON: Any
To Top
—————————–
2. NEW WEAPON
—————————–
Revolution DLC is aptly titled, as it marks a lot of “firsts” for the series. For example, this is the first time that the DLC has added a new weapon to a Call of Duty game, whereas in the past, the DLC packs have always been about multiplayer maps and Zombies.
—>PEACEKEEPER SMG<—
The new weapon is called the Peacekeeper SMG. It is an acceptably useful machinegun that has actually evened the playing field up a bit online since most everyone seems to be using it just to try it out, at least for a little while.
PEACEKEEPER STATS
Type: Primary
Class: Submachine Gun
How to unlock: Purchase Revolution DLC
Damage: 17-25
Fire Mode: Full-Auto
Ammo: 30/90-240
Extended Ammo: 40/120-320
PEACEKEEPER ATTACHMENTS
Weapons can be leveled up in Black Ops II simply by using them and completing challenges with them. Each level with the Peacekeeper unlocks a new attachment for the gun. Remember, you can only have 10 pieces of equipment for each class, so you can only attach a couple of attachments to the Peacekeeper at a time.
The number on the left is the level the gun needs to be in order to unlock the attachment.
2 – Reflex Sight
3 – Laser Sight
4 – Suppressor
5 – Fast Mag
6 – EOTech Sight
7 – Fore Grip
8 – Quickdraw Handle
9 – Full Metal Jacket
10 – Long Barrel
11 – Target Finder
12 – Extended Clip
13 – Select Fire
14 – Rapid Fire
15 – Millimeter Scanner
To Top
—————————–
3. ZOMBIES
—————————–
The bread and butter of the Black Ops DLC packs have always been the Zombies maps. People aren’t buying these DLC packs for the multiplayer, but rather they can’t wait to see what Treyarch does with Zombies next. Black Ops II – Revolution adds more to Zombies than any other DLC pack in the past, featuring new secrets, enemies, buildable items, and even an entirely new game mode for a previously inaccessible map in Zombies.
To Top
—>DIE RISE<—
But first, the new Zombies map. The new Zombies map is called Die Rise, and like all the other Zombie maps in the past, it has its own gimmick. In Die Rise, players are thrust in a series of skyscrapers in China that are mostly destroyed and falling over, leaning against each other to keep from becoming concrete dust.
The goal of Die Rise is the goal that’s in all the other maps, which is to see how long you can survive. That being said, High Rise’s gimmick means that you essentially have to deal with a labyrinth of office buildings.
The first room you can survive until round three easily, and then it’s time to decide where to go next. If everyone stands in the elevator, it will crash to the floor below, which will actually allow you to reach the power faster. Another option is going through the double doors.
If you go through the double doors, you can go straight ahead, and drop off the ledge there to land on the ledge of the floor immediately below. Then you can slowly drop from that ledge to reach a floor with the workbench to build the catapult. Scroll down to the “equipment” section for a more detailed explanation on a few tricks of how to build the catapult especially fast.
There aren’t many places to hold down in Die Rise. Most of the corridors are very tight, and zombies can come from all sorts of different directions. There are a couple of areas that prove to be acceptable in holding down the fort, but only a couple. One is the room with the catapult.
The catapult room can be reached in the way I described above, but it can also be reached if you go to the rooftops. To go to the rooftops, first turn on the power, and then ride an elevator to the top. Then you can jump over to the room with the catapult workbench. Once here, you can place catapults strategically to make this place super easy to defend.
If you are playing with two people, the zombies will only come from the elevator shaft, the area to the immediate right of the shaft, and the breakable window to the left of the shaft. Place one catapult in front of the elevator, but angle it so it will also compensate for zombies coming from the window. Place a second catapult at the area to the right of the shaft as far as it will go, and there will be virtually no zombies to worry about until the catapults break. The downside to this is that it’s hard to get points this way.
If you’re playing with three or more players, then the zombies will also come from the rooftop. Just place a catapult there to prevent them from getting you from behind and it shouldn’t be a problem.
The other place to hide out is the same area with the AK74U. To reach this place, you have to reach the rooms with the platforms that you fall down. You can tell you’re in the right room because the only place to go will be down and the it will tell you the power is accessed below you. Keep dropping from ledge to ledge, then when there’s a little roof to the left, hop on that roof to slide to safety. Then jump across to the other slope and it will dump you right in front of the AK74U.
This place is great to hide if you are playing with four people, and if you all have catapults, it’s probably the best place to defend in the entire map. This area is in an L shape. There is a small hallway with the AK74U, and in this hallway zombies can come from the window and from the chute that you used to get there. Have one person be against the wall exactly opposite from the window, preferably using a packed AK47U or other powerful weapon, as they will have to deal with two streams of zombies simultaneously.
Treyarch patched this map so Zombies will now come from a breakable window down the hall from the AK74U, as well as over a missing chunk of wall. No matter. Have the three other people be in this room. Have one person keeping an eye on the person down the hall so that they can help them out if needed, then have the other two people covering the window and the sectioned off piece of wall. If you have catapults, only use one, and place it at the window with the AK74U next to it.
How to turn on the power in Die Rise
Turning on the power in Die Rise is integral to really be able to move around the map easily and to also use the perk machines. The elevators will not be operational until the power is switched on, so make turning on the power a priority. You can actually get the power turned on in the first round of the game if you are conservative enough with your zombie killing.
Farm zombies, but make sure there are a few left in the first room. Then get everyone on the elevator and ride it to the floors below. Go through the hall, and then jump across to the nearest building. From here, use the electricity symbols on the walls to find the power room. You should only have to open a couple of doors to accomplish this, one single door and a pair of double doors. Farm the other enemies until you have enough points, and then switch on the power on the far wall.
Die Rise Perks
Perk machines return in Die Rise. They can be obtained by first turning on the power. This will activate the elevators, and the elevators rise up and down every few minutes. You need to be on the same floor as the elevator to get the perks. The perks will be in random elevators each time you play the game, except for Quick Revive, which always spawns in the same elevator. The Quick Revive perk is in the same room as the catapult workbench.
Pack-A-Punch is also like this, in that it will be available in a random elevator after the power is turned on. These are the perks available in the game:
Juggernog
Speed Cola
Quick Revive
Double Tap
Mule Kick
Who’s Who
Who’s Who is the only new perk added to Die Rise. The Who’s Who perk allows you to come back to life as a ghost version of yourself, armed with only a pistol. You then have to make it to your dead body and revive yourself. If successful, you will retain all your perks, including Quick Revive. It basically is a chance to give you one extra life if you are playing in single player, so that if you go down, you don’t automatically lose Quick Revive and then have to go buy it again.
Creepy Crawlers
“Fetch me their souls.” The zombie dogs from previous games have been replaced by a new enemy type! These are the “Creepy Crawlers”, and they bounce around on walls like demonic little monkeys. They will show up randomly every few rounds, and are relentless in their assault.
The Creepy Crawlers are best dealt with either using the three burst pistol or a spray and pray machinegun. Shotguns and slower weapons are useless against them, as they move so fast and there are so many. When the Creepy Crawlers round is completed, they will drop a max ammo, just like the dogs.
Apparently, you can get an extra perk if you knife all the Creepy Crawlers to kill them instead of shooting them, but this is unconfirmed.
Where is the box?
The Mystery Box doesn’t play as prominent a role in Die Rise as it has in previous maps, due to its annoying location and the fact that you can just build one of the more powerful weapons in the game rather easily in the Squilifier. But at any rate, I will tell you where the Mystery Box is located in Die Rise.
The first thing you’re going to want to do is get enough points to open the first set of double doors. Then take a left and go down the next hall through the hole in the wall. Go down the slope, and then look up. Yes, the Mystery Box is actually on the ceiling!
Once you build the Squilifier, the Squilifier will be a weapon that can be won from the Mystery Box at random.
PhD Flopper
What’s this? PhD Flopper in Die Rise? Well, yes, but only kind of. PhD Flopper can be seen in Die Rise, and is not obtainable. It’s a nice little Easter Egg thrown in there for fans. Check out the video:
High Maintenance
The High Maintenance achievement is the achievement that governs the ridiculously obtuse Easter Egg in Die Rise. Before you can even think about attempting this Easter Egg, you will need to complete the Easter Egg for Green Run.
You will need four players, either offline or online, to complete this Easter Egg. There is a point where the Easter Egg divides into one of two solutions, and I will mark which solution is which for you.
Step 1: Nav Card Machine
Go to the rooftops and scour the area for four different items needed, which include the 115 Meteorite, Radio, Card Slot, and Small Box. There will be a workbench underneath the bridge that leads to the satellite tower that is used later in the Easter Egg. Throw all these items together to create the Nav Card Machine, and then use the Nav Card found in Green Run to complete it.
Step 2: Gold Emblems
There are two sets of gold emblems that must be interacted with to complete the second step of the achievement. Your first goal will be locating the four different elevators that have gold symbols on top of them. The first set of elevators will be in the building in the power room, while the other set will be in the building that you start out in the game.
Wait for all the elevators to come down and show the gold emblem. Then have everyone you’re playing with step on the emblems simultaneously. When they all glow, that means you completed this part of the Easter Egg right.
Now there will be four gold emblems around the map. The order you have to activate them is random, but you can activate them through a process of trial and error. When you activate the correct emblem, it will glow. When you step on the wrong one, they will all stop glowing. Here’s the locations of the gold emblems:
1. Next to elevator outside spawn room in first building
2. Middle of catapult workbench room
3. Rooftop
4. Above AK74U on balcony
Step 3: Balls
Have someone in your group with the weakest weapon buy the sniper rifle off the wall and trade it. The sniper is the SVU-AS. Use this sniper to shoot the black balls off the dragon signs.
NOTE: From here on, this is the Richtofen path to completing the Easter Egg. If you want the Maxis path to completing the Easter Egg, scroll down to the end of it, and I will resume right at this point.
These balls will now spawn under the feet of the lion statues in the spawn room. Next you need to build the Squilifier. For more information on the specifics of this, check out my explanation below. In the meantime, after it is made, shoot the balls underneath the lions’ feet until the balls start spinning.
Step 4: Satellite Tower
Your final step is to power up the Satellite Tower. To do this, you will need the catapult Trample Steams. These are very easy to build, but a detailed explanation of how to build them can be found in the Equipment section of this Zombies guide. Once you build them, it’s time to place them on four gold symbols placed around the map and aim them so that they will fling zombies at the satellite tower. There are three gold symbols on the roof and one in the hallway right outside the spawn room.
You’ll be notified when enough zombies have been flung at the satellite tower. Next you’ll need to purchase the Galvaknuckles. They can be bought off the wall in an elevator shaft of the upside-down building. With the Galvaknuckles, go to the satellite tower and start hitting the corners of the tower. Keep track of the order that you’re hitting the corners, as you need to figure out what is the correct order to power up the satellite tower. When the tower starts glowing blue, that means you’ll have succeeded.
MAXIS PATH
Part 1: Deja Vu
The first step for the Maxis path is to complete most of steps 1-3 of Richtofen path. After shooting the balls off the dragon sign, go to the spawn room and stay there for about five rounds or so. When Maxis says “Reincarnation”, then means you have killed enough zombies in this room to satisfy his requirement.
Part 2: Reincarnation
This is where things get a little complicated. Figure out who’s who (heh) in your party. Then have Samuel obtain the upgraded Ballistic Knife. Get the Ballistic Knife from the Mystery Box and then Pack-A-Punch it, basically. This will require farming the Mystery Box.
With the Packed Ballistic Knife, have Rusman purchase the Who’s Who perk. Then have them down himself. Shoot him with the packed Ballistic Knife, and then the balls can be taken away from the lions.
Part 3: And Again, but Different
With the balls in hand (…), make sure everyone has a Trample Steam catapult. Place them on the gold symbols. Have the two people with the balls place the balls on their Trample Steams as well. Then when that’s done, have someone purchase the Galvaknuckles and use them to power up the satellite tower using trial-and-error, just like the Richtofen path.
How to do Musical Easter Egg
Like all the Zombie maps, there is a musical Easter Egg that can be activated for doing specific actions. In Die Rise, it is for activating three different teddy bears that are hidden around the map. Their locations are as follows:
Next to the sniper rifle
In the room right before the AK74U room
In the power room
How to build equipment
Besides the Nav Card table that should only be built for the Easter Egg, there are two other pieces of equipment that can be built, and they are both extremely helpful in surviving in Die Rise.
Squilifier
The Squilifier is a little hard to build because its parts are randomly distributed in the super-hard to navigate maze-like rooms underneath the power room. Just keep looking for the parts (there will be four, all in this area), and then take them to the workbench in this area right near the stairs that lead up to the power room.
The Squilifier shoots purple goo that will make the zombies slip around and fall, while constantly dealing damage to them as well. Unlike other equipment in the game, only one player can take the Squilifier at a time. However, after it is built and equipped, the Squilifier can appear in the Mystery Box.
Trample Steam
Another very helpful equipment can be built in Die Rise. It is the catapult Trample Steam. The parts for the Trample Steam can all be found in the first area of the game, in the spawn room and in the hallway outside the spawn room. The workbench for the Trample Steam is found in a room two floors below the spawn room. You can get there easily by dropping off the ledge directly across from the spawn room, past the elevators. You can also reach it by jumping off the rooftop area, which leads directly to this room.
To Top
—>TURNED<—
Also new to Revolution is that, for the first time ever, a new game mode has been added. This new game mode is called Turned, and it allows players to control zombies for the first time in series history. Turned can only be played on the Diner map, and doesn’t allow for split-screen online play.
In Turned, one player controls the human and other players control the zombies. Perks and the like are dropped by zombies and rewarded for getting killstreaks. Every time a zombie is killed, the players’ weapon switches to a different one, so it has a bit in common with the Sharpshooter Party Game.
The goal of the zombies is to rush the player and kill them. Killing the player will result in the zombie that killed them taking control of the human for the next round. The player with the most points by the end of the game wins the match.
To Top


 Sonic Generations Walkthrough
 Killing Floor 2 Guide: How to be the Ultimate Survivor
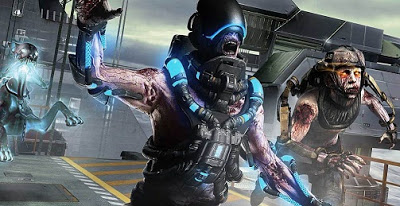 COD Advanced Warfare: Supremacy Trophies, Achievements, Easter Eggs
 Jurassic World: The Game (iPhone / iPad) review
 Who Watches The Watch_Dogs: An Analysis