CheatMasters brings you a complete Battlefield 4 Walkthrough.
Battlefield 4

Collectibles

Baku
Shanghai
South China Sea
Singapore
Kunlun Mountains
Tashgar
Suez
===============================================================================

Collectibles

All collectibles are mentioned in the walkthrough itself...

===============================================================================

Baku

Objective: Reach the Safe House

Prologue: You start off in a vehicle parked under the sea and Dunn gives you
his gun to shoot out the window and save yourselves. You can shoot the window
or leave it alone - you'll be outside no matter what...

You start off without any ammo, move ahead and vault over the fallen locker.
Then crouch under another locker and go up the stairs and you'll come into a
window lit corridor with a door to the right -


Inside, you'll find a bulletin board with a [[DOGTAG]] on it -


Then keep going ahead till you reach the end of the corridor and go thru the
door here. You meet up with PAC and DUNN in this room and there's ammo on the
right wall of this room -


Objective: Protect Irish. Provide covering fire against incoming enemies

After refilling your ammo move to the window to cover Irish who is coming in
hot with enemies on his tail.


Enemies come in from his right inside the building then directly behind him on
the street and on his left from the parallel street. Take them out and he comes
up into the building.

Objective: Get out of the School

Go ahead with your squad and you'll see three enemies come ahead in the
building just below you - use Q to ENGAGE them with your team and take them out

Then jump below and take cover behind something and look to the left ahead of
you and you'll see more enemies come into the area. Take all of them out - keep
using Engage. More enemies come in from directly ahead of you, take them out
and walk to the left end of the area where you'll see a collapsed corridor
which you can walk up on -


Go into the room to the right and come out the other room back onto the
corridor and look for the first [[WEAPON]] -


Then move ahead with your team and before you jump down below onto the lower
floor, look ahead and you should see a shining knife across the gap. You need
to jump across this gap to get the second [[DOGTAG]], if you miss the jump then
you'll need to replay the level to get it -


You can pick up the tag which is on the knife stuck inside the window pane -


Objective: Get Grenade Launcher

Go down to your squad and open the weapon crate to the right and choose the
grenade launcher. Fire at the wall straight ahead of you and go thru it.

Objective: Move towards extraction

Once you come out into the open area, use the binoculars to look at where the
enemies are - there's no need to spot the extraction point right now but
tagging the enemies will give you their location. Also, there's a weapons crate
to the right ahead as you can see in the oculars, take your secondary weapon
there and start the shooting.

You'll receive assistance from the copter here. After you take out the first
four guys as you move ahead, a large truck and a vehicle come in carrying more.
You can target them with Q to make the copter shoot at them. In the middle of
this are you should be able to see an empty vehicle and a weapon crate to it's
left, if you look to the extraction point it should be 386m from this vehicle -


Walk directly to the right from this vehicle and you'll cross a pipe with an
explosive cylinder inside it -


To the right of this are more pipes inside which you get your second [[WEAPON]]
collectible -


This whole section is going to have a ton of enemies ahead. Keep using the
squad Engage when the copter is ready to take down enemies easily. Try to use
long range weapons as they are much much better in this scenario. Keep moving
ahead slowly making sure you take out everyone and finally go thru the drain
pipe in the end into a dark tunnel.

Objective: Get to the Roof

Once you are back outside, you'll hear several RPGs targetting the copter which
flies away. Again, keep using your oculars to tag enemies making it easier for
you to spot and kill them. Keep taking them out and notice the walk way bridge
to the right of the area -


Get on it and move ahead - make sure you are killing the enemies before you
go too far on the bridge. After all of the enemies are down, move ahead on the
bridge to the last but one beam to the left -


Walk on the beam and you'll find the third collectible [[WEAPON]] -


After you have killed all the enemies, move with your squad into the building.
Walk with them into the rickety elevator and once you go up, you'll be under
fire from an enemy chopper. Stay with your team - run with them and take cover
with them, after you get on top of the roof the whole place collapses.

You'll be in the wreckage of the copter, move from the right of the copter to
it's front across the fire - the fire won't get you here and look in the pilot
seat for the third [[DOGTAG]] -


Objective: Help Dunn

Get to Dunn and cut off his leg and get inside the vehicle and drive it. Use
Shift for Boost. Keep going and you'll come to the enemy chopper again. Use
boost and get past it, Irish gives you the grenade launcher and you have only
one shot - don't be hasty wait for the crosshair of the launcher to appear and
then aim properly, take a second and wait for the chopper to come a little
close and shoot... after it goes down, your vehicle takes a dive into the sea..
===============================================================================
===============================================================================

Shanghai

Objective: Reach the Hotel. Meet up with the CIA contact at Zhi-You Tower

Move ahead with your guys and Pac starts picking a lock, to the right side here
is another street - take it and keep going on the street till the end - stay
on the street (First turn right, then left and left again and right) and you'll
come to a door with a [[DOGTAG]] on it -


Get back and follow Irish. Go up the ladder onto the roof and scope the area
ahead, you'll see the hotel which is directly ahead of you and two Chinese
Spec-Ops personnel. Go down the ladder to the right of the roof with your guys
and you get back on street level. Follow your guys into the hotel and hit the
elevator and take your gun. The elevator stop in the middle on the wrong floor
and a gunman comes ahead of you so take him down and the elevator stops on an
upper floor.

Objective: Reach the VIPs

Once the elevator stops, go out and look above it for a [[DOGTAG]] -


From here, you can use the weapons crate ahead to switch weapons and go left
and you'll find an enemy closeby and two more on the stairs, wait for the two
to go up the stairs and silent kill the guy standing below. Look to the left
for a door and go inside and in the end of the room to the left are lockers
and a collectible [[WEAPON]] -


Move ahead and take out the guy on the stairs. In the next area you come to a
lot more enemies. Take out the initial guys and stick to the right of the room
behind the guys here and keep shooting out the guys at the top on the other
side of the room. After you are sure every one is dead, go up the stairs here
and some more guys come at you. After all of them are down, follow your squad
up. There's a weapon and explosives crate here. Take the claymores from the
explosives crate and quickly place them on the stairs and area behind you as
enemies are going to storm into the place.

Objective: Hold position until Pac opens the door

Take out the guys coming in here - the claymores should be a lot of help. Stand
behind one of the pillars here on the top for cover. After you kill everyone,
Pac opens the door so go up and ahead and up the stairs and you'll come onto
the VIPs floor.

Objective: Go to the roof

You meet up with Kovic, after a short conversation, run out behind Kovic and
continue up the stairs to the roof. You need to clear out the entire roof and
then jump and run to the chopper and interact with it to secure it.

Things go haywire and Kovic leaves you with more enemies on the roof, keep
using team engage to pinpoint them and take them out.

Objective: Secure the Helicopter

Enemies keep coming on the roof - get down and pick a solid cover and take out
any you can see from there, the roof has a lot of cover so you can move around
pretty easily if you want to. You can actually keep killing the enemis while
moving around if you are a decent shot. There are going to be stragglers here
and there so you need to make sure you killed all of them on the roof and
then follow your guys to the elevator and go down.

Objective: Reach the Waterfront

Once you come out of the elevator you'll come into an area with an ammo crate
near a lion statue. Walk to the crate and look under the lion statue for a
collectible [[WEAPON]] -


Outside the building ahead are enemies waiting around for you. Best place to
take them on is from behind the left or right wall near the exit door ahead
and after all of them are out, move out and pick out the stragglers. The copter
above has more enemies on it, go left and down the road all the way and the
copter drops off more enemies. Take them out and then follow your team.

You'll go into some alleys where enemies are around every corner so move ahead
slowly and use a shotgun if you have one. Stick close to your team and slowly
move ahead only when the area ahead is clear and watch for more enemies coming
in. After a while of running, you'll come to a falle gate under a red lit area
and you need to walk over it -


You'll come to a red lit tree -


Behind it on the gate is the last [[DOGTAG]] -


Objective: Destroy the Tank

Keep going and you'll meet some people ahead and you'll come to some tanks,
follow you team ahead and you'll come into some ground and if you see thru your
oculars, you'll see some explosives crates around here, go to them and take the
M15 AT MINE. That's the best.

Now, always stay behind the tank or far away and do not get in it's line of
sight. Let a tank pass by where you are and note it's path - if it does not
spot you and you remain hid then you can place the mine on the path it just
went on and it'll eventually come back on the same path in a few mins. So all
you need to do is notices where it's moving and place the mines and hide and
after that repeat with another tank and run to the waterfront and board the
boat.
===============================================================================
===============================================================================

South China Sea

Objective: Find Irish

Go ahead and in the room to the right just before the guy working on the ladder
is a [[DOGTAG]] -


Keep going, there's only one way you can go ahead, you'll meet Pac and Irish
and then Garrison and finally get on a boat with Kovic.

Objective: Get to the USS Titan

Once you get to the ship, move ahead with your squad, soon you'll come to the
entrance pointing to G hatches.

Objective: Locate hatch G-46

Move ahead and you'll come to the door to the right but go left instead and
you'll come to hatch J-37 where you find a [[WEAPON]] -


Go back and head into G-46, open the hatch and jump in.

Objective: Get to the DCC

You'll have to swin thru a door soon -


Once you are thru, look to the left on the wall ahead for a [[DOGTAG]] -


Go to the right and up back to air. Go thru the next couple of doors and you'll
come into a dark room - walk to the left of the room and you'll come to a
door, go thru and you'll come across some dying people. Move ahead and you'll
come into the DCC, go to the while circle and take the Voyager Recorder and
you'll start hearing voices in the room ahead. Be prepared and if you have a
shotgun, take it out and go into the next area and take out all of the enemies.
Stay in the beginning of the room behind cover and take out everyone and only
then go ahead. If you need to move ahead while fighting, go from the right
side of the room since it has ample cover for you.

After you reach the other end, open the door and go thru and you'll see the
ship breaking up. After the whole breaking sequence is done, you need to jump
down ahead. Walk to the left side where you see a jet plane and it'll be
crashed into and moved by another broke plane -


Objective: Escape from the Titan

Under the plane is now a hole you can go down, go to the end of the corridor
and walk left and you'll face one or two enemies here but at the end is a
[[WEAPON]] collectible -


Go back up and take cover behind one of the large panels of the ship which have
been bent up. They are the best cover and you'll need good cover since you'll
be under fire from enemies who are ahead and also from the enemy ship which
is to the left so stay behind cover but pick the enemies out one by one. Keep
moving ahead but very very slowly. Once you reach the end, jump into the water
below and enter the boat.

Objective: Get back to the Valkyrie

Inside the boat, you have normal fire with 1 and with 2 you get heat locked
missiles. Both are great, you'll initially come across 3-4 waves of 3 boats
each. Take them down and you'll fight off a Copter in the end, when the copter
comes use the normal fire to shoot at it as missile lock-on won't work. You
can just stop your boat and concentrate on shooting it down and after it's down
go into the Vlakyrie.

Get inside where you see a ton of enemies around and take them out - grenades
work wonders here. After that, you'll mee up with a couple of American soldiers
ahead so talk to them.

Objective: Get to the Bridge

Go thru the door to the right, open it and go ahead up the steps, ignore the
copters which come to your right and keep going. In the next room you'll find
a Gadget Stash where you can pick up Stinger launchers and other heavy
explosives. Move ahead and you'll see a copter hovering towards you, take it
out with the stinger and move ahead. You'll come out to a hangar with two
cargo planes. Take out the enemies here and go into the front cargo plane to
get the collectible [[WEAPON]] -


Take out the remainder of the enemies and move to the end of the area where
you find a door. Go out and you'll come to Hannah soon. Go ahead with the
rest of the squad. When you come out to the Bridge, go right first where you
see a broke down helicopter -


In the pilot seat is the collectible [[DOGTAG]] -


Go ahead on the bridge and take out the enemies here. Help Kovic to move the
debris but before you help him, go to the Gadgets Stash here and re-fill your
stuff. Help him and soon you'll have helis coming at you. Take the copters
down one by one and if they drop of any soldiers then take them out too.

After Kovic goes down, head up the ladder and move aehad. You'll come to a door
take out your shotgun and open it and kill the guy ahead shooting at you. Throw
in a grenade to the left or shoot the guy and move back. Then go inisde and
meet up with Garrison.
===============================================================================
===============================================================================

Singapore

Objective: Reach the Airfield

You'll get on a boat and get on way to the Singapore Strait. Once you land,
take out any enemies ahead and look to the left where you should see a white
speed boat -


You can pick up the [[DOGTAG]] here on the side of the boat facing the sea -


The tank will offer help so when you Engage enemies it will also fire at them.
Push forward slowly. You need to go a long long way with the tank so keep going
and you'll come under a bridge with the Changi Airport direction board -


To the left here is a ramp which leads up -


You need to go all the way to the other end of where this ramp leads - you'll
come across a big gap you need to jump over so you need to time the jump
precisely when you hit the edge - might take a  couple of tries though. Go
ahead after that and get into the tank -


You'll come across several tanks on your way and if per chance your tank gets
blown up - remember to get out of it before it's health falls below 5 or you'll
get caught in the explosion. If this happens, pick up some missiles from any
gadget stash nearby and continue. But it is really not a good course of action
as you'll be facing really heavy resistance. What you can also do is take out
tanks and enemies and wait for your tank to regenerate itself completely and
then move ahead so don't go in a hurry, take our time, but destroy any enemies
and tanks you see quickly and then move ahead after getting health back to 100.

After a while you will come inside a parking area where roadblock are up and
you can't destroy them. Get out of the tank and go ahead in this place and
you'll see two enemies near a green lit button -


Directly opposite to the button is a ramp going up to the roof of the parking
space here, as soon as you go up turn right -


Go to the end of the roof where you see boxes stacked up and get on top of the
boxes -


Jump across onto the building to the left on the ramp which protrudes from the
building. Get on top of it and go ahead - you need to go all the way to the
other side of the building, be careful while moving though -


You'll find a collectible [[WEAPON]] here -


Go back to your tank and go on forward make sure you are stopping at every
moment you see a tank and destroy it immediately. In the end you'll reach the
airport and cannot continue on tank so get on foot and go up to the airport.

Take out the enemies on your way and continue up till you can fall into a large
room with a bar to the right -


There's a collectible [[DOGTAG]] behind the bar -


After that, go to your squad and push the wood boards off the door and head out
and you'll come onto the bridge. Go ahead and you'll come to an empty bus. On
the other side are enemies. Take them out and continue on the bridge and soon
you'll be pinned to the railing by a car and evetually get out of it.

You'll come onto land again and as you go forward, you'll come to two enemies
who are guarding a door. Go thru it and go across the walkway. In the end,
go up the ladder and you'll come to a room where you'll see a weapons and
gadgets cache. Take a grenade launcer from the cache and move out of this place
and you walk into a room to the left ahead with your team. Go to the left door
where Pac and Irish go and to the left of the door here is a stack of boxes -
destroy the stack completely to reveal a [[WEAPON]] -


Objective: Reach the Target Area

Take out the enemies in the area ahead - watch out for the ones up on the
catwalk and then go ahead, you'll come into a hangar with a large airbus in the
middle. This is where most of the final fight is going to take place. You will
definitely want to try out the sniper here to make things easier. Also, keep
tagging enemies with the ocualrs which will make it easy for you to spot them
and if you are under heavy fire from anyone then use engage on them so that
they will be distracted and you can take them down. Empty up the hangar area
and go down the steps from where you are and go from under the airbus and
you'll come to a ramp leading up to the wing of the airbus -


If you stay here a while the wing will collapse when it is under fire so you
can either wait for that or just jump onto the wing and go to the door of the
plane and take the [[DOGTAG]] -


More enemies come in from two trucks ahead. Take all of them out and go out the
hangar and get in the car with the rest of your group and fire away at the
enemies and see how things turn out...
===============================================================================
===============================================================================

Kunlun Mountains

Objective: Escape

Take the Shank from Dima and keep following him till you come to a guard you
need to silent kill. Take out the guard and Dima asks you to go to the control
tower in the center of the area ahead and open the cells. There are guards
patrolling the whole place. Keep crouched and you can take out two guards who
come to your right here as you come into the area and then get to the stairs
and go up. There are two more guys above and you can silent kill them both or
just use a gun you picked up as it'll be mayhen anyway. Pull the bars to
release the prisoners and pick up the SMG which is on the desk here.

It's better to switch the SMG to single fire using (V) and from here on top you
need to take down a ton of guards who come below and they have bad shotguns
which can hurt fast so take cover properly and aim and shoot - don't waste too
much ammo. As you can't use oculars keep using engage so you'll know where the
enemies are.

After they are down, go back down the stairs and exit this place thru the door
which is under the chinese guy's banner- that is being pointed in your mini map
Go thru and soon you'll come to Irish. Take out the guy he's fighting with and
move ahead into the next area where he asks for the second time for Pac and
there are a few chinese prisoners with guns here -


Go to the right here and look at the shadowed region for a [[DOGTAG]] -


Go ahead and you'll come into a corridor where the enemies keep coming in from
the front of the area. You gotta be careful here and take cover behind to the
sides as you'll be under fire from a lot of them. Move ahead and you'll come
to an elevator soon. Hit the lever to go up and move ahead. In a bit you'll
come into cell block B3 and a ladder which goes up to the left -


Go up and ahead and take out any enemies on your way. You'll come to a junction
where you need to go right, walk a bit ahead and you'll find a fuse box on the
wall to the left with a [[DOGTAG]] on it -


Go right and down the other side of the walkway and you'll come to a control
room with a weapon stash. You need to defend Dima while he opens the gate. Take
the sniper and use it effectively as enemies come in from a distance. After you
take out all of them, go out from under the gate and you meet up with Hannah
again and come out onto the mountains.

Objective: Reach the Tram

Use the oculars to pin point all of the enemies and move ahead. Take them out
near the outpost you see ahead. Since you'll be fighting on the mountain -
cover is difficult to get and you need to go behind small rocky protrusions to
take cover. Go ahead and you'll come to the entrance of a bridge, take out the
enemies and move to the left and go down the steps here -


You'll find the collectible [[WEAPON]] here -


Go back up and take the RPG from the gadgets stash and destroy the mini tank in
your way. Move ahead and you'll come close to a large tower with two bombers
on top. Also, several enemies on ground will use grenade launcers also. The
best place for cover here is behind the small shack to the left of the path.
Go behind it and take out enemies from here if your health  falls too low then
move back and regenrate and get back to the shooting. It's best if you can take
out the two guys on top of the tower first since they are the most lethal here.

Go under the bridge and look down the other side to find a [[DOGTAG]] -


Go back and up the large ramp, the moment you come up more enemies run in
towards you. Use a grenade launcher to clear out the area and climb into the
Tram.
===============================================================================
===============================================================================

Tashgar

You'll meet up with some more American soldiers on a different operation and
they point you to Old Town.

Objective: Reach Old Town

Open the door and when you come out, scope the entire area ahead with your
oculars and take your time tagging everyone you see as there are tons of
enemies and a tank and then some more waiting for you ahead.

You need to take out the tank first. Go to the gadgets cache near the destroyed
copter ahead and take some explosives - make sure you are moving very very
carefully and without attracting any attention because once you are spotted,
things go haywire. After picking up the explosive. Note the path of the tank.
It goes left and right of the area ahead. Place the explosives in it's path
while it is away and wait for it come back to the spot and watch it blow up.

Also, if the tank spots you or if you don't have the patience, then go ahead
further and you'll see a blue building in the center of this area, go inside it
and go up to the roof and you'll find a RPG-7V2, you can take out the tank
easily if you shoot it from behind. But it would actually be much better if
you can blow this tank up with ground explosives and take the RPG with you
when you move to the next area as you need it more there - If you are aiming
properly and shooting the tank from it's sides or behind then you can use the
ROG now and the next time.

                                   After the tank is gone, take out all of the
enemies here - there are a lot of them so mind it. After the area is clear and
you have time to explore, go on top of the same blue building which is at the
center of the area.

Then jump onto the building ahead -


On the roof to the right is a [[WEAPON]] -


After that move out from under the arch ahead. If you did not take the RPG
mentioned above, take it now and go to the next area, this place is crawling
with enemies, stay in the ver beginning of the area itself, just move ahead
once and after the enemies spot you, use a sniper on them and wait for the tank
to get close. When it is really close or atleast within firing range then blow
it using the RPG. Then clear out this place and go ahead. In the next area
you'll come to a mini jungle of sorts in the middle is a large blue container
with a weapons cache infront of it. After the area is sufficiently clear, go
directly left from the weapons cache and you'll come to a broken down car -


Infront of the car is a [[WEAPON]] -


This area has a lot of enemies in the far side straight ahead, take the best
sniper you have and pick them off one by one and there are more dudes than you
can initially see so be very careful while moving ahead. After this place is
clear you head into a tunnel - the entrance to which is to the far right ahead
of this area.

Go thru the tunnel entrance and you'll come within sight of the bridge leading
across to old town. This side is filled with enemies and a tank also. So first
job is to acquire enough rockets to take down the tank. Go ahead and you'll
come to this building -


The nearest enemy is just ahead of the building near a pillar. Take him down
silently and take the rocket launcher he has. Now, these won't be enough, so
use the steps here to the left of the building to go up and take out the two
enemies here, you will find another rocket launcher up here and this should be
enough to take out the tank also there's a [[WEAPON]] -


GO back down and infront of this same building is a Blue Truck - now if this
is not yet blown up by the tank then stand near it so it'll get blown -


Get into the truck and find the [[DOGTAG]] -


Now, take out all of the enemies around and there's a tank straight ahead -
best cover from the tank is a wall directly to the right of it. Go there and
destroy the tank. Take out any stragglers on the bridge and gete across it to
friendly lines.

Objecive: Meet Greenland

Go ahead and you'll meet up with Major Greenland and she'll agree to help you
if you blow up the dam.

Objective: Destroy the Dam

Once you reach the dam go ahead with your buds and out the other side. You'll
come to the spot overseeing the dam. Go ahead and you should come to a weapons
crate. Go slowly further ahead and you'll come to a sniper overwatch. Take out
the guy inside and grab the best sniper you have. You can take out the entire
enemy force which is on the ground ahead from this spot. There's a turret on
the roof on a building below you, concentrate there as when you kill a guy
someone will immediately replace him - it's easy pickings from there. Take
out as many as you can and go down.

Kill any stragglers and move ahead. Now time to take out a grenade launcher or
any of the explosive flying stuff. You'll come across a copter trying to kill
you so take it out first. Then go up using the stairs here -


Then jump across to the other side and move to the left of the bridge -


Move to the left and you'll come across tow enemies near the shack ahead. One's
on the roof and the other on the ground. Take them out and go up the roof of
the shack and jump ahead to the other side onto the platform you see.

Then take the last [[DOGTAG]] of this level -


Go down and to the right of the area here. Kill all of the enemies and you'll
come to an elevator you and take down to the central area of the dam. In this
place you'll come across enemies coming directly from ahead. Pick a nice
assault rifle and take them down. Once you reach the other side. Plant the C4
and  you'll have enemies come in close. Take them out and go outside. There are
two guys to the left ahead taking cover. Kill them and take one of the sniper
from the dead guy and kill the enemies on the scaffolding ahead. Go up there
and take out the two guys you come across. Keep going up till you need to
jump across onto a ladder. Aim and jump properly and go to the edge of the area
till you come to the dead end - do not jump across the gap now. Blast the C4
and you'll meet up with Greenland again to get out of here.
===============================================================================
===============================================================================

Suez

Move ahead and jump out and you'll land on the Valkyrie and have a gadgets and
weapons stash near you. Pick up favourite guns and explosives - an assault
rifle and a sniper were my choice. Take your pick and go up the ladder here
onto the deck of the Vlakyrie.

Objective: Liberate the USS Valkyrie

Move ahead and you'll come across sevral enemies ahead and more on the upper
platform tot he right. You can go up there using a ladder to the right of
the bridge. After you kill every one, below you'll find a cargo copter -


A walkway collapses as you reach the copter, get on it and jump onto the blade
of the copter and on it's rear you'll find a [[DOGTAG]] -


Straight ahead from the copter is a small fire and infront of the fire is a
[[WEAPON]] -


Objective: Find Captain Garrison

You will also come across an enemy copter. Use your granade launcher to take
it down and follow your mates into the ship. Keep going and takeout all of the
enemies and after a while you'll come into the medbay look on the stretcher
directly across from Jin Jei's for a [[DOGTAG]] -


Objective: Sink Chang's Warship

Enter the boat and ride it to the ship, go up safe and choose which companion
you want to send back down - don't worry as they will live even though they
don't seem to now!! you can hear a coversation while the titles roll...
===============================================================================
===============================================================================
THE END


 Guitar Hero Live (PS3) first impressions
 Heroes of the Storm is expensive: This is your guide to what to buy, and avoid, in the store
 Life is Strange: how to focus on Photo - go back in time
 The Wonderful 101 Walkthrough
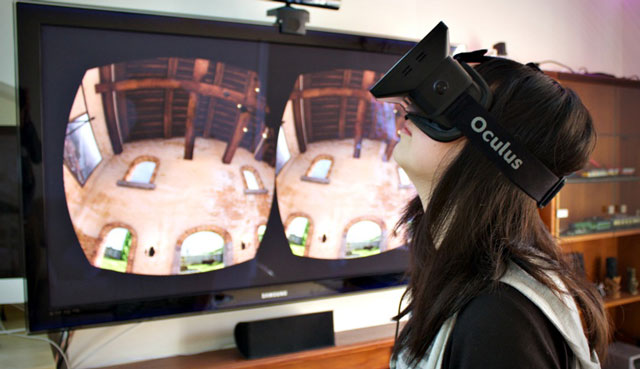 Facebook Bought Oculus: Is VR Dead Before It Began?