Chapter 9: The Cruelest intentions
This chapter begins in the foyer of a massive mansion, and players will find themselves eploring most of it before all is said and done. In fact, it would be difficult to direct you using left and right turns, so instead we’re going to split things up, making our guide much easier to understand.
From the foyer there are a total of four areas that players will need to explore. The first of these areas is the second level. Once you hit the top of the stairs you’ll be staring at doors on your right, left, and directly in front of you. For now, let’s pass through the doors before you.
As soon as you enter the next room look to your left and snag the Lower Safe Dial off the table. Now do a quick walk about to make sure there are no more valuables that Detective Sebastian Castellanos could use on his travels.
Tip: Ruvik will chase you three times during this chapter, once upstairs, and once for each of the two areas you can explore downstairs. You can’t defeat him, so just fun away as fast as you can. We’re not sure if he appears at the same time for everyone, but we easily got away by just running to another part of the mansion. When he stops giving chase return to the area you were exploring, he shouldn’t show up again.
Exit back on the upstairs balcony and enter through the only unlocked door that you haven’t passed through. Once you enter the room look to your left to see a ladder that leads to the second story of a bookcase. Climb it to snag the Upper Safe Dial, but be careful of the creature laying on the floor… he isn’t quite dead yet.
Head back down the ladder and make your way down the long hallway that rests to the right when you first entered the room. There are doors lining both sides, and as per usual we would advise going through them all and grabbing any loot that isn’t nailed down.
Tip: The Shotgun will often knock enemies to the ground, but not kill them. When this happens quickly approach your downed foe and set them on fire. This saves ammunition for times when you really need it.
Make your way down the corridor, following the right turn to an area with some broken floor tiles, a scripted scene will end you in a bit of a pickle. It seems you’ve stepped in a trap, and if you’re not quick enough you’ll be chewed up by a giant instrument of death at the end of the hall. In order to escape, simply aim your Handgun at the light above the machine’s gnawing teeth. Hitting that spot will free your character.
Head back to the area where you triggered the trap and head through the door directly in front of you. Turn to your left to spot a Goddess Statue that will give you a Key if you smash it.
Continue looking through the room until you see a hallowed out fireplace. Crouch and pass through it to find yourself at a machine that is hooked up to what used to be a person’s skull. Follow the on-screen instructions to look around and move the needle, evening inserting it. It’s this puzzle (and two more like it) that are the keys to opening the large door in the foyer. For this particular puzzle look at the diagram on the desk to see where A-2 Fear is located, then move the needle to the corresponding place on the actual brain and insert it.
Once you exit the chamber you’ll witness a short cut scene that shows Ruvik and what we can only assume are his parents. Watch it, then leave the room to see a giant device of murder a ways down the hall. Don’t go that way, instead turn to your left and continue on, making sure to burn any bodies you find along the way. After you pass through another room you’ll find yourself back on the balcony of the second level of the foyer.
Tip: There are quite a few motion sensor traps on this level. Approach them cautiously and disarm them for the parts.
Head back down to the main level of the mansion this time passing through the foyer door to the left and heading into the dining area. In here you’ll find some Green Gel and the Mansion Dining Room Note. Make sure to grab it all.
Keep moving in the only direction you can, eventually coming across two creatures doing terrible things to a corpse. Lob a Grenade at their feet to take them down. For us, this is when Ruvik started to give chase again. If he does the same to you, just run away and back into the foyer. Once he finally gives up just make your way back to this area.
Keep moving and it won’t be long until you reach the second brain puzzle. This time you’ll need to locate the F-7 Consent region of the brain on the diagram and then move the needle to the corresponding area and insert it. Now make your way back to the main foyer.
Tip: You’ll notice blood just left of the main door if you pass through this door you’ll find a Krimson Post Newspaper Clipping that provides some history on Castellanos, as well as lets you return to Nurse Tatiana to save your game.
The last brain puzzle that you must tackle is found to the right of the huge door in the hall. Head through there, looting up and making headway for a room or two. It's about this time Ruvik will show up, and much the same as before you have to flee as far away as possible. When he gives up, simply head once again to precisely where you exited off.
Fight the good fight until you go into a room with a huge piano. In the corner of that room you'll recognize something flashing, and in the event that you approach it you'll grab the Mansion Music Room Note. What's far better, however, is that the painting above there is the place the Upper Safe Dial and Lower Safe Dial will fit. Embedding them will provide you with access to the third and final brain puzzle.
Interface with the machine to take control of the needle, then look to the table and observe where C-4 Hope is located. Find that spot on the subject's head, then move the needle and insert it appropriately. Once this is carried out, backtrack out to the main lobby, killing any creatures that challenge to hinder your advancement.
Pass through the main door and into what is maybe the longest foyer in video game history. There isn't a ton to do, so simply sprint forward until Ruvik appears to ruin the moment. Seriously though, that was a massive amount of work just to spend a few moments behind that door.
The following few sequences are around three parts testing and seven parts frightening and cool. It's all commenced by a short cut scene, however when that is over simply begin moving in the only direction you can, trying your hardest to stay aware of what we'll call Blood Man. When he gets furious and begins pursuing you, flee as quickly as possible.
In the long run you'll go to an area with what looks like movement sensors that crisscross an expansive room. There is a way through them if you crawl, so approach and begin moving. We can't say beyond any doubt what happens in the event that you derail this part since we were successful, yet we expect it’s a pretty horrible consequence. Just watch your step.
When you're at last through that mess of inconvenience you'll end up with an entire new group of issues, this time in the form of falling iron gates and the reappearance of Blood Man. It's sort of terrifying, however in the event that you try to avoid panicking it’s not that hard to overcome.
Continue traveling through the gates, trying your hardest not to let any of them fall on you. When you reach a dead end, search for a chain on the door. When you discover it, shoot it and the door will open and permit you to pass through. Keep on doing this a few times until you emerge on the other side, generally safe and hopefully not to badly injured.
Keep moving forward until you find yourself in a barn, and watching a cut scene that you likely want to pay attention to as it is more revealing of Ruvik and his troubled past.
Once the scene ends you’ll be stuck in the barn, and of course, there are flames surrounding you. Look around for two wheels that you can use to move an overhead cage. Use the one wheel to lower it to ground level, then the other to move it as close as possible to the broken ladder that leads to the loft. Once it is in position step on the cage and shoot the wheel that raises and lowers it. This will deliver you to the loft so you can try to escape.
Escape is never that easy, however, and you’re not getting out of this barn that easily. It’s the return of Blood Man, and this time he’s brought along a couple of extra uglies to help out. The best way to deal with this unfortunate turn of events is to stay away from Blood Man, at the same time working towards killing any of his minions that he’s brought along. Once the last minion is down you’ll find yourself back inside the mansion, standing in the middle of the long corridor. Run to the end of it and pass through the next room between the two bookshelves to end the chapter.


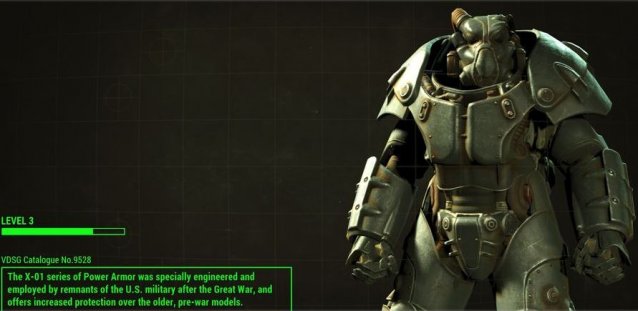 Fallout 4: Find a Full Set of the Enclaves X-01 Power Armor
 Top 10 Best PlayStation 4 Games of 2015
 Titanfall: How to Level Up Fast & Easy
 Crysis 3 Walkthrough
 The World Of Video Certainly Has Changed Over The Years