PuppetShow: Lightning Strikes Walkthrough, Guide, & Tips
PuppetShow: Lightning Strikes Walkthrough

Welcome to the PuppetShow: Lightning Strikes Walkthrough
A wonderful story of the citizens of Joyville. Can you change their destiny? You will see – nothing is impossible.
Whether you use this document as a reference when things get difficult or as a road map to get you from beginning to end, we’re pretty sure you’ll find what you’re looking for here.
This document contains a complete PuppetShow: Lightning Strikes game walkthrough featuring annotated screenshots from actual gameplay!
We hope you find this information useful as you play your way through the game. Use the walkthrough menu below to quickly jump to whatever stage of the game you need help with.
Remember to visit the Big Fish Games Forums if you find you need more help. Have fun!
This walkthrough was created by Amanda Barrera, and is protected under US Copyright laws. Any unauthorized use, including re-publication in whole or in part, without permission, is strictly prohibited.
General Tips
- This is the official guide for PuppetShow: Lightning Strikes.
- This guide will not show when you have to zoom into a location; the screenshots will show each zoom scene.
- Hidden-object puzzles are referred to as HOPs. This guide will not show screenshots of the HOPs, however, it will mention when an HOP is available and the inventory item you’ll collect from it.
- Use the Map to travel to a location.
Chapter 1: Paris

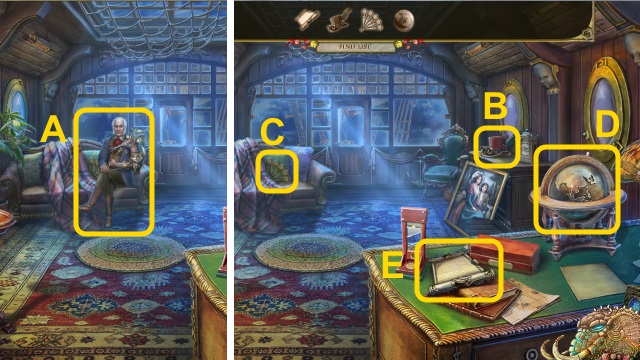
- Talk to Froissart (A).
- Take the Top Hat (B), Fan (C), Globe (D), and Notebook (E).
- Walk forward.

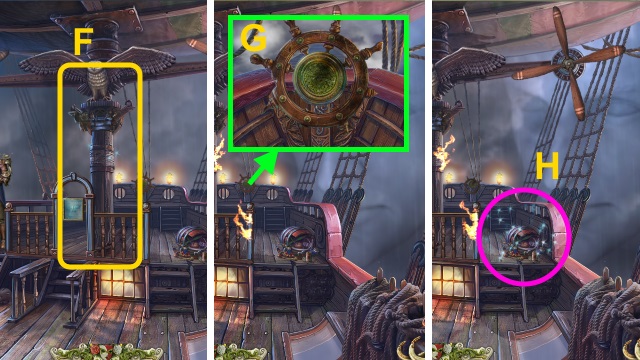
- Try to examine the mast (F).
- Examine the helm; move the wheel (G).
- Play the HOP to receive the HELM PARTS (8/8) (H).

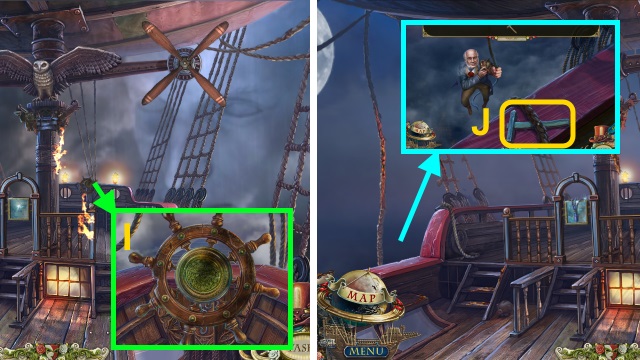
- Place the HELM PARTS on the wheel; turn it (I).
- Take the HAMMER (J).

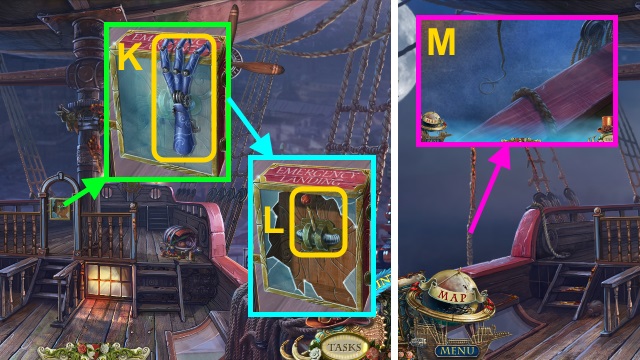
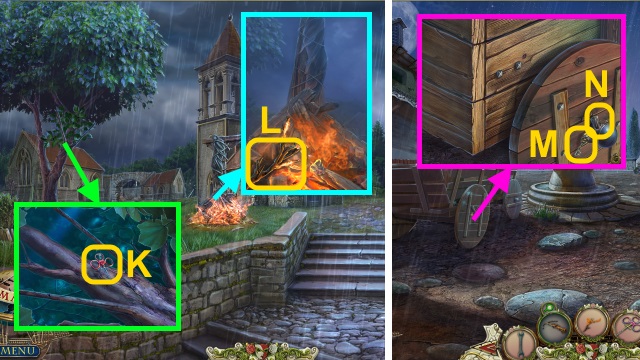
- Take the claw (K); use the HAMMER on the glass.
- Pull the lever (L).
- Examine the rope (M).
- Go down.

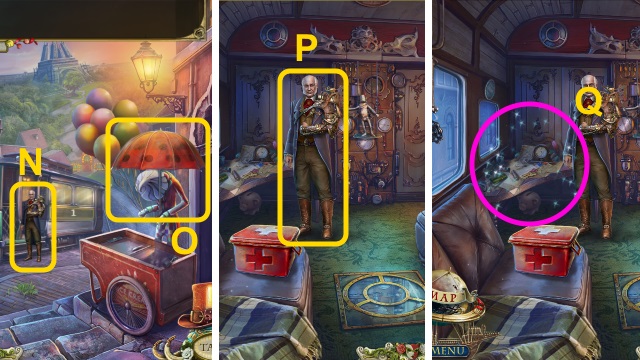
- Talk to Froissart (N).
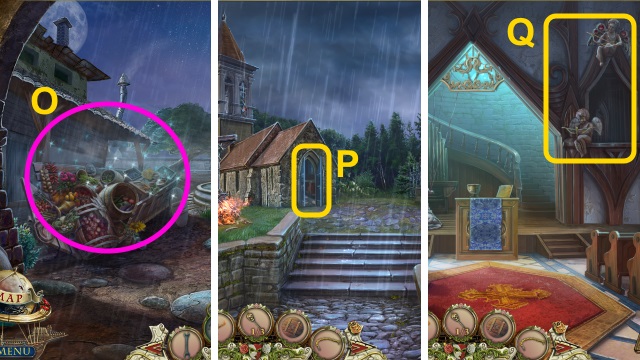
- Take the UMBRELLA (O).
- Go forward.
- Talk to Froissart (P).
- Play the HOP to receive the FOLDER (Q).

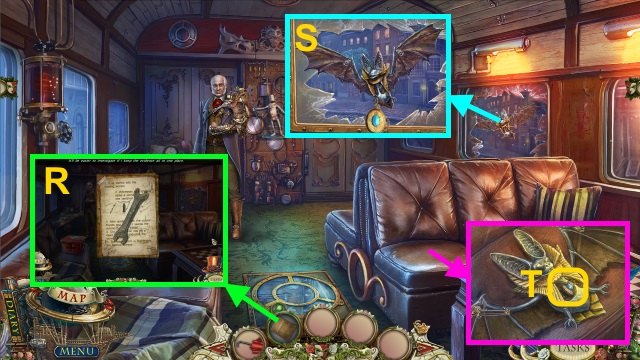
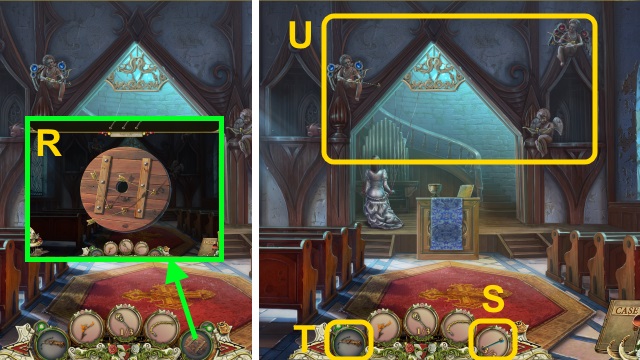
- Open the FOLDER; take the WRENCH and Evidence Folder (R).
- Use the UMBRELLA (S).
- Open the bat; take the ACTRESS MEDALLION (T).

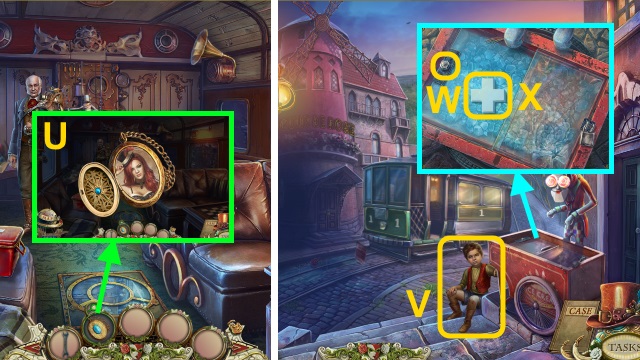
- Open the ACTRESS MEDALLION; take the Actress Portrait (U).
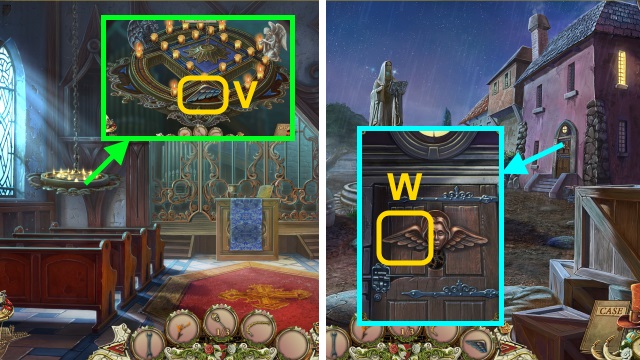
- Walk down.
- Talk to the boy (V).
- Use the WRENCH to take the BOLT (W).
- Open the case; take the WHITE CROSS (X).
- Walk forward.

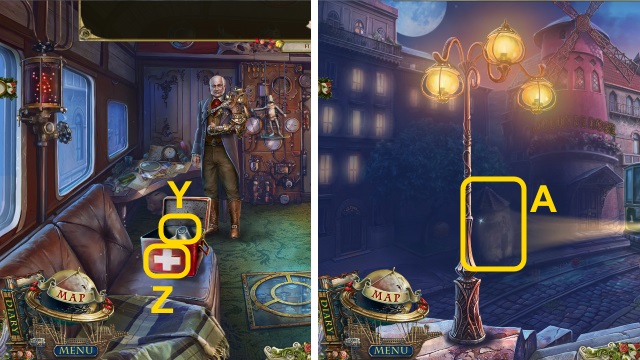
- Place the WHITE CROSS (Y); take the BANDAGE (Z).
- Walk down.
- Look at the poster (A).

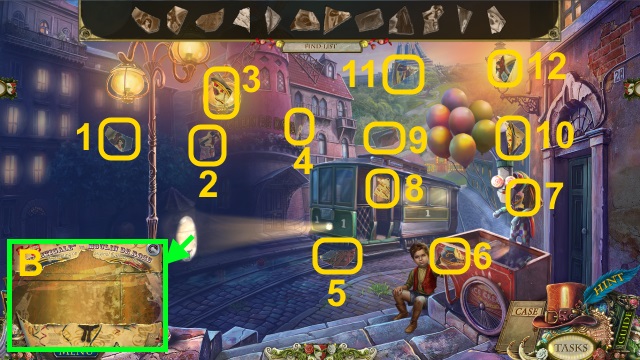
- Play the HOP to receive the POSTER FRAGMENTS (12/12) (1-12).
- Place the POSTER FRAGMENTS for a mini-game (B).

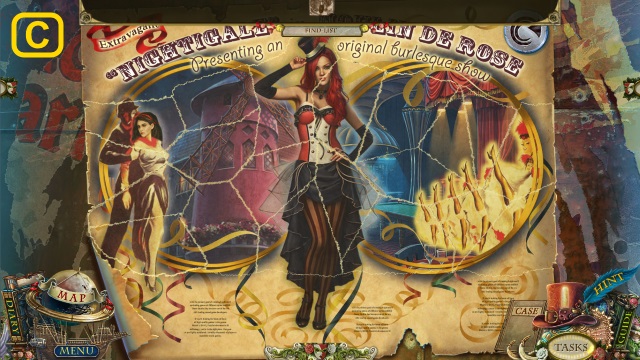
- Solution (C).
- Take the Poster.

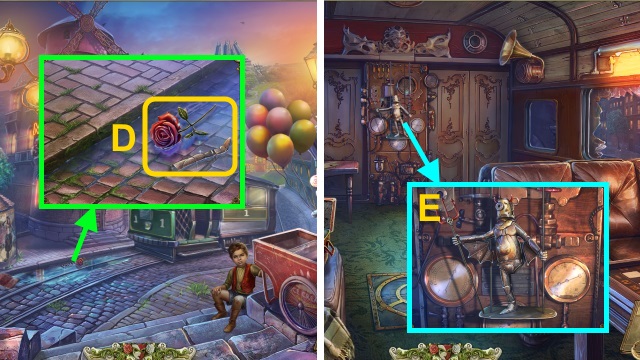
- Take the ROSE (1/3), and FIGURINE’S LEG (D).
- Walk forward.
- Place the FIGURINE’S LEG (E).

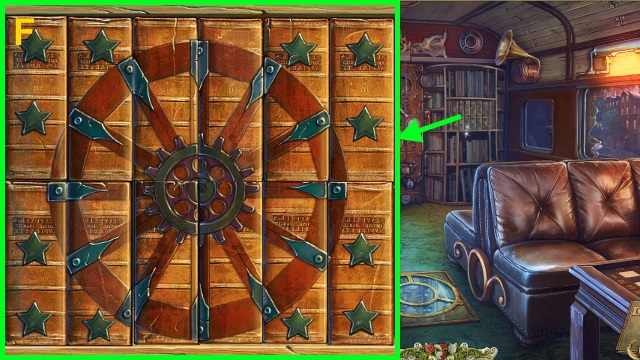
- Examine the bookcase for a mini-game.
- Solution (F).

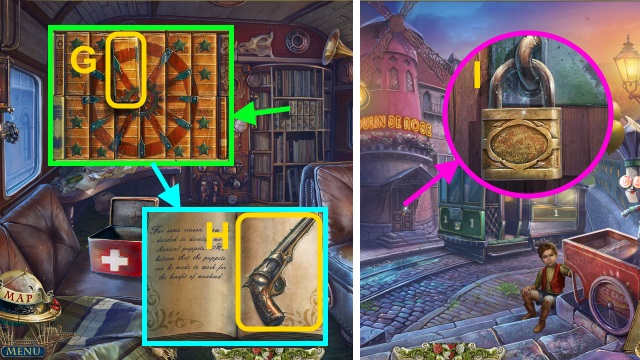
- Open the book (G); turn the page.
- Take the GUN (H).
- Walk down.
- Use the GUN (I).
- Go through the door.
Chapter 2: Cabaret Moulin de Rose

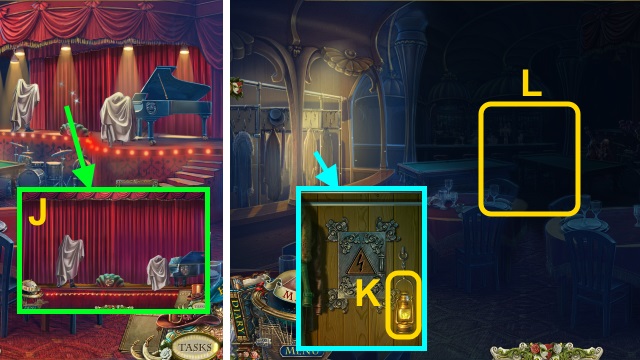
- Examine the curtain (J); you receive the Strange-Woman’s Image.
- Move the coats; take the LANTERN (K).
- Use the LANTERN for a mini-game (L).

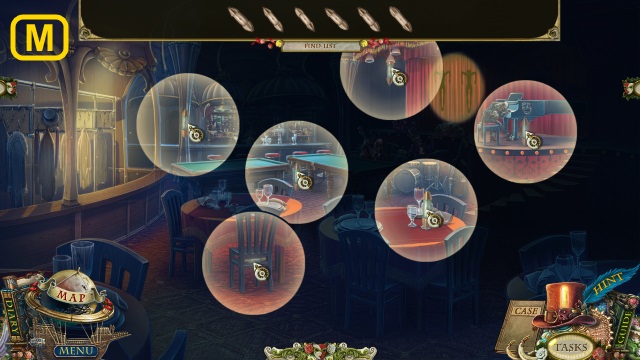
- Solution (M).
- You receive the FUSES (6/6).

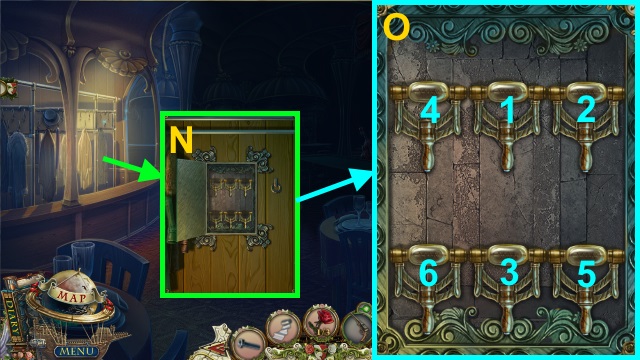
- Open the fuse box; place he FUSES for a mini-game (N).
- Solution (O): 1-6.

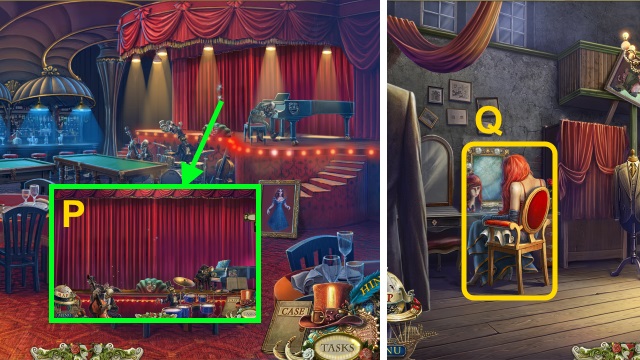
- Open the curtains (P).
- Walk forward.
- Try to talk to the girl (Q); you receive the Strange-Man’s Image.

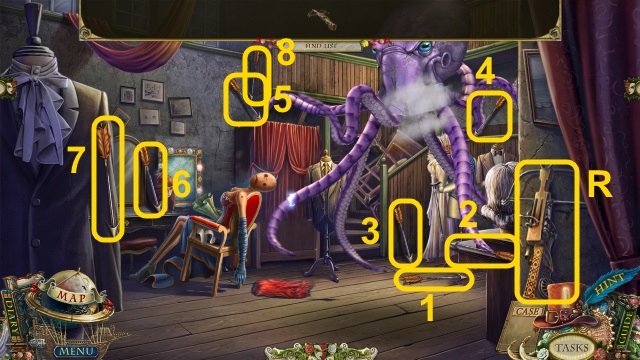
- Take the Crossbow (R).
- Take the ARROWS (8/8) (1-8).

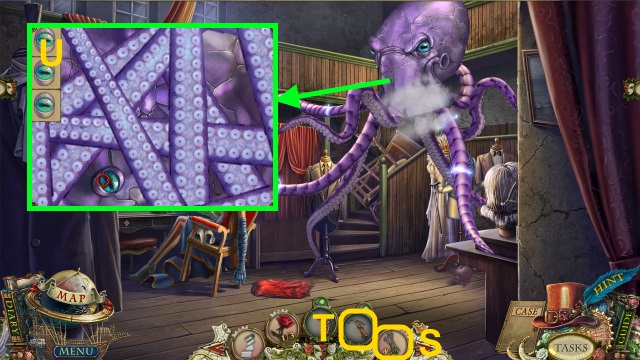
- Use the ARROWS (S) on the CROSSBOW (T) to receive the LOADED CROSSBOW.
- Use the LOADED CROSSBOW on the octopus for a mini-game (U).
- Solution: Shoot the eyes three times.
- You receive the Octopuppet.

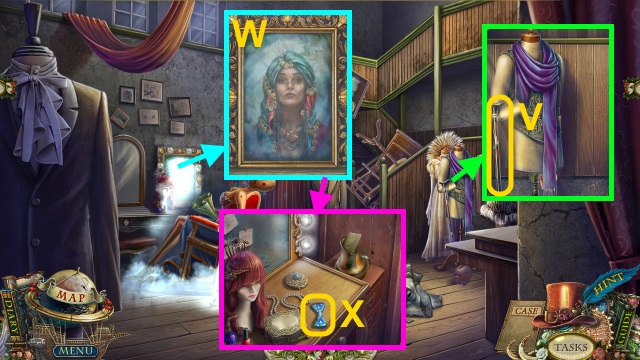
- Take the CANE (V).
- Examine the mirror (W).
- Take the BOW TIE (X).
- Walk down.

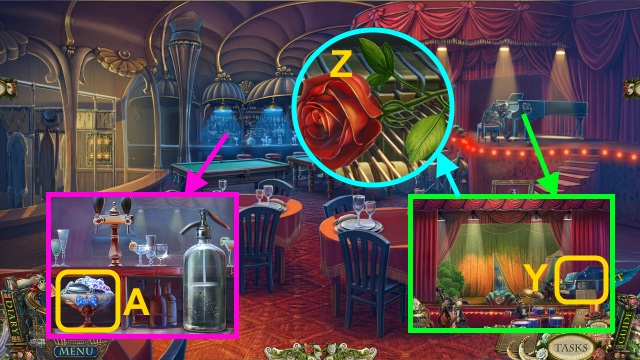
- Use the CANE on the piano (Y); examine it.
- Take the ROSE (2/3) (Z).
- Place the BOW TIE on the cat; take the MANNEQUIN HAND (A).
- Walk forward.

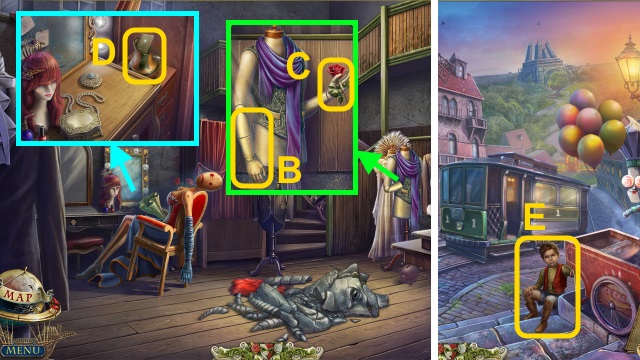
- Place the MANNEQUIN HAND (B); move it.
- Take the ROSE (3/3) (C).
- Read the note (D); place the ROSE (3/3) in the vase.
- You receive the Nightingale Puppet.
- Walk down twice.
- Try to talk to Jean (E).

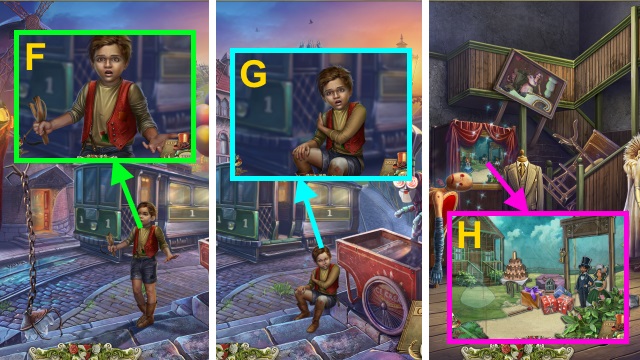
- Talk to Jean; give him the BOLT (F).
- You receive the Lamp.
- Examine Jean; give him the BANDAGE (G).
- Take the PAPER DOLL.
- Walk forward twice.
- Place the PAPER DOLL on the theater for a mini-game (H).

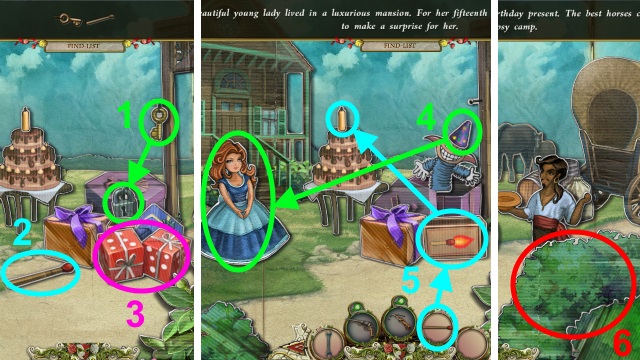

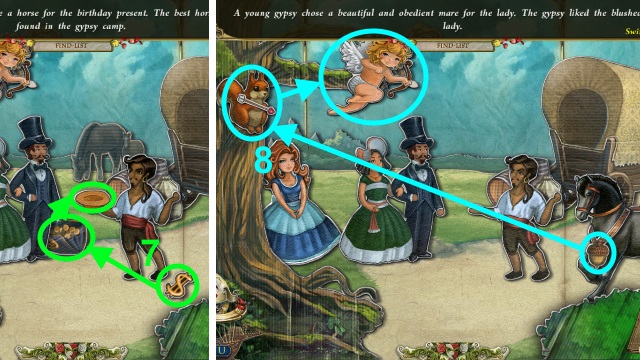

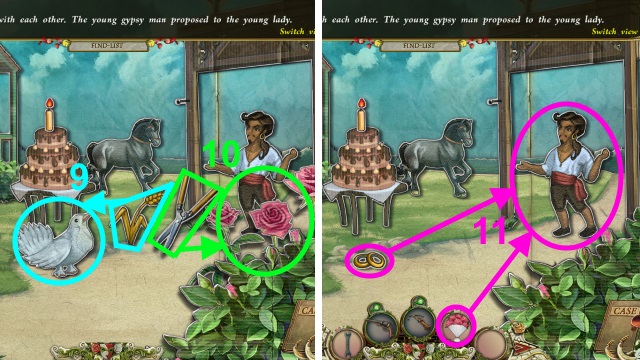

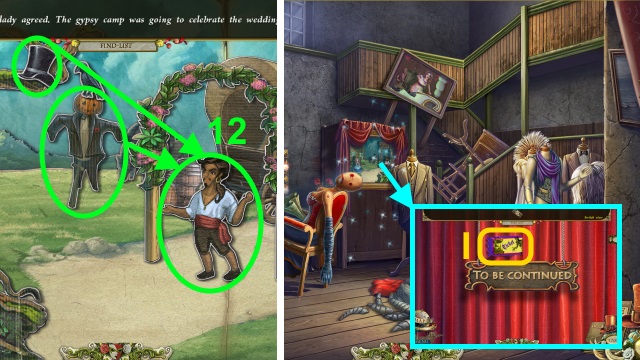
- Solution (1-11).
- Solution (12).
- Take the TICKET (I).
- Walk down twice, then right.
Chapter 3: Traveling Circus

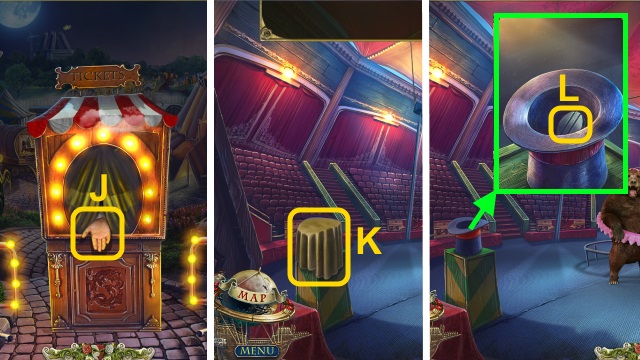
- Examine the ticket booth; give the ticket to the man (J).
- Walk right.
- Take the CLOTH (K) and TOKEN (L).
- Walk down.

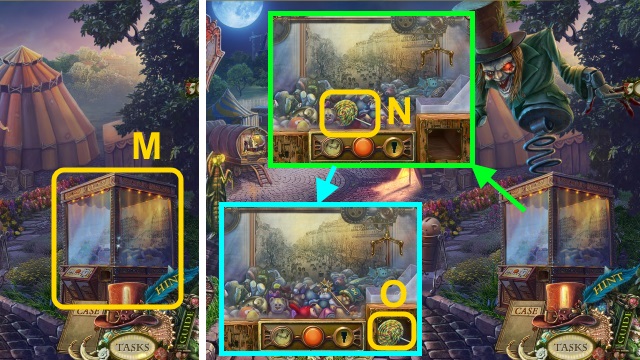
- Examine the crane machine (M).
- Place the TOKEN in the slot for a mini-game.
- Solution: Press the button when the crane is over the lollipop (N).
- Take the LOLLIPOP (O).
- Walk down.

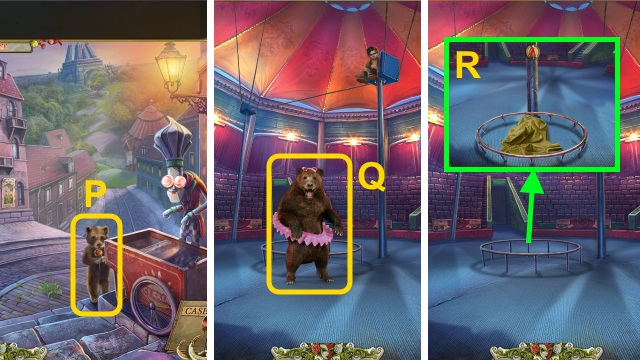
- Give the LOLLIPOP; take the BEAR CUB (P).
- Go to the Circus.
- Give the BEAR CUB (Q).
- Place the CLOTH on the trampoline (R).

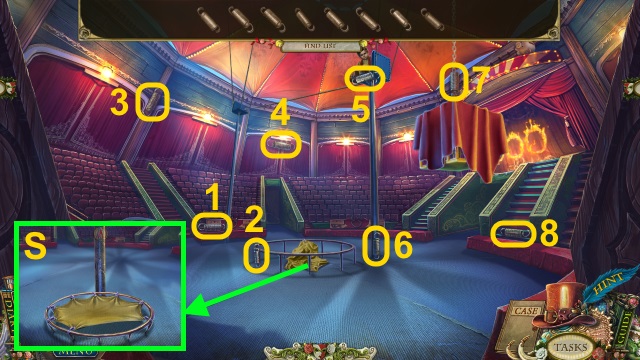
- Gather the SPRINGS (1-8).
- Place the SPRINGS; attach the cloth (S).

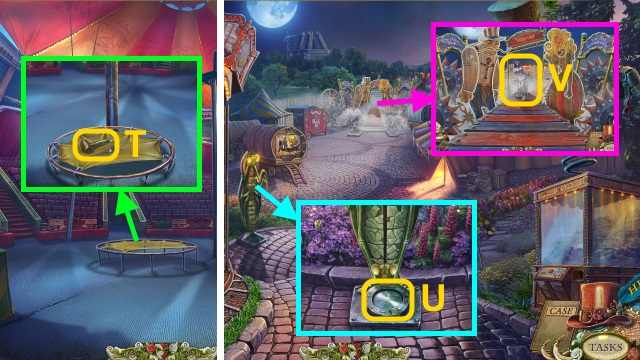
- Take the HAMMER (T).
- Walk down.
- Use the HAMMER on the pad (U); you receive the DOLL MEDALLION.
- Try to talk to the woman (V).

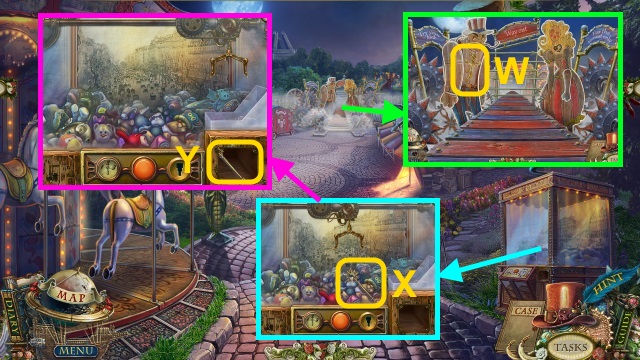
- Place the DOLL MEDALLION (W) to receive the TOKEN.
- Walk down.
- Place the TOKEN in the slot for a mini-game.
- Solution: Press the button when the crane is over the wand (X).
- Take the MAGIC WAND (Y).
- Walk right.

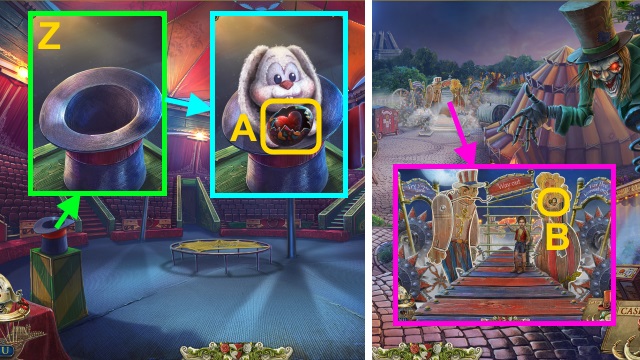
- Use the MAGIC WAND (Z).
- Open the egg; take the HEART (A).
- Walk down.
- Place the HEART (B).
- Walk forward for a mini-game.

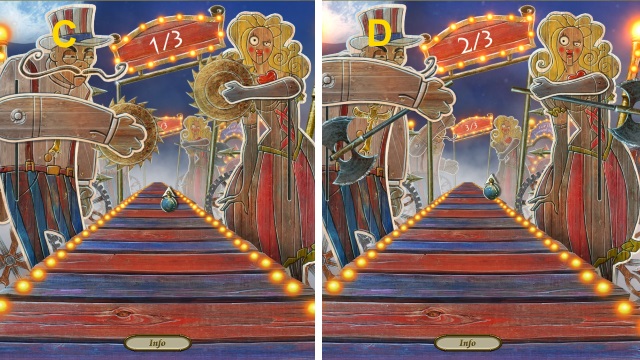

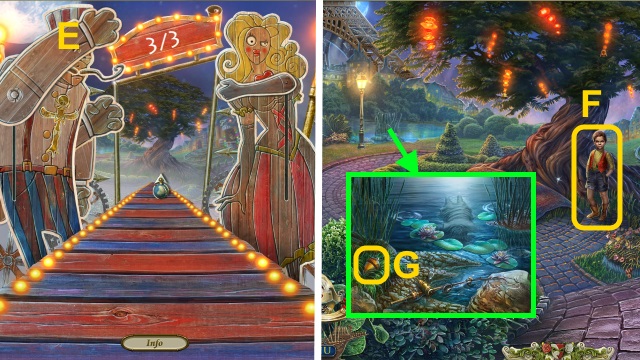
- Solution (C-E).
- Talk to Jean (F).
- Take the ACORN (G).

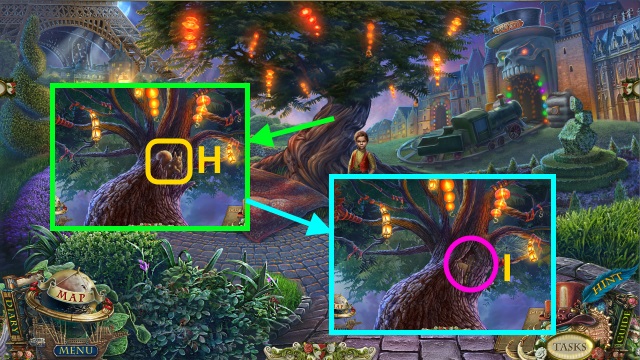
- Give the ACORN (H).
- Play the HOP to receive the BELLS (8/8) (I).
- Place the BELLS (8/8) on the lamps for a mini-game.

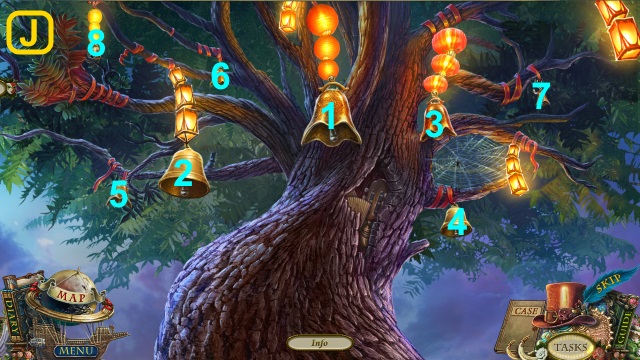
- Solution (J): 1-8.
- Walk forward.

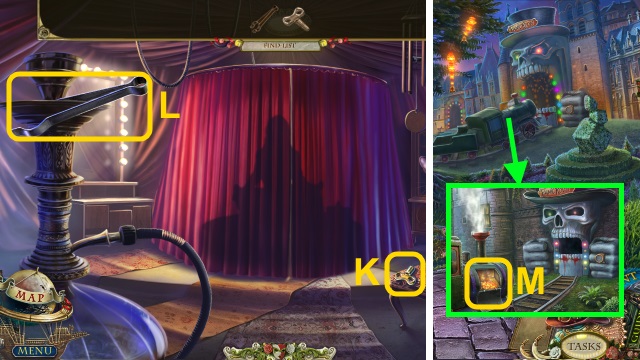
- Take the WINDER (K) and TONGS (L).
- Walk down.
- Use the WRENCH on the train; use the TONGS to take the COAL (M).
- Walk forward.

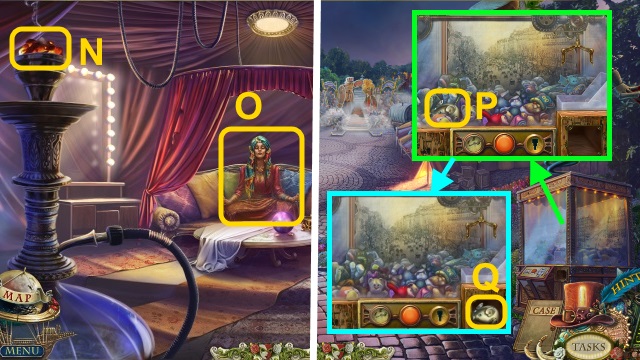
- Place the COAL (N).
- Talk to Shanta (O); you receive the TOKEN.
- Walk down twice.
- Place the TOKEN for a mini-game.
- Solution: Press the button when the crane is over the mouse (P).
- Take the MOUSE (Q).
- Walk forward twice.

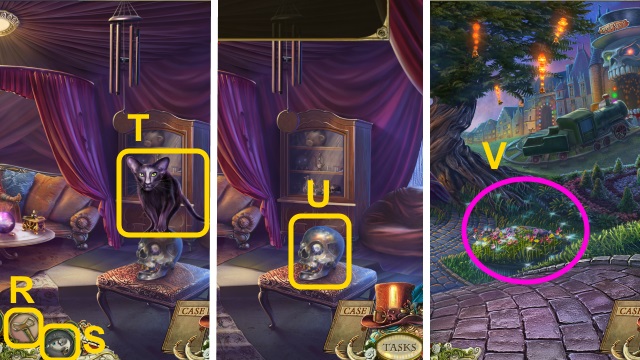
- Use the WINDER (R) on the MOUSE (S).
- Use the MOUSE on the cat (T).
- Take the BROKEN CRYSTAL SKULL (U).
- Walk down.
- Play the HOP to receive the GOLDEN TEETH (V).
- Walk forward.

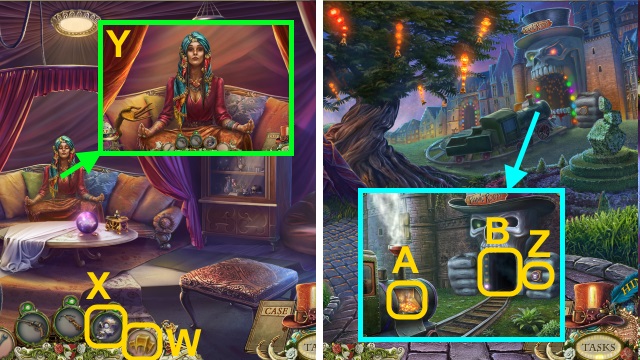
- Use the GOLDEN TEETH (W) on the BROKEN CRYSTAL SKULL (X) to receive the CRYSTAL SKULL.
- Give the CRYSTAL SKULL to Shanta (Y); you receive the Heart Image and BLACK SPOT.
- Walk down.
- Place the BLACK SPOT on the hand (Z); close the coal compartment (A).
- Examine the tunnel (B).
Chapter 4: Boulevard Montmartre

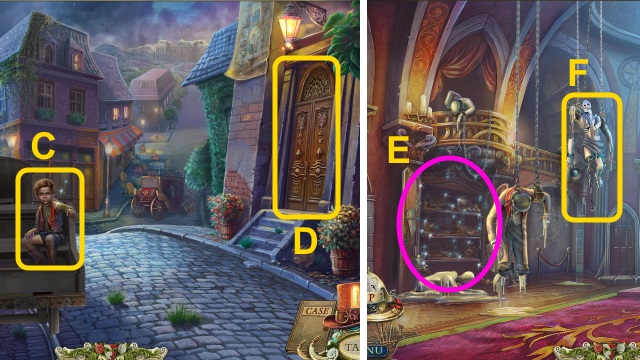
- Talk to Jean (C).
- Open the door (D).
- Walk right.
- Play the HOP to receive the WEIGHT (E).
- Place the WEIGHT (F).

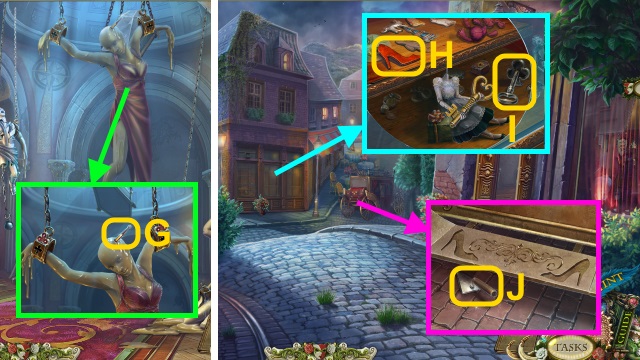
- Take the GLASSCUTTER (G).
- Walk down.
- Use the GLASSCUTTER on the window; move the glass.
- Take the SHOE FIGURINE (1/2) (H) and SHACKLES KEY (I).
- Take the SPATULA (J).
- Walk right.

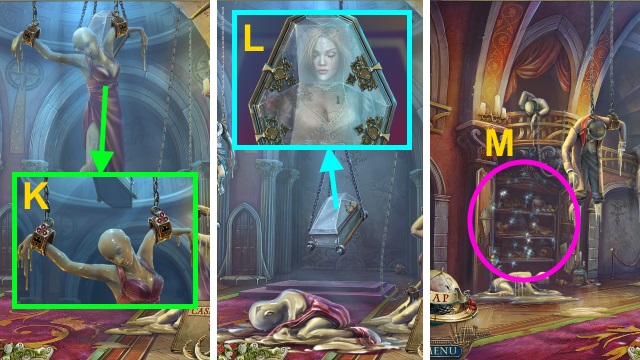
- Use the SHACKLES KEY on the shackles (K).
- Examine the coffin (L); you receive the Wedding’s Image.
- Play the HOP to receive the GEMS (M).

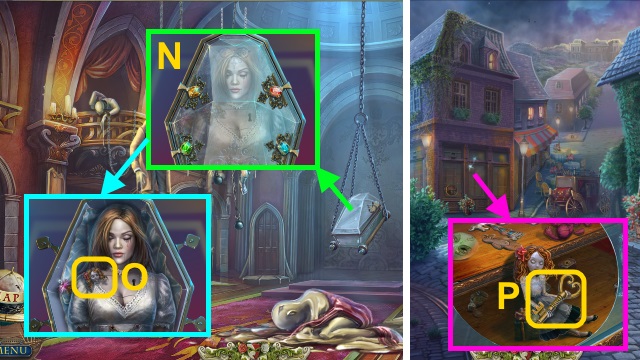
- Place the GEMS on the coffin (N); take the DOLL HEAD (O).
- Walk down.
- Place the DOLL HEAD on the doll; take the HEART KEY (P).
- Walk right.

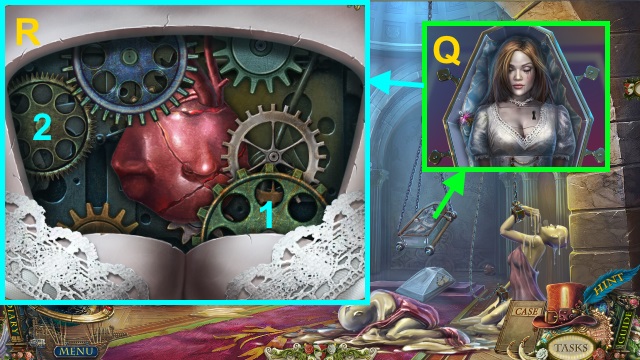
- Use the HEART KEY on the puppet (Q).
- Examine the HEART for a mini-game.
- Solution (R): 1-2.

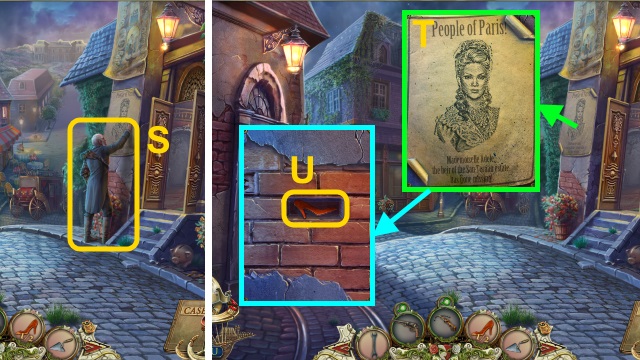
- Talk to Froissart (S).
- Take the New Victim Image (T).
- Use the SPATULA; take the SHOE FIGURINE (2/2) (U).

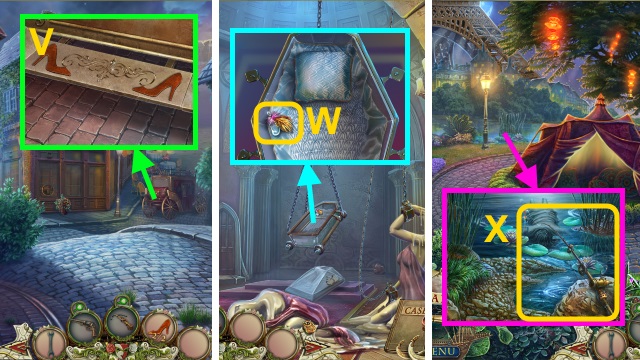
- Place the SHOE FIGURINE (2/2); press it (V).
- Walk right.
- Take the FISHING HOOK (W).
- Walk down twice.
- Place the FISHING HOOK on the pole (X); examine it for a mini-game.

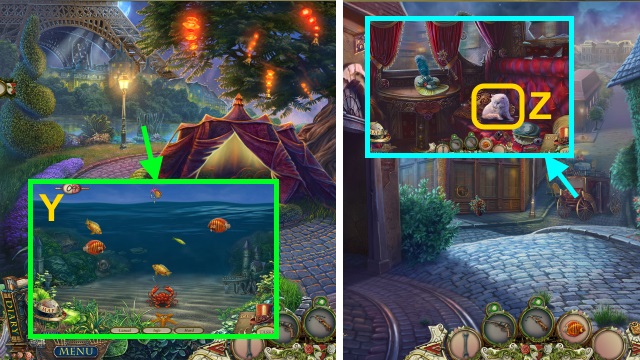
- Solution: catch fish to earn 99 points (Y).
- You receive the FISH.
- Walk right.
- Give the FISH to the cat (Z).

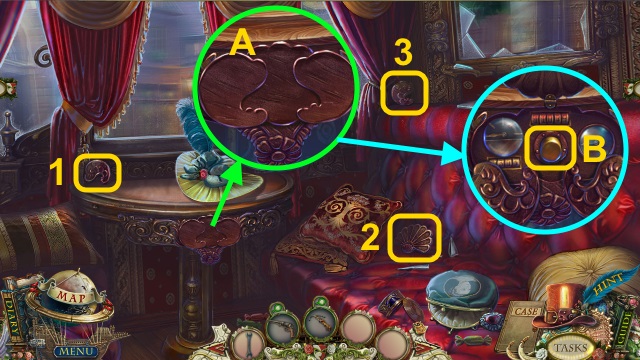
- Examine the table; take the ORNAMENT PART (3/3) (1-3).
- Place the ORNAMENT PART (3/3) on the table (A); press the button (B).
Chapter 5: Adele’s Manor

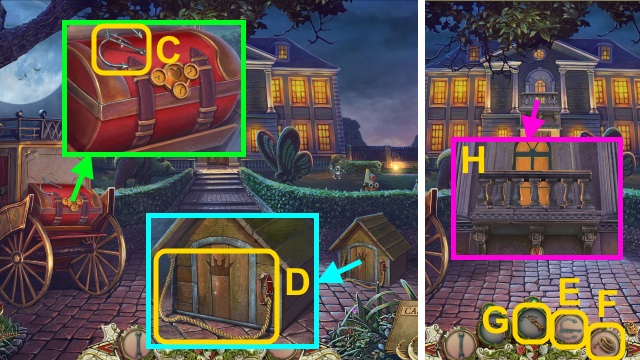
- Take the HOOK (C) and ROPE (D).
- Use the HOOK (E) and ROPE (F) on the CROSSBOW (G) to receive the LOADED CROSSBOW.
- Use the LOADED CROSSBOW on the balcony (H); you receive the CROSSBOW.
- Walk forward.

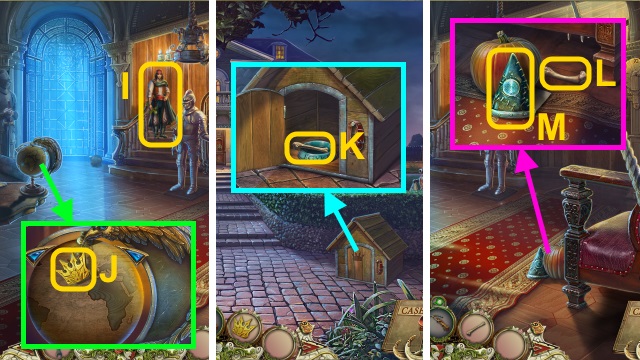
- Examine Alessandro (I).
- Take the CROWN FIGURINE (J).
- Walk down.
- Place the CROWN FIGURINE; take the BONE (K).
- Walk forward.
- Place the BONE on the ground (L); take the GNOME’S CAP (M).
- Walk down.

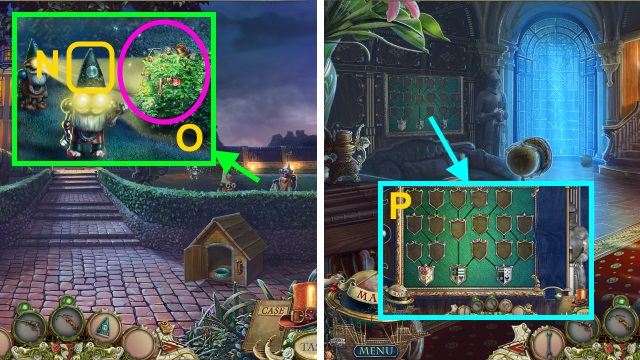
- Place the GNOME’S CAP (N).
- Play the HOP to receive the EMBLEM PARTS (10/10) (O).
- Walk forward.
- Place the EMBLEM PARTS (10/10) for a mini-game (P).

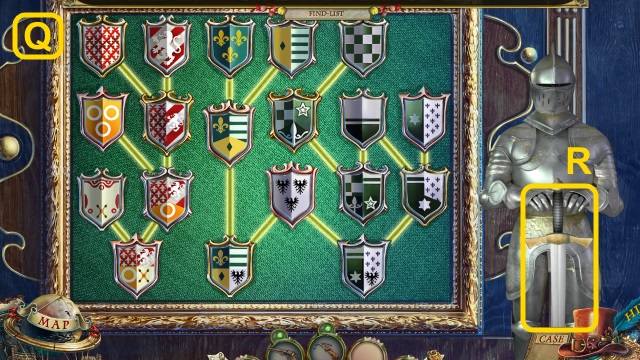
- Solution (Q).
- Take the SWORD (R).

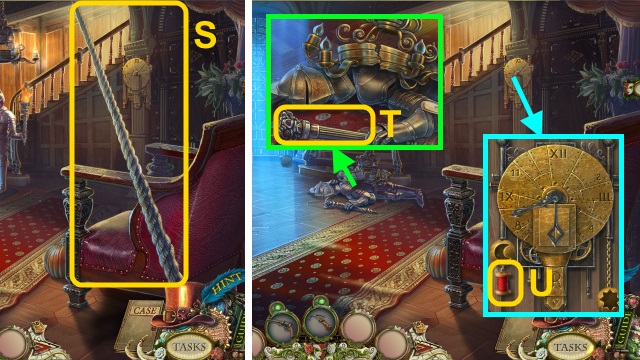
- Use the SWORD on the rope (S).
- Move the armor; take the UNLIT TORCH (T).
- Take the SPOOL OF THREAD (U).
- Walk forward.

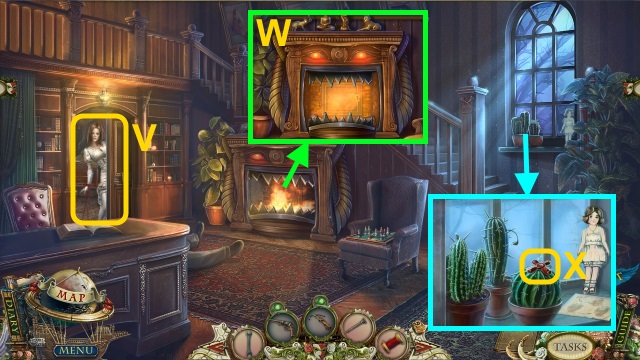
- Examine Marianna (V).
- Use the UNLIT TORCH on the fire to receive the TORCH (W).
- Take the VALVE (X).

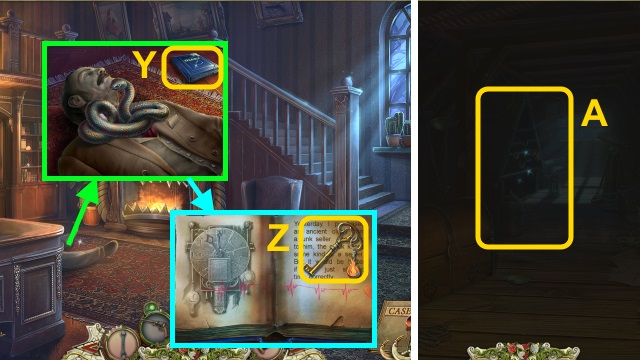
- Flip the diary pages (Y); you receive the Magic Doll Image.
- Take the KEY (Z).
- Go up.
- Use the TORCH (A).

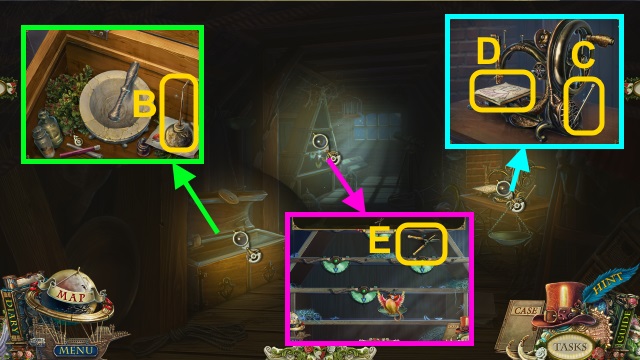
- Open the trunk; take the OIL (B).
- Take the SPOKE (C) and DRESS PATTERN (D).
- Take the SHEARS (E).

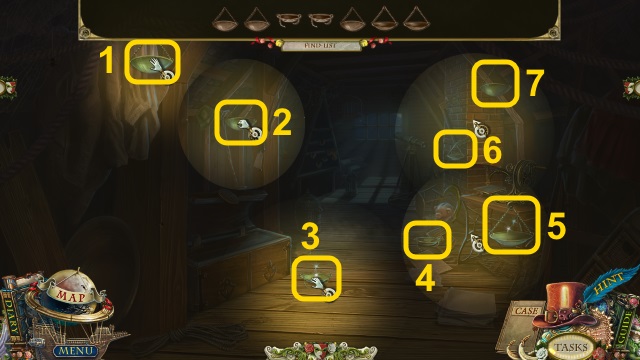
- Gather the SCALES (7/7) (1-7).
- Walk down twice.

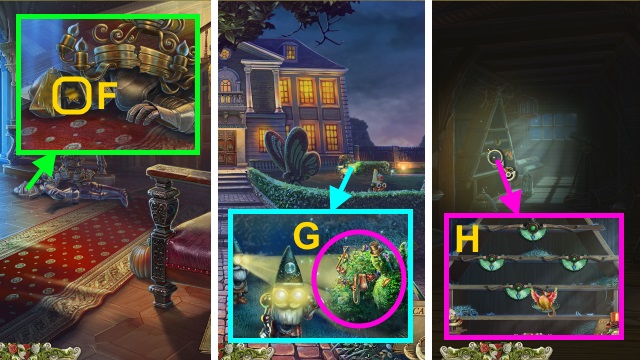
- Use the OIL on the helmet; open it.
- Take the GOLDEN SUN (F).
- Walk down.
- Use the SHEARS on the bush; play the HOP to receive the BIRDS (10/10) (G).
- Go to the Loft.
- Place the SCALES (7/7) and BIRDS (10/10) on the shelf for a mini-game (H).

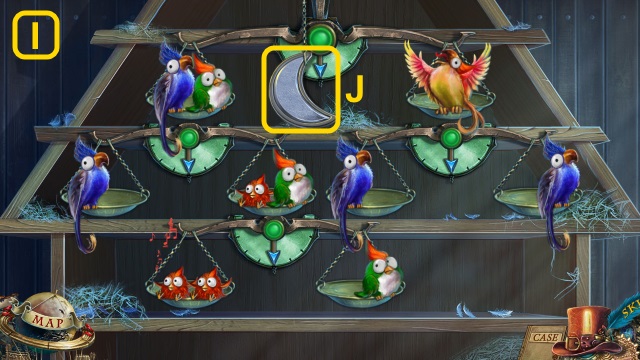
- Solution (I).
- Take the SILVER MOON (J).
- Walk down twice.

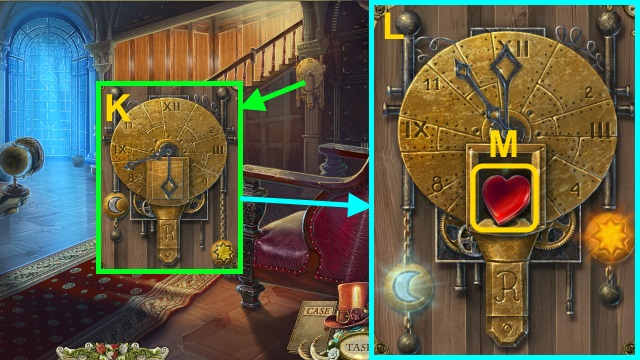
- Place the GOLDEN SUN and SILVER MOON on the clock for a mini-game (K).
- Solution (L).
- Take the HEART FIGURINE (M).
- Walk down.

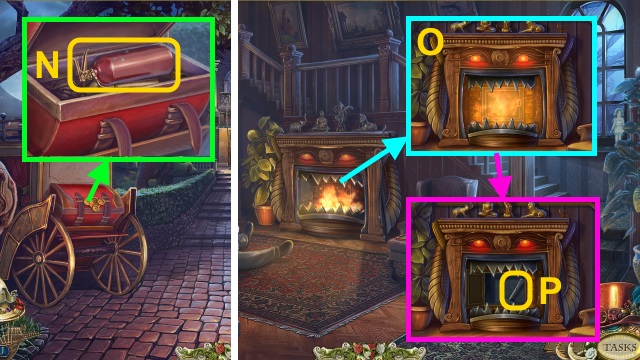
- Place the HEART FIGURINE on the trunk; take the EXTINGUISHER (N).
- Walk forward twice.
- Use the EXTINGUISHER (O).
- Use the KEY; pull the lever (P).
- Walk left.

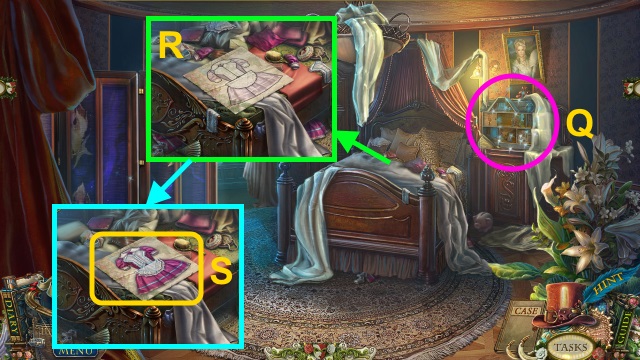
- Play the HOP to receive the SOLDIER (1/2) (Q).
- Place the DRESS PATTERN (R); place the dress pieces on it.
- Take the DRESS WORKPIECE (S).

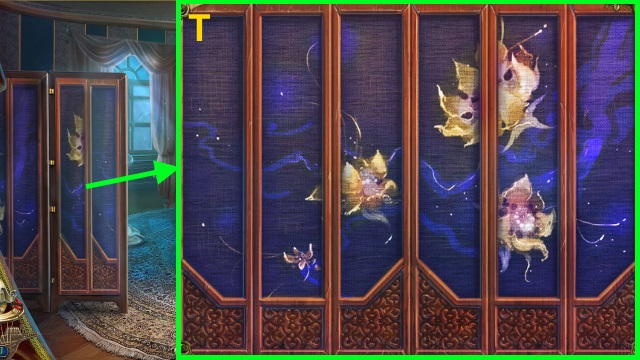
- Examine the screen for a mini-game.
- Solution (T).

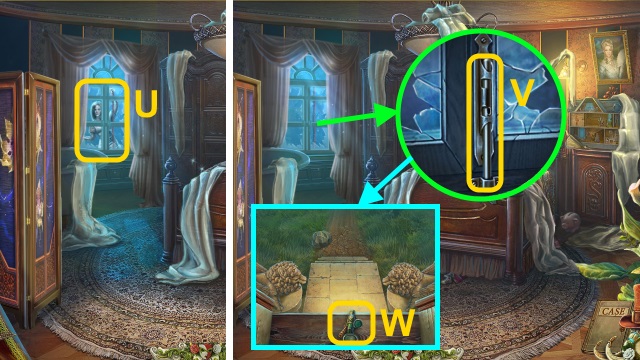
- Examine the window (U).
- Use the SPOKE on the latch (V); take the SOLDIER (2/2) (W).

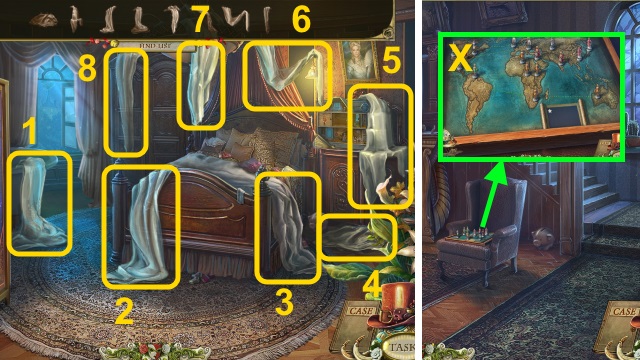
- Gather the SHEETS (8/8) (1-8).
- Walk down.
- Place the SOLDIERS (2/2) for a mini-game (X).

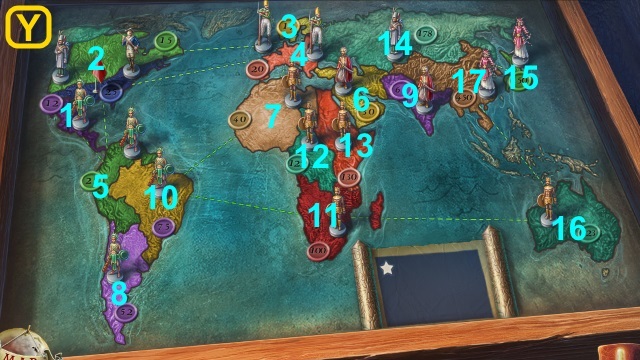
- Solution (Y).
- Take the CONTINENTS.
- Walk down.

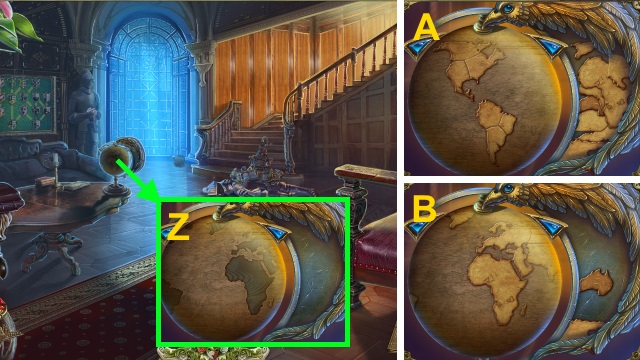

- Use the CONTINENTS on the globe for a mini-game (Z).
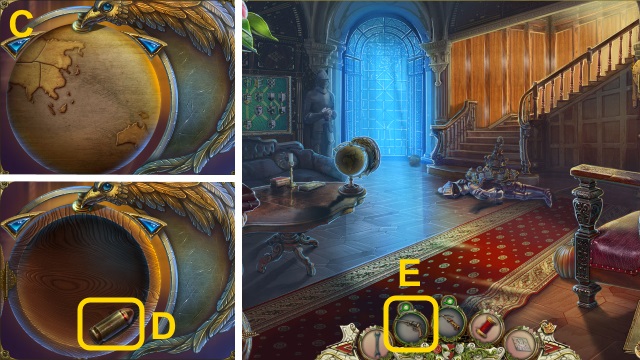
- Solution (A-C).
- Take the BULLET (D).
- Open the gun (E); place the BULLET in it to receive the GUN.
- Walk forward, then left.

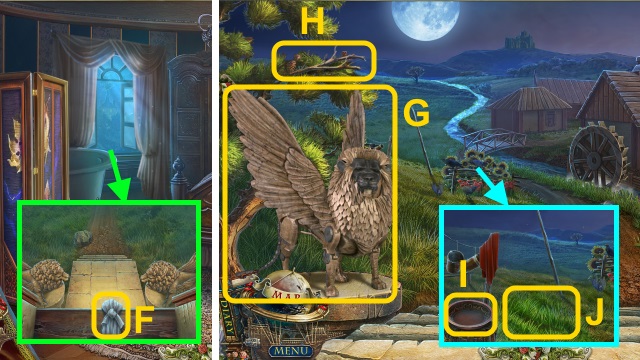
- Use the SHEETS (8/8) on the window (F).
- Walk forward.
- Examine Alessandro.
- Use the GUN on the statue (G).
- Use the SHEARS to take the BRANCHES (2/2) (H).
- Take the BOWL (I).
- Use the SHEARS on the grass (J); take the GRASS.

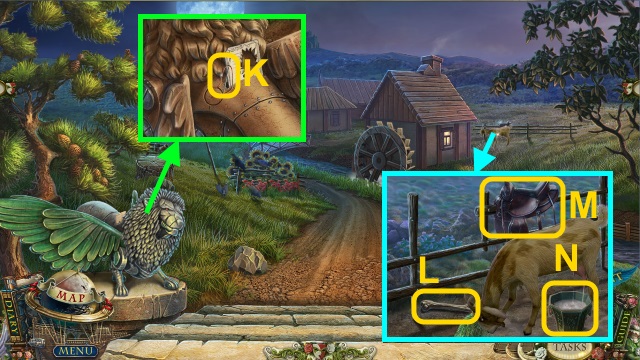
- Take the NEEDLE (K).
- Take the BONE (L).
- Give the GRASS to the goat; Take the SADDLE (M).
- Milk the goat to receive the MILK (N).
- Walk down.

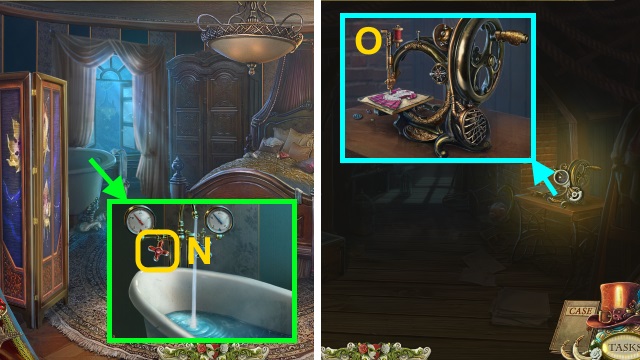
- Place the VALVE on the tub (N); turn both valves.
- Use the BOWL to take the WARM WATER.
- Go to the Loft.
- Place the DRESS WORKPIECE, SPOOL OF THREAD, and NEEDLE on the sewing machine (O); examine it for a mini-game.

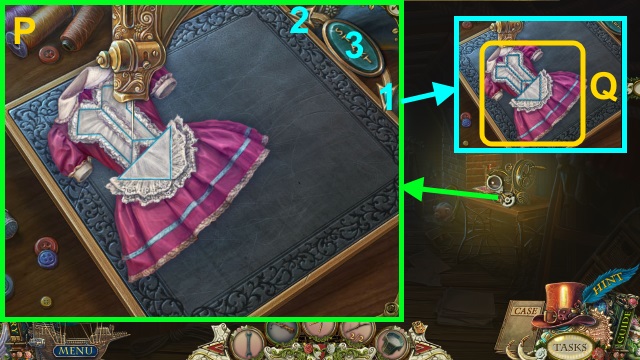
- Solution (P): 3-1-3-1×2-3-1×2-3-2-3-2×2-3-1×3-3-1×2-3-1×3-3×2-2×3-3-2×2-3-1×3-3-2-3-1×2-3-1×2-3.
- Take the DRESS (Q).
- Walk down.

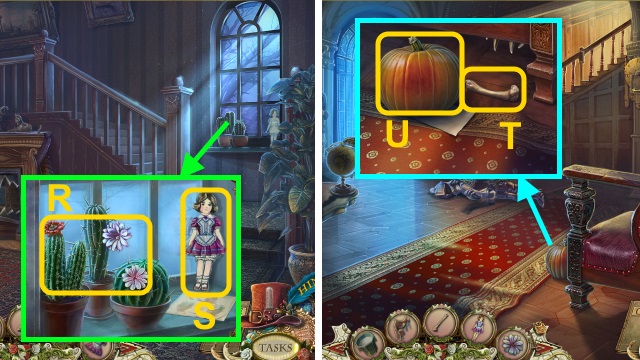
- Pour the WARM WATER; take the CACTUS FLOWER (R).
- Place the DRESS; take the DOLL (S).
- Walk down.
- Place the BONE (T).
- Read the note: you receive Alive Marianna’s Image.
- Take the PUMPKIN (U).
- Walk forward, then left.

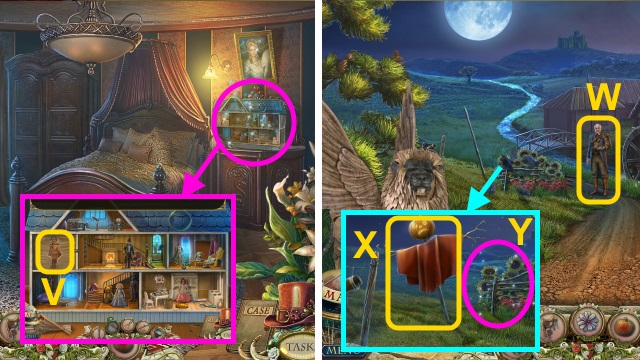
- Place the DOLL (V); play the HOP to receive the LENS.
- Walk forward.
- Talk to Froissart (W); you receive the New Victim.
- Place the BRANCHES, cloth, and PUMPKIN; use the SHEARS (X).
- Play the HOP to receive the POPPY (8/8) (Y).
- Go to the Loft.

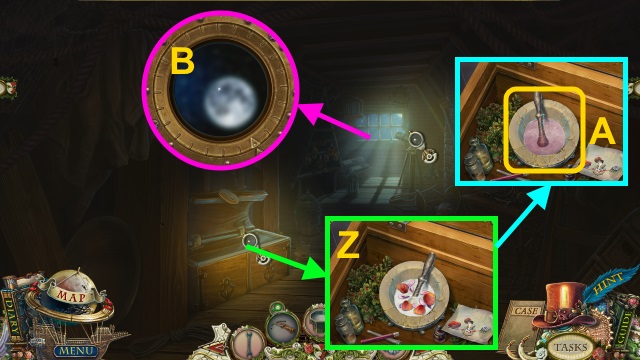
- Place the CACTUS FLOWER, MILK, and POPPY (8/8) in the bowl (Z); use the pestle.
- Take the SEDATIVE POTION (A).
- Place the LENS for a mini-game (B).

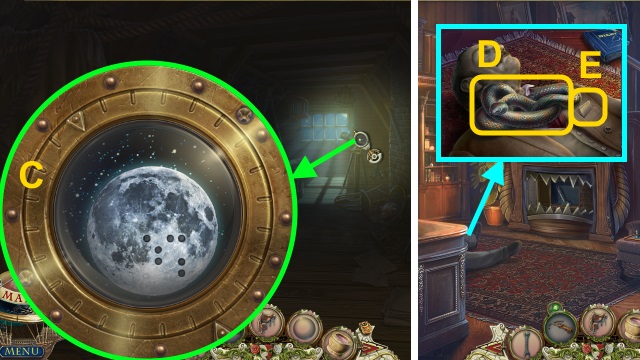
- Solution (C).
- Walk down.
- Use the SEDATIVE POTION on the snake (D); move it.
- You receive the Strangulation Marks.
- Take the CARD (E).
- Go up.

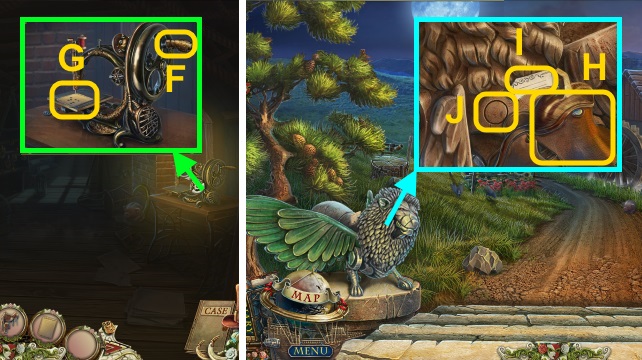
- Place the CARD on the sewing machine; turn the handle (F).
- Take the PUNCH CARD (G).
- Go to the Plains.
- Move the card; place the SADDLE on the lion (H).
- Use the PUNCH CARD (I); press the button (J).
Chapter 6: Convent Bussy-en-Othe

- Take the CORKSCREW (K).
- Take the BURNING BRANCH (L); you receive the Heartless Leah Image.
- Walk left.
- Take the KEY (1/3) (M).
- Use the CORKSCREW (N); take the WOODEN SHIELD.

- Play the HOP to receive the WICKS (O).
- Walk down.
- Open the door (P).
- Walk forward.
- Use the WOODEN SHIELD on the statues (Q); you receive the SHIELD WITH ARROWS.

- Examine the SHIELD WITH ARROWS; remove the ARROWS (3/3) (R).
- Use the ARROWS (3/3) (S) on the CROSSBOW (T); you receive the LOADED CROSSBOW.
- Use the LOADED CROSSBOW on the statues (U).
- Talk to Marianna; you receive the Combustion Image.

- Take the WOODEN WING (V).
- Walk down, then left.
- Place the WOODEN WING on the door (W); open it and go through it.

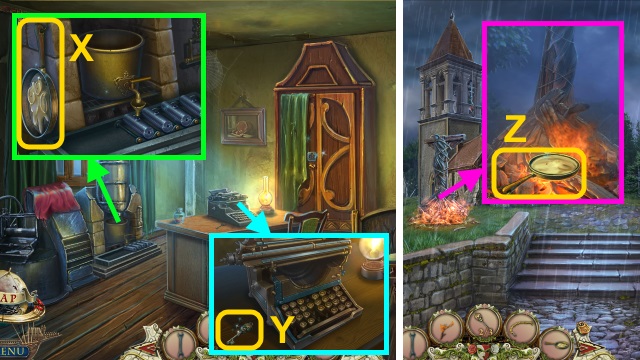
- Take the PAN WITH WAX (X) and KEY (2/3) (Y).
- Walk down twice.
- Place the PAN WITH WAX; take the MOLTEN WAX (Z).
- Go to the Cell.

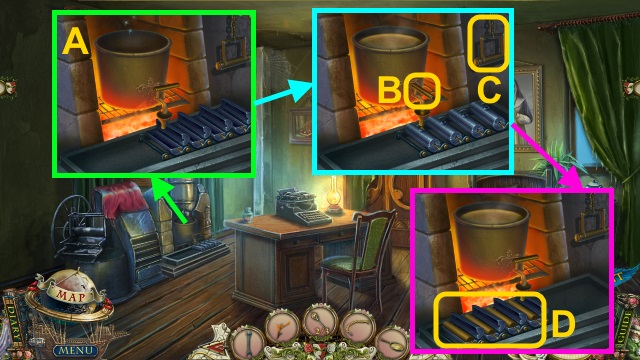
- Use the BURNING BRANCH on the furnace.
- Open the molds; place the WICKS in them (A).
- Close the molds.
- Pour the MOLTEN WAX in the bucket.
- Turn the handle (B) and pull the lever (C) until all molds are filled.
- Open the molds; take the CANDLES (D).
- Go to the Chapel.

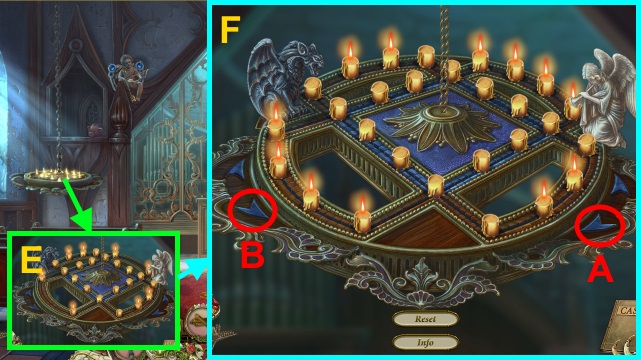
- Place the CANDLES for a mini-game (E).
- Solution (F): Ax4-Bx4.
- Walk forward.

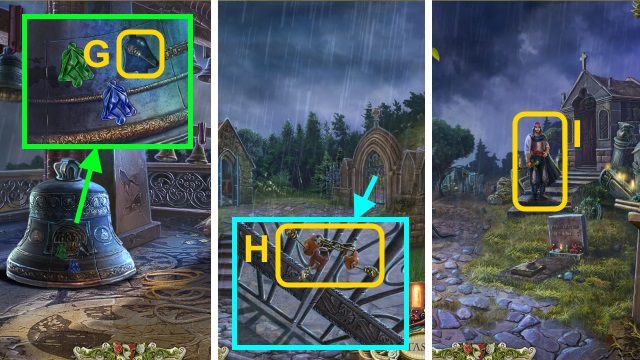
- Take the KEY (3/3) (G).
- Walk down twice.
- Use the Key (3/3) on the locks (H); turn them.
- Walk right.
- Examine Alessandro (I).

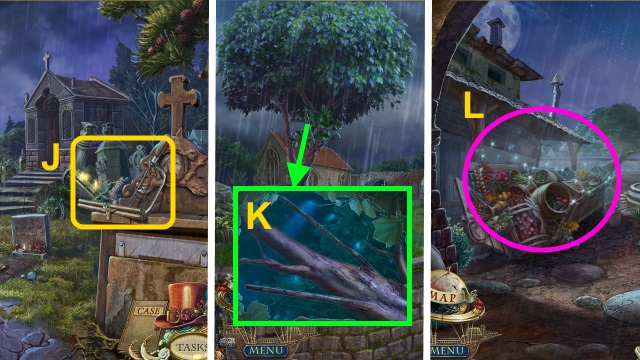
- Take the ANGEL FIGURINE, KITE PATTERN, and SAW (J).
- Walk down.
- Use the SAW to take the STICKS (2/2) (K).
- Walk left.
- Play the HOP to receive the CLAPPERS (L).
- Go to the Belfry.

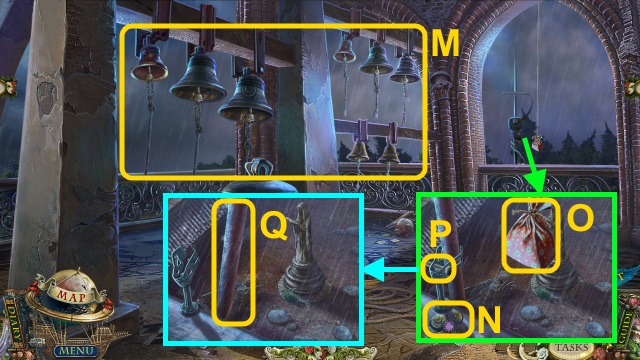
- Use the CLAPPERS (M); pull them.
- Take the CLUBS (N), FABRIC (O), and HEADPHONES.
- Use the WRENCH on the bolt (P); move the pole (Q).
- Go to the Cell.

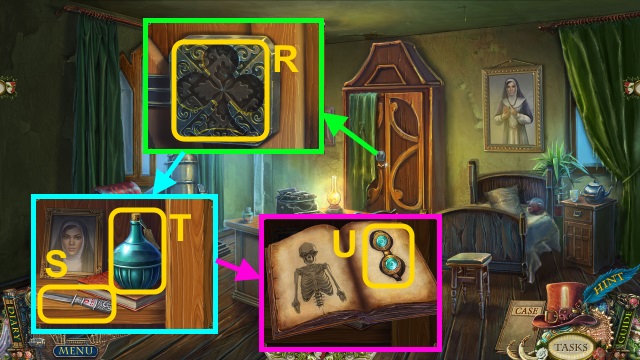
- Place the CLUBS (R); take Leah’s Image, the DAGGER (S) and SPRING WATER (T).
- Flip the book pages to receive the Resurrection Image; take the GLASSES (U).
- Walk down twice.

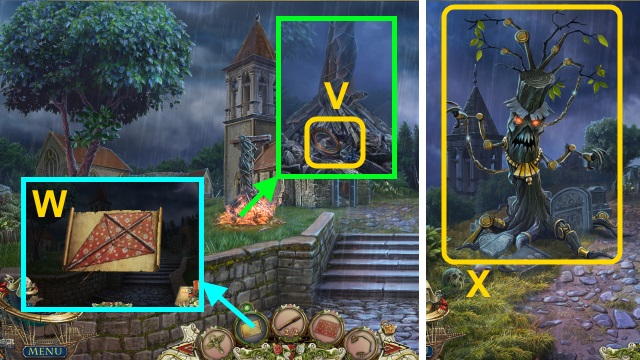
- Pour the SPRING WATER; take the WIRE and COAL (V).
- Use the FABRIC, DAGGER, STICKS (2/2), and WIRE on the KITE SCHEME to receive the KITE (W).
- Walk right.
- Use the KITE on the tree (X).

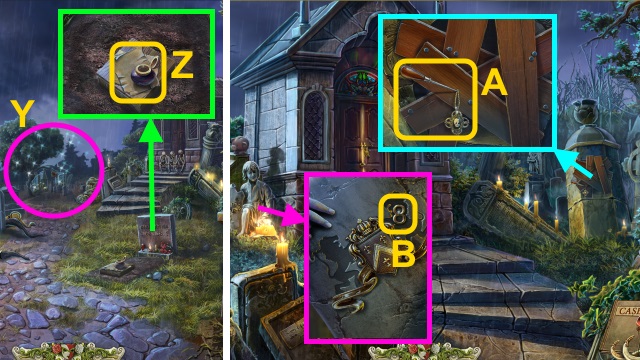
- Play the HOP to receive the BUTTONS (Y).
- Take the INKPOT and PAPER (Z).
- Walk right.
- Take the SKELETON MEDALLION and AWL (A).
- Take the NUMBER 8 (1/2) (B).
- Walk down.

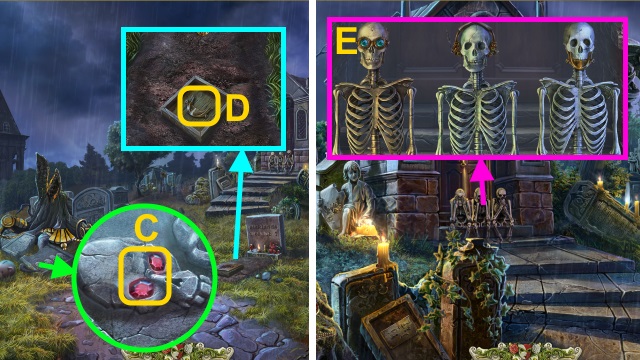
- Use the AWL to take the RUBY (2/6) (C).
- Place the SKELETON MEDALLION on the box; take the MANDIBLE (D).
- Walk forward.
- Place the HEADPHONES, GLASSES, and MANDIBLE (E).
- Open the door; walk forward.
Chapter 7: Crypt

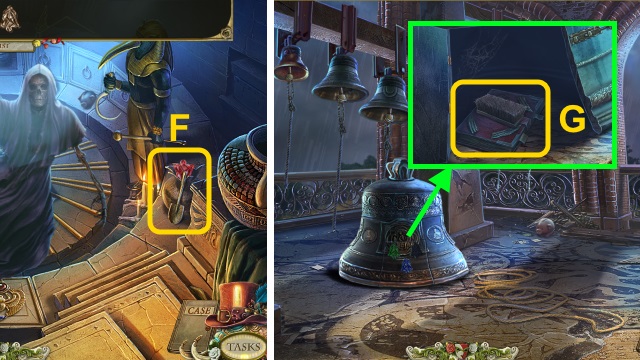
- Take the SHOVEL and RUBY BELL (F).
- Go to the Belfry.
- Place the RUBY BELL on the bell; take the BRUSH and TORN HOLY BOOK (G).
- Go to the Convent Yard.

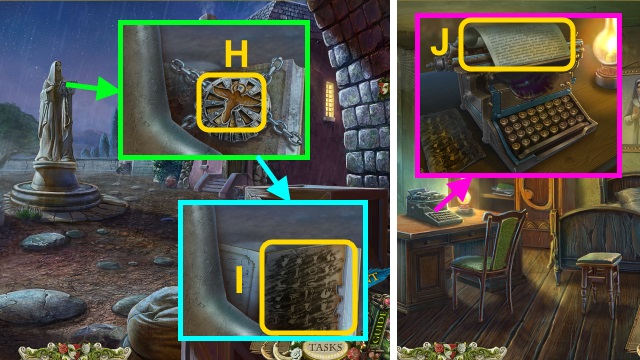
- Place the ANGEL FIGURINE (H); use the BRUSH.
- Use the PAPER and COAL; take the SYMBOLS SKETCH (I).
- Walk right.
- Place the BUTTONS, PAPER, INKPOT, and SYMBOLS SKETCH on the typewriter.
- Use the typewriter; take the HOLY BOOK PAGE (J).
- Go to the Chapel.

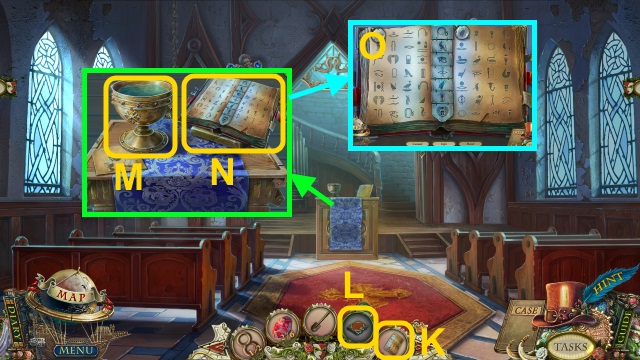

- Use the HOLY BOOK PAGE (K) on the TORN HOLY BOOK (L) to receive the HOLY BOOK.
- Pour the SPRING WATER in the cup (M); place the HOLY BOOK on the stand (N).
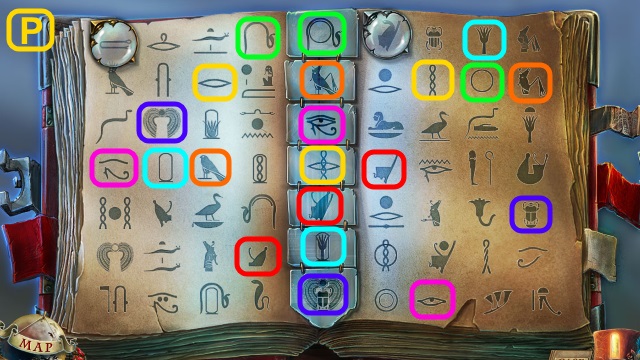
- Examine the book for a mini-game (O).
- Solution (P).

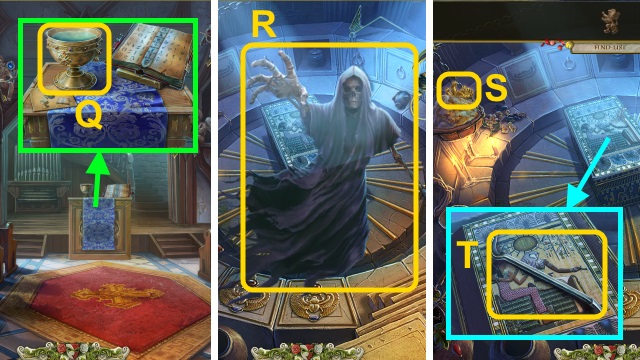
- Take the HOLY WATER (Q).
- Go to the Crypt Inside.
- Use the HOLY WATER (R).
- Take the GOLDEN LION (1/2) (S) and CROWBAR (T).

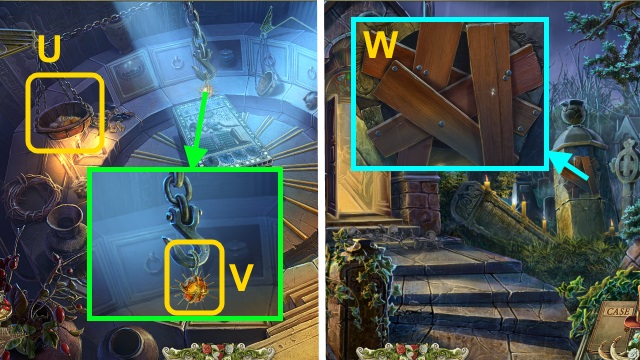
- Use the AWL (U).
- Take the SUN FIGURINE (V).
- Walk down.
- Use the CROWBAR to take the PLANKS (5/5) (W).

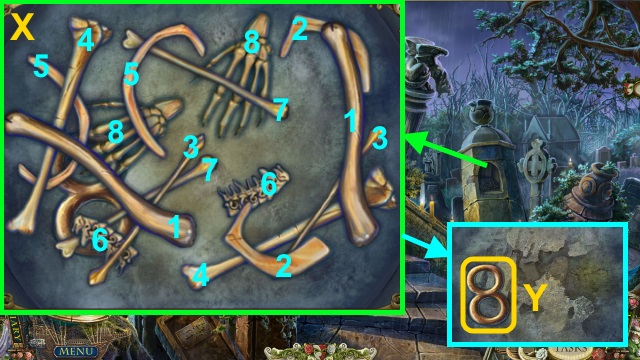
- Play the mini-game.
- Solution (X).
- Take the NUMBER 8 (2/2) (Y).
- Walk down.

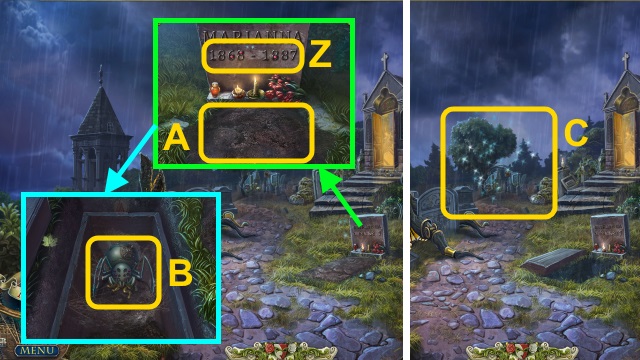
- Place the NUMBER 8 (2/2); take the RUBY (5/6) (Z).
- Use the SHOVEL (A).
- Use the CROWBAR; take the SPIDER and GOLDEN LION (2/2) (B).
- Play the HOP to receive the SPIDER LEGS (C).
- Walk right.

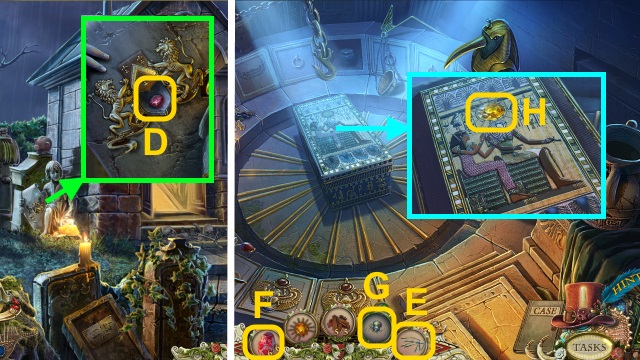
- Place the GOLDEN LION (2/2); take the RUBY (6/6) (D).
- Walk forward.
- Use the SPIDER LEGS (E) and RUBY (6/6) (F) on the SPIDER (G) to receive the MECHANICAL SPIDER.
- Place the SUN FIGURINE (H).

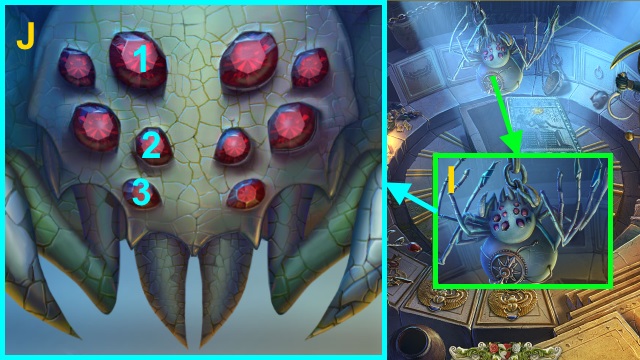
- Use the MECHANICAL SPIDER on the hook (I); examine it for a mini-game.
- Solution (J): 1-2-3.
- Go down.

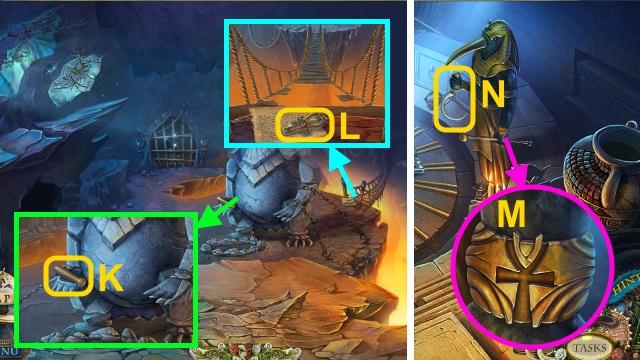
- Take the FILE HANDLE (K).
- Read the note; you receive the Aggression Image.
- Take the ANKH (L); use the PLANKS (5/5) on the bridge.
- Walk down.
- Place the ANKH (M); take the SICKLE (N).
- Go down.

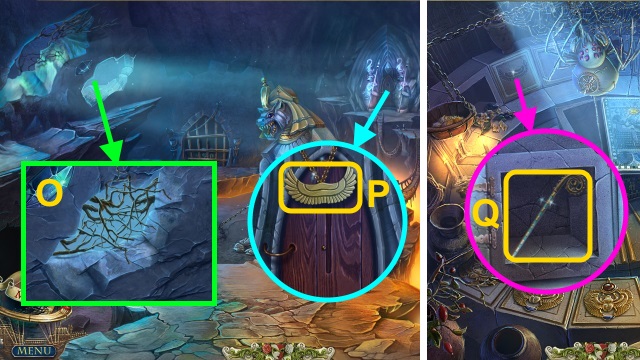
- Use the SICKLE to take the BRUSHWOOD (O).
- Take the WINGS FIGURINE (P).
- Walk down.
- Place the WINGS FIGURINE; take the PHARAOH’S CROOK (Q).
- Go down.

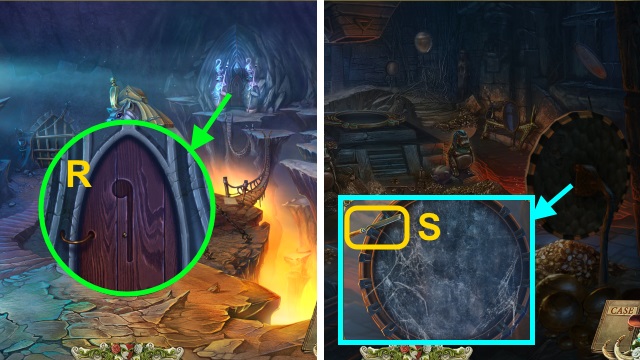
- Place the PHARAOH’S CROOK (R).
- Go forward.
- Use the FILE HANDLE to take the FILE (S).
- Walk down.

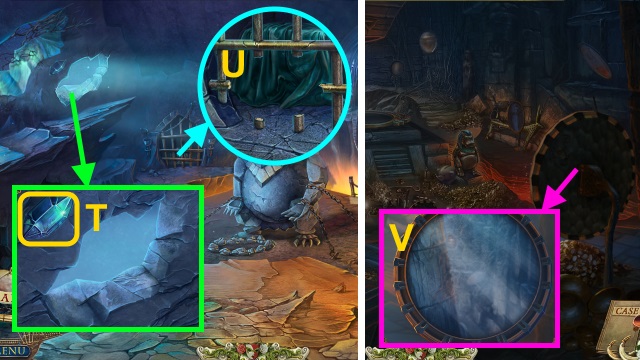
- Use the FILE to take the RHOMBUS (T).
- Use the FILE (U); take the RAG.
- Walk forward.
- Use the RAG (V).

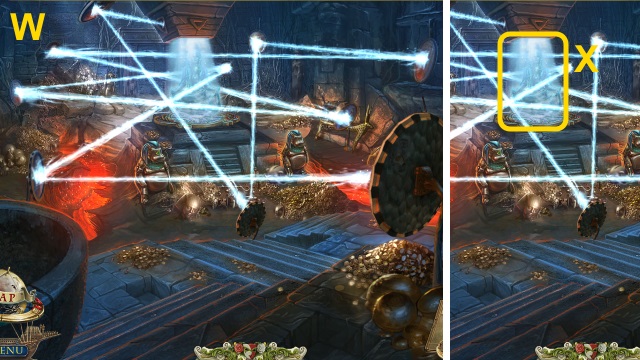
- Turn the mirrors to light the room (W).
- Talk to Shanta (X).

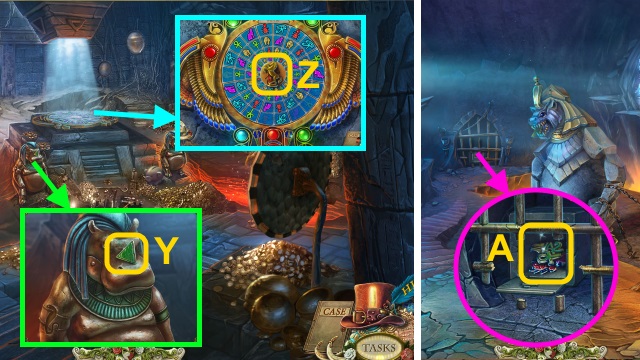
- Take the TRIANGLE (Y) and GOLDEN HORSE (Z).
- Walk down.
- Place the TRIANGLE in the slot.
- Open the box; take the CALENDAR SYMBOLS (A).
- Walk forward.

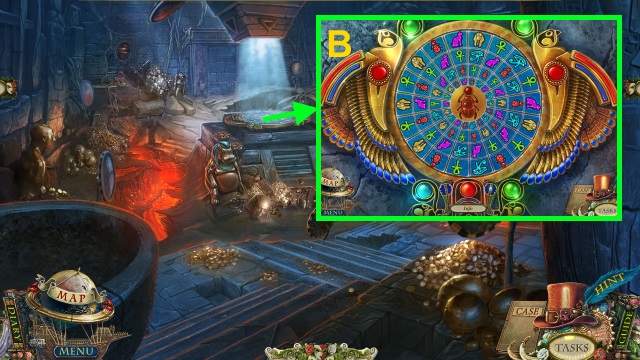
- Place the CALENDAR SYMBOLS on the circle for a mini-game (B).
- Solution is random.
- Go down.
Chapter 8: Heathens’ Catacombs

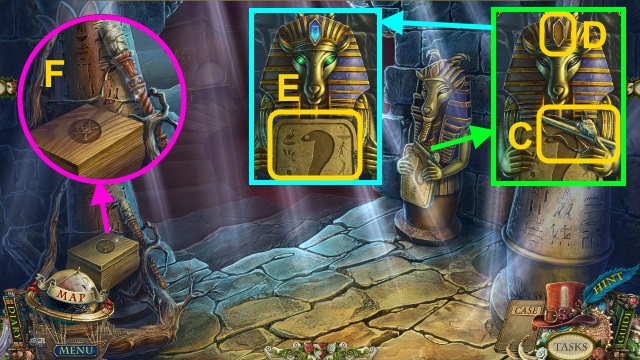
- Take the FLINT (C); place the RHOMBUS (D).
- Take the GOLD TABLET (E) and TORCH (F).
- Walk down twice.

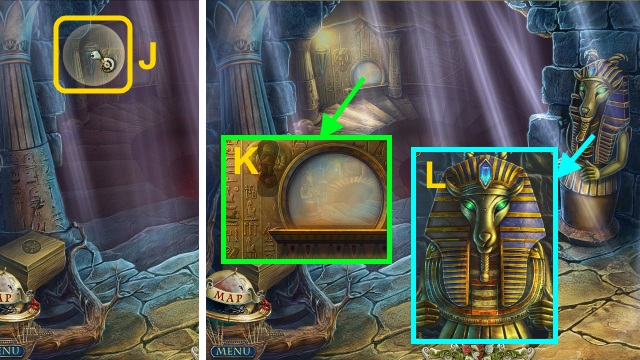
- Place the BRUSHWOOD on the ground; use the FLINT.
- Use the TORCH on the fire to receive the LIT TORCH (G).
- Place the GOLD TABLET; place the GOLDEN HORSE on it (H).
- Take the GOLDEN SNAKE.
- Walk forward.
- Place the GOLDEN SNAKE (I); you receive the STATUE PARTS.
- Go down.


- Use the LIT TORCH; light the torch (J).
- Take the MIRROR (K).
- Place the STATUE PARTS for a mini-game (L).

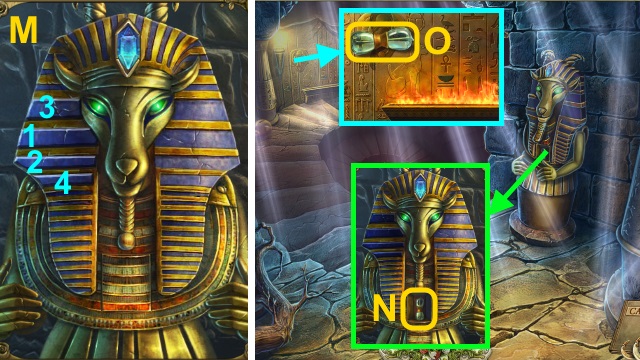
- Solution (M): 1-4.
- Take the FUEL (N).
- Place the FUEL (O).
- Go down.

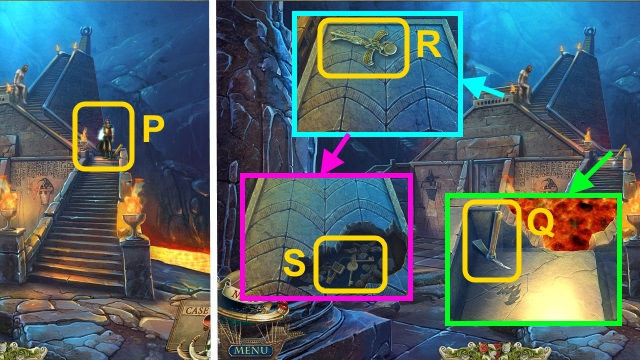
- Use the MIRROR on Alessandro (P).
- Examine the pick to receive the Osiris Court Image; take the PICK (Q).
- Take the GYPSY DOLL (R).
- Use the PICK; take the KEYS (S).
- Walk down.

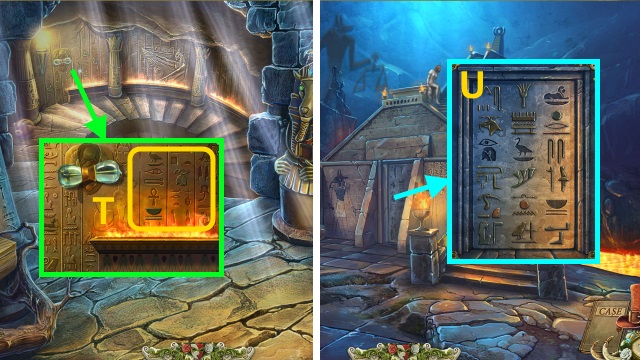
- Use the PICK to take the HIEROGLYPHS (T).
- Go down.
- Place the HIEROGLYPHS (U).
- Go forward.

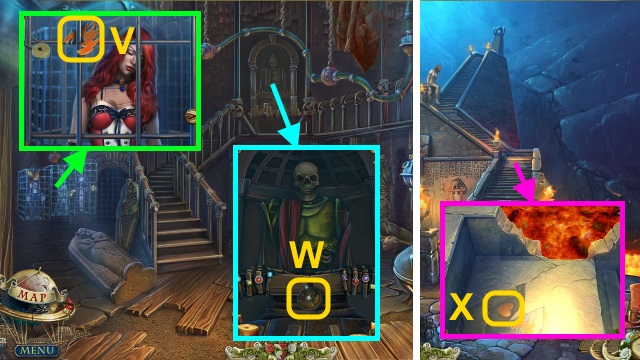
- Take the FIRE FIGURINE (V) and SKELETON COIN (W).
- Walk down.
- Place the FIRE FIGURINE; take the HEART FIGURINE (X).
- Walk forward.

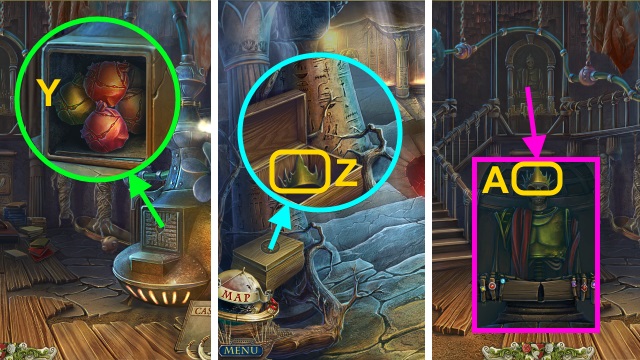
- Place the HEART FIGURINE; take the HEARTS (Y).
- Walk down twice.
- Place the SKELETON COIN on the box; open it. Take the CROWN (Z).
- Go to Alessandro’s Lair.
- Place the CROWN on the skeleton (A).

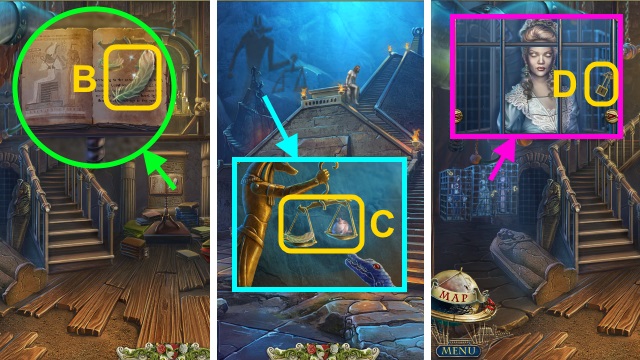
- Take the FEATHER (B).
- Go down.
- Place the FEATHER and HEARTS on the scale (C).
- You receive ADEL’S HEART, LEAH’S HEART, and NIGHTINGALE’S HEART.
- Walk forward.
- Use the KEYS on the locks (D).

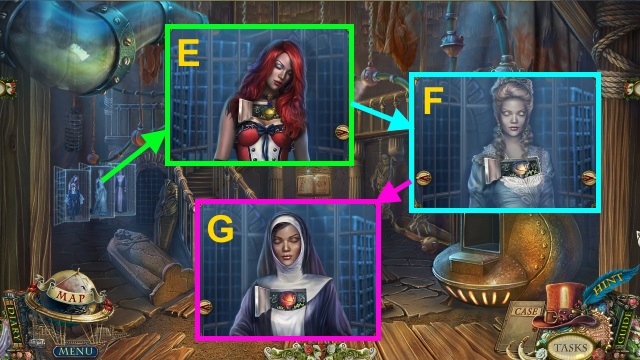

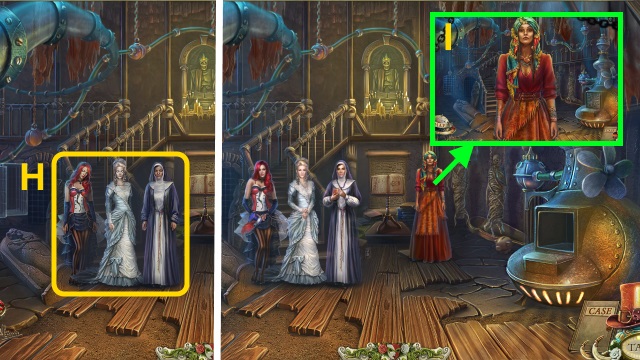
- Open the puppets; place NIGHTINGALE’S HEART (E), ADEL’S HEART (F), and LEAH’S HEART (G) in the correct puppets.
- Use the GYPSY DOLL on the girls (H); talk to them.
- Talk to Shanta; give her the GYPSY DOLL (I).
- Congratulations! You have completed PuppetShow: Lightning Strikes.





 Dark Parables: Jack and the Sky Kingdom Walkthrough, Guide, & Tips
 Alabama Smith in the Quest of Fate Walkthrough, Guide, & Tips
 Dark Strokes: Sins of the Fathers Walkthrough, Guide, & Tips
 Dark Parables: Goldilocks and the Fallen Star Walkthrough, Guide, & Tips
 Tiger Eye - Part I: Curse of the Riddle Box Walkthrough, Guide, & Tips