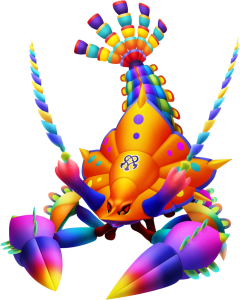
After making your way through Prankster’s Paradise in Kingdom Hearts Dream Drop Distance the main objective will be to defeat the Char Clawbster or Chill Clawbster depending on which character you are playing at the time. This Prankster’s Paradise guide will show you what moves they have, our set up and what to be wary of. Most of these bosses so far haven’t been to bad, but if you are looking for some Kingdom Hearts 3D help you have come to the right place.
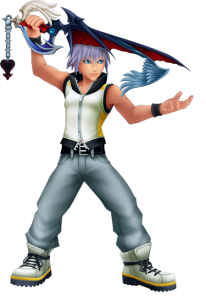 Lets start of with the Riku walkthrough for defeating the Char Clawbster. For me I was level 13 with a level 20 Tama Sheep, level 21 Komory Bat and a level 17 Meow jesty as my dream eaters. My skills where Fire, Fire Windmill, Thundara, Thunder Dash and Cura. The idea is to have moves that bring you in close to the Char Clawbster but allow you to keep a distance when not attacking. If you can get your links up to full before entering the boss it would be a pretty good idea. The room with platforms that have to be activated by hitting a punching bag looking thing is the room directly before the boss battle. Get those links up and head into the boss room.
Staying away from this boss is the best route for Riku. One of his moves is a claw swing that will knock you back. The move doesn’t do a whole lot of damage but is jarring and repetitive if you stay to close. If you do get hit by this move it is easy to get caught up in another one of Char Clawbster’s attacks. If you do have to be in close, make sure to attack from the sides or the back.
Another one of his moves is to shoot out colorful bombs. These bombs don’t initially do a lot of damage but once they land they split into 3 or 4 more smaller bombs. If you get caught up in these bombs they can do a significant amount of damage. You will see the Char Clawbster open his pincers and hold the bomb clusters right before he shoots them. If you are locked onto the boss just dodge around him and this attack will be pretty much useless against you. If you do get hit with the first bomb, an aerial recovery will help you dodge out of the way quick enough so that you don’t take too much damage.
The Char Clawbster has another bomb like attack that fires off red balls that do area damage. They also trail fire until they reach their target, but can be avoided as long as you keep moving in a circle. Be careful for this one if you are close to the boss because he will also launch more of them out of his sides. Flow-motion off of walls or dodge in the air to stay away from these.
After you take down one or two of his health bars The Char Clawbster will pick up a couple of more moves. One of them is a green goop spread bomb that is pretty easy to get caught up in. Make sure you keep circling and you won’t get hit with very many of them and damage will be minimal. If he is far away dodging and running forward is also a good plan as the goop takes a while to fall to the ground.
Another one of his new moves will be a green laser. It takes him a second or two to charge it up and he always does it from the far sides of the room. This attack rotates around the whole room so the only good way to block it is in flow-motion. Hit up some of the walls and air slide into them to activate flow-motion to stay away from the green lasers.
The key to the Char Clawbster for Riku is to keep moving and circling around the boss. Most of the attacks go in straight line and are pretty avoidable. Watch the back tail. When it starts spinning that is your opening if the Char Clawbster is not targeting you. Get a good 3 hits in or a couple of spells and then start circling. When the boss goes onto the ceiling you can hit the switches to flip gravity. Honestly the only real reason to switch gravity is to save time. If you dodge the attacks while he is on the ceiling you will do just fine. Hit him enough in the back and you can get the boss to stumble also giving you more time to land hits.
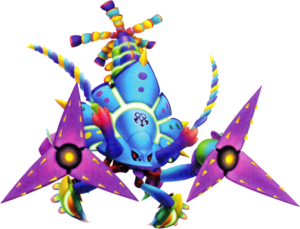
 Lets move on to the Sora walkthrough for defeating the Char Clawbster. For me I was level 15 with a level 20 Tama Sheep, level 21 Komory Bat and a level 17 Meow jesty as my dream eaters. My skills where Fire, Fire Windmill, Thundara, Thunder Dash and Cura. If you can get your links up to full before entering the boss it would be a pretty good idea. The last room before the boss will be a cave like area called the Ocean Depths. Get your decks in order and get ready for the Chill Clawbster.
This battle is significantly easier then the Char Clawbster for Riku. The battle takes place underwater so you should be able to flow motion with large jumps to stay away from any launching attacks. He also stays still quite a lot so spells like bubble, spark, and thundera work quite well. Wait for your opportunities to strike and then unleash.
One of his attacks that is kind of annoying is a wide spreading freeze/bubble attack. The best way to block this is to jump off one of the side walls to start flow-motion. He only does this attack for the first health bar or two thankfully.
After taking a couple of healthbars off of the boss he will start to fly around the map a little more. He isn’t very high off the ground and easily reachable, just be careful of some of his attacks. One of them is a large downward thrust that will knock Sora off balance. Another attack he will launch is a green laser that clips through some of the walls kind of annoyingly. Keep moving and flow-motion around when you can and none of these attacks should be too challenging to dodge.
Take your shots while he is on the ground. He will ground pound you if you stay there too long but skills like bubble and thundera do serious damage and can almost take out a whole hp bar by themselves. Just keep an eye on your health bar after he body slams you and just make sure not to get to cocky. It is easy to get caught up in how much damage you are doing and not how much you are taking while sitting under the belly of the beast.
With around 1 HP bar left Chill Clawbster will knock all of the platforms to the same height and an opening will appear in the middle of the frozon Monstro. Make your way around by using flow-motion. The opening is located around his head. Hammer the spot relentlessly to free Monstro. Once you break the ice there will be a reality shift on Monstro. The reality shift will bust him free.
After doing that you will be riding Monstro like any of the other reality shifts in Prankster’s Paradise. This next part is a little tricky. Start off on one side of the screen or the other and ride Monstro to catch up with the Chill Clawbster. He will fire razer disks at your bubble to try to pop it. Alternate from the left and right side to make sure you don’t take too many hits. After 3 fires of the razer disk you should catch up to the Chill Clawbster and finish the boss off.
Now that you have beaten both of the bosses make sure to check back for our other guides going up soon. Did you guys like this guide? Would you like to see more guides like it in the future? Hit us up in the comments!
If you did like this guide and want to check out more of our Kingdom Hearts 3D guides you can check out:


 Metal Gear Solid 5: The Phantom Pain Episode 0 – [Flashback] Prologue Awakening
 . Plays, 7th November, 2015
 My top 10 favorite DOTA 2 heroes
 . Plays October 4, 2013
 DuckTales Remastered Achievements & Trophies Guide