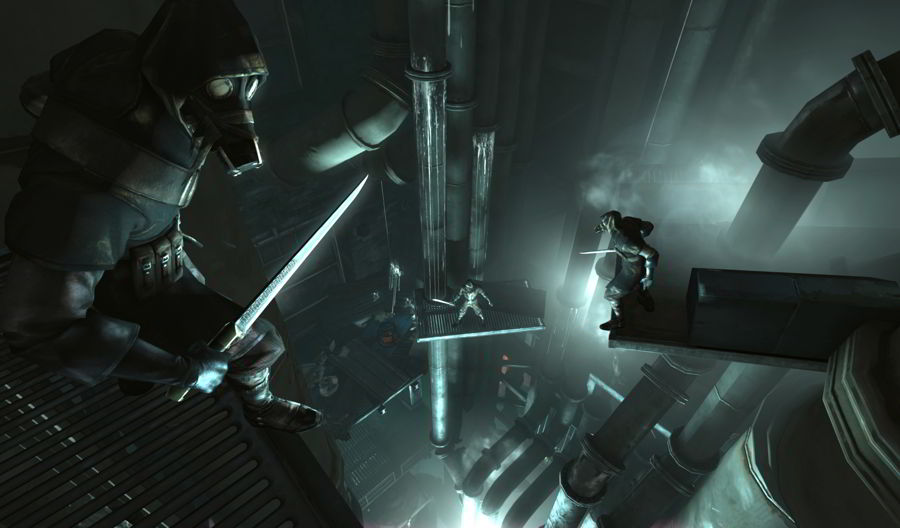
The next chapter of our Stealth walkthrough guide for Dishonored takes us to the Distillery District. This Dishonored Guide: Stealth Guide For Distillery District will walk you through the entire mission, giving tips on remaining undetected along the way. We’ll also add any collectibles and large deposits of coin we find.
Head back to The Pub and speak with the Admiral again. Don’t forget to turn your quest in. Make sure to get your upgrades and you really want to ensure you have Blink rank 2 at this point.
When you first get off the boat check to your left for some tasty rat. Then proceed to the right. There’s one pathing guard here but he’s easy to takedown without attracting attention. Do not attack/subdue any of the civilians you encounter while exploring the Distillery District, there’s just no need. Head up the stairs near the first civilian and take a right, there’s a guy throwing stuff off a balcony. Head up there and down through a door to get your next Rune. You can then speak with Granny Rag to start a rather long side-quest. We’ve got it covered in our Rune Article here.
Head out from Granny Rags’ apartment and head down the stairs opposite. Take a left and you’ll see two guards, just before you reach them go up the stairs to your right, by the Art Collectors house. Once there use Blink to jump across to the buildings the other side via an air conditioning unit. You can then jump up again using Blink and explore a door with 2 books and some coin inside. Leave the room via the same door and use Blink to get across to the metal tubing the other side. Follow it round and use Blink to get on the roof above, continuing in the same direction. You’ll see the Office ahead but take a left. You’ll see the pier ahead with a soldier down to your right. I used Blink to get behind the soldier and take him out, before dumping him in the little room behind him. There’s a strap, rewire tool and some potions in there, so grab those. Now to the Bone Charm at the end of the pier. Drop down below into the water and swim to the end, use Blink to climb the back of the Pier and get the Bone Charm laying on the bed. Head back to where you came from and use the top of the buildings to walk around and enter the first floor of Galvani’s Office.
Once inside use your Dark Vision and you’ll see a Maid talking with a Guard in the next room. Walk around and use the other door. When they finish their conversation the Guard walks upstairs and the Maid goes away. Head down the stairs. Once at the bottom of the stairs turn right and enter the door, continue through to the room with the multiple books and locker. Using your Dark Vision wait until it’s clear to enter and take the Guard staring at the picture directly next to the door. Repeat again for the second Guard and then remove the third.
Gather all the food and books from the kitchen before heading upstairs. It’s still just the one Guard and Maid so dispatch of the Guard search for books and then using the hidden bookcase to open the entrance to the Secret Room. Go inside, grab all the coins and the dead rat. Leave via the nearby exit and head to the Whiskey Distillery.
Once inside you can avoid all of the Guards completely. Look directly above and use Blink to traverse across the pipes and rooftops to the next door. Once inside the next door use Blink to jump high onto the chain and climb up, continue to use Blink across the pipes to the next door. Enter the next door, paying close attention to the guy inside. Once inside head to the right and use Blink to climb the barrels and sides to reach the Bone Charm above the stairs. Then head down the stairs. Crawl under the gap past the gate and infect the brew.
Leave the room and go back up the stairs. Using the same Blink techniques exit the Distillery. Head back to Granny Rag to retrieve your reward, another Rune. Now you want to leave Granny Rag’s house and grab the Bone Charm that’s inside the house blocked by two Guards. It’s the closest one so use the Heart if you don’t remember the way. The easiest way to dispatch of these two Guards is to Blink into the gap behind them both, followed by a quick 1-2 with the Sleeping Dart Crossbow shot. Hide the bodies inside the nearby trash bin and break down the wooden boards with your knife. Free the guy inside. Check upstairs to find a Bone Charm and some coin.
Head to the next Gate and simply remove the Whale Oil from inside and walk through. Using the roofs and high areas, scale towards the end near Holgar Square. On your left as you travel towards the door is a small cart type thing, Blink onto the roof and use the Hatch to enter. Subdue the guard, grab the Rune and head back on your way.
Once inside Holgar Square, take out the Guard ahead with a quick Blink and headlock, then free Martin. Head to your right as you look at Martin and climb using Blink to get to the other side. You can ignore most of the Guards here and enter the room next to the two talking Guards. Dispatch of the Guard inside, check the note on the desk and then proceed through the next door. Head down the stairs directly in front of you and follow the sewers round. After entering the door take a right and enter The Kennels. Use Blink to climb on the pipes directly opposite and follow them round.
This part is up to you, you can skip all of the extra loot and just head for the door to the Overseer. If you choose to try to crack the safe and unlock the door with the two bodies, follow this. As soon as you enter The Kennels take the door to your right. You’ll see the locked door on your right, use the code 217 to unlock. These releases a bunch of rats so make sure you don’t have any unconscious bodies around. The nearby kennels have 2 human bodies inside, there’s a lever on the floor of the nearby open kennel, that unlocks the room. There’s a book (with the code for the door) and some coin inside. After you’ve done this bit pass through to the Office of the High Oversee.
As soon as you enter run across to the statue and interact with the eye, go inside to claim another Rune and a fair amount of coin. Go upstairs and then upstairs again, there’s 2 Guards up here but both are separated and easy to take down. DO NOT go inside the Meeting Chamber just yet. Head past the second Guard towards the archives, jumping up above with Blink to enter. Kill the Guard inside and inspect the mission book. Proceed to kill all of the pathing Guards on this floor, it’s all really easy. Just don’t be seen near the alarm. Eventually you’ll get an Interrogation Room Key. Make sure the stairs are clear as you’ll follow Campbell down to his secret chambers. Now enter the Meeting Room and grab the Rune on the wall, using Blink and mash the key if needed.
Interact with the glasses on the table and spill both. This will make sure that Campbell isn’t poisoned and Curnrow survives. They’ll chat for a bit and then leave the room, heading for Campbell’s Secret Room back down near the entrance to the Kennels. As long as you’ve moved all the bodies, simply follow them down and hide behind the bookcase when you enter. Make sure to use a Sleeping Dart before Curnrow is stabbed, and don’t forget to grab the Sokolov Painting. Pick up the unconscious Campbell and trek all the way back up to the Interrogation Room. Careful of patrolling guards when you head back up stairs, oh and don’t drop Campbell while you’re standing on the stairs. It considers it an assassination as the drop kills him. Once you get back to the Interrogation Room use Blink to get on the pipes above and into the room with the Brand, then proceed to burn it deeply into Campbell’s face. Follow your objective marker to the Main Hall, loot the collection box before you leave to speak with Samuel.
When you enter the next area use the Heart to locate the final Rune and Bone Charm in this mission. Inside the Workship, with the Rune, there’s tons of coin so be sure to pick it all up. There’s also a Valve and a note. When you leave the room head to the left and head, right on the end is the room for the Valve. This is where you’ll find the Bone Charm. Explore all the buildings, the code for the safe in the Bunkhouse is 203, it’s hidden under one of the beds. Inside the Workshop is a locked chest. Search the nearby shelves to find an unusual bottle. Smash it to retrieve the key. If you keep exploring but you’ll find a locked door to the Backyard. Just up and beyond there are 2 windows, 1 barred, 1 open. Head in there for a Bone Charm. Finally, pass the gate and you’ll hear several Guards talking about killing the witch, save her and the brother by using Sleeping Darts on the two aggressive Guards. Now exit with Samuel and onto the next mission.
After you’ve completed the quest line at the Distillery District, you return to The Hounds Pits Pubs only to find danger a little closer to home.
Once you’ve been given the key by the Admiral you’ll want to head into the Sewers. Don’t use the nearby door, instead travel back through The Hound Pits Pub and use the sewer grate on the other side. When you drop down you’ll be faced with 2 Weepers, use the Sleeping Darts to dispatch them quickly. Turn to your right to find an Ancient Note concealing a rune. Search just behind the drawers under the water behind the grate ahead of you for another Rune.
Following this guide should have got you every single collectible as well as all of the Special Actions. Please leave a comment if you need help.
Did you find this Game Guide helpful? Follow us on Facebook for all our latest Game Guides, Game Reviews, Games News and our Suck My Controller Game Podcasts. You can also follow us on Twitter, Raptr, Youtube and Freeglance.

 Miner's Guide/Review of Spelunky HD
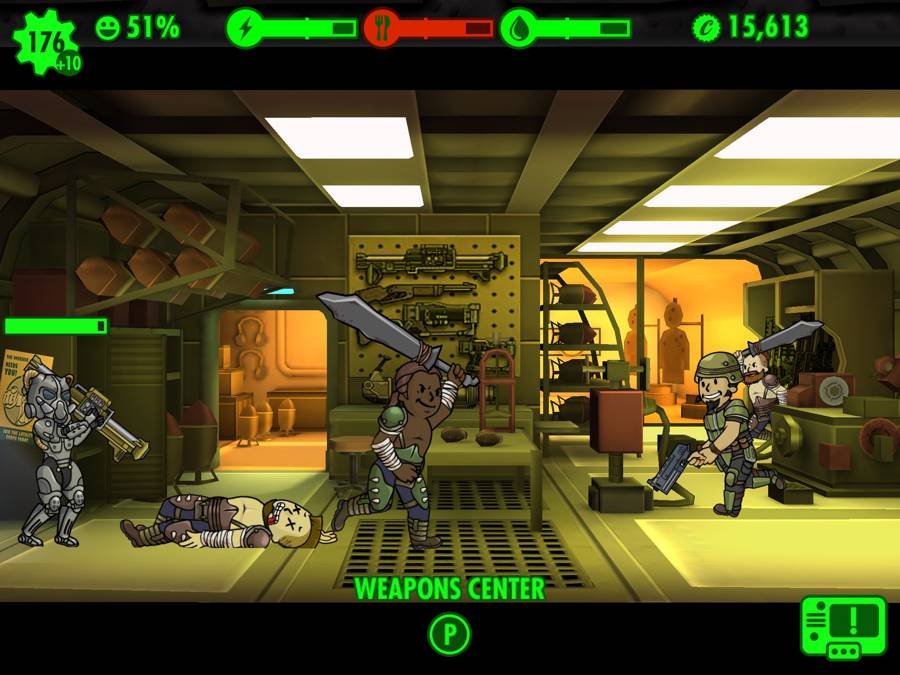
 . Plays, 11th July 2015How To Get More Dwellers In Fallout Shelter
 Call of Duty: Elite, meet and greet
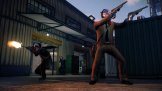
 Assassins Creed 4 Black Flag Guide: Governor No Longer Guide