The Witcher 3 Guide: Velen Side Quest Guide, Hidden Treasures & Witcher Contracts
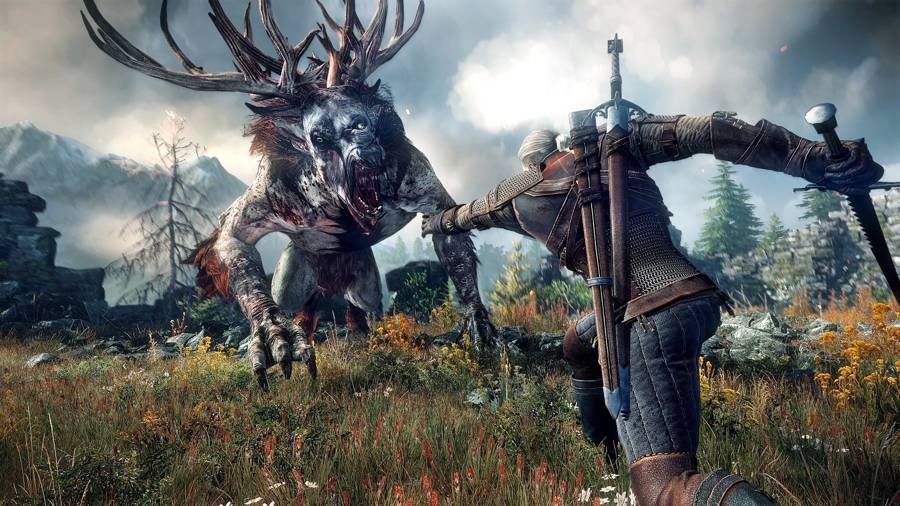
The second area you will be exploring in the Witcher 3: Wild Hunt will be Velen. This The Witcher 3 Guide: Velen Side Quest Guide, Hidden Treasures & Witcher Contracts will list the locations of all quests in the area, details on finding Hidden Treasures and completing Witcher Contracts, and details on other exciting secrets and hidden rewards.
There are a couple of quest types that we felt deserved their own guides, for a more in-depth approach and offering additional detail. They are highlighted as quests and linked but if you want to jump straight there check out our Horse Racing Guide and Gwent Card Locations, Players & Tips Guide.
The Witcher 3: Wild Hunt Guide: Velen Notice Board Quests
The Fall Of The House Of Reardon
You get this from the board in Lindenvale. Head to the location and kill all of the enemies in the area. The Southern most building features a stairway outside at the rear that enters to a cellar below. There’s a wall below that you can break and search behind to find a corpse and a note. After you’ve discovered these head back upstairs and search the North Western most building, there’s a very small lockbox in the corner that contains a key. Return to the Southern most building but instead of entering at the rear, there’s a locked door. Enter inside and search for some writings on the wall. Interact with the writing and you’ll have another interaction option directly next to it, revealing a small chest. After this return and collect your reward.
Hazardous Goods
Take the road north-east main road from Lindenvale and you will run into a ma n being attacked by ghouls. . After you kill the Ghouls you can talk to the guy in the wagon. I picked oughta burn the wagon so they wouldn’t spread the disease anymore. You will need to burn the bodies with you Igni spell.
Loves Cruel Snares
If you take the road South West from Midcopse you can run into a random peasant woman near a Abandoned site.
Talk to the woman and offer to help her find her husband. Go to the woods and use you Witcher Sense to follow some foot prints. This will lead to some wild dogs you need to kill and a corpse you need to inspect. She will pay you 40 Crowns of you can let her keep it and just get the EXP.
Last Rites
You can find this quest north of Blackbough, near a Wooden bridge on the road. I’m not 100% sure but I think this one opened up after I did the Baron quest line. I think this quest only appears at night also. Talk to the old lady and offer to help her out. Head up to the graveyard and use your Witcher Sense to find the red tombstone. If you have the lamp you can check the are after you place the ring and get a bonus 25Exp. Return to the town to get your reward.
The Truth Is In The Stars
You get this from the Benek Village, from the Sage there. If you are having trouble finding the place it is one of the guys on the Gwent Quest. Give him some food and then tell him you will look for the root for him. Go to the cave and in the back you can find a root, use you Witcher Senses to help you spot it. After you return to the Sage you will beat the quest.
The Witcher 3: Wild Hunt Guide: Velen Side Quests
Funeral Pyres
While traveling west from Mulbrydale you can find a Fire Priest on the road with a quest to give. He will want you to set three bodies on fire for him. You will have to clear out some Ghouls then use Igni on the bodies after you put down the oil. On the last set of bodies you will run into a bandit who tells you a little more about the Priest.
Once you return to the you will have to either take his bribe or not. If you take the bribe you get 60 Coins from him. If you choose to not take the bribe you will have to kill him and his guards and you get to loot him. He had 200 coins on his body for me so I chose to kill him.
Defender Of The Faith
You can find this quest on the road east of Blackbough, just talk to the peasant woman. After you pick up the statue for her, accept the next part and you will have 2 more statues to fix. They are pretty far south so you might want to wait for a bit. There are also decently strong enemies protecting these shrines so you may want to wait till Lvl 6+.
For the second shrine I was to weak to fight the monster so I lured it away with my horse then went back to it. I basically ran past on my horse, got off the horse, ran away and the monster went after my horse. I went back and fixed the Shrine then left.
The last shrine has a few humans there that you can talk to. I think the end result is always you beating them down. After you beat them you will end the quest.
Fists of Fury: Velen
Head to the tavern at the Inn At The Crossroads and you’ll see a skirmish inside. Speak to the Bookie to enter into a hand-to-hand brawl again Smithy, the Blacksmith. It’s an easy fight so you shouldn’t have any trouble, bet maximum. Following the fight head far to the South West to Blackbough and join the second fight. Again, very easy so bet maximum. Fast travel back to Mulbrydale and head South to the town of Lindenvale to fight Fishgulper, maximum bet again.
Last up is the Velen Champion, head to Crow’s Perch to take him on. Maximum bet again, just be prepared to dodge instantly as he throws a punch right at the start
Gwent: Velen Players
You can obtain this quest when you encounter the Bloody Baron during the main quest line. After you agree to search for his family and check the area for clues he will return to his room. Challenge him to a game of Gwent to unlock the quest, beating him is the first objective. After defeating the Bloody Baron head a distance South of Crow’s Perch to Oreton, a small village on the shore. There you will find a Boatwright, defeating him is the next objective. The third player you must defeat is Haddy, he can be found to the West in the town of Midcopse. After defeating the initial three another objective opens, defeating Soothsayer. The Soothsayer, or Old Sage when you first meet him, can be found in the small village of Benek. The village is on the far Eastern shores of Velen, East of Reardon Manor, North East of Downwarren. If you have yet to discover either of these locations check your map for Hanged Man’s Tree and then head South East. Cross the small river with the 3 bridges and continue South East. From the Eastern bridge, Benek is the second village to the South.
For a more detailed guide on playing Gwent, winning cards, finding Hero and Leader cards, check out our Witcher 3 Gwent Card Guide.
Magic Lamp
You can choose to accept this from Keira after you deal with the Wild Hunt in the cave with her. Follow her to a blocked door and then use your Witcher sense to interact with it. You will get a riddle that you need to solve. The statues are in order 3, 2, 4 and then 1.
An Invitation From Keira Metz
Progressing through the story continue until you complete the Hunting a Witch quest line. When you escape out the end of the cave agree to see Keira Metz again and promise to visit. This unlocks this quest. Simply travel to her house in the far South West town of Midcopse to complete it
A Towerful Of Mice
After completing An Invitation From Keira Metz she’ll ask you to visit a tower and use the Magic Lamp to speak to spirits. Accept the quest and travel to the huge island in the middle of the lake, Fyke Isle. Continue to climb the tower until you reach the floor with the bodies. You don’t have to use the Magic Lamp on any of the spirits in the tower, except for the one in the Laboratory.
There are multiple outcomes to this quest. If you speak with all the spirits near and inside the tower you can take the bones back to the main spirits husband and she manifests as an enemy and slaughters him. Returning to Keira to finish the quest gets a response similar to “You’ve lost your touch” suggesting other methods are better.
Another method is to avoid speaking to any of the spirits and go straight to the Laboratory. Tell her you need to look around more and then try to leave the tower. A Pesta will spawn, kill it and then take the boat across the lake to Graham’s house. Speak with Graham and take him to the island, fight your way up through the ghosts that spawn back to Anabelle. Return to Keira and receive a more positive response
A Favor For A Friend
This is the next quest in Keira Metz’ line after A Towerful of Mice quest. She will ask you to investigate the whereabouts of a package she was expecting. Simply head to the objective marker and search the Northern area for the cart tracks. Follow these to the cart and take the package hidden in a small box underneath. Then return to Keira to complete the quest. There is a romance option here. For more information check out our Witcher 3: Wild Hunt Romance Guide.
For The Advancement Of Learning
After a rather steamy encounter with Keira you’re left to your own devices on the beach. Following on from the A Favor From A Friend quest, follow Keira to the Fyke Isle and enter the tower again. When talking with Keira respond with the possibility that he is only interested in killing. Then she could kill thousands with a weapon followed by go to Kaer Morhen.
Forefathers Eve
I unlocked this quest after returning to Crow’s Perch to speak with Bloody Baron regarding the completion of Family Matters. When I arrived the Pellar approached and asked me to provide my services at a ceremony. Agree to unlock the quest.Head to Fyke Island and go to the quest marker and wait until midnight to start. For the most part this is a defense quest, protect him from the enemies. A little ways in some Witch Hunters will come and attempt to stop the ritual.
If you choose to stop the Witch Hunters you will have to kill them. After that you will have to stop the Wraiths that attack. Once you kill the Wraiths you will need to enter the swamp for the next part. Here you will need to find a body with you Witcher sense. there are a few enemies protecting it, clear them out, examine the body and set it on fire with Agni. Return to the Pellar for 50 Crowns.
If you let the Witch Hunters do what they want then you just get EXP but no gold, the quest finishes on the Isle.
A Greedy God
You get this from a person in the building south of Wastrel Manor. Use the altar and the quest will update. Go to the rubble outside the building and you can use remove the illusion. Down below you will run into the Allgod.
Talk to him and you will have a few choices to make. You can kill the Allgod and the peasants will be mad at you, only 50 EXP for this.
You can also tell the Allgod to reduce his standards until the end of the war. This will net you 50 Exp and 50 Crowns, you can also let them know about the Tomb.
You can also help the Allgod out by telling the peasants he won’t bend. This will only result in 50Exp.
The Whispering Hillock
A short distance South East of the Orphans of Crookback Bog (South of Downwarren, South East of Lindenvale) you’ll come across a mysterious voice. This automatically starts the quest. A Werewolf is nearby and you’ll need to kill that before moving on. There’s also a Place of Power here to be sure to grab that.
After you’ve killed the Werewolf head into the cave and you’ll come across a bizarre growth. Ask all of the questions and you’ll get to make a choice. Free the being after collecting Raven Feathers, a black horse and bones (all nearby and easy to locate), or refuse to free it. Choosing to perform the ritual and freeing the spirit frees the children but results in Anna’s death in the final quest for this line. I’ve not been able to see what happens if you kill the spirit.
Return To Crookback Bog
When you finish the quest line to help the Bloody Baron locate his wife and daughter he will ask for your assistance to help free Anna from the Crones. Accept the mission and head to Downwarren to begin the quest. The beginning of this quest may differ depending on your choices in The Whispering Hillock quest as the guards spoke of a possessed horse causing havoc. Follow the Bloody Baron and his guards through the swamp until you reach the Crones houses. A Fiend and several monsters will attack. Typical heavy mob tactics work fine here. Use your Thunderbolt potions and QUEN sign to deal large amounts of damage fast, it’s an easy fight
Once defeated you’ll need to go speak with Johnny. Follow the objective marker to his hiding spot and clear out the nearby enemies. He’s not inside so you need to search the area. Johnny is hiding in a small wooden structure to the North East. Careful not to venture too far or you’ll aggravate a rather strong Earth Elemental at the Ruined Tower. Return to the others and share what you’ve learned.
Next you need to enter the house and search the basement. When you get into the basement there are 4 dolls, you can only pick 1 to free Anna. If you’re wondering what doll to pick for Anna in Return to Crookback Bog, you need to pick the one woven with the flower.
Horse Racing
When racing there are a few things you can do to improve your chances of victory. Firstly ensure that you pay close attention to the mini-map. Don’t be tricked by the white path leading to your current quest objective, you want to follow the thick black line the entire way through. It’s also worth avoiding any large bets on the first race of each track so that you can learn the route for easier victories in the future. Check out our Horse Racing Guide for more details.
The Witcher 3: Wild Hunt Guide: Velen Witcher Contracts
Wild At Heart
This is from the board in Mulbrydale, the town near where you spawn in at in Velen. The quest is pretty far away so you may want to wait a bit before doing it. The next part of the quest is in Blackbough. Talk to Neillen in town and ask about his wife. Talk to the neighbors to learn that she was last seen going into the forest. Go to the area on the map and clear out the wolves.
Now you will have a choice to make. You can either lie and gain some coin and end the quest, or you can say you will find Hannah. If you choose to find Hannah you will need to check the corpse near where the Wolves were for more info. After you find the dog corpse you can find a human corpse a little further away and find out your foe is a Werewolf.
Follow the tracks to the tree and examine the tree. I guess Witchers can’t climb so you need to check on the ground for a small tuft of fur. Once you get the scent you can follow it to some ripped up clothes. Near the clothes you can see a shack in the distance, go there. Check the book on the floor of the cabin and you will find the Lair on the outside, under the cabin.
In order to fight the Werewolf you will need to wait until night time for him to return. Werewolves are weak to the Agni sign and Grapeshot grenades. After you bring him down to about 30% HP that other woman will rush in and try to stop you. You can either let the Werewolf kill her or spare her and kill the Werewolf, either way you are killing the Werewolf. I think letting her live will just have an effect later in the game. Don’t forget to loot the locked chest in the Hunting Hut above!
Missing Brother
This contract can be obtained through the Notice Board at the Inn At The Crossroads. As with other contracts you can attempt to bargain for a higher fee. The highest I got was 340 via 390, 390, 375, 340. This quest is level 33 so I’ll update this shortly.
Thou Shalt Not Pass
You get this when you try to pass the Pontar. The easiest way to get one is to either pay or use Axii with a Delusion upgrade. There is a Shady Merchant near the bridge you try to cross over that has one. You can either pay 100 or 50 if you use the Axii skill. Once you have the pass you can go through the fort and move to the next area. You can also help out the Baron and get one for free.
Contract: Jenny O the Woods
You get this contract from the board in Midcorpse. Once you get the quest talk to Ealdorman. You can Haggle for more gold from him for the quest as well. I went for 280 straight away and he agreed. After you finish, talk to the villager that has info and then go to the fields to search for clues. Check the foot prints and then the torn fabric on the ground. After that follow the foot prints to the blood stain to collect the quest knife. After that follow the foot prints up the hill and to the grave. After you read the letter, return to the village and talk to Ealdorman.
After that go to the fire and burn the letter and the dagger. You will need to wait until night time for the Shade to appear. Use Yrden to trap her and deal damage, if you have Wraith Oil use that as well. There is also a grind stone and armorer table in town so be sure to take advantage of that. I beat her at level 9, I had to craft new gear to beat her. When she spawns little ghosts be sure to take them out ASAP! They heal her if you don’t.
Contract: Shrieker
I did this at level 10 so I was over leveled. You get this from the board in Crow’s Perch. Once you get the quest go talk to Chet and you can learn what happened and haggle for more money, I got 250 out of him. After you talk to him, talk to the boy behind the house to gain more info. If you can use Axii to calm him down for some bonus EXP.
After that it is time to track the beast down. Run outside the town and start searching with your Witcher Sense. Once you pick up on the tracks follow them to the monster cave entrance. Inside you can hear the monster screech and you won’t be able to access it quite yet. Toss a grenade up towards the Shrieker to make it flee and then you can chase it down. It will fly for a bit but once it lands you can fight it.
The Shrieker is weak to Grapeshot, Draconid Oil and Aard. If it starts to fly again and swoops at you, shoot it out of the air with a crossbow shot. I was over leveled for this so I had no issues here. Be sure to bring potions and use bombs as you need them!
Contract: The White Lady
You can find this quest on the remains of a body in the basement of Drahim Castle. You can find the castle in the North Western area of the map, over the river and North of the Border Post and Hindhold. You can also find it on the Notice Board in Farcorners.
Contract: Lord Of The Wood
This is a Notice Board quest that you can find on the board in Farcorners, the large town in the North West area of the map. It’s a level 25 quest so I’ll return later to finish this part off.
Contract: The Merry Widow
You get this from the board in Lindenvale. Talk to the Gravekeeper in the area, I could only get 245 for this one. He will tell you to go up to the graveyard so do that. Kill all the Ghouls there and then check out the gravestones with your Witcher Sense. Once you get the scent from one of them follow it to a hut.
Inspect hut and then take skulls back to graveyard. Gravehag is weak to Black Blood Potion, Necrophage Oil, Yrden and Quen. Place the skull and wait for the Hag to appear. She is a bit tougher then she looks. I was a bit over leveled for this one as well so I didn’t have much issue. She does this tongue lash thing that has a ton of range and I think can poison so try to avoid that if you can. I would normally do two easy hits then a big hit and back out. Once you kill her return for your reward.
Contract: Swamp Thing
Talk to the quest giver and negotiate a fee, I got 255 out of this one. Once you’ve done that head to the marker on the map and use you Witcher Sense to check out the rocks and the body in the area. At the next marker check the body and then the marking on the ground. At this point you know what creature it is. The Foglet it weak to Moon Dust bombs, Necrophage Oil and Quen.
You will have to runt through some Poison in the next part so watch you HP. In the next circle you can find an illusionary wall that looks like rocks on the side of the hill. Once you open it up, go inside and you can find the creature in the fog. He likes to use the fog to hide but more importantly he will hit you very hard. I was level 10 and he still was doing chunks of my HP. I would keep Quen on as much as possible to prevent damage and land one or two hits and back out. If you have grenades that do damage feel free to use them for extra damage. Keep yourself healed up and avoid his attacks to win this fight.
Once you return you can either demand payment or wait a week for double. This guy was legit, he actually payed double a week later which I didn’t expect.
Contract: Woodland Beast
You can do this one pretty early I just missed it because the board wasn’t yellow. This contract is acquired at the Bridge Board, the board below the Border Pass waypoint. Talk to the Guard and then head out to the way point. Check the footprints, bodies,and the open chest. After you check them all you can start to follow the footprints.
They will led you to some Drowners and then a tree. Once you run into the Elves you will have to talk to them. I didn’t save here and I wouldn’t give up my weapons so I had to fight them. After you kill them you can return to the guard for your reward. You can also get a pass to go through the fort from this as well.
Contract: Patrol Gone Missing
You get this from the Nilfgaardian Central Army Camp board. Talk to the Quarter Master and he will tell you where to search. Head to the way marker and follow the foot prints into the woods. You will come across a smell that you can follow as well. do this to learn something about the Draconid and then return to the foot prints. Once you make it to the end of the foot prints check out the body.
It is just your typical Wyvern which you most likely have fought a few times before. It is weak to Grapeshot, Draconid Oil and Aard. Once you kill her, return to the quest giver for a reward.
Contract: The Mystery Of The Byway Murders
This is a Notice Board quest that you can unlock in Oreton, a small village by the sea directly South of Crow’s Perch. At level 22 you can come back here and clear out the Ghouls and start the quest. Talk to the citizens and tell them you are nosy so you can keep going. Check out the three dead bodies in the area and follow the blood scent.
Go into the tunnels and head towards the objective marker. You will be fighting a vampire that is weak to Igni, Vampire Oil and Devil’s Puffball. It is pretty easy to set on fire and when it is burning you can land a few hits. It goes into ether mode and can’t be touched for a few seconds, roll when it charges you. Keep setting it on fire and rolling to beat this one. Return to the town people for your reward. Make sure you also go to the Nilfgaard officer for another reward.
Contract: Mysterious Tracks
This is a Notice Board quest that you can unlock visiting the village of Lindenvale and interacting with the Notice Board. I was able to do this quest at level 20 on normal difficulty. Talk to the hunter to negotiate a price and to get more info n the beast. I was able to get 290 out of him. Head over to the quest marker to start your search.
With your Witcher sense you can find some tracks on the ground. Check them out and then follow them. At the end of the tracks check out the tree for scent. Follow the scent to ta cave that you can’t get up to at the moment. Go around to the north and head up to the big tree at the top. Near the tree you can find a hole that is the entrance to the cave. Try to remember to roll when you drop down! Roll is the dodge button.
Explore the cave to find the dead Fiend. After that check out the claw marks on the ground and the blood to get the next part of the quest. You need to go grab some dung to lure the beast out. Go to any of the dung piles and then craft the Chort Lure. Equip it from the quest items to use it. After you place the lures head into the cave and wait.
The Chort is weak to Relict Oil and the Devil’s Puffball. I actually had alot of success with Igni during this fight, also the fire grenade. If he hits you, you get stunned after you get up. I keep the distance and used grenades on him because they worked so well. Still be ready to roll out of the way at anytime because he can charge you! If you use Puffball be careful of going into the poison and hurting yourself. Take it close and keep moving to help you beat this one.
You get this quest from a merchant north of the two Benek. There is a cave entrance there and you can speak to them there. Go through the cave and you will have two fight two Wyverns and break their nests. Thankfully you can fight them one at a time so this part isn’t that bad. After you beat them a Royal Wyvern will come down to fight you.
The Royal Wyvern is weak to Golden Oriole, Grapeshot, Draconid Oil and Aard. When the fight starts the Wyvern will be in the air so shoot it down. Once it falls do some damage and try to start it on fire. I pretty much let it fly and shot it down over and over to beat it. You can use Quen to block a hit and beat it a bit faster. Return to town for your reward.
Contract: The Oxenfurt Drunk
This quest is collected from a Notice Board in Oxenfurt, it’s the large town in the Eastern area of the map, East from Hangman’s Tree and Codgers Quarry. It’s a high level quest, level 26, so I’ll have to update this later
Contract: The Creature From Oxenfurt Forest
This contract is coupled with The Oxenfurt Drunk contract that you get from the large town in the East, Oxenfurt. It’s also a high level at level 35, so I’ll have to update this once I reach the appropriate level range.
The Witcher 3: Wild Hunt Guide: Velen Treasure Hunt Quests
Griffin School Gear
This has level 7 swords and level 8 armor. The first and second piece of the Edwin Greloff map can be found at the Blacksmith in Midcorpse. You will have to travel to a Monster Den in order to complete the first part of the quest. There are about 8 Wraiths in there and a poison hallway you will have to deal with. Lure the Wraiths out of the poison and kill them until there are no more left. After that use fire to ignite the poison and run through to the end of path. Here you will have to jump over in order to get the blueprints but it is guarded by a Ekimmaras. It is also completely dark so use a cat potion to help you see. The beast is weak to Agni and Vampire Oil(which I didn’t have). I pretty much did two hits and ran then two hits and ran, long fight but I won. After you beat him loot everything and then check out the note you get from the chest with the Witcher blueprints.
Hindhold has one of the next blueprints for you so head there. You will have to fight a few bugs and then work your way up to the top for a Monster nest. Kill all the Harpies and burn the nest and then open the door near the nest. On a body inside you will find the Steel Sword blueprint and some other goodies. Make sure to read George’s note!
This next one is a bit tricky. I cheated and jumped over the gap and landed on a small ledge and then jumped over the wall to get to the light house. If you can do that then more power to ya. If not then you will have to go under the light house and use the ladder there. Problem is there are a ton of Drowners that like to drag you down over and over again. You can kill them with your crossbow but it will take a bit more time. Once you are inside there is a ladder near where you lower the drawbridge that you want to take up, near the doorway to the building. Take that ladder up and up there you will find the last piece of the Griffin set.
Sunken Treasure
This quest begins when you find a document on a corpse washed up on the shore. East of Crow’s Perch, past Blackbough and slightly North West of Hangman’s Alley. The corpse is on the shoreline. The treasure is underwater a very short distance to the North, there’s 2 Drowner’s nearby but can be dispatched with a single Crossbow shot.
Blood Gold
Once you pick up the paper for this quest, check it to learn where it is located. Go there and you can see a blood trail that leads from a body to what looks like a dead end. Under the boards and barrel you can find the chest for this quest.
The Dead Have No Defense
I found this note on a hidden treasure marker south of Deun Hen. Read the note and with the key you can open the chest super close to the Hidden Treasure marker.
Out Of The Frying Pan Into The Fire
This treasure quest can be found North of Reardon Manor or South East of Mulbrydale over the bridge. There’s a small gathering of buildings and in the North Western most building there is a door that leads to a cellar with a body and a note, read the note to progress to the next stage. After you’ve read the note exit the cellar and head North East to investigate the area with your Witcher Sense. The furthest North Eastern building hides a chest in a nearby in a hay stack.
An Unfortunate Turn Of Events
Following the South Eastern road out of Mulbrydale you’ll discover an Abandoned Site. On the shore is a corpse with a note, reading the note starts this quest. Swim a short distance out into the water and you’ll discover a chest underwater, opening it completes the quest
Tough Luck
A distance South East of Hanged Man’s Tree, slightly North West of the bridge crossing the river, is a cart guarded by a single Fog enemy. There is a corpse nearby with a key that unlocks the chest atop the cart, another corpse in the area holds a note. Reading the note begins this quest. It also completes the quest instantly so I may have already completed the objectives without knowing.
Costly Mistake
This Treasure Hunt quest begins after reading a note found on a corpse on the far Western shores a short distance West of Hangman’s Alley. Kill the nearby Drowner’s and search the corpse for the note, read it to discover the treasure is nearby under a boat. Dispatch of the underwater Drowner’s with the Crossbow and use the Witcher’s Sense to discover the nearby chest.
Queen Zuleykas Treasure
This quest can be found on the far Western shores at a large pirate camp South West of Hangman’s Alley and North West of the Coast of Wrecks fast travel point. The note can be found on a sleeping bag, surrounded by approximately 12 pirate enemies. Read the note to begin the quest. Travel a distance to the North West to discover the treasure underwater in ship wreckage. There’s an island nearby with treasure also but watch out for the Nightwraith.

The Witcher 3 Wild Hunt Game Guides Collection
Posted May 19, 2015 by Captain Camper
in Game Guides, The Witcher 3: Wild Hunt Guides
The Witcher 3 Place Of Power Location Guide
This The Witcher 3 Place Of Power Location Guide lists all of the Places of Power that you can discover in the various environments throughout the game. They are typically found at points of interest

Posted May 19, 2015 by Captain Camper
in Game Guides, The Witcher 3: Wild Hunt Guides
The Witcher 3 Wild Hunt Guide: Romance, Sex & Broken Hearts Guide
This The Witcher 3 Wild Hunt Guide: Romance, Sex & Broken Hearts Guide will be your sure-fire guide to success with the all the ladies in The Witcher 3 including any quest objectives, conversational
Posted May 19, 2015 by Johnny Hurricane
in Game Guides, The Witcher 3: Wild Hunt Guides
Finding The Vivaldi Bank In The Witcher 3
The Vivaldi Bank in the Witcher 3 is where you can exchange Florens and Orens into Crowns. You can’t get there right away but when you do you can easily miss it in such a big town. This guide will
Posted May 19, 2015 by Johnny Hurricane
in Game Guides, The Witcher 3: Wild Hunt Guides
How To Fast Travel In The Witcher 3: Wild Hunt
The Witcher 3 has a huge world and getting through it can take alot of time if you don’t know how to travel properly. Getting from Point A to Point B will be a breeze once you learn how to fast

Posted October 13, 2015 by Captain Camper
in Game Guides, The Witcher 3: Wild Hunt Guides
Witcher 3 Hearts Of Stone Side Quests, Treasure Hunts & Contracts Guides
The latest DLC for The Witcher 3: Wild Hunt comes filled to the brim with exciting quests and new content. Check out our Witcher 3 Hearts Of Stone Side Quests, Treasure Hunts & Contracts Guides for


 Posted May 19, 2015 by Captain Camper
 Posted May 19, 2015 by Captain Camper
 Posted May 19, 2015 by Johnny Hurricane
 Posted May 19, 2015 by Johnny Hurricane
 Posted October 13, 2015 by Captain Camper


 Call Of Duty Modern Warfare 3 Fast Experience
 Prototype 2 Fairview Field Ops Locations
 League of Legends: How to Smart Cast Spells
 Final Fantasy 13 Lightning Returns Guide: Luxerion Side Quest Guide
 Tips on Choosing Your Club Captain in Football Manager