Dark Souls 2 DLC Strategy Guide. Tips on How to Beat Crown of the Ivory King
It's finally here: The end of Dark Souls 2. While it's been a long, wild ride, by this point, you're probably ready to close the book on FromSoftware's latest RPG—until you come crawling back for more. Crown of the Ivory King stands as one of the greatest Dark Souls challenges yet, but if you follow the helpful hints below, you should be able to make it out relatively unscathed. And be sure to check out USgamer's guides for Crown of the Sunken King and Crown of the Old Iron King as well!
Basic Strategies for Crown of the Ivory King
If you're looking for how to access this content, it can be found just beyond the Ruined Fork Road in the Shaded Woods, in the Shrine of Winter. Just examine the statue within to warp to Frozen Eleum Loyce (after finding all of the Primal Bonfires). You won't be able to access the castle interior without purchasing the DLC, but, as with the last two installments, you can place your summon sign down within the circle of statues (which you should see immediately) to try out the special ultra-hard co-op area. But Crown of the Ivory King comes highly recommended.
Just as with Crown of the Sunken King and Crown of the Old Iron King, you can access this content much earlier than you actually should. In fact, you might want to save it for last. My character was between level 135-140, and I still found it pretty challenging. Your milage may vary, of course.
Thankfully, you won't have to worry about any status effects in Eleum Loyce—Dark Souls 2 isn't evil enough to add a new, ice-based elemental effect for the sake of one DLC. You'll be running up against lots of enemies between bonfires, though, so be sure to carry a backup weapon, or some Repair Powder. And a bow or some kind of ranged attack will work wonders for drawing powerful enemies out, one at a time. The foes in Ivory King hit hard and take a lot of damage, so you'll want to avoid fighting them in groups if you can help it.
At first, you may be frustrated by all of the doors, passageways, and treasure chests covered by impassible ice and snow, but don't worry: Once you defeat Aava, The King's Pet, the snowstorm will cease, and you'll find these inaccessible areas and items now freed from their icy prisons. While you can fight Aava almost immediately after accessing the DLC, this boss (and a handful of enemies within Eleum Loyce) will be invisible (and therefore impossible to beat) until you find the Eye of the Priestess—so be sure to take the rightmost route when entering the castle walls.
When the snowstorm stops, you'll see some new behavior from old enemies. The cloaked retainers, who previously wouldn't even acknowledge your presence, now spring to life when you pass them by. And those frozen golems—similar to the "switches" in Drangleic castle—work just as they once did, except they turn into incredibly powerful enemies instead of helpful door-openers if you kill an enemy near them.
While their assistance isn't 100% necessary, throughout Crown of the Ivory king, you'll find four Loyce Knights, clad in white armor, and sitting alone. They may look dangerous, but these guys serve an incredibly useful purpose during Crown of the Ivory King's final boss fight: They'll help you fight the horde of foes prior to the big boss, and seal off enemy-spawning portals that can make this final fight an incredible pain. If you're having trouble finishing Crown of the Ivory King, be sure to seek out the help of this benevolent foursome.
While the content is entirely optional, being summoned into the Frigid Outskirts can yield plenty of souls. The area offers a constant supply of enemies, each worth a few thousands souls each, which can easily yield you tens of thousands of Dark Souls funbucks per session. If you need to boost stats, upgrade equipment, or stock up on items, this area provides the perfect opportunity.
Enemy Guide for Crown of the Ivory king
Rampart Dog: These dogs are similar to ones you've seen earlier in the game, and while they don't hit very hard, they have a tendency to swarm and annoy, giving more powerful enemies an opening. Try to lure them out and attack them first if you see them—typically, they'll only take a few swipes before falling over.
Rampart Soldiers (Various): You'll want to tackle these guys as you would any humanoid enemy from the last two DLC installments: take them on one at a time, if possible, then keep in mind they have a lot of stamina to burn through. With a hefty strength build character, you may be able to stagger them with three regular attacks, but it's entirely possible for them to sneak in a hit during your combo. As always, don't get greedy!
Rampart Golems (Various): These foes come with a crystal-covered torso that makes them extremely resistant to being staggered, plus they can fire icicles at you from afar. They're less likely to chase after you then the soldiers, so you may want to save them for last. You'll also stumble into a variant of this enemy with the power to summon a massive club out of the air—and when it hits, it hits hard. Luckily, the sheer force of this move leaves them open to backstabs, so roll out of the way and sneak around behind them to eliminate these enemies effectively.
Rampart Knights (Various): These enemies might resemble the soldiers, but they're huge, and immensely powerful, so you'll want to make sure no other opponent is interfering with your fight. Their lance attack can impale you if you're not careful, though if they charge and you dodge out of the way, you're given plenty of time to pull off some powerful attacks on their unguarded backs.
Rampart Hedgehog: These demonic tributes to Sonic might not look intimidating, but they can easily shred through your HP with their spin dash if you're not careful. Don't take on more than one of them at a time, and be sure you're swinging low enough to him them—missing them could leave you open for a devastating attack. Seriously, these guys might be one of the trickiest normal enemies in Dark Souls 2!
Witchtree: These magic-casting enemies aren't incredibly powerful, but usually work from afar to annoy you. Try to eliminate them first before taking on other enemies in the area, since their ice spells can track you and hit you right in the back—which can make you defenseless against other enemies. Once you get up close and personal, though, they only take a few hits before going down for good.
Charred Loyce Knight: You won't be fighting this enemy until just before the final boss, and then you'll be fighting a lot of them. This battle isn't so bad with four White Loyce Knights and two co-op partners by your side, but keep in mind these enemies can use powerful fire magic, and attack fast and hard, so you'll want to give yourself plenty of room, then back far enough away if you need to heal. The good news is that these enemies tend to cluster together, so if you have a weapon with a wide swing, it's easy to attack many at once. Just figure out when it's best to make a tactical retreat.
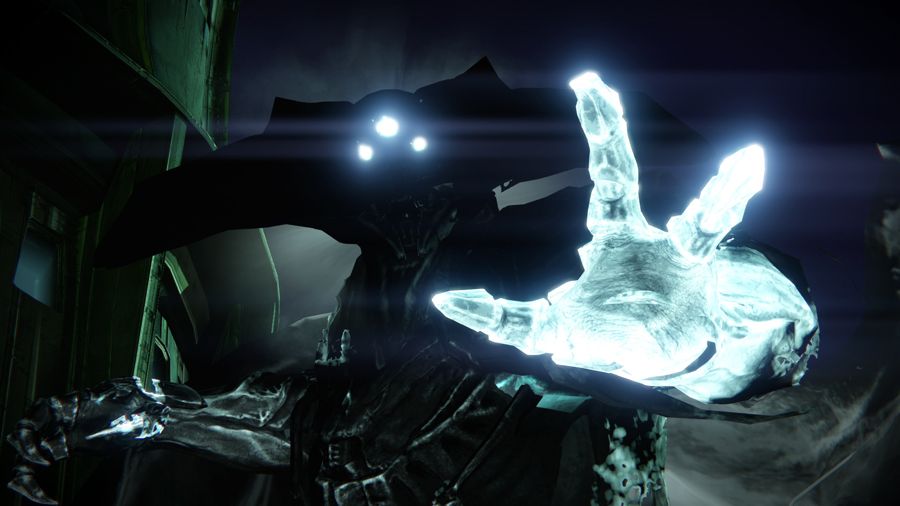
How to Beat Aava, The King's Pet
First off, you'll want to make sure this giant tiger is visible, so be sure to pick up The Eye of the Priestess (found on a skeleton inside of a fiery shrine) before you take it on. Unless you're some sort of Dark Souls psychic, there's no way you're going to beat this boss unless you can actually see it.
While those rows of columns may look like a good place to hide or shield yourself from attacks, they typically go down in one hit from Aava's melee attacks or projectiles, so don't rely on them for safety.
Aava is slow, but its attacks hit incredibly hard. If you're planning on using melee attacks, you'll want a shield with good damage resistance, preferably upgraded to the max (you'll probably have enough resources for it at this point). If you're not as dependent on shields, rolling is also effective, though you'll have to be incredibly quick.
Aava fires a series of Soul Spears, which have limited homing capabilities, but will kill you if more than a few hit successfully. They're somewhat slow, so it's possible to roll multiple times to evade them, but if you're fast, there's a different strategy: As soon as Aava lets you know it's about to do a projectile attack (by leaping away and roaring), run as fast as you can behind this boss—the projectiles will fire off harmlessly if you time it right.
How to Beat the Burnt Ivory King
The pre-boss fight area will send you into an arena battle against various Charred Loyce Knights, so you may want to use disposable healing items until the Burnt Ivory King reveals himself. Those Estus Flask swigs are best saved for the final battle.
As detailed above, the fight with the Burnt Ivory King can be extra difficult unless you come to it after finding all four Loyce Knights—if you don't, portals will spawn Charred Loyce Knights for you to fight alongside the Burnt Ivory King, which can be incredibly irritating.
As with your typical "duel" bosses in Dark Souls, success against the Burnt Ivory King comes down to reading his animations. You aren't given many windows to attack, but when you do, be sure to only slash away a few times, because you'll want to have enough stamina to block or roll away once the King is ready to attack again. If you fought the Fume Knight in the last DLC, you should be prepared for what the Burnt Ivory King has in store for you. After a few rounds with him, you should be able to read his animations enough to know when to attack—but keep in mind he likes to mix things up.
When he makes his sword glow, this weapon can now cause damage to your character, even with a shield raised high. Be extra careful you have enough HP to withstand these kind of attacks, even when guarding.
How to Beat Lud and Zallen, the King's Pets
Crown of the Ivory King's optional bosses come in the form of Aava clones, so you can use the same tactics above to fight them here. You're given a bit of time before Zallen appears, so try to cause as much damage to Lud before this happens—while you want to attack either boss when there's an opening, it's preferable to take out one at a time, so there's less to worry about. Since the area you'll find them in focuses on co-op, this fight goes much easier with two partners at your side.