

Use the flare, and then start wandering around as Emily. Consider exploring to your right, as we ended up dropping down to the left and couldn’t get back up. We can’t tell you if there was anything of interest, or even if you would survive a right turn. If you just want to get Emily through this alive, go left and drop down. A short way through the tunnel and on the right will be a Fortune Totem. Study it, as it shows Mike opting to not use a gun. This will be important later on in this chapter.
The path is fairly linear, and eventually you’ll have to squeeze into a crack in the wall. This will kick off a fairly lengthy and intense chase scene, and as you might expect it’s full of quick time events (QTEs) and important decisions. We aren’t going to promise that ours are the only way for Emily to live, but we do know that if you follow our lead she will indeed survive.
Nail all the QTE stuff along the bridge, and then when the option presents itself choose Go Right rather than Go Left. You’ll end up going left anyway, and when you get to the elevator you’ll have to hold your controller perfect still. Keep in mind that if the vibration is throwing you off, you can disable it in the settings of your PlayStation 4.
The elevator ride will soon be over, and then it’s back to the quick time events that we all love so much. This will lead you to a conveyor belt, and we went with Stay On rather than Leap Off. Just make sure to nail the QTE at the end of the ride or you might not make it. You’ll get a very brief break in the action, but there will be more quick time events before you finally make it to safety.
This will transition you to a scene back at the lodge, and before any action picks up there will be some conversation choices to make. We decided to go with Confused instead of Concerned. In fact, we liked that option so much that we chose it twice in a row. This led us to answer the door, and when given the choice between Demand and Suggest, we went with the latter.
Until Dawn Walkthrough and Guide
Until Dawn Prologue: The Twins
Until Dawn Chapter 1: 10 Hours
Until Dawn Chapter 2: 9 Hours
Until Dawn Chapter 3: 8 Hours
Until Dawn Chapter 4: 7 Hours
Until Dawn Chapter 5: 6 Hours
Until Dawn Chapter 6: 5 Hours
Until Dawn Chapter 7: 4 Hours
Until Dawn Chapter 9: 2 Hours
Until Dawn Chapter 10: 1 Hour
The next bit of game play is where you can either lose or save Chris (at least it’s one of the places). We won’t lie, we lost him, but we’re blaming that on the lack of an inverted pitch rather than making the wrong decision. He’s actually the second character we’ve lost for this reason, so hopefully you aren’t having the same problem.
Follow the stranger and pay very close attention to what he says about the Wendigo. First of all, you can’t kill them with a shotgun, but you can slow them down. You can kill them with fire if you have to, but if you can avoid killing them that’s the best bet. You also learn that they only hunt at night, and they can’t see you unless you are moving.
Follow the stranger to the shed and then back out. He is going to tell you not to move, and again you have to hold your controller perfectly still. It’s not easy with the vibration, and we actually messed this up. It may or may not have gotten the stranger killed (he died, we’re just not sure if it was our fault), and when it’s time to move again you’ll have to respond to several QTEs if Josh is going to live.
Each time you have a Wendigo attacking you, aim your gun at it and pull the trigger. It won’t kill the beast, but it will stop it from getting to you. We actually messed up the very last one, and that’s how Chris died. If you are quicker (and used to non-inverted pitch) than us, he should make it. We also have it on good authority that if you “shot” Ashley during the scene where you are both tied to the table, she will not open the door for Chris and he will die either way. That basically means that the only way to get out of this alive is to have hit all the QTEs and to have done everything in your power to save Ashely throughout the entire game.
The rest of the chapter should play out in the basement, starting with Mike having to decide whether he wants to shoot Emily or not. This should be an easy call if you want to save all your characters, and if you recall the Totem from earlier, it showed Mike lowering the gun. Don’t bother shooting Emily, as we can confirm there is no reason to, something that you will find out shortly.
Note: As our very own Mike Williams noted in his review of Until Dawn, Emily kind of sucks, and many gamers might want her to perish. If that’s the case, shoot her, but we can’t say how this will change the story moving forward.
You’ll soon take control of Ashley and automatically get the Journal: Cannibalism clue. Read through it to learn as much as you can about the Wendigo, and also that Emily is not in danger of turning into one of them just because she was bitten. When given the option we decided to Reassure rather than Conceal, and since all of our characters (besides Chris) made it out of this chapter alive, we think it was the right call.
The chapter will conclude soon after, but first there is a session with Dr. Hill. We opted to go with I’m So Sorry over It was Just a Game, and that was it before we moved on to Chapter 9.
Continue with Until Dawn: Chapter 9.


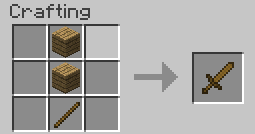 How to make a sword in Minecraft
 Torchlight 2: Tank Support Outlander Build Guide
 Kingdoms of Amalur: Reckoning Guide - Cheats, Exploits, Tips, and Tricks
 Crysis 3 Nanosuit Upgrade Modules and Packages Guide
 . Plays, 24th October, 2015