

1 - Covenant Data Pad: The first piece of Intel you can find is near the very beginning of Mission 1: Osiris. From the start of the mission, walk forward a few steps and turn right. Look for a dead Grunt near a weapon rack, and you’ll find the Data Pad under the Grunt’s hand.
2 - Covenant Data Pad: Continue through the mission until you reach the ice cave. You will be prompted to Spartan Charge through the ice cave wall. Upon exiting the ice cave, walk forward and to the left to find Jul ‘Mdama’s Log near the edge of the cliff.
3 - Covenant Data Pad: Near the entrance of the Forerunner Security Station, there are several rocky ledges to the right of the doorway. Climb up from a lower ledge to reach the highest platform, where you will find the Covenant Combat Orders Data Pad sitting at the top.
4 - Covenant Data Pad: As you move along the icy path, you will reach a cave section where you spot the Kraken for the first time. Look for a small opening to the right of the path that overlooks the area, and you’ll find the first piece of Halsey’s Research Notes in the form of a Data Pad on a small ledge.
5 - UNSC Data Pad: Near the end of the mission, you will reach the Forerunner building where Dr. Halsey is located. As you approach the entrance to this building, move to the right and climb up the ledge next to the doorway. The Data Pad is found near the edge of the cliff, embedded in some Forerunner structure material.
6 - UNSC Data Pad: Enter the Forerunner building where Dr. Halsey is located. Continue straight down the hallway until you reach a door that automatically opens. As you enter this door, look on the floor to the right to find the Data Pad near the window.
7 - UNSC Data Pad: As you approach the final doorway leading to Dr. Halsey, move to the right and climb up on the ledge on the right side of the room. In the upper corner, you’ll find a Data Pad containing the last of Halsey’s Research Notes.
1 - Argent Moon Computer: The first piece of Intel for Mission 2 is a Station Warning found at a computer terminal. As you begin the mission, look for a computer terminal along the right wall that allows you to review the station log. This will be before your first encounter with the Grunts in this area.
2 - Argent Moon Computer: Continue through the mission until you encounter several Jackals and Elites along one of the corridors. Walk straight to the back wall of the corridor, just past where the hallway turns left. To the right of the weapon rack, you’ll find a large computer terminal along the back wall where you can collect the next piece of Intel.
3 - UNSC Data Pad: Further into the mission, you will reach an assembly bay where you encounter quite a few enemies. Near the end of this room, just before the walkway labeled ‘Central Control’, walk back and to the right to climb up several metal platforms. On the top platform, you’ll see a lonely Data Pad glowing near the right corner.
4 - UNSC Data Pad: You will eventually reach some dark corridors that must be lit by flashlight. Once you defeat the Energy Sword Zealot, move to the left side of the room to find several boxes and containers blocking the way of a crawlspace. Crouch and enter the crawlspace to find the Data Pad in the corner.
5 - Argent Moon Computer: Continue through the mission until you reach a long corridor lined with windows looking out into space. As you enter the doorway at the end of the corridor, you will see a computer terminal right in front of the door. Access the terminal to snag the next piece of Intel.
6 - UNSC Data Pad: You will eventually reach a lab where you must face a pair of Hunters. Defeat the enemies, then search the ground near the center of the room to find a Data Pad near a dead body.
7 - Argent Moon Computer: Near the entrance to the room with the Reactor Core, look in the left corner of the room to find a computer terminal with a dead body sitting in the corner nearby. This is the next station log Intel.
8 - Argent Moon Computer: Enter the narrow corridor leading to the Hangar Bay, just after destroying the vents. Follow the path of the corridor as it leads to the left. Pass through a pair of doorways, and straight ahead you will see a computer terminal with the last piece of Intel for this mission.
1 - UNSC Data Pad: Once you descend on the Space Elevator, you will arrive in the elevator lobby. Before entering the large door, go over to the far right side of the room. The Data Pad is sitting on top of a yellow crate near the far wall.
2 - Radio: Now go through the large, newly-opened doorway into the outpost area. Look for a long staircase on the far left. To the left of the staircase, there are several crates covered with a tarp. On the backside of these crates, you’ll find a Radio lodged in a rock sitting on top of a box. Access the Ratio to gather the Intel.
3 - UNSC Data Pad: In the same outpost area as the previous Intel, move to the right side and locate an office just below the Security office on the top floor. You may need to climb up some boxes to reach this area. The Data Pad will be resting on the arm of the chair near the computer terminal.
4 - Radio: Further in the mission, you will follow down a dirt road leading to the bridge. On the right, there is a crashed Pelican near some red containers. Behind the containers you will find a small Radio wedged in a rock.
5 - UNSC Data Pad: There is a work area to the left of the bridge that overlooks the expanse. Along the left wall, there is a Data Pad sitting on a desk near some blueprints.
6 - UNSC Data Pad: In the garage area on the way to the Station gate, locate a garage with a Scorpion parked inside. The last Data Pad for this mission is found in the back corner of the garage behind the Scorpion, on top some crates.
1 - UNSC Data Pad: The Intel in this mission happens to be pretty close together, so these should be easy to find. The first Data Pad is found to the far right side of the interior station gate, on top of a yellow cylindrical container.
2 - UNSC Data Pad: On the higher platform to the left of the interior station gate, there is a small black covered box along the edge. The Data Pad is on top this black box.
3 - UNSC Data Pad: There is a building just behind the center podium that has a vending machine on the bottom floor. Climb onto the box beside the vending machine to get onto the rooftop. The Data Pad is on a crate near the edge of the roof.
4 - UNSC Data Pad: From the rooftop where you found the previous Intel, hop down and find the Deglass Team Personnel Log sitting on top of a bin just outside of the Food Station.
5 - UNSC Data Pad: Walk across to the building on the right and climb up to the rooftop. There is a Data Pad on a crate near a large tarp.
6 - UNSC Data Pad: On the very far right corner of the area, locate a set of containers just before the fence perimeter. Several Meridian inhabitants should be standing nearby. The Data Pad will be sitting on the front crate.
7 - UNSC Data Pad: On the building just behind the main podium, climb up to the highest point. There is an antenna near a stack of containers, and the Data Pad will be on the top.
8 - UNSC Data Pad: On the far left side of the area, there is a vending machine near the fence gate. The last Data Pad will be on a blue trash bin to the right.
1 - Radio: Once you hop of the Pelican at the start of the mission, go to the far left room and look for a pile of rocks in the corner. The Radio Intel will be embedded within one of the rocks.
2 - UNSC Data Pad: Continue up the stairs into the main building, and keep to the right. On an upper level on the far right side, there’s a series of chairs near a ‘follow standards’ sign. The Data Pad is found on one of these chairs.
3 - UNSC Data Pad: Move past the area where the first conflict occurs, and enter the doorway ahead just up the ramp. Inside the doorway to the right there is a walkway. Jump to climb up to the walkway, and look for a single chair off to the side with the Data Pad on top.
4 - UNSC Data Pad: Continue until you reach the open outdoor area where the Prowler is parked. Go up the side walkway and jump onto the top of the Prowler. Search near the tail end of the Prowler to discover the Drill Operator’s Log.
5 - UNSC Data Pad: Once you reach the quarry, look for a two story building with a metal shuttered door that can be smashed with a Spartan Charge. The doorway will be labeled with ‘ventilation duct’ above it. Smash through to find the Data Pad just beside the fan.
6 - Radio: Enter the tunnel leading to the mine. Follow along the large thick pipes on the right side of the room. Jump up on the yellow platform and look in the left corner to find a piece of Radio Intel wedged in a rock atop a tarp.
7 - UNSC Data Pad: Continue past the lava flow in the mine towards the large pit that leads to the Forerunner facility. Don’t drop down yet. Instead, go up the long walkway on the left. Continue to the end of the walkway where several crates are stacked, and you’ll find the last Data Pad for this mission sitting atop the front crate.
1 - UNSC Data Pad: As you approach the bridge, look for a staircase to the right. Go up the staircase to the second level scaffolding, and you will see the first Data Pad on the floor about halfway down.
2 - Radio: As you head back through the large door to the Space Elevator lobby, head to the right towards Lift B. Go up the staircase and jump to the higher platform. Hop over to a small bit of scaffolding on the side wall and locate the Radio within the debris on the platform.
3 - Radio: Now go to the left side of the lobby towards Lift A. Activate Lift A and ride the lift to the second level. While facing the lift controls, walk forward onto the platform and look for the Radio tucked in a pile of rubble on the left.
4 - UNSC Data Pad: Once you are on the main Space Elevator platform, locate a passenger car along the outer edge that has a vented metal door. Smash through the shuttered door with your Spartan Charge, and locate the Data Pad to the left on a passenger chair.
5 - UNSC Data Pad: After the Space Elevator jams, go through a doorway labeled as the emergency exit. Pass through the short hallway and make a sharp left around the corner towards some scaffolding. Continue along the scaffolding walkway until it curves to the right up a pair of stairs. Hop over the railing near the second staircase to find a Data Pad along a metal beam.
6 - UNSC Data Pad: While following along the broken scaffolding walkways, look over the edge of one of the taller staircases towards a pair of thick metal beams. One of these beams has the last Data Pad sitting on top of a case next to a construction helmet.
1 - Covenant Data Pad: Continue along the riverbed leading towards the Gateway. Turn left and head through a narrow tunnel. Follow the tunnel as it curves around to a cliff overlooking the area. On the left is a dead Grunt, as well as a Data Pad on the ground nearby.
2 - Covenant Data Pad: Curve around a narrow path leading to a ledge that overlooks the first battle area. At the end of the path you’ll find a Data Pad lying on the large flat rock just before the edge. This is also about halfway down from where the Grunt Party Skull is located.
3 - UNSC Data Pad: In the canyon where the first battle takes place, move to the right and climb up a series of rock outcroppings. Look for an entrance to a cave high up on the right, and jump up to reach the cave. A few steps ahead you’ll find a UNSC Marine Status Update as well as a few weapons.
4 - Forerunner Console: Continue until you reach the entrance of the Forerunner structure. Look in the small alcove just beneath the turrets to locate and access the Forerunner Console for a new piece of Intel.
5 - Forerunner Console: When you reach the underground passages leading to the Prometheans, keep to the left and locate a circular brown surface on the wall that you can smash. Spartan Charge through this wall, and enter a passage leading to a waterfall. Drop down to a ledge in the center of the waterfall and access the Forerunner Console found here.
6 - Forerunner Console: Further into the underground canyon, there is a pathway that drops off into a pit with a small waterfall. Look for a Forerunner Console on the left just before the pit.
7 - Forerunner Console: Walk across the light bridge where the Warden was defending the Forerunner structure. The last Forerunner Console in this mission is hidden behind a white panel just after the light bridge. Cross the bridge, walk towards the structure, then turn around to find the Console.
1 - Ancient Sangheili Sword: At the start of the mission, move to the far right and search the ground around some nearby ruins. There is an ancient artifact to scan for your first piece of Intel.
2 - Covenant Data Pad: As you proceed forward toward the first battle, search near another set of ruins off to the left. Behind the foot of one of the statues, you’ll find a Data Pad tucked beneath some grass.
3 - Covenant Data Pad: Continue on towards the first enemy encounter. Walk up a short path to the right of the Shade Turret to discover a Data Pad.
4 - Ancient Sangheili Sword: In the same area of the first enemy encounter, look behind the waterfall to find the ancient artifact hidden in an alcove.
5 - Covenant Data Pad: Continue past the initial battle area until you reach the burial ground in the small pool of water. Climb up several rock ledges ahead to find a Data Pad next to an impaled Elite.
6 - Ancient Sangheili Sword: When you reach the sinkhole area, look for a tall rock pillar near the center. Climb up the fallen stone blocks nearby to reach the top of the pillar, where you will find the ancient artifact sword.
7 - Covenant Data Pad: From the tall rock pillar formation where you found the previous sword artifact, climb down one level lower, and look across the chasm to the left of the sinkhole. There is a Data Pad on a ledge across from the rock pillar. Jump across the gap from the pillar to reach the Intel.
8 - Covenant Data Pad: Continue beyond the sinkhole and pass through the large set of ruins. After going up the staircase leading outside, go towards some rock formations on the left to find a Data Pad near a fallen Elite.
9 - Covenant Data Pad: From the same staircase outside of the ruins, move to the right and look for a breakable surface on the ground. Use your Ground Pound to smash through the stone, which drops you down into a hidden passage under the bridge. Here you’ll find the Data Pad near the cliffside, as well as several weapons.
10 - Covenant Data Pad: Continue toward the area where you can obtain a Mantis. Look up towards the Elite statues and climb up the nearby rocks to reach the ledge that the statues are on. Search near the foot of the left statue to find another Data Pad.
11 - Covenant Data Pad: Defeat the Wraiths and Hunters you encounter on the way to the Elder Council Chamber. As you approach the elaborate doorway, go to the left to ascend the broken staircase. Climb the ledge and continue through a short passageway. There is a Data Pad resting at the base of a statue in the far room above the Chamber.
12 - Covenant Data Pad: As you approach the main doorway to the Elder Council Chamber, head up the stairs on the right and locate a Data Pad near a pool of water in front of the waterfall.
1 - Covenant Data Pad: From the starting point, turn around and go straight back towards the shrine on the far wall. You’ll find the Data Pad on the ground.
2 - Covenant Data Pad: Locate the medical tent in the main area. There is a Sangheili Medic’s Personal Log in the form of a Data Pad on the short stone pillar.
3 - Covenant Data Pad: There is a large Sangheili pillar that overlooks the main meeting area. Locate a narrow path leading toward this pillar, and you’ll stumble upon a Data Pad on the ground along this path.
4 - Covenant Data Pad: From the narrow path where you found the previous Intel, curve around toward a Grunt sitting on a ledge, and jump onto the Sangheili pillar. The Data Pad is found on the protruding stone piece of the pillar.
5 - Covenant Data Pad: Near Dr. Halsey’s location, look inside a small alcove nearby to find a Data Pad on top one of the bronze containers.
6 - Covenant Data Pad: Climb up some broad stone steps near the Pelican to reach the top of a nearby pillar. The Data Pad is found beside some boxes at the top of the pillar.
7 - Covenant Data Pad: On the cliffside above the Pelican, look for a pair of Elites standing close to the cliffside. There is a Data Pad on the ground beside them to their right.
8 - UNSC Data Pad: Locate Palmer standing in front of the Pelican. A Data Pad is sitting on some stone steps to the left, beside several boxes.
1 - Ancient Sangheili Sword: From the starting point of the mission, jump into the river in the canyon before entering the ruins. Go to the end of the river, and scan the ancient artifact you find on the shallow rocks.
2 - Covenant Data Pad: Now, hop across the river and enter the ruins. Search the area on the left to find another piece of Intel on the ground.
3 - Covenant Data Pad: As you exit the ruins, look up and to the left to find the Data Pad on a nearby ledge.
4 - Covenant Data Pad: After your first enemy encounter, search a nearby chamber beside several statues to find a Data Pad on the ground near an entryway.
5 - Covenant Data Pad: In the small chamber where several Ghosts are parked, head left and enter a short tunnel. The piece of Intel is on the ground beside several boxes.
6 - Covenant Data Pad: From the area where you found the Ghosts, proceed forward until you reach the elaborate doorway. Turn away from the doorway and jump onto a nearby rock formation to find the Data Pad.
7 - Covenant Data Pad: When you reach the area in front of the temple grounds, head to the right. Walk along the cliffside and locate the Data Pad on top of a stone step overlooking a small cave.
8 - Covenant Data Pad: Pass through the area in front of the temple grounds where you encounter various enemies. Look for a secret passage beneath the bridge that leads to the temple. Spartan Charge through the rocks and enter the passage, where you’ll find the next piece of Intel on the left.
9 - Covenant Data Pad: In the center of the open area in front of the temple grounds, carefully move along some broken stone pieces leading to the right. Jump to the far ledge along the rock wall to reach the Data Pad.
10 - Forerunner Console: Continue through the mission until you reach the large chasm where the Kraken is located. Fly a Phaeton to a Forerunner platform on the far right. Hop off the Phaeton and access the Forerunner Console found on this platform to gather the last piece of Intel.
1 - Covenant Data Pad: From the starting point of the mission, turn around and walk toward several boxes stacked near the cliff. The Data Pad is behind these boxes.
2 - Covenant Data Pad: Go forward from the starting point, and climb up several rock ledges slightly to the left. Jump to the stone pillar on the right to find the Data Pad just beyond the crevice.
3 - Covenant Data Pad: From the location of the Arbiter, move towards one of the umbrella-like tents back and to the left. There is a Data Pad sitting on top of the container under this tent.
4 - UNSC Data Pad: Walk past the Arbiter and follow a narrow path into the canyon. Turn right up some rock steps and curve around towards the cliffside. You will find a Data Pad near the edge of the cliff that overlooks the area.
5 - Covenant Data Pad: From the cliff where you found the previous piece of Intel, jump on top of the medical tents below. From one of the higher umbrellas, jump to a nearby platform protruding from the cliffside, and walk to the edge to find the last bit of Intel for this mission.
1 - Covenant Data Pad: This first Data Pad is found on top of a tall lamp behind the starting point. To get there, jump up onto the ledge on the left, then walk behind the starting point. Jump from the ledge to the lamp to claim the Intel.
2 - Control Console: Continue down the street until you pass the second defense turret. Enter a room on the left to find a glowing blue diamond shaped console, where you can access the next piece of Intel.
3 - Covenant Data Pad: Continue forward through the undercity. When you find a metal shuttered door to one of the buildings, move around to the right of the door and jump on the nearby platforms. The Data Pad is found along the outer ledge of the building.
4 - Covenant Data Pad: In the undercity, locate a building on one of the platforms near the end of the bridge where Covenant troops are deployed. Jump up to the outer ledge of the building to find the Data Pad on a small outer platform on the building’s surface.
5 - Covenant Data Pad: Continue through the undercity until you reach the area where you fight a pair of Hunters, before moving on to the Elevator Control. On a platform to the right of where you fought the Hunters, search the backside of the ornate pillar to find the next Data Pad.
6 - Ancient Sangheili Sword: Upon returning to the surface, look near a pair of dead bodies to find an ancient artifact Sword on the ground nearby.
7 - Covenant Data Pad: After the Guardian appears, you will enter a damaged building. Move along the left side of the upper walkway to find a Data Pad near a structure on the left.
8 - Ancient Sangheili Sword: As you move up a pile of debris leading to the Arbiter, you’ll reach a short hallway. Just before you reach the Arbiter, turn right down this hallway to find an ancient Sangheili Sword near the rubble on the right. Scan the artifact to collect the last Intel for this mission.
1 - Covenant Data Pad: Once you reach the Forerunner facility where you receive the Scorpion tank, walk forward along the path ahead of the tank. Look along the left side to find a Data Pad behind a pair of Ghosts.
2 - Covenant Data Pad: Continue until you reach the first major battle area. Search the cliffside off to the left to find a Data Pad near the edge of the cliff.
3 - Broken Constructor: In the same major battle area, climb the rocky outcroppings along the cliffside that overlooks the Fuel Rod Cannons. Scan the broken constructor at the edge of the cliff to gather the Intel.
4 - UNSC Data Pad: Locate the wreckage of a crashed Pelican outside of the Forerunner security gate. There is a Data Pad on the cliffside near the top of the Pelican.
5 - Forerunner Console: Once you exit the tunnel after the Forerunner security gate, search a Forerunner platform on the left to gain access to the Forerunner Console Intel.
6 - Broken Constructor: Continue toward the area where the second large battle takes place. Locate a tall rock structure next to the bridge overpass, and climb to the top of the structure to find the downed constructor.
7 - UNSC Data Pad: Just before the light bridge, climb up the rocky cliffside to the left to reach a Data Pad sitting along the top rock ledge.
8 - Covenant Data Pad: After the bridge, near the area where the Warden first appears, climb up the rocks on the left if you’re facing the Guardian. When you spot the corpse of an Elite, hop up the ledge above the body to find a Data Pad near the edge.
9 - UNSC Data Pad: From the area of the first Warden fight, take the path on the right that curves up the hillside. Keep to the right to discover a Forerunner platform where the next piece of Intel is located.
10 - Forerunner Console: As you approach the Forerunner Gateway, head to the left and ascend a slope leading up to a second level on the Forerunner structure. There is a Forerunner Console ahead in the corner that can be accessed for the last piece of Intel.
1, 2 - Forerunner Consoles: From the starting position, turn around to face the back of the room. Access the first Forerunner Console in the left corner, and then proceed to do the same for the Console in the right corner.
3 - Forerunner Console: In the first chamber where the Knights are encountered, look for a Forerunner Console near the center of the room on the lower level.
4 - Forerunner Console: At the platform where the Warden temporarily appears, enter the alcove beneath the platform to access the Forerunner Console Intel.
5 - Forerunner Console: In the chamber where the second Knight encounter takes place, drop down to the lower level near the center of the room to find and access the Forerunner Console.
1 - Forerunner Console: From the starting point, move forward and to the right of the main doorway to find the Console near the end of the exhibits.
2 - Forerunner Console: This Console is found on the opposite side of the previous Console, to the left of the main doorway.
3 - Covenant Data Pad: In the first battle area, walk along the paths to the side platforms to reach the central platform up high. You will find the Data Pad on this central platform.
4 - Covenant Data Pad: To the left side of Alpha Core, look along the base of some flaming debris to find this piece of Intel.
5 - UNSC Data Pad: Continue towards the outer area where the cores are located. Head to the right and locate a tunnel that leads toward Gamma Core. Climb up on the ledge to the left of the tunnel to find the Data Pad.
6 - Covenant Data Pad: Move along the ledge on the far right that leads to the wreckage of a downed Pelican, just above Gamma Core. There is a Data Pad on the ledge to the right of the Pelican.
7 - Covenant Data Pad: Head to Delta Core and enter the tunnel on the left. The Data Pad is on the ground behind the Ghost.
8 - Broken Constructor: In between Delta and Epsilon cores, locate a higher ledge in the rocks nearby. Climb the rocks to reach the high ledge and scan the downed constructor.
9 - UNSC Data Pad: On the way to Epsilon Core, head through the icy tunnel on the right where a Mantis is located. On the ground behind the Mantis, you’ll find a UNSC Data Pad.
10 - Broken Constructor: In the tunnel that leads underground to Delta Core where you found Data Pad 7, climb up the pair of rocky outcroppings next to the tunnel entrance. The Broken Constructor is found on the higher ledge.



 Watch Dogs: Brandon Docks ctOS Control Center – sniper rifle, hack server
 GamesCom 2013: Did Microsoft Win The Conference Showdown?
 How To Unlock Call Of Duty Black Ops 3 Zombie Campaign Nightmares
 Destiny guide: Mars Meridian Bay story mission walkthrough and guide
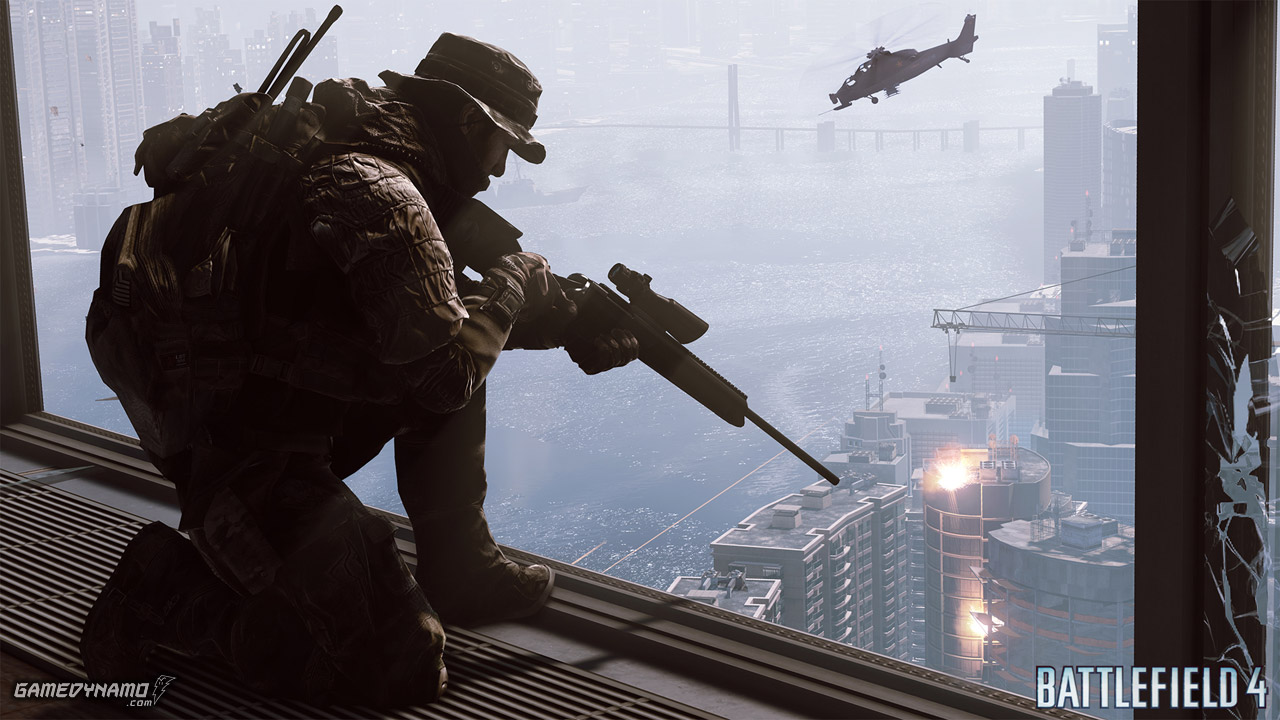 Battlefield 4 – Tips & Tricks