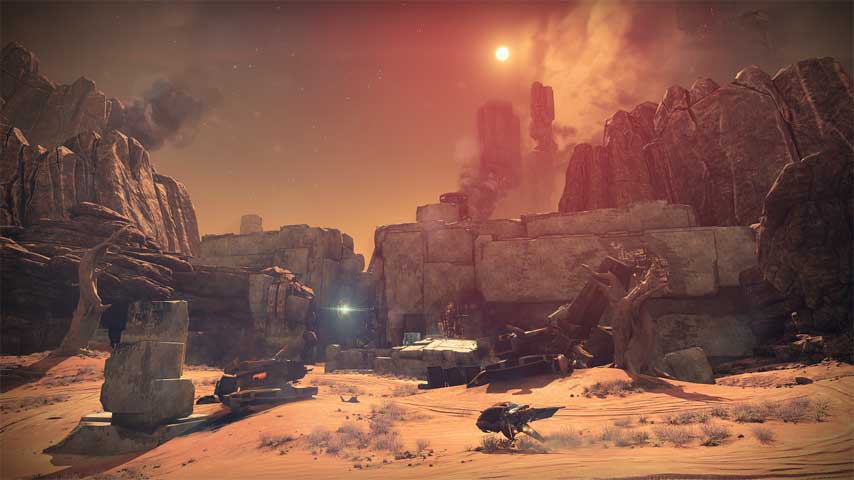
Welcome to Mars! It’s an inetresting place. Look for relic shards in order to harvest Relic Iron, a valuable crafting resource. The landscape here is far emptier than you’re used to, and as such, you’ll have to get used to travelling further – and faster – to find cover in firefights.
Upon arrival, follow your radar but don’t enter the tunnel when prompted to deploy you Ghost; instead, go on a little further to the round building nearby. There’s a Gold Chest here, sitting on some crates.
Whoever “hid” this must have expected you all to stay on the objective path at all times, as it’s easy to find just scanning the room at head height.
Pass through the bunker door by deploying your Ghost, and then whip it out again to access the orbital link – well, to trigger your first combat with the Cabal.
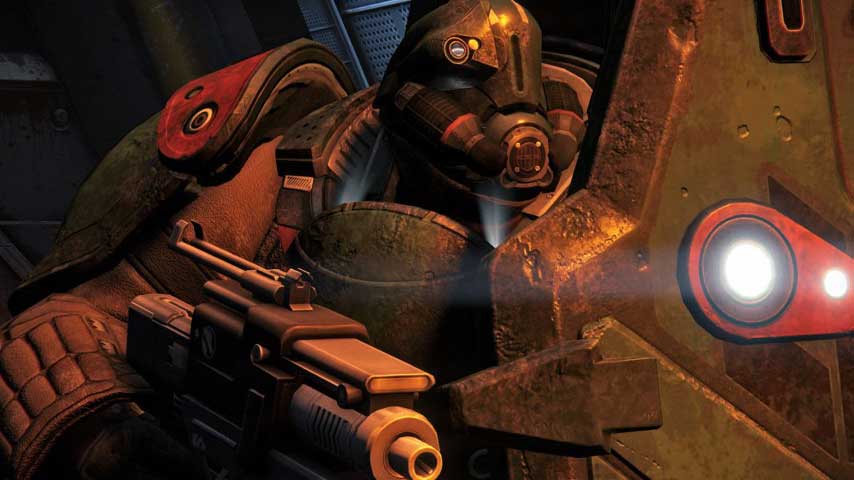
The Cabal are tough; their armour is top notch, and they hit hard. Headshots work, but are tricky thanks to their comparatively tiny faces and sudden movements. Although the Cabal move slowly, they’re not stupid; they’ll dodge sideways, and even use a jetpack, to evade fire. When threatened, they retreat to cover. They’ll always attack in groups, take the high ground, and attempt both to flank you and funnel you into their crossfire zones. In short: trouble.
Legionaries are your basic grunts. Phalanx are slightly tougher, because their shields protect them against all damage. Pop them one in the leg or arm and they’ll stumble, dropping the shield, and you can pepper them with bullets. Don’t wait, though; if you let them recover they’ll set in place and fire blindly over their shield, pinning you down for precious seconds. They’ll also leap to melee you if you get within range.
Centurions are equipped with missile launchers and shields, and are very quick to hide and recharge them, making them a pain. They’re the toughest unit you’ll face regularly for quite some time.
Fight your way through the Cabal carefully; try to lure one or a small number of them away from the rest, and if they retreat, don’t feel obliged to follow. Save the Centurion for last; ocne everyone else is dead, it’s much easier to chase him as aggressively as you’ll need to in order to get through his shields and armour.
The Ghost is sitting on an ammo crate. No wonder those Cabal shots hurt!
Pass through the gate and turn left, then jump onto the ledge. To find the gate from a distance, if you want to zoom in quickly on your Sparrow, look for the green banners.
When you’ve won, you can leave or go on a short trek to find a Dead Ghost. Skirt the borders of the Barrens, ignoring any paths leading out, and you’ll come to a bunker where Cabal and Vex are battling. Clear them out (or not), and enter to find the Ghost in plain sight.
Take your Sparrow down the indicated track. Take a good look around the Scablands when you arrive. There’s a never-ending battle here and getting into it can be deadly. You should take a side trip to the huge wall on one side of the map, though; pass through the gate to find a Dead Ghost on a ledge to one side. Be careful! There’s a Colossus in here.
Giant’s Pass is guarded by several Legionaries and Phalanxes. Clear them out thoroughly before deploying your Ghost at the objective marker ahead of a tough fight.
A drop ship brings the Cabal troops in, and it has a much faster gun than any ship you’ve seen so far, so get out of its range; it’ll hang round and fire at you for quite some time.
If you can, start taking down troops immediately, even while the ship is firing, because if you let them hem you in, you’ll have trouble. This battle introduces a new kind of Cabal enemy, the Psion, which has a ranged magic attack. It’s lightly armoured, but very agile. It runs at you fast, and it has a special melee that will seriously hurt.
There are several trees in Giant’s Pass; the one you want is closest to the exit towards Valley of the Kings, and you’ll have to climb up some rocks to get to it. It is not the one growing half way up a wall. When you find the tree, look in among the roots – it’s between the roots and the rocks.
To win the battle, you’ll need to take down the named major Centurion, but be aware that there may still be troops around after he goes down. When you finish the fight, go and grab a Dead Ghost; it’s in the roots of a tree on a rocky outcrop, tucked into a bend of the track leading towards your next objective.
As you enter the Valley of the Kings, take note of the huge Vex gate to your left; leave it alone for now, unless you fancy beating up some fierce Vex for shits and giggles.
The cliff edges in this area feature overlapping shelves of rock, which can make it hard to see the Ghost from above. That’s why I suggest going right to the edge, and hopping along the ledges to find it.
This is a lot simpler than it sounds. Don’t overthink it. You don’t need to cllimb high, or drop down too low.
Instead, head down the track to where it splits in three (the left fork goes to the gate) and take the centre path. Go on down this track to just past some giant cables sticking out of the sand. Hop off your Sparrow and go to the nearby rock, where you can walk onto the cliff edge. Travel along it a short way to find a Dead Ghost.
Follow your radar to the objective; it’s up on a rocky outcrop, near a Cabal outpost. You’re supposed to fight your way up here across the outpost’s front wall, but you could always cheese it by double jumping up.
Don’t deploy your Ghost just yet; you can collect a Dead Ghost quite easily. Jump onto the roof of the building housing the objective marker, and then look at the nearby rock wall. See that flat shelf? Leap on, then walk a few steps to the edge, away from the objective and further around the wall. Look down. There’s another platform just beneath you. Drop down and search carefully to find the Ghost.
The missions ends when you deploy your Ghost at the objective; you won’t suffer further attack. Take your deployment orders back to the tower for a reward.
Fight your way through the Barrens and Scablands, entering the big gate. If you didn’t grab Dead Ghost #2 during the Exclusion Zone mission, do so now – there’s no Colossus watching this time.
There’s little to do here but grit your teeth and fight through. Stick to the high ground rather than drop down and be caught in a crossfire zone. You’ll start off facing Legionaries, Phalanxes and Psions, but before you’ve turned to cross the bridge you’ll be attacked by a Centurion, the first of two you’ll meet. The Psions are quite thick through this area, and they and Legionaries will often try to get behind you. This area will refill with reinforcements twice, if you hang about, so choose whether to clear it fully or just dash through once you spot an opening.
Hugging the right hand wall on the way back from the entrance to the Rubicon Wastes, the tunnel is found shortly after you pass the big white circular door through which reinforcements sometimes arrive but doesn’t lead anywhere for the player. Look for a light, a crate, and some undergrowth, or just really press against every cranny of the right hand wall. The Ghost is at the end of the tunnel, nestled between the roots of a tree, against the rocks; it’s on the left hand side of the tree as you approach.
Once this area is clear, don’t go through to the Rubicon Wastes just yet – pause to collect a Dead Ghost. If you turn around at the door to the Rubicon Wastes, facing back the way you came, and hug the right hand wall closely – very, very closely – you should find the entrance to a tunnel, tucked behind a light and a crate. It’s very hard to see. The Ghost is in the roots of a tree at the end of this tunnel.
In the next area, you want to head right, to reach the tower. There are four Psion Operants here – a kind of major – so sneak around the tower and try various approaches, to try to take them out before you get close enough to the tower to aggro the Colossus, Legionaries and Phalanxes guarding it. Deploy your Ghost once you break through.
Between the tower and your next objective you’ll find a bunch of Interceptors in a shed. Steal one from the guarding Psions and Legionaries – there are a few majors in here – to make short work of nearby troops. It can be hard to hit the Colossus guarding the exit path, but awareness of which side of the Interceptor while fire next will help you out. You can drive it as far as the Darkness zone if you’re a good pilot and don’t take too much damage, but there’s not much point once your foes are down.
Inside the Iron Line, you’ll face quite a pitched battle, made eerie by an alarm rather than music. To my mind, the Psions pose the biggest threat in this battle: you don’t know Swarming till you’re surrounded by waves of magical force. They’re so quick that it’s easy to lose track of them, so drop them quickly.
There are three waves, and the third includes a Colossus and a couple of Phalanx, but otherwise you’ll mostly just be battling the quicksilver Psions and plodding Legionaries, which is easy enough if you take down the Psions fast.
This bit of platforming is a nightmare due to two protrusions that require you to jump one way, then use double jump to angle back in. Twice. It can be done, though.
Getting to the second platform is tremendously difficult because you need to jump far enough to one side to avoid the cables between you and the platform. You will need an upgraded mobility ability; the Titan has the easiest time. This is really fiddly and awful so you may want to leave it for later.
When the battle is won, you have the opportunity to grab a Gold Chest. Face the door you’re supposed to be going through next, and look left. See those big blue pipes? You can easily jump on to them, and then to the platform above the doors. Then hop your way across in front of the doors to the opposite side; the chest is in the far corner, out of sight.
There’s also a Dead Ghost to be had. Use the pipes to climb up to the platform above the door again, but rather than cross in front of the door to the opposite side, look out across the room to a column with a pair of floodlights. Jump to the small platform here, and then to another suspended above it, closer to the centre of the room. Then climb slightly higher, onto the rocks, to grab the Ghost.
Be warned: as soon as you deploy your Ghost and the doors open, three Phalanxes – including a Major – will charge you. There’s nothing else in the next room, or beyond the next door. A nice change.
To reach the Legion’s Keep, you’ll have to battle your way across a bridge. The Cabal put their cowardly tactics to good use here, and you’ll find yourself constantly advancing into crossfire zones. Watch out for the parallel path; Psions like to sneak down the right hand side of the bridge en masse.
The circular bunker beneath the pillar has two entrances. Use the one with sand spilling inside. The Ghost is just inside, on your left as you enter, tucked in among some equipment.
Once across, put down a few more Cabal and prepare yourself for a tough fight. Before you deploy your Ghost, explore the ground level structure around the base of the pillar to find a Dead Ghost when ready to spawn Primus Sha’aull and a couple of Legionaries.
Primus Sha’aull is a Ultra centurion, so he uses that nasty missile launcher you already dislike. Because this weapon fires in an arc, if you’re slightly above but very close to him, as for example on the platform where you deployed your Ghost, you can usually intersperse the platform at your feet between you and him, granting you a clear shot but keeping you safe. He’s weak against headshots, happily. As Primus Sha’aull’s health depletes he’ll start charging in close to you. Be very wary of his very quick area-of-effect stomp; it can and will one shot you.
If you have the firepower, take Sha’auul down quickly and his minions will go with him; otherwise, be sure to clear out every wave of minions that spawns, so you’re not distracted while whittling down the boss’s health.
Deploy your Ghost to end the mission. You’ll receive an item that can be traded for a reward at the Tower.
Next: A Rising Tide and The Hollows.
Jump to: Page 1 Page 2 Page 3

 Tropico 4 for the PC Review
 The expensive joy of PC gaming – The tale of my return, by Jamie Trinca, aged 30 and a bit
 . Plays September 27, 2013
 Why the best Star Wars movie is actually a documentary about a billionaire infant
 The Cave Guide – The Scientist’s Quest Guide - GamersHeroes