Legend Of Zelda: Skyward Sword Walkthrough Part 19 – Returning to the Sealed Grounds
After everything that happened at the Temple of Time, head back into the Desert. Your Goron friend is still there so talk with him a minute. He remarks that he too is going to head for the Sealed Grounds soon. Use the Bird Statue nearby to quickly head back to the Sky and the Sealed Grounds. When you go in for a landing though your old “friend”, Groose, dives after you and flips about being on solid ground. Link takes it well in stride and explains that you are below the cloud barrier on the ground itself. He calms down well enough after a time.
After all that, talk with your Goron friend to learn a little more about the world, specifically about Gossip Stones and Goddess Walls. They apparently respond well to smoothing sounds. Gossip Stones will give you a random drop of arrows, hearts, bombs or rupees. Goddess Walls let you draw on them to request something. You can draw any of those to request the item, but draw a Triforce and you will get some fairies. He will encourage you to use the nearby Goddess Way so you know what they look like and get some practice with the basic shapes it likes.
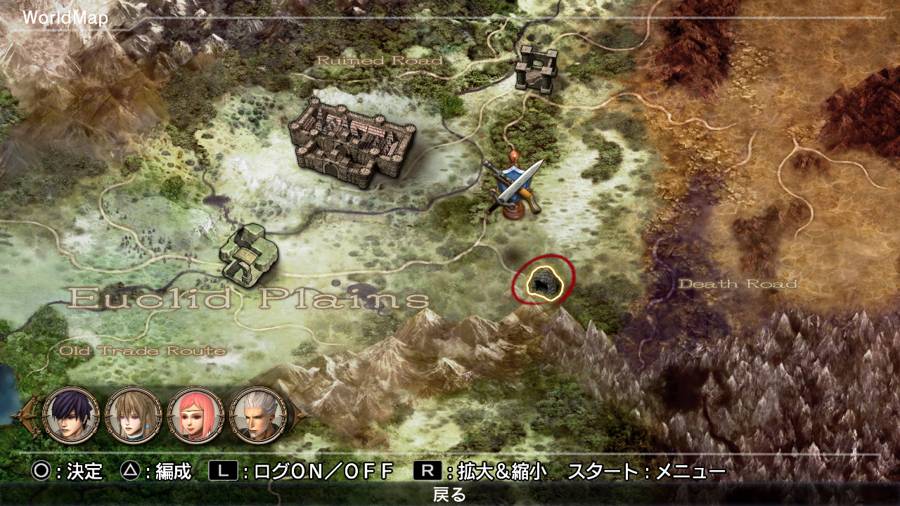
Use your map to get your bearings and start heading for the Temple in the Sealed Grounds. Head up along the vines by the statue. This will lead you right back to the temple. Go inside for another Groose cutscene where he is told that he will not save Zelda and that someone else is fated to do that. She now helps you learn how to play the harp and gain a valuable song, The Ballad of the Goddess.
After the cutscene a wall is raised and you are told to pass through it to face off a series of trials. Time to dash outside and deal with what is waiting for you there. When you get to the bottom a mass of darkness will consume the spike and the monster that swallowed Zelda will appear in front of you.
The Imprisoned
Phase One
Yes, it seems like a grand battle, but for now, you need to focus on its toes. Start with the ones on the back of its feet to ensure you have the best chance to dodge its energy rings. It takes about four hits on each toe to topple it. Once it is on the ground make for the area under its raised leg, to ensure nothing bad happens, then dash for the spike at the top of its head. This will only be driven in farther by you hitting it with ascending vertical strikes. After about four hits it will change its form slightly and you need to stop it from reach the top!
Phase Two
Once it starts slithering you need to speed up yourself. Use the nearby steam geysers to shoot up a level. This will let you get ahead of the Imprisoned. It will go upright when you approach it. You need to topple it twice more to finish the fight. The second time it will start emitting its burst of energy with every step which makes it a lot harder to simply approach and hack off the toes.
After the fight you must once again dash down and hit the Sealing Stone with a Skyward Strike once again. This is followed by you forming a triangle with three quick strokes after that. She will ask you to return to the Sealed Temple after that. She also tells you that the Ballad of the Goddess holds clues as to where in the realms that Sacred Flames are.
Before you return to Skyloft you should talk with your Goron Friend. You will find him in the area behind the Sealed Temple. He will point out an area with a trio of butterflies. Pull out the harp and just strum a little to summon the Gossip Stone. It does not tell you anything new but it does give a random drop which can be very nice.


 Thief Guide: Chapter 3 Activating The Podium Guide
 Tomb Raider – Secret Tombs Guide
 Metal Gear Solid 5 The Phantom Pain Guide: Afghanistan Side Ops Guide
 Dragon Age Inquisiton: Dragon Locations - GamersHeroes
 How to scrounge up money for Apple games