


 Press the back button to leave the pattern, and now go all the way back to the junction (2) where you entered. Once there, go straight to (3) where there is a well. To the right of the well is a stone. Touch this, and you will see a puzzle of cogs with four coins. The solution to this was the photograph you just took on the tree. Opening the satchel and selecting the camera will bring the picture back up.
 Make the position of the coins match the pattern by touching the cogs to rotate them. Once all the coins are in the correct places, a lid will lift up revealing a key. Tap the brass key to take it.
 Now go to (1) where there were two chests. Open your satchel, select the brass key, then touch the locked chest, which will open. Touch it to look inside. Inside it are flint and steel and a brass tablet. Touch them both to add them to your inventory.

 Make your way to (8) where there is a wooden ladder leading up. Go up and you will be in a treehouse. On the left is a crowbar; take it.Go back down, straight, straight and then left to (6) where there is a large stone head, a circular stone and a pile of firewood. Touch the pile to remove a wood log from it.
 Now go back to (15) where the pattern was on the tree. Below the tree is a trapdoor and a puzzle to open it. The solution to the puzzle is on the brass tablet, which can be looked at more closely by selecting it when your satchel is open. Touch the puzzle, and you will see four sliders that need moving to the correct positions, as marked on the brass tablet. Move them to the correct positions which are, considering the bottom as 1 and working from left to right, 5, 2, 4, 3. Once they are all in the correct positions, the trapdoor will open.
 Touch the trapdoor to go down to (14). In this area are some boxes. Open your satchel, select the crowbar, then select the large crate on the right, opening it. Look inside the box and take the revealed amulet.

 Exit this area, then go to (8) where there is a dark cave to the right (12). Enter the cave and in it is a firepit.
 Open your satchel, touch the wood log, touch the firepit to add the log to it, then touch the flint and steel, then the wood log, to light the fire. Some runes will be revealed, and your camera will automatically photograph them, and a pile of old bombs will be seen to the right. Touch the pile to get a bomb.
 Exit the cave and go backwards to (7). On the right is a rock door. Touch this and you will see another puzzle. Open your satchel, select the amulet from (14) and then the recess to place it in it. The runes to the left will now move.
Select the correct four runes as shown at (12) which are stored in your camera, and the door will dissolve.

 Go through the now revealed entrance to (11). In this area are some barrels and a stone tablet. Take the tablet and the barrel that is lying down.

 Exit this cave, go straight and then straight again to (9). To the right is a path up the mountain that is blocked by a boulder. Open your satchel, select the bomb, then touch the boulder to place the bomb. Now touch the flint and steel, then the bomb, to light the fuse, which will destroy the boulder.
 Go right up the now clear path to (13) then right again to the ship at (16). Select the barrel from your satchel and place it below the rungs leading up the side of the ship. Touch the rungs to climb up to (22), then go right to (25).
 Touch the ladders on the right to go up to (29), where there is a locked chest and some cloth. Touch the edge of the cloth to turn it over and take the revealed iron key.
 Go back down to (25) and use the iron key on the locked door to the right, then go through it to (28). Go down the stairs to (24). Above the cannon are some markings on the wall; touch them to photograph them.

 Go left to (21). There is a rope here; touch it to take it. On the left is a loose floorboard; touch it to open it and then look inside to see the pattern of arrows, which your camera will photograph.
 Go up the ladder to go back on deck at (22) and a piece of wood will be revealed in the now open hatch, so take it. Then go right to (25), right again to (28), back down the stairs to (24) and down the stairs again to (23). On the table here are a face carving, a piece of wood and a wood peg. Go back up the stairs to (24), then up again to (28) in the room with the desk. Touch the area on the left of the room where there is something hanging up.
 Open your satchel, select the wood peg, and then place it in the hole, which will reveal a secret compartment with a large gold ring inside it. Take the ring.
 Now select the desk. The combination number is on the two pieces of wood found earlier, and is 6 9 7. Move the numbers to the correct combination to open the desk to reveal a large gold ring and a stone glyph carving. Take them both.

 Exit the ship and go to (13) where there is a stone totem. Touch this to enlarge it. The correct combination of blocks needs to be selected, which are the differently coloured ones on the stone glyph carving from (28). Once pressed, this a secret compartment will open revealing a gold key, which should be taken.


 Move the wheels to the correct position, as marked on the carving, and a stone will rise from the lake with a large gold ring on it. Touch the ring to take it.
 Return to (7) and there is a stone column opposite the rock door opened earlier. Select the face carving from (23) and touch the recess on the column, which will open a secret compartment above it. Touch this to reveal another puzzle where the blocks have to be swapped around. Once solved, a brass dial is revealed in the open compartment, which should be taken.
 Go back to the ship at (22), then go up the ladders at the left to (18).
Beneath the wheel are three brass dials and an empty spot.
 Touch the dials to enlarge them, then select the brass dial from (7) and add it to the missing spot. The dials need to be rotated to the correct positions, as shown by the photograph of the arrows at (21). Move the dials to the correct positions which are, from right to left, right, up, left, down. Once in the correct positions another compartment will open with a rusty key inside it which needs taking.
 Go back down the ladders to (22) and then right to (25) and up the ladders to (29). Use the rusty key from (18) on the chest to open it. Inside is a pewter handle. Take it, go back down to (25), right to (28), down to (24) and down to (23). To the right is a door with no handle. Use the pewter handle from (29) on it; open the door and enter (26).

 There is a heavy weight in this room; take it then go left to (23) then (20). Take the large gold ring from the table to the left, then attach the rope from (21) to the hatch and pulleys, then attach the weight from (26) to open the hatch.
 Go right to (23), up to (24), left to (21) and then up to (22). Touch the door to the left, and you will see four empty rings. Place the four large gold rings - one from (10), two from (28) and one from (20) - into the empty spaces.

 These now need rotating to the positions as shown on the photograph taken at (24). This is quite sensitive, but the positions are, starting at the top left, then going right, then bottom left and bottom right, north east, south west, west and south. This will open a panel revealing a keyhole in which the gold key from (13) will fit. Open the door and go through it to (17).
 Touch the mirror on the wall to reveal a secret compartment, in which there is a gold medallion. Take the medallion, then leave the ship and go to the area with the stone head at (6).
 Place the medallion in the stone circle to the right of the head, and rotate it until it is properly aligned vertically, which will open the mouth of the head. Inside the mouth is a ruby and a pewter key; take them both.

 Go back to the ship at (22) then go left into (17). Touch the skull on the desk, then place the ruby from your satchel in the empty eye socket, and the skull's mouth will open. Take the revealed small cylinder. Go right to (22), right to (25) and right again to (28), then down to (24).
 Use the pewter key from (6) on the door to the right and then enter (27). Take one of the cannonballs from the pile, and the large lever to the right, then go left to (24), down to (23) and right into (26). On the table is a music box.

 Select it to zoom in, then use the small cylinder from the skull at (17) on it, which will reveal a brass key, which should be taken.
 Go to the deck of the ship at (25). In the deck here is a hatch with a rusty lock. Use the brass key to open it, then take the revealed bucket.
 Now go all the way back to the well at (3). Use the bucket on the well, then turn the handle. Take the bucket of water, then go to the tree house at (5).
Use the bucket on the glass jar, filling it, then solve the puzzle beneath it by rotating the pipes so that the water will go though from the top to the bottom with no leaks.

Go down the ladder to (8), then go left to (4). Operate the handle on the mill to reveal a secret compartment. Take the revealed brass plate.

 Go back to the ship to the room where you opened the hatch in the floor at (20). Go down the hatch to (19) and use the large lever from (27) on the bilge pump to the left and then operate it.

 The water will drain away. Revealed in the floor is a puzzle. The correct runes from the outside need to be moved into the positions inside, as shown on the brass plate from (4). Another compartment will open; take the revealed crank tool.

Go back up to (20) right to (23) and right again to (26). Touch the area to the right, where there is a brass button.

 Place the cannonball from (27) on the button, then use the crank tool from (19) in the revealed hole. Turn the crank tool until the hidden compartment fully opens and take the sword. Go back to (17) and touch the shield on the wall. Place the sword from (26) on the shield, which will reveal a safe.
 The puzzle to open the safe is the most tricky. The wheels have to be turned so that the lever will fit through them all. The inner wheel turns all four wheels, the outer one turns just itself, and the two middle ones turn each other and the outermost one.

 The inner wheel needs turning to the correct position first, then the two middle ones, which is the tricky part, and then the outermost one. This is very fiddly to do on anything but a tablet. The two middle wheels need to be turned alternately until they line up correctly.
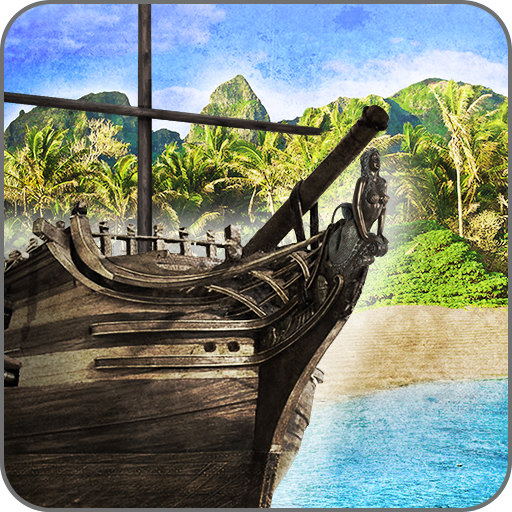 The Lost Ship

 Hammerfight - Chapter 2 Melka Solo Mode Walkthrough
 Dark Souls 2 Melee Hexing Guide: Join The Dark Side
 Thief Walkthrough Chapter 3: Dirty Secrets – How to Remove the Ritual Book
 Neverwinter Nights 2 Tweak Guide
 Metal Gear Solid 5: The Phantom Pain Episode 2 – [Flashback] Diamond Dogs