
See introductory video. Click the left mouse button to interact with any other material. Answer the call on the mobile phone. After this control will go completely into your hands. Use a standard set of keys – W, S, A, and D to move around the room. So, study the apartment. You can turn on the light use the switch on the wall. In various drawers and bedside tables are magazines, photographs, postcards, and other notes. Look at them, if you’re interested.
Listen to the message on the answering machine, and then read the email on your computer. Send a letter of “Draft”. Then go to the door of the apartment where the kitchen is located. , find a cure protagonist in the cabinet on the wall over the kitchen table. By the way, it also can be hidden in a locker located in the bathroom.
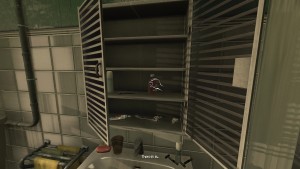
Drink a medicine by clicking the left mouse button. Incidentally, in the top drawer of the table, on which stands a laptop, there is a note from the newspaper, which talks about what happened to the main character.
When you drink the medicine, then go to the door, take a bunch of keys to the left of the plate (optional, but it is possible to do this) and leave the apartment.
The metro answer Jesse call, you were sent a letter from the “Draft”. After talking with him, wait until Simon will be in the hospital.
Once you are in a hospital, look around. You can push the curtains on the windows, and you can turn on the light. There is the reception desk in front of the left. Go for it and go into the laptop positioned on a table. Open letter “Everything is locked.” It pointed out that the passwords were changed in the laboratory. New passwords are stored somewhere on the piece of paper.
Come near to the door and try to open it. Simon would get the phone automatically and you will only have to press the CALL button to contact Dr. Munshi. Unfortunately, his phone is turned off, so the access code to the laboratory must be sought independently. Return of the reception desk and open the top drawer. There should be based notebook. You can look at it and see the bottom of the four-digit code, circled column in the rectangular frame. In my case the code was 2501. Changes or not, it has not been verified. Enter the code 2501 in the left pane of the door.
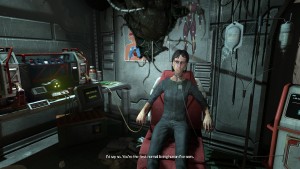
If the code is entered correctly, you will hear a signal. Open the door on yourself and go to the corridor. The next destination – the door at the opposite end. Come and discover it. Go to the room where is Dr. Munshi. Talk to him a few times, and after that, you’re ready to plunge into the world of horror, sit in a chair in the middle.
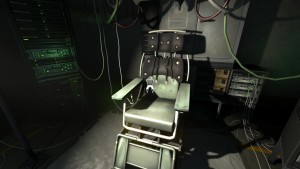
Watch the cut-scene.
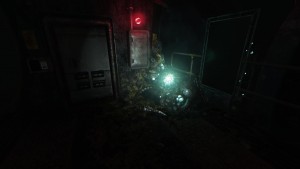
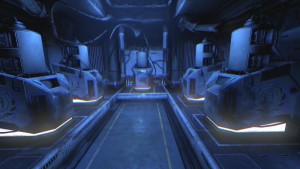
As soon as the main character wakes up, then get up from his chair and go to the red lights ahead on the left. Pull the switch to turn on the light. Inspect the room, then grab a fire extinguisher and throw it in the cracked window on the left of the door. Climb into the hall through a window aperture and open the door from this side to you can freely return to the original premise.
If you go to the right of the door, standing to face her, you are rested into the grate with a lock. Go to the other side. At the fork go forward a little and look at the door on the right leading to the hangar (MACHINE HANGAR). Remove the lock and press the yellow on the left of the door. Initially, the red button, as in the case with the original location.
Go inside the hangar, move to the end, where the hanging robot. Click on it to listen to the memory. When you hear a loud noise, then stay in this room. Wait until the creature subside. Go back into the corridor. As you can see, the door broken in. However, now open passage to the right, but you’re not in a hurry to go there.
Follow the back, to the left, and turn right at the fork. Left and right, there are two rooms. The room on the right, BREAK ROOM, open. More to the right of the doorway is a panel with the inscription OFFLINE. Click the left mouse button to listen to one more memory. If you do not want to listen to the end of the memory, you can turn it off by pressing the right mouse button.
The toilet and the dining room is nothing. Walk down the hall, which was opened after the appearance of the monster access. Turn right, when he turns off the light. Try to go to the illuminated door. You will hear the eerie sounds. Run off and get down. When the sounds disappear, and with them the light and the door, open it and go inside. On the table on the right locate the omni-tool. Leave the room and go forward. Eventually, you have to get to a huge round hatch on the right side of which is the control panel. Apply on the panel found the omni-tool. The access is denied.
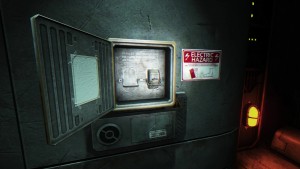
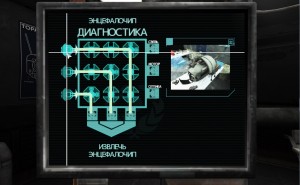
Return to the starting room and a computer check on the left at the entrance. You see the message on the monitorthat you want to insert omni-tool. Insert it into the slot on the left of the monitor. Now look at the monitor. You will see four sections. You must go to the section “Omni-tool.” Review the information about the control chip and entsefalochipe. Neither one nor the other in the omni-tool is not inserted. Click on the function “Open the box for the chips.” Now open the glass cover to the left of the slot with the omni-tool, all on the same table. Pull out one of the chips and insert it into the omni-tool.
Then again look at the monitor, select the section “Managing the chip” and click the “Update” button. Access codes are updated. Now you can pick up the omni-tool and go back to the very door. Open the door in the form of the hatch. Go forward on tunnel with glass walls. On the left is the terminal with which you can listen to the memories. Go forward until you reach the room where you locked up. To continue your journey, you must click on the strange plant in the right pane. By doing this, you will not be able to return to the previous compartment.
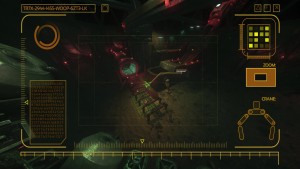
There is a passage in ventilation on the right. Crawl through the ventilation system in the far left aisle to get to the only available room. Go to the room where the floor lying semi-disassembled robot. Disconnect the robot from the power by removing the two cords. After that, the button on the panel will be yellow. Click on this button to activate the computer on the right. Look at the computer – there are two scales. Under the monitor with two scales are three red buttons. Press the left button and wait for the upper range fills up green. Immediately press the middle button. Wait until the scale and the bottom to fill up the green. Then you can press the right button to start the whole system.
Once this happens, wait until you will be contacted by a woman. Listen to the conversation of her and Simon. Just then the door opens. Walk into the spacious hall and move along the bridge until it collapses. You can try to immediately climb the ladder, but it will fall down. By locating wandering huge robot. Do not try to fall on your eyes. Walk around it. There are stairs leading upstairs at the far opposite corner. Climb up on it on one span, pull the lever to open the hatch, and then follow the above. Passing through the sunroof, momentarily pull the lever on the other side to close the passage.
Follow the steps above and find yourself in a room with multiple doors. Right click on a plant near the table with the lock your computer. It is located on the wall where the ceiling is dripping the black gel. Look around. Both computers are blocked. You need to enter any ID. Go to the stairs leading to the top. It is in the middle of the room. Way up blocked by a hatch, which can be opened with a lever. The lever is near, but it is locked.
So now there are three doors through which you might pass out. One of the doors leads to a room with several rails and robots-repairers, which you can see through the windows. To start go through the door in front of her and find yourself in a small room. Click on the destroyed robot lying on the floor, to see the memory.
Go back and go to the front of the room, where there are several repairmen. You will hear a voice calling for help. On the rails, between robots-repairers rolls one regular dilapidated robot. Talk to him. He claims that he Semken Carl. At the end of the rail has a huge wardrobe with a red lever. If you pull the lever for this, the robot who calls himself Karl, the amperage starts to kill him. He did so not fast, therefore, you can return the lever to its original position.
Return to the central room and go through the third door to which is not yet fit. On the floor in the corridor lying body. Look at him. Click the left mouse button to listen to the memory. Then click the plastic card on his chest. This is Carl Semken. Remember it ID: 0722. back to one of the two computers, and click “Change”. Enter the new ID: 0722. Then click “OK”.
So, you are logged into the computer as Karl Semken. You can see all files. You need a section “Power Management.” In this section there are six items: thermal camera, communications center, warehouse, factory, flow control and siphon. Immediately you can click on the storerooms and the flow controller to activate them. Click on the center of communication. Note that the screen displays a map which shows the two sections. You need to disable one of the two sections in order to feed energy into the communications center.
One of these sections – the same red lever, which when activated gradually begins to kill the robot. You have a difficult choice: to feed energy into the center of communication, it is necessary to kill the robot considers himself Karl Semkenom. However, even if you get to the second arm, the robot will still die. Storage space that you have opened, is located next to these computers. Inside the table you’ll find a note on the black box. Nothing more. With regard to the open room “flow regulator” that is exactly the same room where the second arm. This passage would be made a choice in favor of this lever.
Once the lever has been activated (by the way, to his right hangs a warning that it should be done only in extreme cases), the electricity will be partially disabled. You will see the same enemy robots. Walk around it, go back to the computer, which was introduced by ID of Charles Semkena. Go to the tab “Power Management” and select “Communication Center” to activate the lever in the center of the room, near the stairs. Go to the lever, pull it out and see what happens at the top of the hatch is opened. Quickly climb up to the center of communications and pull another lever to the left. You are safe!
Activate the build-up to the left, this is the third in a row. Look the computer to the right and restore the files. Listen to four record. Then go to the huge computer and click on the yellow button. So, here you can try contacting one of the other compartments. As you know, you’re on Epsilon. Enter the Tata: 2202. Click on “OK”. Now you need to catch the signal. Screenshot will not be, but the approximate coordinates are: 2557 x 3273.
Contact as Lambda coordinates of 1500 x 6600. There is a woman with whom you are talking to before. Her call Catherine. Talk about everything, until you find yourself in the water.
Climb up to the ledge and move forward. You will see familiar to the panel on the right side on one of the designs. Press and listen the memories. Soon after the fork on the left you’ll see a robot that needs to give him a black gel. Walk around its side. Even if he starts to attack you, just run away. After go back and go left or right of it. In the end, you should see the structure with a sign SHUTTLE B UPSILON. It will be the rock on the left. To the right of it lyelittle robot in the sand who press against the stone. Move the stone to the robot could go after you. Follow ahead and to the left. Follow the path with small lantern. In the end, you will see a hatch leading into the station to the shuttle. Click on the button to the right to try to open it. It will not work, but after a few seconds and swim up small robot would open the door. Go inside and use the omni-tool to the control panel on the right.
Wait until all the water out of the compartment will be rolled out and will pass into the next room. Go forward on the corridor. From this point by pressing the F key, you can activate the lights. On the left side of the panel will hang. Click on it to listen call from the past. Look at the front of the plant. Click on it, and then try to pull the red lever.
The root, which in contact with Simon feels better (regenerates).
Nothing happens. Turn around and go back a little. Take the exit on the left for the shuttle. Move along the rails and the like will find yourself at a dead end, then crouch and crawl through a hole on the left side. So you reach the other side. Go to the room at the end of the tunnel. Look at Amy’s body, connected to the system. Remove from the panel to the right two cables. Amy will die, but you can activate the power. Go back to the lever and pull it.
Turn around and go into the right side of the shuttle. Place omni-tool into the slot on the left of the pilot’s seat. Switch the three toggle switches and press the red button. Face the seat and click on it to sit. Select as a destination “Lambda”.
Watch the cut-scene. Remove the omni-tool from the table and then pull the lever on the floor in front of the chair to take the emergency exit. Go forward the tunnel and answer the intercom call, hanging on the right. Follow the corridor to the end and click on the built-up edge on the right side. Turn around and take 10-15 steps back. On the bottom right you should see the hatch with the inscription EXIT. Open it up, crawl forward and climb the red stairs. Use the omni-tool on the panel on the wall to be back in the water.
Go up the stairs and follow forward. The path here is one. Soon you will have to meet the enemy robot. Walk around its side. Take the narrow passage between the rocks on the left. There should be a sign pointing to the bay, “Lambda”. Click on the button to open the hatch. Go inside, use the omni-tool, and the water will be rolled out.
Go forward and hear the cry of Katherine. Go back and hide behind the overturned crates from the monster. When she says that you can go, then follow the hallway ahead and fork over a large roll in the room on the left side. Here you will find Catherine dilapidated robot left. Talk to her. Go to the other side of the room and insert the omni-tool into the slot panel. Return to Katherine, who is about to disable itself. Remove from the back entsefalochip and paste it into omni-tool. Talk to Catherine loaded into the system. She will ask to scan your computer in the next room and learn about the Ark.
Return to the hallway and go right back to where you came from. Will be two doors with yellow buttons the left and right across from each other. Go through the door on the right by clicking on the very yellow button. Go to the left side of the computer and learn all the tabs. The last tab will ask you to find the location of the Ark. Choose a sector with Earth, with further sector in West Africa. After this, the sectors on the right side, where the letters have TAU. Finally, select the top sector from the scheme. Go back to the omni-tool with Catherine and remove it from the computer. Follow back into the intermediate space, use the omni-tool to be back in the water.
Go right and open the small escape pod. Place omni-tool into the slot, Katherine tried to run it. Nothing doing. But Katherine updated omni-tool and you can now use it to get on the ship, who went between Lisbon and lambda. For sure the ship is another escape pod “Curie”.
Move to the left of the capsule. Turn left to follow the path of several lights. When you see the monster that instantly disappear, do not panic and keep moving. You go in the right direction. Soon you will see the red light. Come and use the omni-tool to open the door of the ship.
Go inside, follow the left and slightly open the door. Climb up the stairs and crawl through the vent until eventually you find yourself outside of the ship. Go forward along the path, past the wreckage and see the huge ship. This is the ship that plied between Lambda and Lisbon. There is a hole at the stern of the ship . Make your way through it inside, go up the stairs, follow the steps above and still open the door on the right. Move aside the need to the right side. Go forward a bit and open the other door.
Climb the stairs on the side of the ship until, eventually, Simon will say that you need to find somewhere here capsule. You will find yourself on the floor with the very monster. If you do not want to die, we must be guided by the following rules:
On this floor you have to get to the gate. To do this, move around the perimeter clockwise. You can hide in any room. When you reach the valve, turn it to lower the ladder. Climb up the stairs.
Go forward and turn in a corridor lit right at the fork, which has a sign with information about the escape pod. Climb inside the capsule and insert the omni-tool in a free slot. Catherine says that the capsule is locked fuse, and you should check whether you can unlock in the engine room.
Leave the capsule and turn right down the hall. In one of the rooms in front, through which you must pass, the monster walks. The difficulty lies in the fact that the monster hardly leaves the room. You either have it as a lure that is unlikely to succeed, or to act otherwise. Wait, when the monster will come to a nearby doorway, and then begin to move away. Go into the room with him, looking at the wall to the right. Do not turn the look in his direction! Entering the room, you have to go all the way forward, to hide in the corner. When the monster will pass you by, and you will understand it by gritting and image interference, move through the perimeter of the room counterclockwise.
Go through the doorway and up the stairs is way above is not blocked by. Go through the huge cargo bay. You will understand that it is he, by hanging drawers. Find out here and follow the step a little higher. Move through the next doorway and you find yourself in the engine room. There are several devices on both sides monitors and black cables. You have to pull three of these cables to overload the reactor. Once the cable is pulled out of the third, there will be a monster. Very quickly come back into an escape pod on the floor below. We can not delay, otherwise the monster will catch up with you. Once inside, watch the cut-scene.
Once the capsule breaks, try to open the door to the left of the chair. Yes, pre-need to pick up the omni-tool. An attempt will not be successful, but soon will be on the side of the baby-robot that will open the door for you. Come out to the outside and go to the nearest large annexe, which can climb up the ladder and through the trapdoor at the bottom. Click on the plant next to the body of the diver, and then click on the diver himself, to listen to the conversation of the past.
Pull the lever on the cabinet to the left of the diver. You will see a monitor. Click on “Zoom” in order to understand where you are. This station “Delta”, an intermediate point between the “Lambda” and “theta”. Go down and go forward and to the right. Soon, you should find a small building with a circular hatch on the wall on the right side . Try to push the hatch, but nothing happens. But the robot swim up and cut it. Go inside and check the body to hear the dialogue and Evans Komorebi from the past.
Go back out and go right to the door of the building with a sign DELTA. Try to open the door, after which the robot and it will cut. Walk in through two doors, click the growths on the table. Click on the button to the right and go into the computer. Here you can find useful information. On the wall to the right and in front of hanging two cards that will give you an idea of what there is still underwater station.
Note LANDING ZONE. It is a place where come zeppelins. Upon exiting the building, it will be left. Move back, but Zeppelin will not be here. Before the guise of “Transport Station”, which leads to the site zeppelins, there is a computer. If you look at the drop zone, it will be right. Click on the button and you will see on the screen a few sections. The map location CONTROL ROOM, a room in which you have found the body of Evans, there COMMON ANTENNA. Move to this point and see the dashboard in the water. Activate it, press the power button, select the channel “5” and move the signal around to the yellow line.
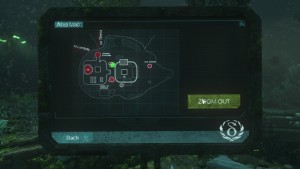
Map Station “Delta”.
Return to your computer around the drop zone and press the zeppelins section “Zeppelin”. Select “Echo” for Zeppelin 049. When the system informs you that the Zeppelin works, select the “Request Zeppelin.” Wait, when he will come and go closer. Insert the omni-tool in the Control Panel and talk to Katherine. You will learn that the manager went out of order chip. And it is possible to get one of the two robots are floating. If you remember, baby helped you .There is a box with the weapon to the left of the panel and Katherine. Click on the yellow button and remove the weapons. Coming close to one of the robots and shoot, when you see the sight. In the case of a large robot will have to shoot three times. Remove chip and insert it into the omni-tool. After that, pull the lever on the right and click the button next to run the zeppelin.
Upon arrival, remove the omni-tool and go under the guise of THETA. There is a column with an intercom on the left. Click on it and listen to the conversation. Do you see the red lights ahead? Go to the next pole and click on the next intercom. Listen to the message Stroymeyera. Turn left where you can see the pile of garbage blue. Get closer and see a robot. Talk to him about everything, and then go to a huge door that leads to the station “Theta”. There is the control panel on the right. Open the flap and see the right arm and the left some thing. Turn this thing in a clockwise direction, pull over, turn it counterclockwise and push the panel. At the top of the red light should come on, and the lever must be active. Lower the lever all the way down to light became green.
Log in and connect the omni-tool to the panel on the right. Wait until the water leaves the room and the door will open, and then go forward. Turn right, break the glass with a fire extinguisher into the room and climb inside. Insert the omni-tool to a computer on the desk to connect to the station Katherine “Theta”. Talk to the girl and find out what you need to find the access code to the submarine.
Exit the room, go to the other side and go through the first door. Run forward down the corridor to the fork. The room on the left is nothing special. So go ahead and click on the yellow bar to open the door. Examine the next room, go into the hallway on the right. There are cabins, home to members of the crew. Look at each room where you will find a lot of useful information. In the last room on the left, where he lived Fisher, it is the very plants that you have to touch.
Follow back to the fork. Left forward and you already went, so we need to see what is on the right (if you come back, you need to turn left). Remove the unit with the door and go inside. The doorway leads to the front of the lab. Go to the room on the left. On the wall on the left side hanging intercom, clicking on which you will hear the conversation Catherine and scientist. After that, go into the room behind the seats, where you wake up early in the game. Take a look at the computer and check the information of four people, one of whom – Dr. Munshi, and another – Jarrett Simon, the main character. Here you will find out who you really are.
Go into the room on the other side. This study Katherine. You can examine it, and you can immediately go back to the main room where the window you are making their way to the computer. Turn left and go through another door. The stairs go down to the bottom. The first door leads to a dead end, so go to the second door on the left of it.
You will find yourself in a large server room. There is haunting monster meeting which should be avoided. Just sneak and he did not see you. You must get to the other end of the room to find a host. Click on the small button to the right (yellow) to open the glass cover. Switch the toggle switch. While there is a restart of the router, you have to hide from the monster. Then you will have a few seconds to confirm the operation and manually switch back to the reverse position. If you do not, the restart will be canceled.
When you’re done, go back and go to the lab Catherine Chung, where the vault is located with the images. To do this, move through the main room through the door on the right of the staircase, on which you have to go back here. Go to the fork and turn right. Go through the door and go into the lab right. There is a doorway leading to the vault on the left. There are only five stands with the images: two side and one front. Come to that front, and click on one of the two blue arrows on the control panel to turn the stand. You have to find a chip with images of people, which will be different from the rest. Pull it out. Chun should be said that this chip is not damaged. He may be on a different stand.
Room with stands that hold the chips.
Return to the previous room and look at the computer on the left. On it is written that the images are not loaded. On the left side of the table there is a small device. Insert the chip and log in to the computer. Are you interested in Brandon Wang. Select it and click “Send.” Then after loading the image, click on the button “Start”. Katherine tries to talk to Wang Brandon, but nothing happens. Please note that the right of his photographs have settings. Here are two points: “Environment” and “module”. And there, and there’s nothing there.
Go into the hallway, where the cabin staff. On the left side look for a locked room Brandon Wang. Katherine will open it for you. To start, click on the intercom on the right to listen to the conversation and Alice Wang. Next, inspect the files in the computer on the left. It is necessary to click on all four entries! The drawer on the left find a note from Alice and read it. Catherine says that he can recreate the voice of Alice in the simulator. Go back to the lab, Catherine, log into the computer and select a module Alice. Now run the simulator. Again, something is missing.
There is not environment settings. In the same room at the other table, where there is another monitor, there are red and white box. Open the cover by sliding up and get another chip. Insert the chip into the second slot of the computer where the simulation. This chip contains two environment settings: “Beach” and “Winter framework.” Do not even try to play with the simulation environment. Take the chip and go to the front of the room, where there is a chair. Insert the chip into the slot on the left of the computer and log on to the computer. Choose among “Room scan”. Select “Copy” and the environment will be copied to your chip. Take the chip, plug it into a computer where the simulation. Select a medium “Room scan” and the module – “Alice.” Run the simulation and Wang blurted.
Move back to the panel, which is inserted omni-tool. After talking with Katherine, take the instrument. Get out into the hallway and look at the huge door on the right. There is a panel to the right of it on which you have to use omni-tool. This opens a passage to the right of the panel. Go there. In the middle of the room there is a huge hole, fenced grid. To the right is the control panel with five dials, display and one button. Next to the panel lying cord. Pick it, holding the left mouse button, and insert into the side opening with a yellow light bulb. When power is applied, then click on the button and turn clockwise until the tumblers until an accident happens.
After the accident, go to the other side of the room, move the ladder to a small hatch on the wall with a yellow panel. Climb the ladder, click on the bar to open the door and climb into the ventilation. Take the single possible way, open another door and select the lab. Right there at the bottom of the plant. Use it to improve the health of the stock.
Go to the computer on the left and insert the omni-tool. Talk to Catherine, she asks to know more about the “Ark.” To get started go to another part of the room. In the right corner there should be a huge capsule with a green or yellow button. Press the (panel), sign in and click on another button. You learn from what made Simon.
Go back to the omni-tool, the left is the system unit and monitor. Connect the cable located here, to the system unit. Log in to your computer by clicking on the monitor. So, the files marked in red are activated. Disconnect all of them. Now, in order to run the simulation, you need certain files. Initially connected tether “natural forest.” Please note that the right is displayed in red letters status. As it is written, that the file “natural forest” required.File “sist_general_rast_prdv.” Activate the file and see the new requirement. Thus, in accordance with the emerging requirements of the order.
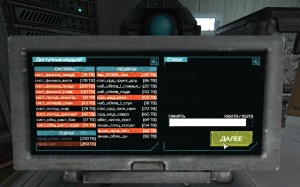
How to set up the simulator “Ark”.
If done correctly, it activates “Next” button. Click on it, select the “Test” and click “Submit.” Run the simulation. At the top there are the names of different files. Below, there is a button “Stop the simulation.” You must stop the simulation so that the top was not the best modules that you connect, and the module “Test” selected recently. When you stop the simulation on the word “test”, you can run the “Diagnostics”. You can reduce the “allocation of resources” and 25% to the simulation slow.
So, click on the “Diagnostics”, Katherine tells a bit about the “Ark.” Exit the computer and after dialogue with Katherine collect omni-tool. With it open the door to the right (left if you stand back to the computer). Go forward down the hall and listen message on the intercom. You will learn that Van Brandon blocked the elevator, he take the chip. We need to find him.
Turn around, take a few steps forward and turn right. The corridor is very large. You can find another intercom and listen to the dialogue of the past in the room left. That you are not looking for a long time, this is the way. Return to a blocked elevator, stand up to it and just go forward. Turn right and immediately go away to the right. You will move deeper into the corridor, while the elevator has to be you behind the wall to the right. Go to the end, skirting the various rooms until you reach a dead end. There is medical laboratory to the right, and slightly ahead of the left – the guard room. This room has several large windows and illuminated. Go inside and check the computer. There are three sections. Are you interested in the first one, where you can lock or open a certain room. You have to lock, for example, medical laboratory, but instead unlock another room (this one was blocked).
Go back to the elevator, you back to him, go to the left. The first door on the right leads to the unlocked room. Go inside and look at the body of Wang Brandon on a chair. Take out of his hands connecting chip. Be sure to re-visit the security room. Insert the chip into the slot on the right of your computer, click on the monitor, and then click “Control codes”. Update the code on the connecting chip. Follow back to the elevator, insert a chip in the panel on the left and turn the two levers: the lower lift up, and the top goes down. Then close the panel to the elevator door opened. Run in the elevator and then to the floor – “station”.
In any case, the elevator will stop. Open the hatch on the floor, put it down, and then click on the stairs. Start down until Simon did not fall. Climb the stairs and find yourself on the floor. Go through the door on the left, while the monster does not catch you.
After the cut-scene press the W, to get out of the trap. Follow the corridor and go through the door on the left. Along the corridor wandering monster. You need to avoid meeting him. Go to the left side. The first door on the left can not go. You need the door to the far left side of the corridor. Go through it and another door, and then open using the yellow button ventilation. Climb into the ventilation, and then click on the other side.
There is also a monster in this part of the corridor. Walk around it, hiding behind the barricades. Go through the door and use another ventilation. Go to the door with the yellow button, click it, but do not hurry. The monster can stand side by side. If so, then slowly move back. When the monster will go into the room, then log into it and immediately hide behind the overturned furniture right. Let the monster go away. Take a couple of steps forward, to the emaciated man. There is a door with a red panel on the left. Walk up to it and read the message on the screen that you need to recharge the battery. Go back and turn left. There you have not walked. You will find yourself in a room with a few strokes. There is a cover flap on the wall at the far right. Remove it and move the cursor down. Move the mouse while holding the left button, left and right, until the battery is fully charged.
When this is done, then hide and wait for the monster. Walk around it, run to the door and open it using the panel. Drop down into the water. Under the water, go to the stairs to the left of the container. Climb the container, move on to the surface of the coils of the wall on the left.
Do you see them? Open the gate, throw off the coil and go forward. You need the right of the plant which treats Simon. In the water can be seen big boxes. Move them not to fall to the bottom, otherwise it will have to be repeated again. With box jump on the panel above the water, up the stairs. Walk along the platform, drop down to the protruding pipe, jump on the box, and with his move to the other platform. Climb up and jump to the platform with a beam sticking out on the left. From here you can gain access to the metal sheet, blocking a hole in the wall. Take it and go inside.
Go ahead, take the room on the left. You can use the plant on the left. Pull the lever on the control panel. Turn around and run forward until Simon did not go astray down the flow of water. Watch the cut-scene.
Click on the corpse at the bottom and listen to the message. Now move forward, never deviating. Walk past the location with hanging balls. As a result, we should see a huge extension, which were collected at the station “Delta”. Climb the stairs inside. It is necessary to pump out the water. To do this, look at the cover with two handles on the right of the staircase leading upstairs. Remove the cover and see a red lever. Read the inscription on the plate on the left. It says that before draining of water is necessary to open the valve and start the pump. There are two gates to the right of the panel. Turn them clockwise. Next, locate the lever on the opposite side, where there is a pump and lower it. Done! Go to the panel and lower the red lever to drain the water.
Go up the stairs above, click on the corpse of a man, but nothing useful can not be read. Insert the omni-tool in the panel on the right, and talk about everything with Catherine. There is the fuse panel on the left side on a large server cabinet. Remove the panel. So you can switch between several levers. There are four rows and four column fuse. Number them from left to right and top to bottom. Now turn on the following fuses:
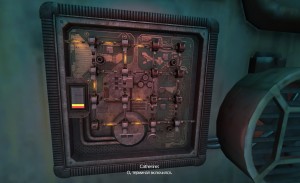
Proper positioning toggle switches on the panel with fuses.
The terminal must be involved. Go to the computer on the right, where there is omni-tool. Go to the ‘Omicron’ and click on ‘in quarantine’. So, for the removal of the quarantine is necessary to enter the code. Turn around and walk away from the computer monitor to another across the street.
Scroll to the bottom tab on the screen and see a few repetitions of 1880. This is the code. Be careful, because the code may be different. Enter it on the previous computer, and lock the station “Omicron” is disabled.
Leave the outhouse, move forward to on the left was a field with floating balls. There is the entrance to the station “Omicron” to the right. Click on the corpse of a man to listen to the conversation, and then click the button to the right to open the gate. Go inside and use the omni-tool in the left pane. Unfortunately, some mechanical fault does not allow you to take advantage of this move.
Go back and follow the bottom of the ocean to the left. Get down on the designs to the next door. Way is line. you will want to keep a low profile in one of the places. Open the door and use the omni-tool on the panel. Finally, you will find yourself inside the station.
Go forward. There are two doors available. Go through the door on the left and climb to the second floor. In the hallway, open the first door to the right and see the monster that after one phrase will disappear. Go through the doorway on the other side of the room, down the hall to the right and enter the first door on the left. You will find yourself in a medical ward with several beds. Turn right and go through the door at the end. Move down the hall and open another door. You have to get into the control room.
Insert the omni-tool into the slot on one of two computers on the left. Talk to Catherine. The girl asks you to inspect the camera in search of power suit. Go into the next room and open the chamber D. Click on energy costumes and look what happens. Conversely cameras have a control panel. Click on the red button and enter the computer’s right side. Select the activation of the power suit capsule D. Now you need to find entsefalochip, structural and gel batteries.
Go back to the room where they saw a monster. There is a control panel to the right of the glass chamber in the center. Look at it. Here you can switch to a plan = schema upper, middle and lower floors. Click on the command “Manual” in the lower right corner of the screen. Now you must unlock. Press a few buttons until you see the field, consisting of red and blue squares. Click on any of the boxes. This will start a mini-game. You need to paint all the black squares are interconnected new blue. And to click on the same square twice is impossible, just as it is impossible to switch to red. Start with the central square at the top left and move as shown below:

The sequence of activation of the cells to release the space station “Omicron”.
All doors must be unlocked. Turn around and go through the door that leads to the CLEANROOM. Wait for the disinfection procedure. Go through the other door. At the opposite wall there is a computer with interesting text material. To the right of it is a stand with a closed glass. Inside, there are the structural gel flask. Click on the panel on the right, but the lid will not open due to a system failure. Go into the room to the right through the glass door. There is a monitor on the table which show the direction of the beam. There is a device management laser on the right. There is a switch that can be switched to the left or right, and the red button. To start toggle switch to the left and hold until the laser stops. Then press the red button. Begin repairs.
Go back to the bench with flasks with structural gel is lower pane, locate the plate. Open the lid and remove the damaged chip. Go to the room with the laser. You see the three branches in the background. The left and right compartment occupied by the chip and rat. Open the middle compartment. To do this, press the red button near the glowing red light. Green light should come on. Now pull the shelf and place on a baking damaged chip. Push and press the red button. Go to the front of the monitor to move the laser to the second chamber move to the chip and click on the red button to use the gel structure. Open compartment, take the chip repaired and return it to the place. Click on the top panel to open the stand. Take the gel structure.
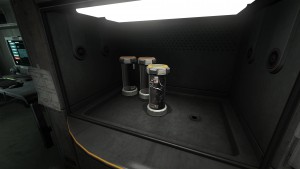
Flask with structural gel.
Go to the central hall and go through the door on the right. Follow the corridor to the right and use the next door, behind which is the landing. Climb the stairs and go into the hall, where another terminal as the floor below. Press release “Manual”, but before that, select the “upper” floor. Go to POWERROOM right, go down the hall to the left and go through the door ahead. On the right side of the warehouse can not go. Inspect one plate on the wall (already after a pass by the corpse). Then you get to the other panel, which will be guarded by another monster. Hide away and wait for the monster will go the other way. Then open the panel on the wall next to the place where originally stood a monster. Remove the battery pack and get out back into the room where the terminal is unlocked.
Panel with battery.
You can go through the door on the other hand, there to get a new room and found the plant to connect to the structural gel and resupply forces. There is a laptop on a table near the corpse, which you can listen to three recordings.
Go back down the same stairs and go even lower on the other. You will find yourself in the first place. Now turn left and will get to the bottom tier of the hall itself. Activate the terminal, click the “lower” level, and press the reset button “Manual”. Go through the door on the left and immediately enter the room ahead.
There is a robot on the operating table to the right. There is a control computer to the left of robot in the center of the room. Click on the monitor and will see a box with nine cells. Right and left have additional characters. Click on any of the three characters the left of the 3×3. You should see a ray of white.There is a column on the left with three sources of radiation. You must set the nine cells so that all rays, without interfering with each other, and broke down. See the screenshot below, which indicates the solution to the puzzle:
How to pull entsefalochip of the robot in the operating room.
Pull entsefalochip of the robot on the operating table, quickly run to the second tier, go to the room with the power suits and Catherine close the door behind you. Apply all items found in the power suit capsule D. Again, try to activate it by using the control panel in the middle. Expect to complete the calibration process.
Go into the next room, where there is a pilot’s seat. On the right there is a terminal. Look into it, and adjust the three parameters (left to right): 1, 5, 7. If done correctly, Catherine will tell you about it. Sit down in the chair. In the end, decide what to do with the old Simon.
Take omni-tool, go outside and turn right. Follow to the end of the bridge and go down the stairs to the lift. Insert the omni-tool into the slot on the dashboard. There are two toggle switches on the right. Switch toggle both the way to the left to select the “Descent” and one passenger. Next, pull the red lever to the left of the inserted omni-tool. Sit down in a chair to begin the descent.
When the lift stops, then get up and go up the stairs to the roof. Open the panel and insert the fallen guard. Return to the site and continue the descent.
Downstairs, take omni-tool and apply it to the panel nearby to open the door. Follow down. Stay on track. The building on the left has a terminal with “Journal of ATP.” The building on the right is the intercom, which you can listen to your messages.
Go forward to the end, until you see the post with a sign “TAU”. There is a lever below. Pull the lever and lights light up ahead. Move between the lamps to the next building. Inside the building on the wall to the left is one more lever. Pull the lever, but the break. Exit the building and turn left. Go forward until you see the lights. So continue to follow until you run into other buildings. Inside there is a computer, but that did not work initially. Go forward and pull the lever on the right. On the wall hangs an intercom on the left. Listen to the message. There is also a familiar plant, connecting you with the Scientific research institution.
Go outside, there is the garage to the left. Walk up to it and enter the terminal. Select “Manage”, and the destination – “TAU”. The robot starts. Follow him as he will illuminate the road and scare away fish. When the robot monster eats, the run up to the lantern. Follow the right. Move along the rocks to the left until the green lights around you see the entrance to the cave. Scroll through the cave, guided by green lights.
Get out of the cave. Ahead you will see a bright light. Do not hurry, because this is a dangerous fish. Go back to the cave, wait out a bit and go outside again. Ahead should be barely visible two white lights. Follow them, and then move from the lantern to the lantern until you find the entrance to the station. Click on the button to the left, and go inside the second room, apply the omni-tool on the panel on the right.
Go forward in the room to the right (DIVE ROOM) find another intercom. Return to the hallway and go to the very end. There is a massive door to the right. Open it. Opening it will be a few seconds, behind the door is a monster. You must get rid of him, running on the next room. Then move forward through this door, anywhere without displacing. Go through another door, and then – through the door on the left. You will find yourself in the control room. Inspect your computer. Choose the section “Intercom” option “Infirmary” and see that there is an intercom enabled. Make a call, you will be contacted by a girl who refuses to communicate with the robot.
Get out into the corridor in front of the computer, take the door on the right (DISPATCH). Get to the second massive door, which immediately open. Behind the door should not be a monster. Go through the door ahead and go up the stairs. Go down the other stairs and through two doors enter the residential apartments. Inspect the large room with several doors. Go through the last door on the right. In the control room, take a look at your computer. There is a section “Door locks”. As you can see, the infirmary and the room of Johan Ross is locked. In order to open the room Johansson, you need to know the password. But you can click on the infirmary, and access will be opened.
Return to the room with several doors. Go through the door ahead on the right, leading to the stairs to the infirmary. Talk with Sarah Linduoll. Turn off the life-support system.
Torment Linduoll Sarah came to an end.
Before pick up “Ark” from the table on the left, look to the left of the computer. Look at all sections. Enter the section “Door locks”, click on the room Ross Johan. You’ll see the code. In this case, the code was 2678, but it may be different. Turn to the door, to the right of it is the freight elevator shaft. And between the door and the mine has a red cover. Press the white button on the panel to call the elevator. Take the “Ark” and place it in the elevator. Send it to DIVE ROOM.
Go down, go to the control room and go into the computer. Select “Door locks” and click on the room of Johan Ross. The code should enter automatically and you will be just a click on the “OK” button. Then follow to Johan’s room. Not so you’d expect to see here. Examine the plate on the table in front. Read a variety of entries from a diary, listen to audio messages. Get down into the DIVE ROOM, a room in the middle of the lift pull the “Ark” and place it on the platform in the back room. Log in to the terminal on the right and click “Attach”. Use the omni-tool, which will need to pull out from the panel. The room begins to fill with water, when treatment stops. Right from the cargo tank there. There are two tubes on the sides of the tank that you have to pull out. Hold down the left mouse button and move it to the side. The third handset is on the opposite wall. Unhinge it and room completely filled with water.
Follow the route, which is moved by “The Ark”. Are clearing a path. When you finally find yourself in a dead end, then turn around and take a few steps back. The right to be a hole leading to the cave. Follow through the cave and go to the station “Alpha”. Lift up the front door and go down below. Move forward, picking up all the other doors. In a room with several servers will need to get to the end and turn through a crack in the wall on the left side. Get this route to the heart of the monster. Put it out and see what happens.
Click on the yellow button at the right of the hatch. Run through the hatch, try to avoid the monster. Follow the path between the illumination lamps. After the monster catch and release you, turn your back to the fence and move to the right. You must get to the door leading to the station “Phi”. Click on the button to the left and go inside.
Follow ahead, in the room on the left side of the computer to find a hole in which to insert the omni-tool. So do it, then talk to Katherine. Turn around so that you stand back to the computer and go through the door ahead. Go down. Go to the room in front of the terminal and pull out the battery. Follow back and take in the passage to the right. At the far door (not the door, near where the plant is located) is a terminal to which you want to insert the battery. So did they. Walk into the room with the ark and collect it.
Come back. Pass on the left leads to the stairs, where there is Katherine (omni-tool). You need a second door on the left. Open it and go forward. Climb the stairs and place the “Ark” in the rocket. You turn around and see a wall terminal, in which the battery is missing. Look for the battery where you left it the last time, when they tried to gain access to the room with the “Ark.” On the floor lay a corpse. Click on it and find out what really happened with Katherine. Insert the battery into the opening and start using the computer near the rocket. Catherine says that you have to go back.
Go to your computer and take the omni-tool. Turn around and go through the gate on the left. Use the omni-tool on the panel to lock flooded with water.
Go outside and go up the stairs on the right. Insert the omni-tool in the right hand pane, and then click on the pilot’s seat. You will manage the lift. Move the yellow cross on the ground to the left, a rocket, located on the rails. The cross should be green. Hold down the left mouse button and wait for the crane hook rocket.
Office of the crane during loading missiles from “Ark” in the gun.
Release the mouse button and move the cross to the right on path orange rectangle. Hold down the left mouse button to put a rocket into the gun. Then press the button on the left to start the “Ark” in space. Watch the cut-scene.
Do not rush to leave the game. After the credits, you’ll learn what happened to Simon. Move forward. On the left will be the terminal, where you can answer a few questions about the “Ark.”

Last hope humanity.
Walk to the end, until you meet Katherine. See the final shots of the game.


 Torchlight 2: Ice Tundra Berserker Build Guide
 Elder Scrolls Online - How To Kill Gutstripper (Mage's Guild)
 Dragon Age Inquisition: Requisition Guide
 We need to stop criticising Star Wars Battlefront for lacking the things it never wanted to offer
 Age of Empires 3 - Act 3 Steel Campaign Walkthrough Guide