In this series we will look at different zombie related games and talk about surviving in them, while also (if this applies) talk about killing the survivors. First we shall look at a popular Source mode called Zombie Panic: Source. In ZP:S you are either a survivor, or a zombie, and depending on the map type you want to either “just” survive, or complete a series of objectives. When you die as a survivor you join the zombie team, and try to kill the survivors, while stopping them from completing their objectives. Unlike most FPS games, ZP:S does not allow you to act like Rambo. The survivors have a wide choice of weapons, but they cannot carry all of them at once. Ammunition is also an issue, since you not only have a limited supply of it on the map, but also can only carry a certain amount of it. Meanwhile, as a zombie, you could find yourself troubled by the “camping” survivors, or well barricaded safehouses. Worry not, we are here to help, and very shortly you too will be the best zombie/survivor around!

Zombie Panic: Source!
Like in almost any FPS you move around with your WSAD button, while using your mouse to turn around and look. As a survivor you will often start off with a randomly selected close combat weapon and a sidearm. Melee weapons do not have any secondary fire mode, so pressing the left mouse button will make you swing it. Pistols do not have secondary fire modes, also meaning you cannot aim down the sites, making you rely on the cross hair. The only firearm which has a secondary fire is the Winchester, which can be used to fire both buckshots at once. As a zombie your left mouse button is used to attack, while your right mouse button allows you to push objects. When you have to move a poorly made barricade out-of-the-way, look down at it, and press the right mouse button.

Start of a survivor round. My trusted piece of kitchen equipment, pistol and freshly obtained shotgun. What now?
As a survivor you can use objects, collect weapons, melee weapons, ammo, complete objectives, and other useful things. It’s done using the E button. When a weapon is highlighted when you look at it, Press E. Objectives which have to be collected will often be highlighted in some way, so that you know what to look for. Notice your inventory at the bottom of the screen. Depending on the order you pick up your weapons in, they will be allocated specific numbers. As such, when you are in a safe area, reorganise your gear. In order to drop a weapon press G. Remember this useful button, since you will eventually run out of ammo for your gun, and there will be no point in carrying it around with you. Another useful function is throwing ammo away. Use the V key to scroll through your ammo types, you will know which one is selected thanks to the arrow, and press T to throw out an entire pack of it. Useful, for when you picked up ammo you do not need, or want to share it with your mates. N is a button which is key, when you pick up a gun, but would rather just keep the ammo it has. When you hold out the weapon press N and any ammo it held will be transferred to your inventory. P is your “Panic” button. If you press it all the weapon in your inventory, except the one you currently hold, will be thrown away, as well as any ammo you carry, but you get a significant speed boost to run away from your foes.
As a zombie, you have much less functions, but the ones you have are key to defeating the pesky survivors. The SHIFT key makes you “run”. If you hold it down and use the right mouse button you will also perform a boosted “push”. Do note, this drains your Eat-o-Meter. The Eat-o-Meter will only fill itself up, if you successfully hit survivors. The Whitey (boss Zombie) also has the Carrier Roar, which makes friendly zombies spawn closer to you and highlights you on the screen, so zombies known where you are exactly. Both the Survivors and Zombies have a use for the F key. Survivors have a flashlight, which uses up power when turned on, but when turned off regenerates slowly. Zombies have Zombie vision. Everything becomes a bit lighter, and survivors will be highlighted red (normal survivors) or green (infected survivors).

Your typical zombie start, i.e. You are out here, they are inside. My higher than usualy health (ordinary zombies have 200) means I am the Whitey.
As a zombie you could start the game as a “Whitey”. This is a zombie which looks different from the other zombies, but also has more health, deals more damage and with each hit (depending on the server settings) can infect a person. An infected survivor will turn into a zombie after a certain time, making such people ideal backstabbers, if the group tries to reinforce their position. A survivor will know they are infected after some time, and steadily they will lose control over their “character”, such as, not being able to reload, gather ammo, etc.
Now, that we are done with the basics, let’s look at the juicy details. First off, surviving as a Survivor.
You managed to survive the start of the Zombie Apocalypse, and now ended up here. Now, there are three types of game modes on ZP:S. Survival means that zombies have a limited number of respawns. You have to either survive long enough, or kill off all the zombies. Every survivor which dies adds another life for the zombies and joins the zombie team. Objective mode is just that, completing objectives. Do not be frustrated if you do not get them done the first, or the tenth time. Learn from your mistakes, and of course, study the map as a zombie. When in doubt, follow the people who know what they are doing. The third mode is essentially “Defend the base”. The survivors defend a certain point from the zombies, and random weapon/ammo drops appear on the map which the survivors can gather for bonuses. If the zombies capture the base, the game ends. Survivors get points for recovering supplies, and holding the house. A dead survivor does not join the zombies, but remains on his team, respawning with basic gear. Once a round is over, the teams swap.

Mmmm... Canned Food!
The big question: How to survive? Like in any classic zombie movie, barricades are the essence of survival. 99% of the time a map will not allow you to block an entrance for an entire round, very often there will be more than one entrance, and you will not have enough barricades to block all of them off. The trick is to use what is available around you, and maximize its use to your own benefit. Let us talk about, barricades.
You run into a house, room, or basement. You take a quick look around, gather some weapons and ammo, what next? Barricade yourself in. Usually you do not have enough time to block every single entrance, so look for a single room to lock yourself in. A good hiding spot has a number of elements to make it optimal for you:
1) Very few or no windows. If you are on the ground floor zombies could climb in. On upper floors they can still potentially jump in from the roof. However, a window is both a good entrance for the zombies and an escape route for you. Being underground, in a basement for example, means you cannot be surprised in that way, but it could mean there is only one way in, and thus, out.
2) Plenty of room, or very thin entrance. If you are in a big group you will prefer a bigger room. The reason being, if a large horde of undead shambles toward you, you would prefer to have somewhere to retreat to, while they approach, to give you those precious few seconds to reload or swap weapons. At the same time, the other survivors can target the undead from different angles. If you are alone, a thin entrance, like a single door and a long corridor is very useful too. Zombies can enter in limited numbers, and if you have a shotgun or rifle you have a decent chance of wounding multiple zombies at the same time.
3) Furniture, lots, and lots of furniture. Sofas, tables, chairs, shelves, anything made of wood, metal, plastic or anything else for the matter. It is necessary to halt the advance of the undead, or at least to slow them down. In the event that you cannot block off the entrance you can at least create an obstacle course for the zombies.

What is this? A surprisingly effective barricade made of 2 planks. Zombies can't get up, or jump over the planks, and you have perfect view of the approach.
When you feel you are relatively safe press H to hide your weapon. You can always produce the weapon again by clicking the number buttons, but in order to more efficiently push objects your weapons must be hidden. Just like in the case of the zombies press the right mouse button to push objects. You will notice, that survivors are weaker than zombies when it comes to pushing objects. As such, do not be disheartened if the barricade you had to build for five minutes gets wrecked in a single attack.
Before we do get disheartened, let us talk briefly on how to think in terms of barricades. Different pieces of furniture can be destroyed, or are indestructible. In the vast majority of cases anything made of wood (including, most doors) can be destroyed by zombies. As such, using wooden objects as the base for your barricade is a very short-term plan. What you will prefer to use are Sofas, metal tables, and possibly, anything heavy, and made of metal. The foundation of your barricade will be a heavy sofa, tipped over table, or something equivalent. You will attempt to place all the other elements of the barricade around or on the foundation. If you push in enough things against the foundation a single zombie push will not be able to open the gateway to your safehouse.This does not guarantee that the zombies will not hop over the barricade, but it is still a method of slowing them down, so that you, or your group, can take a few clear shots on the zombies.

Even if you feel the zombies cannot open the door just yet, it pays off to keep an eye on your mates. All too often the momet you turn around, is the moment zombies start pouring in.
When constructing your barricade be wary that a zombie attack can come at the worst possible moment. When you, or your mates, are building the barricade, ask somebody to cover you/them. If zombies come during the construction, and you give an early enough warning, you can quickly dispatch the threat and return to your rapid construction. If you are aware that you do not have the time to construct a full barricade use the elements of furniture as obstacles for the zombies. Sofas, tables and other items will slow the zombies down, but a smart zombie can also use them for cover.
If you were lucky, or thoughtful, you might had picked up some red hammers or an IED (Improvised Explosive Device). Red Hammers are planks you can place wherever you wish, as long as they fit, and they have something to be nailed to. These planks can be rotated (using the R button) and you have two lengths of planks to choose from (right mouse button). These planks are mildly tough, and when placed properly against a door, or barricade they make excellent support. One plank alone can mean the difference between a horde getting in with ease, or having to crawl under it. For example, a plank placed more or less on chest height will be too high for the zombies to jump over it, and just low enough to force them to crawl under it. As such, you can shoot at them with ease, while having a one-plank barricade. Red Hammers take up two inventory slots however, so if you could not find any heavier guns, you might as well take a few planks. If you placed a plank, you can recover it. Walk up to it, and press E. If you have enough space in your inventory you will recover it.
Zombie Tip: If you jump on a Red-Hammer plank you will break it immediately. As such, if a foolish survivor placed a plank near the floor, jump on it. It saves a lot of time.

A long corridor, and heavy barricades at the end of it. Being a zombie is not about being smart, it's about being expendable. So... be a good meat shield and soak up some bullets.
What would you need the IED for? Call it the last desperate attempt at stopping the zombies which have managed to go past your barricade. The IED is a powerful bomb which can easilly empty out a solid portion of a room. If you place it at the bottom of the barricade, and zombies start pouring over it, the IED will kill them, but it will also destroy most of the barricade, and (possibly) kill the person who placed it. When you are forced to use the IED you should then immediately flee, since your barricade is gone. When you throw the IED and it begins blinking red press J to produce the mobile phone. In order to active the IED press the right mouse button, and stay as far away from the explosion as you can.

You are here, it is there. A single plank in the window with enough space for you to fire through is worth a cart load of gold.
Do not think of barricades as a method to permanently stop a zombie horde. Barricades are only as good as their defenders. As such, when the zombies do come, kill them as they try to destroy your wall. Hold in mind, that zombies can regenerate their health, and as such, a zombie can taunt you by feebly pushing your barricade so that you empty your shells. In Survival rounds you will want to kill off the zombie, but in objective maps, where zombies have infinite lives, and you have limited ammo supplies, you might be faced with a troublesome dilemma of either firing at the undead, or waiting untill the very last moment to do so. If you run out of bullets, be the good guy for your team and reinforce your barricade if it gets damaged. Since you will most likely only have a melee weapon left you won’t have the chance to fight the zombies untill they do get into your safehouse, and that might be Game Over.
That would be all for this part of the ZP:S survival guide. Stay tuned for more tips and tricks next week!


 Hunted The Demons Forge Prisoner Location Chapter 2
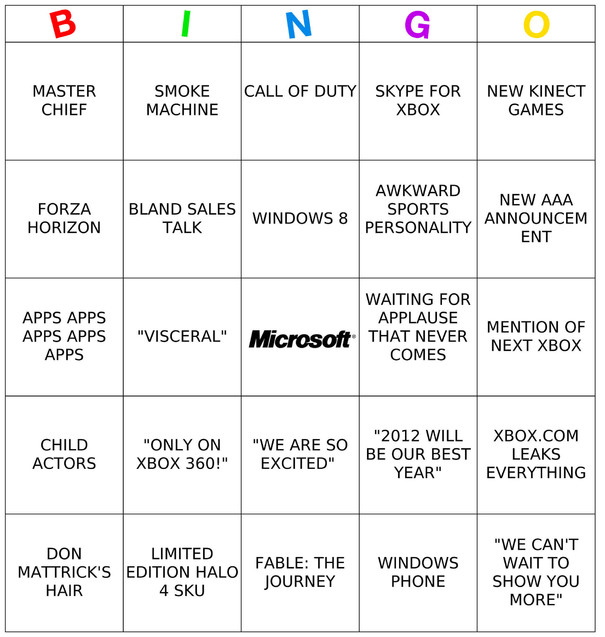 . presents E3 2012 bingo cards
 The Taken King quest walkthrough – Step 9: Lost to Light
 Zelda OoT 3D King Dodongo Guide
 MK 9 Hidden Fights