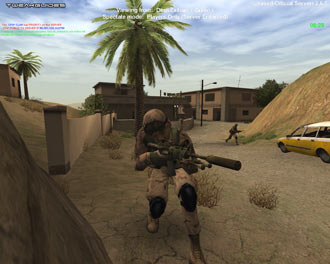
America's Army is a 3D online game centered around the US Army. The game was developed by US Army and US Dept. of Defense experts to "provide civilians with an inside perspective and a virtual role in todays premiere land force". It does just that, providing players of the game with the most authentic military experience available. The full version of the game is available completely free of charge from here and rivals any online first person shooter in both gameplay and state-of-the-art graphics.

Since America's Army came out in July 2002, it has rapidly grown in popularity, such that there are now over 7 million registered players, placing it in the top 5 most popular online PC games. One of the reasons the game is so successful is that it is based on the Unreal Engine, which powers games like Unreal Tournament 2004. The Unreal Engine provides America's Army with highly realistic graphics, sound effects and physics. To add to this, the game is constantly being improved in the form of new versions regularly released by the game's developers.
The latest version of the game is called America's Army: Special Forces (Overmatch) and brings the game up to Version 2.8.5. If you haven't tried America's Army yet it is without a doubt worth the download.
I've prepared this guide as a means of bringing together important America's Army resources as well as providing details on what all of the game's settings do both those available in-game and those in the .ini files - to let you maximize your enjoyment of the game. Whether you're new to the game or a long time player, there is something here for everyone so read on.
Note: This guide refers to the latest version of America's Army: Special Forces Version 2.8.5. Check back regularly for updates to the guide.
Important: This guide will not be updated for America's Army 3.0. However since AA 3.0 is based on the Unreal Engine 3.0, you can refer to the Unreal Tournament 3 Tweak Guide, especially for advanced tweaking details.
Before getting into any game-specific settings and tweaks, this section covers the obligatory system optimization information I include in all my guides. If you've followed this advice recently, you can skip this section.
Many people report problems with this game and in almost all cases these are due to general system issues and not the game itself. With that in mind I strongly urge you to take some time and follow the advice below if you truly want this game, and indeed every other game you own, to run at its fastest and most trouble-free.
The place to start is my free TweakGuides Tweaking Companion. It is the complete system optimization guide for Windows users. Designed for novice and advanced users alike, it is written in plain English to help you genuinely understand all aspects of Windows and your PC. The guide covers every major topic, from the correct installation of Windows and critical drivers and software, through to recommendations for every significant setting and feature, all the major performance and convenience tweaks and customizations, as well as detailed troubleshooting advice. There are also links to a range of reliable free applications for optimizing and maintaining your system, as well as to important resources for finding out even more about Windows and your PC. There are two separate versions: one for Vista and one for XP.
If you've ever wondered what common graphics and display settings like FPS, VSync, Refresh Rate, Antialiasing and Anisotropic Filtering are, and how they really work, then check out my Gamer's Graphics & Display Settings Guide for all the details in an easy to understand format. The guide also gives you a rundown on exactly how a game goes from a being a set of files on your hard drive to a 3D image on your screen, including relevant performance tips.
Finally, if you run an ATI or Nvidia graphics card, I have written two comprehensive guides which you should check out: the ATI Catalyst Tweak Guide and the Nvidia Forceware Tweak Guide. These guides cover absolutely everything about the latest graphics drivers, how to set them up correctly, as well as advanced tweaking, overclocking and benchmarking tips. They're a must-read for configuring your graphics card correctly.
The above information really will serve you well in the long run, not just in this game. If you don't optimize your system and keep everything updated and maintained correctly you will keep running into "mysterious" problems time and time again. Do yourself a favor and when you get a chance spend an afternoon or two optimizing your machine the right way with the guides above.
The next section goes into more detail about specific troubleshooting tips which address common performance issues with the game.

This section contains specific troubleshooting tips which address many of the most common problems experienced by America's Army players. Several of the tips below are drawn from my guides mentioned in the Essential Optimization section. This is no coincidence, since some of the common America's Army problems are not game bugs, but specific sub-optimal system conditions which lead to problems. America's Army is quite system intensive and uses some advanced features, and this brings out instability and problems on many systems. I can't stress enough the importance of taking the time to go through the checklist of advice below if you're having a problem with the game:
Official Support: If you have a problem with the game, the first place to visit is The Official America's Army Support Site. Make sure to read the Frequently Asked Questions list as it's highly likely the answer to your question is there. For details of the changes in the latest version of the game, read the ArmyOpsReadMe.txt file found in your \America's Army\System\ directory. If you still can't find what you're looking for, try the Official America's Army Support Forum where you can post questions which other members of the community can help with. If you want to chat live to support personnel using the in-game Chat function, or by using an IRC client (like mIRC) then join the #aa-support channel on irc.americasarmy.com. A large range of official support resources, many of which are covered below, are also available from within America's Army itself. Click the Support item on the main menu of the game for more details.
System Requirements: The minimum system requirements for America's Army are quite high, however for reasonable performance you should actually try to meet the Recommended system requirements. Both of these are listed here: America's Army System Requirements. If you don't meet the hardware requirements, or barely meet them, then expect to see very poor performance, visual anomalies, and in some cases the game simply will not run. This includes things like playing AA on a laptop or nonstandard graphics chipset. There is no fix for not meeting all the minimum requirements except hardware upgrades.
Windows Vista Users: If you're having problems running this game under Windows Vista, first make sure that you're using the latest Vista graphics and audio drivers for your hardware, and the latest version of this game (see page 4 for patch details). Next, make sure you don't change your UAC settings after the game has been installed, as due to Virtualization this can change the location of the game files and settings. If you can't launch the game successfully when UAC is enabled, you will need to run the game with full Admin privileges. To do this either right-click on the launch icon and select 'Run as Administrator', or right-click on the launch icon, select Properties and under the Compatibility tab tick 'Run this program as an administrator' then click OK. I strongly recommend that you refer to the TweakGuides Tweaking Companion for Windows Vista for more information - in particular check the 'Gaming in Vista' section of the Graphics & Interface chapter; the UAC section of the PC Security chapter; and the 'Personal Folders' and 'Directory Junctions & Symbolic Links' sections of the Windows Explorer chapter. These will tell you how you can fix game-related issues and also explain the relevant differences of Vista.
Known Game Bugs: There are still a range of known bugs and issues with the latest version of the game. Some are listed in the ArmyOpsReadme.txt file as detailed further above, some are listed here. This includes the Texture settings bug, covered in the In-Game Settings section of this guide. Only further updates will resolve many of these.
Lag - Ping, Packet Loss, Stuttering & Graphical Slowdowns: Lag is a major issue which most people complain about. However unfortunately most people just use the generic term 'Lag' to describe up to four very separate types of problems. To clarify what they mean, their causes, and solutions, first see the ConfiguredInternetSpeed setting on page 9 of this guide, then refer to this detailed post on the Official America's Army Forums topic I posted a while ago. You cannot solve a problem if you don't understand the root cause of it, which is why the generic use of the term 'Lag' is annoying as it confuses the actual cause of the issue which differs for many people.
Note 2: Users playing the new AI-based Co-Op maps (Interdiction and Snake Plain) may experience strange small skipping/pauses which are due to the AI implementation and CPU intensive nature of these maps for both server and clients. This is evidenced by the fact that it occurs both online and offline, and is most noticeable when AI are in proximity and are 'activated'. There is no fix for this at the moment.
PunkBuster Issues: The PunkBuster anti-cheat system is software which attempts to detect and remove cheaters from America's Army. See the PunkBuster America's Army Support Site for more details. However PunkBuster can cause some problems in certain circumstances. To start with, you should have Administrator level access to your PC when playing America's Army or you may experience PunkBuster errors. Also in some instances PunkBuster may have problems updating automatically, in which case it is recommended that you manually update by going to your Program Files\America's Army\System\pbsetup\ directory and running the pbsetup.exe file. This will open a series of agreements you must click 'I Agree' to, and then the 'PunkBuster Setup' window. Here you can select to add any game to the list of PunkBuster supported games displayed by clicking the 'Add a game' button. Do so and select 'America's Army' from the Game list, then click the OK button. Now on the main screen listing click the 'Check for Updates' button. If a new version of PB for America's Army is available, it will be downloaded and applied automatically. The next time you go to play AA online, there will be no need to wait for a lengthy update process to occur - so long as you remember to manually update PB as often as possible. You can now also run PBSetup via the main AA Loader screen, by clicking the 'Update PunkBuster' button which is shown when you first click the 'Play America's Army' button.
Connection Problems: If you are having errors logging into your Account, see the Account Problems section above. For general connection problems such as using the server browser and/or connecting to servers, first check your Filter settings. If nothing else helps, or if you don't like the default server browser, try another server browser like the All Seeing Eye. Furthermore, sometimes the America's Army Master Server is simply under load or experiencing problems and may Time Out or have other errors trying to verify your account. The best you can do is wait a while and try again later.
General Protection Faults/Critical Errors: The Unreal Engine is known to generate 'General Protection Faults' and 'Critical Error' crashes to desktop if your system is not running optimally. This is not an AA-specific bug, and occurs with all games based on the Unreal Engine since 1999, so it's not a new bug and it's not going to get 'patched'. There are ways to minimize or prevent it though - these crashes are directly related to the 'memory subset' on your system. That means that one or more of the following components on your system are malfunctioning under stress: the L2 Cache on your CPU; your System RAM; your Windows Virtual Memory/Disk Cache; and/or a background program/service in memory. That doesn't mean they're physically faulty, it usually occurs due to overclocking or sub-optimal software settings, so make sure you don't have an extremely high CacheSizeMegs value (See the Advanced Tweaking section), and make sure you go through my TweakGuides Tweaking Companion in detail. In particular check the BIOS Optimization, Memory Optimization, Overclocking and Benchmarking & Stress Testing chapters for further assistance. Trust me when I say there is no single quick fix - you have to optimize your entire machine.
Antialiasing and Anisotropic: If you have mysteriously low frames per second despite being certain that your hardware is capable of more, then one place to check would be your graphics card's Antialiasing and Anisotropic Filtering settings. These are explained in detail in my Gamer's Graphics & Display Settings Guide. Even 2x Antialiasing for example can turn America's Army into a slideshow in certain areas, depending on your hardware and in-game settings. For maximum framerates set both AA and AF to 0x or 'Application Controlled' in your graphics card's control panel.
Virus Scan: Do a full scan of all your files using a free virus scanner such as AVG Antivirus, a free trojan cleaner such as A-Squared, and a free spyware cleaner such as Ad-aware. Viruses and trojans can cause unexplained behavior and general file corruption, so it's best to make sure your system isn't infected before moving on to other troubleshooting measures. However make sure to disable any background scanning programs once you're done (See Background Programs below). More details of securing your PC are in the PC Security chapter of my TweakGuides Tweaking Companion.
Background Programs: Disable all background applications, especially virus, trojan and spyware scanners and messaging utilities. These applications can and do use up valuable CPU resources, take up precious RAM, cause memory conflicts and crashes to desktop, and lag online play, but most importantly they interfere with read/writes to your hard drive effectively slowing it down and causing more in-game freezes and increasing load times. Full instructions on how to identify your startup programs and services and how to correctly disable unnecessary ones are in the Startup Programs and Services chapters of my TweakGuides Tweaking Companion.
Overclocking: The Unreal Engine on which America's Army is based can be sensitive to overclocking. If you have overclocked any components on your system and are having problems, set everything back to the default speeds and try running the game. If you don't experience the same problems at default then your overclock is the primary culprit. In particular, read through the Overclocking and Benchmarking & Stress Testing chapters of my TweakGuides Tweaking Companion for tools and instructions on how to correctly stress-test an overclocked system and determine which components are being pushed too far. Even if every other game and program you run works just fine at your current overclock, AA may well be crashing because of your overclock.
Defragging: Make sure that after you have installed AA that you run through the Regular Maintenance procedures detailed in my TweakGuides Tweaking Companion. If you only do one thing on that list though, make sure you run the Windows Defragmentation utility after installing a large game like AA (which takes up over 2GB of disk space). Defragging ensures that the game's files are all on the same place on your hard drive, greatly reducing loading pauses/freezes and loading times. It may take a little while but it is well worth it.
Fast CPU and Fast Graphics Card: Recent games based on the Unreal Engine (like America's Army) require a balance of both a medium to fast CPU and a medium to fast graphics card for optimal performance. If you have a fast CPU but a slow graphics card for example (e.g. P4 3.2Ghz combined with an FX5200), or vice versa, then your machine will struggle. While you can certainly reduce the load on your machine by scaling down the in-game settings and undertaking some advanced tweaking, you cannot alter the advanced character and bullet physics, the basic terrain complexity, or the sheer amount of essential detail on screen during a heavy combat scene.
That's just a basic rundown of troubleshooting tips. Read the remainder of this guide for more specific settings and tweaks which can help improve your performance and resolve any problems.
This section covers the important basic information every America's Army player needs to know. In particular if you're new to America's Army you should definitely familiarize yourself with this section dont skip over it.
Downloading the Game
America's Army can be downloaded completely free of charge from a variety of places. There are usually two types of downloads for the game - patches and the full version. If you have an earlier version of the game, you can often download small patches which will bring it up to the latest version. On the other hand if you don't have the game, or your current version is relatively old, download the latest full version of the game.
As of version 2.8.4 a new Deployment Tool is used to download the game. You can download the Deploy Client from the America's Army Download Page. You can read about the changes the latest version contains here or in the ArmyOpsReadMe.txt file in your \America's Army\System\ directory after installing the new version.
Just remember that America's Army is a completely free game, and there is absolutely no difference between the versions of it available for free on a range of sites, and those sold by some sites or on Ebay for example. You should never have to pay a cent to download and play America's Army.
Installing the Game
To install the new version correctly it is recommended you follow the details on how to do this here. If you've never installed America's Army on your system before, then simply download and run the full version of the game. However if you experience problems with the new version and/or if you had previous versions of the game installed in the past, then it is strongly recommended that you do a clean install of the new version by uninstalling and deleting all traces of the previous version(s). Furthermore do not restore or use any old Armyops.ini or User.ini files - they may not be completely compatible with the latest version and could cause problems. Note that uninstalling the game from your machine will not lose your soldier and all his training and honor - those are recorded against your username and held on the America's Army Master Server.
When installing the game I recommend choosing the Custom installation option, since when installing America's Army the average player does not need to install some of the additional items, such as the America's Army Server Manager (AASM); AASM is totally unnecessary unless you are going to host a server for others to play on. If later you want to install AASM, find the AASM17Installer.exe file under your /America's Army directory, unzip the contents and run the Setup executable to install it.
Creating An Account
If you're new to America's Army you will have to create an account which will hold your player's details, save your training results and keep track of your overall score. There is no charge to have a user account, it is simply a requirement of the game. The quickest way to create a new account is to go directly to the America's Army Account Management Page. This is the same page as the one you are taken to if you click the 'New Account' button on the Login screen in the game.
Next click the 'Register Account' option and enter the Username which you will be using in the game, along with a valid email address. Once you're done entering details a registration email will be sent to the email account you specified, and from there you can verify your registration, and use the details to log into America's Army. Note that the account registration email may take a while to be sent out, so be patient.
Account Login & Record Brief
Once you've created a new account, or if you have an existing account, make sure you're connected to the Internet, then start America's Army. On the Login screen enter your account's Username and Password exactly as they were registered, then click the Login button and after a few moments you should see the News page. If you're not using a public machine, I recommend ticking the 'Remember Login' box so you don't have to manually re-enter your login details each time you start the game. For further convenience you can tick the 'Automatically Login' option as long as you make sure you're connected to the Internet each time you launch the game, and again if you're not on a machine which is widely shared. If you have any problems with account login, see the Troubleshooting Tips section on the previous page.
Once you've Logged in, you can see all the details for your player under the Record Brief section of the main menu. By selecting the Player Stats tab you can see all the detailed statistics on your gameplay, the Badges tab shows any special badges or qualifications you've earned, and under the M4A1 Mods tab you'll be able to select weapons modifications for your M4A1 which is used on certain SF Maps (See Weapons Modifications on next page for details).
America's Army Official Manual Set
America's Army can be very difficult to comprehend the first time you play online. Which buttons to press, who's friendly and who's foe, how to operate the different weapons and equipment, where the objectives are and how to get to them are all common questions players ask when first playing online. Everyone was new to America's Army at some point, so we can all relate to the confusion new players may face, and any common mistakes they make. However this does not excuse new players from making some effort to learn about the game's workings before playing online. The place to start is the Official America's Army Manual.
Links to the full game manual can be found under your \America's Army\Help\ directory. At the very least, read the America's Army Quickstart Guide PDF file found under the same directory. If you want to download the full game manual or any other manuals, such as those for the Mission Editor, you can obtain these in PDF format from here: Official America's Army Manual Set.
It's very important that you read the main America's Army manual from start to finish, whether you're new or experienced. It has a great deal of genuinely useful information and contains numerous tips, tricks and strategies, as well as pictures of the layout of each online map - these are all things which the best players use to their advantage, and often take weeks to learn the hard way. When combined with some offline practice (See Offline Practice section below), reading the manual will save you a lot of ROE, aimless wandering around and constantly asking other players obvious questions - things which may inevitably see you get booted off a server.
Special Forces Roles
There are a variety of roles which can be undertaken within the US Army Special Forces. To learn more about these roles, go to your \America's Army\System\Videos\ directory and run the SF_A-Team_Videos.exe file which will give you access to 7 short videos which take you through the capabilities of these roles, and help you understand their method of operation better when playing these roles within the game. Note that not all of these roles are available in the current version.
Training
America's Army requires the completion of specific types of training before being able to play online. It may seem tedious to undertake at times, especially when attempting for Special Forces qualification, but in keeping with the game's overall theme, it is there to familiarize players with the concepts and methods involved in being in the real US Army.
To start training, click on the Training option on the main menu screen. There are five sections under the Tours drop box:
Note: SF E & E (Escape and Evade) is a very tedious and frustrating test, but it must be passed for you to play as a Special Forces soldier on SF maps. The best advice is to take it very slow - crawl or slow crawl almost the whole way, and stop as often as necessary for as long as necessary if you hear dogs or the enemy shouting out. Be very patient and you will pass this test.
Not completing a particular training course can prevent you from being able to play on certain maps, and undertake certain roles, so make sure you complete all the training to have the fullest experience on AA. There are no cheats or tweaks to pass the training - it's an essential part of the game and prepares you for what the game is like when playing online against experienced opponents.
Honor, the Score System and ROE
America's Army has a player statistic called 'Honor'. Your Honor score represents a combination of experience and playing time, and can also be a reflection of skill. It is based on how many points you have accumulated over time while playing on Official servers and Honor-enabled Leased Servers. Any points you earn while playing on any other type of server does not contribute to your Honor total.
The scoring system in Americas Army can be quite confusing. You will see your score go up and down based on several factors, but you may not know what affects it. There are some simple rules about the scoring:
For the purposes of Honor, your total score at the end of a round is used to add to your running total, however negative points from deaths and leadership do not count for Honor purposes. ROE on the other hand does count in reducing your score, so it is important you understand what causes ROE and how to avoid it.
Note: The scoring system is slightly different for Co-Operative (Co-Op) maps such as Snake Plain and Interdiction. On those maps the Objectives and ROE are far more important than enemy kills, and the points reflect this. Each kill only gains 1 point, and each death is -4 points.
Americas Army takes the Rules of Engagement (ROE) very seriously, and as such the game strives to impress upon players the importance of making sure they dont hurt teammates or civilians. Whether intentional or accidental, any damage you inflict on a teammate or civilian will give you ROE points. The amount of ROE depends on the nature and severity of the damage, and how soon after the start of the round it is inflicted. If within a match you accrue a certain amount of ROE (usually 400 points), or if you kill or severely injure a teammate within 30 seconds of starting a round you will be automatically booted from the server and wind up in jail. Other players may also at any time start a votekick on you to vote upon whether you should be removed from the server due to high ROE. The bottom line is you should be very careful not to do things which cause ROE, such as firing or grenading blindly - this is not a deathmatch game.
Honor is important in Americas Army because it plays a large part in determining whether you get your weapon of choice in the Weapon Selection phase of online play, as well as the requirement for 15 Honor or more to be able to play as a Special Forces soldier. If you want your Honor to increase, you need to play as though you were in the real Army - be very careful not to violate ROE and try to achieve the team's objectives as often as possible and your Honor will steadily rise. The America's Army Manual has a section which details how to identify friend and foe, and is also useful in familiarizing yourself with weapon details such as the fuse time on grenades, the possibility of misfiring an RPG-7 or killing a teammate with its backblast for example.
Note that if at any time your honor falls below 9 you will not be able to play on some servers. You can still play on non-Honor servers, but it is recommended you visit the special retraining servers so that you can practice and regain enough points to return your honor to 9.
Here are the points (score) needed to gain a point of Honor within each Honor Range:
01-10: 500
11-20: 1,000
21-30: 2,500
31-40: 4,000
41-50: 6,000
51-60: 9,000
61-70: 13,000
71-80: 23,000
81-90: 43,000
91-99: 83,000
For example if you have 10 Honor you will need to accumulate 500 points - net of any ROE - to gain another Honor point (taking you to 11).
If you want to check what your current accumulated score is, and how many points you have left before reaching the next Honor level, the easiest way is to go to the Record Brief section of the game, and under the Player Stats tab you will see all your detailed statistics. You can also check this by going to the America's Army Website and then login using your AA username and password.
To keep track of additional statistics, such as your enemy kills and fragrate (enemies killed for each of your deaths) you should register as soon as possible for the ArmyOps-Tracker, and regularly visit the AAOTracker site to check out additional AA game statistics.
The next section wraps up the Important Basics for America's Army.
Offline Mode
Even though America's Army is primarily an online game, you can practice offline to gain familiarity with the maps, weapons, and general dynamics of the game, not to mention allowing you the opportunity to thoroughly tweak control, graphics and audio settings at your own pace. It is strongly recommended that you spend some time practicing offline on all of the more complex maps.
To begin offline mode:
1. Start America's Army and open the Console (press the TAB or ~ key).
2. Type "Start mapname" (without quotes) to open a map, where mapname is the name of a particular map (e.g. Start Pipeline or Start Sfcsar). All the mapnames can be found in your \America's Army\Maps\ directory.
3. To be able to move around and fire weapons, you will have to choose a character class. Type "Class code" (without quotes), where code is one of the following (e.g. Class M4M):
R - Rifleman (M16A2)
RCT - Recruit (no weapons)
SF - Special Forces
SL - Squad Leader
FT - Fireteam Leader
G - Grenadier (M203)
S - Sniper (M82)
D - Door Breacher
J - Javelin Missile (FGM-148)
S24 - Sniper (M24)
AR - Automatic Rifleman (M249)
M - Rifleman (M4A1)
M4M - Rifleman (Modified M4A1)
M9 - Pistol (M9 Baretta)
BDM - Bunker Defeat Munitions (M141)
AT4 - AT4 Rocket Launcher (M136)
SPR - Special Purpose Rifle (MK12 SPR)
AK - Opfor (AK-47)
AK74SU - Opfor Special Forces (AKS-74U)
GP - Opfor Grenadier (AK-47 / GP-30 launcher)
RPK - Opfor Automatic Rifleman (RPK)
SVD - Opfor Sniper (Dragunov)
MOS - Opfor Sniper (Mosin-Nagant)
RPG - Indigenous Forces Rocket Launcher (RPG-7)
V - Opfor/Indigenous Forces (VSS Vintorez)
To create some basic soldier 'bots' for target practice, type the following command in the console:
summonNPCSoldier
That creates an inanimate opfor soldier who stands with his arms outstretched like a scarecrow. You can shoot him and he won't move or fight back. You can set some of these dummies up at different spots on a map and use them for target practice. In previous versions of America's Army, if you wanted a bit more of a challenge, you could open the console and type "Walk" (without quotes) to animate these dummies with some basic AI, but this no longer appears to work. In previous versions you could also summon other NPCs (Non-player characters) and objects using commands such as summon agp_characters.NPC_AirborneSoldier or summon agp_inventory.PickupT_M67_Frag. However these do not work as of Version 2.6 onwards.
Playing Offline Against Bots
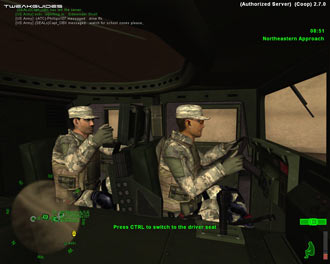
As of Version 2.7, with the introduction of genuine Artificial Intelligence (AI, or 'Bots') there are now two maps which can be used to give you a much better offline practice. The two maps are SF Snake Plain and Interdiction, and you can start them in the normal way. That is, open the console and type Start SFSnakePlain or Start Interdiction and the relevant map will be loaded. As per the instructions further above, select a class for your character, and you can now run around shooting and interacting with the bots - without any teammates of course - which is a useful way of familiarizing yourself with various weapons and tactics in America's Army.
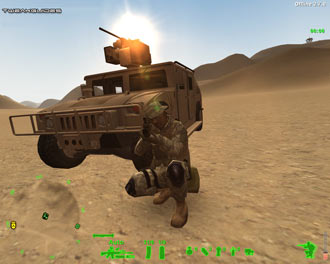
In Sf Snake Plain in particular you can practice driving a HMMWV, using the CROWS gun, and also firing the Javelin missile system (if you spawn using Class J) against actual targets. This is very useful for those who are unfamiliar or not confident with this equipment, even after completing training.
General Offline Commands
Some useful/fun commands which can be used only in offline mode are provided below:
Fly - Lets your character fly around the map. Use the Walk command to disable
Ghost - Allows you to move through solid objects
Entropy - Toggle invincibility mode on/off
Invisible - Toggles player invisibility
AllAmmo - Give player ammo for all weapons
Wpnrecoil - Toggles weapon recoil on/off
Judas - Toggles perfect weapon accuracy
Switchlevel [mapname] - Goes to the specified map
Viewbots - Views from the next summoned character
Freecamera [0, 1] - Changes the view to a free floating camera (1) or back to the player (0)
SetCameraDist [range]- Set camera distance from the character
Lockcamera - Locks the camera view in one spot and lets the player roam around
Slomo [number] - Lets you change the rate at which time passes
Setspeed [number] - Changes the player's speed
Setjumpz [number] - Sets the player's jump height (325 is default)
For more information on the commands that can be used in offline mode see Appendix D of the Official America's Army Manual, and for more commands used in the console (in both online and offline modes) see the Console Commands section on page 10 of this guide, as well as this extremely comprehensive list of Console Commands, Switches and Keybinds.
Weapon Modifications
Go to the main menu in the game, select Record Brief, and under the 'M4A1 Mods' tab you can customize the SOPMOD M4A1 rifle issued to US Special Forces soldiers. If you've passed the Special Forces Tour (See Training above) and you have 15 or higher Honor, then whenever you join a Special Forces map and select a free Special Forces soldier slot, you will be assigned the SOPMOD M4A1 with the modifications you've chosen for the M4A1 in the Weapon Mod screen. At no other time can you use this modified M4A1.
There are four sections on the M4A1 where you can attach a mod: the Top, Front and Bottom Rails, as well as the Barrel. Each rail has a Heatshield by default, but you can add options like the M203A1 grenade launcher, or M68 Aimpoint sight where available. Some things to note about weapon mods:
Once you've chosen your mods here, they are saved automatically so that you can use them when next on the relevant map. Remember, on non-Special Forces maps where the standard M4A1 is used (e.g. Radio Tower) you will not have any of your weapon mods, since you will be using a standard-issue non-SOPMOD M4A1. Only certain Special Forces soldier slots on SF Maps get modifiable M4A1 rifles.
Playing Online
Once you've created a new account, logged in, completed Basic Training, set up your Weapon Mod and perhaps spent some time practicing offline you can then join other people in playing America's Army online. To do this, click on the AA Browser option on the main menu screen. The Master Browser Server will appear, with the default screen being for online play over the Internet. Before doing anything else, make sure there is a tick mark against the 'Enable PunkBuster' setting at the bottom of this screen to enable the PunkBuster anti-cheat software (See PunkBuster section in the Troubleshooting Tips section, and further below). This is strongly recommended since firstly you cannot join most servers unless you enable PunkBuster, and secondly because playing on PunkBuster-enabled servers means you will be less likely to run into people who are cheating.
To view a list of available America's Army servers on which you can play, you can first set the particular Filters you want to use to filter out servers which would not suit your needs. For example you can filter for servers which are not password protected, and which are not empty. Go through the categories listed on the left side and select all the options which suit you, and when you click the 'Apply Filters' button at the bottom of the browser, it will refresh with the servers which meet your filtered requirements. You can close (and open) the Filter display by clicking the vertical bar in between the Filter settings and main browser server.
Once all the relevant servers have been found, click twice on the 'Ping' column title at the top right of the browser list to sort all the servers by ping from lowest to highest. Now try to find a server with a low Ping (See Network settings under the In-Game Settings section for more details on pings), highlight it, and if there is an open slot you should either double-click on it to join, or press the Join button at the bottom of the screen. Again, note that you may need to complete certain Training missions to join certain maps, such as the Special Forces (SF) maps.
Note that there are two Ping figures shown, the figure to the left of the slash is the ping to the server (which is most relevant for our purposes); the figure to the right is the average ping of all the users on that server. Furthermore in the server browser the Pings for some servers may appear incorrectly as unusually high or low - if you find the Pings don't display correctly or if you just don't like the default AA Browser you can switch to the 'GameSpy Browser' option (See In-Game Settings) to browse servers.
Note: To use the default or Gamespy browsers successfully you may need to open a range of ports on your router as detailed here.
Finally if the in-game browser doesn't suit you, you can use a third party browser like All Seeing Eye which is popular among AA players.
PunkBuster Updates
PunkBuster is the official anti-cheat software used in America's Army. You can find out more about it on the PunkBuster America's Army Support Site. There is also a America's Army PunkBuster FAQ you can read if you have any basic questions about PunkBuster and how it works in America's Army. For the most part it works in the background and doesn't require any additional action on your part.
However, whenever you first join a server after launching America's Army you may notice that you cannot start playing because PunkBuster is updating to the latest version. PunkBuster updates are released quite often simply because as cheaters find new ways of cheating, PunkBuster has to update to detect and defeat these new variations. As a result you may find that virtually every time you start AA and connect to play a game online, PB will update at the start of your first match. This updating can effectively take anywhere from 2 to 8 minutes depending on your connection speed, but note that the speed at which it can download to your system is capped, so even the fastest Internet connection will see the update taking several minutes.
The better alternative is to manually update PunkBuster before starting a game of America's Army. To do this, go to your \America's Army\System\pbsetup\ directory and run (double-click on) the pbsetup.exe file. This will open a series of agreements you must click 'I Agree' to, and then the 'PunkBuster Setup' window. Here you can select to add any game to the list of PunkBuster supported games displayed by clicking the 'Add a game' button. Do so and select 'America's Army' from the Game list, then click the OK button. Now on the main screen listing, click the 'Check for Updates' button. If a new version of PB for America's Army is available, it will be downloaded and applied automatically. The next time you go to play AA online, there will be no need to wait for a lengthy update process to occur - so long as you remember to manually update PB as often as possible. You can also update your other PunkBuster supported games using this utility, so you might want to create a shortcut for it on your desktop (Right-click on the pbsetup.exe file and select 'Send to Desktop').
Note that as Version 2.8.3.1 onwards, you can also update PunkBuster using the AA Loader screen - when you click the main 'Play America's Army' button, you will be presented with an option to 'Update PunkBuster', which if clicked will simply run the PBSetup utility and check for PB updates to AA only.
As a final note, do not modify any of your America's Army files, either by editing them, or adding or removing them. This can be detected as a cheat by PunkBuster. The only edits allowed are those to the .ini files as described in the Advanced Tweaking section of this guide. Note that recently Punkbuster has also made changing the USArmyMainThemeBoostEQ256.ogg file with another .ogg a cheat as well. So do not add/remove/alter anything in your America's Army directories or have any cheating software installed on your system and you will be perfectly safe. If you are kicked by PunkBuster from a server, you can check this list of reasons for being kicked, to see what the probable cause might be.
Dynamic Content Delivery System
As of America's Army 2.7, a new Dynamic Content Delivery System (DCDS) has been incorporated into the game. This allows players to download and install maps and other America's Army content directly to their machine through DCDS. For example the map Steamroller is not installed by default with the game; you will be prompted to download it the first time you connect to a server using the map. For the most part DCDS is automatic and very easy to use, simply follow the prompts.
A final piece of advice to new players - there's nothing wrong with being new online and your teammates will usually take this into account when they see your Honor. You will find there are many experienced players who are willing to help you out should you need it. But at the same time people generally join public games to play, and not to spend most of their time helping you learn the basics. You will get the most positive response from other players by showing that you've already put in some effort to learn the maps and gameplay as much as possible beforehand.
The next section covers the In-Game settings and their performance and visual quality impacts in detail.
In this section of the guide I provide descriptions and recommendations for all the in-game settings to allow you to achieve a good balance between audio-visual quality and performance. It is virtually impossible to provide a specific measure of the performance impact of any particular setting, as it varies significantly based on different types of hardware and their level of support for shader effects for example, or your chosen resolution and the interaction of various other settings.
To access the in-game settings, start America's Army and click on the Settings option in the main menu, or press ESC during a game and click the Settings button. The settings under this section are explained in detail below:
Video
Render Device: This setting determines the API (Application Programming Interface) which America's Army uses to render (draw) the 3D graphics in the game. The main APIs are DirectX and OpenGL, however the choice here is limited to Direct3D (the component of DirectX which relates to rendering 3D graphics). This is because America's Army is designed around DirectX, and will perfom at its best using Direct3D. It currently cannot run under OpenGL, however see the Advanced Tweaking section for more details on how to change the Render Device.
Resolution: This setting determines the Resolution for the in-game image - see this page of my Gamer's Graphics & Display Settings Guide for more details. The higher the resolution, the more detailed and clearer the game image, but the more graphics card power required and hence you will see less Frames Per Second (FPS). The highest resolution available in this list of resolutions is limited to what your graphics card and monitor are actually capable of rendering. The resolution alone will have the biggest impact on your framerate, but if changing the resolution doesn't impact significantly on your performance then it is likely your CPU is the performance bottleneck. Note that in general America's Army only officially supports standard resolutions ranging from 800x600 to 1600x1200. To set a non-standard resolution such as 640x480 see the Advanced Tweaking section.
Brightness, Gamma, and Contrast: These sliders affect how bright/dark, washed out or crisp your graphics appear in-game. Adjust them to suit your taste, and remember that it is considered cheating by PunkBuster if you raise Brightness or Gamma too high (e.g. to make night maps appear almost like daytime).
Full Screen: If this box is ticked, your game will run in full screen mode which is highly recommended. If you untick this box you will run the game in a window. Note that if your in-game Resolution setting is higher than your Windows Desktop resolution before switching to windowed mode, the game window will be larger than your screen and you may have problems - make sure you change your resolution to be the same or lower than your Desktop resolution before switching to windowed mode.
VSync: Vertical Synchronization (VSync) is the synchronization of your graphics card and monitor's abilities to redraw the screen a number of times each second (measured in Hz). If VSync is disabled (unticked), you may see some image 'tearing' as your monitor and graphics card go slightly out of synchronization at certain times. This does no damage, it just may be annoying to see. However it is always recommended that you disable VSync to increase performance. Enabling VSync can remove tearing, but not only does it cap your FPS to your Refresh Rate, it will also reduce your average FPS, usually by up to 50%. For that reason, I recommend disabling VSync. For a clear explanation of this see this page of my Gamer's Graphics & Display Settings Guide. Note that you should also check your graphics card's control panel for the VSync setting there and make sure it is set to match your VSync choice here or set to 'Application preference' (recommended) to allow this setting to work correctly.
Texture Detail: This determines how detailed the in-game textures (the images that cover the surface of every 3D object) will look. The options range from Lowest to Highest. The higher the setting, the crisper and more detailed the textures around you will look. Higher texture settings primarily impact on loading times and loading pauses in-game, although they can have a noticeable impact on your FPS. The more Video RAM your graphics card has (ideally 128MB or more), and the more system RAM you have (ideally 512MB or more) the higher you can set your texture settings without experiencing performance issues. The image quality difference between Lowest and Normal is quite noticeable, whereas the difference between Normal and Highest is less so.
Important: As of America's Army 2.7 this setting has been broken, as is the Detail Textures setting (See further below). Texture Detail cannot be increased above Normal in the game - any setting above that is ignored and will not actually result in better textures. The Developers are aware of this bug, but there is no workaround or fix at the moment.
Character Detail: Similar to the Texture Detail setting above, from Lowest to Highest this determines how detailed the textures on all the characters (and their weapons) look. The higher the setting combined with the number of players in a match determines the performance impact, particularly on loading times. Once again the image quality difference between Lowest and Normal is quite noticeable, whereas the difference between Normal and Highest is much less so.
World Detail: Options are Low, Normal and High. The higher this setting the richer your surroundings, as more optional 3D objects are loaded onto the landscape, but the higher the computing power required (and hence the lower your FPS) especially on levels where you can see further and/or there are more optional objects to see. If you have a slower graphics card and/or CPU lower this setting to improve your FPS. In practice the visual differences are not major on most maps, because to maintain fairness most visible geometry has to be seen by all players equally regardless of this setting.
Physics Detail: Options are only Normal and High. This setting changes the level of detail for the simulation of physics in the game. The High setting requires more CPU effort to crunch the numbers to show more realistic effects, from the basic 'ragdoll' effects through to effects such as water ripples. I would recommend that if your CPU is closer to the minimum specs (2.4GHz Intel or equivalent AMD), you set this to Normal. However on most maps this setting does not have a significant image quality or performance impact.
Dynamic Mesh LOD: This setting controls the degree to which the Level of Detail (LOD) on Dynamic Mesh objects (i.e. objects like characters and vehicles) is affected by distance. The higher this setting, the less quickly the level of detail (number of polygons) on such objects is removed as they move into the distance. Put another way, the higher the setting, the better the visual quality but the greater the impact on your FPS depending on how many dynamic objects are on screen. A setting of Normal is recommended for most people, and the difference is not significant between the lowest and highest settings.
Decal Stay: This setting (if the Decals and Projectors option are also ticked - see below), will determine how long decals (e.g. bullet holes) will remain on surfaces. The three settings are Low, Normal and High, and unless you want absolute realism, Normal or even Low should be just fine. Setting it to High can have a significant negative impact your FPS, especially during periods when high-rate weapons such as the SAW/RPK are firing on the screen.
Character Shadows: This setting determines whether characters in the game cast any shadows, and how detailed they are. It can have a significant impact on your performance when there are several characters and several light sources on the screen at one time. The following are the available options under this setting:
None - This completely turns off all shadows. If selected it can make things look unrealistic, but is the best option to choose if you are struggling for FPS.
Blob - This allows shadows (if Projectors is ticked), but makes them much less complex and hence improves your FPS. I recommend this as a good compromise between realism and performance.
Full - If chosen this option draws shadows in all their glory (again, only if Projectors is ticked), but can give a significant performance hit which varies depending on your graphics card and the number of players and light sources visible. I recommend only high end systems enable this setting, as it is the most realistic but the most taxing of shadow settings.
Note: Shadows may be disabled by the Administrator on the server you are playing on - this is to prevent a glitch whereby player shadow 'bounding boxes' can be seen through walls, floors etc.
Decals: Decals are the marks left by explosions and bullets for example. If this setting is ticked, such decals are visible, however this can reduce your FPS (depending on your Decal Stay setting above) particularly during heavy firefights as lots of decals are generated. If unticked, no decals will be shown which reduces realism but will improve performance on slower machines. If Projectors is unticked, this option will not be available.
Dynamic Lighting: Dynamic lighting allows interactive lights from things such as the muzzle flash of guns to the tracers from a SAW to react realistically with the objects surrounding them, shining at different angles off weapons, walls and characters based on the light's position. This makes for great effects but can have a significant impact on your framerate when such dynamic lights exist. For realism purposes I recommend you tick this option, however to assist in reducing graphical slowdowns during heavy gun battles, especially when weapons with a high rate of fire (e.g. M4, SAW and RPK) are involved, untick this option.
Detail Textures: Enabling this setting adds a level of detail or 'grain' to certain textures used in the game. This makes them look much more realistic especially when examined close up (e.g the walls of buildings in Radio Tower, SF CSAR or Urban Assault). However this can also reduce your FPS due to the extra texture detail required, so untick this option if you require a performance boost particularly for graphics cards with lower amounts of Video RAM (e.g. less than 128MB).
Important: As mentioned further above, Detail Textures does not work for many textures in the game as of America's Army 2.7. Whether enabled or disabled, many textures will not display the more realistic grain they had under previous versions. Once again there is no fix for this at the moment.
Trilinear Filtering: This rendering method makes textures seem crisper as they progress into the distance, but will reduce performance, especially if you have a slower video card. Most newer systems should notice little if any performance drop from having this enabled. If you're unsure about this setting, or are struggling for performance then leave it unticked - the image quality difference is not significant. If you want even better texture filtering, such as Anisotropic, see the Advanced Tweaking section.
Projectors: Projectors are textures projected onto other textures, such as decals and shadows from characters. The noticeable effect of unticking this option is the disabling of the Decals setting, and the removal of all player shadows and decals, regardless of your Character Shadows or Decals settings. Although unselecting Projectors will improve FPS, I don't recommend unticking this option for the sake of realism. To begin with experiment with different levels of Decals, Decal Stay and Character Shadow settings, and then if all else fails you should untick this to improve FPS.
The next page continues the In-Game setting descriptions.
Audio
Music Volume: This slider controls the volume of the in-game title music. The further to the right the slider moves, the louder the music. Adjust to suit your taste, however note that setting the slider to the far left only reduces the music volume to 0, it doesn't improve your performance or loading times by preventing the music from loading up.
Effects Volume: This setting controls the volume of the in-game sound effects. The further the slider is taken to the right, the louder the in-game sound effects. You can adjust it to suit your taste, however once again moving the slider to the far left does not improve performance - to disable sounds altogether see the Advanced Tweaking section.
Audio Mode: This setting determines the type of audio processing the game will use, and is dependent on the type of sound hardware you have. All the possible options are covered below.
[Safe Mode] - This option is only provided for those having sound problems with other sound modes. If your sound problems are resolved by switching to Safe Mode, then chances are you need to update or reinstall your sound card driver, or address another general system issue (See the Essential Optimization section on page 2).
[3D Audio] - This is the standard audio mode in America's Army and it uses your CPU to process the sound. The sound quality is acceptable and provides good 3D audio. Software audio provides the best framerate performance, but the lowest quality of sound.
[H/W 3D Audio] - If you have an add-in sound card, this option will make use of your sound card's hardware capabilities to extend the audio experience. It sounds slightly better than Software 3D, but may reduce your FPS slightly.
[H/W 3D + EAX] - If you have a sound card capable of running Creative Lab's EAX (Environmental Audio) 3.0 or 2.0, such as the SoundBlaster Audigy or X-Fi series, then you can enable this option. EAX adds special effects to the sound and gives you advantages such as being able to determine with greater accuracy where people are (true positional), and being underwater or behind walls will sound more realistic (occlusion culling). However with this option enabled, you may notice a slight drop in FPS. Note that you may also have to update your sound card's drivers to get correct 3D audio with EAX on America's Army. Finally, to make sure your EAX is played back correctly you should go into your Sound Card's AudioHQ, open the EAX Control Panel, and click the 'All Effects Off' button.
In general the Hardware 3D or Hardware 3D + EAX audio provides the greatest advantage in being able to accurately position sounds, and the performance impact is minimal on most modern systems, so I recommend selecting one of those sound modes. See the Advanced Tweaking section for more sound options.
Low Sound Detail: Selecting this option lowers the sampling rate of the sound in the game, lowering its overall quality. This may improve FPS, but is generally not recommended unless you are really struggling for performance.
System Driver: This option determines whether America's Army uses the game's generic OpenAL sound driver, or an OpenAL driver specific to your sound card. If this setting is ticked, the game will use the default defOpenAL32.dll driver found in your \America's Army\System\ directory. However if you check in your \Windows\System32 directory and find an OpenAL32.dll file, then untick this option to use your sound card-specific driver which will improve performance and audio quality, and may resolve any audio problems you are having.
Note that for optimal trouble-free sound, exit and restart the game after making any changes to the Audio Mode, System Driver or Low Sound Detail settings.
Message Beep: Selecting this option allows a small beep every time a message is sent in-game. If find the beeps distracting untick this option to turn them off.
Text To Speech: The section to the bottom right of the Audio settings screen relates to the America's Army Text-to-Speech capability introduced in Version 2.4. As the name implies, the functionality allows text on the screen to be converted into an audible synthesized voice within the game. See below for details of these settings, and note that you you can adjust the voice characterstics used for Text-to-speech (such as the speed and gender of the voice) by going to your Windows Control Panel and choosing the Speech option then selecting the 'Text to Speech' tab.
[Enable in Game] Ticking this option enables the text-to-speech functionality during gameplay in America's Army. Selecting this option will have some performance impact in that extra CPU processing is required, but it may not be significant depending on your CPU's speed. More importantly, if you are on a low-bandwidth connection selecting this option can result in fluctuations to your ping resulting in variable lag. Unselect all the text-to-speech options if they're not to your taste and/or you want maximum game performance.
[Enable on IRC] Enables the text-to-speech functionality in Internet Relay Chat (IRC). This option converts all text shown in the main tab of the in-game chat window (found under Deployment>Chat) to speech.
[Team Messages Only] Ticking this option will force text-to-speech to only operate for messages sent by your teammates.
Importantly, if you enable or disable text-to-speech options you must exit and restart America's Army for the changes to come into effect.
Input
Configure Controls: Pressing this button takes you to a separate screen where you can view and reassign all your major keyboard and mouse commands for the game. To change a key setting, left-click once on the currently assigned key/button and then press the key or button you wish to replace it with. Note that if you select a key or button currently in use it will be allocated away from its original use to the new setting you have selected. If you want to unassign a key/button, either assign that same key or button to another command, or see the Advanced Tweaking section for details of how to edit keybindings.
While the settings in this section are up to your individual preferences, I strongly recommend that you pay particular attention to Report In, Votekick, Action, Suppressor, Zoom In/Out and Supported/M203 commands which are often overlooked but vital to gameplay. A valuable gameplay tip is to bind the 'Report In' function to your middle mouse button, so you can report in quickly and easily by clicking this button regularly. Importantly, you should not bind the '~' key (the key above TAB) to any function as it already serves as the Console shortcut, and you should also not bind the ESC key to any function other than Menu or you will experience problems attempting to exit most screens in the game.
There is a known bug which can cause issues with the ~ key used to open the in-game console. If you find your ~ key is unbound for example and you can't rebind it, delete your User.ini file under the \America's Army\System directory and it will be recreated the next time you launch the game. To prevent this type of bug from occuring, go to User.ini, open it with a text editor, find the line Tilde=Console and change it to Tilde=Type then save the file.
Configure Communications: This area allows you to bind specific keys to particular communication phrases, and also to configure specific voice phrases when using the speech recognition/voice activation functionality in the game. See Speech Recognition further below for more details.
Auto Slope: Ticking this option means that whenever your character is moving up or down an incline the game attempts to automatically keep your view parallel with the surface you're moving upon. I strongly recommend that you untick this setting as it will reduce your accuracy, and can result in 'view shaking' when you try to adjust your view up/down manually while moving.
Invert Mouse: Ticking this option will mean that pushing your mouse forward will make your character look down, and pulling your mouse backward will make your character's view tilt upward. It has no impact on FPS so set to suit your taste.
Mouse Smoothing: As the name implies, ticking this setting will mean your mouse movements will result in smoother movement on screen and less jerking about. This option will not affect your framerate so tick it unless it gives you problems.
Reduce Mouse Lag: If you have issues with your mouse 'lagging' on screen during play, then ticking this option may help resolve them. However selecting this option will actually decrease your overall FPS. In truth most mouse-lag issues are to do with low framerates, so the first course of action is to improve your overall FPS by lowering settings if necessary. You should also make sure VSync is disabled as that can lead to greater mouse lag. If none of these things work, then you can tick this option to reduce mouse lag.
Enable Joystick: If have a joystick connected and wish to use it with this game, you will need to tick this option, otherwise leave it unticked.
Mouse Sens. (Game): The higher the number, the more sensitive your character movements will be to mouse movements in the game. There is no 'correct' setting - it all depends on your mouse type, the surface it's on, your general Windows mouse speed and your preference for speed and accuracy. This setting has no impact on FPS. For the optimal value for your system, go into Offline mode (See Offline Mode on page 5) and adjust it there to start with, then fine tune it when online. If you experience 'mouse lag' when playing online, do not increase this setting straight away. Increasing this setting to reduce mouse lag will only result in jerkier mouse movements and variable mouse speeds during laggy periods - see the Reduce Mouse Lag setting as well as the advice throughout this guide to improve your FPS, which will then help reduce mouse lag.
Mouse Sens. (Menus): Just like the above option, the higher the number, the more quickly your cursor will move in response to a mouse movement - but only in the user interface (menus, settings screens, etc.). This setting has no impact on FPS, or your in-game mouse movements.
Mouse Smooth. Strength: This setting lets you change the extent to which mouse smoothing occurs on your movements (If Mouse Smoothing is enabled - see above). If you are experiencing problems with your mouse smoothness, try varying values up to 1.00, with the default being 0.30.
Mouse Accel. Threshold: This value affects the acceleration of your mouse and can increase or decrease mouse precision. The higher the setting, the more movement of the mouse is needed before mouse acceleration kicks in. That means the higher the value, the more accuracy you'll have with the crosshairs for small movements, but the more you will have to move your mouse to turn around for example. The default of 0.00 should be fine for most people.
Game
Auto Switch from Grenade: This setting determines whether you automatically switch back to your current weapon after throwing (or putting away) a grenade. It is strongly recommended that you tick this option so that you're not caught without a weapon immediately after throwing a grenade. This setting has no impact on FPS.
Toggle Lean: If selected, this setting makes your lean keys toggle - that is if you press a lean key once you will remain leaned until you press a lean key again. If unselected, you will only lean while holding down a lean key, and once you let go you automatically straighten up. Has no impact on FPS so set to your taste.
Walk Zoom: If enabled, this option makes you automatically slow down to 'slow walking' speed when you zoom in with a weapon. This is recommended as it prevents you from accidentally jumping out of zoomed view if your character moves slightly. To toggle back to fast walking speed the default toggle key is SHIFT. This setting has no impact on FPS, so set according to your taste.
Connection: Choose the type of network connection you have from the four presented options: Modem (56kbps or less), ISDN, Cable/ADSL, LAN/T1. Note that once you've chosen your connection here, to get the very best Ping and hence the least possible amount of online lag, I recommend you optimize your Netspeed setting (See the Advanced Tweaking section for details).
Dynamic Netspeed: If ticked this option will automatically adjust your Netspeed setting (See the Advanced Tweaking section) to suit your connection type and the server you are connected to. This should result in an optimal Ping. For the most part this setting seems to work reasonably well in America's Army, so I recommend that most beginners tick this option. However if you are an advanced user, or if you're having connection-related problems, I recommend that you untick this option and manually choose a suitable netspeed value as on some servers if this setting is enabled you will get a variable Ping (lag), particularly at the start of a round and as people join.
Preload All Player Skins: If ticked this setting will load all the various character textures during the loading of a map. This can increase map loading times, however it should decrease the amount of in-game loading pauses you may experience. This setting should only be enabled on systems with 512MB or more of physical system RAM. To further reduce loading pauses see the Troubleshooting Tips section.
Speech Recognition: If ticked this option allows you to issue voice commands to the game using a microphone. More details of how to do this can be found here. If you don't want to use this feature, make sure to untick this option.
Browser Service: You can select from either the default Master Browser Server (MBS), or the GameSpy browser. Both work reasonably well, so choose the one which suits you best. Note that the filtering options on each of these may be slightly different.
Disable Server Name Colors: If you want to get rid of all the funny colors people use to highlight their server names, tick this option. In my opinion this makes the list of servers much easier to read.
HUD
The HUD is the Heads Up Display - the area around the screen which shows important information about your soldier, his environment and his equipment status. This section contains various HUD elements you can select to hide, such as your weapon status or grenade count. It is recommended that you do not hide any of these elements as they all provide information vital to good gameplay.
SAI Options: The Situational Awareness Indicator (SAI) is the small radar-like display in the bottom left corner of the screen while you're playing online. You can select or deselect to have particular aspects of the SAI show up, or disable the SAI entirely (which is not recommended).
HUD Opacity: Using this slider you can increase or decrease the opacity (transparency) of the HUD elements. Look at the image of the grenade just above the slider to see how see-through HUD elements will be.
Custom HUD Color: If ticked, this setting allows access to three sliders (Red, Green and Blue) which you can use to alter the color of the HUD elements. Change to suit your taste, has no impact on FPS.
Crosshair: There are seven weapon crosshair types to choose from here. Select one which suits your taste, none of them have any impact on your FPS.
Parental
Selecting this button gives parents the tools to set up a Language Filter (blanks out identified swear words), turn off all blood in the game, limit play to MILES servers (simulation laser-tag), and disallow the ability to play as an Advanced Marksman (sniper). Once the chosen settings are ticked, a password protection system stops kids from overriding them. Enter a Password, re-enter it in the Confirm box, then click Set and these settings cannot be changed without entering the same password again.
If you don't want any filtering to occur, make sure all the options here are unticked, make sure the Password and Confirm fields are blank, then click on Set to remove it so you don't see **** every time someone swears.
Well you're done with the In-Game settings. Come back and fine tune them as necessary, but for now we move on to the advanced settings which can't be accessed through the in-game menus.
You can change more than just the settings available under the in-game menus by editing two .ini files called ArmyOps.ini and User.ini in your \America's Army\System\ directory. Before making any changes to them however, first make copies of these files and keep them as backups. If at any point you want to go back to the default settings, simply delete ArmyOps.ini and/or User.ini, and the system will recreate them using all the default settings the next time you launch the game. Note that the files Default.ini and DefUser.ini contain the system default settings for ArmyOps.ini and User.ini respectively. Do not delete or alter the two default files - the system requires them to remain unchanged. Furthermore, do not import older versions of these .ini files into the latest version, as there are differences which may cause problems; always start tweaking them from scratch.
To edit the ArmyOps.ini and User.ini files you can use any text editor such as Windows Notepad. Note that since America's Army is based on a modified version of the Unreal Engine originally designed by Epic Games for Unreal Tournament 2004, entire sections of the .ini files are non-functional in America's Army, so certain settings within the .ini files have no impact whatsoever.
It's important to understand that changing the ArmyOps.ini and User.ini files as detailed in this guide is not considered cheating or 'hacking' - it is simply further customizing the game to maximize your system's performance. The America's Army's Developers have stated that the .ini files can be edited by users and have also shown their support for this guide, as well as linking to it under the Support>Links section of the game itself. However, editing the .ini files to use unauthorized, unrealistic or exploitative values is against the spirit of the game and may see you get booted and/or banned by the PunkBuster anti-cheat software or by custom Admin software on certain servers. There are many settings in the .ini files which you should not edit, so if it isn't shown below I strongly recommend that you do not edit them.
Details of the particular sections and settings to edit in each .ini file are provided below, however note that settings which can be fully changed using the in-game settings won't be covered - you should use the Settings screens to adjust those (See the In-Game Settings section). What I cover below are the major working commands:
ArmyOps.ini
[Engine.Engine]
RenderDevice=D3DDrv.D3DRenderDevice
;RenderDevice=D3D9Drv.D3D9RenderDevice
;RenderDevice=Engine.NullRenderDevice
;RenderDevice=OpenGLDrv.OpenGLRenderDevice
;RenderDevice=PixoDrv.PixoRenderDevice
America's Army only runs using the DirectX API (D3DDrv), and cannot run under OpenGL or Software render devices. If you still want to try another renderer, simply remove the ';' from in front of the render device you wish to use, and make sure a ';' is in front of all the other renderers.
As of Version 2.8.1 onwards, you can now use the Direct3D9 render device, rather than the default Direct3D device. This may provide improved performance, though in my testing it appears identical to the normal Direct3D renderer. Importantly, if you do select the D3D9 renderer here, then further below you will have to change the settings under the [D3D9Drv.D3D9RenderDevice] area of ArmyOps.ini, not the usual [D3DDrv.D3DRenderDevice].
Note that you cannot however use the other render devices, such as OpenGL, because the appropriate drivers to run in OpenGL or Software mode are currently missing from the game's main directory. For the record running in OpenGL or Software modes in Unreal-based games is usually slower and more buggy than Direct3D anyway, since the engine is designed around D3D. Do not manually copy any alternate renderer files into your System directory (e.g. from UT2004), as these don't work and may be detected by PunkBuster as a cheat.
[Engine.GameEngine]
CacheSizeMegs=64
This value represents the amount of System RAM set aside for temporarily caching game information. This setting is not designed to impact on FPS as such, it is more for reducing loading pauses in-game. I recommend a cache size of 64 for all systems (which is the default). If you have more than 512MB of RAM you can try a cache value of 128, however I don't suggest increasing this value any higher since the cache is not where the entire game is meant to load into. Increasing this setting to a very high value (e.g. half of your RAM) is likely to negatively impact on overall performance. More importantly, values higher than 128 greatly increase the likelihood of Critical Errors/General Protection Faults in the game.
UseSound=True
Set this to False if you want to disable all sounds and perhaps see a performance improvement. Obviously this is not recommended, however the option is here if you want it. This might be useful if troubleshooting to see if your problems are sound-related for example.
[WinDrv.WindowsClient]
FullscreenViewportX=1280
FullscreenViewportY=1024
These two settings control the resolution of America's Army when playing in full screen mode. While this should always be adjusted using the in-game settings, if for some reason you want to try a non-standard resolution which is supported by your monitor - such as 640x480 - or you are having trouble entering the game to alter your resolution you can alter it here. The value ending in 'X' is the width in pixels, while the value ending in 'Y' is the height in pixels. Note that a resolution below 800x600 may cause problems with in-game menus and F1, F2 menu displays, and is not officially supported.
Brightness=0.830000
Contrast=0.800000
Gamma=1.040000
Although these settings should be adjusted in-game, you can fine tune them here if you find the in-game settings sliders to be troublesome. Note that setting Gamma to a very high value will be detected as a cheat by PunkBuster.
MouseYMultiplier=1.000000
MouseXMultiplier=1.000000
These settings control how magnified your mouse movements are. The MouseYMultiplier setting controls your mouse's up and down movements, the MouseXMultiplier setting controls the left and right ones. The larger the number you enter for these, the more exaggerated will be the translation of your physical mouse movements into in-game and in-menu movements on screen. Only change these settings if you cannot improve your mouse responsiveness with the in-game mouse settings.
[Engine.Player]
ConfiguredInternetSpeed=10000
ConfiguredLanSpeed=20000
As of Version 2.4 onwards these settings in ArmyOps.ini do not have any impact on the game - the ones which do have been moved to the [Engine.Player] section of the User.ini file and those are the ones you should edit (See User.ini on the next page).
[ALAudio.ALAudioSubsystem]
UseEAX=True
This setting determines whether Creative's Environmental Audio (EAX) is enabled, and depends on your Audio Mode setting in the in-game settings (See In-Game Settings section). If you believe your sound card supports EAX, but the option is not available to you in-game, set it to True here.
Use3DSound=True
This should be set to True for most people, as it uses your sound card's 3D sound capabilities. However it may be set to False in some instances, so make sure it is set to True.
CompatibilityMode=False
If you're experiencing audio problems and tried a range of other tweaks, then setting this to True may help resolve problems. Note that you may experience reduced performance and sound quality from using Compatibility Mode.
UsePrecache=True
This option attempts to pre-load most sounds into memory while loading maps. Setting this to True is the best option for most people, as it avoids the small lags and hitches in-game if sound is loaded up during gameplay. However if you want to decrease loading times you can set this to False, although you may experience more in-game loading pauses as sounds are loaded 'on the fly'.
Channels=32
You can set the number of individual audio channels used for sound in America's Army manually by editing this number. The default of 32 Channels provides excellent quality audio, however setting this to a lower value (such as 16) will improve your overall performance at the cost of audio quality.
Rolloff=1.000000
This setting was incorrectly set to a value of 0.5 in AA version 2.4, however the Developers have rectified this and set it back to a default of 1.0. Importantly, this value now cannot and should not be changed from 1.0. Do not edit this line as it is no longer functional.
[D3DDrv.D3DRenderDevice]
HighDetailActors=True
Set this to True for a slight performance loss but graphics quality improvement.
SuperHighDetailActors=True
When set to True, this ensures the highest quality of detail on the characters and objects in the game. Set this to False if you need the performance boost.
UsePrecaching=True
If set to True, this allows the game to precache (load in advance) a range of graphics data. This helps reduce loading pauses, choppiness and hitches in the game, especially at the start of a new map. Only set this to False if troubleshooting a problem, or if you want to reduce loading level loading times in return for more in-game hitching.
UseTripleBuffering=False
Set this option to True to improve overall performance when VSync is enabled. Using Triple Buffering may cause problems for graphics cards with lower Video RAM, so set to False if youre experiencing problems such as mouse lag or stuttering, or if you have disabled VSync. For more details of what Triple Buffering does, see this page of my Gamer's Graphics & Display Settings Guide.
UseCubemaps=True
This is a trick used to make some reflective surfaces like water puddles and computer screens look like theyre actually reflecting whats around them in 3D. Turning it off (set to False) can improve graphics performance without any noticeable drop in image quality. For most systems however set it to True for best visual quality at the cost of minimal FPS.
DesiredRefreshRate=60
If you have VSync enabled (See In-Game Settings section) then your refresh rate will be limited to whatever this setting is. However, to reduce monitor flickering and eyestrain, you should set this value to the highest refresh rate supported by your monitor at the desired resolution. For example, your monitor may support a maximum refresh rate of 85Hz (=85FPS) at 1280x1024 resolution when VSync is enabled. This setting is at 60 by default, but you could set it to 85 to make full use of your monitor's capabilities and ease the strain on your eyes. This setting has no impact if you have VSync disabled.
UseCompressedLightmaps=False
Compressed lightmaps are light map textures which have been compressed and hence take up less video memory, however the colors and shadows in these textures have noticeable 'banding' and purplish hues. If you have a graphics card with less than 128MB of Video RAM selecting this setting can result in a performance improvement at the cost of some image quality.
UseStencil=True
I am not totally certain about this setting, but it may be referring to Stencil Buffering. Stencil Buffering can improve performance when enabled by not rendering areas covered by the HUD. This is probably best left at its default setting (=True).
Use16bit=False
This setting determines how many different colors can be displayed on screen. If set to False, 32-bit color is used (the default), if set to True, 16-bit is used. 32-bit color provides the richest color, but 16-bit color provides better performance while also showing reduced image quality. In particular 16-bit color mode displays more color 'banding' that is, the gradation between colors is more apparent, and there will be purplish and greenish hues around most textures. However using this setting (i.e. setting it to =True) is considered a cheat by PunkBuster due to the potential for graphical glitches which may allow players to gain an unfair advantage.
Use16bitTextures=False
Using 16-bit textures can improve performance however you will notice a drop in texture quality with color banding as mentioned above. However, if you are using 16-bit mode (see above), then it is recommended you also use 16-bit textures for maximum performance without losing any image quality. Again, this will be considered a cheat by PunkBuster so do not enable in online mode.
LevelOfAnisotropy=1
This setting controls the level of Anisotropic Filtering in the game. For more details of Anisotropic Filtering see my this page of my Gamer's Graphics & Display Settings Guide. The minimum value is 1 (setting to 0 makes no difference), and a value such as 2 provides 2xAF, 4 is 4xAF and so forth. Note that you can also force Anisotropic Filtering through your graphics card's control panel - choose one method of applying AF to America's Army, not both.
AvoidHitches=False
If set to True, this setting may help reduce the occurrence of substantial hitches (pauses/stuttering) in the game, but it can also reduce average framerates, so leave this option at default and first try to minimize the loading pauses with the other tweaks mentioned in this guide.
OverrideDesktopRefreshRate=True
If set to True, this setting will allow you to exceed any refresh rate limitations Windows may try to impose on America's Army. Set to True just to be safe, but if you already use a refresh rate fix such as Refresh Force, changing this setting will have no noticeable effect.
DecompressTextures=False
Just as with compressed lightmaps, compressed textures reduce image quality slightly, however they improve graphics performance dramatically as more textures can be loaded into video memory when compressed. Set this option to True only if you have an extremely fast machine and a graphics card with 256MB of Video RAM or more, and you want the absolute highest quality of textures showing. Setting this option to True will cripple most machines' performance.
[D3D9Drv.D3D9RenderDevice]
As noted further above, if you manually set your game to use the D3D9 Renderer instead of the normal D3D renderer, then the settings under this section will have an impact as opposed to those under the [D3DDrv.D3DRenderDevice] section above. The settings are the same as described above however, so you can use the same descriptions.
[Engine.LevelInfo]
KeepDecals=100
If the Decals and Projectors options are ticked in the in-game settings then this setting controls the maximum number of decals which can be shown at any one time. The higher the value the more of a negative impact on your FPS as more decals are able to be shown at any one time. I recommend a setting such as 50 which maintains realism but also provides good performance.
KeepDecoDecals=10
If you've enabled the Decals and Projectors settings in the in-game settings, you can manually assign the maximum number of decals shown on doors using this setting. The default is 10, however you can lower this to a value such as 5 to gain better performance when firing (or being fired at) through doors.
bFadeDecoDecals=True
If this setting is set to True, the decals on doors will fade after a while. I recommend leaving this option on True for performance purposes however if you find it annoying - for example if you see a flickering on a nearby door as decals are removed and this distracts you, set it to False.
Remember, any settings which can be fully adjusted using the in-game menus aren't mentioned above. And once again, most of the settings in ArmyOps.ini will not have any effect on the game since they are part of the Unreal Engine but are not implemented in this game. Finally, some settings are not appropriate for changing even though they have tempting names, either because changing them will be detected as a cheat by PunkBuster, or they are exploits which are against the spirit of the game. Do not experiment with these settings if you don't know what you're doing. The major working settings are already covered above.
The next section covers Advanced Tweaking the User.ini file.
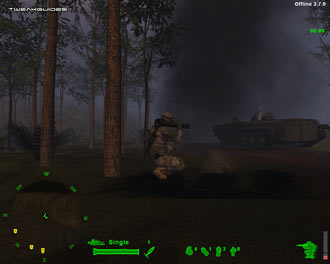
User.ini
[Engine.Input]
This section contains all your keyboard/mouse control mappings which are currently assigned. You can edit the majority of these under the Control Configuration section of the in-game settings. However to insert, delete or edit a key function here find the key entry you want to change (e.g. the E= line is for the 'E' key on your keyboard) and alter the command following it to change its function.
Note that as of Version 2.5, commands for the crouching, crawling, reload, swaphands and jump actions cannot be combined with any other command, with the exception of reload being modified to "reload / teamsay "Reloading, Cover Me!!" / reportin". This prevents double-action commands which were unrealistic and against the spirit of the game.
For more details on all the main commands to use, and how to bind various commands to keys using the Bind command see this detailed Console Commands, Switches and Keybinding Help thread on the America's Army Forums. For problems with the ~ command becoming unbound, see the Troubleshooting Tips section.
[Engine.PlayerController]
DynamicPingThreshold=400.000000
This setting controls the Ping threshold before the Dynamic Netspeed option kicks in and alters your Netspeed value. The lower this setting, the more likely Dynamic Netspeed will continually alter your Netspeed to maintain your ping below this value. The default of 400 is recommended for most people, and if you want to alter it you should only try to set it to something which is realistically achievable on most servers, otherwise the constant changing of your Netspeed by the Dynamic Netspeed option could see you experience more rather than less lag.
[Engine.Player]
ConfiguredInternetSpeed=10000
This is a vital setting because it determines your network rate in bits per second (bps), also known as Netspeed. Adjusting it can improve your Ping and thus reduce online lag problems (See also the Troubleshooting Tips section). The trick is to set a Netspeed which is not too low, but also not too high. For 56K modems, depending on your actual connection speed try values around 3000 for an optimal ping. For DSL/Cable and faster connections try values around 8000, once again depending on your actual connection speed. The default value of 10000 (which is also the maximum value for most servers) should be fine for fast connections (i.e. 1.5mbps or higher), however slightly lower values can still help better maintain a steady ping. Note that you can adjust Netspeed 'on the fly' during the game by using the Netspeed command - See the Console Commands section for more details. Further note that if you have the Dynamic Netspeed setting enabled, your netspeed will vary here depending on the DynamicPingThreshold setting above and the servers on which you have been playing recently. If you want to manually adjust your netspeed I recommend you disable the Dynamic Netspeed setting first.
Note: Some servers may require you to have a netspeed higher than a particular value, such as 9000 or above. If you find you're being kicked from servers for this reason, return your Netspeed value to the default of 10000.
Importantly you should note that your maximum FPS online is limited by your Netspeed value. The Unreal Engine has an FPS cap of 90 when playing online, however Netspeed values below 5000 will further reduce this FPS cap. For example, I get 60FPS maximum with a Netspeed of 5000, but I reach the 90FPS maximum with a Netspeed of 8000 or higher. However Lag isn't just caused by your Netspeed or Internet connection. I cover this in more details here, but a summary is below:
Ping Lag: Online lag due to your connection is measured by your Ping. Look at your Ping by using the 'Stat Net' command (See the Console Commands section) or observe the Ping shown in the F1 scoreboard - the Stat Net version should be more accurate, however there is a bug currently where your actual ping may be shown as four times higher than your real ping on the F1 scoreboard - ask other players for verification of your Ping. If the Ping is 150 or higher then you will experience noticeable Ping Lag. This is represented by a delay between when you initiate an action, and when the effects are seen on screen - e.g. firing a gun with a 500 ping will result in a 500ms (half a second) delay between you pressing your fire button, and the bullet impact actually being seen on the screen. While having a high ping can be annoying, players with high pings do not affect other players' pings in America's Army as confirmed by the game's Developers.
Packet Loss: If your character starts 'warping' around while playing then this is usually due to game information being lost on the way to/from the server. The only solution to this is to make sure your connection is sound (i.e. if it doesn't happen in other online games then it's probably not your connection), and going to another America's Army server.
Stuttering: If your Ping is showing a low value when viewing the Stat Net statistics, but you are getting choppy or stuttery gameplay, with small pauses here and there, this is called Stuttering and has nothing to do with your Internet connection. It's due to your hardware - particularly your hard drive - struggling to supply information to your system smoothly. To solve this check the guides under the Essential Optimization section on page 2 and make sure to optimize your system.
Graphical Slowdown: If your Ping is showing a low value when viewing the Stat Net statistics but you are still experiencing laggy graphics and movement at certain times, particularly during heavy combat scenes, this is called a Graphical Slowdown and has nothing to do with your Internet connection. It is caused by your graphics hardware struggling to render the game. To solve this, aside from following the guides on page 2 of this guide, tweak your game to increase average FPS as per the In-Game settings and Advanced Tweaking sections of this guide, and if nothing else helps consider a graphics card upgrade.
ConfiguredLanSpeed=20000
You should leave this value at its default since LANs can quite easily accommodate Netspeeds of 20000. Lower it only if you experience a higher ping than usual on a LAN. This setting only has an impact on LAN games, and has no impact at all when playing on the Internet.
[Engine.PlayerInput]
MouseSamplingTime=0.008333
This setting effects how fast/slowly your mouse moves by taking samples at more/less frequent intervals (in seconds). As this number increases from the default the slower your mouse will seem as samples of your mouse movement are taken less often. Experiment with fine tuning this setting if the default sampling time doesn't seem to help your mouse speed, however be careful with extreme values as they may be seen as cheats.
DoubleClickTime=0.250000
This setting controls the length of time in seconds during which a double-tap of a movement key is registered. In particular, since the sprint function in America's Army is tied to a quick double-tap of the Forward key, if you press W (default Forward key) twice within 0.25 seconds then it will register as the signal to start sprinting. Increasing this value will mean more time during which two presses of the forward key will trigger a sprint. I recommend setting this higher than the default, say to 0.400000 so that you can more easily engage the sprint mode. If you want to turn off double-tap sprinting altogether, set this value to 0.000000.
Note, if the above section and/or some of the settings are not in your User.ini, first change some of the mouse settings in the In-Game Settings, exit the game and check back in this file.
[Engine.HUD]
ConsoleFontSize=8
MessageFontOffset=-4
Unfortunately while the above settings do work in resizing the console text in the current version, they seem to reset after a restart and I haven't found a way to make them 'stick'.
[XInterface.GUIController]
bQuietMenu=False
Set this option to True if you don't want any clicking sounds while you're navigating the America's Army game menus.
bNoToolTips=False
Set this to True if you want to disable the small description boxes which popup every time your mouse moves over a setting or option in the America's Army game menus. Note that this will make adjusting some sliders difficult as their current value is shown as a tooltip popup.
[Engine.TextToSpeechAlias]
Aliases=(MatchWords=("gg"),ReplaceWord="good game")
The Text to Speech engine in the game (see In-Game Settings section) uses the settings in this section to determine how to translate common abbreviations into spoken words. For example "thx" (without quotes) gets translated into the word Thanks, while "omg" becomes Oh My God. If you want change or add abbreviations which you or your friends use, add a new line and use the same format to enter the abbreviation first, then the words which should be used by the speech engine as substitutes.
[AGP.HumanController]
Username=
UserPassword=
This is the section of the User.ini file which records your player's Username and Password - the ones which are entered in the Personnel Jacket to log into the game. As of Version 2.7 your password is now stored here in encrypted format, which makes it much more secure, whereas previously the password was held in plain text format and was susceptible to being stolen via P2P or malware.
bFlushOnRoundRestart=False
If set to True, this setting performs the Flush command (See Console Commands section) each time a new round starts. This can remove or reduce any graphical anomalies you get over time in the game, but it will increase loading times significantly.
bNoClientSideEffects=False
If set to True, this option disables all Client Side Effects, which includes all weapon effects such as bullet shells, gun sounds, muzzle smoke, bullet impacts etc. This can help improve performance and online lag, however it is not recommended that you set this option to true since it is highly unrealistic. Only turn this on if your system is really struggling.
SkinTonePref=
This setting is blank by default, and you are randomly assigned a skin tone when joining a server. If you want to set a preference for a particular skin tone, you can assign a value of =SKINPREF_African, =SKINPREF_Caucasian or =SKINPREF_Latino to this setting and you should get the skin color of your choice when playing online, although it is not guaranteed.
bDemoRecSounds=false
bDemoRecMuzzleFlash=false
These two commands were added as of the 2.8.3.1 patch, and must be manually inserted here if you wish to use them. If set to True, they disable weapon firing sounds and weapon muzzle flashes respectively during the recording of demos using the Demorec console command, to prevent problems or glitches.
The next section covers America's Army Console Commands.
To open or close the in-game console, press the '~' key (or the key above TAB on European keyboards), or the TAB key. You can enter a range of commands in the console, and the most important of these are covered in this section. Note that some commands can only be used in multiplayer, and some can only be used in singleplayer modes.
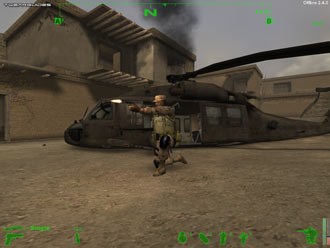
Common Commands
Stat FPS - Displays your frames per second
Stat Net - Shows network game play stats including Ping
Suicide - Kills your character
Open [IP address:Port] - Connect to a specific server IP. If a port isn't specified the default is 1716
Start [mapname] - Opens the specified map in offline mode
Disconnect - Disconnect from current server
Reconnect - Reconnect to the most recently joined server
Teamsay [text] - Displays your message in team chat
Say [text] - Displays your message in global chat
TTS [text] - Uses Text to Speech to speak the specified text
Netspeed [number] - Sets the network communication rate in bits per second, default is 10000
Bind [key] [value] - Will bind a command to a particular key. E.g. Bind E LeanRight will make the E key the key to use to lean to the right.
Brightness [number] - Changes the brightness level to the specified number
Contrast [number]- Changes the contrast level to the specified number
Gamma [number] - Changes the gamma level to the specified number
Exec [filename] - Executes a file in the \America's Army\System\ directory by default
FOV [number] - Changes the Field Of View to the specified number, 90 is the default
Relaunch - Relaunches the engine
Set [class variable value] - Sets a specified class and specified variable with the specified value. For example Set Input N ThrowWeapon will make using N key throw your weapon.
SetSensitivity [number] - Sets the mouse sensitivity to the specified number
Setres [WxHxD] - Sets your screen resolution to the specified width, height, and color depth
ToggleFullscreen - Toggles fullscreen mode
Flush - Flushes all caches and relights. Useful in removing any graphical glitches during the game
Quit - Exits the game to Desktop
Exit - Exits the game to Desktop
Note: For a range of additional Offline Commands, see page 5 of this guide.
Voting Commands
Votekick [playername/playernumber] [reasonnumber] - Votes to kick a particular player for a specific reason. Note that you don't need to enter the player's full name - use the Playerlist command and insert the relevant Playernumber in this command.
Playerlist - Lists all the current players on a server, and provides a playernumber next to their name which can be used in commands like Votekick.
Reasonnumber - Lists all the possible Votekick reasonnumbers. These are:
1. Player is idle
2. Player is intentionally violating ROE (note: cannot be used if player has no ROE)
3. Player has used foul or abusive language
4. Player is spamming chat
5. Player is camping
Demo Commands
(Only work in multiplayer)Demorec [demoname] - Records a demo using the demoname you type here
Stopdemo - Stop recording a demo
Demoplay [demoname] - Plays the specified demo with the name given
DemoRecToggleSound - Toggles on/off weapon firing sound effects to prevent demo recording problems
DemoRecToggleMuzzleFlash - Toggles on/off weapon muzzle flashes to prevent demo recording problems
System Diagnostics
Stat All - Shows all stats
Stat None - Turns off all stats
Stat Audio - Shows audio stats
Stat Game - Displays game stats
Stat Hardware - Shows hardware stats
Stat Render - Displays rendering statistics
Memstat - Displays Windows memory usage
Confighash - Displays configuration info
Dumpcache - Displays the memory cache contents
GetColorDepth - Displays the maximum color depth supported by your hardware
GetCurrentColorDepth - Displays your current color depth
GetCurrentRes - Displays your current resolution
GetCurrentTickRate - Displays your current tick rate
GetMaxTickRate - Displays the maximum allowed tick rate
Obj Classes - Displays a list of object classes
Obj Garbage - Collects and purges objects no longer in use
Obj Hash - Displays object hashing statistics
Obj Linkers - Displays a list of active linkers
Debug Crash - Test crashes the game with an error
Debug Eatmem - Tests memory allocation until full
Debug GPF - Test crashes the game with a general protection fault error
Debug Recurse - Test crashes the game by infinite recursion
Report - Copies a report of the current game to clipboard
Sockets - Displays a list of sockets in use
PunkBuster Console Commands
There are a range of additional PunkBuster console commands you can use in America's Army. These aren't covered here due to space considerations, however you can see the full list of these in this section of the PunkBuster Online Manual.
America's Army Server Manager
A utility called the America's Army Server Manager is included with America's Army which makes managing servers much easier for Admins by providing an easy-to-use GUI. For full details of how to enter the AASM Utility, see the Getting Started With AA Server Manager.pdf document in your \Program Files\America's Army Server Manager\ directory. Note that you must install this utility during the initial installation of America's Army to have access to it. However if you can't find it on your machine, run the AASM17Installer.exe file found in your base \America's Army\.
Importantly for Server managers - you must open the following ports for America's Army to work correctly on your server:
UDP - 1716, 1717, 1718, 8777, 27900
TCP - 14200, 20025-20045, 20046, 20047, 20048
For a full list of all known console commands, and in particular help in undertaking complex keybindings, see the detailed Console Commands, Switches and Keybindings Help thread on the America's Army Forums.
The next page concludes this guide with some final words and important resources
AA Mission Editor
As of version 2.8, America's Army now includes a Mission Editor which allows users to create custom maps for the game. You can access the AA Mission Editor by using its icon placed on your Desktop after the installation of America's Army, directly from the AA Loader screen, or by going to your \Program Files\America's Army\System\ directory and running the AAEditor.exe file. The editor will take some work to use, however once you've created a custom map you can submit it to AA Mission Depot and if approved will be available for all players to download and use.
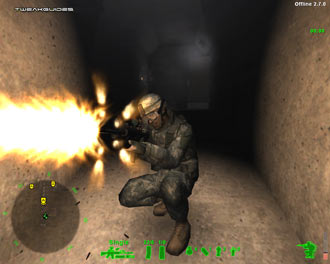
Conclusion
Again, we come to the end of another TweakGuides tweak guide. Various versions of this America's Army Tweak Guide have been floating around since I originally released it on Tweaktown back in late 2002. Since then it's been updated many, many times and the current version you see before you is completely re-written and extremely refined, both from a great deal of user feedback and my now 6 years experience with the Unreal Engine, from games such as the original Unreal and Unreal Tournament, through to Unreal Tournament 2004 and games based on the same engine such as Thief: Deadly Shadows.
In any case I sincerely hope this guide has been some help to you in increasing your enjoyment of America's Army, a game which I first started playing since Version 1.2 of the game back in 2002. If you believe there are any important tweaks or information missing from the guide, or there are any inaccuracies, please Email me with the details. Note however that I can't provide any tech support.
Useful Links
The following are some highly useful sites which contain more helpful information on America's Army. If you're a fan of the game like I am, you should check each and every one of them out:
America's Army Official Site
America's Army Official Forums
ArmyOps Tracker
America's Army Server Admins
AmericasArmy Files
Be sure to check back often on this guide as it is constantly updated, and always contains the latest information on America's Army. Until next time, take care.