


Classic Ironman mode in XCOM is not for the faint of heart. You will lose troops, regardless of how amazing you might think you are at the game. Sooner or later all your units will spectacularly miss their shots and an alien will critically hit one of your soldiers in full cover. You will most likely see a number of countries withdraw from the council and you’ll feel like you’re fighting an absolutely hopeless cause, especially early in the game.
But quite frankly, this is by far the most enjoyable way to play XCOM: Enemy Unknown, and many of us wouldn’t have it any other way.
There are a wide range of things you can do to even the odds in your favor and to ensure you have a much better chance at succeeding against the ever increasing alien menace. After beating the game on normal with virtually no losses I’ve been playing Classic Ironman exclusively and the game has taught me a thing or two in the process. The very first game I played was completely hopeless, my Memorial was 3 pages long and no soldier would last to Lieutenant.
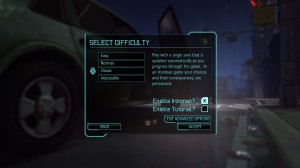
A game for real men.
A few games further and I’ve largely perfected my strategies. Soldiers reach Colonel rank consistently and I only lose soldiers in the most dire of circumstances. I’ve also managed to keep the number of countries who withdraw from the council to an absolute minimum. For example, in my current Classic Ironman game I have world wide satellite cover in Month 3 with the only exceptions of China and Australia.
So let’s go through some of the strategies I found highly successful. I do recommend you play through and finish the game at least once on normal non-ironman. This way, you are familiar with the research, the story and can read through this without spoiling things for yourself.
Your first decision will be whether or not to play the Tutorial. I would recommend that you don’t. You do get a free satellite, but the timing of other aspects is poor at best, and you might find yourself unable to order another satellite before you run out of time. Since they take 20 days to build, you need to be able to order another one by the 10th.
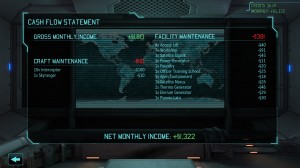
A healthy financial situation is crucial.
Upon finishing the mission, check your base layout/facilities. In particular, where your Steam vents are located. You need at least one, ideally two of these to manage your power needs efficiently. Please refer to base layout for more information as I go in more depth about this in that section. If your Steam vents are in totally terrible locations (they’ll prevent you from getting a good base layout, especially in regards to satellites) – consider restarting. You have enough challenge to worry about without an impossible to manage power situation.
You should aim for the following satellite cover by the end of each month as an absolute minimum (assuming an Africa start):
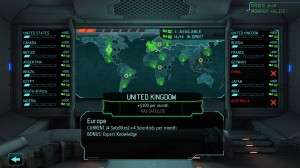
This is an excellent situation to be in at this difficulty.
A much more ideal scenario (depending on your mission success / available resources) is to bring forward the 1st Uplink into Month 1 or buy 2 Uplinks in Month 2. This is very possible – but you’ll have to plan accordingly and manage your funds extremely carefully. If you’re lucky on what missions you get, go for it. Sell some UFO Power Sources if you need to, it’s worth it in the long run and you’ll acquire more anyway. They bring in enough cash to fund your uplinks. Don’t get rid of the Navigation Computers, you’ll need them for research and construction of the Satellite Nexus.
Note that you will need Workshops in order to pull this off – as there will be an ever-increasing requirement of Engineers in order to place new satellite up-links. This means you will need to anticipate this by building generators and workshops accordingly.
Managing Panic
If you are at serious risk of losing a council member, you can drop the panic level in said country by 2 by placing a satellite right before the council report. Don’t do this any sooner as a late month mission might change everything. Generally speaking once you are nearing the end of the first and second months you might have to plan to sacrifice specific countries. If you started in Africa, you can safely sacrifice the two other countries there without too much impact. The best other choice for sacrifice would be the lower paying countries in Asia. The bonus Asia gives is completely not required by the time you heavily invest in the Foundry and Officer School, as you will have a satellite network paying you in excess of 1500 per month. Bear this in mind when you choose Abduction missions as well – take note of the reward and the effect not doing them will have on the rest of the continent. Russia might be fine, but if Germany is on 4 panic, you might want to do the Russia mission just to prevent Germany from withdrawing from the council. With 9 workshops planned in this strategy, Europe provides a huge bonus which you don’t really want to lose if you can avoid it. (Though not as vital as Africa and North America are!)
Please note that countries with Satellite cover are not subject to Abductions. Since abductions are the biggest risk to your panic levels, full cover effectively means you have a very stable and much easier time managing your panic levels across the globe. It is worth keeping a spare satellite around – in case you fail to shoot down a UFO and it decides to take out one of your Satellites. Launch a new one ASAP, to prevent triggering an abduction!
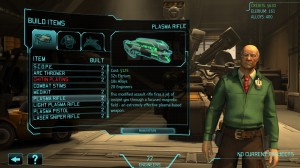
Be as efficient with your items as possible and only ever have as many as you use in any given mission.
You only ever need 2 medikits, 2 arc throwers and a handful of protective vests or chitin plating. You might wish to use scopes on a few soldiers later.
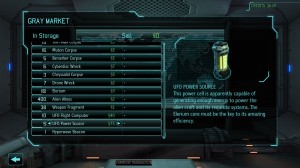
Sell anything you don’t need – it will give you a much needed cash injection. Don’t ever sell Alien Alloys or Elerium though.
When planning your base, consider the following:
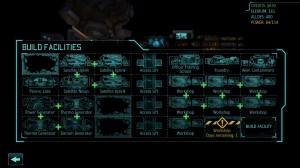
As you can see, there’s room for the Hyperwave Relay and Gollop Chamber facilities with plenty of power spare.
One of the biggest questions I get asked is what soldiers to take on missions – and what perks they should have. There isn’t really a single good answer to this, but I’ll tell you what worked extremely well for me, and provide comments where I am able.
First in terms of set-up for the Squad itself. Obviously, you will rely on the availability of your soldiers, but in my experience you will mainly come down to a fairly consistent set-up. I had a huge section written out until I realised that quite frankly, there’s little variation in what you should take. The ‘core’ would definitely be;
2 Supports
1 Sniper
1 Assault
You then add a Heavy for any mission which isn’t a UFO. For those, honestly – besides for the few pulls away from the UFO, you want to minimise collateral damage. On Terror Missions, I am torn. If you have a fantastic Heavy, go ahead but otherwise consider an additional Assault or Sniper. Your last slot once you have 6 can be anything: Shiv, experienced soldier or better: rotate less experienced soldiers in to bring your reserves up to snuff. Personally I’ve had a lot of success with experienced Assaults and love running with 2x Support, 2x Assault, 1x Sniper and 1x Heavy/Shiv. On Council missions, provided I have a very experienced one spare, I might bring an additional sniper as those can make a huge difference on the smaller maps when the reinforcements spawn. Thin men are very easily dispatched with double tapping squadsight snipers.
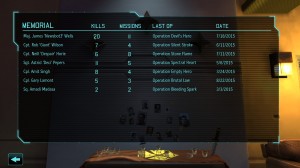
No matter how fantastic you are doing, you will still lose experienced soldiers. Plan accordingly.
Corporal: Covering Fire – at this difficulty you’re not sprinting across the map with a support, you are turtling and covering your squad at every opportunity with overwatch. Covering Fire is absolutely amazing for this as it means your Support will fire at aliens which don’t leave their cover. This combines very well with Sentinel later on.
Sergeant: Field Medic – there simply isn’t another choice here. Medikits are vital if you wish to see your soldiers survive beyond a few missions. Having a veteran unit bleed to death because you were stupid enough not to bring enough medikit uses is nothing short of heartbreaking.
Lieutenant: Revive - bring soldiers back into the fight? Yes please. No medic should go without this. Rifle Suppression is situational, ideally enemies should be dead, or you go in Overwatch if they’re not.
Captain: Dense Smoke – this is a personal choice and you could easily go with Combat Drugs for those tougher situations when not panicking is key. I quite like being able to make smoke grenades more effective, as I primarily use them in situations where additional defense is key.
Major: Deep Pockets – all Supports get this but I wanted to highlight how crucial this perk is. This enables your Support to take an Arc Thrower, or if live aliens is no longer a concern, Chitin Plating. A huge benefit.
Colonel: Sentinel - this might be an odd choice as additional healing is obviously a great perk. Personally, I use my supports exactly as the name implies: to cover and support my other soldiers. My supports are among the soldiers with the highest number of kills and I have them on overwatch almost permanently – unless they’re busy actively killing something or healing another soldier. Sentinel is outright amazing and has literally saved me during some tough terror missions later in the game.
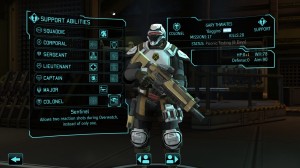
Experienced Supports are utterly invaluable in difficult missions.
Squaddie: Run & Gun – all Assaults get this but oh my god this skill is so damned useful. It allows you to flank enemies and make a real difference.
Corporal: Tactical Sense – this is a personal choice and the other perk is great too. However, when there are enemies in sight and all else fails (which it often will) I’d like my soldier to have every chance to survive the alien turn. Aggression could work well too – but later on you really have plenty of crit chance already and I never felt it made a huge difference.
Sergeant: Lightning Reflexes – this is hands-down the winner here. You can now use Run & Gun not only to flank the enemy but to force that enemy to waste its Overwatch reaction shot, allowing the rest of your squad to move freely. Vital.
Lieutenant: Rapid Fire - quite frankly, flush is useless and doesn’t work half the time. Rapid fire is amazing as it allows you to Run & Gun close to an alien and then blast it full in the face with 2 shots. As you’re so close by, the -15 to aim isn’t that big of a deal.
Captain: Close Combat Specialist – this gives a free attack against any enemy who comes within 4 tiles. This attack has a great chance of hitting as the enemy is so close to the assault. The amount of times this will save you against cryssalids, or on top of a ladder cannot be underestimated. This talent is huge and always works. Vital.
Colonel: I tend to go with Killer Instinct, which provides an excellent synergy with Ghost Armor. Using Run & Gun and shooting someone twice with the additional crit damage and 100% crit chance on your first shot due to stealth can lead to a tremendous amount of damage. Resilience however makes it far more likely that your Assault will survive several hits during combat, which can prove vital in Classic Ironman. Either is a solid choice, I’d make an assault with each and use one of them to make banzai style attacks and the other as clean-up crew.
Corporal: Bullet Swarm – this gives your Heavy the ability to fire and then either move or shoot again. As useful as Holo-Targeting might be, Bullet Swarm is the clear choice here.
Sergeant: Shredder Rocket – I’ve found this rocket invaluable both for taking out groups of weaker enemies early in the game, as well as softening up the stronger enemies later, such as Cyberdiscs or worse. Suppression uses a huge amount of ammo and pretty much forces you to lose another turn later while you reload.
Lieutenant: HEAT Ammo – very nice against Cyberdiscs and Sectopods, which are among the hardest enemies in the game. Rapid Reaction relies on the Heavy firing and hitting a reaction shot and given that this class has the poorest aim of all, the chance of this actually happening is quite small.
Captain: Danger Zone – unless you consistently equip grenades on your heavy (which I don’t, I prefer a S.C.O.P.E. as their aim is poor) you are better off increasing the area of effect of your rockets.
Colonel: Rocketeer - whilst additional damage is nice, I prefer to carry an additional rocket. Especially as my Heavies don’t use grenades, otherwise I would run with a Grenadier/Mayhem combo.
Corporal: Squad Sight – This is miles better than Snap Shot, I guarantee you. Without squad sight, you spend far too much time finding good vantage points for your Sniper. With Squad Sight, this is not needed. Just ensure you are in a good position overseeing a large part of the map and you can shoot anything your other soldiers see as long as there are no walls or obstacles between you and the target. Once you have Archangel armor, you simply float to max elevation in the corner of a map, far away from the aliens and shoot them in complete safety.
Sergeant: Gunslinger - You will use your pistol a lot if you play the sniper right, especially early on while you level towards the better perks. You might not be able to use your sniper rifle after you move, but you can use your pistol and it does a surprisingly decent amount of damage with this perk. With better pistols, you will instantly kill most weaker enemies and your pistol is always available.
Lieutenant: Battle Scanner – To be honest, this depends on your play style. I use Battle Scanners a lot to reveal areas of the map and allow for Squad Sight kills but you could use Disabling shot if you want to disarm an opponent. That said, it doesn’t work on the enemies which cause you the most problems so I’ve never seen too much point in it.
Captain: Opportunist - This is awesome and makes Overwatch incredibly dangerous on your Sniper. My sniper has made an insane amount of kills in Overwatch because of this skill with huge critical hits against stronger opponents.
Colonel: Double Tap – A lot of people love In The Zone, but I prefer Double Tap. Being able to shoot twice with your sniper rifle against any enemy in sight is just too good to pass up. There are specific situations where In The Zone is better, but Double Tap is invaluable against some of the stronger opponents later in the game when one shot just isn’t enough.
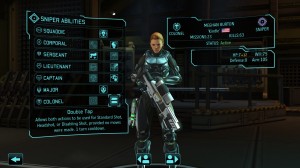
Colonel rank Snipers are amazing with a good build. Even more so if they’re gifted.
Classic Ironman is often brutal, and completely unforgiving. You will not get a second chance if you make a huge tactical error, and therefore your stategy should involve not making any errors. If you play with caution, your soldiers will live longer and each subsequent mission will become a lot easier as a result. Alternatively, if you play poorly and lose a lot of soldiers, this problem will cascade and things will become harder up to the point where you can no longer achieve your missions successfully. Below are some tips and strategies that will help you reduce unneeded losses.
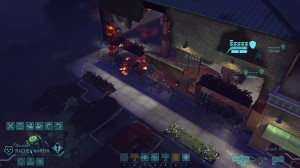
Alternatively, just blow up the entire building. That works too.
Use grenades and rockets to blow up the opponents cover if they’re behind cover and hard to hit.
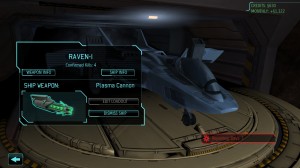
I never even noticed the game kept track of kills for individual interceptors until I made this screen shot.
And so concludes an insanely long article. I hope you found it useful and that it will help you find your own success in Classic Ironman mode. Most of these tips will apply in normal difficulty as well, but you’ll go through that without feeling the sensation of despair and terror that the harder difficulties bring. Don’t worry though, once you’re through the early difficulty, have your satellite network online and have some experienced and well-equipped soldiers, things aren’t actually that bad in this mode. Just be careful, as any mistake could be your last.
Give them hell, soldier!



 Suck My Controller: Borderlands 2 Edition - GamersHeroes
 inFamous: Second Son – Trash the Stash, tag boats, defeat dealers
 Watch Dogs: One Foot in the Grave – find Tobias
 Minecraft Mod Examination: Ye Gamol Chattels
 How to import your Mass Effect 2 Character into Mass Effect 3 for the PC