This will be a complete walkthrough with help, hints, tips and tricks for the iOS and Android game The Lost Ship.
Free/Lite Version:
(Scroll down for full paid version.)
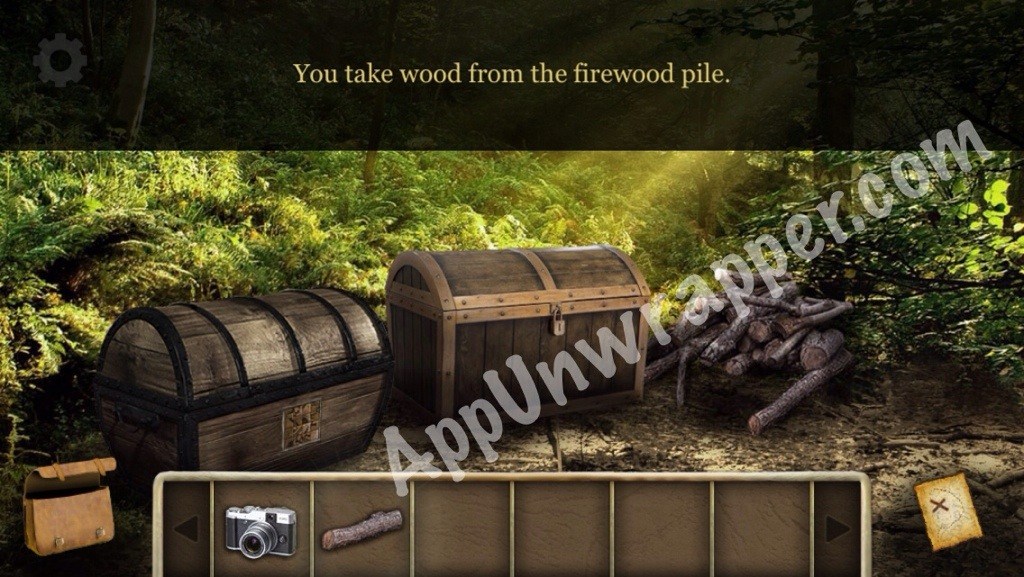
1. At the fork in the road, take the left path. Pick up some wood from the pile of firewood.
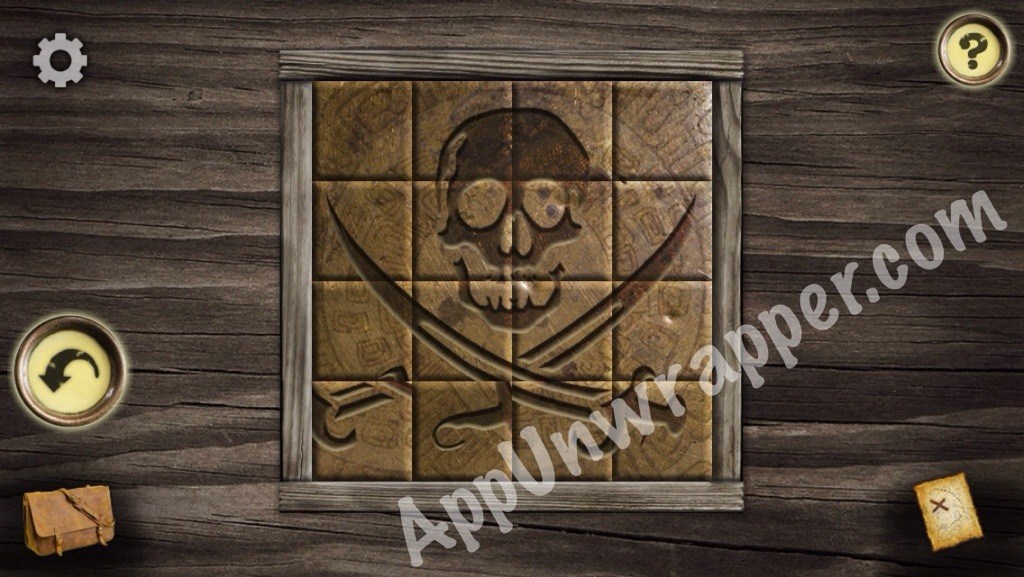
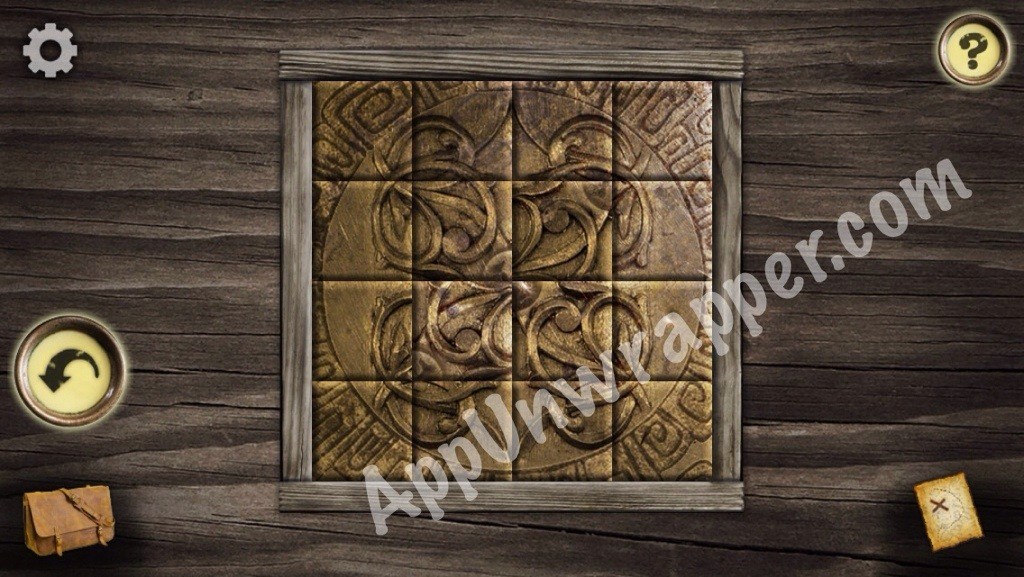
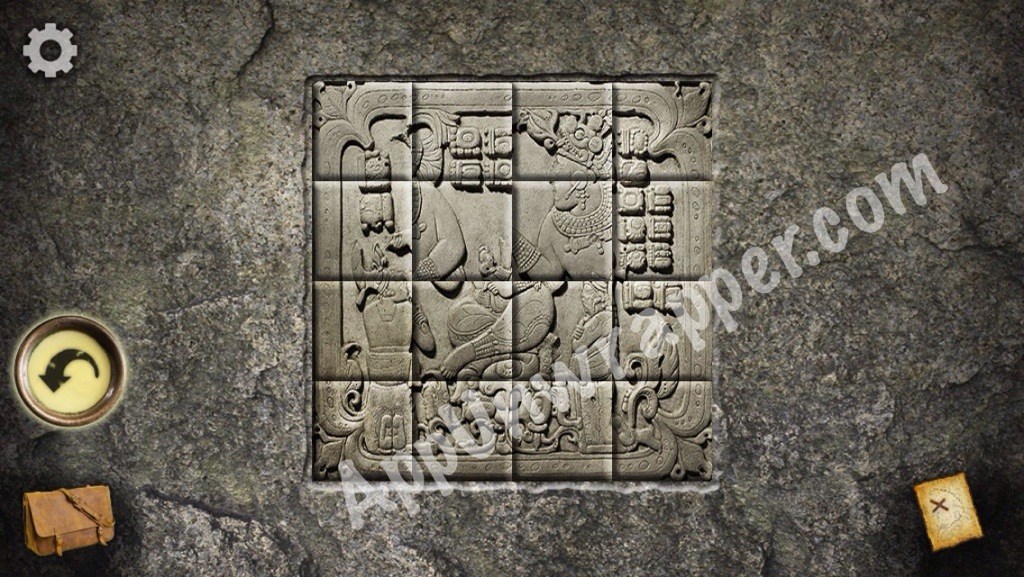
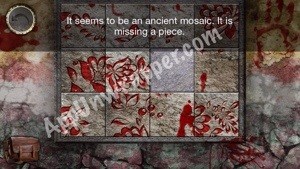
2. Solve the tile puzzle on the left chest by making a skull. (It looks like the photo below. Just swap the bottom left two tiles.) The chest will unlock and you can take the hatchet.
3. Go back to the fork in the road and use the hatchet to cut the vines blocking the right path.
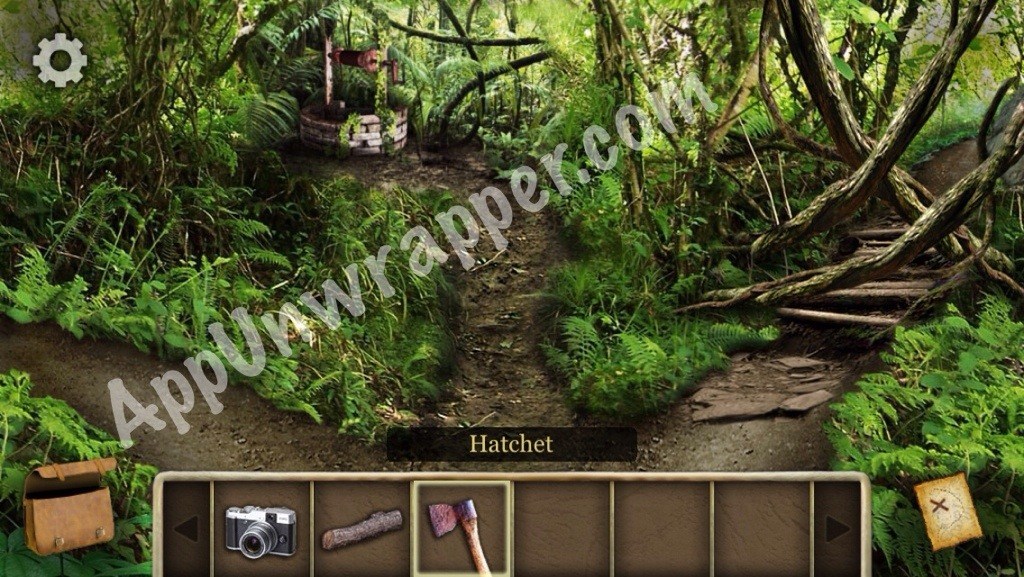
4. Take the right path. Then continue straight along the path. Go up the tree’s ladder and take the crowbar.
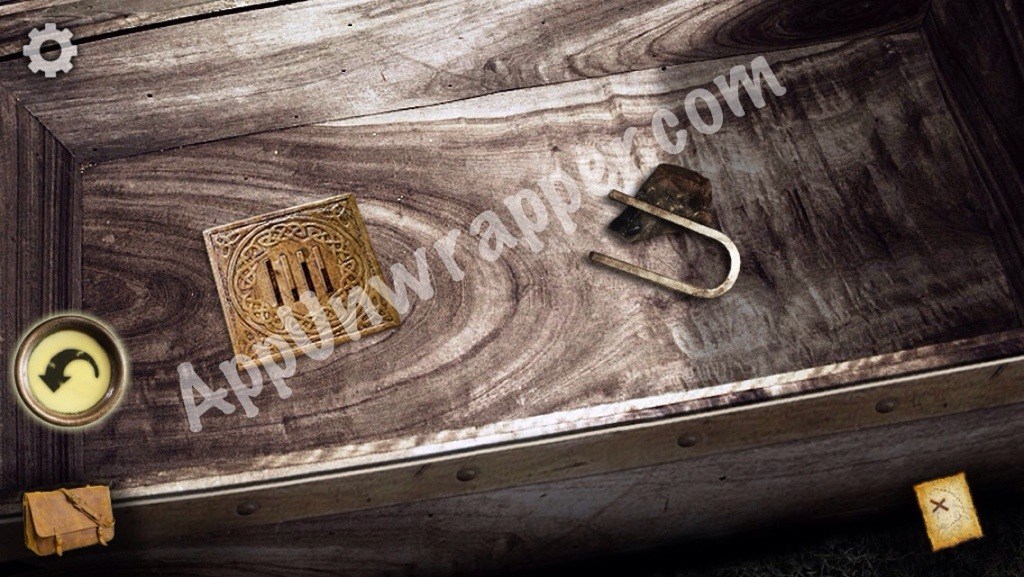
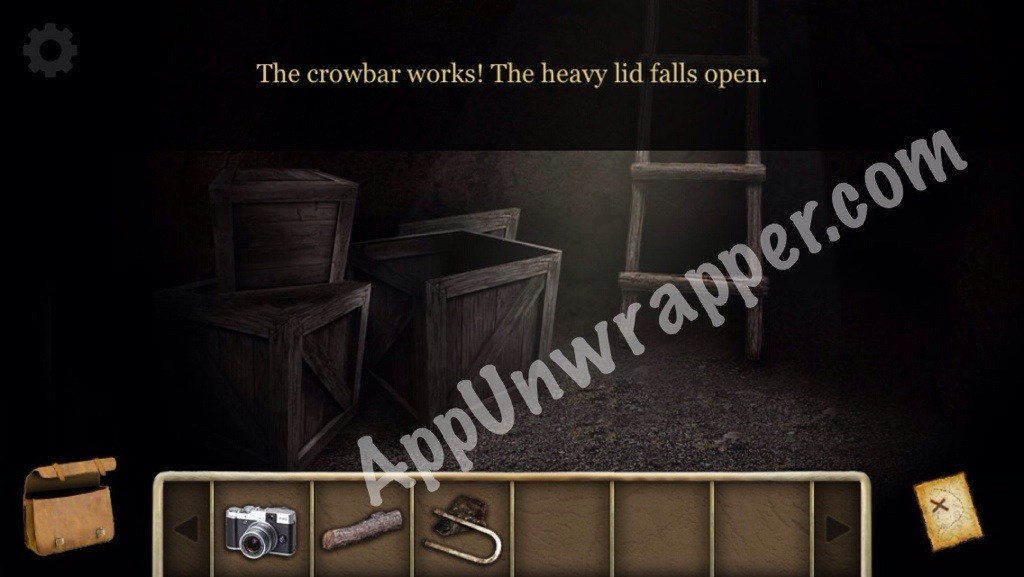
5. Go back down the ladder and turn left. Use the crowbar to open the crate to the left and get the flint and steel.
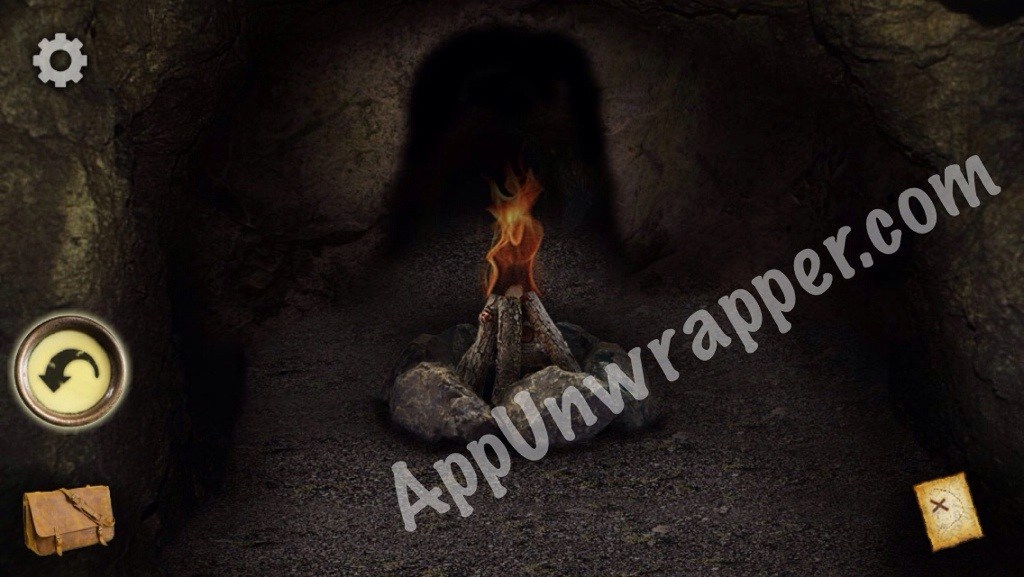
6. Go back a screen to the right and enter the cave. Place the wood on the fire pit and use the flint and steel on it to light a fire.
7. Go through the doorway that’s now visible behind the fire. ***This ends the free/lite version. The full version will start below.***
Full Version:
1. Take the left path and solve the tile swapping puzzle on the left chest to unlock it and get the hatchet. I couldn’t get a photo of the final image, but this is close:
2. Just like the free version, go back to the fork in the road. Use the hatchet to cut the vines blocking the right path and take that path.
3. Continue along the path and go up he tree’s ladder to get the crowbar. Go back down and continue along the path.
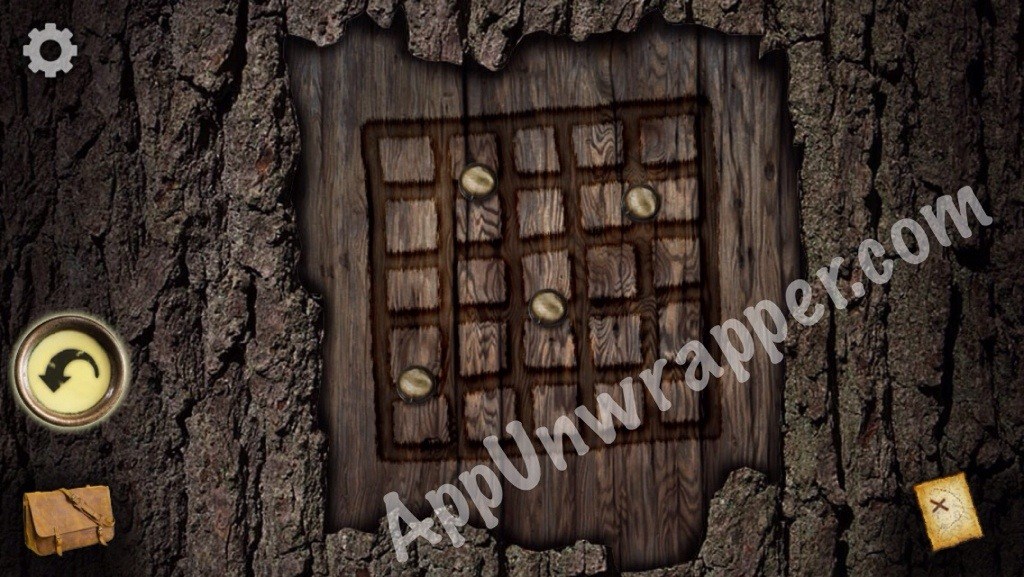
4. Continue along the path until you come to another fork in the road. Go right and see a clue on the tree. Also, notice the puzzle on the ground.
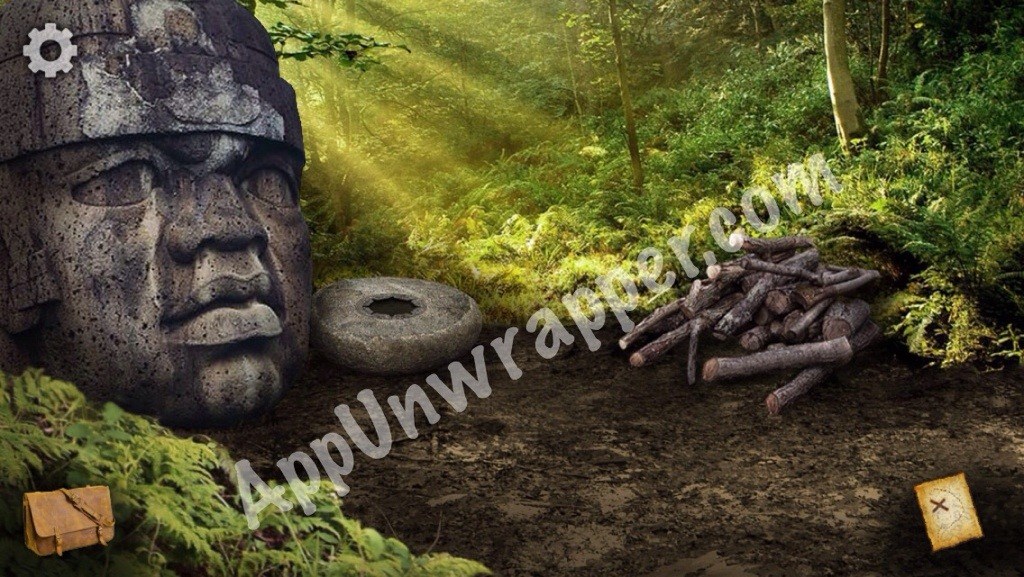
5. Go back and take a left at the fork. Pick up a piece of wood from the pile of firewood.
6. Go back to the very first fork with three paths. Take the middle path to the well. There’s a puzzle to the right. Use the clue you found on the tree to solve the puzzle and get a brass key.

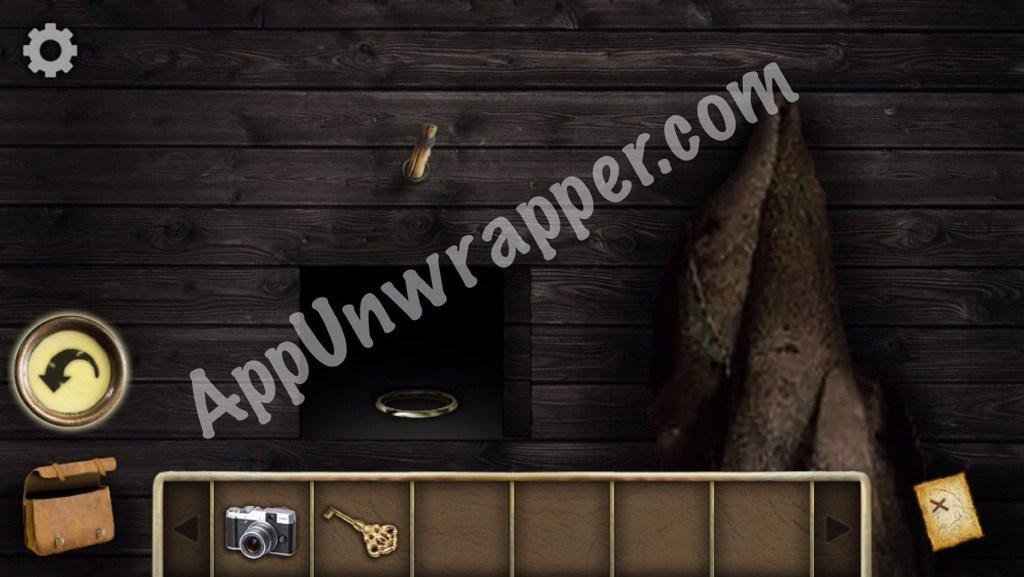
7. Go back and take the left path. Use the brass key to unlock the chest to the right. Take the flint and steel and the brass tablet.
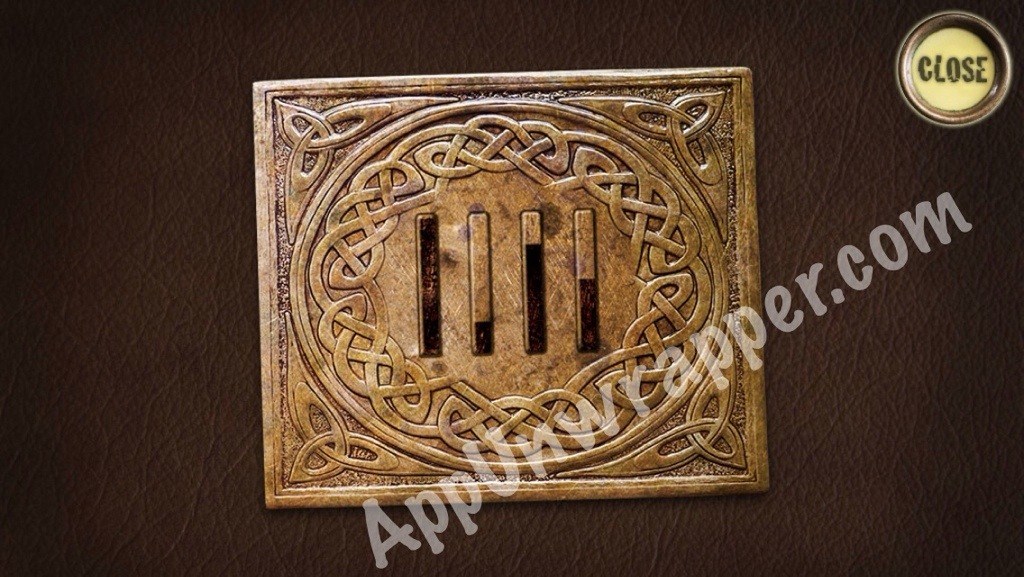
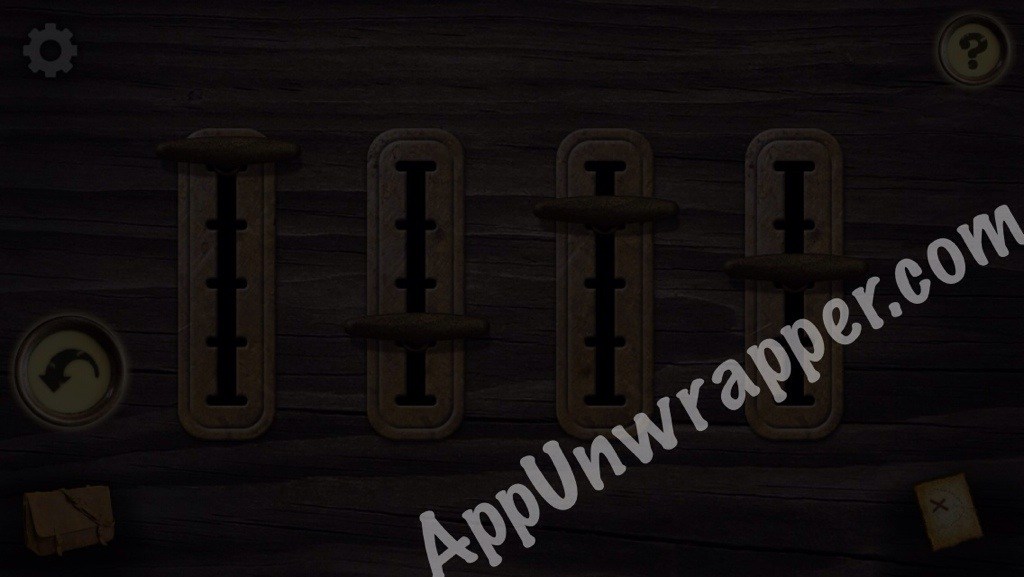
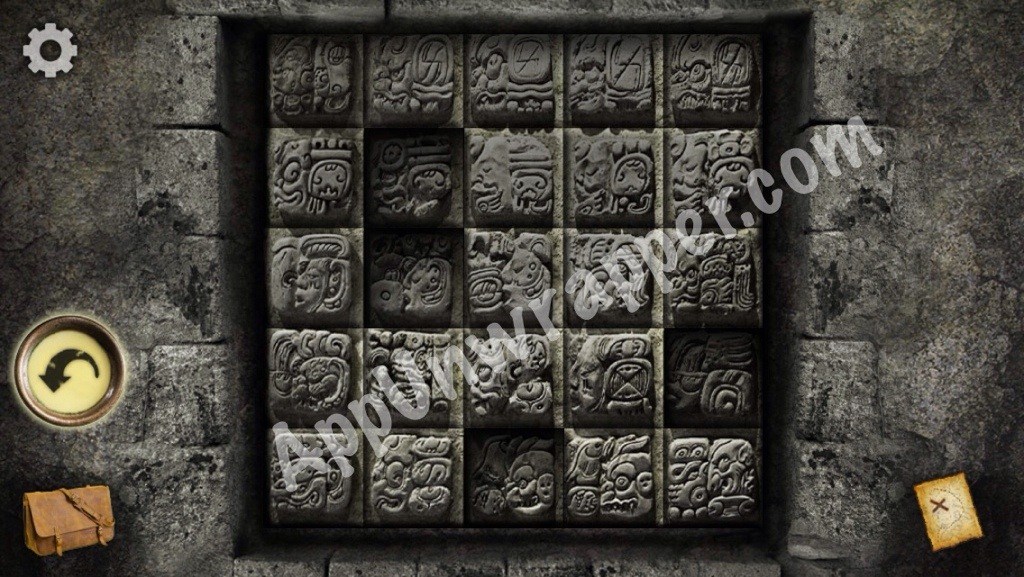
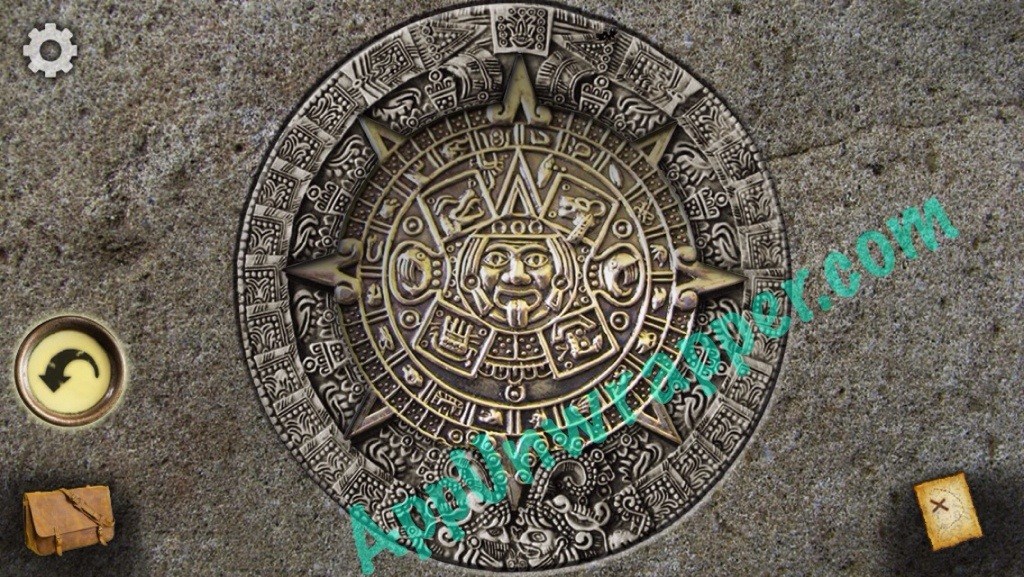
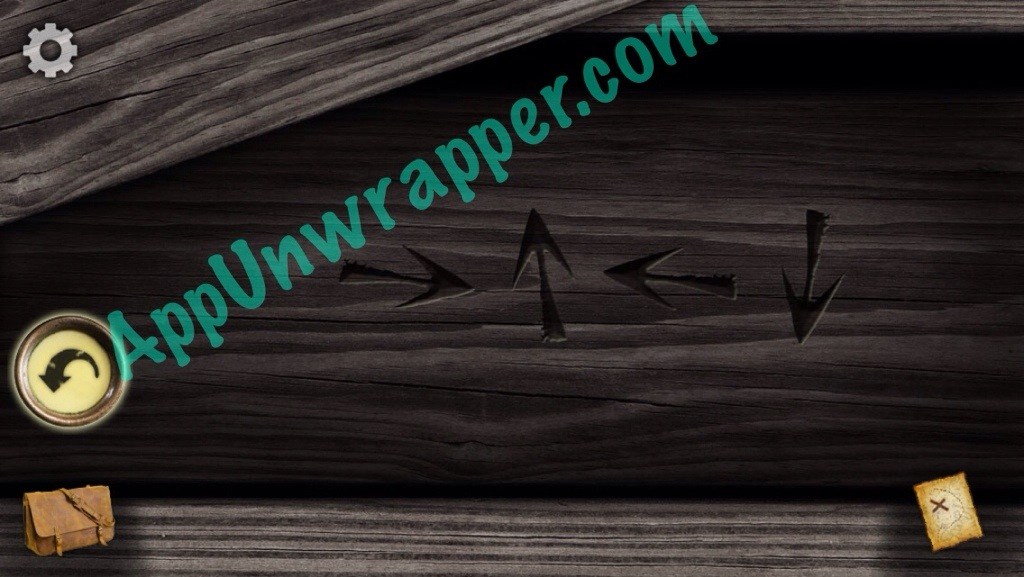
8. Look at the brass tablet. Does it remind you of anything? Go back to the puzzle next to the clue on the tree. Use the brass tablet to solve it (sorry the photo’s so dark).
9. Go down and use the crowbar to open the crate. Take the amulet.
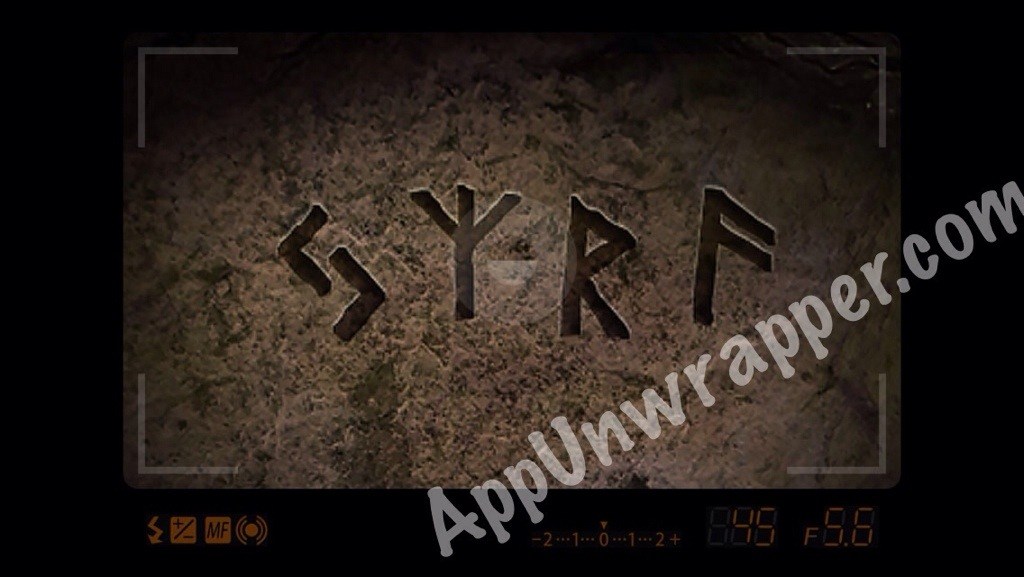
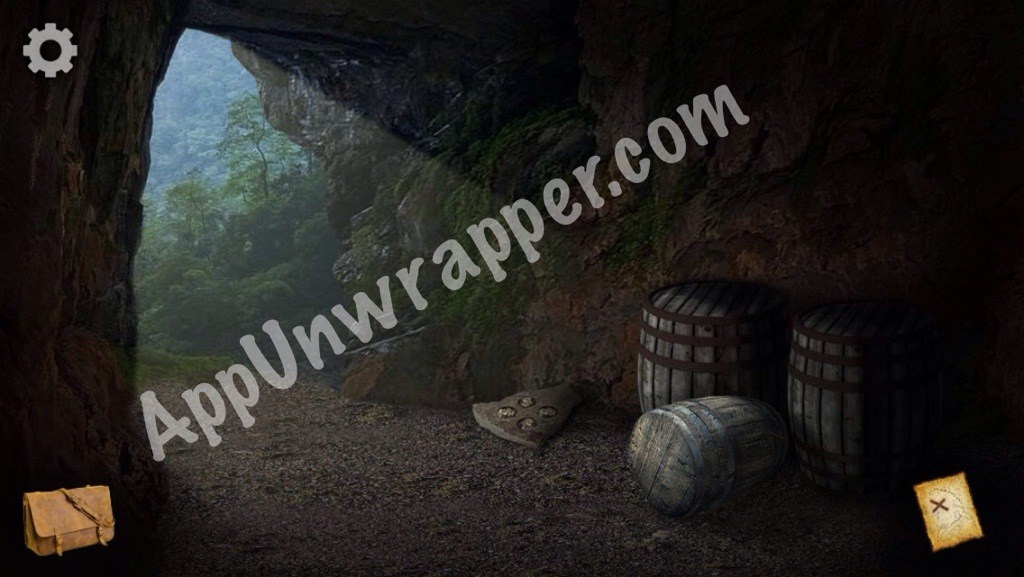
10. Go back a bit to the cave opening. Enter and place the wood in the fire pit. Then use the flint to light a fire and see some symbols on the wall.
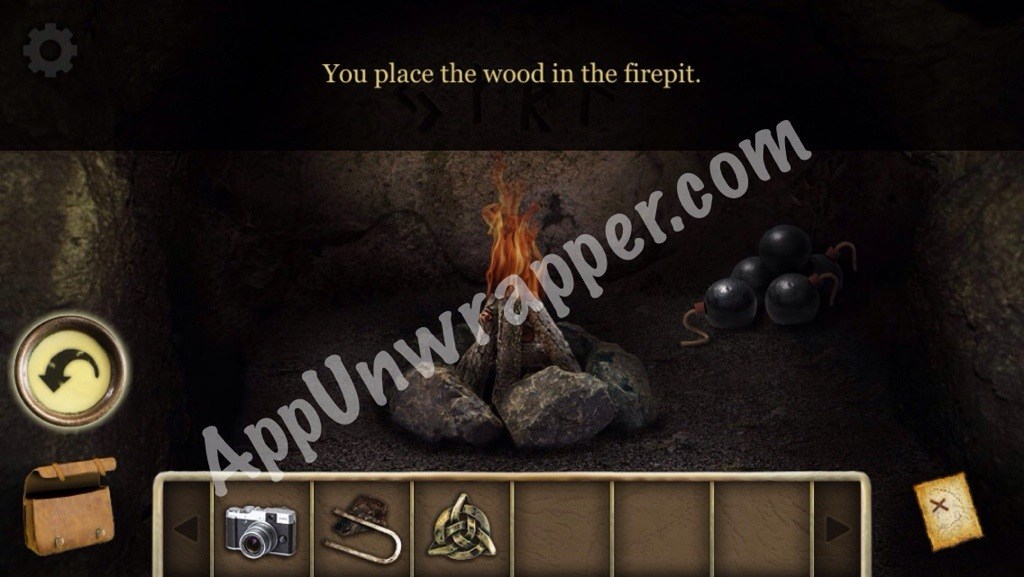
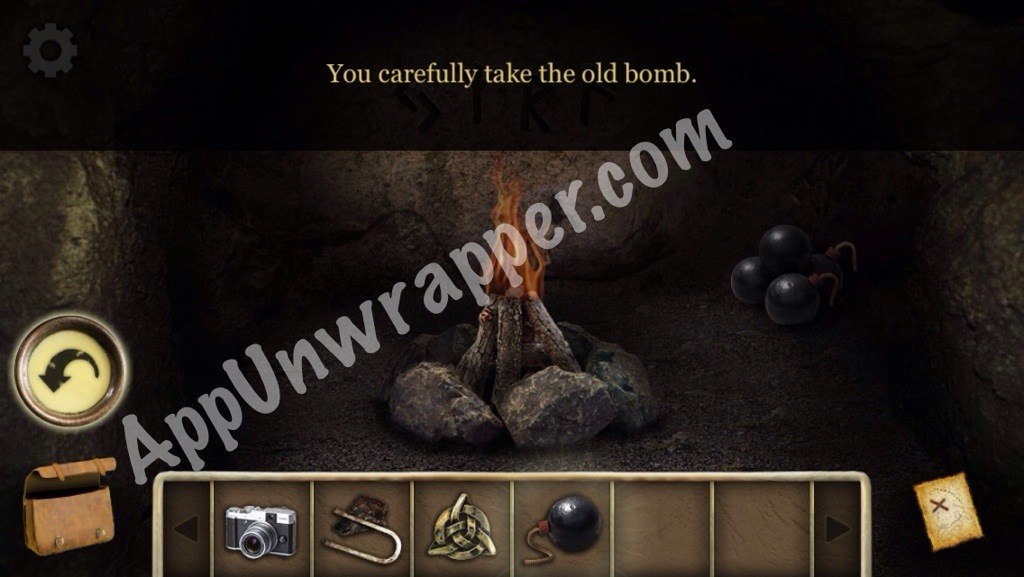
11. Take a bomb before you leave.
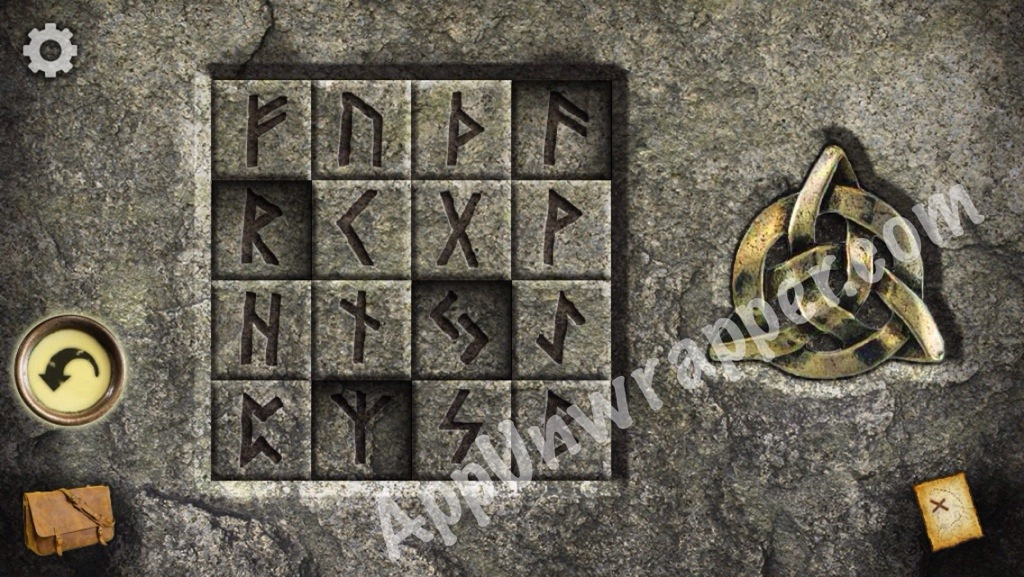
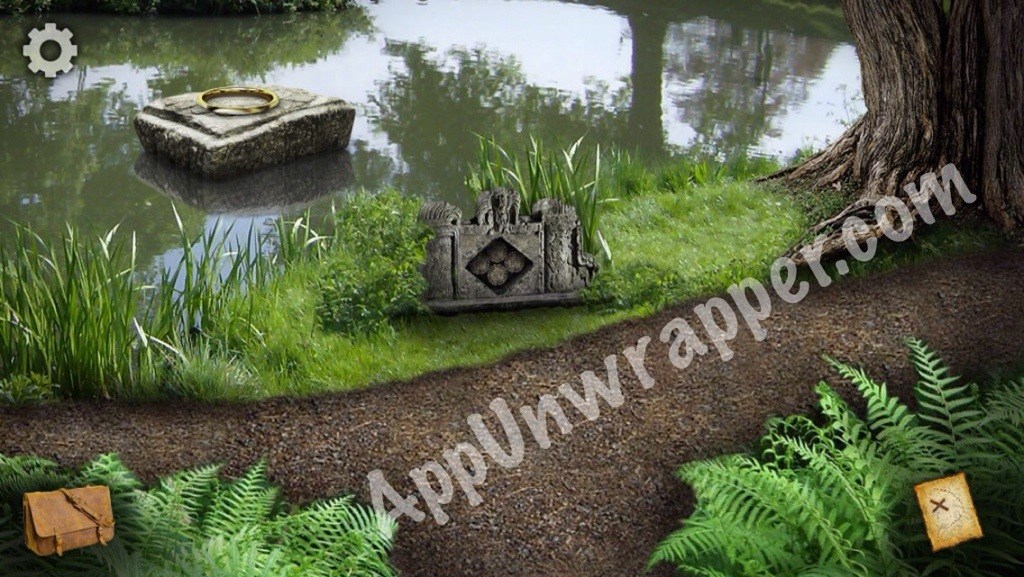
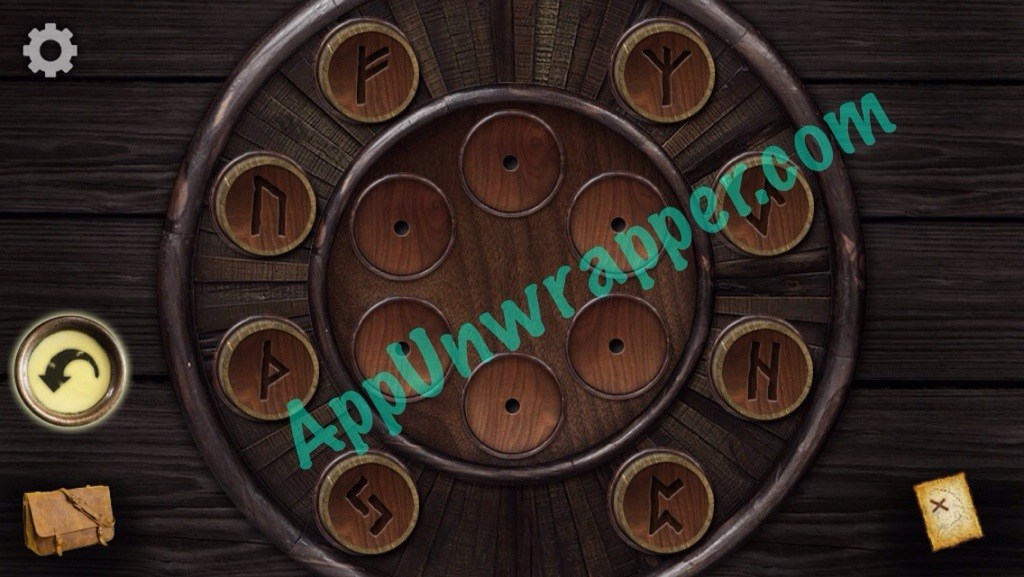
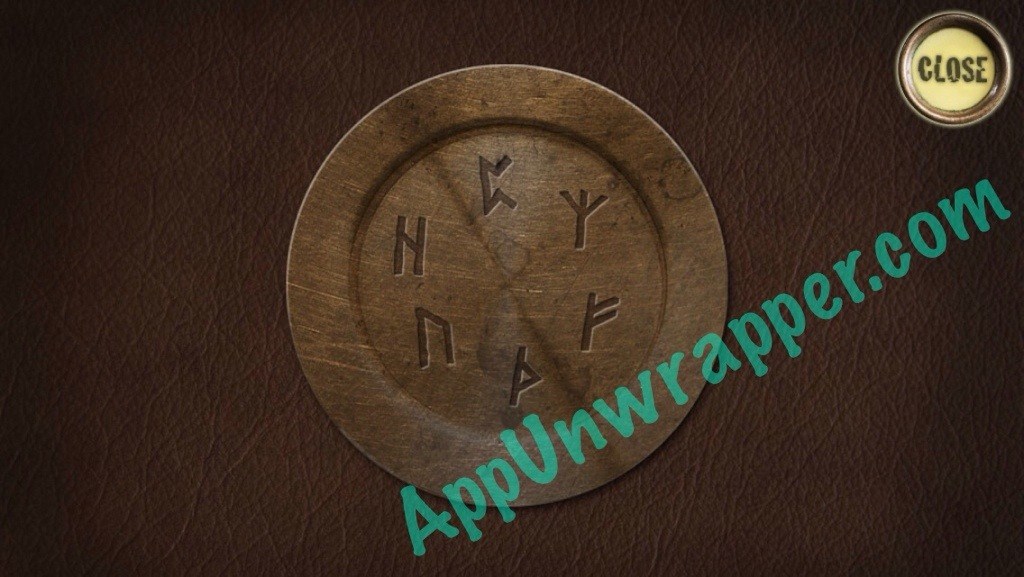
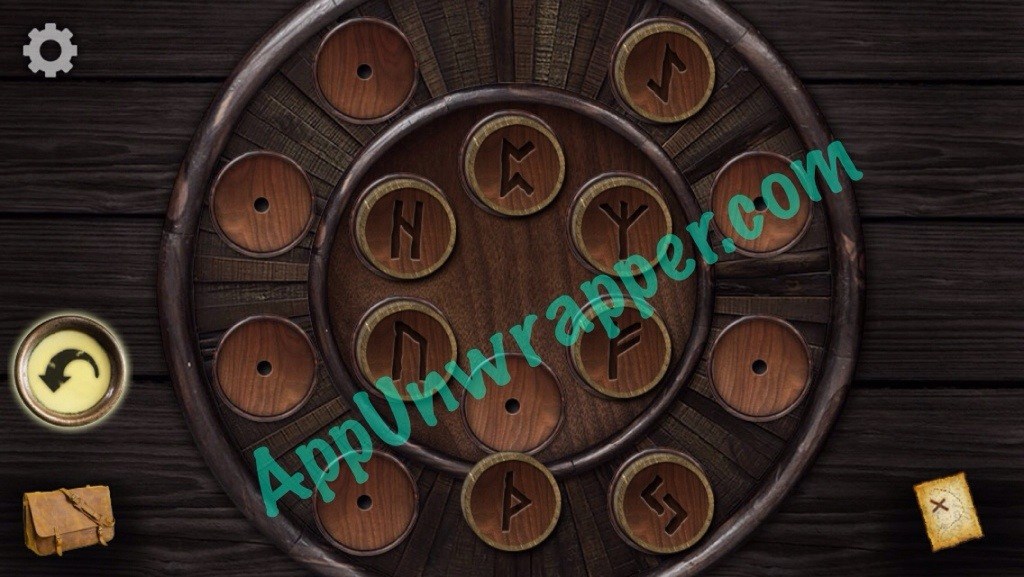
12. Go back to the other cave, the closed one. Place the amulet in the slot and press the symbols/runes you saw on the cave wall. Then enter and pick up the stone tablet and barrel.
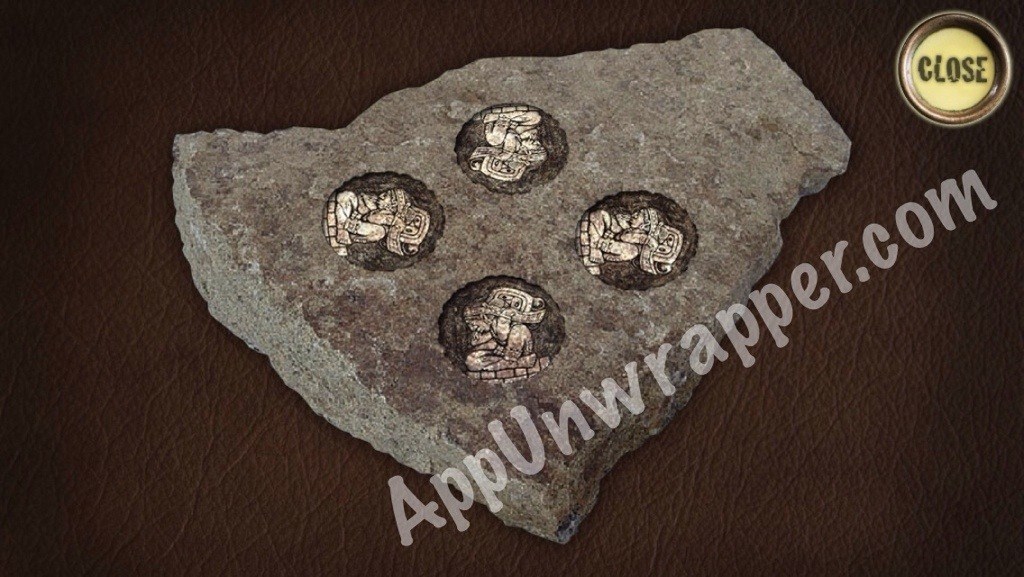
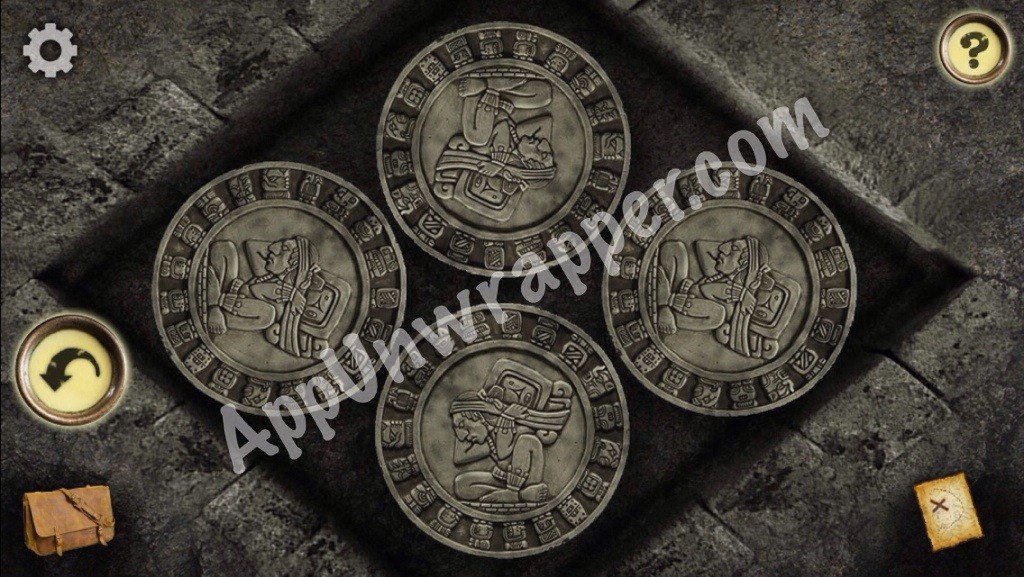
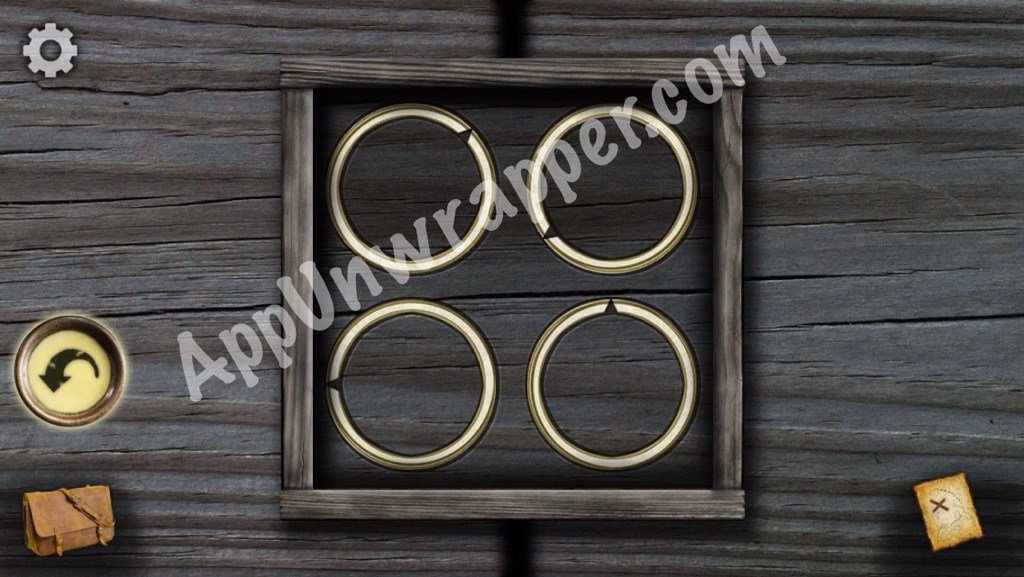
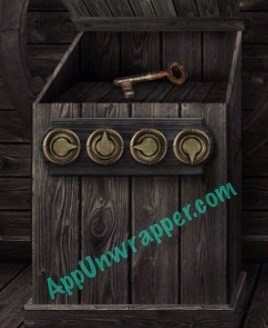
13. Remember the fork in the road? Look in the center at the puzzle with four wheels on it. Look at the stone tablet and use it to solve the puzzle and get a gold ring.
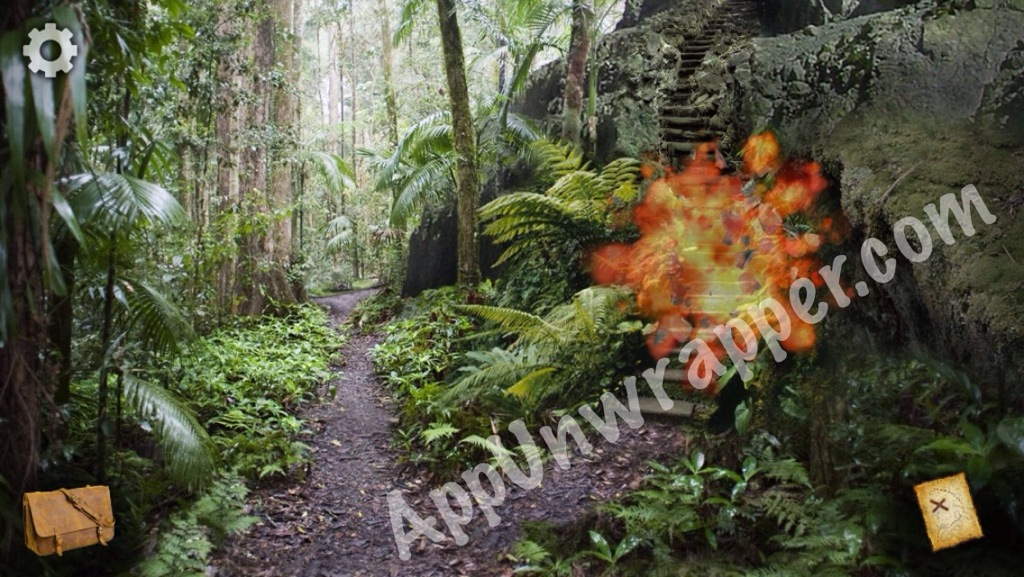
14. Go back a bit to this screen and use place the bomb in front of the boulder blocking your way. Light the fuse and watch it explode. Then go through.
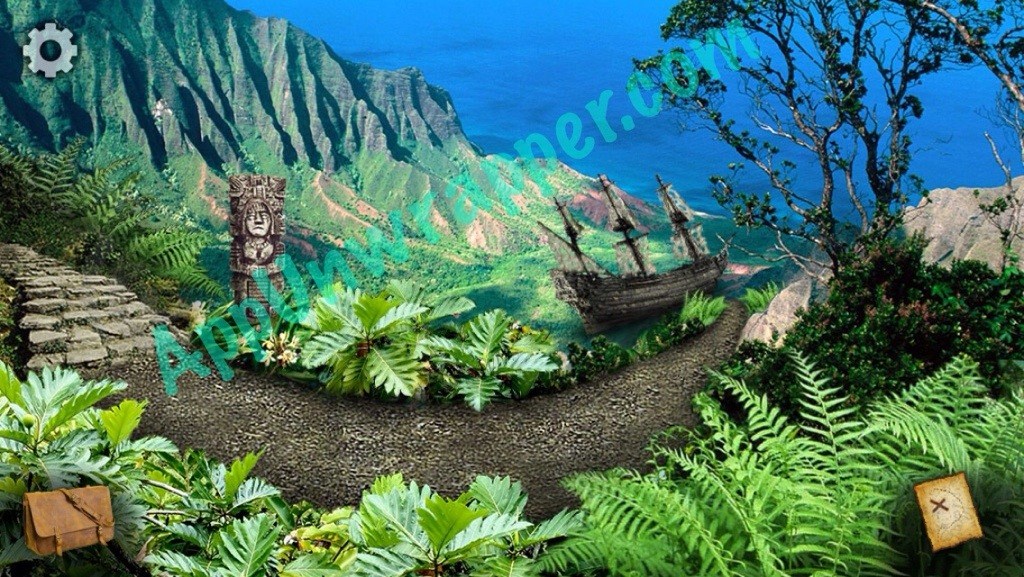
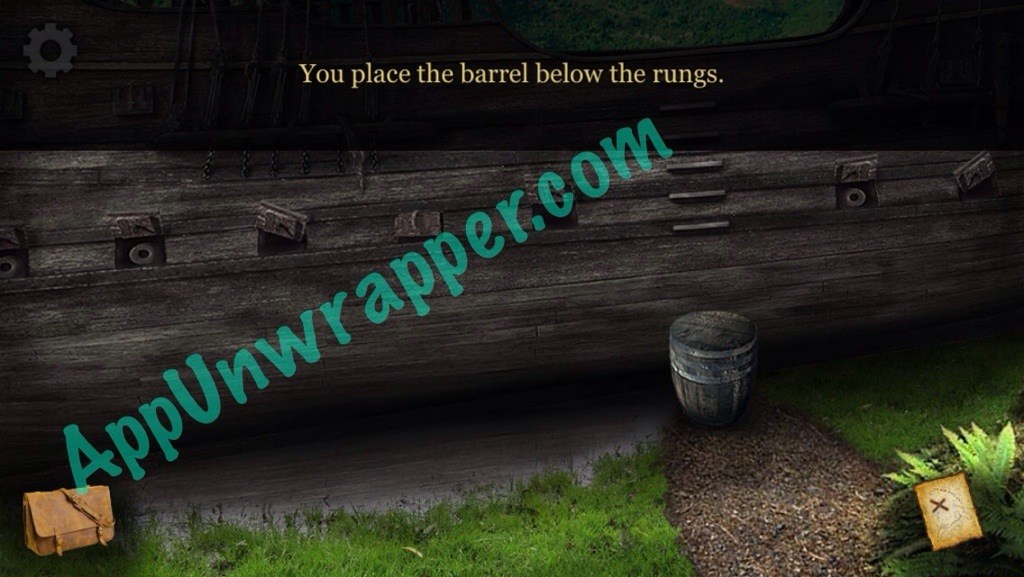
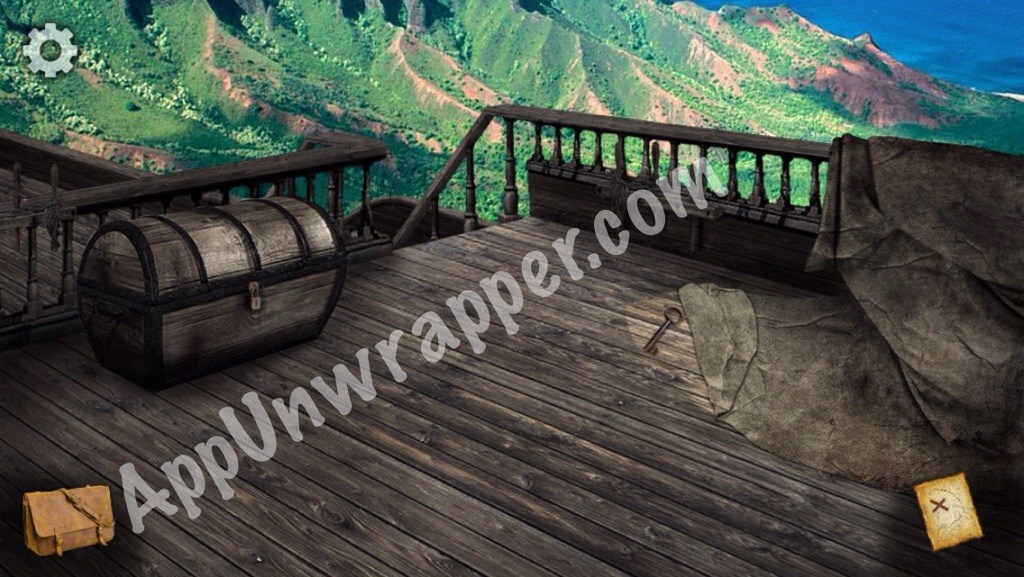
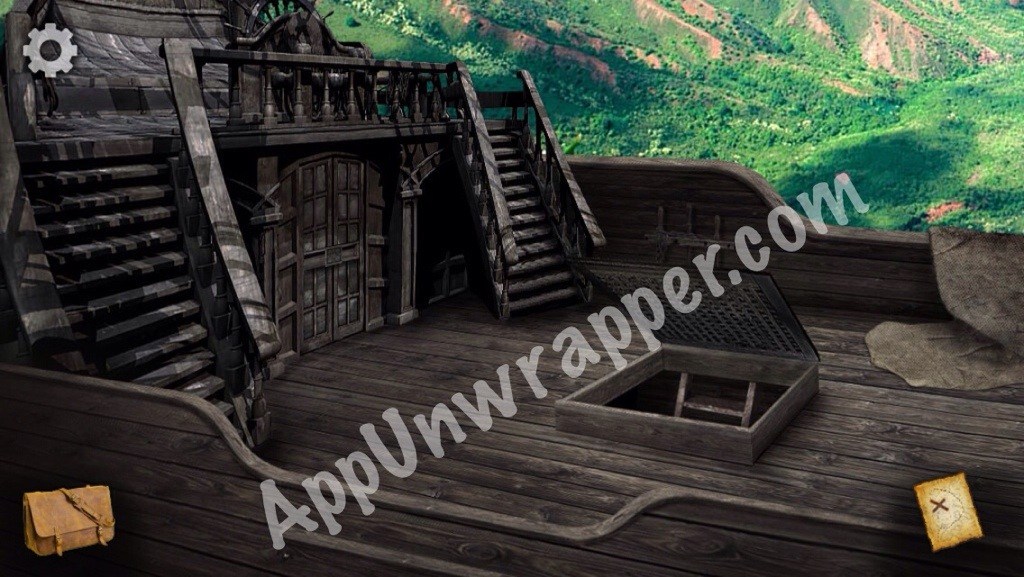
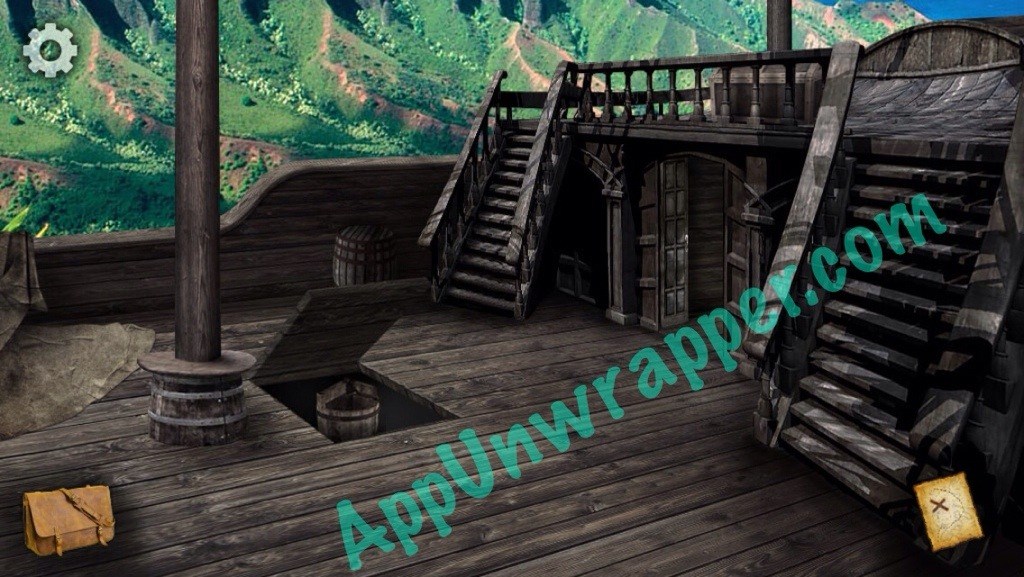
15. Tap on the ship and use the barrel to get on board.
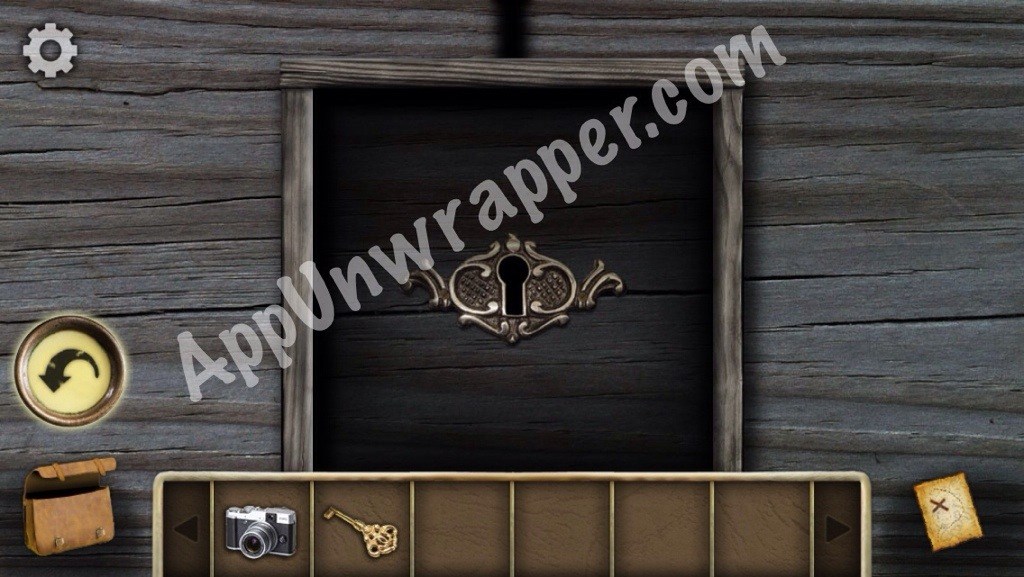
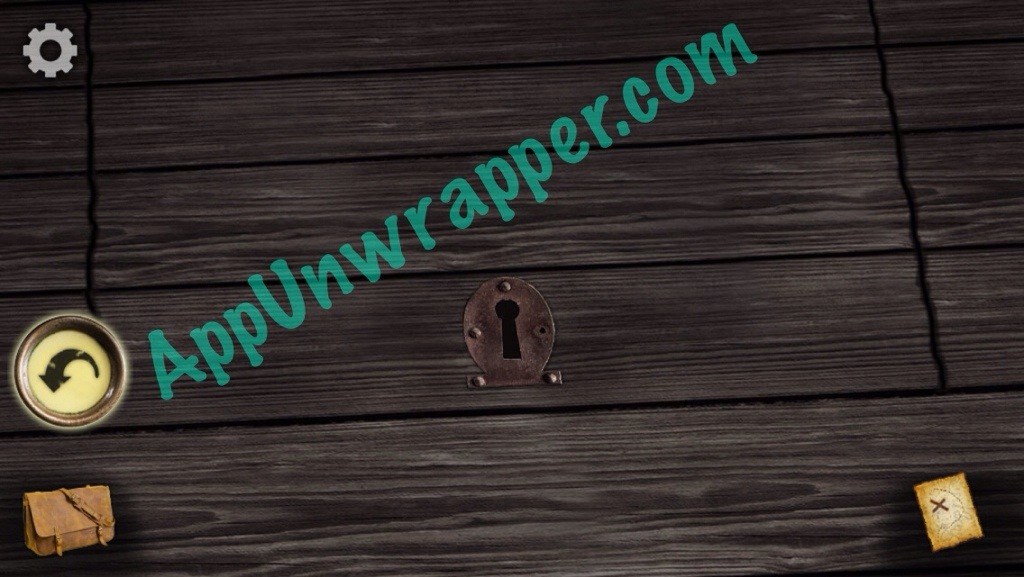
16. Go to the right and up the stairs. Look under the tarp/sheet for an iron key. Go back down and use it on the locked door under the stairs.
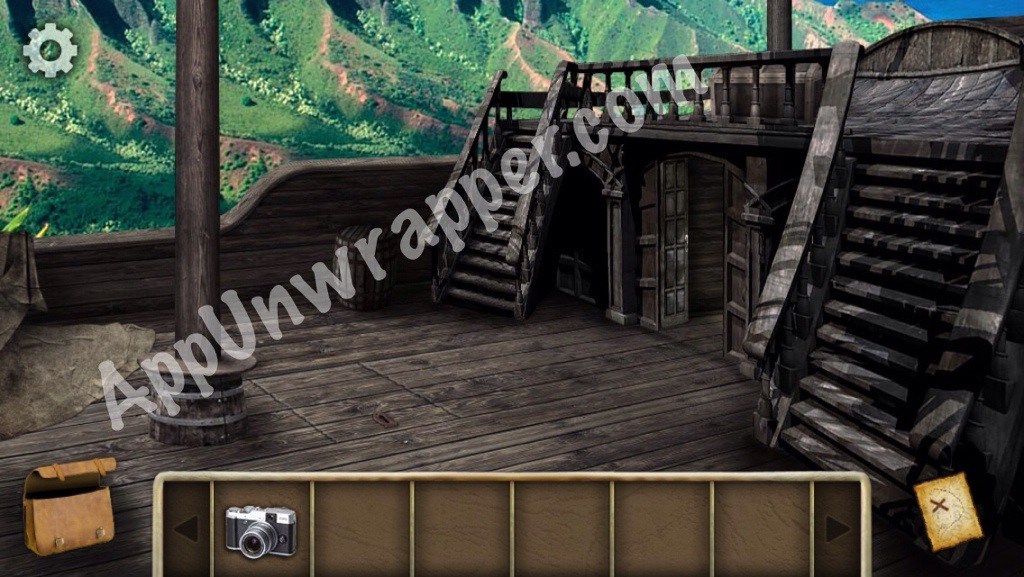
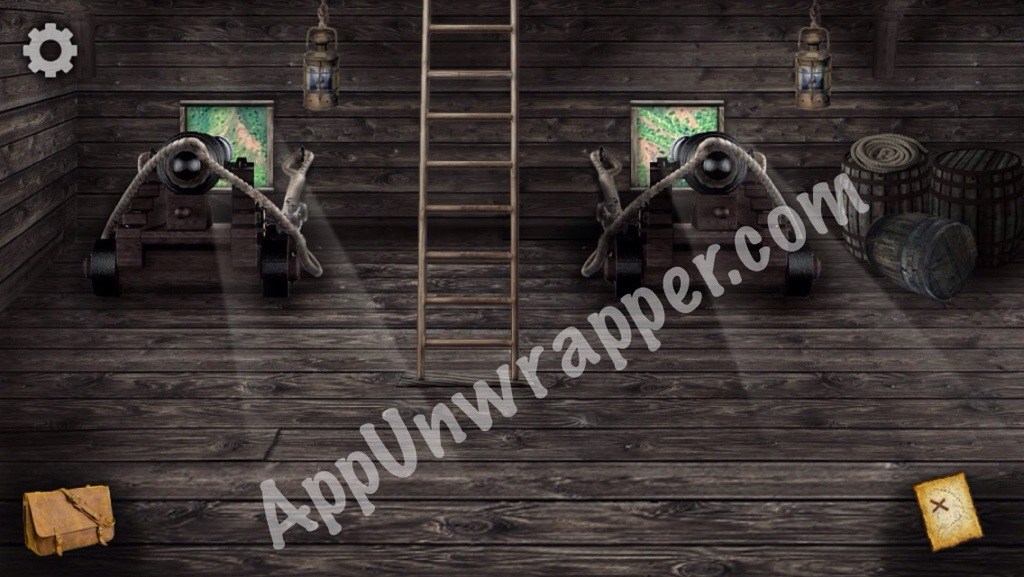
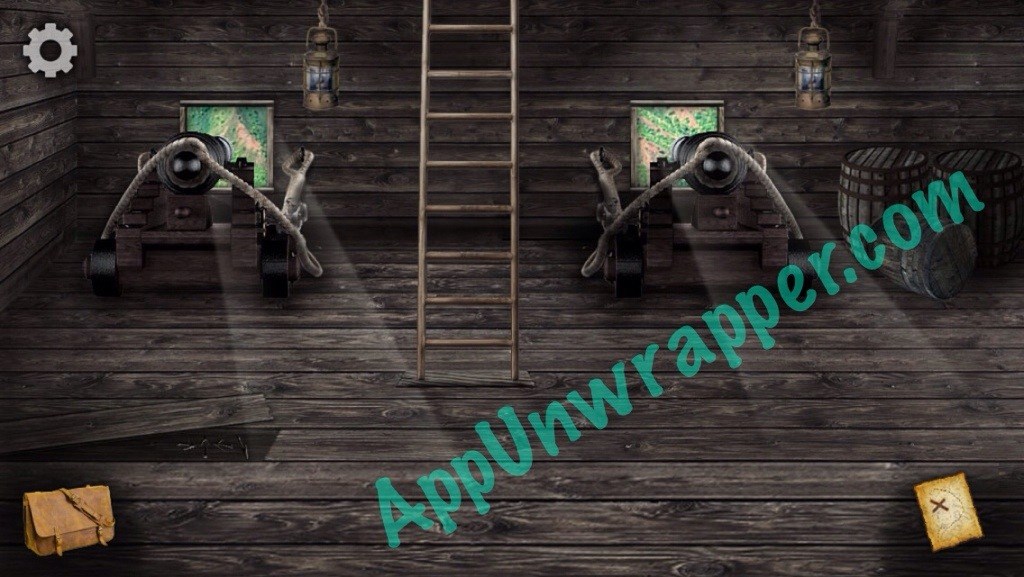
17. Once inside, go down the stairs. Notice the clue on the wall above the cannon:

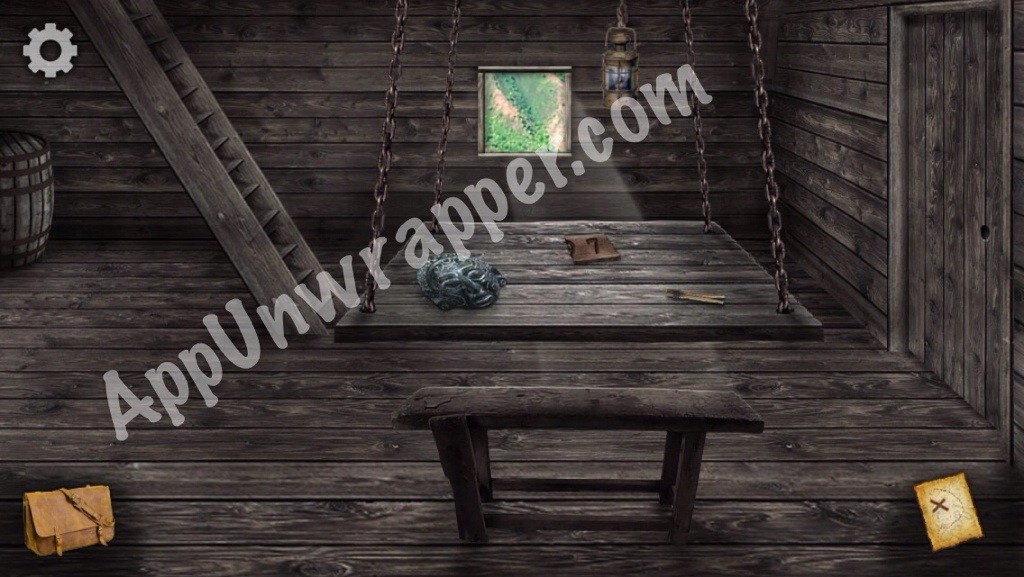
18. Go down again and take the wooden number, the clothespin and the mask from the table. Go left and take another gold ring.
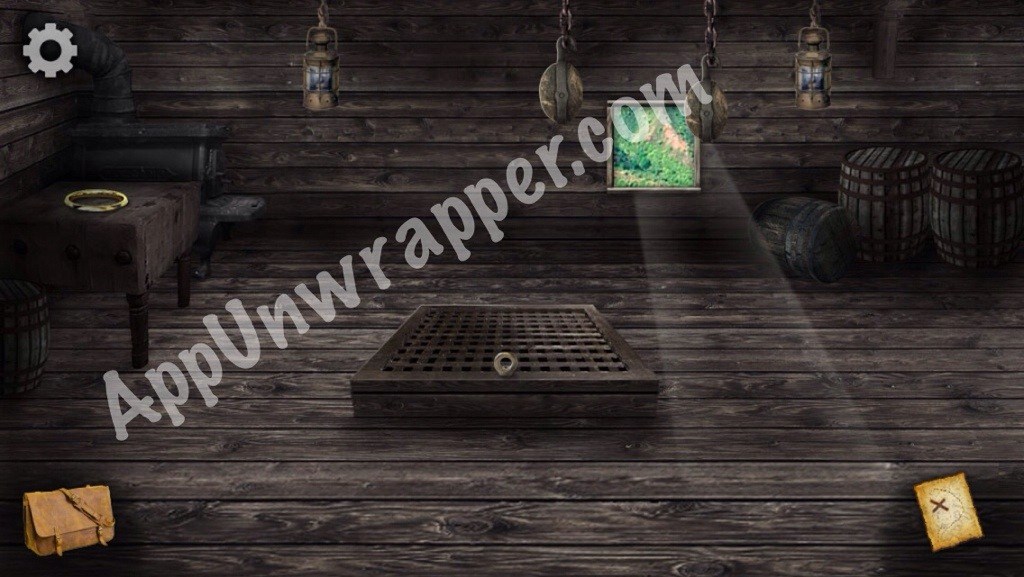
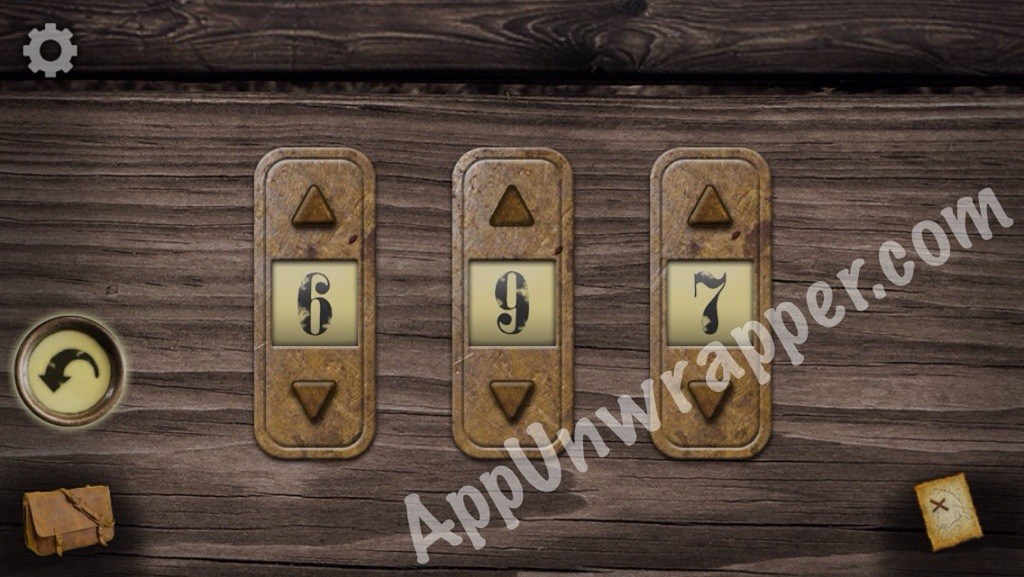
19. Go back up and go left and take the rope from on top of the barrel. Then go up the ladder to open the latch to the deck. Take the wooden number piece from it.
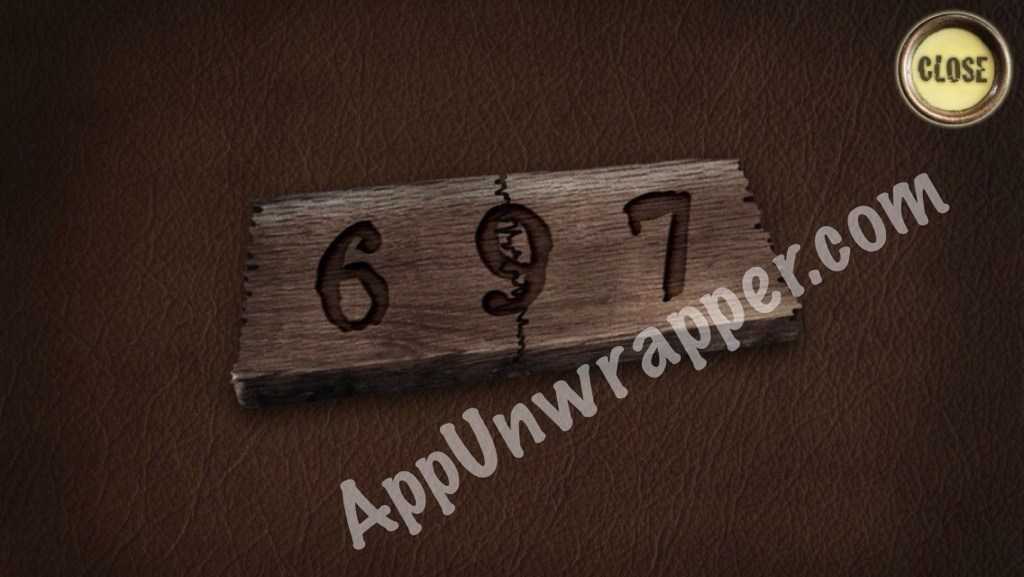
20. Go right, back through the door. Use the numbers from the wooden piece on the combination lock on the desk to get another ring and a tablet.

21. There’s a jacket hanging on the wall to the left. Next to it is a hole in the wall. Stick the clothespin in it and you’ll get another ring.
22. Leave the ship and tap on the statue to the left. Use the tablet to solve the puzzle and get a gold key.
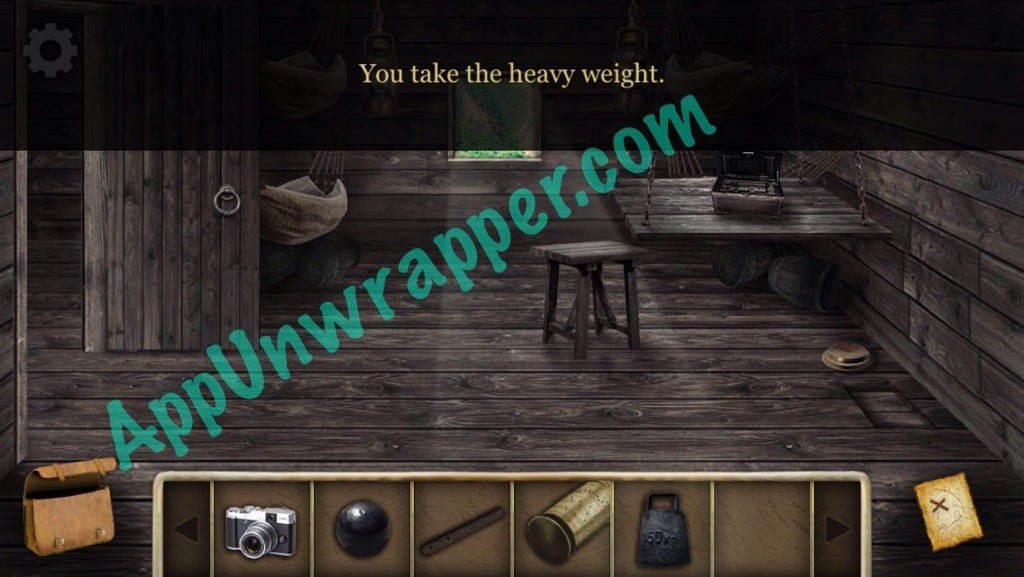
23. Go back to the ship and to the left door. Place all four rings in the slots and use the clue you found to solve the puzzle to reveal a lock (sorry, I didn’t snap a photo in time to get the last ring). Use the gold key to unlock the door and enter.
24. Slide the mirror aside to reveal a sun emblem. Take it and notice the skull, then leave.
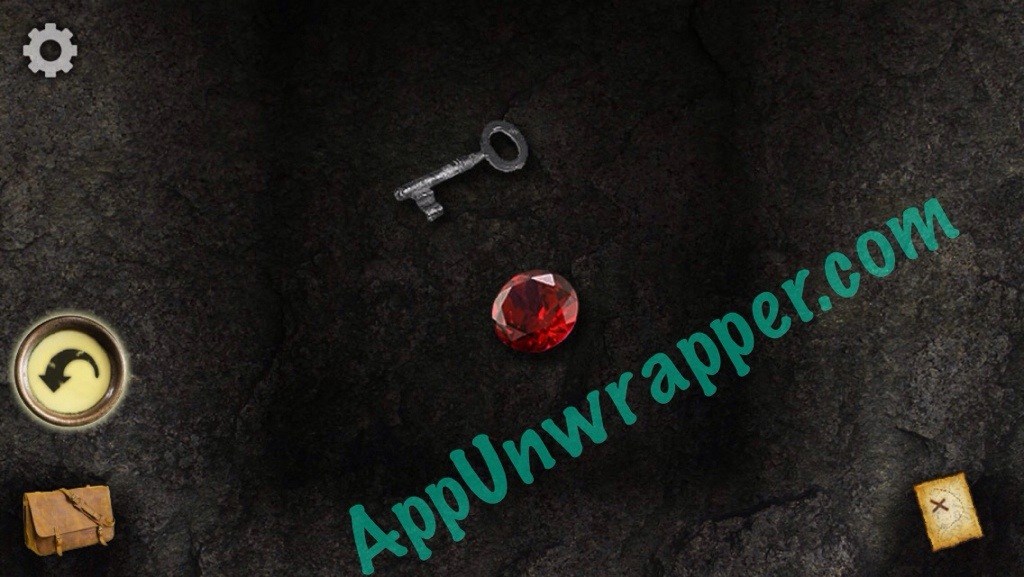
25. Go back to the giant carved head. There was a slot the same shape as the sun emblem. Place it in there and rotate it so it’s right-side up. Then take the ruby and key from the statue’s mouth.

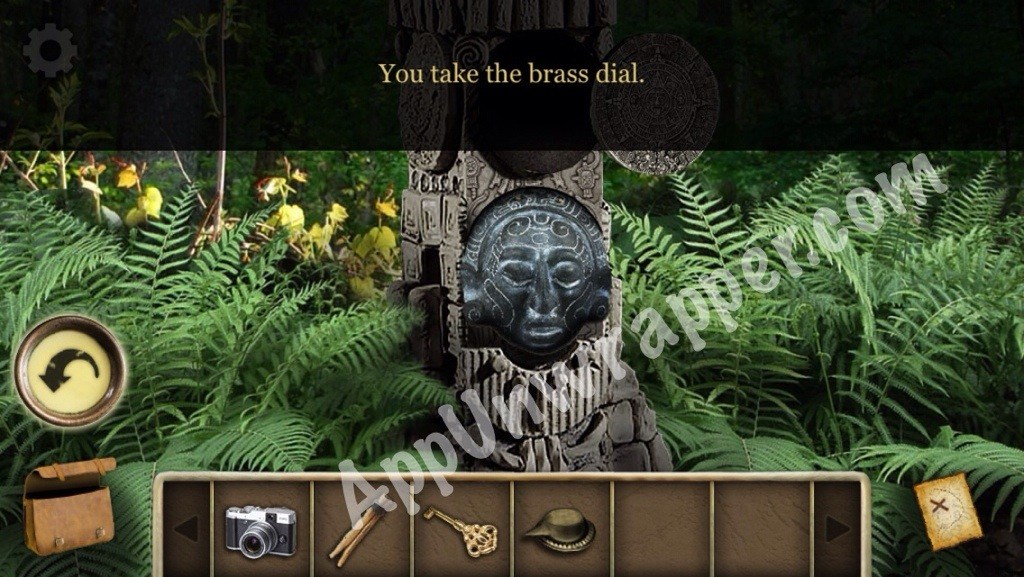
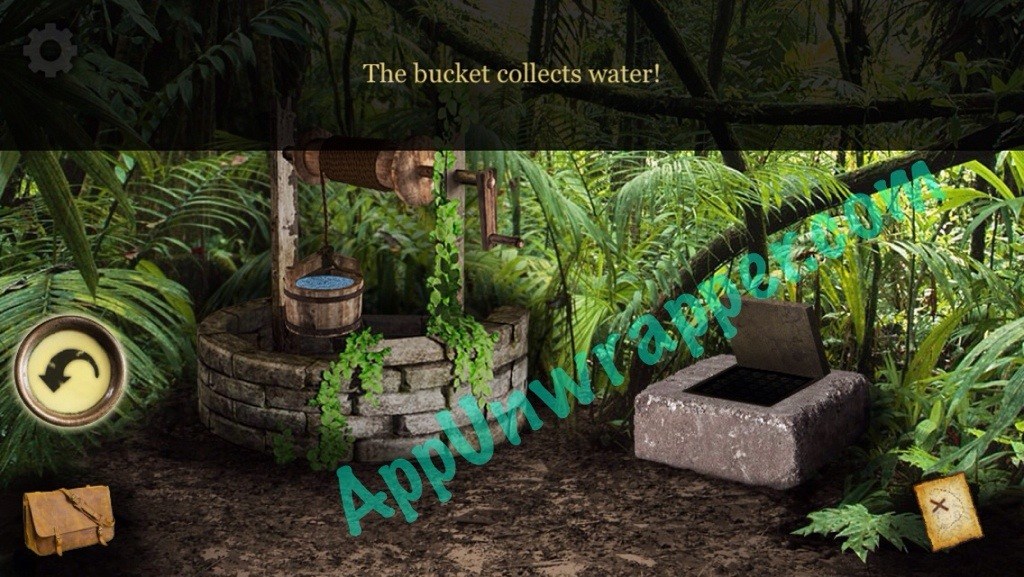
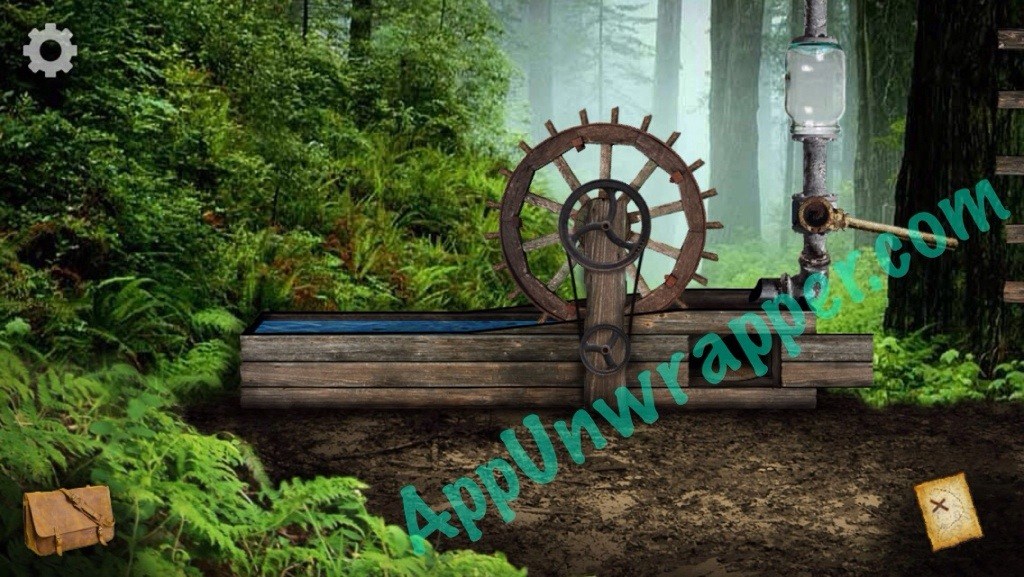
26. Go back a few screens to this pillar and place the mask in the slot. Solve the puzzle (sorry, didn’t snap a photo in time) and take the dial.
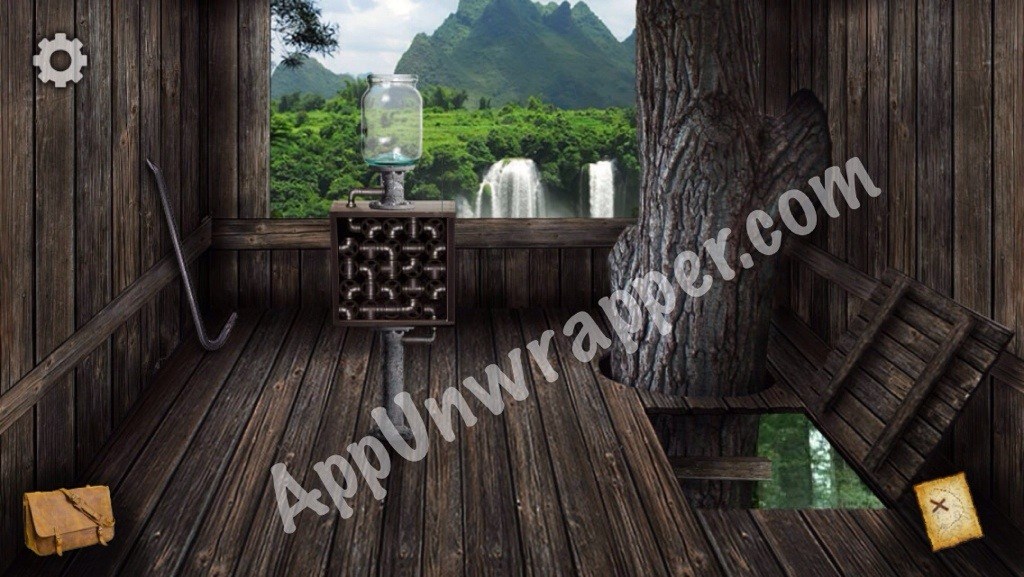
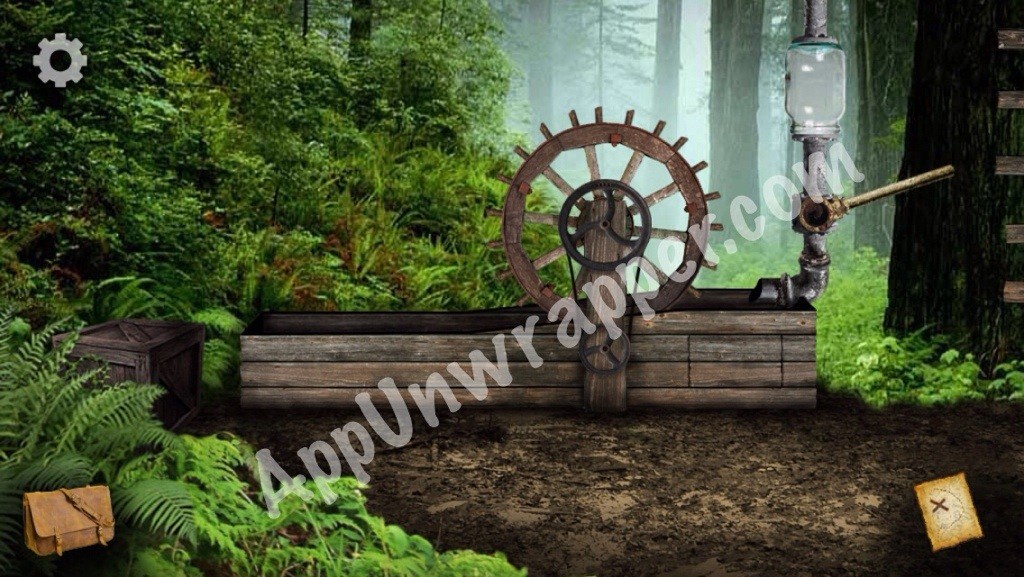
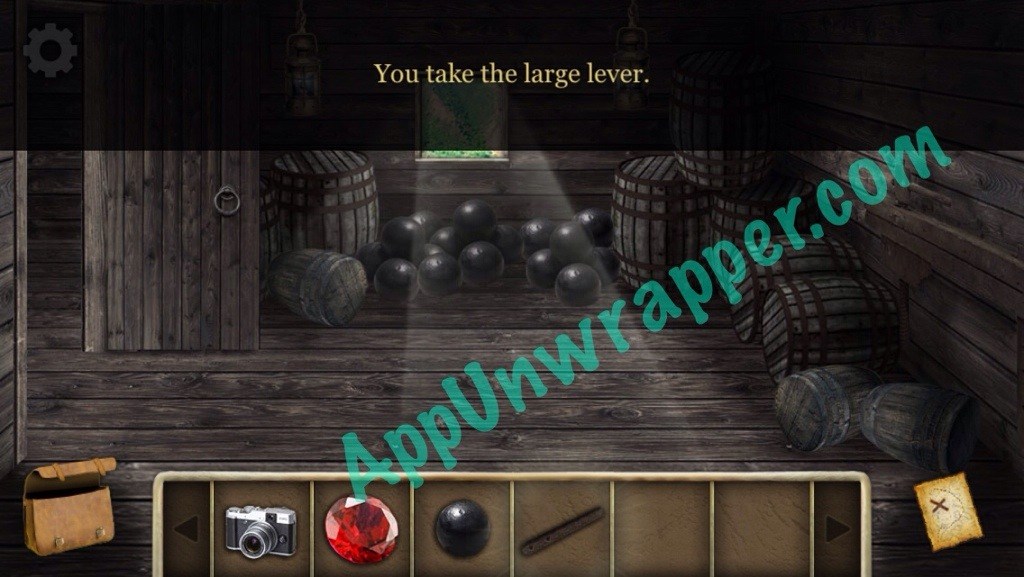
27. Go back to the boat. Go downstairs to the locked door and use the key you found to unlock it. Go inside and take the cannon ball and large lever.
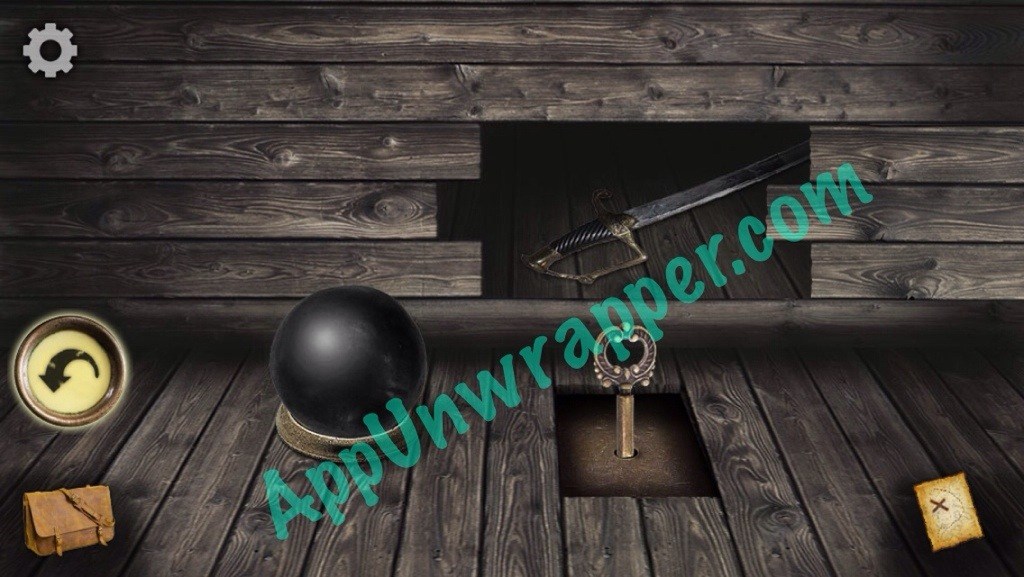
28. Go back to the skull and place the ruby in its eye socket. Take the cylinder from its mouth.
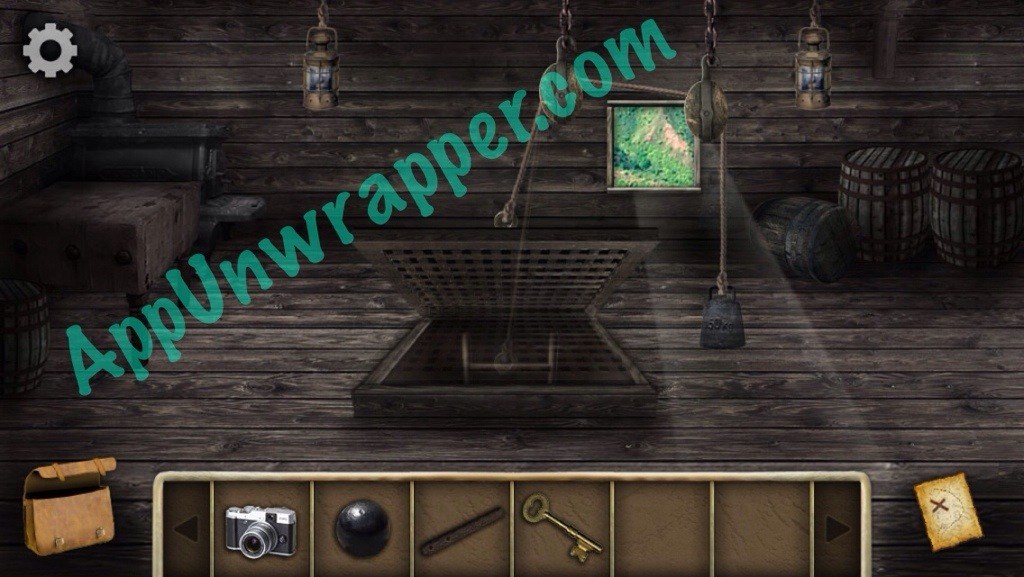
29. On the bottom level of the ship, there’s a hatch that’s too heavy to lift. Tie the rope to it.
30. Go back to this screen and lift up the loose floorboard. Look at the clue.
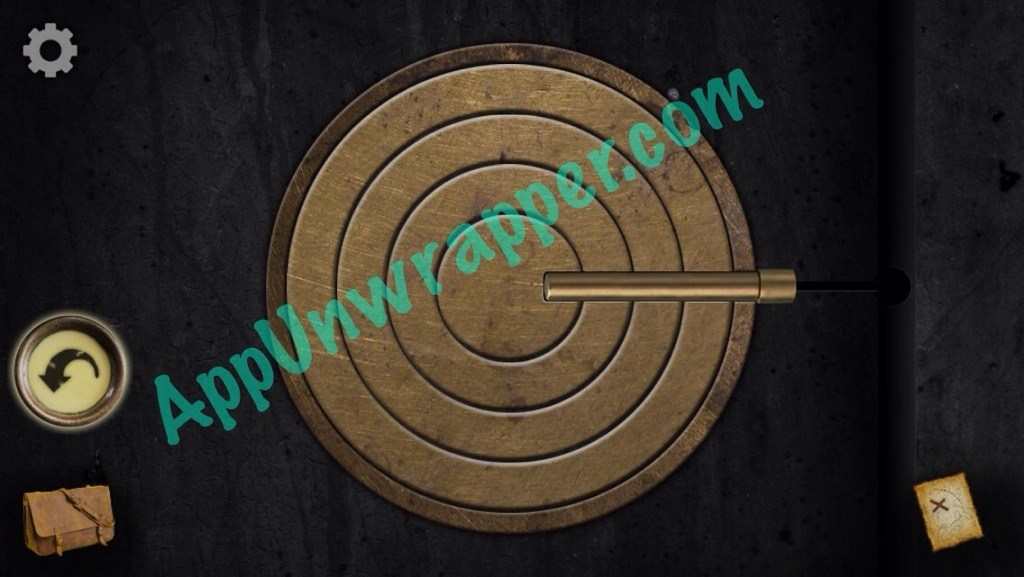
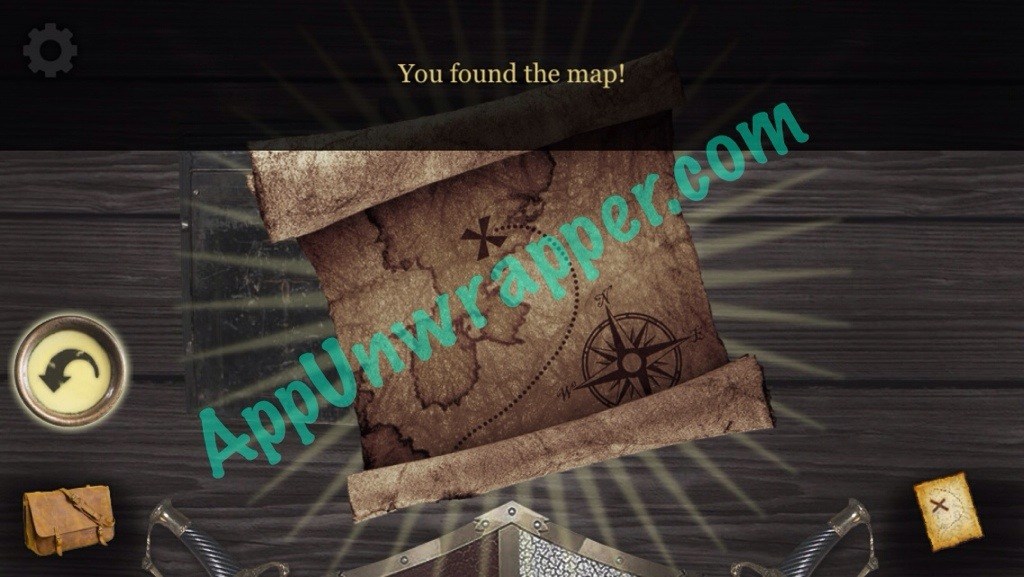
31. Go back to the deck of the ship. Go up the left stairs to the dials puzzle. Add the fourth one if you haven’t yet. Then use the clue from the floorboard to solve the puzzle and get a rusty key.
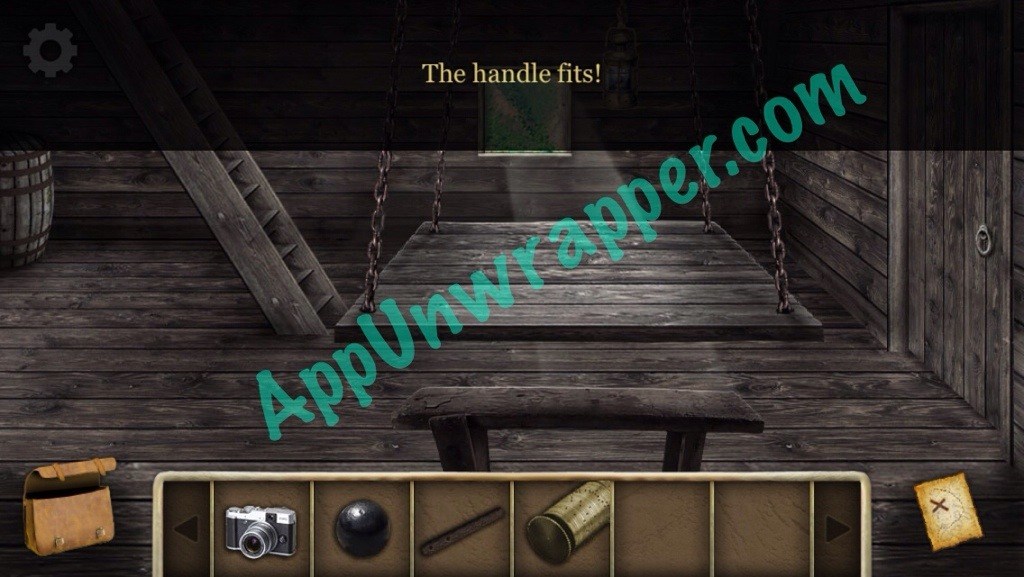
32. Go to the right side of the ship and use the rusty key to unlock the chest and get the pewter handle.
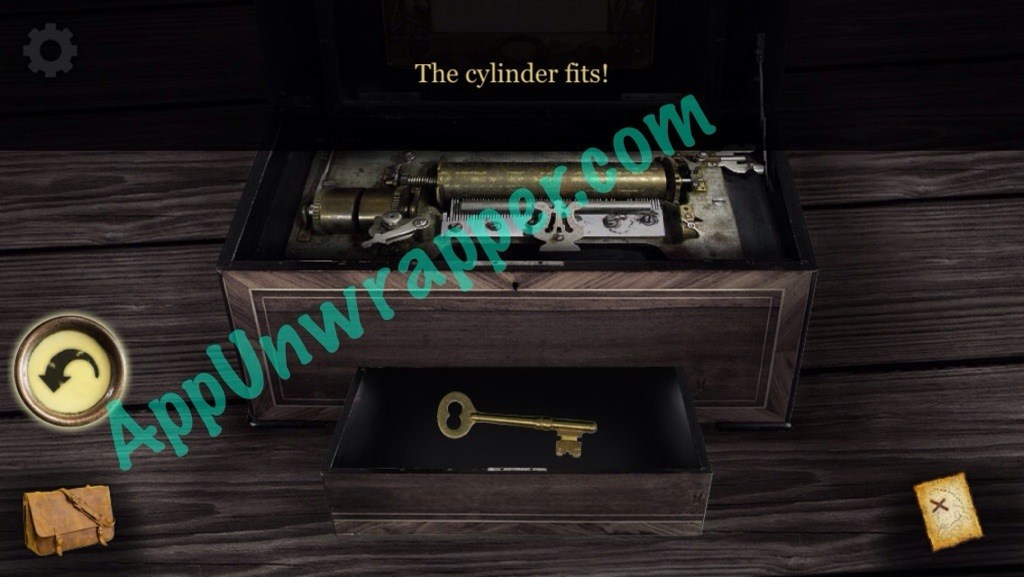
33. Go to the bottom level of the ship and use the handle to open the door that’s missing a handle. Go inside and take the weight. Also, place the cylinder in the music box on the table to get a brass key.
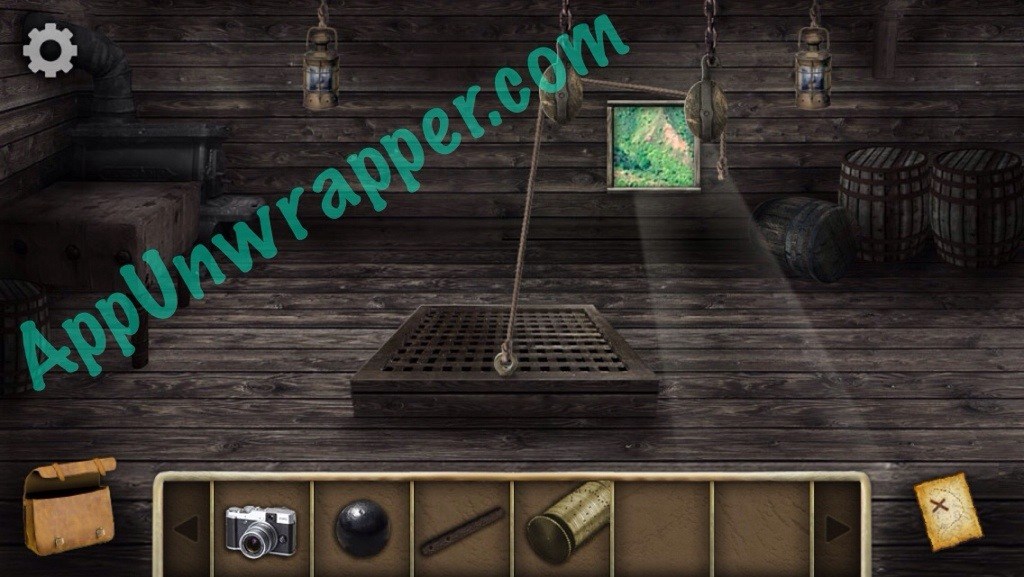
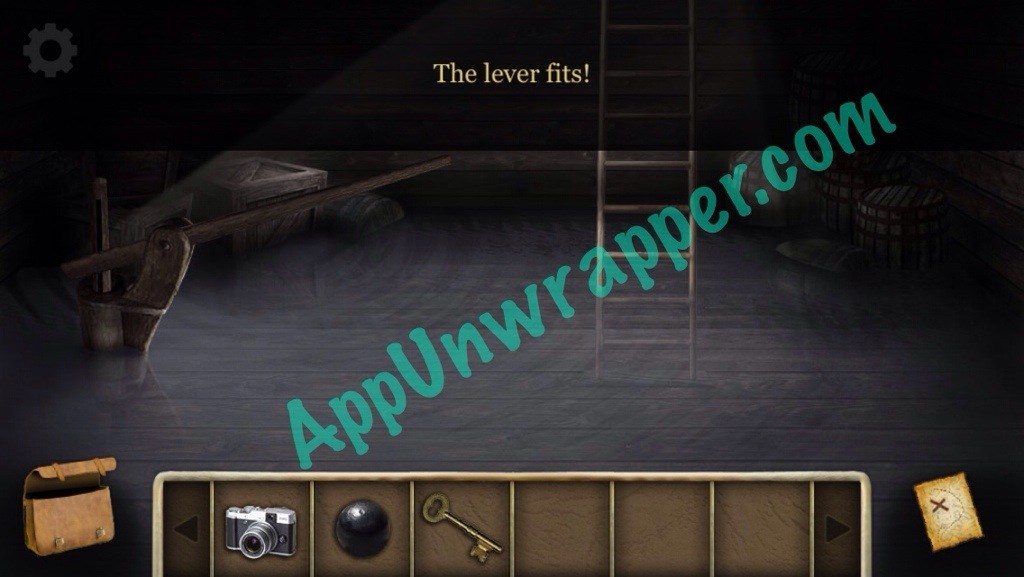
34. Go back to the rope you set up and attach the weight to it so you can go below. Then use the lever on the pump to access a puzzle. We’ll come back to this.
35. Go to the deck and find the trap door. Use the brass key to unlock it and get the bucket.
36. Go back to the beginning and take the middle path. Attach the bucket to the rope on the well and turn the crank to fill it with water. Take the bucket of water.
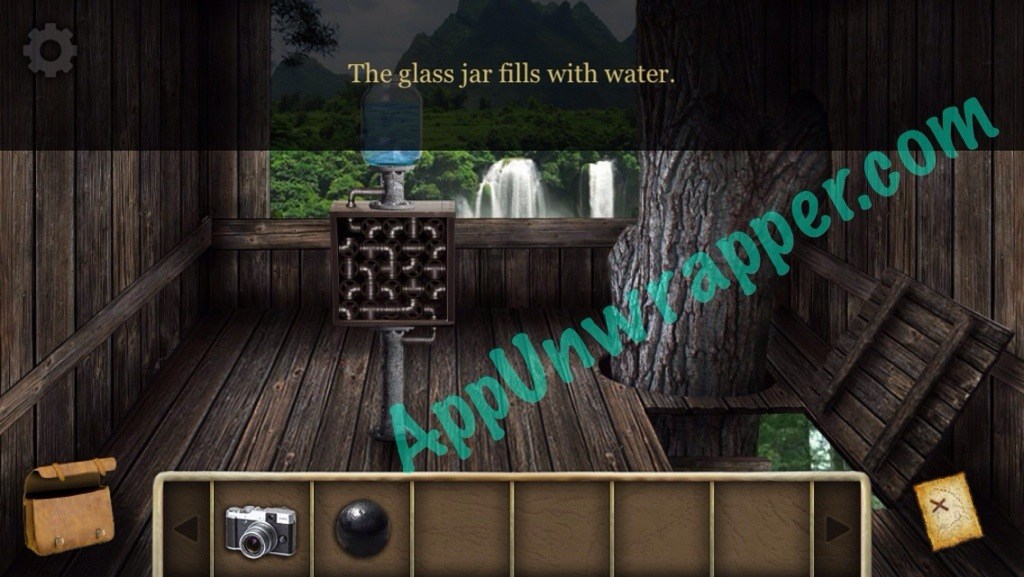
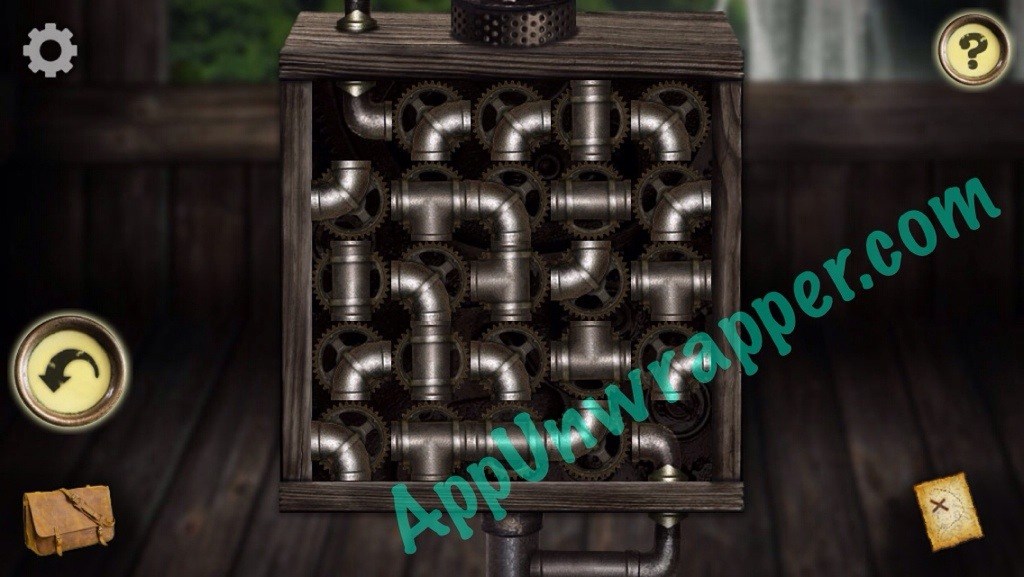
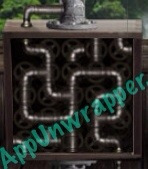
37. Find the tree with the ladder and climb up. Pour the water in the glass jar and solve the rotating pipes puzzle to get the water to go through them.
38. Go back down and left. Pull the lever and the water will rush through, opening a small door. Take the brass plate and look at it.
39. Remember the puzzle on the ship by the water pump? Use the brass plate to solve it and take the crank tool.

40. Go back to the room where you found the weight. To the right is a big button. Place the cannon ball on it. Place the crank on the piece beside it and keep turning until you can grab the sword in the wall.
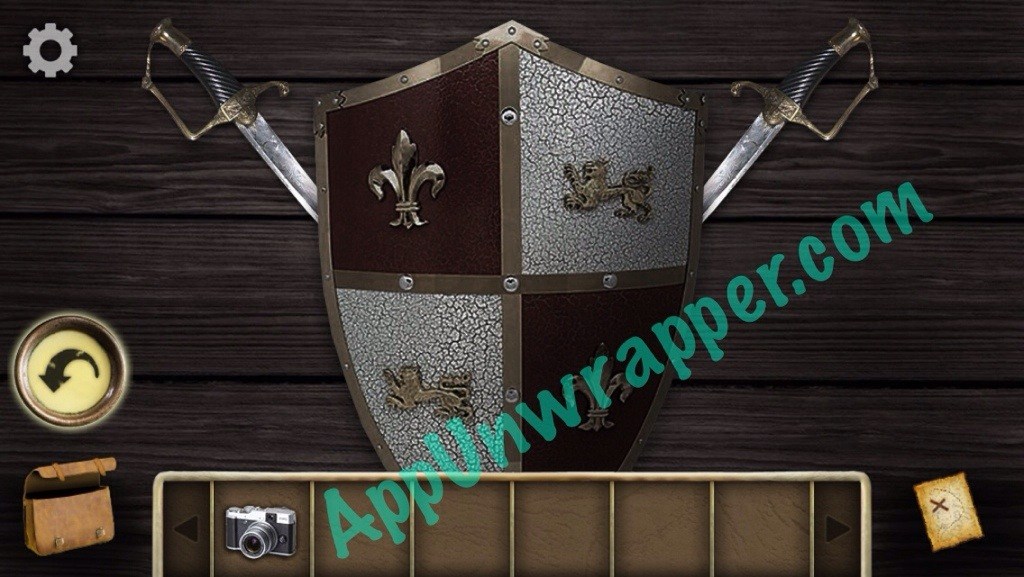
41. Go back to the room with the skull. Tap on the shield and sword. Place the other sword with it. A safe will be revealed. Line up the holes with the cylinder to unlock it and take the map.
Congratulations! You completed the game! If you liked this game, you might also like Sea of Giants, Kiwanuka, or these other escape and adventure games.


 Shipwrecked: Volcano Island Cheats & Hack for Gold, Silver & Spirit - AppGameCheats.com
 Green Farm 3 Cheats & Hack for Cash & Coins 2016
 Emoji Geo Level 51-60 Solutions and Answers
 Complete Metrico walkthrough for PlayStation Vita - Chapter 3
 Alchemy Genetics Combinations Cheats List