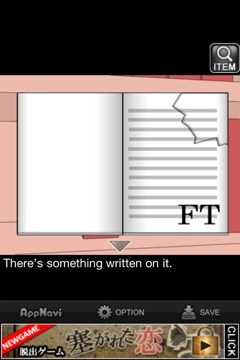
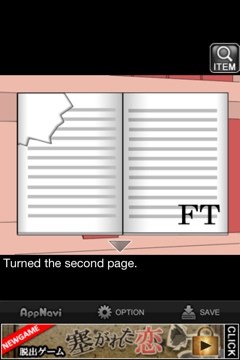
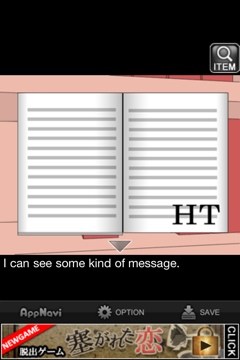
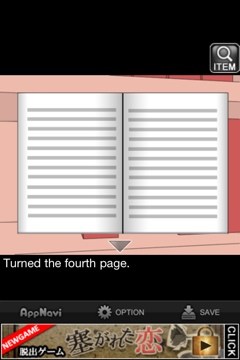
1. Zoom in on the bookcase. Move the red book aside to find a manual. Read through all the pages:

2. Zoom in on the desk and open the right drawer. Move the notebook and take the ruler.
3. Turn right. Look to the right of the dressing table to find a pair of scissors.
4. Cut the plant leaves with the scissors and take the screwdriver.
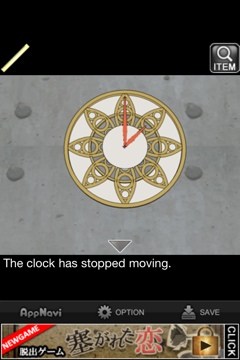
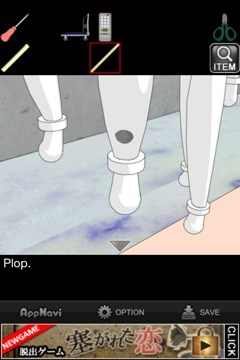
5. Turn right and look at the clock:
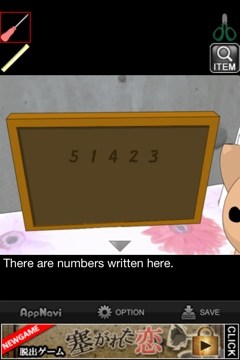
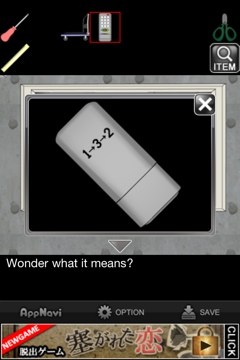
4. Turn right and look at the photo on the dresser. Turn it around and use the screwdriver to remove the back and find this clue:
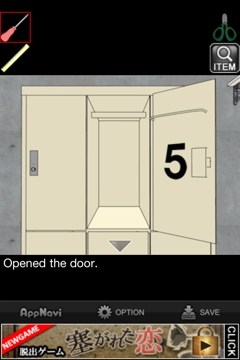
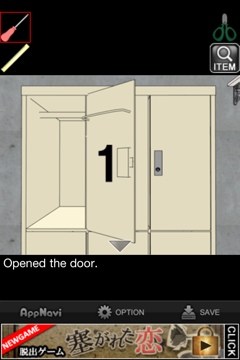
5. Turn left and open the lockers in the order shown on the back of the photo, like so:
6. The bottom middle locker will unlock. Take the pushcart from inside.
7. Tap on the bottom left side of the lockers. Place the push cart in the slot and then tap it to move the lockers. Take the remote from underneath.
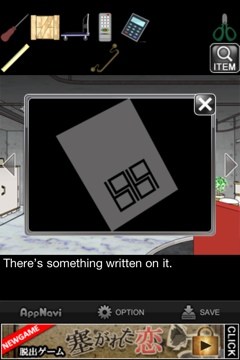
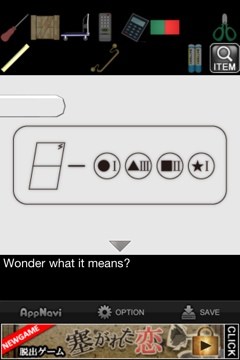
8. Flip the remote over to see this clue:
9. Remember the pages in the manual? According to the clue on the remote, you get FT, HT, FT. Go to the wall safe to the right of the bookcase. Not sure why this works, but I turned it left, right, left and it opened. Take the wooden pole from inside.
10. Look at the pictures on the pole:
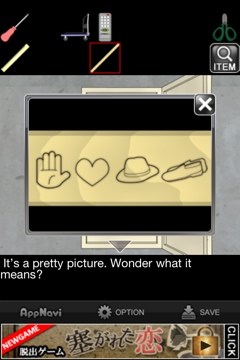
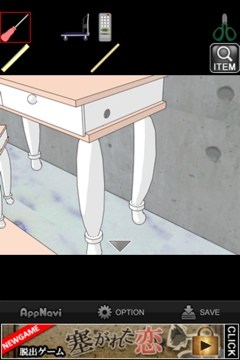
11. Ok, this next part can be a little tricky because you have to be really precise. It took me a few tries because I sometimes didn’t hit the hole exactly right and had to start over. Go to the desk to the left of the bookcase. There are four holes. You need to insert the wooden pole into the holes in order of the pictures on the pole. They go in this order, like a hand, heart, hat, and shoe:
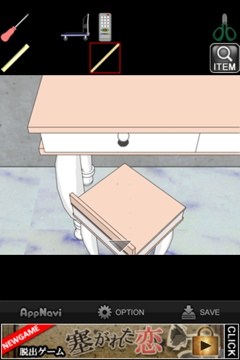
12. Take the handle that drops to the ground.
13. Turn left and place the handle on the door that’s missing one. Open it and take the big box from inside.
14. Turn the box over and use the screwdriver to pry it open. Take the calculator from inside.
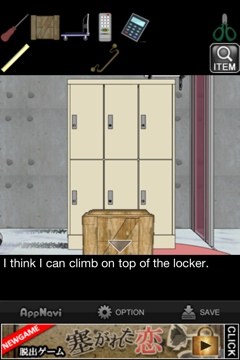
15. Turn the calculator over to see this:
16. Put the box in front of the locker like so:
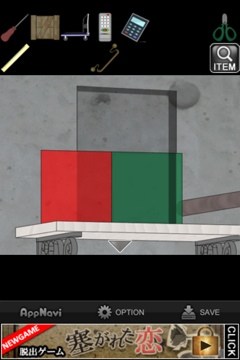
17. Climb on it by tapping above the lockers to see an arrow. Tap on the arrow to see this:
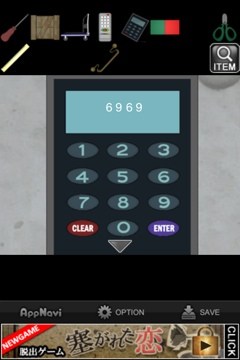
18. Take the film. Zoom in on it to see this design:
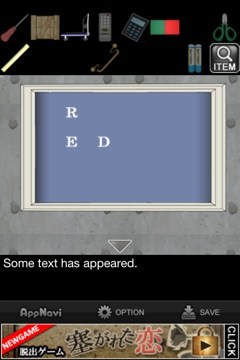
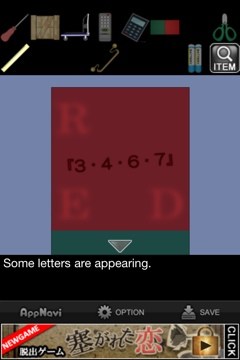
19. Place the calculator in the empty slot on the wall where you found the film. Enter the numbers from the back of the calculator:
20. Some text will appear on the screen:

21. Examine the remote and open the battery slot on the back. The batteries are missing.
22. Turn to the clock and zoom in on it. Flip it over and take the batteries.
23. Place the batteries in the remote.
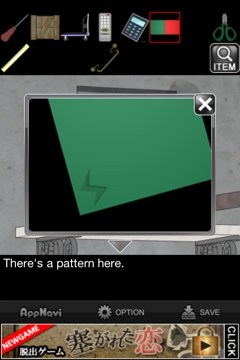
24. Use the remote on the TV to see this:
25. Place the film on the mirror and a pattern appears:
26. Press the corners of the mirror in the order shown on the film.
27. Take the film back. The mirror will move, revealing a door.
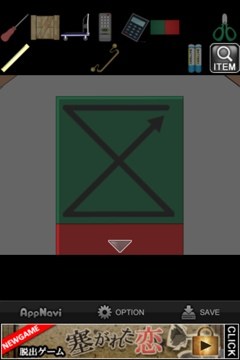
28. Examine the clue on the door:
29. Place the film on the TV to see this:
30.


 Tiny Thief complete walkthrough: Chapter 6 - Bewitched
 Guess Picture 2015 Answers All Levels
 Marble Legend Hack & Cheats for No Ads Unlock - New Tips Available - AppGameCheats.com
 Asphalt Overdrive Cheats, Tips, and Hack for Gold & Cars - AppGameCheats.com
 Infinite Pics Celebs Pack Level 0-99 Answers