

In this guide to Rig'n'Roll I included a couple of economic hints and these related to driving a truck, short characteristics of tasks a player has to handle, some listenings of car parts for tuning your default vehicle, lists of trucks, drivers. Finally you'll see here a map of California with repair shops marked on it. One can find here also a solution to the storyline's mystery - yes, Rig'n'Roll is an untypical sim, not only with the elements of economic puzzle but also with a storyline! This guide is related to a medium difficulty of a gameplay.
Pawel "PaZur_76" Surowiec
Key on the left, to the right its function plus, at a pinch, my comments to it.
Controlling of a truck:
Up arrow - accelerate; with Ctrl key - full throttle
Down arrow - brake; with Ctrl - emergency brake
Left arrow - turn left; with Ctrl - sharp turn left
Right arrow - turn right; with Ctrl - sharp turn right
A - gear up
Z - gear down
X - reverse gear
0 (zero) - neutral gear; you use this key only when you drive with manual gear box!
1, 2, 3, 4, 5, 6 - successive gears; similarly a.b. you use these keys only when you drive with manual transmission.
- (minus) - clutch; key is in use only when driving with manual transmission - to change a gear you have to, just like in real car, hold the clutch (this key) pressed and then shift the gear by pressing its selected button.
B - handbrake
E - engine brake; its key becomes available only after buying a suitable car part in one of the repair shops, in this case - the above-mentioned motor brake!
Space - ignition on/off
W - windshield wipers; you'll stop using this key after the installation of a rain detector, which automatically turns the wipers on when it's raining, and off after the rainfall.
H - horn
S - boost; key is available only after the mounting of the NITRO installation in your truck.
< - left blinker
> - right blinker
? - emergency flashers
L - headlights; with a combination Ctrl + L you can switch between upper and lower headlight beams and this L key is no longer in use after installing in your vehicle the device that automatically controls the operation of truck's driving lights (though you can still change between upper and lower beams). Though not everybody will be satisfied with this mechanism (I mean it's not for everyone's eyes) - some of you may find out that this sensor turns on driving lights too late and switches them off too early!
R - Adaptive cruise control (ACC); you'll use this key only after installing in your vehicle the mechanism of cruise control (it can be bought in some repair shops), that maintains constant speed of a vehicle, regardless to the degree of stoop of the pavement - driver can take off his feet from the acceleration pedal. Cruise control switches off after depressing the acceleration or brake pedal again. By using Ctrl + R key combination you can resume cruise control at the previous set speed.
M - switching on the rear view monitor installed in your truck's cab, which shows on its screen the situation behind a truck. There are three views available and you can switch among them with Ctrl + M combination. Of course you use this M key only after buying in one of the repair shops the system that contains these three cameras and a monitor - thanks to them you don't have to look at side mirrors as often as usual.
T - hook/unhook trailer
Controlling of the electric side mirrors:
Delete/Page Down - move left mirror to the left or right (with Ctrl key you can control in this axis your right-sided mirror)
Home/End - move left mirror up or down (with Ctrl you control in this axis your right mirror)
Radio:
U - car radio on/off
J - next radio station; with Ctrl key - previous radio station
I - next audio track in selected radio station; with Ctrl - previous song
Controlling the views:
V - switching between external and in-cab view
C - in-cab view (three perspectives available: from driver seat, passenger seat and from sleeper cab)
Numbers (on the numeric keypad, you should switch on first with the NumLock key!) - successive perspectives of external views or scouting around the cab (for that last purpose you can also use your mouse instead of numpad)
- (minus on numeric keypad) - zoom out the view
+ (on numpad) - zoom in
/ (numpad) - taking a cam back (scale out)
* (on numeric keypad) - shifting the cam forward (scale in)
Other keys and their functions:
Ctrl - modifier; hold this button when pressing other keys, to call out their additional functions (for example: with combination Ctrl + M you can switch among the views offered by a monitor mounted in the cab, while M key itself turns this monitor on - see above)
Esc - go to in-game menu or skip cutscene
Enter - activation of an option or area entrance (repair shop, bar, motel, etc.) during the game
Y - positive ("yes") answer in mission dialogue
N - negative ("no") answer in mission dialogue
P - pause; during the conversation over CB-radio with other characters in game you can not only pause game with this key, but also see a chat history with current interlocutor
Tab - mini-map on/off; adjust its scale with Ctrl key
Q - next mission on mini-map; Ctrl + Q - previous task
F1 (function button) - help (key bindings)
F3 - turn on PDA (hand-held organizer book)
F6 - quick save
F9 - quick load
F12 - take a screenshot
The main objective of this game (besides untangling the storyline's mystery) is to transform our spedition company called Nick Trucking into a potentate on the market of transporting services. Your character isn't able to fulfill this task alone, so you should very quickly try to expand your business by purchasing the licenses for cargo delivery in other Californian cities, by founding branch offices in these towns, by hiring additional drivers and expanding your machine park.
To achieve Golden Career status, you will need to sign contracts with all CCWA (California Commercial Warehouse Alliance) warehouses. This title, along with a big monetary prize, is rewarded to the company which is the first to sign contracts with all of the CCWA warehouses (in other words, be the first to reach 100 percent coverage). If several companies achieve 100 % coverage at the same time, the prize is awarded to the one with the highest turnover. If by chance the turnovers of these companies are also the same, the winner is considered the one with the fewest number of drivers.
Nick Armstrong (Pieriepielov in Russian ver. of a game) manages his firm from his main office located in Oxnard (initially Nick has only this one bureau), where he has got his supercomputer. Let's take a look at some more important screens displayed by this PC now, since many of you have problems with understanding what is written on them (when using copies of Russian version of the game).
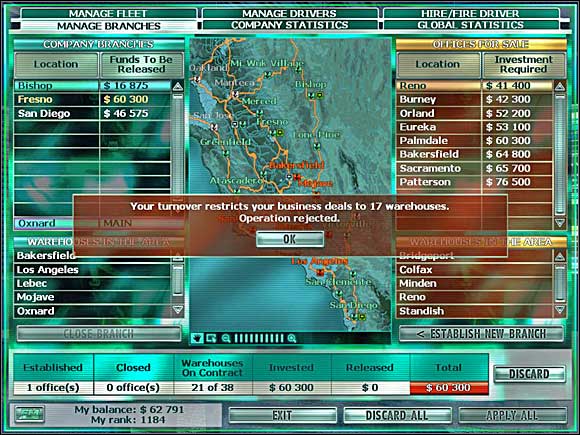 Branch offices management screen.
Let's try to decipher a thing or two, starting from branch offices management screen. It is the right place to buy cargo spedition licenses, which you should possess, to be able to take delivery orders from other Californian towns displayed on the map in the middle of the screen. You can deliver cargos to, and haul cargos among towns around Oxnard marked with green color on this map, because you've already got in them your branches (warehouses). So a green color means that Nick and his associates will be able to take order and cargo from such a warehouse, when visiting it.
White marked towns represent these ones where Nick and his associates can only deliver cargo to, but won't be able to take any orders from their warehouses. To do this you have to first found a branch office in this particular region of the state. Such a branch will serve several adjacent towns and then they'll also change their colour on map, from white to green. How to found a branch office? To do this check your chosen city on the list of towns close to the right edge of the screen, then press wide button under the list, and finally push the button in the lower right corner of the screen. After this the whole metropolis with its "slavish" towns will be transferred onto the list close to the left edge of the screen (the list of founded branch offices). Sounds simple, but you will notice, that this doesn't work always - we're clicking and clicking, but we can't found this branch office. Where's the catch? Well, to expand your company with branches you have to fulfill some additional terms. First - you must have enough cash destined for purchasing a given license (the required sums are written on the list next to city names). Second and most important: your firm should generate meaningful turnover (the total daily income the company makes on the warehouses' orders). You can check your present revenues on two other statistics screens generated by Nick's supercomputer.
 Global statistics.
As for turnovers: it's hard to determine what are the exact numbers that interest game. Thought you can valuate this more or less by taking a look at global statistics screen and examining what are the turnovers of other companies, which have the coverage you're currently interested in. It is a safe bet thought, that if you don't want to stay behind your competing companies, then you should work on your firm's profitability right after starting the game. Work on this by hiring some additional drivers, buying trucks for them and managing their jobs. Purchasing licenses for cargo delivering to other Californian warehouses is not so important for the moment.
At the beginning Nick has 150k $ of cash - it should be enough to hire at least 2 drivers and purchase 2 cheapest trucks for them.
If you drive around California for fun mostly, but you care about the development of your business too, then you have to spend practically all of your money on hiring new drivers and purchasing trucks for them. Initially you'll do this for a long time and at the expense of resigning from upgrading your own truck, because this game is quite demanding in its economic aspects.
Though dodgers who want to go quick and dirty may use a little trick to quickly obtain this desirable Gold Career status. Do you remember still that for that title you must purchase all the licenses first, and your firm should generate respectively high daily income? So you can spend the whole day in game doing warehouses' orders (only them!), helping your employees, and then go before 6 p.m. to one of your offices and purchase another license. You should have sufficient revenues for this. Repeat the whole procedure in the next days to quickly obtain all the required licenses and to win the title.
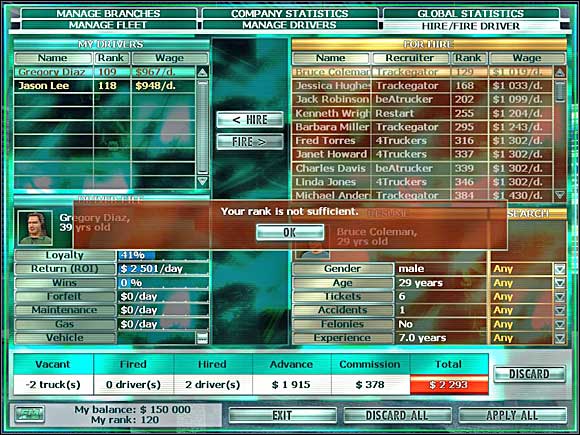 Drivers' hiring screen.
You can hire and fire your drivers on the next screen displayed by a supercomputer in the base. In order to do this you have to click two buttons located between the list of available drivers (on the right) and the list of hired ones (to the left). Every operation of this kind you should confirm by pressing the button in the lower right corner of the screen (button next to it, to the left, means "discard all" and another stands for "exit"). You will surely notice that you don't have an access to all drivers at once - names of these who can be hired are written white on the list to the right. Other drivers will become available once you have sufficient rank. Naturally, all drivers have their attributes: according to them, you can decide which drivers will be displayed on the list - just click these small arrows located to the right. That's all, as for the translation of what's on the screen and where, for owners of Russian ver. of a game. You will find more about drivers and their attributes in the next chapter of this guide, called "Administrating the work of the drivers".
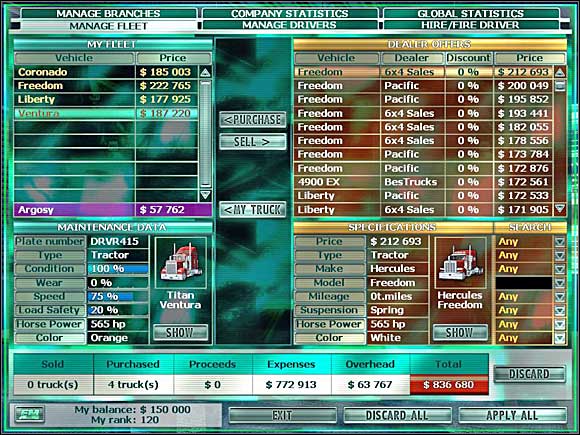 Truck buying screen.
After hiring a driver it's time to purchase a tool for him. I mean - the truck ("semitrailer towing vehicle", if using professional vocabulary). You can do this in next window. You may sort vehicles on the list to the right, according to their prices, for example, by hitting buttons located on top of this list. You can also do a search - buttons close to the right edge of the screen let you decide which vehicles will be displayed on the list (according to what parameters). List to the left shows your already purchased trucks of course. You can buy and sell vehicles by pressing two buttons located between both lists. Button under them allows you to select your truck from these already purchased - you'll use this truck in game. I recommend using the default truck (you have it from the beginning), since it's one of the best trucks in game already.
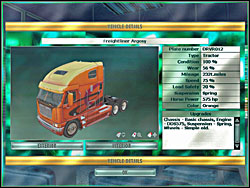 Truck technical data.
Under the trucks' thumbnails you can find buttons that allow you to take a closer look at these vehicles - you can see them from the external view or in-cab view. There will be also some technical data presented to you. Condition, wear and mileage of the truck determine how often this vehicle will probably need to be repaired. It goes without saying: the worse condition and greater wear and mileage, the bigger need for repairs and frequency of visiting mechanic in the future. Dynamics, which means speed of the truck (though displayed not in mphs, but in percents), shows the vehicle's racing capabilities. The bigger this attribute is, the greater the chances that this vehicle will win in races.
Load Safety or Ride Comfort indicates the truck's fitness for transporting fragile cargo. When this value is small you should avoid transporting such a type of cargo with this truck, because it will be easier to damage your load in even a minor accident. Next parameter stands for suspension of the truck: soft suspensions are good for delivering fragile cargos, but they don't work as good in races without trailers. Hard suspensions - vice versa. Other attributes you can examine are: truck's engine horsepower, color of the vehicle and already installed components.
When you know already to what attributes you should pay attention, according to tasks these trucks will be purposed for, then it's easy also to match proper vehicle with a specific type of driver (sprinter or trailer hauling admirer). Your drivers will take care about their vehicles by themselves, repairing these trucks when they need to, but you must upgrade their vehicles by yourself, according to what these cars are purposed for. In order to do this you have to visit one of your offices and set such a vehicle as yours. Then go to the neighboring repair shops, choose and install necessary parts. After this return to the office and bring back already upgraded truck to his driver.
All operations on trucks (buying and selling them) you have to confirm by pressing the button in the lower right corner of the screen.
Notice also, that truck dealers give discounts to loyal customers, so try working with the same seller. Truck manufacturers also give discounts to loyal customers, so purchasing vehicles of the same manufacturer can net you some savings.
Keep in mind, that, when buying trucks, you'll have to pay any additional charges, such as dealer's commission and delivery fees.
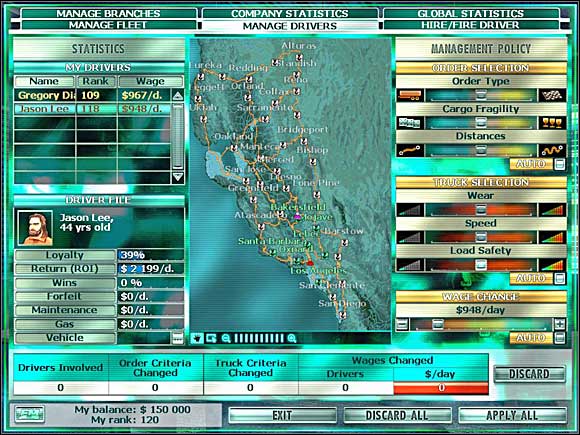 On this screen you can administrate the work of your hired drivers.
When you've finally purchased several drivers and bought trucks for them (at first I suggest to choose the cheapest ones, though with engines as strong as possible), it's time for administrating the work of your personnel. The next screen displayed by Nick's supercomputer is dedicated for this purpose. By clicking driver's name on the list to the left, and then moving sliders in the first window atop on the right, you can determine the nature of orders this driver will handle. Thus: types of orders (races or cargo deliveries) he should prefer in his work (first slider atop), susceptibility to breakages of cargos selected by him (vulnerable/not vulnerable) and trip distance (short distances on the left and long on the right edge of 3rd slider). As for cargo types, which our drivers should handle with in the beginning, I'd suggest leaving the slider in its default position. Unless our purchased trucks have strong engines installed - then you can shift this slider to the right. You can also choose favored orders according to the percentage of victories presented by a particular driver (see below). In this case the more wins on driver's account, the higher probability that he prefers races without trailers, instead of cargo deliveries. Leave these fragile cargos for experienced and more careful truckers, the rest of them should focus on deliveries of less fragile loads or races without trailers.
When choosing type of cargo, which your driver should prefer in his work (fragile or not fragile), it is worth to pay attention to maintenance costs of a truck he uses, that he pays daily during his work (see below). Carefully driving employee spends less money on truck repairs, thus you can give him orders concerning deliveries of fragile cargos. When it comes to trip distances I propose to take initially only these shortest - move the slider all the way to the left. You should remember, that on longer route your driver may be penalized with tickets on tidy sum of money, he may damage his truck heavily (repairs will also cost us a lot), and finally he may lose the competition (race) against his opponents. And arriving at the warehouse on the last place with damaged cargo equals deducting some money from max fee you'd earn for this delivery. Finally, you should take into account that after arriving at the warehouse located in the area, where you don't have your office, your driver will only leave his cargo, but he won't be able to take another. So he comes back with empty hands - it's a waste of time and money (in the same time he'd do several shorter deliveries). Summa summarum, in the beginning of a gameplay short trips among the cities located within the "operational range" of one of your branches are more lucrative and less risky. Though if you still insist to make long trips with trailers, then I'd suggest giving them to careful drivers, who don't have too many tickets on their accounts. Give short orders to your most aggressive drivers, causing many car accidents and paying a lot of forfeits daily (see below). Shortly - match trip distance according to the amount of driver's forfeits.
Three sliders in the middle window let you decide, what the computer should take into account, while selecting trucks (you've bought) for your drivers. Unfortunately you can't do this (choose vehicles) by yourself. First slider represents the wear of the vehicle - the greater wear, the bigger need for repairs in the future and you'll have to spend more money on refits. Thus driver which uses this vehicle will generate respectively smaller income (depleted for costs of repairs), so I'd recommend giving these worn vehicles to your best employees, often winning the orders, in order to minimize your losses. 2nd slider represents speed of vehicles chosen by the computer for your drivers. For races without trailers choose fast trucks, for deliveries of cargo - slowest vehicles. 3rd slider represents "cargo safety" (or "ride comfort" in other words) and by shifting it you can choose type/quality of suspension of the vehicle. Soft suspensions guarantee good safety for hauled cargos, so this type of suspensions is good for cargo deliveries, especially fragile, damageable loads, but perform badly in races without trailers.
Slider on the bottom allows you to specify daily wage of your selected employee. This has direct impact on driver's loyalty towards your firm, and on turnover generated by this company, of course. High wages raise a driver's loyalty but decrease company profit. If a driver's profitability increases, but his wage stays the same, his loyalty will decrease, since effective drivers demand to be paid more. If an employee's loyalty reaches 0 (zero), he quits the company the next day. Similarly, if a driver doesn't receive his wage for 2 days in a row, he also quits the company. In such cases the Freight Manager (FA - Nick's supercomputer) will warn you suitably earlier. Wages are paid in advance for the next day of work, and they're paid every day at 6 p.m.
Naturally you can leave all of this to Nick's supercomputer (FA), by checking the squares located under each window with sliders. It's the safest solution, that guarantees some small but constants profits and zero losses to your firm, though the automatic mode is the least effective, because when you use it, you do not fine-tune your truckers' activity, so they cannot do their best.
Confirm all operations executed on your truckers by pressing the button in the lower right corner of the screen. On the map in the middle of the screen you can see where your driver is currently.
To the left, under the list of hired truckers, the game presents to you some data related to the productivity of your employees. You can see there the level of loyalty, the daily income generated by a particular driver, and the index in percentage of his wins in orders he undertook. As for loyalty - it doesn't depend on employee's wage only. For example, you may be taking a driver who likes to drive fast and forcing that driver to transport fragile cargos, or telling a careful but slow trucker to take part in races - in consequence the loyalty of both employees will decrease, because they'll feel unhappy with their tasks. Below wins percentage is displayed the daily amount of driver's forfeits - these penalties can be sizeable in case of giving incorrectly assigned orders (to inappropriate employees). Next there are daily costs of the maintenance of the vehicle used by this trucker - these are sums he spends on repairs. High costs of maintenance may be the consequence of incautious driver who is incorrectly assigned to this particular truck, or may be the result of a serious wear of the truck. Gas is the amount of money your company spends daily to pay for fuel - fuel expenses can be high for powerful or worn vehicles.
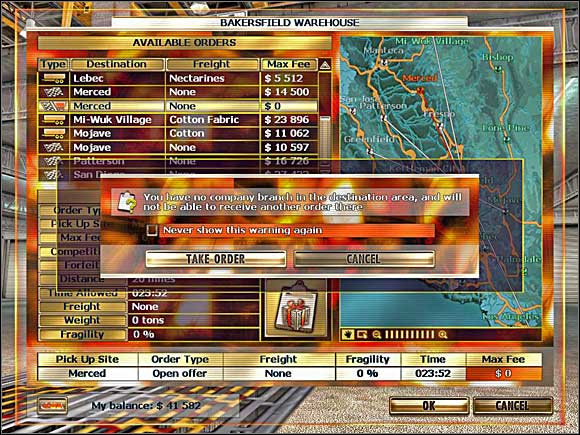 The screen of choosing and accepting orders.
You can choose and accept consecutive orders presented to you in warehouses located in towns you're visiting. These warehouses belong to California Commercial Warehouse Alliance (CCWA). After watching the cutscene (unfortunately you can't turn them off) showing your truck arriving at the warehouse, you'll see order accepting screen. You can sort orders on the list with buttons atop, according to their kind (cargo delivery, race with opponents without a cargo, tender/open offer), destination, type of cargo and max. fee you will receive for successful delivery of the chosen cargo. Of course you can damage a cargo on the route and your payment will be smaller then - if cargo damage exceeds 90 %, the delivery will be cancelled and the trucker penalized. All goods differ in terms of fragility. For example, the fragility of imported cars is about 80%. This means that such a cargo can be easily damaged in even a minor road accident. On the other hand, fragility of scrap metal is under 10%. This means that such cargo can survive numerous serious accidents.
Under the list of orders you can see a window showing the details of this particular order. You can also choose orders by clicking the arrows on the map to the right. Towns' names marked green on it are within the "operational range" of your firm (one of its offices). Though, if you've selected an order with its destination outside of your "operational range", you'll see a warning window on your screen. Then you can decide if you want to take this order after all (button on the left) with a mindfulness that you won't be able to choose and accept another order after reaching your current destination (so you're returning without a trailer), or you can cancel this order (button to the right). Check a square in this warning window and you won't see it again. I'm making these two annotations having in my mind the owners of the Russian version of the game, who may be not orientated well, what function has a given button. After taking an order and quiting the warehouse, the first information you see on the screen applies to your current place in the race - you should remember that you make all deliveries by racing against the time and opponents, drivers of other spedition companies. And this info will be refreshed when you pass your opponents (or vice versa).
Orders available in warehouses belong to three categories. These are respectively: 1) "Competitions", when you have to race against a running time and other drivers, but without cargos (trailers), 2) "Deliveries", when you race with a trailer against the time and other opponents, and 3) so-called "Open Offers" (I write more about them in next chapter of this guide). You can easily recognize all three kinds of orders by their specific icons. Pay attention that you can drive into a warehouse from its one side only, marked on your mini-map with an icon of a green hook! Do not abandon the trailer, even if the delivery has been cancelled - you must deliver it to a warehouse, or they will charge you for having to tow it themselves!
Before you accept any order of these characterized below, it is necessary to save your game status, in case of this new task collides somehow with the order you currently carry out (for example, new task requires from you to go in the opposite direction). Obviously you won't be always able to sniff out that after awhile you'll be given a proposal to deliver a cargo (this applies mainly to contracts proposed via CB-radio). In such a case exit to in-game menu and rename your quicksave saved earlier. To keep it, just in case - if you won't rename your quicksave, then the next one will overwrite it!
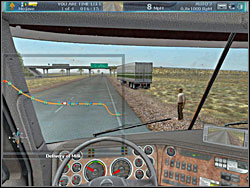 Hop in, dude!
You can often see the hitchhikers of both genres on roadsides. In order to give them a lift you have to slow down first to the speed lower than 10 mph and press Enter key. Attention! Not every hitchhiker will be interested in traveling with you! If he (or she) doesn't flail his (her) hands, then you shouldn't be able to take him (her) to your cab. There are several types of tasks related to hitchhikers. 1) You must take the hitchhiker to the place indicated by him. You can check out the exact location by viewing tasks' window in your PDA, after accepting his request. You can give a lift to only one hitchhiker at the same time. Usually you have to drop off the hitchhiker at the truck stop (bar or motel).
2) The hitchhiker may also ask you to drop off the parcel (consisting ferrets, for example) at some place (usually at the truck stop too), instead of himself. You can deliver only one parcel at a time. 3) 3rd type of tasks related to hitchhikers relies on delivering the cargo indicated by them (usually you can see such a trailer near the hitchhiker) to specific places, like shops, etc. Naturally, you complete all kind of these orders by racing against the running time. Sometimes you will be awarded by a thankful hitchhiker with some money, sometimes you'll earn some reputation points, or you'll get... big 0, nothing. You can check out what will be the reward only by viewing task's detail window displayed by PDA, merely after accepting this task.
Next type of orders is bound up with events you can read about in the journal of your hand held organizer book (PDA). These events pop out in the journal when you're close to the place where something interesting is actually happening. The journal also records rumors from Long Haul News and radio broadcasts. These events are marked in it with an icon of the envelope. While driving around the California take a look from time to time at the upper edge of the screen, looking for similar icon of the envelope - when you see it there, this is a sign that the new event related to it just occurred in journal. By clicking this icon in the event window you can add such a message as a task to your tasks' list.
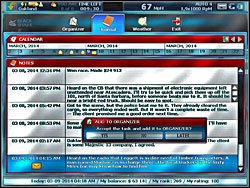 Icon of the envelope means that you can add this event to your tasks' list.
This kind of tasks usually relies on transporting some cargos from one place to another. As for most intriguing orders I can recall myself a task of evacuating from the beach the remains of a dead whale.
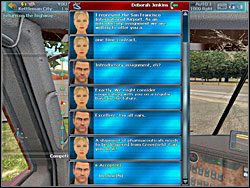 This lady has a proposal for Nick...
Imagine yourself this situation: you drive across the California and in some moment somebody just calls you over the CB-radio and proposes you a delivery task. First you have to listen to what this person says (what conditions he offers, etc.), then you have to decide (by pushing suitable keys), if you want to take this order or not. If you press P during this conversation you can pause game and extend chat window - you can then read once more and understand the whole conversation, if you had problems with following it to this moment. This type of orders received over the radio involves usually transporting of some cargo (first you must drive for a trailer to the place indicated by the ordering party).
Though not always - sometimes over CB-radio comes the request for help: from a cop, whose partner was badly injured during dangerous action, or from a trucker, whose truck broke down somewhere on the road, etc.
Another way of getting a job in R'n'R world is to visit one of "60 miles" bars, which you can find at the truck stops. On the right side of the screen you can usually find the tasks of giving a lift to bar's hitchhikers, delivering the parcels or cargos given to you by these people. On the left side of the screen there are usually listed so-called "open offers" bound up with CCWA warehouses. You can learn more about "open offers" in the penultimate indention of this subsection of my guide.
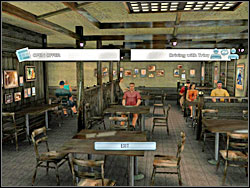 Open offer or "Driving Miss... Trixy" - the choice is yours.
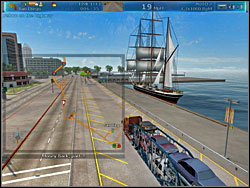 Hm, what about quitting driver's job and sailing to Europe?...
Sometimes you can find in a bar even one more type of tasks - game may give you an opportunity of visiting some places, where something intriguing just happens. For example, you may have a unique occasion to pay a visit at San Diego port, in order to see beautiful sailing ship staying there at anchor. Of course you'll not receive any cash or reputation points for completing these tasks.
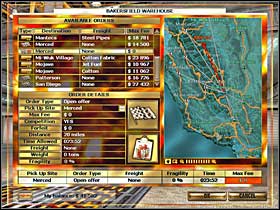 When you're on time at the indicated warehouse, it's time for race without trailer and fee first.
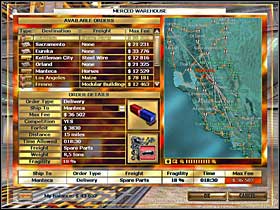 After winning this race you can finally choose amongst several lucrative orders of cargo delivery.
And now few sentences about these so-called "open offers". As I mentioned above you can learn about them by reading "Long Haul News" newspaper in bars located on truck stops. These news contain an information where you should go (to which warehouses, what towns), before time expires, to be able to get this offer. When you're on time at the indicated warehouse, you'll recognize order of open offer by its characteristic icon (picture on the left above). This order consists of two stages. In the first phase you race against your opponents, trying to get on 1st position to the next, indicated warehouse. You do not haul a trailer in this race, and you won't earn anything after winning it. After arriving at the warehouse on 1st position (in other words: after winning the race - other places don't count!) you will be rewarded with a possibility of choosing amongst several orders of premium deliveries of cargos. These are the most lucrative offers in game - their fees are 2 or 3 times higher than usually (in cases of delivering same cargo on identical route but on normal conditions)! Hunt for these "open offers" whenever you can!
Often there's no problem to have several irons in the fire at once. This means that you can, for example, select a race-without-a-trailer order in one of the warehouses, then you can accept a task proposed over the CB radio that requires transporting of some cargo, and finally you can give a lift to a hitchhiker - all of this at the same time, simultaneously.
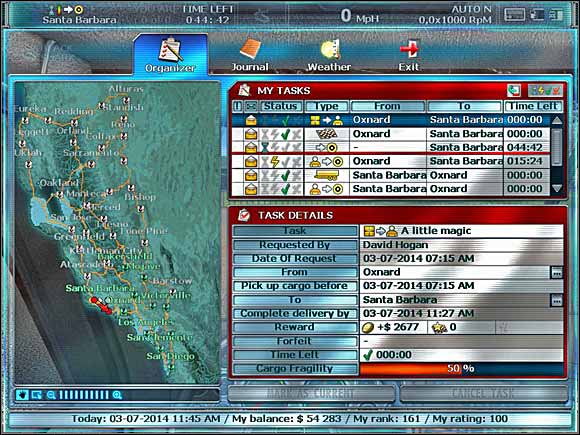 Hand-held organiser book.
On the route, during your journey, you can use your hand-held organizer book (function key F3), called Black Shark PDA, to take a look at some important data. Tabs atop of it (from left to right) are: the main window of this organizer book, the journal, the weather report and "exit" button of course. After pressing F3 key you'll see the main window of this organiser book showing a map, list of tasks and details of current order. You can sort your tasks on the list by their importance, status (completed/failed/in progress - icon of egg timer), type (cargo delivery, race, package delivery, giving a lift to a hitch-hiker, order to get to concrete place), location where you've accepted an order or where you have to deliver a cargo to, and finally - according to the time that left for mission accomplishment.
Pressing the button in the upper right corner of this list deletes all done or undone orders - for better readability. Below, in a window that displays the details of a particular order, you can see two small buttons with dots (...) - after pressing this lowest one you can see in a new, small window an exact location where this particular order should be accomplished. It can be a base (warehouse), where you have to deliver a cargo, a truck stop - in case of a hitch-hiker, or some other location (Police post, for example) which you should visit, to make the next step in the storyline. Two buttons under the details of a particular order let you set it as current (button on the left) or delete it (right button) - have in mind, that this second option involves paying a penalty from your pocket! On a foot-note one can see (from left to right): current date, account position, rank and rating (displayed as numbers).
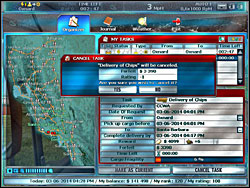 Task cancellation.
You can cancel particular tasks, if you wish, but it's often punished by paying a forfeit and/or deduction of some reputation points. This applies mainly to orders when you haul a trailer (cargo), so to ordinary deliveries taken from warehouses.
In the next tab ("journal") you can read entries related to events in game, listed in chronological order. If you see an envelope icon to the left of a particular entry, you can click on it, to open another, small window, which lets you chose amongst adding this event to the list of orders (button on the left), not adding it, or deleting it. These entries marked with envelopes are usually related to events, you have learnt about by reading the newspaper "Long Haul News" in a bar on the truck stop, or from radio broadcasts.
Another tab allows you to acquaint yourself with weather forecasts for California state - by pressing the buttons near the right edge of the screen you can view weather reports for today, tomorrow and the next two days.
And now some hints related to driving a truck, dealing with "ambushes" on the roads, etc. In other words - hints that make playing easier.
It can't be hidden that the Police in this game may toughen you up. These cops have got an elephant's memory and don't give up when pursuing you for even small offences committed on the road, like crossing the continuous yellow line (in this case the police will only react if a patrol car is nearby). You can't shake them off by hiding in the repair shops and changing the colour of your truck - this is not GTA, it doesn't work here. So how to deal with Californian cops? First of all you should accept the fact that, if you broke the rules of the road, you'll have to pay for this, sooner or later. Period. Though in some cases, to be concrete - when you have pursued your opponents and you've managed to catch up with them on a straight stretch of the road - but you hear police sirens behind you, it is worth to play Tom and Jerry with cops. Because if they stop you on this straight and fast stretch of the road (they have to pass you and slow you down, in order to give you a ticket) your rivals will drive away quickly again. In this case you shouldn't let the Police stop you, until all of you (the whole convoy) reach a sharp turning - on this bent everybody must slow down, of course. Then, even after stopping by the Police, you still have good chances to quickly gain ground on the rest of your rivals.
How to "make a stand" against the cops? There are several ways of doing this. If the road isn't wide, all you have to do is to zig-zag from one curb to another, not letting the cops to pass you. Though, you have to watch out and not to graze or hit a police car with your trailer - otherwise the trailer can easily disconnect! In case when the road is wide and makes zig-zaging ineffective, but traffic lanes are separated with a tight, neutral lane, you can bomb along this lane. Local cops are stupid and won't be able to cut you off - they always stick to their traffic lane and ride abreast! If all else fails, you can drive off your traffic lane into the opposing lane. Though you must remember, that the more rules of the road you'll break, the bigger will be the ticket you'll have to pay later.
It is also worth to notice, that if you play with low traffic density, the Police also more often turn a blind eye on your road offences and sometimes you can even drive regularly into the opposing traffic lanes with impunity. Remember also, that pulling into the truck stop or accomplishing the order will not acquit you magical from pursuing cops. Though, sometimes cops will forget about your road offences if you spend enough time on selecting next order in a warehouse.
In a long time interval it is not worth to avoid paying your tickets, because you can slip down under the distribution board of your truck, when you finally see the amount you have to pay.
And now exemplary tickets for selected offences committed on the road:
Reckless driving - you'll have to pay 820$ on Police retirement fund
Driving on the wrong side of the road (upstream) - 540$
Interfering with another vehicle while changing lanes - 346 $
Failure to give way to a vehicle on the right - 374$
Driving after the sunset without active/working lights - 248$
Creating a danger on the road by driving on reverse gear - 284$
Creating a danger on the crossroads - 398$
Assaulting a police vehicle (collision with Police patrol car) - 1.640$
At the bottom you see "pay" button.
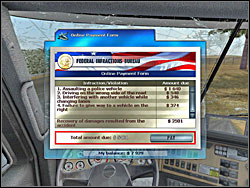 Don't worry, even if you broke all rules of the road, the cops won't take away your driving license.
Driving at night, in complete darkness, without active/working headlights (and you can easily crack them in this game; though it may happen less often in English version of R'n'R) may be another tidy challenge (besides the intrusive Police) for some players. You've got luck, if the route goes through well illuminated cities and city roads. But if you're outside of these cities you'll have to face the complete darkness mentioned above... Generally you won't be able to continue your journey without calling for emergency road service first. Though, if you've decided for some reasons to continue your travel without working headlights, the only thing that can rescue you is to stay close to other car(s) driving abreast or ahead of you. Stick close to them until you get with this companionship to a better illuminated city. Though even then pulling into a less-trodden truck stop may become a problem that you won't be able to hurdle. Unfortunately other trucks rarely (or even never) use truck stops in this game, so there is nobody you can stick to when exiting road. Generally, in case of damaging truck's headlights, I recommend to call for emergency road service immediately. How to do this?
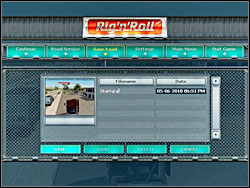 Menu accessible after pressing the Esc key.
By pressing the Esc key you can pause game and get to the menu with tabs (from left to right): "Continue game", "Call for emergency road service", "Restart game", "Save/load game", "Game Settings", "Exit to main menu" and "Quit game".
Price list of services offered by a wrecker may look like below:
Towing - may costs us above 1.000$
Repairing - may amount up to 15.000$ in case of badly damaged vehicle, that makes further journey impossible
Refueling - can cost us up to approx. 340$ (they'll fill up only half a tank!)
Button on the left - "pay", to the right - "cancel".
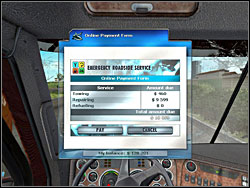 Mechanic, wrecker, Police officer - these are very lucrative jobs in this game.
Save your game progress often - it's advisable to do this when you're closing to every serious road crossing, before you pull into a warehouse, or after seeing a hitch-hiker standing further off on a roadside. Game allows you to quickly save your progress, but you have to notice, that the next quicksave overwrites previous! So you can additionally rename such a quick save to avoid overwriting it later.
Remember about the possibility of changing the scale of the mini-map, zooming it in. Bring this option to your mind when closing to bigger crossroads, or when you drive through the town's dense web of streets. Zooming in the mini-map will help you to maintain the orientation.
Remember also about the possibility of switching tasks on this mini-map. You don't have to look at your hand-held organizer book every time when you want to change your current task.
If you have problems following the CB-radio messages while driving, press the pause key during your conversation - it will not only stop the game, but will also display the whole chat history with your radio interlocutor.
When using electric side mirrors it is worth to set them up this way, to be able not only to see the road behind us, but also a sideboard of a hauled cargo. One look at the mirror then lets you quickly find out if you're still hauling a cargo, or you've just shed it, because you'll not always hear clearly an audible signal informing you about loosing the trailer.
If you must reverse for your lost trailer and it lies on its sideboard, you can try to put it in a right position by hitting it gently with the rear part of your truck (otherwise you'll bruise your headlights!). Generally it's just better and easier to load a saved game, than reverse for a lost cargo...
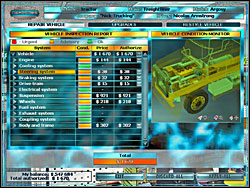 The mechanic will effectively cool your ardour for acting like a maniac on the roads.
This game rewards a fast, but cautious driving, and your truck, even when it's upgraded, is still very fragile and vulnerable. All breakages may cause serious failures to your truck and in consequence may force you to visit a repair shop. And this gentleman (a mechanic) can drain your pocket very quickly with his prices - his services cost from hundreds of $ up to dozens of thousands of $! There's no sense in mentioning here all the break-downs that may happen to your truck on the road, so I'll describe here only these most frequent, with an assessment, if they qualify for urgent repairs, or you can drive for a little more with them.
For a kick-off:
You can tuning your truck in repair shops on truck stops. Though before you start you have to repair your vehicle, even if it is damaged in minimal degree only - otherwise you won't be able to look at the truck's tuning screen. I'm sure everybody would gloat over, if I'd write down next to these listed below parts where exactly you can purchase them, but it's not possible here - obviously parts assortment changes during the gameplay. These given approximate prices apply to a medium difficulty of a gameplay (trucker), English version of a game and the default truck (Freightliner Argosy) you begin your game play with. Additionally these are parts you can mount only in this default truck. The assortment of components for other vehicles will differ a little, and even prices of identical parts will be different than these presented here. For example, for trucks that have front engines hidden beneath the cowl it will be possible to purchase some hood ornament (statuettes), you can mount on this cowl. For these trucks it also should be possible to buy marker lights, horns or additional mirrors (including electric side mirrors), etc.
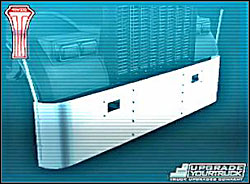
Bumper trim
Standard, chrome - 652 $
Classic, chrome - 1202 $
Classic, carbon - 1304 $
Teuton, chrome - 1884 $
Cabin trim
Western - 3480 $
Classic - 1594 $
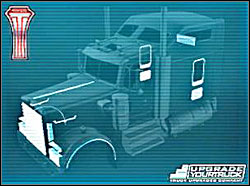
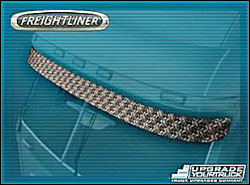
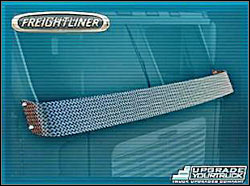
Sun visor
Classic, glass - 420 $
Classic, chrome - 710 $
Classic, carbon - 1001 $
I strongly advise against buying and installing these sun visors! They shut off the view when you drive using only the internal cam and you'll have problems with reading signs and signboards hanged over the road.
Bug shield
Classic, glass - 201 $
Country, chrome - 390 $
Classic, carbon - 433 $
Wind deflector
Plastic - 361 $
Chrome - 636 $
Carbon - 941 $
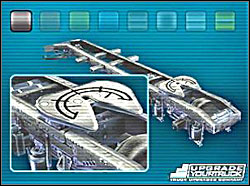
Chassis
Basic - 8690 $ (default part)
Red - 9996 $
Yellow - 9996 $
Chrome - 14363 $
Gold - 18861 $
Black - 24520 $
Titan - 28872 $
Engines
CS370 - 21328 $
CS400 - 23069 $
CS450 - 25970 $
DDS350 - 18861 $
DDS400 - 21618 $
DDS575 - 31049 $ (default part)
CP335 - 21037 $
CP380 - 23925 $
CP435 - 27421 $
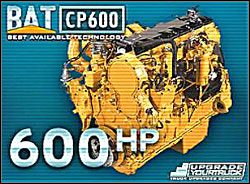
CP600 - 37578 $
Numbers in engines designations stand for horse power of course.
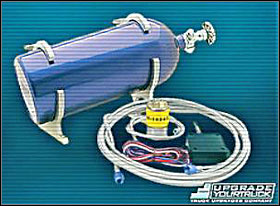 Booster N20 Aggressor - 1871 $
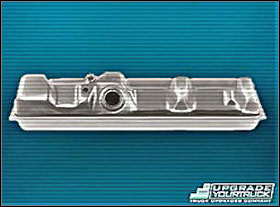
 Extra tank with extended (double) capacity - 1779 $
These are two basic modifications that you should buy as soon as possible. You will appreciate this double capacity tank on longer routes, because of its offered lower frequency of getting off the freeway to refuel your vehicle on the truck stop.
Booster ("afterburner") lets you gain ground on your opponents on the track - it works temporarily, but you can use NITRO time after time, without pauses. Thought it consumes a lot of fuel in a meteoric tempo, so make sure you have enough fuel, before using the booster. If you don't want to be at the mercy of Emergency Road Service you must leave yourself the possibility of getting to the nearest fuel station at least. Use booster only on straight stretches of the road. NITRO accelerates up your default truck to the speed of 112 mph, regardless of the horsepower of mounted engine.
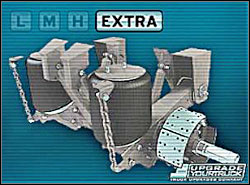
Suspension
Spring - 7109 $ (default part)
Air Suspension L Class - 8560 $
Air Suspension M Class - 10431 $
Air Suspension H Class - 14363 $
Air Suspension Extra - 17265 $
Electromagnetic - 31905 $
Wheels
Simple old - 4338 $ (default part)
Standard - 7239 $
American - 8545 $
Classic - 9416 $
Liberty - 10286 $
Modern - 10867 $
Gold - 11433 $
Black - 11882 $
Aero - 12318 $
Mag - 13043 $
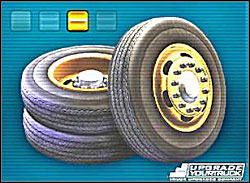
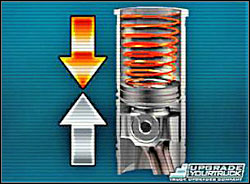
Engine brake - 1857 $
I'd recommend buying (ASAP) a parking cam, which consists of three cameras and a monitor installed in the cab - this system displays situation behind the truck even better and more comfortably than electric side mirrors. You don't have to look around, because the view from the monitor is displayed in two places practically directly in your face, when your eyes still observe the road ahead of you. You can switch between the views displayed by a monitor with a combination of Ctrl + M.
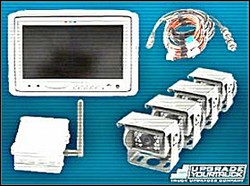 Rear view camera - 3612 $
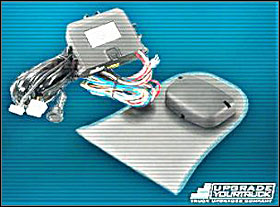 Rain sensor - 406 $
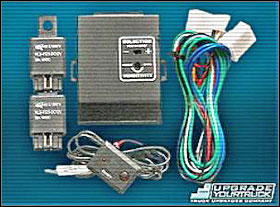 Headlights sensor - 544 $
You should really consider buying these two devices. Headlights sensor which automatically controls the operation of driving lights of your truck has a tendency to turn them on too late and turn them off too early. This sensor turns the headlights on at 10 p.m., and switches them off at 6 a.m. Rain detector works similarly and automatically turns on and off the wipers, but not necessary in the way we like.
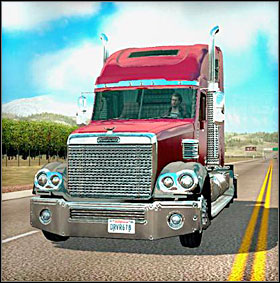 Cruise control - 1233 $
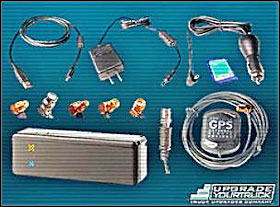 Navigation system (GPS) - 782 $
Cruise control is a very useful device that allows the vehicle to drive with a constant speed, regardless to the degree of stoop of the pavement - it lets your fingers rest. And the navigation system (GPS) shows with arrows displayed in the upper left corner of the screen the direction you should choose to get to your target. It is helpful when you're closing to the bigger crossroads, so I recommend buying GPS ASAP.
Here you will have to take what comes with my simple listening, presenting on the pictures only silhouettes of particular trucks (without technical data, without numbers), because you'll encounter that the trucks in R'n'R career mode differ (in parameters, mounted upgrades and prices) even insofar as the same model. I mean the same models of available trucks may have different chassis, engines with different horse power, different types of suspension, sets of wheels, even colors and finally - prices (from dozens to hundreds of thousands of $). You can check most of these parameters in truck preview window on truck buying screen displayed by a computer in the main office of Nick Trucking company located in Oxnard (see picture below and on the left). You can choose amongst trucks with constant and persistent parameters only if you've decided to play in a "single mission" mode.
Though for a long time and in the beginning of a gameplay, a player shouldn't be interested in buying a new truck for himself, because his character starts a career with already quite a good vehicle - Freightliner Argosy with engine 575hp. This is one of the best trucks in game, though with some kilometers on its odometer. But it's a good truck for a start, because with it you can win most of the races, when playing on medium difficulty. I suggest not to change this 575hp engine for a 600hp monster - you won't notice a benefit of dozens hps practically, and you can spend your saved cash on buying a better suspension, for example. Besides, an acquirement of a nitro installation can be a better idea than buying the engine with a couple more hps. Other elements of your truck, like chassis or wheels, differ only in finish in fact, and you can be interested in changing them only when you're a unique esthetician focusing on pimping up your car, its external appearance ;-).
We should be more interested in buying trucks in case of hiring new drivers in our company - these gentlemen (and ladies also) must have something to drive, of course. In this case low price of a particular model of a vehicle doesn't always mean that you have a wreck in your sight: for dozen thousands of dollars you can buy quite a nice truck. You should pay your attention to horse power of a mounted engine (choose as strongest as possible of course) and mileage (select as lowest as possible), which is bound up with the degree of wear and tear of the vehicle. It is worth to see also, what is the size of discounts granted by a truck dealer, albeit initially these are small and insignificant concessions on prices. They'll become more attractive later.
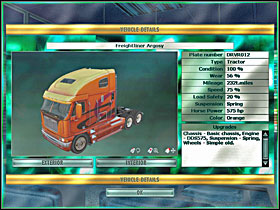 Take a look at truck's parameters first, when buying a new vehicle.
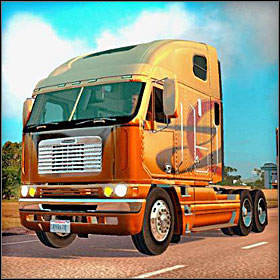 Freightliner Argosy
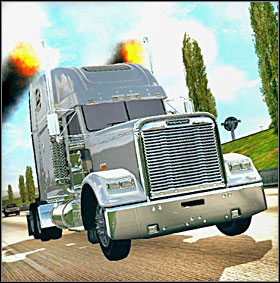 Freightliner FLD120 classic XL
 Freightliner Coronado
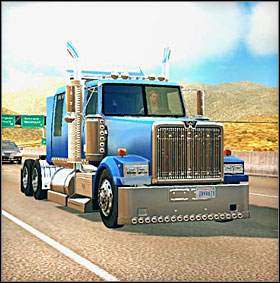 Western Star 4900 EX
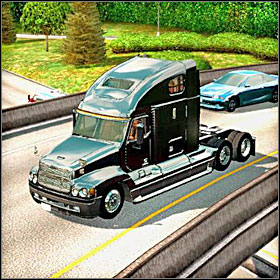 Freightliner Century
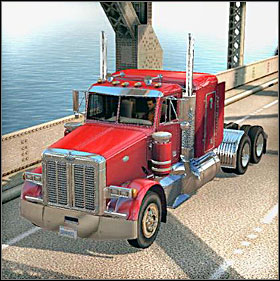 Hercules Liberty
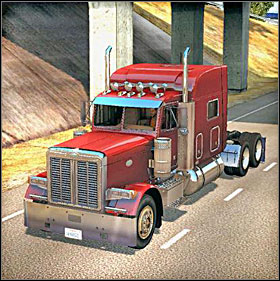 Hercules Freedom
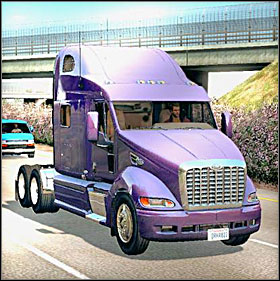 Hercules Atlas
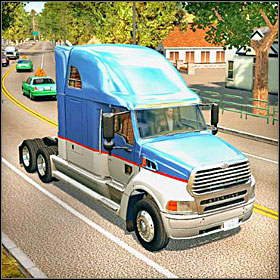 Sterling 9500
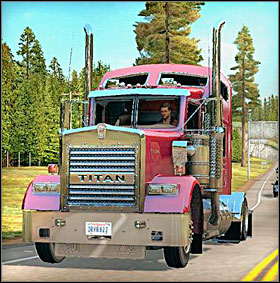 Titan Ventura
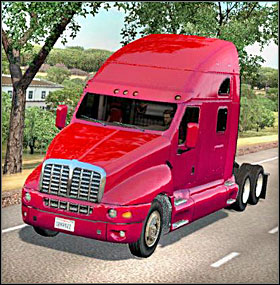 Titan Alpine
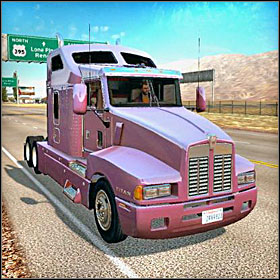 Titan El Dorado
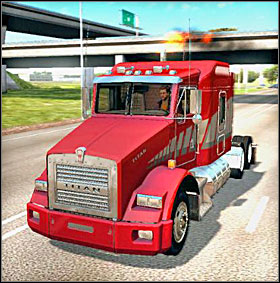 Titan Inyo
Drivers in the listenings below are listed in order of their ranks (starting from the lowest), which player should obtain, to be able to hire a particular driver (not every driver will be available from the start). As to sort of orders you can assign to your hired drivers, I personally preferred giving all these races without a cargo to aggressively driving employees (thus they've got many penalties, car accidents, etc on their accounts), and giving fragile orders that require delivering of least damaged freights to drivers without fletulent police files. You'll receive drivers' returns and advance their pay at 18:00 every day. You won't be able to hire a driver if his rank (reputation as a trucker) is higher than yours - first you must raise your rank by completing orders and tasks, winning races, delivering cargos, etc. Recruiting agencies provide you with employees for a one-time hiring fee. Try working with the same agency and its fee will decrease over time.
Name
Gender
Recruiter
Rank
Wage ($ per day)
Age
Tickets
Car accidents
Felonies (yes/no)
Driving experience (in years)
1
Gregory Diaz
M
4Truckers
109
967
39
19
6
no
19
2
Jason Lee
M
Trackegator
118
948
44
6
1
no
23
3
Bruce Coleman
M
Trackegator
129
1019
29
6
1
no
7
4
Jessica Hughes
F
Trackegator
168
1033
39
9
2
no
18
5
Jack Robinson
M
beAtrucker
202
1099
42
14
4
no
22
6
Kennet Wright
M
Restart
255
1204
25
8
2
no
3
7
Barbara Miller
F
Trackegator
295
1243
31
18
7
no
9
8
Fred Torres
M
4Truckers
316
1302
52
13
5
no
32
9
Jannet Howard
F
4Truckers
337
1302
26
12
4
no
4
10
Charles Davis
M
beAtrucker
339
1302
45
7
2
no
24
Name
Gender
Recruiter
Rank
Wage ($ per day)
Age
Tickets
Car accidents
Felonies (yes/no)
Driving experience (in years)
11
Linda Jones
F
4Truckers
346
1302
38
2
0
no
17
12
Michael Andersen
M
Trackegator
384
1430
42
15
6
yes
20
13
Alan Butler
M
Longhaul
412
1465
27
3
1
no
6
14
Bill Taylor
M
Restart
436
1496
43
1
0
no
22
15
Susan Clark
F
beAtrucker
459
1525
32
1
0
no
11
16
Daniel Miller
M
Longhaul
462
1549
47
18
8
yes
27
17
Patricia Sanchez
F
Restart
466
1549
27
13
6
no
5
18
Robert Smith
M
Longhaul
473
1560
34
14
6
no
12
19
Timothy Camble
M
4Truckers
475
1525
38
17
7
yes
18
20
Jose Martinez
M
4Truckers
486
1522
39
9
4
no
18
Name
Gender
Recruiter
Rank
Wage ($ per day)
Age
Tickets
Car accidents
Felonies (yes/no)
Driving experience (in years)
21
Carlos Simmons
M
4Truckers
489
1555
30
16
7
no
9
22
Victor Bennett
M
Longhaul
489
1560
26
12
5
no
5
23
Angela Flores
F
Longhaul
498
1557
38
7
3
no
17
24
Carol Brooks
F
Trackegator
534
1602
26
14
6
no
4
25
Laura Sanders
F
Longhaul
537
1602
32
15
7
yes
12
26
Antonio Ramirez
M
beAtrucker
539
1602
39
7
3
no
19
27
John Harris
M
Trackegator
571
1722
46
17
8
yes
25
28
Sarah Johnson
F
Restart
575
1681
38
19
8
yes
17
29
Ronald Nelson
M
Longhaul
579
1681
51
0
0
no
29
30
Kevin Carter
M
4Truckers
589
1720
27
5
3
no
5
Name
Gender
Recruiter
Rank
Wage ($ per day)
Age
Tickets
Car accidents
Felonies (yes/no)
Driving experience (in years)
31
Donna Hill
F
Trackegator
595
1720
38
9
4
no
18
32
Margaret Taylor
F
Longhaul
618
1779
32
3
2
no
10
33
Joseph Walker
M
Longhaul
673
1815
26
5
3
no
4
34
Larry Parker
M
beAtrucker
704
1937
29
4
3
no
8
35
Deborah Butler
F
beAtrucker
723
1886
22
12
6
no
2
36
David Rivera
M
Restart
736
1913
40
7
4
no
20
37
Martha Peterson
F
Trackegator
743
1941
36
5
3
no
14
38
Gary Mitchell
M
beAtrucker
770
1959
26
10
6
no
4
39
Jeffrey Lewis
M
beAtrucker
786
1999
25
14
7
no
3
40
Amanda Steward
F
Longhaul
789
1999
34
4
3
no
12
Name
Gender
Recruiter
Rank
Wage ($ per day)
Age
Tickets
Car accidents
Felonies (yes/no)
Driving experience (in years)
41
Mary Williams
F
Longhaul
798
2117
29
0
2
no
7
42
Christopher Brown
M
Longhaul
805
2117
46
4
3
no
26
43
James Allen
M
Longhaul
827
2117
29
0
2
no
7
44
Michael Ross
M
4Truckers
855
2138
43
17
9
yes
23
45
Pamela Russel
F
Trackegator
868
2138
30
14
8
no
9
46
Ruth Murphy
F
Longhaul
868
2234
38
3
3
no
18
47
Elizabeth Baker
F
Trackegator
870
2125
35
13
7
no
15
48
Christine Jenkins
F
Restart
887
2138
31
16
9
yes
10
49
Thomas Johnson
M
Trackegator
907
2138
34
1
2
no
13
50
Juan Perez
M
Trackegator
946
2272
43
12
7
no
21
Bolded, blue text - game's characters
Bolded, green text - locations related to missions
Bolded, orange text - missions' names
Bolded, black text - time limits to complete particular missions
The game opens with an intro that introduces to you Matt Tierson (guy in a red, baseball cap on my picture). Your main character's name is Nick Armstrong (dude in between the display frame). You're the owner of Nick Trucking Transportation Company now, which has the main office in Oxnard.
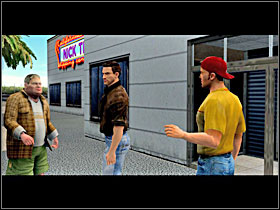
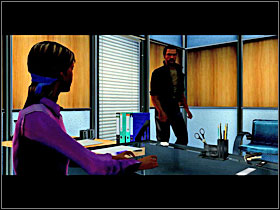
Matthew will introduce to you company slob named Crane and also your secretary - Pamela. He will also give you some basic advices how to play, where you can find the nearest repair shops and other locations, what is their purpose, etc., and show you the main computer installed in Oxnard's office. And then he will disappear... Your task will be to find him, to solve that storyline's mystery that hides behind Matt's disappearance.
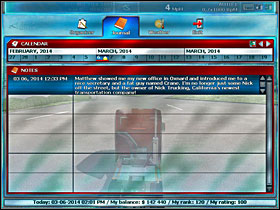
In the journal of your handheld organizer book (F3 function key) you can read about events you have participated in. First entry in this journal applies to the cutscenes you've just watched.
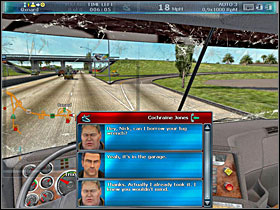
Shortly after starting a proper game Crane should contact with you asking for help - he wants to borrow a lug wrench from you. Of course Nick accepts Crane's request, besides fat man already took a wrench form the garage. Remember that you should press the Enter key, if you want to answer on messages incoming over the CB-radio, and if you have problems with following the chat you can also pause game with P key - this enlarges chat window and shows you the whole chat history with current interlocutor.
After some long time of free gameplay Matt will call you over the CB-radio asking for help (well, looks like he didn't disappear yet...). He wants you to pick up his friend, a girl named Dorothy O'Leary from "60 miles" bar located on the truck stop at the southern exit from Oxnard. This mission is called "Save Dorothy". Dorothy is in troubles - she's being chased by a couple of thugs. Don't reject this request and press Y key (say "yes", in other words), when you see a question, if you want to help, in the dialogue. Thought you should remember that after accepting this request other (current) tasks will be canceled.
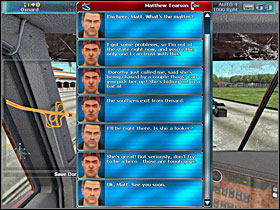
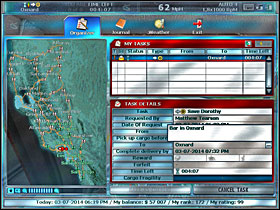
You can also check where you should go exactly to pick up Dorothy, by looking at your handheld organizer book - just click these 3 dots (lower dots) in current task's details window. This location is also marked (though not so precisely) with an arrow on your mini-map. You have approx. 5 minutes to get to the place.
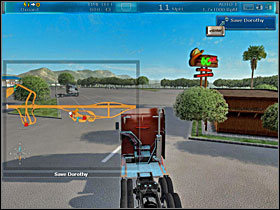
After getting to the truck stop in Oxnard you'll see a truck parking near the bar - this truck belongs to the bad guys chasing Dorothy. Before you stop your vehicle and enter (by pressing the Enter key - btw, you must slow down in order to get in anywhere, or to pick up a hitchhiker!) "60 miles" bar, you can try to reduce thugs' chances for effective pursuit after picking up Dorothy. With this end in view you can try to damage thugs' truck by hitting it with your vehicle, if you have a couple of minutes (at least) left to pick up a girl. There's a repair shop nearby, so after such an action you will be able to repair your truck. But there is also other and even better method of taking an advantage over the thugs later, when they start to pursue both of you (Nick and Dorothy). And this method boils down to buying earlier in one of these repair shops the NITRO installation. And eventually a double capacity tank, as NITRO eat up fuel very quickly after turning this thing on. So don't forget to refuel your truck at gas station, also located nearby, if you already have NITRO booster. Parking cam can also come in handy - with its help you'll be able to observe a situation behind your truck and simultaneously safely drive your vehicle away.
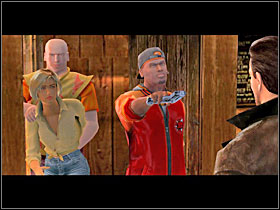
When Nick tries to enter the "60 miles" bar, Dorothy storms out then, yelling for help. After hoping in Nick's truck (thugs hop in theirs) the pursuit starts with the effective cutscene. Though if you're late (and you didn't manage to be in time) you'll be killed by these thugs right in front of the bar's entrance - this ends the game! Similarly, if you've allowed them later, during the chase (when you were on time at bar), to get to close to your truck, your vehicle explodes - this is the end of game too!
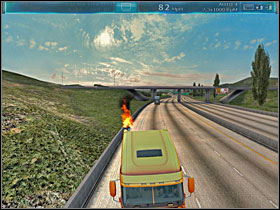
Though, if you've installed the NITRO boost in your vehicle earlier, and you use it now intensively, then you shouldn't have bigger problems escaping these thugs.
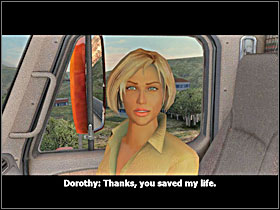
After a while the pursuit is over, Dorothy introduces herself to Nick, thanking him for saving her life, and then she takes wing.
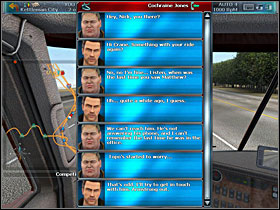
After some time Crane again contacts Nick using the CB-radio. Fat man is wondering what happened to Matt - Matthew isn't answering his phone calls and he wasn't in the office for a long time. Nick promises to get in touch with missing Matt.
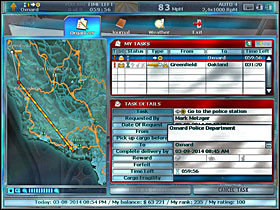
Later a detective Mark Metzger from Oxnard Police Department wants to see Nick in his office - it's important. You've got 1 hour to get to the place and mission is named... just "Go to the Police Station". ( It's a lot of time, so you can complete some orders before you go to the Police Station in Oxnard.
In order to get to the Police Station in Oxnard you have to turn off the main road leading from Oxnard to Santa Barbara/Lebec and get on the road marked on your mini-map with green number 1. It's Pacific Coast Hwy (South). Drive by this road to the south and near the end of the road (near two gas stations), turn left.
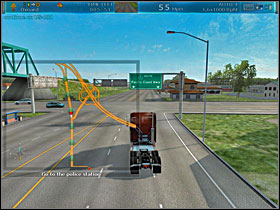
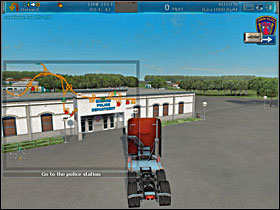
Few blocks further, on the left side of the road, you'll find the Police Station building. Park your truck near the entrance and press the Enter key.
During your conversation with detective Metzger you'll be informed by him about Matthew Tierson's truck, which was found on the outskirts of the city, riddled with bullets and burned. However, cops didn't find Matthew's body in the wreck.
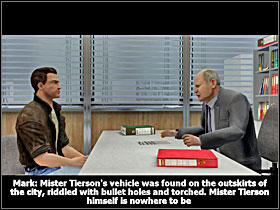
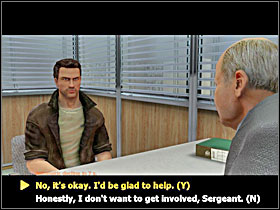
Metzger wonders whether you'll cooperate and assist local cops in the investigation. Answer "yes" of course (by pressing Y key) - Matt is your friend in game and friends should help each other, when one of them needs this...
After some time of a free gameplay Nick got a call (CB-radio) from some guy (named John Doe), who says he has information about missing Matthew. In order to talk to this guy you have to get to the "60 miles" bar on the truck stop near Oxnard's north entrance. Doe waits there every night and this mission is called "Meet the Stranger". You have approx. 250 minutes to get to the bar. It's a lot of time so feel free and make some money, before you go there.
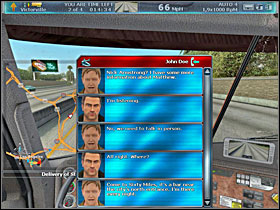
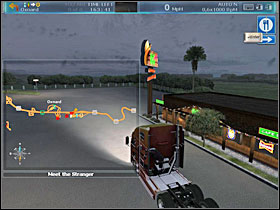
When you've decided finally to talk to Doe, try to arrive at the agreed-upon place at night. I've been at bar before 6 a.m. and haven't met the guy.
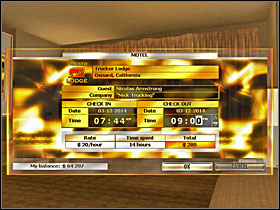
But you can take a nap for a couple of hours in the motel nearby, setting the alarm clock for 9 p.m., to wake you up before the night. Then go to the "60 miles" bar again. If Doe is already inside you'll hear an acoustic signal when disembarking your truck.
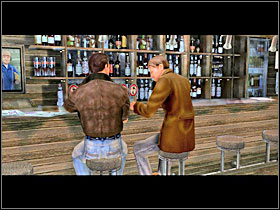
Both gentlemen will have a natter. Doe says that Matthew worked not only for Flat Sole managed by Topokinaki (Topo is known to Nick), but also was somehow involved with Storm Express. And that's why he could afford his house and the truck. Storm Express is another transportation company which makes big money on illegal freight. By Doe's account, dudes from Storm Express are dangerous, and Matthew could've just ended up on their bad side... Doe recommends Nick to pay a visit to their boss, Jack Murdoc.
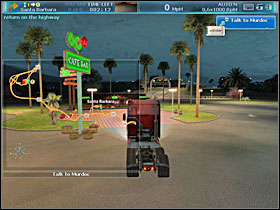
You'll find Murdoc at another "60 miles" bar, but in Santa Barbara this time. You've got approx. 185 minutes to get to this place, so again there's no hurry and you can do some other tasks first. This next mission is called "Talk to Murdoc".
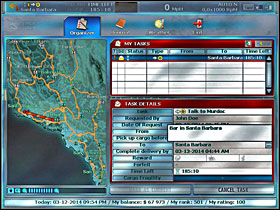
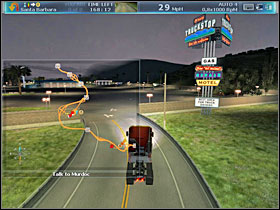
Before you meet with Murdoc it is advisable to repair and refuel your truck - it's important! You can do this on the truck stop located north-west from Santa Barbara, between Santa Barbara and Atascadero. If you've still got no NITRO booster and extra tank, try also to purchase them in some of the repair shops. Soon they should be very useful.
Many things indicate that you should be at "60 miles" bar in Santa Barbara right before the expiration of the time limit anticipated for completing this mission, in order to catch Jack Murdoc there. Additionally, you have to be there after the sunset. I was there at 11.00 p.m., just a few minutes before time limit expiration. When you're at bar earlier, it's possible that Murdoc's thugs you meet there (you know them well - they pursued Dorothy) will told you to come back later. And later and... - this may happen even couple of times in a row.
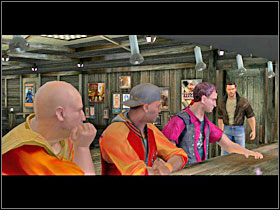
But if you're at bar in Santa Barbara using my above-mentioned guidelines, you should finally catch Murdoc (wearing a weskit on my picture) there. He will give you some information about missing Matthew only if you win a race against him (to Atascadero, in all probability). You'll lose your truck in case of your defeat.
Though, we're here not to lose anything, but to take the next step in the storyline. So you should win the bet and the competition. With NITRO booster and extra tank installed in your default truck you shouldn't have any problems with this. On medium difficulty it's easy to win this race even without "afterburner" - just step on gas and after some time you should pass Murdoc's truck. But if you use booster it's far easier to pass this dude, even if you started this race from so-called "standing start". Pay attention only to not deplete your fuel reserve completely, because you won't be able to refuel your truck during this race, without losing the competition!
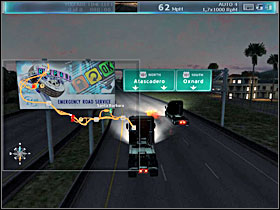
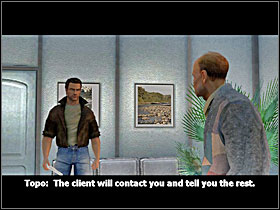
The competition ends when you're close to Atascadero. Murdoc keeps his word and informs the winner (this is you - Nick) about missing Matthew. It turns out that Matt Tierson owed Storm Express some money. They offered to forget the debt if he brings one of Toponaki's shipments to them (Murdoc doesn't want to tell what was the cargo), but Matt refused. They didn't kill him though, he just disappeared somewhere far away. But Murdoc threatens he'll find Matt sooner or later...
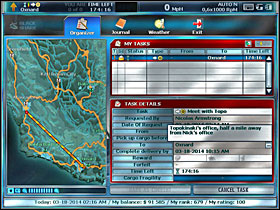
After the conversation with Murdoc Nick thinks that Topo's gonna lose his company in two days. Nick (that means - you) has to talk to Topokinaki before that happens. And this is where the next mission, called "Meet with Topo" begins. You have approx. 175 minutes to complete it. Topokinaki's office is located in Oxnard, half a mile away from Nick's office.
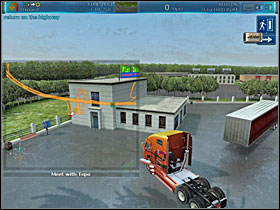
After arriving at place you'll see a trailer parking in front of Spyros Toponaki's office (Flat Sole). Enter this building by pressing the Enter key.
During your conversation with Topo you'll be informed by him that his business is really on the verge of bankruptcy and soon it will be auctioned off. No wonder this guy looks totally depressed. Nick convinces Topo to give him the order that Matthew was supposed to deliver before his disappearance. You have to take a special load of cargo you saw outside the office to Lebec and wait there for further instructions. There's something strange with this cargo - it's worth so much money, that this one delivery alone would have gotten the bank off Topo's back. And the customer is also very mysterious - he demands complete discretion, won't specify the destination until the last moment, and when you decide to take this order, he will give you instructions over the CB-radio. For the moment you should take the 126 towards Lebec. You've got 7,5 minutes of time limit and this mission is called "Deliver the special cargo". After completing this order Topo promises Nick his company as a reward! Lastly he gives you one more advice - watch your back when hauling a trailer.

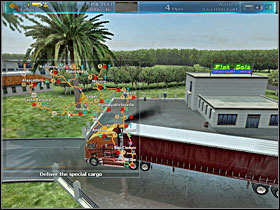
After exiting Topo's office hook the trailer by pressing T key and proceed towards Santa Barbara. Notice, there's no traffic on the roads at present, you won't see any cars - this is strange...
When closing to big crossroads turn right towards the Lebec and Palmdale - this is highway number 126. A moment later you'll see a Storm Express truck (should be well known to you by now) with Murdoc's thugs (these two bandits that pursued Dorothy earlier) behind you. They want you to stop and probably want to kill you for this cargo - don't even slow down! Notice, that you're not able to save your game progress during this mission, unlike in previous episodes! Few seconds later Nick got a call from Crane also - fat man says he and Dorothy will meet Nick at the exit to the 126. You just have to hold out.
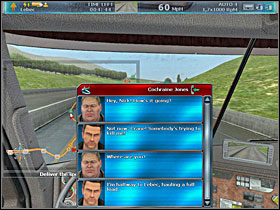
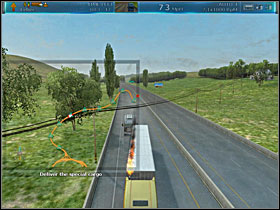
In order to drive away use your Nitro booster and eventually skillfully cut off these thugs in Storm Express truck. Without the "afterburner" it can be hard to shake them off - you're hauling a heavy trailer and they don't have such a ballast.
Carefully observe the road in front of you and zoom in your mini-map to spot all the sharp windings before it's too late. If you have a rear view camera installed in your truck turn on the monitor mounted in the cab and take a look at the screen from time to time, to quickly orientate yourself where are the thugs, how far behind your truck. When you're closing to a spot of the 126 road marked on your mini-map with an orange arrow, some guy named Dakota will contact you using the CB-radio. He says "hold out, till the next crossing". He will try to stop the thugs there.
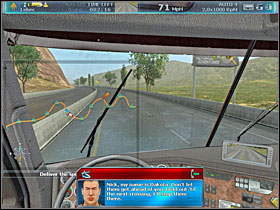
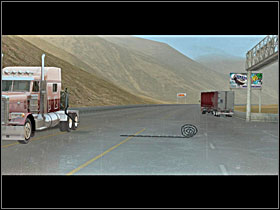
On that crossing you'll see Dakota's truck passing you and then this dude will quickly unroll a stopstick. Storm Express truck will stop - these thugs are not able to continue their pursuit with flat tires.
Continue towards the orange arrow on your mini-map - you can't lose your way here. However, you can't still save your game, so drive carefully. When you're closing to the spot, you've got a call from the mysterious customer.
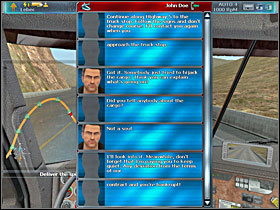
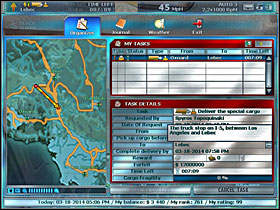
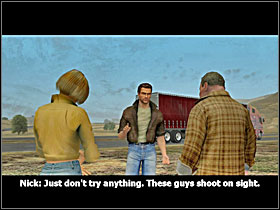
He wants you to go south along highway 5 towards Los Angeles and wait at the truck stop there for further instructions. You have approx. 8 minutes to get there and this anonymous guy is named John Doe for the moment.
No one should pursue you anymore, but the traffic comes back onto the streets - drive quickly, but carefully, avoid road accidents with other cars. However, there can be another small inconvenience - poor weather. I traveled in rain and on slippery roads. When you're closing to a big interchange you should notice two trucks parking on the roadside - this is Crane and Dorothy. After chitchating with them continue south, towards the truck stop - they will warn you, if someone comes after you again.
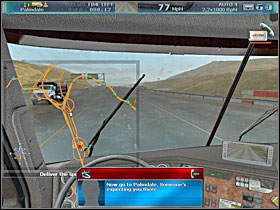
Zoom in your mini-map and drive across that big interchange, heading for Los Angeles and the truck stop on the south. After a moment the mysterious customer John Doe calls again. Now he wants Nick (that means - you) to drive towards Palmdale (east) using the road number 14. Couldn't he say this earlier!?
You can reach the truck stop and refuel there, or you can turn round immediately (braking the road rules) - the highway is wide and the lanes shouldn't be separated with concrete barriers here. This time you've got approx. 8 minutes to get to the place marked on your mini-map with an orange arrow. Doe will take the trailer from you there. You still aren't able to save your game progress.
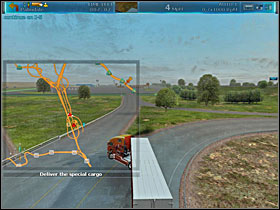
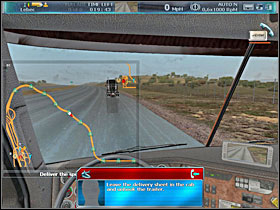
Slow down when closing to the destination point on road number 14. You'll see a black truck parking on the roadside in front of you. Then starts the cutscene with Nick unhooking the trailer on it. Mysterious Doe orders Nick to leave the delivery sheet in the cab of his truck. Funny thing - the drawing on the client's mudflaps looks very similar to Matthew's cobra tattoo. Could it just be coincidence?
Notice also, that after doing the job your account will be fed with 22k $ from Topokinaki. Topo also gives Nick his firm, but he's just glad he has got his reputation back at least.
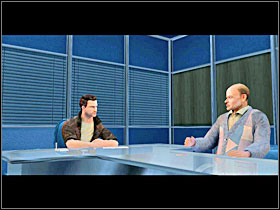
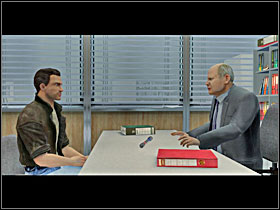
Your conversation is interrupted by Pamela - she informs Nick, that the police want to see him again. You should remember well, where Police Station in Oxnard is. This next mission is called again "Go to the Police Station" and you've got 120 minutes for contacting with detective Metzger. On Police Station in Oxnard detective Metzger shows Nick a lug wrench that belongs to our driver, which was found yesterday near the body of... Jack Murdoc! Someone killed him and this cop is convinced that was you (but you still remember that you've lent this wrench to Crane, right?).
Sergeant was just about to slap the cuffs on, when Frank Dakota appeared again and somehow got you out of there, driving away in his top grade truck right after.
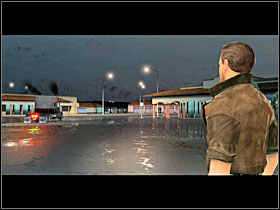
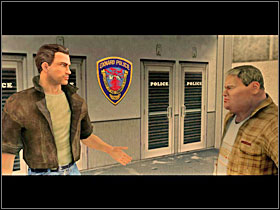
In front of the Police Station in Oxnard you'll meet also Crane. He gave your wrench to Matthew a while back. Fat man says also that Frank Dakota is another mysterious guy here - Crane calls him a "dark horse", a "phantom". No one knows where's Dakota from, or what his business is. Dakota doesn't work for anyone and his ride is top grade, a real beast. He doesn't seem to be interested in profit at all and he's rarely seen at the truck stops. Crane heard also that Storm Express stays away from Dakota for some reason... Lastly Crane says he's quitting and going out on his own, since he makes troubles for Nick - therefore he feels himself guilty. Well, sayonara, crisco!
Now you have to drive a little, doing what you want. After some longer time your secretary Pamela Russell will contact with you using CB-radio. If she takes her time and doesn't call, try to pull into a truck stop - during my gameplay she contacted me when I was visiting some "60 miles" bar. She's got some new informations for Nick. She says that somebody named Cunning waits in the main office of Nick Trucking company in Oxnard and wants Nick to pay a gigantic fine for the loss of his cargo. I.e. that special cargo, which Nick delivered to the mysterious John Doe waiting on the road number 14 to Palmdale, belonged to Cunning, but was supposed to be delivered to somebody else. Not to John Doe - he just fabricated the delivery sheet. Obviously you have to talk to Cunning personally and clarify all the matters at the main office in Oxnard. I'm sure you were there many times so you know perfectly how to get there. This mission is called just "Meet with Cunning" and you've got 60 minutes of time limit to get to the office. If you're doing some tasks currently, try to organize your work well, to be at the meeting in time.
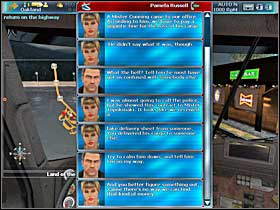
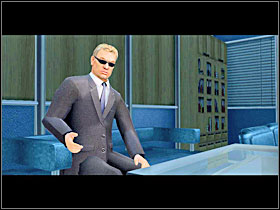
Steve Cunning works for the government and he decided to forget about Nick's debts. But this is the end of the good news. Cunning and his men have been trying to get a handle on a certain criminal group engaged in the production and distribution of a powerful new synthetic hallucinogen. These criminals have been using a transport service as their cover. Knowing Matthew's criminal ties Cunning and he together put a fake order to deliver a large batch of the more costly chemicals through Topokinaki's company. The plan was to lure the criminal group into stealing the cargo and then follow Matthew to their laboratory. But something went wrong along the way, Matthew probably got himself killed, the delivery passed on to Nick and he managed to lose both Cunning's men and the criminals. Though the cargo was stolen by an unknown third party - some lone wolf (the mysterious John Doe) faked the waybill and snatched the trailer right from under everyone's noses. Nick is afraid about his life, thinks that these mobsters will probably just kill him now. So Cunning recommends Nick to leave the state, at least for now, to be on the safe side, until Cunning and his men find this gang and put them behind the bars. Nick refuses to do it and Cunning says that in this case he can't guarantee Nick's safety here.
You have to drive a little again and make some money, etc. After some time Frank Dakota will contact with Nick Armstrong over CB-radio, as usual. He wants to meet with our driver again at the main office of Nick Trucking Company in Oxnard. You've got approx. 25 minutes to get there and this mission is called simply "Talk to Dakota".
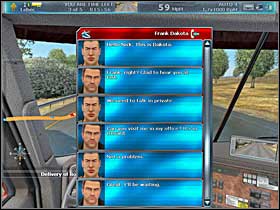
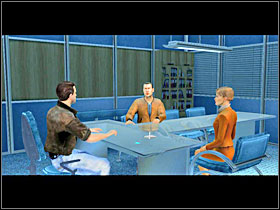
Frank Dakota has Native American features and he turns out to be a federal agent. He invited to the meeting Monica Dalancy also, who is a journalist and an author of series of articles about the road killings and robberies. The truckers who got attacked in all of these events were transporting some chemicals and all the attacks took place on Highway 108. Those who survived reported seeing the black truck of John Doe, to whom Nick delivered a special cargo earlier (this cargo was later destroyed by bandits, nobody knows why). Nick reminds himself that there was a picture of a cobra on the mudflaps of the black truck and Matthew Tierson had the same thing tattooed. Dakota's feds will try to bring down Storm Express and Nick agrees to be a part of this plan. For openers Monica is going to mention Nick's encounter with the black truck in her next article and if it really was Matt in this truck (as Nick suspects) he will probably try to get in touch with Nick.
Again you have to rove a little across the California state. At one point, as you suspected, Matthew will contact Nick using the CB-radio. Ha has a proposal of meeting in Red Rock Canyon on the 14 between Mojave and Lone Pine. This mission's name is "Meet with Matthew" and you've got 26 minutes to get to the place.
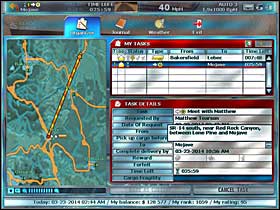
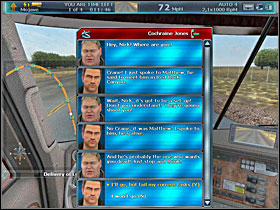
Crane calls you when you're going to the meeting (he contacted me when I was near Mojave in my gameplay). When he hears that Nick is going to meet Matt, he tries to talk Nick out of this idea. Fat man thinks this is an ambush and Matthew wants to shoot our driver. At the end of this conversation you'll have a choice between disregarding Crane's feedback by going to the meeting, which may require canceling current task (if you're doing one currently), and taking Crane's advice seriously by resigning from the meeting with a friend. Here the game is bugged twice: if you choose first option then your current task will not always be canceled and sometimes you can finish it (if you're hauling something to Mojave) and still be able to get to the meeting punctually. Though usually game works fine at this moment, your current order is canceled and you may leave behind your cargo. Second bug manifests in that way, that even after the resignation from the meeting it's still active in your hand held organizer as a task, and you can still complete it - I think this shouldn't look like this... So if you care about the fee for your current order, then you can choose 2nd option (not going for the meeting with Matthew) when talking to Crane, deliver your cargo to Mojave, and after this go to the meeting. But if you don't care about the money, or you're not making any delivery at this moment, then you can choose 1st option and go to the meeting with Matt, as I did.
A cut scene starts when you're close to the spot in Red Rock Canyon on the 14 between Lone Pine and Mojave. You can see Nick's truck being pursued by Matthew's one (it has cobra pictures on both mudflaps). Matt goes like the wind and tries to pass Nick to save our driver's life - somebody launches from the nearby hills a rocket aimed at Nick's vehicle! Obviously someone wants to see Nick dead...
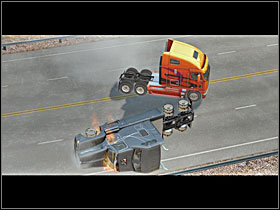
But brave Matthew manages to cut Nick off and cover him from a rocket, though this heroic action ends tragically for Matt and his truck.
When the cutscene ends and the road is magically cleared up of the wreck and Matt's body, you can again drive where you want. You have to bum around for a while only (this time), to be able to pass to another episode of the storyline. This is the next conversation over the CB-radio with our sagamore Frank "The black ponytail" Dakota, who will contact Nick by himself. This chitchat has a similar progress, regardless of being an eye-witness of Matt's death when meeting him, or avoiding the meeting with a friend in canyon. In both cases Matthew dies, but when you've resigned to meet him earlier, you'll be informed about his death now, by Dakota. Nick doesn't like the way in which Frank talks about his friend (for Dakota Matt is only the dead witness). Dakota says also that the hunt for Nick is on, things are looking pretty bad and he will contact Nick later. Howgh!
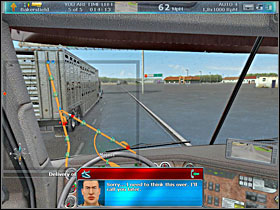
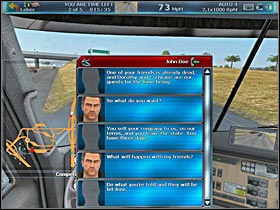
The mysterious John Doe calls after some time of driving around. Johnny says that Crane and Dorothy were taken as hostages by him and his dudes. He wants Nick to sell him Nick's Trucking (on his terms). This criminal demands also from Nick to leave the state and gives our driver three days for accomplishing his requests. But our brave driver knows that even if he agrees, thugs from Storm Express won't let the hostages go.
Shortly after this conversation a journalist Monica Dalancy contacts with Nick using CB-radio. She's got good news - she was able to find and photograph thugs' hideout (the laboratory) after all. There's a small road running through the forest that goes off the 108, about 4 miles from the interchange with Highway 395. It continues through the gorge and over a lake to a small valley in the mountains. Apparently, it's a fortress - the valley is blocked by a large rock and there is armored gate on one side. Nick asks Monica to inform about her discovery Frank Dakota and a certain John, friend of Nick.
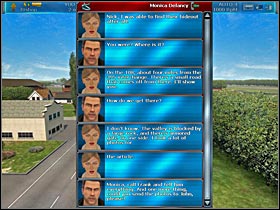
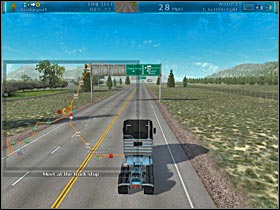
Frank Dakota from FBI should call after a short time. He is going to mount a major raid and take thugs down with the usage of helicopters. But Nick dissuades Frank from doing this, by saying that such an action will provoke the criminals to kill the hostages and destroy the evidence. So instead of raiding the hideout with full force things should be done discreetly. Our driver already has a plan in his head, but he needs the assistance of Dakota and above-mentioned John. All three gentlemen invite out for a meeting at the truck stop to the North from Bridgeport. You've got approx. 4,5 minutes to get to the place and the mission is called "Meet at the truck stop".
The truck stop is located to the North from Bridgeport, as I wrote above, towards Minden, near the junction of Highway 395 and road number 108 that leads to the West. Thus not so far away from thugs' hideout.

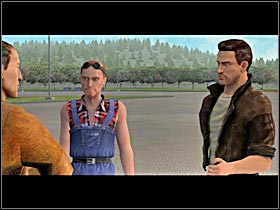
At the truck stop all three gentlemen discuss their plan. First redheaded John goes to the rock and sets up the ramp. Then it's Dakota's turn - he takes the jump and smashes the base of the water tower to the left - it should fall on the roof of the laboratory. Then Nick takes his jump and hits the supporting cables (beams) on the right. If everything will go according to the plan, the laboratory should collapse. Lastly redheaded John gives a valuable hint to both gentlemen - speed up to 65 mph when you hit the jump.
Nick tells they will meet inside the gorge, then line up and make the run. He'll head out 10 minutes after both guys - first he must acquaint himself with his new toy given for that occasion by brick-top. It's a dilly, very fast and designed with a futuristic look truck called Cheetah. Though when Nick seats behind the wheel calls John with a warning that mafia hacked the Cheetah's computer and turned it into a time bomb! It will go off in a few short minutes!
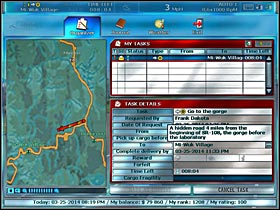
So you have only 9 minutes to "Go to the gorge" marked on your mini-map with an orange arrow and on the map in your hand held organizer book with red arrow. Then maybe John will be able to stop the explosion somehow. Luckily rocket-propelled Cheetah is a very strong machine that accelerates to 100 mph very quickly and additionally it has a NITRO booster installed, which increases Cheetah's engine power even more.
So exit the truck stop and drive West by road 108 towards Mi-Wuk-Village. It's a fairly tight, mountainous road with hairpin bends. Observe the right roadside and look out for large, yellow road signs. Come to think of it, when you're close to 3rd of them, after passing several very sharp turnings, you should see the woody clearing on the right roadside - drive into it.
A moment later turn right again (branch to the left is a dead end).
Drive straight on, till you see a lake ahead of you. All should be easier to find, if you play this mission at day. But when playing at night, this characteristic darkness can be a problem, so turn on upper headlight beams. Drive across the lake using a dyke - better not to skid on it, or you'll finish your game in the water!
Turn left right behind the dyke. And then race towards the orange arrow on your mini-map. Watch out for individual trees and stones on the ground!
When you see in the distance the headlights of some vehicle (or this vehicle by itself, if you're driving at day) begins the cutscene. Right before this moment it is worth to save your game, because later you won't be able to do this for a period of time.
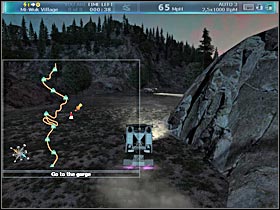
Redheaded John quickly sets up a ramp mounted on his vehicle, thus allowing both stuntmen (Dakota and Nick) to jump over the chasm blocking further way to the Storm Express laboratory (hideout). First jumps Dakota's truck.
After the landing Dakota smashes the base of the water tower located to the left and it falls on the roof of the laboratory almost completely devastating it.
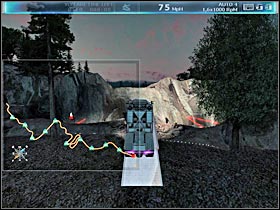
Now it's your turn to finish this work of destruction. Note, that you're unable to save your game, so better don't make a mistake! First you have to jump over the charm too. In order to do this run onto the ramp - in the initial phase you can accelerate by turning on (for a moment) your NITRO booster. You have to speed up to 65mph at least, to be able to jump over the charm. If you won't be able to accelerate up to this speed, or you badly run onto the ramp, you'll end your gameplay by falling into the charm (you can see red laser beams in it on my picture).
I wouldn't recommend running onto the ramp with speed exceeding 65-70 mph, because you will have to quickly brake after the landing, in order to avoid hitting the red explosive barrels situating in front of the laboratory. Hitting'em also causes Nick's death! So better brake using the hand brake, for example. Do you remember what was the plan? Dakota had to drive to the left (in the distance you can see his truck on my picture) and Nick had to turn right! If you did a mistake, you'll also end your game, because Nick's truck will be destroyed by a thug armed with grenade launcher, which appears on the roof of the laboratory.
So turn to the right when closing to red barrels, by-pass them and hit the supporting cables (beams) on the left.
If everything goes as planned the laboratory should collapse completely now.
Then begins the next cut scene. Both hostages (Crane and Dorothy) are set free. Redheaded John informs our driver that the bomb in Cheetah has been neutralized and asks Nick to take his rocket propelled truck to Bridgeport for him. Nick, Dakota, Crane and Dorothy are going to the bar to Mi-Wuk-Village, to celebrate this great victory over Storm Express thugs.
During this meeting Dorothy shows Dakota a folder of documents about Storm Express company she has managed to find, while she was in the laboratory. These docs exposes clearly that ... the fat man Cochrane stays behind all of this! He was a true owner of Storm Express, he killed Murdoc when this thug stopped being useful and that was him, who tried to frame Nick for that murder!
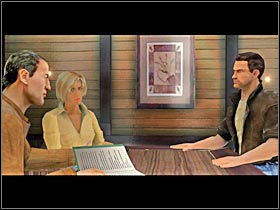
And now Crane discreetly decamps only to steal Dakota's truck and try to kill you all by crashing half the bar.
You have to get him before he picks you off one by one - this is the last mission of the storyline. Crane tries to escape in Dakota's truck, but you shouldn't have any problems with capturing him, because Nick still got a rocket-propelled Cheetah at his disposition. I'd suggest saving your game status right after taking a seat behind the Cheetah's wheel. A moment later turn on the engine and follow Crane by the road - he escapes towards Manteca (in all probability).
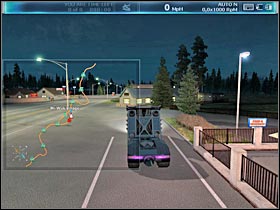
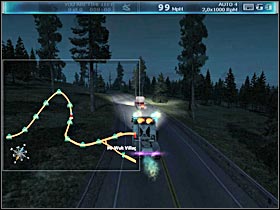
You should be able to get close to him in just dozen of seconds. Just use your NITRO booster on some straight stretch of the road to quickly catch up with the evader.
When you're really close to him... his car simply explodes - this is the end of the pursuit.
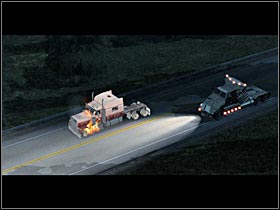
And the end of the story too. You should be awarded with both "Trucker of the Year" title and the Golden Bison award. But you can also play more, perambulate round virtual California in your truck (unfortunately Cheetah returns to its rightful owner). You can also still run your business, make deliveries or other additional tasks. The firm's account should be filled with a sum of 500k of $.
For all of you, owners of the Russian version of a game, who got frustrated and disorientated with Russian names of American towns on mini-map, but American names on road signs, I've prepared this map. Apart from translating all Russian names, I've also marked on it - as precisely as I can - all the repair shops. Note, that most of them are located on truck stops, which means that you can find near them also a motel, gas station or one of "60 miles" bars. There's also a secret road marked on my map - though what secret is it, if you can't find it only on map in the main menu, but it is marked on your mini-map when driving a truck. This is the road with number "120", which leads from Manteca to Bridgeport through Mi-Wuk Village. Don't bother thinking about other "secret roads" - they are usually short road exits that lead to factories, etc, so to places connected only with some missions/orders. On my map you can also find the main office (located in Oxnard) of Nick Trucking Spedition Company (your company), which is marked with an icon of a green monitor. San Francisco is the one and only town in the R'n'R universe where you won't find any truck stop with a repair shop, nor a warehouse. As for gas stations and fuel prices offered by them - they differ, but at the beginning of your gameplay you have no choice, and you must refuel very often, without searching for the cheapest station. At least until you buy a tank with increased capacity - then you can be more choosy. All the time remember about a possibility of changing the mini-map scale during your journey: bigger zoom in decisively makes easiest orientating on road exits and in cities, in a morass of their roads.
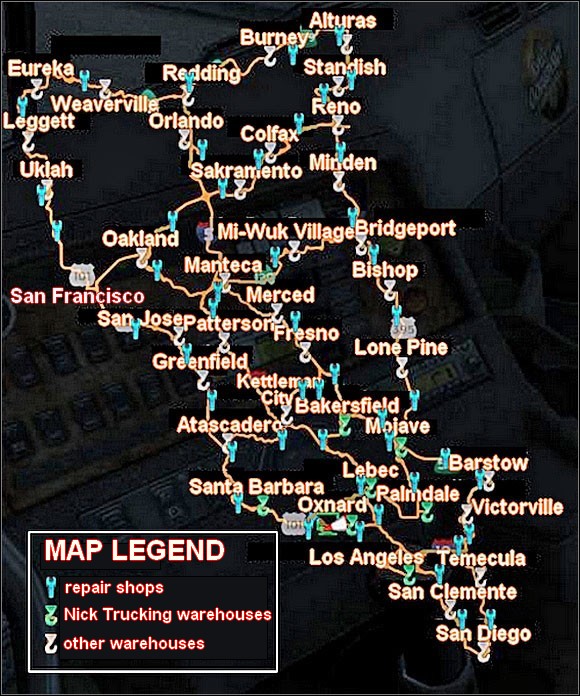
 RignRoll Game Guide & Walkthrough
 Risen Game Guide & Walkthrough
 Reus Game Guide & Walkthrough
 Risen 2: Dark Waters Game Guide & Walkthrough
 Risen 3: Titan Lords Game Guide & Walkthrough