

Harvestable items such as wheat, melons, and pumpkins fit the raw definition of Minecraft farming by requiring well-irrigated farmland. Follow these general steps to set up a farm:
Find a well-lit area made of grass or dirt.
If the area isn’t well lit, craft some torches. A flat workspace makes this task easier, though it isn’t mandatory.
Craft a gardening hoe and use it.
You can right-click the ground to use the hoe to till farmland.
Locate a water source nearby, and then right-click it while holding a bucket. Right-click again while holding the full bucket to dump the water near your crops.
Dig an irrigated hole or canal in your future farm, allowing any nearby farmland to thrive. Dry farmland grows more slowly and wears out after too much time passes without crops being planted on it.
Lock up your farm.
Jumping on farmland destroys it. Keep crops safe from animals and mobs by building walls around the crops. Fences and fence gates work well.
Rabbits in particular can eat crops quickly, so build a fence around your crops. After these steps are finished, you’re ready to harvest crops!
Wheat, carrots, and potatoes are relatively simple to farm. Simply follow these steps:
Collect seeds and vegetables.
Breaking tall grass blocks or tilling grass blocks sometimes provides wheat seeds. You can find carrots and potatoes in villages or by killing zombies.
Right-click the farmland to plant seeds, carrots, or potatoes.
Tiny, green stems appear on the block.
Wait until the crops are fully grown. Speed up this process by using bone meal or artificial light.
Wheat is mostly yellow and brown when it’s fully grown, and carrots and potatoes are ready to harvest when the heads of the vegetables begin to emerge. Work on other tasks while you wait. You can also use bone meal (crafted from skeleton bones) to grow crops instantly.
Adding bone meal by right-clicking the crop with bone meal makes it grow one stage, significantly decreasing the growing time. Also, crops grow only with light. To supplement natural sunlight, place torches or glowstone around your farms.
Break the crop blocks to obtain your profit.
Replant seeds, carrots, and potatoes until your farmland is refilled, and keep the remainder as profit. The figure shows a thriving farm.
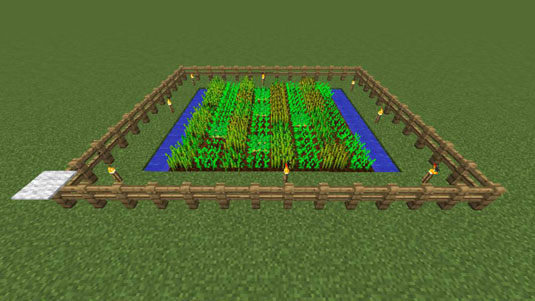
Using this strategy, you can start a farm that obtains items for you while you go out and enjoy the game.
Rather than place fence gates, you can place carpets on top of your fence. Mobs, including animals, don’t see the carpet as a block that they can jump on, but you can jump on the carpet to get in and out of your cropland. This strategy is particularly helpful when farming animals, because it prevents animals from leaving through a fence gate.
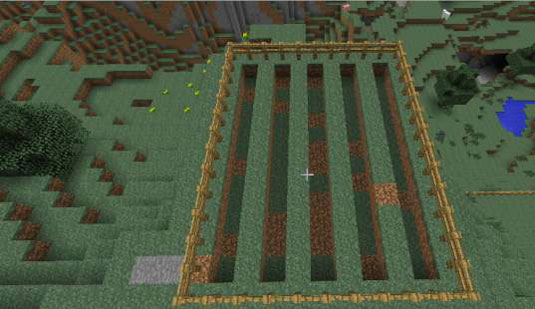
Growing large plants such as melons and pumpkins takes quite a bit of work. Follow these steps to start a farm similar to the one shown:
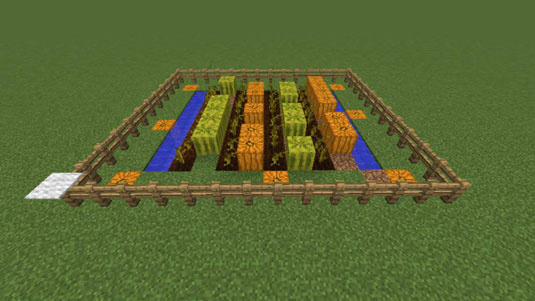
Collect seeds.
You can find both melon and pumpkin seeds in treasure chests hidden in abandoned mineshafts. In addition, naturally found pumpkins can be crafted into seeds. Melon seeds can be crafted from melon slices, which you can get by trading with villagers.
Right-click the farmland to plant seeds.
Unlike wheat, this farmland has to be adjacent to grass or dirt. When these seeds grow into stalks, they tip over and grow melons or pumpkins next to them. To grow lots of melons or pumpkins, till a row of farmland next to a row of dirt, with water pools spaced throughout.
Wait.
Using bone meal on seeds speeds them into mature stalks, though they don’t yet bear fruit. Pumpkins and melons take a while to grow. Ensure that these crops have growing space, and work on other tasks in the meantime.
Harvest the crops.
Don’t break the stalk blocks — instead, break the pumpkin and melon blocks that appear nearby. If you’ve grown pumpkins, you can craft them into pumpkin seeds to expand your farm. If you’ve grown melons, breaking the blocks produces melon slices that can be eaten or crafted into seeds.

 How to Choose a Base in Minecraft - For Dummies
 How to Make the Most of Food in Minecraft - For Dummies
 5 Minecraft Enemies and How to Defeat Them - For Dummies
 How to Obtain, Program and Activate a Command Block in Minecraft - For Dummies
 How to Prepare the Land for Your Minecraft Farm - For Dummies