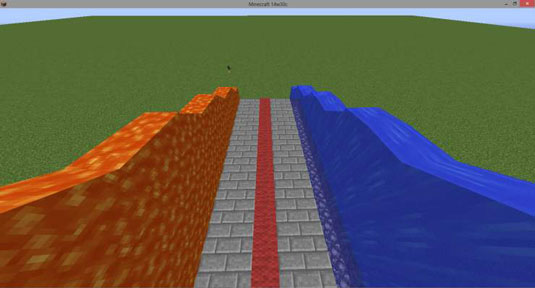
In addition to solid blocks in Minecraft, liquids such as water and lava make for eye-catching decorations. You can use water and lava buckets to make fountains, canals, moats, and more.
Fountains are pretty popular in Minecraft. You can make one using either water or lava that falls from a few source blocks. Many times, a fountain is just a single block of water that spills down a few blocks and makes a neat pattern. However, you can use a few blocks of liquid in all sorts of creative ways.
To bend water and lava to your creation, follow these steps:
Gather some buckets of water or lava.
You can use both water and lava, if you want — just make sure that the two never touch, or else they’ll combine to form unwanted stone, cobblestone, or obsidian (depending on the arrangement).
Place the liquid at the top of the stream you want to create.
Place more source blocks if there’s a gap in the water.
Block off any parts of the current that go somewhere you don’t want them to.
For example, if a waterfall spills all over the ground, build a little cup around the base of the stream to contain it.
Place blocks in the liquid’s path to change its course.
Whether you use single blocks or trails, you can direct liquids around however you want. Try out several different arrangements in order to get the creation you want.
Repeat Steps 3 and 4 until you have the shape you like.
Add more source blocks, if you want.
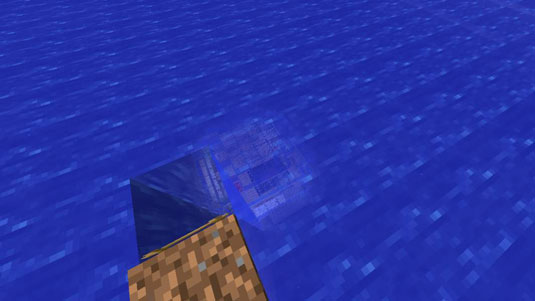
If you’ve ever wanted to live under the sea, now’s your chance. You just need to know a few things before you get started:
You want your rooms to be free of water.
You can hold your breath for only so long.
You are slow when underwater.
It’s tricky to build an underwater structure, but it can be done.
Your best bet for clearing out water is sponges, which can soak up a lot of water at a time and be dried out in a furnace. If you don’t have many sponges, you’ll want lots of cheap, easily destroyed blocks, like sand. Source blocks are destroyed by placing solid blocks inside them, so you can fill your rooms up with temporary blocks to blot out all the water.
However, you still have the problem of staying underwater and building effectively for an extended period. Fortunately, you can use an enchanting table to enchant armor with some useful abilities:
Respiration: This enchantment is for your helmet that lets you hold your breath much longer and see clearly underwater. If you get the highest possible level (Respiration III), you can stay underwater for an extra 45 seconds without taking damage.
Aqua Affinity: This enchantment, another one for your helmet, lets you destroy blocks underwater just as quickly as you can above water.
Depth Strider: This enchantment is for your boots. With this enchantment, you can move much faster underwater. The highest possible level (Depth Strider III) lets you move as fast as you can on land, though you can’t sprint underwater.
When you’re ready, you can begin building your masterpiece under the sea. The process for underwater construction is a bit different if you’ve chanced upon some sponges. It turns out that getting sponges is very tricky, requiring that you go to a water temple. Sponges can be found in sponge rooms which are randomly generated in the water temple, or, one is dropped when you kill an elder guardian.
If you have some sponges to use, just follow these steps:
Go underwater and start building the exterior of your structure.
Construct all the floors, walls, and ceilings.
Keep building until all the walls and ceilings are finished.
Make sure that no more water can enter your structure. If you miss a spot, don’t worry — the problem will go away if you just patch up the part that’s leaking.
Enter your building.
It’s probably full of water right now. Remember that water can’t pass through doors, fence gates, and the like — you can build a gateway right out into the ocean, if you want.
Place a furnace in your building.
You can ignore this step if you have a lot of dry sponges.
Put sponges next to the water source blocks.
This step soaks up the water and converts your sponges into wet sponges.
If water remains, put your wet sponges into the furnace.
By cooking wet sponges, you can dry them out so that they’re ready to use again.
Continue soaking up the water until it’s all cleared out.
Destroy all the sponges.
Continue designing the interior of your structure.
If you don’t have sponges to follow these steps, you have to rely on a slower method:
Grab the necessary building materials, along with a bunch of dirt or sand blocks.
Both dirt and sand have their advantages, but it’s a good idea to use sand — it’s affected by gravity, so it can easily complete Step 4. Besides, you can destroy whole columns of sand quickly by destroying the bottom block and immediately replacing it with a torch or pressure plate or another nonsolid block.
Build the floors and walls of your structure.
Fill up the entire structure with the dirt or sand blocks.
Build the ceiling of your structure, and be sure to fill any gaps with dirt or sand.
Enter the structure.
Destroy all excess dirt and sand, revealing a water-free interior.
Get rid of any leftover water by picking it up with buckets, or by placing blocks in the sources.
Decorate the interior of your structure.

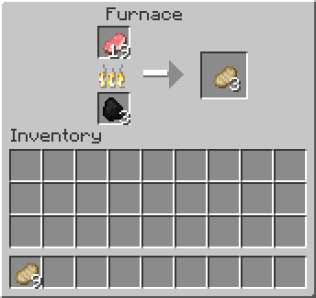 How to Use the Furnace in Minecraft - For Dummies
 How to Build a Tower in Minecraft Modding - For Dummies
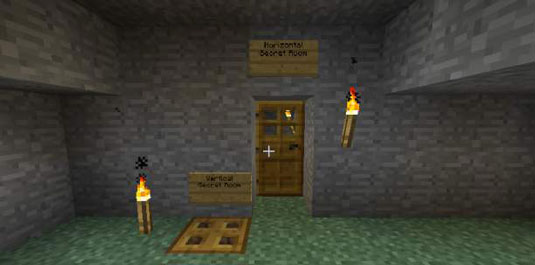 How to Make a Secret Room in Minecraft - For Dummies
 Designing Your Minecraft Minigame - For Dummies
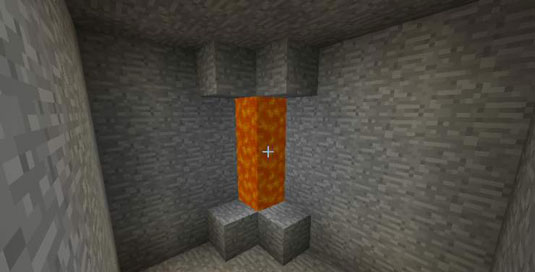 How to Use Lava as Light in Your Minecraft Build - For Dummies