

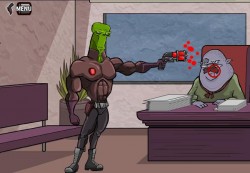
 A Small Favor is an excellent flash adventure, one that deservedly received the game of the day award from our website. I have now created a walkthrough for the game since, let’s be honest: A Small Favor is not the easiest game out there, is it? No, so if you ever get stuck somewhere, check out the step by step walkthrough below and you will finish the game in no time!
1. Click on cigar and pistol, then click on the red generator to the left. Click on the gray door.
2. Click on “Menu,” select the cigar and use it with the monster. Click on the green hose to take it. Click on the gun and click the monster. Read the text and click on the gun again to holster.
3. Click on the gray door to the left to get outside.
4. Click on the water pipe to the left then go right to the next screen.
5. Move right just a bit and a doll’s head will be revealed on the rock to the left. Pick it up then continue going right.
6. Click on Menu and select the water hose. Click on the faucet and wait for a while. To the right of the screen, a round thing comes up. Click on it to get a key.
7. Go left two screens and click on the entrance to the Transit (it’s the gray door to the left of the screen).
8. In order to deactivate your weapon, click twice on the gray screen above the blue table. Move towards the lasers and pass by.
9. Now you have to memorize the symbol to the left of the screen. In my case, it was a triangle. Then click on the red alarm button on the wall.
10. Click on the Trading Post. Select the doll’s head from the menu and click on the appropriate spot. Select the plug to get it. Then go to the room to the left.
11. In the lower left corner of the room is a garbage bin. Click on it to get a bottle.
12. Click on the two aliens to talk to them. Click on the power outlet near the sofa. When the new screen pops up, click on Menu and select the plug you have bought. Click on the outlet again and press the X. Go down the stairs to the left.
13. Move forward a bit to reveal the fan controller (it’s a gray thing above the stairs) and click on it. Click again to turn the fans off and press the “X”.
14. Click on the locker without yellow lights and pick up the coffee. Go to the locker to the left and open it with the code 4827. Pick up the coffee mug. Then, notice that there’s a thing glued to the door of that locker. Click on it and select the symbol you have memorized. Memorize the placement of the lights.
15. Click on the green pad and use the correct combination of lights to turn the lasers off. Click on the red thing to charge your gun and go back upstairs.
16. Click on Menu and select the coffee. Click on the coffee machine. Click on the menu again and use the mug with the machine. Click on the red X button. Select the new coffee from the inventory and give it to the guard. Follow it to the bathroom and shoot it.
17. Without holstering the weapon, click on the vent twice and shoot the power supply (the red thing). Go back, holster your weapon and click on the garbage bin for some popcorn. Exit the bathroom.
18. Click on the door the guard was guarding. Click on the weapon to draw it, then click it again to holster. Click on the green vial to pick it up, then shoot Milos with your gun. Exit the room
19. Go all the way back to the fountain you first turned on, then one screen to the right. Click on the big box.
20. Click on the guitar to take it. From the inventory, give the green vial to the Monster. Once you get the bomb, shoot the monster and pick up the suitcase. Holster the weapon and go left all the way to the Transit Entrance.
21. Deactivate your weapon again and head to the trader. Trade the empty bottle for the doll’s head and the guitar for the sock. After that, use the bomb with the trader to kill it.
22. Go left and re-charge your weapon, then go right back to the trader’s office and click on the door to the right – you will reach building 9.
23. Talk with the big snake then go to the Menu and get the popcorn. Click the menu again and combine popcorn with sock. Then combine the result with the doll head. Then get the doll and click on the snake.
24. Go to the panel to the left and use the key to open it. Click all the six buttons to the right (you have to switch the plug on each row to do it) until they all turn green, then click the red switch to the upper left corner. Move both sliders to the bottom right all the way to the right. Then, press the left arrow, the button and the right arrow. Get the chip.
25. Give the chip to the worm that gave you the key (near the fountain), take the hacked one and go back to the transit room and give the briefcase to the dog. Charge your weapon again then go back to building 9 and put the hacked chip back in. Enter building 9.
26. Enter the first room and click on the red thermometer on the wall. Click on the right arrow until it reaches red. Get out and enter the third room. Pick up the metal mug and go to the first room again. Click on the microwave oven and put the mug in. After it explodes, click on the thermometer again and lower the temperature.
27. Go through the hole and pick up the red badge on the floor. Then click on the fishtank to see the code (173) then go out.
28. Enter the fourth door and click on the green computer. Select “book”, then “swap”. Enter code 173 and exit the computer. Enter the room to the right and shoot the senator.
This was the walkthrough for the great flash adventure game A Small Favor. If you have any questions, don’t hesitate to ask!
 BioWare and Dragon Age Panel: The Future of Dragon Age
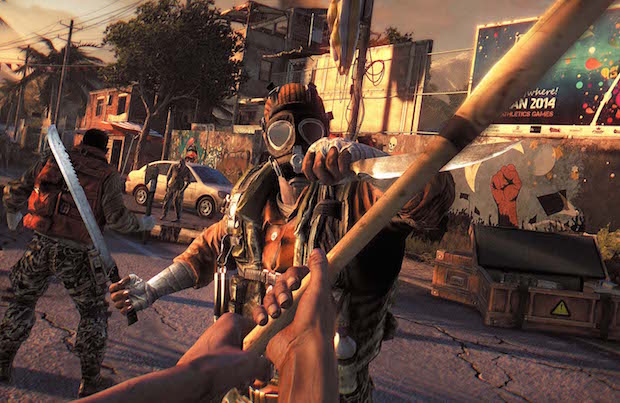 Dying Light Guide: Farming Nighttime Zombies for Fast Money and XP
 Final Fantasy XV Wiki – Everything you need to know about the game .
 How to fix Pro Evolution Soccer 2015 PC DLL Error, Low FPS Issue, Crashes, Controller Issue and more
 BREAKING: Fork Parker Reveals Hotline Miami not part of Bad Boys franchise