SWTOR 3.0 Immortal Juggernaut Tanking Guide by Artorias of Ebon Hawk. Updated August 2, 2015 for Patch 3.3
Contents
Immortal is one of the three tanking Disciplines to choose from. Similarly to the other two, it has its own play style and stat specialization. If you take a good look at the Discipline’s passives and the name of the Guardian spec; ‘Defense’, it gives you a fair idea where your priorities lie. The spec has a few rules to abide by both in single-target and AOE situations. We’ll touch on those as we go.
The outlines utilities make use of buffs to assist your job in assisting and protecting the group you are in. You can also choose to take the self cleanse on Enraged Defense, how ever this job should be fulfilled by your healers to allow you to take a more worthy utility. Intimidating Presence above all other utilities is necessary and should always be taken.
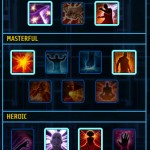
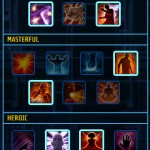
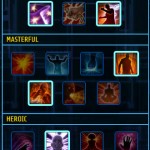
Skillful
Masterful
Heroic
The following are varients of your utilities you can take to assist assist against boss mechanics.
Accuracy: 10% given from Tank Stance + 1% Companion buff = 101% Melee Accuracy
Tank Mitigation: Defense is the main component of your gearing and shares a tertiary slot in your gear against Absorb, as such for mods, implants, earpiece and enhancements, you will need to decide between Defense and Absorb. Shield is separate and as such is passively stacked along with these stats.
Priority for statting: Defense > Shield > Absorb
A goal to start heading towards in 186’s from the Yavin Vendor:
This goal was taken from KeyboardNinja’s optimal tank distribution board and is someone I personally consolidate with for tanking matters and discussion.
Augments: Unlike the other roles (DPS, Healers), your augments are not predetermined and will change due to drastic gear changes you will go through while upgrading your gear. As such you will need to constantly look to your stat pool and see if you’re too low or high on certain stats and make adjustments accordingly.
Set Bonus: Set Bonus is of course the War Leader 6-piece set bonus, purchased from the Strength Vendors. Unlike prior updates, Alacrity and Accuracy are not present in these gear sets and as such these stats should not find themselves into your gear.
Armorings will be high endurance due to your set bonus but you should take Might Hilt and Armorings in your non set bonus pieces which contribute to things such as your Enraged Defense Heals and Sonic Barrier threshold (works off of Force Healing which increases with your strength level).
Mods: Should be unlettered mods. The name should read Resilient Mod 36, not Resilient Mod 36A. Unlettered mods are optimized and give the best stat gain of their field.
Enhancements: Immunity and Sturdiness enhancements have made a return. These enhancements were not available in the (162) Arkanian gear tier all the way to (186) Dread Master. These enhancements are high mitigation similar to the unlettered mods and again, give the best stat gain of their field both for absorb and defense.
Relics: Fortunate Redoubt (Defense Rating) and Reactive Warding (X amount of Absorb Shield).
Form: Soresu
The Immortal Discipline has no stack maintaining unlike Shield Specialist and Darkness. It how ever has the maintaining of passive buffs that will replenish due to procs or rotation. The sooner these can be reapplied and maintained the better, once these are constantly kept active, your resistance to incoming damage is increased as a whole via increasing your various mitigation ratings and granting flat Damage Reduction buffs and absorb shields similar to the Reactive Warding Relic.
Buffs
Debuffs
Juggernaut tanking is about maintaining your buffs and reapplying them as they come off cooldown. Unlike the other tanks you wont be dealing with stacks (besides Revenge) to make your mitigation increase over time as you deal and receive damage.
The rotation isn’t too dynamic and has a rough outline you can continue to follow as abilities do not have a hard premature reset via a proc or ability use, giving you a rough priority system you can follow. The main ability that will grant your two most utilized buffs and buffs that will maintain a near 100% uptime is Aegis Assault, which in turn will build your Rage. Force Scream is also useful when granting Sonic Barrier, allowing you to withstand a decent percentage of the next incoming attack. Retaliation will grant your Blade Barricade, increasing your main mitigation pools percentage. Crushing Blow now applies Impaired to your enemy, reducing the effectiveness of their Force and Tech abilities. Smash will reduce the active accuracy of your target, allowing the chance for them to miss + chance for you to dodge to increase on top of Blade Barrier.
Abilities highlighted in green are new for 3.0
 Aegis Assault: Grants 3% damage reduction and 3% Shield Absorption. Grants 7 Rage. Deals minimal damage and threat but grants two of your most important mitigation buffs, both lasting 20 seconds.
 Force Scream: Deals kinetic damage and is a high priority. Sonic Barrier applied will fully absorb a partial amount of the incoming damage while it is active. Once the capacity of its barrier is reached, it will fade prematurely, lasting 10 seconds upon every use.
 Retaliation is off of the global cooldown in Immortal Spec. Retalition grants Blade Barricade, increasing defense chance by 5% for 10 seconds. With Retalition being a 5 seconds cooldown, there is no reason why a 100% uptime cannot be maintained while doing your rotation.
 Crushing Blow has been buffed significantly in damage output and is now your hardest hitting ability, more so than even the 3rd tick of Ravage. It is the best damaging-threat generator you have and is also an AOE when Aegis Assault buff is present on you.
 Smash: One of your two AOE abilities and strikes up to 8 enemies, applying the accuracy reduction to them which lasts 45 seconds. This ability is 360o centered on yourself.
 Sweeping Slash: Deals lower damage than Smash, applies Accuracy reduction and trauma and has no cooldown. This ability is a 180o frontal cone
 Backhand does not apply any buffs but is routine for your threat generation. It generates the second highest threat of your damaging abilities and does not have a cost tied to it.
Ravage has had its damage output reduced and Cooldown shortened. As such it can be used a lot more often but generates a lot less threat than before.
Backhand does not apply any buffs but is routine for your threat generation. It generates the second highest threat of your damaging abilities and does not have a cost tied to it.
Ravage has had its damage output reduced and Cooldown shortened. As such it can be used a lot more often but generates a lot less threat than before.
 Force Choke deals slightly less damage than assault but generates 1 more Rage. As the spec now functions to give you plenty of Rage, it’s a small filler/DoT and is not as fundamental now as it was before.
 Force Push deals slightly more damage than Assault, but generates no Rage. It is a simple filler for you to use if you need to bridge a GCD but you do not require Rage.
 Saber Throw is used for striking ranged targets and grants 3 Rage. Does decent damage but not decent threat, as such it has no place in the opener.
 Vicious Throw deals slightly less damage than the buffed Crushing Blow and costs 1 less Rage, best used on cooldown if it does not delay the reapplication of your buffs.
 Vicious Slash is your best filler most of the time behind Vicious Throw. It does little threat and little damage as such as no place in the opener.
 Assault builds 2 rage but does mediocre damage and threat. Due to how generous the spec is and due to Revenge, this is next to never used.
Raid Buffs
Managing your cooldowns and using the correct cooldowns are what makes you a good tank. Mindlessly pressing a purple or red button to mitigate an incoming attack or bounce back from a massive spike is not the mentality you want to go through. Each cooldown has its own damage type it specializes in defending against, if you can learn which cooldown to pair with which damage you’re taking, you can reduce your damage taken even further. It takes practise to understand what damage is being applied.
 Saber Reflect: Reflects all single target Ranged, Force and Tech damage back to the user. AOE’s and raw Melee damage are not fended against. Saber Reflect is possibly one of your best cooldowns as you literally take no damage for its duration if the damage you’re taken respects the damage types its built against. It can either mitigate a series of attacks and allow you to come out unharmed or it can be your trump card against an ability that can deal mortal damage to even you. Lasts 5 seconds, 1 minute cooldown.
Saber Ward: Increases Ranged and Melee Defense and reduces all Force and Tech damage taken. Ward is used against Blasters and Sabers to put it simply. Damage that can be dodged is what Ward specializes in. Ward will allow you to take no damage when it kicks in, allowing the incoming Melee and Ranged damage to miss you entirely. Any Force or Tech abilities that fall into an enemies rotation that hit you will also be reduced in their effectiveness but Ward should not be used to mitigate these Force and Tech Abilities entirely. Lasts 12 seconds, 2:30 minute cooldown.
Invincible: Is the other side of the spectrum in regards to Ward’s use. I mentioned above Ward should not be used to purely defend against the Force and Tech damage you’re taking so it works against things such as Force Lightning and Missiles and Explosions. This is where Invincible plays in. Since Force and Tech attacks cannot be dodged, just reduced in effectiveness, Invincible plays into a better role than Saber Ward. Saber Ward reduces their effective damage by 25% where as Invincible reduces it by 40%. Thus if your enemy is hitting you purely with Force and Tech attacks, Ward will do a worse job than Invincible. As such when dealing with pure Tech and Force users, Invincible falls into a higher priority. Lasts 10 seconds (12 with set bonus), 2:30 minute cooldown.
Saber Reflect: Reflects all single target Ranged, Force and Tech damage back to the user. AOE’s and raw Melee damage are not fended against. Saber Reflect is possibly one of your best cooldowns as you literally take no damage for its duration if the damage you’re taken respects the damage types its built against. It can either mitigate a series of attacks and allow you to come out unharmed or it can be your trump card against an ability that can deal mortal damage to even you. Lasts 5 seconds, 1 minute cooldown.
Saber Ward: Increases Ranged and Melee Defense and reduces all Force and Tech damage taken. Ward is used against Blasters and Sabers to put it simply. Damage that can be dodged is what Ward specializes in. Ward will allow you to take no damage when it kicks in, allowing the incoming Melee and Ranged damage to miss you entirely. Any Force or Tech abilities that fall into an enemies rotation that hit you will also be reduced in their effectiveness but Ward should not be used to mitigate these Force and Tech Abilities entirely. Lasts 12 seconds, 2:30 minute cooldown.
Invincible: Is the other side of the spectrum in regards to Ward’s use. I mentioned above Ward should not be used to purely defend against the Force and Tech damage you’re taking so it works against things such as Force Lightning and Missiles and Explosions. This is where Invincible plays in. Since Force and Tech attacks cannot be dodged, just reduced in effectiveness, Invincible plays into a better role than Saber Ward. Saber Ward reduces their effective damage by 25% where as Invincible reduces it by 40%. Thus if your enemy is hitting you purely with Force and Tech attacks, Ward will do a worse job than Invincible. As such when dealing with pure Tech and Force users, Invincible falls into a higher priority. Lasts 10 seconds (12 with set bonus), 2:30 minute cooldown.
 Endure Pain: Is your loan shark Cooldown, giving you added comfort when bouncing back from a big spike. How ever this cooldown is only as effective as your healers ability to make up for the breathing room it has given you and more. Endure Pain is a good cooldown to use in the higher percentages of your health rather than the lower. If used in the lower numbers, its dropping off could prove very destructive, leaving you with little health to work with. It is worth noting you should communicate with your healers on the duration left of Endure Pain as well as the fact you use it, for example “Endure falling off in 5 secs, need heals.” is enough for them to get you some extra health back so you don’t dip too low. Lasts 20 seconds, 1 minute cooldown.
 Enraged Defense: A stacked buff that reduces in number as it replenishes your health. Enraged Defense is on the same level as Endure as a ‘soft’ cooldown. Not doing a lot to fend against massive hits, but Enraged Defense can top you up or at least balance out incoming hits if the heals are in the rough area of the next ten hits. Enraged Defense has a short duration and as such should be planned with care, letting all 10 charges linger and fall is a waste. Lasts 10 seconds, 2 minute cooldown (1:30 with Utility).
 Blade Turning (Passive): A buff exclusive to Juggernaut. This passive increases all Ranged and Melee defense by 100% for 1-2 seconds depending on set bonus when Saber Ward is activated. This Buff allows you to take no damage at all from the right damage types. If you try and use Blade Turning purely to fend against a massive Force or Tech hit, it’ll only be reduced by the 25% protection that ward provides.
Adrenal: You should be using the Rakata or Exotech Absorb Adrenal. This Adrenal increases your armor rating and thus gives a flat damage reduction to all attacks that are not Internal or Elemental (both circumvent armor rating). The Nano-infused and Anodyne increase your Shield and Absorb chance, emphasis on chance as the potential buff of the adrenal will not be 100% active as opposed to the armor rating increase which will mitigate all the right damage types. The Adonyne and Nano-infused adrenals are worse than Rakata and Exotech, also keep in mind Rakata is reusable and is better for you in every way.
Blade Turning (Passive): A buff exclusive to Juggernaut. This passive increases all Ranged and Melee defense by 100% for 1-2 seconds depending on set bonus when Saber Ward is activated. This Buff allows you to take no damage at all from the right damage types. If you try and use Blade Turning purely to fend against a massive Force or Tech hit, it’ll only be reduced by the 25% protection that ward provides.
Adrenal: You should be using the Rakata or Exotech Absorb Adrenal. This Adrenal increases your armor rating and thus gives a flat damage reduction to all attacks that are not Internal or Elemental (both circumvent armor rating). The Nano-infused and Anodyne increase your Shield and Absorb chance, emphasis on chance as the potential buff of the adrenal will not be 100% active as opposed to the armor rating increase which will mitigate all the right damage types. The Adonyne and Nano-infused adrenals are worse than Rakata and Exotech, also keep in mind Rakata is reusable and is better for you in every way.
When opening a fight, it is fundamental to hold aggro on the target and ensure all the damage the enemy is throwing out is on you. As such threat is what you worry about and it’s why certain abilities are used (or even not used) to ensure you’re generating high enough numbers against the massive opening bursts your DPS are doing.
Ability Priority:

The opener above is used purely to make the most threat in the short amount of time you have before the DPS threat catches up and over takes you. Force Charge will close the gap to your target while Enrage grants extra rage to spend, circumventing the use of Aegis in the early opening stage. Crushing Blow generates the highest threat of your abilities follow by Backhand, the second highest. Smash then applies your accuracy reduction and deals the third highest threat.
Saber Reflect is deterministic in its threat generation. The threat generation of Intimidating Presence only occurs AFTER you take damage, as such if you take damage in an earlier stage of the opener, pop Reflect as soon as this happens. How ever if Reflect has use later on to mitigate a big attack or several attacks, its best to remove it from your opener but you lose a rough 10,000 Threat as a result. Force Scream and Retaliation do near exact same threat, Scream has a more useful and applies a buff with a shorter uptime as such, it’s best to get that on the CD as soon as possible.
Retaliation will apply your blade barricade, thus your two defense buffs (accuracy and barricade) are now in play. At this time, your big threat abilities are burned and you’re going to be in a down time threat wise, hence Taunt is used to boost Threat numbers and forcing the target to attack you for 6 straight seconds, allowing you to fit Ravage and Aegis in, now all your buffs are flowing freely. It is time to reapply Sonic Barrier and Blade Barricade and spike your threat with Crushing Blow and secure it with Threatening Scream (AOE Taunt).
You may be asking; “Why don’t I use saber throw?” The answer is that Saber Throw generates barely any threat, only a bit more than Force Leap. In 3.0, the Rage generation of the spec is massive and you do not need any more Rage than what Leap and Enrage grants. You’re delaying the Threat generation of your rotation by 1.5 seconds, which is all the room a DPS needs to rip aggro from you. Saber Throw does a lot more harm than good. It does have its use.
When Opening from range and letting the boss gap close to you rather than you to them (rare cases where this occurs example; Dread Master Tyrans or The Dread Council). You substitute Saber Throw for Force Charge, you will build the exact same amount of Rage and do a small bit more threat in comparison. But there is only room for either your gap closer or a Saber Throw, not both.

The above rotation is roughly you’ll be following, not precisely in this order but due to how the opener is handled, you’ll notice abilities coming off cooldown in a certain order and if you are not Rage starved or dealing with a large down time, you’ll see a rotation form.
When engaging in AOE situations, the rotations will all depend on your current standing of Aegis. Aegis Assault is what turns your Crushing Blow into an AOE rather than your target having Armor Reduction which is no longer applies by the Tanking Discipline.

With Aegis active going into an AOE situation, the AOE threat generation is vastly easier due to the fact Crushing Blow deals a massive amount of threat and the damage cap of 8 targets meaning you’ll be hitting all possible targets in your vicinity without problem. Following this is Smash, your next biggest threat generator with the Accuracy debuff following Impaired as well as some sweeping slashes for fluff threat. Once you take damage from enough targets to satisfy you, Saber Reflect can be used to shoot up your threat as well as Taunt to secure their aggro for 6 seconds. Finally, the use of Aegis or Enrage to rebuild Rage.
Without Aegis, you may need to delay Aegis Assault and Crushing blow further down the line due to the terrible threat generation it provides. In response to this, it is ideal to use Smash and some Sweeping Slash threat fluff before popping AOE Taunt to lock in mandatory aggro, followed by Saber Reflect to spike your threat. Aegis and Crushing Blow will fall inside this massive threat window as well as some Sweeping Slashes for added damage.
Your AOE threat will only work with the use of Crushing Blow or Reflect, the lack of both will leave a very weak threat generation and target loss, meaning you’ll not be the priority of your enemies, and DPS or healers will.
Things to Know when Tanking
Tanks are like any other role, you need to know how it works before you step foot into an instance. When you’re leveling you should get an idea of how your rotation works i.e. buffs, gaining stacks, what CD’s affect what abilities/damage and so on.
Becoming a tank is not impossible but difficult if you are not ready to learn the basic mechanics of combat. A tank first of all should sit down and look at the class they’re playing as many of the tanks diversify in play style, not by a lot but enough that each tank will feel unique, which is good. To get a better idea of how your tank operates, again look at your skill tree and buffs, even the tank specs tell you how you should be gearing also: Defense Guardian, Shield Specialist Vanguard and so on. But regardless let’s start from scratch.
Learn about threat. It is the mechanic which the entire premise of tanking is based upon. Your job as a tank is to control the boss and make it that the other roles can do their job without having to worry about survival or positioning. Threat is what determines if the boss is looking at you or them, make sure you and your co-tank are the top of the aggro table. Taunt and your rotation determine your aggro and the effectiveness of your rotation will determine how solid your threat is, hence why you see people discussing; AOE threat, high threat opener etc. It’s so they can ensure that upon engaging a target, that target will be fixated on them from beginning to end. And for the love of Lana Beniko’s butt use Target of Target! (Enable it in UI Editor)
Learn about basic mechanics of fights and how to work with them. Fights in this game are not too different from one another. You’ll need to swap, reposition, kite, aim frontal cones away from the raid and pick up adds. If you master these points then you can adapt to any fight.
Learn your rotation to ensure your DTPS (Damage Taken Per Second) is as low as possible. The buffs you gain as a tank are there to minimize incoming damage while not having to resort to your Cooldowns, this is your priority once threat is secure. Rolling these buffs and making sure your damage intake is as low as possible (I.e maintaining Dark Bulwark, Heat Screen or Sonic Barrier.)
Learn when to use your cooldowns. Popping Saber Ward then beginning the fight is the worst thing you can do. Cooldowns are not there to make you remain at 100% for the opening of a fight, they’re there mostly to bounce back from a huge spike or incoming spike. Popping them when damage intake is low so you can maintain a 85%> HP is not needed,
Learn to use Guard effectively and why it is used on certain targets. There is a reason for everything when tanking, DPS always get guarded with the exception of maybe 2 fights in End Game. DPS are guarded NOT for the Damage Reduction, it’s used for the 25% threat output reduction so you do not get pulled off of.
Know when to taunt and when not to taunt. If you’re the main tank, taunting to gain some added threat is fine, but taunting off your co-tank when they’re holding the boss if you are not asked or it is unjustified should never be done. You should also not neglect threat generation while not being the target of the boss, if you do a poor job, once the threat debuff fades, you’ll lose aggro.
Know how to gear. I touched on this above, your class gives HUGE hints of how to prioritise your gearing. If that wasn’t obvious enough read KeyboardNinja’s ideal tank stat distribution.
Lastly, don’t take advice with salt. Tanking takes work, you will make mistakes, a lot. But bounce back from them, accept them and better yourself. Don’t be deluded and think that a DPS pulling aggro is their fault or you not kiting a boss into a mechanic correctly was due to a bug. If you admit your mistakes, you will become a good tank, if you blame everyone but you, you’ll be nothing better than that of a Black Talon tank at the end of the day.
About the Author
My in game name is Artorias/Sinais, depending on which faction you’re on of course. You may have seen me on the forums or /r/SWTOR as Luckygunslinger. I raid with Aisthesis on the Ebon Hawk and have been playing Juggernaut since 1.3 and DPS spec since 1.5 all the way until 3.0. I’ve been tanking as well as DPS’ing on my Juggernaut and Guardian and have been for a long time, tanking from SM’s all the way to Nightmare content.


 SWTOR 3.0 Sharpshooter Gunslinger Guide by Shulk
 SWTOR 3.0 Deception Assassin DPS Guide by Artorias
 SWTOR Life Day 2015 Event Guide
 SWTOR 3.0 Mercenary DPS Guide by Marisi and Fascinate
 SWTOR 3.0 Annihilation Marauder DPS Guide by Stippling