Risen 2: Dark Waters Game Guide
The Risen 2: Dark Waters game guide contains detailed quest walkthroughs divided by islands and portions of continents at the order at which they visited are during the course of the adventure. Every quests has its own map showing the locations of all key characters and places. The exact contents of the guide are as follows:
CHANGE LOG
June 19th, 2012 - 17 new quests on Isle of the Dead, 4 new quests on The Water Temple, small updates and new quests in other locations. New chapter about character development, battle system, crew members and factions. The guide is finished.
June 12th, 2012 - 63 new quests on Maracai Bay. Added Traders, Trainers, Key Locations, Pickpocketing, Legendary Items, Unique Weapon on Caldera II and Maracai Bay.
May 31st, 2012 - 12 new quests from the return to Caldera.
May 16th, 2012 - 20 new quests on The Sword Coast, 17 new quest on The Isle of Thieves. Added Traders, Trainers, Key Locations, Pickpocketing, Legendary Items, Unique Weapons on The Isle of Thieves.
May 11th, 2012 - 35 new quests on Antgigua. Added Traders, Trainers, Key Locations, Pickpocketing, Legendary Items, Unique Weapons on The Sword Coast and Antigua.
May 8th, 2012 - 11 new quests from The Sword Coast.
May 2nd, 2012 - 35 new quests from Caldera and The Sword Coast.
April 24th, 2012 - the first part of the walkthrough, which contains all quests on Caldera and the island of Tacarigua, as well as most quests from the Sword Coast. Legendary items, pickpocketing, traders and trainers from Tacarigua.
Maciej "Czarny" Kozlowski and UV

Affects: damage dealt in melee combat and the power of throwing weapons;
Usefulness: very high. It's by far the most important attribute for all players who prefer melee combat. Without raising it, the Nameless Hero's attacks will be feeble and won't inflict a lot of damage on anybody.
Legendary item: Comb with one tooth (Caldera, attribute +1);
Talents: Slashing Weapons, Piercing Weapons, Throwing Weapons;
Skills: Powerful Attack, Forging, Swordmaster, Parry, Riposte, Powerful Riposte, Slashing Weapons I, Slashing Weapons II, Slashing Weapons III, Piercing Weapons I, Piercing Weapons II, Piercing Weapons III, Throwing Weapons I, Throwing Weapons II, Throwing Weapons III.
Affects: damage dealt by all firearms;
Usefulness: very high for players who prefer ranged combat. It's particularly useful if the Nameless Hero has a companion (see chapter: Crew Members) and is able to apply the "hit and run" tactic;
Legendary item: Meerschaum pipe, (Tacarigua, attribute +1);
Talents: Muskets, Shotguns, Pistols;
Skills: Critical Hit, Nuff Said!, Left-handed, Gunsmith, Marksman, Blazing Barrels, Muskets I, Muskets II, Muskets III, Shotguns I, Shotguns II, Shotguns III, Pistols I, Pistols II, Pistols III.

Affects: reduces damage dealt to the Nameless Hero and increases his ability to intimidate opponents;
Usefulness: high. A high Toughness ensures that the Nameless Hero can survive more hits, giving him an edge in combat. The attribute can be increased by wearing special items of clothing. The assigned Intimidate is not too useful, though;
Legendary item: Peg leg (Tacarigua, attribute +1);
Talents: Bladeproof, Bulletproof, Intimidate;
Skills: Kick, Liquid Courage, Quack, Distiller, Doctor, Indestructible, Bladeproof I, Bladeproof II, Bulletproof I, Bulletproof II, Intimidate I, Intimidate II, Intimidate III.
Affects: stealing, lockpicking, persuading and using Dirty Tricks;
Usefulness: huge. Despite of what may seem, it's one of the most important attributes - allows to get rich quickly (by stealing and breaking in), and facilitates most fights (thanks to Dirty Tricks). The usability of Silver Tongue is debatable - usually it doesn't affect the quests in any meaningful way, but at the very most shortens them and lowers their expenses;
Legendary item: One left boot (Antigua, attribute +1);
Talents: Dirty Tricks, Thievery, Silver Tongue;
Skills: Sneaking, Pickpocketing, Lockpicking, Monkey Trainer, Parrot Trainer, Old Trickster, Dirty Tricks I, Dirty Tricks II, Dirty Tricks III, Thievery I, Thievery II, Thievery III, Silver Tongue I, Silver Tongue II, Silver Tongue III.

Affects: the strength of voodoo magic (Scepters and spells) and the power of potions;
Usefulness: very little - even for players who use magic. The ability to use voodoo magic is very limited, and its usefulness - debatable. In comparison with other attributes, this one is the least useful. It doesn't even help that you can brew potions and create magic items (which are plenty to be found in the game). What's worse, voodoo magic is available only to those who on the Sword Coast have sided with the Natives. It's not a choice worth much attention;
Legendary item: Skull of death (Maracai Bay, attribute +1);
Talents: Black Magic, Death Cult, Ritual;
Skills: Create Doll, Create Sceptre, Brew Potion, Create Talisman; Powerful Curse, Voodoo Master, Black Magic I, Black Magic II, Black Magic III, Death Cult I, Death Cult II, Death Cult III, Ritual I, Ritual II, Ritual III.
Affects: damage dealt by slashing weapons;
Usefulness: very high for players who want to fight with this kind of weapons. Slashing weapons are very common, so it's a very good investment;
Legendary item: Hook hand (Isle of the Dead, talent +10);
Skills: Slashing Weapons I, Slashing Weapons II, Slashing Weapons III.
Affects: damage dealt by piercing weapons;
Usefulness: very high for players who want to fight with this kind of weapons. Piercing weapons are very common, so it's a very good investment;
Legendary item: Voodoo needle (Antigua, talent +10);
Skills: Piercing Weapons I, Piercing Weapons II, Piercing Weapons III.
Affects: damage dealt by throwing weapons;
Usefulness: virtually none - throwing weapons are very weak, take a lot of time to use and don't stand a chance against other types of weapons;
Legendary item: Parrots wing (Isle of Thieves, talent +10);
Skills: Throwing Weapons I, Throwing Weapons II, Throwing Weapons III.

Affects: damage dealt by muskets;
Usefulness: very high for players who want to fight with this kind of weapons. Muskets aren't common and are quite expensive, but they deal a huge amount of damage, which makes them a very good investment;
Legendary item: Hangman's nooe (Antigua, talent +10);
Skills: Muskets I, Muskets II, Muskets III.
Affects: damage dealt by shotguns;
Usefulness: very high for players who want to fight with this kind of weapons. Shotguns can be bough from the majority of Inqusition's traders and they deal quite a lot of damage, which makes them a very good investment;
Legendary item: Cannonball (Maracai Bay, talent +10);
Skills: Shotguns I, Shotguns II, Shotguns III.
Affects: chance of hit with pistols and damage dealt by them;
Usefulness: in spite of appearances - low. Using pistols takes up a lot of time and requires lengthy loading. What's more, the damage they deal are decidedly insufficient - the investment doesn't pay off;
Legendary item: Powder bag (Sword Coast, talent +10);
Skills: Pistols I, Pistols II, Pistols III.

Affects: decreasing damage dealt by blades;
Usefulness: very high. The more damage the Nameless Hero can withstand, the better. Blades (or jaws, tentacles, etc.) are used by a vast majority of the enemies in the game, which makes this talent indispensable;
Legendary item: Silver mask (Antigua, talent +10);
Skills: Bladeproof I, Bladeproof II.
Affects: decreasing damage dealt by firearms;
Usefulness: high. Even though relatively few enemies use firearms, protecting against their attacks might save the Nameless Hero's life;
Legendary item: Old coin (Isle of the Dead, talent +10);
Skills: Bulletproof I, Bulletproof II.
Affects: intimidating certain characters;
Usefulness: zero. Using this skill usually solves a few quests, but at the price of other ones - when it comes to Glory points, the balance is always negative. What's more, there are really not a lot of characters in the game who can be intimidated (and even if they are, they require the talent at a high level);
Legendary item: Shrunken Head (Sword Coast, talent +10);
Skills: Intimidate I, Intimidate II, Intimidate III.

Affects: chance of success of Dirty Tricks and their lasting time;
Usefulness: very high, but only on the basic level. In truth, throwing sand at foes' eyes is only marginally weaker than using a Parrot (which is costly and requires a separate skill). Dirty Tricks greatly facilitate fighting - especially when fighting one on one;
Legendary item: Flask (Isle of Thieves, talent +10);
Skills: Dirty Tricks I, Dirty Tricks II, Dirty Tricks III
Affects: stealing from certain characters and opening locked chests;
Usefulness: huge. Without leveling this talent the game gets very difficult, as the Nameless Hero quickly runs out of money. Apart from that, opening chests is a requirement in quests involving unique weapons;
Legendary item: Snuffobox (Caldera, talent +10);
Skills: Thievery I, Thievery II, Thievery III
Affects: persuading certain characters to your point of view;
Usefulness: surprisingly low. Each quest that demands this talent may be solved by using other measures (which also give more Glory points). The cases in which the talent opens new dialogue options or lowers the costs of quests are also very rare. It's not too much of use;
Legendary item: Hand mirror (Tacarigua, talent +10);
Skills: Silver Tongue I, Silver Tongue II, Silver Tongue III.
Affects: increases the chance of hit with magic maces and affects the power of curses;
Usefulness: low, unless you want to use the above mentioned weapons type. Be aware, though, that it's not very effective (especially against Dirty Tricks), so choosing this talent doesn't make much sense;
Legendary item: Broken rattle (Maracai Bay, talent +10);
Skills: Black Magic I, Black Magic II, Black Magic III
Affects: strength of summoned spirits;
Usefulness: zero. The number of spirits you'll be able to summon during the game can be counted on the fingers of a pirate's hand (who met the alligator). It's much better to level up the Nameless Hero;
Legendary item: Bottle of Memories (Sword Coast, talent +10);
Skills: Death Cult I, Death Cult II, Death Cult III.
Affects: the power of potions;
Usefulness: low. There may be a lot of potions to be found, but the bonuses they give don't make up for building this talent up. Apart from that, it doesn't affect the power of potions with a permanent effect, so it's not worth the effort.
Legendary item: Jaguar paw (Maracai Bay, talent +10);
Skills: Ritual I, Ritual II, Ritual III.
Powerful Attack - an essential and very important skill which you should learn as soon as possible. It enables a slow, but a very powerful blow which deals a lot of damage. Some foes (i.e. animals) can't evade it. It's usually best to use it at the very beginning of the fight - the foe is swept off balance, giving the Nameless Hero an instant advantage. Nevertheless, using Powerful Attack involves a certain risk - it's slow enough for the foe to use a quick thrust. Therefore it's ought be used carefully and with consideration. Requires Blades at 2.
 Powerful Attack
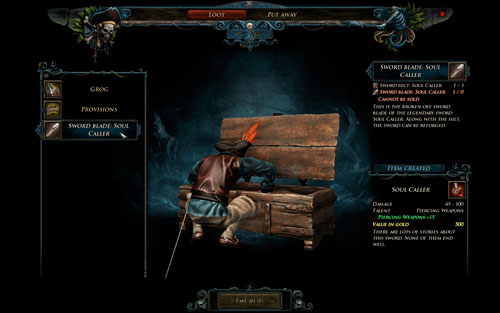
Forging - without this skill you won't be able to piece together any of the legendary weapons. You buy in only once, but it's very worthwhile - yet only if you prefer melee combat. Requires Blades at 6.
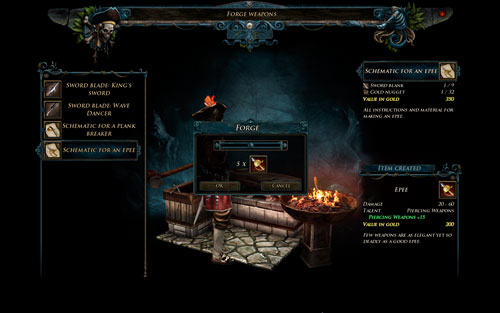 Forging
Swordmaster - greatly increases damage dealt by blades. Start raising it as soon as it becomes available (can be tought by Alvarez on Antigua). To make it available, complete The Cunning Captain quest. Required Blades at 10.
Parry - an utterly meaningless skills which may as well be replaced by the right mouse button. It allows for avoiding most blows, true, but in itself is pretty difficult to activate (you need to press the left mouse button when you're blocking an enemy attack). Unfortunately - parrying is required for using Riposte, so if you want that skill, you need to buy it. Requires Blades at 1.
 Parry
Parry
Riposte - allows for a striking powerful blow while parrying (requires the parrying skill). When yours and the foe's blades are crossed (or when you evade the blow), press Space quickly. The power of this skill is comparable to Powerful Attack. In fact it means it's not very useful - unless you want to invest in Powerful Riposte. Requires Blades at 2 and Parry.
 Riposte
Powerful Riposte - the most powerful attack in the whole game - it deals such amount of damage that it usually kills the enemy. While parrying, press Space, and you'll kill the foe with a single blow. Unfortunately, the combo works only after buying two less useful skills - Parry and Riposte, forcing you to complete the whole skill tree, which is a pretty high expense. Requires Blades at 8 and Riposte.
 Powerful Riposte
Slashing Weapons - each subsequent level of this skill increases damage dealt by slashing weapons by 5 points. It's a moderately worthwhile investment if slashing weapons are just what you're using. Subsequent levels of this skill require Blades at: 1, 4 and 7.
Piercing Weapons - each subsequent level of this skill increases damage dealt by piercing weapons by 5 points. It's a moderately worthwhile investment if piercing weapons are just what you're using. Subsequent levels of this skill require Blades at: 2, 5 and 8.
Throwing Weapons - each subsequent level of this skill increases damage dealt by throwing weapons by 5 points. Since this type of weapons is utterly useless, it's not worth the effort. Subsequent levels of this skill require Blades at: 3, 6 and 9.
Critical Hits - gives a small chance of a critical hit with each shot. If you're using firearms, this skill will be very important to you - you'll have greater chances in a fight. Requires Firearms at 1.
Nuff Said! - gives the opportunity to shoot the foe during a conversation. It's a way to avoid fighting with certain enemies, but there are maybe four enemies in the whole game who can be killed by it. It doesn't pay off completely. Requires Firearms at 2.
 Nuff Said!
Left-handed - reduces the loading time. The game has a bug which doesn't activate it (or the difference is so small that I wasn't able to measure it with a stopwatch in hand). Requires Firearms at 4.
Gunsmith - enables creating your own weapons. You'll find a lot of pistols, muskets and shotguns during your adventures, and the best of them will be given to you for quests or you'll buy them from traders - so it's not a particularly good choice. It doesn't look good on the economical side either - schematics needed for creating weapons are often much more expensive than the weapon itself! Requires Firearms at 6.
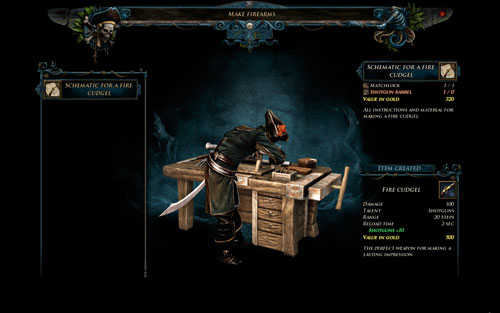 Gunsmith
Marksman - doubles the chance of a critical hit. It's a worthwhile investment if you're using muskets or shotguns (which the skill concerns). Requires Firearms at 8.
Blazing Barrels - another skill that doesn't work. What's more - loading the best muskets and shotguns takes only 2 seconds, so reducing that time would make them machine guns. Requires Firearms at 10.
 Pistols
Muskets - each subsequent level of this skill increases damage dealt by muskets by 5 points. It's a moderately worthwhile investment if muskets are just what you're using. Subsequent levels of this skill require Firearms at: 3, 6 and 9.
Shotguns - each subsequent level of this skill increases damage dealt by shotguns by 5 points. It's a moderately worthwhile investment if shotguns are just what you're using. Subsequent levels of this skill require Firearms at: 2, 5 and 8.
Pistols - each subsequent level of this skill increases damage dealt by pistols by 5 points. Since this type of weapons isn't too useful, it's not worth the investment. Subsequent levels of this skill require Firearms at: 1, 4 and 7.
Kick - a skill you should really learn. It not only helps in encounters with Giant Crabs, but also with any human opponent. Press Space while fighting to push the enemy away. It's particularly useful when you're using firearms and wish to keep the foe at a safe distance. Even so, fencers should buy it too, as it will give them a moment of peace between the rain of blows. Requires Toughness at 1.
 Kick
Kick
Liquid Courage - lengthens the duration of painkillers. You won't find too many of them in your way, and those bought from traders are simply expensive. Think about buying it if you really want to reduce damage dealt to you. Requires Toughness at 2.
Quack - increases the Nameless Hero's health points by 20. Only Bones can you teach you this skill (found in the Maracai Bay). Buying Quack pay off, because the difference in the hero's stamina is very noticeable. Requires Toughness at 4.
Distiller - enables brewing any kind of liquor. It's unrewarding for a purely economical point of view - recipes and ingredients cost a lot more than the finished product. Since there are plenty of alcoholic beverages to be found in the game, choosing this skill doesn't make much sense. Requires Toughness at 6.
Distiller
Doctor - increases the Nameless Hero's health points by 30. It's a big enough difference for the skill to be worth the thought. It's worth the costs even though it requires having Quack first - the sum of all the bonuses is 50 health points. The only minus is that the only character who can teach it to you is Bones (met fairly late in the game). Requires Toughness at 1 and Quack.
Indestructible - allows the Nameless Hero to slowly regenerate health points. Requires Quack and Distiller first, but helps cut the costs on grog and provisions - the balance is pretty equaled. What's more, Indestructible greatly helps during fights - the Nameless Hero is healing, while his opponent is not (the longer fights are pretty easy that way). The only minus is that the only character who can teach it to you is Bones (met fairly late in the game). Requires Toughness at 10 and Doctor.
 Indestructible
Bladeproof - increases the resistance to blades by 5 points (for each skill level). The majority of foes fight in close combat, so it's better to have it even only on the basic level. Subsequent levels of this skill require Toughness at: 2 and 5.
Bulletproof - increases the resistance to bullets by 5 points (for each skill level). Only certain human opponents use firearms, and the difference isn't too great, so you can skip it. Subsequent levels of this skill require Toughness at: 3 and 6.
Intimidate - increases the effectiveness of Intimidate by 5 points (for each skill level). Using this type of persuasion is utterly useless, so it doesn't make much sense to spend money on it. Subsequent levels of this skill require Toughness at: 1, 4 and 7.
Sneaking - you'll learn this skill at the very beginning of the game from Largo. It will come in handy during numerous house burglaries, but nothing else. Requires Cunning at 1.
Pickpocketing - a very useful skill thanks to which you can get rich very quickly. The list of all NPCs whose pockets you can look into is found in a separate chapter of the guide. Requires Cunning at 2.
Lockpicking - you won't get far without it. This skill will let you open chests which are plenty on the worldmap. Some of them hold fragments of unique weapons - so it's better to buy it while on Tacarigua. Requires Cunning at 4.
 Lockpicking
Monkey Trainer - a skill with a lot of potential which hasn't been used to its full extent. There is only one location in the whole game that you get into only by using a monkey (the attic in Antigua, where the Hangman's noose is). The monkey in itself isn't very useful and it can't be used in a fight - it gets killed instantly. Requires Cunning at 6.
 Monkey Trainer
Parrot Trainer - theoretically, it's the most powerful of all Dirty Tricks, but in practise it's not so worthwhile (it's expensive and requires buying a Parrot). The advantage of the bird over throwing sand or salt is such that it affects all types of enemies. The chance of hit is smaller, though, so the whole idea is not so good. Requires Cunning at 8.
 Parrot Trainer
Old Trickster - reduces the renewal time of Dirty Tricks. Same as corresponding skill in the firearms category, this one doesn't work as well. It will probably be fixed in a future patch. Requires Cunning at 10.
Dirty Tricks - increases accuracy and effectiveness of all Dirty Tricks by 5 points (for each skill level). Though some of the tricks are worth using, spending money on such a small modification doesn't seem like a good idea. Subsequent levels of this skill require Cunning at: 3, 6 and 9.
 Dirty Tricks
Thievery - increases the quality of Lockpicking and Pickpocketing by 5 points (for each skill level). It's moderately profitable, though it's usually enough to but equipment which will increase these skills. Subsequent levels of this skill require Cunning at: 2, 5 and 8.
Silver Tongue - increases the scope of persuading NPCs by 5 points (for each skill level). Since diplomacy isn't too important in the game, you can just ignore it completely. Subsequent levels of this skill require Cunning at: 1, 4 and 7.
Create Doll - a skill you'll get on the Sword Coast if you join the Natives (see: The Ancestors' Blessing). You won't be able to complete the game without it: there are a lot of times when you'll be creating doll to gain control over non-playable characters. Apart from that, the skill will also let you create dolls with curses, which are sadly very weak. Requires Voodoo at 1.
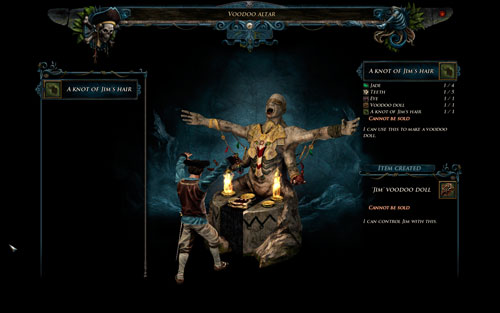 Create Doll
Create Sceptre - not a particularly useful skill, available only to the Natives' allies. Scepters can be bought from most of Native traders, but their effect leaves much to wish for. Don't bother with it. Requires Voodoo at 2.
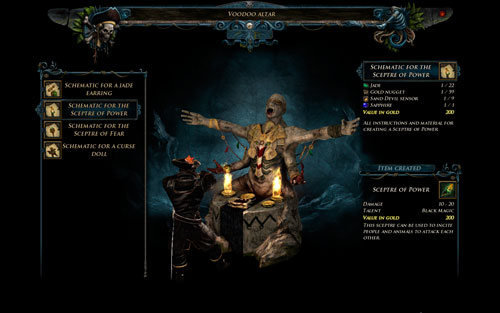 Create Sceptre
Brew Potion - potions are easily available, so brewing them misses the point. The only argument in favor of this skill is that it allows for creating potions which permanently raise the statistics. The catch is that ingredients are very rare and the benefits - not too high (the bonus is usually +2 as opposed +1 in the case of raw plants). The skill is available to both factions. Requires Voodoo at 4.
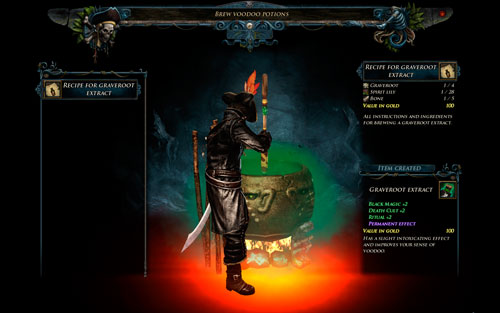 Brew Potion
Create Talisman - another useless skill - there is an abundance of all kinds of amulets and talismans on the world map, so the ability to create them becomes utterly pointless. Another issue is that recipes and ingredients are very expensive, making it pointless even more (it's available only to the Natives' allies). Requires Voodoo at 6.
Powerful Curse - increases the power of cursed voodoo dolls. Since they are completely uneffective, you can go ahead and ignore it (available only to the Natives). Requires Voodoo at 8.
 Powerful Curse
Voodoo Master - reduces the regeneration time of voodoo sceptres. The skill doesn't work - same all the others which affect cooldowns. It's available only to the Natives' allies. Requires Voodoo at 10.
Black Magic - increases the power of curses and sceptres by 5 points for each skill level. Since both items are radically ineffective, ignore it. Subsequent levels of this skill require Voodoo at: 3, 6 and 9.
Death Cult - increases the power of a summoned spirit by 5 points for each skill level. There is only one spirit to "gain", and it's not very helpful - so go ahead and ignore it. Subsequent levels of this skill require Voodoo at: 2, 5 and 8.
 Death Cult
Ritual - increases the Ritual talent by 5 points for each skill level (affects the power of potions). It only pays off if you can't help yourself and keep swallowing all kinds of stuff. It doesn't affect liquor! Subsequent levels of this skill require Voodoo at: 1, 4 and 7.
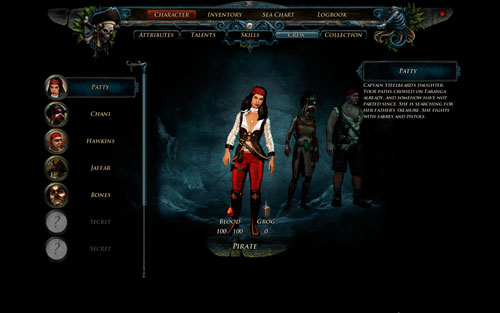
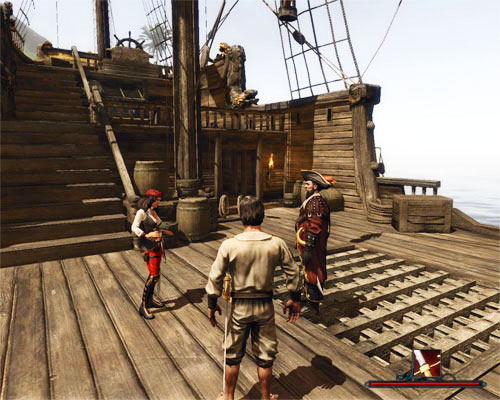
You meet Patty at the very beginning of the game, still on Caldera. It's thanks to her that you'll be able to find Captain Steelbeard and embark on a great journey. She's quite temperamental and foul-mouthed, but at the same time pretty likeable. Sadly, you can't romance her.
She uses a pistol and a sabre, making her a huge help in the first stages of the game, and further on. It's worth having her at your side - not only for the power boost, but for funny dialogues as well.
The witch from the Shaganumbi tribe will only join you if you side with the Natives (see: Chani, Daughter of the Chieftain). Though she's very strict and harsh, she's a worthy addition to your crew - specifically due to her unusual skills. As a person sensitive to voodoo magic vibrations, Chani can heal her companions during a fight, a she's quite a formidable warrior herself. Usually, she uses a special sceptre and doesn't get away from a fight - even if it's a suicide. All this makes her - if not the best conversational partner - a valuable companion to the Nameless Hero's battles and adventures.
You'll meet the red-haired protector on the Sword Coast - he'll join you if you ally yourself with the Inquisition (see: Support from the Inquisition). Despite being quite a simple man (a farmer by origin), he can surprise you with a witty comment and an accurate riposte. His sharp tongue is probably the reason why he never got promoted in spite of having many talents. And those are really something to boast about - he's one of the best shooters in the whole army. He keeps his distance in a fight, but hits almost every time and the damage he deals is truly impressive. He's worth having and worth leveling - not only for his skills, but also for an interesting personality.
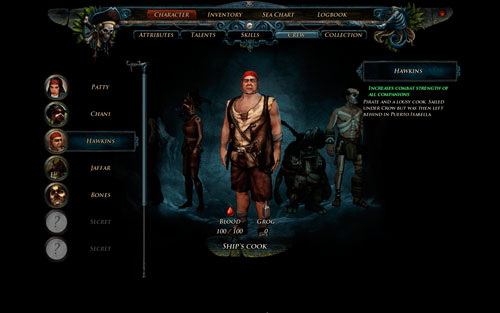
You'll meet the cook from Crow's crew on the Sword Coast - when you free him, he'll happily join you (see: The Fourth Crew Member). A born pirate, he's coarse and straightforward, but he's a good chap. He can take care of himself in a fight, particularly due to his appearance (he can withstand a lot of blows). He keeps telling unrefined jokes, which makes him a interesting travel companion. Don't keep him in the kitchen - it's much funnier to bring him along. If he stays there, though, he'll still be useful - increasing the power of all crew members.
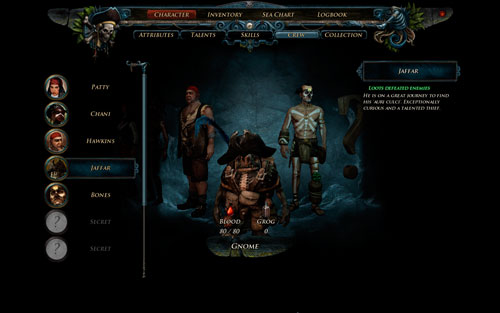
The likeable gnome had lived on the Isle of Thieves, waiting for a grand adventure. Meeting the Nameless Hero was a great opportunity - the resourceful thief decided to use his chance. Since then, he's been accompanying the Nameless Hero, his "mataa" - master. His goal is to find auri culci - an item so precious and legendary that it will allow him to become a true, grown up gnome. Since he's very smart, he'll surely achieve it - there's no doubt about it. His physical fitness may be a bit more worrisome - Jaffar will never be a good fighter. He's much more useful as a scout - collecting everything that gets in his sight (including equipment belonging to the rest of the crew). Of course, there are boundaries - if the master say so, the gnome will give back everything he had "borrowed".
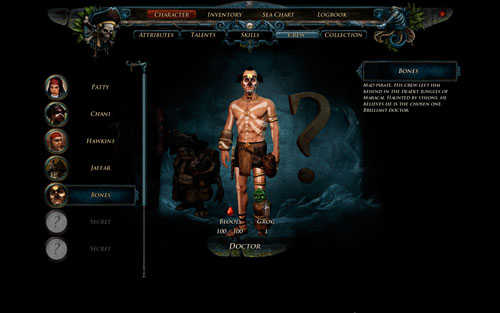
The possessed doctor can be found only in the Natives' village in the Maracai Bay. Apparently it's not a problem for him that he's white - he still paints himself in Native tattoos and speaks in a complex, highly mythologized language. Being a person touched in the head, he's quite problematic, but his medical skills are not to be underestimated (he can share them with the Nameless Hero). He's soul has been locked in the world of the dead - if you journey to the Isle of the Dead and free it, that will surely help the mad man (see: The Split Soul). Nevertheless, even without his spirit Bones is a good aid - also during a direct combat.
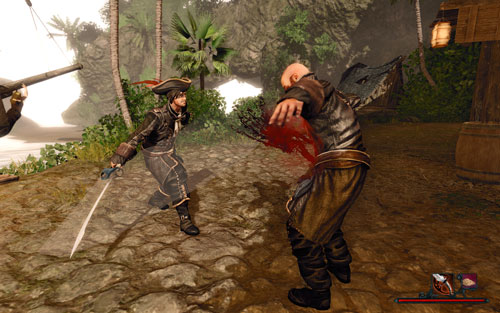
When fighting with blades, it pays off to use the assigned skills. Powerful Attack is especially useful because it deals twice as much damage. It's used by holding the left mouse button. Using it is risky - it involves a long animation which the player can't abort. The foe can easily strike the Nameless Hero, which often aborts the blow. You have to be very careful.

Another interesting combo, which requires some investing, is a trio: Parry, Riposte, Powerful Riposte. Though it involves a lot of expenses and requires attributes at high levels, it works magnificently. The combination of these three skills can win practically every duel, and also some encounters with multiple enemies. Nonetheless, don't buy only Parry - it doesn't give you any advantage (the right mouse button works much better for blocking enemy attacks). Only combined with Riposte (even the basic one) the skill starts to make some sense. The deadly combination of all three skills can be activated by parrying an enemy attack (left mouse button during a successful block), and then pressing Space.
Unfortunately, the above remarks refer only to fighting humans. You can't block the attacks of animals and monsters, not to mention striking a counter-attack or exercising a more advanced form of sword fighting. You can, though, use Powerful Attack - which is fairly worth the effort, especially at the beginning of the game (the beast will usually become a little stupefied). Usually what works best is just a quick swinging of the blade - it's the only way the stop the rain of blows that will come in the Nameless Hero's direction.
No matter how you play, with blades it's always a good idea to invest in Toughness and the skills that can be learned from Bones. They increase the amount of the hero's health points, and even regenerate them. It's particularly important during longer battles, when healing is an issue. It's also good to use dirty tricks then (see: Dirty Tricks).
The general rule to using firearms is very simple - shoot the enemy and run to a safe distance (holding Caps Lock). The "hit and run" method works perfectly here - as long as you have where to run. The damage dealt by muskets and shotguns are high enough that you won't have any problems even with challenging foes, like the Leviathans or Guards. Don't forget the advantage that firearms give - you can place yourself in a spot where the enemy can't get (i.e. a hill) and shoot it from there. Large beasts, such as Grave Spiders, also have a tendency to get stuck in narrow corridors - use that against them!
Pistols are another matter. They're used solely as a supplementary weapon (held in the left hand) and activated by pressing E. You can use them when fighting a blade duel or while shooting other kinds of firearms. The main problem is that pistols can't be aimed - it's the game that calculates the hit chance and the damage. Apart from that, a huge flaw of these weapons is that they take a lot of time to load (usually: 20 seconds), which greatly lessens their usefulness. It's generally better to use any Dirty Trick (which interrupts the fight for a while, giving you a chance to load your gun or fire another shot) than a pistol.

The above rules usually work against both humans and animals. In the latter case it's good to remember that they're generally faster than the Nameless Hero - so in some cases it's better to fight with blades. If you don't have any or you haven't raised the proper attributes, you can always hit them with the butt of a musket or a shotgun. It will stop the blows for a while and allow you to shoot. Even so, don't count on it that you'll kill the foe with a sole strike or by impaling it on a bayonet (some muskets have it) - the damage dealt this way are really laughable.
Dirty Tricks are a whole range of all kinds of tricks which will make the fighting much easier. Naturally, they requite a proper equipment. Most of them stun the foe for a while (sand, salt or parrot), other deal damage (coconut, throwing knives). Interestingly enough, only the latter ones use up (and not always). It means that if you buy a pinch of salt, you'll be able to use it until the end of the game (it's a considerable saving). It's pays off to spend a few pennies on these type of items so as to defeat the opponents quicker. When they're stunned, you can hit them hard - it's the perfect moment to use Powerful Attack and deal a lot of damage. The renewal time of Powerful Attack is quite short (usually 10 seconds), so it can be used numerous times. You don't have to buy additional skills either - every player can use dirty tricks from the very beginning of the game.

A certain drawback to Dirty Tricks is their unreliability. The chances of hitting or wounding a foe are calculated by the game. You can aid the Nameless Hero by raising certain skills or giving him certain potions, but it doesn't change the fact that there is always a chance of failure. Another thing is that tricks don't affect individual opponents - for example a Guard won't be bothered by sand thrown in his eyes (but will be by a parrot).
Despite the above drawbacks, Dirty Tricks are really useful - especially in duels. If we hit the foe with a coconut there is a high chance he'll be instantly defeated (!). The same applies to boss fights. If we can't take out the Leviathan, we can make it easier for us by sending a parrot his way, and then withdrawing to a safe distance to fire a musket. There are plenty of possibilities, and how they're used is only up to the player. You can throw your enemy off a cliff thanks to fire oil, or throw sand at his face the moment he's about to kills us. The selection is very wide.
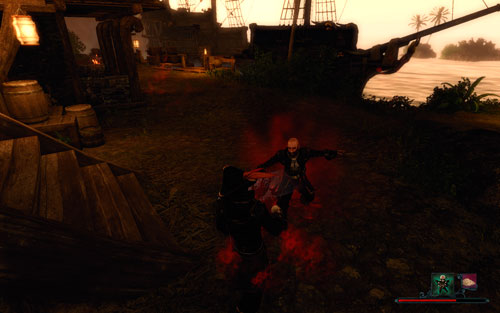
Magic in Risen 2 doesn't work well during fights - it has to be said plain and clear. Most of magic items that can be used in a fight is practically utterly useless. There are a few factors as to why. Most of all, the time for the spell to start working is long - both in the case of voodoo dolls (curses) and sceptres. While the Nameless Hero takes the time to chant the incantation, foes will most surely manage to approach and strike him (aborting the whole process, of course). It's best visible in fights taking place on small grounds with no way to escape - a direct contact with the enemy generally ends in an immediate death of the main hero.
Another thing is that using sceptres (in themselves quite powerful) requires a pretty advanced character. Without a high level of Black Magic you can forget about any spellcasting. Some characters are generally immune to this kind of fun, making magic completely useless against them. The sole fact of having a sceptre which will make enemies go at each other doesn't solve anything yet - the Nameless Hero won't usually have anyone to use it on. What's more, funny things happen when a foe is knocked down, but not killed (because he's i.e. a trader): after standing up from the ground he'll fight again with a full health bar. What's worse, everyone in sight of the Nameless Hero using a sceptre will most likely rush to attack him - a public use of sceptre magic is unforgivable. It's completely not worth the trouble.

Throwing all kinds of bombs and powder kegs also doesn't pass the test. Most of all, both items deal damage not only to the enemies, but to the Nameless Hero as well. Bombs explode after a while (too long), and kegs have to be blown up by shooting them. It greatly reduces their effectiveness - especially in a fight. These types of tools work well only before a fight, when you can see the group of enemies but they can't see the hero yet - only then does it make any sense.
Another debatable issue is using a spear. Aside from the Titan Harpoon, all other use up instantly (each throw takes one). You can't block attacks with them (at least the Nameless Hero can't), and the damage they deal is no damage at all (!). The only exception is Powerful Attack which takes as much health points as slashing or piercing weapons. Summing up, don't bother with spears - other types of weapons are much more effective.
There are two factions in Risen 2 - the Natives and the Inquisition. The former deal with voodoo magic, the latter prefer firearms. When the player decides upon one of them, there's no turning back - this is a one-time and irreversible choice. It affects many elements in the game - not only the way certain quests are resolved, but also the availability of skills you can learn from trainers and items you can buy from traders. Even though, choosing a faction is not so important - most quests are exactly the same, regardless of the chosen side. The same goes for other elements in the game - most items for trade will stay the same, but not every trader will want to do business with you (concerns mostly mages).
The fundamental difference between the factions is that the Natives have access to the arcanes of magic, while the Inquisitors don't. Keep in mind, though, that the spells are fairly weak (see chapter: Battle System: Voodoo and other) - they serve mostly as an accent to spice up the game. They don't work well on the battlefield, which is the playground for the Inquisition.
 Only Native supporters can use magic.
After joining the savages in the quest Chani, Daughter of the Chieftain, the Nameless Hero will learn how to make voodoo dolls, which will allow him to possess a certain number of characters in the game (it's required for the completion of some quests). If you keep raising Voodoo, he'll learn new techniques of this art, such as creating sceptres, amulets and potions (see: Skills). Unfortunately, they can as well be bought or found, so raising magic skills isn't too profitable.
What about the Inquisitors? After joining them in the quest Support from the Inquisition, the Nameless Hero will gain access to the highest row of firearms skills: Blazing Barrels, Muskets III, Shotguns III, Pistols III. The only character who can teach them is Godin, who lives in Caldera.
 Inquisitors are better with firearms.
There is one last, final difference: the Native supporters can reach the Isle of the Dead right after leaving the shores of the Sword Coast (and not after collecting all the Titan artifacts, as the Inquisitors). It's not recommended, though - the beasts that live on the island are really powerful, and they will rip the hero apart before he even manages to deal them any damage. The options is neither significant nor tempting.
The list of all traders and trainer, together with their availability and requirements, can be found in the appropriate chapter of the guide. If they're available only to a certain faction, it's been noted. Similar thing applies to quests - those that can be completed in two ways (by magic or by the "regular" way), have been described from both points of view. This way, regardless of the chosen side, every player can benefit from the blessings of this guide.
![Quest giver: Storehouse master [#1] - Flotsam - Caldera - Quests - Risen 2: Dark Waters - Game Guide and Walkthrough](https://game.lhg100.com/Article/UploadFiles/201512/2015121709161815.jpg)
Quest giver: Storehouse master [#1]
In Caldera, between the docks and the Crystal Fortress, there is a huge building [#2] supervised by the Storehouse master hanging around. In order to receive a quest from him, you first need to help Patty get rid of Sand Devils on the beach (see: Rescue Patty), and then talk to the commandant (see: Talk to Carlos).
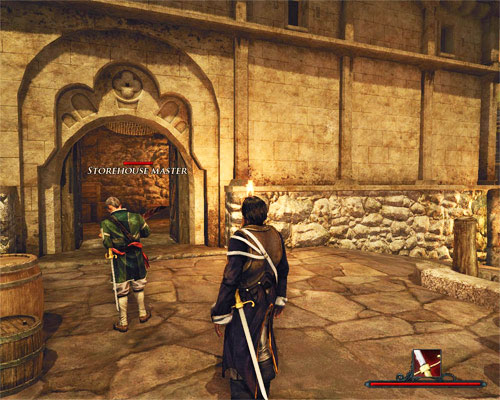
The Storehouse master will gladly pay you to find the merchandise.
The goal of the mission is to collect six pieces of Flotsam washed ashore on the beach [#2] after the Kraken had sunk the pirates' boat (it's tantamount to completing the Flotsam on the Beach Collected quest). It's not particularly difficult because the chests are easy to spot. The only problem may be caused by two Sand Devils somewhere around the last piece of the merchandise.
Having collected all six chests, take them back to the Storehouse master and the quest will be completed.
Rewards:
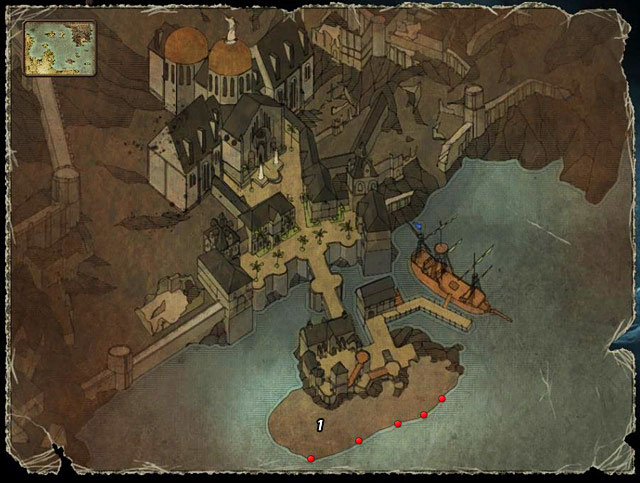
This quest is triggered and completed automatically when you've managed to collect all six chests washed ashore after the crash caused by the Kraken (see: Flotsam).
Pieces of Flotsam are scattered all over the beach [#1], the same that was the witness to the fight between Patty and the Sand Devils in the Rescue Patty quest. To make things easier, the locations of all chests have been marked by red dots on the map above.
 All chests are lying just by the shore.
Note! When you approach the chest farthest to the west, you'll be attacked by two Sand Devils. The sea monsters may be a bit problematic at this point in the game, so be on your guard.
Rewards:

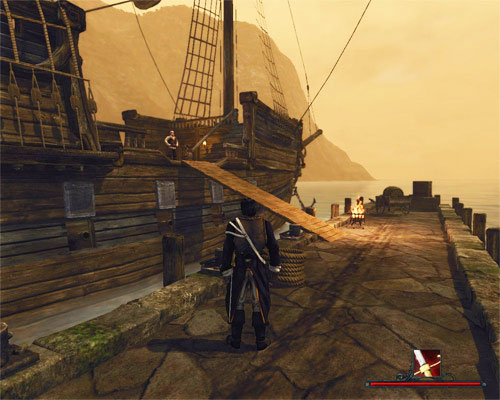
This is the quest that opens the Risen 2 adventure - you'll receive it right after the opening movie and a few cutscenes. The goal of the mission is to reach Commandant Carlos [#1], who is watching the monster raging on the coast of Caldera.
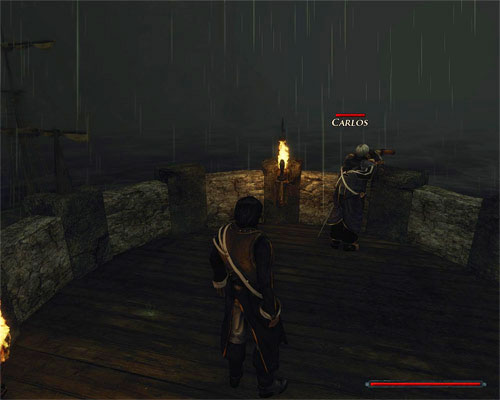 Carlos is using a spyglass to watch what the Kranen is doing.
Leave your quarters [#2] and turn left immediately. Right next to guard Juan you'll see stairs leading to the tower where you can find the commandant. To successfully complete the mission, simply climb up and talk to Carlos. At the same moment, you'll receive another quest - Search the Beach.
Rewards:
![When you come to the beach [#1] (see: Search the Beach) you'll see a girl, who had just gotten to the shore, being attacked by three Sand Devils - Rescue Patty - Caldera - Quests - Risen 2: Dark Waters - Game Guide and Walkthrough](https://game.lhg100.com/Article/UploadFiles/201512/2015121709162068.jpg)
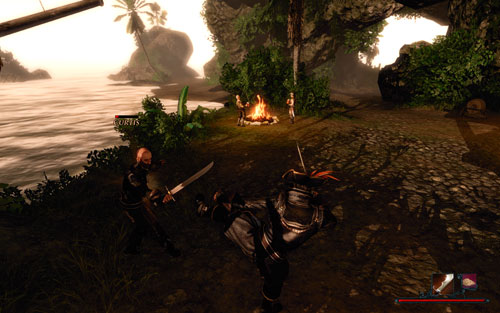
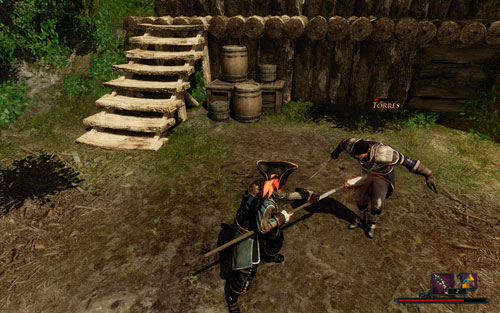
When you come to the beach [#1] (see: Search the Beach) you'll see a girl, who had just gotten to the shore, being attacked by three Sand Devils. At this moment, the game will trigger the present quest.
Its goal is to eliminate all three enemies endangering the girl's life. The problem is Patty is a much better warrior than you, and is perfectly capable of taking care of the sea monsters all by herself. It doesn't mean, though, that you can't help her out. Remember that every slain monster gives you additional Glory points. There is only one condition: you have to deliver the killing blow since Patty is currently not a member of your party.
 The only weapon available at this point in the game lies in your quarters.
When all enemies drop dead, you'll lose the control over your character for a short while. The story will jump to the fortress where, after a mandatory conversation with the girl and Commandant Carlos, you'll once again end up in your cluttered little room (see: Talk to Carlos).
Rewards:
![Quest giver: Carlos [#1] - Search the Beach - Caldera - Quests - Risen 2: Dark Waters - Game Guide and Walkthrough](https://game.lhg100.com/Article/UploadFiles/201512/2015121709162173.jpg)
Quest giver: Carlos [#1]
This quest will be triggered automatically after your first conversation with Carlos [#1] (see: Meet the Commandant!). The leader of the Inquisitors will ask you to see if anyone survived the crash caused by the Kraken.
 On the beach, you'll see Patty fighting sea monsters.
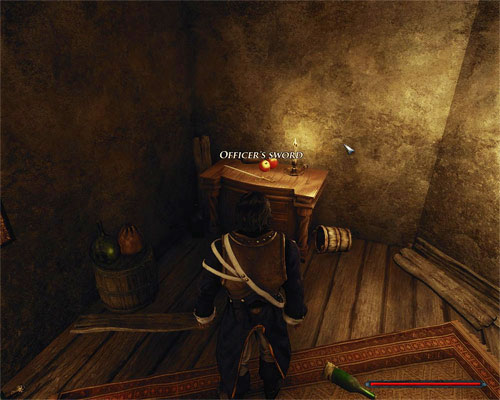
Go down and approach the gate at the courtyard. The guard named Juan will open the gate only on one condition - you need to have the Officer's sword, which is laying on the desk in your quarters [#2]. Leave the fortress and use the stone stairs to go to the beach [#3]. After a while you'll see a young woman being attacked by some Sand Devils. The game will automatically activate another quest: Rescue Patty. Unfortunately, there is no reward, even the smallest one, for coming to the beach.
![Having saved the woman on the beach [#1] (see: Rescue Patty) and watched the cutscene, you and your well-known lady will end up in your quarters [#2] - Talk to Carlos - Caldera - Quests - Risen 2: Dark Waters - Game Guide and Walkthrough](https://game.lhg100.com/Article/UploadFiles/201512/2015121709162153.jpg)
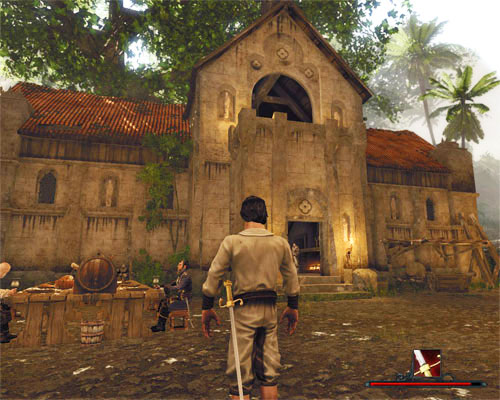
Having saved the woman on the beach [#1] (see: Rescue Patty) and watched the cutscene, you and your well-known lady will end up in your quarters [#2]. A while later the game will automatically trigger the present quest. Its goal is to talk to Carlos again.
Piece of cake. Walk down to the courtyard and use the open gate to enter the biggest building [#3]. Wait until Carlos finishes talking to Sebastiano, and then you. The Inquisitors have an ambitious plan to defeat the Kraken that's controlling the neighboring waters, and its key element requires finding the legendary weapon of the Titans. At this moment, the game will activate three new quests: To Tacarigua, Find Steelbeard and The Titan Weapon.
 The commandant resides in the biggest building.
Note! When the conversation is over, go upstairs to the upper floor and talk to Angus sitting at the desk. Ask him for money, and when he refuses saying that you're not a member of the Inquisition anymore, convince him using the Silver Tongue skill. Since the difficulty level is only 5, you don't need to take any additional lessons.
Rewards:
![Quest giver: Carlos [#1] - To Tacarigua - Caldera - Quests - Risen 2: Dark Waters - Game Guide and Walkthrough](https://game.lhg100.com/Article/UploadFiles/201512/2015121709162172.jpg)
Quest giver: Carlos [#1]
After a long conversation with the Commandant of Caldera [#1] (see: Talk to Carlos), you'll begin the search for the legendary weapon (see: The Titan Weapon), capable of defeating the Kraken lying in wait in the harbor. Your supervisor will rightly notice that the first step is to go to the island of Tacarigua, not far from the Inquisition's seat.
 The ship's hard to miss since it's the only one in the docks.
The task is very easy. Simply leave the Crystal Fortress and go straight towards the only ship in the docks [#2]. On board, you can find Sebastiano [#3]; talk to him to express your readiness to start the journey. That's all.
Note! At this point in the game you can't travel around the world freely, so the decision to leave Caldera is irreversible!
Rewards:
![Quest giver: Elia [#1] - 10 Bloody Roots - Tacarigua - Quests - Risen 2: Dark Waters - Game Guide and Walkthrough](https://game.lhg100.com/Article/UploadFiles/201512/2015121709162293.jpg)
Quest giver: Elia [#1]
On the second floor of Booze's tavern, there is a distillery where a man named Alister is brewing rum. His assistant is Elia [#1] - he's the one you need to talk to get this quest (if Alister chases you away from the tavern, wait until dark for the assistant to go sleep downstairs). During the conversation, keep talking about Bloody Mary until he offers to give you a recipe for it in exchange for ten Bloodroots.
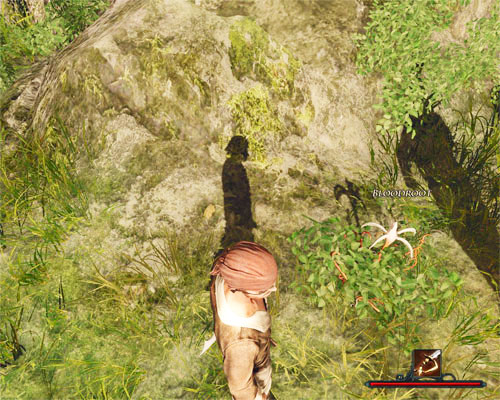 This is a Bloodroot.
Bloodroot is a plant common on the island and you shouldn't have any problems finding the required amount - if you've been consistent in collecting herbs from the beginning, you may have enough even before talking to Elia. You can also buy them from Colby, of which Elia tells you himself. The boy can be found near the waterfall [#2] or at the gates [#3], depending on whether you've completed The Water Carriers or not. Colby exchanges his stock for rum: one bottle of Rum in exchange for three plants.
No matter how you acquire the necessary amount, give the roots to Elia and the quest will be completed.
Rewards:

This quest is part of: The Sugar Shipment
Easy as pie. The quest will be triggered and completed once you've collected seven Sacks of sugar Booze is looking for. The sweet goods are hidden in the south part of the island, in a cave [#1] near Jack's lighthouse [#2]. The only problem might be the termites - there are several dozen of them nestling near the cave. You can find more information on them in The Sugar Shipment and The Termite Plague quests description.
Rewards:
![Quest giver: MacLaine [#1] - A Difficult Chest - Tacarigua - Quests - Risen 2: Dark Waters - Game Guide and Walkthrough](https://game.lhg100.com/Article/UploadFiles/201512/2015121709162285.jpg)
Quest giver: MacLaine [#1]
This quest is part of: Become a Pirate
In the cargo hold of the ship [#2] docked in the pirates' settlement, there is a chest of gold; the loot brought back by Steelbeard during one of his recent expeditions. The problem with the chest, though, is that it's locked by a key and none of the crewmembers can open it. You will know all of this from MacLaine [#1] if you ask him how to get on the Captain's good side. The pirate's on board the ship, right next to the ship's wheel.
You'll need a Lock pick to open the chest - MacLaine will suggest buying it from Stone [#3]. Visit the local blacksmith and lie to him that it's the pirate who wants to open the bloody chest. The blacksmith won't be fooled, but will look kindly on your attempts to trick him. He'll even offer to sell the lock pick for a huge sum of 500 Gold. If you have money to burn, buy it at once.
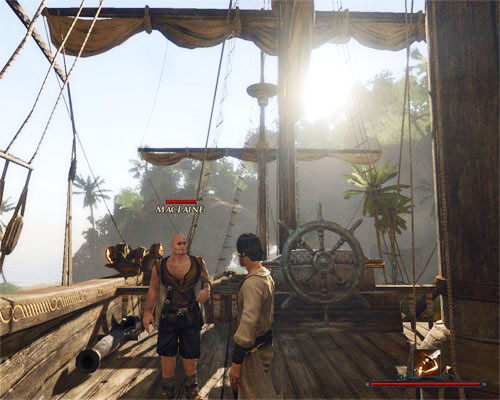 MacLaine will tell you about the chest below the deck.
Note! You can obtain the lock pick for free by doing quests given by Largo [#4]. If you agree to help him escape, he will suggest going to Stone and simply taking the lock pick from him, as the blacksmith owes him a favor. The blacksmith will agree to it if you show him one of two of the prisoner's personal items - Pirate's bandana or an earring (Black pearl) - and then mention the debt he owes to Largo. You can find more information on this subject in The Clothes of a Pirate and Freeing Largo quests descriptions.
The lock pick itself won't be enough to open the chest - you also need to know how to use it. You can learn how to pick locks from Largo. The pirate is a skilled thief and will gladly teach you what you need to learn, but not without a price - 1000 Gold, to be more precise. Keep in mind that in order to learn Lockpicking you also need a high level in Cunning. It has to be at least 4!
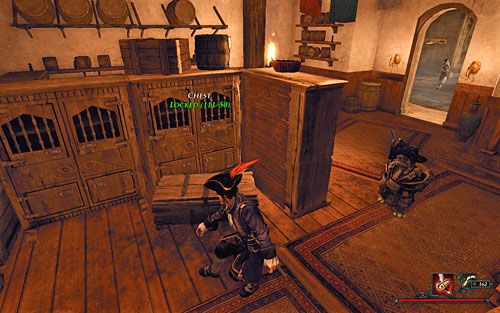
Locked chests have a different difficulty level. To even begin trying to open them, the number denoting the complexity of the lock has to be equal or higher than the Thievery skill level. In this case, the difficulty level is 25, so you won't be able to do much without additional training.
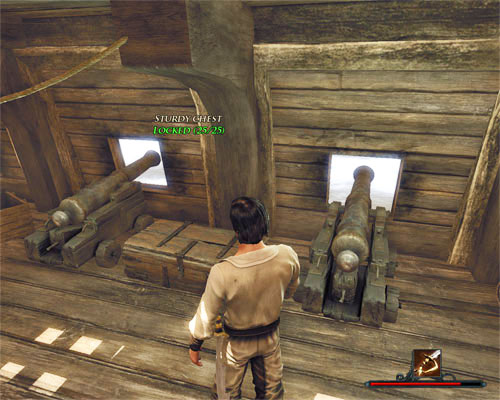 And here is the chest. If the caption is green, we can open it.
If you match the criteria, you can try to open the lock, which boils down to a simple mini-game. Move the lock pick in such a way that the springing bolts stay open. Once you beat all four locks, the Nameless Hero will turn the lock and the contents of the chest will be yours.
Note! Despite the fact that MacLaine clearly states opening the chest will increase your chances of getting on the Captain's good side, Steelbeard won't take your achievement into his assessment of your merit. Even talking to the quest giver again and getting him to promise to get a good word for you won't change that. There seems to be a bug in the game.
Rewards:
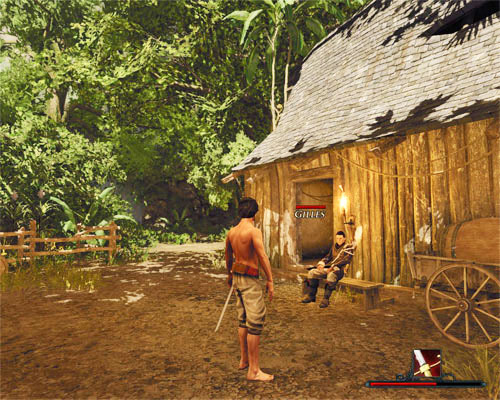
![Quest giver: Thompkins [#1] - A Fat Roast - Tacarigua - Quests - Risen 2: Dark Waters - Game Guide and Walkthrough](https://game.lhg100.com/Article/UploadFiles/201512/2015121709162397.jpg)
Quest giver: Thompkins [#1]
Another easy quest, perfect as a warm-up. To activate it, you need to go to the sugar cane plantation and talk to Thompkins [#1] - a hunter guarding the farm's entrance.
The key is to ask the him to go hunting together. Thompkins won't be too happy about it, but will agree anyway. The hunt will turn out to be pretty modest - the target is a Prize warthog [#2] a few meters away. When the animal is down, the mission will be successfully completed and the hunter will go towards the hut guarded by Gilles [#3].
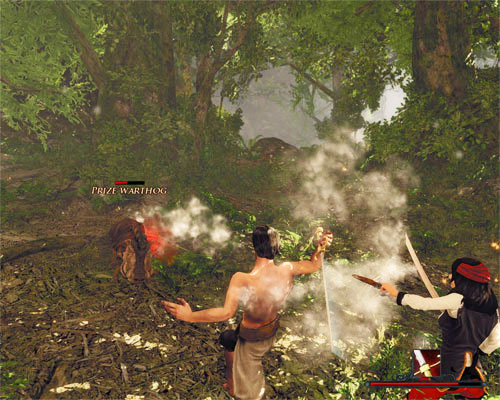 Fighting with Patty at your side is much more pleasant, especially since her Glory points go to our account.
Two things to sum up:
Rewards:
![Quest giver: Asad [#1] - A Hungry Slave - Tacarigua - Quests - Risen 2: Dark Waters - Game Guide and Walkthrough](https://game.lhg100.com/Article/UploadFiles/201512/2015121709162379.jpg)
Quest giver: Asad [#1]
North of Puerto Sacarico there is a sugar cane plantation overseen by a sadistic guard named Riley [#2]. Visit the plantation during the day (in the evening, all workers go to the slave hut [#3]) and talk to Asad [#1] - the only local who is described by a name. He will tell you how bad the soldiers are treating them and that they don't even give them food.
If you have Provisions on you, which is more than likely, you can complete the quest in three seconds. Give the food to Asad and the mission will be over. If by some strange coincidence you don't have anything to eat, you can buy it from Osorio [#4].
Asad works at the sugar cane plantation until late evening hours.
Note! Your conversation with Asad will anger the guard so much that the short chat could end in a fight. After winning, the Nameless Hero will receive the Pirate's bandana Riley bought back from Carter some time earlier. You don't know why it's so? You can find more information on this subject in The Clothes of a Pirate quest description.
Rewards:
![Quest giver: Pedro [#1] - A Map of Tacarigua - Tacarigua - Quests - Risen 2: Dark Waters - Game Guide and Walkthrough](https://game.lhg100.com/Article/UploadFiles/201512/2015121709162370.jpg)
Quest giver: Pedro [#1]
This quest is part of: Find the Pirate's Den
It's not necessary to obtain the map of the island, but it's better to have it - it makes moving around the hostile terrain much easier. You can trigger the quest allowing you to receive the precious piece of parchment from Pedro [#1], the quartermaster strolling along the main square of Puerto Sacarico. Talk to him and say that you'd like to get to the other side of the island. Mention a map in the next part of the conversation, and you'll find out that you can buy one from governor Di Fuego.
 The governor's villa. You can find Di Fuego on the upper floor.
It may prove difficult to enter the governor's mansion - the guards on the ground floor won't let the Nameless Hero inside if he's half naked. The key to success is to put on any shirt, even if it's just a piece of Dirty shirt. You can find these rags in various ways. The easiest one is to go to the slaves' night shelter [#3] and loot the chest inside. You can also buy them from prison guard Carter [#3], but first you need to learn that he's selling them. You can get that information from Pedro if you ask him about clothing (see: Sturdy Clothes).
No matter how you manage to get a shirt, head to the biggest building [#2] in Puerto Sacarico, convince the guards that you need to pay the governor a visit, and go up the stairs. Talk to Di Fuego, asking him about the possibility of buying the Map of Tacarigua. He will sell it to you for 100 Gold. That's all.
Note! If this is your first conversation with Pedro, help him go back to his counting when you end it. The right answer, worth as many as 100 Glory points, is "29"!
Rewards:
![Quest giver: Steelbeard [#1] - Become a Pirate - Tacarigua - Quests - Risen 2: Dark Waters - Game Guide and Walkthrough](https://game.lhg100.com/Article/UploadFiles/201512/2015121709162496.jpg)
Quest giver: Steelbeard [#1]
This quest is part of: The Titan Weapon
After finding Captain Steelbeard [#1] (see: Find Steelbeard), talk to him about the Titan Harpoon. He will give you valuable information about that powerful weapon, including the name of the man who currently possess it. It will quickly turn out that in order to follow the trail of the artifact, the Nameless Hero will have to join the pirate crew. Unfortunately, it won't be so easy.
Steelbeard will promise to go after the weapon, but will demand that you became a full-fledged pirate. There are two steps to be accepted in the ranks of the pirates - first you need to distinguish yourself, and then take an oath.
"Distinguishing yourself" is a lengthy process and requires a proper effort on your part. Steelbeard will observe your accomplishments and make a final assessment on their basis. If you haven't completed any mission from the list below, only one accomplishment will be taken into consideration at the beginning - finding the pirates' den. Patty's father will ask you which route you've taken to reach the camp, but what you tell him won't be of any matter.
 Steelbeard will gladly take you into his crew provided you can prove your usefulness. Not necessarily in drinking rum.
In order to win Steelbeard over, you need to successfully complete at least five different missions from the list below:
 Helping pirates in need is the key to success in this quest.
  Booze is the most important person on the island. He or his tavern are connected with most quests.
When the quest is completed, all that's left to do is to take an oath in front of the crewmembers. In order to do that, tell Steelbeard [#1] you're ready to join their ranks. At this moment you can leave the island aboard the ship - simply talk to the captain.
Rewards:
![Quest giver: Di Fuego [#1] - Bounty - Tacarigua - Quests - Risen 2: Dark Waters - Game Guide and Walkthrough](https://game.lhg100.com/Article/UploadFiles/201512/2015121709162410.jpg)
Quest giver: Di Fuego [#1]
When you first approach the governor's mansion [#1] in Puerto Sacarico, you'll be a witness to a short conversation between Commandant Sebastiano and his subordinate Roquefort. The discussion concerns a small group of slaves who had escaped the Inquisitors and hidden in the jungle.
Enter the villa and convince the guards that you need to see the governor. They will refuse unless you're wearing a proper attire. If not, you'll have to obtain some clothing first. Dirty shirt lies in a chest in the slaves' hut [#2]. You can also buy clothes from Carter [#3], but you need to learn that from Pedro first (see: Sturdy Clothes).
 While talking to the governor, use the opportunity to increase the bounty for the savages' heads.
When you finally manage to get upstairs, talk to the governor and ask him about the slaves. Depending on how the conversation goes, the following things may take place:
The slaves are hiding in the jungle [#4], a few hundred meters east of the tower by which Vasco [#5] is standing. Because they are quite challenging at the beginning of the game, don't try to fight them without Patty. She will draw the attention of at least one of them to herself, and additionally pacify the others with her pistol - which will prove invaluable. The last one is of course the strongest, though you shouldn't underestimate the spearmen as well. They can attack the Nameless Hero from a distance which, considering his feeble health, may be quite problematic.
 The slaves are hiding in the jungle. Don't venture there without Patty.
Once you've taken care of all the enemies, collect their equipment as well as their Heads, the proof you've done the job. With the trophies in your inventory, visit the governor [#1] and tell him all about your spectacular achievement. As promised, you will be rewarded according to what was agreed.
Two things to sum up:
Rewards:
![Quest giver: Blake [#1] - Crab Slapping with Blake - Tacarigua - Quests - Risen 2: Dark Waters - Game Guide and Walkthrough](https://game.lhg100.com/Article/UploadFiles/201512/2015121709162547.jpg)
Quest giver: Blake [#1]
This quest is part of: Become a Pirate
Blake [#1] is a member of Captain Steelbeard's [#2] crew, but instead of wasting his time sitting in the docks, he's currently occupied with watching for sea monsters at the north-east exit of the pirates' camp. The buccaneer would much rather see which one of you is better in killing giant crabs, but no competition can take place until the Nameless Hero learns how to perform kicks.
Note! The crab problem also gains the interest of Stone [#2], which you'll learn if you talk to him before attempting to complete this quest. It doesn't affect the mission in any way, though - the blacksmith won't give you any reward for eliminating the animals either.
If you haven't used the Kick skill before, it's a perfect opportunity to catch up. You won't have to look for a trainer too far because Blake can easily teach you the art, that is unless you don't mind spending some money - you'll need 500 Gold for a lesson. Later, you can talk to him again and suggest a sparring match.
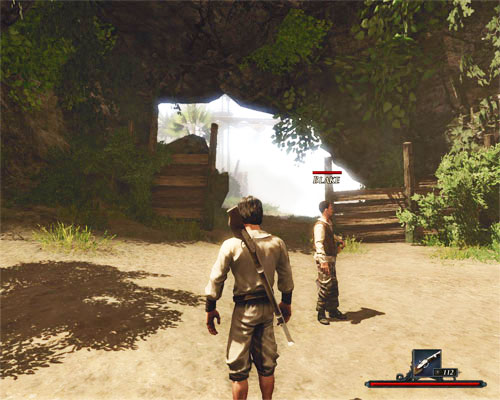 Blake is watching for sea monsters near the north-east entrance to the pirates' den.
At the beginning of the game, Giant Crabs are formidable foes, even individually, and here you'll have to deal with five of them at once. Luckily, you have Blake with you - the presence of a companion on the battlefield makes things much easier, as the pirate will efficiently draw the attention of some of the crabs away from you. It doesn't change the fact, though, that during the fight you have to be very careful- it surely won't be easy.
To successfully complete the quest, all crabs have to be killed. In truth, you can completely ignore them and focus only on avoiding them - it's only important that they fall, not by whose hand. If, however, you leave all of them to Blake, you'll miss the opportunity to score a bonus for eliminating them! Don't forget that the pirate isn't a member of your team, which means that the rewards for the creatures he slays go straight to his account!
How to kill the crabs? In close combat, kicking is indeed effective (hold the right mouse button and then press Space). A well aimed hit can turn them upside down, leaving an open way to pummel them without risking a counterattack. Guns are also efficient - if you got a shotgun from Hopkins [#4], you can easily attack them from a distance. In general, it's also good to bring Patty along - the girl is helpful as always and, as opposed to Blake, Glory points for enemies killed by her go to you.
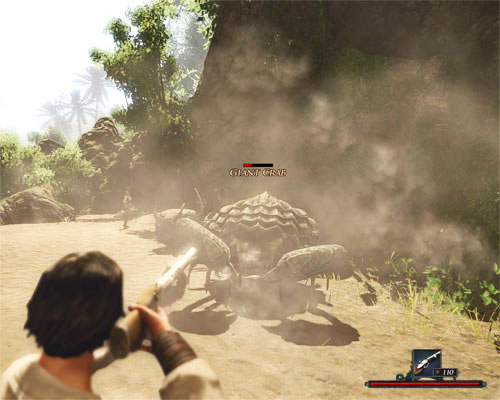 Using guns against Giant Crabs is a good idea, but you have to keep the enemies at a distance.
When every enemy drops dead, the game will sum up your accomplishments and calculate your monetary reward:
Note! Killing crabs is part of the Become a Pirate mission, which means that it affects your reputation with Captain Steelbeard:
Rewards:
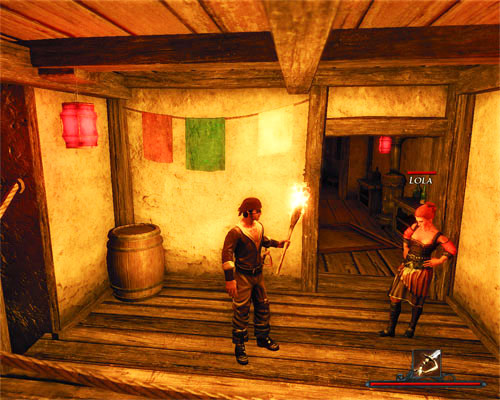
![Quest giver: Morris [#1] - Distract Alister - Tacarigua - Quests - Risen 2: Dark Waters - Game Guide and Walkthrough](https://game.lhg100.com/Article/UploadFiles/201512/2015121709162588.jpg)
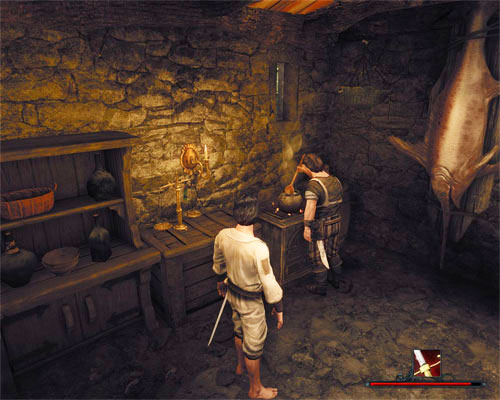
Quest giver: Morris [#1]
In the middle of the pirates' camp, by one of the fires, you can find Morris [#1]. He's a member of Captain Steelbeard's crew and will gladly tell you about items you can find in Booze's room [#2] on the second floor of the tavern. He had tried to sneak up to the innkeeper's room, but was chased off by Alister guarding the distillery. Where Morris failed, maybe you can succeed.
 You can reach the distillery using the outside stairs.
During the conversation you'll find out that Morris has a plan do distract Alister's attention, but won't give it to you for free. The price for getting the distiller out of the way is 100 Gold. If you agree to pay, the pirate will let you in on the details.
Wait until sunset and go to the first floor of the tavern. Elia - Alister's assistant - doesn't sleep in the distillery, but in his own bed, so that takes care of the first problem. When he goes to sleep, move to the tavern's inner balcony and talk to the prostitute there, Lola. Your goal is to convince her to distract Alister. The girl will agree, but not without a price - her service will cost you either 100 or 200 Gold, depending on the chosen dialogue option (if you want to pay less, tell her Morris is outside). At this moment, the quest is completed.
You can find Lola on the first floor. She's busy looking pretty on the balcony.
Two things to sum up:
Rewards:

This quest is part of: The Water Carriers
The quest is triggered when you chose Colby [#1] to change the guard at the front gate of the pirates' settlement (see: The Water Carriers), and decide to fight Doggs.
 Using guns in this type of fights is fully allowed.
The pirate isn't too much of a challenge, so even an inexperienced character can easily take him down. Once Doggs is forced to accept your superiority, the quest is completed and you're free to have another fight with Foster, or to finish The Water Carriers completely.
Rewards:

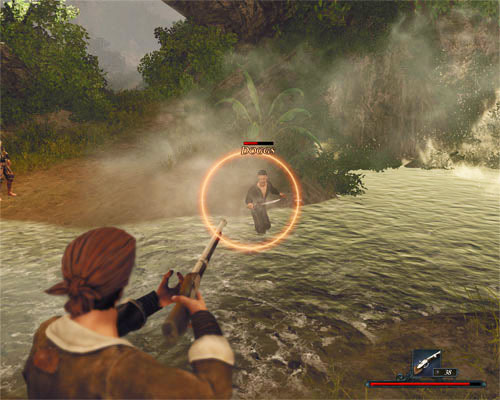
This quest is part of: The Water Carriers
The quest becomes available when you decide that Colby should change Fence at the front gate of the pirates' settlement. It starts the moment you lead to a fight with Foster.
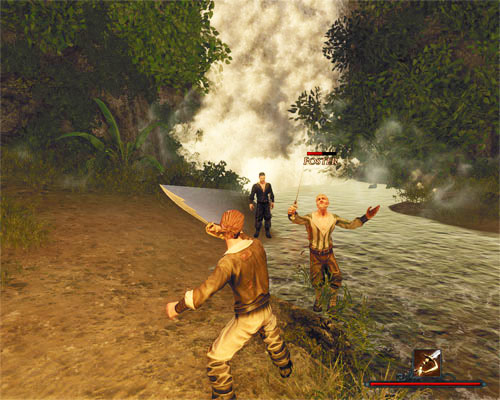 Foster is taking a pounding.
Your opponent shouldn't be any problem for you, even if you're not a champion of melee combat. Once Foster falls, the quest is completed, and you're free to have another fight with Doggs, or - if the other pirate has been already defeated - finish The Water Carriers completely.
Rewards:

This quest is part of: The Titan Weapon
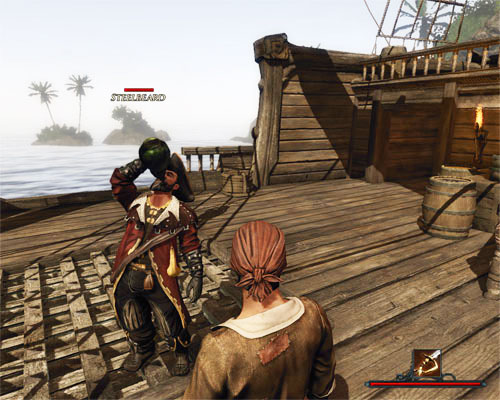
Steelbeard [#1] is a cursed cutthroat currently residing in the pirates' camp in the north-east part of the island. He is also Patty's father, the girl who's been faithfully accompanying you from the very beginning. The Nameless Hero knows that the sea rover has information on the artifact of the Titans, which is why he wants to find him at any cost.
Steelbeard doesn't leave the pirates' den at all, so the search will be neither long, nor difficult. The only thing you have to do is get to the pirates' camp (you can find detailed information on how to do it in the Find the Pirates' Den quest description) and head to the ship docked in the harbor. When you approach the gangway, there will be a short cutscene showing the meeting of the father and daughter. Wait until it's over and talk to the captain. When you mention the weapon that can kill the Kraken, the quest will be completed.
 The price of meeting Steelbeard is saying goodbye to Patty. The girl stops accompanying you.
Completing the quest results in Patty leaving your party for good! The girl's help is indispensable in the first stages of the game, with the Nameless Hero still being too weak a warrior to have no problems in battle, therefore visiting Steelbeard too early isn't recommended. If you want to make the first challenges easier, delay the meeting as long as you can, using your companion to help exterminate the enemies inhabiting the island. Remember that Patty can't be fooled. Even if you leave her in Puerto Sacarico and go meet the captain alone, she will still join you when the moment comes.
Rewards:

This quest is part of: Find Steelbeard
Reaching the pirates' den is one of the basic quests you have to complete while on the island of Tacarigua. This is where you can find Captain Steelbeard, the father of your companion Patty, and one of the key characters in the game's storyline.
The quest isn't particularly complicated - simply walk into the pirates camp [#1] and you'll be done. The most problematic, though, will probably be the journey to get there. The Nameless Hero will have to face different kind of enemies (monkeys, warthogs, termites), and almost all of them are quite challenging at the beginning of the game. To be safe, it's good to bring Patty along. The girl is pretty handy in melee combat, and from time to time uses a pistol which deals serious damage.
 The gate to the pirates' camp is guarded by Fence. If you fail the conversation, you'll be forced to look for another way in.
The main entrance to the camp is situated on a hill, and as you'll soon find out, forcing the closed gate won't be easy. It's guarded by a pirate named Fence [#2] who'll display a far-reaching distrust towards your person. You have only one chance to convince the cutthroat to let you in - if it ends in fiasco, you won't be able to repeat it. First, let me tell you that traditional arguments won't persuade him - be patient and wait until Silver Tongue or Intimidate become available in the dialogue options. In both cases, they have to be at least at 15.
If the conversation ends in a failure, you'll need to find another way in. You can enter the camp from the north-east, using the beach. There isn't any gate there, and Blake [#3], the pirate keeping an eye on the area, will look more kindly upon you. No matter how you reach the den, the quest will be completed.
Two things to sum up:
Rewards:
![Quest giver: Largo [#1] - Follow Largo - Tacarigua - Quests - Risen 2: Dark Waters - Game Guide and Walkthrough](https://game.lhg100.com/Article/UploadFiles/201512/2015121709162766.jpg)
Quest giver: Largo [#1]
After freeing Largo [#1] from prison, the pirate moves a few meters to the east [#2] and patiently waits until you have a moment to talk to him. During the conversation you'll find out that the ex-convict intends to go the pirates' camp in the north-east part of the island. If you care about what happens to him, you can accompany him on the way. Choosing the proper dialogue option activates the present quest.
Escorting Largo to the pirates' camp proves to be quite a difficult task, especially if you haven't previously cleared the jungle from the animals inhabiting it. The thief's route passes through a few critical spots with monkeys, warthogs and termites. Largo even "scores" a hideout with hostile Savages [#3], fugitives from the sugar cane plantation (see: Bounty). You'll have to fight all these opponents all by yourself because your companion is unarmed. Lucky for you, the pirate can't die - if his health bar drops to zero, he'll get up on his legs once the fight is over. No point in hiding it makes things much easier.
 When you're attacked, Largo will panic. Killing the enemies will drop on your shoulders.
The joint venture will end in front of Booze's tavern [#4]. Largo will thank you for your help and go inside, which from now on will become his new home. There is a shockingly low amount of Glory points the game offers as a reward.
A few notes to sum up:
Rewards:
![Quest giver: Largo [#1] - Freeing Largo - Tacarigua - Quests - Risen 2: Dark Waters - Game Guide and Walkthrough](https://game.lhg100.com/Article/UploadFiles/201512/2015121709162762.jpg)
Quest giver: Largo [#1]
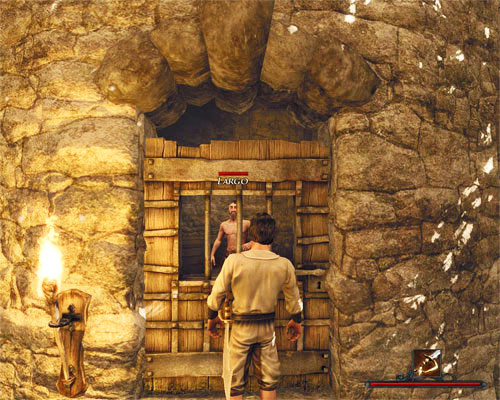
Largo is a prisoner currently held in a tower [#1] in the north part of Puerto Sacarico. Captured by the Inquisitors, he'd like to be freed, which he'll tell you if you ask the right questions.
This conversation will be available only once, so be careful which answers you choose. After Largo tells you about his lost clothes (see: The Clothes of a Pirate), you'll be asked what you want to do next. If you admit to wanting to join the pirates, the prisoner will tell you how to get a lock pick and then ask whether you'd like to help him get free. By agreeing, you active the quest. If at any point during the conversation you either refuse or suggest that Largo should keep to his own business, the subject of the escape won't be touched upon at all, and you will lose the chance to complete this mission. A conversation that once went wrong cannot be repeated!
 Stone is a hard player. You'll have to wheel and deal to convince him to give you the lock pick for free.
The key to freeing the thief is acquiring a Lock pick. According to Largo, the tool is in the possession of Stone, a blacksmith from the pirates' settlement. Both men know each other very well, and what is more, the blacksmith owes the convict a debt of gratitude. It doesn't mean, though, that everything will go smoothly. It won't.
Head to the camp and find the blacksmith's workshop [#2] - it won't be difficult with the settlement having five houses in total. Tell the blacksmith about the troubles of his colleague and say you'll free him if you receive a lock pick. Stone will demand proof that you're telling the truth, quite rightly. The only thing that can convince him is the Black pearl or the Pirate's bandana - two items that once belonged to Largo, but were taken from him after he went to prison. More information on how to obtain those items are in The Clothes of a Pirate quest description.
Note! There is another way of obtaining the lock pick, but it requires spending a substantial amount of cash. On Captain Steelbeard's boat, right next to the steering wheel [#3], you can find a man named MacLaine. He'll tell you that there is a chest below the deck that no one can open (see: A Difficult Chest), and the lock pick necessary to do it is in Stone's possession. If you agree to the challenge and learn from MacLaine that the blacksmith has the tool, you can go to him and ask for it. He'll agree to sell it for 500 Gold.
With the pearl or the bandana in hand, go to Stone and show him the proof. The blacksmith will give you the lock pick, but will demand 500 Gold for it. Mention that Largo expects him to pay his debt, and you can have the tool for free. Return to Puerto Sacarico.
 Fighting Carter is inevitable. Largo will be watching you.
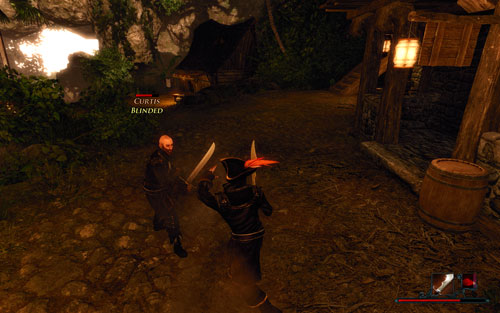
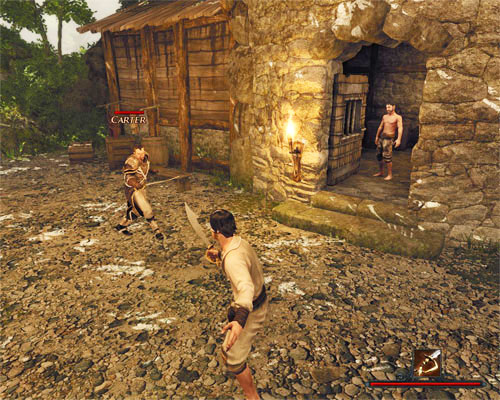
The quest will be completed after you talk to Largo and tell him you have the lock pick. The pirate will take it and open the door by himself. Seeing what's happening, Carter [#1] will step into action. Defeat the soldier and everything will go back to normal. The guard won't hold it against you, apparently believing that you had no part in the prisoner's escape.
You can find Largo a few meters to the east. Talk to him again to obtain the lock pick which will serve you well until the end of your adventure. When the conversation is over, the man will go to the pirates' settlement, where a corner in Booze's tavern [#4] is waiting for him. If you feel like it, you can escort him to the camp, which means activating another quest - Follow Largo.
Note! Freeing the prisoner earns you a great opinion in Captain Steelbeard's [#5] eyes, bringing you closer to completing the Become a Pirate quest. Once Largo is free again, visit Patty's father and tell him about your accomplishment.
Rewards:
![Quest giver: Osorio [#1] - Grog for the Guards - Tacarigua - Quests - Risen 2: Dark Waters - Game Guide and Walkthrough](https://game.lhg100.com/Article/UploadFiles/201512/2015121709162863.jpg)
Quest giver: Osorio [#1]
You receive this quest automatically if you manage to persuade Patty to work in the kitchen (see: Kitchen Help). When Osorio [#1] retreats to get a much deserved rest, he will give you 5 bottles of Grog and tell you to take them to Gilles.
To complete this quest, head to the sugar cane plantation located north of Puerto Sacarico. Gilles [#2] spends his days sitting on a bench in front of the only cabin in the area. Talk to him and tell him you brought the liquor. The quests ends right there, but the conversation won't be over - how you handle it has an impact on what happens next.
Gilles will ask you to let Thompkins [#3] know that the grog's here:
 Gilles is the receiver of the Grog transport.
The work has been done and the cook promised a reward. How high it is depends on how you handled the situation with Thompkins:
Once you inform Osorio that the quest has been completed, Patty will be fired. Try to talk to her and step back when she tells you to. How you steer the conversation may or may not get you the food stolen from the kitchen:
Rewards:
![Quest giver: Osorio [#1] - Kitchen Help - Tacarigua - Quests - Risen 2: Dark Waters - Game Guide and Walkthrough](https://game.lhg100.com/Article/UploadFiles/201512/2015121709162839.jpg)
Quest giver: Osorio [#1]
Opposite the governor's mansion, directly across the square, there is a small house occupied by Osorio [#1]. He is a cook and is complaining about the lack of volunteers for work, which he'll tell you if you ask him about job openings.
Osorio needs a helper to take care of the dishes and a messenger. You won't get the first job - whichever dialogue option you choose, it will always turn out you don't have the slightest idea about cooking. Instead, the cook will offer to hire your companion Patty for one day, but the girl will categorically refuse.
 You can't replace the cook yourself, but you can persuade Patty to do it instead.
Talk to Patty. She won't respond to rational arguments, so you'll be forced to trick her. To succeed, choose the option that says about a plan, but in order to have that option available, your Silver Tongue has to be at least 10. No matter how you play the rest of the conversation, the girl will agree to your proposal.
Talk to Osorio and tell him that Patty will help in the kitchen. The quest will be completed and you'll automatically receive another one - Grog for the Guards.
Note! Even though Patty should formally work only for one day, the time flow won't have any effect on her stay in the kitchen! The girl will work for Osorio until you complete Grog for the Guards. Until then, you won't be able to use her help!
Rewards:
![Quest giver: Largo [#1] [#2] - Largo's Clothes - Tacarigua - Quests - Risen 2: Dark Waters - Game Guide and Walkthrough](https://game.lhg100.com/Article/UploadFiles/201512/2015121709162906.jpg)
Quest giver: Largo [#1] [#2]
In order to activate this quest, you need to find at least four things that belong to Largo [#1] [#2] (see: The Clothes of a Pirate), then attempt to give them back to him during a conversation (the proper dialogue option will be available only if the required item is in your inventory). The pirate will be grateful, but won't be interested in getting his clothes back one at a time, so he'll ask you to bring them all at once.
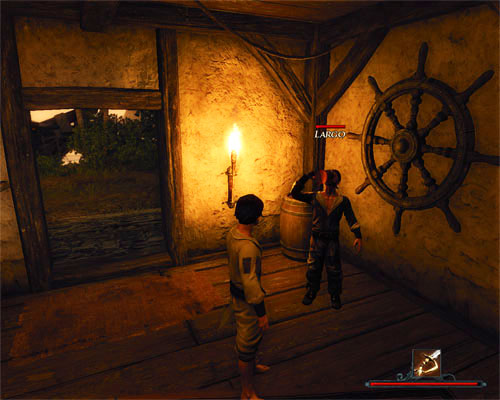 After leaving prison, Largo will stay at Booze's tavern to spend his time drinking beer.
You can find detailed information on how to obtain the individual parts of the pirate's clothes in The Clothes of a Pirate quest description, so I won't go over them again. When you manage to collect all of them (Pirate's bandana, Black pearl, Worn-our boots and Leather shirt), visit Largo once more and tell him you've completed the mission. The clothes will go back to their rightful owner, you will receive the promised 1000 Gold, and the quest will be completed.
Note! This quest description contains two possible locations where you can find Largo. Once the pirate is freed from prison [#1], he will stay at Booze's tavern [#2].
Rewards:
![Quest giver: Gilles [#1] - Let Thompkins Know! - Tacarigua - Quests - Risen 2: Dark Waters - Game Guide and Walkthrough](https://game.lhg100.com/Article/UploadFiles/201512/2015121709162949.jpg)
Quest giver: Gilles [#1]
This quest is received automatically when you agree to help Gilles [#1] inform Thompkins about the delivery of grog (see: Grog for the Guards). The quest is easy as pie since the hunter is standing a few meters north-east of the cabin in front of which the quest giver is sitting. Go to him and tell him about the alcohol. At this moment, another quest begins: Meat for the Cook.
Rewards:
![Quest giver: Thompkins [#1] - Meat for the Cook - Tacarigua - Quests - Risen 2: Dark Waters - Game Guide and Walkthrough](https://game.lhg100.com/Article/UploadFiles/201512/2015121709162933.jpg)
Quest giver: Thompkins [#1]
This quest is triggered automatically when you inform Thompkins [#1] about the grog (see: Let Thompkins Know!). The hunter, thinking you're here at Osorio's [#2] orders, will give you a large piece of Fresh meat from an animal he had just killed, and ask to deliver it to the cook.
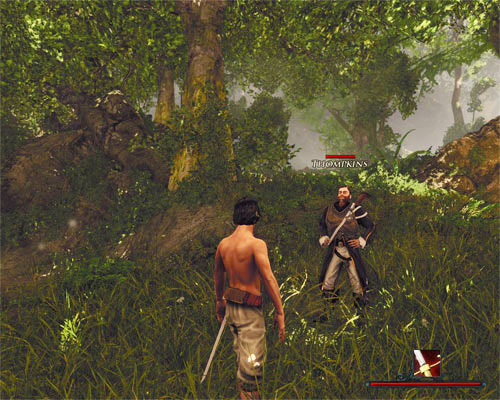 Osorio is waiting for the meat from Thompkins.
The mission is trivially easy - simply go to Osorio and, apart from the grog, tell him about the meat from Thompkins. If the Nameless Hero lies, the quest will be cancelled!
Rewards:
![Quest giver: Booze [#1] - Night-time Pursuit - Tacarigua - Quests - Risen 2: Dark Waters - Game Guide and Walkthrough](https://game.lhg100.com/Article/UploadFiles/201512/2015121709162943.jpg)
Quest giver: Booze [#1]
This quest is part of: The Traitor and the Beast
In Booze's [#1] tavern, by the table under the window, you can find Meeks. He's particularly repulsive, but try to talk to him anyway. Depending on whether you buy him a drink, the conversation can be either short or shorter. Strictly speaking, you're gesture won't affect the situation in any way.
When you try to leave the tavern, Booze will call you. Talk to him and you'll learn than Meeks is not his favorite person. The bartender goes even as far as to say that the pirate is hiding something, and his secret escapades at night are proof of that. Offer to investigate where the shady fellow is sneaking out.
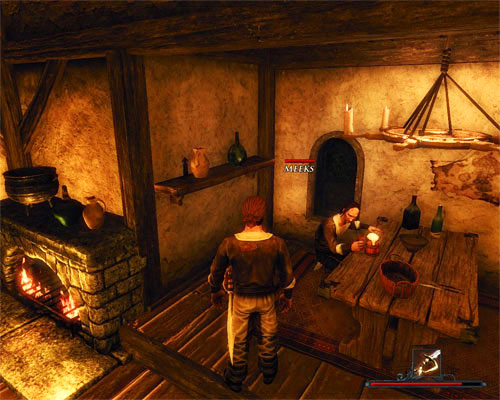 Meeks is a nasty fellow. Proving he's up to something is a good idea.
Meeks leaves the tavern only during the night, so following him is only possible after sunset. It's best to just sleep until late in any bed. When darkness falls on the pirates' settlement, go to the tavern and tell Booze you're ready to follow Meeks. At that moment, the pirate will leave the table and head out. Follow him, maintaining a safe distance (if he sees you, he'll momentarily go back to the tavern and you'll have to repeat the whole operation). A few minutes later you'll reach a beach [#2] where you'll witness some interesting events.
A Sunken One appears on the beach, which - as it turns out - collaborates with Meeks, collecting information on the situation on the island. Unfortunately, the scene isn't long because the sea monster detects the Nameless Hero. At this point, the current quest is completed and another one begins - The Traitor and the Beast. The game doesn't give you any rewards for the present one.
![Quest giver: O'Brian [#1] - O'Brian's Treasure - Tacarigua - Quests - Risen 2: Dark Waters - Game Guide and Walkthrough](https://game.lhg100.com/Article/UploadFiles/201512/2015121709163097.jpg)
Quest giver: O'Brian [#1]
This quest is part of: Become a Pirate
After obtaining the treasure map during the O'Brian's Treasure Map quest, the Nameless Hero will learn where the drunk from Captain Steelbeard's crew buried the chest full of valuables. The goal of this mission is of course to find it.
In order to dig it out, you will need a Shovel - you can buy it for 150 Gold from Flannigan [#2], a merchant living in the west part of the pirates' settlement. If you completed the previous mission, Pete's Treasure, shopping won't be required as you should already have it, and completely for free.
 The place where the treasure is hidden is usually marked by a red cross.
Armed with a shovel, head to the waterfall [#3] where water carriers are working, and then use the tunnel ahead of you, which leads to the north part of the island. As soon as you reach a beach, look to the left. You'll see a spot marked by a red cross several meters away [#4], which is where O'Brian buried his treasure. All you need to do is approach it and use the left mouse button. That's all.
Note! This quest is part of the Become a Pirate mission. If you're trying to gain reputation with Captain Steelbeard [#5], telling him that you've uncovered the treasure is a must. He will take it into consideration in his assessment.
Rewards:
![Quest giver: O'Brian [#1] - O'Brian's Treasure Map - Tacarigua - Quests - Risen 2: Dark Waters - Game Guide and Walkthrough](https://game.lhg100.com/Article/UploadFiles/201512/2015121709163005.jpg)
Quest giver: O'Brian [#1]
This quest is part of: O'Brian's Treasure
Drinking in the pirate tavern is O'Brian [#1], a sailor barely standing on his feet, who belongs to the crew of Captain Steelbeard [#2]. After a short chat you'll find out two important things. First, the pirate has recently buried a treasure and drawn a map leading to it; second - he'll be most glad to participate in a contest to drink as much liquor as fast as you can.
You can play the drinking game just for fun, or you can try to win some money (50 Gold). The most valuable reward is, however, the aforementioned map, and that's what the Nameless Hero should try to focus on. For the contest to begin, though, you have to put something in first, and O'Brian won't be satisfied with just anything.
 O'Brian is more than happy to take part in the contest, but will demand something equally valuable should you want the map.
There are three things you can give him: a monkey you probably won't be able to free on your first visit on the island, an earring belonging to Largo (Black pearl), or 500 Gold. The third option is definitely the best as it's not that difficult to acquire such a sum. Nonetheless, if you insist on the monkey, you should visit Flannigan [#3]. As for the Black pearl, you can steal it during The Clothes of a Pirate quest - all necessary information on how to do it are in the quest description.
When you agree on the stake, go to the innkeeper and buy a proper beverage. O'Brian wants to drink the most powerful one, the Painkiller - Booze sells one bottle for 150 Gold. With the liquor in hand, go back to your rival and tell him you're ready. The contest has a form of a mini-game - save before you begin.
You'll see a hand and a few bottles. The goal is to catch all the beverages so that your friend could drink them. You shouldn't move too rapidly because the bottle can fall and you'll have to start over. Additionally, try to aim at the neck of the bottle. It gets more difficult with each one, because the hand starts to shake and react slower to the way you move. The passing time is also a factor. The Nameless Hero has to deal with the alcohol before your rival drinks up his batch.
 The drinking mini-game - empty all the bottles before your rival.
Note! If O'Brian wins, the quest will be cancelled and you can't repeat it! What's more, if you chose to put the earring in the pool, you won't be able to return the full set of clothes to Largo and therefore completing the quest The Clothes of a Pirate! This is a very high price for a defeat - try not to let it happen.
If you win, the quest will be successfully completed. O'Brian will give you the map thanks to which finding the treasure is extremely easy. But that's a topic for another quest - O'Brian's Treasure.
Rewards:
This quest is part of: Become a Pirate
While exploring the island you'll surely come across some monumental buildings, remainders of a long lost civilization. Plundering them will pay off, but will also be very dangerous - they are guarded by extremely challenging opponents.
The person who tells you about the tombs and the risks they pose is Asad [#1], a local forced to work on the sugar cane plantation. You won't trigger the quest by talking to him, though. The mission will appear in your logbook only after you have plundered any of the ruins (plundering meaning finding the hall with the Idol and taking it from the pedestal). There are three such idols on the island, and you can find them in two different tombs. It's worth mentioning that taking all of them is not necessary. To complete the quest, you only need to get one.
 The most efficient way of defeating the Grave Spider is to attack from a distance and quickly run away.
Head to Vasco's tower [#2] and start climbing up, carefully watching the rock slope to your right. Keep going straight ahead until you reach the cave farthest to the north [#3]. The entrance to the tomb is inside, but before you can open it you'll be forced to fight a Grave Spider that lives here.
The creature is not only huge, but also very dangerous, which you'll find out soon enough. With Patty at your side, use her to draw its attention away from you, and take your time to attack it from a distance. Close combat is a complete waste of time and healing measures - if you're not expert in melee combat, it will be ages before you succeed. The best solution by far is to attack from a safe distance and run away if the creature comes too close.
Once you've dealt with it, don't forget to take the Golden head from its corpse; then return to the cave's entrance and find the gate leading to the tomb. You can open the door by placing the idol in the Lock right next to it. Move forward, killing the mild Rats on the way and defeating a Warrior. At the end of the route you'll see a pedestal with an Idol on it. If you lift it, you'll trigger a trap in the corridor. In order to avoid death by a murderous blade, press Space when a proper command appears on the screen.
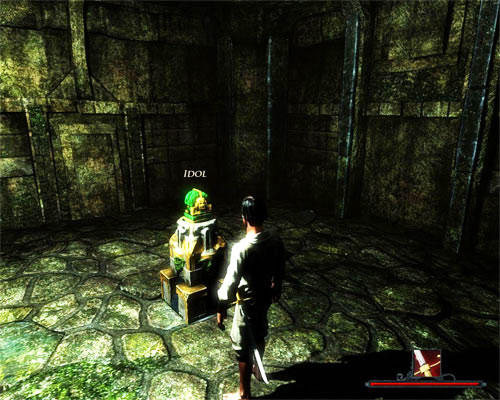 Lifting the Idol off the pedestal will trigger a trap.
The second tomb [#4] is located the central part of the island, in the same gorge where Pete (see: Pete's Treasure) buried his chest. In the first chamber you'll find only a sarcophagus, but it's a good idea to loot it anyway - there are valuable items inside. The corridors leading to the idols are a little above the ground, so you'll have to lift up to get to them.
West corridor - there are no enemies here, so getting to the Idol won't be a problem. When you take it, a trap will be triggered. If you wish to avoid being cut into little pieces, quickly press Space when the proper command appears on the screen.
East corridor - here it won't be that easy, as the passage to the idol is guarded by a Ghoul. The living corpse is a quick and challenging opponent, but the fight is still way easier than with the Grave Spider. After defeating the undead, use the only available way forward, looting another sarcophagus on the way. When you take the Idol at the end, traditionally a trap will be triggered. This time the floor will collapse beneath you - if don't press Space in the right moment, you'll fall one floor down. I don't recommend falling down if you're a new and fresh character, because you'll meet a particularly nasty Guard there. He's a gigantic opponent which poses a huge challenge even to an advanced warrior.
 Meeting the Guard at the beginning of the game. Two swings of the cudgel and you're done.
 After obtaining any of the three idols, report to Captain Steelbeard [#5] and tell him all about your courageous deed. Naturally, this achievement influences your reputation with the pirate - if you're thinking about joining his crew, this is another step in the right direction. You can find more information on this subject in the Become a Pirate quest description.
Before leaving the island, think about plundering all the tombs. The items you can acquire are very valuable.
Rewards:

This quest is part of: Become a Pirate
The quest is triggered automatically after finding Pete's [#1] treasure map (see: Pete's Treasure Map). The goal is to uncover a chest with valuables the pirate managed to bury before his death.
The chest containing valuable items is located several hundred meters north from where you found Pete's body, just in front of the entrance to the ancient tomb. The precise location is marked by a large red cross drawn on the ground [#2], so you shouldn't have any problems finding it.
 Dig here. If you don't know how, borrow Pete's shovel. He won't be needing it anymore.
In order to dig the treasure out, you will need a Shovel - if you haven't bought it from Flannigan [#3] before, you can always use the one lying right next to you. When you're ready, approach the cross and use the left mouse button. Wait until the chest is uncovered, and check what's inside. At this moment, the quest is completed.
Finding Pete's treasure brings you closer to becoming a pirate, so don't forget to tell Captain Steelbeard [#4] all about it. You can find more information on this subject in the Become a Pirate quest description.
Rewards:
![Quest giver: Holly [#1] - Pete's Treasure Map - Tacarigua - Quests - Risen 2: Dark Waters - Game Guide and Walkthrough](https://game.lhg100.com/Article/UploadFiles/201512/2015121709163176.jpg)
Quest giver: Holly [#1]
This quest is part of: Pete's Treasure
In Booze's tavern you can meet Holly [#1], a local prostitute under the supervision of another of the tavern's patrons, Hank. The girl will be eager to tell you a few interesting things, so don't be afraid to talk to her. The most curious one is a rumor about Pete's treasure, a pirate who's recently gone missing. Make her tell you everything she knows (it will be necessary to pay her 100 Gold) and you'll activate the quest.
Note! By having a conversation with Holly you may unintentionally step on Hank's toes. The pimp will demand cash for any contact with the girl, and if you refuse, he will force you to fight. You can find more information on this subject in the Setting the Score with Hank quest description.
 Save your game frequently if you want to avoid this kind of surprises.
Holly believes Pete had buried his treasure between a gorge and a closely unidentified tomb. The only place that fits the description are the ruins of an ancient building in the central part of the island [#2]. To get there, leave the pirates' camp through the main gate and head west. Don't climb any hills, but keep going straight ahead. After a while, you'll see a large gorge to your right. Turn north and move forward. Your destination is at the end of the path.
During the hike, you'll come across a few animals, quite easy to defeat - monkeys and warthogs. The real threat, though, isn't the local fauna, but an invisible trap buried in the ground. If you activate it, you'll be pierced through by sharp spikes, which means instantaneous death. Your only rescue is pressing Space when a proper command appears on the screen. Save frequently to avoid such accidental failures.
 Pete managed to bury his treasure, but not to come back home safely.
When you reach the building, you'll find a corpse [#3] lying on the ground. The dead man is of course Pete. Search his body to receive the Treasure map and complete the quest. At the same time, another one will begin - Pete's Treasure.
Rewards:
![Quest giver: Roquefort [#2] - Pirate Post - Tacarigua - Quests - Risen 2: Dark Waters - Game Guide and Walkthrough](https://game.lhg100.com/Article/UploadFiles/201512/2015121709163244.jpg)
Quest giver: Roquefort [#2]
When you first approach the governor's seat [#1] in Puerto Sacarico, you'll witness a short conversation between Sebastiano and his subordinate Roquefort. Wait patiently until the uneven battle of words ends and talk to the scolded soldier [#2]. Admit to looking for pirates, and the man will give you the present quest.
The goal is to deliver a Sealed letter to the pirates' den, located in the north-east part of the island - if you agree to do it, Roquefort will even give you 100 Gold as an incentive, and promise another 100 after the mission is completed. The job doesn't seem too complicated, and indeed isn't, though the journey to the cutthroats' hideout may be a bit problematic. If you haven't been there before, taking Patty with you is a must - she'll be imperative in eliminating foes. You can find more information on this subject, as well as the description on how to reach the pirates' camp, in the Find the Pirates' Den quest description.
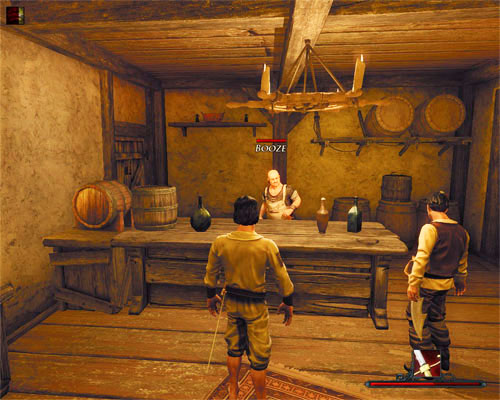 Booze is the recipient of the letter. You can find him in the pirate tavern.
Note! Before you go, you can tell the governor [#1] about the mission from Roquefort. Di Fuego will tell you to show him the correspondence, so do that. Depending on whether you've unsealed the letter or not, the governor's reaction will be different. The sole fact that the letter has been read doesn't change the subsequent events, and there's no punishment for it either. The governor will only say that Roquefort should be more careful in choosing his messengers. It's hard to disagree.
When you finally reach the pirates' den, visit the local tavern [#3]. The person you're looking for is Booze, the bartender - deliver the letter to him. After completing the quest, he will try to send you back to Puerto Sacarico to carry the answer (see: The Sugar Trade). The Nameless Hero may refuse to run another errand, but the new mission won't be forfeited - it will be available later after choosing the proper dialogue option when talking to Booze.
Rewards:
![Quest giver: Osorio [#1] - Provisions - Tacarigua - Quests - Risen 2: Dark Waters - Game Guide and Walkthrough](https://game.lhg100.com/Article/UploadFiles/201512/2015121709163226.jpg)
Quest giver: Osorio [#1]
This quest is part of: Find the Pirate's Den
This is a one-second quest, very easy to complete. To receive and finish it at the same time, go to Osorio the cook's house [#1], located directly opposite the governor's seat in Puerto Sacarico. During the conversation, ask if he sells food. That's all.
Rewards:
![Quest giver: Hank [#1] - Settling the Score with Hank - Tacarigua - Quests - Risen 2: Dark Waters - Game Guide and Walkthrough](https://game.lhg100.com/Article/UploadFiles/201512/2015121709163234.jpg)
Quest giver: Hank [#1]
This quest is part of the: Become a Pirate
Go to the pirates' camp and enter Booze's tavern, the only joint in the area. Right next to the bar you can find Hank [#1], a harmless - you'd think - type, who in fact is a common thug. You can learn about his foul intentions from Holly, a prostitute hanging around the tavern. One simple word with the girl is enough to draw the man's attention.
Depending on how long your conversation with Holly lasts, Hank will accost you either in the tavern, or outside, right by the door. For a chat with "his" subordinate, the pimp will demand 100 Gold. If you agree to pay, the Nameless Hero will give him the money and that will be the end of it. If you refuse, though, Hank will try to change your mind by force, automatically triggering a new quest.
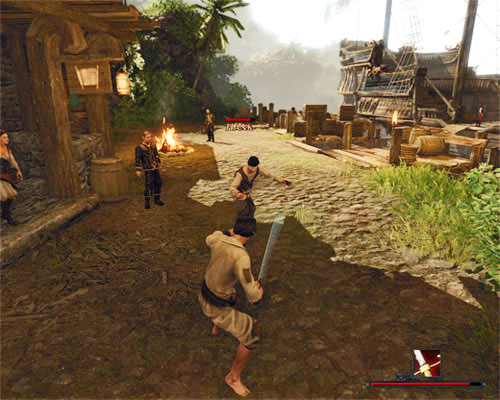 The other pirates won't meddle in your affairs - you're free to beat the pants off of Hank.
In order to complete the mission, you have to beat the living daylights out of your opponent. It's not particularly difficult since Hank isn't a challenging foe. When you win, he will recognize your superiority and go about his business.
A few things to sum up:
Rewards:
![Quest giver: Pedro [#1] - Sturdy Clothes - Tacarigua - Quests - Risen 2: Dark Waters - Game Guide and Walkthrough](https://game.lhg100.com/Article/UploadFiles/201512/2015121709163321.jpg)
Quest giver: Pedro [#1]
This quest is part of: Find the Pirate's Den
The Nameless Hero came to Tacarigua wearing only a ragged pair of trousers, so getting some decent clothing will soon become a matter of life and death. The current quest is activated during a conversation with Pedro [#1] when you mention the subject. You can find the Inquisition's quartermaster at Puerto Sacarico's main square.
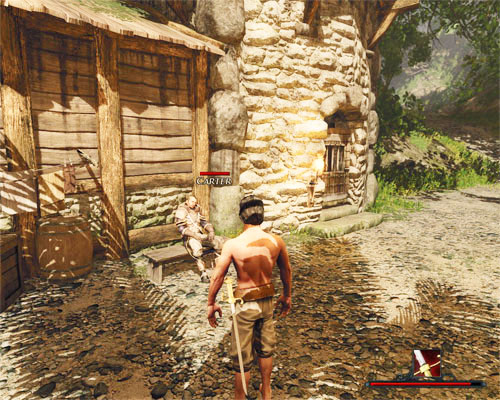 You can buy clothes from Carter if you know he sells them.
The case is very simple - Pedro says that Carter [#2], a guard in front of the nearby prison, is selling clothes. Simply go to where the quartermaster directs you and ask the guard about it. From now on, the game will allow you to do business with the soldier, and the quest will be completed.
Note! If this is your first conversation with Pedro, help the quartermaster go back to his interrupted counting. The correct answer, worth as much as 100 Glory points, is "29"!
Rewards:
![Quest giver: Largo [#1] - The Clothes of a Pirate - Tacarigua - Quests - Risen 2: Dark Waters - Game Guide and Walkthrough](https://game.lhg100.com/Article/UploadFiles/201512/2015121709163345.jpg)
Quest giver: Largo [#1]
In the north part of Puerto Sacarico there is a not too tall tower in front of which you can find a man named Carter. The building is in fact a prison, and the man its guard. When you approach the solid wooden door, you can see a prisoner in a cell. His name is Largo [#1].
Talk to him and you'll learn that Carter has taken all of his clothes and put them up on sale. The Pirate's bandana was bought by the arrogant Riley [#2], and Worn-out shoes by a soldier who left them by his bed in the barracks [#3]. The prisoner is also missing a Leather shirt and an earring, Black pearl. As it turns out, the last one is still in Carter's possession. Use all the dialogue options available to make the pirate tell you how to recover the individual items.
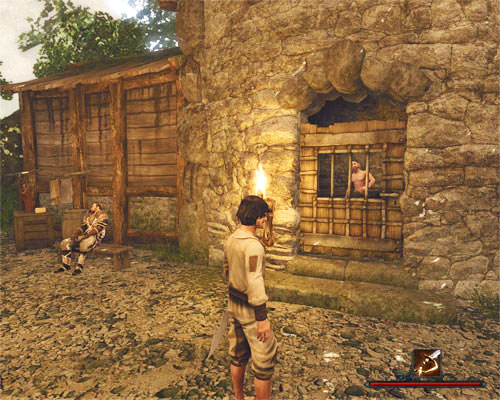 Largo will teach you how to steal the earring from Carter sitting nearby.
Acquiring the earring won't be difficult, but certainly costly. In order to learn of Carter's [#1] weak spot, which will allow you to steal the Black pearl, you need to become a thief first, which means you need to learn the Pickpocketing skill.
The pleasure costs 1000 Gold and you need to have the second level of Cunning. The trainer isn't hard to find because Largo is a specialist in the thieving arts. Ask him to show you tricks on how to pick pockets, and when it's over, mention the earring. The pirate will tell you that Carter has a weakness for grog. If you give him the alcohol, the rest is a formality.
There is a small chance you don't have Grog on you, so you need to obtain it first. You can find one bottle in a chest right next to Carter; Osorio the cook also has a supply, but you'll have to pay for it. With the flask in hand, talk to the guard and offer him a drink. He will agree and a second later the earring will be yours. Easy as pie.
Note! Before returning the pearl to its owner, you can use it for other purposes. The earring permanently raises Cunning by 1 and it's valuable enough that O'Brian [#4] will agree to put in the pool during the drinking contest over the treasure map (see: O'Brian's Treasure Map). It will also help you convince Stone [#5] to give the lock pick for free - see: Freeing Largo.
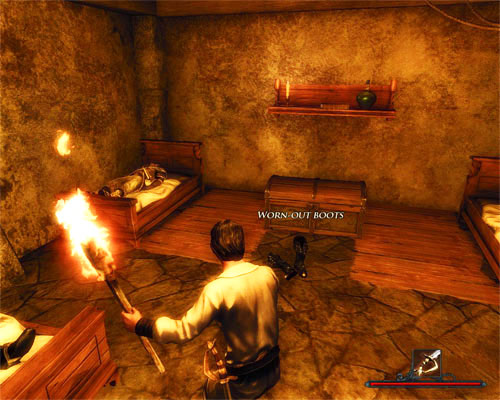 You can steal Worn-out boots during the night.
This is a very simple case because Worn-out boots are in one place only - the barracks [#3], situated right next to the governor's villa in Puerto Sacarico. The only problem may be an easy access to the building, as the sleeping room is constantly guarded by a sentry.
In a previous conversation, Largo [#1] suggested that it's best to go get the boots after sunset, and he was right. Quicken the time flow by sleeping in any bed until midnight, and head to Puerto Sacarico's main square. If you notice guards returning from their posts, wait until they disappear inside and go to sleep.
Switch to sneaking and start moving closer to the door, going from the villa's side. Keep close to the wall or you'll be seen by Osorio sitting on a bench. The entrance has to be clear - if the cook notices you, you'll have to repeat the whole operation. Once you're inside, move towards the only chest you see. The boots are right in front of it.
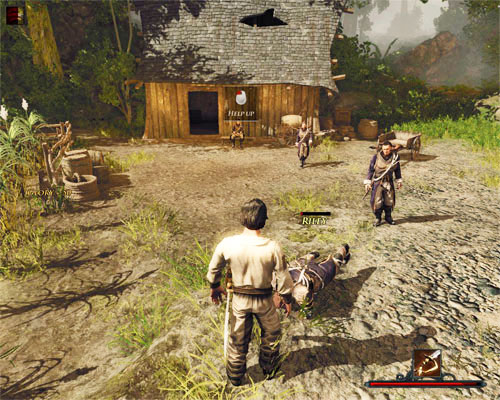 A humiliated Riley will give you Largo's bandana without complaint.
Riley [#2] is the overseer of the sugar cane plantation north of Puerto Sacarico. The arrogant type should draw your attention for one reason - he's the one currently in possession of the Pirate's bandana, previously owned by Largo [#1].
The first conversation is crucial. The Nameless Hero will go straight to the point, mentioning the bandana. What you answer next determines the course of events:
If you failed the conversation at the very beginning, you can always try to take the bandana by force. Riley will have an allergic reaction to you talking to Asad [#2], one of the slaves. The guard will give you one and only warning, but a right dialogue line will allow you to proceed right to the fight. If you lose, you can provoke a rematch the same way - by trying to talk to the slave. Riley will stop paying attention to you only after he loses the bandana.
 You can buy the Leather shirt from Carter.
The fourth and last piece of the thief's clothing is his Leather shirt. You can simply buy it back from Carter [#1] for 150 Gold, but only if you know that the guard is selling clothes. In order to learn that information, you need to complete the Sturdy Clothes quest.
To sum up:
Rewards:
![Quest givers: Steelbeard [#1], Booze [#2] - The Rum's Got to Come - Tacarigua - Quests - Risen 2: Dark Waters - Game Guide and Walkthrough](https://game.lhg100.com/Article/UploadFiles/201512/2015121709163450.jpg)
Quest givers: Steelbeard [#1], Booze [#2]
This quest is part of: Become a Pirate
The quest can be activated in two different ways. The easiest one is to accept it from Captain Steelbeard [#1], whom you can find on the ship in the pirates' settlement. When you talk to him after completing the Find Steelbeard quest, the cutthroats' chieftain will tell you about troubles with rum deliveries. The scenario can also be initiated in the tavern during a conversation with Booze [#2]. First, though, you must complete The Water Carriers and The Sugar Shipment quests.
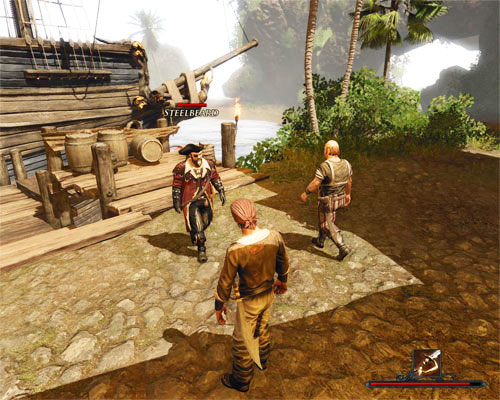 Booze and Steelbeard will meet on the square in front of the tavern.
The quest is as simple as it can be. If you had reestablished the water deliveries to the camp (see: The Water Carriers) and taken hold of the sugar stolen from the Inquisition (see: The Sugar Shipment), there will be a new dialogue option available when talking to Booze. The Nameless Hero will ask what happened with the rum delivery to Steelbeard. The innkeeper will promise to take care of this matter personally and leave the tavern a while later. If you decide to accompany him, you'll witness the two pirates having an interesting conversation in the middle of the settlement [#3].
Wait patiently until the gentlemen agree and then talk to Steelbeard. In order to finish the quest, you'll need to tell the captain that you'd handled the rum delivery. The pirate will be so grateful that he'll take it into his assessment of your deeds. You can find more information on this subject in the Become a Pirate quest.
Rewards:
![Quest giver: Booze [#1] - The Sugar Shipment - Tacarigua - Quests - Risen 2: Dark Waters - Game Guide and Walkthrough](https://game.lhg100.com/Article/UploadFiles/201512/2015121709163497.jpg)
Quest giver: Booze [#1]
This quest is part of: Become a Pirate
When you visit the tavern in the pirates' camp in the north-east part of the island, talk to Booze [#1]. Ask him about Steelbeard and he'll quickly change the subject to the problem with rum production. It turns out that the distiller is having trouble with water and sugar supplies. If you agree to help with the first matter, you'll start The Water Carriers quest, but if you choose the second problem, you'll trigger the present one.
 Jack's Lighthouse is located in the south part of the island.
The person responsible for the sugar supplies is Jack [#2], who lives in a old lighthouse in the south of the island. Take a long walk to reach the place and talk to the man inside. The lighthouse keeper will tell you that the break in the supply is caused by termites. Getting more information about it will trigger a second quest: The Termite Plague. Because of the fact that you won't be able to obtain the Sacks of sugar without taking care of the termites, you can kill two birds with one stone.
All sacks are in a cave [#3] near Jack's lighthouse. The entrance is guarded by Termite Warrior, another one is by the sacks, and additionally there are ten Termite Workers between the cave and the supplies. Because they won't just sit and watch how you steal their goods, you have to kill every termite in your way (you can find more information on this subject in The Termite Plague quest description). Once you've dealt with them, enter the cave and collect the sacks. There are all in one location - if you have trouble seeing them, light the torch. Once the supplies are in your possession, you'll automatically complete the 7 Sacks of Sugar mission.
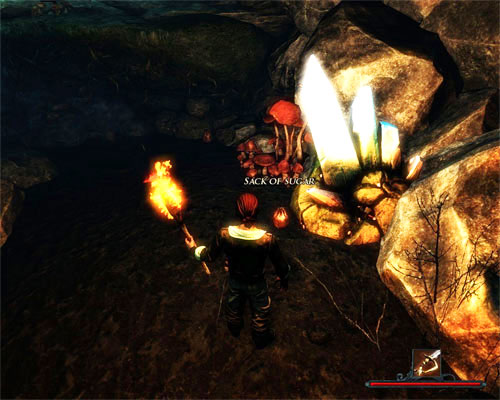 Use the torch to help you find the sacks.
Go back to the pirates' camp and tell Booze you managed to get the supplies back. The innkeeper will send you to Alister [#1], his colleague on the second floor of the building. The distiller will be so happy that will not only agree to give you a recipe for brewing rum (for a proper price), but also give you permission to snoop around the distillery. When you're done, go back down the stairs and talk to Booze again. This way you'll receive additional rewards.
Rewards:
![Quest giver: Booze [#1] - The Sugar Trade - Tacarigua - Quests - Risen 2: Dark Waters - Game Guide and Walkthrough](https://game.lhg100.com/Article/UploadFiles/201512/2015121709163524.jpg)
Quest giver: Booze [#1]
When you deliver the letter from Roquefort [#2] to Booze [#1] in the pirate tavern (see: Pirate Post), the innkeeper will ask you to take the answer back to the governor. You can agree to do it right away or play as a courier later - the quest will not be forfeited if you refuse to take it the first time.
If you've unsealed the letter written by governor Di Fuego [#3], you probably know now that the conflict between the two factions concerns the sugar shipment seized by the pirates. The sea rovers need it to brew rum, but the Inquisition is not in the habit of tolerating theft. The governor of Puerto Sacarico demands compensation in liquor, to which Booze doesn't agree. The innkeeper decides to pay the equivalent in gold, but suggests to burden the quartermaster Pedro [#4] with the costs, as he once used to take the sugary stock out of the warehouses.
If you don't want to pay the Inquisitors out of your own pocket, you should talk to Pedro first. Once the quartermaster hears about the situation, he will give you 200 Gold without turning his nose up. You can also demand 100 Gold more - your Intimidate skill should be at least 20 to succeed. If you're not skilled enough, there's nothing stopping you from trying again later. You can also ask Pedro for money after completing the quest.
 Pedro will give you the money to compensate the Inquisitors.
The mission ends the moment you inform Di Fuego about bringing the answer to his letter. The governor will ask how much the pirates offer for the stolen sugar. Booze didn't price it, so you can improvise. There are three possibilities:
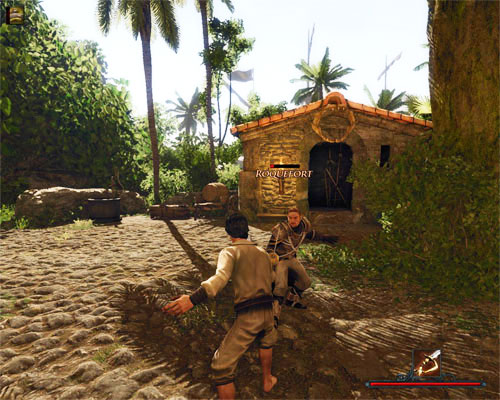 Fighting Roquefort isn't a bad idea - it's always 75 Glory points more.
In the two cases mentioned above, you'll have to go to Roquefort and ask him for the reward promised for delivering the letter. The soldier doesn't have the slightest intention of living up to his end of the bargain, and you'll be forced to use persuasive arguments:
The best solution is to extract the whole sum from Pedro (300 Gold), pay governor Di Fuego as little as possible (100 Gold) and then get the money from Roquefort. Altogether, these schemes can earn you 300 Gold. Don't forget to go back to Booze for his reward - 5 bottles of Rum.
Rewards:
![Quest giver: Jack [#1] - The Termite Plague - Tacarigua - Quests - Risen 2: Dark Waters - Game Guide and Walkthrough](https://game.lhg100.com/Article/UploadFiles/201512/2015121709163527.jpg)
Quest giver: Jack [#1]
Jack [#1] - the keeper of the lighthouse in the south part of the island, has a huge problem with termites. The pests are hindering his sugar shipment, which has a negative effect on the production of rum in the pirates' settlement. In the man's eyes, you're a godsend, especially if you agree to take care of this emergency.
Note! This quest is linked to The Sugar Shipment which can be activated after talking to Booze [#2]. It's a good idea to complete both missions at once.
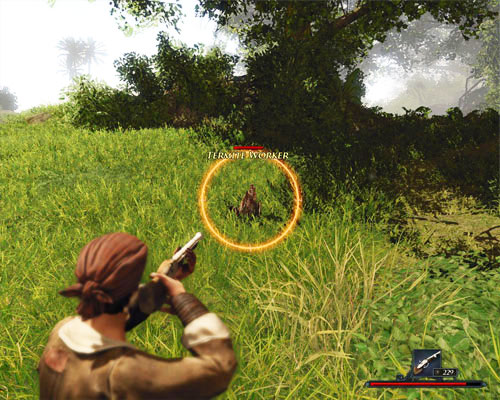 Draw the workers away from what they're doing and kill them out of the way of their companions.
The termites that are bothering Jack are nesting in the area, just several meters south-west of the lighthouse [#3]. Go round the building, keeping to the left, and down the sloping path towards the beach, and you'll see the first batch. The creatures keep running between the cave and the boxes lying on the shore. If you maintain safe distance, the foes won't pay any attention to you.
In total, there are ten Termite Workers and three Termite Warriors to defeat. Start with the former because there are more of them, and they're not any less dangerous than their older brothers, especially in a group. The tactic is very easy - one by one, draw the carriers away, but be careful not to alarm their companions. Guns work brilliantly here. Keep in mind, though, that the workers can fight in close combat as well as from a distance (they shoot green balls), so you have to be quick and efficient.
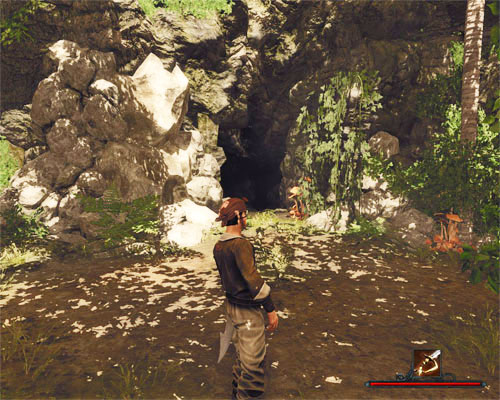 To complete the mission, you'll also be forced to clear out the cave.
The warriors are guarding the cave [#4] - one is outside, the other two inside. They're not too much of a challenge either, as long as we don't let them approach too closely. Myself, I prefer to systematically drain their health from a distance and, if necessary, finish them off with a sabre when they're close to dying.
Note! Before you start eliminating the termites, think about bringing along a Bone saw. From each slain enemy you can get a Sickle, which may not be the most expensive item you can receive, but at the beginning of the game every penny counts. You can obtain the said tool from Giles [#5] or Flannigan [#6].
Rewards:

This quest is part of: Become a Pirate
The quest is triggered automatically when Meeks [#1] and his particularly ugly friend from the depths - the Sunken One - find out you've been eavesdropping on their conversation on the beach (see: Night-time Pursuit). Both "gentlemen" will immediately rush at you, which means fighting is inevitable.
Meeks is no more challenging than other pirates, but the Sunken One is much more problematic. If you're bad at melee combat, don't let the creature draw a knife at any cost. Just shoot him with your gun and then withdraw to a safe distance, repeating the same procedure over and over again. When both opponents fall, the quest will be completed.
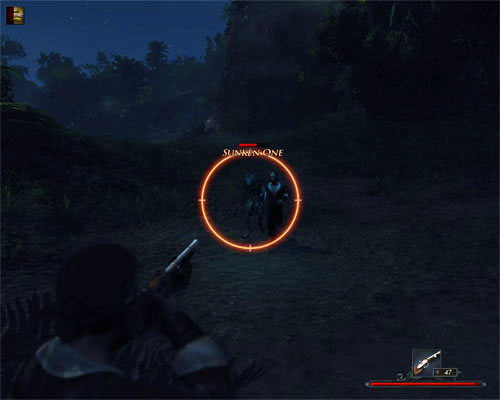 If you're bad at melee combat, keep shooting the enemies from a distance.
Captain Steelbeard [#2], currently aboard the ship in the docks, will be very interested to hear about your night-time adventure on the beach. Killing the creature of the depths will make him so glad he'll take it into account of your achievements to become a pirate. You don't even have to tell him about it, he'll start the subject as soon as you visit him. Taking care of the traitor will also earn you a reward from Booze [#3], so don't forget to go to him after the completion of the quest.
Rewards:
![Quest giver: Booze [#1] - The Water Carriers - Tacarigua - Quests - Risen 2: Dark Waters - Game Guide and Walkthrough](https://game.lhg100.com/Article/UploadFiles/201512/2015121709163615.jpg)
Quest giver: Booze [#1]
This quest is part of: Become a Pirate
Visit the pirate tavern and talk to the owner, Booze [#1]. Ask him about Captain Steelbeard and wait until the he mentions trouble with alcohol production. The source of the problem is the lack of basic products required in the production of rum - water and sugar. Both key components stopped being shipped to the distillery, which makes it impossible to function at all. There are two quest associated with reopening the distillery: The Water Carriers and The Sugar Shipment. Here, we'll take care of the former.
Booze will suggest that you talk about it to Curtis [#2], a pirate hanging around in front of the tavern, who is responsible for the deliveries. He will explain that the lack of water is due to the laziness of the carriers, and then ask you to send one of those lazybones to change guard at the camp's front gate. Note! If you ignore the chat with Curtis, nothing bad will happen. Despite your lack of information, the quest will proceed according to the following scenario.
Curtis will give you clues as to how to complete the quest, but in truth you don't have to talk to him at all.
Time to take care of the carriers. Head west to the waterfall [#3] from where the water necessary in rum production is taken. When you reach the place, you'll learn very quickly why the water deliveries had stopped. Two pirates are to blame - Dogss and Foster - who, instead of working, keep arguing with each other.
You won't achieve anything by trying to talk to them, so talk to Colby instead - the only person of the three not engaged in the conflict. He will tell you that the two gentlemen are fighting over who is going to change Fence [#4], the guard keeping an eye on the camp's entrance. If you want to reestablish the water deliveries, you need to resolve the conflict. Finish the conversation with Colby and talk to either of the pirates. You'll have three options:
 It's your decision who should change Foster at the post. Colby deserves it the most.
Dogss and Foster will agree to the third solution only on one condition - you'll have to defeat them in battle first. Which one you choose to fight first doesn't matter - you have to teach both of them a lesson anyway. This opens two additional quests: Fight Doggs and Fight Foster. When you manage to humble both pirates, which shouldn't be difficult, talk to Colby again to tell him the good news.
Two things to sum up:
Rewards:

This quest is part of: Jade
When you enter the cave in the west part of the island, you'll face a group of Termite Workers. Deeper inside you'll notice shimmering trinkets lying by the wall. These are Pieces of Jade required in the Jade quest. When you collect all four of them (which activates and completes this quest), go to the Shaganumbi village and give them to the shaman woman Kapua; she'll make good use of them (see: A Shipment for Crow). The pieces can be found in the first corridor and in the next two chambers - you don't need to go any further.
 This is how pieces of jade look like.
Note! If you haven't discovered the jade cave before, the shaman's servant girl, Hikoko, can take you there (see: Accompany Hikoko).
Rewards:
![Quest giver: Ranapiri [#1] - A Dangerous Beast - The Sword Coast - Quests - Risen 2: Dark Waters - Game Guide and Walkthrough](https://game.lhg100.com/Article/UploadFiles/201512/2015121709163716.jpg)
Quest giver: Ranapiri [#1]
You receive this quest from a hunter named Ranapiri, who can be found in the Shaganumbi village. He'll ask you to seek out a monster - if you defeat it, you'll prove yourself worthy to the tribe, and thus open the possibility of trade and training. It's recommended to complete this quest, especially since you can combine it with two other ones.
 Direct combat isn't a good idea - try the shotgun.
Leave the village and go down to the river. If you talk to Natsumi [#2], she'll ask you to defeat the Alligator and retrieve three packages (see: The Evil Spirit of the River and Natsumi's Bag of Herbs). Both quests are closely connected with the present one because you have to kill the reptile to recover the bags anyway. The beast can be found a little to the east of the scared woman [#3]. Once it's slain, report back to Ranapiri to get your reward.
Rewards:
![Quest giver: Chani [#1] - A Doll for Bakir - The Sword Coast - Quests - Risen 2: Dark Waters - Game Guide and Walkthrough](https://game.lhg100.com/Article/UploadFiles/201512/2015121709163758.jpg)
Quest giver: Chani [#1]
This quest is part of: Chani's Plan
A quest that takes one second to complete, but gets you quite a substantial reward. After returning from the Earth Temple (quest: The Chieftain's Hair), tell the shaman what had happened, and hand her the Long strand of Baki'r hair which you've taken from him. At this moment you will receive all ingredients necessary to make a voodoo doll for the Natives' chieftain.
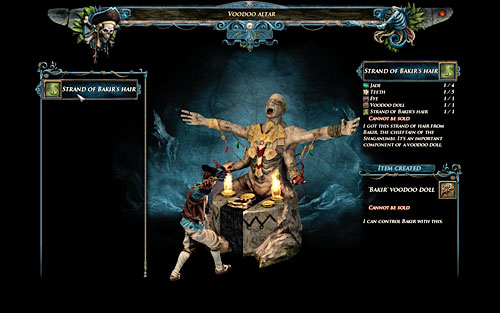 Possessing the Native is a simple formality.
All that is left to do is to make the artifact which will allow you to possess Bakir. Approach the stall vis-a-vis Chani, and connect all the ingredients.
Rewards:
![Quest giver: Chani [#1] - A Doll for Jim - The Sword Coast - Quests - Risen 2: Dark Waters - Game Guide and Walkthrough](https://game.lhg100.com/Article/UploadFiles/201512/2015121709163849.jpg)
Quest giver: Chani [#1]
This quest is part of: The Chieftain's Hair
It takes only a short while to complete this mission - having obtained A knot of Jim's hair in the Ouch! quest, you can proceed to making a voodoo doll (Chani will teach you how to do it). You will need a few ingredients to do it (apart from the hair, of course). These are: Teeth, Eyes, Jade, and the Voodoo doll itself (not enchanted yet). The first two can be bought from Ranapiri [#2], the warrior who is standing at the edge of the village; the third can be found inside the temple in the west [#3] (the left corridor) or in one of the hundred chests scattered all over the island. The last ingredient can be bought from the witch, Kapiri, standing next to Chani.
 Something's happening.
Once you've collected all necessary ingredients, you can finally make the magic doll. Approach the altar in the center of the village [#4] and complete the process.
Rewards:
Quest giver: Chani [#1]
This quest is part of: The Puppet
Note! This quest is only available if you have sided with the Natives!
Having obtained the hairbrush belonging to Commandant Sebastiano [#2], talk to Chani. The shaman will hand you all ingredients necessary in making a voodoo doll - you will need it to possess the Inquisitor. To create the magical artifact, go to the Natives' village (on foot or through fast travel) and complete the appropriate ritual at the altar [#3].
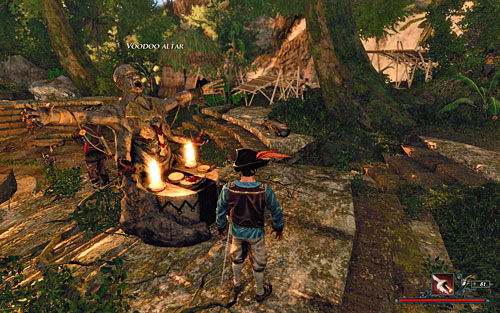 Another doll for your collection.
If somewhere along the way you've decided to sell the items obtained from the shaman, you can always buy them from Ranapiri [#4], a warrior from the Natives' village. The only problem might be the jade which the trader doesn't have - but don't worry, you can find the precious stone in the temple beyond the village (the left corridor, in a sarcophagus).
![Quest giver: Patty [#1] - A Few Barrels of Water... - The Sword Coast - Quests - Risen 2: Dark Waters - Game Guide and Walkthrough](https://game.lhg100.com/Article/UploadFiles/201512/2015121709163842.jpg)
Quest giver: Patty [#1]
This quest is part of: A New Ship
No crew can sail far without water - every sailor knows it. Therefore, before you can steal a ship you need to take care of a proper supply of drinking water for your future subordinates.
If you have sided with the Inquisition, you can talk about the shipment to a soldier, Venturo [#2]. He'll prompt you in the direction of Sophia [#3], the wife of the storehouse master. Of course, instead of talking to the soldier you can just go directly to the woman - she'll listen to what you have to say without any complaints.
 The beautiful innkeeper will gladly help you... for a proper price.
When you explain your problem to Sophia, she'll offer you a deal - your ship will be stocked if you manage to obtain three Golden masks for her, which are located in Commandant Sebastiano's seat. The offer is part of the Golden Masks quest, which you have to do presently. To complete it, collect the precious artifacts from the garrison's tower [#4], the connecting room on the upper floor [#5], and the commandant's bedroom [#5]. Take them to the innkeeper and the quest will be completed.
If you have sided with the Natives, you'll need to see Chani [#6] and ask for her help. The shaman will suggest possessing Commandant Sebastiano [#5] and using his body to secure the shipment (quest: The Puppet). Go to the garrison and steal a Hairbrush from his bedroom. With it, go back to the shaman to collect other ingredients necessary in preparing a voodoo doll. Then, go to the Natives' village and craft the artifact on the altar [#7] (quest: A Doll for Sebastiano). Once you have it, return to the commandant and possess his body.
 Unfortunately, you can't talk to yourself.
In Sebastiano's body, go the storehouse master, Miguel [#8], and order him to supply the ship. When it's done, go back to your body by approaching the Nameless Hero and using the left mouse button. At that moment the quest ends.
Rewards:
![In Puerto Isabella's docks you can find Sophia [#1], the wife of Miguel [#2] who is the owner of a nearby warehouse - A Good First Impression! - The Sword Coast - Quests - Risen 2: Dark Waters - Game Guide and Walkthrough](https://game.lhg100.com/Article/UploadFiles/201512/2015121709163983.jpg)
In Puerto Isabella's docks you can find Sophia [#1], the wife of Miguel [#2] who is the owner of a nearby warehouse. If you start a conversation with her using Silver Tongue (30 at least), you will momentarily make a very good impression on her and thus complete this simple quest.
Note! You have only one try to complete this mission. If you start the conversation in any other way than by using the Silver Tongue dialogue option, you won't get a second chance.
Rewards:
Quest giver: Patty [#1]
After Captain Steelbeard's ship had been sunken, the Nameless Hero and Patty have to find a new source of transportation. Since there is only one ship docking in Puerto Isabella, the choice is simple - that ship is the object of your desire.
To obtain a new boat, you need to complete several sidequests:
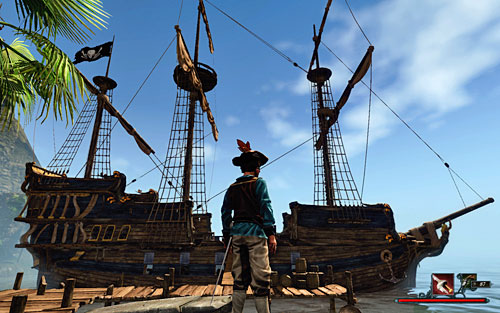 It's big, so it puts a smile on the face.
When all the conditions above are met, talk to Patty aboard your new ship. This completes the mission and allows you to sail wherever your heart desires. The order at which to visit subsequent islands is completely up to you - you can chose your destination without a care in the world.
Rewards:

This quest is part of: Crow's Ship
If you ignore Captain Steelbeard's worries and decide to go through the cave (see: Through The Rat Cave), you will soon discover the source of the pirate's concern. There will be four Cave Bats [#1] in your way. Let your companions move forward and engage in the fight, while you - staying back - shoot them from your gun. Once the enemies are down, you can proceed on your way.
 Cave Bats are extremely quick and dangerous. I recommend shooting them from a safe position.
After leaving the cave [#2], Steelbeard will make one last attempt to try to convince you to change the course, which is tantamount to completing the quest. You now have two options:
Rewards:
![Quest giver: Chani [#1] - Access to the Temple - The Sword Coast - Quests - Risen 2: Dark Waters - Game Guide and Walkthrough](https://game.lhg100.com/Article/UploadFiles/201512/2015121709164021.jpg)
Quest giver: Chani [#1]
This quest is part of: The Ancestors' Blessing
The quest is very simple - follow the shaman inside the temple. You'll need to cross a wooden bridge and then enter the sanctuary itself. If you haven't completed the Are You Worthy? quest up until now, a warrior, Samir [#2], will stop you and demand that you fight him (after a short questioning, which doesn't affect the duel in any way). When the fight is over, you can proceed to the next part of the building.
 You can loot the tomb - the shaman won't mind.
Go past the defeated Native and enter the chamber with a sarcophagus and a pedestal, and tell the shaman about your victory. At that moment, the quest is completed and you receive a reward.
Rewards:
![Quest giver: Hikoko [#1] - Accompany Hikoko - The Sword Coast - Quests - Risen 2: Dark Waters - Game Guide and Walkthrough](https://game.lhg100.com/Article/UploadFiles/201512/2015121709164057.jpg)
Quest giver: Hikoko [#1]
This quest is part of: Jade
You receive this quest as part of the A Shipment for Crow mission, when Slick [#2] asks you to get the Natives' idol. The magical artifact is being made by the shaman woman Kapua [#3], who cannot finish the job due to the lack of jade. She'll ask you to talk to her servant girl, Hikoko, and go with her to a cave which holds the precious mineral. The quest activates after talking to the girl, who immediately starts on the way.
 Your journey together isn't a romantic one.
You'll probably encounter several Claw Monkeys while going through the jungle. Unfortunately, you have to deal with them on your own because Hikoko can't fight - her only job is to lead you to the cave. There [#4], she'll step away to let you explore it freely. This quest then ends and The Jade Cave begins.
Rewards:

This quest is part of: The Natives
The last stage of the journey with Steelbeard and Patty to the Shaganumbi village. After going down the hill (see: Just a Little Farther) [#1], you need to cross the river [#2] to complete not only the current quest, but also the main quest called The Natives. A few seconds long no-brainer.
 Crossing the river marks the end of the journey to the Shaganumbi village.
Note! Your companions won't agree to enter the enemy-occupied village, so immediately after completing the quest they will go back to the pirates' tower [#3] - the same they took over right after landing on the Sword Coast.
Rewards:
![Quest giver: Venturo [#1] - Among Savages - The Sword Coast - Quests - Risen 2: Dark Waters - Game Guide and Walkthrough](https://game.lhg100.com/Article/UploadFiles/201512/2015121709164150.jpg)
Quest giver: Venturo [#1]
This quest is part of: The Lookout's Report
The Inquisitor Venturo [#1] had gone to the north-west part of the land to infiltrate the Shaganumbi village which lies there. If you managed to find the scout hidden deep in the wilds (see: The Lookout's Report), don't forget to talk to him. He'll answer that his mission is not over yet and will ask you to check how many warriors the tribe had sent to the temple. Agree and you will trigger the present quest.
To be able to enter the savages' village, you first have to deal with the guard at the entrance [#2]. Masaru will let you in, but only on one condition - you can't choose the option that insults him. Otherwise you'll pick up a fight and won't be able to go past the Native (see: Duel with Masaru) unless you win.
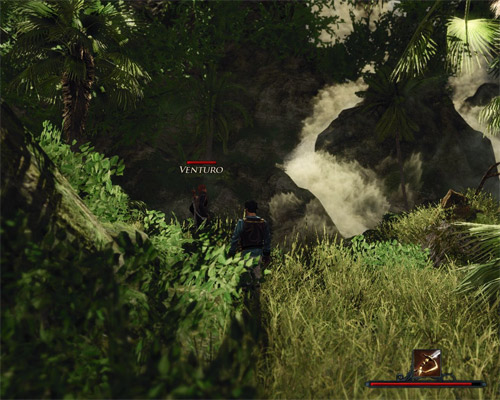 Venturo is lurking not far from the Natives' village.
There are three ways to complete this quest - each is chosen by a different dialogue option:
The moment you get the information, you can go back to Puerto Isabella with Venturo at your side. You can find more information on this subject in The Lookout's Report quest description.
Rewards:
![Quest giver: Samir [#1] - Are You Worthy? - The Sword Coast - Quests - Risen 2: Dark Waters - Game Guide and Walkthrough](https://game.lhg100.com/Article/UploadFiles/201512/2015121709164135.jpg)
Quest giver: Samir [#1]
This quest is part of: The Ancestors' Blessing
When you enter the temple of the ancestors, you'll meet a warrior, Samir, who is guarding the entrance to the inner chambers. If you've sided with the Natives, Chani, the shaman [#2], will tell you to defeat him in combat. This doesn't trigger the quest, though - it's activated only after talking to the guard.
 Apparently, the gods were on the Nameless Hero's side.
Before you proceed to the fight, Samir will want to question you - saying that every lie will give him new strength. Regardless of whether you speak the truth or lie, the result will be the same - he will challenge you to a duel, which course is the same irrespective of the answer. After you defeat the warrior, you can enter the building, which is necessary in the Access to the Temple quest.
Note! If you lose the duel, you won't be able to enter the lower levels of the building and thus completing the Chani's Plan quest which is required in finishing the game!
Rewards:
![Quest giver: Sebastiano [#1] or Chani [#3] - Assault on the Temple - The Sword Coast - Quests - Risen 2: Dark Waters - Game Guide and Walkthrough](https://game.lhg100.com/Article/UploadFiles/201512/2015121709164146.jpg)
Quest giver: Sebastiano [#1] or Chani [#3]
This quest is part of: The Titan Weapon
A short quest for which there is no reward. You can reach the Earth Temple by land (on foot) or by using fast travel (if you've been to the temple before). The path doesn't affect the quest in any way, but it can save you some trouble with fighting animals living in the jungle.
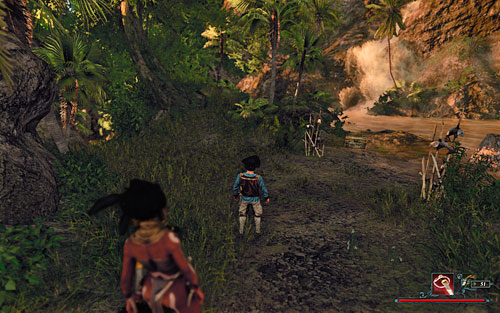 When you travel, watch out for the local fauna .
When you reach the destination and resolve the Natives' problem (quest: Forward March! or Chani's Plan), it's time to take care of Crow and his pirates [#2]. Before it goes to that, though, the present quest will end and another one will begin - The Fight Against Crow.

This quest is part of: Crow's Ship
Steelbeard didn't appreciate the idea of going through the bat cave, but went anyway because you insisted. It doesn't mean he gave up and won't try to change your mind again, though. Not the captain.
He will ask you twice whether you'd like to change the course - first time before fighting the Cave Bats [#1] (see: Through The Rat Cave), the second time after leaving the cavern [#2] (see: A Terrible Feeling). If in either of these situations you change your mind and decide to go back to the fork in the road [#3], you'll begin the present quest.
The quest is a piece of cake. You'll complete it when you leave the cave with Steelbeard and Patty. At this moment, another quest will begin: Farther Toward the Coast.
Rewards:
![Quest giver: Hikoko [#1] - Back to the Village with Hikoko - The Sword Coast - Quests - Risen 2: Dark Waters - Game Guide and Walkthrough](https://game.lhg100.com/Article/UploadFiles/201512/2015121709164242.jpg)
Quest giver: Hikoko [#1]
This quest is part of: Jade
This quest is utterly optional - when you collect all four Pieces of Jade (see: The Jade Cave) and tell Hikoko about it, you'll have two dialogue options available. If you decide to return to the village alone, the quest will be skipped. Only the second option, which is going together, activates it.
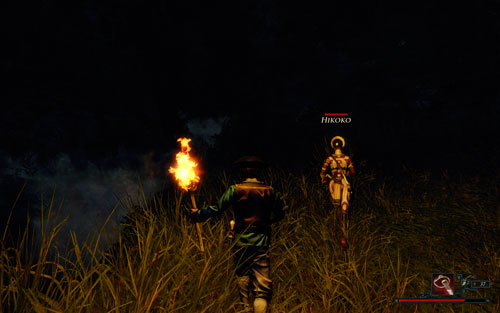 A stroll together doesn't involve seducing the Native woman.
The task is easy as pie - return to the Shaganumbi village [#2] by following Hikoko. Since you've already walked this path in the other direction (see: Accompany Hikoko), there're practically no risks involved - you must have already killed the animals that could have threatened your lives. It's not recommended, though, to use fast travel - the girl will be left behind, preventing you from completing the quest (at least until you go back for her and indeed take the stroll together).
Rewards:
![Quest giver: Torres [#1] - Bartering - The Sword Coast - Quests - Risen 2: Dark Waters - Game Guide and Walkthrough](https://game.lhg100.com/Article/UploadFiles/201512/2015121709164222.jpg)
Quest giver: Torres [#1]
West of Puerto Isabella there is an observation tower [#2], currently used by the Inquisition as a prison. Guarding it is Torres [#1], a soldier who spends all of his days walking the road leading there. If you pay him a visit and ask about his duties, the conversation will quickly turn toward food.
Torres will ask you for a small favor. He wants you to bring him a Package of meat which is distributed on Puerto Isabella by Tito [#3]. He'll also give you a Moluccan idol to trade with the butcher. The idol cannot be sold in a regular way, so it's no use keeping it to yourself.
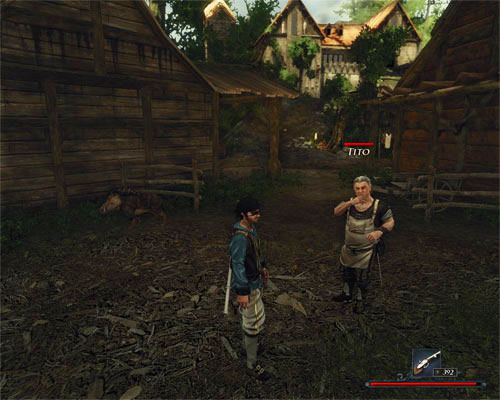 Due to the introduction of food rations, Tito doesn't trade meat in a traditional way.
Visit Tito and talk to him about meat. If this is your first conversation with the butcher, you'll have an opportunity to buy one package for 100 Gold or, following Torres' recommendation trade it for the idol. In the latter case, the game allows to haggle with the seller. You can sell the idol for 100 Gold, one package of meat, or 50 Gold and a food package. The last option is naturally the most profitable.
Note! If you don't trade the Moluccan idol with Tito during this quest, you won't be able to do it later! The idol will stay in your inventory for the rest of the game because you can't sell it!
After obtaining the meat, go back to Torres. When you give him the package the quest will be completed.
Rewards:

This quest cannot be activated in a regular way, that is by talking to an NPC. It will be automatically completed after you eliminate Basil [#1], the chieftain of the pirates from the fort in the south-west part of the island. You'll have a perfect opportunity to kill him during a walk to the city with Venturo (see: Follow Venturo to the Temple). It's perfect because the Inquisitor will suggest paying a visit and to the keep and shoot its defenders himself.
There are two possible ways to get inside: not just by the front gate, but also by a hole in the palisade [#2]. The choice has no effect on the battle. What has, though, is whether you do the raid with the Inquisitor, or without. Killing the enemies with Venturo at your side will, of course, be easier. Basil is not a challenging opponent and neither are his Pirate buddies.
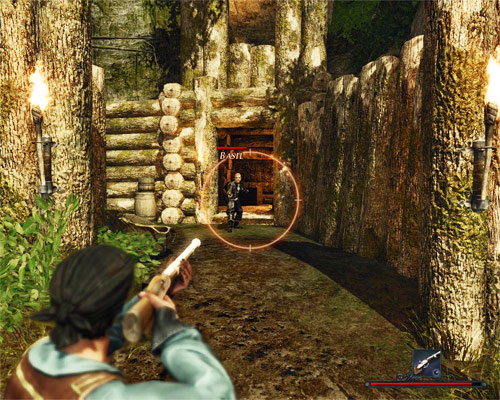 Killing Basil is not difficult, especially with Venturo at your side.
Note! If you decided to raid the keep during the quest Follow Venturo to the Temple and chose the aggressive variant, after the execution of the pirate Venturo will wait for you near the ledge [#2], the same that helped you reach the hole in the palisade. In the following conversation with Venturo you'll be able to agree to the trip to Puerto Isabella again. If so, an additional quest will be triggered: Follow Venturo to the City.
Rewards:

A simple quest activated and completed automatically after emptying the chest belonging to the pirate Basil. You can find the chest in the south-west part of the island in the fort taken over by pirates [#1].
If you want to loot the chest without letting the pirates know of your presence, don't go through the front gate but use the nearby ledges [#2] to climb the palisade. The chest, unguarded, is in a small room you can reach by the left stairs. While exploring Basil's hideout, try to avoid the guard patrolling the area on a predetermined route.
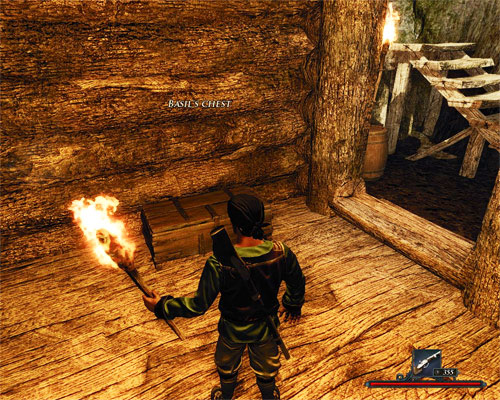 Basi's chest is not closed, so you won't have any trouble looting it.
Naturally, sneaking up inside the pirates' fort has its charms, but keep in mind that there aren't any additional bonuses for that. The best possible solution is to get rid of everyone inside before getting your hands on the chest. You can read about the forceful solution in the Basil Is Dead! quest description.
Rewards:
![Quest giver: Cooper [#1] - Blades for Cooper - The Sword Coast - Quests - Risen 2: Dark Waters - Game Guide and Walkthrough](https://game.lhg100.com/Article/UploadFiles/201512/2015121709164339.jpg)
Quest giver: Cooper [#1]
In the central part of Puerto Isabella, there is a workshop owned by Cooper [#1], the local blacksmith who specializes in all kinds of blades. He complains of having too much responsibilities - the needs of the Inquisition are large, and there's no one else in the area who could help out in the smithy. Well, almost no one.
The Nameless Hero can hire himself out to help the blacksmith in the smithy, but only on one condition - he has to know how to make weapons. Cooper himself can teach you the skill as long as you have a fat amount of cash (1000 Gold), and your Blades skill is at least 6. Rich in new knowledge, you can offer to take on some of his responsibilities. The blacksmith will welcome you with open arms.
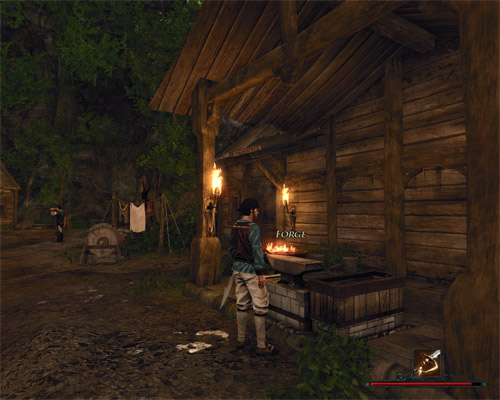 Swords are forged on the anvil. You don't have to look far.
When the quest begins, you'll receive five Sword blanks and instructions to make that many Epees. If you don't have schematics for it, you need to buy it from the blacksmith - the price is 1500 Gold! But that's not the end of it. To forge this weapon you need not only the blanks, but also Gold nuggets - if you've neglected to collect them in caves or extract them from ores, you may have trouble completing this quest!
Armed with the ingredients, go to the anvil and forge the weapon. With five in hand, approach Cooper to tell him you've finished. The quest will be completed and you will receive the Soul Caller's Sword hilt.
Rewards:

This quest is part of: Cargo Crates for Miguel
The quest will be completed once you've found all ten Cargo crates for Miguel [#1] - supervisor of a warehouse near Puerto Isabella's docks. The lost merchandise is scattered all around the coast, so it will take a while before you can collect it.
If you want to find the crates all by yourself, start by combing the beach farthest to the south. You'll soon learn that the merchandise is located only on sandy terrain - which is undoubtedly a convenient. Be prepared for a lot of fighting, especially with Giant Crabs which often come out from the ground in the least expected moment.
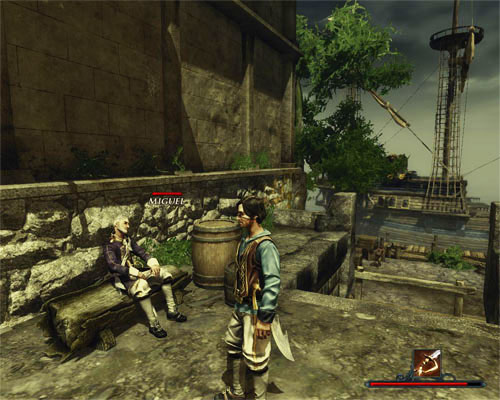 All of Miguel's crates are on beaches in different parts of the coast.
Less patient players should be happy to use the above map. The locations of all crates marked by red dots.
Rewards:
![Quest giver: Miguel [#1] - Cargo Crates for Miguel - The Sword Coast - Quests - Risen 2: Dark Waters - Game Guide and Walkthrough](https://game.lhg100.com/Article/UploadFiles/201512/2015121709164452.jpg)
Quest giver: Miguel [#1]
In Puerto Isabella's docks there is a large warehouse [#1] supervised by Miguel, a local merchant. Talk to him about the possibility of trading and continue the conversation until you receive a job offer. He will ask you to find Cargo crates with merchandise that's been cast ashore during a storm.
Finding the crates is a time-consuming task because the Nameless Hero will have to comb the entire coast. Sadly, the marker on the map will be quite useless as it shows the locations of only three crates out of ten. If you want to find the crates by yourself, start with the beach farthest to the south and systematically move north. The fact that all crates are buried in sand should be more than helpful.
Miguel is the supervisor of the warehouse - he usually sits on a bench in front the building.
Finding all ten crates is tantamount to completing the Cargo Crates quest (the description of that quest contains a map with the locations of all the merchandise). With the precious boxes in your inventory, visit Miguel again to inform him of the job well done. The quest will be completed and you will receive a grand reward - The Powder Bag, one of the legendary items!
Rewards:
![Quest giver: Chani [#1] - Chanis Plan - The Sword Coast - Quests - Risen 2: Dark Waters - Game Guide and Walkthrough](https://game.lhg100.com/Article/UploadFiles/201512/2015121709164430.jpg)
Quest giver: Chani [#1]
This quest is part of: The Titan Weapon
If you've decided to side with the Natives, you will need to learn the secrets of voodoo magic. The only person who can teach you these secret arts, and the only one who'll want to fight Crow at the same time, is the witch, Chani [#1], tending to the savages' village in the jungle. When you gain her trust in the Chani, Daughter of the Chieftain quest, you can move on to more precise actions against your enemy. However, in order to do that, you need to gain the favor of the Natives' gods in The Ancestors' Blessing quest first, then create a voodoo doll for the pirate Jim, and, by possessing him - create a similar artifact for Crow's follower - Bakir (The Chieftain's Hair and A Doll for Bakir). You can find a detailed walkthroughs of these missions in the corresponding sections of the guide (both are very complex).
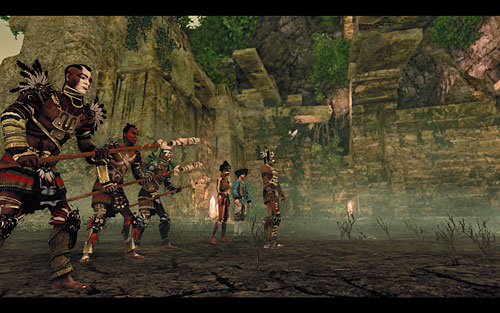 By siding with the Natives you can save the Chieftain's life.
When you complete both quests, head to the Earth Temple where Crow is residing [#2]. This is the goal of the Assault on the Temple mission. When you're there, Chani's Plan ends.
Rewards:
![Quest giver: Steelbeard [#1] - Crow's Ship - The Sword Coast - Quests - Risen 2: Dark Waters - Game Guide and Walkthrough](https://game.lhg100.com/Article/UploadFiles/201512/2015121709164510.jpg)
Quest giver: Steelbeard [#1]
After you've killed the enemies in the observation tower (see: Defeat the Lookouts at the Tower), you can ask Steelbeard [#1] for his help in getting to two major human settlements on the Sword Coast - the city of Puerto Isabella, occupied by the Inquisition, or the Shaganumbi village. If you choose the former and tell the captain you're ready, the current quest will begin.
A few things for starters. The quest is actually divided into a couple of smaller missions completed in a specific sequence. During the trip, the pirate will be your guide and will lead the party. Every time you decide to stray of the path you won't be left behind, because Steelbeard will always patiently wait for your return. Patty, on the other hand, will stay close to you, which means you'll be able to use her in exploring other locations. Rewards for enemies killed by your companions will always go to your account.
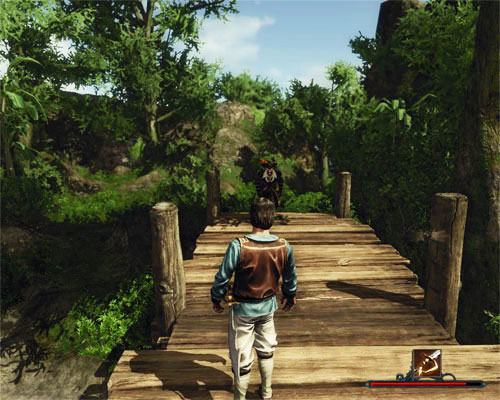 In this quest, it's Captain Steelbeard who chooses which way to go.
The trip to the city consists of the following missions:
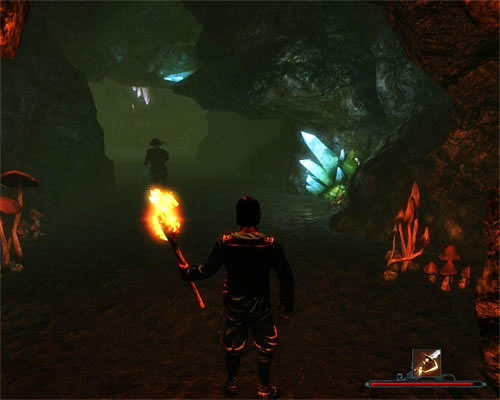 The pirate won't be too happy about your desire to explore the cave, but will lead you through it anyway.
No matter where you finish the current quest, the effect will be the same: both the pirate and his daughter will go back to the pirates' tower [#1], leaving you to your business. You'll be forced to learn where the wanted ship is located all by yourself, but this is the plot of another quest - Where Is Crow's Ship?
Note! Once Steelbeard and Patty have reached the tower, you'll be able to take them on another trip - this time to the Shaganumbi village (see: The Natives).
Rewards:
![The quest is triggered automatically when you decide to fight Tito [#1] - Dance with Tito - The Sword Coast - Quests - Risen 2: Dark Waters - Game Guide and Walkthrough](https://game.lhg100.com/Article/UploadFiles/201512/2015121709164524.jpg)
The quest is triggered automatically when you decide to fight Tito [#1]. You can do it during the investigation of Bartolo's missing weapon (see: The Shotgun) by provoking the butcher in the final confrontation.
Tito uses a rapier and he's not too good with it, so defeating him should only be a formality. The fight lasts until it's successful, which means in case you lose you can talk to the butcher again and pick another fight.
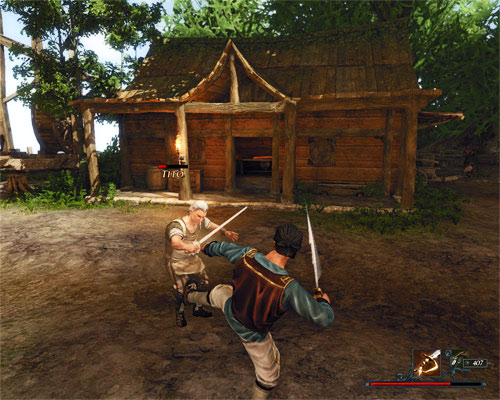 You don't have to be a swordmaster to defeat the butcher.
When Tito eventually falls, the quest will be completed. You can now bully the butcher by threatening to tell the commandant. In return for your silence, he'll offer you a flask of Red wine (you can trade it with Sophia [#2] for 100 Gold - see: Red Wine) or cash of 150 Gold. You can also take pity on him - but this way you won't receive anything, even some additional Glory points.
Rewards:

This quest is part of: The Titan Weapon
The quest will be activated after reaching the tower [#1] guarded by pirates and the natives (see: Talk to the Pirates at the Tower), and having a short chat with the hosts. The goal is to defeat all enemies.
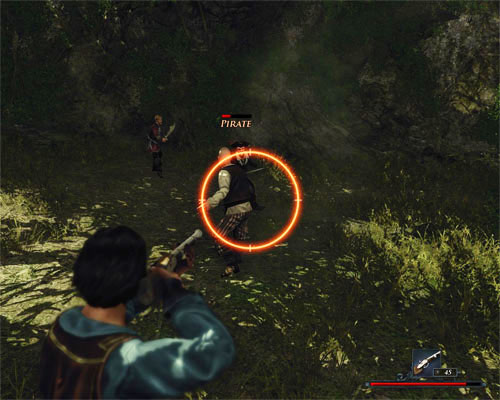 If the enemies are busy fighting your companions, you can easily shoot them from a distance.
There will be two Hunters and the same number of Pirates against you. It's important to note that Patty and Steelbeard will leave your party, so if you want to receive all Glory points, you have to deliver the killing blow to each enemy. Your companions will naturally actively participate in the fight, drawing enemies away from you. When all of them are dead, the quest will be completed.
Rewards:
![Quest giver: Skinner [#1] - Distract Skinner - The Sword Coast - Quests - Risen 2: Dark Waters - Game Guide and Walkthrough](https://game.lhg100.com/Article/UploadFiles/201512/2015121709164681.jpg)
Quest giver: Skinner [#1]
This quest is part of: Redistributing the Loot
Not all pirates are easy to steal from - if you try to pickpocket Skinner, he'll notice in a second, forcing you to find an alternative solution. The person who can help you is Digger [#2], whom you owe 100 Gold. You can get it from the pockets of the nearby Natives and Floyd [#3] - there's enough cash to be found.
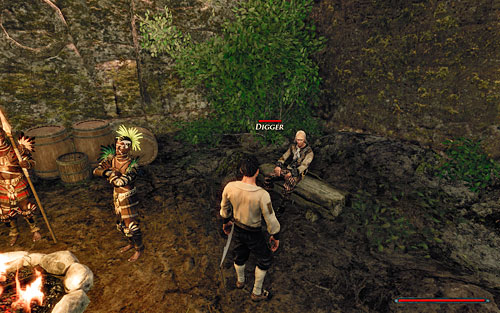 Puzzling - where do the Natives keep Gold?
When your pockets are full, return to Digger and give him the Gold. This way you'll be able to buy a bottle of rum from him for 50 Gold. With it, go back to Skinner and get him drunk - that's how you obtain the artifact for the Redistributing the Loot quest.
Rewards:

This quest is part of: The Natives
After reporting to Steelbeard about the enemies in the cavern (see: The Cave at the Pass), the pirate will resume the trip to the Shaganumbi village. Patty will automatically join your party.
Unfortunately, the next stage of the journey won't be long because there are trouble on the way. This time they are caused by Tough Blueclaw Monkeys [#2] blocking the road to the camp. Eliminating them is the subject of another quest: Monkey Business.
Rewards:
![Quest giver: Masaru [#1] - Duel with Masaru - The Sword Coast - Quests - Risen 2: Dark Waters - Game Guide and Walkthrough](https://game.lhg100.com/Article/UploadFiles/201512/2015121709164625.jpg)
Quest giver: Masaru [#1]
This quest is part of: Crow's Ship
Masaru [#1] is a member of the Shaganumbi tribe who guards the entrance to the natives' village. There is only one way inside it, so meeting the warrior is inevitable. He won't be waiting for your move, so as soon as you approach him he'll start the conversation himself. In order to begin the duel, you'll have to insult him in the first conversation.
The native will respond in the following cases:
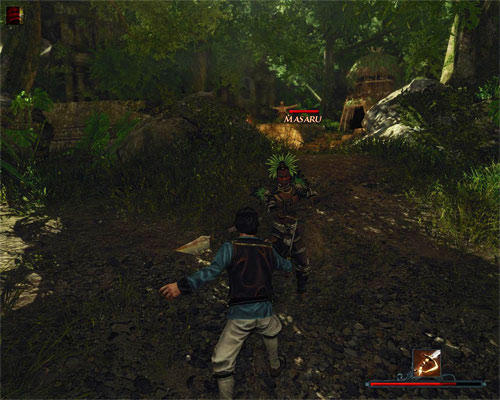 The spear is quite handy in melee combat.
Masaru is a spearman, so naturally he prefers fighting from a distance. Adapt to his style and feed him lead. Don't worry about the spears he's throwing at you - simply move to the side when he prepares to the throw. When he falls, the quest will be completed and you'll be free to enter the village.
Note! If you lose the duel with Masaru, you won't fail the quest and you can still do it! Because the warrior won't want to talk to you again, you'll have to attack him and defeat him in a regular way. The trouble is that this act of violence will provoke other residents of the village who will automatically stand against you. If you don't want to fight with additional opponents, lure Masaru away from his post by a single shot from a distance, and take care of him far from the village. After completing the quest, no one will mind this ruthless attack.
Rewards:

This quest is part of: Free Tahana
After freeing Tahana from the Inquisition's Tower [#1] in the south part of the island (see: Free Tahana), the native will make a run for it, automatically triggering the current quest. Your actions won't get by Torres who'll immediately appear on the courtyard.
The prison guard won't go easy on you and will attack the escaped prisoner momentarily. You can join the fight and help Tahana or not - your choice doesn't affect the mission. After Torres is forced to accept the superiority of the savage, the latter will run down the hill. Do the same. Once he's down [#2], the quest will be completed.
The native will now ask for your help in finding an idol he had hidden shortly before his arrest. You can find more information on this subject in The Search for the Idol quest description.
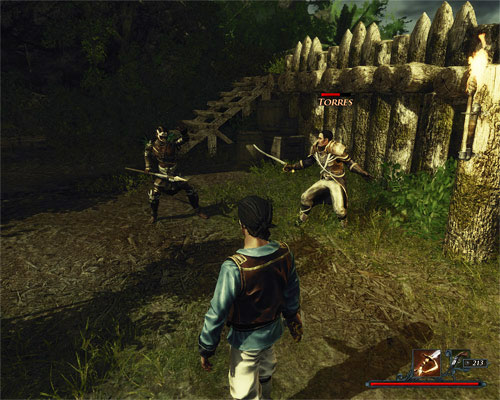 You can just stand and watch Torres and Tahana fight, but it's quicker to just help the native.
Note! If you approach Torres after he's lost the fight, the soldier will automatically start a conversation. Its result depends on which answer you choose:
Rewards:
![Quest giver: Eusebio [#1] - Eusebio's Debts - The Sword Coast - Quests - Risen 2: Dark Waters - Game Guide and Walkthrough](https://game.lhg100.com/Article/UploadFiles/201512/2015121709164728.jpg)
Quest giver: Eusebio [#1]
This quest is part of: 4 Muskets Against Crow
During the investigation of Bartolo's missing weapon (see: The Shotgun), you'll meet a participant of a boozy party called Eusebio [#1]. He's a guard keeping an eye on the west city entrance who knows a lot about what happened during the memorable events, though he won't tell you anything. His tongue can be loosened only by a well-aimed threat or a promise of paying off a debt he owes Tito [#2]. If you assure him that you'll pay the butcher his due, the quest will begin.
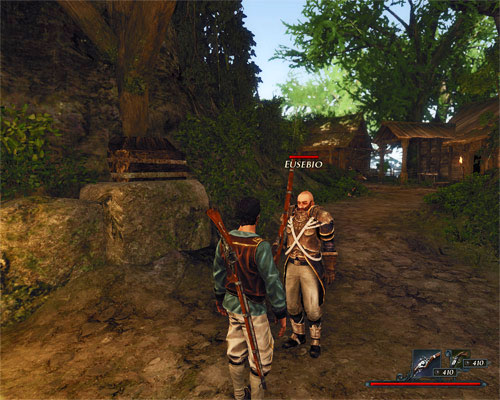 Paying off Eusebio's debts can help you solve the case of the missing shotgun.
Eusebio owes the butcher a round 200 Gold. He himself will say that the sum is a little higher, but the Nameless Hero won't be fooled. You can of course pay the 300 Gold, but 200 will be enough for Tito. If you choose the second option, two other possibilities open up:
When you're done with Tito, return to Eusebio. The quest will be completed and the guard will tell you more information about the party and who attended it.
Rewards:

This quest is part of: The Natives
Soon after heading for the natives' village (see: To the Natives), Steelbeard [#1] will stop to try to remember the right way to the camp. After a while, he'll go inside a nearby cave, so go after him. Kill the harmless Rat and join the captain.
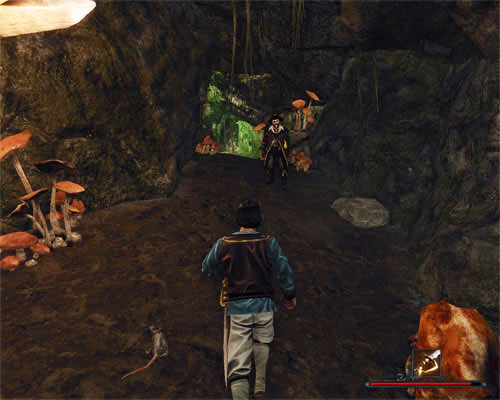 A short run through the cave is all this quest has to offer.
After leaving the tunnel, the pirate will stop [#2] and start a conversation that ends the current quest. According to Steelbeard, there are two ways to reach the destination - passing through a valley or a pass. Despite the fact that you can suggest which way to go, you won't be able to change a thing. The captain will always decide on the second option because he thinks it's simply safer (see: Over the Pass).
Rewards:

This quest is part of: Crow's Ship
Another short quest to complete during the journey to Puerto Isabella with Patty and Steelbeard. The quest begins after you cross the wooden bridge [#1] (see: Over the Bridge), until recently occupied by Firebirds.
The quest will end when you and the captain reach the crossroads [#2]. Here, you'll have to tell your companions which way to go. You can choose to go through a cave (see: Through The Rat Cave) or head for the shore (see: Farther Toward the Coast). If you leave this decision to Steelbeard, he'll always choose the second option.
Note! The most favorable option for the Nameless Hero is the cave since his companions will help him deal with the enemies that live there. Once you've gathered Glory points, you can go back to the fork in the road - Steelbeard will ask you a couple of times whether you feel like it (see: Back to the Beginning).
Rewards:

This quest is part of: Crow's Ship
Another step in the journey to Puerto Isabella with Steelbeard and his daughter Patty. After reaching a fork in the road [#1] (see: Farther South) the pirate will ask you which way to go now. The quest begins when you choose to head for the coast or leave the choice to the captain. He will try to avoid the cave like the plague.
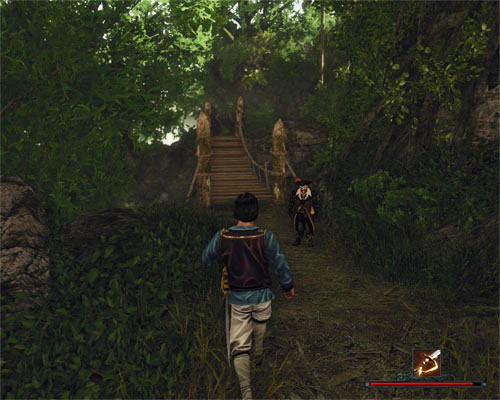 The last but one part of the journey ends at the wooden bridge.
Steelbeard will start on the path leading up, so do the same. During the hike you'll come across a Claw monkey, but it won't be a threat in your present company. When you reach the wooden bridge [#2], the quest will be completed and another one, the last of the batch series, will begin: The City Gate Is Not Far Off.
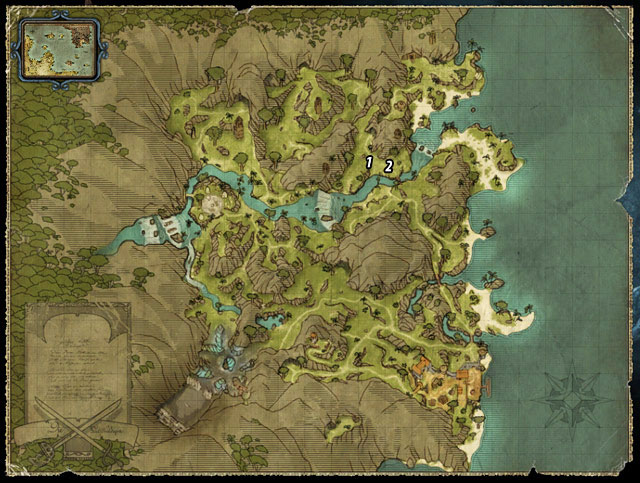
This quest is part of: Crow's Ship
This is the second mission associated with the journey with Steelbeard and Patty to the city of Puerto Isabella. It begins when you reach the bridge occupied by Firebirds (see: To Puerto Isabella) [#1].
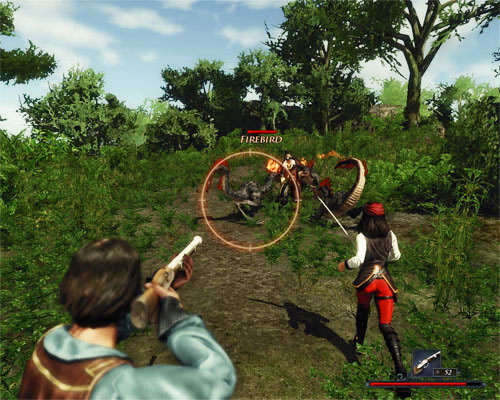 Let Patty and Steelbeard take the burden of fighting the Firebirds.
The girl's father will attack the animals peacefully feeding off the grass - do the same. Your companions will draw their attention away from you, allowing you to stay on the side and attack from a distance. When all of them fall (which means the completion of the Firebirds Blocking the Bridge quest), proceed on your way. After a short stretch, Steelbeard will stop and make a comment on the fight [#2]. At this moment, the game will activate another quest: Over the Bridge.
Rewards:

This quest is part of: Crow's Ship
A short quest activated and completed after killing all the firebirds blocking the passage over the bridge [#1] (see: Firebird Hunt).
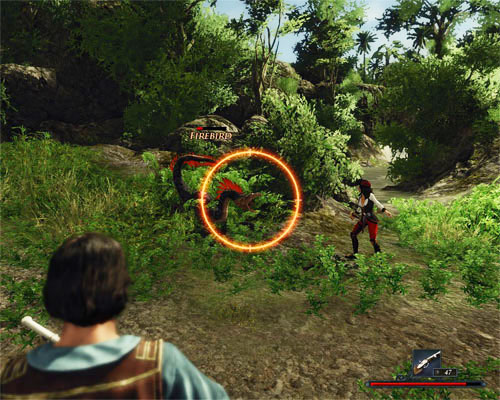 Stay back and attack from a distance. Your companions will take care of the rest.
Firebirds might be a problem if you fight them alone, but here you'll have not only Captain Steelbeard, but also his daughter Patty to help you. Let the companions move forward and draw the attention of the enemies to themselves, while you stay back and attack from a distance. There's no point in exposing yourself to danger. Remember that Glory points for the enemies killed by your companions go to your account.
Rewards:
![When Commandant Sebastiano [#1] orders you to hand the Titan Harpoon over to the warehouse, Patty will be furious - Follow Patty - The Sword Coast - Quests - Risen 2: Dark Waters - Game Guide and Walkthrough](https://game.lhg100.com/Article/UploadFiles/201512/2015121709164944.jpg)
When Commandant Sebastiano [#1] orders you to hand the Titan Harpoon over to the warehouse, Patty will be furious. Talk to her (quest: Talk to Patty) and she will declare she doesn't agree to such course of events. She will leave your party and head towards the Puerto Isabella docks. To complete the quest, you should follow her.
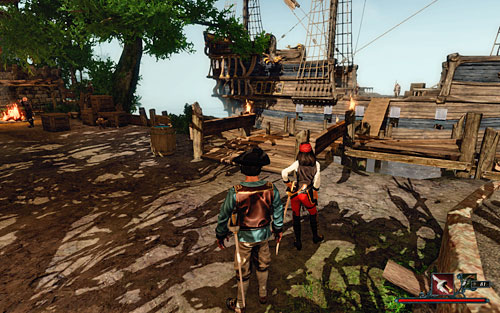 Running behind such a girl is pure pleasure.
Note! It's important where you talk to Patty at the beginning of this quest. If you do it in Sebastiano's office, you're in for a short run along the city docks [#2]. If you do it somewhere else, be aware that she will head for the docks anyway - if you're too far, there's going to be a lot of running.
Rewards:

This quest is part of: Free Tahana
The quest is triggered automatically when, following Chani's suggestion, you and the warrior Ranapiri go on a search to find a missing Shaganumbi tribe member, Tahana (see: Follow Ranapiri into the Jungle). The present quest is the second stage of that joint expedition, and begins at a large clearing [#1].
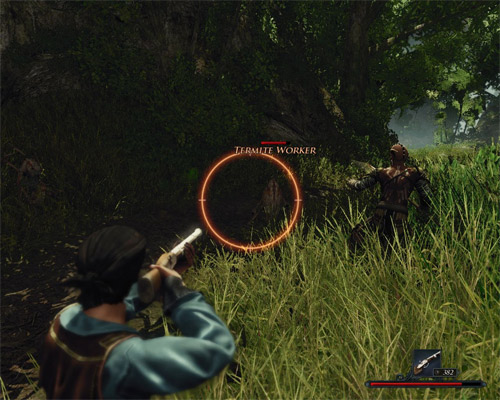 Ranapiri will be happy to help you fight the termites.
Follow your partner, eliminating all creatures on the way. If you haven't cleared that area before, you'll encounter, among others, Termite Workers. When you reach a fork in the road [#2], Ranapiri will rightly notice that if Tahana had really gone to the graveyard in the mountains, he would have been back a long time ago. The warrior will suggest to visit a nearby tower [#3] where the missing tribesman may be found. That part of the expedition is described in another quest: Follow Ranapiri to the Tower.
Rewards:
![Quest giver: Ranapiri [#1] - Follow Ranapiri into the Jungle - The Sword Coast - Quests - Risen 2: Dark Waters - Game Guide and Walkthrough](https://game.lhg100.com/Article/UploadFiles/201512/2015121709165019.jpg)
Quest giver: Ranapiri [#1]
This quest is part of: Free Tahana
When Chani [#2] suggests that you find Tahana (see: Free Tahana), you'll have the opportunity to ask Ranapiri [#1] for help in locating the lost tribe member. But there's a catch. The proper dialogue option will appear only if you haven't been to the Inquisition prison before [#3] and haven't learned that the Native is being held in a cell.
 Ranapiri will run ahead. If he comes across enemies, he'll attack them at once.
When you manage to persuade Ranapiri to join you, he'll run ahead, pointing the way. He'll automatically join your party, which means you'll be receiving all experience points for the enemies you both eliminate. After a short walk, you'll reach a large clearing [#4] where your companion will stop you and warn you about Inquisitors ahead. At this moment, the quest will be completed and another one will begin: Follow Ranapiri Farther Inland.
Rewards:

This quest is part of: Free Tahana
The third part of the joint expedition with Ranapiri, which purpose is to find the lost Shaganumbi tribe member (see: Free Tahana). The quest is triggered close to the Inquisition's tower [#1], after your Native companion confirms his mate isn't in the mountains (see: Follow Ranapiri Farther Inland).
 Ranapiri will stop far enough from the tower so as not to provoke Torres.
There's nothing to it. Simply walk a short distance until a fork in the road [#2], with Ranapiri at your side, and the mission will be completed. If you come across any enemies, the warrior will help you defeat them - Glory points will go to your account. When the quest is over, your companion will start a journey back, and you'll be free to rescue the prisoner.
Rewards:
![Quest giver: Venturo [#1] - Follow Venturo to Puerto Isabella - The Sword Coast - Quests - Risen 2: Dark Waters - Game Guide and Walkthrough](https://game.lhg100.com/Article/UploadFiles/201512/2015121709165040.jpg)
Quest giver: Venturo [#1]
This quest is part of: The Lookout's Report
You can activate this quest only if you helped Venturo infiltrate the Shaganumbi village (see: Among Savages), and then agreed to accompany him in his travel. Further events are pretty non-linear - you go with him to where Captain Crow [#2] resides (see: Follow Venturo do the Temple), and afterwards help him eliminate pirates [#3] (see: Basil Is Dead!), or simply ignore both quests and go straight to Puerto Isabella [#4] instead. Keep in mind, though, that the last option is the least profitable, because it's a waste of additional Glory points.
 What a picturesque weather conditions...
Note! This quest is parallel to Follow Venturo to the City - both end in the same place, but start in another. You can learn about it in the description of the second quest.
Rewards:
![Quest giver: Venturo [#1] - Follow Venturo to the City - The Sword Coast - Quests - Risen 2: Dark Waters - Game Guide and Walkthrough](https://game.lhg100.com/Article/UploadFiles/201512/2015121709165165.jpg)
Quest giver: Venturo [#1]
This quest is part of: The Lookout's Report
This quest can be triggered only during The Lookout's Report, provided you agreed to help Venturo in his travels and completed the Among Savages quest. If so, you'll be forced to accompany him to the Earth Temple [#2] (see: Follow Venturo to the Temple) and choose a dialogue option. If you decide upon going back to Puerto Isabella together, you'll get the first opportunity to trigger this quest. If, on the other hand, you prefer to defeat Basil [#3] (see: Basil Is Dead!), you can go back to the city right afterwards, as soon as you inform Venturo of the pirate's death (and it's the second opportunity).
 Look around for animals - Venturo will help you eliminate them.
No matter the option, the quest will be completed the moment you're safely back in Puerto Isabella [#4]. So remember not to send Venturo away too early, because the quest won't even be activated then!
Rewards:
![Quest giver: Venturo [#1] - Follow Venturo to the Temple - The Sword Coast - Quests - Risen 2: Dark Waters - Game Guide and Walkthrough](https://game.lhg100.com/Article/UploadFiles/201512/2015121709165170.jpg)
Quest giver: Venturo [#1]
This quest is part of: The Lookout's Report
You receive this quest if you helped the guard Venturo infiltrate the Shaganumbi village (see: Among Savages), and then eliminated the Natives in the Earth Temple who support Captain Crow. If that's the case, simply accompany him on his way and help him out with wild beasts. Enemies killed by Venturo power your Glory points account, so you don't need to exert yourself. The guard's rifle has pretty impressive firepower, capable of knocking down practically any enemy - there's no need to worry about who is going to win.
 Admire the views on your way.
The quest will be completed when you arrive at the Earth Temple [#2]. To finish The Lookout's Report, though, you need to help Venturo out with his other tribulations.
Rewards:
![Quest giver: Sebastiano [#1] - Forward March! - The Sword Coast - Quests - Risen 2: Dark Waters - Game Guide and Walkthrough](https://game.lhg100.com/Article/UploadFiles/201512/2015121709165195.jpg)
Quest giver: Sebastiano [#1]
This quest is part of: The Titan Weapon
Having assembled a team of brave soldiers (quest: Support from the Inquisition), you can proceed to attack Crow [#3] and his followers. Leave Puerto Isabella and talk to Venturo [#2], standing with the other daredevils you've recruited for the team.
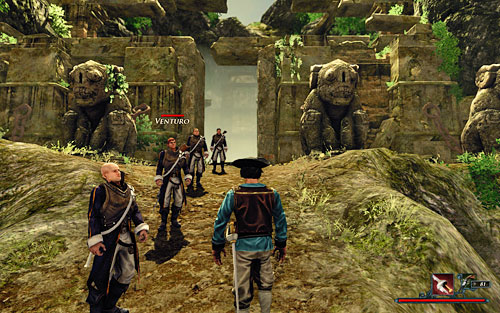 Four soldiers make a powerful force.
Together, go to the Earth Temple [#3] located in the south-west part of the island. To get there, simply go west (bypassing the Inquisition's towers) and don't stray from the paths. There will be several Natives in your way, but you can kill them without any trouble (provided you haven't done it earlier).
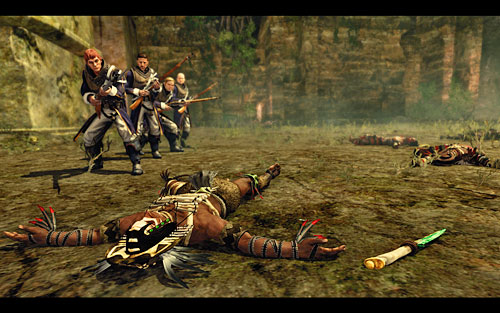 The Natives' Chieftain will not make it through the fight.
Once you've reached your destination, the huge gate to the temple will open before you. When you pass through it, there will be a cutscene showing Crow talking to the Natives. The savages will rush at the Inquisition's soldiers, but they don't stand a chance - shotguns are a powerful argument in this discussion. When the movie ends, the quest will be completed.
Rewards:
![Quest giver: Badriya [#1] - Four Offerings for Kanadiktu - The Sword Coast - Quests - Risen 2: Dark Waters - Game Guide and Walkthrough](https://game.lhg100.com/Article/UploadFiles/201512/2015121709165285.jpg)
Quest giver: Badriya [#1]
A simple quest requiring only to collect four Offerings from NPcs around the Shaganumbi village. These are: the chieftain's daughter - Chani [#2], the guard Samir [#3], the hunter Ranapiri [#4], and the warrior Nakutu [#5]. Some of them will engage you in a short conversation before handing the artifact, but don't worry - every dialogue option is correct.
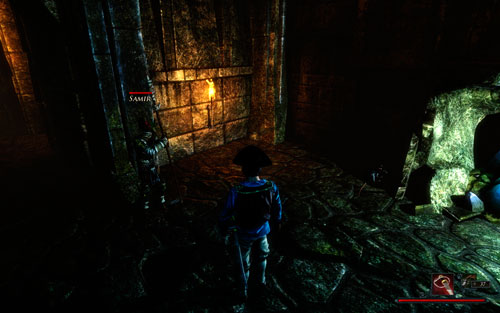 Samir can be found in the temple outside the village.
Once you've collected all the offerings (the order doesn't matter), report back to Badriya. She'll be so pleased that you've completed this simple task for her that she'll pay you for it. The sum is quite substantial for this type of quest.
Rewards:
![Quest giver: Hawkins [#2] - Free Hawkins! - The Sword Coast - Quests - Risen 2: Dark Waters - Game Guide and Walkthrough](https://game.lhg100.com/Article/UploadFiles/201512/2015121709165248.jpg)
Quest giver: Hawkins [#2]
Talk to Sebastiano [#2] about Hawkins - the only pirate who survived the sinking of Crow's ship and who had been captured by the Inquisition after the sea battle. The commandant will suggest that you interrogate the prisoner (see: Interrogate Hawkins), so agree to it. With the blessing of the authorities, head to the stone tower [#1] where the prisoner is held, and talk to him. When the ship's cook relates the details of the battle, tell him you'd like to get some answers to a few questions. Hawkins will agree but in return will demand your help in escaping the prison. Agree and you'll trigger the quest.
Ask the pirate about the escape plan to learn that after leaving the prison, Hawkins intends to jump over the walls and hide in a nearby cave. There's also the case of the solid door, but the cook had taken care of that too. The cell can be opened with a key which is currently in the possession of Commandant Sebastiano. Naturally, you'll be the thief.
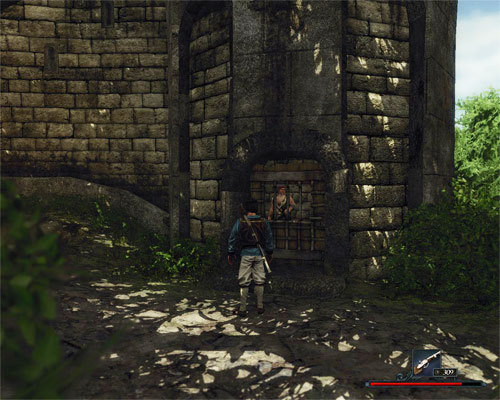 Hawkins is the only resident of the prison cell near the commandant's villa.
You can obtain the key by pick pocketing as long as your Thievery is at least 35. When you have the item, report back to Hawkins. Finish the conversation to let the cook make a run for it. The quest will be completed.
A few things to sum up:
Rewards:
![Quest giver: Chani [#1] - Free Tahana - The Sword Coast - Quests - Risen 2: Dark Waters - Game Guide and Walkthrough](https://game.lhg100.com/Article/UploadFiles/201512/2015121709165370.jpg)
Quest giver: Chani [#1]
This quest is part of: Help Against Crow
You receive this quest from the chieftain's daughter, Chani, after asking her why she opposes Bakir and Crow. She'll be shocked to hear that you even know about her rebellion, but won't deny your guesswork. In order to win her over to your side and convince her to fight the pirate, you need to gain her trust first - which is the goal of the present quest.
The tribe's scout, Tahana, has gone missing a while ago, during and expedition on the Inquisition's grounds. His mentor, the old hunter Ranapiri [#2], is the last person to have seen the young tribesman. Begin your search by talking to him. After exchanging a few words, he'll offer to help you. Agree and he'll show you to the place where Tahana should be located.
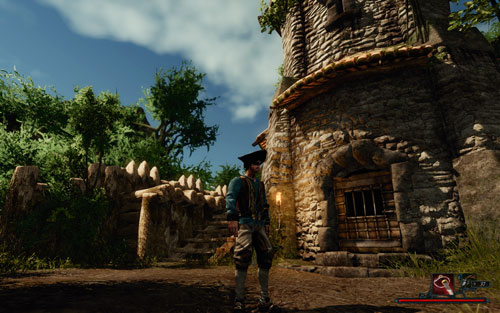 You can find Tahana in the Inquisition's tower.
The quest with Ranapiri is divided into three smaller tasks, each rewarded with 10 Glory points. Here's the list:
You don't have to do any fighting - Ranapiri is quite handy at it, and Glory points he collects go to your account. When you reach the tower [#3], though, the old man will leave you and you'll have to finish the task alone.
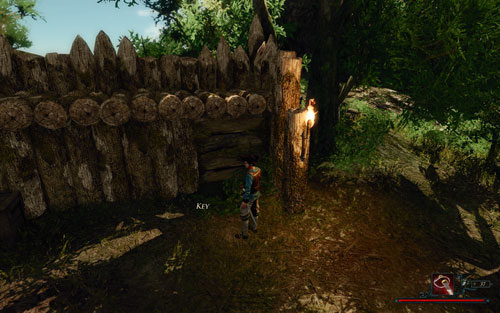 It's easy to miss the key.
Climb to the top of the mountain to enter the Inquisition's tower. You'll find Tahana in a cell. When you explain that you had been sent by Chani, he'll tell you that the key to the prison is somewhere nearby. Indeed, you can find it by the tower's entrance, in the bushes next to the palisade (see: the above screen). Pick up the Key and hand it to Tahana; he'll free himself and the escape will begin (see: Escape from the Tower). To be able to leave the place, you also need to have a little spar Torres. You should do fine with Tahana's help (his Glory points go to your account). Afterwards, head for the Shaganumbi village, and on the way complete several other quests:
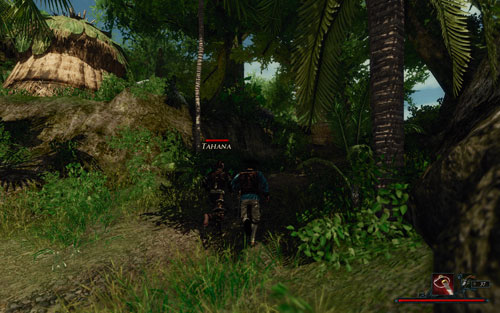 There's no place like home.
When all stages of the quest are completed, report back to Chani [#1]. With Tahana safe in the village, the woman will be able to help to help you against Crow. The quest ends here.
Note! If you wish, you can skip the expedition with Ranapiri and free Tahana at once - though it involves loosing the Glory points you could get for the hunter's quests. You can't, however, free the Native without talking to Chani first - the prison key appears only when the Free Tahana quest has been activated.
Rewards:
![Quest giver: Sophia [#1] - Golden Masks - The Sword Coast - Quests - Risen 2: Dark Waters - Game Guide and Walkthrough](https://game.lhg100.com/Article/UploadFiles/201512/2015121709165321.jpg)
Quest giver: Sophia [#1]
This quest is part of: A Few Barrels of Water...
Note! This quest is only available if you have sided with the Inquisition!
You receive this quest from Sophia when you ask her for help in loading water aboard the ship (it's required for the A New Ship mission). The nimble innkeeper will ask you to find three Golden masks, which are located in Commandant Sebastiano's barracks. The first artifact lies in a box at the top of the guard tower [#2] (next to the cannon from the Sabotage quest). The second can be found in the connecting room on the first floor [#3], while the third - in the commandant's bedroom [#3].
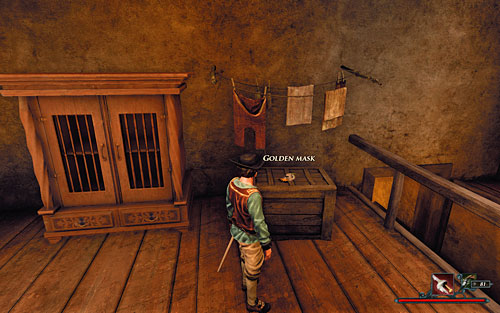 You can find one of the trinkets under the commandant's wet pants.
The order at which to collect the masks is up to you, you don't have to worry that someone might notice you - apparently collecting precious artifacts isn't a crime. When you have them all, give the beloved trinkets to Sophia.
Rewards:
![Quest giver: Sancho [#1] - Got Anything to Eat? - The Sword Coast - Quests - Risen 2: Dark Waters - Game Guide and Walkthrough](https://game.lhg100.com/Article/UploadFiles/201512/2015121709165322.jpg)
Quest giver: Sancho [#1]
A no-brainer, this is a short quest which shouldn't be any problem to you. In order to complete it, go north-west of Puerto Isabella to where a group of the Inquisition's soldiers are patrolling the area. One of them is Sancho [#1] - a constantly hungry footman who'll ask you for food even at the start of the conversation. If you agree to give him one piece of Provisions, the quest will be momentarily completed. If you refuse, you will fail it.
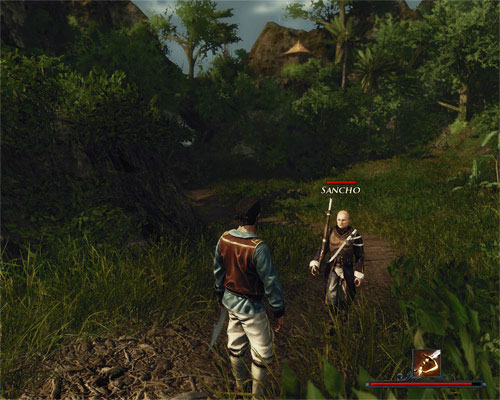 Sancho went on the patrol as a punishment, which he won't forget to tell you.
Note! Further in the conversation, Sancho will ask you for food again. If you give him some of your rations one more time, you will get another 25 Glory points. You can get this reward no matter how you've resolved the current quest.
Rewards:

This quest is part of: Free Tahana
The last in the line of quests referring to the imprisoned warrior. The goal is simple - follow Tahana [#1] to the Shaganumbi village. The road takes you along the river [#2] up to the main gate [#3]. You shouldn't encounter any enemies, unless you haven't dealt with them during one of the previous missions (expect Warthogs then). Tahana will help you, and his Glory points will count as yours.
 Finally at home.
When you arrive at the Natives' village, the escaped prisoner will thank you for your help and head for his hut. The quest will completed, but in order to finish the Free Tahana mission you also need to talk to Chani [#4].
Rewards:
![Quest giver: Captain Steelbeard [#1] - Help Against Crow - The Sword Coast - Quests - Risen 2: Dark Waters - Game Guide and Walkthrough](https://game.lhg100.com/Article/UploadFiles/201512/2015121709165403.jpg)
Quest giver: Captain Steelbeard [#1]
This quest is part of: The Titan Weapon
You receive this quest upon arriving at the Sword Coast. You're in for a hike through the jungle to get to a tower [#2] that rises above the area. Once you've killed the guards that were stationed there (quests: Talk to the Pirates at the Tower and Defeat the Lookouts at the Tower), have a chat with Captain Steelbeard and Patty. When you're ready to continue the journey (it's recommended to regenerate health in a bed), you and your companions can proceed forward. No matter which road you take (a few mini quests are involved), eventually you'll arrive at a port city - Puerto Isabella [#3]. Here you will learn about the fate of Captain Crow [#4], who has the sought-after Titan Harpoon. To make it to that cunning swashbuckler, though, you'll have to side with the Natives who live in the Shaganumbi village [#5] or with the Inquisition residing in the city [#3]. Once you've made your choice, you can't change it in any way, and it will affect subsequent quests until the end of the game - so take a moment to think about it!
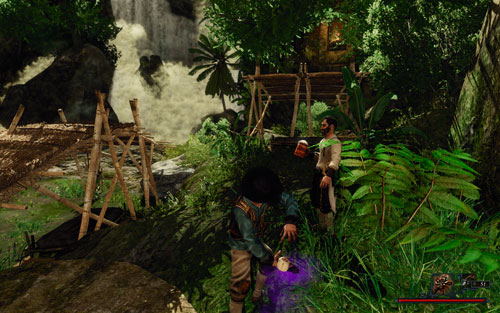 Help from the Natives is pure magic.
Chani, Daughter of the Chieftain - the Natives' way. In order to gain the trust of the savages, you'll have to complete a lot of subquests they give you. Most of them rely on proving the courage and loyalty of the Nameless Hero - as a white man, he can't count on being respected too much amongst the native inhabitants of the jungle. Therefore, gaining that trust is quite problematic and largely depends on another quest - Free Tahana. During that quest you'll learn that Ranapiri [#5], one of the warriors from the village and a hunter at the same time, is concerned about the fate of his ward, Tahana [#6], who has been captured by the Inquisition. If you agree to help the Native, you'll need to go to the tower in which the prisoner is held. The key to the cell lies opposite the cell door, on the right of the small staircase, on the ground. When you use it to free the prisoner, you'll be forced to fight a guard. Afterwards, simply walk Tahana to the Natives' village (on the way you'll find the Shaganumbi idol required in The Ancestors' Blessing quest). All this will allow you to gain Chani's trust, thanks to whom you'll be able to prepare to face Crow. Once you've won the girl over and joined the Natives, the quest will be completed.
 Venturo is hiding outside the Natives' village.
The Lookout's Report - the Inquisition's way. To complete this quest, meet with Venturo [#7] in front of the Shaganumbi village, and help him infiltrate it (see: Among Savages). When it's done, report back with the information you've obtained. The quest can now go two ways - you can either finish it immediately by reporting to Commandant Sebastiano [#8], or help Venturo eliminate pirates (see: Basil Is Dead!). Regardless if the choice, the mission ends the moment you join the Inquisition (having previously reported to Sebastiano).
Rewards:

This quest is part of: The Natives
The quest is both activated and completed when you get rid of a small group of enemies residing in a cave far to the north [#1]. You can do it at any point in the game or, as the writers intended it, according to the script, which is during the trip to the natives' village with Steelbeard and Patty (see: The Natives).
The cave consists of one large corridor - you can find the enemies at the end. They are represented by two Hunters and a Pirate - the former will attack you from a distance, while the latter will test you in melee combat. The narrow location causes some trouble moving around, but despite the unfavorable conditions the fight shouldn't be too much of a problem. The key is not to let the savages shower you with you spears while you're taking care of the cutthroat.
The eliminated enemies have some valuable items on them, so don't forget to search their corpses. A few things are also scattered around the cave. If you don't have the Map of the Storm Coast, take a look at the closed chest - difficulty level: 30.
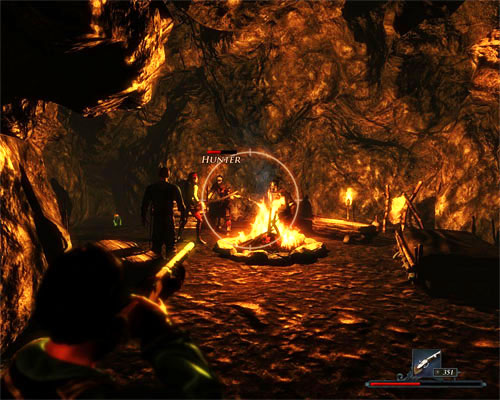 It's harder to fight in the narrow corridor, but a skilled shooter can deal with his enemies under any conditions.
To sum up, two things which may prove useful if you've entered the cave during The Natives quest:
Rewards:
![Quest giver: Sebastiano [#1] - Interrogate Hawkins - The Sword Coast - Quests - Risen 2: Dark Waters - Game Guide and Walkthrough](https://game.lhg100.com/Article/UploadFiles/201512/2015121709165552.jpg)
Quest giver: Sebastiano [#1]
In the upper part of Puerto Isabella there is a large villa - its entrance is guarded by Alcazar [#2] - one of the Inquisition's soldiers. If this is your first time here, convince the guard to let you inside (how you do it doesn't matter, you'll succeed anyway), a then talk to Commandant Sebastiano [#1]. When you ask him about Crow, you'll not only learn that the pirate ship had been sunk (see: Where Is Crow's Ship?), but also that the ship's only surviving passenger, a cook named Hawkins [#3], is held in a nearby cell. Continue the topic and a while later you'll be persuaded to interrogate the prisoner.
 In order to enter the villa to talk to the commandant, you have to convince Alcazar to your point of view.
Head to the stone tower and talk to the imprisoned pirate. Wait until Hawkins relates the sea battle, and ask him for information on some bothering matters. The cook will sense that you have your own agenda here, and will demand helping him escape from prison in return for answers (see: Free Hawkins!). One doesn't stand in the way of the other, so don't hesitate to agree.
When everything is settled, ask Hawkins all available questions. Rich in the newly found knowledge, return to Sebastiano with a report. That's all.
Rewards:
![Quest giver: Kapua [#1] - Jade - The Sword Coast - Quests - Risen 2: Dark Waters - Game Guide and Walkthrough](https://game.lhg100.com/Article/UploadFiles/201512/2015121709165578.jpg)
Quest giver: Kapua [#1]
This quest is part of: The Shipment for Crow
When you talk to the shaman Kapua about an idol she was supposed to make for Slick (see: The Shipment for Crow), she'll tell you there's only one element missing - the heart. It can be made only with pure Jade, which is very hard to obtain. However, the shaman's servant girl, Hikoko [#2], knows the way to a cave where you can find the missing ingredient. Talk to her to let her take you there (see: Accompany Hikoko), and collect four Pieces of Jade (see: The Jade Cave). Unfortunately, because she is a woman she can't fight any of the encountered enemies, so it's up to you to deal with them. They're mostly Termite Workers and Claw Monkeys, so they won't be a problem.
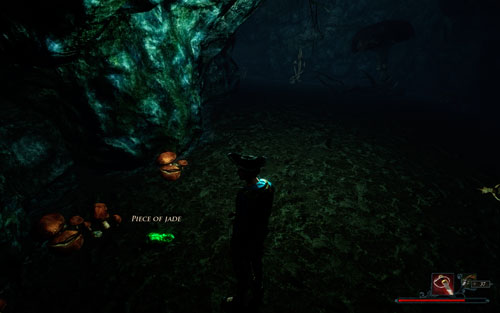 All this trouble for a few trinkets...
After entering the cavern [#3] and recovering the needed mineral (see: 4 Pieces of Jade), return to the Shaganumbi village. If you want, you can ask Hikoko to accompany you on the way back (see: Back to the Village with Hikoko), but it's utterly optional - you can just go back alone. When you meet with Kapua and hand her the Pieces of Jade, she'll give you Jade and the Idol of Protection that Slick needs. The quest ends and you only have to talk to the abrasive pirate.
Rewards:

When you obtain Jim's treasure map (see: Jim's Treasure Map), you can start searching for his hidden valuables. The chest is buried in the central part of the island [#1], near the grand waterfalls.
Finding the place where the chest is isn't difficult (use the marker on the map to help you locate the exact spot), but getting it out is another matter. All because of an Alligator lurking around, which is one of the most dangerous creatures you can encounter on the Sword Coast. It's not only fast, but also lethally threatening in a direct encounter, so you have to be extremely cautious. If you're not too good with swords, attack it from a distance and use sprint to escape. The Alligator has trouble with sudden movements, so the best solution in order to avoid its jaws is to frequently change your position.
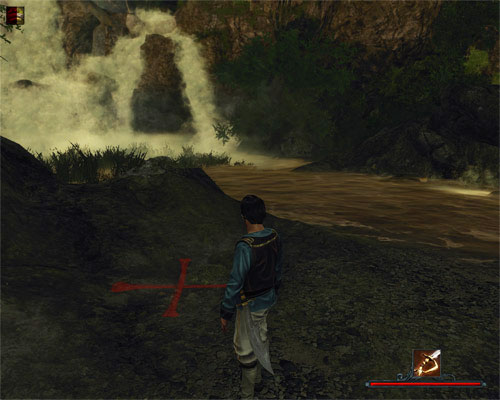 The treasure is buried near the grand waterfalls in the central part of the island.
Once you've eliminated the threat, you can get your hands on the chest. Its exact location is marked by a cross drawn on the ground. Of course, you'll need a Shovel to dig it out - you can buy it from Sophia [#2] in Puerto Isabella.
Rewards:

This quest is part of: Jim's Treasure
Jim [#1] is a member of Captain Crow's crew, who is currently residing in the Shaganumbi village, wasting his time drinking large amounts of rum. Several meters behind the drunk there is a closed chest [#2] which contains, apart from some cash and Grog, Jim's treasure map. The lock in the chest is not difficult (difficulty: 20). If you're not skilled enough to take on that simple challenge, though, you can always take some lessons. Jim is a trainer, so you won't have to look far.
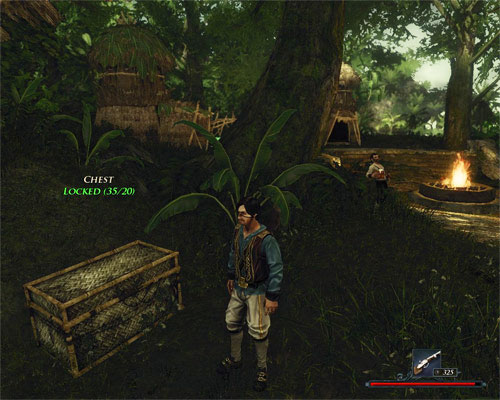 Jim's chest is not a challenge for an average thief.
The quest will be completed automatically after taking the map, and another one will start: Jim's Treasure. You don't have to worry about the residents of the village while opening the chest - none of them will see you getting your hands on its contents.
Rewards:

This quest is part of: The Natives
The joint trip to the Shaganumbi village is nearly over. Having eliminated the Tough Blueclaw Monkeys [#1] (see: Monkey Bussiness), you'll begin the next phase of the journey. Follow the captain, killing a single Claw Monkey on the way.
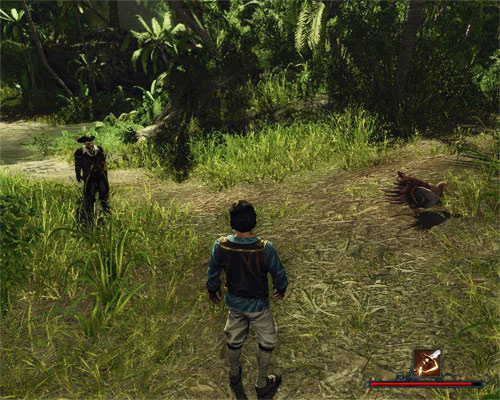 Neutral enemies earn some easy Glory points.
When you reach a river [#2], the current quest will be completed and the game will activate another one - Across the River. Before you accomplish that daredevil performance, don't forget to shoot the Turkeys bustling around the banks first - they're an easy target and a source of the precious Glory points.
Rewards:
![Quest giver: Patty [#1] - Liberate the Ship - The Sword Coast - Quests - Risen 2: Dark Waters - Game Guide and Walkthrough](https://game.lhg100.com/Article/UploadFiles/201512/2015121709165655.jpg)
Quest giver: Patty [#1]
This quest is part of: A New Ship
When you're ready to attack the ship (having destroyed the cannons, secured the water supply and assembled the crew), it's time for an open assault. Talk to Patty to tell her that you're ready for the battle. At this point, you board the ship in the docks [#2].
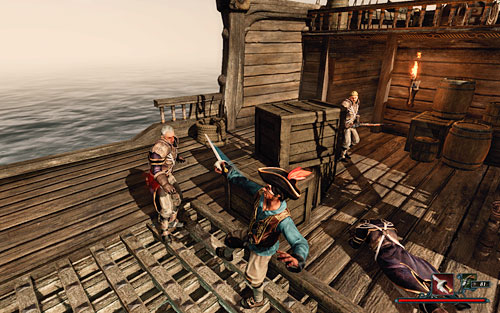 The ship isn't guarded too well.
As expected, the ship's crew won't to be too thrilled with the fact that you're stealing it - consequently, you'll need to defeat all four sailors on board. It shouldn't be too difficult, both sides are evenly matched. When the fight is over, the ship will become your property and you're free to sail to other places. The destination is your choice - the order is completely up to you.
Rewards:

This quest is part of: The Natives
On your way to the Shaganumbi village (see: Down into the Valley), you'll come across a flock of Tough Blueclaw Monkeys [#1], which are blocking the only way leading to the river. Captain Steelbeard will ask you to take care of that problem and patiently wait until you resolve it. Same goes for Patty who will leave your party again.
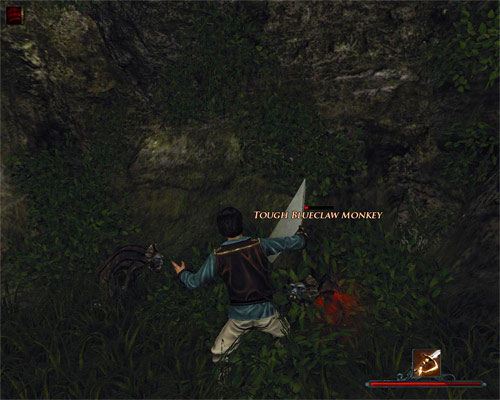 The monkeys enjoy running around their opponent. It's a perfect opportunity to strike a few precise hits.
The blue monkeys won't give you any trouble as long as you prevent them from attacking in shifts. Keeping your companions out of the fight will prove much more difficult. If you attack the animals too close to Steelbeard and Patty, they will rush in to help you. Naturally, there's nothing wrong in such help, it's always better to fight in a group. Nevertheless, remember the most basic rule: in this quest, you don't get Glory points for a foe killed either by the pirate or by his daughter, so it's you who has to deliver the killing blow! If you don't want to risk it and wish to kill the monkeys by yourself, simply circle around them and attack as far as possible from your companions.
After completing the mission, return to Steelbeard and tell him the monkeys have been slain. The captain will run ahead, which means another quest begins: Just a Little Farther.
Rewards:
![Quest giver: Natsumi [#1] - Natsumis Bag of Herbs - The Sword Coast - Quests - Risen 2: Dark Waters - Game Guide and Walkthrough](https://game.lhg100.com/Article/UploadFiles/201512/2015121709165720.jpg)
Quest giver: Natsumi [#1]
This quest is part of: The Shipment for Crow
You receive this quest from Natsumi, the gatherer from by the river. When you try to talk to her about her work, you'll learn that she had to drop her bundle because she saw a terrifying Alligator. You can offer to help her retrieve her bags, as well as eliminate the threat (see: The Evil Spirit of the River). Killing the animal is also a requirement for the A Dangerous Beast quest.
 The sacks are lying close to each other.
To complete this mission, go a little west of Natsumi and collect three sacks [#2] which are lying just by the river (this will complete Natsumi's Bag of Herbs). Before you get there, though, you'll have to fight the formidable Alligator the woman has mentioned. The best way to defeat it is to shoot it with a shotgun and pull back - close combat won't end too well.
Once you have all of Natsumi's lost bundles, give them back to her. The quest ends.
Rewards:
![Quest giver: Chani [#1] - Ouch! - The Sword Coast - Quests - Risen 2: Dark Waters - Game Guide and Walkthrough](https://game.lhg100.com/Article/UploadFiles/201512/2015121709165730.jpg)
Quest giver: Chani [#1]
This quest is part of: The Chieftain's Hair
This quest is short, but requires some diplomatic skills. Approach a pirate, Jim [#2], who is standing at the edge of the Native's village, under a tree. Tell him that if he gives you a lock of his hair, you'll make him an amulet which protects against witches (this is the only correct dialogue option!). He decides to do it, cuts some strands, and hands them to you. Naturally, you won't keep your promise, but instead, with Chani's help, you'll create a Voodoo doll which will let you bewitch the poor fellow (see: A Doll for Jim).
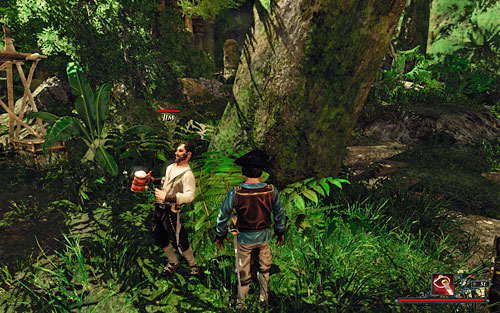 Despite what you may think, the pirate won't be tempted by an amulet that increases potency.
Rewards:

This quest is part of: Crow's Ship
The third part of the journey with Steelbeard and his daughter Patty to the city of Puerto Isabella. The quest will begin shortly after the fight with Firebirds (see: Firebird Hunt). Here the authors evidently got carried away because the quest ends right after you cross the wooden bridge [#1] hung across a rapid river. A whole fifteen seconds of work. Once the mission is completed, another one begins: Farther South.
Rewards:
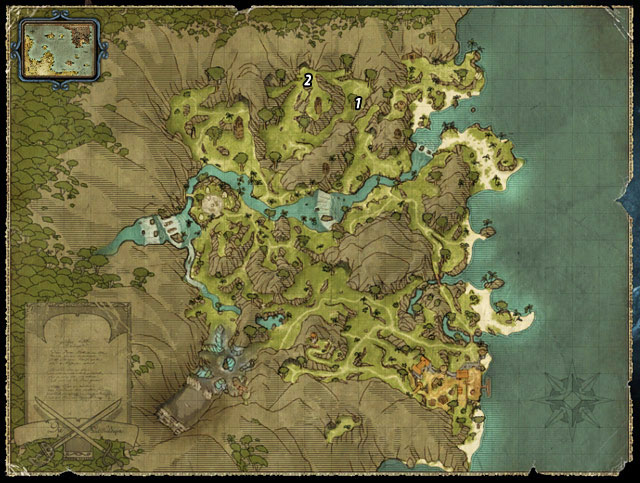
This quest is part of: The Natives
Another part of the journey to the natives' village, the third in line. After leaving the cave (see: Farther Inland) Steelbeard [#1] will choose the safest route to the destination, thus activating the current quest.
For starters, you'll have two Claw Monkeys to take care of. Use the fact that you have companions at your side and, as tradition has it, let them take the burden of the fight. Enemies killed by your companions are rewarded with Glory points, so you don't even have to move.
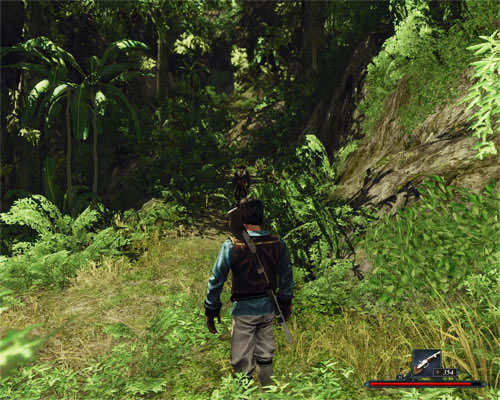 The captain doesn't feel like visiting the valley, so he'll lead you over a pass.
After the fight you'll face a longer hike because Steelbeard will stop only at the entrance to a suspiciously looking cave [#2]. Don't worry, you'll be forced to check it out, but this is a place for another quest, The Cave at the Pass.
Rewards:

This quest is part of: Natsumi's Bag of Herbs
The quest is completed automatically after obtaining three bags of plants for Natsumi [#1]. The woman from the Shaganumbi village will ask you to find her lost bag when you talk to her (see: Natsumi's Bag of Herbs).
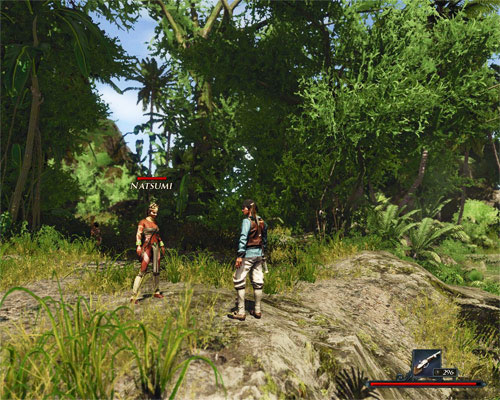 Natsumi has already collected herbs for Slick, but can't hand them to you yet.
The sacks (Sack of mushrooms, Bundle of plants and Bag of herbs) are lying [#2] a few meters west from where you meet Natsumi. In order to collect them, thought, you'll first have to get rid of an Alligator residing in the area. There is a separate quest devoted to eliminating it called The Evil Spirit of the River and it's there that you'll find clues as to how to do it.
Rewards:
![Quest giver: Sophia [#1] - Red Wine - The Sword Coast - Quests - Risen 2: Dark Waters - Game Guide and Walkthrough](https://game.lhg100.com/Article/UploadFiles/201512/2015121709165957.jpg)
Quest giver: Sophia [#1]
Go to Puerto Isabella docks and talk to the tradeswoman, Sophia [#1]. If you touch upon the topic of treasures, she will mention some small work you can do for her. Ask about the details and the quest will be activated.
The case is very simple. Back when Sophia's husband warehouse wasn't properly guarded, the city residents managed to take out a substantial supply of Red wine. Now, the woman would like to recover at least some of the stolen alcohol. She'll be content with five bottles for the quest to be completed.
 The bottles of wine lay in some really strange places.
The red wines are found in several various locations. Some can be taken on the spot, others will require to take some proper precautions. If a bottle is in a house of a resident, it's best to sneak inside during the night. The full list is as follows:
 The wine can be also found inside chests.
To complete the quest, find five bottles and hand them to Sophia. If you've found more, don't worry! Each additional bottle will get you additional 100 Gold.
Rewards:
![Quest giver: Floyd [#1] - Redistributing the Loot - The Sword Coast - Quests - Risen 2: Dark Waters - Game Guide and Walkthrough](https://game.lhg100.com/Article/UploadFiles/201512/2015121709165965.jpg)
Quest giver: Floyd [#1]
This quest is part of: The Chieftain's Hair
When you take over Jim's body and want to enter the Earth Temple, you'll be stopped by a pirate, Floyd. He won't let you inside until you give him three ancient artifacts. There's only way to do it - by stealing them from the rest of the pirates [#2], who are standing outside the building. While you shouldn't have any problems with Gunpowder Ben and Digger, Skinner won't be robbed so easily. You'll need to distract him first - traditionally, by getting him drunk on a dose of alcohol (quest: Distract Skinner). You can do it by paying back the debt you owe Digger - the money can be obtained by a little bit of thieving on Floyd and the Natives.
 All this trouble for some hair...
When you have the required amount of money, you can give them back to your creditor, buy Rum from him, and use it to get Skinner drunk. All that is left to do is robbing the pirate and delivering all of the artifacts to Floyd.
Rewards:
![Quest giver: Patty [#1] - Sabotage - The Sword Coast - Quests - Risen 2: Dark Waters - Game Guide and Walkthrough](https://game.lhg100.com/Article/UploadFiles/201512/2015121709170070.jpg)
Quest giver: Patty [#1]
This quest is part of: A New Ship
It's best to complete this quest immediately after recruiting your new crew members, but before informing Patty of it (your companions cannot join your party then!).
To complete the quest, you need to destroy four cannons in Puerto Isabella - three are on a bluff [#2], one at the garrison's tower [#3]. Naturally, it can't be done with bare hands - first, you need to ask your favorite pirate woman for proper tools, namely Rusty nails.
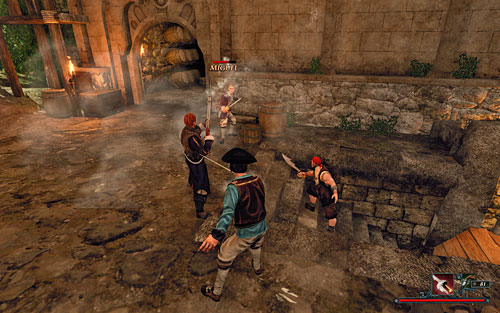 After the fight, your companions will take offence with you, but it doesn't interfere with anything.
While the cannon at the top of the tower shouldn't be a problem (even if the Nameless Hero is spotted, he'll have to fight one guard at the most), the ones on the waterfront may be a bit more problematic. The thing is, they are constantly watched by Miguel, Benito and one of the guards. Since fighting them is inevitable (they're at their posts even during the night), you can use the help of Venturo, Hawkins or Chani, who'll deal with the threat without a problem. Once the work is done, report back to Patty.
Rewards:
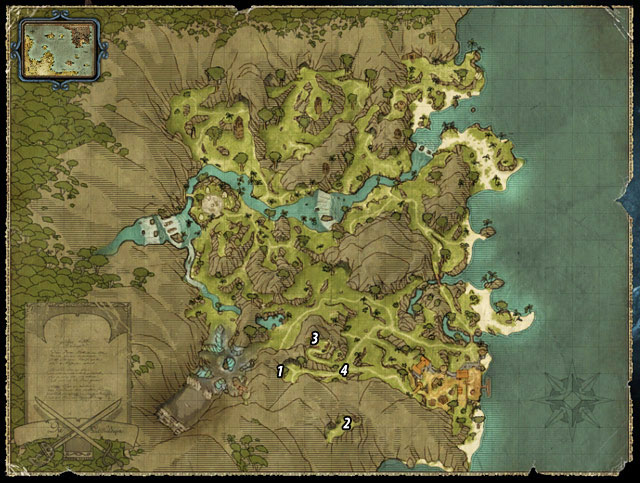
This quest is part of: Free Tahana
The quest is completed automatically when you find the Shaganumbi idol, a precious item valued by the tribe and sought for by Tahana. The idol lies by a tree [#1] at the road leading to the Natives' Graveyard [#2]. You can pick it up at any point in the game, thought it's not recommended.
You can learn about the idol from Tahana himself [#3] after you've helped him escape the Inquisition's Tower (see: Free Tahana) and moved to a safe distance [#4] (see: Escape from the Tower). The savage will guide you to where he had discarded the idol, which concludes the Shaganumbi Idol Found quest.
 The idea is simple: don't take the idol until you've freed Tahana from prison.
The situation will change entirely if you find the idol before freeing the native. In this case, Tahana won't mention the idol at all, and after completing the Escape from the Tower quest you'll go straight to the Through the Jungle mission. Shaganumbi Idol Found will be completely omitted, and what's more, the idol will stay in your inventory for the rest of the game. It's probably a bug in the game.
Rewards:
You'll receive this quest right after the death of Captain Steelbeard, after talking to Patty on the beach of the Sword Coast (see: The Titan Weapon). Unfortunately, the old pirate didn't have enough time to tell you where he had hidden his piece of the Titan artifact. Your goal is to locate it and obtain it. Because of the fact that this is one of the most complicated quests in the whole game, the description has been divided into the following several smaller parts. The way the mission goes depends on the faction you've chosen to side with - it's been taken into consideration in subsequent chapters. If you preferred the Native way, you should be particularly interested in reading the Isle of the Dead chapter, while if you're a member of the Inquisition, take a closer look at the Maracai Bay.
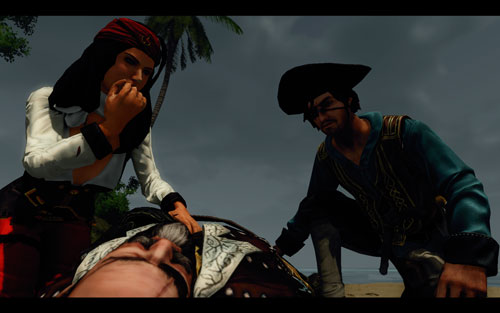 Spoiler - hard to omit while writing a game guide.
 The Sword Coast
 Antigua
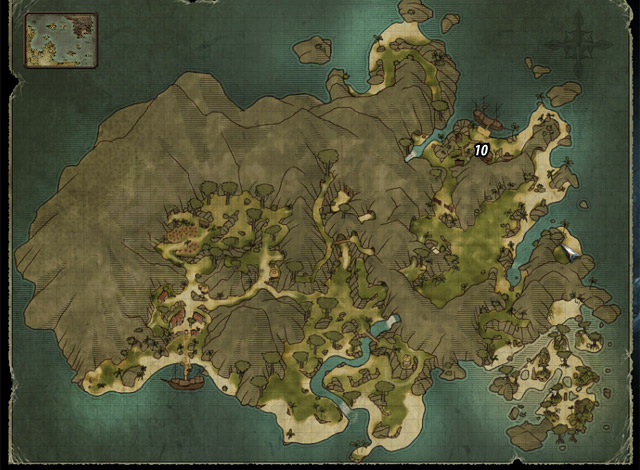 Tacarigua
To escape from the Sword Coast and be able to continue your mission, you need to get a ship. You can do it in the A New Ship quest, which is activated right after you talk to Sebastiano (see: Talk to the Commandant). After the fat Inquisitor explains to you that you're nothing but garbage to him, have a few words with your companion (see: Talk to Patty), and follow her to the harbor [#1] (see: Follow Patty). There, she'll explain to you her plan thanks to which you would leave these unwelcoming shores.
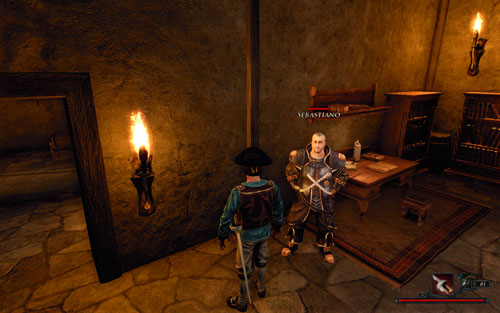 The Inquisition won't be eager to help.
To get a new ship, you need to complete several sidequests:
 You'll be using this ship for the rest of the game.
When all the above conditions are met, board your new ship and talk to Patty. This way you complete the A New Ship quest and are free to sail wherever your hearth desires.
If you want, you can ask around about Steelbeard's treasure (see: The World's Best Hiding Place). There are two people who had known Steelbeard well enough that they might know something about the treasure's location. They are: Admiral Alvarez [#9] on Antigua, and Booze [#10] who you've met in the tavern on Tacarigua. After talking to either of them you'll automatically complete the quest and learn that Steelbeard had hidden his treasure in Garcia's chest. Now you need to find the man who has been last seen on Caldera.
Note! If you've sided with the Natives, Chani will tell you the location of the Isle of the Dead, where you can find Steelbeard's ghost (involves the Steelbeard's Ghost quest). If you're no too fond of Caldera or Maracai Bay, you can completely ignore their parts and sail to the Isle of the Dead at once. You'll get the complete resolution to the Steelbeard's Artifact quest there - just remember that this way you'll waste a substantial amount of Glory points you could have otherwise collected if you had completed the quests one by one!
![Upon arriving at the shores of Caldera, talk to Carlos [#1] who will give you the Following Garcia's Trail quest - Steelbeards Artifact - The Sword Coast - Quests - Risen 2: Dark Waters - Game Guide and Walkthrough](https://game.lhg100.com/Article/UploadFiles/201512/2015121709170133.jpg)
Upon arriving at the shores of Caldera, talk to Carlos [#1] who will give you the Following Garcia's Trail quest. Your goal is to find Garcia - the pirate who owns another Titan artifact. Though it seems easy enough, in truth it involves a whole lot of subquests you'll be forced to complete. Even the first one, Mauregato!, can be finished in two different ways, depending on the faction you've sided with. Leave the Crystal Fortress and go to Mauregato's house [#2].
If on the Sword Coast you have sided with the Natives, you can obtain Mauregato's Wig and use it to possess him. Go to the east part of his house and take the Claim ticket [#3]. Show the document to the merchant Pantaleo [#4] (if you don't have it, you can simply steal the Wig from him, as long as your Thievery is at least 75). Regardless of the chosen option, the item will be yours. Lastly, go to the second floor of the hotel and use Di Silva's altar [#5] to create the voodoo doll. With it, return to Mauregato and use your magic.
 Here's how you solve troubles with clerks!
In the body of the grumpy politician, go to the cathedral [#6] and talk to Custodio [#9] there, who will inform you about a council meeting. Then, tell the man on your right, Puco [#10] how he should vote (for or against the alliance with Mara). Sneak into Mauregato's office [#11] to steal the Incriminating letter (you need to do it before going to the library!). Move to the library [#12] and read the scroll with High Council Rulings - it will end the Following Garcia's Trail quest and start a new one - Maracai Bay.
If you want to finish the Mauregato! quest, enter Godin's office [#13] (opposite the reading-room) and tell him about the meeting. Meet with all the politicians in the main hall and carry out the voting. Unless you vote for the alliance with Mara and then reveal your treachery, the outcome of the voting will have no effect on the plot. Otherwise, you'll be killed and the quest will be cancelled! If that's what's happened, the only other way to solve the problem of Garcia is to do the Errand Boy quest.
If you want to disgrace Mauregato, steer the voting into not supporting Mara, and then admit to treachery. The man under your control will lose his position in favor of his opponent - Azuro.
 This solution lets you get to know the dirty world of politics.
If on the Sword Coast you have sided with the Inquisition, the Mauregato! quest will end the moment you talk to man in question. Since you weren't able to gain anything, ask the townspeople about Garcia (see: Follow the Servant). Thanks to that you'll be approached by the servant Azuro [#7], who will let you talk to his master [#8]. This opens the Errand Boy quest. It's divided into two subquests:
 The Signet ring lies in the bedroom where Mauregato sleeps with his maid.
When you have both items, report back to Azuro. He'll give you a forged Pass which will allow you to enter the cathedral (put on the messenger's clothes first!). Inside, talk about Garcia to Custodio [#9]. This way you'll discover that the librarian Cassandra [#14] had talked with the pirate about books. Meet the woman, then (see: Scrolls, Books and Shelves), buy a key to Mauregato's office from her (costs 500 Gold) and steal the Incriminating letter from there [#11]. Next, enter the library itself (see: Access to the Archives) and read the scroll titled High Council Rulings. At that moment, the Following Garcia's Trail will end, and another one will begin - Maracai Bay (that's where Garcia is hiding!).

Note! This part of the quest is optional and can be replaced by the Steelbeard's Ghost mission, which can be completed on the Isle of the Dead.
The most important quest on the Maracai Bay is Search Garcia's Possessions. Leave the harbor [#1] and take the path going south. Go under the rope bridge [#2] to reach an old campsite [#3], then turn east. Go south on the crossroads [#4] and pass by Angus [#5]. Next, go down to the beach and get into the boat there [#6]. When you approach the pirate's ship [#7], you'll have to fight the captain's thugs (see: Seize Garcia's Ship) - there're quite challenging, so it's better to have some companions with you.
Enter Garcia's office and on the desk next to the bed you should see a Map (see: The Treasure on the Pirate Coast) and a book - Garcia's logbook. Read it to learn the location of the captain's hideout and the password that will allow you to open its gates (see: Open Sesame). You'll also complete the quest The Password which you might have gotten on Antigua if you looked inside the gates under the waterfall (even if not, the quest will still be completed).
 There's no way around a little quarrel with pirates.
This is when you need to talk to Patty [#1] (which ends the Search Garcia's Possessions quest) and sail to Antigua. That's Steelbeard's artifact has been buried.
 The Sword Coast
 Antigua
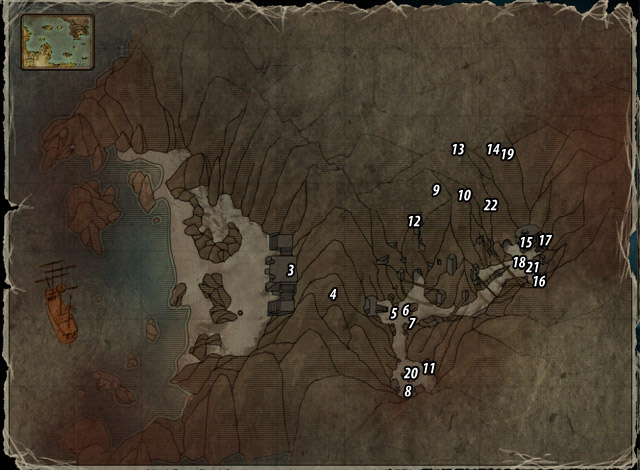 Isle of the Dead
Quest giver: Chani [#1] on the Sword Coast or Admiral Alvarez [#2] on Antigua
Note! This part of the quest is optional and can be replaced by the Search Garcia's Possessions mission, which can be completed on the Maracai Bay.
The Isle of the Dead is a legendary location only few can reach. There are two ways to learn of its location:
If on the Sword Coast you have sided with the Natives, you'll receive the sailing map from Chani after telling her about Captain Steelbeard's death (see: A New Ship). The clever witch will tell you that you can talk to his ghost on the Isle of the Dead (see: Steelbeard's Ghost). You'll get access to it at once and you can sail there as soon as you get a ship. It's not recommended, though - in such early stages of the game you have no chances of surviving in that hostile land. Monsters that live on the Isle of the Dead, such as Ghouls, Warriors and Guards will rip you apart before you even know it. It's much better to go there only after completing all other quests pertaining to the Titan artifacts.
If on the Sword Coast you have sided with the Inquisition, you'll get access to the Isle of the Dead only after collecting all Titan artifacts. If you have them, talk to Admiral Alvarez on Antigua (see: Steelbeard's Ghost).
 There's nothing like talking to a dead friend.
Regardless of the choice, the course of the quest is the same. You need to go to the Isle of the Dead and complete quests: The Journey to the Underworld and The Skull Sceptre. The first one is received from the guard Tao by the entrance to the land [#3]. Your goal is to brew a potion which will allow you to cross over to the underworld. You'll need Black lotus and Grave dust to make it (see: Black Lotus and Grave Dust). Both items are found in the further parts of the island. Go through the gate opened for you by Tao, and face a Warrior [#4] lurking there. Further on you'll have to fight a difficult battle with a Guard and a Ghoul [#5] - firearms work and some Dirty Tricks work best here. Afterwards, focus on collecting the necessary ingredients - you can find their locations below. Remember to remain cautious - there are enemies everywhere!
 It's better to start the search during the day - it's hard to see anything in the dark.
Black lotus can be found:
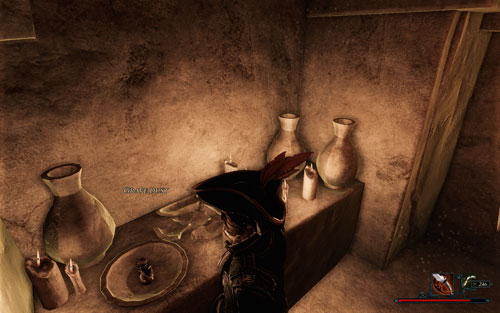 Grave dust is found in the houses, not by the graves.
Grave dust can be found:
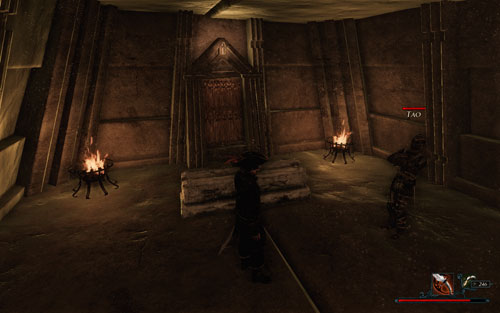 Goodnight!
Once you have all the necessary ingredients, enter the temple and talk to Tao [#17] (killing two Warriors by the door on the way). Tell him that the search is over to receive the Potion of false death from him. Lie down on the altar and drink the mixture. When you do it, The Journey to the Underworld quest will end and another one will begin - The Skull Sceptre.
When you wake up, take the Old coin off the shelf (a legendary item) and talk to Nahele [#18], who is standing by the entrance to the Altar of Transition. The witch can create a tool for you to be able to communicate with Steelbeard - the Skull sceptre. She needs four pieces to combine it. Bring her:
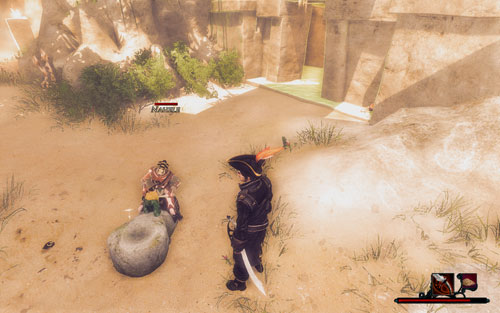 She's probably been doing that for thousands of years.
Once you have all the items, report back to Nahele. She'll give you the Skull sceptre. The Artist's Curse will end, but to continue the present mission report to Tao by the entrance to the land [#3]. When he resurrects the captain, ask him about the location of Earth Amulet and the password (see: Open Sesame). This way you'll complete the main quest - Steelbeard's Ghost. What's more, since you've joined the Natives while on the Sword Coast, old Tao will tell you the secrets of the most powerful voodoo acana (he's a master of them) and let you keep the Skull sceptre. This will allow you to summon Steelbeard's ghost any time and place!
![When you arrive upon Antigua, go to the waterfall [#1] under which you'll find a Strange gate - Steelbeards Artifact - The Sword Coast - Quests - Risen 2: Dark Waters - Game Guide and Walkthrough](https://game.lhg100.com/Article/UploadFiles/201512/2015121709170307.jpg)
When you arrive upon Antigua, go to the waterfall [#1] under which you'll find a Strange gate. Stand in front of it and say the password that you got from the logbook (see: Garcia's Treasure) and the way will be opened for you (you'll also complete the Open Sesame quest). Proceed forward, but watch out for Cave Bats and be ready for a Grave Spider [#3] - your companions' help will be much appreciated here. When the threat is over, approach the spot marked by the huge X [#6] and dig out the treasure that's buried there. If you open the chest and take the Earth Amulet, you'll complete the main quest - Steelbeard's Artifact.
 Here's the location of the chest.
Note! If the Earth Amulet is the fourth (and the last) Titan artifact you've found, tell Patty about it. The girl will suggest asking Admiral Alvarez what next. Talk to him, then - this is how you'll receive The Water Temple quest (the last quest in the game!).
Rewards:
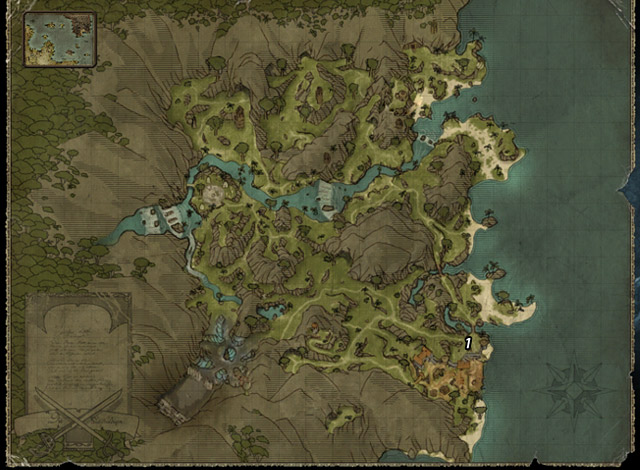 The Sword Coast
 Antigua
 Isle of the Dead
Quest giver: Chani [#1] on the Sword Coast or Admiral Alvarez [#2] on Antigua
There are two ways to trigger this quest.
If on the Sword Coast you have sided with the Natives, you'll receive it from Chani after telling her about Captain Steelbeard's death (see: A New Ship). The clever witch will tell you that you can talk to his ghost on the Isle of the Dead . You'll get access to it at once and you can sail there as soon as you get a ship. It's not recommended, though - in such early stages of the game you have no chances of surviving in that hostile land. Monsters that live on the Isle of the Dead, such as Ghouls, Warriors and Guards will rip you apart before you even know it. It's much better to go there only after completing all other quests pertaining to the Titan artifacts.
If on the Sword Coast you have sided with the Inquisition, you'll get access to the Isle of the Dead only after collecting all Titan artifacts. If you have them, talk to Admiral Alvarez on Antigua.
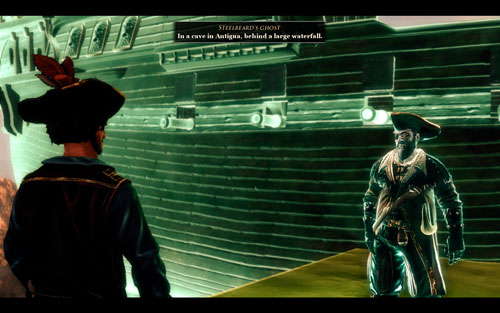 There's nothing like talking to a dead friend.
Regardless of the choice, the course of the quest is the same. You need to go to the Isle of the Dead and complete quests: The Journey to the Underworld and The Skull Sceptre. The first one is received from the guard Tao by the entrance to the land [#3]. Your goal is to brew a potion which will allow you to cross over to the underworld. You'll need Black lotus and Grave dust to make it (see: Black Lotus and Grave Dust). Both items are found in the further parts of the island. Go through the gate opened for you by Tao, and face a Warrior [#4] lurking there. Further on you'll have to fight a difficult battle with a Guard and a Ghoul [#5] - firearms work and some Dirty Tricks work best here. Afterwards, focus on collecting the necessary ingredients - you can find their locations below. Remember to remain cautious - there are enemies everywhere!
 It's better to start the search during the day - it's hard to see anything in the dark.
Black lotus can be found:
 Grave dust is found in the houses, not by the graves.
Grave dust can be found:
 Goodnight!
Once you have all the necessary ingredients, enter the temple and talk to Tao [#17] (killing two Warriors by the door on the way). Tell him that the search is over to receive the Potion of false death from him. Lie down on the altar and drink the mixture. When you do it, The Journey to the Underworld quest will end and another one will begin - The Skull Sceptre.
When you wake up, take the Old coin off the shelf (a legendary item) and talk to Nahele [#18], who is standing by the entrance to the Altar of Transition. The witch can create a tool for you to be able to communicate with Steelbeard - the Skull sceptre. She needs four pieces to combine it. Bring her:
 She's probably been doing that for thousands of years.
Once you have all the items, report back to Nahele. She'll give you the Skull sceptre. The Artist's Curse will end, but to continue the present mission report to Tao by the entrance to the land [#3]. When he resurrects the captain, you'll complete not only the present quest, but the main quest as well - Steelbeard's Ghost. What's more, if you've joined the Natives while on the Sword Coast, old Tao will tell you the secrets of the most powerful voodoo acana (he's a master of them) and let you keep the Skull sceptre. This will allow you to summon Steelbeard's ghost any time and place!
Note! If you decided to sail to the Isle of the Dead before completing the Search Garcia's Possessions quest, you'll additionally receive the Talk to Steelbeard's Ghost quest.
Rewards:
![Piece of cake - to complete the quest simply talk to Patty [#1] after the briefing from Commandant Sebastiano - Talk to Patty - The Sword Coast - Quests - Risen 2: Dark Waters - Game Guide and Walkthrough](https://game.lhg100.com/Article/UploadFiles/201512/2015121709170522.jpg)
Piece of cake - to complete the quest simply talk to Patty [#1] after the briefing from Commandant Sebastiano. You can do it at any point, since the girl will accompany you anyway, thought it's best to take care of it right away - it will save you a lot of trouble in the Follow Patty quest.
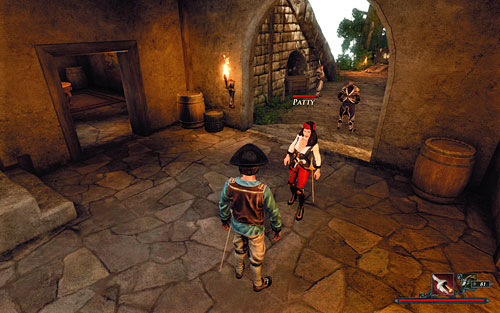 It's best to have the conversation right away.
Rewards:
![Quest giver: Patty [#1] - Talk to the Commandant - The Sword Coast - Quests - Risen 2: Dark Waters - Game Guide and Walkthrough](https://game.lhg100.com/Article/UploadFiles/201512/2015121709170588.jpg)
Quest giver: Patty [#1]
After defeating Crow and witnessing the sinking of Captain Steelbeard's ship, you need to get a new vessel. To this end, you should talk to Commandant Sebastiano [#2] from Puerto Isabella. As usual, you'll find him in the barracks towering above the city.
The commandant doesn't have good news.
The island's governor can be reached in one of three ways: on foot, through fast travel (by clicking on the map of the island), or by using a boat on the coast. The choice of the route doesn't affect the events of the mission or the amount of the reward. When you're there, you'll learn that you have been betrayed - the Inquisitor will order you to hand the Titan Harpoon over to the warehouse. Naturally, you can't do that - luckily, you have Patty, who will solve this problem in the Talk to Patty quest.
Rewards:

This quest is part of: The Titan Weapon
The quest will be activated automatically the moment you take a first step on the Sword Coast. The goal is to talk to the pirates occupying the tower [#2] west of your starting point [#1].
The tower is directly in front of you, but in order to reach it you need to climb the path leading up. Before you go, use the opportunity to clear out the area. Remember that as long as Steelbeard and Patty are in the Nameless Hero's party, Glory points received by enemies killed by the companions go to his account.
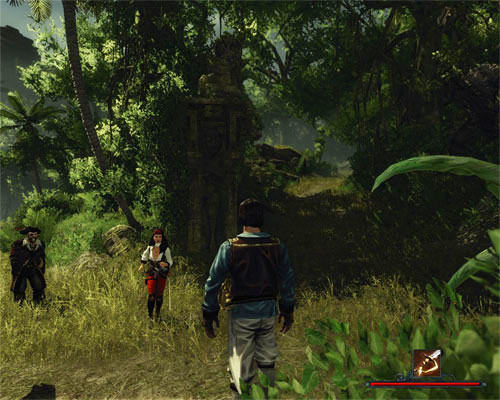 You can reach the pirates' tower by climbing the path leading up.
When you finally approach the tower, there will be a short cutscene. A while later you'll witness a violent conversation, and be attacked afterwards. The present quest will be completed and another one will begin - Defeat the Lookouts at the Tower.
Note! There are no rewards for this quest! There will also be announcement informing you of its completion either.
![Quest giver: Chani [#1] - The Ancestors Blessing - The Sword Coast - Quests - Risen 2: Dark Waters - Game Guide and Walkthrough](https://game.lhg100.com/Article/UploadFiles/201512/2015121709170693.jpg)
Quest giver: Chani [#1]
This quest is part of: Chani's Plan
To be able to face Crow and his supporters, you'll need to learn the secrets of voodoo magic. In order to do that, help Chani in her ritual to appease the ancestors. The first thing you need to take care of is to deliver the Shaganumbi idol to the priestess (quest: The Hidden Idol), which you have previously obtained during the Free Tahana quest. It's not too much of a problem - simply hand her the item you've been holding on to for some time now.
 The ghost won't be too helpful, but will fulfill its part.
Next, you'll have to defeat the guard, Samir [#2], found inside the temple (quest: Are You Worthy?). The Access to the Temple quest isn't too much of an effort either - the only thing you need to do is to enter the temple with Chani at your side and then tell her about how you have defeated the guard. At this point, there's only one thing left - summoning the spirit of the ancestors, Yizakil. No matter which dialogue options you choose during the conversation, the result will be the same - the ghost will bless you and allow the shaman to bestow the powers of voodoo magic upon you. At this moment, the quest will be completed.
Note! Although it's not a part of the quest, you can poke around the temple and loot the sarcophaguses inside. You can find them in the corridor on the left (seeing from the temple entrance) - to get to them, climb the footbridge. Two tombs hold Jades which you will need in The Chieftain's Hair quest (though you can also obtain them elsewhere, for example in the Jade quest).
Rewards:

This quest is part of: The Natives
In the middle of the journey to the natives' village (see: Over the Pass), you and your companions will come across a cave [#1]. Steelbeard won't like it from the start, so before venturing inside he'll tell you to go check it out. He will patiently wait for your report; same as Patty, actually, who at that moment will leave your party.
Enter the cave and carefully proceed forward. At the end of a long corridor there is a group of enemies consisting of two Hunters and a Pirate. In order to complete the quest it's enough to see the enemies without letting them know of your presence. You can do it by sneaking up near the corner and carefully leaning out.
 What hides inside the cave? Trouble - as usual.
When the quest is completed, go back to Steelbeard [#2] to tell him about what you've found. He will accept your account and begin the next part of the journey (see: Down into the Valley). Of course, before you report back you need to kill the enemies in the cavern - due to a large number of valuable items you can find in that makeshift camp, it's actually advisable. You can find more information on this subject in the Hidden Lookouts quest description.
Rewards:
![Quest giver: Chani [#1] - The Chieftain's Hair - The Sword Coast - Quests - Risen 2: Dark Waters - Game Guide and Walkthrough](https://game.lhg100.com/Article/UploadFiles/201512/2015121709170640.jpg)
Quest giver: Chani [#1]
This quest is part of: Chani's Plan
To be able to reach and defeat Crow, you have to strip him of his influence over the Natives first. To this end, you should possess the leader of the savages, Bakir [#2], who had allied himself with the villainous pirate. Obviously, you can't accomplish that in a direct way - it would have ended in a quick and painful death. You need to be smart by making a Voodoo doll which will give you power over the Natives' chieftain. Unfortunately, it's only possible after obtaining his hair, which in itself is quite problematic.
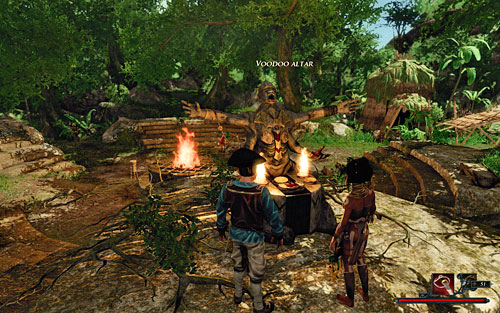 Altars like this will come in handy more than once.
But there is a solution - bewitch Jim, a pirate [#3] in the savages' camp, and use his own hands to obtain the desired hair (dreadlocks?). Naturally, to possess the pirate's body you need to have his hair first. Stealing them is the goal of the Ouch! quest (chose the option with the protective amulet against witches). Once you have it, create the magical artifact by connecting Jade, Teeth, Eyes, A knot of Jim's hair and an empty Voodoo doll (quest: A Doll for Jim).
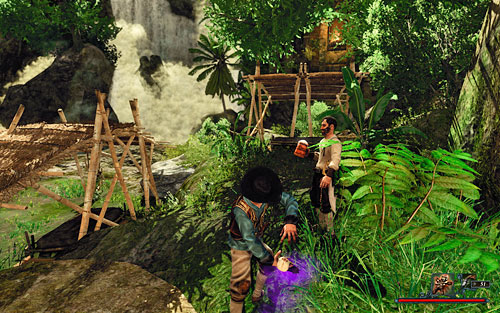 For the spell to work, you need to approach the pirate.
This is when the most interesting part of the quest begins. Approach Jim and equip his doll (same as with sabres or pistols). Pull it out and use it on the pirate. After a while you'll wake in the poor fellow's body, right in the middle of the Earth Temple [#4]. Reaching Crow and Bakir [#2] inside won't go without trouble, though - that would be too much to ask.
Note! While being in the body of a possessed person, you can't save the game or change your equipment. Be on your guard!
As Jim, you need to complete the Redistributing the Loot and Distract Skinner quests. The first is about delivering three artifacts to Floyd [#5], which are in the possession of the rest of the pirates [#6] - Gunpowder Ben, Digger and Skinner. Robbing the first two isn't difficult, but the last one is a problem (it involves the second quest). You can look inside his pockets only when you get him drunk on Rum (bought from Digger after paying off your debt). Having all three artifacts, hand them to Floyd and you can enter the temple.
 With the mission completed, it's time to evacuate.
Inside, you will find Crow having a conversation with Bakir. Talk to the Native and then steal the Long strand of Bakir's hair. With it, leave the temple. At this moment the quest is completed.
Rewards:
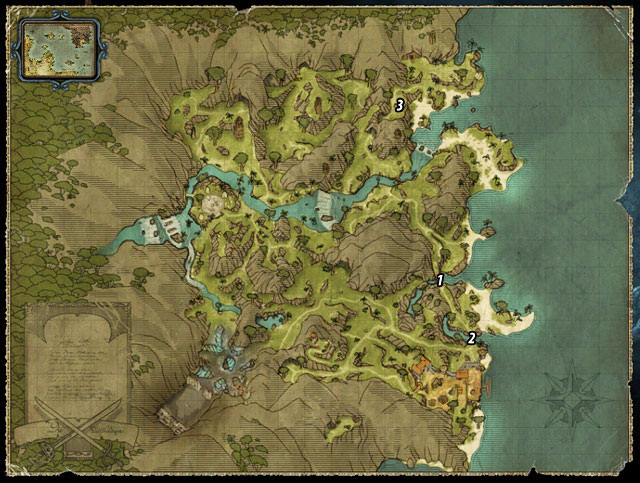
This quest is part of: Crow's Ship
The last stage of the journey to Puerto Isabella with Steelbeard and Patty begins at the wooden bridge [#1] and ends near the north city entrance [#2]. The route is very simple, the enemies you'll find there are not difficult either - a Claw Monkey and Firebirds. If you don't feel to good about fighting, let your companions do it for you, while you fire at the foes from a safe distance.
 The city gate is indeed not far off.
When you reach your destination, Steelbeard and Patty will leave you. They will go back to the pirates' tower [#3], the same you took over at the beginning of your stay on the Sword Coast. The Crow's Ship quest will be completed and another one will begin: Where Is Crow's Ship?
Rewards:
![Quest giver: Captain Steelbeard [#1] - The Cunning Captain - The Sword Coast - Quests - Risen 2: Dark Waters - Game Guide and Walkthrough](https://game.lhg100.com/Article/UploadFiles/201512/2015121709170793.jpg)
Quest giver: Captain Steelbeard [#1]
The quest is activated after the completion of The Earth Titan quest, on the Sword Coast. A cutscene is triggered in which Captain Steelbeard is murdered by Mara, while his ship sinks in the depths of the ocean. Just before he dies, the poor pirate reveals his last secret to the Nameless Hero, and asks him to find the ship of Captain Slayne on the island of Antigua. To get there, you have to obtain a vessel - which is the goal of the mission called A New Ship.
 On his deathbed, Steelbeard sends you on his last quest.
Note! Because of the fact that this is one of the most complicated quests in the whole game, the description has been divided into the following several smaller parts. It should make the reading of the guide much easier and enable a satisfactory way to complete the game.
Rewards:
![Quest giver: Patty [#1] - The Cunning Captain - The Sword Coast - Quests - Risen 2: Dark Waters - Game Guide and Walkthrough](https://game.lhg100.com/Article/UploadFiles/201512/2015121709170800.jpg)
Quest giver: Patty [#1]
To get a new ship (quest: A New Ship), you need to complete several sidequests:
 It's big, so it puts a smile on the face.
When all the above conditions are met, board your new ship and talk to Patty. This way you complete the quest and are free to sail to the island of Antigua, where you can meet Captain Slayne (quest: Find Captain Slayne).
Rewards:

Following Captain Steelbeard's last will, you need to go to Antigua and convince Slayne to give you the second of the Titan artifacts. There are a few sidequest to complete before you can achieve that:
 There's nothing else like doing someone's dirty work for them...
When you have all the elements necessary for the captain to leave Antigua, report to Slayne [#13] to tell him about it. On your way, you'll stumble upon a pretty furious Admiral Alvarez, but don't worry about him - he won't stand in your way anymore. The quest will be completed as soon as you report to the pirate. What's left now is to tell Patty about the location of Isle of Thieves and be on your way (quest: The Journey to the Isle of Thieves).
The second part of The Cunning Captain mission has an interesting turn. To move the events further, you need to complete the following quests:
 Gnomes are surprisingly friendly creatures.
 All this trouble to build a raft...
Once all the items required to build the raft are in your possession, report back to Jaffar [#6]. As soon as the gnome hears about it, the quest Meet Jaffar on the Western Beach is activated, in which you simply have to get to the little guy and leave the island. When you take off the shore and find yourselves on Tacarigua, the quest Where Is My Ship? will begin.
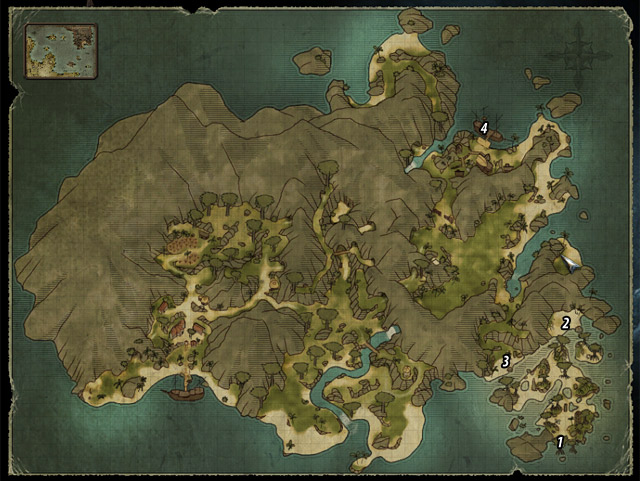
There is only one relatively easy quest on Tacarigua. It's as follows:
 There's nothing like coming back home.
Note! If you don't have the patience to go through the jungle and fight the animals living there, you can skip that part of the mission. Simply use the map to travel to the key location of your choosing. Keep in mind, though, that you won't be able to collect Glory points you could otherwise obtain for eliminating enemies.

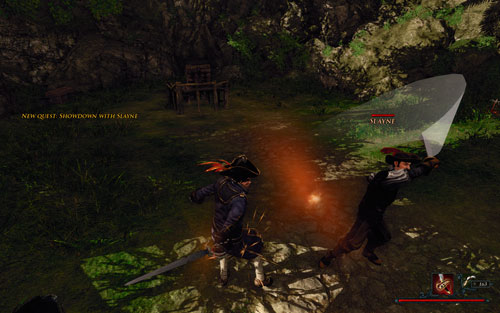 Slayne is a master fencer - defeat him with brains, not with force.
When the enemy is defeated, the quest will be completed - together with the whole The Cunning Captain mission. After the fight you'll also obtain the Sacrificial Knife, one of the Titan artifacts necessary for defeating Mara. If you talk to Alvarez about your victory, he'll agree to teach you his fighting skill (he's a Fencer).
![If you've defeated Crow, you also have to finish off the beast he had summoned [#1] - The Earth Titan - The Sword Coast - Quests - Risen 2: Dark Waters - Game Guide and Walkthrough](https://game.lhg100.com/Article/UploadFiles/201512/2015121709170955.jpg)
If you've defeated Crow, you also have to finish off the beast he had summoned [#1]. The key to the victory is the Titan Harpoon you've obtained earlier - it's a throwing weapon which you should hurl at the titan's mouth. He'll be throwing stones at you, but it's not difficult to evade them - simply jump to your side. After each throw, the titan will stop to draw a breath - creating a perfect opportunity for you to hit it with the deadly weapon.
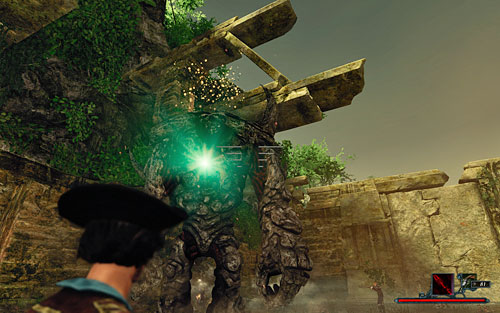 To kill the titan, aim at the middle of his torso - it's his weak spot.
When the titan is hit five times, he'll apply a more direct type of fighting - trying to crush the Nameless Hero with his huge paws. It not that threatening, though - just hide in the corner and continue hurling the harpoon. After the fifth hit, the beast will stagger on its feet. At this point, a QTE sequence will be activated in which you have to push the left mouse button while standing on the titan's head. If you do it properly, the quest will be completed.
 Push the button very fast!
Thought it's not part of any quest, it pays to search Crow's body before leaving the temple - he has a Crystal head on him, which can open the gate to the temple. There are a lot of valuable items inside which will surely repair the holes in your budget. To open the secret chamber, place two idols from sarcophaguses on the pedestals in the center of the hall - an additional way to make yourself richer. Leave the temple afterwards.
Rewards:
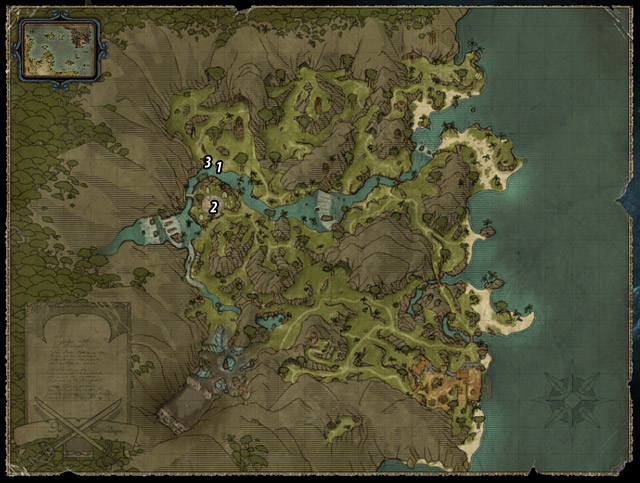
Quest giver: Natsumi
Natsumi [#1] of the Shaganumbi tribe collects all kinds of plants for Slick [#2], a pirate stationed in the savages' settlement on Crow's orders. The woman is presently by the river, north of the village. If you talk to her, you'll find out that she's troubled by a particularly nasty Alligator [#3].
The goal of this mission of to eliminated the reptile, which is preventing Natsumi from recovering a few bags of herbs she had collected earlier (see: The Shipment for Crow). You won't have to look too far for the animal since it's only several dozen meters away from where the woman is standing.
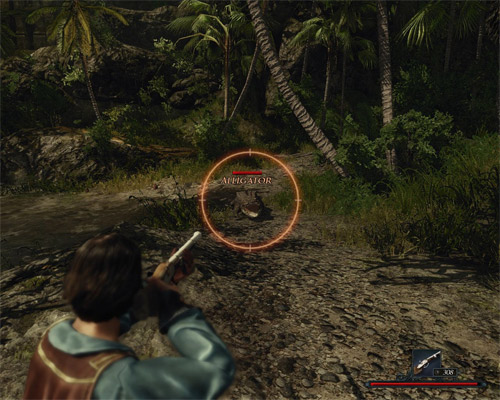 Be cautious while taking care of the Alligator - it's one nasty bastard.
The Alligator is very dangerous and can cause you some serious trouble, especially if you're not too skilled with melee combat. The most efficient weapons against it are all kinds of firearms and shotguns - if you shoot at it and sprint away, the alligator will get confused enough for you to fill it with lead. Of course, when you hit it, you have to run like hell again. Repeat this maneuver until the enemy drops dead.
The mission will be over after you kill the enemy. You can tell Natsumi about it, but there won't be anything special for you for doing that.
Rewards:

This quest is part of: The Titan Weapon
Once the problem of the Natives supporting Crow [#1] has been taken care of (quest: Assault on the Temple), it's time to deal with him and his pirates. The fight is only as problematic as the huge earth elemental helping him out, which is, at least for now, immortal. You don't have to worry about it too much, though, because it's there only to throw rocks at you - simply evade them and you'll be fine. Don't worry about the pirates, either - they'll be killed by your bodyguards. The only real threat is the captain with whom you have deal on your own.
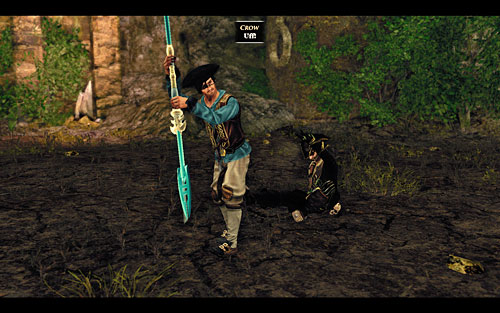 After the fight you'll receive the Titan Harpoon.
Crow uses the Titan Harpoon - a powerful artifact and the reason you came to the Sword Coast. It's a very dangerous weapon - your foe will hurl it at you, dealing a lot of damage (the weapon automatically goes back into his hands). The key is to shorten the distance between you and him as quickly as possible, and dealing serious damage in melee combat (the shotgun works fine, too). When the enemy is down, the quest will be completed - as will The Titan Weapon quest.
Rewards:
![Quest giver: Patty [#1] - The Fourth Crew Member - The Sword Coast - Quests - Risen 2: Dark Waters - Game Guide and Walkthrough](https://game.lhg100.com/Article/UploadFiles/201512/2015121709171100.jpg)
Quest giver: Patty [#1]
This quest is past of: A New Ship
A quick quest which can be completed without much effort. Leave Puerto Isabella by the main gate and turn left - there, you'll find a pirate, Hawkins [#2], whom you have previously freed from prison (quest: Free Hawkins!). After a short conversation he'll decide to join your crew. In order to complete the quest fully, you also need to tell this to Patty - but keep in mind that when you do it, the cook will leave you to talk to the pirate woman, so he won't be able to help you with the Sabotage quest!
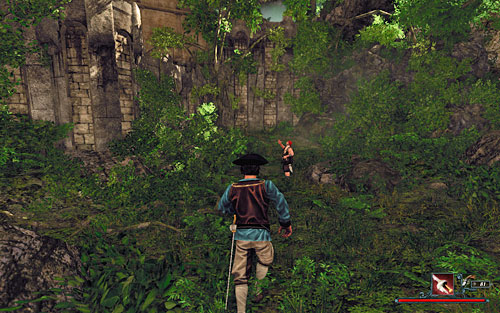 Hawkins is lurking in the bushes outside the city.
Note! If you haven't freed the pirate from the Inquisition's dungeons yet, you can do it now. Steal the prison key from Commandant Sebastiano and take it to the prisoner. He will run towards the spot marked by the number [#2] on the map, where the two of you can talk in peace.
Rewards:
![Quest giver: Chani [#1] - The Hidden Idol - The Sword Coast - Quests - Risen 2: Dark Waters - Game Guide and Walkthrough](https://game.lhg100.com/Article/UploadFiles/201512/2015121709171135.jpg)
Quest giver: Chani [#1]
This quest is part of: The Ancestors' Blessing
One of the conditions necessary to appease the Natives' gods is finding the Shaganumbi idol and handing it over to the shaman. Luckily, there's no problem with it since you've had it for some time now - having obtained it during The Search for the Idol quest, which is a part of the Free Tahana mission. You must have already completed it, because otherwise Chani wouldn't have agreed to help you learn voodoo magic.
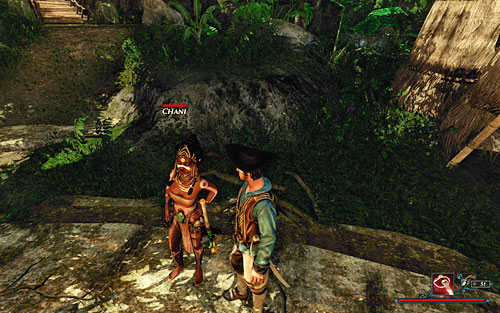 Simply hand the idol to the priestess.
To complete the quest, simply hand the idol to the priestess - the mission will end and the Nameless Hero is free to proceed to its next part.
Rewards:
![Quest giver: Hikoko [#1] - The Jade Cave - The Sword Coast - Quests - Risen 2: Dark Waters - Game Guide and Walkthrough](https://game.lhg100.com/Article/UploadFiles/201512/2015121709171188.jpg)
Quest giver: Hikoko [#1]
This quest is part of: Jade
This quest is activated upon arriving with Hikoko to the cave south of the Shaganumbi village [#1] (see: Accompany Hikoko). Inside, your goal is to collect pieces of a mineral that will help the shaman Kapua [#2] in making an idol for Slick (see: A Shipment for Crow). Expect small groups of Termite Workers in your way.
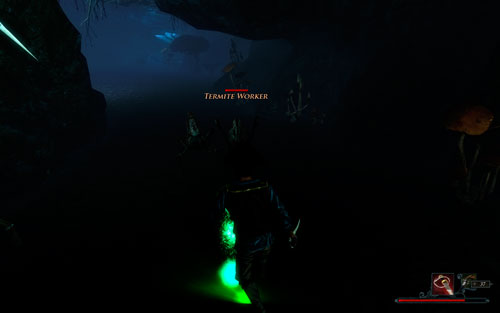 Termites are formidable opponents.
The pieces of jade you're looking for are in the corridor and the first two chambers (see: 4 Pieces of Jade). Of course, nothings is stopping you from exploring the whole cavern - keep in mind, though, that it's inhabited by very dangerous Ghuls and Termite Workers. Luckily, defeating them isn't connected with any quest and it's completely optional.
The Jade Cave mission ends when you leave the cave and tell Hikoko that you've found all four Pieces of Jade. You can now go back to the village [#2]. If you tell the girl to take you there, you'll activate the Back to the Village with Hikoko quest.
Rewards:
![Quest giver: Martinez [#1] - The Jaguar Cave - The Sword Coast - Quests - Risen 2: Dark Waters - Game Guide and Walkthrough](https://game.lhg100.com/Article/UploadFiles/201512/2015121709171251.jpg)
Quest giver: Martinez [#1]
This quest is part of: 4 Muskets Against Crow
This quest is part of a set of missions available to the Inquisition, but they can be completed before declaring to work for Commandant Sebastiano!
Leave Puerto Isabella by the east entrance [#2] and use the only path forward. Several meters from where Euzebio is standing guard, you'll meet Martinez [#1]. He's a particularly vulgar and nasty fellow who attempts to hunt down a Jaguar wandering the area. If you're not put off by the way he speaks to you, you can volunteer to help him.
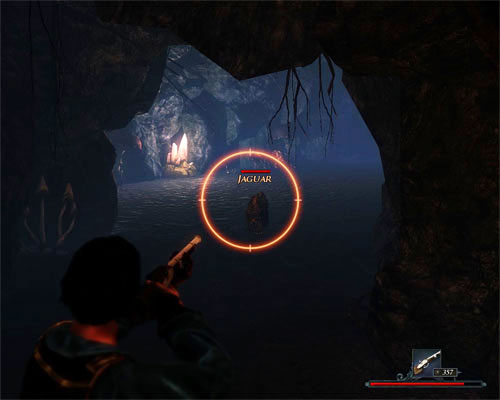 A joint hunt with Martinez is joint only by name. Killing the Jaguar is traditionally all up to you.
It doesn't matter in the slightest how you steer the conversation with Martinez during your first meeting. It only matters how it ends:
Follow Martinez until you reach the cave - the trip isn't too long because the cave is just a few meters farther. The soldier will stop at a fork it the road and tell you to hunt the animal down. Chose the corridor on the right and soon you'll find yourself in a huge cavern . Attack the Jaguar and slay it to complete the quest. You can of course inform the soldier about the kill; you'll be rewarded with additional coin. The Inquisitor - for lack of better things to do - will head to Puerto Isabella.
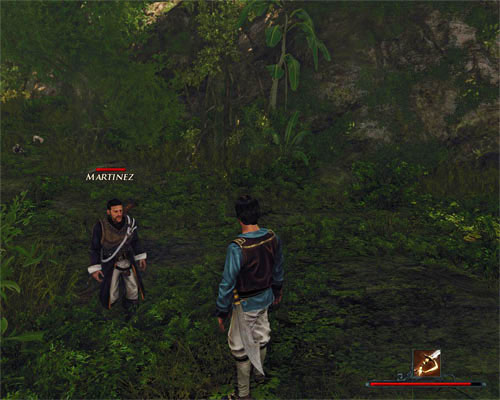 After the hunt, Martinez will go to the city.
A few things to sum up:
Rewards:
![Quest giver: Sebastiano [#1] - The Lookouts Report - The Sword Coast - Quests - Risen 2: Dark Waters - Game Guide and Walkthrough](https://game.lhg100.com/Article/UploadFiles/201512/2015121709171205.jpg)
Quest giver: Sebastiano [#1]
This quest is part of: Help Against Crow
A complicated quest which will begin by talking to Commandant Sebastiano in the Inquisition's headquarters [#1]. The dialogue will reveal that a scout named Venturo had gone on patrol and hasn't been back yet. Your job is to find the man and bring him back to the city. The last person to have seen that brave soul is a guard, Aguilar, who can be found at the gates of Puerto Isabella [#2].
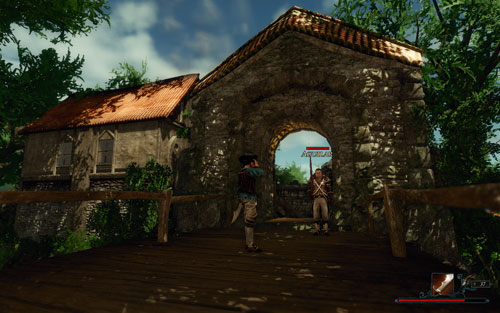 Talking to the guards is pure passing the buck.
When you talk to the guard, he'll send you to another military man, Torres [#3], who can be found near the Inquisition's tower. He'll tell you that Venturo had taken the path west, and you should be able to find him by signs he had left on the way. Climb down the mountain on which the tower is built, and turn left to go through a huge tunnel carved through the rock [#4]. You'll have to fight a Jaguar, a Firebird and several Claw Monkeys. Keep going forward until you reach the Earth Temple's turnpikes - this is where you should find the first sign left by Venturo [#5] (the below screen).
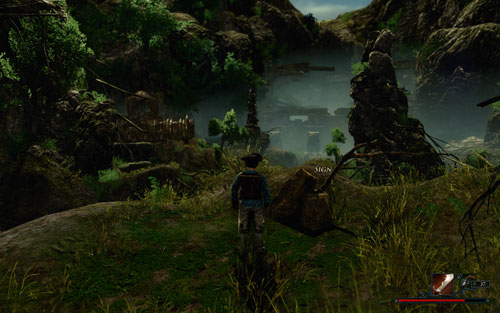 The sings are on stumps by the road.
By clicking on it, you'll learn in which direction the man had gone. Each sign will lead you to another, so you shouldn't be lost. Follow Venturo's trail, killing Firebirds, Jaguars and Claw Monkeys on your way. You'll soon reach a river and a bluff which you should climb up [#6]. Eventually, you'll find Venturo standing just outside the Natives' village [#7]. Talk to him to receive the Among Savages quest, which is a part of The Lookout's Report.
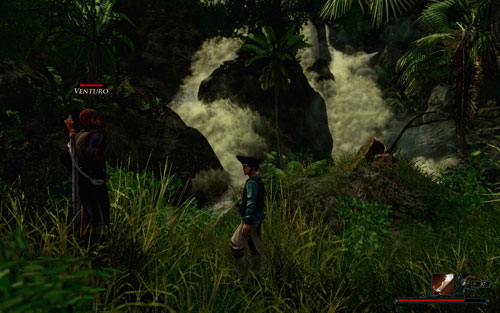 And here is our lost one.
The Among Savages quest can be completed in three ways - each by choosing a specific dialogue option:
When you go back to Venturo [#7] to pass him the obtained information, the Among Savages quest will end. You now have a choice - you can either go with the guardsman to the Earth Temple to take care of the Native supporters of Crow (see: Follow Venturo to the Temple), and then walk him back to the city (see: Follow Venturo to the City), or... ignore him completely and deal with the threat on your own. The second option is less favorable because it involves rejecting the two aforementioned quests, and therefore - loosing Glory points. It's better to agree to the guardsman's offer.
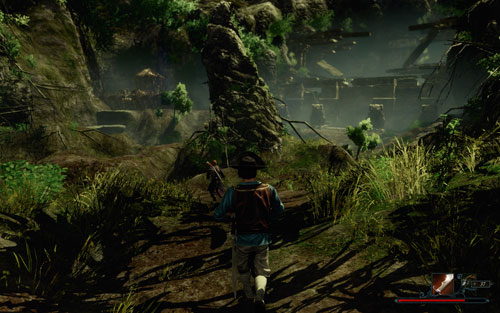 Venturo's help will be useful against enemies.
While following Venturo, you'll have to fight Warthogs met by the river [#11]. When you arrive at the Earth Temple [#12], the warrior will ask you what next. You can:
The first option is the most profitable as it gets you the most number of Glory points and profits (the quest Follow Venturo to the City is also completed after killing Basil). You can also count on the soldier's help in fighting savages during The Warriors in Front of the Temple! quest [#14].
 To end the quest nicely you also have to walk the scout back to the city.
Regardless of your choice, The Lookout's Report quest will end the moment Venturo is back in Puerto Isabella (doesn't matter if you were with him, or nor), and you report everything back to Commandant Sebastiano [#1]. Naturally, it's better to complete all of the miniquests, but it's completely optional.
Two things to sum up:
Rewards:
![Quest giver: Steelbeard [#1] - The Natives - The Sword Coast - Quests - Risen 2: Dark Waters - Game Guide and Walkthrough](https://game.lhg100.com/Article/UploadFiles/201512/2015121709171363.jpg)
Quest giver: Steelbeard [#1]
Having eliminated the enemies occupying the observation tower (see: Defeat the Lookouts at the Tower), you can now ask Steelbeard [#1] to help you get to the city of Puerto Isabella, the headquarters of the Inquisition on the Sword Coast, or to the village of the Shaganumbi tribe, located in the east. The present quest describes the second option. If you're ready to begin, inform the captain.
Before you proceed, a few things to keep in mind. The quest is comprised of several smaller missions which are completed in a predetermined sequence. During the trip, the captain will be your guide and will lead the party instead of you. Every time you decide to deviate from the path you won't be left behind, because Steelbeard will always patiently wait for your return. Patty, on the other hand, will stay close to you, which means you'll be able to use her in exploring other locations and eliminating additional enemies. As for the rewards for the enemies killed by your companions, there are only two cases in which they won't go to your account - in the Monkey Business and Hidden Lookouts quests.
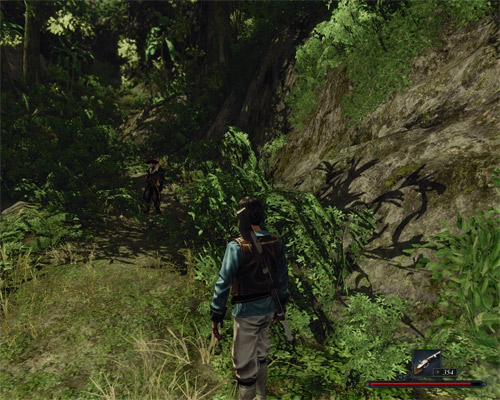 Captain Steelbeard will be your guide in this mission.
The trip to the Natives' village is comprised of the following missions:
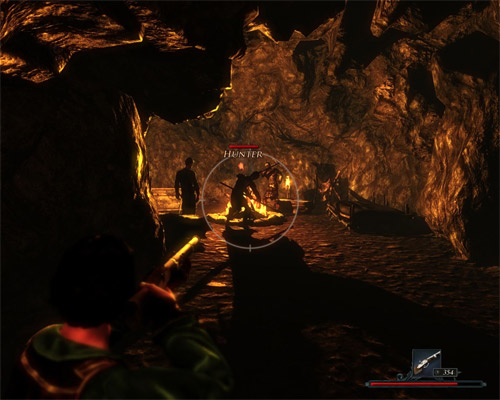
Defeating the lookouts isn't mandatory, but it's better to beat the pants off them.
Steelbeard is afraid of a possible meeting with Captain Crow, so as soon as the mission is over he'll decide to go back to the observation tower [#1]. Patty will also leave you, being under the delusion that if she goes with her father, he'll give her information on his legendary treasure. Once your companions reach their destination, you'll be able to take them on another quest, this time to Puerto Isabella (see: Crow's Ship).
Rewards:
![Quest giver: Chani [#1] - The Puppet - The Sword Coast - Quests - Risen 2: Dark Waters - Game Guide and Walkthrough](https://game.lhg100.com/Article/UploadFiles/201512/2015121709171344.jpg)
Quest giver: Chani [#1]
This quest is part of: A New Ship
Note! This quest is only available if you have sided with the Natives!
When you'll be trying to find a way to supply your ship with water, you'll stumble into Chani standing outside the city. She will agree to join your crew (quest: The Third Crew Member), and charge you with finding the spirit of Captain Steelbeard (Steelbeard's Ghost). What's more, the clever witch will also find a way for you to solve the water supply problem - she will help you possess the commandant of the Inquisition, Sebastiano [#2]. It's thanks to him that you'll be able to load the water barrels on the ship without arousing anyone's suspicion.
 The hairbrush is in the room on the left side of the building.
To be able to bewitch the commandant, you will need a sample of his hair. Obviously, you can't just yank them out of his head - it would be easy to spot. The only solution is to steal the Hairbrush, which is lying in his bedroom, on a table by the bed. Equipped with it, return to Chani, and she'll hand you other ingredients necessary in preparing the voodoo doll. Go back to the Natives' village and complete the appropriate ritual on the altar [#3] (quest: A Doll for Sebastiano).
 Voodoo magic is a powerful weapon.
When you have the doll, return to Puerto Isabella and go to the garrison where you can find Sebastiano [#2]. Approach the commandant and use the magical artifact on him. At that moment, you gain control over the overweight man and can take care of the ship's supply.
Note! While being in the body of a possessed person, you can't save the game or change your equipment. Be on your guard!
 As the fatty, you can afford to do a lot.
In the commandant's body, go to the storehouse master, Miguel [#4] and tell him he has to supply the ship (meaning the water barrels you will need while stealing it). You can talk to Patty and Alcazar on the way, but it won't get you anything. When you're bored with scolding your subordinates, return to your body by approaching the Nameless Hero and using the left mouse button.
Rewards:

This quest is part of: Free Tahana
Having successfully escaped from the Inquisition's Tower (see: Escape from the Tower), Tahana [#1] will ask for your help in finding a precious idol he had found in the Natives' Graveyard [#2] before his arrest. The quest is very simple. When the conversation is over, follow your companion, and when he stops, wait for what he has to say.
At that moment, the current quest will be completed, but you won't be able to continue the main quest, Free Tahana, until you've found the idol. You can find the Shaganumbi idol [#3] a few meters away from where you're standing - it's just by the large tree, hard to miss. Pick up the item and you'll complete the Shaganumbi Idol Found quest.
Approach Tahana and tell him you've found the lost item. The native will signal to proceed with the journey, which is tantamount to the completion of the Through the Jungle quest.
Rewards:
![A task as simple as arriving at the Shaganumbi village [#1] - The Shaganumbi Tribe - The Sword Coast - Quests - Risen 2: Dark Waters - Game Guide and Walkthrough](https://game.lhg100.com/Article/UploadFiles/201512/2015121709171466.jpg)
A task as simple as arriving at the Shaganumbi village [#1]. Since the road there is quite dangerous, take your companions with you - Patty and Captain Steelbeard, for example (see: The Natives). The savages' settlement is one of the most important locations on the island, to which you'll be returning over and over again - therefore it's better to find it in the early stages of the game to spare yourself the trouble later.
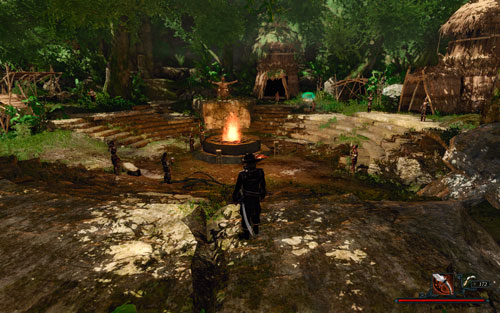 To complete this quest simply arrive at the Natives' village.
In order to enter the village through the main gate [#2], you need to convince the guard Masaru that you mean no harm. If you tell him that you were sent by Captain Crow and came to desecrate the graves (or that you are seeking the corsair and his weapon), you're in for a fight (see: Duel with Masaru). Otherwise you'll be free to enter the village. Of course, nothing is stopping you from entering the village from the side - that way you won't have to deal with the overeager guard at all.
Rewards:
![Quest giver: Slick [#1] - The Shipment for Crow - The Sword Coast - Quests - Risen 2: Dark Waters - Game Guide and Walkthrough](https://game.lhg100.com/Article/UploadFiles/201512/2015121709171427.jpg)
Quest giver: Slick [#1]
This quest is part of: The Titan Weapon
The quest is received from the pirate Slick from the Shaganumbi village. The abrasive fellow will force you to collect a tribute from the Natives. The first part of it, food, can be taken from the collector by the river [#2] (see: Natsumi's Bag of Herbs). There is an Alligator [#3] to be defeated on the way (see: The Evil Spirit of the River). With the sacks of food and herbs in your possession, the first part of the quest is over.
 The sacks are by the river.
In order to complete the second part, talk to the shaman woman named Kapua [#4]. You'll learn that the Idol of Protection she had been working on is still missing a heart. It can be made only with pure Jade which is very hard to find (see: Jade). Luckily, the servant girl Hikoko [#5] knows the location of a jade cave [#6], and she can take you there. Talk to her, then, and follow her (see: Accompany Hikoko). When you arrive at the cave, which is guarded by Termite Workers, go inside (see: The Jade Cave) and collect four pieces of the precious mineral (see: 4 Pieces of Jade). With them, return to Kapua and hand them to her. They will allow her to finish her work, which you'll be able to hand over to Slick.
 Jade is found in a cave in the south.
The last, third, part of the tribute is the probably the least problematic - you need to collect six Gold nuggets. To this end, leave the village and go to the collectors by the river. One of them, Lin [#7] (standing farthest to the east, alone), is a gold panner. Talk to her to receive seven Gold nuggets. You should hand them over to Slick.
When the tribute has been collected, the quest will end. Regardless of which dialogue option you choose, the pirate won't agree to take you to Crow or give you your cut. Apparently, you have been fooled.
 You'll get the gold from the collector in the north-east.
Note! If you sold the Gold nuggets before handing them over to Slick, you can replace them with any other found in your journeys. One is in a chest outside the village (Lockpicking at 30), another can be stolen from Lin (Thievery at 20). Three more are in the temple behind the village, in the corridor on the left (open the sarcophaguses). Unfortunately, these are the only gold nuggets you can find in the vicinity of the Shaganumbi village - you're going to have to take care of the rest on your own.
Rewards:
![Quest giver: Bartolo [#1] - The Shotgun - The Sword Coast - Quests - Risen 2: Dark Waters - Game Guide and Walkthrough](https://game.lhg100.com/Article/UploadFiles/201512/2015121709171588.jpg)
Quest giver: Bartolo [#1]
This quest is part of: 4 Muskets Against Crow
A relatively long and interesting quest which is completed during the forming of the army against Captain Crow. The quest is given by Bartolo [#1] when you tell him you'd like to be a part of the special task force (see: 4 Muskets Against Crow). You can find him in the commandant's villa on the ground floor, in the room on the left.
Bartolo won't be able to fight for one good reason - he doesn't have a weapon. Last night, he was at a party with his buddies, and when he woke up, his shotgun was gone. Finding it is of course the main goal of this mission.
Start the investigation by interrogating him. It will soon turn out that Bartolo had been drinking at Webster's [#2] with his drinking buddy Eusebio [#3]. Go to the gunsmith's workshop in the center of the city to ask him about the party. He won't tell you anything new, so go to the other one, a guard watching the west entrance of Puerto Isabella.
 The old saying is not a lie. A soldier without a gun is no good.
The conversation with Eusebio proves much more fruitful. He'll tell you that there was another man at the party, Tito [#4]. Incidentally, it will also turn out that the guard owes some money to the butcher, namely 200 Gold. You will have two options:
Not matter whether you help or threaten Eusebio, you'll eventually find out that the last one to attend the party was Martinez. Depending on your previous encounters with the Inquisitor, he can be at four possible locations:
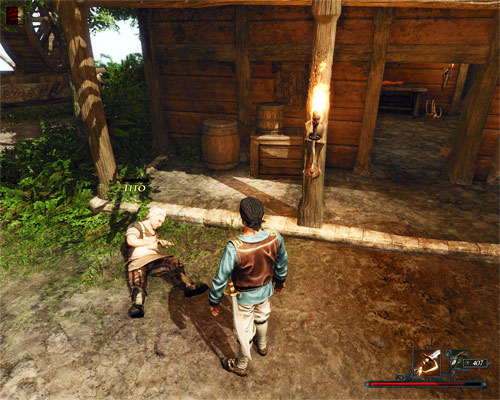 The source of the problem defeated.
After a fruitful conversation with Martinez it'll become clear he's not the one behind the shotgun's theft. All pieces will come into place - the one to blame is Tito [#4]. Head to the center of the city to talk to the butcher. Show him the proof of his guilt (it doesn't matter if it's the full or the shortened version) and you'll have two options of getting the weapon back:
With Bartolos' shotgun in hand, go back to the commandant's villa and tell the owner of the gun of your success. The shotgun will require repairs, but Bartolo will take care of it himself. He'll go to the rendezvous point and the quest will be completed.
Rewards:
![The quest will activated when you leave the Shaganumbi village [#1] with Chani (see: The Ancestors' Blessing) - The Suspicious Tonka - The Sword Coast - Quests - Risen 2: Dark Waters - Game Guide and Walkthrough](https://game.lhg100.com/Article/UploadFiles/201512/2015121709171665.jpg)
The quest will activated when you leave the Shaganumbi village [#1] with Chani (see: The Ancestors' Blessing). You'll be passing by a warrior, Nakutu [#2], who'll stop you to say that you're not worthy to be walking on these sacred grounds. If you pin him down, thought, you'll discover that in truth he's jealous because you've spent some time alone with Chani. Though the man clearly loathes you, you won't be able to provoke him into a fight. Regardless of the chosen dialogue options, he'll eventually yield and allow you to look after the girl.
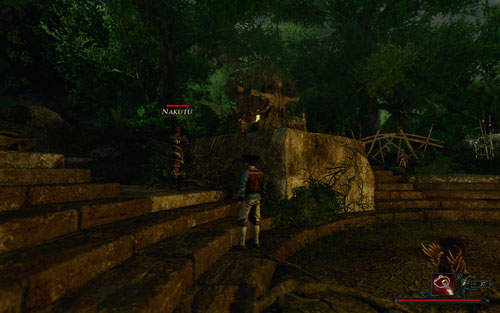 Nakutu has a big mouth, but he's not a threat.
When the sweet chat is over, the quest will be completed and you will be rewarded. Apparently, the Native lacks the courage to cross swords with the Nameless Hero.
Rewards:
![Quest giver: Patty [#1] - The Third Crew Member - The Sword Coast - Quests - Risen 2: Dark Waters - Game Guide and Walkthrough](https://game.lhg100.com/Article/UploadFiles/201512/2015121709171668.jpg)
Quest giver: Patty [#1]
This quest is part of: A New Ship
The course of this quest depends on which faction you've decided to side with. If you've chosen the Inquisition, you should talk to Venturo [#2], who can be found in Puerto Isabella docks drinking beer with the local innkeeper. If you've sided with the Natives, though, you need to talk to Chani [#3], who is standing outside the city (she'll also dispatch you on another mission, Steelbeard's Ghost). The quest is completed when either of the described characters agrees to kidnap the ship, and Patty is informed of all of this.
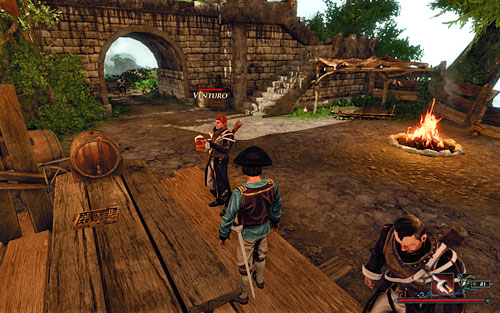 Venturo and his inseparable beverage - doesn't matter if it's day or night!
Keep in mind that when you report back to the girl, Venturo (or Chani) will leave your party to wait for you in the docks - you won't be able to count on his (or her) help in the Sabotage quest!
Rewards:
![Quest giver: Carlos [#1] - The Titan Weapon - The Sword Coast - Quests - Risen 2: Dark Waters - Game Guide and Walkthrough](https://game.lhg100.com/Article/UploadFiles/201512/2015121709171622.jpg)
Quest giver: Carlos [#1]
Note! This is one of the biggest and most complicated quests in the entire game. It includes several dozen smaller missions which course depends on the choices you make during the game. It affects not only the way in which particular quests are completed, but also the factions you want to side with (the choice is final and irreversible!). Because of the above, the chapter devoted to this quest is divided into smaller parts containing references to individual chapters in the guide.
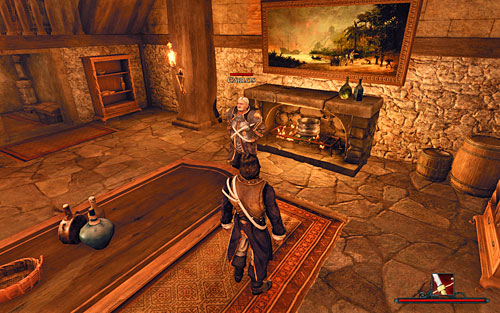 A humble beginning of a grand adventure.
You can receive this quest from Carlos at the very beginning of the game, as soon as you walk Patty to your room and talk to your superior. He'll explain to you how difficult is the situation in which humanity has found itself - the fearsome Titans have woken up to wipe all their enemies from the face of the earth. Luckily, an artifact exists that has the power to vanquish the monsters: the legendary Titan Weapon. Rumor has it that it's in the possession of one the pirates tormenting the southern seas. It's up to you to recover the mysterious weapon and defeat the monsters with it.
For a good start, leave Caldera to embark on a dangerous journey to Tacarigua. As it happens, Patty, the girl you saved, is the daughter of Captain Steelbeard - one of the most famous cutthroats of all seas and oceans. Approach the girl [#2] and talk to her about her father. When she offers that you work together in the search for the pirate, agree and head to the ship in the docks. Once you're on board, talk to Commandant Sebastiano [#3] to embark on your very first adventure.
![After landing on the island (quest: To Tacarigua), talk to Patty [#1] - The Titan Weapon - The Sword Coast - Quests - Risen 2: Dark Waters - Game Guide and Walkthrough](https://game.lhg100.com/Article/UploadFiles/201512/2015121709171761.jpg)
After landing on the island (quest: To Tacarigua), talk to Patty [#1]. The girl will join you and will be accompanying you until the moment you meet her father (quest: Find Steelbeard). Finding him isn't too easy, and the conversation itself won't do you much good. Before he agrees to help you obtain the Titan Weapon, you will have to prove your usefulness. Therefore, try to complete as many sidequests as you can and max out your character as much as possible before going to him - until the conversation with the mysterious pirate, you will have a companion in Patty who is indispensable during battles. Later, you'll have to deal on your own.
If you feel up to it, you can travel from Puerto Sacarico [#2] to the pirates' den [#3] where Captain Steelbeard [#4] is usually staying. When you reach the main gate [#5], convince the guard sitting there to let you inside (Silver Tongue or Intimidate at 15), or circle around it [#6]. Eventually, you will meet the pirate, and Patty will leave your party (the Find Steelbeard quest ends at that moment). Now, your main assignment would be to convince the sly fox of your abilities - it's the main goal of the Become a Pirate quest. To be able to get on the captain's good side, you'll need to complete at least five of the following quests:
 Helping pirates in need is the key to success in this quest.
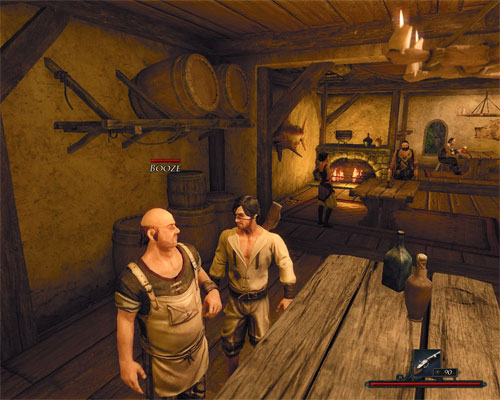 Booze is the most important person on the island. He or his tavern are connected with most quests.
When the quest is completed, all that's left to do is to take an oath in front of the crew members. In order to do that, tell Steelbeard [#4] you're ready to join their ranks. At this moment you can leave the island aboard the ship - simply talk to the captain.
![When you land on the Sword Coast, you're in for a hike through the jungle to get to a tower [#1] that rises above the area - The Titan Weapon - The Sword Coast - Quests - Risen 2: Dark Waters - Game Guide and Walkthrough](https://game.lhg100.com/Article/UploadFiles/201512/2015121709171794.jpg)
When you land on the Sword Coast, you're in for a hike through the jungle to get to a tower [#1] that rises above the area. Once you've killed the guards that were stationed there (quests: Talk to the Pirates at the Tower and Defeat the Lookouts at the Tower), have a chat with Captain Steelbeard and Patty. When you're ready to continue the journey (it's recommended to regenerate health in a bed), you and your companions can proceed forward. No matter which road you take (a few mini quests are involved), eventually you'll arrive at a port city - Puerto Isabella [#2]. Here you will learn about the fate of Captain Crow [#3], who has the sought-after Titan Harpoon. To make it to that cunning swashbuckler, though, you'll have to side with the Natives who live in the Shaganumbi village [#4] or with the Inquisition residing in the city [#2]. Once you've made your choice, you can't change it in any way, and it will affect subsequent quests until the end of the game - so take a moment to think about it!
 Help from the Natives is pure magic.
Chani, Daughter of the Chieftain - the Natives' way. In order to gain the trust of the savages, you'll have to complete a lot of subquests they give you. Most of them rely on proving the courage and loyalty of the Nameless Hero - as a white man, he can't count on being respected too much amongst the native inhabitants of the jungle. Therefore, gaining that trust is quite problematic and largely depends on another quest - Free Tahana. During that quest you'll learn that Ranapiri [#4], one of the warriors from the village and a hunter at the same time, is concerned about the fate of his ward, Tahana [#5], who has been captured by the Inquisition. If you agree to help the Native, you'll need to go to the tower in which the prisoner is held. The key to the cell lies opposite the cell door, on the right of the small staircase, on the ground. When you use it to free the prisoner, you'll be forced to fight a guard. Afterwards, simply walk Tahana to the Natives' village (on the way you'll find the Shaganumbi idol required in The Ancestors' Blessing quest). All this will allow you to gain Chani's trust, thanks to whom you'll be able to prepare to face Crow.
To have any chance at defeating the cunning pirate, you need to carefully think it over and prepare all necessary resources in advance. The following quests serve just that purpose:
 Four against all.
Support from the Inquisition - as the name implies, a quest connected to the Inquisition. To complete it, you need to tell Commandant Sebastiano [#7] that you've decided to take his help. He will tell you to talk to Alvarez about the army you're about to receive. After a short conversation, the officer standing by the garrison will introduce you to four recruits you should take under your wing to help you deal with Crow (quest: 4 Muskets Against Crow). The first two aren't any problem - you can find Venturo in the city where he drinks beer with the local innkeeper, while Martinez - a short walk beyond the city gates [#8] where he hunts jaguars (you can help him with that, but it's not mandatory - he'll join you anyway). The last two men, though, require some small favors to be done.
Rewards:

The existence of another chest of valuables can be learned in an atypical way - by a message hidden in a bottle that has been washed ashore. You can find the bottle with the Treasure map on one of the beaches [#1] in the east part of the island.
To study the map, you not only have take the bottle, but also uncork it on the inventory screen. According to the clues, the treasure is located on a land sacred to the native inhabitants of the island - an old graveyard in the mountains.
 The treasure is buried to the left of the graveyard's entrance.
The road that leads to the graveyard begins not far from the observation tower [#2] which the Inquisitions currently uses as a prison. Going west, turn south before a rocky curve [#3] - this is where the trail starts systematically climbing up. There a strong possibility that you haven't been in this area before at all, so you'll have your hands full. The way up is guarded by Termite Workers and Termite Warriors, you could also encounter a Cave Bat. In front of the entrance to the graveyard, you'll be forced to eliminate four aggressive Warriors - the savages prefer the spear, so be on your guard.
The treasure is located to the left of the entrance - the spot is traditionally marked by a large red cross. To dig the treasure out you need a Shovel. If you don't have it, you can buy it from Sophia [#4], a tradeswoman from Puerto Isabella.
Rewards:
![There is a small cavern [#1] west of Puerto Isabella where a Jaguar is residing (see: The Jaguar Cave) - The Treasure in the Valley of the Jaguar - The Sword Coast - Quests - Risen 2: Dark Waters - Game Guide and Walkthrough](https://game.lhg100.com/Article/UploadFiles/201512/2015121709171862.jpg)
There is a small cavern [#1] west of Puerto Isabella where a Jaguar is residing (see: The Jaguar Cave). When you enter it, turn left at the fork and you'll find yourself in a small chamber. You should immediately notice an object lying on the ground - a Treasure map.
 In the cavern, you can find a treasure map...
Pick it up and you'll activate the quest. The goal is to find the treasure buried by a closely unidentified person. The marker on the map points to a place near a cave [#2].
Leave the cavern and head north-east. When you're close to the rock wall, keep a close eye to the ground. Traditionally, there will be a cross drawn on it to show you the treasure spot.
 ... and the treasure itself is near the cavern.
The chest can be dug out only if the Nameless Hero has a Shovel is his inventory. If you don't have it, you can always buy it from Sophia [#1], a tradeswoman from Puerto Isabella docks.
Rewards:
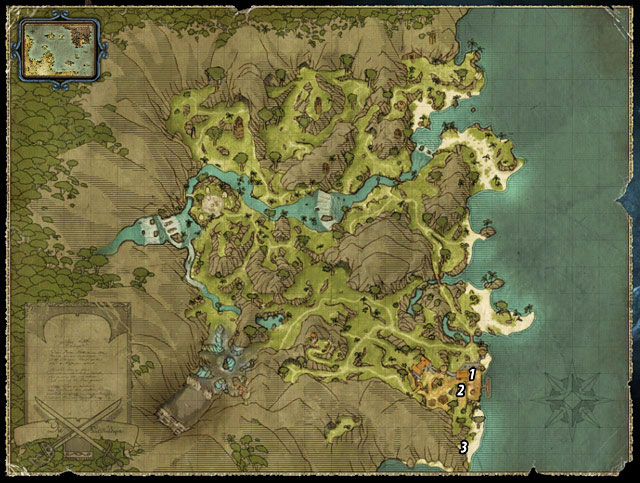
On a beach near Puerto Isabella there is a hidden chest containing a lot of gold and a few valuable plates. To learn of its existence, you need pay a visit to Sophia [#1] and buy her Treasure map. It's not too expensive, only 100 Gold.
You can find the tradeswoman it the docks, but the treasure is a few meters south of her. Sneak past the gunner Benito [#2] and head straight to the beach. The chest is buried at the very end [#3] - you shouldn't have any trouble finding it thanks to the traditional cross marking the spot. You need a Shovel to dig it out. If you haven't obtained it until now, you can always buy it from Sophia.
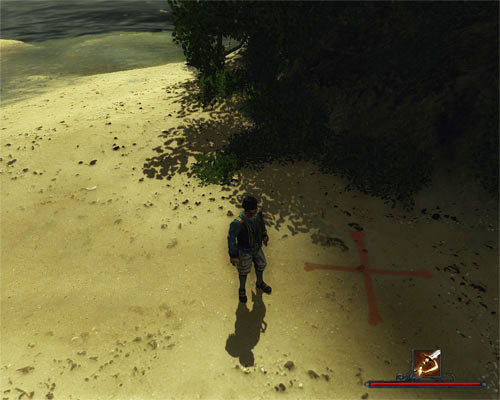 It's hard to miss the treasure spot - the cross is seen from afar.
Note! There are no Glory points for completing this quest!
![This quest isn't received from a character, but activated during the fight with the savages outside the Earth Temple [#1] - The Warriors in Front of the Temple! - The Sword Coast - Quests - Risen 2: Dark Waters - Game Guide and Walkthrough](https://game.lhg100.com/Article/UploadFiles/201512/2015121709171949.jpg)
This quest isn't received from a character, but activated during the fight with the savages outside the Earth Temple [#1]. To complete it, kill all eight Warriors standing in your way. It's not an easy task because each of them is armed with a Spear which is capable of dealing a lot of damage - both melee and ranged. Your foes are grouped in close-knit teams, so try to disperse them first before going straight at them.
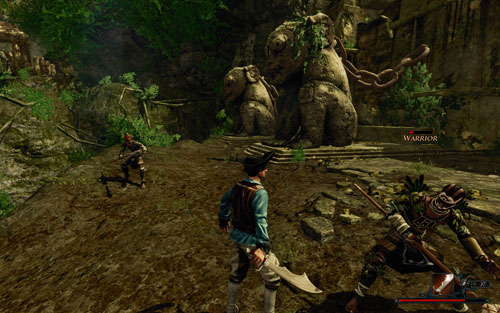 The battle with the Natives is no trifle - have backup!
Because the number of enemies is quite vast, it's better to have support. You'll have the first opportunity to get yourself a companion during a trip with Venturo (see: The Lookout's Report); he'll surely be very helpful. Another choice are the Inquisition's soldiers (see: Forward March!), or Chani, the daughter of the chieftain (see: Chani's Plan). The reward, though, will be the same regardless of whether you defeat the enemies on your own, or with help.
Rewards:
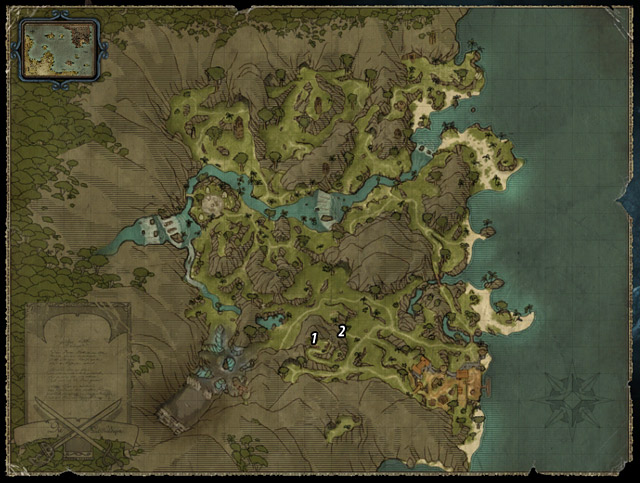
NOTE: This quest is only available if you have sided with the Inquisition.
Three aggressive pirates have accommodated themselves in a cave under the Inquisition's tower [#1]. Sancho [#2], one of Alvarez's soldiers who had been sent on a patrol as punishment, is blocking their escape route. Talk to him to activate the quest, and choose the second dialogue option.
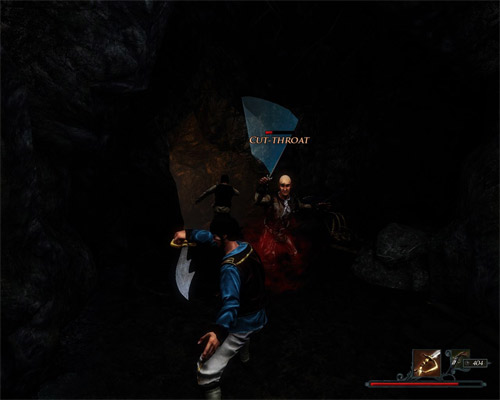 It pays to defeat the enemies on your own, without Sancho's help.
Sancho will go inside the cave, so do the same. As soon as The Cut-throats see you, you'll be attacked. Your companion will naturally take part in the fight, but - note! - the enemies he kills won't be awarded with Glory points. It's a much better idea to enter the cave alone and eliminate its dwellers on your own.
Rewards:

This quest is part of: Free Tahana
Having found the idol searched for by Tahana [#1] (see: The Search for the Idol), you can proceed with taking him back to the Shaganumbi village [#2]. Follow the Native, then, fighting with every animal that comes in your way (provided you haven't vanquished them before). Tahana won't be too useful here since he deals very little damage - which isn't too surprising seeing as he had only just left the prison. Even though, what Glory points he receives go to your account.
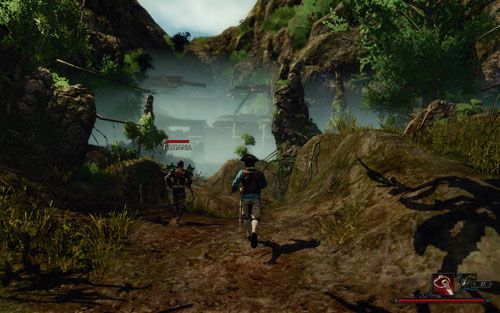 You'll pass by a majestic temple.
When you pass the Earth Temple [#3], the Native will stop to talk to you. The quest will be completed after a short conversation, and a new one will begin - Heading Back Home. It will be the last of the Free Tahana quests.
Rewards:

This quest is part of: Crow's Ship
After reaching the fork in the road [#1] during the Farther South quest, Captain Steelbeard will let you choose the way to Puerto Isabella. If you decide to go through the caves, you'll activate the current quest.
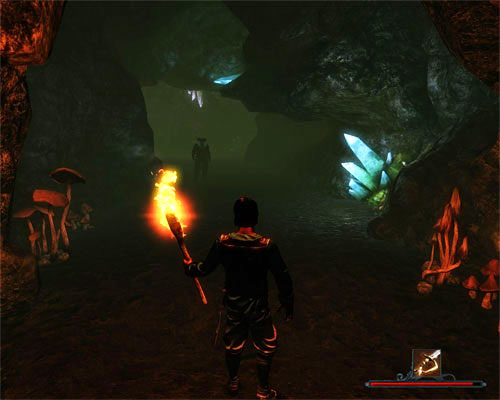 With every step, Steelbeard will advise you against continuing through the cave.
Keep following Steelbeard. At one point he'll get seriously scared and ask you one more time if you're sure you want to continue. If you say yes, you'll start the A Terrible Feeling quest. Otherwise, you'll activate the Back to Beginning quest.
Rewards:

This quest is part of: Crow's Ship
Having decided on the journey to Puerto Isabella (see: Crow's Ship), Steelbeard [#1] will promise to take to you to the Inquisitor-occupied city. Follow the captain, killing what enemies you meet on the way.
Note! In this and later missions, Patty will always keep close to you, which will allow you to stray of the course and use her help whenever you want to kill some additional enemies. The girl's father will always wait for you to join him again.
 In all missions from the Crow's Ship series, the captain will be the one to lead you to your destination.
After a short trip, you will reach a bridge [#2] guarded by Firebirds. The quest will be completed and another one will begin: Firebird Hunt.
Rewards:

This quest is part of: The Natives
The quest will be activated when you decide to go to the natives' village with Steelbeard and Patty (see: The Natives), and report to the captain that you're ready.
The joint trip of the three adventurers begins at the pirates' tower [#1]. The captain will play the role of a patient guide, so if you suddenly feel like diverting of Steelbeard's course, he will always wait for you. For the duration of this journey, Patty will become your regular companion, which means she'll follow you step by step. There are roughly two exceptions from this rule in later missions.
But let's go back to the present one, which - as you'll soon see for yourself - is very short. The captain will run south-west and stop by a cave [#2]. Join him and the quest will be completed. The adventure will continue in the Farther Inland quest.
Rewards:
![Quest giver: Isabella [#1] - Trophies - The Sword Coast - Quests - Risen 2: Dark Waters - Game Guide and Walkthrough](https://game.lhg100.com/Article/UploadFiles/201512/2015121709172124.jpg)
Quest giver: Isabella [#1]
Isabella [#1], the daughter of Commandant Sebastiano, has a room on the upper floor of the villa in Puerto Isabella. A shameless incursion of her privacy will trigger a short conversation in which the Nameless One will have to explain his behavior. The only argument that can convince her is available under the Silver Tongue option (difficulty: 40). If you answer without it, the woman will order you to leave. A subsequent attempt to win her affection will take much more pains - the opening line requires Silver Tongue at 45!
No matter how you manage to persuade the girl, listen to what she has to say. It turns out Isabella would like to design new clothes collections, but doesn't have the proper sewing tools. If you agree to help her make her dream come true, you'll receive a Hunting knife to skin animals and a list of items you need to collect in order to complete the quest.
 Three of four trophies you can easily buy from Ranapiri.
 Isabella will ask you to deliver the following items: the Skin of the Jaguar, the Feather of a Firebird, and a Tusk and Teeth of any animal.
Having collected the trophies, return to Isabella and hand her the items, choosing proper dialogue options in the conversation. The quest is completed.
Rewards:
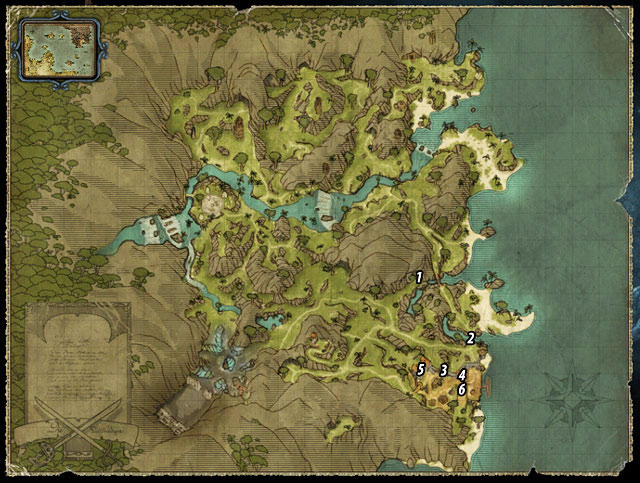
This quest is part of: Crow's Ship
In order to receive this quest you have to go to Puerto Isabella with Steelbeard and Patty at your side (see: Crow's Ship). When the joint trip ends, which is tantamount to completing the A Terrible Feeling [#1] or The City Gate Is Not Far Off [#2] quests, the current mission will be activated automatically.
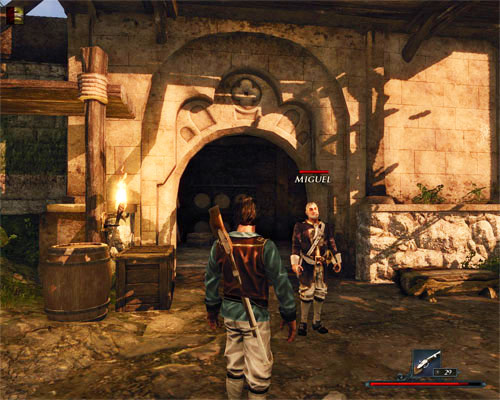 Miguel will gladly tell you about the ship's fate.
The goal of this quest is to locate the ship of Captain Crow, who is transporting the Titan Weapon you're looking for. Unfortunately, it soon turns out that the ship had been sunk during a battle with the Inquisition's forces. You can find this out from several characters in Puerto Isabella:
Note! Benito [#6], a gunner, clearly mentions the ship too, but for whatever reasons his account is not counted as part of the quest!
Rewards:
Quest giver: Mac [#1]
This mission is received from a lone pirate living in a tower in the west part of the island [#1]. When you ask Mac to tell you the history of the pirates, the old warhorse will share a few stories with you. If you push him, he'll say that other information he has are too valuable to give them to just anyone. Then, he'll ask you to deliver the merchandise the warehouse master Rick [#2] owes him.
 There's nothing like a forgetful clerk.
Go to the port city to talk to Rick (you'll find him in front of Slayne's ship, in the docks). When you explain the situation to him, you'll learn that he had forgotten to deliver the shipment - just a little inadvertence on his part. Take the Small package from him and hand it to Mac. The quest will be over.
Rewards:
![Quest giver: Rick [#1] - A Treasure on Antigua - Antigua - Quests - Risen 2: Dark Waters - Game Guide and Walkthrough](https://game.lhg100.com/Article/UploadFiles/201512/2015121709172245.jpg)
Quest giver: Rick [#1]
This quest is part of: Powder Kegs
To supply Captain Slayne's ship, you need Rick's help (see: Ship's Equipment). You have to persuade him to transport the goods. This can be achieved either by threatening him (Intimidate at 55), or by helping him find a treasure. The man hates his work, which is why he dreams of wealth - if he was rich, he could so something else in life and leave Antigua. If you don't wish to intimidate him, you can help him realize his dream.
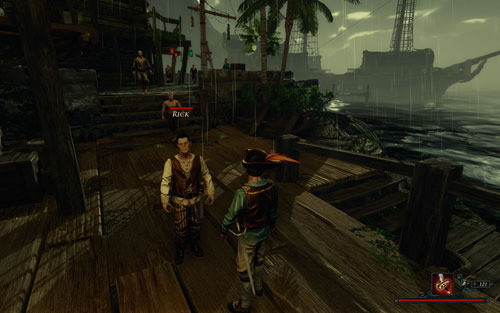 Rick is a very naive young man.
The treasure map can be found in Admiral Alvarez's bedroom [#2], locked inside a chest (Lockpicking at 30 could be useful). Steal it and return to Rick. He'll be pleased so much that he'll immediately agree to help Slayne. At that moment, the mission ends. If you don't have the appropriate thieving skills, you can also buy the map back from the con man Quinn [#3] - it'll will do just as well. If that solution isn't to your liking either, Duncan will give you the map [#4] for free, provided you save him in The Missing Fisherman quest.
Note! You don't lose the map by showing it to Rick - once you tell him about the treasures, you can dig them out yourself [#5], [#6] and [#7]. There are also no objections to you taking the treasures first, and then showing the map to Rick - it won't dawn on him that he had been fooled.
Rewards:
![Quest giver: Zak [#1] - Beat Em Up - Antigua - Quests - Risen 2: Dark Waters - Game Guide and Walkthrough](https://game.lhg100.com/Article/UploadFiles/201512/2015121709172244.jpg)
Quest giver: Zak [#1]
There is a man named Zak [#1] in front of the city's tavern. If you annoy him by asking all kinds of questions and don't back out, you'll pick up a fight (the quest will be activated). There's quite a reward in Glory points for defeating him.
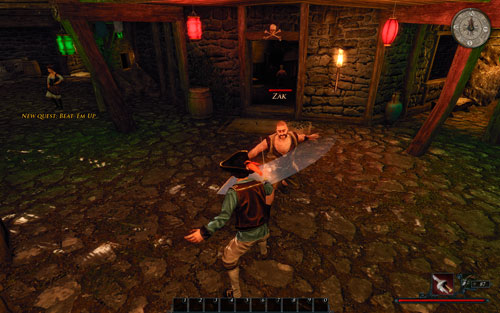 Zak is a very challenging foe - defeating him is quite an achievement.
Note! In the conversation with Zak it's important to ask him questions, but not threaten him (requires Intimidate at 60). If he finds the Nameless Hero too sinister, the quest won't even begin. If you lose the fight, the quest won't be completed and you won't be able to repeat it.
Rewards:
![Quest giver: Miles [#1] - Butch Has Got to Go - Antigua - Quests - Risen 2: Dark Waters - Game Guide and Walkthrough](https://game.lhg100.com/Article/UploadFiles/201512/2015121709172289.jpg)
Quest giver: Miles [#1]
This quest is part of: Water Barrels
A quick and simple quest. Go to the workers' camp by the water hole and meet with Butch [#2], who runs the whole operation. He won't be eager to help you out, forcing you to find an alternative solution to your problem.
If on the Sword Coast you have sided with the Natives, talk to Miles about Butch until you have an epiphany - possessing the supervisor (see: The Butch Puppet). To this end, cut some of his hair and go to the witch Emma [#3], who resides in the city.
 Once again, magic is the key to success.
Buy the necessary ingredients from the witch and create a voodoo doll on the altar. Equip it, return to the workers' camp and possess Butch. In his body, force Miles to load water barrels on Captain Slayne's ship. At this moment, the quest ends.
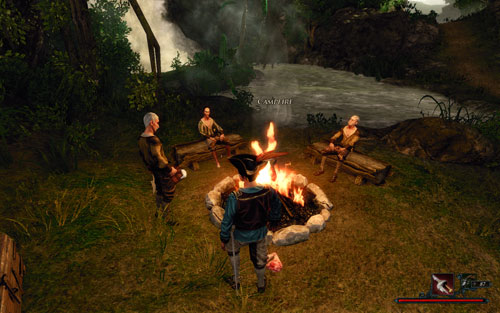 After chasing Butch away, the workers will go back to work.
If on the Sword Coast you have sided with the Inquisition, talk to Miles about Butch to learn that the supervisor is very easy to trick. You'll have an idea to tell him about a treasure allegedly buried in a nearby cave [#4] (see: Down into the Cave). Inside, beat the man up (see: Give Butch a Thrashing). Afterwards, return to the workers and tell them to go back to work.
Rewards:

Note! This quest is only available if on the Sword Coast you have sided with the Natives!
Quest giver: Miles [#1]
This quest is part of: The Butch Puppet
To secure the water supply for Captain Slayne (see: Ship's Equipment), talk to the workers' supervisor - Butch [#2]. He won't be eager to help you out and there's no way you can convince him to it. Instead, talk to the worker Miles [#1] to find out how the supervisor can be gotten rid of. The drunken water carrier will suggest creating a voodoo doll. Consequently, cut some of Butch's hair necessary in the preparation of the magical artifact (see: The Butch Puppet) and go pay a visit to the witch Emma [#3].
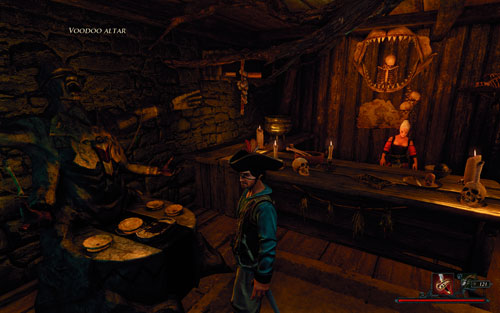 Magic is good for everything.
There, use the voodoo altar to create the necessary artifact. If you're missing one of the ingredients for the doll, don't worry - the shaman woman has all of them to sell. When the process is over, the quest will be completed and you're free to return to the supervisor (see: The Butch Puppet).
Rewards:

Note: This quest is only available if on the Sword Coast you have sided with the Inquisition!
Quest giver: Miles [#1]
This quest is part of: Butch Has Got to Go
While searching for water barrels during the Ship's Equipment quest, you'll surely arrive at the water hole supervised by Butch. Since he won't to be too eager to help you out, you have to dispose of him. To this end, talk to Miles [#2] who'll suggest that the supervisor should be tricked.
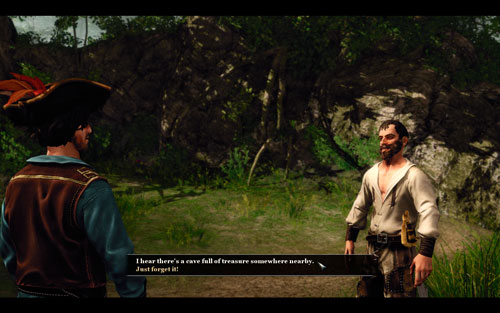 A naive man is hard to find...
Convince Butch [#2] that you know the location of a treasure, and go with him to a cavern where the chest is allegedly hidden [#3]. The quest will end and you'll have the doubtful honor of defeating the supervisor in a fight (see: Give Butch a Thrashing).
Rewards:
![Quest giver: Henri [#1] - Follow Henri to the Shooting Range - Antigua - Quests - Risen 2: Dark Waters - Game Guide and Walkthrough](https://game.lhg100.com/Article/UploadFiles/201512/2015121709172397.jpg)
Quest giver: Henri [#1]
This quest is part of: Shooting Match with Henri
Piece of cake - when you challenge Henri to a duel (see: Shooting Match with Henri), he'll invite you to the shooting range [#2] just outside the city. He'll run there at once, so try to keep up with him. The quest will be completed the moment you get there.
Rewards:
![Quest giver: Slayne [#1] - Follow Slayne - Antigua - Quests - Risen 2: Dark Waters - Game Guide and Walkthrough](https://game.lhg100.com/Article/UploadFiles/201512/2015121709172321.jpg)
Quest giver: Slayne [#1]
This quest is part of: The Cunning Captain
Another miniquest in which you have to follow Captain Slayne after finding him (see: Find Captain Slayne).
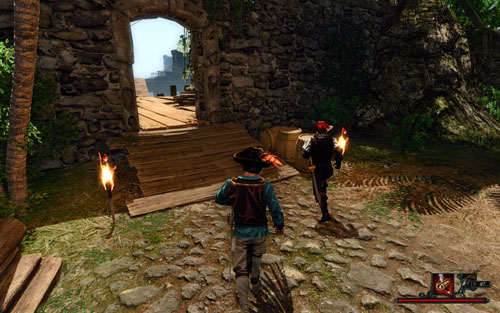 These types of quests allow the creators to boast how many of them they have prepared.
To receive it, leave Admiral Alvarez's quarters and talk to the pirate. Follow him for a few steps and talk to him again. The quest will be completed and you will proceed to the next one - Follow Slayne to his Ship.
Rewards:
![Quest giver: Slayne [#1] - Follow Slayne Outside - Antigua - Quests - Risen 2: Dark Waters - Game Guide and Walkthrough](https://game.lhg100.com/Article/UploadFiles/201512/2015121709172469.jpg)
Quest giver: Slayne [#1]
This quest is part of: The Cunning Captain
It takes only a few seconds to complete this mission. The only thing you have to do after the conversation with Slayne (see: Find Captain Slayne) is to go outside Admiral Alvarez's quarters [#1] with him. Since the distance is only as much as ten steps long, the reward isn't too great either (though adequate to the effort). A cutscene will be triggered afterwards, and the Follow Slayne quest will begin.
Rewards:
![Quest giver: Slayne [#1] - Follow Slayne to his Ship - Antigua - Quests - Risen 2: Dark Waters - Game Guide and Walkthrough](https://game.lhg100.com/Article/UploadFiles/201512/2015121709172446.jpg)
Quest giver: Slayne [#1]
This quest is part of: The Cunning Captain
Yet another quest with you running after Slayne. After leaving Admiral Alvarez's quarters, going outside and heading for the city gates, you can finally reach the ship itself. There's nothing to it - simply run in the same direction [#2].
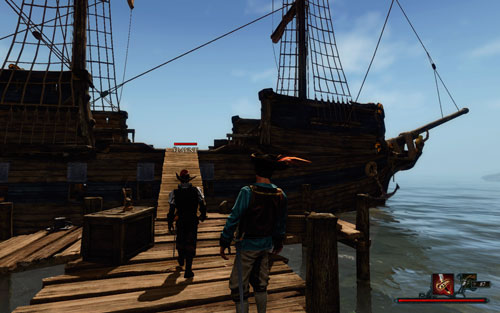 Slayne's boat isn't much different from yours.
When the marathon is over, talk to Slayne. He'll ask you for help in a matter concerning his ship, which constitutes the Ship's Equipment quest. The completion of that quest is necessary to acquire another Titan artifact.
Rewards:
![Quest giver: Eddie [#1] - Fresh Fish - Antigua - Quests - Risen 2: Dark Waters - Game Guide and Walkthrough](https://game.lhg100.com/Article/UploadFiles/201512/2015121709172420.jpg)
Quest giver: Eddie [#1]
This quest is part of: Ship's Equipment
One of the conditions Captain Slayne has to meet in order to leave the island is to have fresh fish delivered - this, in turn, can only be taken care of in the fishermen's hut on the west coast. Leave the port city by the east gate, pass by Bill and the water carriers' camp, and then turn east. There are several Giant Crabs, Sand Devils and even a Grave Spider to be defeated on the way - but they're not dangerous enough for you. After breaking through them, you should see a small cabin on the shore [#1] - that's your destination.
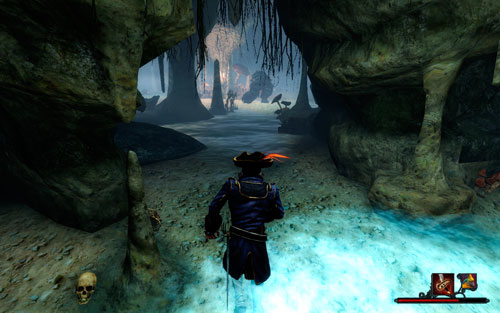 The monster awaits!
Inside, you'll find a lone man - Eddie [#1]. A short conversation will reveal that his mate, Duncan, was kidnapped by a formidable Hobgoblin. To have any chances at getting those fish, you need to slay the beast first (see: The Hobgoblin) - otherwise the poor fisherman will be too scared to even leave the house. It's better to find Duncan too, but it's not mandatory (see: The Missing Fisherman).
 A happy ending - provided you rescued Duncan.
Leave the cabin and follow the coastline north. A bit further beyond a small bay you should see the cave [#2] in which the monster is hiding (as well as the missing man, deeper inside). Kill the Hobgoblin using firearms, dirty tricks or your crew members - an open battle will most surely lead to your demise. Return to Eddie once the best is slain. Remember, though, that finding Duncan gets you additional Glory points!
Rewards:

The way leading to the completion of this quest is pretty complex. First, buy the key to the city's tavern from the con man Quinn (costs 300 Gold - it's one of his special items). When you have it, go to the tavern and open the previously locked door on the first floor [#2]. Go inside and read the book lying on the dresser.
 Give the treasure back and you can rest in peace.
The book will allow you to learn of Gibson's secret - apparently, he has taken his treasures to his grave. You have no other choice but to disturb the dead man's resting place, which is located at the city's graveyard [#3]. Once you're there, take a shovel in hand and perform the exhumation. Among all kinds of junk you find there, there's a Silver mask - a legendary item by the same name.
Rewards:

Note! This quest is only available if on the Sword Coast you have sided with the Inquisition!
Quest giver: Butch [#1]
This quest is part of: Butch Has Got to Go
While searching for water barrels for the Ship's Equipment quest, you'll eventually end up at the water hole which is supervised by Butch. Because he's not too eager to cooperate, you have to get rid of him. To this end, talk to Miles [#2], and then convince the supervisor that you know the location of a treasure cave (see: Down into the Cave). The sucker will go for it and you'll be free to take him into a nearby cavern [#3].
 This means fight!
Since there are no valuables there, the man will realize he has been fooled. You can now either fight him or shoot him - even during the conversation (requires the Nuff Said! skill). Whichever option you choose, the quest will be completed, leaving you free to go back to the workers at the water hole.
Rewards:
Quest giver: Morgan [#1]
In order to hire Morgan [#1] to work on Captain Slayne's ship (quests: Ship's Equipment and The Helmsman), you'll have to defeat him in a series of three competitions. The first is to chastise him in a conventional fight, the second to win the drinking contest, and the third - to shoot seven bottles at the shooting range. These competitions are commonly known as the "pirate triathlon". To complete the quest you have to win at least three.
 The pirate's strikes aren't too strong.
Fighting with blades is something you should be well familiar with, so defeating Morgan shouldn't be too much of a problem. Don't underestimate him, though, because he knows a wide variety of moves and skills which can do some serious damage. The best tactic to apply here is to parry before counterattacking.
 Try not to move the hand while reaching for the bottle.
The second stage of the competition is the drinking contest. This shouldn't be a problem either - reach for the bottles (hold them at the neck), but don't shake the hand too much. The view will become more blurry with each gulp, and the hand will react to your movements with more delay. Nevertheless, Morgan isn't too much of a drinker, so you'll be alright.
 You can miss only three times!
The last task before you is to shoot down seven objects the pirate will throw for you (you have only 10 bullets). Try not to hit the bombs, and be quick and precise. This is the hardest competition of the three, but if you don't succeed, it's enough to win the other two. When it's all over, talk to Morgan about it - if you've managed to best him, the quest will be completed (as will The Helmsman mission).
Note! The reward for winning two competitions is the same as for winning all of them. If you lose, don't worry - you can do the triathlon any number of times.
Rewards:
![Quest giver: Rick [#1] - Powder Kegs - Antigua - Quests - Risen 2: Dark Waters - Game Guide and Walkthrough](https://game.lhg100.com/Article/UploadFiles/201512/2015121709172639.jpg)
Quest giver: Rick [#1]
This quest is part of: Ship's Equipment
Getting off your ship on the coast of Antigua, you'll surely stumble upon the warehouse master, Rick. He'll be very impressed with your ship and tell all about his work. When you ask him, though, whether he wouldn't be interested in trading a few odds and ends, he'll refuse - apparently every item in the warehouse is meticulously catalogued. You have two choices to complete the quest:
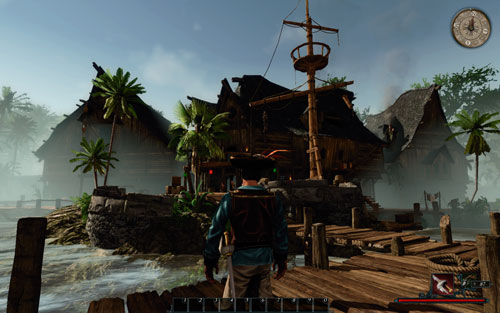 The conversation with Rick can't be avoided - you'll complete the quest one way or the other.
Two things to sum up:
Rewards:
 AntiguaTacarigua
Quest giver: Spencer [#1]
Spencer [#1], the bartender at his own tavern, will inform you that he's run short of rum. Since it's the favorite beverage of the pirate population, the problem is quite huge. He'll ask you to procure a supply of alcohol from Tacarigua. The bartender there, Booze, has all kinds of liquor at his disposal. Therefore, board your ship and sail to the well-known island.
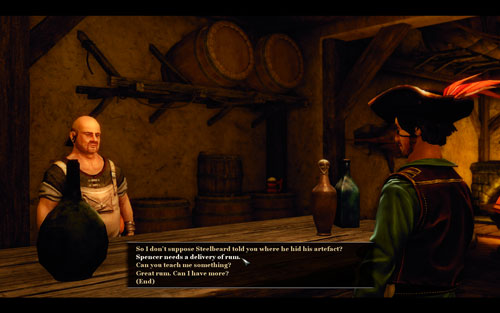 Rum brings people closer.
As always, you can find Booze [#2] at his tavern on the coast. When he hears that you're working for Spencer, he'll be very surprised that you decided to help such a weasel. Despite his aversion, he'll agree to load the liquor on your ship. At this moment, the quests ends and another one begins - Take the Rum to Antigua.
Rewards:
![Quest giver: Wilson [#1] - Pure Luxury - Antigua - Quests - Risen 2: Dark Waters - Game Guide and Walkthrough](https://game.lhg100.com/Article/UploadFiles/201512/2015121709172707.jpg)
Quest giver: Wilson [#1]
This quest is part of: The Cannon
The blacksmith Wilson isn't too eager to trade - he's afraid of violating the blockade (see: The Cannon). As it happens, though, the bearded fellow has the hots for a certain lady, who unfortunately keeps refusing him. Of course, the Nameless Hero can help the poor guy out, thus gaining his gratitude - and with it, the possibility of buying the cannons. If you don't feel like taking part in a shooting competition (see: The Pawned Pistol), you should pay a visit to the blacksmith's chosen.
 After a longer conversation you'll learn that Grace is in fact a deluxe prostitute.
The object of the blacksmith's desire is the most beautiful and dignified woman on the whole island - Grace [#2]. During the day you can find her outside the fort where Slayne lives, and at night on the square between the buildings. When you talk to her, she'll be outraged that a simpleton like Wilson dares to even bother her. You have to persuade her that the old guy isn't so bad. Don't offer to buy her charms - she'll get mad and the quest will be cancelled!
Regardless of what diplomatic skills you possess, the situation can be resolved only by giving her a bribe of 1000 Gold (she'll suggests it herself, don't push the topic!). If you're charming enough, you can persuade her to cut the amount by half (requires Silver Tongue at 60) - so as not to make too much of a loss.
Note! Completing this mission does not exclude completing The Pawned Pistol - you can do both, thus gaining more experience points.
Rewards:
![Quest giver: Slayne [#1] - Ship's Equipment - Antigua - Quests - Risen 2: Dark Waters - Game Guide and Walkthrough](https://game.lhg100.com/Article/UploadFiles/201512/2015121709172789.jpg)
Quest giver: Slayne [#1]
This quest is part of: The Cunning Captain
A very demanding and complicated quest which will take up a lot your time. In order to secure all the elements necessary for the pirate to embark on the journey, you need to complete the following sidequests:
 There's nothing else like doing someone's dirty work for them...
When you have all the elements necessary for the captain to leave Antigua, report to Slayne [#13] to tell him about it. On your way, you'll stumble upon a pretty furious Admiral Alvarez, but don't worry about him - he won't stand in your way anymore. The quest will be completed as soon as you report to the pirate. Now you only need to begin the journey (quest: The Journey to the Isle of Thieves).
Rewards:
![Quest giver: Henri [#1] - Shooting Match with Henri - Antigua - Quests - Risen 2: Dark Waters - Game Guide and Walkthrough](https://game.lhg100.com/Article/UploadFiles/201512/2015121709172786.jpg)
Quest giver: Henri [#1]
This quest is part of: The Pawned Pistol
Henri [#1], the pistol maker, is the current owner of Wilson's pistol, which you need in The Pawned Pistol quest. To win the gunsmith over, you have to beat him in a shooting competition. Follow him to a safe location [#2] (see: Follow Henri to the Shooting Range) and show him who is the real sniper. If you succeed, the blacksmith Wilson will help you with The Cannon quest.

To best Henri, you need to fire eight successful shots. The task is quite problematic since you only have ten bullets and your opponent tends to cheat (he'll sometimes throw bombs, and if you hit them you'll automatically lose). Also, you can't wait too long between the shots because Henri has only a limited number of throwing objects. Luckily, you can approach the task any number of times - nothing happens if you lose. When you win, talk to Henri and buy the reward back for 1000 Gold (see: Wilson's Pistol).
Rewards:
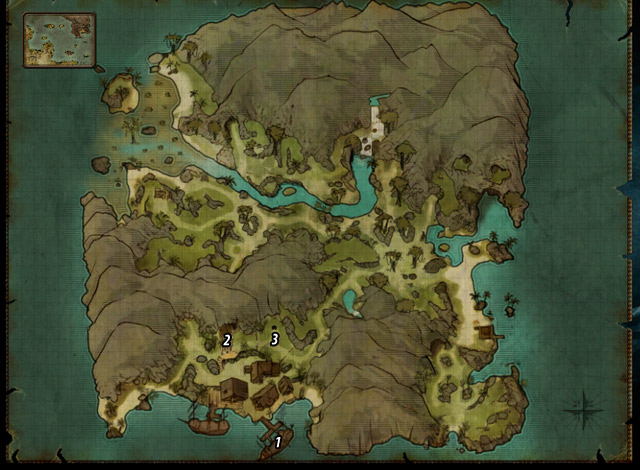
After coming back from Tacarigua (see: Where Is My Ship?), look for Slayne on Antigua. When you reach its shores [#1], Patty will spot the traitor's ship - apparently, he has hidden nearby. When you enter Admiral Alvarez's mansion [#2], you'll witness a quarrel between the old captain and the wanted deceiver. When you enter the conversation and challenge Slayne to a duel, there's only one thing left - to meet with destiny.
 You'll be duelling alone - no companion will help you.
Leave the building and run to the square on the left [#3] (see: Meet Slayne at Blood Oath Square). This is where the two of you will fight to the death. Every move is available - both to you and to you opponent. After you kill him, don't forget to take the sacrificial knife from him - this way you'll complete not only the present quest, but the whole The Cunning Captain mission as well. Now you should talk to Alvarez.
Note! If the Knife is the fourth (and the last) Titan artifact you've found, tell Patty about it. The girl will suggest asking Admiral Alvarez what next. Talk to him, then - this is how you'll receive The Water Temple quest.
Rewards:
 Tacarigua
 Antigua
Quest giver: Booze [#1]
A simple quest worth as much as 1000 Gold. Having procured a liquor supply from Booze [#1] on Tacarigua (see: Procure Fresh Supplies from Tacarigua), you also need to deliver it to Spencer [#2], who awaits your return at the tavern on Antigua. Simply board your ship and sail to the designated island.
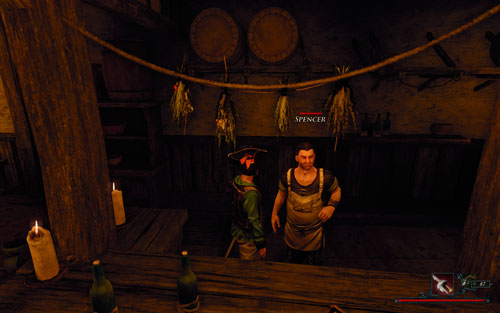 Yo ho ho and a bottle of rum!
Spencer will greet you with open arms. The long awaited rum is finally back in the tavern storages and the business can roll again. The man will be so pleased with your success he'll pay you a round sum for your trouble - spend it well!
Rewards:

Note! This quest is only available if on the Sword Coast you have sided with the Natives!
Quest giver: Miles [#1]
This quest is part of: Butch Has Got to Go
During the Ship's Equipment mission you're doing for Captain Slayne, there'll be a moment when you'll have to find water (see: Water Barrels). What you're looking for is in the hands of the surly workers' supervisor, Butch [#2], by the water hole. Since there won't be any way to persuade him to give up the needed supply, you'll have to turn to magic.
 It's funny that no one reacts to using magic right next to him.
To this end, talk to Miles (he's the one to give you the quest) and he'll suggest a solution - a voodoo doll. First, you'll need to steal a strand of Butch's hair, and then go to the witch Emma [#3] to create the puppet on her altar (see: Create Butch's Voodoo Doll).
Note! If you don't have the ingredients necessary to make the puppet, you can buy them from the shaman Emma.
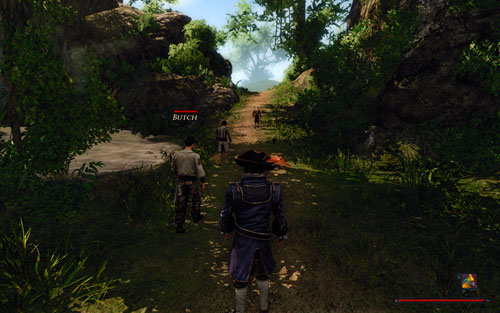 At the end of the day, the merchandise will be delivered.
With the magical artifact in your possession, return to Butch and bewitch him. Then, in his body, approach Miles and tell him to supply Captain Slayne's ship. That's all - the mission ends.
Rewards:
![Quest giver: Wilson [#1] - The Cannon - Antigua - Quests - Risen 2: Dark Waters - Game Guide and Walkthrough](https://game.lhg100.com/Article/UploadFiles/201512/2015121709172918.jpg)
Quest giver: Wilson [#1]
This quest is part of: The Cannon
The blacksmith from the port city adamantly refuses to sell his cannons which are essential on board Captain Slayne's ship. Ask Wilson about everything there is - he'll eventually confess that he's in love with a certain lady. This is how you trigger the Pure Luxury quest.
 A tough guy with a heart of gold.
If you ask the local girls about the blacksmith, they'll tell you that the object of his desire is Grace [#2] - the woman standing in front of Alvarez's fort. She'll agree to pleasure Wilson as long as you pay her a 1000 Gold bribe (if you have Silver Tongue at 60, she'll cut the amount by half). Go back to the quest giver to receive your reward.
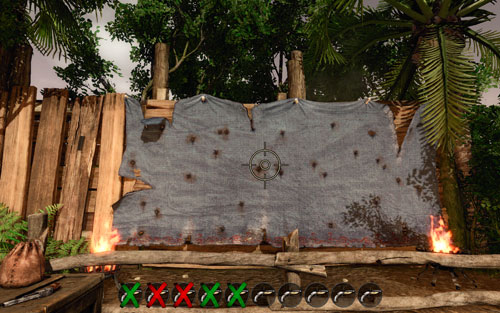 Henri is a good shooter - the fight won't be easy.
There is an alternative way to complete this quest - you can secure his gratitude by recovering the blacksmith's weapon (see: The Pawned Pistol). To this end, go to the pistol maker, Henri [#3]. Wilson's pistol is in his possession now, and he'd like to duel with you over it. Beat him in a competition at the shooting range [#4] so you could buy the item back. When you return it to the blacksmith, you'll be able to purchase the cannons too.
Note! Solving one problem does not exclude solving the other - you can help Wilson out with both his problems, thus gaining more experience points.
Rewards:
![Quest giver: Morgan [#1] - The Helmsman - Antigua - Quests - Risen 2: Dark Waters - Game Guide and Walkthrough](https://game.lhg100.com/Article/UploadFiles/201512/2015121709172932.jpg)
Quest giver: Morgan [#1]
This quest is part of: Ship's Equipment
You'll get this quest in the port city's tavern after talking to Morgan [#1], who is sitting by one of the tables. He had planned to join the crew of some ship, but he doesn't want to have anything to do with Captain Slayne - the pirate has too little respect for human life. Because you need to assemble a crew for the controversial captain, it doesn't leave you too much choice - you have to convince Morgan to change his mind. There's only one way to do it - by defeating him in a series of competitions (see: Pirate Triathlon with Morgan).
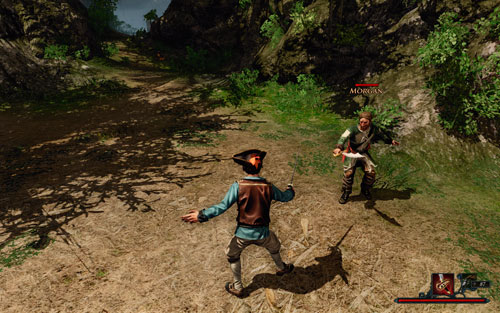 Don't let yourself be surprised - Morgan knows how to use a weapon.
The first competition is a conventional sword fight - simply defeat him in a regular way. You can of course fight dirty or use firearms - it's a pirate fight, not an honorable duel. When the man falls, help him up and join him in a drinking contest. The rules are simple - empty the bottles as fast as you can before your opponent does, trying not to knock them over (it's a huge waste of time). When that part is over as well, it's time for a shooting match - shoot down at least seven objects with only ten bullets. Try not to hit a bomb while you're at it - you'll fail immediately!
 How many bottles will make you smile?
When all stages of the triathlon are over, it's time to count your winnings. You need to win at least two competitions for the quest to be completed - if you win all three, there's no bonuses, and losing means only that you have the do the triathlon all over again. The moment you're declared the winner, the quest will end and Morgan will make up his mind to join Captain Slayne's crew.
Rewards:
![Quest giver: Eddie [#1] - The Hobgoblin - Antigua - Quests - Risen 2: Dark Waters - Game Guide and Walkthrough](https://game.lhg100.com/Article/UploadFiles/201512/2015121709173036.jpg)
Quest giver: Eddie [#1]
This quest is part of: Fresh Fish
Leave the fishermen's hut [#1] and follow the coast to a cave in the north [#2]. There will be Giant Crabs and Sand Devils in your way, but they're not enemies which can cause you any serious trouble, especially since you've already killed plenty of them. A much greater adventure awaits you at the cave itself - a Hobgoblin with a small army of Sand Devils.
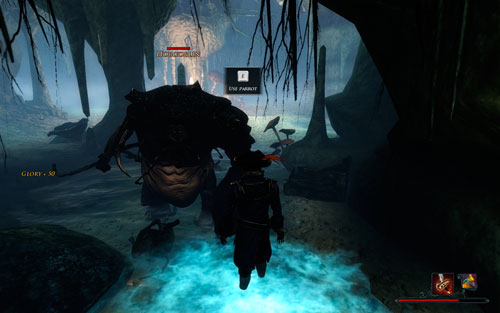 Eddie was right - the beast is monstrous.
Take care of the little monsters first - leave the cavern and defeat them outside (the Hobgoblin will most likely get stuck in the narrowing). Now for the real battle. The most efficient way of fighting the beast is shooting at it from a safe distance, and running away. If you don't have a powerful enough shotgun, use a couple of dirty tricks (i.e. the Parrot) to try to weaken the foe. If that's also not enough, you can always use the help of your crew - if they don't defeat it themselves, at least they'll be able to distract its attention. Once the threat is eliminated, the quest will be completed.
Rewards:
![Quest giver: Captain Slayne [#1] - The Journey to the Isle of Thieves - Antigua - Quests - Risen 2: Dark Waters - Game Guide and Walkthrough](https://game.lhg100.com/Article/UploadFiles/201512/2015121709173047.jpg)
Quest giver: Captain Slayne [#1]
This quest is part of: The Cunning Captain
You'll receive this quest from Captain Slayne [#1] the moment you complete the Ship's Equipment. After talking to the pirate, go to Patty [#2] to tell her where the Isle of Thieves is. A new location will appear on your map. Your goal is to sail there and meet with Slayne.

When your ship arrives at its destination, get to the lifeboat and sail for the shore. There, meet with the pirate. At this moment, the quest ends.
Rewards:
![Quest giver: Eddie [#1] - The Missing Fisherman - Antigua - Quests - Risen 2: Dark Waters - Game Guide and Walkthrough](https://game.lhg100.com/Article/UploadFiles/201512/2015121709173149.jpg)
Quest giver: Eddie [#1]
This quest can be completed together with the Fresh Fish mission. While talking to Eddie at the fishermen's hut [#1], you'll learn that his companion, Duncan, has been kidnapped by the formidable Hobgoblin. The beast had left his cave in the north and took the poor man, but Eddie decided to return to his home. It's up to you to find the missing man - the terrified fisherman won't leave his shelter even for a second.
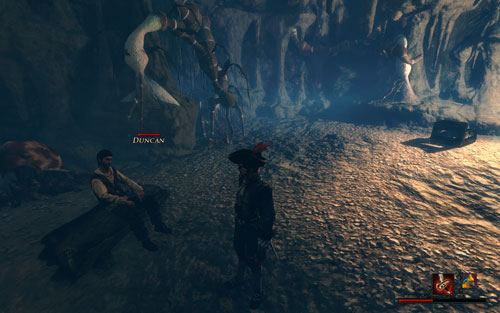 For a terrified prisoner, Duncan seems to be doing just fine.
Duncan can be found in the same cavern [#2] as the creature (see: The Hobgoblin). Having taken care of the beast, look around the cave. You should find the man in one of the sideway chambers where he had been hiding from the monster. When you tell him that the danger has passed, the quest will be completed.
Rewards:
 Antigua
 Maracai Bay
You'll receive this quest after reaching the gate under the waterfall on Antigua [#1]. Since you don't know the password, you'll need to walk away empty-handed. The solution to the puzzle lies in the Maracai Bay, where you can go after completing the Following Garcia's Trail quest (completed on Caldera - see the corresponding chapter).
In the Maracai Bay, read the Logbook on Garcia's ship [#2] (see: Garcia's Logbook). You'll need to use the boat on the beach [#3] to reach it. The captain's thugs will wait for you to finish them (see: Seize Garcia's Ship) - there're quite challenging, so it's better to have some companions with you.
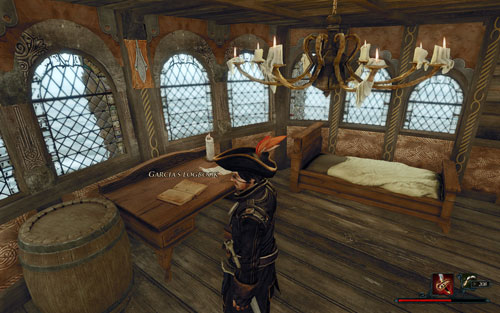 Solving this quest will take you a lot of time.
On the desk next to the bed you should see a Map (see: The Treasure on the Pirate Coast) and a book - Garcia's logbook. Read it to learn the location of the captain's hideout (see: Garcia's Treasure) and the password that will allow you to open its gates. This is when the quest ends.
Two things to sum up:
Rewards:
![Quest giver: Wilson [#1] - The Pawned Pistol - Antigua - Quests - Risen 2: Dark Waters - Game Guide and Walkthrough](https://game.lhg100.com/Article/UploadFiles/201512/2015121709173157.jpg)
Quest giver: Wilson [#1]
This quest is part of: The Cannon
When you talk to Henri [#2] about his work, you'll find out that he has recently came into possession of a real rarity - Wilson's pistol. Naturally, Wilson himself [#1] isn't particularly pleased with it - he had to pawn his weapon to a man he dislikes. Consequently, as soon you as you offer to get it back, the blacksmith will gladly agree, thus sending you on this quest.
Note! The mission can also be activated after obtaining Wilson's pistol - the order doesn't matter.
In order to recover the weapon, you need to defeat the pistol maker in a duel (see: Wilson's Pistol). Suggest an honorable fight. The man will take you to a safer place [#3] (see: Follow Henri to the Shooting Range). There, proceed to the duel. Your goal is to shoot down at least eight targets the gunsmith will throw at you. Remember that you only have ten bullets and you can't shoot bombs (it's tantamount to an immediate defeat).
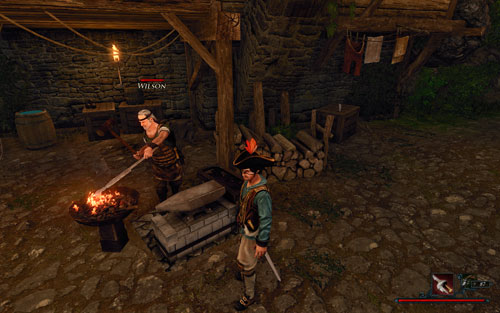 Paying off Wilson's debt is a bit of an expense.
After you've bested Henri in the shooting arts, demand that he give Wilson's pistol back. He'll agree, but not without paying him 1000 Gold. When you do it, return to the blacksmith and hand him his property back.
Note! Completing this mission does not exclude completing Pure Luxury - you can do both, thus gaining more Glory points.
Rewards:
![The map to this treasure can be obtained from Duncan [#1] if you saved him during The Missing Fisherman quest (received from Eddie [#2] in the cabin on the coast) - The Treasure in the Grotto on Antigua - Antigua - Quests - Risen 2: Dark Waters - Game Guide and Walkthrough](https://game.lhg100.com/Article/UploadFiles/201512/2015121709173275.jpg)
The map to this treasure can be obtained from Duncan [#1] if you saved him during The Missing Fisherman quest (received from Eddie [#2] in the cabin on the coast). The treasure chest lies in the same cave [#3] as the rescued man. Leave the chamber in which you had found the fisherman, and take the treasure [#4] from the cavern with the Cave Bat (north part of the cave).
 A hero with a shovel.
Note! If you saved Duncan by accident, without accepting The Missing Fisherman quest, both quests will be activated and completed.
Note! This mission is connected with the Powder Kegs quest - which requires the treasure map. Even so, don't worry that the warehouse master, Rick, will beat you to the spot - he'll stay in the docks virtually till the end of the game.
Rewards:
![Quest giver: Quinn [#1] - The Treasure on a Rocky Plateau of Antigua - Antigua - Quests - Risen 2: Dark Waters - Game Guide and Walkthrough](https://game.lhg100.com/Article/UploadFiles/201512/2015121709173281.jpg)
Quest giver: Quinn [#1]
There is only one way to receive this quest - by buying Quinn's map [#1]. It's one of two items in his stock which purpose he's going to hide. One of these secret objects costs 200 Gold, the other 300 Gold. If you have Silver Tongue at least at 50, you'll be able to persuade him to tell you that the map is the cheaper one. Regardless of whether you've known it before or bought a pig in a poke, the quest begins once you obtain the sketch.
![The spot where the precious chest has been hidden is a long way behind the city's walls - in the north-east part of the island [#2] - The Treasure on a Rocky Plateau of Antigua - Antigua - Quests - Risen 2: Dark Waters - Game Guide and Walkthrough](https://game.lhg100.com/Article/UploadFiles/201512/2015121709173248.jpg)
The spot where the precious chest has been hidden is a long way behind the city's walls - in the north-east part of the island [#2]. To get there, go through the city and follow the only available path to the water carriers' camp. Then, turn north and continue the journey until you reach a bluff (it looks a little bit like stairs - the above screen). Now you only have to dig the treasure out; that's all.
Note! This mission is connected with the Powder Kegs quest - which requires the treasure map. Even so, don't worry that the warehouse master, Rick, will beat you to the spot - he'll stay in the docks virtually till the end of the game.
Rewards:
![The map leading to the treasure can be found in Admiral Alvarez's quarters, in his bedroom [#1] - The Treasure on Antigua's Western Beach - Antigua - Quests - Risen 2: Dark Waters - Game Guide and Walkthrough](https://game.lhg100.com/Article/UploadFiles/201512/2015121709173206.jpg)
The map leading to the treasure can be found in Admiral Alvarez's quarters, in his bedroom [#1]. Take it from the chest (requires Lockpicking at 30), and go on a treasure hunt. Unfortunately, the road is long, because our wanted cargo is buried at the very edge of Antigua, on a small island in the north-west part of the map [#2]. You can get there either by a taking a path east of the port city (a roundabout route), or by going through the caves in the north (towards Mac's tower). When you arrive at the treasure spot, dig it out and enjoy your loot.
 Another chest to your collection.
Note! This mission is connected with the Powder Kegs quest - which requires the treasure map. Even so, don't worry that the warehouse master, Rick, will beat you to the spot - he'll stay in the docks virtually till the end of the game.
Rewards:
 Antigua
 Tacarigua
Quest giver: Alvarez [#1] or Booze [#2]
This quest is part of: Steelbeard's Artefact
A short quest completed by talking to Admiral Alvarez on Antigua or Booze on Tacarigua. Use all dialogue options pertaining to Captain Steelbeard - in any order. Eventually you'll discover that the old pirate's artifact has been hidden in Garcia's chest (last seen on Caldera). Now you have find the treasure and obtain the magic item. Go to where you've begun the game and solve Captain Steelbeard's puzzle (see: Following Garcia's Trail).
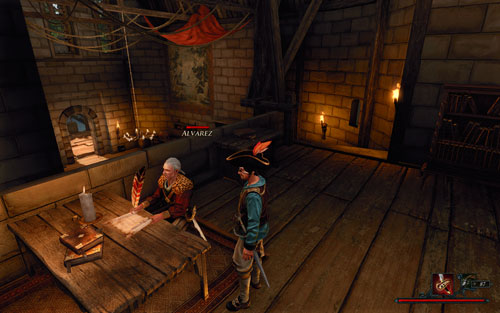 Alvarez is a busy man - but you'll get to an understanding.
Note! This quest can also be completed if Captain Steelbeard's ghost reveals to you the location of his treasure (see: Talk to Steelbeard's Ghost). This option is only available if you haven't completed the Search Garcia's Possessions quest yet and on the Sword Coast have sided with the Natives.
Rewards:
![Quest giver: Rick [#1] - There's No Place Like Home - Antigua - Quests - Risen 2: Dark Waters - Game Guide and Walkthrough](https://game.lhg100.com/Article/UploadFiles/201512/2015121709173364.jpg)
Quest giver: Rick [#1]
Note! This quest will only be available if you have completed the mission Where Is My Ship? on the island of Tacarigua and A Treasure on Antigua on your current island.
A simple quest done in a split of a second. Having found the warehouse master [#1] in the quest Where Is Rick, you now need to take him back to the port city [#2]. You can do it quickly by using fast travel, or by passing through the jungle. Regardless of your choice, the mission ends when you reach the city.
 Walking usually means fighting monsters.
Note! If you inform Scarlett that you had found Rick, she'll give you some jewelry you can later sell with a good profit.
Rewards:
![Quest giver: Butch [#1] - Water Barrels - Antigua - Quests - Risen 2: Dark Waters - Game Guide and Walkthrough](https://game.lhg100.com/Article/UploadFiles/201512/2015121709173378.jpg)
Quest giver: Butch [#1]
This quest is part of: Ship's Equipment
When you arrive at the workers' camp, you'll meet a very nasty man - Butch. You'll need his help in supplying Captain Slayne's ship, so unfortunately you can't ignore him, the boor that he is. Threatening him won't do you any good since it won't open any additional dialogue options (and it still requires Intimidate at 90!). There's no way to convince him to help you out, therefore you have to get rid of him.
 The problem can be solved only with magic...
If on the Sword Coast you have sided with the Natives, approach the drunken water carrier, Miles [#2], and ask for his suggestions. Though he himself won't tell you anything useful, during the conversation you'll have an epiphany. Possess Butch with a voodoo doll, and the problem will be solved! You now have only to carry that plan out (see: Butch Has Got to Go). Cut a lock of his hair and use the voodoo altar in Emma's house [#3] to create the doll (if you don't have the necessary ingredients, buy them from the witch). Go back to the workers and bewitch the supervisor. In his body, order Miles to load water on the ship. That's all.
...or subterfuge.
If on the Sword Coast you have sided with the Inquisition, talk to Miles [#3] as well, and he'll hint that outsmarting Butch isn't anything particularly difficult. Go back to the supervisor and tell him that there is a treasure hidden in a nearby cave [#4]. He will go there at once, but not alone - he'll force you to go with him (see: Down into the Cave). When you get there, your lie will come to light and you'll have no other choice than to beat him up (see: Give Butch a Thrashing). Afterwards, return to Miles and ask him to resume the deliveries.
Rewards:
![Quest giver: Scarlett [#1] - Where Is Rick? - Antigua - Quests - Risen 2: Dark Waters - Game Guide and Walkthrough](https://game.lhg100.com/Article/UploadFiles/201512/2015121709173419.jpg)
Quest giver: Scarlett [#1]
Note! This quest will only be available if you have completed the mission Where Is My Ship? on the island of Tacarigua and A Treasure on Antigua on your current island.
When you leave your ship and head to the port city, you'll pass by a harlot - Scarlett [#1]. She'll engage you in a conversation and ask for your help with the warehouse master, Rick, whom you've previously helped with a treasure hunt. Apparently, the boy decided to try his luck and left to dig out the chest you had pointed him to. He's not been back for quite some time, so go and check on him.
 Not everyone is fit to be a hero.
You'll find Rick at a fire near the waterfall in the north part of the island [#2]. He'll complain that treasure hunting is not quite what he had expected. Terrified of the beasts living in the jungle, hungry and barely alive, he'll ask you for help in taking him back home. Your travel together is described in the There's No Place Like Home quest.
Note! If you talk to Rick first and only then to Scarlett, nothing will happen - the quest will still be completed.
Rewards:
![Quest giver: Henri [#1] - Wilson's Pistol - Antigua - Quests - Risen 2: Dark Waters - Game Guide and Walkthrough](https://game.lhg100.com/Article/UploadFiles/201512/2015121709173411.jpg)
Quest giver: Henri [#1]
This quest is part of: The Pawned Pistol
In order to convince Wilson to give you the cannons (see: The Cannon), you can either help him out in his love conquests (see: Pure Luxury), or recover his pistol from the gunsmith Henri [#1] (which is described below). If you've decided upon the second option, you'll have to win over the pistol maker first. The only way to do that is to defeat him in a duel (see: Shooting Match with Henri).
 The task is difficult, so you'll probably be shooting until very late into the night.
The talkative foreigner will take you to a place where you can shoot in peace [#2] (see: Follow Henri to the Shooting Range). With ten bullets you'll have to shoot down eight targets (hit the bomb and you'll fail immediately!). Afterwards - having demonstrated your accuracy and dexterity - Henri will sell you Wilson's pistol (for 1000 Gold - it's is fixed price), which you can now return to the blacksmith.
Note! Completing this mission does not exclude completing the Pure Luxury quest - you can do both, thus gaining more experience points.
Rewards:
![Quest giver: Captain Slayne [#1] - A Way Out of the Cave - The Isle of Thieves - Quests - Risen 2: Dark Waters - Game Guide and Walkthrough](https://game.lhg100.com/Article/UploadFiles/201512/2015121709173453.jpg)
Quest giver: Captain Slayne [#1]
This quest is part of: The Cunning Captain
After Slayne's betrayal in the Slayne's Treasure quest, you need get out of the collapsed cave. Take the corridor left of the chest you've just opened, and follow it until find yourself in a larger cavern. Here you'll have to fight two Cave Bats. Afterwards, you'll come across a fork in the road. Turn right to reach a small room [#2]. A few items are lying on the table, and next to them is a chest (requires Lockpicking at 40) and a bed (sleep in it to regenerate the Nameless Hero's health points).
 Fighting the Leviathan is no child's play!
When you wake up and loot the cave, go back to the fork and turn left this time. You'll face a Termite Worker. Behind it, there is another fork in the road. There are two Termite Workers and one Termite Warrior on the left - they're guarding a few items lying by the wall. The corridor on the right, on the other hand, leads to a large cave where a gigantic Leviathan [#3] is lying in wait. The best way to defeat it is by standing on a slope and firing the shotgun, but it's also good to distract its attention (for example by using a parrot) and delivering a few murderous blows when the opportunity presents itself.
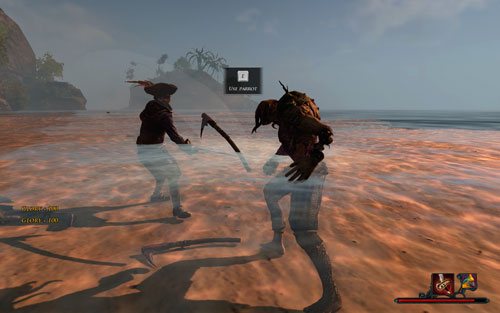 There is a whole army of Sunken Ones on the coast.
When you step outside, you'll come across a few Sunken Ones - kill them all to fight your way to freedom. On the way, you'll find a Message in a bottle connected with The Treasure in the Cave quest.
The mission will be completed when you can see the path leading from the beach to your ship [#4]. If you take a few steps towards it, it will turn out that the ship is long gone - it had sailed in an unknown direction. At this moment, the quest Marooned begins.
Rewards:
![Quest giver: Captain Slayne [#1] - Along the Beach - The Isle of Thieves - Quests - Risen 2: Dark Waters - Game Guide and Walkthrough](https://game.lhg100.com/Article/UploadFiles/201512/2015121709173526.jpg)
Quest giver: Captain Slayne [#1]
This quest is part of: Treasure Cave
A simple quest requiring you to follow Captain Slayne along the beach of the Isle of Thieves. After a conversation with the sly pirate, follow him to the east. You'll have to fight several Sand Devils and one Giant Crab there. Since you're not alone, the battle will be very easy and will quickly end with a victory.
If you don't wish to sully your sword, leave the fight to your companion - all Glory points he gets go to your account, so you don't have to exert yourself at all.
 The nice stroll will soon be over.
Continue after the captain when the monsters are gone. When you enter the jungle [#2], he'll stop to talk. The quest will then end.
Rewards:
![Quest giver: Jaffar [#1] - Build a Raft - The Isle of Thieves - Quests - Risen 2: Dark Waters - Game Guide and Walkthrough](https://game.lhg100.com/Article/UploadFiles/201512/2015121709173538.jpg)
Quest giver: Jaffar [#1]
This quest is part of: Marooned
This quest triggers when you arrive at the harbor [#1] and talk to the gnome Jaffar. Being a nice fellow, he'll suggest leaving the Isle of Thieves together. Since it's in your best interest too (see: Marooned), agree to his offer. With the little guy's help you'll be able to find Patty and your ship.
 Driftwood is easy to miss.
In order to build the raft, you need proper tools and materials. Luckily, your gnomish guide has an excellent knowledge of the topography of the island and will help you gather the necessary pieces (see: Follow Jaffar into the Jungle). Go through the jungle, defeating two Termite Workers while you're at it, and look inside the chest [#2] you'll stumble upon on the way (it holds a treasure map). From then on it's a piece of cake - follow the little guy to his hut [#3] and ask where you should look for the materials for the raft.
To build the desired vessel, you have to obtain:
The hardest part is of course the last one because it involves separate quests. It's usually better to begin with the The Thief Has Been Robbed quest since it's fairly easy - simply talk to Zeki [#6], enter the termite cave [#7] and take the crown from there (of course you'll return it to its owner later). The Lost Gnome is a bit more of a challenge, because after talking to Ulvi [#8] you'll be forced into saving his friend from Threatening Giant Crabs [#9]. This heroic deed will get you a Pitch-black pearl that Zeki [#10] is searching for (see: Lost in Translation). Each of these quests is described separately in the corresponding chapters of the guide.
 Vines are the small climbing plants pictured on the screen.
When you have all the items needed in building the raft, report back to Jaffar. As soon as the gnome hears about it, the quest Meet Jaffar on the Western Beach will be triggered.
Rewards:
![Quest giver: Captain Jaffar [#1] - Follow Jaffar into the Jungle - The Isle of Thieves - Quests - Risen 2: Dark Waters - Game Guide and Walkthrough](https://game.lhg100.com/Article/UploadFiles/201512/2015121709173638.jpg)
Quest giver: Captain Jaffar [#1]
This quest is part of: Build a Raft
Upon meeting the gnome in the harbor, he'll suggest to escape the island together. To do it, you'll need materials which will allow you to build a raft. Before that can happen though, Jaffar will take you to his home. Follow the little smartass, helping him fight Termite Workers (there will be two in your way).
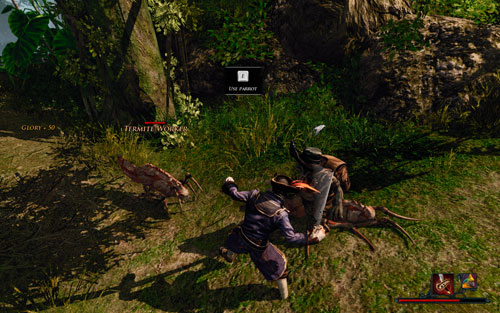 Jaffar is a poor warrior - help him out or he'll lose consciousness.
While going through the jungle, take notice of a chest you'll be passing by [#2] - there is a Map of the Isle of Thieves inside. Take it and continue forward until you reach the gnome's hut [#3]. At this moment, the quest ends.
Rewards:
![Quest giver: Nuri [#1] - Lost in Translation - The Isle of Thieves - Quests - Risen 2: Dark Waters - Game Guide and Walkthrough](https://game.lhg100.com/Article/UploadFiles/201512/2015121709173658.jpg)
Quest giver: Nuri [#1]
This quest is part of: Build a Raft
During your visit to the gnomes' village you'll sooner or later meet with Nuri - a funny little guy who unfortunately doesn't speak your language. Since he has three shirts required for the Build a Raft quest, you need to find a way to communicate with him. If you have Silver Tongue at least at 50, you can use the special dialogue option, but it won't help with anything. Regardless of whether you know the gnomes' language, or not, you're going to have to find something which will interest Nuri enough to trade the shirts for.
 The shaman will be helpful as usual.
To find out what the little guy was all about, talk to the leader of the village - Kaan [#2]. When you explain the problem to him, he'll answer that the young gnome desires small, black, round objects. The description perfectly matches those of a black pearl. But the mean little fellow won't be satisfied with just any pearl - he wants the blackest of all pearls. Such rarity can only be bought from the tradesman Ulvi [#3] during The Lost Gnome quest. Have a chat with him to learn that his friend had gone missing somewhere on the beach [#4]. If you help the tradesman and save his close one from Threatening Giant Crabs, you'll be able count on his support.
The only thing you have to do is talk to the saved gnome (after disposing of the crabs, naturally - see: The Lost Gnome), take the Gnome's feather from him, and bring it to Ulvi. The Pitch-black pearl will be yours.
 Ulvi's support turns out to be invaluable.
Now you only have to hand the newly obtained trinket to Nuri. When you do it, the quest will be over and you'll receive a shirt for the Build a Raft quest.
Note! If you completed The Lost Gnome quest before starting this one, it won't make any difference - the option to give the pearl to Nuri will simply appear straight away.
Rewards:
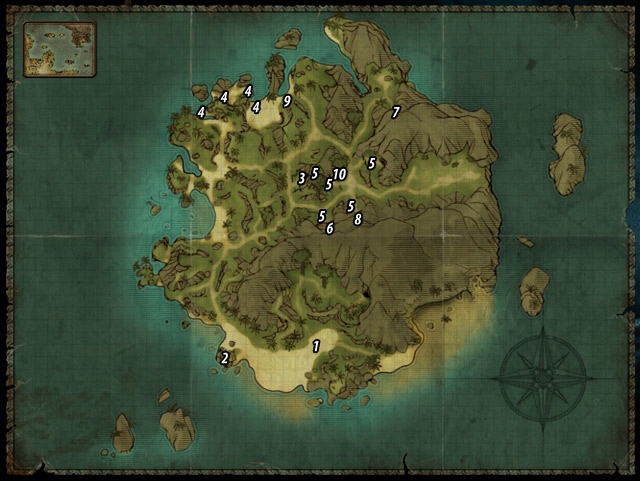
This quest is part of: The Cunning Captain
The quest will be activated on the beach after you leave the cave Slayne had locked you in, and take a few steps in the direction of your ship [#1]. As you'll soon see, your ship has been hijacked - it's nowhere in sight. Therefore, you have to leave the island and find your boat. This, however, won't be easy - the only intelligent species living on the island are gnomes who have a very unfavorable opinion.
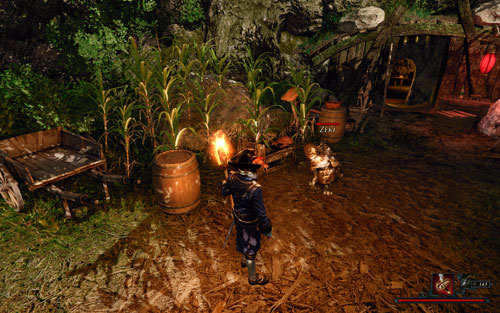 Gnomes are surprisingly friendly creatures.
Head west until you reach the harbor where you'll meet the first of them - Jaffar [#2]. The little slyboots turns out to be quite a friendly and helpful creature - he's biggest asset, though, is that he wants to leave the Isle of Thieves. Since you two share the same goal, you should join forces. Follow the little guy to his home [#3] and help him build a boat on which you'll escape this tropical paradise (quest: Build a Raft). To build it, you need to find:
The hardest part is of course the last one because it involves separate quests. It's usually better to begin with the The Thief Has Been Robbed quest since it's fairly easy - simply talk to Zeki [#6], enter the termites' cave [#7] and take a crown from there (of course you'll return it to its owner later). The Lost Gnome is a bit more of a challenge, because after talking to Ulvi [#8] you'll be forced into saving his friend from Threatening Giant Crabs [#9]. This heroic deed will get you a Pitch-black pearl that Nuri [#10] is searching for. Each of these quests is described separately in the corresponding chapters of the guide.
 Ahoy, adventure!
When you have all the items needed in building the raft, report back to Jaffar. As soon as the gnome hears about it, the quest Meet Jaffar on the Western Beach will be triggered.
Rewards:
![Quest giver: Jaffar [#1] - Meet Jaffar on the Western Beach - The Isle of Thieves - Quests - Risen 2: Dark Waters - Game Guide and Walkthrough](https://game.lhg100.com/Article/UploadFiles/201512/2015121709173770.jpg)
Quest giver: Jaffar [#1]
This quest is part of: Marooned
The quest begins right after you complete Build a Raft. Your goal is plain and simple - meet with Jaffar in the agreed location [#2]. Leave the gnomes' village and head west until you get to the beach with the raft on it.
 A really beautiful view.
Note! If you decide upon leaving the island, you won't be able to return to it for a longer while! Finish all started quests first.
Rewards:
![Quest giver: Captain Slayne [#1] - Slayne's Treasure - The Isle of Thieves - Quests - Risen 2: Dark Waters - Game Guide and Walkthrough](https://game.lhg100.com/Article/UploadFiles/201512/2015121709173722.jpg)
Quest giver: Captain Slayne [#1]
This quest is part of: The Cunning Captain
The quest begins the moment the Treasure Cave ends, which is upon entering the cave [#1]. Take a few steps until you find a chest in the corner [#2]. Approach it to try to open it. A cutscene will be triggered in which Slayne decides to betray you by collapsing the entrance. Apparently, you have fallen into a trap.
 As you can see, Slayne's infamy is truly justified.
The quest will be over once the movie ends, and A Way Out of the Cave will begin. You're going to have to go through a dangerous underground filled with all kinds of monsters - be prepared for a tough struggle.
Rewards:
![Quest giver: Captain Slayne [#1] - The Cave Is Not Far Off - The Isle of Thieves - Quests - Risen 2: Dark Waters - Game Guide and Walkthrough](https://game.lhg100.com/Article/UploadFiles/201512/2015121709173833.jpg)
Quest giver: Captain Slayne [#1]
This quest is part of: Treasure Cave
The present quest is the last stage of the trip with Captain Slayne (see: Treasure Cave). After leaving the jungle (see: The Way Up), take a short walk towards the cave [#2]. Before entering it, though, you have to defeat four Termite Workers and two Termite Warriors. With the pirate's help, it won't be a problem. You don't really have to take part in the fight if you don't want to - Slayne's Glory points go to your account anyway.
When the threat is over, talk to the captain and the quest will be completed. Another will begin at once - Slayne's Treasure. Prepare for a serious twist!
 A few termites are no match for two pirates.
Rewards:
![Quest giver: Kaan [#1] - The Gnome Eater - The Isle of Thieves - Quests - Risen 2: Dark Waters - Game Guide and Walkthrough](https://game.lhg100.com/Article/UploadFiles/201512/2015121709173892.jpg)
Quest giver: Kaan [#1]
You receive this mission from the gnomes' shaman who can be met on the edge of the village, just outside the cave. He'll tell you (he speaks the human language fluently) about a menacing threat lurking in the east of the island [#2]. A giant beast has claimed it as its hunting grounds, and it has a particular taste for gnomes. If you wish be of service to the little smartass, help him eliminate the threat.
 The battle is not easy - make sure you come prepared.
Leave the gnomes' village and head west - just follow the path. The monster can be seen even from a long distance - it's really gigantic. Since he moves very fast, you won't be able to shoot it with the shotgun (with the "hit and run" method) - Dirty Tricks are much more successful, especially the number with the parrot (it will allow you to strike a few blows). After it's defeated, loot its lair (there is a couple of useful stuff), and go back to Kaan. The bigheaded gnome will be so pleased as to give you his Flask - one of the legendary items.
Note! If you killed the monster before talking to the shaman, nothing happens - the quest will still be completed.
Rewards:
![Quest giver: Ulvi [#1] - The Lost Gnome - The Isle of Thieves - Quests - Risen 2: Dark Waters - Game Guide and Walkthrough](https://game.lhg100.com/Article/UploadFiles/201512/2015121709173804.jpg)
Quest giver: Ulvi [#1]
This quest is part of: Build a Raft
You receive this quest when you enter Ulvi's hut [#1] and agree to help him find his missing friend. It turns out that the foolish gnome, Kalil, went to the beach alone. It's a very dangerous place and Ulvi is very worried about him. Naturally, it's your job to bring the missing gnome back.
 Apparently, the regular crabs are less dangerous.
Leave the village and take the path north until you arrive at a beach [#2]. Expect to fight four Threatening Giant Crabs there. Try to take them out one at a time, and you should be fine. Once they're in the past, approach Kalil, who is standing on the hill [#3], and tell him he can go back home now. Happy to hear it, he'll give you the Gnome's feather. The quest ends right there, and you're free to trade with Ulvi (he has a treasure map!). Report back to him and tell him about the gnome's gift. You'll receive the Pitch-black pearl (required in the Lost in Translation quest) and two Shirts (for the Build a Raft quest).
Rewards:
![Quest giver: Captain Zeki [#1] - The Thief Has Been Robbed - The Isle of Thieves - Quests - Risen 2: Dark Waters - Game Guide and Walkthrough](https://game.lhg100.com/Article/UploadFiles/201512/2015121709173880.jpg)
Quest giver: Captain Zeki [#1]
This quest is part of: Build a Raft
The quest is received from a panicky gnome just as you pass by his home [#1]. The little guy will run out in front of his hut and ask you for help - he has been robbed by Termites and is desperate to get his property back. The lost item is not any trinket, but a real golden Crown. Loosing such a priceless artifact is a great dishonor to the gnome. If you want to help him, you need to go to the Termites' cave [#2].
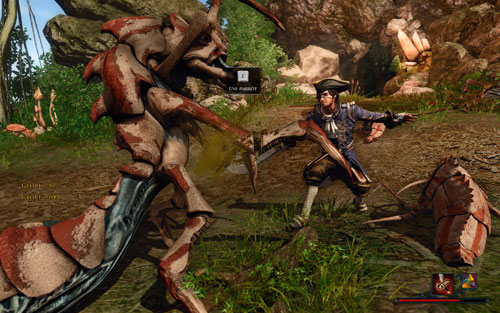 You're in for a battle with several dozen enemies - kill them one at a time!
Leave the village and head north (use the path). A few steps later you'll be attacked by a whole army of Termites - both the workers and the warriors. An equally warm greeting awaits you at the entrance to the cave - try to draw them out individually and kill them one at a time. When the bug infestation is over, look after the Crown, which is lying in the corner, and take it back to Zeki. The quest will be closed and you'll receive 3 shirts needed for the Build a Raft mission.
Note! During the exploration of the cave you'll come across a fork in the road - the path on the right will take you to the Crown, the path on the left - to a locked chest (difficulty 40). Inside you'll find the blade of a legendary weapon - the Wave Dancer. How to find the sword's second fragment is described in a proper chapter of the guide.
Rewards:
![On the beach beyond the cave Slayne had locked you in you should find a Message in a bottle [#1] - The Treasure in the Cave - The Isle of Thieves - Quests - Risen 2: Dark Waters - Game Guide and Walkthrough](https://game.lhg100.com/Article/UploadFiles/201512/2015121709173929.jpg)
On the beach beyond the cave Slayne had locked you in you should find a Message in a bottle [#1]. Read it to discover that a treasure had been hidden in the cave. Go back to where you fought the Leviathan and dig out the chest [#2] buried there.
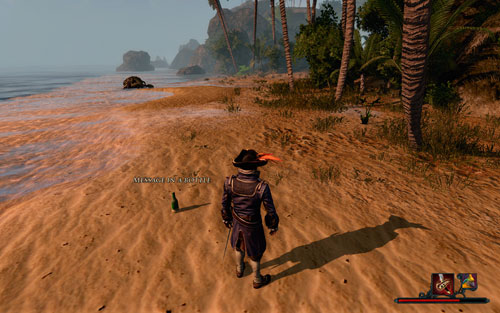 The bottle stands out.
It will turn out that inside, among other valuables, there is also a legendary item - the Parrot's Wing (+10 to Throwing Weapons). Take it and you'll complete not only the present quest, but also the one referring to the newly found item (quest: The Parrot's Wing).
Rewards:

Before completing this quest you first need to close The Treasure in the Valley of the Gnome Eater. To this end, buy a treasure map from Ulvi [#1] and dig out the first treasure chest. There is another drawing at the bottom of it - this time leading to the present treasure. Reaching the treasure spot may prove a bit troublesome as it has you going along the northern beach [#3] down to the gorge [#4].
 This is the only right way.
Be ready for a fight on the beach - there are three Sand Devils to get rid of here. Afterwards, dig out the chest [#4] and enjoy the treasures.
Rewards:
![If you completed The Lost Gnome quest for Ulvi [#1], you'll be able to trade with the fearful tradesman - The Treasure in the Valley of the Gnome Eater - The Isle of Thieves - Quests - Risen 2: Dark Waters - Game Guide and Walkthrough](https://game.lhg100.com/Article/UploadFiles/201512/2015121709173969.jpg)
If you completed The Lost Gnome quest for Ulvi [#1], you'll be able to trade with the fearful tradesman. Apart from a pile of not so useful items, there is also a treasure map in the little guy's assortment (costs 100 Gold). Since the treasure is worth much more, the investment pays off.
 The treasure spot is visible even at night.
The map clearly points to the Gnome Eater's hunting grounds, from the quest by the same name. Go to where the sketch leads you [#2] and dig out the chest. Interestingly enough, you'll find another map among other valuables - this time leading to a chest from The Treasure in the Sea quest.
Rewards:
![Quest giver: Captain Slayne [#1] - The Way Up - The Isle of Thieves - Quests - Risen 2: Dark Waters - Game Guide and Walkthrough](https://game.lhg100.com/Article/UploadFiles/201512/2015121709174033.jpg)
Quest giver: Captain Slayne [#1]
This quest is part of: Treasure Cave
The second stage of the stroll with Slayne (see: Treasure Cave) shouldn't be any problem to you. Expect two Sand Devils after entering the jungle - not the most dangerous of creatures, which you must have killed an army of by now. If you don't feel like fighting them, leave it to Slayne - his Glory points count as yours. He's strong enough to be able to deal with them without your help.
Afterwards, continue on the path up.
 The jungle is disturbingly quiet. Too quiet.
When you reach the cavern [#2] Slayne has led you to, the quest will end and you'll receive the next one: The Cave Is Not Far Off. Approach the dark catacombs.
Rewards:
Quest giver: Captain Slayne [#1]
This quest is part of: The Cunning Captain
You receive this quest right upon arriving at the Isle of Thieves, after talking to Captain Slayne. In a few words he'll explain that the land is inhabited by Gnomes - creatures not particularly dangerous, but very annoying. Equipped with this knowledge, follow the captain (quest: Along the Beach), eliminating several Sand Devils and a Giant Crab on the way. When you reach the edge of the jungle, the pirate will stop to chose a further path [#2] (quest: The Way Up).
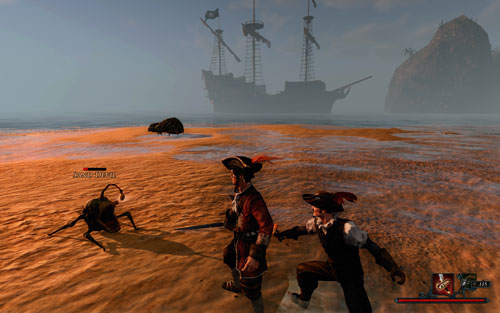 The journey won't go without trouble.
Take care of another group of Sand Devils, and head towards the entrance to a cave where there are a few Termites waiting for you [#3] (quest: The Cave Is Not Far Off). Once you enter the cave [#4], the quest will be completed and another one will begin - Slayne's Treasure.
Rewards:
![Quest giver: Custodio [#1] - Access to the Archives - Caldera II - Quests - Risen 2: Dark Waters - Game Guide and Walkthrough](https://game.lhg100.com/Article/UploadFiles/201512/2015121709174082.jpg)
Quest giver: Custodio [#1]
This quest is part of: Following Garcia's Trail
This quest can only be received if you've decided to do the Errand Boy mission which has gotten you access to the cathedral [#2]. There, talk about Garcia to Custodio [#1]. The man will relate how the pirate had visited the library to the right [#3]. In order to enter it, though, you need a special permission. The only person who can give it to you is Custodio himself. Inform him that you're a spy for the Inquisition and you came to Caldera to obtain Garcia's artifact (those are the only correct dialogue options!). You'll be able to persuade him if your Silver Tongue is as least 80.
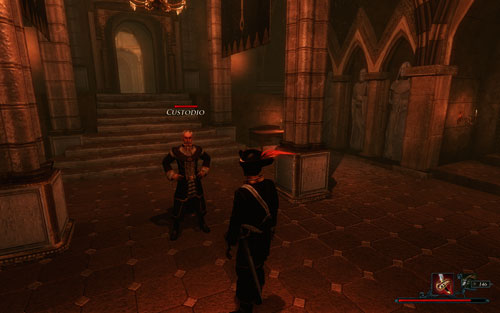 By word...
If you're not eloquent enough, you can apply a forceful solution. Head for the library, using the corridor on the right. When a Guard stops you [#3], challenge him to a duel. If you win, you'll be free to use all the resources available inside the room.
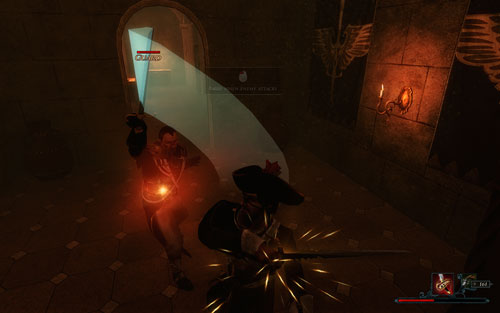 ...or sword.
Regardless of the chosen way, the quest will be completed the moment the guardsman lets you inside the library. Approach the desk in the corner of the room and read the scroll titled High Council Rulings. This is how you end the Following Garcia's Trail quest and begin another on - Maracai Bay.
Note! If you lose the fight with the guardsman outside the library, you'll be able to repeat it again (any number of times).
Rewards:
![Quest giver: Azuro [#1] - Errand Boy - Caldera II - Quests - Risen 2: Dark Waters - Game Guide and Walkthrough](https://game.lhg100.com/Article/UploadFiles/201512/2015121709174112.jpg)
Quest giver: Azuro [#1]
This quest is part of: Following Garcia's Trail
To trigger this quest, you have to talk to at least three people from the following list after a conversation with Mauregato [#2]:
 And here is you becoming a spy. Again.
When this stage is over, approach the Servant [#8], who is standing by the cathedral. You'll be asked to contact his master, Azuro [#1], as soon as you can. You can follow him to the mansion (which activates the Follow the Servant quest), or go there on your own without paying attention to the youngster. Regardless of your choice, the present quest will be triggered when you agree to Azuro's plan. It involves two sidequests:
 Stealing pays off.
With both items in your inventory, go back to Azuro. He'll give you a forged Pass which will allow you to enter the cathedral (put on the messenger's clothes first!). The quest ends and you're left with finishing the main one - Following Garcia's Trail.
Rewards:
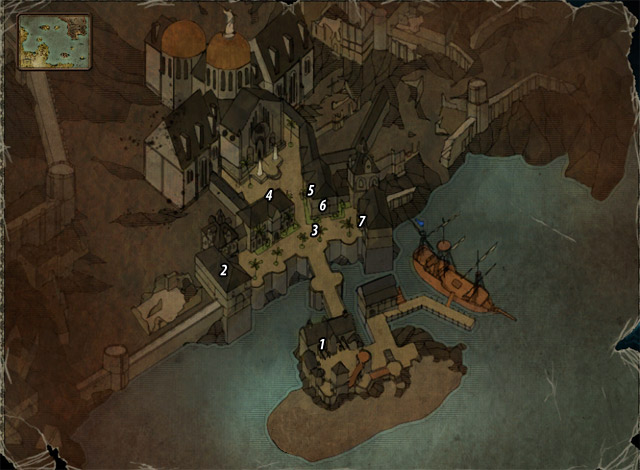
This quest is part of: Following Garcia's Trail
The quest isn't activated in the regular way, and it's completely optional. To trigger it, you have to talk to at least three people from the following list after a conversation with Mauregato [#2] (see: Mauregato!):
When this stage is over, approach the Servant [#7], who is standing by the cathedral. You'll be asked to contact his master, Azuro [#8], as soon as you can. The quest starts if you agree to follow the helper.
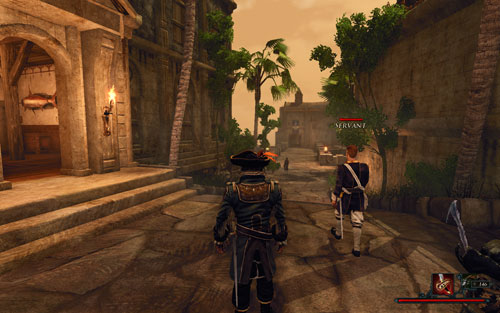 Another miniquest - gets you a minireward.
The walk with the Servant isn't too long. You'll reach Azuro's mansion [#8] practically in a moment. The quest will be completed once you go inside. Talk to the host to activate the Errand Boy quest.
Rewards:
![Quest giver: Carlos [#1] - Following Garcia's Trail - Caldera II - Quests - Risen 2: Dark Waters - Game Guide and Walkthrough](https://game.lhg100.com/Article/UploadFiles/201512/2015121709174213.jpg)
Quest giver: Carlos [#1]
This quest is part of: The Greedy Captain
You receive this quest from Carlos when you report to him after coming back from the Sword Coast (see: A New Ship). Your goal is to find Garcia - the pirate who owns another Titan artifact. Though it seems easy enough, in truth it involves a whole lot of subquests you'll be forced to complete. Even the first one, Mauregato!, can be finished in two different ways, depending on the faction you've sided with. Leave the Crystal Fortress and go to Mauregato's house [#2].
If on the Sword Coast you have sided with the Natives, you can obtain Mauregato's Wig and use it to possess him. Go to the east part of his house and take the Claim ticket [#3]. Show the document to the merchant Pantaleo [#4] (if you don't have it, you can simply steal the Wig from him, as long as your Thievery is at least 75). Regardless of the chosen option, the item will be yours. Lastly, go to the second floor of the hotel and use Di Silva's altar [#5] to create a voodoo doll. With it, return to Mauregato and use your magic.
 The Inquisition's city could use some charm.
In the body of the grumpy politician, go to the cathedral [#6] and talk to Custodio [#9] there, who will inform you about a council meeting. Then, tell the man on your right, Puco [#10] how he should vote (for or against the alliance with Mara). Sneak into Mauregato's office [#11] to steal the Incriminating letter (you need to do it before going to the library!). In the library [#12] read the scroll with High Council Rulings - it will end the Following Garcia's Trail quest and start a new one - Maracai Bay.
If you want to finish the Mauregato! quest, enter Godin's office [#13] (opposite the reading-room) and tell him about the meeting. Meet with all the politicians in the main hall and carry out the voting. Unless you vote for the alliance with Mara and then reveal your treachery, the outcome of the voting will have no effect on the plot. Otherwise, you'll be killed and the quest will be cancelled! If that's what's happened, the only other way to solve the problem of Garcia is to do the Errand Boy quest.
If you want to disgrace Mauregato, steer the voting into not supporting Mara, and then admit to treachery. The man under your control will lose his position in favor of his opponent - Azuro.
 During the voting you can utterly humiliate Mauregato.
If on the Sword Coast you have sided with the Inquisition, the Mauregato! quest will end the moment you talk to man in question. Since you weren't able to gain anything, ask the townspeople about the wanted pirate (see: Follow the Servant). Thanks to that you'll be approached by the Servant Azuro [#7], who will let you talk to his master [#8]. This opens the Errand Boy quest. It's divided into two subquests:
 The signet ring lies in Mauregato's bedroom.
With both items in your possession, report back to Azuro. He'll give you a forged Pass which will allow you to enter the cathedral (put on the messenger's clothes first!). Inside, talk about Garcia to Custodio [#9]. This way you'll discover that the librarian Cassandra [#14] had talked with the pirate about books. Meet the woman, then (see: Scrolls, Books and Shelves), buy a key to Mauregato's office from her (costs 500 Gold) and steal the Incriminating letter from there [#11]. Next, enter the library itself (see: Access to the Archives) and read the scroll titled High Council Rulings. At that moment, the Following Garcia's Trail will end, and another one will begin - Maracai Bay.
Rewards:
 Caldera
 Maracai Bay
This quest is part of: The Greedy Captain
You will receive this quest the moment you complete Following Garcia's Trail, as soon as you read the High Council Rulings scroll in the library of the cathedral [#1]. You'll learn that the wanted pirate took refuge in the Maracai Bay. Board your ship and head for the scenic land.
When you arrive, a man named Valdez [#2] will stop you - he's the administrator of this area. No matter which dialogue option you choose, he'll give you new quests: The Expedition and The Hidden Valley. Complete them both.
 Time to go to the land of the savages!
The first mission is simple enough - go to the Maracai village and talk to Corrientes. To reach it, circle around the temple from the west, and then use the path going south. If you took a companion with you (whichever), he or she will notice tracks on the ground - that's how you'll know which way to go. There will be plenty of Firebirds in your way - the first batch will attack you right at the temple [#3], and they will accompany you practically for the rest of your way. After you cross under a rope bridge (it's the only right way!) and go south, you'll have to fight Claw Monkeys which have claimed this area as their hunting ground. If you take a few steps towards the hill, you'll come across an old camp [#4]. You can sleep and regenerate your health here - you'll need it if you want to venture forth into the jungle.
 Do all Inquisition leaders have to be so fat?
When you're ready to go, turn east and pass an old temple [#5] (there is The Graves of the Ancestors quest inside). Turn right at the crossroads and head towards a lake [#6] (you can find Hanu there, who will give you The Beast in the Lake quest). Climb up the path where the Natives' camp is [#7]. There, talk to Corrientes, who can be found in the hut on the right. This is when The Expedition quest ends.
 Suicide mission in progress.
Completing the second quest is much more time consuming. There are two ways of doing it - and the choice has an influence over subsequent events. The first option is saving Angus [#8] (see: The Deserter) - if you take him back to Valdez and talk to the Inquisitor, you'll learn the true identity of Corrientes [#7] (see: Garcia's Masquerade Uncovered). When you next see him, the Nameless Hero will automatically draw his weapon and attack the impostor. Choosing this option is quite unfortunate because it means fighting with every one of Garcia's servants all at once - including the Natives which you'll have to stun (you'll kill the pirates, therefore cancelling their quests!). Since the battle is extremely difficult, don't forget to bring your companions along, and what's more, flee the village - you have zero chances while you're within its borders! Only when you get back you can try to lure your enemies, one by one, outside and take care of them there. Once you've dealt with them, kill Corrientes and take his Blood of the Ancestors - it will allow you to pass through the wall of fire (see: The Barrier of Flames). You don't have to do it, though - the Maracai Bay quest, together with The Greedy Captain, will end as soon as you kill Corrientes and claim his Thief's Bone Hand (one of the Titan artifacts).
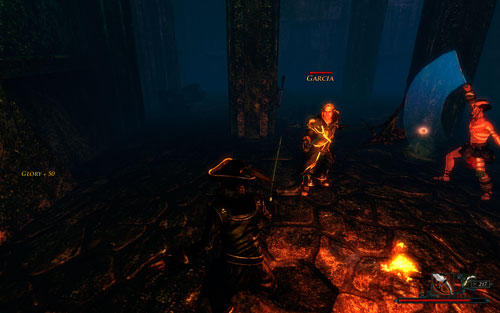 Your companions won't help you against Garcia.
The second option involves talking to the shaman Osamu [#9]. When you report to him after completing the Secret Entrance Found quest and talking to Corrientes, the pirate's deception will come into light (see: Garcia's Masquerade Uncovered). The Native will give you the Blood of the Ancestors, which will allow for a pursuit. Your destination is a wall of fire [#10] in the cave south-east of the village. You'll have to fight with two of the pirate's men - Egas and Palomo. After you kill them, go through the magical barrier (sadly, you can't take your companions with you). There is a Ghoul to defeat on the other side, and a little further after him - a Grave Spider. In the location with the latter, turn 180 degrees, climb the upper level and approach the wall with the door forged in it. There is a button at the top which will open it. This passage will allow you to go back to the companions you had to leave in front of the the flame barrier, and continue on with them.
 Mara doesn't like traitors.
Leave the cave by taking the corridor on the right of the Grave Spider. When you see the sunlight [#10], the present quest will be completed. Now you need to find Corrientes, hiding inside the fire temple [#11]. Watch out for Termites and Firebirds in the area when you try to enter it, but most of all - for the lethal trap set by the stairs [#12]. You'll meet the impostor inside the holy building. After a short movie, you'll have to fight not only him, but also a large group of Sand Devils. If you have a companion with you, he'll help you eliminate the pests, but the main foe is all on you. After you kill him, take his Thief's Bone Hand and the quest will be completed (together with The Greedy Captain).
Rewards:
![Quest giver: Carlos [#1] - Mauregato! - Caldera II - Quests - Risen 2: Dark Waters - Game Guide and Walkthrough](https://game.lhg100.com/Article/UploadFiles/201512/2015121709174353.jpg)
Quest giver: Carlos [#1]
This quest is part of: Following Garcia's Trail
Leave the Inquisition's fortress through the door on Carlos' right, and pass the bridge. You will be stopped by a guard who'll tell you that Mauregato's house is just on your left [#2]. A guard will stop before you can go in. If your Silver Tongue is 55 at least, you can persuade him to your point of view, though even without diplomatic resources the way to the apartment is open for you.
Inside, you will be approached by Mauregato's Servant who wishes to know what brings you here. It doesn't matter what you tell him, you'll still be free to talk to the man upstairs. Unfortunately, regardless of the chosen dialogue option, you'll be gotten rid of. This means you need to find another way.
 Your knowledge of magic will grant you a quick solution.
If on the Sword Coast you have sided with the Natives, you can obtain Mauregato's Wig and use it to possess him. Go to the east part of his house and take the Claim ticket [#3]. Show the document to the merchant Pantaleo [#4] (if you don't have it, you can simply steal the Wig from him, as long as your Thievery is at least 75). Regardless of the chosen option, the item will be yours. Lastly, go to the second floor of the hotel and use Di Silva's altar [#5] to create a voodoo doll. With it, return to Mauregato and use your magic.
 A little magic won't hurt anyone.
In the body of the grumpy politician, go to the cathedral [#6] and talk to Custodio [#9] there, who will inform you about a council meeting. Then, tell the man on your right, Puco [#10] how he should vote (for or against the alliance with Mara). Sneak into Mauregato's office [#11] to steal the Incriminating letter (you need to do it before going to the library!). In the library [#12] read the scroll with High Council Rulings - it will end the Following Garcia's Trail. Enter Godin's office [#13] (opposite the reading-room) and tell him about the meeting. Meet with all the politicians in the main hall and carry out the voting. Unless you vote for the alliance with Mara and then reveal your treachery, the outcome of the voting will have no effect on the plot. Otherwise, you'll be killed and the quest will be cancelled! If that's what's happened, the only other way to solve the problem of Garcia is to do the Errand Boy quest.
If you want to disgrace Mauregato, steer the voting into not supporting Mara, and then admit to treachery. The man under your control will lose his position in favor of his opponent - Azuro. The quest ends when you go back to your body.
 During the voting you can utterly humiliate Mauregato.
If on the Sword Coast you have sided with the Inquisition, the Mauregato! quest will end the moment you talk to man in question. Since you weren't able to gain anything, ask the townspeople about the wanted pirate (see: Follow the Servant). When Azuro's Servant [#7] stops you and you talk to his master [#8], you'll start the Errand Boy quest, which is the proper solution to the current problem.
Two things to sum up:
Rewards:
![Quest giver: Azuro [#1] - Messenger's Attire - Caldera II - Quests - Risen 2: Dark Waters - Game Guide and Walkthrough](https://game.lhg100.com/Article/UploadFiles/201512/2015121709174487.jpg)
Quest giver: Azuro [#1]
This quest is part of: Errand Boy
An easy quest done as a favor to Azuro. If you are sided with the Inquisition or failed the Natives' quest (see: Mauregato!), you're going to have to get your hands on a Messenger's attire and a Signet ring. These two items will grant you access to the cathedral where the city's politicians are residing.
 The tailor will be delighted - you somewhat less.
Obtaining the Messenger's attire is very easy - buy it from the tailor Pantaleo [#2] (costs 500 Gold). Sadly, there isn't any other way of getting it except for the purchase - you'll have procure that sum from somewhere. If you're short on cash, you can complete the Three New Recruits quests which repair some of your budget.
Rewards:
![Quest giver: Cassandra [#1] - Scrolls, Books and Shelves - Caldera II - Quests - Risen 2: Dark Waters - Game Guide and Walkthrough](https://game.lhg100.com/Article/UploadFiles/201512/2015121709174475.jpg)
Quest giver: Cassandra [#1]
This quest is part of: Following Garcia's Trail
You can receive this quest only on the condition that you had completed the Errand Boy mission and was permitted into the library [#2]. Once inside, talk about Garcia to Custodio [#3]. You'll learn that the pirate you're after had been talking with the librarian, Cassandra, and then went to the scrolls' storage area. Ask the woman about her recent visitor.
 If all librarians could look like that...
Leave the hall using the entrance on the left, and then turn right. Ask the nimble librarian about the pirate. Since she's bored, she'll want to flirt with you, so let her (Silver Tongue answers don't have any effect on the conversation). Eventually you'll reach a point where you'll have to solve a mathematical puzzle concerning books. The correct answer is: two shelves and fifteen free spaces. When you choose it, the quest will be triggered and immediately completed. You can continue your investigation (see: Following Garcia's Trail) and buy a Key to Mauregato's room from Cassandra (for 500 Gold).
Note! Even you make a mistake in your calculations and give an incorrect answer, it won't block the possibility of buying the key.
Rewards:
![Quest giver: Carlos [#1] - The Greedy Captain - Caldera II - Quests - Risen 2: Dark Waters - Game Guide and Walkthrough](https://game.lhg100.com/Article/UploadFiles/201512/2015121709174494.jpg)
Quest giver: Carlos [#1]
This quest is given to you by Carlos when you talk to him about the death of Captain Steelbeard (see: A New Ship). Your goal is to track down Captain Garcia, who has been last seen on Caldera. For this, follow the Following Garcia's Trail quest, which is described further in the guide (and below). When you complete it, you'll find out that the wanted corsair has taken refuge in the Maracai Bay (see: Maracai Bay). Find him, kill him and take the Thief's Bone Hand from him - it's an artifact that will allow you to kill Mara.
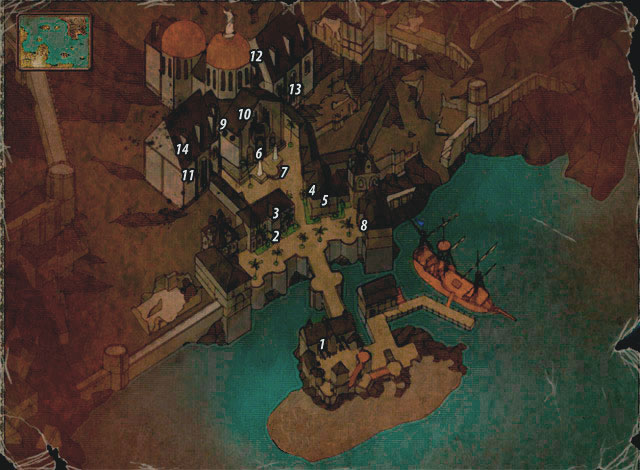
Your goal is to find Garcia - the pirate who owns another Titan artifact. Though it seems easy enough, in truth it involves a whole lot of subquests you'll be forced to complete. Even the first one, Mauregato!, can be finished in two different ways, depending on the faction you've sided with. Leave the Crystal Fortress and go to Mauregato's house [#2].
If on the Sword Coast you have sided with the Natives, you can obtain Mauregato's Wig and use it to possess him. Go to the east part of his house and take the Claim ticket [#3]. Show the document to the merchant Pantaleo [#4] (if you don't have it, you can simply steal the Wig from him, as long as your Thievery is at least 75). Regardless of the chosen option, the item will be yours. Lastly, go to the second floor of the hotel and use Di Silva's altar [#5] to create the voodoo doll. With it, return to Mauregato and use your magic.
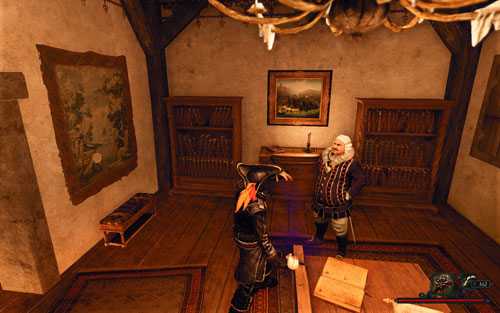 Clerks are susceptible to voodoo magic.
In the body of the grumpy politician, go to the cathedral [#6] and talk to Custodio [#9] there, who will inform you about a council meeting. Then, tell the man on your right, Puco [#10] how he should vote (for or against the alliance with Mara). Sneak into Mauregato's office [#11] to steal the Incriminating letter (you need to do it before going to the library!). In the library [#12] read the scroll with High Council Rulings - it will end the Following Garcia's Trail quest and start a new one - Maracai Bay.
If you want to finish the Mauregato! quest, enter Godin's office [#13] (opposite the reading-room) and tell him about the meeting. Meet with all the politicians in the main hall and carry out the voting. Unless you vote for the alliance with Mara and then reveal your treachery, the outcome of the voting will have no effect on the plot. Otherwise, you'll be killed and the quest will be cancelled!
If you want to disgrace Mauregato, steer the voting into not supporting Mara, and then admit to treachery. The man under your control will lose his position in favor of his opponent - Azuro.
 You can also solve the quest by deception.
If on the Sword Coast you have sided with the Inquisition, the Mauregato! quest will end the moment you talk to man in question. Since you weren't able to gain anything, ask the townspeople about Garcia (see: Follow the Servant). Thanks to that you'll be approached by the servant Azuro [#7], who will let you talk to his master [#8]. This opens the Errand Boy quest. It's divided into two subquests:
 Be careful not to get caught!
When you have both items, report back to Azuro. He'll give you a forged Pass which will allow you to enter the cathedral (put on the messenger's clothes first!). Inside, talk about Garcia to Custodio [#9]. This way you'll discover that the librarian Cassandra [#14] had talked with the pirate about books. Meet the woman, then (see: Scrolls, Books and Shelves), buy a key to Mauregato's office from her (costs 500 Gold) and steal the Incriminating letter from there [#11]. Next, enter the library itself (see: Access to the Archives) and read the scroll titled High Council Rulings. At that moment, the Following Garcia's Trail will end, and another one will begin - Maracai Bay.
![When you arrive, a man named Valdez [#1] will stop you - he's the administrator of this area - The Greedy Captain - Caldera II - Quests - Risen 2: Dark Waters - Game Guide and Walkthrough](https://game.lhg100.com/Article/UploadFiles/201512/2015121709174518.jpg)
When you arrive, a man named Valdez [#1] will stop you - he's the administrator of this area. No matter which dialogue option you choose, he'll give you new quests: The Expedition and The Hidden Valley. Complete them.
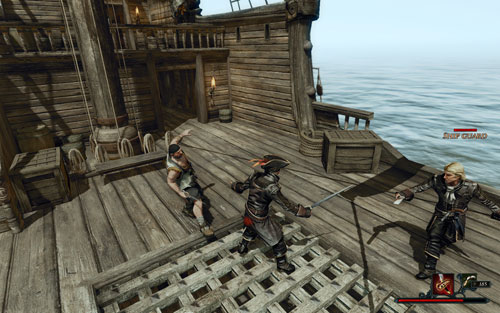 You won't find Garcia even on his own ship.
The first mission is simple enough - go to the Maracai village and talk to Corrientes. To reach it, circle around the temple from the west, and then use the path going south. If you took a companion with you (whichever), he or she will notice tracks on the ground - that's how you'll know which way to go. There will be plenty of Firebirds in your way - the first batch will attack you right at the temple [#2], and they will accompany you practically for the rest of your way. After you cross under a rope bridge (it's the only right way!) and go south, you'll have to fight Claw Monkeys which have claimed this area as their hunting ground. If you take a few steps towards the hill, you'll come across an old camp [#3]. You can sleep and regenerate your health here - you'll need it if you want to venture forth into the jungle.
 A bit like Heart of Darkness, isn't it?
When you're ready to go, turn east and pass an old temple [#4] (there is The Graves of the Ancestors quest inside). Turn right at the crossroads and head towards a lake [#5] (you can find Hanu there, who will give you The Beast in the Lake quest). Climb up the path where the Natives' camp is [#6]. There, talk to Corrientes, who can be found in a hut on the right. This is when The Expedition quest ends.
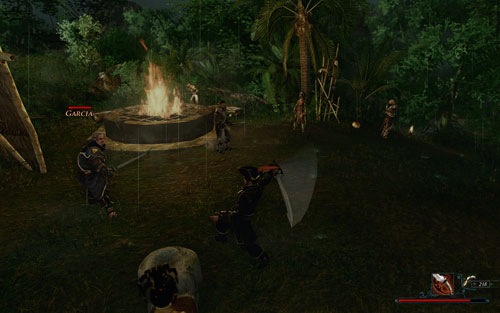 There's nothing like fighting multiple enemies all at once.
Completing the second quest is much more time consuming. There are two ways of doing it - and the choice has an influence over subsequent events. The first option is saving Angus [#7] (see: The Deserter) - if you take him back to Valdez and talk to the Inquisitor, you'll learn the true identity of Corrientes [#6] (see: Garcia's Masquerade Uncovered). When you next see him, the Nameless Hero will automatically draw his weapon and attack the impostor. Choosing this option is quite unfortunate because it means fighting with every one of Garcia's servants all at once - including the Natives which you'll have to stun (you'll kill the pirates, therefore cancelling their quests!). Since the battle is extremely difficult, don't forget to bring your companions along, and what's more, flee the village - you have zero chances while you're within its borders! Only when you get back you can try to lure your enemies, one by one, outside and take care of them there. Once you've dealt with them, kill Corrientes and take his Blood of the Ancestors - it will allow you to pass through the wall of fire (see: The Barrier of Flames). You don't have to do it, though - the Maracai Bay quest, together with The Greedy Captain, will end as soon as you kill Corrientes and claim his Thief's Bone Hand (one of the Titan artifacts).
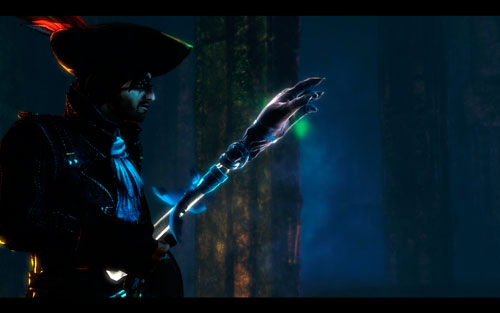 Here is the Thief's Bone Hand - an item which will help you defeat Mara.
The second option is talking to the shaman Osamu [#8]. When you report to him after completing the Secret Entrance Found quest and talking to Corrientes, the pirate's deception will come into light (see: Garcia's Masquerade Uncovered). The Native will give you the Blood of the Ancestors, which will allow for a pursuit. Your destination is a wall of fire [#9] in the cave south-east of the village. You'll have to fight with two of the pirate's men - Egas and Palomo. After you kill them, go through the magical barrier (sadly, you can't take your companions with you). There is a Ghoul to defeat on the other side, and a little further after him - a Grave Spider. In the location with the latter, turn 180 degrees, climb the upper level and approach the wall with the door forged in it. There is a button at the top which will open it. This passage will allow you to go back to the companions you had to leave in front of the flame barrier, and continue on with him.
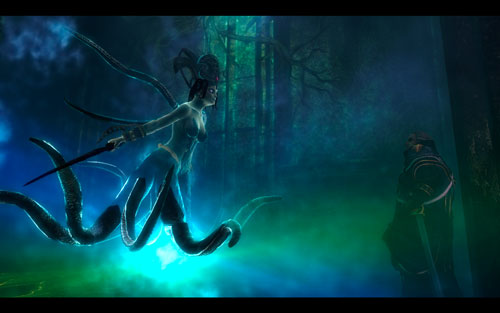 Completing the quest using Osamu's help is much more effective.
Leave the cave by taking the corridor on the right of the Grave Spider. When you see the sunlight [#10], the present quest will be completed. Now you need to find Corrientes, hiding inside the fire temple [#11]. Watch out for Termites and Firebirds in the area when you try to enter it, but most of all - for the lethal trap set by the stairs [#12]. You'll meet the impostor inside the holy building. After a short movie, you'll have to fight not only him, but also a large group of Sand Devils. If you have a companion with you, he'll help you eliminate the pests, but the main foe is all on you. After you kill him, take his Thief's Bone Hand and the quest will be completed (together with The Greedy Captain).
Note! If the Thief's Bone Hand is the fourth (and the last) Titan artifact you've found, tell Patty about it. The girl will suggest asking Admiral Alvarez what next. Head for Antigua, then, and talk to him - you'll receive The Water Temple quest.
Rewards:
![Quest giver: Azuro [#1] - The Signet Ring - Caldera II - Quests - Risen 2: Dark Waters - Game Guide and Walkthrough](https://game.lhg100.com/Article/UploadFiles/201512/2015121709174653.jpg)
Quest giver: Azuro [#1]
This quest is part of: Errand Boy
The quest is completed as part of a favor to Azuro. If you have decided upon the alliance with the Inquisition, or failed the quest from the Natives (see: Mauregato!), you'll have to get your hands on the Messenger's attire and Mauregato's Signet ring. These two items will allow you to enter the cathedral from where the city's officials govern the city.
 Use sneaking!
Acquiring the Signet ring will call for certain dexterity. Enter Mauregato's house [#2] and look around for the Key in his bedroom (on the left on the upper floor). You can get the item in two ways: by entering the room from the right and taking it off the table, or by stealing it from Hermina who works in the kitchen [#3] (Picpocketing at 50 required). Regardless of the option, you should avoid being captured. If the householders catch you red-handed, you'll have to fight them!
 You have to sneak again on the upper floor - otherwise the servants will hear you!
Once you have the key, sneak up on the upper floor and open the door to the bedroom on the left. the Signet ring can be found on the nightstand by the bed. Take it and go back to Azuro, who will forge a Pass for you. The quest will end and you'll have a free access to the cathedral [#4].
Rewards:
To get the treasure you need to open the chest in the Inquisition's tower first. You can find it near the garrison, left from Carlos [#1]. It's a tough nut to crack as the chest can't be opened without Lockpicking at least at 60. If you meet those conditions, play around the lock and take the treasure map from it.
 An interesting place to hide valuables.
With the drawing pointing to the hidden cargo, leave the fortress and head for the crystal cave below [#2]. The entrance is from the beach - pretty much where you found Patty at the beginning of the game. Dig the chest out in the cave. In it, apart from all kinds of valuables, there is a legendary artifact - Comb with one tooth. This is the end of the quest.
Rewards:
![Quest giver: Lopez [#1] - Three New Recruits - Caldera II - Quests - Risen 2: Dark Waters - Game Guide and Walkthrough](https://game.lhg100.com/Article/UploadFiles/201512/2015121709174782.jpg)
Quest giver: Lopez [#1]
You will receive this mission from Lopez after asking him about a job. He is currently recruiting for the Inquisition's army and is looking for three stout men. If you feel like earning some money, assist him in his search.
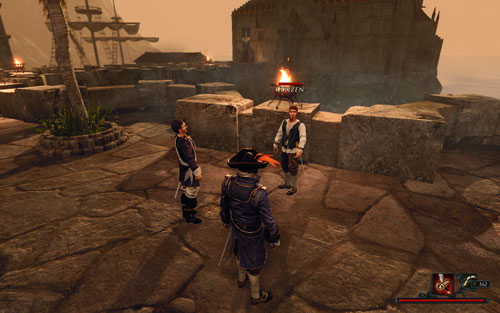 Two future warriors are standing right next to each other.
The first recruit is just behind you, opposite the clerk - he's one of the two talking citizens [#2]. When you tell him that women are crazy about men in uniforms, he'll sign anything you give him. The second talker will join the Inquisition no matter what you tell him. The third candidate is a red-bearded worker [#3] near the crossing in the city centre (he'll be tempted by the musket training). When all three men sing the documents, the quest will be completed. Report back to Lopez to receive 300 Gold.
Rewards:
 Maracai Bay
 Isle of the Dead
Quest giver: Bones [#1]
This quest is part of: The Split Soul
You'll receive this quest from Bones [#1] in the Maracai Bay if you complete the Unwanted Sermon first. If so, ask the man why he thinks he's a dead person. Next, you should sail to the Isle of the Dead (see: The Water Temple) and find the Confused ghost there [#2]. You'll gain access to him only after drinking the Potion of false death (see: The Journey to the Underworld). In the spirit world, head for the Thief's Temple [#3] (one of key locations) and look for a man who looks exactly like Bones. He's the ghost you want to talk to.
 No wonder the doctor went crazy.
Regardless of the chosen dialogue option, you'll eventually be able to free the spirit. As soon as you mention the white scarf (it's been mentioned by the real Bones), the spirit will instantly understand what's happened to it. This is when the present quest ends and another one begins - A Message from the Afterlife.
Rewards:

This quest is part of: The Deserter
The quest can be completed in one of three ways. When you see Angus [#1] after the conversation with Corrientes [#2] (see: The Deserter), you will have several dialogue options to choose from. If you use the Nuff Said! ability, you'll immediately end the mission and receive all possible rewards. If you choose the honorable way, which is challenging the youth to a duel, you'll have to fight him (he's weakened by an injury - you'll be done with him in no time). This also gives you the maximum number of points.
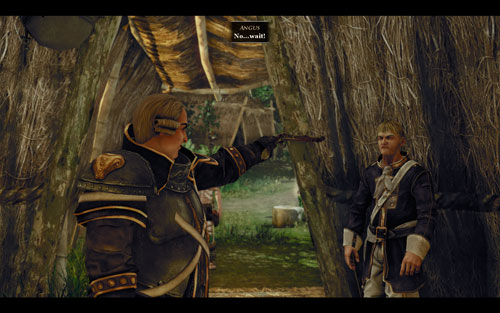 This is the commander of the Inquisition?
There is also another way - you can take Angus to Corrientes. If you do it, the man will kill him right there, allowing you to complete the mission, but not receive Glory points for killing the boy.
Note! If you decided to take Angus to Valdez [#3], the quest won't be activated. Don't worry, though - the Glory points won't be wasted because you'll complete the Angus Rescued quest.
Rewards:

This quest is part of: The Deserter
When you see Angus [#1] after the conversation with Corrientes [#2] (see: The Deserter), you'll have several dialogue options to choose from. If you don't kill the boy, but instead choose to take him to Valdez [#3], the present quest will be opened. Simply reach the Inquisition's camp by the temple, and the boy will be safe under the soldier's wings. You won't only complete the quest (as well The Deserter), but also learn the identity of Garcia (see: Garcia's Masquerade Uncovered).

A true guardian angel.
Note! You can save Angus by choosing a different dialogue option as well (provided you didn't kill him on the spot) - it's only important who you take him to, not what you say.
Rewards:
![Quest giver: Hakeke [#1] - Back to the Village with Hakeke - Maracai Bay - Quests - Risen 2: Dark Waters - Game Guide and Walkthrough](https://game.lhg100.com/Article/UploadFiles/201512/2015121709174866.jpg)
Quest giver: Hakeke [#1]
This quest is part of: Chaka Datu's Legacy
Note! This quest is only available to those players who on the Sword Coast have joined the Inquisition!
The only way to get this mission is to talk to the Native after completing the Paws for Hakeke quest and ask him to go back to the village together. He'll agree and take you there [#2]. Since it's the exactly same road you've taken during the Follow Hakeke, Follow Hakeke Through the Jungle and Follow Hakeke to the Cave, you should not be expecting any surprises. You've most likely cleared the area of any beasts prowling it when you were here the first time, so now there won't be any dangers waiting for you.
 This will be a safe journey.
The quest ends when you arrive at the village. To continue the Chaka Datu's Legacy quest, talk to the chieftain [#3].
Rewards:

Note! This quest is only available to those players who on the Sword Coast have joined the Natives!
Quest giver: Zaalu [#1]
This quest is part of: Chaka Datu's Legacy
The only way to get this mission is to talk to the Native after completing the Paws for Zaalu quest and ask him to go back to the village together. He'll agree and take you there [#2]. Since it's the exactly same road you've taken during the Follow Zaalu, Follow Zaalu Through the Jungle, you should not be expecting any surprises. You've most likely cleared the area of any beasts prowling it when you were here the first time, so now there won't be any dangers waiting for you.
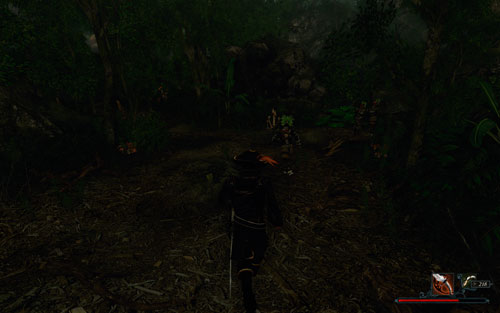 This will be a safe journey.
The quest ends when you arrive at the village. To continue the Chaka Datu's Legacy quest, talk to the chieftain [#3].
Rewards:
![Quest giver: Datu [#1] - Become Halmak of the Maracai - Maracai Bay - Quests - Risen 2: Dark Waters - Game Guide and Walkthrough](https://game.lhg100.com/Article/UploadFiles/201512/2015121709174900.jpg)
Quest giver: Datu [#1]
This quest is part of: Chaka Datu's Legacy
In order to prove your worth to the Maracai and become halmak, you need to demonstrate your courage, wisdom and physical prowess. Nevertheless, you can't perform it alone - a halmak is a kind of a representative, a bondsman. To become halmak, you need to seek protection from one of two pretenders to the throne. Interestingly, the choice of this patron is determined by the faction you've sided with on the Sword Coast.
If you're an ally to the Natives, talk to Zaalu [#2], who can be found next to the fanatical prophet. Convince him to your virtues, and then eliminate your greatest opponent - Potaka [#3]. There are two ways to do it - by intimidating him (which ends the quest immediately and requires Intimidate at 70), or by dueling with him (see: Follow Potaka to the Ritual Site and Get Rid of Potaka). When the problem is solved, talk to Zaalu, and then to Datu - now you're free to continue the Chaka Datu's Legacy quest, ending the present quest at the same time.
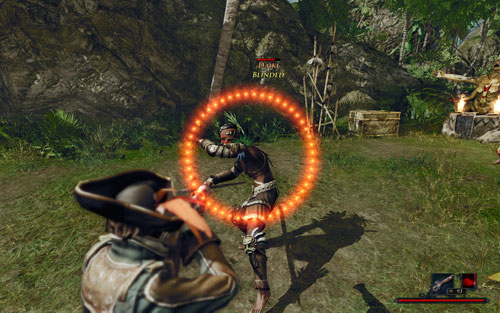 Even though this is an honorable duel, you can use guns.
If you're an ally to the Inquisition, talk to Hakeke [#4], who is standing right by the village entrance. The warrior is fascinated by guns, which is why he'll be very interested in your help. Before you become his halmak, though, you need to defeat his current representative - Daiki [#5]. Same as with Potaka, you need to follow him to the arena [#6] and defeat him (see: Follow Daiki to the Ritual Site), or use Intimidate of 70 on him. Once you declare your victory in front of Hakeke and Datu, the quest ends and you're free to move on.
Note! If you want to resolve this quickly, intimidate Potaka or Daiki - this ends the quest right away. Keep in mind, though, that this way you won't get the quests Follow Potaka to the Ritual Site, Get Rid of Potaka (or Follow Daiki to the Ritual Site, Get Rid of Daiki).
Rewards:
![Quest giver: Palomo [#1] - Black Dog - Maracai Bay - Quests - Risen 2: Dark Waters - Game Guide and Walkthrough](https://game.lhg100.com/Article/UploadFiles/201512/2015121709174936.jpg)
Quest giver: Palomo [#1]
You get this mission in the Natives' village if you talk to Palomo after the conversation with Corrientes. The bearded man will explain that he has been wounded by a pirate called Black Dog. If you deliver to him a proof that the corsair is dead, you'll be rewarded. Leave the Natives' village, then, and go down to the lake [#2]. Next, turn south to a small gorge [#3]. Several steps ahead you should stumble across thugs [#4] - one of them is Black Dog. If you kill all his bodyguards as well as himself, you'll complete the Enemy Pirate Camp quest.
 This is a difficult fight - take a crewmember with you.
Examine the corpse to find the Black Dog's dagger. Go back to Palomo and sell it to him (you don't have to, but the price is tempting). You'll receive 1000 Gold and some Glory points.
Rewards:
![Quest giver: Datu [#1] - Chaka Datu's Legacy - Maracai Bay - Quests - Risen 2: Dark Waters - Game Guide and Walkthrough](https://game.lhg100.com/Article/UploadFiles/201512/2015121709174918.jpg)
Quest giver: Datu [#1]
There are two ways to complete this quest, depending on which faction you've joined on the Sword Coast. The majority of its plot is identical - the only difference is that you serve a different patron (supporters of the Natives will favor Zaalu [#2], members of the Inquisition - Hakeke [#3]).
 The Native fanbase will traditionally use magic...
The beginning of the quest is the same in both cases - talk to your future patron and get rid of their opponent (see: Get Rif of Potaka or Get Rid of Daiki). When you do it, speak to Datu and ask him for three trials. This is when the quest Paws for Zaalu (or Paws for Hekeke) activates. Regardless of the faction, the goal will be the same - killing the Black Hunter together [#4] (see: The Black Hunter). The paths of both candidates will part after it's dead.
If you have sided with the Inquisition, you need to support Hakeke in his hunting skills trial (see: The Four Feathers). You need to collect all four feather left by Kenan. Bring your companion, then, and take a stroll through the jungle where all feathers are scattered ([#5], [#6], [#7], [#8]). When you have them, talk to Kenan [#9], then Hakeke, and report back to Datu.
While the Inquisitors will turn to technology.
If you have sided with the Natives, you'll need to possess Zaalu's body with a voodoo doll (see: Zaalu's Voodoo Doll), and answer Datu's riddles (see: The Three Questions). The correct answers are: darkness, time and nothing.
Regardless of the chosen side, the final round will always look the same - you'll need to face your rival's representative on a special arena [#10] (see: Duel with Zaalu's Halmak or Duel with Hakeke's Halmak). When the foe is down, simply report back to Datu. This is when the quest ends and you receive a reward from your patron (Tek Shaballa or Corrientes' thunderstick), as well as from the chieftain (a legendary item - Skull of Death).
Rewards:
![Quest giver: Datu [#1] - Datu's First Question - Maracai Bay - Quests - Risen 2: Dark Waters - Game Guide and Walkthrough](https://game.lhg100.com/Article/UploadFiles/201512/2015121709175045.jpg)
Quest giver: Datu [#1]
This quest is part of: The Three Questions
Note! This quest is only available to those players who on the Sword Coast have joined the Natives!
Having completed the first of chaka Datu's trials (see: Paws for Zaalu) and possessing the body your patron [#2] (see: Take Over Zaalu's Body), you also need to solve three puzzles given to you by the Natives' chieftain. The first one is fairly simple - you should know the answer right away. But in case you're having trouble, the correct answer is "darkness". When you choose it, the quest will be completed.
 If you don't remember the question, ask to repeat it.
Note! If you gave a wrong answer, the mission will be failed (same as The Three Questions main quest). Despite that, there's no need to worry - the third chaka Datu's trial (see: The Final Test) will decide upon the whole success, so a slight slip would only mean losing Glory points.
Rewards:
![Quest giver: Datu [#1] - Datu's Second Question - Maracai Bay - Quests - Risen 2: Dark Waters - Game Guide and Walkthrough](https://game.lhg100.com/Article/UploadFiles/201512/2015121709175071.jpg)
Quest giver: Datu [#1]
This quest is part of: The Three Questions
Note! This quest is only available to those players who on the Sword Coast have joined the Natives!
Having completed the first of chaka Datu's trials (see: Paws for Zaalu) and possessing the body your patron [#2] (see: Take Over Zaalu's Body), you also need to solve three puzzles given to you by the Natives' chieftain. The first one is fairly simple - the correct answer is "darkness" (see: Datu's First Question). With the second puzzle, choose "time". When you do it, the quest will be completed.
 In every cRPG game there is a puzzle with time as the answer.
Note! If you gave a wrong answer, the mission will be failed (same as The Three Questions main quest). Despite that, there's no need to worry - the third chaka Datu's trial (see: The Final Test) will decide upon the whole success, so a slight slip would only mean losing Glory points.
Rewards:

Note! This quest is only available to those players who on the Sword Coast have joined the Natives!
Quest giver: Datu [#1]
This quest is part of: The Three Questions
Having completed the first of chaka Datu's trials (see: Paws for Zaalu) and possessing the body your patron [#2] (see: Take Over Zaalu's Body), you also need to solve three puzzles given to you by the Natives' chieftain. The first one is fairly simple - the correct answer is "darkness" (see: Datu's First Question). With the second puzzle, choose "time". With the last - it's "nothing".
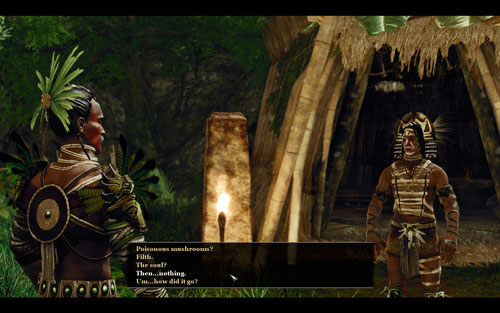 It's like having a conversation with Nietzsche.
Note! If you gave a wrong answer, the mission will be failed (same as The Three Questions main quest). Despite that, there's no need to worry - the third chaka Datu's trial (see: The Final Test) will decide upon the whole success, so a slight slip would only mean losing Glory points.
Rewards:

Note! This quest is only available to those players who on the Sword Coast have joined the Natives!
Quest giver: Datu [#1]
This quest is part of: Chaka Datu's Trial
The final part of Chaka Datu's Legacy quest can be triggered only after completing the two previous ones: Paws for Zaalu and The Three Questions. When they're over, go back to the Natives' chieftain [#1] and tell him about everything that's happened. You'll learn that the last trial before you is a victory over Hakeke's halmak. Go to Daiki then [#2], and follow him to the ritual arena [#3] (see: Follow Daiki to the Ritual Site).
 Daiki isn't too challenging.
When you arrive at the spot, your opponent will accost you. You can shoot him right away (as long as you have the Nuff Said! skill), or engage him in a conventional fight. In the latter case keep in mind that every Native who sees it will rush to attack you - forcing you to overcome them.
After defeating your opponent, go back to Datu to inform him about your victory. This is when the quest ends - together with Chaka Datu's Legacy. If you declare Zaalu's [#4] victory, you'll additionally receive the Tek shabella amulet (+10 to Death Cult, Ritual and Black Magic).
Rewards:

Note! This quest is only available to those players who on the Sword Coast have joined the Inquisition!
Quest giver: Datu [#1]
This quest is part of: Chaka Datu's Trial
The final part of Chaka Datu's Legacy quest can be triggered only after completing the two previous ones: Paws for Hakeke and The Three Questions. When they're over, go back to the Natives' chieftain [#1] and tell him about everything that's happened. You'll learn that the last trial before you is a victory over Zaalu's halmak. Go to Potaka then [#2], and follow him to the ritual arena [#3] (see: Follow Potaka to the Ritual Site).
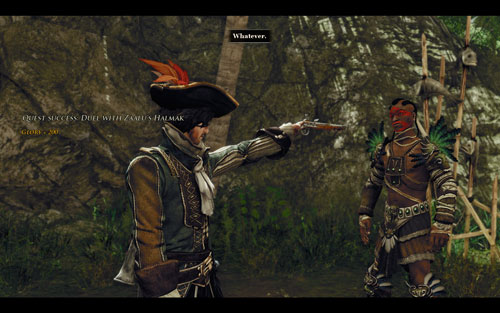 A duel is a duel, but it doesn't always pay off to play fair.
When you arrive at the spot, your opponent will accost you. You can shoot him right away (as long as you have the Nuff Said! skill), or engage him in a conventional fight. In the latter case keep in mind that every Native who sees it will rush to attack you - forcing you to overcome them.
After defeating your opponent, go back to Datu to inform him about your victory. This is when the quest ends - together with Chaka Datu's Legacy. If you declare Hakeke's [#4] victory, you'll additionally receive Corrientes' thunderstick - the best gun in the game.
Rewards:

This quest is part of: Black Dog
The quest is triggered and automatically completed when you kill all four pirates occupying a small camp near the lake [#1]. One of them, Black Dog, is worth less Glory points that the rest of them - even despite the fact that all of them have the same set of skills and immunities. Don't' worry about it now and just kill them to get your reward.
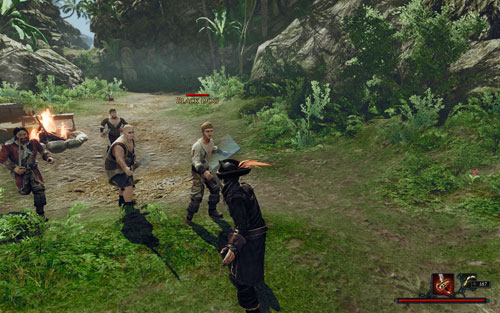 Nothing like a morning exercise.
As there're four of them, it's better to have a companion at your side. Just remember that Jaffar, being a thief, doesn't work too well on the battlefield, and he'll soon be out. The remaining crewmembers are a much a better choice.
If you want to earn a bit more, go to the Natives' village and tell Palomo that you've killed the pirates (you need to take Black Dog's dagger from his corpse). This will get you 1000 Gold.
Rewards:

This quest is part of: Nice and Spicy
The quest will be triggered and automatically completed once you've collected all four Fire peppers. Three of them can be found north of the Natives' village [#1], but the fourth one can be acquired only from the gatherer Ezana [#2], who is standing nearby. She'll agree to share them with you only if you started the Nice and Spicy quest. If you didn't, go back to the village and talk to Jamila [#3]. Be careful, though, because there will be Claw Monkeys in your way!
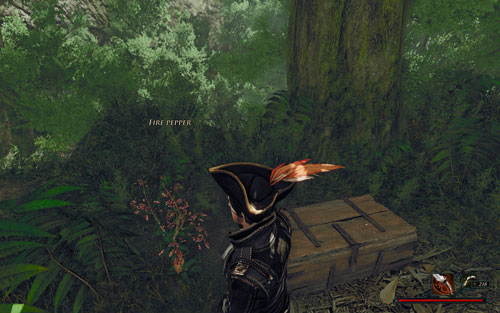 The local pepper is more like a weed than a vegetable.
With all four peppers in your inventory, report back to Jamila. It will conclude the mission and get you the Firutaopi soup, which is needed in the Unwanted Sermon quest.
Rewards:
![Quest giver: Daiki [#1] - Follow Daiki to the Ritual Site - Maracai Bay - Quests - Risen 2: Dark Waters - Game Guide and Walkthrough](https://game.lhg100.com/Article/UploadFiles/201512/2015121709175282.jpg)
Quest giver: Daiki [#1]
This quest is part of: Chaka Datu's Legacy
This quest can be started in one of two ways, depending on the chosen faction.
If on the Sword Coast you have sided with the Natives, you'd certainly decided upon helping Zaalu [#2] in his attempts to take over the throne (see: Become Halmak of the Maracai). Having completed the trials (see: Paws for Zaalu and The Three Questions), you now need to defeat Daiki in an open battle (see: Duel with Hakeke's Halmak). Approach him and challenge him to a duel. You can usually find him in the village, next to Hakeke, but sometimes he's hanging around in the jungle as well [#3].
If on the Sword Coast you have sided with the Inquisition, you must be helping Hakeke [#2] in his quest for power. Obviously enough, you need to get rid of his previous representative - Daiki. To do this, approach the young man and explain the situation to him. If you don't use Intimidate (at least 70), you'll be challenged to a duel - and activate the present quest.
Your goal is to get to the place where the two of you will duel with each other. It shouldn't be any problem, since you'll be led there practically by the hand, and the place itself is only several meters away.
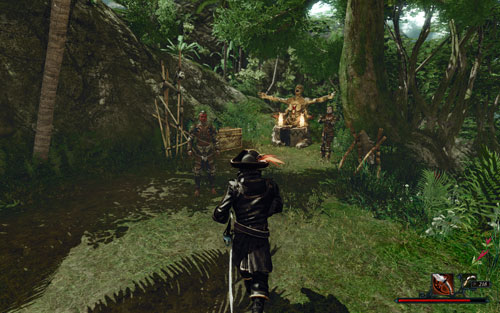 There's nothing like a short run on a beautiful sunny day.
When you arrive at the site appointed by Daiki [#3] (on the hill next to the voodoo altar), the quest will be completed. Now you need to beat the Native up.
Rewards:
![Quest giver: Hakeke [#1] - Follow Hakeke - Maracai Bay - Quests - Risen 2: Dark Waters - Game Guide and Walkthrough](https://game.lhg100.com/Article/UploadFiles/201512/2015121709175237.jpg)
Quest giver: Hakeke [#1]
This quest is part of: Paws for Hakeke
Note! This quest is only available to those players who on the Sword Coast have joined the Inquisition!
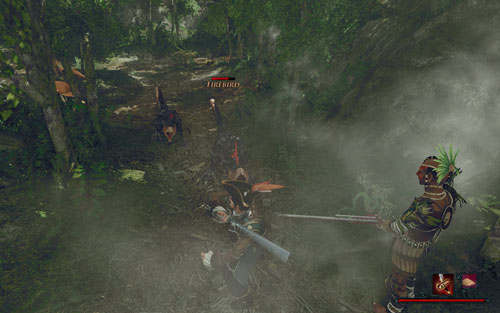 A short stroll is a pure pleasure.
A simple quest received after a conversation with Datu [#2] and Hakeke (see: Chaka Datu's Legacy). Since you've been named Halmak, you can help your patron in his attempts to gain the throne. Talk to him about the first task (see: Paws for Hakeke), and then join him in a short run. When you're outside the village [#3], he'll inform you the easiest part is behind you. This is when the present quest ends and another one begins: Follow Hakeke Through the Jungle. You'll be wise to prepare for a fight - the rest of the venture isn't going to be that easy!
Rewards:

Note! This quest is only available to those players who on the Sword Coast have joined the Inquisition!
Quest giver: Hakeke [#1]
This quest is part of: Paws for Hakeke
Continuing the quest Follow Hakeke, follow your guide into the jungle. You'll have to break through several Claw Monkeys on the way, but there's nothing to worry about - even if you don't help Hakeke out, he'll take care of the threat on his own. All of his Glory points go to your account anyway, so you don't have to take part in anything - especially since you also can bring a companion along.
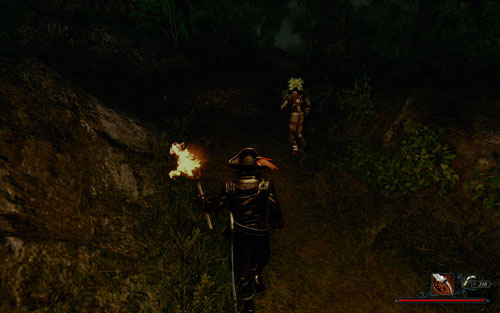 If you killed the animals before, the journey will go without surprises.
Sooner or later you'll reach a cave [#2] where the beast sought by the Native is hiding (see: Paws for Hakeke). The present quest ends, and now you need to enter the cave and slay the animal.
Rewards:
![Quest giver: Hakeke [#1] - Follow Hakeke to the Cave - Maracai Bay - Quests - Risen 2: Dark Waters - Game Guide and Walkthrough](https://game.lhg100.com/Article/UploadFiles/201512/2015121709175316.jpg)
Quest giver: Hakeke [#1]
This quest is part of: Paws for Hakeke
Note! This quest is only available to those players who on the Sword Coast have joined the Inquisition!
After you leave the village with Hakeke [#2] and go through the jungle [#3], you'll also have to track down The Black Hunter. Begin the search at the location where you talked to your patron [#1] (which activated the quest), and follow him north-east. Defeat Firebirds in the area (or leave them to Hakeke) and proceed forward. When you reach a cave [#4], the quest will be completed.
Watch for the birds!
Note! Because Hakeke is your temporary companion, his Glory points go to your account. If you don't feel like fighting the beasts, you can simply ignore them - the Native will take care of them on his own.
Rewards:
![Quest giver: Potaka [#1] - Follow Potaka to the Ritual Site - Maracai Bay - Quests - Risen 2: Dark Waters - Game Guide and Walkthrough](https://game.lhg100.com/Article/UploadFiles/201512/2015121709175318.jpg)
Quest giver: Potaka [#1]
This quest is part of: Chaka Datu's Legacy
This quest can be started in one of two ways, depending on the chosen faction.
If on the Sword Coast you have sided with the Natives, you'd certainly decided upon helping Zaalu [#2] in his attempts to win the throne (see: Become Halmak of the Maracai). Obviously enough, you need to get rid of his previous representative - Potaka. To do this, approach the young man and explain the situation to him. If you don't use Intimidate (at least 70), you'll be challenged to a honorable duel - and activate the present quest.
If on the Sword Coast you have sided with the Inquisition, you must be helping Hakeke [#2] in his quest for power. Having completed the trials (see: Paws for Hakeke and The Three Questions), you now need to defeat Potaka in an open battle (see: Duel with Zaalu's Halmak). Approach him and challenge him to a duel.
Your goal is to get to the place where the two of you will duel with each other. It shouldn't be any problem, since you'll be led there practically by the hand, and the place itself is only several meters away.
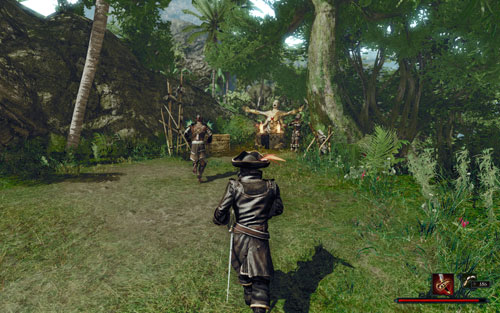 In a moment the altar will bleed.
When you arrive at the site appointed by Potaka [#3] (on the hill next to the voodoo altar), the quest will be completed. Now you need to beat the Native up.
Rewards:
![Quest giver: Zaalu [#1] - Follow Zaalu - Maracai Bay - Quests - Risen 2: Dark Waters - Game Guide and Walkthrough](https://game.lhg100.com/Article/UploadFiles/201512/2015121709175499.jpg)
Quest giver: Zaalu [#1]
This quest is part of: Paws for Zaalu
Note! This quest is only available to those players who on the Sword Coast have joined the Natives!
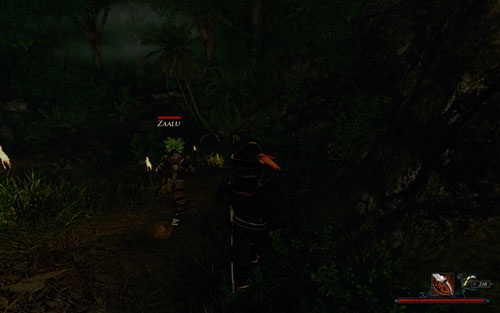 A stroll in the night - part one.
A simple quest received after a conversation with Datu [#2] and Zaalu (see: Chaka Datu's Legacy). Since you've been named Halmak, you can help your patron in his attempts to gain the throne. Talk to him about the first task (see: Paws for Zaalu), and then join him on a short run. When you're outside the village [#3], he'll inform you the easiest part is behind you. This is when the present quest ends and another one begins: Follow Zaalu Through the Jungle. You'll be wise to prepare for a fight - the rest of the venture isn't going to be that easy!
Rewards:

Note! This quest is only available to those players who on the Sword Coast have joined the Natives!
Quest giver: Zaalu [#1]
This quest is part of: Paws for Zaalu
Continuing the quest Follow Zaalu, follow your guide into the jungle. You'll have to break through several Claw Monkeys on the way, but there's nothing to worry about - even if you don't help Zaalu out, he'll take care of the threat on his own. All of his Glory points go to your account anyway, so you don't have to take part in anything - especially since you also can bring a companion along.
 If you killed the animals before, the journey will go without surprises.
Sooner or later you'll reach a cave [#2] where the beast sought by the Native is hiding (see: Paws for Zaalu). The present quest ends, and now you need to enter the cave and slay the animal.
Rewards:

This quest is part of: Search Garcia's Possessions
The quest will be triggered and immediately completed the moment you get on board Garcia's ship [#1] (see: Garcia's Ship) and look inside the captain's cabin. You'll need to use the boat on the beach [#2] to reach it. The captain's thugs will wait for you to finish them (see: Seize Garcia's Ship) - there're quite challenging, so it's better to have some companions with you.
On the desk next to the bed you should see a Map (see: The Treasure on the Pirate Coast) and a book - Garcia's logbook. Read it to learn the location of the captain's hideout (see: Garcia's Treasure) and the password that will allow you to open its gates (see: Open Sesame). When yo're finished reading, the present mission will end.
 Here's the book you want.
To get more Glory points for completing this quest, combine it with Garcia's Ship - you'll end up in this location one way or the other, but additional experience points will always come in handy.
Rewards:

This quest is part of: The Hidden Valley
Note! If you begin this quest, you won't be able to complete the quests The Deserter, Angus is Dead and Angus Rescued. If you complete this quest, the following ones won't become available: Black Dog, Grave Robbers and Garcia's Ship. Try to complete them first!
There are two ways to activate this quest - the choice determines the way they're resolved. The first on involves saving Angus [#1] (see: The Deserter) - if you take him back to Valdez [#2] and talk to the Inquisitor, you'll learn the true identity of Corrientes [#3] (which ends the present quest).
 If you uncover Corrientes' identity, you won't be able to complete his quests!
The second option is talking to the shaman Osamu [#4]. When you report to him after completing the The Secret Entrance quest and talking to Corrientes, the pirate's deception will come into light - which also ends the quest.
No matter which option you choose, you're going to have to deal with the deceptive pirate. You can read how to do it in the description of the Maracai Bay quest.
Rewards:
![Quest giver: Cordobar [#1] - Garcia's Ship - Maracai Bay - Quests - Risen 2: Dark Waters - Game Guide and Walkthrough](https://game.lhg100.com/Article/UploadFiles/201512/2015121709175573.jpg)
Quest giver: Cordobar [#1]
You'll get this mission in the Natives' village if you talk to Cordobar after your conversation with Corrientes. Leave the village and head north. Pass by Angus (see: The Deserter) [#2] and go straight towards the sea. Use the boat [#3] on the beach to get close to the old ship [#4]. Keep in mind that you'll be attacked the moment you get on board, so prepare beforehand - it's best to take a companion with you. Jaffar won't be too helpful here considering his fighting skills have a lot to wish for, but Patty or Venturo can prove very useful. When the enemies are dead, you'll complete the quest Seize Garcia's Ship.
 Watch your back!
Afterwards, don't forget to look around the deck. You can find a Map in the captain's cabin (see: The Treasure on the Pirate Coast), and right next to it - the Logbook of Garcia himself (see: Garcia's Logbook). The second item is necessary to complete the game.
After looting everything there is to loot, report back to Cordobar. If your Silver Tongue is at least 60, you can also share the tale with Valdez [#5] - he'll give you 300 Gold.
Rewards:
 Maracai Bay
 Antigua
This quest is part of: Steelbards's Artefact
You receive this quest after reading Garcia's logbook on his ship [#1] (see: Garcia's Logbook). You'll need to use the boat on the beach [#2] to reach it. The captain's thugs will wait for you to finish them (see: Seize Garcia's Ship) - there're quite challenging, so it's better to have some companions with you.
Enter Garcia's office and on the desk next to the bed you should see a Map (see: The Treasure on the Pirate Coast) and a book - Garcia's logbook. Read to learn the location of the captain's hideout and the password that will allow you to open its gates (see: Open Sesame). You'll also complete the quest The Password which you might have gotten on Antigua if you looked inside the gates under the waterfall (even if not, the quest will still be completed).
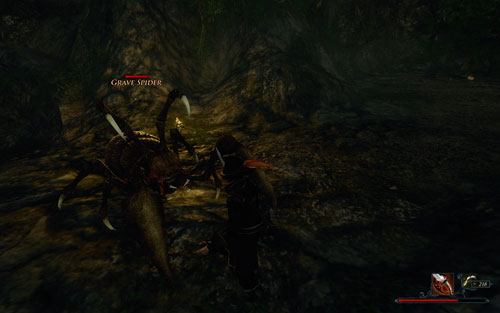 Fighting a spider is no trifle - be prepared!
This is when you need to talk to Patty [#3] (which ends the Search Garcia's Possessions quest) and sail to Antigua. There, go to the waterfall [#4] under which you'll find a Strange gate. Stand in front of it and say the password that you got from the logbook ("long live Garcia!"), and the way will be opened for you (you'll also complete the Open Sesame quest). Proceed forward, but watch out for Cave Bats and be ready for a Grave Spider [#5] - your companions' help will be much appreciated here. When the threat is over, approach the spot marked by the huge X [#6] and dig out the treasure that's buried there. If you open the chest and take the Earth Amulet, you'll complete the main quest - Steelbeard's Artefact.
 The treasure has been buried at the very edge of the clearing.
Two things to sum up:
Rewards:
![Quest giver: Daiki [#1] - Get Rid of Daiki - Maracai Bay - Quests - Risen 2: Dark Waters - Game Guide and Walkthrough](https://game.lhg100.com/Article/UploadFiles/201512/2015121709175617.jpg)
Quest giver: Daiki [#1]
This quest is part of: Become Halmak of the Maracai
Note! This quest is only available to those players who on the Sword Coast have joined the Inquisition!
After deciding upon helping Hakeke [#2] in his attempts to win the throne (see: Become Halmak of the Maracai), you need to get rid of his previous representative - Daiki. Approach him and explain the situation. If you don't use Intimidate (at least at 70), you'll be challenged to an honorable duel - therefore activating the Follow Daiki to the Ritual Site quest.
 You can use guns during the fight.
When you arrive at the spot [#3], you'll be forced to fight the Native warrior (this is when the present quest begins). Daiki isn't a challenging opponent - you shouldn't have any problems with him, especially since you're allowed to use guns. When he's down, wake him up and congratulate him on his spirit. This way you'll complete not only the present mission, but the main quest as well - Become Halmak of the Maracai.
Note! If you intimidated Daiki, the quest won't be even triggered. You'll waste a lot of Glory points!
Rewards:

Note! This quest is only available to those players who on the Sword Coast have joined the Natives!
This quest is part of: Become Halmak of the Maracai
After deciding upon helping Zaalu [#2] in his attempts to win the throne (see: Become Halmak of the Maracai), you need to get rid of his previous representative - Potaka. Approach him and explain the situation. If you don't use Intimidate (at least at 70), you'll be challenged to an honorable duel - therefore activating the Follow Potaka to the Ritual Site quest.
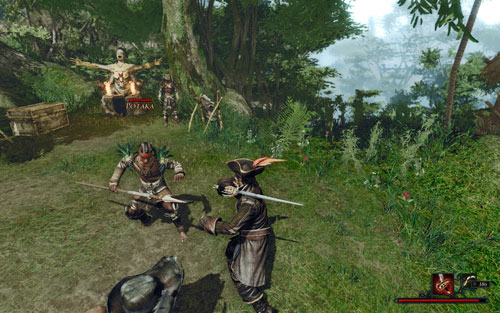 Crouching Native, hidden pistol.
When you arrive at the spot [#3], you'll be forced to fight the Native warrior (this is when the present quest begins). Potaka isn't a challenging opponent - you shouldn't have any problems with him, especially since you're allowed to use guns. When he's down, wake him up and congratulate him on his spirit. This way you'll complete not only the present mission, but the main quest as well - Become Halmak of the Maracai.
Note! If you intimidated Potaka, the quest won't be even triggered. You'll waste a lot of Glory points!
Rewards:

This quest is part of: The Peace of the Dead
The quest will be activated and automatically completed when you kill the pirates outside the temple [#1] and take their Idols. Since there are three of them, it's wise to bring along a companion. If you still can't handle them, you can always retreat to Koraka [#2] standing in front of the temple (see: Where Is Koraka?). The Native will help you fight, but enemies killed by his hand won't bring you any Glory points!
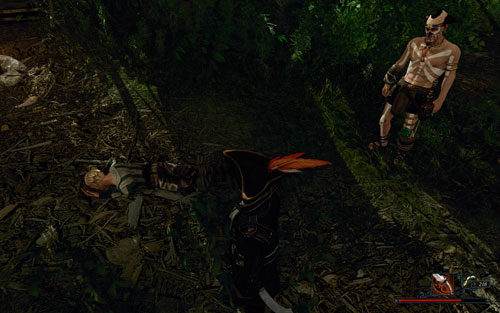 Maybe his grave will be plundered too.
The quest will be completed the moment you search the bodies and take three Idols of them. If you want, you can also talk to Koraka to finish the Where Is Koraka? quest. To complete the main quest, The Peace of the Dead, you also need to talk to Malaika [#3] in the Natives' village.
Rewards:
![Quest giver: Egas [#1] - Grave Robbers - Maracai Bay - Quests - Risen 2: Dark Waters - Game Guide and Walkthrough](https://game.lhg100.com/Article/UploadFiles/201512/2015121709175782.jpg)
Quest giver: Egas [#1]
This quest is part of: The Peace of the Dead
The quest is received from Egas, who is guarding Corrientes' hut in the Natives' village. Your goal is to get rid of every pirate sitting outside the temple [#2]. Since there are three of them, it's wiser to bring a companion along. If you still can't handle them, you can always retreat to Koraka [#3] standing not far from the temple (see: Where Is Koraka?). The Native will help you in the fight, but you won't get Glory points for the enemies he kills!
 Right in the eye!
The quest will be completed the moment all enemies drop dead and you report back to Egas. If you search the bodies of the pirates, you'll find idols needed for the Grave Idols quest. Don't forget to talk to Koraka too - it will finish the Where Is Koraka? quest.
Note! If you kill the pirates first and only then meet with Egas, the quest will still be completed.
Rewards:

It will take a while before you can get to the map - unfortunately you're going to have to start blind. Leave the temple by the sea [#1] and take the path going south. Go under the rope bridge [#2] and proceed in the same direction. When you see a fire on the hill, you'll reach the first key location - an old campsite [#3]. From there, turn east and take the path leading to the lake (turn right at the crossroads) [#4]. Go around it and climb up - you've just arrived at the Natives' village [#5].
 You'll receive the map from this man.
Enter the first hut on the right - you'll find a man named Corrientes [#6] there. Talk to him to receive the Map of Maracai. From now on you won't be walking around blindly.
Two things to sum up:
Rewards:
![Quest giver: Jamila [#1] - Nice and Spicy - Maracai Bay - Quests - Risen 2: Dark Waters - Game Guide and Walkthrough](https://game.lhg100.com/Article/UploadFiles/201512/2015121709175861.jpg)
Quest giver: Jamila [#1]
You get this quest after talking to Jamila about her spices. She's missing some Fire pepper, which is found in inaccessible mountains taken over by Claw Monkeys. Your goal is of course to obtain the rare specimen - four of them, to be exact. Three of them can be found north of the Natives' village [#2], but the fourth one can be acquired only from the gatherer Ezana [#3], who is standing nearby. She'll agree to share them with you only if you talked to Jamila before - otherwise you'll have make do without them.
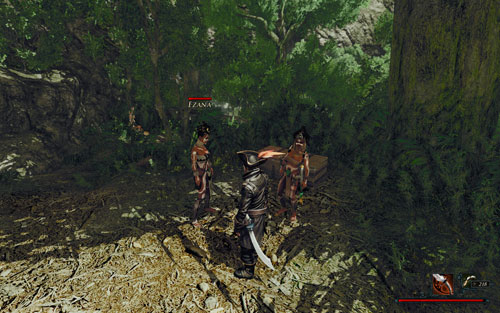 You can the last pepper from the gatherer.
With all four peppers in your inventory, report back to Jamila. It will conclude the mission and get you the Firutaopi soup, which is needed in the Unwanted Sermon quest.
Rewards:
Note! This quest is only available to those players who on the Sword Coast have joined the Inquisition!
Quest giver: Hakeke [#1]
This quest is part of: The Four Feathers
 Leaving the village - a truly epic quest.
This quest can be received only after passing the first trial of chaka Datu - the Paws of Hakeke. Complete it and talk to villages' chieftain [#2] to trigger the present quest. Go back to your patron and explain to him that the trial will be prove his hunting skills. Since Hakeke isn't to much of a hunter, you're going to have to help him. Leave the village with him and climb down the slope into the jungle [#3]. This is when the quest ends. To continue The Four Feathers quest you need to find the first feather (it's been nailed to a tree branch north behind your patron (see: The Black Feather).
Rewards:
 Maracai BayAntigua
This quest is part of: Steelbeard's Artefact
You receive this quest after reading Garcia's logbook on his ship [#1] (see: Garcia's Logbook). You'll need to use the boat on the beach [#2] to reach it. The captain's thugs will wait for you to finish them (see: Seize Garcia's Ship) - there're quite challenging, so it's better to have some companions with you.
On the desk next to the bed you should see a Map (see: The Treasure on the Pirate Coast) and a book. Read to learn the location of the captain's hideout (see: Garcia's Treasure) and the password that will allow you to open its gates (see: The Password).
 The puzzle is finally solved.
After leaving Garcia's ship, return to yours and talk to Patty [#3]. When she hears about what you've managed to learn, the Search Garcia's Possessions quest will be over. You can now set sail to Antigua and go to the large waterfall [#4]. Approach the gate that's been blocking the way to the cave up till now, and say the password from Garcia's logbook. This when the quest ends.
Note! There is an alternative way to complete this quest - available only to those players who on the Sword Coast have joined the Natives. If so, you can sail to the Isle of the Dead and ask Steelbeard's ghost for the location of the treasure and the password to the gate (see: Talk to Steelbeard's Ghost).
Rewards:

Note! This quest is only available to those players who on the Sword Coast have joined the Inquisition!
Quest giver: Datu [#1]
This quest is part of: Chaka Datu's Legacy
Having gained the favor of Hakeke [#2] and eliminated his apprentice (see: Get Rid of Daiki), talk to the village's chieftain - Datu. He'll give you the present quest in which you have kill The Black Hunter (Panther) and obtaining its Paws. To do this, talk to you patron and follow him to the beast's lair (see: Follow Hakeke, then Follow Hakeke Through the Jungle and Follow Hakeke to the Cave).
 If you want, you can take a crew member with you.
When you arrive at the location [#3], the future chieftain will tell you to go inside the cave and scare the animal away. You can of course do it, but it doesn't pay off - if you don't kill the beast yourself, you won't get Glory points for it (only for completing The Black Hunter quest). It's better to kill the cat with your own hands (or your companions'), and then bring The Black Hunter's paws to Hakeke. This is when the mission ends. You've completed the first trial that will make Hakeke the chieftain of the Maracai, so go back to the village and continue the Chaka Datu's Legacy quest. If you suggest to go together with the Native, you'll receive the Back to the Village with Hakeke quest.
Rewards:
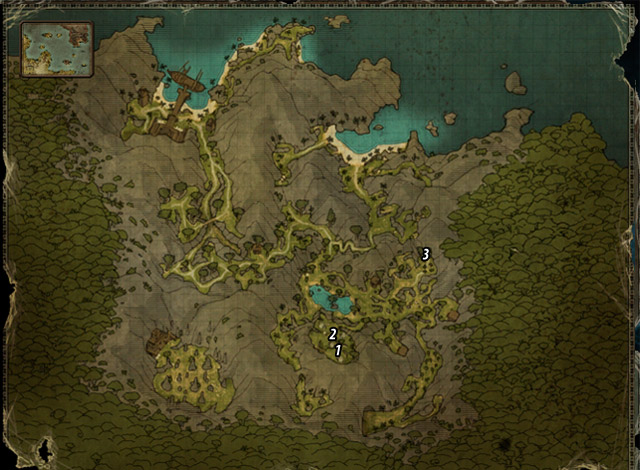
Note! This quest is only available to those players who on the Sword Coast have joined the Natives!
Quest giver: Datu [#1]
This quest is part of: Chaka Datu's Legacy
Having gained the favor of Zaalu [#2] and eliminated his apprentice (see: Get Rid of Potaka), talk to the village's chieftain - Datu. He'll give you the present quest in which you have kill The Black Hunter (Panther) and obtaining its Paws. To do this, talk to you patron and follow him to the beast's lair (see: Follow Zaalu, and then Follow Zaalu Through the Jungle).
 The Black Hunter isn't much different from a Panther.
When you arrive at the location [#3], the future chieftain will tell you to go inside the cave and scare the animal away. You can of course do it, but it doesn't pay off - if you don't kill the beast yourself, you won't get Glory points for it (only for completing The Black Hunter quest). It's better to kill the cat with your own hands (or your companions'), and then bring The Black Hunter's paws to Zaalu. This is when the mission ends. You've completed the first trial that will make Zaalu the chieftain of the Maracai, so go back to the village and continue the Chaka Datu's Legacy quest. If you suggest to go together with the Native, you'll receive the Back to the Village with Zaalu quest.
Rewards:
![Quest giver: Koraka [#1] - Plunderers at the Ancestral Grave - Maracai Bay - Quests - Risen 2: Dark Waters - Game Guide and Walkthrough](https://game.lhg100.com/Article/UploadFiles/201512/2015121709175954.jpg)
Quest giver: Koraka [#1]
This quest is part of: The Peace of the Dead
You get this quest from the Native named Koraka before going inside the pirates' camp outside the temple [#2]. Your goal is to get rid of all the pirates. Since there are three of them, it's wiser to bring a companion along. If you still can't handle them, retreat to the quest giver and he'll help you in the fight (you won't get Glory points for the enemies he kills!).
 Right in the eye!
The quest will be over when the enemies drop dead. You can search their bodies (you'll get idols for the Grave Idols quest) and talk to Koraka (which ends the Where Is Koraka? quest).
Note! If you kill the pirates first, and then meet Koraka, the quest will still be completed.
Rewards:

This quest is part of: Steelbeard's Artefact
The quest will be triggered upon your arrival at the Maracai Bay. Go on board Garcia's ship [#1] (see: Garcia's Ship) and look inside the captain's cabin. You'll need to use the boat on the beach [#2] to reach it. The captain's thugs will wait for you to finish them (see: Seize Garcia's Ship) - there're quite challenging, so it's better to have some companions with you.
Enter Garcia's office and on the desk next to the bed you should see a Map (see: The Treasure on the Pirate Coast) and a book. Read to learn the location of the captain's hideout (see: Garcia's Treasure) and the password that will allow you to open its gates (see: Open Sesame). You'll also complete the quest The Password which you might have gotten on Antigua if you looked inside the gates under the waterfall (even if not, the quest will still be completed).
 This book will allow you to complete the quest.
The only thing left to do in order to complete the mission is to talk to Patty [#3]. When she hears about what you've managed to find out, the quest will end.
Note! To get more Glory points you can combine this mission with Garcia's Ship - you'll have to get there one way or the other, and additional experience always comes in handy.
Rewards:

This quest is part of: The Secret Entrance
To complete this mission, you need to go to the wall of fire [#1]. If you want, you can talk about it to the hunter Pandu [#2], found a short walk south beyond the village. He'll tell you that a wall of flames has been raised in a cave inhabited by huge spiders [#3]. Go there, then, and use the only available path, exterminating everything that moves on the way (you'll encounter a few Cave Bats and four Grave Spiders). When you arrive at the wall of flames [#5], the quest will be completed, and you'll be free to report back to Corrientes [#4] (see: The Hidden Valley).
 This is how the entrance to hell looks like.
The quest has a lot of difficult battles. Eliminate the Grave Spiders from a distance (shotgun works best), because if they come close you'll surely die. It's a good idea to bring some companions along - though they may not help you much during in the fighting itself, but will distract the attention of your enemies away from you.
Rewards:

This quest is completed in the same way as the Enemy Pirate Camp mission. To do it, kill all four Ship guards stationed on board Garcia's vessel [#1] (see: Garcia's Ship). Use the boat left by the beach [#2] to reach it. Keep in mind that you'll be attacked the moment you get on board, so prepare beforehand - it's best to take a companion with you. Jaffar won't be too helpful here considering his fighting skills have a lot to wish for, but Patty or Venturo can prove very useful.
 Watch out or you're be surrounded!
Afterwards, look around the deck. You can find a Map in the captain's cabin (see: The Treasure on the Pirate Coast), and right next to it - the Logbook of Garcia himself (see: Garcia's Logbook). The second item is necessary to complete the game.
Rewards:
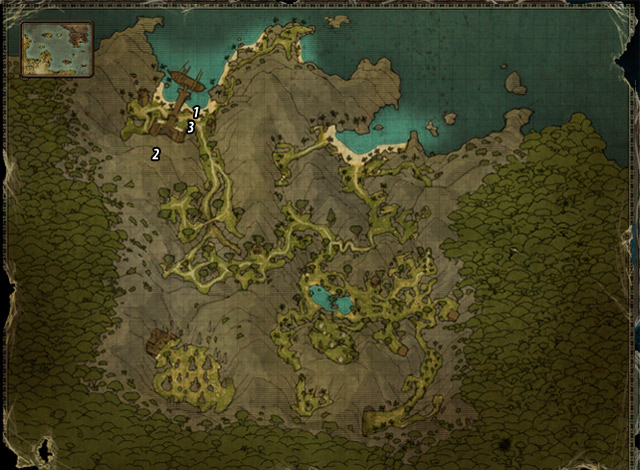
This quest is part of: Storage Barrels from the Wreck
After leaving your ship you should have the beach on your left. If you look closely enough, you'll notice six Storage barrels there [#1]. The quest will be completed when you collect them. If you'd like to earn some additional Glory points, bring your finding to the storehouse master Mercutio, found in the temple by the harbor [#2]. Be aware that there are two Firebirds waiting for careless adventurers in your way [#3]. They can't really harm you at this stage of the game, though.
 Take it easy - this barrel won't explode.
If the birds are causing trouble for you, you can use the temple for shelter. This way the creatures will be killed by the temple guards, but you won't receive any Glory points for eliminating them.
Rewards:
![Quest giver: Mercutio [#1] - Storage Barrels from the Wreck - Maracai Bay - Quests - Risen 2: Dark Waters - Game Guide and Walkthrough](https://game.lhg100.com/Article/UploadFiles/201512/2015121709180116.jpg)
Quest giver: Mercutio [#1]
You can receive this quest from the storehouse master, Mercutio, at the temple by the docks. Talk to him to learn that the Inquisition's storages are in a disastrous state. Because they're so poorly stocked, there's no talk of trade (unless you have Silver Tongue at least at 65). If you wish to help the bearded man and at the same time restore trade, you need to complete this quest.
 If the battle is too difficult for you, you can go back to the temple. The guards will kill the birds, but you won't receive any Glory points for them.
Leave the temple and head for the docks. Turn right and kill two Firebirds who'll stand in your way [#2]. Next, go down to the beach and collect six barrels lying there [#3] (completing the Storage Barrels Found quest while at it). Return to Mercutio with them.
Note! The quest won't be cancelled if you persuade Mercutio to your point of view by using the Silver Tongue skill.
Rewards:

Note! This quest is only available to those players who on the Sword Coast have joined the Natives!
Quest giver: Zaalu [#1]
This quest is part of: The Three Questions
After completing the Paws for Zaalu quest, report back to Datu [#2]. He'll be very pleased with your success, and give you another quest, The Three Questions. Meet with Zaalu [#1] and tell him that the next trial will be a test of his wisdom - he'll have to answer three questions. It's a tough challenge for the proud Native, so you're going to have to help him. Create a voodoo doll and take over his body (see: Zaalu's Voodoo Doll). This little trick will allow you to solve the chieftain's puzzles with everybody thinking you're actually Zaalu.
 You'll be using the forbidden arts once again.
The goal of the quest is to make the said doll. Convince the Native to give you his Hair, and go to the altar [#3] that is towering above the village. Use it to create the doll so that you could posses the man. If you don't have ingredients, buy them from Malaika [#4] or Kenan [#3] (the Voodoo doll can also be found inside Zaalu's chest, but it requires Lockpicking at 20). When the ritual is over, possess the Native's body.
 Afterwards, you can go back to yourself.
In the warrior's body, go to Datu and answer his riddles:
After passing the test, go back to your body and tell Zaalu about your success. This is when the quest ends, leaving only the last challenge from the Chaka Datu's Legacy quest.
Rewards:

This quest is part of: Chaka Datu's Legacy
The quest will be triggered and immediately completed after you talk to the Natives' chieftain, Datu. You can find him on the hill towering above the village [#1]. If you continue the conversation, you'll receive two quests at once: Become Halmak of the Maracai and Chaka Datu's Legacy. Both are strictly connected with each other.
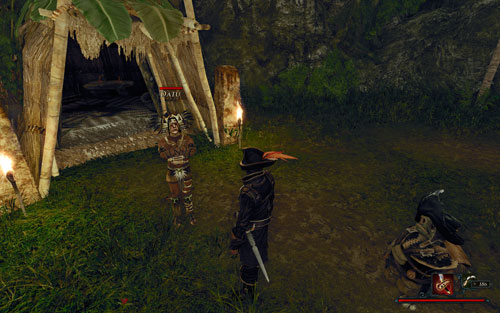 The old chieftain will not be pleased with your visit.
Since you've met the village's chieftain, you can use the opportunity and learn from him (only if you have joined the Natives on the Sword Coast). He can show you a few useful tricks concerning voodoo magic. If you have the knowledge, this acquaintance will prove very advantageous.
Rewards:
This quest is part of: The Hidden Valley
To be able to go through the barrier of flames and complete this mission, you need to obtain the Blood of the Ancestors (see: The Blood of the Ancestors). There are two ways to do it:
The first option involves saving Angus [#1] (see: The Deserter) - if you take him back to Valdez [#2] and talk to the Inquisitor, you'll learn the true identity of Corrientes [#3]. When you next see him, the Nameless Hero will automatically draw his weapon and attack the impostor. Choosing this option is quite unfortunate because it means fighting with every one of Garcia's servants all at once - including the Natives who you'll have to stun (you'll kill the pirates, thus cancelling their quests!). Since the battle is extremely difficult, don't forget to bring your companions along, and what's more, flee the village - you have zero chances while you're within its borders! Only when you get back you can try to lure your enemies, one by one, outside and take care of them there. Once you've dealt with them, kill Corrientes and take the Blood of the Ancestors from him. With it, approach the barrier and go through it [#5].
 Fire, stand behind me.
The second option involves talking to the shaman Osamu [#4]. When you report to him after completing the Secret Entrance Found quest and talking to Corrientes, the pirate's deception will come into light (see: Garcia's Masquerade Uncovered). The Native will give you the Blood of the Ancestors, which will allow for a pursuit. Your goal is a wall of fire in the cave south-east of the village. You'll have to fight with two of the pirate's men - Egas and Palomo. After you kill them, go through the magical barrier [#5] (sadly, you can't take your companions with you).
Rewards:
![Quest giver: Hanu [#1] - The Beast in the Lake - Maracai Bay - Quests - Risen 2: Dark Waters - Game Guide and Walkthrough](https://game.lhg100.com/Article/UploadFiles/201512/2015121709180255.jpg)
Quest giver: Hanu [#1]
This quest is received from a fisherman met by the lake. The terrified Native will tell you about a terrible Beast living down in the water, which makes it impossible to fish. The monster had already killed a lot of people, and its appetite seems to be insatiable. The clever creature hides under the surface of the lake, and jumps at the victims swallowing them in their whole.
The description perfectly fits those of an Alligator - and rightly so, the Beast described by Hanu comes from just that branch of species. If you don't have too much love for it, you can hunt the monster down.
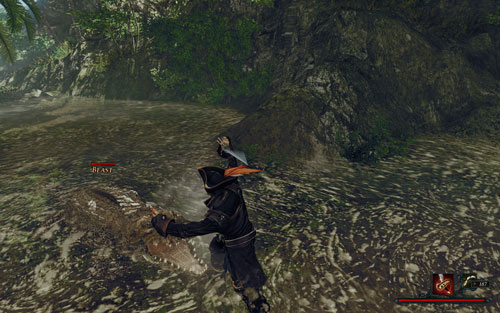 Lizards are definitely a NO!
Go into the lake and start moving in bigger and bigger circles. Sooner or later you'll be attacked by the enraged Beast. Though the monster doesn't look much different from any other Alligator, it's still a bit more powerful. Once you slay it (preferably by using a shotgun), report back to Hanu to receive your reward.
Rewards:
![Go into the lake [#1] when you find it (even pirates can be wrong sometimes) - The Beast Is Dead - Maracai Bay - Quests - Risen 2: Dark Waters - Game Guide and Walkthrough](https://game.lhg100.com/Article/UploadFiles/201512/2015121709180332.jpg)
Go into the lake [#1] when you find it (even pirates can be wrong sometimes). If you stay in it for a few moments and move around, you'll be attacked by the fearsome Alligator, called the Beast. To kill it, use a shotgun or any other gun (melee combat isn't recommended), and the quest will be completed. If you'd like to increase your profits additionally, talk to the fisherman Hanu at the waterfront [#2] and tell him all about the fight.
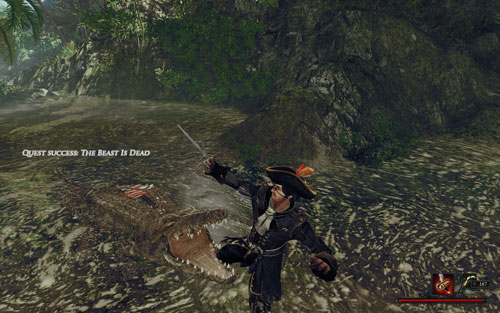 Since Captain Hook, no pirate has a tendency to like alligators.
When you take the news of your victory to the Native, he'll give you a Treasure map (see: The Treasure on the Hunting Grounds). As you can see, by slaying the Beast you've earned the respect of the Maracai.
Rewards:

This quest is part of: The Four Feathers
Note! This quest is only available to those players who on the Sword Coast have joined the Inquisition!
The quest will be activated and automatically completed the moment you find the fourth of the feathers left by Kenan (see: The Four Feathers). To find it, leave the village with Hakeke [#1] (see: On the Road with Hakeke), and take a few steps north-east. On the tree branch next to the crossroads you should see the black feather [#2] which concerns the present quest.
 Here's the wanted object.
To continue The Four Feathers quest, take a closer look at the symbol carved on the trunk with the feather, and tell Hakeke about it. This will allow you to venture forth.
Two things to sum up:
Rewards:

This quest is part of: Chaka Datu's Legacy
The companion who will accompany you during this quest depends upon the faction you're sided with. If you chose the Natives, you'll travel with Zaalu, and as an Inquisitor you'll support Hakeke.
After you've gained the trust of either Zaalu or Hakeke [#1] and eliminated their apprentices (see: Get Rid of Potaka or Get Rid of Daiki), talk to the chieftain of the village - Datu [#2]. He'll give you the Paws for Zaalu quest (or Paws for Daiki), in which you have to kill the Black Hunter and collect his Paws. To do it, talk to your patron and let him take you to the lair of the beast (see: Follow Zaalu, and then Follow Zaalu Through the Jungle, or... same with the other guy).
 Remember that you can't parry the panther's attacks!
When you're at the spot [#3], the future chieftain will order you to enter the cave and scare the animal away from it. You can of course do it, but there's little profit in it - if you don't kill the beast yourself, you won't receive Glory points for it (only for completing the quest). It's much better to kill the cat with your own hands, which automatically ends the mission and guarantees a bigger reward.
If you want to complete Paws for Zaalu (or Paws for Hakeke) immediately, cut the Paws of the Black Hunter, and hand them to the Native.
Note! The Black Hunter appears in the cave only after activating the Paws for Zaalu or Paws for Hakeke quest. You won't find it there otherwise.
Rewards:
![Quest giver: Corrientes [#1] - The Blood of the Ancestors - Maracai Bay - Quests - Risen 2: Dark Waters - Game Guide and Walkthrough](https://game.lhg100.com/Article/UploadFiles/201512/2015121709180426.jpg)
Quest giver: Corrientes [#1]
This quest is part of: The Hidden Valley
You'll receive this mission from Corrientes right after completing The Secret Entrance quest. There are two ways to do it.
The first option involves saving Angus [#2] (see: The Deserter) - if you take him back to Valdez [#3] and talk to the Inquisitor, you'll learn the true identity of Corrientes. When you next see him, the Nameless Hero will automatically draw his weapon and attack the impostor. Choosing this option is quite unfortunate because it means fighting with every one of Garcia's servants all at once - including the Natives who you'll have to stun (you'll kill the pirates, thus cancelling their quests!). Since the battle is extremely difficult, don't forget to bring your companions along, and what's more, flee the village - you have zero chances while you're within its borders! Only when you get back you can try to lure your enemies, one by one, outside and take care of them there. Once you've dealt with them, kill Corrientes and take the Blood of the Ancestors from him (which ends the present quest).
 By fighting inside the village you can get more Glory points.
The second option involves talking to the shaman Osamu [#4]. When you report to him after completing The Secret Entrance quest and talking to Corrientes, the pirate's deception will come into light, and you will receive the Blood of the Ancestors. This way is much easier, but it gives you less Glory points (for not fighting with the Natives).
Rewards:
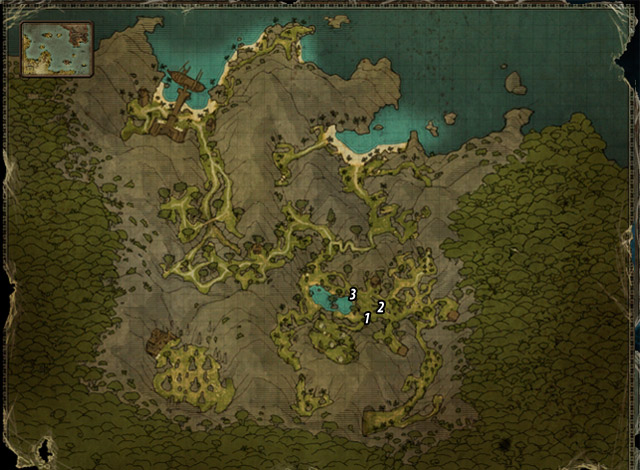
Note! This quest is only available to those players who on the Sword Coast have joined the Inquisition!
This quest is part of: The Four Feathers
This quest will be triggered and immediately completed when you find the second of the four feathers left by Kenan (see: The Four Feathers). To find it, leave the village [#1] with Hakeke (see: On the Road with Hakeke), and take a few steps north-east. You should see a Black feather [#2] on a tree branch next to crossroads.
 It's really hard to miss.
When you bring the first finding to Hakeke, he'll say he doesn't know where to look for the other ones. Go back to where you found the Black feather, then, and read the sign on the trunk (points north-west). Inform Hakeke about it and proceed in the indicated direction. After a few steps you should see the Blue feather [#3] - the goal of this quest.
Two things to sum up:
Rewards:
![Quest giver: Corrientes [#1] - The Deserter - Maracai Bay - Quests - Risen 2: Dark Waters - Game Guide and Walkthrough](https://game.lhg100.com/Article/UploadFiles/201512/2015121709180467.jpg)
Quest giver: Corrientes [#1]
You can receive this mission in the Natives' village as soon as you talk to Corrientes. He'll send you out to kill a deserter who's been hiding somewhere in the jungle. When you meet Angus [#2] (that's his name), you'll have several dialogue options to choose from. If you use the Nuff Said! ability, or challenge him to a duel, the boy will die, and you'll only have to report back to the quest giver (see: Angus is Dead).
 You can save the boy if you want.
There is another option - you can take Angus to Corrientes. If so, the man will immediately kill the boy, which completes the quest, but doesn't give you Glory points for killing him yourself.
The last option is the most interesting - if you take the deserter to Valdez [#3], you won't only complete the quest, but also learn the true identity of Corrientes (see: Garcia's Masquerade Uncovered). You'll also complete the Angus Rescued quest.
Rewards:
![Quest giver: Valdez [#1] - The Expedition - Maracai Bay - Quests - Risen 2: Dark Waters - Game Guide and Walkthrough](https://game.lhg100.com/Article/UploadFiles/201512/2015121709180413.jpg)
Quest giver: Valdez [#1]
This quest is part of: The Hidden Valley
You'll get this quest upon your arrival at the Maracai Bay, as soon as you talk to Valdez in the harbor. He'll tell you to join Corrientes' expedition, which is camped inside the Natives' village [#2]. To reach it, go around the temple from the west, and then use the path going south. If you took a companion with you (whichever), he or she will notice tracks on the ground - that's how you'll know which way to go.
 If you cross over the bridge, you'll in for a fight with a couple of panthers.
There will be plenty of Firebirds in your way - the first batch will attack you right at the temple [#3], and they will accompany you practically for the rest of your way. After you cross under a rope bridge (it's the only right way!) and go south, you'll have to fight Claw Monkeys which have claimed this area as their hunting grounds. If you take a few steps towards the hill, you'll come across an old camp [#4]. You can sleep and regenerate your health here - you'll need it if you want to venture forth into the jungle.
 You'll wipe out the entire henhouse in the course of this quest.
When you're ready to go, turn east and pass an old temple [#5] (there is The Graves of the Ancestors quest inside). Turn right at the crossroads and head towards a lake [#6] (you can find Hanu there, who will give you The Beast in the Lake quest). Climb up the path where the Natives' camp is [#2]. There, talk to Corrientes, who can be found in a hut on the right. This is when the quest ends.
Rewards:
![Quest giver: Datu [#1] - The Final Test - Maracai Bay - Quests - Risen 2: Dark Waters - Game Guide and Walkthrough](https://game.lhg100.com/Article/UploadFiles/201512/2015121709180512.jpg)
Quest giver: Datu [#1]
This quest is part of: Chaka Datu's Legacy
Having completed two previous trials (see: Chaka Datu's Legacy), you need to finish the whole thing by defeating the opposing halmak.
If you support Zaalu [#2] (meaning you're sided with the Natives since the Sword Coast), you need to defeat Daiki, who servers Hakeke [#3]. Find him and tell him about the duel. This activates the Follow Daiki to the Ritual Site quest.
If you support Hakeke [#3] (meaning you're sided with the Inquisition since the Sword Coast), you need to defeat Potaka, who serves Zaalu [#2]. You can find the warrior next to his commander, outside his hut. Tell him about the duel and go to the arena (see: Follow Potaka to the Ritual Site).
 Even though it's an honorable duel, you can use dirty tricks and guns.
Regardless of who you're backing, the hot-headed youngster will start shouting insults at you the moment you arrive at the fighting spot [#5]. You can ignore him and begin a regular duel, or shoot him unexpectedly (as long as you have the Nuff Said! talent). In the latter case keep in mind that every Native who sees it will rush to attack you, forcing you to overcome them (which guarantees more Glory points!). No matter how you defeat your opponent, after the fight ends the quest Duel with Hakeke's Halmak will be completed (or Duel with Zaalu's Halmak if you're on the Inquisition's side).
After the battle, report back to your patron and go to Datu afterwards. When you tell him about your victory, the quest will be completed - together with Chaka Datu's Legacy.
Rewards:
![Quest giver: Datu [#1] - The Four Feathers - Maracai Bay - Quests - Risen 2: Dark Waters - Game Guide and Walkthrough](https://game.lhg100.com/Article/UploadFiles/201512/2015121709180503.jpg)
Quest giver: Datu [#1]
This quest is part of: Chaka Datu's Legacy
Note! This quest is only available to those players who on the Sword Coast have joined the Inquisition!
You can start this quest only after completing chaka Datu's first trial - the Paws for Hakete mission. You will receive it when you talk to the chieftain. Go back to your patron and explain to him that the second trial will test his hunting skills. Hakeke isn't much of a hunter, so you'll have to help him out. Leave the village together (see: On the Road with Hakeke), and look for the first feather (see: The Black Feather). You will see if several steps ahead, on a tree branch above a stone with a symbol on it [#2] (the below screen).
When you bring the first finding to Hakeke, he'll say he doesn't know where to look for the other ones. Go back to where you found the Black feather, then, and read the sign on the trunk (points north-west). Inform Hakeke of it and proceed in the indicated direction. After a few steps you should see the Blue feather [#3] - the goal of the quest by the same name. Read the symbol underneath to learn that you should go west next.
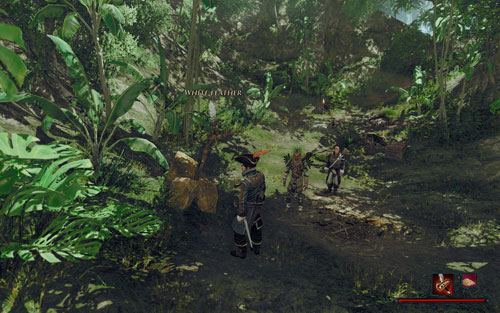 Here's the magnificent White feather.
Continue along the line of the lake until you a reach a fishermen's camp. Nearby, on a twig, you should find the Yellow feather [#4]. The sign underneath will point you north. The last item, the White feather, lies near the battleground [#5] you should be well familiar with. The next symbol will take you north-west, where you'll find Kenan. Talk to him to finish the quest. What's left is to report back to Hakeke and return to chieftain Datu [#7] (see: Duel with Zaalu's Halmak).
Two things to sum up:
Rewards:
![Quest giver: Yagul [#1] - The Graves of the Ancestors - Maracai Bay - Quests - Risen 2: Dark Waters - Game Guide and Walkthrough](https://game.lhg100.com/Article/UploadFiles/201512/2015121709180614.jpg)
Quest giver: Yagul [#1]
Enter the temple that rises above the central part of the land [#1] and take care of three Ghouls that live there. Then, go inside the room with the Golden mask placed on the pedestal. When you try to lift it, a huge monster will appear - Yagul. The spirit will be angry at your behavior - you've just desecrated one of the holy places of the Maracai tribe. To repent for your sins, you'll need to recover three other masks and bring them back to where they belong. If you agree to do it, the quest will be triggered. Otherwise you'll have to fight Yagul and three Warriors - which basically means certain death. What's more, even if you did manage to survive, killing the monster cancels the whole quest!
 Close encounter of the third kind.
Head for the temple east of the Natives' village [#2] and get rid of Termites that prowl the area (there're not only Workers, but also Warriors). After entering the temple and turning left, prepare for a meeting with a dangerous trap - a swinging blade which will cut you in half if you fail to press Space quickly enough. If you survived the trap, move forward and search the body of a pirate for the Golden mask. Place it on the pedestal near the corpse. This will close the door leading to the room on the right (there are some treasures inside, so take them before closing the door), and complete the first part of the quest. Before leaving the room with the pirate, though, take the Jaguar paw lying next to him - it's a legendary artifact. Now you can leave in peace - the trap has been disabled.
 Don't forget the paw!
The third temple lies north-east of the Maracai village - the same place where you've met the plunderers from The Peace of the Dead quest [#3]. Eliminate the Ghoul lurking near the entrance, and jump down to the hole in the inner corridor of the building (unfortunately, you're going to have to leave your companions). Kill another Ghoul and move forward - on the crossroads you'll find a body of a pirate. It holds another Golden mask - take it and get ready to fight a Guard. He's a powerful enemy, best killed by using the Parrot and continuously jumping sideways (he's pretty slow). When you defeat him, proceed ahead and immediately dodge the swinging blade which will fall on you at the exit of the corridor (press Space). Move forward, pull the lever on the wall and kill another Ghoul. Place the Golden mask on the pedestal in the next room and leave through the newly opened gate (you'll have to jump over a hole that got you underground).
 Even a demon has to yield to the power of the Parrot.
The most problematic part of the quest is its ending - the mask is found in a completely different location than where it's supposed to be placed. You can get the precious artifact from a cave in the south of the map - the same in which you've found the wall of flames [#4] (see: The Barrier of Flames). When you stand before it, turn left and take the stairs up. Kill a Grave Spider which will dig out from the ground, and then take the Mask from the table on the right. With it, go to the temple north-east of the Maracai village [#5] - you should be familiar with it thanks to The Naked Corpses quest. Go inside and put the artifact in its rightful place. Yagul will show himself to you and erase your sins. This is when the quest ends, but in order to receive the most important reward for it you also need to go to the shaman Osamu [#6]. Tell him about your achievement, and he'll give you the Broken rattle - one of the legendary items.
 Don't be fooled - it's a golden mask.
Note! The order at which to visit the subsequent temples is up to you - and what's more, you can activate this quest at any of it. Simply attempt to steal one of the masks - Yagul will surely notice.
Rewards:
![Quest giver: Valdez [#1] - The Hidden Valley - Maracai Bay - Quests - Risen 2: Dark Waters - Game Guide and Walkthrough](https://game.lhg100.com/Article/UploadFiles/201512/2015121709180680.jpg)
Quest giver: Valdez [#1]
This quest is part of: Maracai Bay
You'll receive this quest upon your arrival at the Maracai Bay, as soon as you talk to Valdez in the harbor. There are two ways to complete it - the choice determines the way they're resolved. The first on involves saving Angus [#2] (see: The Deserter) - if you take him back to Valdez and talk to the Inquisitor, you'll learn the true identity of Corrientes [#3]. When you next see him, the Nameless Hero will automatically draw his weapon and attack the impostor. It's better not to hurry with this option, though - it will cancel all the quest received from the impostor and his men!
 Fighting the whole village - not a wise choice.
Choosing this option is quite unfortunate because it means fighting with every one of Garcia's servants all at once - including the Natives which you'll have to stun (you'll kill the pirates, therefore cancelling their quests!). Since the battle is extremely difficult, don't forget to bring your companions along, and what's more, flee the village - you have zero chances while you're within its borders! Only when you get back you can try to lure your enemies, one by one, outside and take care of them there. Once you've dealt with them, kill Corrientes and take his Blood of the Ancestors - it will allow you to pass through the wall of fire (see: The Barrier of Flames).
The second option is talking to the shaman Osamu [#4]. When you report to him after completing the Secret Entrance Found quest and talking to Corrientes, the pirate's deception will come into light. The Native will give you the Blood of the Ancestors, which will allow for a pursuit. Your destination is a wall of fire [#5] in the cave south-east of the village. You'll have to fight with two of the pirate's thugs - Egas and Palomo. After you kill them, go through the magical barrier (sadly, you can't take your companions with you).
 Tomb Risen.
No matter which choice you make, you'll have to kill a Ghoul after passing through the wall of flames, and a little further after him - a Grave Spider. In the location with the latter, turn 180 degrees, climb the upper level and approach the wall with the door forged in it. There is a button at the top which will open it. This passage will allow you to go back to the companions you had to leave in front of the flame barrier, and continue on with them.
Leave the cave by the corridor right of the Grave Spider. You'll complete the mission when you see daylight [#6]. Now there's only Corrientes to take care of (see: Maracai Bay).
Rewards:

This quest will not be triggered in the usual way. You need to enter the temple by the lake [#1] and examine the bodies that rest there. You'll notice that every one of the has been massacred and then stripped of clothes. Since they belong both to the Natives and the white men, you should report this incident either to the shaman Osamu [#2] or to Captain Valdez [#3]. Interestingly enough, the quest can be completed only after revealing the true identity of Garcia (see: Garcia's Masquerade Uncovered) - any reports before that won't have any effect.
 The smell must be less than pleasant.
Note! You can also report this incident to Corrientes [#4] - but it won't get you anything.
Rewards:
![Quest giver: Malaika [#1] - The Peace of the Dead - Maracai Bay - Quests - Risen 2: Dark Waters - Game Guide and Walkthrough](https://game.lhg100.com/Article/UploadFiles/201512/2015121709180771.jpg)
Quest giver: Malaika [#1]
Talk to the witch Malaika to learn that some foul thieves are digging out Native graves and stealing priceless idols. As a friend to the Malakai tribe, you can't condone such behavior - you have to cut this thieving business short. Deal with the bandits and recover the holy items.
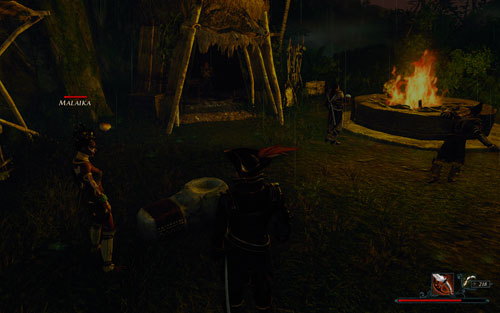 Malaika is standing in front of Corrientes' hut.
Before leaving the village, meet with Dara [#2] and Egas [#3]. The former will send you on a quest to find her husband (see: Where Is Koraka?), the latter - to kill all pirates (see: Grave Robbers). Take these quests and you're free to get your revenge.
Your goal is to get rid of every pirate lurking outside the temple [#4]. There are three of them, so it's better to have a companion with you. If you still can't handle them, retreat to Koraka [#5] standing nearby (see: Where Is Koraka?). The Native will help you out, but you won't get Glory points for the enemies he kills!
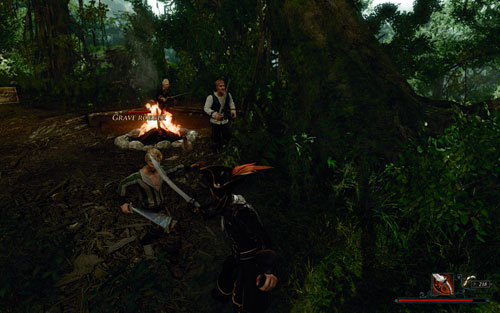 Another encounter with pirates.
Afterwards, search their bodies to find three Idols. If you talk to Koraka, you'll also complete the Where Is Koraka? quest. Return to the village and report to Egas (to complete Grave Robbers), and then to Malaika. When you give the Idols back to her you can pick your reward (see below). This is when the quest ends.
Note! If you kill the pirates first, and only then meet with Koraka, Malaika or Egas, their quests will still be completed - the moment you talk to them.
Rewards:
Skull ring (+5 to Intimidate and Slashing Weapons) or Spirit Essence (bonus to Black Magic for 10 seconds).

This quest is part of: The Hidden Valley
This mission if received from Corrientes [#1] in the Natives' village. Your destination is the magical barrier that blocks the way to the fire temple [#2]. If you want, you can talk about it to the hunter Pandu [#3], found a short walk south beyond the village. He'll tell you that a wall of flames has been raised in a cave inhabited by huge spiders [#4]. Go there, then, and use the only available path, exterminating everything that moves on the way (you'll encounter a few Cave Bats and four Grave Spiders). When you arrive at the wall of flames [#5], the quest Secret Entrance Found will be completed, and you'll be free to report back to Corrientes [#1] (which ends the present quest).
 An RPG without spiders? It just won't do!
This quest has a lot of difficult battles. Eliminate the Grave Spiders from a distance (shotgun works best), because if they come close you'll surely die. It's a good idea to bring some companions along - though they may not help you much during in the fighting itself, but will distract the attention of your enemies away from you.
Rewards:
 Maracai Bay
 Isle of the Dead
You'll receive this quest from Bones [#1] in the Maracai Bay if you complete the Unwanted Sermon first. If so, ask the man why he thinks he's a dead person. Next, you should sail to the Isle of the Dead (see: The Water Temple) and find the Confused ghost there [#2]. You'll gain access to him only after drinking the Potion of false death (see: The Journey to the Underworld). In the spirit world, head for the Thief's Temple [#3] (one of key locations) and look for a man who looks exactly like Bones. He's the ghost you want to talk to.
 No wonder the doctor went crazy.
Regardless of the chosen dialogue option, you'll eventually be able to free the spirit. As soon as you mention the white scarf (it's been mentioned by the real Bones), the spirit will instantly understand what's happened to it. This is when A Message From the World of the Living quest ends and another one begins - A Message from the Afterlife.
You can now go back to Bones [#4] and explain the situation to him. Go to the Altar of Transition [#5] and return to the realm of the living. When you talk to the doctor, he won't grasp the fact that he's no longer half-alive at first. Eventually, he'll accept the truth. Sadly, he'll still remain the irritating mad man preaching his boring sermons - apparently healing his soul hasn't healed him. There's nothing you can do about it, though - you can't heal Bones any more beyond that.
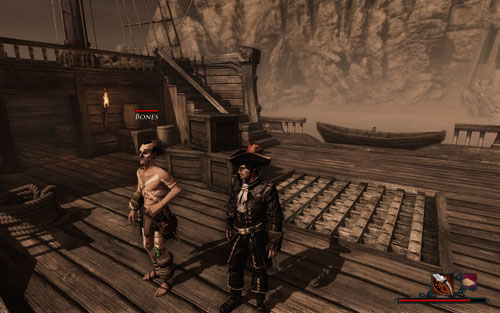 Talking to mad men is always interesting.
Since you've helped him out, the man will offer you his services. A skilled doctor will surely come in handy in your travels and the fight with Mara.
Rewards:

Note! This quest is only available to those players who on the Sword Coast have joined the Natives!
Quest giver: Datu [#1]
This quest is part of: Chaka Datu's Legacy
After completing the Paws for Zaalu quest, report back to Datu. He'll be very pleased with your success, and give you another quest, The Three Questions. Meet with Zaalu [#2] and tell him that the next trial will be a test of his wisdom - he'll have to answer three questions. It's a tough challenge for the proud Native, so you're going to have to help him. Create a voodoo doll and take over his body. This little trick will allow you to solve the chieftain's puzzles with everybody thinking you're actually Zaalu.
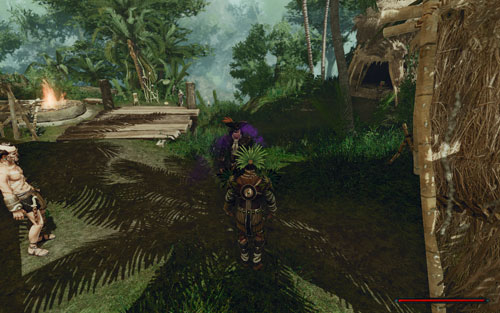 Apparently, the Natives have nothing against trickery.
Convince the Native to give you his Hair, and go to the altar [#3] that is towering above the village. Use it to create the doll so that you could posses the man. If you don't have ingredients, buy them from Malaika [#4] or Kenan [#3] (the Voodoo doll can also be found inside Zaalu's chest, but it requires Lockpicking at 20). When the ritual is over, go back to your patron and take over his body (see: Take Over Zaalu's Body). Next, go to Datu and answer his three questions:
After passing the test, go back to your body and tell Zaalu about your success. This is when the quest ends, leaving only the last challenge from the Chaka Datu's Legacy quest.
Note! If you gave a wrong answer, the mission will be failed (same as The Three Questions main quest). Despite that, there's no need to worry - the third chaka Datu's trial (see: The Final Test) will decide upon the whole success, so a slight slip would only mean losing Glory points.
Rewards:
![The map to this treasure can be bought from the witch Malaika, from the Natives' village [#1] - The Treasure in the Hidden Valley - Maracai Bay - Quests - Risen 2: Dark Waters - Game Guide and Walkthrough](https://game.lhg100.com/Article/UploadFiles/201512/2015121709180935.jpg)
The map to this treasure can be bought from the witch Malaika, from the Natives' village [#1]. It will take a lot of time to get to where it's been buried - you'll have to complete The Hidden Valley quest first. When it's done, simply go to the temple at the south-west edge of the map [#2], and dig out the chest. Be careful, though, because there is a small pack of Termites and a sinister Panther lurking around - claiming the treasure won't go without trouble.
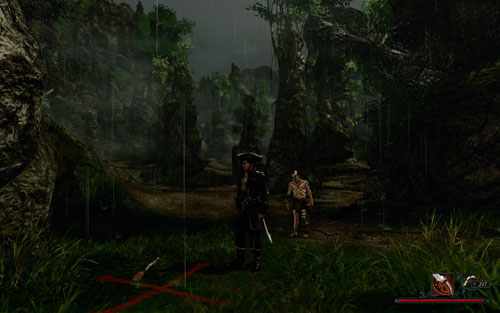 A pretty place to hide valuables.
The quest will be completed once you take the chest. Open it and bathe in your richness!
Rewards:
![The map leading to this treasure is found next to Garcia's raft [#1], which in turn is found not far from his ship [#2] - The Treasure in the Panther Cave - Maracai Bay - Quests - Risen 2: Dark Waters - Game Guide and Walkthrough](https://game.lhg100.com/Article/UploadFiles/201512/2015121709180904.jpg)
The map leading to this treasure is found next to Garcia's raft [#1], which in turn is found not far from his ship [#2]. The quest will be activated only when you pull the bundle out of the glass container (which means selecting it in the inventory). From now on you'll be able to see where the chest has been buried. To reach it you need to go back a little. Return to the Maracai village [#3] and go north-east from there (watch out for Claw Monkeys!). In the northern part of the valley you should see an entrance to a cave [#4]. Go inside and kill the Cave Bat that lives there.
 The symbol's been marked in such a way so that finding it would not be easy.
Look around the cavern - there are some plants and mushrooms and quite a lot of veins of gold (a Pickaxe will come in handy). When your pockets are full, approach the cave's north edge and look for the X mark [#5] that should be visible on the ground (it's pretty difficult to see). Use the shovel and dig. That's all.
Rewards:
![To obtain the map leading to this treasure you need to help he fisherman Hanu [#1] fight the Alligator living in the lake [#2] (see: The Beast in the Lake) - The Treasure on the Hunting Grounds - Maracai Bay - Quests - Risen 2: Dark Waters - Game Guide and Walkthrough](https://game.lhg100.com/Article/UploadFiles/201512/2015121709180986.jpg)
To obtain the map leading to this treasure you need to help he fisherman Hanu [#1] fight the Alligator living in the lake [#2] (see: The Beast in the Lake). Afterwards he'll give you the drawing. Go to where X marks the spot.
 A pretty place to hide valuables.
Head south and use the mountain path along the hill. You're going to have to fight several Firebirds and Claw Monkeys, but that shouldn't worry you - it's nothing you haven't defeated before. An encounter with pirates [#3] you'll meet on the way may be a little more challenging (see: Enemy Pirate Camp). After you've covered the ground with their bodies, you're free to go to the treasure spot and to dig it out [#4]. Watch for other monkeys, though - this place must be their hunting grounds!
Rewards:
![If you want to get your hands on the map to this treasure, go to Garcia's ship [#1] - The Treasure on the Pirate Coast - Maracai Bay - Quests - Risen 2: Dark Waters - Game Guide and Walkthrough](https://game.lhg100.com/Article/UploadFiles/201512/2015121709181046.jpg)
If you want to get your hands on the map to this treasure, go to Garcia's ship [#1]. Use the boat by the beach [#2] and take it to the old ship. You'll have to break through four Ship guards (see: Seize Garcia's Ship), but they shouldn't be a problem for you. When they're dead, enter the captain's cabin and take the Map.
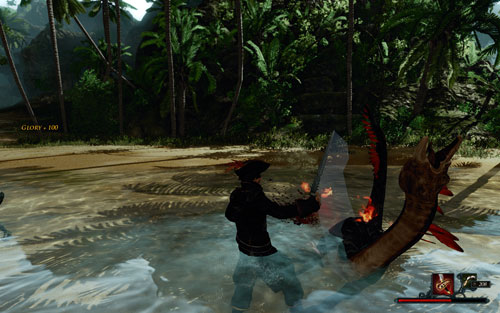 Apparently, Firebirds can't swim.
The drawing suggests that the treasure has been buried on the beach [#3], the one you've just came from. Reach the shore and take a walk along the waterfront (watch out for Firebirds!). You should see an X when you arrive at the side of the hill. Dig there and the old chest will appear before your eyes. Here's the treasure!
Rewards:

This quest is part of: The Four Feathers
Note! This quest is only available to those players who on the Sword Coast have joined the Inquisition!
The quest will be activated and automatically completed the moment you find the fourth of the feathers left by Kenan (see: The Four Feathers). To find it, leave the village with Hakeke [#1] (see: On the Road with Hakeke), and take a few steps north-east. On the tree branch next to the crossroads you should see the Black feather [#2].
When you bring the first finding to Hakeke, he'll say he doesn't know where to look for the other ones. Go back to where you found the Black feather, then, and read the sign on the trunk (points north-west). Inform Hakeke of it and proceed in the indicated direction. After a few steps you should see the Blue feather [#3] - the goal of the quest by the same name. Read the symbol underneath to learn that you should go west next.
 Here is the magnificent White feather.
Continue along the line of the lake until you a reach a fishermen's camp. Nearby, on a twig, you should find the Yellow feather [#4]. The sign underneath will point you north. The last item, the White feather, lies near the battleground [#5] you should be well familiar with. This is when the mission ends, and the next symbol takes you west, to Kenan. Talk to him to finish The Four Feathers quest.
Two things to sum up:
Rewards:

This quest is part of: The Four Feathers
Note! This quest is only available to those players who on the Sword Coast have joined the Inquisition!
The quest will be activated and automatically completed the moment you find the fourth of the feathers left by Kenan (see: The Four Feathers). To find it, leave the village with Hakeke [#1] (see: On the Road with Hakeke), and take a few steps north-east. On the tree branch next to the crossroads you should see the Black feather [#2].
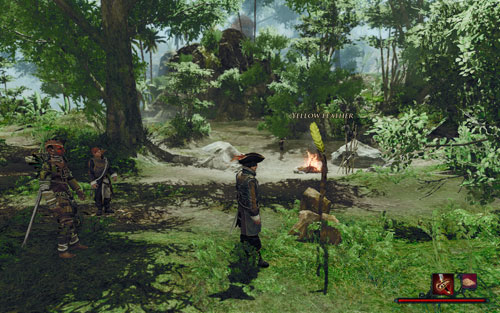 The thing sticks out.
When you bring the first finding to Hakeke, he'll say he doesn't know where to look for the other ones. Go back to where you found the Black feather, then, and read the sign on the trunk (points north-west). Inform Hakeke of it and proceed in the indicated direction. After a few steps you should see the Blue feather [#3] - the goal of the quest by the same name. Read the symbol underneath to learn that you should go west next.
Continue along the line of the lake until you a reach a fishermen's camp. Nearby, on a twig, you should find the Yellow feather [#4] - the goal of this mission.
Two things to sum up:
Rewards:
![Quest giver: Bones [#1] - Unwanted Sermon - Maracai Bay - Quests - Risen 2: Dark Waters - Game Guide and Walkthrough](https://game.lhg100.com/Article/UploadFiles/201512/2015121709181196.jpg)
Quest giver: Bones [#1]
You can receive this quest in the Natives' village after talking to Bones (this irritating preacher who keeps giving sermons in the middle of the day). The words he praises are terribly irritating to the locals - and they would surely give a lot if he could be silenced. You can help them by stopping the mad man's monologue.
 You won't find someone that crazy just anywhere.
There are two ways of completing this quest. If you have Intimidate at least at 90, you can convince Bones to shut up. If you haven't been investing in that skill, give him the Firutaopi soup which you got from Jamila after completing the Nice and Spicy quest. Both solutions are equally successful and involve the same reward.
After you've silenced the mad man, you can now try to convince him to join your crew. There is always a need for a doctor - even a crazy one (especially since he can teach you his trade). The process also involves The Split Soul quest which you'll complete on the Isle of the Dead.
Rewards:
![Quest giver: Dara [#1] - Where Is Koraka? - Maracai Bay - Quests - Risen 2: Dark Waters - Game Guide and Walkthrough](https://game.lhg100.com/Article/UploadFiles/201512/2015121709181172.jpg)
Quest giver: Dara [#1]
This quest is part of: The Peace of the Dead
The quest is received from a concerned Dara, who is walking around the Natives' village. She's worried about her husband, Koraka, who's gone into the wild. If you find the man and bring him back home, you'll surely gain the Native woman's trust.
 Young and rebellious.
The warrior can be found east of the village, not far from the temple [#2]. He's hiding in the bushes, watching the pirates robbing the cemetery [#3] (see: Plunderers at the Ancestral Grave). He won't agree to go back home unless you exterminate all the pirates. Do it then, and talk to the Native afterwards. He'll go back to his wife at once, and later agree to train you in the surviving arts. If you tell Dara that her husband had stopped wandering around the woods, she'll also give you a Potion of persuasion.
Note! This quest can be combined with The Peace of the Dead, which it's part of. If you complete it, you'll get more Glory points.
Rewards:

Note! This quest is only available to those players who on the Sword Coast have joined the Natives!
Quest giver: Zaalu [#1]
This quest is part of: The Three Questions
After completing the Paws for Zaalu quest, report back to Datu [#2]. He'll be very pleased with your success, and give you another quest, The Three Questions. Meet with Zaalu [#1] and tell him that the next trial will be a test of his wisdom - he'll have to answer three questions. It's a tough challenge for the proud Native, so you're going to have to help him. Create a voodoo doll and take over his body. This little trick will allow you to solve the chieftain's puzzles with everybody thinking you're actually Zaalu.
 You'll be using the forbidden arts once again.
The goal of the quest is to make the said doll. Convince the Native to give you his Hair, and go to the altar [#3] that is towering above the village. Use it to create the doll so that you could posses the man. If you don't have the ingredients, buy them from Malaika [#4] or Kenan [#3] (the Voodoo doll can also be found inside Zaalu's chest, but it requires Lockpicking at 20). When the ritual is over, the quest will end.
Rewards:
![Quest giver: Confused ghost [#1] - A Message from the Afterlife - Isle of the Dead - Quests - Risen 2: Dark Waters - Game Guide and Walkthrough](https://game.lhg100.com/Article/UploadFiles/201512/2015121709181203.jpg)
Quest giver: Confused ghost [#1]
This quest is part of: The Split Soul
After completing the quest A Message from the World of the Living in which you had talked to the Confused ghost, you can go back to Bones [#2] and explain the situation to him. Go to the Altar of Transition [#3] and return to the realm of the living. When you talk to the doctor, he won't grasp the fact that he's no longer half-alive at first. Eventually, he'll accept the truth. Sadly, he'll still remain the irritating mad man preaching his boring sermons - apparently healing his soul hasn't healed him. There's nothing you can do about it, though - you can't heal Bones any more beyond that.
 Talking to mad men is always interesting.
Since you've helped him out, the man will offer you his services. A skilled doctor will surely come in handy in your travels and the fight with Mara.
Rewards:
![Quest giver: Akando [#1] - Akando's Chest - Isle of the Dead - Quests - Risen 2: Dark Waters - Game Guide and Walkthrough](https://game.lhg100.com/Article/UploadFiles/201512/2015121709181228.jpg)
Quest giver: Akando [#1]
This quest is part of: The Skull Sceptre
This quest is received from Akando [#1] - the thief you'll meet outside the Thief's Temple. Talk to him to learn of his sad fate - he is stuck in the world of the undead until someone robs him. There is a chest is his house (difficulty level at 60) which holds the White diamond. If someone steals it, the old thief will be free to leave.
 Can you handle it?
There are two ways to open the chest. If you have Lockpicking at least at 60, use the lock pick to open the lock. If not, you can ask Nahele [#2] to make a special key. The woman needs gold to melt it - you'll need to hand her 300 Gold, then. If you do it, you'll receive the key and the problem will be solved.
When you open the chest and take the White diamond, you'll complete the present quest. To conclude The Thief's Curse you also need to talk to Akando again.
Rewards:
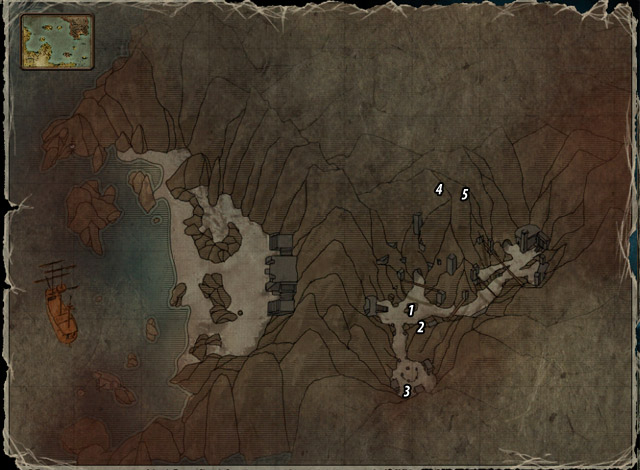
This quest is part of: The Potion of False Death
To help Tao prepare the potion which will allow you to pass to the underworld (see: The Potion of False Death), you need to bring him five flowers of Black lotus and six containers with Grave dust. The locations of the latter are described in the Grave Dust chapter, the locations of the former - below.
Black lotus can be found:
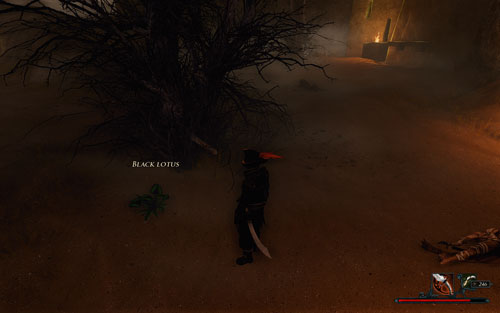 Lotus grows mostly under withered trees.
The quest will be activated and immediately completed the moment you have've collected all flowers. Now you need to procure the second ingredient and bring everything to Tao.
Rewards:
![Quest giver: Kusko [#1] - Defeat Kusko - Isle of the Dead - Quests - Risen 2: Dark Waters - Game Guide and Walkthrough](https://game.lhg100.com/Article/UploadFiles/201512/2015121709181392.jpg)
Quest giver: Kusko [#1]
This quest is part of: The Warrior's Curse
When you reach the Arena located in the south, you'll meet Kusko there. The warrior will instantly challenge you to a duel - he's been waiting for an opponent who can defeat him for a thousand years. You happen to be the only candidate - give him what he wants and take his Spear of the Warrior (see: The Skull Sceptre).
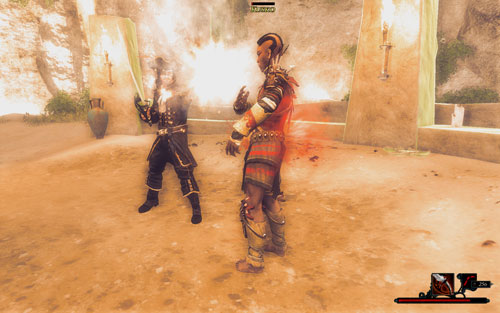 You can use any type of weapon.
While fighting, block as much as you can - the Natives can't interrupt parrying, but they're very skilled at evading. The smartest thing to do is to keep covering yourself and attack only when the foe makes a mistake (i.e. attempts to perform an attack that takes too much time).
When you defeat him, you'll complete the Defeat Kusko quest. To complete the present one you also need to talk to the angered spirit. Since you've managed to defeat him, you'll receive the Spear of the Warrior.
Rewards:
![Quest giver: Motega [#1] - Follow Motega - Isle of the Dead - Quests - Risen 2: Dark Waters - Game Guide and Walkthrough](https://game.lhg100.com/Article/UploadFiles/201512/2015121709181330.jpg)
Quest giver: Motega [#1]
This quest is part of: The Skull Sceptre
The quest is triggered by talking to Motega - the hunter you'll find in one of the houses. He'll tell you that he has been punished by Mara and has too look at the beast he cannot kill for all eternity - the Silverback itself. Since you'll need the ghost's help (see: The Skull Sceptre), you can help him slay the monster. Go with him to a cave [#2] and then to where the beast lives [#3]. When the two of you reach your destination, the quest will be completed and another one will begin - The Hunt.
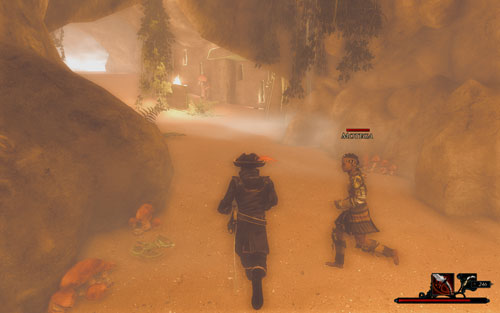
Note! If you killed the Silverback first and only then talked to Motega, the quest won't be activated at all!
Rewards:

This quest is part of: The Potion of False Death
To help Tao prepare the potion which will allow you to cross over to the underworld (see: The Potion of False Death), you need to bring him five flowers of Black lotus and six containers with Grave dust. The locations of the former are described in the Black Lotus chapter, the locations of the latter - below.
Grave dust can be found:
 Most of the dust containers are found in the Native huts.
The quest will be activated and immediately completed the moment you have've collected all vials. Now you need to procure the second ingredient and bring everything to Tao.
Rewards:
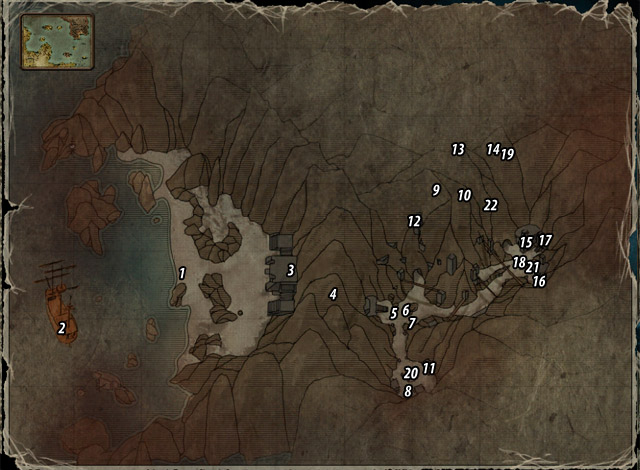
This quest is part of: Steelbeard's Artefact
Note! You can receive this quest only on the condition that you had sailed to the Isle of the Dead before learning the location of Steelbeard's treasure (see: The World's Best Hiding Place). This option is only available to those players who on the Sword Coast have sided with the Natives.
The quest is triggered upon your arrival at the Isle of the Dead [#1]. To complete it, you need to find Patty's father [#2] and ask him to tell you where he had hidden the Earth Amulet. It's a pretty difficult quest which involves a lot of dangers and completing two side quests: The Journey to the Underworld and The Skull Sceptre. The first one is received from the guard Tao by the entrance to the land [#3]. Your goal is to brew a potion which will allow you to cross over to the underworld. You'll need Black lotus and Grave dust to make it (see: Black Lotus and Grave Dust). Both items are found in the further parts of the island. Go through the gate opened for you by Tao, and face a Warrior [#4] lurking there. Further on you'll have to fight a difficult battle with a Guard and a Ghoul [#5] - firearms work and some Dirty Tricks work best here. Afterwards, focus on collecting the necessary ingredients - you can find their locations below. Remember to remain cautious - there are enemies everywhere!
 It's better to start the search during the day - it's hard to see anything in the dark.
Black lotus can be found:
 Grave dust is found in the houses, not by the graves.
Grave dust can be found:
 Goodnigh!
Once you have all the necessary ingredients, enter the temple and talk to Tao [#17] (killing two Warriors by the door on the way). Tell him that the search is over to receive the Potion of false death from him. Lie down on the altar and drink the mixture. When you do it, The Journey to the Underworld quest will end and another one will begin - The Skull Sceptre.
When you wake up, take the Old coin off the shelf (a legendary item) and talk to Nahele [#18], who is standing by the entrance to the Altar of Transition. The witch can create a tool for you to be able to communicate with Steelbeard - the Skull sceptre. She needs four pieces to combine it. Bring her:
 She's probably been doing that for thousands of years.
Once you have all the items, report back to Nahele. She'll give you the Skull sceptre. The Artist's Curse will end, but to continue the present mission report to Tao by the entrance to the land [#3]. When he resurrects the captain and you ask him about the location of the treasure, you'll complete not only the present quest, but the main one as well - Steelbeard's Ghost.
Since you've joined the Natives while on the Sword Coast, old Tao will tell you the secrets of the most powerful voodoo acana (he's a master of them) and let you keep the Skull sceptre. This will allow you to summon Steelbeard's ghost any time and place!
Rewards:
![Quest giver: Nahele [#1] - The Artist's Curse - Isle of the Dead - Quests - Risen 2: Dark Waters - Game Guide and Walkthrough](https://game.lhg100.com/Article/UploadFiles/201512/2015121709181450.jpg)
Quest giver: Nahele [#1]
This quest is part of: The Skull Sceptre
You'll receive this quest from Nahele by the entrance to the Altar of Transition (see: The Journey to the Underworld). The witch can create a tool for you to be able to communicate with Steelbeard - the Skull sceptre. She needs four pieces to combine it. Bring her:
 Being imprisoned forever must by really boring.
Once you have all the items, report back to Nahele. She'll give you the Skull sceptre. The quest will end, but to continue The Skull Sceptre mission you have to report to Tao by the entrance to the land [#6].
Rewards:
![Quest giver: Motega [#1] - The Hunt - Isle of the Dead - Quests - Risen 2: Dark Waters - Game Guide and Walkthrough](https://game.lhg100.com/Article/UploadFiles/201512/2015121709181592.jpg)
Quest giver: Motega [#1]
This quest is part of: The Hunter's Curse
Talk to Motega - the hunter you'll find in one of the houses. He'll tell you that he has been punished by Mara and has too look at the beast he cannot kill for all eternity - the Silverback. Since you'll need the ghost's help (see: The Skull Sceptre), you can help him slay the monster. Go with him to a cave [#2] and then to where the beast lives [#3]. When you reach your destination and talk to the Native, the quest will be activated and immediately completed. Notice that you don't need to hunt the Gorilla to complete this quest - if you kill him first and talk to the man afterwards, you'll still finish it.

Note! If you killed the Silverback first and only then met with Motega (before accepting The Hunter's Curse), the quest won't be triggered at all!
Rewards:
![Quest giver: Motega [#1] - The Hunter's Curse - Isle of the Dead - Quests - Risen 2: Dark Waters - Game Guide and Walkthrough](https://game.lhg100.com/Article/UploadFiles/201512/2015121709181597.jpg)
Quest giver: Motega [#1]
This quest is part of: The Skull Sceptre
The quest is triggered by talking to Motega - the hunter you'll find in one of the houses. He'll tell you that he has been punished by Mara and has too look at the beast he cannot kill for all eternity - the Silverback itself. Since you'll need the ghost's help (see: The Skull Sceptre), you can help him slay the monster. Go with him to a cave [#2] and then to where the beast lives [#3] (see: Follow Motega). Talk to him there to activate and complete The Hunt quest. Now you need to kill the beast.
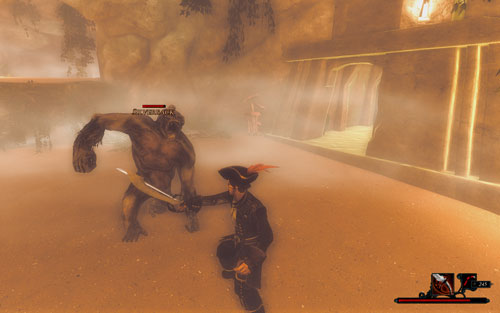 The fight with the gorilla is no trifle - don't underestimate him!
Attack the Gorilla and strike as many blows as you can - he's not too resilient, so he should go down soon enough. If you can't take him on your own, retreat to Motega and he'll help you out. Even if he kills the beast, you'll still receive the Glory points - there's nothing to worry about. When he's down, you'll complete The Silverback Is Dead quest, and when you report back to Motega you'll not only complete the present mission, but also receive the Skull of an undead animal (needed for The Skull Sceptre).
Rewards:
![Quest giver: Tao [#1] - The Journey to the Underworld - Isle of the Dead - Quests - Risen 2: Dark Waters - Game Guide and Walkthrough](https://game.lhg100.com/Article/UploadFiles/201512/2015121709181596.jpg)
Quest giver: Tao [#1]
This quest is part of: Steelbeard's Ghost
You'll receive this mission from the guard Tao during your first conversation with him. Your goal is to brew a potion which will allow you to cross over to the underworld. You'll need Black lotus and Grave dust to make it (see: Black Lotus and Grave Dust). Both items are found in the further parts of the island. Go through the gate opened for you by Tao, and face a Warrior [#2] lurking there. Further on you'll have to fight a difficult battle with a Guard and a Ghoul [#3] - firearms work and some Dirty Tricks work best here. Afterwards, focus on collecting the necessary ingredients - you can find their locations below. Remember to remain cautious - there are enemies everywhere!
 Lotus is not black at all.
Black lotus can be found:
 You'll find the Grave dust in the huts, not by the graves
Grave dust can be found:
 Time for a test of faith.
Once you have all the necessary ingredients, enter the temple and talk to Tao [#15] (killing two Warriors by the door on the way). Tell him that the search is over to receive the Potion of false death from him. This is when you need to lie down on the altar and drink the mixture. When you do it, the present quest will end and another one will begin - The Skull Sceptre.
Rewards:
![Quest giver: Tao [#1] - The Potion of False Death - Isle of the Dead - Quests - Risen 2: Dark Waters - Game Guide and Walkthrough](https://game.lhg100.com/Article/UploadFiles/201512/2015121709181691.jpg)
Quest giver: Tao [#1]
This quest is part of: The Journey to the Underworld
The first one is received from the guard Tao during your first conversation. Your goal is to brew a potion which will allow you to cross over to the underworld. You'll need Black lotus and Grave dust to make it (see: Black Lotus and Grave Dust). Both items are found in the further parts of the island. Go through the gate opened for you by Tao, and face a Warrior [#2] lurking there. Further on you'll have to fight a difficult battle with a Guard and a Ghoul [#3] - firearms work and some Dirty Tricks work best here. Afterwards, focus on collecting the necessary ingredients - you can find their locations below. Remember to remain cautious - there are enemies everywhere!
 Lotus is not black at all.
Black lotus can be found:
 You'll find the Grave dust in the huts, not by the graves
Grave dust can be found:
 Time for a test of faith.
Once you have all the necessary ingredients, enter the temple and talk to Tao [#15] (killing two Warriors by the door on the way). Tell him that the search is over to receive the Potion of false death from him. Lie down on the altar and drink the mixture. This is when the quest ends - to continue The Journey to the Underworld, lie down on the altar and drink the mixture.
Rewards:
This quest is triggered and automatically completed after killing the Silverback [#1]. The beast is connected with The Hunter's Curse quest - and it should be killed in the course of it. You can of course kill it before talking to Motega [#2] (the quest giver), but it involves loosing an additional amount of Glory points.
You can find the hunter in one of the houses. He'll tell you that he has been punished by Mara and has too look at the beast he cannot kill for all eternity - the Silverback itself. Since you'll need the ghost's help (see: The Skull Sceptre), you can help him slay the monster. Go with him to a cave [#3] and then to where the beast lives [#1] (see: Follow Motega). Talk to him there to activate and complete The Hunt quest. Now you need to kill the beast.
 You can defeat the gorilla on your own or with the hunter's help.
Attack the Gorilla and strike as many blows as you can - he's not too resilient, so he should go down soon enough. If you can't take him on your own, retreat to Motega and he'll help you out. Even if he kills the beast, you'll still receive the Glory points - there's nothing to worry about.
Rewards:
Quest giver: Tao [#1]
This quest is part of: Steelbeard's Ghost
You'll receive this quest right after crossing over to the underworld. When you wake up, take the Old coin off the shelf (a legendary item) and talk to Nahele [#2], who is standing by the entrance to the Altar of Transition. The witch can create a tool for you to be able to communicate with Steelbeard - the Skull sceptre. She needs four pieces to combine it. Bring her:
 Being imprisoned forever must by really boring.
Once you have all the items, report back to Nahele. She'll give you the Skull sceptre. The Artist's Curse will end, but to continue the present mission report to Tao by the entrance to the land [#1]. When he resurrects the captain, you'll complete not only the present mission, but the main quest as well - Steelbeard's Ghost. What's more, if you've joined the Natives while on the Sword Coast, old Tao will tell you the secrets of the most powerful voodoo acana (he's a master of them) and let you keep the Skull sceptre. This will allow you to summon Steelbeard's ghost any time and place!
Rewards:
![Quest giver: Akando [#1] - The Thief's Curse - Isle of the Dead - Quests - Risen 2: Dark Waters - Game Guide and Walkthrough](https://game.lhg100.com/Article/UploadFiles/201512/2015121709181702.jpg)
Quest giver: Akando [#1]
This quest is part of: The Skull Sceptre
This quest is received from Akando - the thief you'll meet outside the Thief's Temple. Talk to him to learn of his sad fate - he is stuck in the world of the undead until someone robs him. There is a chest is his house (difficulty level at 60) which holds the White diamond. If someone steals it, the old thief will be free to leave.
 Can you handle it?
There are two ways to open the chest. If you have Lockpicking at least at 60, use the lock pick to open the lock. If not, you can ask Nahele [#2] to make a special key. The woman needs gold to melt it - you'll need to hand her 300 Gold, then. If you do it, you'll receive the key and the problem will be solved.
When you open the chest and take the White diamond, you'll complete the Akando's Chest quest. If you talk to the thief again, he'll let you keep the finding, and disappear. This way you'll complete the present quest and be free to conclude the main one - The Skull Sceptre.
Rewards:
![The map leading to this treasure can be found near the Arena, in the hut on the right [#1] - The Treasure in the Tomb - Isle of the Dead - Quests - Risen 2: Dark Waters - Game Guide and Walkthrough](https://game.lhg100.com/Article/UploadFiles/201512/2015121709181744.jpg)
The map leading to this treasure can be found near the Arena, in the hut on the right [#1]. Reaching the place is not easy - there are several Warriors to break through and a powerful Guard and a Ghoul to face. It's a very challenging battle, so it's best to lure them out one by one and keep them at a distance (firearms work well here). After you've dealt with them and got the map, you're in for a long hike north. Enter the cave [#2] and turn left (climb the slope). Proceed forward, fighting Warriors, Ghouls and Guards. No one said it was going to be easy!
 The location of the buried treasure.
Eventually, you'll reach the spot where the chest had been buried [#3] (it's a dead end between the buildings, between the slope and the precipice). Dig it out and open the lock. There is a pleasant surprise inside - a Hook hand. It's a legendary artifact which increases Slashing Weapons.
Rewards:
![Quest giver: Kusko [#1] - The Warrior's Curse - Isle of the Dead - Quests - Risen 2: Dark Waters - Game Guide and Walkthrough](https://game.lhg100.com/Article/UploadFiles/201512/2015121709181803.jpg)
Quest giver: Kusko [#1]
This quest is part of: The Skull Sceptre
When you reach the Arena located in the south, you'll meet Kusko there. The warrior will instantly challenge you to a duel - he's been waiting for an opponent who can defeat him for a thousand years. You happen to be the only candidate - give him what he wants and take his Spear of the Warrior (see: The Skull Sceptre).
 Apparently, Dirty Tricks and firearms are not dishonorable.
While fighting, block as much as you can - the Natives can't interrupt parrying, but they're very skilled at evading. The smartest thing to do is to keep covering yourself and attack only when the foe makes a mistake (i.e. attempts to perform an attack that takes too much time).
When you defeat him, you'll complete the Defeat Kusko quest. To complete the present one you also need to talk to the angered spirit. Since you've managed to defeat him, you'll receive the Spear of the Warrior, which is required for the completion of The Skull Sceptre.
Rewards:
This quest is part of: The Water Temple
Having collected all four Titan artifacts and embarked on the journey to meet Mara (see: The Water Temple), you'll also have to deal with the Kraken, which will attack you on the sea. In spite of appearances, the battle is quite easy - you can heal with grog and provisions all the time (breaks between subsequent attacks are pretty long).
The goal of the fight is to hit the beast in the mouth a couple of times - it opens it during certain types of attacks. After each successful throw take into consideration the fact that the monster will swim under your ship and will attack you from the other side (save the game frequently). You'll need to keep running on the deck so as to avoid being hit by tentacles - mobility is crucial here. When you successfully strike it four times, the Kraken will surface a bit more and open its mouth - this is when you need to aim perfectly at it. If you miss, you'll have to repeat the whole sequence.
 This is the moment when you can't not hit!
When you kill the monster, there will be a movie in which a wounded Mara swims to the Water Temple. Follow her (see: The Water Temple).
Rewards:
After the winning battle with Mara (see: Kill Mara), leave the Water Temple and talk to your crew. When you address Jaffar, the little thief will congratulate you on your victory, but at the same will be saddened by the failure of his own mission. He wasn't able to find his auri culci - the reason for his sadness, though, is the lack of the item, but... the fact that you have it. It turns out that the artifact he's been dreaming of is Steelbeard's hat. If you want to make the gnome happy and complete this quest, give the hat to him.
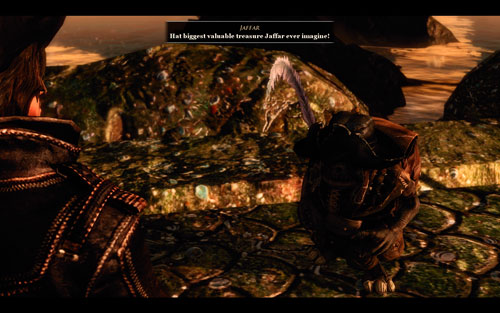 Jaffar has found not only a treasure, but a friend.
The quest ends when you do it. It's the last quest in the game. Congratulations!
Rewards:
This quest is part of: The Water Temple
Be ready for a difficult battle as soon as you land on the shores of the Water Temple. There are several Leviathans and Sunken Ones before you - they're very challenging opponents which you pretty much can't take on your own. Luckily, you won't have to - you have a whole crew of brave companions! Lure the beasts in the vicinity of the deck and observe how they're slaughtered by your friends (their Glory points go to your account). When this stage is over, enter the temple itself and dealt with Mara (sadly, you need to do it without anyone's help).
 Dirty Tricks work very short!
The witch will attack you in melee combat - she's very quick, so be careful. Throwing sand or salt in her eyes works well here - it will let you strike a few blows. If you're not too fond of melee combat, shooting her with a rifle works well too - with the "hit and run" method. Nevertheless, you have to be aggressive - if you give Mara too much time to catch her breath, she'll go into air and summon several Sand Demons which will surely surround you. They shouldn't be a trouble for you - kill them and go back to fighting Mara.
 Mara won't be coming back.
When you finally kill her, watch the cutscene showing her failure. It's not the end of the game yet, only of this quest. If you want to see the end credits, talk to Jaffar (see: Jaffar's Auri Culci) and the rest of crew members.
Rewards:
This quest can only be received after collecting all four Titan artifacts. It can be done during the course of the following very complicated quests: The Titan Weapon, The Gready Captain, Steelbeard's Artefact and The Cunning Captain. If you completed them all and have the Titan Harpoon, Earth Amulet, Sacrificial Knife and Thief's Bone Hand, report to Admiral Alvarez on Antigua. The old man will tell you to go to the Water Temple to defeat Mara once and for all. Before you can proceed to doing that, though, think carefully - you won't be able to go back and complete the rest of the quests. The choice is final and irreversible - as soon as you go to the temple, the game will reach its final stage.
The only person who knows the location of the Water Temple is the spirit of Captain Steelbeard. If you've already met him, go back to him or summon him by using the Skull Sceptre - this way you'll learn the bearings. If you haven't met the spirit before at all, sail to the Isle of the Dead (Alvarez will give you the coordinates) and complete the Steelbeard's Ghost quest.
 This is how the grand adventure ends!
After dealing with all the problems and learning the location of the Water Temple, set course on it. On the way you'll have to defeat the Kraken, which will attack you on the sea (see: Defeat the Kraken). In spite of appearances, the battle is quite easy - you can heal with grog and provisions all the time (breaks between subsequent attacks are pretty long).
The goal of the fight is to hit the beast in the mouth a couple of times - it opens it during certain types of attacks. After each successful throw take into consideration the fact that the monster will swim under your ship and will attack you from the other side (save the game frequently). You'll need to keed running on the deck so as to avoid being hit by tentacles - mobility is crucial here. When you successfully strike it four times, the Kraken will surface a bit more and open its mouth - this is when you need to aim perfectly at it. If you miss, you'll have to repeat the whole sequence.
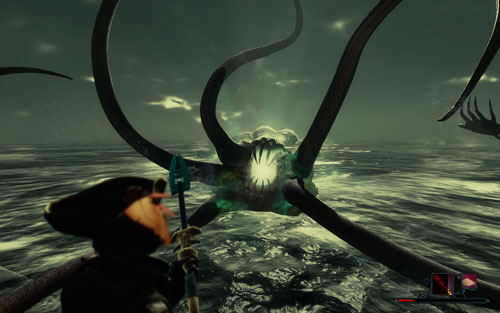 This is the moment when you can't not hit!
When you kill the monster, there will be a movie in which a wounded Mara swims to the Water Temple. Follow her. Be ready for a difficult battle as soon as you land on the shores of the Water Temple. There are several Leviathans and Sunken Ones before you - they're very challenging opponents which you pretty much can't take on your own. Luckily, you won't have to - you have a whole crew of brave companions! Lure the beasts in the vicinity of the deck and observe how they're slaughtered by your friends (their Glory points go to your account). When this stage is over, enter the temple itself and deal with Mara (sadly, you need to do it without anyone's help).
 Dirty Tricks work very short!
The witch will attack you in melee combat - she's very quick, so be careful. Throwing sand or salt in her eyes works well here - it will let you strike a few blows. If you're not too fond of melee combat, shooting her with a rifle works well too - with the "hit and run" method. Nevertheless, you have to be aggressive - if you give Mara too much time to catch her breath, she'll go into air and summon several Sand Demons which will surely surround you. They shouldn't be a trouble for you - kill them and go back to fighting Mara.
 Mara won't be coming back.
When you finally kill her, watch the cutscene showing her failure. If you want to see the end credits, talk to Jaffar (see: Jaffar's Auri Culci) and the rest of crew members. After you tell Patty to leave the island, the game ends. Congratulations - you've just finished Risen 2!
Legendary items are one of a kind artifacts which permanently raise the skills of our hero. The Nameless Hero doesn't keep them in his inventory, so they can't be sold. You can browse through them on the character's screen, in the Collections tab.
Legendary items are marked in the logbook similarly to regular quests - they can be traced with journals scattered across the world. Every time you find one, you automatically get 200 Glory points.
![The artifact lies on a mountain path near a huge tomb [#1] - Tacarigua - Legendary Items - Risen 2: Dark Waters - Game Guide and Walkthrough](https://game.lhg100.com/Article/UploadFiles/201512/2015121709181997.jpg)
The artifact lies on a mountain path near a huge tomb [#1]. To find it, go through the cave [#2] near Vasco's tower [#3], then turn left and keep going forward. Several hundred meters north of the wooden bridge [#4] you'll see the entrance to a second cave [#5], the same in which the Grave Spider is lurking. Don't go inside the cave, but check out the terrain behind a large rock. The Peg leg [#6], among other items, lies right there.
Bonus received: +1 to Toughness
Nothing too difficult here - to get the Meerschaum pipe you have to find Pete's treasure. You can learn about the buried chest from Holly [#7], a prostitute from Booze's tavern, if you agree to pay her 100 Gold. Dead Pete as well as the pipe are lying just outside the entrance to a large tomb [#1]. You can find more information on this subject in the Pete's Treasure Map quest description.
Bonus received: +1 do Firearms
![You can find the trace of the Hand mirror in a book, Pirate Raids, which lies in Jack's lighthouse [#8] - Tacarigua - Legendary Items - Risen 2: Dark Waters - Game Guide and Walkthrough](https://game.lhg100.com/Article/UploadFiles/201512/2015121709181962.jpg)
You can find the trace of the Hand mirror in a book, Pirate Raids, which lies in Jack's lighthouse [#8]. The clue points to the pirate tavern.
Head to Booze's tavern [#7] and ask the innkeeper for rum. This will open trade with him, and if you scroll down to the very bottom of the list of his products, you'll find the mirror. The price is scary, though: 2000 Gold. Unfortunately, this is the only way to obtain the artifact.
Bonus received: +10 to Silver Tongue

![When you arrive at the Shaganumbi village, look around for a woman named Kapua [#1] - The Sword Coast - Legendary Items - Risen 2: Dark Waters - Game Guide and Walkthrough](https://game.lhg100.com/Article/UploadFiles/201512/2015121709181948.jpg)
When you arrive at the Shaganumbi village, look around for a woman named Kapua [#1]. You'll find her right of an enormous altar, between a cauldron and the leader of the village, Chani. A conversation with the Native woman will reveal that you're dealing with a powerful shaman. If you wish to join the savages, she'll teach you everything she knows about the arcanes of voodoo magic. For now, though, you'll have to do with trade only - and there's much to buy. Apart from a whole lot of alchemy ingredients and all kinds or odds and ends, the woman can also sell you a legendary item - the Bottle of Memories. If you're thinking about a carrier of a shaman, it pays to purchase it (for 2000 Gold).
Bonus received: +10 to Death Cult
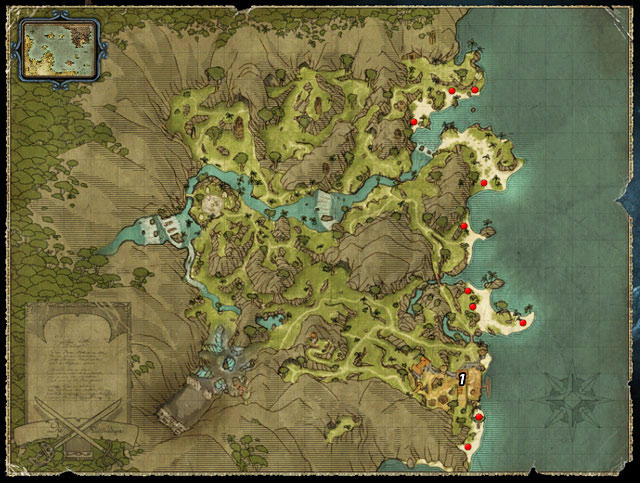
To obtain this precious item you have to complete the Cargo Crates for Miguel quest. The locations of the missing cargo are shown on the above map. Once you've collected them all, report back to the old grumbler [#1] and take your reward - the Powder bag.
Bonus received: +10 to Pistols.
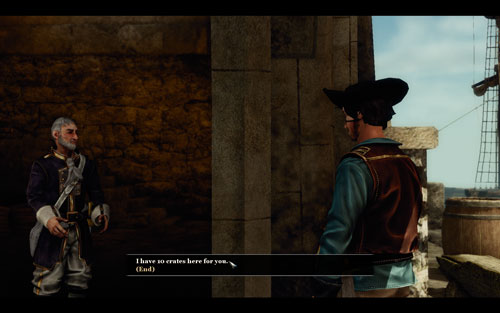
![The item is found on a small island off the west coast of Antigua [#1] - Antigua - Legendary Items - Risen 2: Dark Waters - Game Guide and Walkthrough](https://game.lhg100.com/Article/UploadFiles/201512/2015121709182026.jpg)
The item is found on a small island off the west coast of Antigua [#1]. To reach it, pass through the port city [#2] and then turn north - to a cave which will lead you to Mac's tower [#3]. The keep should guide you to a small path running towards the shore. Here, be prepared to fight several monkeys and a Sunken One. Afterwards, get on the island and find the boot. There is a also a chest nearby, connected with The Treasure on Antigua's Western Beach quest - it's worth checking out.
Bonus received: +1 to Cunning.
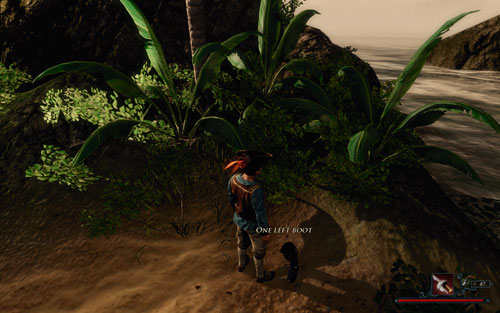

This item can be received during the Gibson's Grave quest - it's the only way of finding the precious artifact. First, talk to Quinn [#1] by the port city's coast. For 300 Gold, you can buy the key to the tavern. With it, enter the tavern and open the door to a room on the first floor [#2]. Read the book inside - it will give you a lead to a treasure, which is Gibson's grave [#3]. Go to the graveyard to dig his grave out. You should find the Silver mask among other valuables.
Bonus received: +10 to Bladeproof

![The item can be obtained without trouble - the witch Emma [#1] has it - Antigua - Legendary Items - Risen 2: Dark Waters - Game Guide and Walkthrough](https://game.lhg100.com/Article/UploadFiles/201512/2015121709182130.jpg)
The item can be obtained without trouble - the witch Emma [#1] has it. She lives in the port city and will sell it to you for 2000 Gold. Since there's no other way of getting it, grit your teeth and pay the witch.
Bonus received: +10 to Piercing Weapons
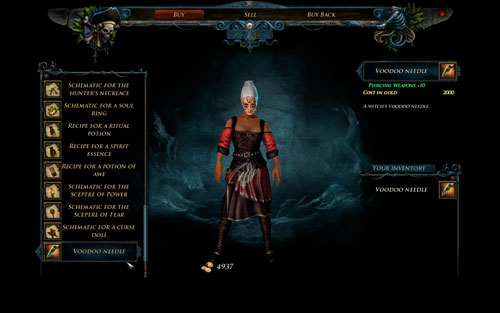
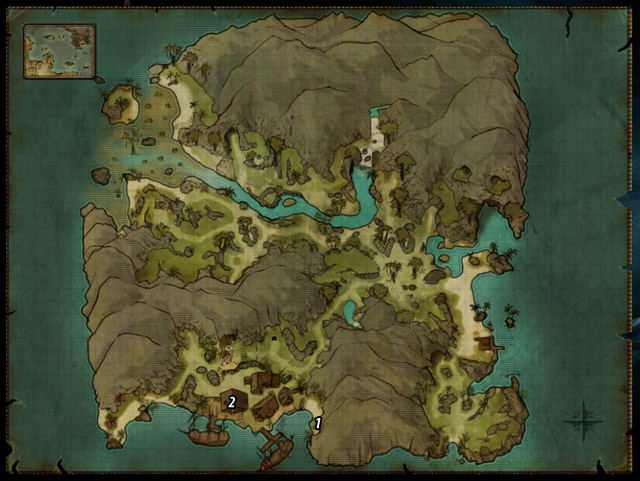
A very hard to get item, requiring an advanced character. For the Hangman's noose to be obtained, you need a Monkey - a small animal you can control to get to places inaccessible to mere mortals. The skill Monkey Trainer allows you to tame the little beast (you also need Cunning at least at 6). You can learn it from any trickster (for example, Quinn [#1]) for 1000 Gold.
 A wonder animal.
With the Monkey in your possession, you can now release it on the second floor of the warehouse [#2]. Guide the animal through the broken window and climb the roof until you reach a hole. Enter the attic and rummage about it. The Hangman's noose should be lying on top of one of the chests. Take it and go back to the Nameless Hero.

Look closely at the waterfront on the beach beyond the cave in which Slayne had trapped you. In the area near the Sunken Ones you should find a message in a bottle [#1] (see: The Treasure in the Cave). Read it to discover the location of a hidden treasure chest - the Parrot's Wing is inside it. Enter the cave [#2] in which you fought the Leviathan and dig out the treasure. That's all.
Bonus received: +10 to Throwing Weapons

![You can receive the item from the gnomes' shaman, Kaan [#1], if you complete The Gnome Eater quest - The Isle of Thieves - Legendary Items - Risen 2: Dark Waters - Game Guide and Walkthrough](https://game.lhg100.com/Article/UploadFiles/201512/2015121709182261.jpg)
You can receive the item from the gnomes' shaman, Kaan [#1], if you complete The Gnome Eater quest. Find the mighty beast in the east part of the island [#2] and slay it. Afterwards, return to the little guy and you'll get your reward.
Bonus received: +10 to Dirty Tricks

The artifact lies in the chest buried in the crystal cavern under the Inquisition's fortress (see: The Treasure on Fortress Beach). To get the Comb, open the baggage left of Carlos in the garrison [#1] (requires Lockpicking at 60). Take the treasure map, go down to the cave and open the chest that you'll find there [#2]. Also, be ready for a fight - you'll be attacked by several Sand Devils.
Bonus received: +1 to Blades
![Can be bought from the trader Possodino [#1], found in the upper part of the city right outside the cathedral - Caldera II - Legendary Items - Risen 2: Dark Waters - Game Guide and Walkthrough](https://game.lhg100.com/Article/UploadFiles/201512/2015121709182266.jpg)
Can be bought from the trader Possodino [#1], found in the upper part of the city right outside the cathedral. Unfortunately, the item costs 2000 Gold and there's no other way to obtain it that a fair trade. If you want to enjoy its benefits, get the sum and make the deal.
What's more, before you can even go to that location you need to escape the Sword Coast (see: A New Ship) first and then ask Carlos [#2] to grant you access to the city of Caldera. Only then will you be allowed to reach the trader.
Bonus received: +10 to Thievery
Obtaining this artifact is a very complicated process - you can get it only if after completing the Chaka Datu's Legacy quest.
There are two ways of completing this quest, depending on which faction you've sided with while on the Sword Coast. Most of it is exactly the same - the only difference is that you serve a different master (the Native supporters will favor Zaalu [#2], while the Inquisition members - Hakeke [#3]).
 The Native fan will traditionally use magic...
The beginning of the quest is the same in both cases - talk to your future patron and get rid of their number two (see: Get Rif of Potaka or Get Rid of Daiki). When you do it, speak to Datu and ask him for three trials. This is when the quest Paws for Zaalu (or Paws for Hekeke) activates. Regardless of the faction, the goal will be the same - killing The Black Hunter together [#4] (see: The Black Hunter). The paths of both candidates will part after it's dead.
If you have sided with the Inquisition, you need to support Hakeke in his hunting skills trial (see: The Four Feathers). You need to collect all four feather left by Kenan. Bring your companion, then, and take a stroll through the jungle where all feathers are scattered ([#5], [#6], [#7], [#8]). When you have them, talk to Kenan [#9], then Hakeke, and report back to Datu.
 While the Inquisitors will turn to technology.
If you have sided with the Natives, you'll need to possess Zaalu's body with a voodoo doll (see: Zaalu's Voodoo Doll), and answer Datu's riddles (see: The Three Questions). The correct answers are: darkness, time and nothing.
Regardless of the chosen side, the final round will always look the same - you'll need to face your rival's representative on a special arena [#10] (see: Duel with Zaalu's Halmak or Duel with Hakeke's Halmak). When the foe is down, simply report back to Datu. This is when the quest ends and you receive a reward from your patron (an amulet or a shotgun), as well as from the chieftain (legendary item - Skull of Death).
Bonus received: +1 to Voodoo
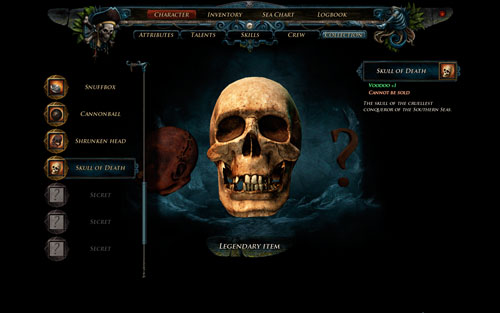

You shouldn't have any problems with obtaining this artifact. You can buy it from the storehouse master Mercutio [#1] if you complete the Storage Barrels from the Wreck quest for him, or by persuading him to trade with you (requires Silver Tongue at 65). The artifact costs 2000 Gold - there's no other way to get the Cannonball. If you don't have that kind of money, do some quests - most of them involve a certain monetary reward.
Bonus received: +10 to Shotguns
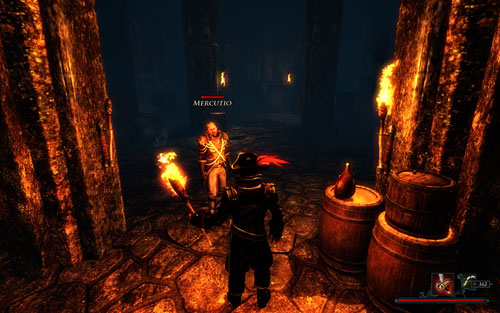
![This artifact can be found in the temple [#1] east of the Natives' village [#2] - Maracai Bay - Legendary Items - Risen 2: Dark Waters - Game Guide and Walkthrough](https://game.lhg100.com/Article/UploadFiles/201512/2015121709182360.jpg)
This artifact can be found in the temple [#1] east of the Natives' village [#2]. Kill the Termites prowling the area (not only Worker, but also Warriors). Go inside, turn left and get ready to avoid a dangerous trap - a swinging blade which will cut you in half if you fail to press Space quickly enough. If you survived, move forward and search the body of a dead pirate for the Jaguar paw. Leave the location, once again avoiding the trap.
Bonus received: +10 to Ritual
Note! There's also a Golden mask from The Graves of the Ancestors quest in this temple. Take it and put it back on the pedestal to activate that quest.
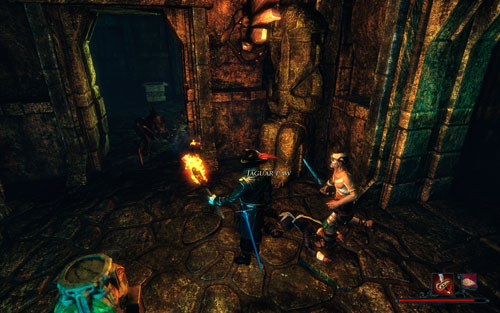

This item can be obtained only during The Graves of the Ancestors quest - it's the reward for completing it. Here's how to do it:
Enter the temple that rises above the central part of the land [#1] and take care of three Ghouls that live there. Then, go inside the room with the Golden mask placed on the pedestal. When you try to lift it, a huge monster will appear - Yagul. The spirit will be angry at your behavior - you've just desecrated one of the holy places of the Maracai tribe. To repent for your sins, you'll need to recover three other masks and bring them back to where they belong. If you agree to do it, the quest will be triggered. Otherwise you'll have to fight Yagul and three Warriors - which basically means certain death. What's more, even if you did manage to survive, killing the monster cancels the whole quest!
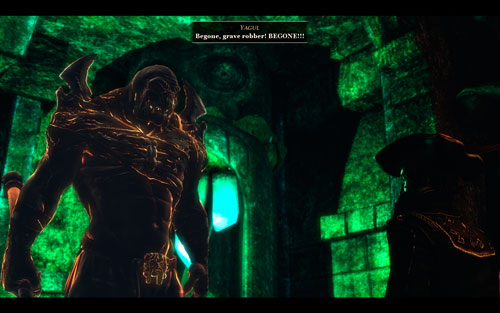 A mighty guard watches over the artifact.
Head for the temple east of the Natives' village [#2] and get rid of Termites that prowl the area (there're not only Workers, but also Warriors). After entering the temple and turning left, prepare for a meeting with a dangerous trap - a swinging blade which will cut you in half if you fail to press Space quickly enough. If you survived the trap, move forward and search the body of a pirate for the Golden mask. Place it on the pedestal near the corpse. This will close the door leading to the room on the right (there are some treasures inside, so take them before closing the door), and complete the first part of the quest. Before leaving the room with the pirate, though, take the Jaguar paw lying next to him - it's a legendary artifact. Now you can leave in peace - the trap has been disabled.
 The Jaguar paw is another legendary artifact.
The third temple lies north-east of the Maracai village - the same place where you've met the plunderers from The Peace of the Dead quest [#3]. Eliminate the Ghoul lurking near the entrance, and jump down to the hole in the inner corridor of the building (unfortunately, you're going to have to leave your companions). Kill another Ghoul and move forward - on the crossroads you'll find a body of a pirate. It holds another Golden mask - take it and get ready to fight a Guard. He's a powerful enemy, best killed by using the Parrot and continuously jumping sideways (he's pretty slow). When you defeat him, proceed ahead and immediately dodge the swinging blade which will fall on you at the exit of the corridor (press Space). Move forward, pull the lever on the wall and kill another Ghoul. Place the Golden mask on the pedestal in the next room and leave through the newly opened gate (you'll have to jump over a hole that got you underground).
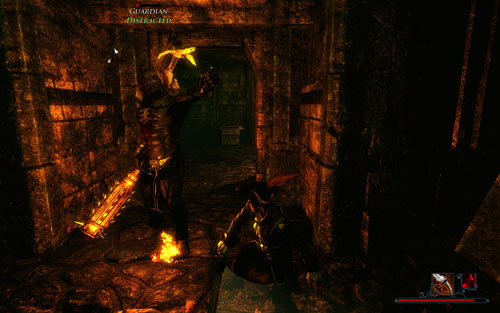 Even a demon has to yield to the power of the Parrot.
The most problematic part of the quest is its ending - the mask is found in a completely different location than where it's supposed to be placed. You can get the precious artifact from a cave in the south of the map - the same in which you've found the wall of flames [#4] (see: The Barrier of Flames). When you stand before it, turn left and take the stairs up. Kill a Grave Spider which will dig out from the ground, and then take the Mask from the table on the right. With it, go to the temple north-east of the Maracai village [#5] - you should be familiar with it thanks to The Naked Corpses quest. Go inside and put the artifact in its rightful place. Yagul will show himself to you and erase your sins. This is when the quest ends, but in order to receive the most important reward for it you also need to go to the shaman Osamu [#6]. Tell him about your achievement, and he'll give you the Broken rattle - one of the legendary items.
 Here's the last of the masks.
Bonus received: +10 to Black Magic
Note! The order at which to visit the subsequent temples is up to you - and what's more, you can activate this quest at any of it. Simply attempt to steal one of the masks - Yagul will surely notice.

This artifact can be found in a chest from The Treasure in the Tomb quest. It's found near the Arena, in the hut on the right [#1]. Reaching the place is not easy - there are several Warriors to break through and a powerful Guard and a Ghoul to face. It's a very challenging battle, so it's best to lure them out one by one and keep them at a distance (firearms work well here). After you've dealt with them and got the map, you're in for a long hike north. Enter the cave [#2] and turn left (climb the slope). Proceed forward, fighting Warriors, Ghouls and Guards. Eventually, you'll reach the spot where the chest had been buried [#3] (it's a dead end between the buildings, between the slope and the precipice). Dig it out and open the lock. The artifact is inside.
Bonus received: +10 to Slashing Weapons
![The artifact lies in the hall with the Altar of Transition, on a table near the entrance [#1] - Isle of the Dead - Legendary Items - Risen 2: Dark Waters - Game Guide and Walkthrough](https://game.lhg100.com/Article/UploadFiles/201512/2015121709182572.jpg)
The artifact lies in the hall with the Altar of Transition, on a table near the entrance [#1]. It will only appear there after you've drank the Potion of false death and crossed over to the land of the dead (see: The Journey to the Underworld). It may be a little hard to spot the Coin because the whole hall is basked in light - you can barely see anything in it. Approach the gate and examine the shelf to find the item. When you have it, enjoy its unusual benefits. Keep in mind, though, that you're still mortal - the artifact only reduces the damage dealt by firearms!
Bonus received: +10 to Bulletproof

![Barny [#1] - specializes in firearms, namely pistols - Tacarigua - Traders - Risen 2: Dark Waters - Game Guide and Walkthrough](https://game.lhg100.com/Article/UploadFiles/201512/2015121709182547.jpg)
Barny [#1] - specializes in firearms, namely pistols. He sells a few types of them, as well as bullets and the schematics for The Twins. His workshop is located in the west part of the settlement.
![Booze [#2] - the innkeeper from the pirates' camp, who sells a wide variety of alcoholic beverages and recipes for liquors - Tacarigua - Traders - Risen 2: Dark Waters - Game Guide and Walkthrough](https://game.lhg100.com/Article/UploadFiles/201512/2015121709182587.jpg)
Booze [#2] - the innkeeper from the pirates' camp, who sells a wide variety of alcoholic beverages and recipes for liquors. He also has the Hand mirror - one of the legendary items.
![Carter [#3] - the Puerto Sacarico prison guard, who sits on a bench outside the building all the time - Tacarigua - Traders - Risen 2: Dark Waters - Game Guide and Walkthrough](https://game.lhg100.com/Article/UploadFiles/201512/2015121709182597.jpg)
Carter [#3] - the Puerto Sacarico prison guard, who sits on a bench outside the building all the time. He'll agree to trade with you if you complete the Sturdy Clothes quest. He sells a few types of clothing, including the jacket belonging to Largo.
![Di Fuego [#4] - the governor of the island, residing in the biggest building in Puerto Sacarico - Tacarigua - Traders - Risen 2: Dark Waters - Game Guide and Walkthrough](https://game.lhg100.com/Article/UploadFiles/201512/2015121709182615.jpg)
Di Fuego [#4] - the governor of the island, residing in the biggest building in Puerto Sacarico. To be able to see him, you need to be wearing a shirt (see: A Map of Tacarigua). He sells elegant clothes.
![Flanningan [#5] - a trader who lives in the pirates' settlement, in the west part of the camp - Tacarigua - Traders - Risen 2: Dark Waters - Game Guide and Walkthrough](https://game.lhg100.com/Article/UploadFiles/201512/2015121709182691.jpg)
Flanningan [#5] - a trader who lives in the pirates' settlement, in the west part of the camp. He sells mostly clothes, but there are other useful items in his inventory as well.
Gilles [#7] - you can find him in front of the warehouse on the sugar cane plantation. He'll agree to trade with you after a short conversation, and sells, among other things, a saw to cut trophies from killed animals and a valuable ring.
![Osorio [#6] - the cook in the house next to the governor's seat in Puerto Sacarico - Tacarigua - Traders - Risen 2: Dark Waters - Game Guide and Walkthrough](https://game.lhg100.com/Article/UploadFiles/201512/2015121709182666.jpg)
Osorio [#6] - the cook in the house next to the governor's seat in Puerto Sacarico. He sells food and alcohol - to be able to trade with him, ask about provisions (see: Provisions).
![Stone [#8] - can be found outside the smithy in the east part of the pirates' settlement - Tacarigua - Traders - Risen 2: Dark Waters - Game Guide and Walkthrough](https://game.lhg100.com/Article/UploadFiles/201512/2015121709182665.jpg)
Stone [#8] - can be found outside the smithy in the east part of the pirates' settlement. He sells all kinds of blades and the schematics for a Scimitar.
![Thompkins [#7] - a hunter on the sugar cane plantation, north of Puerto Sacarico - Tacarigua - Traders - Risen 2: Dark Waters - Game Guide and Walkthrough](https://game.lhg100.com/Article/UploadFiles/201512/2015121709182660.jpg)
Thompkins [#7] - a hunter on the sugar cane plantation, north of Puerto Sacarico. He sells firearms and bombs. Before he agrees to do any business with you, though, you need to talk to him about hunting.
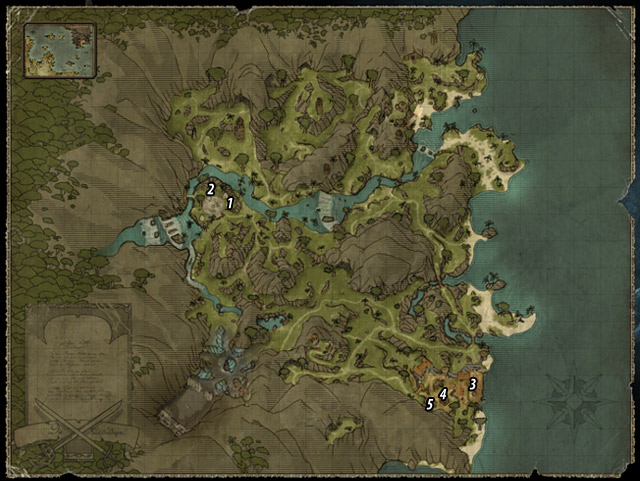
![Ranapiri [#1] - he'll agree to trade with you if you complete the Free Tahana quest - The Sword Coast - Traders - Risen 2: Dark Waters - Game Guide and Walkthrough](https://game.lhg100.com/Article/UploadFiles/201512/2015121709182688.jpg)
Ranapiri [#1] - he'll agree to trade with you if you complete the Free Tahana quest. He sells mostly hunting trophies needed for voodoo rituals.
![Kapua [#2] - the witch from the Natives' village offers a whole lot of alchemy ingredients and items needed for magic rituals - The Sword Coast - Traders - Risen 2: Dark Waters - Game Guide and Walkthrough](https://game.lhg100.com/Article/UploadFiles/201512/2015121709182775.jpg)
Kapua [#2] - the witch from the Natives' village offers a whole lot of alchemy ingredients and items needed for magic rituals. If you've decided to follow the voodoo path, you will surely be her regular customer.
![Sophia [#3] - the innkeeper from Puerto Isabella sells clothes, tools and some jewelry - The Sword Coast - Traders - Risen 2: Dark Waters - Game Guide and Walkthrough](https://game.lhg100.com/Article/UploadFiles/201512/2015121709182714.jpg)
Sophia [#3] - the innkeeper from Puerto Isabella sells clothes, tools and some jewelry. Don't underestimate her, though, because she's connected with quite a few quests.
![Cooper [#4] - the city's blacksmith has a wide assortment of blades - from small-sized daggers to powerful epees and sabres - The Sword Coast - Traders - Risen 2: Dark Waters - Game Guide and Walkthrough](https://game.lhg100.com/Article/UploadFiles/201512/2015121709182707.jpg)
Cooper [#4] - the city's blacksmith has a wide assortment of blades - from small-sized daggers to powerful epees and sabres. He's connected with the quest Blades for Cooper for which you receive the blade of the King's Sword.
![Webster [#5] - the good-natured pistol maker will gladly sell you some ammunition and some of his own products - The Sword Coast - Traders - Risen 2: Dark Waters - Game Guide and Walkthrough](https://game.lhg100.com/Article/UploadFiles/201512/2015121709182792.jpg)
Webster [#5] - the good-natured pistol maker will gladly sell you some ammunition and some of his own products. His assortments also hides two schematics for firearms - the Seaman's shotgun and the Fire cudgel.

![Spencer [#1] - the innkeeper of the port city's tavern - Antigua - Traders - Risen 2: Dark Waters - Game Guide and Walkthrough](https://game.lhg100.com/Article/UploadFiles/201512/2015121709182743.jpg)
Spencer [#1] - the innkeeper of the port city's tavern. Found behind the bar, where he stays day and night. He sells Bloody Mary and some food.
![Emma [#2] - the witch of the port city, who lives in one of the smaller cottages - Antigua - Traders - Risen 2: Dark Waters - Game Guide and Walkthrough](https://game.lhg100.com/Article/UploadFiles/201512/2015121709182785.jpg)
Emma [#2] - the witch of the port city, who lives in one of the smaller cottages. She can sell you most of the ingredients necessary for voodoo rituals, all kinds of recipes and one legendary item - the Voodoo needle. In her house there is also a voodoo altar which you can use to prepare the finished products.
![Henri [#3] - a artisan who makes pistols - Antigua - Traders - Risen 2: Dark Waters - Game Guide and Walkthrough](https://game.lhg100.com/Article/UploadFiles/201512/2015121709182752.jpg)
Henri [#3] - a artisan who makes pistols. He's connected with the quest Shooting Match with Henri. He sells ammunition, several kinds of pistols and schematics for The Twins.
![Quinn [#4] - a con man hiding outside the port city - Antigua - Traders - Risen 2: Dark Waters - Game Guide and Walkthrough](https://game.lhg100.com/Article/UploadFiles/201512/2015121709182728.jpg)
Quinn [#4] - a con man hiding outside the port city. He can sell you a lot of equipment required for thieves (including rare items such as parrots or monkeys), as well as expensive, but effective, weapons and clothes. If you talk to him properly (Silver Tongue at 50), you can learn about other items in his offer - the tavern key (worth 300 Gold) and a Treasure map (200 Gold). Both items can be bought without knowing what they really are. The former is connected with the Gibson's Grave quest, the latter with The Treasure on a Rocky Plateau on Antigua.

![Ulvi [#1] - an agitated tradesman who can be found in the centre of the village - The Isle of Thieves - Traders - Risen 2: Dark Waters - Game Guide and Walkthrough](https://game.lhg100.com/Article/UploadFiles/201512/2015121709182819.jpg)
Ulvi [#1] - an agitated tradesman who can be found in the centre of the village. He sells mostly useless junk, but also a map for The Treasure in the Valley of the Gnome Eater. You can trade with him only after completing The Lost Gnome quest.
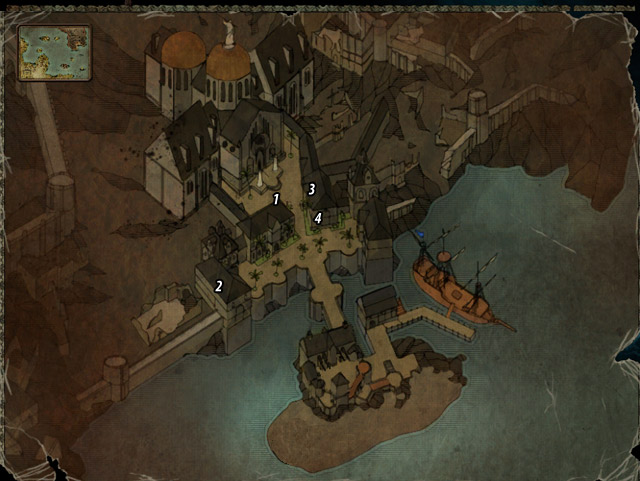
![Possodino [#1] - a rich merchant found in the upper part of the city - Caldera II - Traders - Risen 2: Dark Waters - Game Guide and Walkthrough](https://game.lhg100.com/Article/UploadFiles/201512/2015121709182837.jpg)
Possodino [#1] - a rich merchant found in the upper part of the city. His goods include the map of Caldera and a legendary item, Snuffbox.
![Fernando [#2] - found in the west part of the city, in the building on the left - Caldera II - Traders - Risen 2: Dark Waters - Game Guide and Walkthrough](https://game.lhg100.com/Article/UploadFiles/201512/2015121709182851.jpg)
Fernando [#2] - found in the west part of the city, in the building on the left. He deals in gunsmithing, so you'll find mostly shooting equipment here.
![Pantaleo [#3] - found in the hotel in the north part of the city - Caldera II - Traders - Risen 2: Dark Waters - Game Guide and Walkthrough](https://game.lhg100.com/Article/UploadFiles/201512/2015121709182891.jpg)
Pantaleo [#3] - found in the hotel in the north part of the city. He sells high grade clothing, some of which will surely catch your attention.
![Di Silva [#4] - the mysterious man is on the floor of the hotel in the upper part of the city - Caldera II - Traders - Risen 2: Dark Waters - Game Guide and Walkthrough](https://game.lhg100.com/Article/UploadFiles/201512/2015121709182900.jpg)
Di Silva [#4] - the mysterious man is on the floor of the hotel in the upper part of the city. He deals mostly in the Natives' magic, so you can buy magic items as well many recipes from him.

![Mercutio [#1] - the storehouse master in the harbor will agree to trade only if you complete the Storage Barrels from the Wreck quest for him - Maracai Bay - Traders - Risen 2: Dark Waters - Game Guide and Walkthrough](https://game.lhg100.com/Article/UploadFiles/201512/2015121709182991.jpg)
Mercutio [#1] - the storehouse master in the harbor will agree to trade only if you complete the Storage Barrels from the Wreck quest for him. The other way of convincing him is to use the Silver Tongue skill - 65 required.
![Malaika [#2] - the witch in the Natives' village - Maracai Bay - Traders - Risen 2: Dark Waters - Game Guide and Walkthrough](https://game.lhg100.com/Article/UploadFiles/201512/2015121709182979.jpg)
Malaika [#2] - the witch in the Natives' village. She sells mostly alchemy ingredients and magic items, but she also has a treasure map (see: The Treasure in the Hidden Valley).
![Kenan [#3] - the hunter by the voodoo altar, on the hill above the Natives' village - Maracai Bay - Traders - Risen 2: Dark Waters - Game Guide and Walkthrough](https://game.lhg100.com/Article/UploadFiles/201512/2015121709182934.jpg)
Kenan [#3] - the hunter by the voodoo altar, on the hill above the Natives' village. You can buy some alchemy ingredients and trophies from his (mostly animal remains).

![Alister [#1] - the primary resident of the second floor of Booze's tavern, where the distillery is - Tacarigua - Trainers - Risen 2: Dark Waters - Game Guide and Walkthrough](https://game.lhg100.com/Article/UploadFiles/201512/2015121709182953.jpg)
Alister [#1] - the primary resident of the second floor of Booze's tavern, where the distillery is. He can train you after completing The Sugar Shipment quest.
Type: Distiller, teaches: Distiller
![Barny [#2] - an artisan, a little hard of hearing, who has a workshop in the west part of the pirates' den - Tacarigua - Trainers - Risen 2: Dark Waters - Game Guide and Walkthrough](https://game.lhg100.com/Article/UploadFiles/201512/2015121709182958.jpg)
Barny [#2] - an artisan, a little hard of hearing, who has a workshop in the west part of the pirates' den. He can teach you on the spot, provided you're able to communicate with him.
Type: Pistol maker, teaches: Gunsmith, Critical Hits, Left-handed, Pistols I, Pistols II, Nuff Said!
![Booze [#1] - the owner of the pirate tavern in the settlement, endlessly behind the bar - Tacarigua - Trainers - Risen 2: Dark Waters - Game Guide and Walkthrough](https://game.lhg100.com/Article/UploadFiles/201512/2015121709183022.jpg)
Booze [#1] - the owner of the pirate tavern in the settlement, endlessly behind the bar. As a real bartender, he specializes in intimidating and neutralizing wounds.
Type: Bartender, teaches: Liquid Courage, Intimidate I, Intimidate II, Intimidate III, Bulletproof I, Bulletproof II
![Blake [#3] - a pirate under the orders of Captain Steelbeard, guarding the west entrance to the pirates' settlement - Tacarigua - Trainers - Risen 2: Dark Waters - Game Guide and Walkthrough](https://game.lhg100.com/Article/UploadFiles/201512/2015121709183072.jpg)
Blake [#3] - a pirate under the orders of Captain Steelbeard, guarding the west entrance to the pirates' settlement. He'll offer to teach you himself.
Type: Thug, teaches: Kick, Bladeproof I, Bladeproof II
![Curtis [#4] - found in the pirates' den, walking to and fro in front of Booze's tavern [#1] - Tacarigua - Trainers - Risen 2: Dark Waters - Game Guide and Walkthrough](https://game.lhg100.com/Article/UploadFiles/201512/2015121709183013.jpg)
Curtis [#4] - found in the pirates' den, walking to and fro in front of Booze's tavern [#1]. Master of the blade.
Type: Master of the sabre, teaches: Parry, Powerful Attack, Riposte, Powerful Riposte, Slashing Weapons I, Slashing Weapons II
Flanningan [#5] - a merchant from the west part of the pirates' settlement, who not only sells goods, but also teaches some dirty tricks.
Type: Trickster, teaches: Monkey Trainer, Parrot Trainer, Old Trickster, Dirty Tricks I, Dirty Tricks II, Dirty Tricks III
![Holly [#1] - a glib prostitute form Booze's tavern, where she spends all days entertaining patrons - Tacarigua - Trainers - Risen 2: Dark Waters - Game Guide and Walkthrough](https://game.lhg100.com/Article/UploadFiles/201512/2015121709183060.jpg)
Holly [#1] - a glib prostitute form Booze's tavern, where she spends all days entertaining patrons.
Type: Harlot, teaches: Silver Tongue I, Silver Tongue II, Silver Tongue III
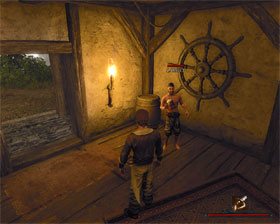
Largo - the only thief on the island, a specialist in his line of work. He can be found in two places: either in the Puerto Sacarico prison [#6], or in Booze's tavern [#1], depending on whether you've completed the Freeing Largo quest, or not.
Type: Thief, teaches: Sneaking, Pickpocketing, Lockpicking, Thievery I, Thievery II, Thievery III
![Roquefort [#7] - the only representative of the Inquisition on the island who will agree to teach you anything - Tacarigua - Trainers - Risen 2: Dark Waters - Game Guide and Walkthrough](https://game.lhg100.com/Article/UploadFiles/201512/2015121709183080.jpg)
Roquefort [#7] - the only representative of the Inquisition on the island who will agree to teach you anything. Found in Puerto Sacarico, usually on a bench in front of the barracks.
Type: Master of the epee, teaches: Parry, Powerful Attack, Riposte, Powerful Riposte, Piercing Weapons I, Piercing Weapons II
![Stone [#8] - the blacksmith of the pirates' den who has a workshop near Booze's tavern [#1] - Tacarigua - Trainers - Risen 2: Dark Waters - Game Guide and Walkthrough](https://game.lhg100.com/Article/UploadFiles/201512/2015121709183008.jpg)
Stone [#8] - the blacksmith of the pirates' den who has a workshop near Booze's tavern [#1]. He teaches only one but very useful skill.
Type: Blacksmith, teaches: Forging

![Ranapiri [#1] - the old hunter will share his knowledge only if you complete the Free Tahana quest for him - The Sword Coast - Trainers - Risen 2: Dark Waters - Game Guide and Walkthrough](https://game.lhg100.com/Article/UploadFiles/201512/2015121709183152.jpg)
Ranapiri [#1] - the old hunter will share his knowledge only if you complete the Free Tahana quest for him. It will also allow for trading.
Type: Hunter, teaches: Throwing Weapons I, Throwing Weapons II, Throwing Weapons III.
![Kapua [#2] - the witch of the Natives' village guards the secrets of voodoo magic - The Sword Coast - Trainers - Risen 2: Dark Waters - Game Guide and Walkthrough](https://game.lhg100.com/Article/UploadFiles/201512/2015121709183133.jpg)
Kapua [#2] - the witch of the Natives' village guards the secrets of voodoo magic. To persuade her to teach it to you, you need to side with the Natives (see: Chani's Plan).
Type: Voodoo mage, teaches: Create Doll, Create Sceptre, Create Talisman, Powerful Curse, Black Magic I, Black Magic II.
![Nakutu [#3] - the bit hot-headed warrior from the Natives' village can teach you toughness - The Sword Coast - Trainers - Risen 2: Dark Waters - Game Guide and Walkthrough](https://game.lhg100.com/Article/UploadFiles/201512/2015121709183183.jpg)
Nakutu [#3] - the bit hot-headed warrior from the Natives' village can teach you toughness. Any possible squabbles you may have with him won't affect the quality of the teaching or its price.
Type: Fighter, teaches: Kick, Bladeproof I, Bladeproof II.
![Jim [#4] - the little dodger drinking beer in the Natives' village can teach you a few thieving tricks - The Sword Coast - Trainers - Risen 2: Dark Waters - Game Guide and Walkthrough](https://game.lhg100.com/Article/UploadFiles/201512/2015121709183139.jpg)
Jim [#4] - the little dodger drinking beer in the Natives' village can teach you a few thieving tricks. Watch your pockets!
Type: Thief, teaches: Sneaking, Pickpocketing, Lockpicking, Thievery I, Thievery II, Thievery III.
![Sophia [#5] - the bartender from Puerto Isabella is not only a nice lady, but also a skilled teacher - The Sword Coast - Trainers - Risen 2: Dark Waters - Game Guide and Walkthrough](https://game.lhg100.com/Article/UploadFiles/201512/2015121709183166.jpg)
Sophia [#5] - the bartender from Puerto Isabella is not only a nice lady, but also a skilled teacher. She offers the same kind of training as any other innkeeper in the game.
Type: Bartender, teaches: Liquid Courage, Intimidate I, Intimidate II, Intimidate III, Bulletproof I, Bulletproof II
![Cooper [#6] - the blacksmith who can be found in front of the Inquisition's garrison in Puerto Isabella - The Sword Coast - Trainers - Risen 2: Dark Waters - Game Guide and Walkthrough](https://game.lhg100.com/Article/UploadFiles/201512/2015121709183164.jpg)
Cooper [#6] - the blacksmith who can be found in front of the Inquisition's garrison in Puerto Isabella. As any other artisan, he can teach you his trade.
Type: Blacksmith, teaches: Forging
![Webster [#7] - the gunsmith with a workshop in Puerto Isabella, opposite the Inquisition's barracks - The Sword Coast - Trainers - Risen 2: Dark Waters - Game Guide and Walkthrough](https://game.lhg100.com/Article/UploadFiles/201512/2015121709183137.jpg)
Webster [#7] - the gunsmith with a workshop in Puerto Isabella, opposite the Inquisition's barracks. He'll share his knowledge for a proper price.
Type: Pistol maker, teaches: Gunsmith, Critical Hits, Left-handed, Pistols I, Pistols II, Nuff Said!
![Alcazar [#8] - the surly officer from the Inquisition's barracks will agree to train you only if you side with his organization - The Sword Coast - Trainers - Risen 2: Dark Waters - Game Guide and Walkthrough](https://game.lhg100.com/Article/UploadFiles/201512/2015121709183250.jpg)
Alcazar [#8] - the surly officer from the Inquisition's barracks will agree to train you only if you side with his organization. Don't count on him otherwise.
Type: Master of the blade, teaches: Parry, Powerful Attack, Riposte, Powerful Riposte, Piercing Weapons I, Piercing Weapons II
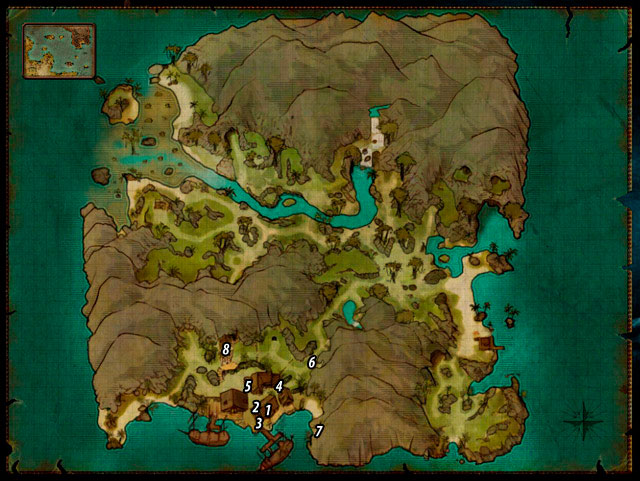
![Zak [#1] - the bouncer outside the port city's tavern - Antigua - Trainers - Risen 2: Dark Waters - Game Guide and Walkthrough](https://game.lhg100.com/Article/UploadFiles/201512/2015121709183210.jpg)
Zak [#1] - the bouncer outside the port city's tavern. He's quite short-tempered, so if you manage to annoy him to a certain level, you'll receive the Beat 'Em Up quest.
Type: Fighter, teaches: Kick, Bladeproof I, Bladeproof II
![Spencer [#2] - the innkeeper of the port city's tavern, found behind the bar - Antigua - Trainers - Risen 2: Dark Waters - Game Guide and Walkthrough](https://game.lhg100.com/Article/UploadFiles/201512/2015121709183257.jpg)
Spencer [#2] - the innkeeper of the port city's tavern, found behind the bar. He's connected with the Procure Fresh Supplies from Tacarigua quest.
Type: Bartender, teaches: Liquid Courage, Intimidate I, Intimidate II, Intimidate III, Bulletproof I, Bulletproof II
![Scarlett [#3] - a prostitute living in the port city's tavern - Antigua - Trainers - Risen 2: Dark Waters - Game Guide and Walkthrough](https://game.lhg100.com/Article/UploadFiles/201512/2015121709183247.jpg)
Scarlett [#3] - a prostitute living in the port city's tavern. You can usually find her on the first floor, but sometimes she likes to walk outside.
Type: Harlot, teaches: Silver Tongue I, Silver Tongue II, Silver Tongue III
![Wilson [#4] - the port city's blacksmith - Antigua - Trainers - Risen 2: Dark Waters - Game Guide and Walkthrough](https://game.lhg100.com/Article/UploadFiles/201512/2015121709183264.jpg)
Wilson [#4] - the port city's blacksmith. He's connected with the quest The Cannon, which you need to complete in order to finish the game.
Type: Blacksmith, teaches: Forging
![Henri [#5] - a pistol maker, connected with the Shooting Match with Henri quest - Antigua - Trainers - Risen 2: Dark Waters - Game Guide and Walkthrough](https://game.lhg100.com/Article/UploadFiles/201512/2015121709183217.jpg)
Henri [#5] - a pistol maker, connected with the Shooting Match with Henri quest.
Type: Pistol maker, teaches: Gunsmith, Critical Hits, Left-handed, Pistols I, Pistols II, Nuff Said!
![Bill [#6] - the pirate standing outside the port city who is guarding the entrance to the jungle - Antigua - Trainers - Risen 2: Dark Waters - Game Guide and Walkthrough](https://game.lhg100.com/Article/UploadFiles/201512/2015121709183389.jpg)
Bill [#6] - the pirate standing outside the port city who is guarding the entrance to the jungle.
Type: Master of the sabre, teaches: Parry, Powerfull Attack, Riposte, Powerful Riposte, Slashing Weapons I, Slashing Weapons II
![Quinn [#7] - a mysterious con man talented in the thieving arts - Antigua - Trainers - Risen 2: Dark Waters - Game Guide and Walkthrough](https://game.lhg100.com/Article/UploadFiles/201512/2015121709183332.jpg)
Quinn [#7] - a mysterious con man talented in the thieving arts. He can teach you a lot of useful skills, as well as sell a lot of illegal merchandise. If you use Silver Tongue on him (level 50), you'll learn about additional items in his stock. The first is a key (for 300 Gold) connected with the Gibson's Grave quest, the second, a map (for 300 Gold) - connected with The Treasure on a Rocky Plateau on Antigua.
Type: Trickster, teaches: Monkey Trainer, Parrot Trainer, Old Trickster, Dirty Tricks I, Dirty Tricks II, Dirty Tricks III
![Alvarez [#8] - will agree to teach you fencing only if you complete The Cunning Captain quest - Antigua - Trainers - Risen 2: Dark Waters - Game Guide and Walkthrough](https://game.lhg100.com/Article/UploadFiles/201512/2015121709183343.jpg)
Alvarez [#8] - will agree to teach you fencing only if you complete The Cunning Captain quest.
Type: Fencer, teaches: Swordmaster, Slashing Weapons III, Piercing Weapons III
![Jaffar [#1] - a gnome who will teach you a few thieving tricks, as long as you agree to be his master - The Isle of Thieves - Trainers - Risen 2: Dark Waters - Game Guide and Walkthrough](https://game.lhg100.com/Article/UploadFiles/201512/2015121709183342.jpg)
Jaffar [#1] - a gnome who will teach you a few thieving tricks, as long as you agree to be his master. To receive this title simply talk about Jaffar to the leader of the village - Kaan.
Type: Thief, teaches: Sneaking, Pickpocketing, Lockpicking, Thievery I, Thievery II, Thievery III
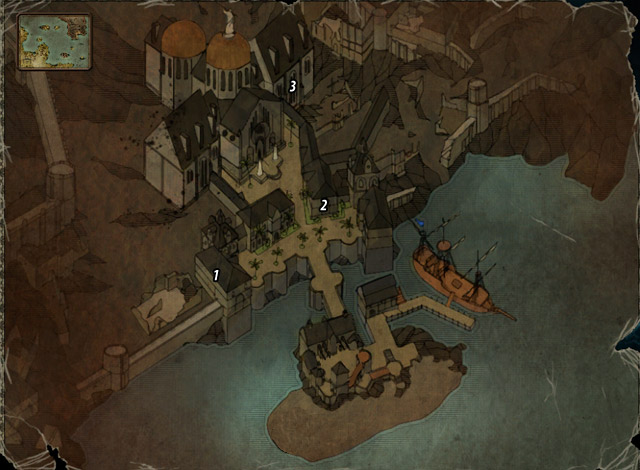
Fernando [#1] - the gunsmith can teach you a few useful tricks as long as on the Sword Coast you've chosen the Inquistion. Sadly, voodoo magic enthusiasts can't count on his help.
Type: Gunsmith, teaches: Gunsmith, Critical Hits, Muskets I, Muskets II, Shotguns I, Shotguns II.
![Di Silva [#2] - the old weirdo can share the knowledge of alchemy with you - but only if on the Sword Coast you've chosen the Inquisition - Caldera II - Trainers - Risen 2: Dark Waters - Game Guide and Walkthrough](https://game.lhg100.com/Article/UploadFiles/201512/2015121709183373.jpg)
Di Silva [#2] - the old weirdo can share the knowledge of alchemy with you - but only if on the Sword Coast you've chosen the Inquisition.
Type: Alchemist, teaches: Brew Potion, Ritual I, Ritual II.
![Godin [#3] - the gun inventor can be reached only during and after completing the Following Garcia's Trail quest - Caldera II - Trainers - Risen 2: Dark Waters - Game Guide and Walkthrough](https://game.lhg100.com/Article/UploadFiles/201512/2015121709183456.jpg)
Godin [#3] - the gun inventor can be reached only during and after completing the Following Garcia's Trail quest. He'll reward you with a few lessons - and it doesn't matter what side you're on.
Type: Gunsmith master, teaches: Gunsmith, Marksman, Blazing Barrels, Muskets III, Shotguns III, Pistols III.

![Marcos [#1] - the soldier at the harbor outside the temple can teach you how to become a tougher guy - Maracai Bay - Trainers - Risen 2: Dark Waters - Game Guide and Walkthrough](https://game.lhg100.com/Article/UploadFiles/201512/2015121709183472.jpg)
Marcos [#1] - the soldier at the harbor outside the temple can teach you how to become a tougher guy. He's quite nice, so you can have a chat with him.
Type: Fighter, teaches: Kick, Bladeproof I, Bladeproof II.
![Valdez [#2] - the first person you'll meet upon arriving at the Maracai Bay - Maracai Bay - Trainers - Risen 2: Dark Waters - Game Guide and Walkthrough](https://game.lhg100.com/Article/UploadFiles/201512/2015121709183482.jpg)
Valdez [#2] - the first person you'll meet upon arriving at the Maracai Bay. Though the governor will greet you coolly, you can still train with him.
Type: Master of the blade; teaches: Parry, Powerful Attack, Riposte, Powerful Riposte, Piercing Weapons I, Piercing Weapons II.
![Malaika [#3] - the witch from the Natives' village, which is located in the central part of the land - Maracai Bay - Trainers - Risen 2: Dark Waters - Game Guide and Walkthrough](https://game.lhg100.com/Article/UploadFiles/201512/2015121709183478.jpg)
Malaika [#3] - the witch from the Natives' village, which is located in the central part of the land. You can learn a few useful things about brewing potions from her.
Type: Alchemist, teaches: Brew Potion, Ritual I, Ritual II.
Egas [#4] - met in the Natives' village where he guards Corrientes's hut. He can teach you a couple of tricks concerning pistols.
Type: Pistol maker; teaches: Gunsmith, Critical Hits, Left-handed, Pistols I, Pistols II, Nuff Said!
![Cordobar [#5] - a very skilled warrior trained in the way of swords and blades - Maracai Bay - Trainers - Risen 2: Dark Waters - Game Guide and Walkthrough](https://game.lhg100.com/Article/UploadFiles/201512/2015121709183450.jpg)
Cordobar [#5] - a very skilled warrior trained in the way of swords and blades. If you talked to Corrientes, he'll be glad to give you a few lessons.
Type: Master of the blade; teaches: Parry, Powerful Attack, Riposte, Powerful Riposte, Slashing Weapons I, Slashing Weapons II.
![Datu [#6] - the chieftain of the Natives can train you in the voodoo arts, provided you've learned the basics on the Sword Coast (see: Chani, Daughter of the Chieftain) - Maracai Bay - Trainers - Risen 2: Dark Waters - Game Guide and Walkthrough](https://game.lhg100.com/Article/UploadFiles/201512/2015121709183453.jpg)
Datu [#6] - the chieftain of the Natives can train you in the voodoo arts, provided you've learned the basics on the Sword Coast (see: Chani, Daughter of the Chieftain).
Type: Voodoo mage; teaches: Create Doll, Create Sceptre, Create Talisman, Powerful Curse, Black Magic I, Black Magic II.
![Osamu [#7] - the powerful shaman can share his knowledge with you provided you've joined the Natives while on the Sword Coast - Maracai Bay - Trainers - Risen 2: Dark Waters - Game Guide and Walkthrough](https://game.lhg100.com/Article/UploadFiles/201512/2015121709183518.jpg)
Osamu [#7] - the powerful shaman can share his knowledge with you provided you've joined the Natives while on the Sword Coast.
Type: Voodoo master, teaches: Voodoo Master, Black Magic III, Ritual III, Death Cult I, Death Cult II, Death Cult III.
![Bones [#8] - the crazy preacher is hard to miss - he's shouting at the entire village, angering the surrounding Natives - Maracai Bay - Trainers - Risen 2: Dark Waters - Game Guide and Walkthrough](https://game.lhg100.com/Article/UploadFiles/201512/2015121709183556.jpg)
Bones [#8] - the crazy preacher is hard to miss - he's shouting at the entire village, angering the surrounding Natives. If you complete the Unwanted Sermon quest, though, you can invite him to your crew and learn a few useful skills.
Type: Doctor; teaches: Quack, Doctor, Indestructible.
![Koraka [#9] - the hunter of the wilds is located outside the temple where pirates are plundering the graves (see: Where Is Koraka - Maracai Bay - Trainers - Risen 2: Dark Waters - Game Guide and Walkthrough](https://game.lhg100.com/Article/UploadFiles/201512/2015121709183535.jpg)
Koraka [#9] - the hunter of the wilds is located outside the temple where pirates are plundering the graves (see: Where Is Koraka?). When you complete this quest for him, you'll be able to learn from him. That's also when you'll be transported back to the Maracai village.
Type: Hunter; teaches: Throwing Weapons I, Throwing Weapons II, Throwing Weapons III.

![Tao [#1] - the guard will become your master if you completed The Journey to the Underworld quest and joined the Natives on the Sword Coast - Isle of the Dead - Trainers - Risen 2: Dark Waters - Game Guide and Walkthrough](https://game.lhg100.com/Article/UploadFiles/201512/2015121709183577.jpg)
Tao [#1] - the guard will become your master if you completed The Journey to the Underworld quest and joined the Natives on the Sword Coast.
Type: Voodoo master, teaches: Voodoo Master, Black Magic III, Ritual III, Death Cult I, Death Cult II, Death Cult III.
There are a few key locations on individual islands which finding is rewarded with 50 Glory points. All newly found locations are marked in the Nameless Hero's logbook, same as regular quests. If you have a map, you can fast travel between these locations.

![Main gate [#3] - the entrance to the pirates' den is located near the cave network in the central part of the island - Tacarigua - Key Locations - Risen 2: Dark Waters - Game Guide and Walkthrough](https://game.lhg100.com/Article/UploadFiles/201512/2015121709183585.jpg)
Main gate [#3] - the entrance to the pirates' den is located near the cave network in the central part of the island.
![The pirates' den [#4] - located in the north-east part of the island, can be accessed in two ways - through the main gate, which is a key location in itself, or from the east, right off the beach - Tacarigua - Key Locations - Risen 2: Dark Waters - Game Guide and Walkthrough](https://game.lhg100.com/Article/UploadFiles/201512/2015121709183642.jpg)
The pirates' den [#4] - located in the north-east part of the island, can be accessed in two ways - through the main gate, which is a key location in itself, or from the east, right off the beach. The checkpoint that activates this location is right next to the tavern.
![Jacks' lighthouse [#5] - a magnificent structure in the south part of the island - Tacarigua - Key Locations - Risen 2: Dark Waters - Game Guide and Walkthrough](https://game.lhg100.com/Article/UploadFiles/201512/2015121709183678.jpg)
Jacks' lighthouse [#5] - a magnificent structure in the south part of the island. Can be accessed through the wooden bridge spread over the rapid river, or from the beach.
![Puerto Sacarico [#1] - the Tacarigua Inquisition's headquarters, located in the south-west part of the island - Tacarigua - Key Locations - Risen 2: Dark Waters - Game Guide and Walkthrough](https://game.lhg100.com/Article/UploadFiles/201512/2015121709183644.jpg)
Puerto Sacarico [#1] - the Tacarigua Inquisition's headquarters, located in the south-west part of the island. Holds not only the governor's seat, but also the slaves' huts, the barracks and the harbor.
![Vasco's tower [#2] - a building south of the sugar cane plantation, named after the guard perpetually on post - Tacarigua - Key Locations - Risen 2: Dark Waters - Game Guide and Walkthrough](https://game.lhg100.com/Article/UploadFiles/201512/2015121709183621.jpg)
Vasco's tower [#2] - a building south of the sugar cane plantation, named after the guard perpetually on post.

![Pirates' tower [#1] - the first key location you find upon arriving at the Sword Coast - The Sword Coast - Key Locations - Risen 2: Dark Waters - Game Guide and Walkthrough](https://game.lhg100.com/Article/UploadFiles/201512/2015121709183682.jpg)
Pirates' tower [#1] - the first key location you find upon arriving at the Sword Coast. To reach it, follow Patty and Captain Steelbeard. Climb the slope and you're there.
![Puerto Isabella [#2] - the most important location on the island - a lot of artisans, traders and trainers live there - The Sword Coast - Key Locations - Risen 2: Dark Waters - Game Guide and Walkthrough](https://game.lhg100.com/Article/UploadFiles/201512/2015121709183629.jpg)
Puerto Isabella [#2] - the most important location on the island - a lot of artisans, traders and trainers live there. There is a whole set of quests to be received in the city, as well as the possibility of siding with the Inquisition.
![Inquisition's tower [#3] - stands in the central part of the island, towering above the whole area - The Sword Coast - Key Locations - Risen 2: Dark Waters - Game Guide and Walkthrough](https://game.lhg100.com/Article/UploadFiles/201512/2015121709183696.jpg)
Inquisition's tower [#3] - stands in the central part of the island, towering above the whole area. It's found halfway between the Natives' village and Puerto Isabella. Connected with a few sidequests.
![Shaganumbi village [#4] - the seat of the Natives - The Sword Coast - Key Locations - Risen 2: Dark Waters - Game Guide and Walkthrough](https://game.lhg100.com/Article/UploadFiles/201512/2015121709183788.jpg)
Shaganumbi village [#4] - the seat of the Natives. If you prove yourself worthy to the savages, they'll let you join them, and even teach you the secrets of voodoo magic. It's a very interesting option which opens different solutions to several quests.
![Earth Temple [#5] - the hiding place of Captain Crow and his supporters - The Sword Coast - Key Locations - Risen 2: Dark Waters - Game Guide and Walkthrough](https://game.lhg100.com/Article/UploadFiles/201512/2015121709183722.jpg)
Earth Temple [#5] - the hiding place of Captain Crow and his supporters. You can go there only if you have the support of the Natives or the Inquisition (see: Help Against Crow).
![Graveyard [#6] - a mysterious location which holds a lot of treasures and a few dangerous opponents - The Sword Coast - Key Locations - Risen 2: Dark Waters - Game Guide and Walkthrough](https://game.lhg100.com/Article/UploadFiles/201512/2015121709183729.jpg)
Graveyard [#6] - a mysterious location which holds a lot of treasures and a few dangerous opponents. There are no quests to be received there, though, or NPCs to meet. You can get there by taking a path leading south of the Inquisition's tower.

![The port city [#1] - the first location to visit after getting off the ship - Antigua - Key Locations - Risen 2: Dark Waters - Game Guide and Walkthrough](https://game.lhg100.com/Article/UploadFiles/201512/2015121709183732.jpg)
The port city [#1] - the first location to visit after getting off the ship. A lot of pirates, traders and trainers live there - it's a good idea to meet with all of them. It's also where you can find Captain Slayne.
![Mac's tower [#2] - situated in the west of the island, on a high slope - Antigua - Key Locations - Risen 2: Dark Waters - Game Guide and Walkthrough](https://game.lhg100.com/Article/UploadFiles/201512/2015121709183787.jpg)
Mac's tower [#2] - situated in the west of the island, on a high slope. You can reach it by going through the tunnels (north-west of the port city), or by taking a roundabout route - using the paths around the mountains. The second option involves fighting a few monkeys and a Sunken One, though.
![Fishermen's hut [#3] - occupied by the fisherman Eddie, who gives you The Missing Fisherman and The Hobgoblin quests - Antigua - Key Locations - Risen 2: Dark Waters - Game Guide and Walkthrough](https://game.lhg100.com/Article/UploadFiles/201512/2015121709183774.jpg)
Fishermen's hut [#3] - occupied by the fisherman Eddie, who gives you The Missing Fisherman and The Hobgoblin quests. To reach the hut, leave the port city and head towards the water hole (water carriers are there), and then turn east. You'll have to fight a few monkeys and a Grave Spider. You'll find the hut afterwards, on the beach.
![Large waterfall [#4] - a scenic location which hides a mysterious cave connected with The Password quest - Antigua - Key Locations - Risen 2: Dark Waters - Game Guide and Walkthrough](https://game.lhg100.com/Article/UploadFiles/201512/2015121709183734.jpg)
Large waterfall [#4] - a scenic location which hides a mysterious cave connected with The Password quest. To reach it, take the path on the left side of the waterfall.
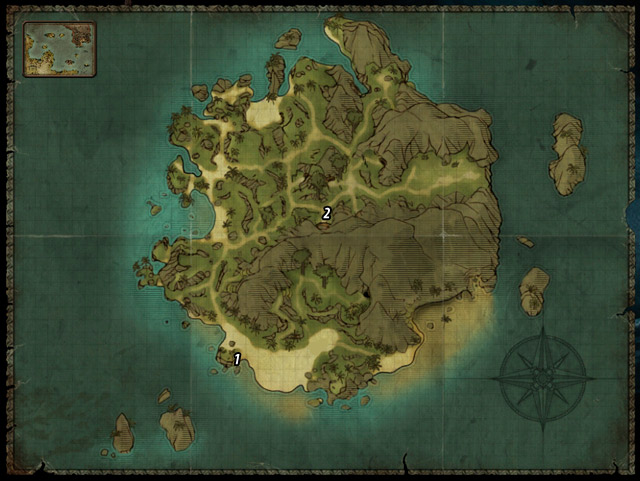
![Harbor [#1] - in truth, it's not a harbor in the usual meaning of the word, but merely a rock with grass and some bushes on it - The Isle of Thieves - Key Locations - Risen 2: Dark Waters - Game Guide and Walkthrough](https://game.lhg100.com/Article/UploadFiles/201512/2015121709183802.jpg)
Harbor [#1] - in truth, it's not a harbor in the usual meaning of the word, but merely a rock with grass and some bushes on it. The name comes from the fact that people usually dock their ships here. If you completed the A Way Out of the Cave quest, this is where you'll meet the friendly gnome Jaffar.
![Gnomes' village [#2] - a settlement of little in size, but very smart creatures - The Isle of Thieves - Key Locations - Risen 2: Dark Waters - Game Guide and Walkthrough](https://game.lhg100.com/Article/UploadFiles/201512/2015121709183842.jpg)
Gnomes' village [#2] - a settlement of little in size, but very smart creatures. The gnomes are not hostile - you will need their help in getting off the island.
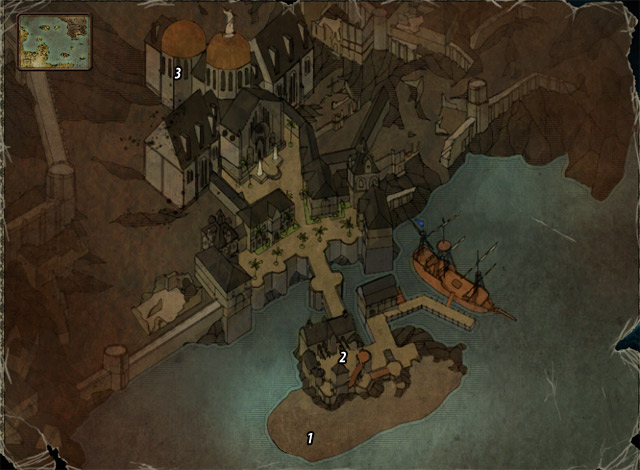
![Beach [#1] - the place where you find Patty at the very beginning of the game - Caldera II - Key Locations - Risen 2: Dark Waters - Game Guide and Walkthrough](https://game.lhg100.com/Article/UploadFiles/201512/2015121709183864.jpg)
Beach [#1] - the place where you find Patty at the very beginning of the game. If you look at he hill the Crystal Fortress is situated on, you'll see an entrance to a cave - it's where the chest from The Treasure on Fortress Beach is.
![Crystal Fortress [#2] - the last keep of the human kind and at the same time - the headquarters of the Inquisition - Caldera II - Key Locations - Risen 2: Dark Waters - Game Guide and Walkthrough](https://game.lhg100.com/Article/UploadFiles/201512/2015121709183824.jpg)
Crystal Fortress [#2] - the last keep of the human kind and at the same time - the headquarters of the Inquisition. It's where you begin the game.
![The Council building [#3] - this location can be visited only during the Following Garcia's Trail quest and after completing it - Caldera II - Key Locations - Risen 2: Dark Waters - Game Guide and Walkthrough](https://game.lhg100.com/Article/UploadFiles/201512/2015121709183845.jpg)
The Council building [#3] - this location can be visited only during the Following Garcia's Trail quest and after completing it. You can find a couple of politicians inside and the gunsmith master - Godin.

![Old camp [#1] - the place until recently used by Garcia - Maracai Bay - Key Locations - Risen 2: Dark Waters - Game Guide and Walkthrough](https://game.lhg100.com/Article/UploadFiles/201512/2015121709183998.jpg)
Old camp [#1] - the place until recently used by Garcia. Found south of the harbor and the temple. Unfortuntaly, there's nothing of interest in here.
![Maracai village [#2] - the key location where you can find most of the NPCs - including Corrientes - Maracai Bay - Key Locations - Risen 2: Dark Waters - Game Guide and Walkthrough](https://game.lhg100.com/Article/UploadFiles/201512/2015121709183986.jpg)
Maracai village [#2] - the key location where you can find most of the NPCs - including Corrientes. To get there, go to south-east to the Old camp and cross the lake in the middle of the map.
![Garcia's ship [#3] - an important place which will allow you to complete the Garcia's Ship quest and obtain Steelbeard's artefact (during the quest by the same name) - Maracai Bay - Key Locations - Risen 2: Dark Waters - Game Guide and Walkthrough](https://game.lhg100.com/Article/UploadFiles/201512/2015121709183981.jpg)
Garcia's ship [#3] - an important place which will allow you to complete the Garcia's Ship quest and obtain Steelbeard's artefact (during the quest by the same name). To get there, use the boat on the beach [#4].
![Shaman [#4] - the shaman's camp is located at the edge of the map, in the south-east corner - Maracai Bay - Key Locations - Risen 2: Dark Waters - Game Guide and Walkthrough](https://game.lhg100.com/Article/UploadFiles/201512/2015121709183930.jpg)
Shaman [#4] - the shaman's camp is located at the edge of the map, in the south-east corner. The old witch doctor will help you in your search for Garcia, and if you know magic, he'll also give you a few lessons.

![Entrance [#1] - the first location you reach on the Isle of the Dead - Isle of the Dead - Key Locations - Risen 2: Dark Waters - Game Guide and Walkthrough](https://game.lhg100.com/Article/UploadFiles/201512/2015121709184062.jpg)
Entrance [#1] - the first location you reach on the Isle of the Dead. You'll find the guard Tao here who will help you cross over to the other side (literally and figuratively).
![Arena [#2] - there are plenty of monsters to be met here, and after completing The Journey to the Underworld - the warrior Kusko - Isle of the Dead - Key Locations - Risen 2: Dark Waters - Game Guide and Walkthrough](https://game.lhg100.com/Article/UploadFiles/201512/2015121709184012.jpg)
Arena [#2] - there are plenty of monsters to be met here, and after completing The Journey to the Underworld - the warrior Kusko.
![Thief's Temple [#3] - you'll find it thanks to a trip through the northern tunnels - Isle of the Dead - Key Locations - Risen 2: Dark Waters - Game Guide and Walkthrough](https://game.lhg100.com/Article/UploadFiles/201512/2015121709184045.jpg)
Thief's Temple [#3] - you'll find it thanks to a trip through the northern tunnels. After completing The Journey to the Underworld, you'll meet the ghost Akando here.
![Altar of Transition [#4] - this building will let you travel between the world of the living and the dead (see: The Journey to the Underwold) - Isle of the Dead - Key Locations - Risen 2: Dark Waters - Game Guide and Walkthrough](https://game.lhg100.com/Article/UploadFiles/201512/2015121709184037.jpg)
Altar of Transition [#4] - this building will let you travel between the world of the living and the dead (see: The Journey to the Underwold).
Below you will find a list of all characters that can be robbed during your visits to individual islands, provided you have the Pickpocketing skill. The "difficulty" rate is the Thievery skill level necessary for the the theft to be successful.


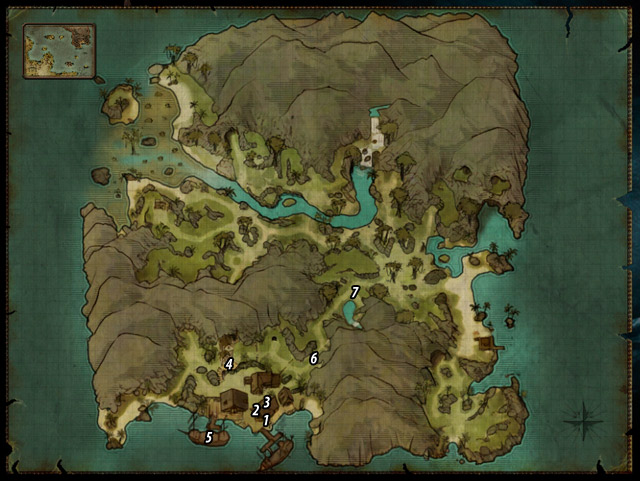

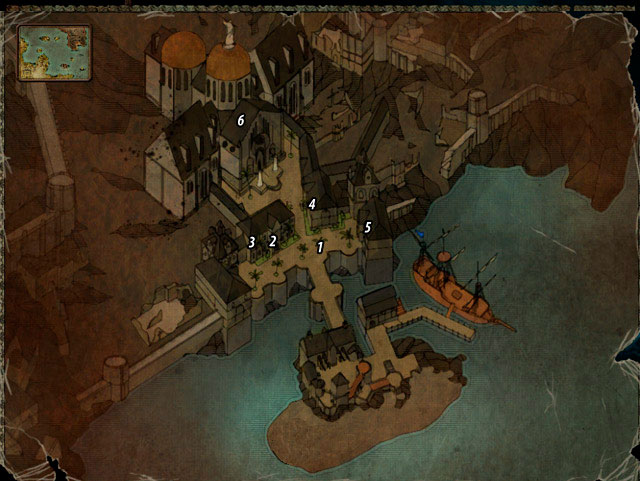

The isles and coasts of the archipelago hide many secrets. While exploring the lands you'll surely come across fragments of legendary swords, sabres and epees, which lay hidden there for years. With proper work, the items you find will allow you to gain the most powerful weapons in the whole game. Therefore, seeking out those lost fragments is a very lucrative business - even if you don't use them, you can always sell them (and with large profits).
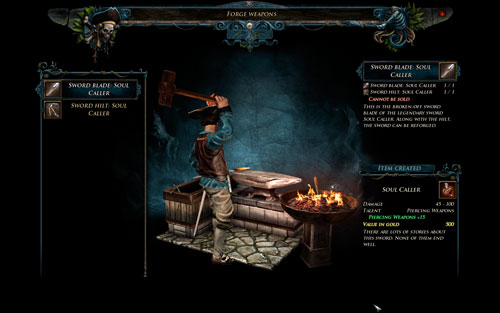 Almost as in The Lord of the Rings.
The first challenge is to acquire individual fragments - to connect them is the second. To be able to do it, you need to have the Forging skill, which can be learned from any blacksmith (for 1000 Gold, as long as you have Blades as least at 6). If you meet the conditions, use any forge to piece the fragments together. You'll receive not only an excellent weapon, but some experience as well.
All legendary killing tools are listed on the following pages of the guide.
 Tacarigua
 The Sword Coast
The blade of this excellent weapon is found on Tacarigua, on a beach in the south-east part of the map [#1]. It's hidden in a chest with a very high difficulty level (Lockpicking at least at 90) and it's guarded by four powerful Ghuls. In practice, it means you won't be able to do anything about it during your first visit to the island - you'll have your chance later in the game. Bring your companions along; they will distract the undead and make the fight easier for you.
 Only advanced characters can take down these kind of enemies.
The second fragment of the weapon is found on the Sword Coast. If you have Forging, you can go to the blacksmith Cooper [#2] in Puerto Isabella and agree to make five epees for him (quest: Blades for Cooper). This will get you all necessary pieces required to make the weapon, but you'll still have to buy the schematics (for 1500 Gold). When you're done, accept the hilt of the King's Sword as a reward. Now you only have to piece it together with the blade, and voila - the fine weapon is yours!
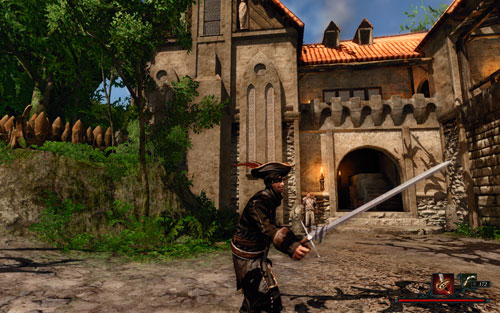 An elegant weapon for a more civilized age.
Note! Due to a bug in the game, Cooper will reward you with the hilt of the Soul Caller, not the King's Sword. It will probably be fixed in one of the upcoming patches.
Properties:
Rewards:
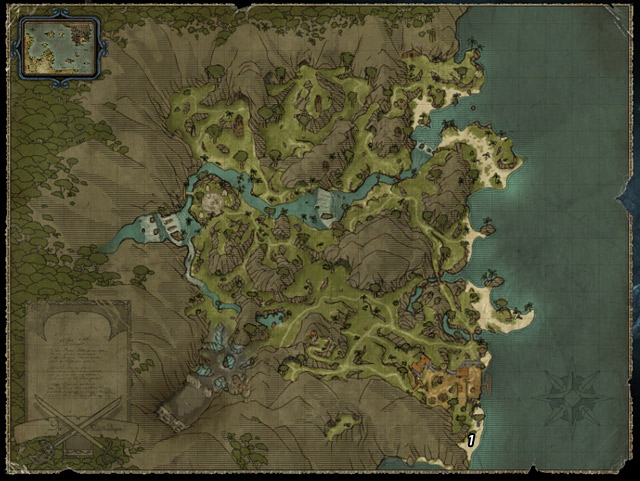 The Sword Coast
 Antigua
Parts of this powerful sword can be found on two separate islands: The Sword Coast and Antigua. The Sword hilt is on the first one [#1], in a locked chest (Lockpicking at 45). The Sword blade is much easier to get - it's in a chest (Lockpicking: 20) on the upper floor of Antigua's warehouse [#2].
 Finding the parts of the weapon isn't that difficult.
But the quest doesn't end yet - you still need to piece both fragments together. To do it, you need to have the Forging skill (costs 1000 Gold and requires Blades at 6), which can be learned from any blacksmith. If you meet these conditions, go to the forge and create the weapon.
The weapon looks really impressive.
Properties:
Rewards:
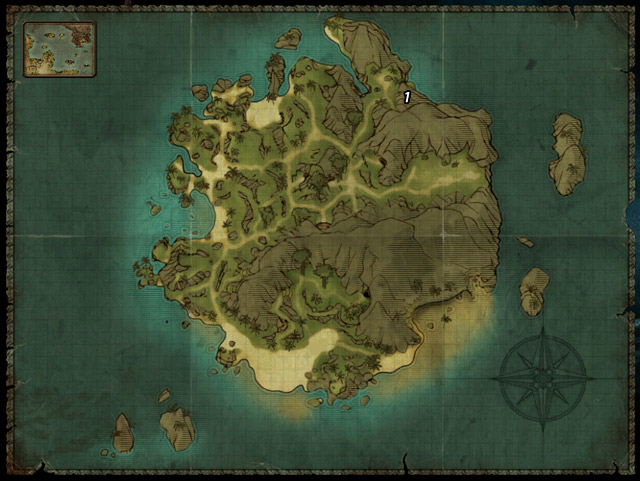 The Isle of Thieves
 Caldera
The blade of this powerful weapon can be found on the Isle of Thieves, in a cave in the north [#1] (connected with The Thief Has Been Robbed quest). Go inside and take care of the Termites nesting there. At the fork in the road, turn left and open the chest lying in a small basin (Lockpicking at 40). You've just obtained the first fragment on the weapon.
 You must enter the cave to obtain the artifact.
The second fragment is found in Caldera, in a building in the west part of the city [#2]. To get to it, talk to Carlos at the Inquisition's tower [#3] - you'll gain access to other parts of the island. When you're inside the building [#2], open the chest (Lockpicking at least at 50) and loot it to the bone. The Sword Hilt: Wave Dancer lies among other junk. Now you only have to piece the two fragments together using any forge available in the game.
 The weapon looks impressive.
Properties:
Rewards:

Differently than the other unique weapons, Silver Iron doesn't have to be forged from two elements - you'll find it already completed. It's owned by Corrientes [#1] on the Maracai Bay. When you kill him (see: Garcia's Masquerade Uncovered) and search his body, the magnificent pistol will be yours. It's a very useful weapon which will make fighting much easier.
 Isn't it beautiful?
Properties:
Rewards:
 Maracai Bay
 Isle of the Dead
The blade of this weapon can be found on the Maracai Bay, in a small chest at the end of a gorge [#1]. It's guarded by a few Claw Monkeys, so be ready for a struggle. When the animals are down, get your hands on the treasure - it requires Lockpicking at 20. Look inside to find the Stormwind's blade among other junk.
 Sadly, it the worst legendary weapon in the whole game.
The other piece of the artifact will require you to go the Isle of the Dead. The Stormwind's hilt is hidden inside a chest that lies on a hill between the beach and the temple's entrance [#2]. To open it, you need Lockpicking at 30. When you take it, piece the weapon together.
Properties:
Rewards:

 Risen 2: Dark Waters Game Guide & Walkthrough
 RIFT Game Guide & Walkthrough
 Rainbow Six: Lockdown Game Guide & Walkthrough
 Race Driver GRID Game Guide & Walkthrough
 Rise of Nations: Rise of Legends Game Guide & Walkthrough