This unofficial guide to Remember Me includes, first of all a thorough walkthrough for all the stages (episodes). Descriptions for each of the levels include, among others, information on how to complete the received quests, eliminate the enemies effectively, find collectibles, defeat bosses and remix memories of other characters. The description also gives numerous screenshot, thanks to which finding a given location or interactive elements of the environment should be easier.
Further parts of this guide include elaborations on collectibles (memories, SAT patches focus boosts and parasites), the development of Nilin's abilities and creation of the best possible combos. The entire guide comes complete with the description of all achievements/trophies available in the game.
This guide for Remember Me is:

This guide has been color-coded in a following manner:
Jacek "Stranger" Halas

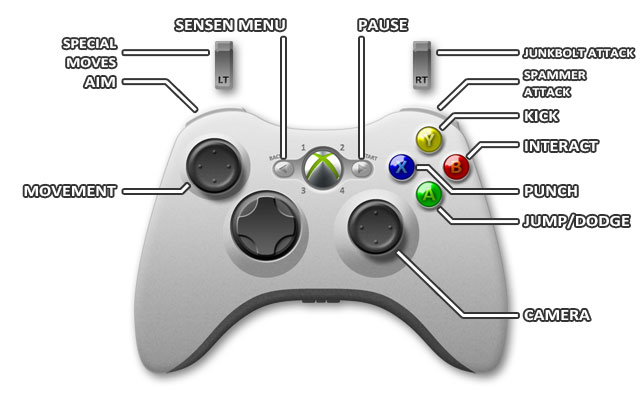
Movement

Jump/dodge

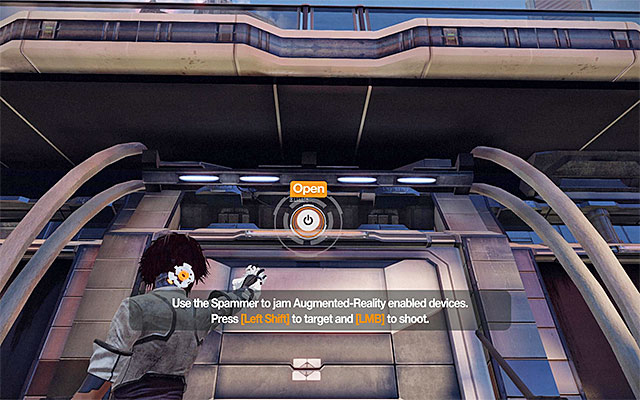
Punch/ Spammer

Kick/ Junk Bolt

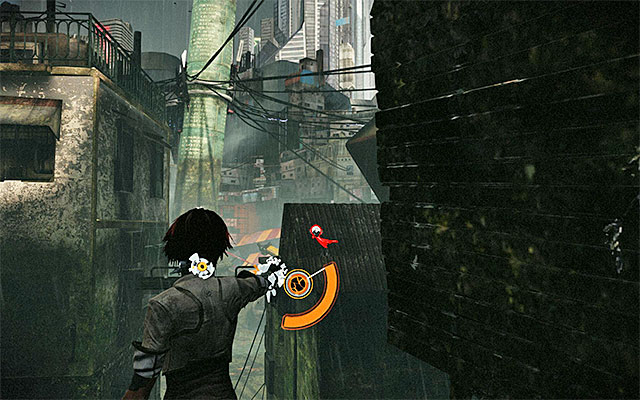
Interact

Aim

Walk

Sensen chip menu display

Combo menu (S-Pressen)

Eye augmentation (Aug-Eye)

Center camera

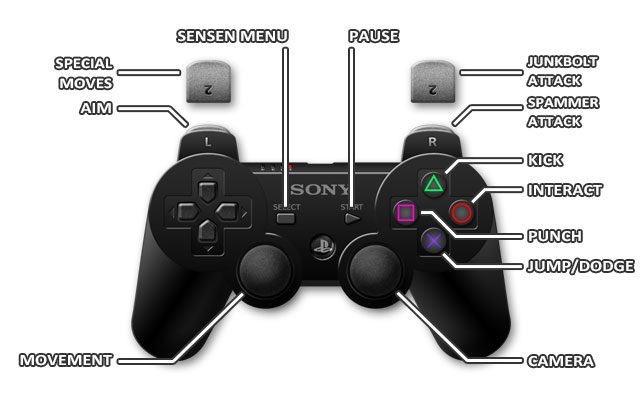
Movement

Camera control

Jump/dodge

Interact

Punch

Kick

Aim

Special moves menu (S-Pressen)

Spammer ranged attack

Junk Bolt ranged attack

Sensen chip menu

Pause

Movement

Camera control

Jump/dodge
Interact

Punch

Kick

Aim

Special moves menu (S-Pressen)

Spammer ranged attack

Junk Bolt ranged attack

Sensen chip menu

Pause
Note - all the basics connected with fighting have been described in thee walkthrough section. The game itself also elaborates on every new element in the game at the moment of making it available to the player. Therefore, remember to read the information that displays on your screenshot.
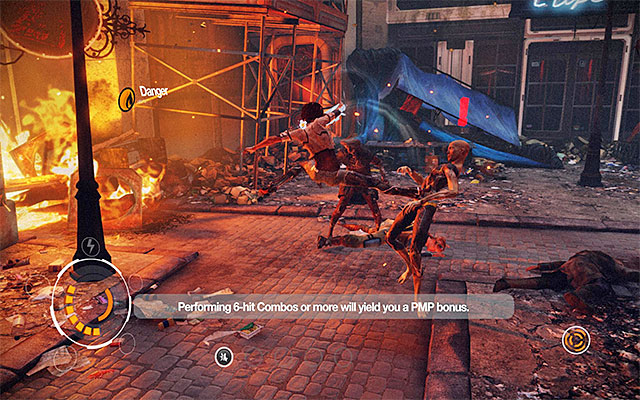
The fighting system in Remember Me is in many respects unique. Thanks to the option of developing own combinations you can determine what types of attacks Nilin is supposed to launch, and what their purpose is (regeneration, inflicting heavy damage etc.). Just to remind you, there are five types of moves in the game:
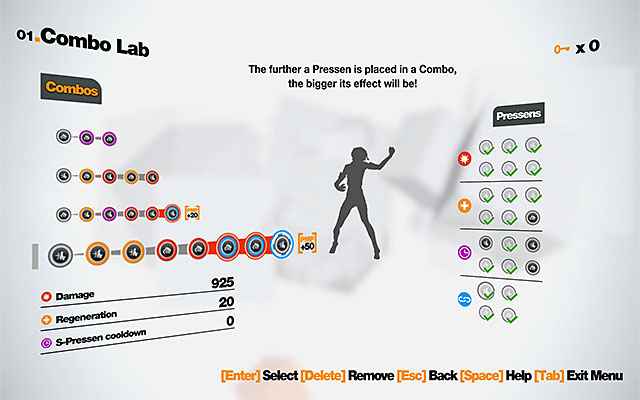
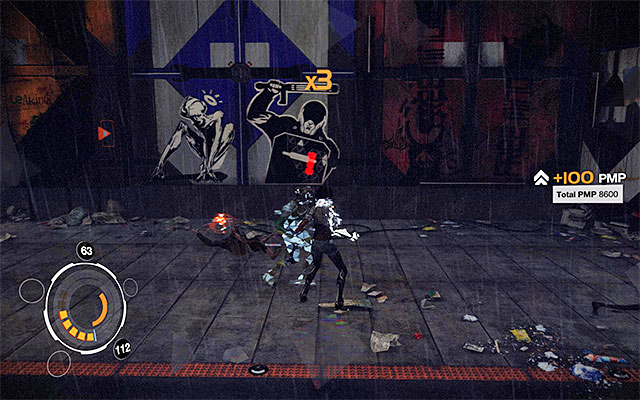
The above screenshot presents example combos that were used for the purposes of this walkthrough. It is worth remembering here that all of the moves are available straight away and that the consecutive attacks presented in the list to the right can be unlocked as a reward for achieving the next experience level. After each such "promotion" pick the move that you are actually going to need at the given moment. Check also if the attack you want to unlock is a kick or a punch, so you do not buy the movement that you do not need right now.
I definitely recommend that you pay more attention to developing a more "universal" combo that Nilin will be able to make use of in every situation. This is especially important if you do not want to bother about remembering the correct sequence of buttons for each combo. In my case, the last combination, i.e. the combo of up to eight moves, was universal combination. It pays off to put less offensive moves at the beginning i.e. the regenerating or the cooldown ones. What should follow is the power moves with the chain moves, which take after and boost the previous moves, at the end.
The longest combo, which is described above, inflicts a lot of damage and, as a result, most of the weaker enemies may die before you reach the end. If you notice that such a situation occurs often, take into consideration the possibility of developing less complex combos, like the ones in the second and the third line in the above screenshot.
I recommend that you use the most simple combo, which you unlock at the very beginning of the game (the three move combo) to launch cooldown attacks, unless you want to use the special attacks more often and/or you find it difficult to defeat some of the bosses, which can be weakened only with special moves. In such a situation, you should consider replacing moves in some of the remaining combos to your liking (except for the chain moves that should definitely go at the very end).
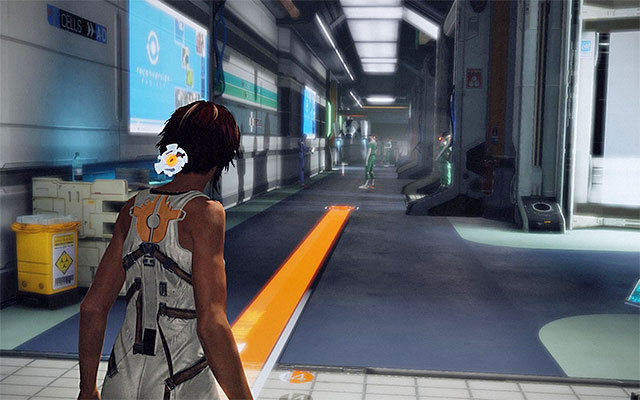
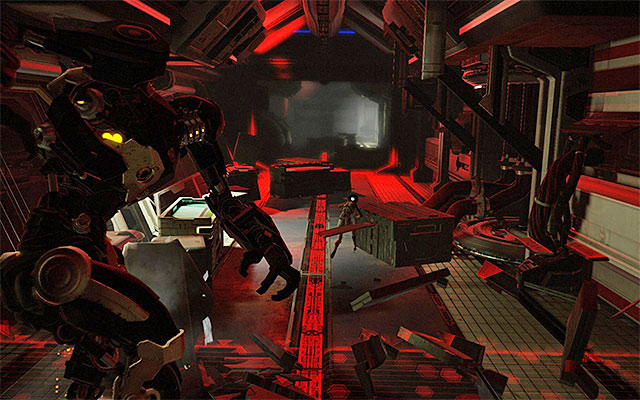
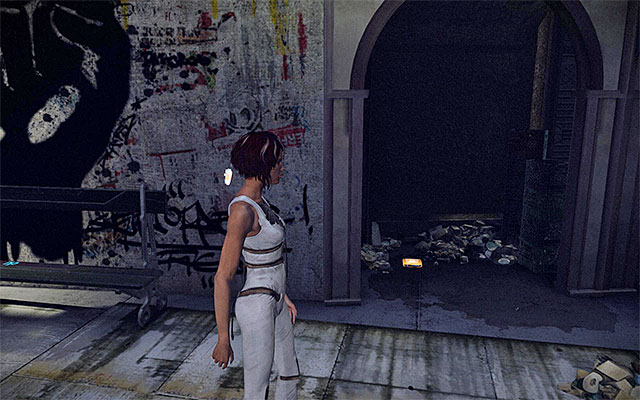
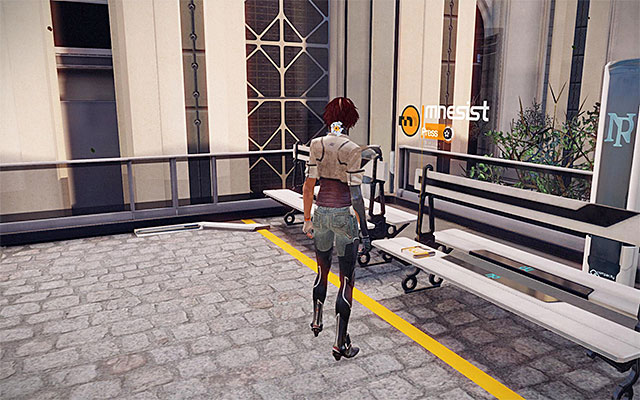
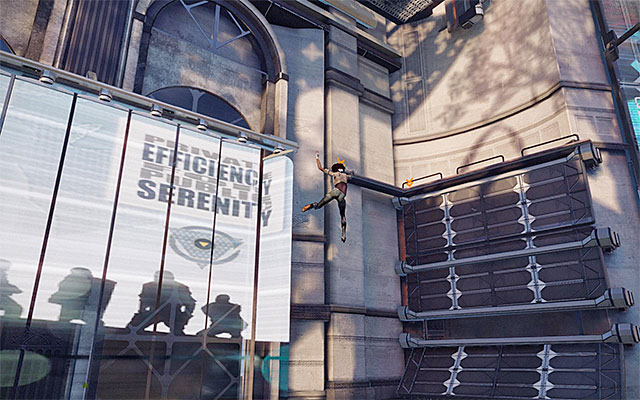
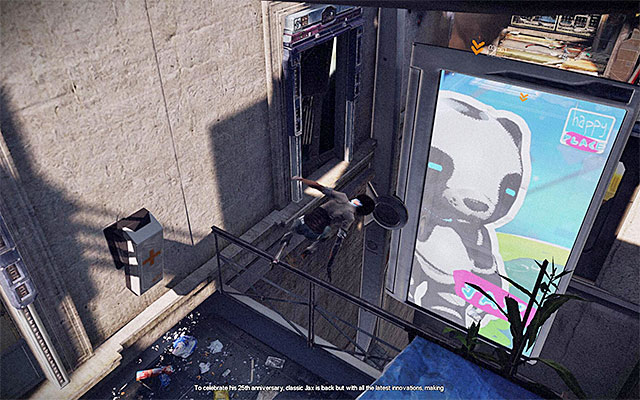
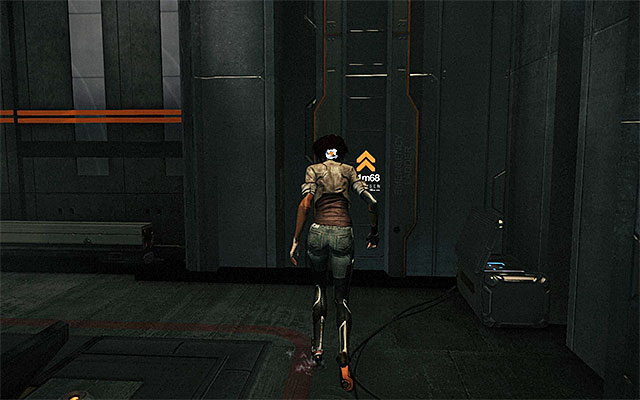
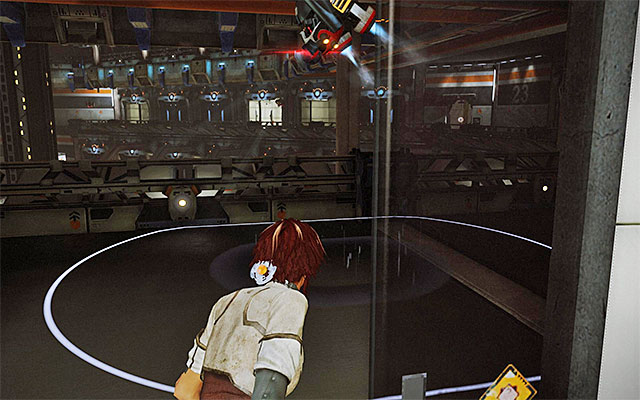
The beginning of the game is not going to let you show off too much. Start by using the mouse, or the analog stick, to lift Nilin's head. Follow the drone, and keep to the orange line. You do not have to focus on the exploration of this area because, while paying the prologue, you won't find any interactive items that you could collect.
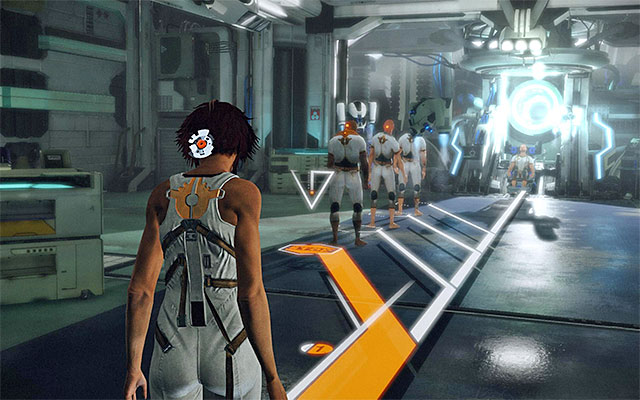
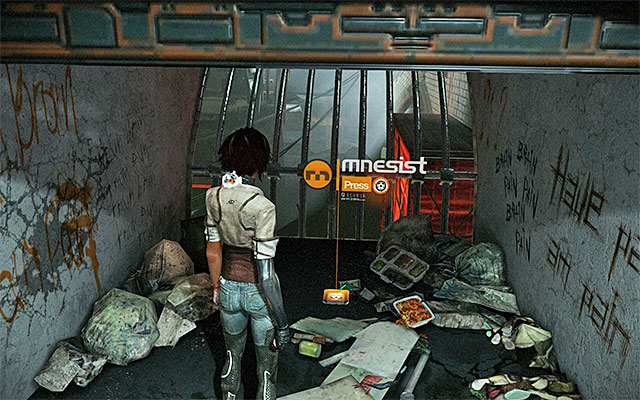
As you walk down the corridor, some unspecified individual will want to contact you. In the end, you need to reach a room where people are queuing up to an armchair used to erase memories.
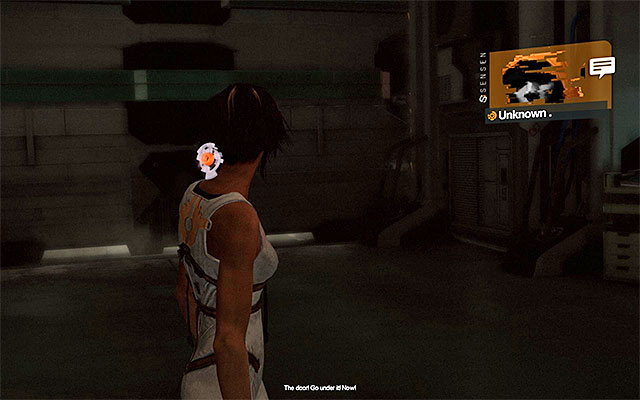
After a while, the abovementioned individual will succeed at making a connection with Nilin. Wait for the power supply to be cut out, turn left and approach the partially opened gate, thanks to which you will escape from the place.
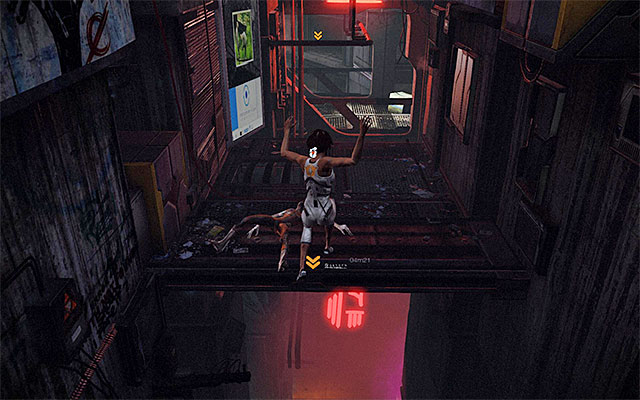
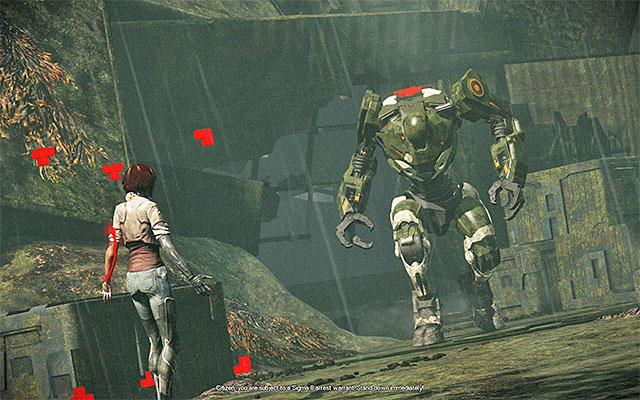
Walk around the large robot, who will soon start chasing Nilin. Start escaping and do not stop, or else this will result in the main character's being killed. Follow the bigger corridor and navigate around the larger obstacles. After you reach the final part of the corridor, a cutscene will display automatically.
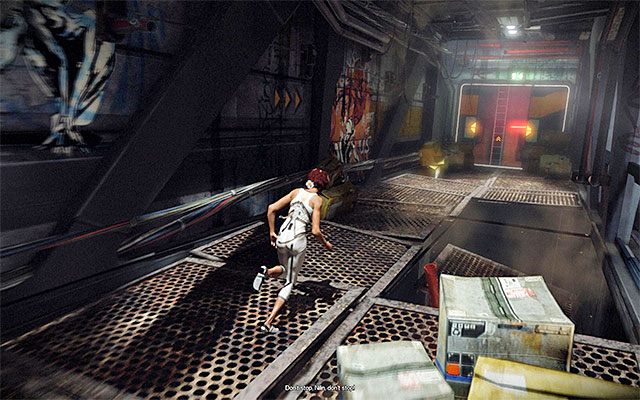
Go ahead. You do not need to hurry here anymore because, the robot has already stopped chasing you. Walk into the larger room and approach the capsule located to the right, which will result in the prologue being concluded and a new cutscene, featuring a conversation with Edge, being started.
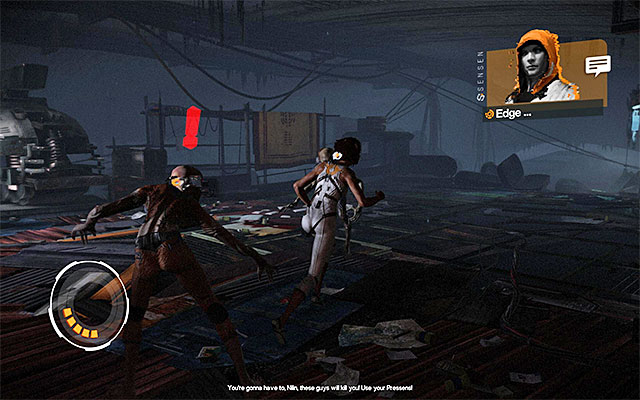
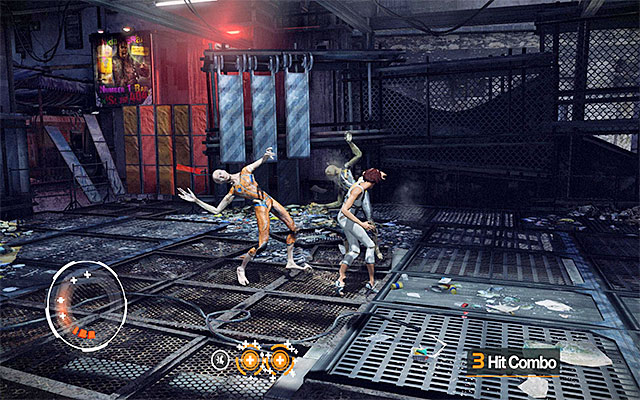
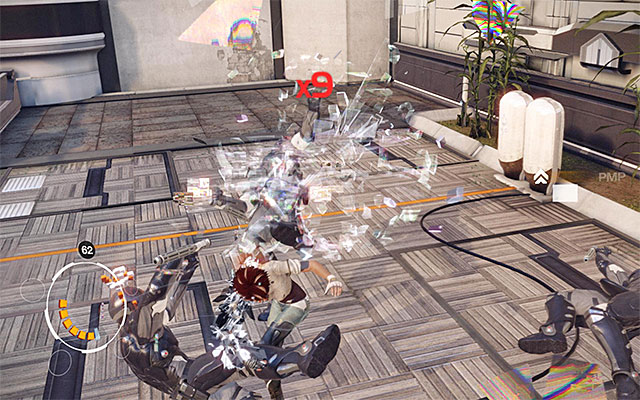
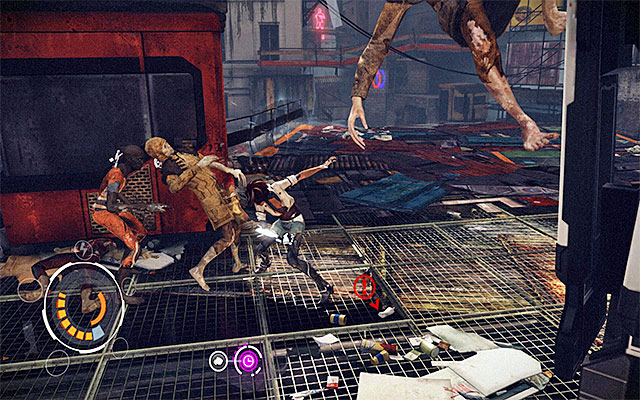
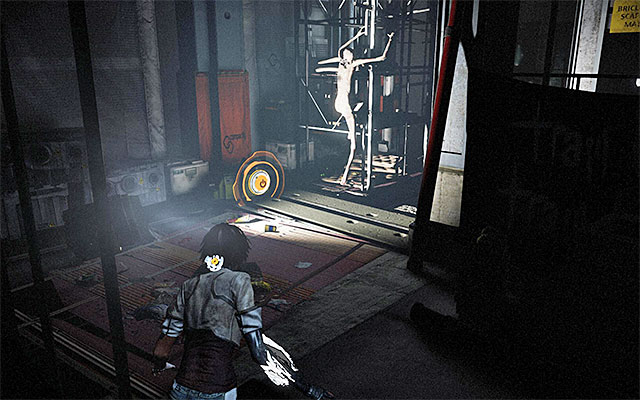
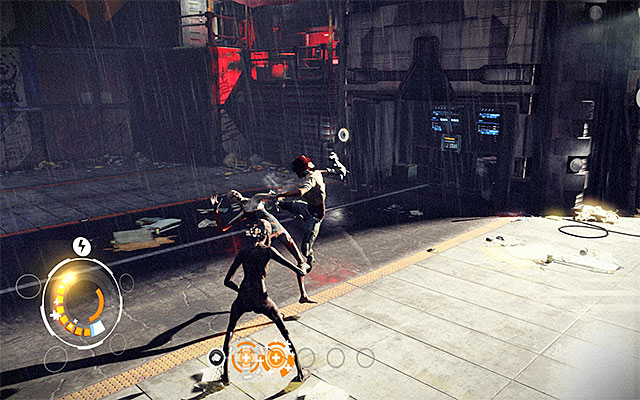
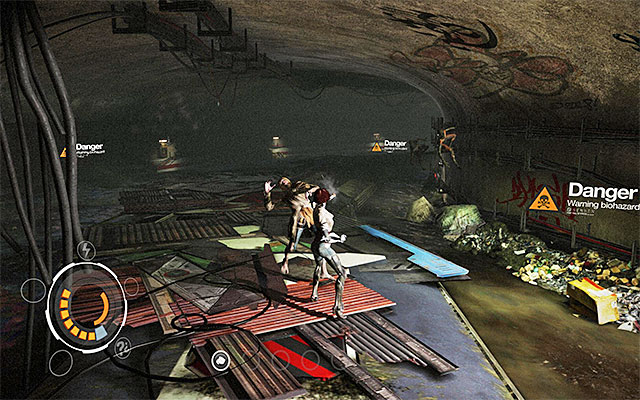
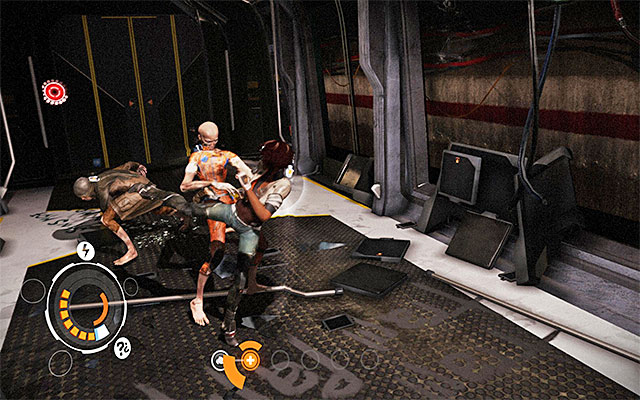
Right after the beginning of this episode, you will have to fight your first fight with mutant outcasts called Prowler Leapers. At first, test your quick dodges. At the same time, pay attention to the red exclamation marks above your enemies' heads. These notify you of the imminence of their attacks.
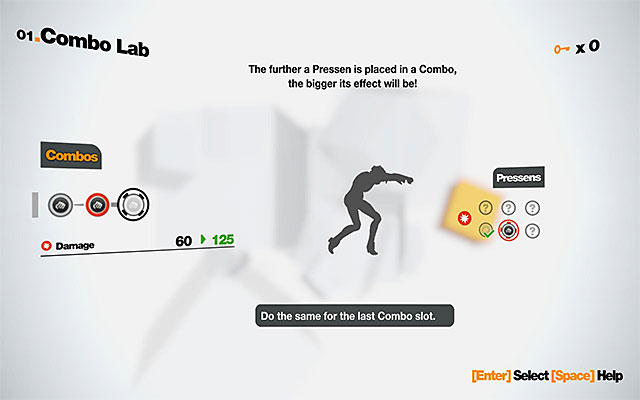
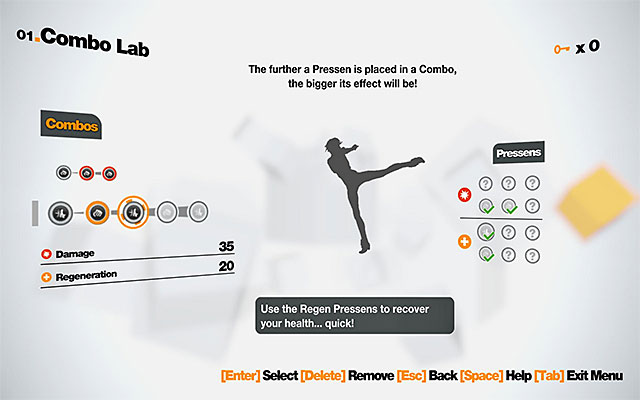
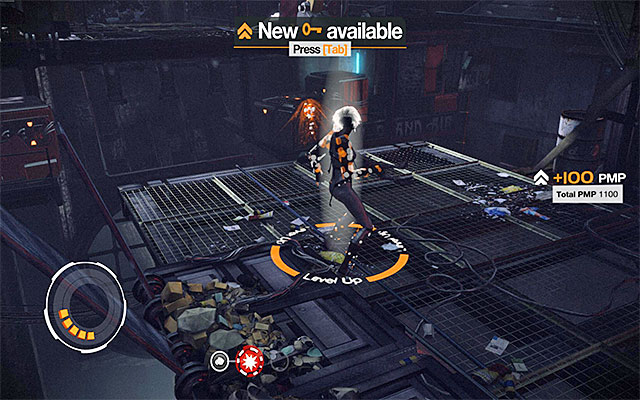
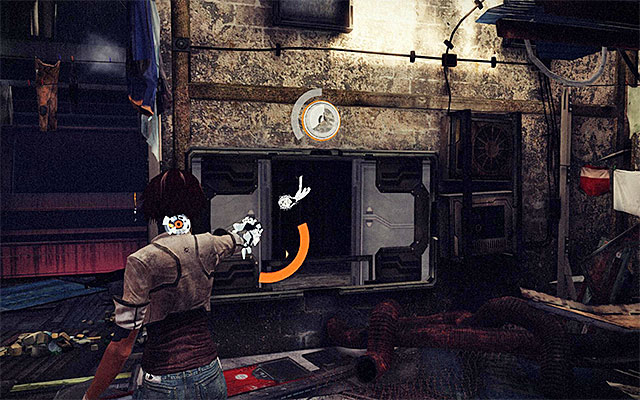
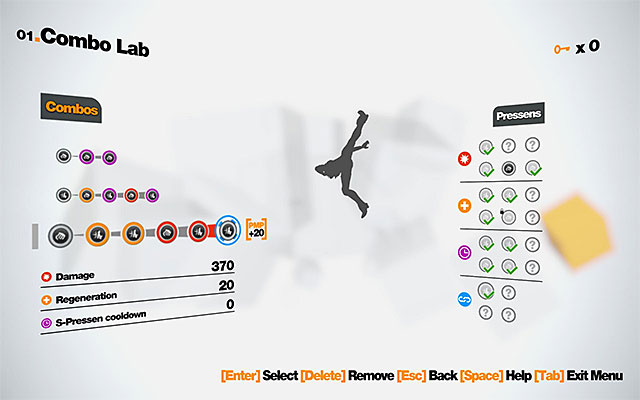
Before you start to land your own blows, you are going to see a tutorial concerning the construction of combos. Start by bringing up the Sensen chip menu and selecting the first item on the list (Combo Lab). As of now, the main character has two basic power strikes at her disposal (Power Pressens). You can use these to create a combo of three fist strikes. The first strike always comes predefined so, there are two more slots that you can define yourself. (the above screenshot). In general, taking into account the fact that you are early into the game, you cannot make any serious alterations here and, to all intents and purposes, you can only define the sequence in which the basic movements are going to be delivered. It is worth mentioning here that each consecutive strike is a bit stronger than the previous one. For example, if you place a strike in the third slot, instead of the second one, this individual strike will inflict more damage (this also means that, in order to reach that strike, you will have to press two buttons instead of one).

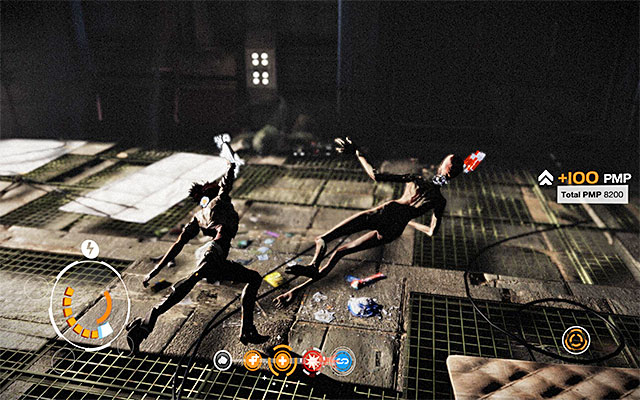
Return to the game and start dealing your punch combos; so, press the left mouse button , or the button on your controller linked to the upper limb attacks, three times. Follow the game's instructions and try to work out the appropriate rhythm by pressing each consecutive button right at the moment that the previous hit lands. Note also that Nilin has been gradually gathering experience points (PMP - Procedural Mastering Points), which will allow you to unlock new moves further in the game.
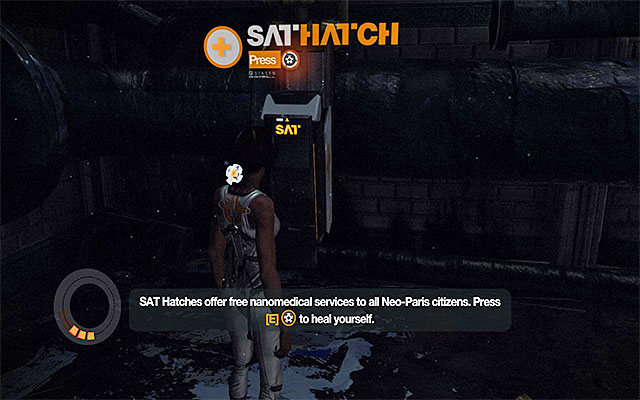
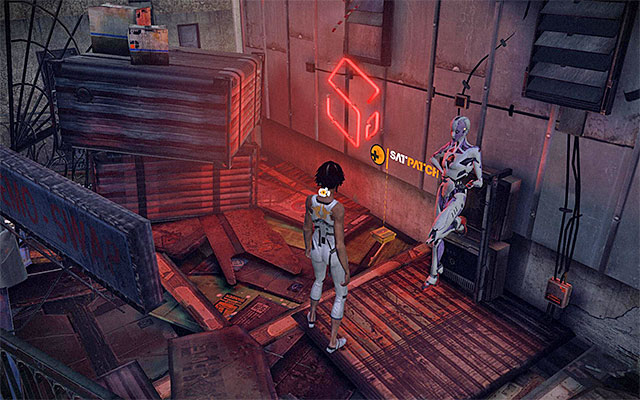
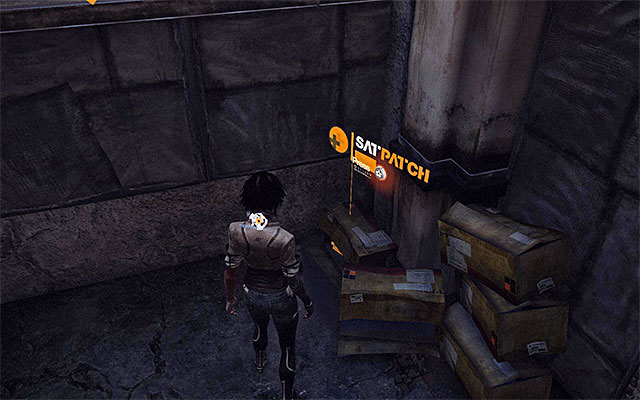
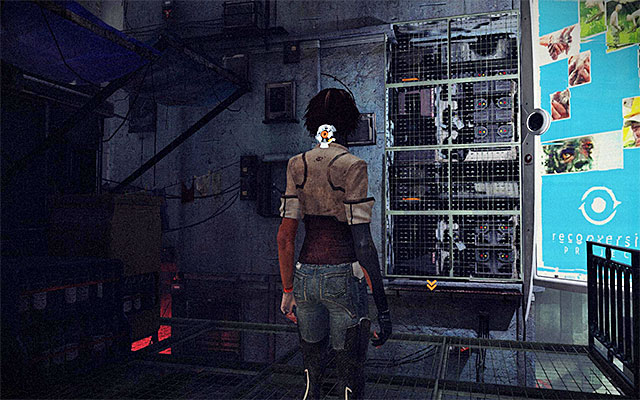
Continue launching your attacks and remember to dodge frequently because, as of now, Nilin is not capable of healing herself. After you deal with the mutants, listen to the conversation with Edge and take the only available exit from this location, which will allow you to reach the medical spot (SAT Hatch) shown in the above screenshot. Stations like this one will allow your character to heal free of charge.
[New Journal Entry: Enemy Information- Prowler Leaper]
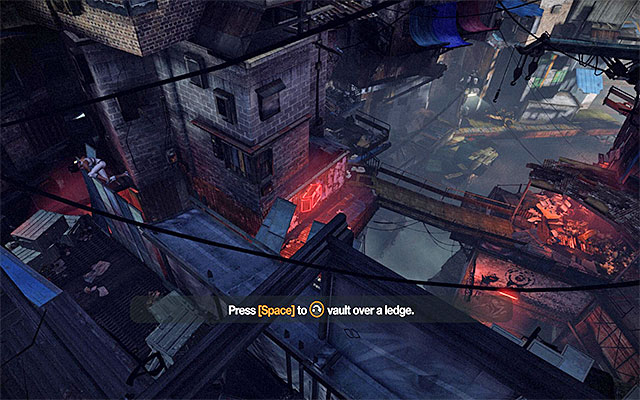
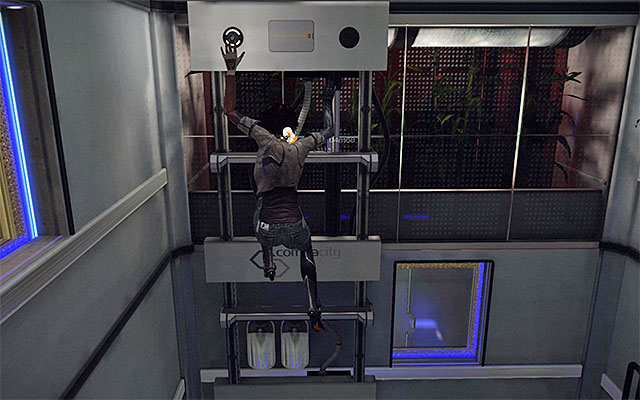
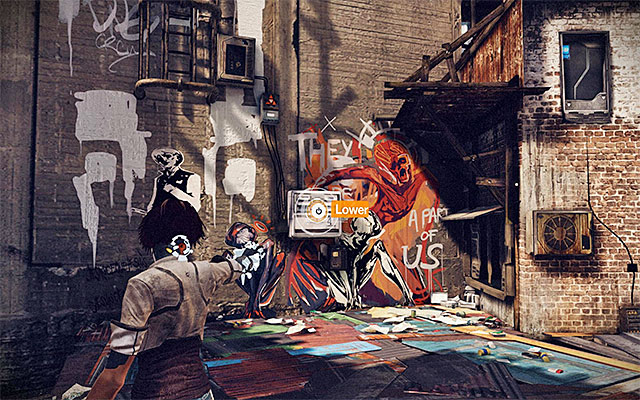
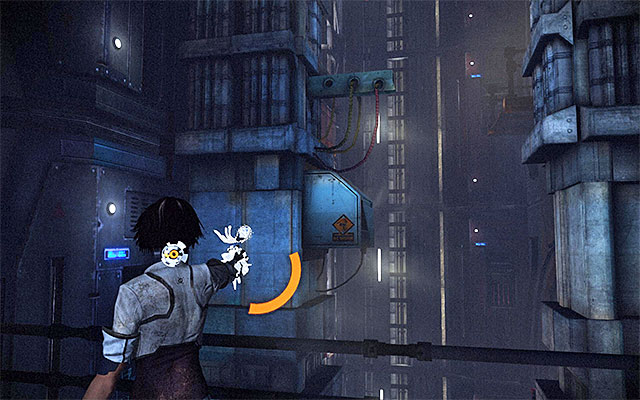
Enter now another big room. Approach the edge on the left and pres the jump key/button to catch onto it. Shimmy to the right and press the jump key/button after you reach the end of the ledge, to pull up.
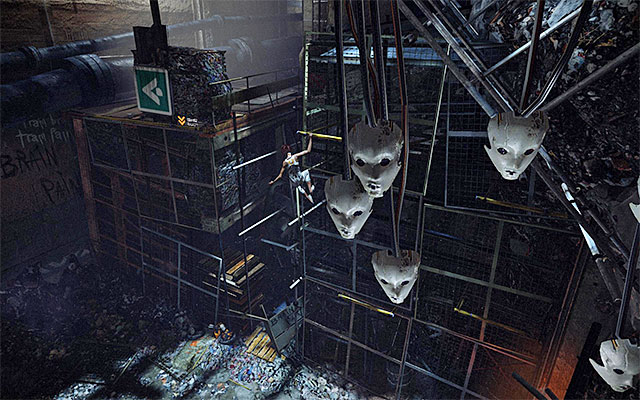
You now need to make a leap and catch onto the interactive ledge that you can see in the distance so, make sure that you take a run-up before you press the jump key/button (in the appropriate moment). After you catch onto the ledge, shimmy to the left. After you reach the scaffolding, jump towards the next interactive ledge overhead. Continue climbing and move to the left. Perform a simple jump to catch onto the neighboring ledge. Wrap it up by pressing the interaction key/button to drop off the ledge.

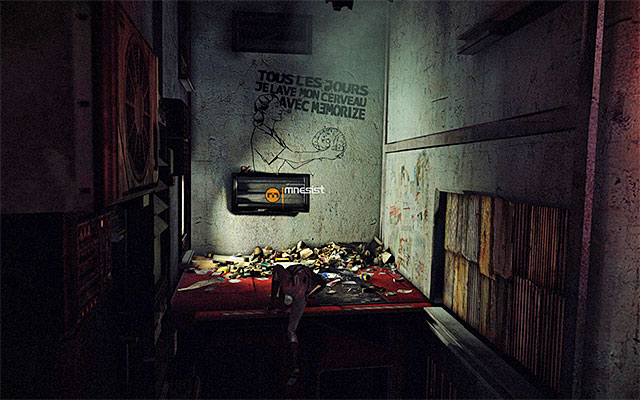
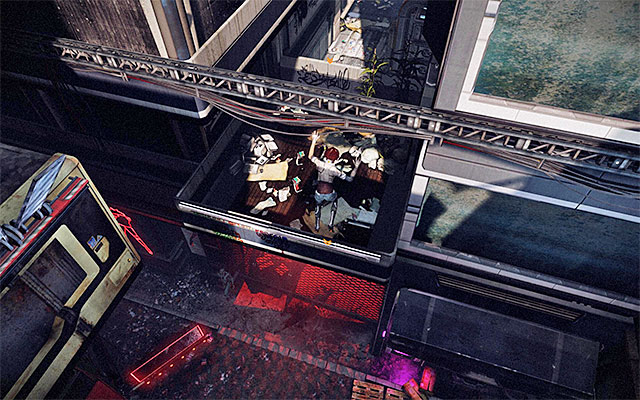
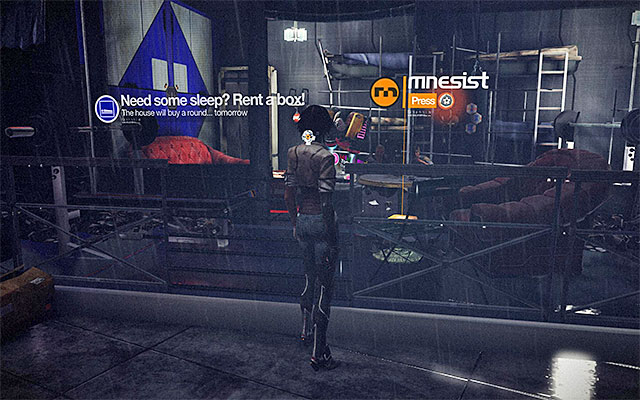
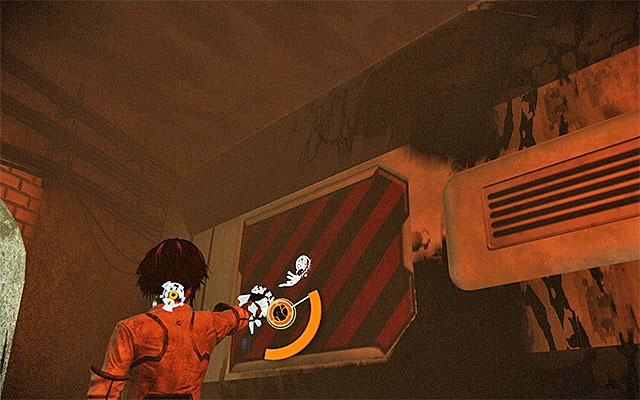
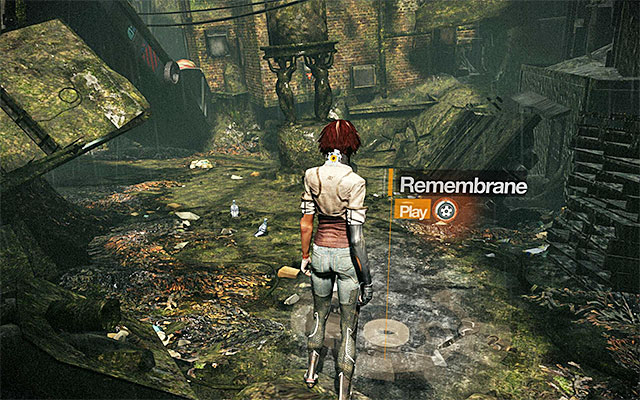
After you land in a new location, take a look around for the first one of the Mnesist Memories on the ground (the above screenshot). All of the collectibles of this class provide you with an insight into the events of the past (new journal entries which you can open at any time throughout the game).
[New Journal Entry: Neo-Paris History- Founding of Neo-Paris]
Catch onto the ledge to the left and start climbing again. Jump to reach the ledge to the right and then, the one overhead. Shimmy to the left as far as you can, and jump towards the ledge a bit further away. Finish your climbing by reaching a new stable shelf.

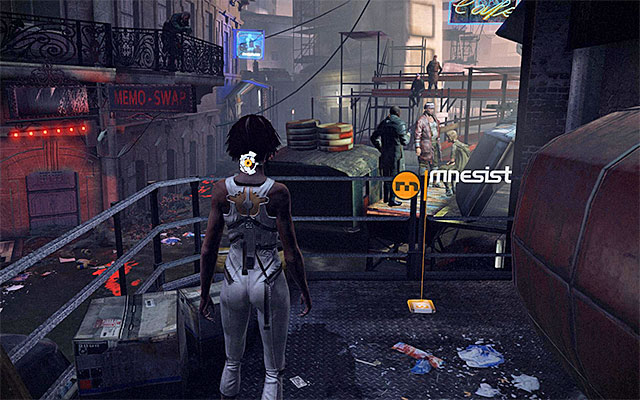
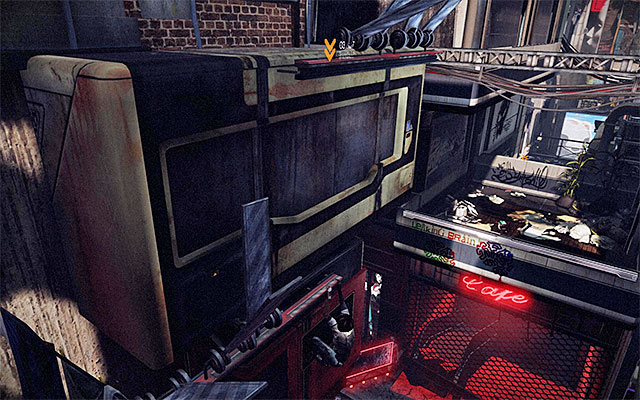
Go straight ahead. After you enter the destroyed railcar, turn right to find another Mnesist Memory in the location shown in the above screenshot. For a change, now go to the left of the starting point. This way, you will reach an exit to the surface after a few moments.
[New Journal Entry: Neo-Paris Landmarks - The Nymphea Hospital Ship ]
After you are done admiring the beautiful sights, approach the ledge and press the interaction key/button to climb down to the ledge below. Keep going straight and follow the linear path to reach another interactive ledge. Grab onto the ledge and then, onto the one above. Shimmy to the right to reach a stable ledge that you will be able to climb.

Turn left. You do not need to take a careful look at the screen displaying the location of the collectible, because you can easily find it on your own. It is a SAT Patch located on the catwalk in the spot shown in the above screenshot. It is a good idea to be on a constant lookout for this kind of collectibles because, each five of them increases the maximum health bar.
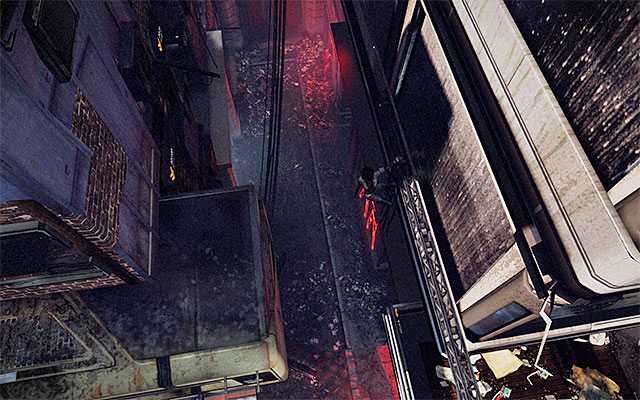
Turn around and approach the location in which you will notice an interactive ledge above Nilin's head. Grab onto that ledge and jump up to reach the one above. Shimmy to the left as far as you can and DO NOT DROP or else, you will fall to certain death. Make sure that you are holding on to the ledge and press one of the directional keys/buttons (or lean by using the analog stick), so that Nilin leans back. You can now press the jump key/button to reach another ledge.
Finally, release all of the buttons and pres the jump key/button only. This will make your character jump over to the other side of the vertical wall. Approach the Prowler Leapers, to fight them.
You have probably noticed that the game unlocked a new combo of up to five moves. Apart from that, you have been granted two new Regen Pressens (regeneration moves) which, apart from inflicting damage, allow you to regenerate Nilin's health bar as a result of successfully landed blows. I recommend against ignoring the combo that you defined earlier (a given move can be ascribed to one slot only). Don't let it bother you that you do not have enough moves to fill all five slots of the new combo. Sooner or later (higher experience levels) you will receive new moves.
To sum up, the combination that I recommend is: kick (predefined basic move), punch (the first one of the regeneration moves) and kick (the second one of the new regeneration moves). This combo, with its perfect efficiency when it comes to healing Nilin, will suffice for now. Further in the game, you will be able to expand/redefine the combo.
Let's get moving into action. Start the fight by initiating the combo with the regeneration moves but, in the future, do that only in situations in which Nilin loses some of her health points. Otherwise, it is better to rely on the first one (the earlier one) combo that relies on the Power Pressens for its effectiveness, which inflicts more damage. Regardless of the combos you decide to employ in the course of the fight, do not forget to perform frequent dodges, especially when you see an exclamation mark above the enemy's head.
After you are done with the fight, you can turn to locating the interactive ledge and, after you grab onto it press the jump key/button you get over to the other side. Just like in the case of the climb that took place before the fight, you now need to lean back and then jump.

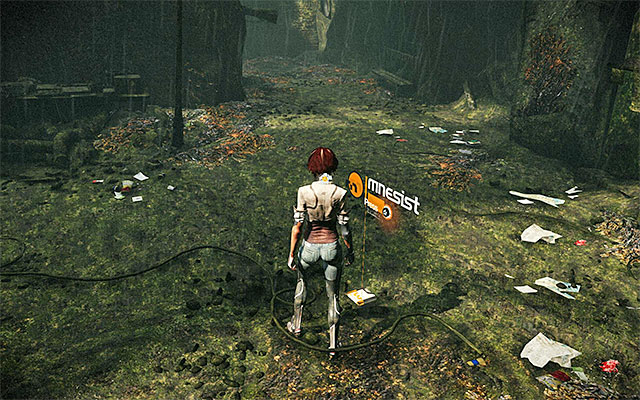
Jump to reach to the ledge on the left and drop to grab onto the one below. You can now shimmy to the left to reach a stable platform after a while. Go ahead and take the first turn to the right to reach a Mnesist Memory.
[New Journal Entry: Memorize and the Sensen- Founding of Memorize]
You can now return to the area where Nilin needs to perform a simple jump. After you land on the neighboring platform, turn your attention to the SAT Hatch, especially if you have sustained any damage towards the end of the previous fight and haven't had the time to initiate the healing moves.
Keep moving. After you approach the machine with the crates that block further passage, interact with the control console. Go ahead and make a leap on your way to reach a location with a new information screen displaying the whereabouts of another collectible (you will be able to reach it in a few moments). Turn left and jump towards the neighboring platform.
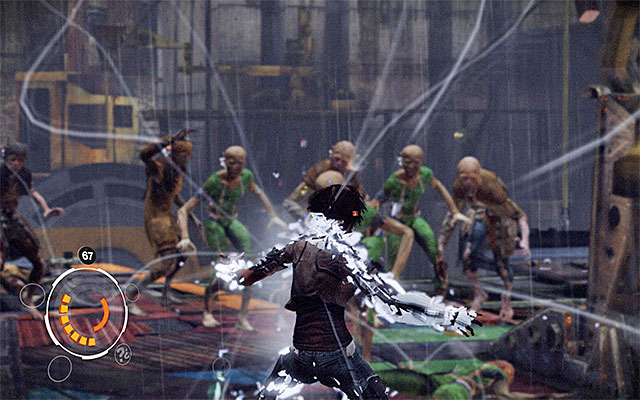
Be careful here because, right after Nilin mounts the platform, she will be attacked by a group of Prowler Leapers. There is nothing extraordinary about this fight so, simply keep delivering the combos that inflict heavy damage (Power Pressens), as well as the healing ones (Regen Pressens).
Note- after the fight ends, Nilin should gain a new experience level. If this is what happens, go to the Sensen chip menu and unlock a new movement, which you should map right away (replace one of the current moves with the new one or, add the new move to the second one of the combos). Do not forget to unlock the new move right, always after you receive the information that you gained the next experience level.

Start running and leap towards the large, metal platform that you need to mount. Locate the SAT Patch, shown in the above screenshot, i.e. the one that you have earlier seen on the information screen. Around, there is also another SAT Hatch.
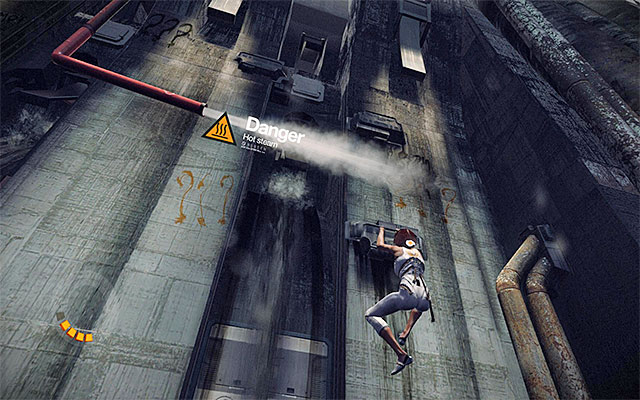
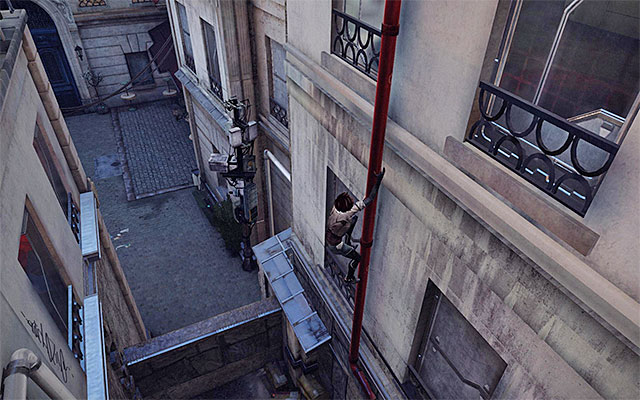
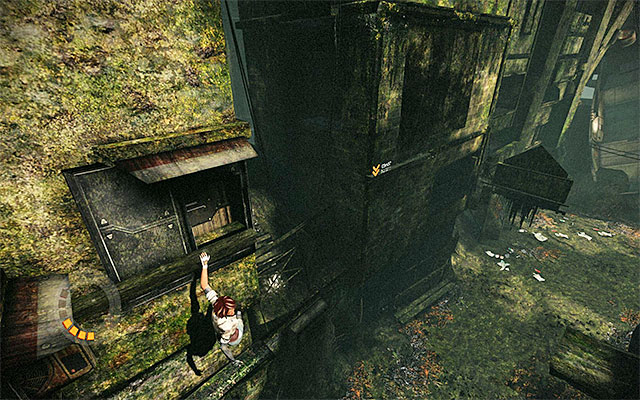
After you've taken care of all your business here, approach the drainpipe and press the jump key/button to start climbing it. Soon another group of monsters will show up but, you do not need to fight them. Wait for a short cutscene to display and leap towards the ledge to the right. Jump up to reach the ledge above and stop in the spot shown in the above screenshot.
Stop for the vapor to stop leaking and then perform one more upward jump. Quickly, shimmy to the left now. Lean to the left again and jump towards another red drain pipe. The last part of the climb is, fortunately, devoid of any additional trouble. Your character will soon reach the arena where you will have to fight a more demanding fight.
This is going to be where you encounter a discernibly bigger and stronger mutant (Skinner Leaper). I recommend that you spend some time practicing dodges whenever the creature charges at you because, in an event of collision with the monster you can lose quite a few health points.
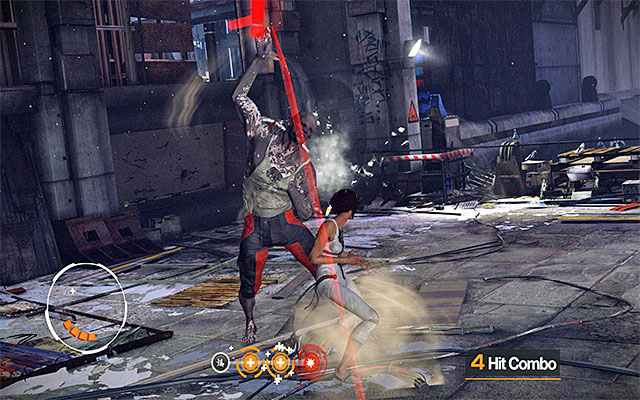
When it comes to attacking this overgrown mutant, the creature can block the regular hits and it is vulnerable only to the Power Pressens. This means that you need to utilize the combinations that include this kind of movements (the red icon). An interesting thing here is that, while fighting, you can also use Regen Pressens so, do not ignore them and rely on these as soon as Nilin loses a few units from the health bar.
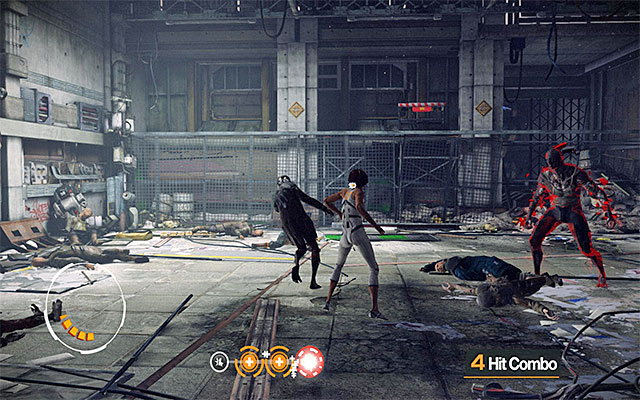
After the main mutant sustains some damage, a few Prowler Leapers will join in. Listen to the in-game hints and stop attacking the Skinner as, thanks to the reinforcements, it will go into the fury more and will become very tough. Start attacking the "regular" mutants and remember to perform frequent dodges, as well as about replenishing Nilin's health on a regular basis.
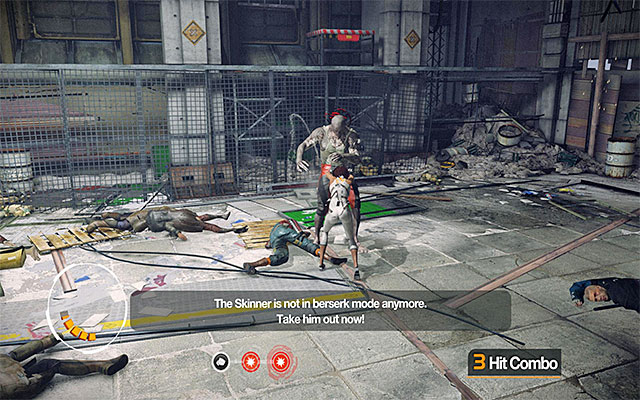
Re-launch your attacks on the skinner as soon as you get rid of the lesser monsters. Fortunately enough, this should be no problem now. After you deal with the monster, listen to another conversation with Edge.
[New Journal Entry: Enemy Information- Skinner Leaper]
Start by locating the interactive crane and interact with it. Perform a leap towards the interactive ledge on the crane. Make your way to the ledge above and shimmy to the right as far as you can. End by leaning back and perform the last jump back to reach the ledge behind you. You can now pull up.
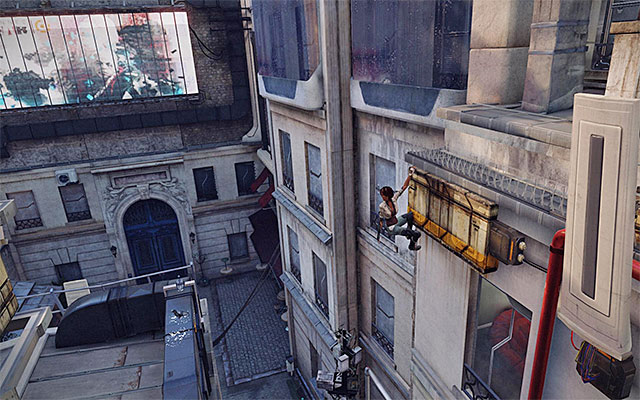
Wait for the passage ahead of you to unlock and jump towards the ledge underneath one of the billboards. Shimmy to the right and jump towards the ledges to the right and then, directly above Nilin. Continue moving to the right and stop where the your character will be able to pull up.
Start the linear march and jump to the horizontal beam and then drop to land on the platform below. Find another SAT Hatch, and then explore the market place. Pay attention to the screen that you walk by and stop at the collectible shown in the above screenshot (Mnesist Memory).
[New Journal Entry: Technology- Hunt Glove]

Turn around and take the catwalk you ignored earlier and reach another part of the market place. On your way, you will find yet another SAT Patch (the one you have just seen on the interactive screen) located on the ground to the left of the two new merchants. (the above screenshot).
Move on. Ignore the interactive ladder for the time being and, after you reach the final part of this area, turn left. Explore the area shown in the above screenshot, which will earn you yet another (Mnesist Memory). Only then, return to the ladder and climb it. .
[New Journal Entry: Neo-Paris VIPs- Edge: The Founder of Errorism]
Go ahead and turn right at the first opportunity. Approach the character shown in the above screenshot to find another collectible on it - a SAT Patch. You can now approach the bridge control and interact with it. Walk over the bridge and use the next control to unlock further passage. Finally, perform a jump.

Go right and locate the barricaded entrance to one of the building. Press the interaction key/button to cut through the barricade. After you watch a short cutscene, deal with several new enemies that attack Nilin. Winning this encounter will be easy, as the enemies come exposed to Nilin's attacks.
Go straight ahead and jump towards the ledge in front of you. Shimmy to the right as far as you can, and stop where the billboard is located. Press the jump button to jump over to its other side. After that, drop so that Nilin catches onto the ledge below. Finally, shimmy to the right where you can pull up.
Run up and jump towards the next interactive ledge. Shimmy to the left and lean back. Jump onto the next ledge. Shimmy to the right and jump towards the next ledges whenever necessary. Soon, you will end up on a larger ledge. Go ahead and climb onto the higher part of the roof.
Turn right and approach, carefully, the platform with electrical discharges. Wait for the discharges to stop, run-up quickly and jump to the ledge. Do not stop, run ahead and jump onto the next ledge in the distance. Shimmy to the right and drop only when there is a bigger balcony below.
Get ready because, soon after you see a short cutscene, you will have to get out of the unstable catwalks as quickly as possible. Run ahead, avoid stepping onto the falling elements and jump over holes. Finally, you need to make a leap towards the ladder.
Slide down the ladder to the very bottom of the ladder and, after you reach its end, drop to catch onto the ledge below. Shimmy to the left and jump. Start sliding down again and make your way towards the ledges located below (screenshot 1). Finally, shimmy to the left as far as you can and climb onto the ledge shown in screenshot 2, where there is a Mnesist Memory.
[New journal Entry: Memorize and the Sensen- First memoriel accident]
Approach the ledge, hang down from it and shimmy to the right. Start climbing here and jump up to reach the ledges above. Eventually, you need to reach the roof of one of the tallest buildings around, from which you will have clear visuals of the bar towards which you are heading.

Follow the linear path until you reach the movable platform, which you need to set into motion. After you are transported to a new location, do not hurry too much with reaching Tommy's bar, and check out the stalls to the right, instead. On the stall shown in the above screenshot, there is a SAT Patch (if you have collected all the previous patches, Nilin's health bar will extend).
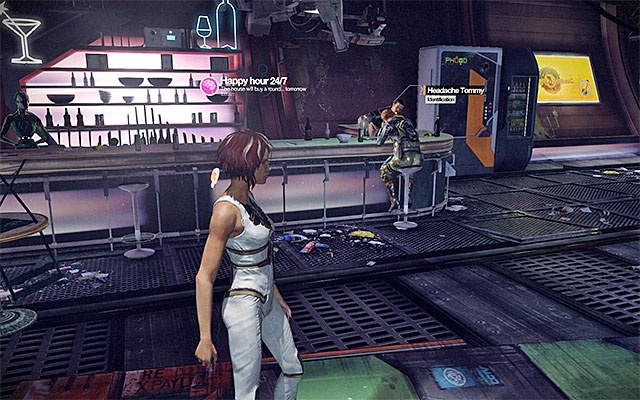
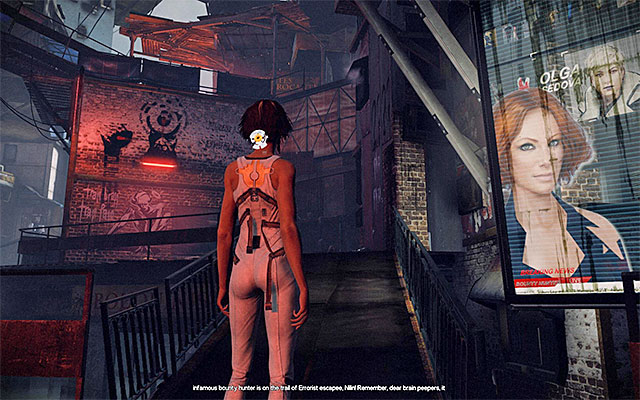
Only now, approach the counter that Tommy serves his clients at. This will result in a cutscene being displayed, during which Nilin will receive a new outfit and a Hunt Glove. Your character will soon be surprised by another hunter - Olga Sedova and it is going to be the first time you will take part in a very interesting scene. This will consist in remixing the hostile hunter's memories.

Start by watching through Olga Sedova's current memories It is connected to her husband David's, prostrating illness, who is being treated by Doctor Quaid. From the cutscene you will learn that is serves as a main motivator for Olga's hunting Nilin, so that she can receive the reward for capturing the Errorist, and therefore pay for the treatment. Your task will be to modify Olga's memories in a way that makes Olga believe that Doctor Quaid actually killed David. This will not only make Olga drop her desire to hunt Nilin down, but also want to exact vengeance on Quaid.
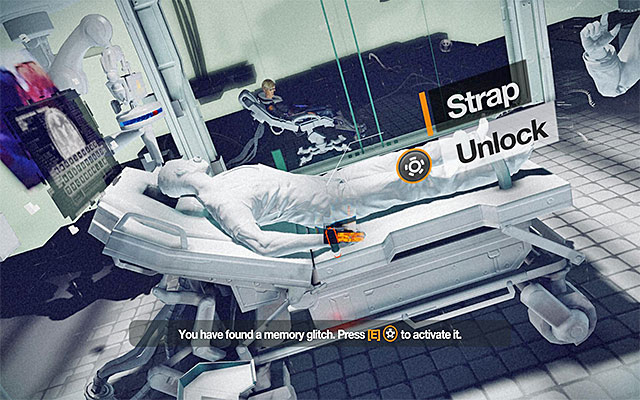
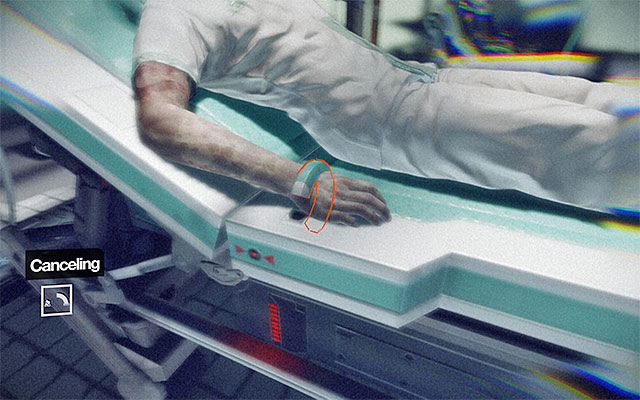
Start making counter-clockwise, circular movements with your mouse, or the analog stick. This will start the process of rewinding the memory, whose aim is to find glitches in memory that will help you modify Olga's memories. Since it is only a tutorial, for now, the game will automatically draw your attention, by stopping at the first glitch it encounters, which is connected with the Strap holding David down on the table (the above screenshot). Press the interaction key/button to select the glitch and unstrap David.
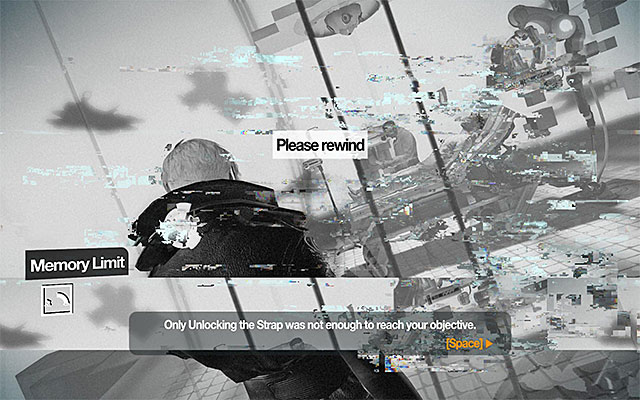
Watch the altered version of Olga's memories. It will turn out, unfortunately, that unstrapping David is not enough to achieve your goal, i.e. to cause David's death. Don't worry because, this is when the actual events, which you will be fully in control of, starts.
Start rewinding the memory again, which will result in the change connected with the strap being overridden.

It is a good idea to speed up the rewinding process, by holding down the left mouse button, because you need to go as far back as the beginning of the memory. The glitch you need to locate is connected with the Capsules shown in the above screenshot. Make sure that you press the right mouse button (or the corresponding button on your game pad) to stop the rewinding process and then, press the interaction key/button, thanks to which you will switch the capsules.

Start playing the memory again but, be prepared to stop it again. This time around, you need to locate the glitch connected with the Anaesthatic Mask. Press the interaction key/button to untie the mask.
Finally, you need to stop on the glitch connected with the strap again. Press the interaction key/button to unlock it.
You can now watch the modified memory until the very end. David will attack Doctor Quaid, and as a result, Quaid will have to kill Olga Sedova's husband. After the return to the reality, Olga will abandon her idea to kill Nilin, and will also offer her help at destroying Memorize. This is the end of this episode.
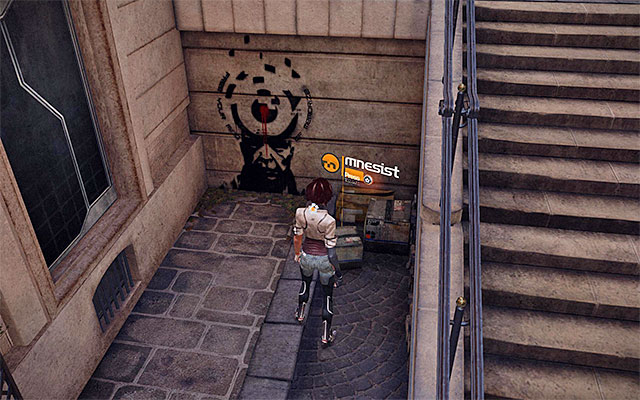
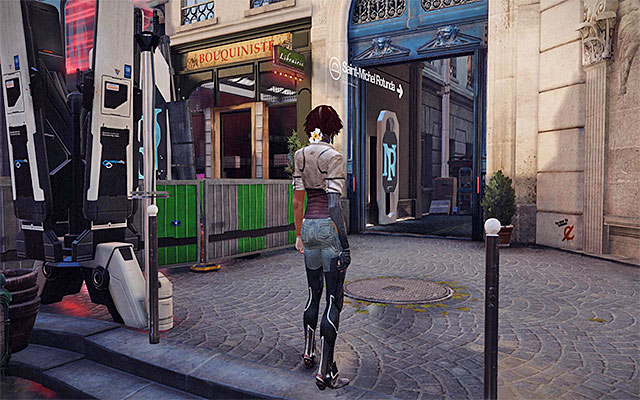
After you listen to the conversations with Olga Sedova and Edge, start exploring St. Michael's district. Go towards the St Michael's Square and ignore the NPCs and shops that you pass because, you are not going to get any interactive items yet. Only after you reach the abovementioned square, find the side stairs and get to the location where one of the people is giving a speech. Explore the area to the right of the stairs to find a Mnesist Memory (the above screenshot).
[New Journal Entry: Neo-Paris History- Regulation of Firearms]
Return to the square and continue the exploration, by choosing the path leading up to the rotunda. Follow several corridors here, which will take you to a big yard. There is where you are up for your first encounter with the S.A.B.R.E soldiers, who are the local guardians of law and order.
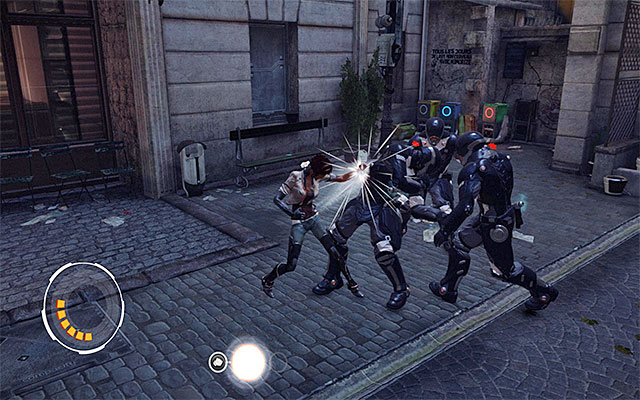
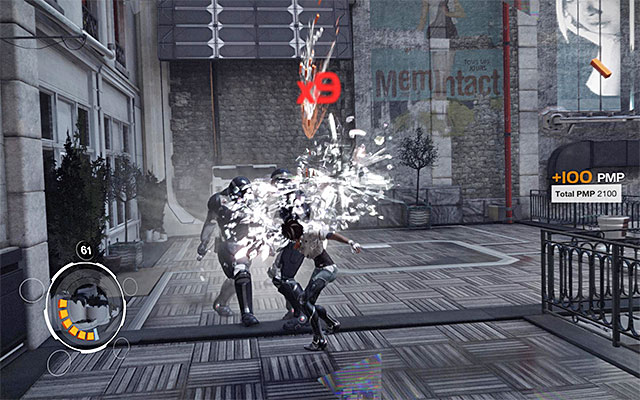
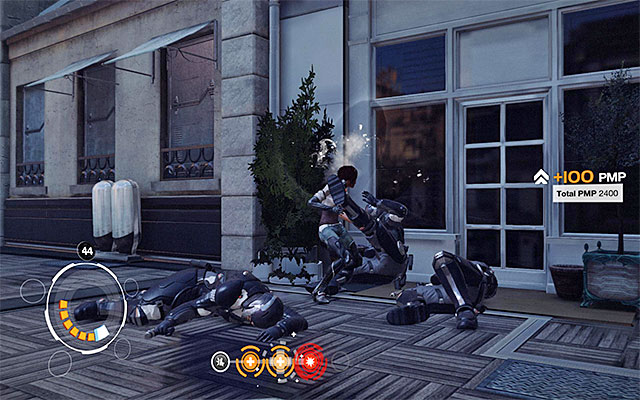
There are several Enforcers to be taken care of. Right after you start the fight, make sure that you perform regular dodges, so you can avoid being hit with tonfas. Also, make sure that you initiate Power Pressens as often as possible because, these will deal to the enemies more damage than regular blows.
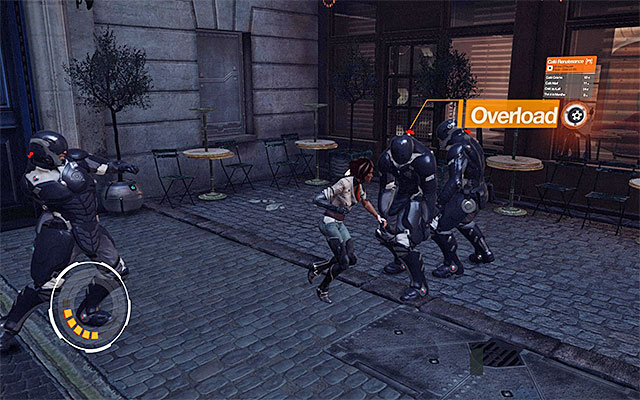
You might have already noticed that, sometimes, the severely wounded enemies display the chip Overload message. This suggest that you can eliminate them in a stunning way. If you want to finish off your weakened opponent without any problems, run up to him and press the interaction key/button to make Nilin perform an execution. Continue fighting until you deal with the enforcers.
[New Journal Entry: Enemy Information- Enforcer]
Explore the entire yard and find an information screen with the whereabouts of the next collectible displayed. Find a ledge that Nilin can grab onto. Jump over to the next ledge and shimmy to the left, to jump towards the neighboring ledge. Do not haste too much with continuing the climbing. Instead, jump down to the small area between the buildings underneath (screenshot 1). Approach the cardboard boxes and collect the SAT Patch.
Jump over the low wall, thanks to which you will return to the yard that you've recently fought the enforcers on. You need to repeat the first part of your climbing and reach the ledges above again. Do not drop into the enclosed are. Instead, lean back and jump towards the drain pipe behind, which you need to climb.
After you reach the head of the pipe, jump towards the small ledge to the left. Lean back again. Press the jump key/button to reach the roof of one of the nearby buildings. Climb up the rooftop and approach the nearby ladder. Turn your attention to the SAT Hatch and jump over the balustrade, thanks to which you will land in a new "arena".
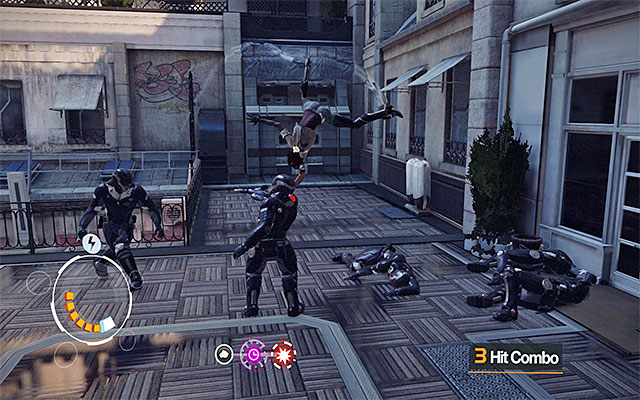
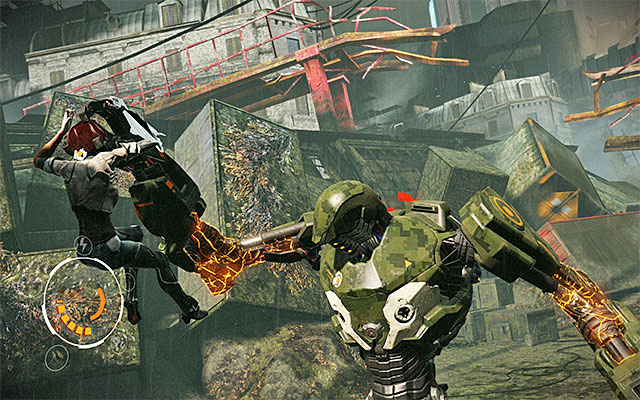
Right after you start another fight with the Enforcers, you will gain access to your first special move, i.e. Sensen Fury. Follow the in-game instructions and bring up the special actions window to activate this mode. In the Fury mode, you do not need to worry about the utilization of the defined combos, and only press the kick and punch buttons. Try and harm as many enemies as possible because, there is a limit to this mode. What is even more, after the mode ends, it needs to regenerate (the cool-down time is 60 seconds, by default but soon, you will learn a method to shorten it).
After Nilin goes out of the fury mode, start using the two available combos, while remembering to perform frequent dodges and finishing the overloaded enforcers off (Overload message).

After another group of hostiles arrives, you will receive a message concerned with the unlocking of a new group of attacks, i.e. (Cooldown Pressens). These moves allow you to speed up the regeneration process, for Sensen Fury attacks, as well as for many others to be unlocked in the course of the game. It is a very useful ability, as Sensen Fury requires, by default, as long as one minute to cool down. At first, you will receive only one such movement so, it is a sound decision to "incorporate" it into one of the already available combos (an example in the above screenshot).
Start attacking various enforcers and try to make a regular use of the combination that includes the Cooldown Pressens. Each time you notice that Sensen Fury has regenerated, initiate it to make things easier. Keep launching attacks until you defeat all of the S.A.B.R.E. soldiers, while remembering to regenerate Nilin's health level (regeneration moves).
After you win the battle, approach the red drain pipe and start climbing. Stop in the spot shown in the above screenshot, i.e. right next to the billboard with changing images. Wait for the "wave" to disappear and start shimmying quickly to the right. It is crucial that you hold down the left mouse button while doing that (or the corresponding button that you use to speed up shimmying). Because, it is the only way to make it to the next ledge. Fortunately, even if you are hit in the process, Nilin doesn't die. You will just have to repeat the last actions.
Shimmy now to the opened shutter and press the interaction key/button to jump inside one of the apartments. There are a SAT Hatch and a balcony door to find here. Explore the rooftops and leap after you approach the edge of the roof.
Shimmy to the left as far as you can and jump towards the ledge to your left. Continue to the left and stop only where you are able to drop to a roof below safely. In here, locate the place where you can climb to a higher part of the roof. Turn left and run-up to jump.
Ahead of you, there is another part where you need to shimmy quickly along ledges (this time around, a slipup means death). Wait for the electrical discharges above Nilin to disappear, jump towards the main ledge and shimmy to the right (the above screenshot). Jump exactly at the same moment at which the discharges to the right disappear. Move quickly to the right now and jump towards the white pipe.
I recommend that you remain here and jump towards the ledge to your right. Shimmy to the right as far as you can and jump towards the small balcony shown in the above screenshot, where there is a Mnesist Memory.
[New Journal Entry: Neo-Paris Landmarks - Saint-Michel Comfortress]
Grab onto the ledge above and shimmy to your left so that you return to the vertical white pipe. You can now slide down the pipe to the very bottom. After you find yourself in an area with new NPCs in it, go towards the entrance to the rotunda.

After you listen to the conversation with Edge, examine the interactive screen and start by going left. Right at the locked gate, there is a SAT Patch) shown in the above screenshot.
You can now return to the starting point and go right, or a change. It shouldn't be long before you reach the location, where there is an NPC, called Bad Request, waiting for you.
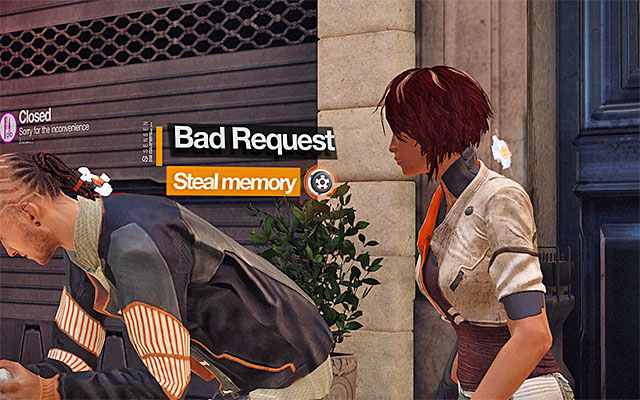
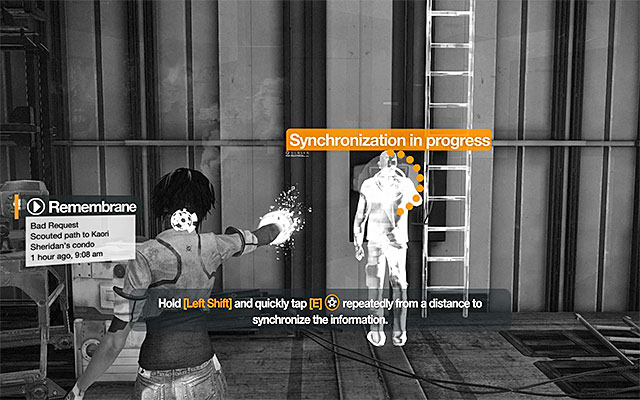
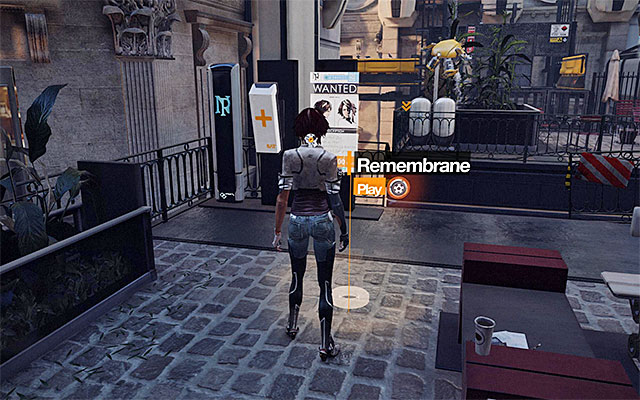
Listen to the conversation with the friendly hunter and press the interaction key/button to download some of his memory which concerns the means of reaching Kaori Sheridan's apartment.
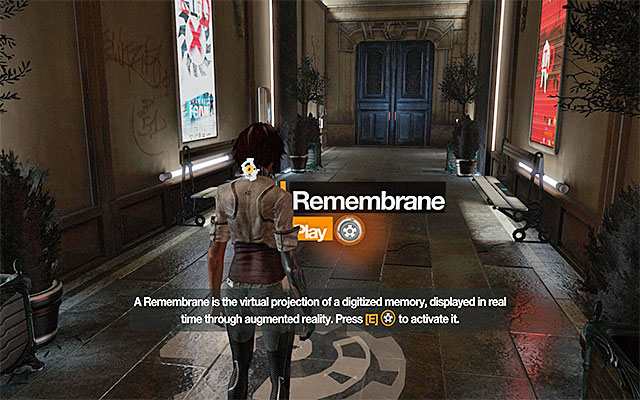
From now on, you will be finding virtual projections (Remembranes) left for you by the memory hunter you have met at the rotunda. Their purpose is to help Nilin reach the staying place of the architect. Approach the first Remembrane and press the interaction key/button to watch the it (each remembrance can be replayed over and over again).
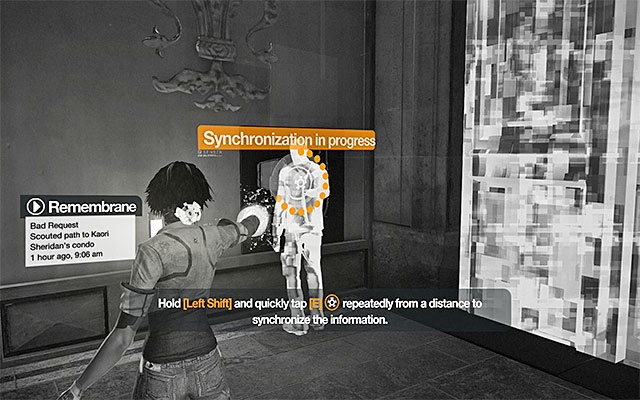
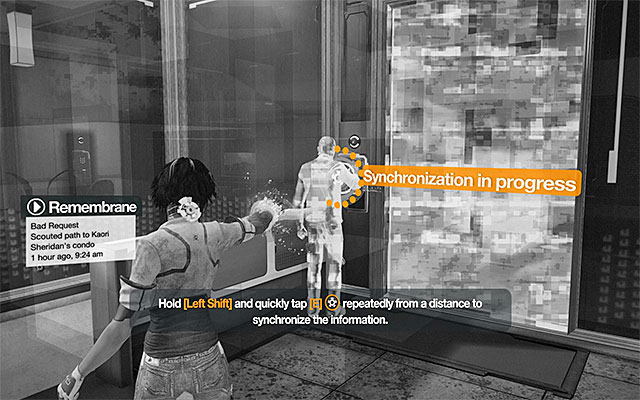
Reach now the next remembrane and approach the locked door while it plays. Turn left and press the aim key/button in order to lock onto the door control (the above screenshot). You can now start pressing rhythmically the interaction key/button in order to synchronize the information.
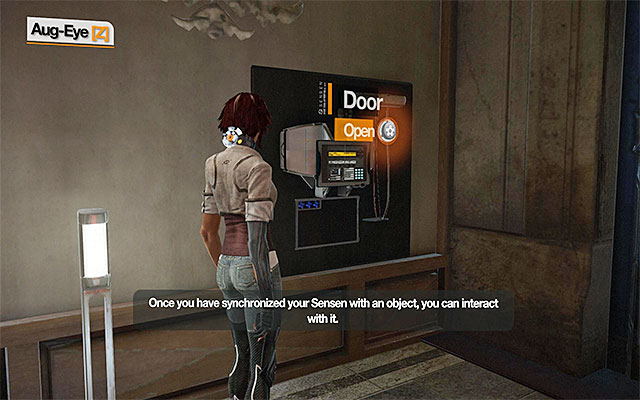
If you have done everything correctly, the control panel will become active and you will be able to unlock further passage for yourself. If you failed to open the door, activate the remembrane once again and try again. After you reach a fork, turn right.
Approach the Enforcers and attack them. Because there is only two of them, it would be better if you don't use Sensen Fury but, seize the opportunity to learn fro the hint how to replenish the Focus Gauge that powers the ability. The gauge is filled every time Nilin deals or takes damage. There is additional bonus included if you perform the execution move on the overloaded enemy.
Since there are no interactive items around, climb the ladder. Approach the new remembrane and initiate it. Just like previously, you need to lock onto the door control and start tapping rhythmically the interaction key/button in order to synchronize. Finish by interacting the unlocked mechanism to open the door above.
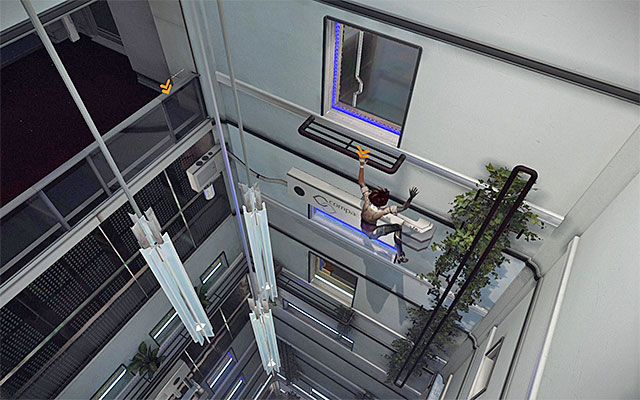
Turn right and leap towards the first interactive ledge to start climbing. After Nilin grabs onto the ledge, wait for a flying drone to appear behind her back (the above screenshot). Lean back and jump towards the drone to grab onto the ledge and land onto the wall. You can now finish climbing (the ledges and the ladder), which will take you out of this location.
Locate an interactive screen and approach the next remembrane to play the recording. Listen especially carefully to the commentary concerned with avoiding armed drones because, soon you will encounter one.
If you need to, make use of the SAT Hatch, approach the ledge and leap towards the metal balustrade. Shimmy to the right and jump over the balustrade in the pot shown in the above screenshot. Wait for the combat drone to fly away to the left, and walk around it in the right, while remembering, at the same time, not to approach to it (the drone scans the area within the radius of 360 degrees.

Go towards the big platform with yellow edges, which you need to mount. After you do, start another remembrane and climb on the ledge above. Start by turning left and jump down onto the platform below shown in the above screenshot. There is a new SAT Patch here.
Return to the platform above, turn towards the glass fragment of the roof and leap towards it. Thanks to this, Nilin will smash the roof and land inside the apartment.

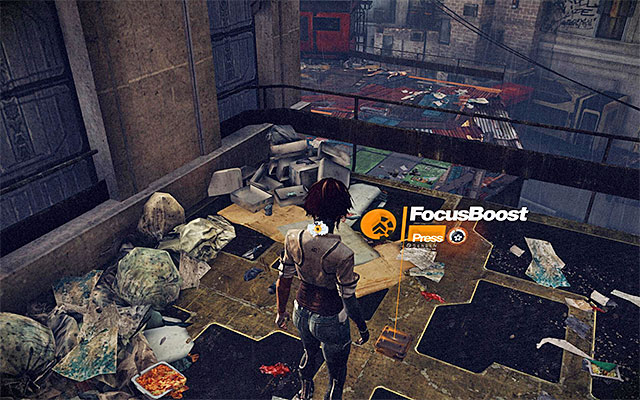
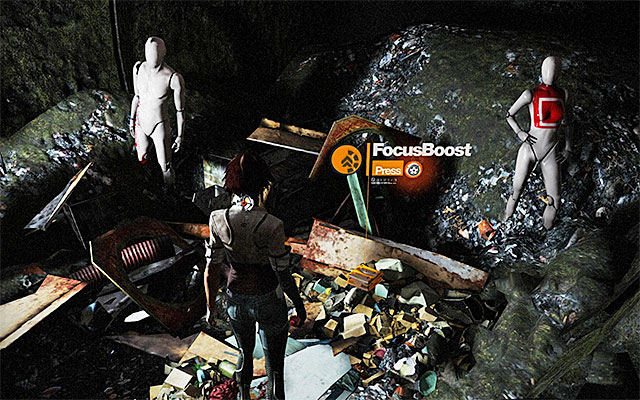
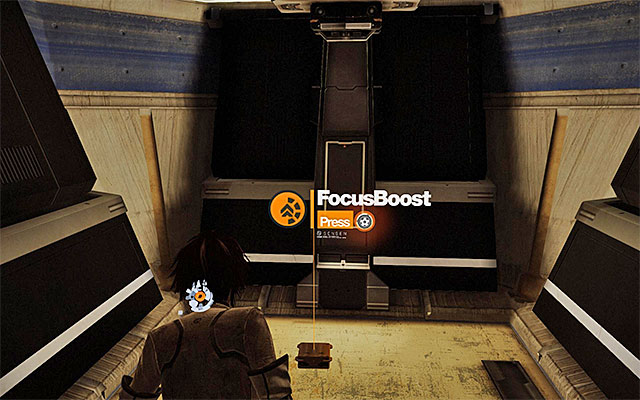
After you listen to the conversation with Edge, walk over to the main area in the apartment. Examine the screen and go to the stairs to the left, which will take you to a collectible of a new kind - Focus Boost. Just like in the case of the patches, it is a good idea to be on a lookout for boosts because, collecting every five of them expands the Focus Gauge.

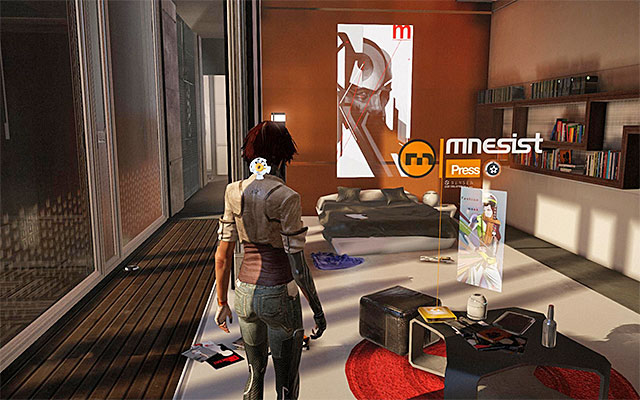
Return to the main area and walk over to the room located to the right. Turn your attention to the SAT Hatch here, as well as the Mnesist Memory on the table.
[New Journal Entry: Technology- Remembrane]
You can now walk over to the small balcony. Jump over the balustrade and leap towards the vertical pipe to your right. Keep climbing up the pipe until you reach the roof of the building to the right, which you need to jump onto.
After you land onto the rooftop, you will be attacked by the Enforcers. Because this group is quite large, I recommend that you initiate the Sensen Fury. Further in the fight, remember to initiate your strikes in the correct sequence and to finish off the overloaded enemies.
After you are done with the enemies, take the passage at which they first appeared. Jump over the balustrade and turn left, use the SAT Hatch if you need to, and listen to another conversation with Edge. After you reach the shaft, grab onto the ledge in front of you and climb in order to reach the next balustrade.
Shimmy to the right to reach the place, where Nilin will be able to jump up to the two vertical pipes. Climb up as far as you can and then jump towards the ledge to the left. Finally, jump towards the balustrade, which you need to jump over. Once you reach the higher floor, go straight ahead and take the first turn to the right.
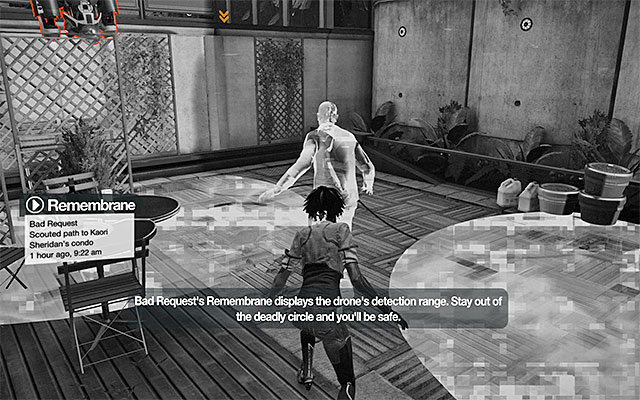
Approach the next remembrane. Do not wait around until it displays, and follow your virtual guide. Thanks to the remembrane being active, you will see areas monitored by two new combat drones (the above screenshot). You need to avoid entering the circles at all cost, or else Nilin will die where she stands.
Grab onto the ledge of the balcony above and turn let to find another interactive screen. If you need it, make use of the SAT Hatch and approach the new remembrane. Approach quickly the door control, lock onto it and synchronize in order to open the passage to this apartment.

Open the door and walk into the apartment. Ignore the next remembrane, for the time being, ant turn to the exploration of the entire apartment. The staircase to the left leads to a SAT Patch shown in the above screenshot, which you have probably already noticed (you were unable to reach it because of the grate).
Turn now to the exploration of the rooms to the right of the entrance. There is a table in the last one of them, where there is a Mnesist Memory shown in the screenshot
[New Journal Entry: Neo-Paris VIPs- Kaori Sheridan]

You can now approach the abovementioned remembrane and play it. Locate the nearby shutter control and synchronize the information. Afterwards, approach the panel and interact with it, which will result in wall appearing, which will cover you from the range of vision of one of the drones.
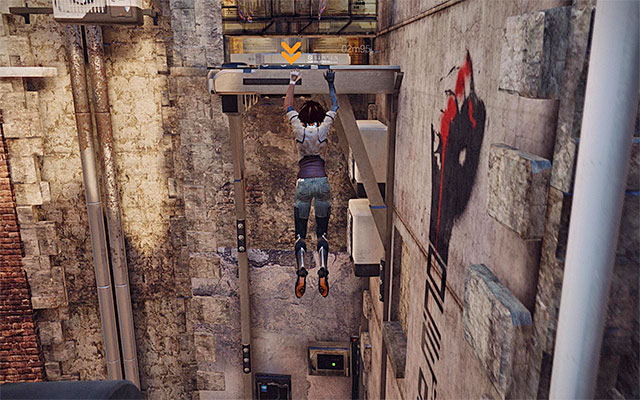
Leave the apartment and go right; take the path shown in the above screenshot, which you have ignored earlier. On your way along the path, you are going to have to perform two jumps, but this should be no problem. Right after the second one, pull up and enter the building.
Approach the locked door and start a simple climb consisting only in jumping to grab ledges overhead. After you finally get into a bit bigger room,, deal with the two Enforcers, trying to surprise Nilin. Listen to the conversation with Edge before you set out for further journey.
Go towards the wall with the interactive ledge and jump over it. Go left here and take a look around for the Mnesist Memory on one of the benches (the above screenshot). Around, there also is another SAT Hatch.
[New Journal Entry: Neo-Paris VIPs- Kid X-Mas]
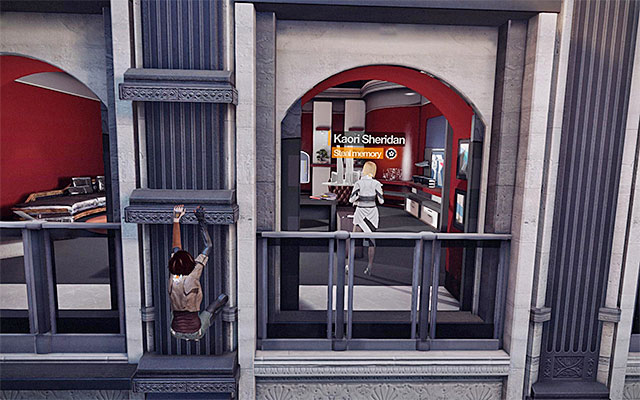
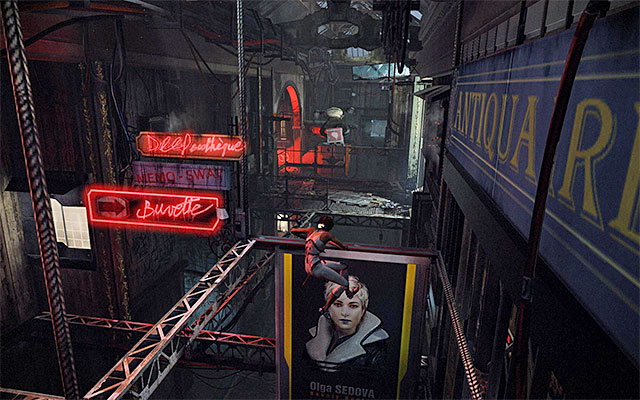
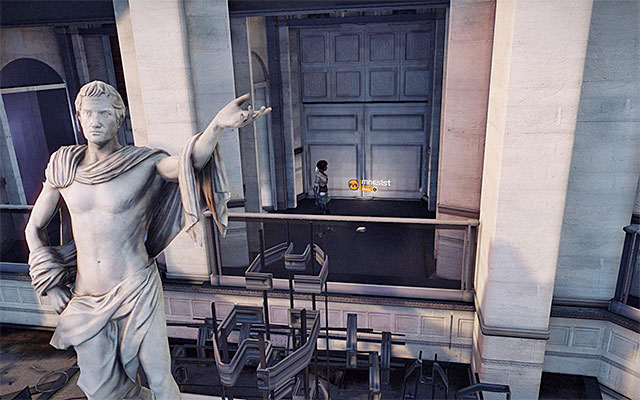
Go towards the roof's edge and leap towards the ledge that you can see in the distance. After you grab onto it, shimmy to the right and then, up. Stop in the spot shown in the above screenshot and pres the interaction key/button to steal Kaori Sheridan's memories.
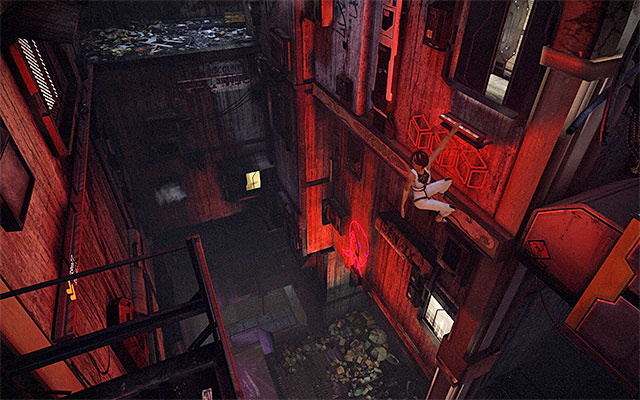
After you listen to another conversation with Edge start shimmying to the right. Jump over the red neon light, because there is nothing to threaten you here. Continue going right, which will result in a short cutscene being played, during which Nilin will lose her balance.
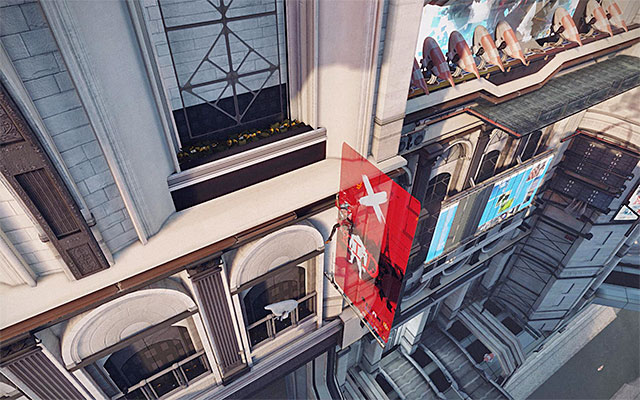
There is another challenge for you including an active billboard. Wait for the first two panels to the left to stop, and shimmy to the right quickly. Stop in the spot shown in the above screenshot.
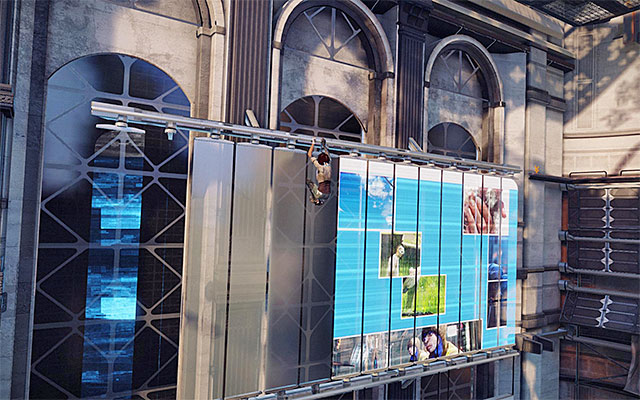
Wait for the panels to the right to stop rotating and shimmy to the right. It is necessary that you press, and hold down, the key/button for faster shimmying. Finally, jump towards the ledge to your right.
Keep shimmying to the right until you reach a location in which Nilin can jump towards the vertical pipe. Climb up the pipe and make your way to a small metal balcony. Jump over the balustrade and go right to reach the Mnesist Memory shown in the above screenshot.
[New Journal Entry: Memorize and the Sensen- First Sensen Prototype]
Return to the left and jump towards the wall with the interactive ledge to continue along your path. After you end up in a dimly-lit corridor, jump down to a lower level. Turn your attention to the interactive elements here, i.e. the screen and the SAT Hatch.

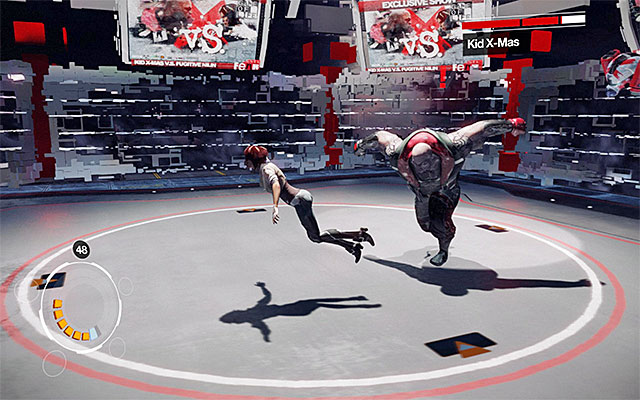
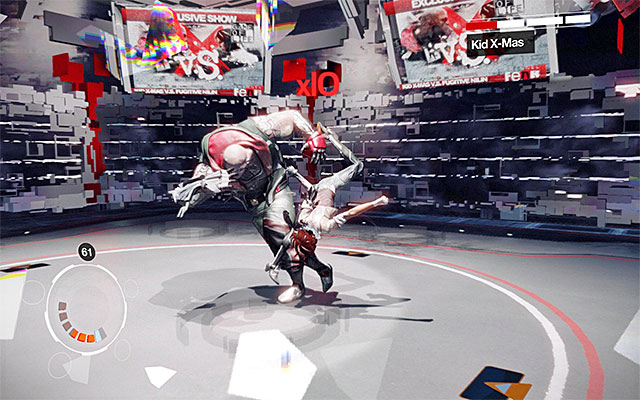
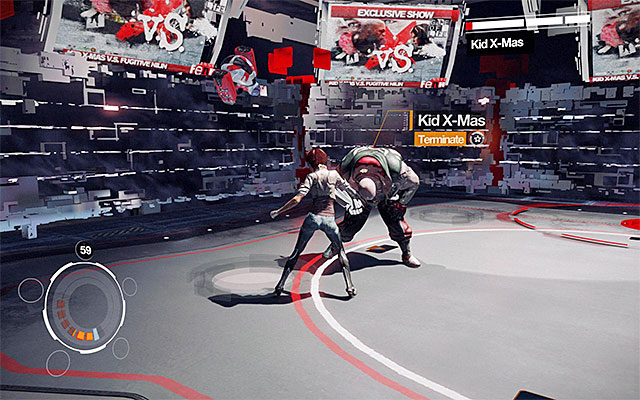
After you make it to the roof, take the first turn to the right. In the location shown in the above screenshot, there is the last one of the collectibles in this episode - a Focus Boost. Jump into an arena of some sort and start the fight with the first boss of this game Kid X-Mas.
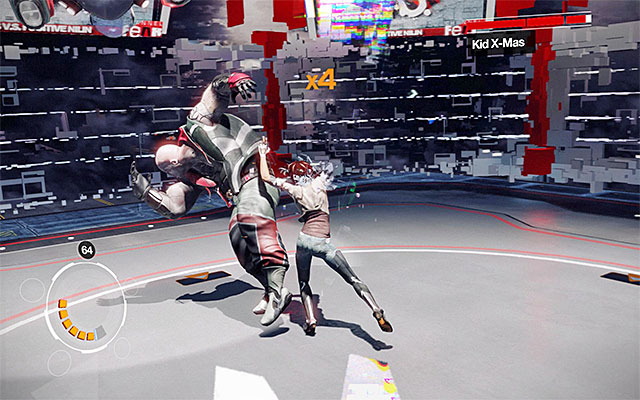
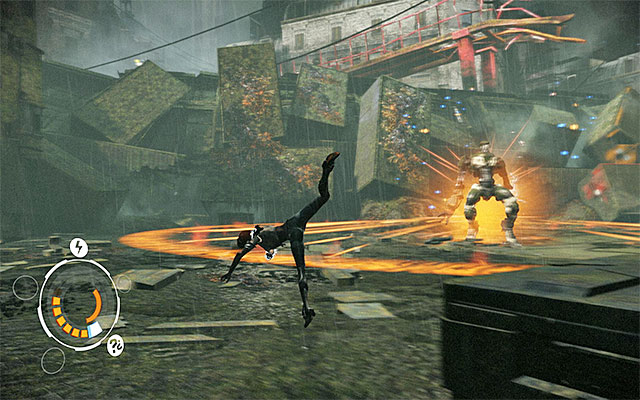
Kid X-Mas is not too demanding an opponent, although there are three rounds to this encounter. This means that it will take you some time to achieve victory. I recommend that right after the first part of the battle starts, you initiate Sensen Fury, and start pounding at the boss to prevent him from defending himself. It is worth remembering because, Fury Sensen is the main means of defeating this opponent.
After the fury depletes, focus on avoiding the boss's charges and notice, that he stops briefly each time his charge fails. This exposes him to your standard attacks. Depend mainly on the Power Pressens, but do not forget about the combos that regenerate Nilin (you can always replenish your health bar, even if Kid Blocks a given blow) as well as Cooldown moves (shorter Cooldown time for Fury mode).
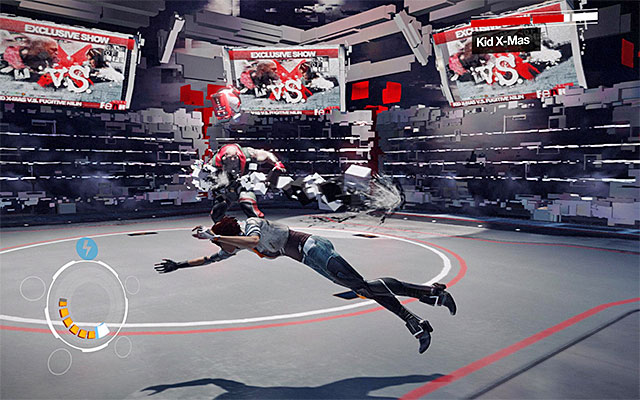
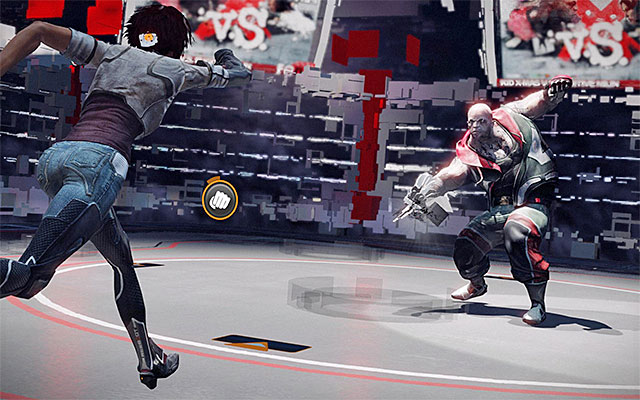
The first part of the duel draws to an end when the shortest part of the boss's healthbar goes down. In the second part of the battle, Kid starts using a gizmo called Spammer, which works similarly to firearms. It discharges a series of projectiles which inflict damage to characters equipped with the Sensen chip (this also holds true for your character). Keep avoiding these projectiles with side-jumps.
Just like in the previous part of the battle, keep making use of the Sensen fury as frequently as possible, focus on avoiding the boss's charges and try to inflict damage every time the charge fails. Keep repeating these actions for as long as you make the second part of Kid's health bar drop to zero.
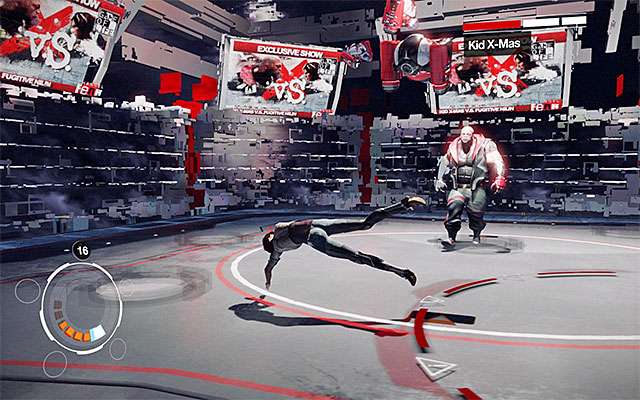
The third part of the battle introduces a few new impediments. The most important one are the mines that Kid deploys. I recommend against waiting until the boss destroys the mines inadvertently. It is better to enter the external circle, which initiates detonation procedure.
Another important impediment is that Kid X-Mas stops charging. It is very important because, the only way to harm him, from now on, is to use the Fury mode. Of course, you need to modify the your playing style accordingly, and try to make the best possible use of fury, and initiate Cooldown combos after the fury finishes. This will allow you to cut shorter the waiting times, and defeat the boss faster.
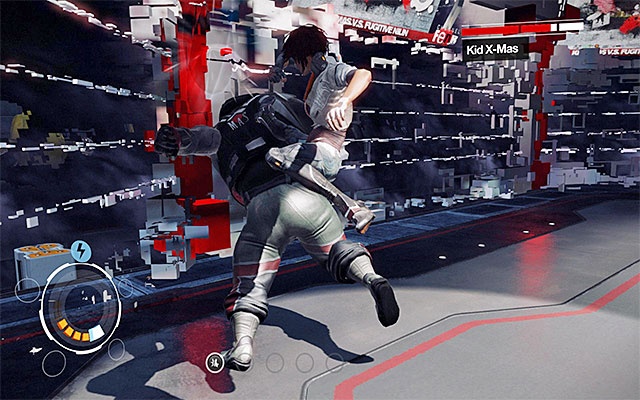
Continue launching your attacks and remember to launch regeneration movements to heal your character. Wait for the moment in which a message informing of the possibility of execution displays (Terminate - the above screenshot).
Press the interaction key/button and prepare to play a QTE event that consists in pressing a sequence of keys/buttons at the right moment. The appropriate sequence is: punch (the left mouse button), jump (SPACE), kick (the right mouse button). Finally, approach the boss and press the interaction key/button once again (Overload).
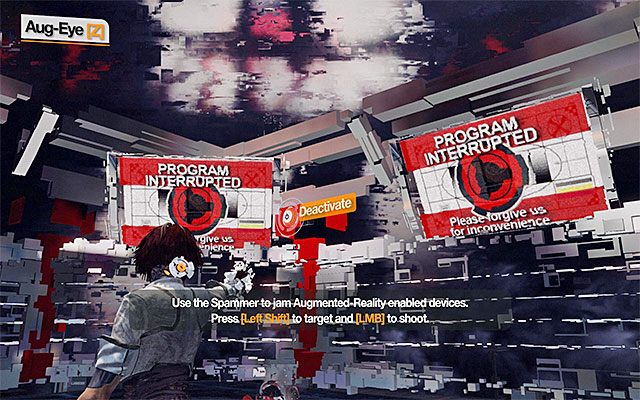
As a reward for defeating Kid X-Mas, you will receive 1000 experience points and a device called Spammer. The game will give you the opportunity to test this piece of equipment straight away. Enter the targeting mode and fire a projectile towards the first one of the "anchors" of the power field. Repeat this action with the two remaining anchors, which will disable the power field that has been enclosing the entire arena.
The only thing remaining here to do is go to the door shown in the above screenshot. Use the Spammer once again to open the door and leave the arena, which will conclude this episode.
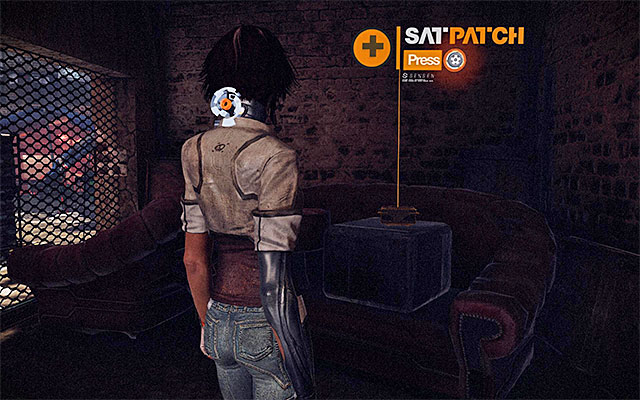
Listen to the conversation with Edge and start exploring the slums. This will take you to the market place after a while. It is a good idea to explore this area and more precisely, one of the side alleys to the right, which will earn you a SAT Patch (the above screenshot).
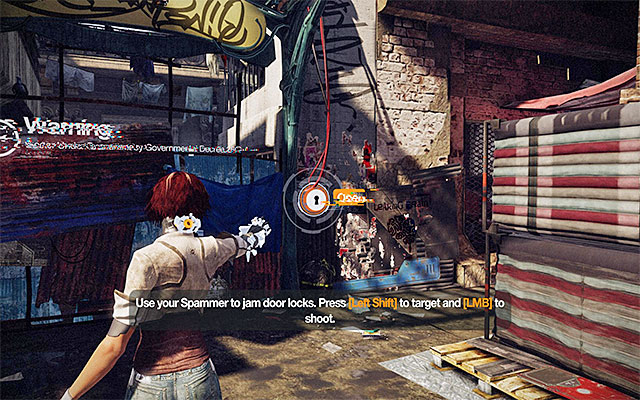
After you collect the patch, face the exit gate from the market place. Press and hold down the targeting key/button and use the Spammer (Left mouse button) which you obtained in the previous episode, to unlock further passage.

Approach the wall opposite the gate that you have just opened, where you will notice the first one of the Scaramechs. The game treats these parasites as collectibles because, there is always a definite number of these in each episode (there are 10 of them in this one). Start the targeting system once again (the above screenshot) and start using the Spammer to launch projectiles at the parasite. Soon, the parasite will die and you will gain 200 experience points.
Turn right and go ahead. Stop after you take the second staircase. Turn towards the unused shop to the right and approach the partially open roller-blind. You will find here another Mnesist Memory.
[New Journal Entry: Neo-Paris History- The Leapers Appear]
You can now resume your exploration of the slums. Check out the screen that you pass and take the stairs to encounter another group of Prowler Leapers. Right after you start the fight, the game will unlock the third combo of up to six moves. What is interesting, the appropriate performance of all six moves earns you 20 experience points. You do not need to define this new combo yet. This is especially so if you do not have enough moves to assign. You can deal with the Leapers using your current combos.

After you win the fight, focus on finding the collectible that you have seen on the screen. Check the area to the right of the stairs. In the place shown in the above screenshot, there is another SAT Patch. Return now to your main route and use the Spammer to open the door.

Continue along the narrow alleys. Stop as soon as you notice a big puddle, with discharges, in front of you. Enter the targeting mode and use the spammer by aiming at the switch that you can see in the distance, which opens the door. You can now walk through the shop, with the broken robots, to your right.

Keep moving. Stop near the bigger staircase to the right. Walk through the balcony to the left (screenshot 1). Turn right and explore the building that you can see in the distance, to find the switch (screenshot 2) that you need to aim Spammer at. After the manhole opens, shoot at the Scaramech. If you are too slow and fail to kill the parasite fiat first, you can open the manhole again.
Only then, take the stairs to the "pleasure district". Keep going ahead and turn left to enter a small yard. In here, you will have to fight Prowler Leapers and a Skinner Leaper. Start attacking the weaker mutants (the Prowlers) and avoid attacks coming from the Skinner. It is a good idea to take the suggestion and use the Spammer and send projectiles towards the monsters that clinge to the walls. This will bring them down (otherwise=, such a prowler would bounce off the wall and inflict damage to you.

Keep attacking prowlers and remember to use the combos that include the regeneration moves. If you want to, you can launch Sensen Fury here but, In my opinion, it is not going to be necessary and it is best to use on Skinner. The stronger mutant can be disposed of in a standard way, by relying on the power moves (as you can probably remember, the monster blocks the regular moves).
After you are done with the mutants, locate an interactive screen and two blinds that can be rolled down by using the Spammer. Performance of these actions will result in the exposure of interactive ledges. Start climbing and go up, and then left. Press the jump key/button to jump over the hanging neon light.
Lean back and leap towards the interactive ledge behind Nilin's back. Keep moving right and jump towards the ledge above. Shimmy to the right again and jump towards the metal structure.

I recommend that you now focus on reaching two well-hidden collectibles. Start by shimmying to the left and drop down to grab onto the ledge shown in screenshot 1. Lean back and leap towards the ledge to the left. You need to shimmy to the right here and jump towards the consecutive ledges. This will take you to the area shown in screenshot 2.
Start the exploration by locating the interactive manhole shown in the above screenshot, which you can aim at with the Spammer. Right after the manhole opens, start firing at the Scaramech.

Go right now and reach the place shown in the above screenshot, where there is another SAT Patch.
You now need to return to the metal ledge above the staircase to the pleasure district. You can do that by taking the metal pipe and jump over from ledge to another or, by returning to the arena that you fought on with the mutants and repeating the previously taken actions. Regardless of the variant you chose, you now need to slide down in such a way that allows Nilin to grab onto the balustrade shown in the above screenshot.
Climb now and go straight ahead. Jump over the low wall and listen to the conversation with Edge. If necessary, use the SAT Hatch, jump over another balustrade and lean back to jump towards a big billboard. Jump over the billboard and lean back to perform one more leap.

Stop for a moment on a small fragment of the roof because. You can find here the Mnesist Memory shown in the above screenshot. You can now move on by taking the nearby ladder.
[New Journal Entry: Neo-Paris Landmarks- The Slum 404]
Go straight ahead and perform jumps towards the big platforms. After you reach the biggest one, you will be attacked by a Prowler Leapers and a Skinner Leaper). For starters, deal with the weaker mutants, also do not forget that you can use the Spammer against those of them who are clinging to the walls.
Soon, you will gain access to a new category of movements, i.e. Chain Pressens. The working of this kind of movements consists in borrowing, and strengthening the previous movement in a given combo. For example, putting chain pressens together with the power pressens increases the amount of damage dealt by Nilin. If you put them together with the healing moves, this will increase the effectiveness of the healing process. It would be good to follow the game's hint and map the only available chain pressen to a slot further away from the beginning of a combo because, this will increase the effectiveness of the combo. An example combo has been shown in the above screenshot.

You can now continue fighting. Just like in the case of the first fight, fought in the first part of the slums, you first need to deal with all of the weaker mutants (Prowlers) and then get to the stronger one (Skinner). Do not forget about launching the Sensen Fury which will make it easier to achieve victory.
Find an interactive switch here and use the Spammer on it. This will result in the ladder being lowered. Climb up the ladder and perform two leaps, towards the ledges on your left, after you get to the top. Shimmy to the left and pull up in order to grab onto the ledge overhead.
After you reach the end of the ledge, lean back and leap towards the balustrade behind your back. DROP DOWN after Nilin catches onto the balustrade, which will allow you to land on the platform shown in the above screenshot, where you can find a Focus Boost.
Climb the ladder and go ahead by jumping towards the vertical beam and, automatically, towards the new stable platform. Go ahead to find a SAT Hatch and a door that you can open with the Spammer. After you reach the new location, turn left and locate the Scaramech shown in the above picture, which you need to eliminate.
Move on and listen to a short conversation with Tommy as you pass the blazing wreck. Right after you take the stairs, turn around and explore the area shown in the above screenshot, which is adjacent to the stairs. You can find here a Mnesist Memory.
[New Journal Entry: Memorize and the Sensen- Philosophy of Charles Cartier-Wells]
Keep on moving ahead. After you reach the edge, locate the crane and use the Spammer, which will unlock a passage for you , and you will be able to grab onto the ledge. Use the SAT Hatch, if you need to, and approach the interactive panels, where you need to use the Spammer again. Remain here and locate the Scaramech shown in the above screenshot, clinging to one of the raised panels.
Eliminate the parasite and perform the leap only then. Explore the dimly-lit, linear corridors. While you are doing that, the game will notify you of the appearance of a new mutant. The Floodlights that you pass on your way can, in theory, be ignored although, if you turn them on, you will be able to watch interesting cutscenes featuring the creature that "accompanies" you. Climb the two ladders and open the door, which leads to a hangar. In here, you will have to face monsters that you have not seen before.

You re now about to fight a new kind of mutants (Strangler Leapers) that can become invisible and, as a result, take you by surprise. During this fight, remember to remain in constant motion and to perform dodges frequently, which will decrease the risk of taking damage. Fortunately enough, you do not need to fight blindly as, the mutants are vulnerable to light. Therefore, every now and then, approach the Floodlight to turn it on (you can also operate it at a distance).
To your advantage, you can use the fact that the monsters become visible after you turn on the lights and that is when you should strike. Because the time frame in which you need to pull out your movements, rely on the combos that inflict the most damage, as well as on the Sensen Fury. Repeat this sequence (turn on the floodlight, attack the visible monsters) until you finally win.
[New Journal Entry: Enemy Information- Strangler Leaper]
Listen to the conversation with Tommy and use the Spammer against the newly-unlocked door to exit the warehouse. Perform a leap towards the neighboring platform, where there is a SAT Hatch. Climb onto the ledge above and approach the ledge of the platform by positioning yourself like in the above screenshot. Wait for the discharges to disappear and leap towards the interactive ledges. Quickly, make your way through to the top and leap towards the ledge to the left.
Shimmy to the left and lean beck to leap towards another ledge. Shimmy to the right here and, after a few moments, lean back to perform a backwards leap. Jump towards the ledge above and to the one located to your left. Finally, jump towards the blue balustrade, which will result in a short cutscene being played.
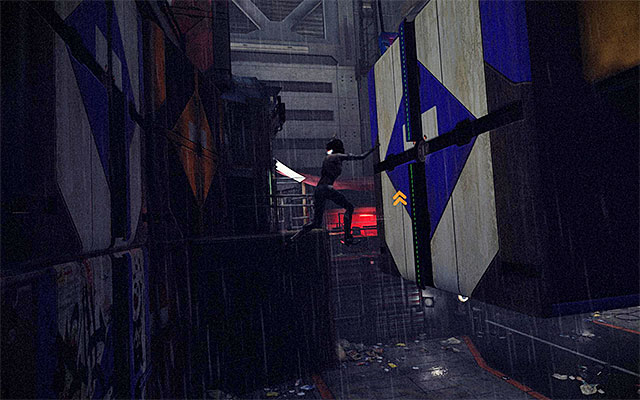
After you land in the loading bay, go forward and open the door. Walk into the new location and take a look around the closed shop for the Mnesist Memory shown in the above screenshot. Turn left, now, and send a Spammer projectile towards the Locking Bar, which will result in unlocking of the interactive element, which you can climb onto. Jump down to the arena and try to open the door.
[New Journal Entry: Neo-Paris VIPs- Nilin]
There are further fights ahead of you. First, you will have to fight the Strangler Leapers. The first phase of this fight is similar to the previous battle with the invisible creatures. Turn on the Floodlight and start attacking the monster only after you do that. Try, at the same time, to eliminate as many of them as possible, before the floodlight goes off.
Soon, one of the mutants will damage the floodlight but, the game will make the it easier for you, by unlocking Sensen DOS. Just like the previous moves, this one can be selected from the circular menu and using this move results in all of the characters around being stunned. Initiate he move and attack the stunned enemies straight away (remember that, unlike in the case of the Sensen Fury, you need to use the regular combos).
After Sensen DOS wears off, focus mainly on the Cooldown combinations, because the abovementioned move requires a default of three minutes to regenerate. Apart from the invisible ones, you will also have to fight the "regular" Prowler Leapers. Remember, also, to check on the condition of the floodlight every now and then because, after some time, it will be possible to turn it on again.
You can now approach the platform control and interact with it. Wait for the platform to arrive and use the interactive bar to get onto it. Use the terminal here, which is responsible for activating the nearby Locking Bars.
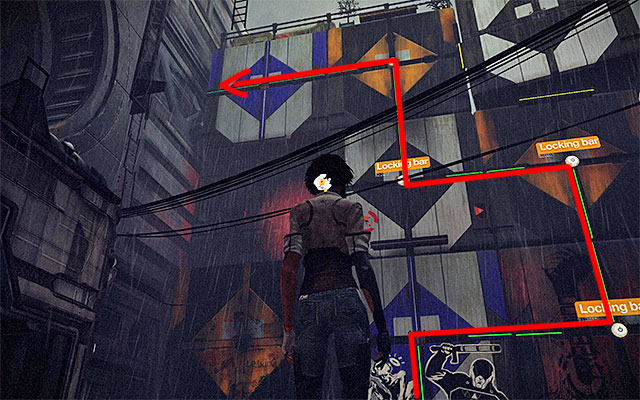
Now, you will have to solve a simple puzzle that requires you to use the Spammer to hit the Locking Bars to change their situation. Your task here is to make way for yourself (symbolized by the green lines) to reach the ladder located on the left above. Some bars need to be hit more than once and the correct path has been shown in the above screenshot.
Return downstairs and go towards the first bar that you need to jump to grab. You can now start climbing, by grabbing onto the consecutive green bars. If you have done everything the way you were supposed to, reaching the ladder (you need to lean back and leap to reach it) should be no problem.
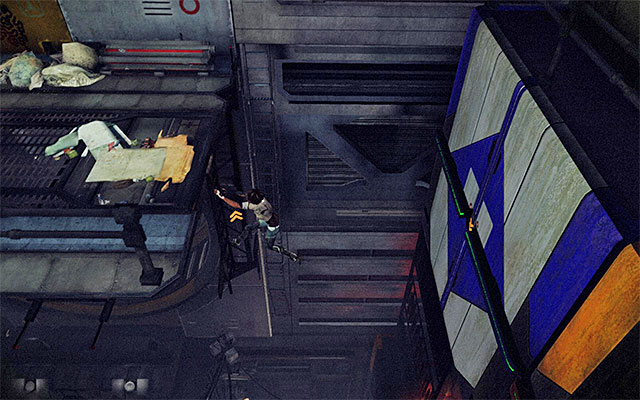
Use the SAT Hatch, if you need to, and walk through the opening to the right. Run up and jump towards the interactive ledge. After you grab onto it, shimmy to the left and drop down to catch onto the ledge below. After a while, you will have to drop down again, and leap towards the ledge located on the left side of the hall.
Drop down again and shimmy to the right. Finally, lean back and leap towards the ladder. Make your way to the stable platform and, before you do anything, explore the area around you. This will allow you to locate the Scaramech) shown in the above screenshot.
Stop now near the working fan and send a Spammer projectile towards the turbine. Quickly, leap towards the fan because, its blades will stop only for a few moments.

Get over to the other side of the fan and go ahead. On your way, you will find another screen. Focus on locating the interactive ledges shown in the above screenshot and use that knowledge to reach the small balcony above, where you will find a SAT Patch.
Return downstairs and aim at the drone control button, which will result in a passage being unblocked. It is the last part of your journey to the bar, where you only need to jump over two balustrades.

After you land near Tommy's bar, the game will play another cutscene. Right after it finishes, deal with several Prowler Leapers and listen to the conversation with your ally. Get ready for several more time-consuming fights with the enemies.
The best idea to start the battle with the Prowler Leapers is to wait until larger numbers of these appear in the bar (you do not need to worry about Tommy) and start the Sensen Fury, then. Thanks to this you will make it most effective. I recommend that during the following fights you use combos with Cooldown moves, thanks to which you will be able to make use of the Fury again.
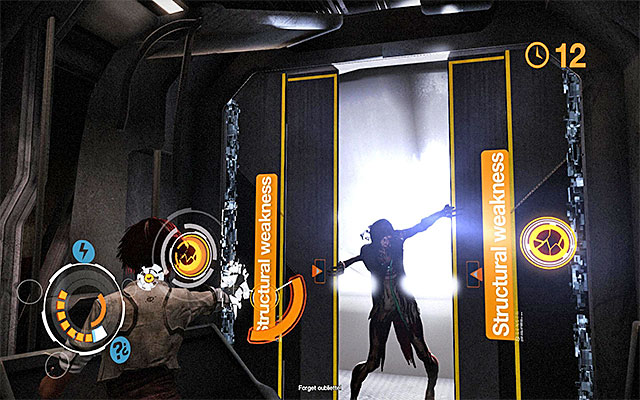
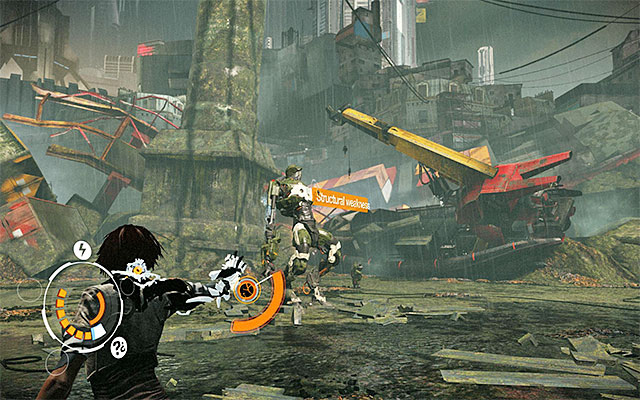
After you eliminate the first larger wave of mutants, return to the location where there is Tommy. From him, you will receive an upgrade to Spammer, called Junk Bolt. Its main function is to destroy Structural Weaknesses.
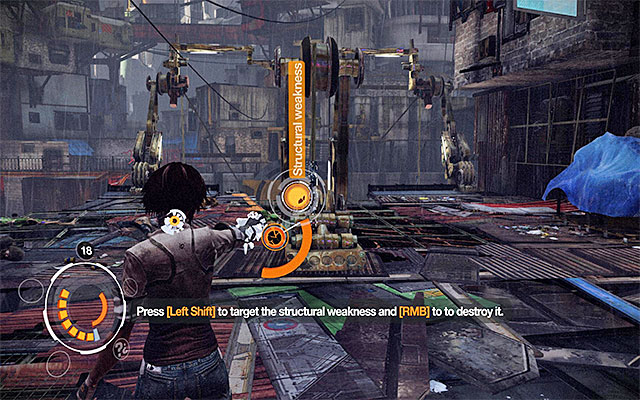
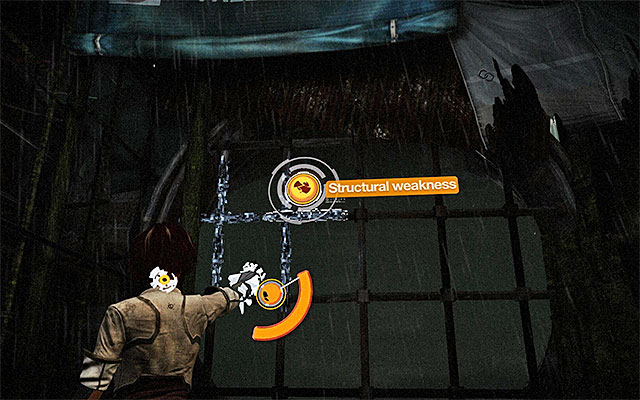
Of course, you will get now the opportunity to test the new device. Enter the aiming mode and aim at the interactive fragment of the metal structure shown in the above screenshot. Press the right mouse button (or the corresponding button on your game pad) in order to discharge. It is worth noting here that Junk Bolt can be used only if the Spammer power bar is full.
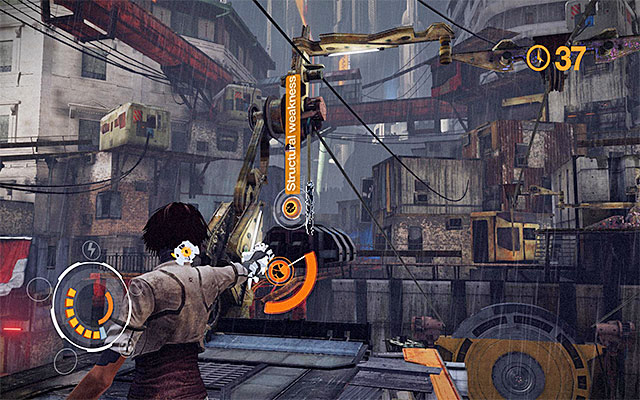
You need to destroy two other construction points and you will have only 45 seconds to do that. Aim at the first one of the Structural Weaknesses and use Junk Bolt to destroy it.
While waiting for the Spammer power bar to replenish, attack the nearby Prowler Leapers. As soon as the gauge signals the top power level, launch projectiles towards the second structural weakness. The only remaining thing to do here is to eliminate the remaining monsters and the best way to do it is by initiating Sensen Fury. After you are done, listen to the conversation with Tommy and wait for Nilin to descend to the sewers.
If you need to, use the SAT Hatch, lock on the structural weakness and use Junk Bolt (right mouse button in the aiming mode). You can now grab onto the ledge and move to the other side of the grate. Explore the linear tunnels where you will meet no monsters, at first.
While exploring the sewers, listen to the conversation with the hunter named Bad Request, whom you have already met in the previous episode. Try also to check out the side-tunnels. Notice that there is a switch in one of these (screenshot 1) which sets in motion the entire platform above when shot at. After you perform this action, you should return to the previous grate and stop in the spot shown in screenshot 2. Note that you can aim at a Scaramech while here.
Make sure that you have eliminated the parasite and go on to explore the sewers. Examine the screen that you walk by and, as soon as you reach the fork, turn to exploring the tunnel to the right. In the area shown in the above screenshot, there is a Focus Boost. You can now return to the fork and go left.
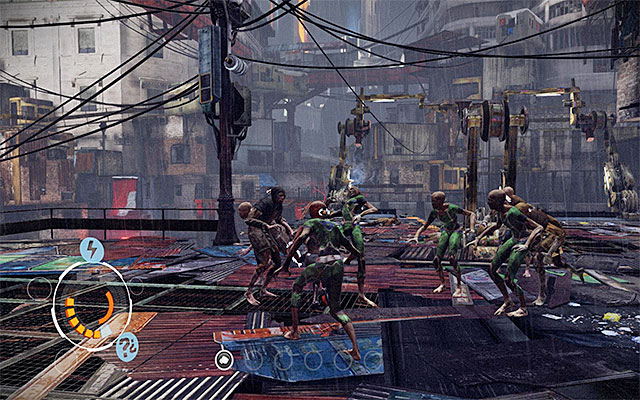
After you reach a large hole, make a leap towards the ledge in front of you. After you catch onto it, drop down. Fight the Prowler Leapers and a Strangler Leaper here while paying attention to the poisonous waste here. You cannot enter the water even for a moment (or fall into it) because this would result in your character's untimely demise.
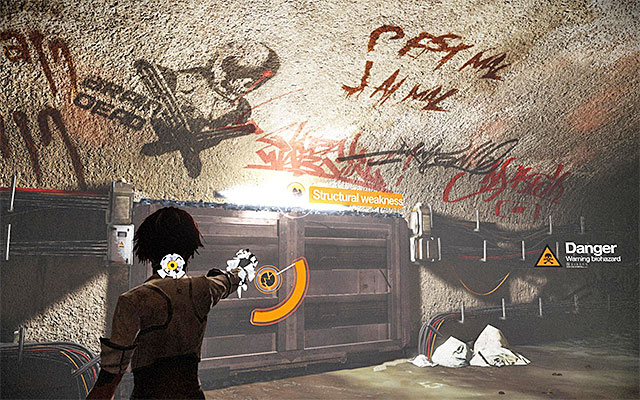
After you are done with the mutants, go straight ahead to reach the edge of the metal platform. Approach the wall to your right and grab onto the interactive ledge, thanks to which you will go around the container with the radioactive substance. You can now approach the weakened hatch at the left wall. Use Junk Bolt here to open the hatch and unlock the passageway.
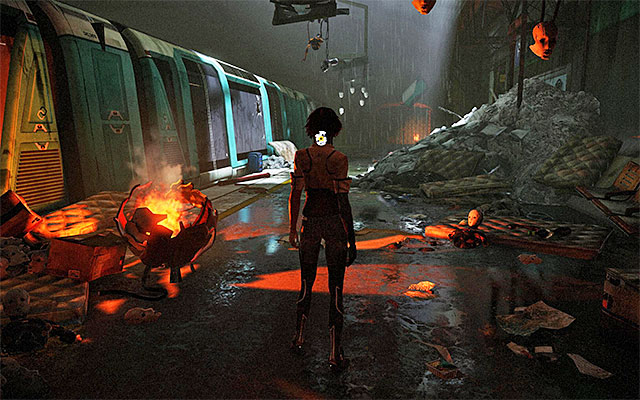
Leap towards the platform and approach the ladder, which you need to climb to get to the very top. Turn your attention to the SAT Hatch, and go on. Keep walking until you reach a derelict metro station. Reach the far end of the platform and enter the railcar to the left.
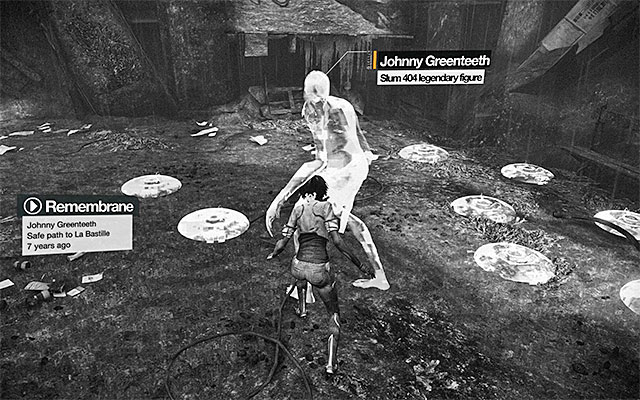
Turn left and go ahead to reach the last railcar. Approach Johnny Greenteeth here, to find out that he transformed into a mutant. Do not attack him now because, as of now, he poses no threat to you.
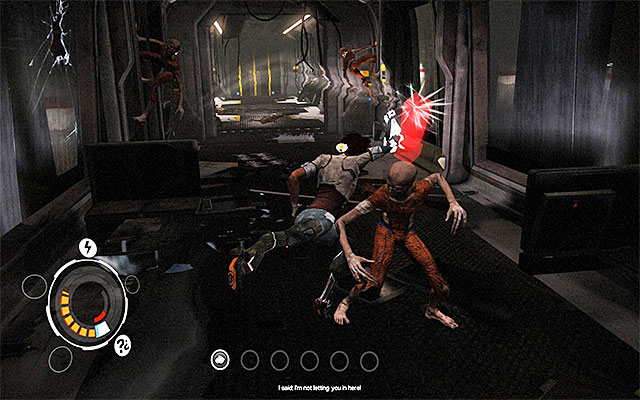
Watch a short cutscene and turn around to set out for a new location that Johnny Greenteeth is staying at. Open the door and enter the next railcar. You will have to eliminate some Prowler Leapers here and, because the area is small, it would be a good idea to make use of Sensen Fury, Sensen DOS and strong combos that include Power Sensen, during the fight.
After you eliminate the monsters, open another door. Before you attack the mutants that appear, you should approach Johnny as quickly as possible (you only have 20 seconds to do that) and use Junk Bolt against either of the two structural weaknesses.
After you do that, attack the mutants but, wait for the moment in which the time limit meter appears in the screen. As soon as it drops, approach Johnny again and destroy the other structural weakness (this time around, you only have 15 seconds to do that).
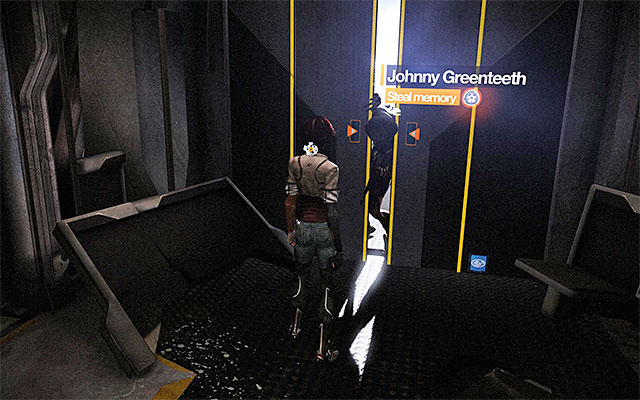
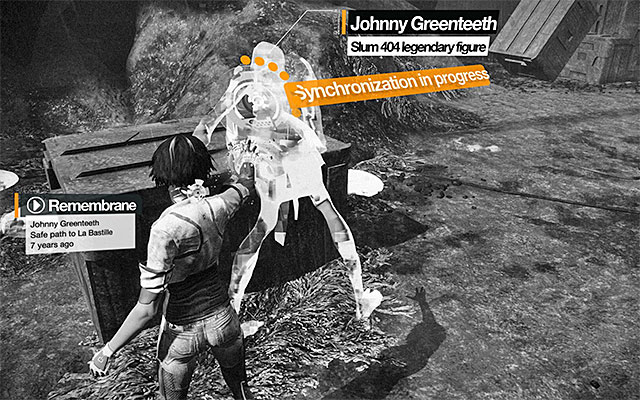
You can now resume attacking the mutants. It is a good idea to use the Sensen Fury to your aid because, you are not going to need it to eliminate Johnny. Make sure that you have dealt with all of the monsters and approach Johnny Greenteeth. Press the interaction key/button to steal the memories that Nilin is after. Wait now for a new cutscene to play.
Go ahead and make sure that you do not cone close to the blazing warehouse too much. After you reach the end of the tracks, take a look around because, there is a Scaramech clinging to one of the walls (the above screenshot). Destroy the parasite and take the passageway to your left, and use the spammer to open the door.
Use the SAT Hatch here if Nilin sustained any damage and resume your exploration of the narrow corridors. Listen to the conversation with Edge and reach the end of the first main corridor. There, you will find a Mnesist Memory) lying around. Collect the item and take the stairs to the left.
[New Journal Entry: Technology- AV-78 "Horn of Jericho"]
Follow the linear path that will take you to the ladder. Grab onto the ladder and reach its upper part, lean back, and leap towards the small catwalk. You can now go on.

After you reach another big hall, slow down a bit because, there is a Scaramech (the above screenshot) clinging to one of the railcars. Eliminate the parasite and turn to the exploration of this area. You will reach the exit gate, which you need to raise.
Be careful because, right after you squeeze past the gate, you will be attacked by a group of monsters. First, focus on attacking the regular Prowler Leapers, and leave the stronger Skinner Leaper for the end. I definitely recommend that you make use of the special moves, i.e. the Sensen Fury and Sensen DOS because, you are fighting in a small area and, as a result it is going to be difficult to avoid the enemies' attacks.
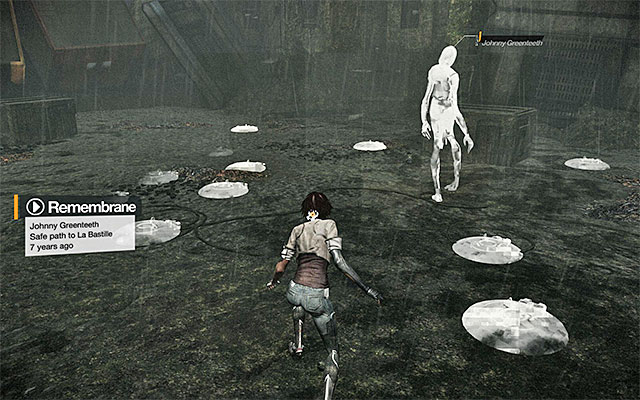
Approach the balustrade and jump over it after you are done. Listen to a short commentary from Edge and approach the first remembrane in this stage. Watch to the recording connected with Johnny Greenteeth, whom you have recently met, and go towards the next area.
You definitely need to stop in the place where there is the second remembrane. Start it and follow the "virtual' Johnny straight away. This will allow you to notice the nearby mines before you activate them. Fortunately a direct blast from a mine does not equal instant death for Nilin but only losing some health.
During the exploration of the mine fields, you definitely need to stop in the spot shown in the above screenshot because, on the ground, there is a Mnesist Memory. Collect the item and then leave the mine field.
[New Journal Entry: Technology- Spammer]

Approach the display and take a look at it because, it gives you information on the whereabouts of a very well hidden collectible. Grab onto the first ledge and shimmy to the right. Stop in the spot shown in screenshot 1, i.e. directly below the screen. Lean back and perform a backwards leap towards a ledge that you can't see from here (screenshot 2). You can now pull up and collect the SAT Patch.
Jump down to a lower level and repeat the first part of your climbing. This time around, do not lean back and leap towards the ledge to the right and then, to the one above. Keep shimmying to the right to reach a stable ledge after a while, which you can pull up onto. After you reach the ledge, stop to locate the last Scaramech (the above screenshot).
Leap towards the interactive ledge and then, towards the one to the left. Shimmy to the left and then, go up. Leap towards a small balcony and land on it.
Approach another remembrane carefully. Just like earlier, you need to keep following Johnny, which will allow you to avoid activating a mine by accident. A bit further, there is another remembrane. Activate it and walk past another mine field.
Stop next to the last one of the remembranes. After you activate it, you QUICKLY need to start to synchronize so, press and hold down the aiming key/button and keep pressing the interaction key/button rhythmically. After you succeed, approach the control panel and interact with it, which will lead to all of the mines being disabled.
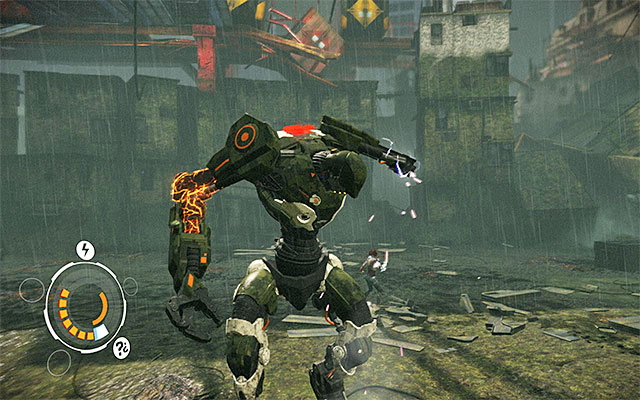
You do not really need to perform a careful exploration of the mine field because, there is nothing of interest in here. Approach the manhole cover that you can see in the distance, which will start a boss fight. This time, it is going to be an AV-78 Zorn robot.
Try to keep the distance from the boss throughout the battle. There is no point in fighting at close quarters because the standard attacks cannot damage the robot. Instead, you can be grabbed or hit and lose a lot of health points as a result.
Remember to remain in constant motion. And this is not only to keep the robot at bay, but also to avoid the crates thrown by the boss. In the case of the latter, it is a good idea to make use of avoidance to your aid.
You can win this battle by using the Spammer. In theory, the game itself will suggest using Junk Bolts to immobilize the boss temporarily, but it is best not to waste the Spammer's energy this way. Instead, shoot standard projectiles (the left mouse button/ corresponding game pad button projectiles) at the boss.
During the first phase of the battle with Zorn, focus mainly on attacking one of the robot's upper limbs. After you discernibly weaken this limb, wait for several seconds to replenish the Spammer's energy bar and repeat the shooting. The aim of this action is to weaken the robot's limb during "one take" because, if you deplete the entire energy of the Spammer while shooting, the boss will be able to repair its limb partially.
The first phase finishes when you completely destroy the robot's upper left limb. As soon as phase two of the battle begins, watch out for several new attacks from he boss. This includes a punch to the ground. The best strategy then is to remain outside of the attack's range, combined with avoiding. Start shooting at the upper right limb and, just like earlier, you need to destroy it completely.
As soon as phase three of the battle starts, Zorn will start to implement a new attack, which is releasing the cumulated energy. Act just like previously in the case of the earthquake punch, i.e. stay away from the boss and remember to avoid his attacks.
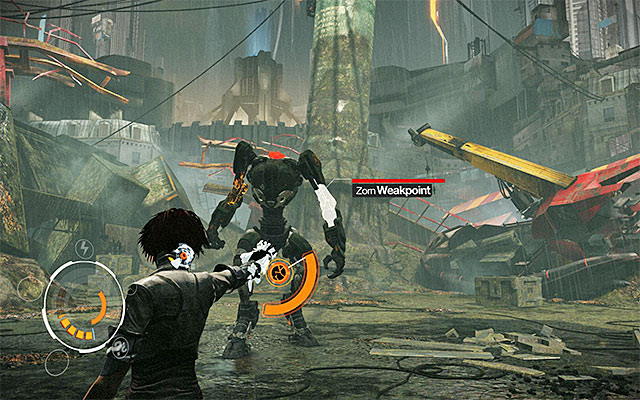
Notice that Zorn becomes weaker after the discharges of energy (Structural Weakness - the above screenshot). You need to exploit that weakness to your end and take a quick shot at the boss with a Junk Bolt (right mouse button or the corresponding button on your game pad).
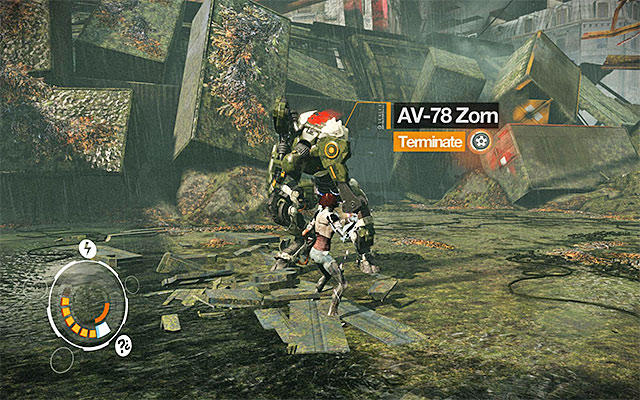
If you manage to hit the robot with a Junk Bolt within the specified frame of time, the robot will freeze and you will receive a piece of information about the possibility of termination (the above screenshot). Run up to Zorn and press the interaction key/button.
There is only a QTE event between you and the total victory. The correct combination is kick (right mouse button), punch (left mouse button), kick (right mouse button). For defeating the boss, you will be rewarded with 300 experience points.
[New Journal Entry: Enemy Information- AV-78 Zorn]
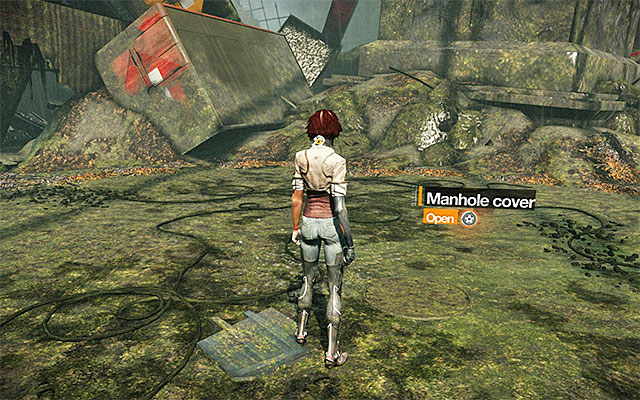
Approach the manhole cover once again. This time around, the attempt to leave this location will be a successful one and a new episode will start loading.
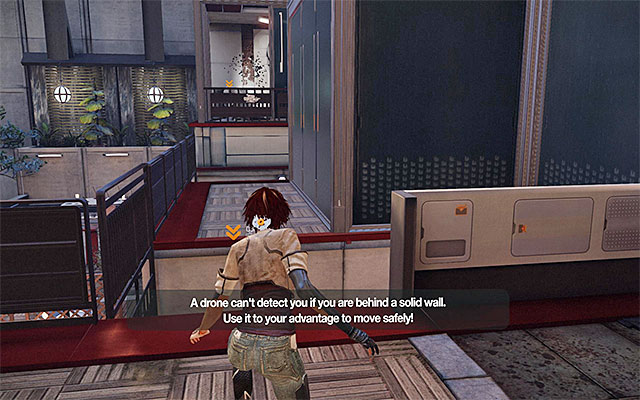
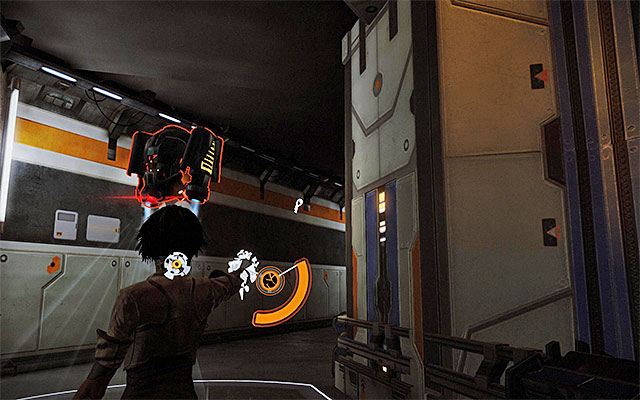
Go straight ahead and leap towards the nearest ledge. Continue along the linear path and listen to the conversation with Edge, and also examine the interactive screen. Stop in the spot shown in the above screenshot because, here you will encounter a combat drone patrolling the area. Just like in the case of the previous episodes, you need to avoid the drone's range of monitoring (the circle around the machine), or else this is going to be a terminal encounter for Nilin.

Wait for the drone to pass and move away. Then follow it. Stop in the area to the right that you go past. S soon as the drone moves back towards the starting point, finish the exploration of the area and reach the area shown in the above screenshot, where you will find a Focus Boost.
Return to the area with the drone in it and wait again until it flies over to the point where you started the exploration of this area. Quickly, grab onto one of the nearby interactive ledges. Jump over the balustrade to land in the area where you will be attacked by a group of Prowler Leapers and Strangler Leapers).
Obviously, the mo0st serious threat are the invisible mutants and you can deal with them in two different ways. Variant one assumes that you initiate Sensen DOS which, stuns the enemies temporarily and prevents the mutants from becoming invisible. The downside to this solution is that you will not be able to kill every last of them before Sensen DOS wears off. Therefore, you will have to wait for this ability to regenerate before using it again (I recommend implementing the cooldown moves then).
Variant two assumes that you aim your Spammer at the turbine control. Each time you hit the device, you will turn on the lights for a part of this area. This will allow you to locate the mutants. Regardless of which strategy you adopt, do not forget to monitor Nilin's health bar and to use the second one of the available special moves (Sensen Fury).


After you have dealt with the mutants, locate the interactive ledges shown in screenshot 1, which Nilin can grab onto. Reach the upper ledge and shimmy to the right. After you reach the end of the ledge, explore the small optional area, where you can find a Mnesist Memory.
[New Journal Entry: Neo-Paris History- Global Production Spike]

Return to the main hall, where you have fought the invisible mutants. Locate a vertical interactive fragment of a wall and grab onto it in order to start climbing. Reach the upper part of this structure and start leaping towards the ledges located to your right. What you need to do, is get to the bigger balcony and then drop down.
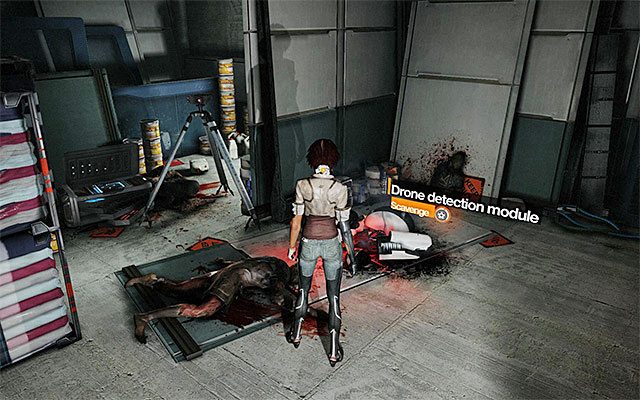
Follow Edge's suggestion and approach the drone destroyed by mutants. Examine the machine to obtain a Drone Detection Module. After collecting, the device will automatically integrate with your Sensen Chip, which will display all of the areas monitored by combat drones. This makes for easier avoiding of these machines. You can now open the nearby door and leave.
Start exploring the linear corridors and find a SAT Hatch) on your way. Stop in the area patrolled by the combat drone. Follow it and make a short stop in the corner shown in the above screenshot. Wait for the drone to pass you by and go on. Stop once again after you reach an interactive screen.

This location is patrolled by two combat drones. Because they both move in the same direction, avoiding them is not going to be difficult. Wait for one of the drone to pass you by and follow it while, at the same time, keeping a short distance of the machine. As you go, explore the second area to the right. In the place shown in the above screenshot, there is a SAT Patch.
Again, position yourself at the two main planks, wait for one of the drones to appear and resume your march. Follow the drone until you reach an interactive ladder. Jump to grab the ladder and climb up it, lean back and perform a leap towards the catwalk located above. Listen to the conversation with Edge.
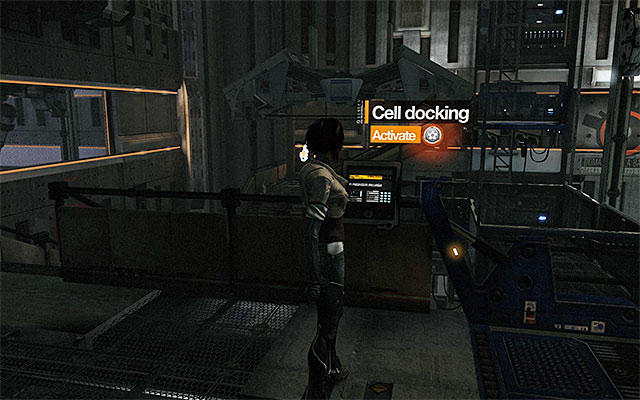
Go right and jump to reach the platform above. You now need to keep grabbing onto the nearby ledges and shimmy to the right. Drop down onto the bigger balcony below. You do not really need to explore the balconies around because, you are not going to find anything of value. Approach the Cell Docking mechanism and interact with it.
Note that this calls in an empty cell shown in the above screenshot. Use the balconies around to get inside the cell and wait for Nilin to be transported into the main part of the prison.
After you leave the cell, turn left and go towards the still (but fully operational) combat drone. Approach the machine as much as you can and enter the aiming mode. Try to aim at the Scaramech shown in the above screenshot.
Return to the starting point and go right. Watch out for another combat drone here that patrols the area, and make sure you do not get within the range of its monitor. You can easily walk around the drone by entering one of the empty prison cells around and waiting until it passes you by. Do the same when you encounter the next one.

Do not hurry too much to leave this place and stop next to the interactive door. Turn left and approach the balustrade, and enter the aiming mode. Try to locate the Scaramech shown in the above picture.

It is not the end, yet. Go left of the abovementioned door, i.e. towards the corridor patrolled by another drone. Just like earlier, hide in the cell. Right after the drone passes you by, dash out of the cell and run ahead to reach the area shown in screenshot 1. Enter the holding cell to the right and collect a Mnesist Memory (screenshot 2). Return now to the previous area, while hiding in the holding cell to the side.
[New Journal Entry: Neo-Paris History- The European Civil War in Ten Dates]
You can now open the door to the jail Staff Only area. Once in a new corridor, go straight ahead and examine the ceiling to find the Scaramech clinging to it ( the above screenshot). Return to the fork that you passed by earlier and take the corridor to the right.
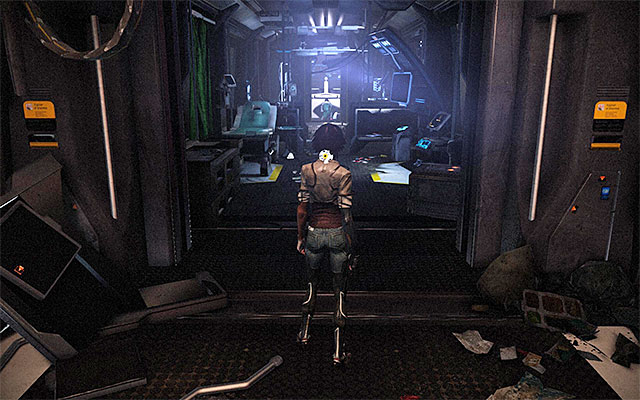
On your way to the Madame's place of staying, you will pass by the door to a (Tech Room that can be opened. You do not need to explore the room because, the only thing that you can find there is an interactive screen. Turn right now, but do not haste too much or else you might bump into a combat drone.

Wait for the drone to move away from you and follow it. On your way, you might want to make a BRIEF stop to eliminate a Scaramech on the wall to the right. Afterwards, it would be safer to return to the tech room thanks to which you won't be surprised by the drone on its way back.

Follow the drone once again and hide in the recess underneath the wall that the parasite was on,. After you squeeze past the hostile machine, ignore the staircase and turn your attention to the corridor to the left, which is being patrolled by the second drone. Wait for the machine to reach the location shown in screenshot 1 and squeeze past to the right. Reach the end of the corridor and find a Focus Boost (screenshot 2).
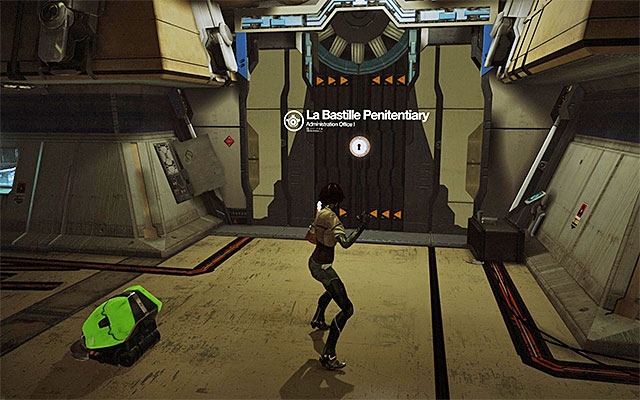
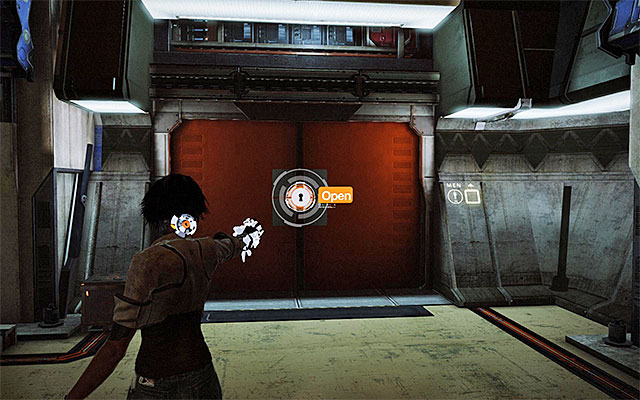
Carefully, return to the fork and take the stairs that you ignored earlier. Go ahead to find a SAT Hatch. Open the door to the Administration Office I and turn right to reach an area where a cutscene, featuring Sergeant Vaughan plays.
Go right along the linear corridor to reach the barracks. Unfortunately, you won't be able to steal
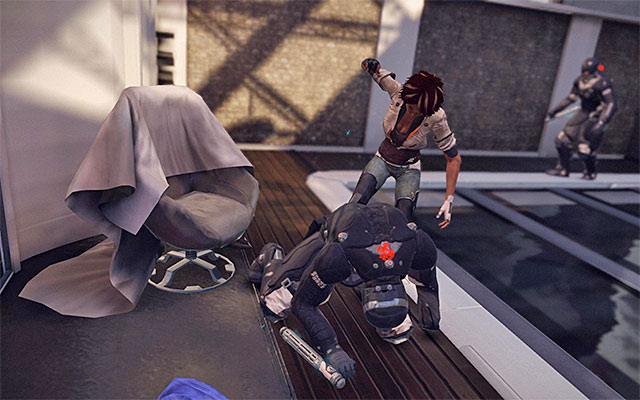
Sergeant Vaughan's memories straight away because, even if you try to sneak up to him, you will be attacked by the Prison Enforcers staying in the barracks.
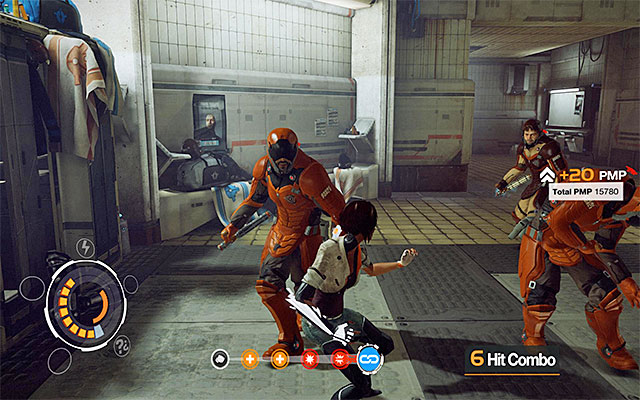
At first glance, prison enforcers are no different than the Law Enforcers that you encountered in episode 2. Still, they have an additional attack at their disposal called Brain Lock. The attack sucks out some of the Focus energy of your character and thus, make the special moves' cooldown process longer (even if the moves are ready to be used before the actual attack). Because the enemies can launch this attack only after grabbing Nilin, I recommend that you focus mainly on avoiding attacks and reacting quickly to the exclamation marks appearing above the enemies' heads.
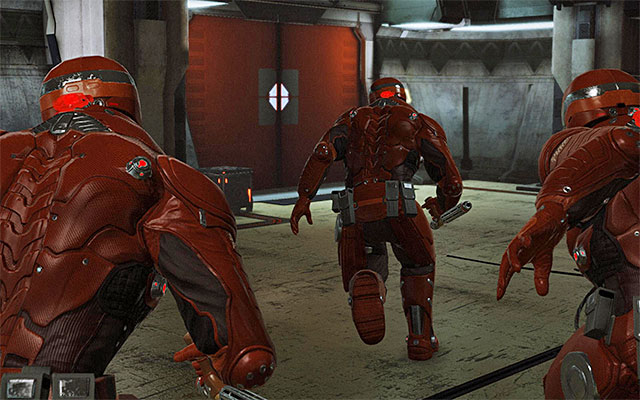
Apart from the regular enforcers, also Sergeant Vaughan will take part in the fight. Fortunately, the game does not treat him as if he was a boss. Therefore, defeating him will not be that difficult. After you eliminate the first group of enforcers, new ones will arrive. That is why you should remember to make use of Sensen Fury and Sensen DOS, as well as about terminating the overloaded enemies monitoring Nilin's health.
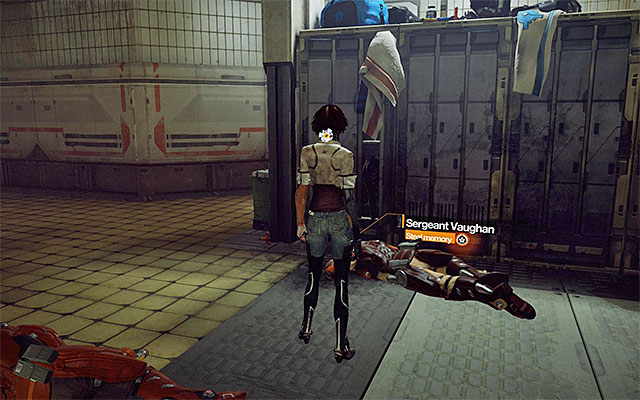
Keep fighting until you achieve victory. Explore the barracks in search of the defeated Sergeant Vaughan, approach him and press the interaction key/button to steal his memories.
[New Journal Entry: Enemy Information- Prison Enforcer]
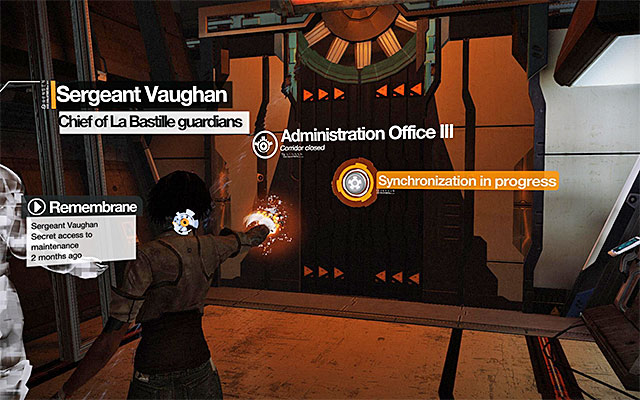
Exit the barracks and approach the nearby remembrane. After you play it, press the aiming key/button and start pressing the interaction key/button rhythmically in order to synchronize. You can now open the door to the Administration Office III.
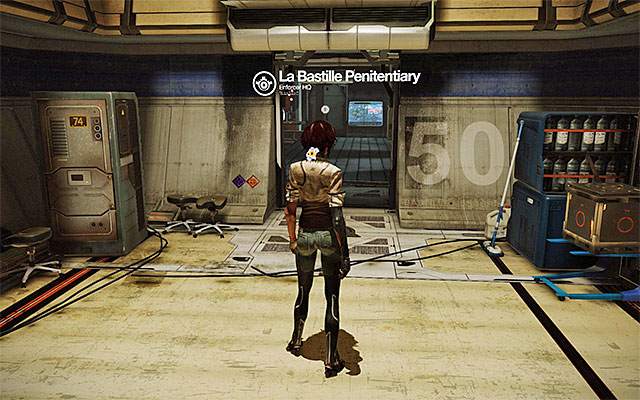
Go ahead, take the stairs to reach the SAT Hatch. Open the door to the Enforcer HQ and walk inside to match up against the Heavy Prison Enforcer.

The key to defeating the enforcer is to deprive him of his shield. The easiest way to do this is by attacking with the Junk Bolt (RMB after you enter the aiming mode). It is worth mentioning that the spammer power gauge must be full or else, you won't be able to fire Junk Bolt. When hit with the projectile, the enforcer will lose his shield, which leaves him exposed to standard attacks.
[New Journal Entry: Enemy Information- Heavy Prison Enforcer]

After you eliminate this enemy, take a look around to locate a door to the Enforcer Outfit Storage Room). Examine the room and obtain a Mnesist Memory. You can now take one of the doors to the Enforcer Training Room. Walk over to the next room to start a longer fight.
[New Journal Entry: Neo-Paris Landmarks- La Bastille Fortress]
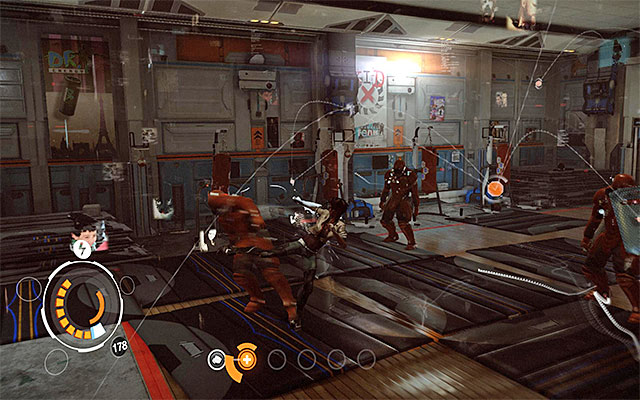
Start attacking the Prison Enforcers and Heavy Prison Enforcers. First off, I recommend that you focus on the enforcers with shields. Use the Junk Bolt attacks to knock their shields away, which will expose them to standard attacks. Also, do not forget about avoiding the enemy attacks to prevent being grabbed by the enforcers, which will result in longer cooldown time.

Right after the second group of enforcers appears, you will be given access to a new special move - Logic Bomb. Bring up the special moves menu, chose the newly unlocked attack and mark any of the enemies that has no shield (it doesn't really matter which one). Finally, take the game's suggestion and jump back to avoid being caught within the range of the explosion.
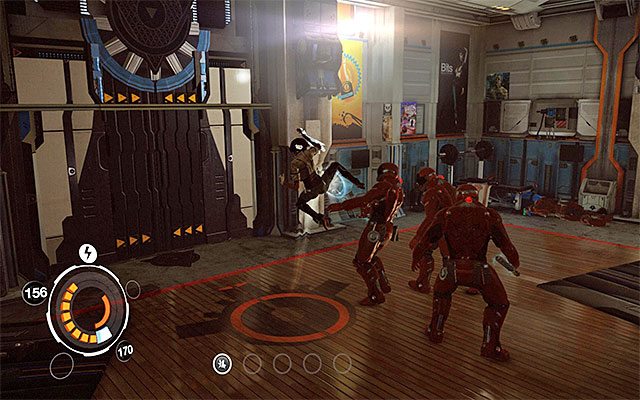
As you have probably noticed, the explosion of the logic bomb deprived all of the opponents caught within the range of the explosion, of their shields. The remaining part of the fight is easier now. Keep initiating your special attacks (Sensen Fury, Sensen DOS) on a regular basis. At the same time, move around the area incessantly and wait for the best opportunity to introduce combos. After you have dealt with all of the opponents, listen to the conversation with Edge.

Locate the interactive door to Sector III. Right after you open the door, turn left and aim at the Scaramech shown in the above picture to eliminate it. You can now go ahead. On your way, find a SAT Hatch.
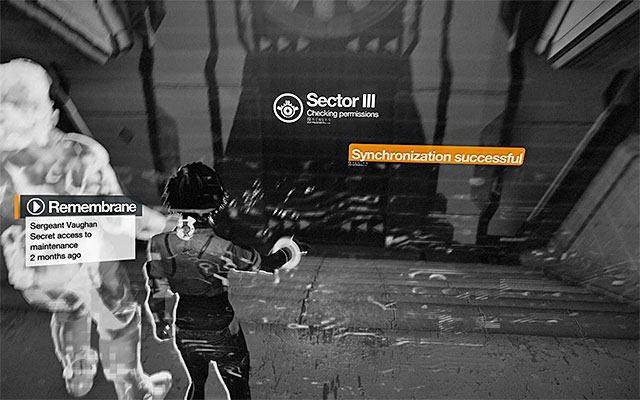
Turn right and take the stairs to another remembrane. Right after the projection starts, press the aiming key/button and start tapping the interaction key/button rhythmically, in order to open the door. Enter the next area and go towards another door. Soon, you will watch a short cutscene featuring Madame who you are after.
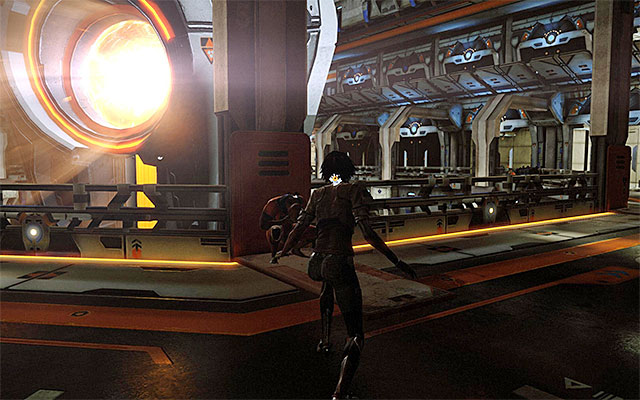
Just as it has been shown in the cutscene, the Brain Drainer can be used to erase completely the memory of a person equipped with a Sensen chip. That is why, you need to avoid staying within the light of this device.

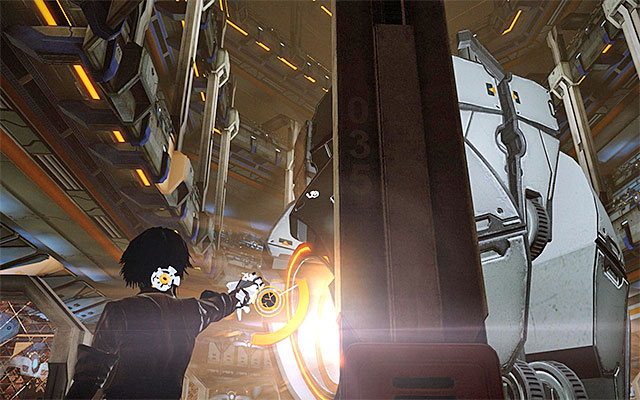
Take cover behind a pillar; you are safe there. Do not move for a moment because there are two Scaramechs clinging to the rotating Brain Drainer. Both of them have been shown in the above screenshots. You should be able to eliminate both of them without exposing yourself to excessive risk (if you have problems locking on a parasite, wait for the Drainer's light to be directed away from the pillar, quickly jump out of your cover and approach the balustrade.

You can now go right and cover behind the other pillars as you go. While on the go, you'd better make frequent stops to avoid being caught in the light out of a sudden, without the possibility to change your position.
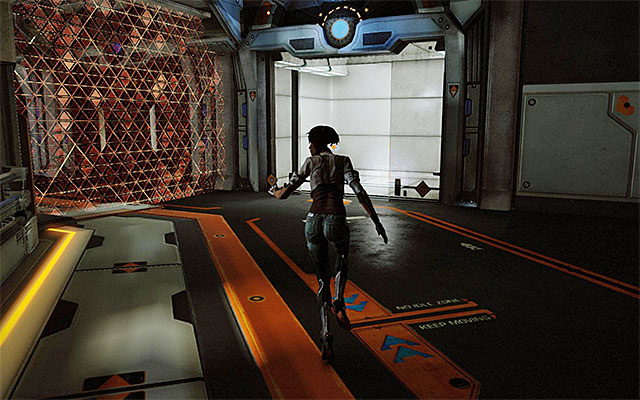
Continue your walk along the hall. Your current destination is the empty holding cell shown in the above screenshot. Approach the remembrane here and initiate it. After that, face the toilets and synchronize again. If you succeed, you will be able to leave.

Leave the holding cell and explore your surroundings carefully. First of all, turn your attention to the interactive screen and the SAT Hatch. Then, approach the area patrolled by the combat drone. Wait for the machine to move away to the dimly-lit area and go there, thanks to which, you will obtain a Focus Boost (the above screenshot).

Go to the red-lit corridor to the interrogation room. Entering the new area will be equivalent to starting a new fight with Prison Enforcers reinforced by an airborne prison robot AV-48S Seraphim.
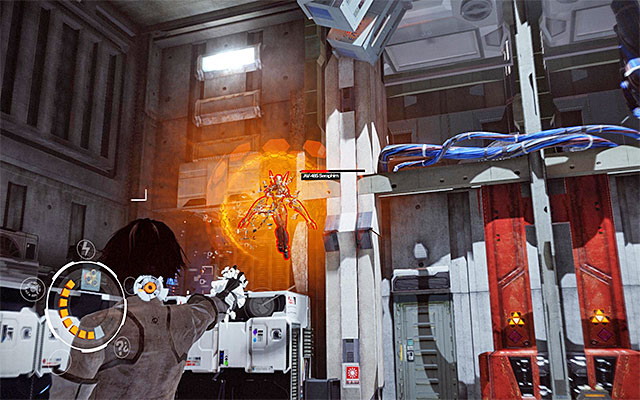
After the first phase of the fight starts, focus mainly on the robot which you see for the first time. Try to avoid taking damage resultant from the enemy fire. I recommend that, to attack the robot, you use the Spammer (Junk Bolts, more precisely) because a single his should take a half of the robot's health bar.
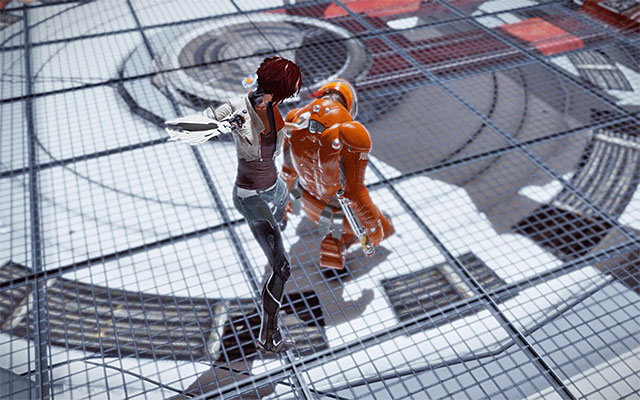
After the robot is hit, it will initiate shields for a moment but, this is no obstacle to you because you need for the Spammer energy bar to regenerate anyways. The second shot should destroy the robot and only then take to attacking the "regular" enforcers.
[New Journal Entry: Enemy Information- AV-48S Seraphim]
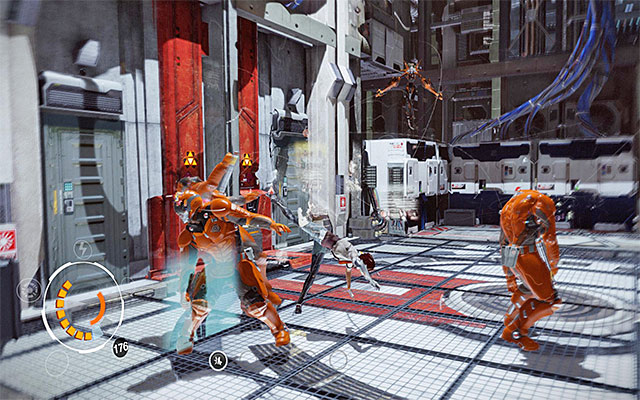
Once you get promoted to the second phase of the battle, there will be two new robots to enter the area and a quite numerous group of enforcers. To defeat the robots, just like before, use the Junk Bolts, while remembering to avoid being shot. If you want to, you can also initiate Sensen DOS because, this attack will immobilize robots as well. Continue fighting until you eliminate all enemies.
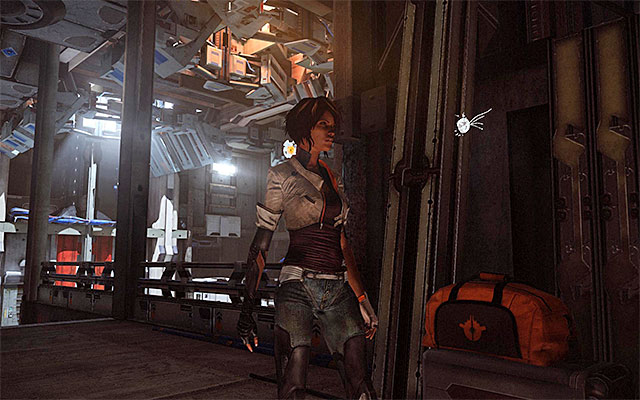
Take the newly-unlocked stars to the next part of the prison. Right after you do, examine the walls around because, there is another Scaramech clinging to one of them (the above screenshot). You can now go ahead to reach another door.
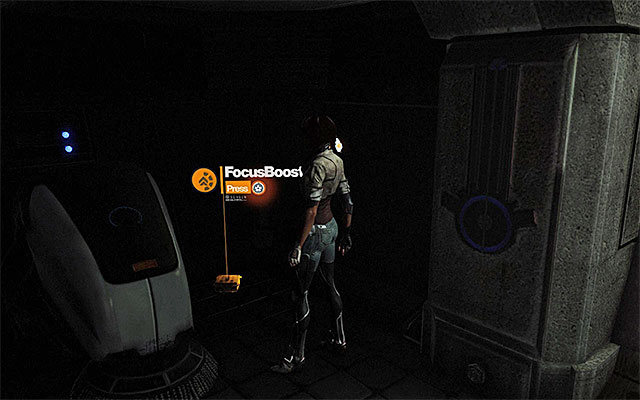
After you gain access to the new room, examine the interactive screen and take a look into every corner. In the dimly-lit corner shown in the above screenshot there is a Focus Boost. Go now into the red floor corridor.
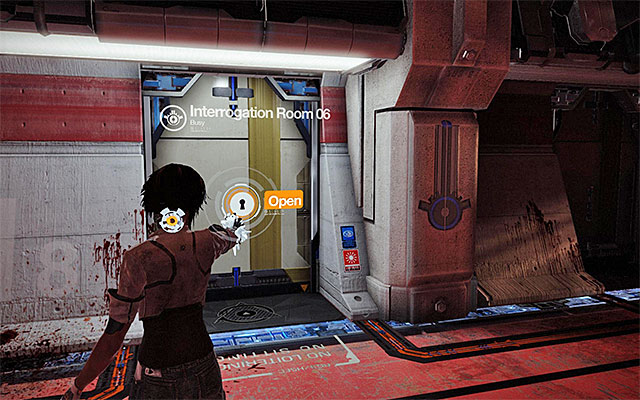
The only available interrogation room is the one numbered 3. You do not need to explore it, though because, apart from a prisoner, there is nothing of interest in there. Therefore, go towards the door to Interrogation Room 06.
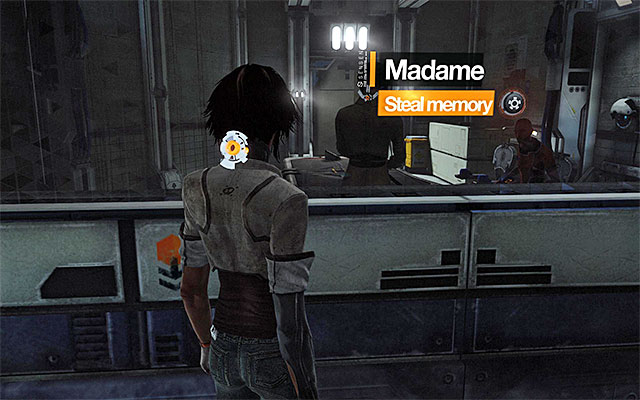
Wait for the game to unlock access to the neighboring room and approach the one-way mirror to play a cutscene of the interrogation conducted by Madame. Wait until you regain control over Nilin and, after you listen to the conversation with Edge, position yourself next to the mirror. Press the interaction key/button to steal Madame's memory.
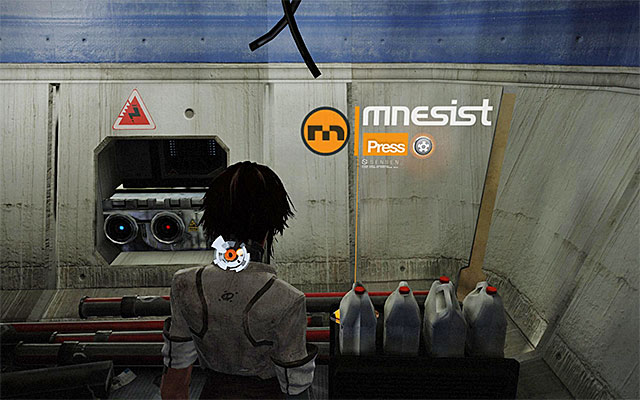
Open the only available door to leave the interrogation room. After you reach a fork, turn to the exploration of the storage room first, where You can find a Mnesist Memory. You can now return to the previous room and take the door to the door to the Courtyard.
[New Journal Entry: Neo-Paris VIPs- Madame]
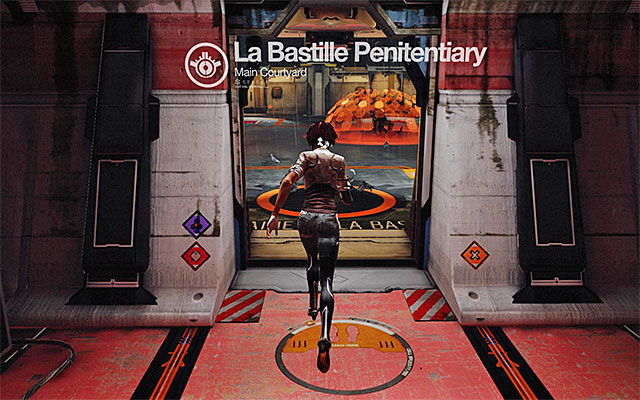
Watch a short cutscene and go towards the new door (Correctional Programs). You are up for a linear walk here, where the only attraction is a SAT Hatch. Open the door to The Main Courtyard. In here, you will have to fight another group of Prison Enforcers joined later by a new kind of a robot - AV-48N Nephilim.
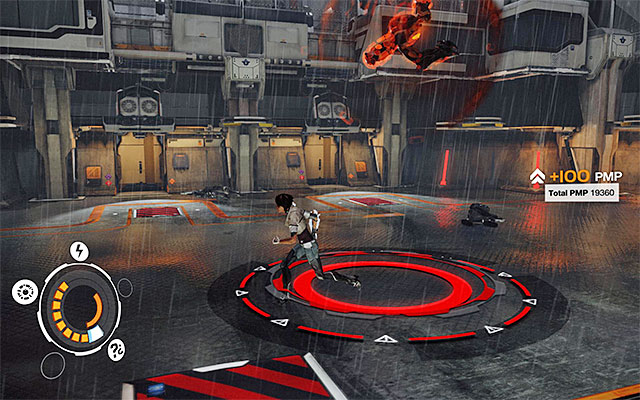
Fights with the Nephilim robots are a tad more complicated than the ones with the Seraphim. The hostile machine is has the shields on by default and that is when there is no point in attacking them. Wait for the moment in which the Nephilim attempts to leap into a new position. That is when you should move away from the landing spot marked by the game.
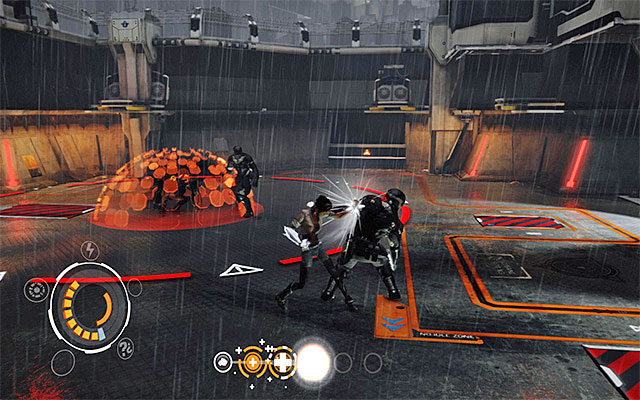
To keep a safe distance from the machine is just as important. This is so because its shield explodes after some time. This is signaled by the appearance of a red circle on the ground and, it is of course, a good idea to stay outside of the circle.
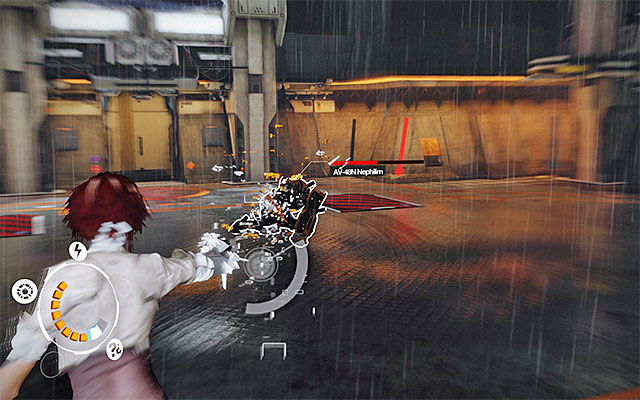
Notice that after the explosion, the Nephilim remains without its shield for some time. That is when you should attack. Just like in the case of the Seraphim robots, the best for this job is a Junk Bolt (RMB). During the periods of time when you are not attacking the Niphilim, take care of the enforcers. This should be no problem, though.
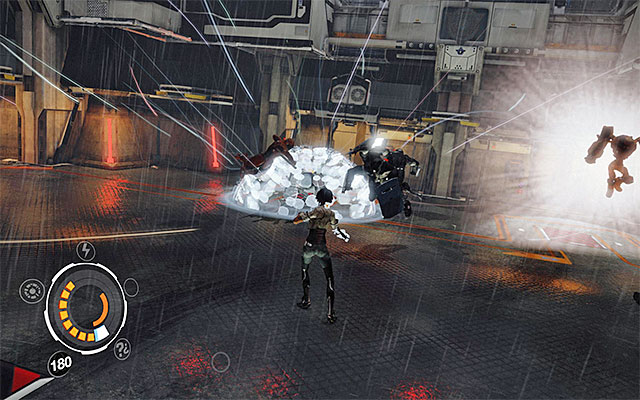
As soon as the second phase of the battle begins, there will be new Prison Enforcers, Heavy Prison Enforcers and two AV-48N Nephilim to join into the fun. The game will also unlock a new special move for you, called Rust In Pieces. This peculiar ability can be used to win the machines over to Nilin's side. Select this attack from the circular menu and mark either of the Nephilim robots.
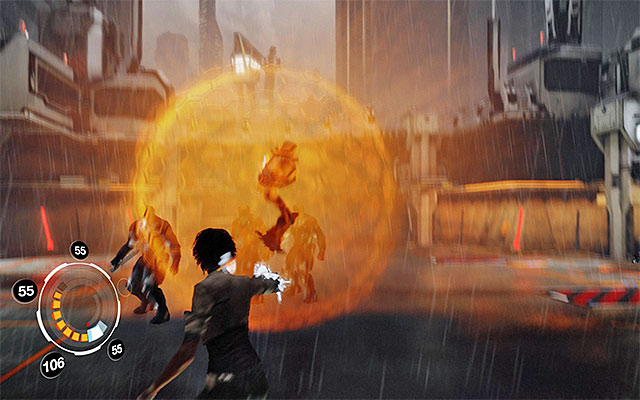
Allow one of the robots to attack the enemies and note that, at the same time, the enemy machine will self destruct as soon as the special move wears off. Eliminate the other one of the robots either in the same way as the previous one, or by using Junk Bolts. When it comes to the enforcers, remember to use Junk Bolts or the Logic Bombs to destroy the shields of those of the enforcers that are equipped with one.
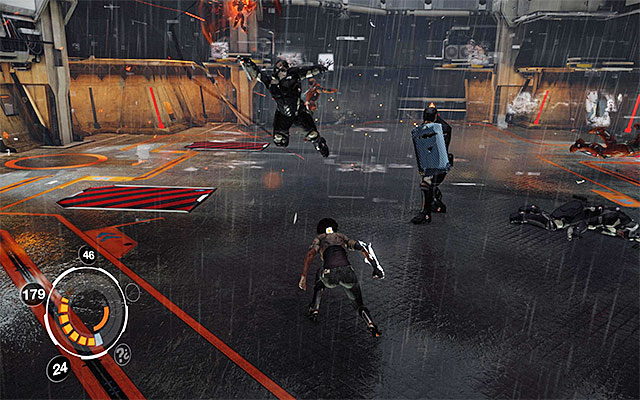
The enemies to participate in the last phase of this battle are Prison Enforcers, Heavy Prison Enforcer and two AV-48S Seraphim) robots. I recommend that this time, you implement the same strategy as in the case of the previous phase, i.e. first use Rust in Pieces to take control over one of the robots. You can still destroy both of the robots on your own and here, you need to make use of the Junk Bolts . The standard enforcers should be left for the very end, while remembering to avoid being grabbed by any of them.

After you are done, go towards the door to the tower (Tower Entrance). After you walk into the new area explore the area carefully. This will allow you to lay your hands on another Mnesist Memory shown in the above screenshot.
[New Journal Entry: Technology- "Valet" robot]
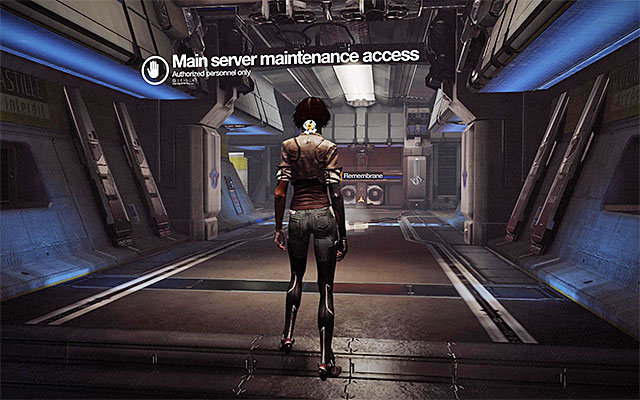
Approach a remembrane and activate it. Go straight ahead, find a SAT Hatch and climb a few staircases. Stop after you reach the entrance to the server room (Main Server Maintenance Access). There is another remembrane here.
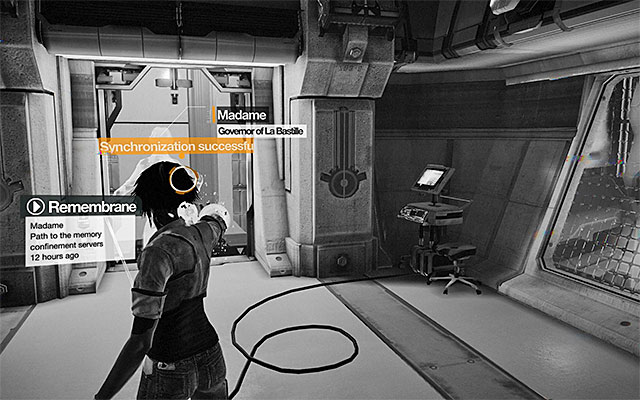
Start by going left. Approach the door with the Madame's projection at it and synchronize (Exceptionally, here you can take your time). Return to the starting point and go right now. Just like earlier, initiate the synchronization at the locked door.

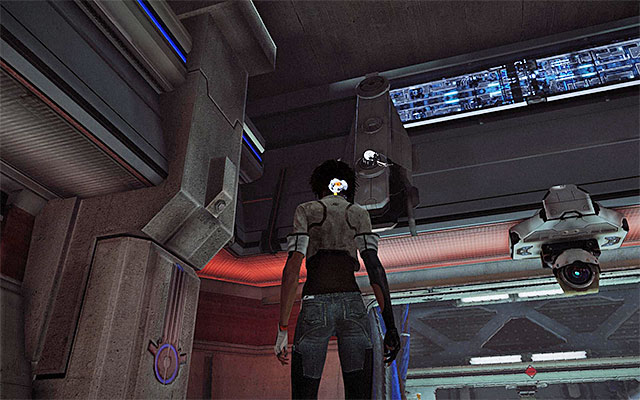
Do not leave yet and explore the location instead. In both the corridor to the left, and to the right, there are Scaramechs shown in the above screenshots. Make sure that you eliminated both of them and go towards the door in the corridor to the right, which you unlocked earlier. Open another door, and initiate another remembrane after you enter.
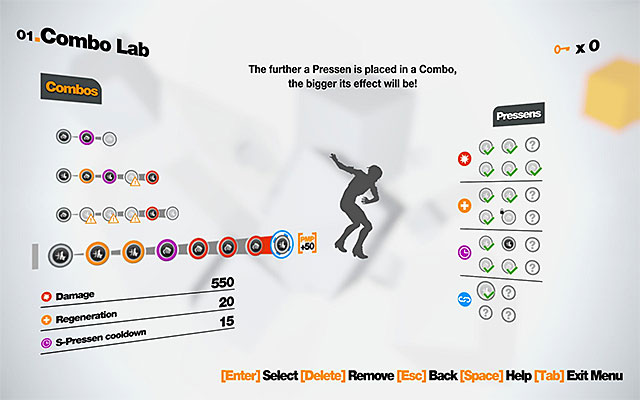
In here, something unexpected will happen because, Nilin will be attacked by the projections of Prison Enforcers and Heavy Prison Enforcers. Notice, at the same time, that the game unlocked a new combo of up to eight moves. You do not need to define it now but, it is worth knowing that launching a combo of eight moves is rewarded with 50 experience points.
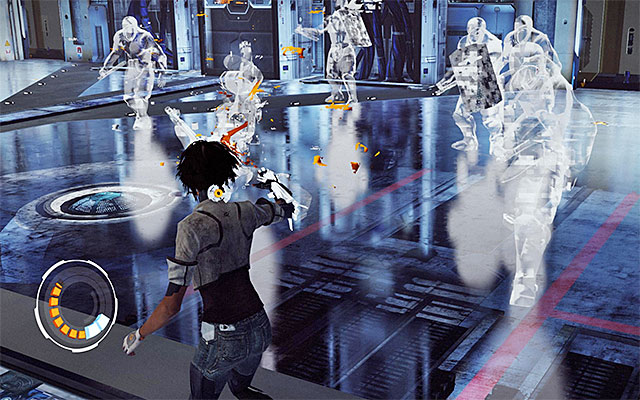
Because you cannot use your special moves now, you will have to do with the regular combinations and the Spammer (Junk Bolt, which is necessary to get rid of the shielded enemies, works best here).
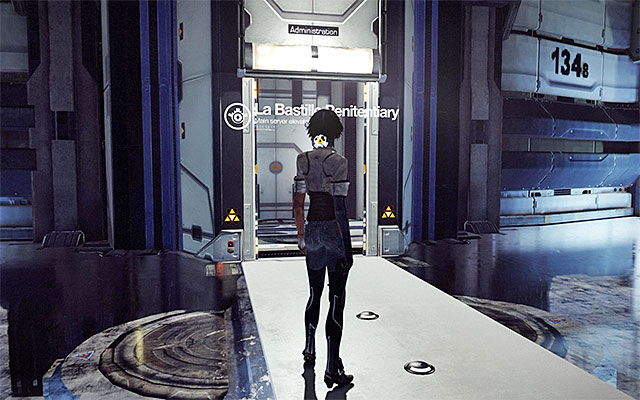
After you fail to contact Edge, enter the elevator and wait until you reach the floor where there is Madame. You will see a longer cutscene featuring this character, after which you will be transferred into the virtual reality.
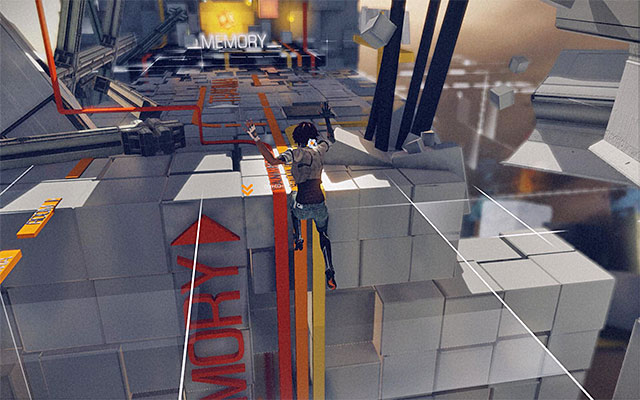
Go ahead. You do not need to explore the area in detail because, there is nothing of value here. After you reach a void, make a leap over it.
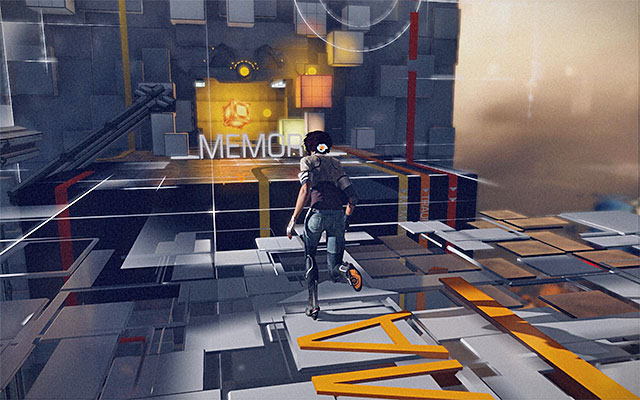
Go towards the Memory that you can see in the distance. You will fail the second leap but, you do not need to be bothered by that as, this has been pre-planned. Ahead of you, there is a fight with Madame and her minions.
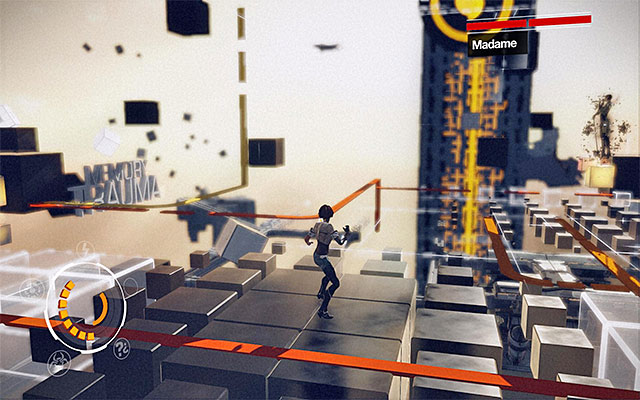
I recommend that you learn about the basic premises of the fight with Madame before you actually start fighting. First of all, do not worry about the missing fragments of the floor. They will be "drawn up" as you move around the battlefield. This does not mean, of course, that the ground is unlimited in size but, it is big enough to operate without worries.
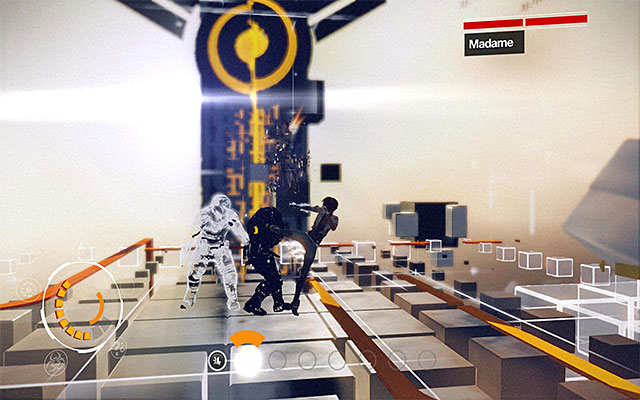
Another thing is the presence of the virtual helpers. At first it is going to be Prison Enforcers. You need to watch out for them BUT, their elimination is not necessary and will not make you any closer to the victory.
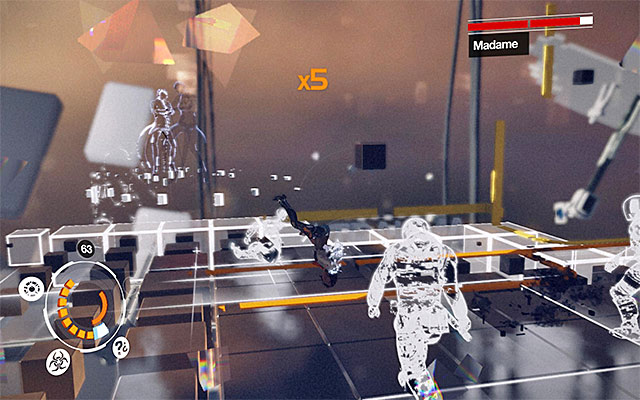

Madame herself is also a threat but, she does not start using all of her attacks straight away. You should be paying most attention to the series of projectiles shot by her (screenshot 1) and to the exploding parts of the ground (screenshot 2). The best solution in both cases is to remain in constant motion and frequent avoiding.
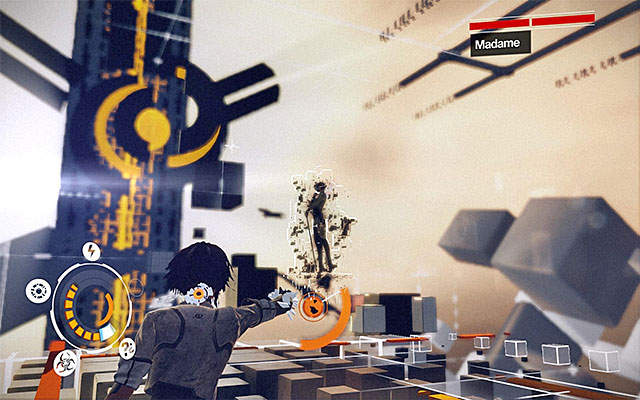
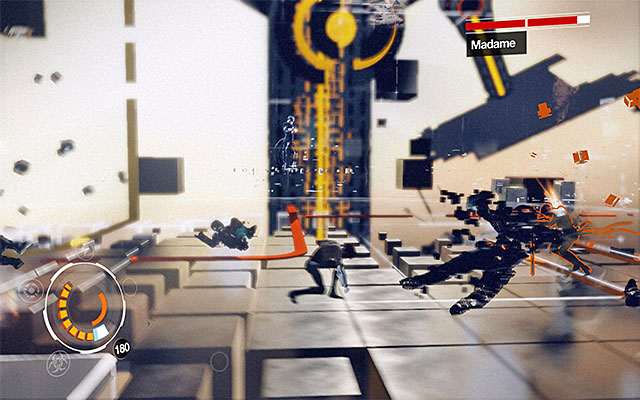
Before you start dealing damage to Madame, you need to bring her down first. Also here, you can decide on your strategy. The easiest way to "ground" Madame, is by using Junk Bolts (screenshot 1), although Sensen DOS also works here (screenshot 2).
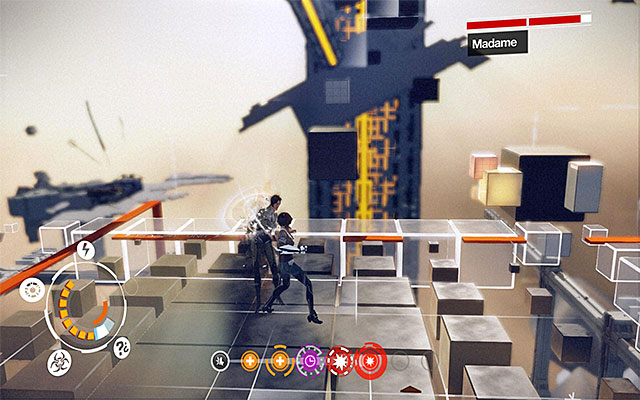
Each time Madame lands on the arena, run up to her and start delivering regular blows, or the Sensen Fury. Try to inflict as much damage to her as possible, in order to make this battle shorter. Also, jump away at the last time to avoid taking damage from Madame's "explosions".
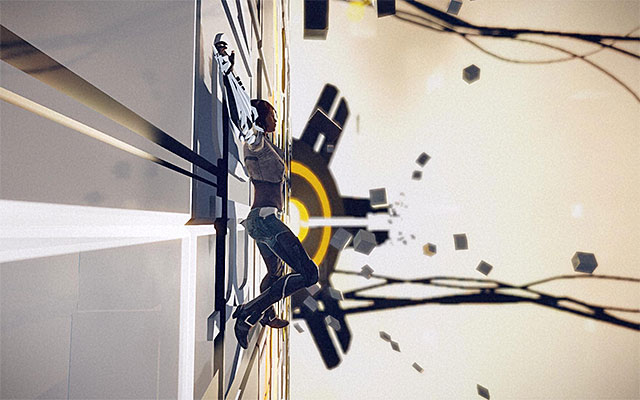
Repeat the above actions , i.e. repel Madame's and her minions' attacks while searching for the occasion to launch an attack. The first phase of this fight will draw to an end when Madame's health bar drops by a half. This will be signaled by a short cutscene.
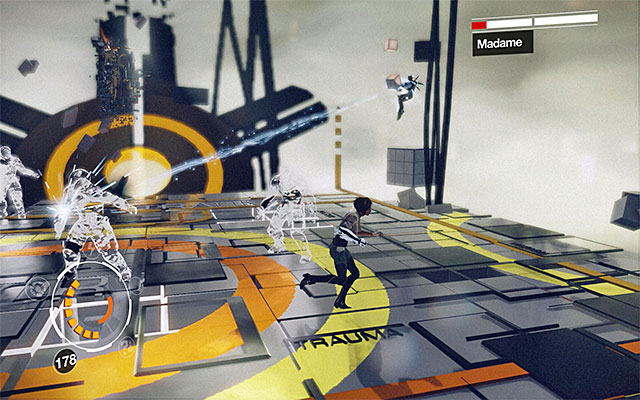
In the second phase you need to be aware of a few additional impediments. One of them is the appearance of a new type of virtual minions, i.e. AV-48S Seraphim robots. It is worth remembering that you can win robots over to your side by using the Rust In Pieces special move.
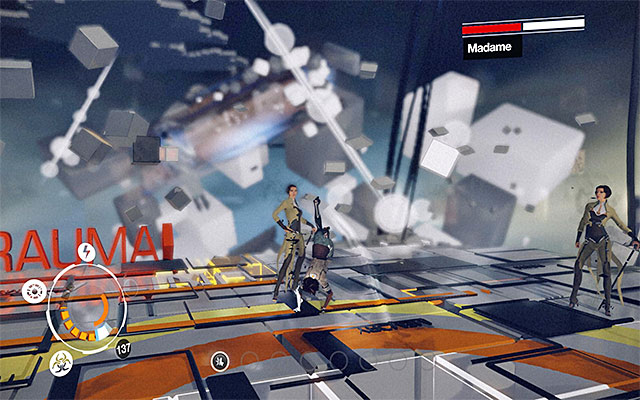
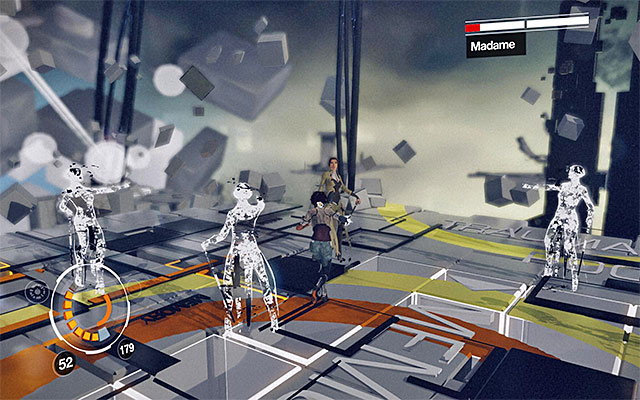
When it comes to Madame herself, the most serious trouble starts when she is brought down to the ground because she spawns her own clones at that moment. Theoretically, you could try and take on the clones one by one (standard hits or the Spammer - screenshot 1), but this would mean missing the actual Madame and losing some health in the process. A much better idea is to initiate Sensen DOS, which reveals the Madame herself (screenshot 2).
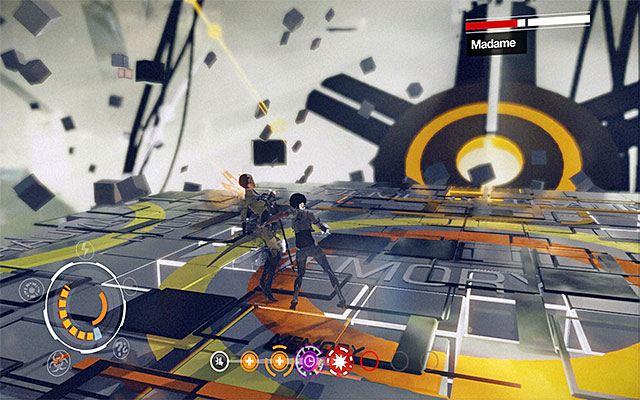
After you identify Madame correctly, start attacking her. And so, just like earlier, launch the best attacks you can afford . While Madame is weakened, attack the minions using the cooldown moves. This will allow you to have Sensen DOS fully charged next time.
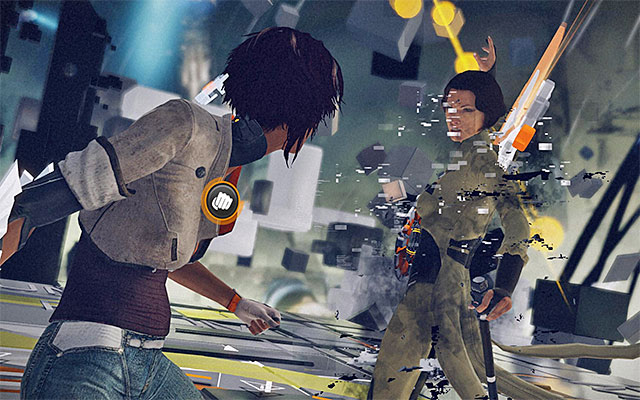
Keep repeating the above actions until Madame loses the other half of her health bar. Approach Madame and press the interaction key/button (Terminate). There is also a QTE event for you to play and the right combination is punch (LMB), kick (RMB), interact (the "E" key).

Start pressing the SPACE BAR rhythmically (or the corresponding game pad button for "jump") and end up by overloading Madame. For your victory, you will be rewarded with 1000 experience points and a new function to your Spammer- Force Spammer. The upgrade enables you to move the chosen interactive elements of the environment.

Listen to the conversation with Edge and start by taking a very careful look around the server room. On the floor, in the place shown in the above screenshot, there is a Mnesist Memory).
[New Journal Entry: Memorize and the Sensen- Globalization of Sensen]
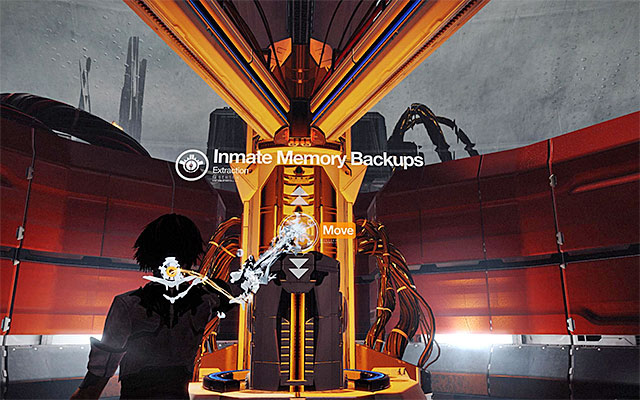
You can now focus on completing this task, by aiming at the marked memory server. Make sure that you are holding down the interaction key/button and use the mouse or the analog stick to eject the server (the above screenshot).
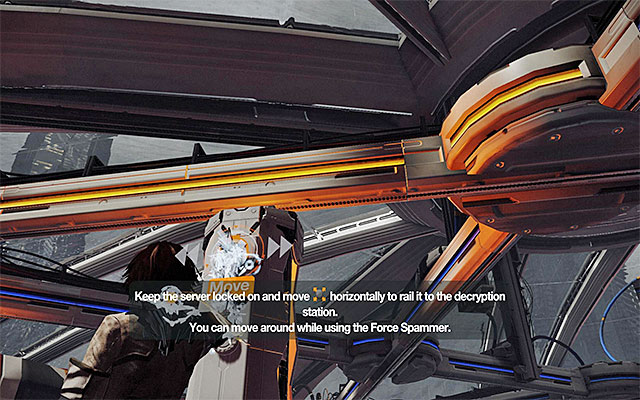
Aim at the server again and start moving it along the ramp above. Follow the game's suggestion and move along. Make the server reach the a big slot.
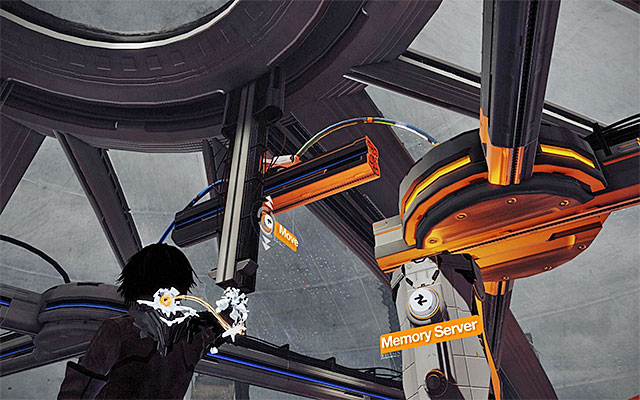
Wait for the server to go online and start moving it long the ramp above again. You might have already noticed that some pieces of the ramp are missing so, aim at the object shown in the above screenshot and bring it down. You can now finish moving the server . In a moment, you will see a cutscene.

You are up for a long sequence connected with remixing memories of NPCs. This time you are going to take a peek into Forlan's mind. The memory selected by the game is connected with his wife Alexia and you have to manipulate memories in such a way, so as to make Forlan believe that he contributed to his wife's accidental murder. Start by watching the entire memory and rewind it to the very beginning (move the mouse or the analog stick in the counterclockwise direction).
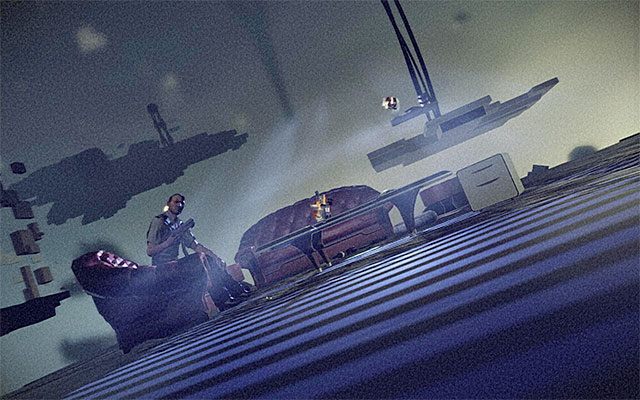
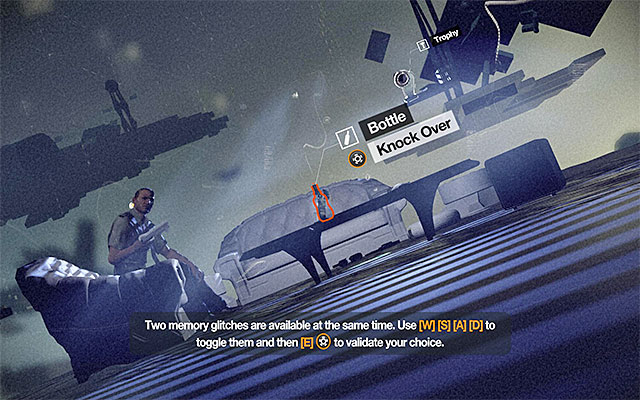
Replay the memory. Soon after you start the memory, the game will mark glitches (screenshot1). Stop where the glitch is (RMB or a corresponding button of your game pad) and select the bottle (screenshot 2). Press the interaction key/ button to make the bottle fall to the ground.
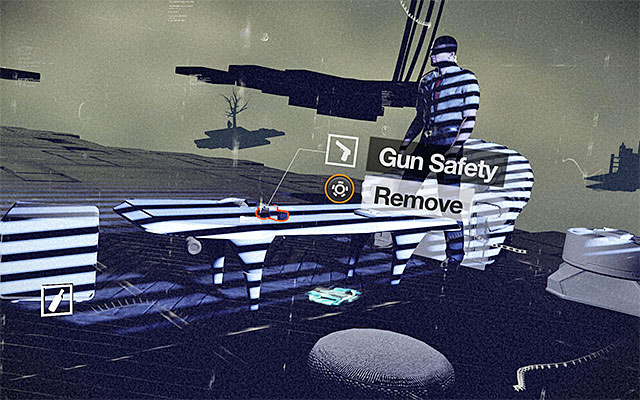
Continue playing the memory until you see a glitch connected with the pistol lying o the table (Gun Safety). Press the interaction key/button to unlock the gun.

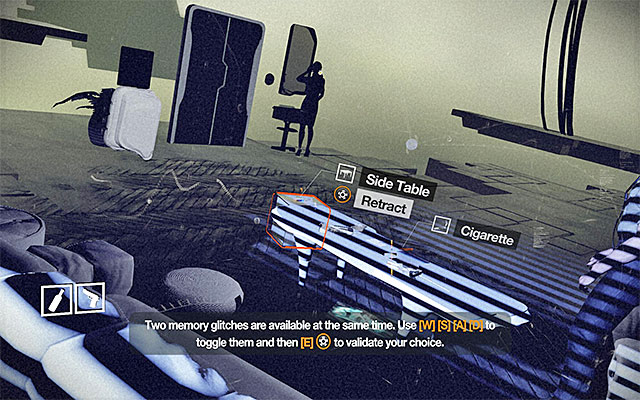
Stop again when you see two glitches(screenshot 1). Select the Side Table and press the interaction button to retract it. (screenshot 2).
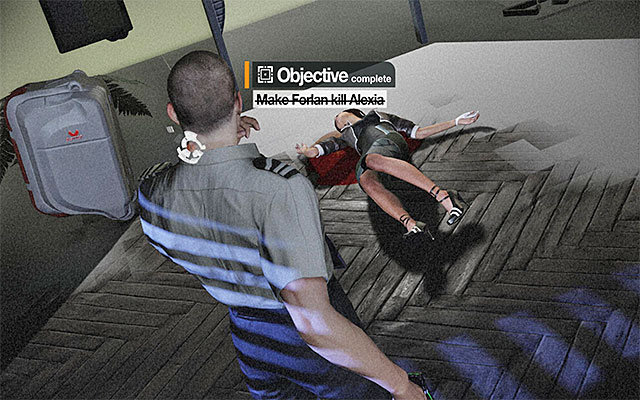
You can now watch the memory to the very end. If you have done everything correctly, Forlan will shoot his wife. After returning to the reality, he will commit suicide. This is the end of this long episode.


Right after you start this episode and listen to the first conversation with Edge turn around to find an interactive door. Explore the corridors to the sides. Around, there are two Scaramechs for you to find (the above screenshots). After you eliminate them, return to the starting point and go straight.
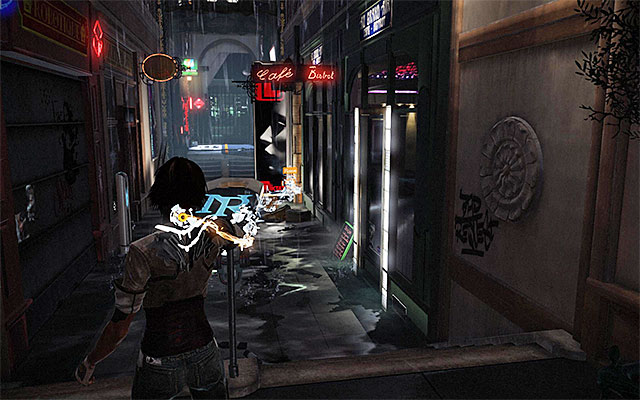
Stop when you reach the flooded part of your path, i.e. in the area where there are electrical discharges. Do not attempt walking into water or else, you will die. Instead, enter the aiming mode and aim at the nearby billboard.
You need to use here the Force Spammer that you unlocked towards the end of the previous episode. You do that by pressing, and holding down the left mouse button (or the corresponding button on your game pad), which will result in the billboard being raised. Do not release the mouse button until you get to the platform shown in the above screenshot. You can now run-up and perform a leap to leave this dangerous area.
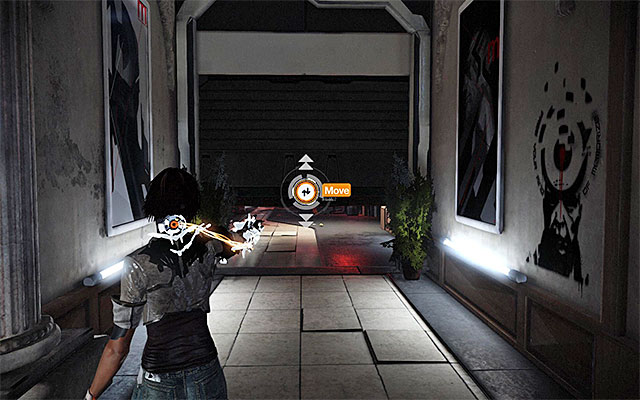
Follow the linear corridors, open the door and find the interactive screen. Stop by the shutter that is blocking further passage. Once again, use the Force Spammer to raise the shutter, and walk under it.
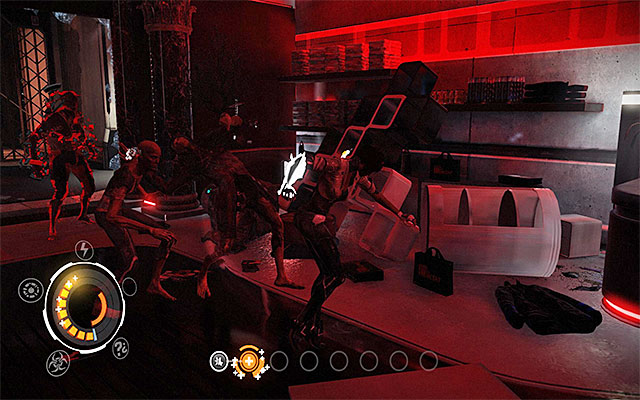
Stay vigilant because, right after you walk into the next area, you will be attacked by Prowler Leapers and a Skinner Leaper. Just like in the case of the previous encounter with these, first deal with Prowlers (it is better to fight them in the alley instead of in the shop) and then, turn to Skinner. It is a good idea to use the special moves during the fight especially that, due to a small area, it is easy to sustain damage.


After you finish the fights, exit the shop and finish exploring the alley to find an interactive ledge shown in screenshot 1. Climb the ledge and then, to the next one to make your way to the scaffolding to find a Focus Boost.
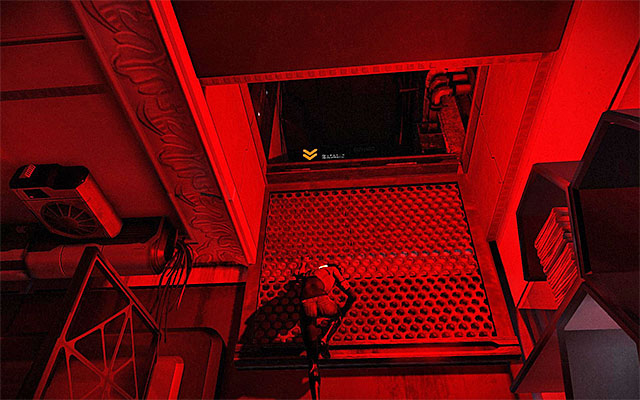
You can now return downstairs and enter the shop where the mutants spawned. Climb the ledge and start climbing. After you reach a dimly -lit corridor, listen to Edge's commentary and go straight ahead.
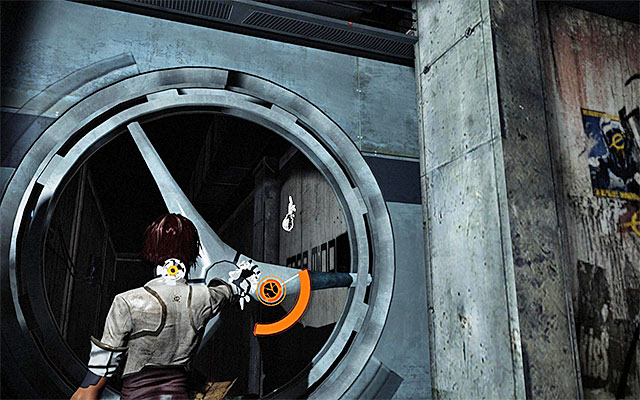
After you reach the first fork, turn left. Approach the fan at the end of the corridor and enter the aiming mode to eliminate the Scaramech shown in the above screenshot. Return to the fork and take the other corridor to reach a small area with a ladder in it.
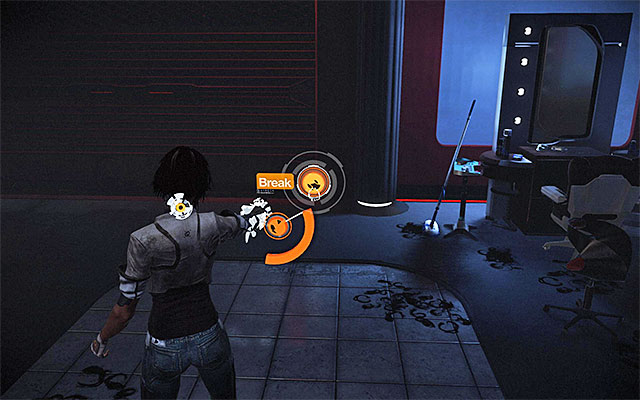
After you climb the ladder, use the SAT Hatch) if you need to, and open the nearby door. Approach the lowered shutter, aim at the Padlock and use a Junk Bolt (RMB) to destroy it. You can now use the Force Spammer to raise the shutter.
Listen to another conversation with Edge and go left. Stop in the spot shown in the above screenshot, i.e. at the balustrade, where there is an Elevator. Aim the Force Spammer at the elevator to raise it as much as possible.
You can now run-up and leap towards the elevator to grab onto the interactive ledge. Shimmy to the right, lean back and leap towards the large hanging structure. Walk over the structure and leap towards the balconies that you can see in the distance.
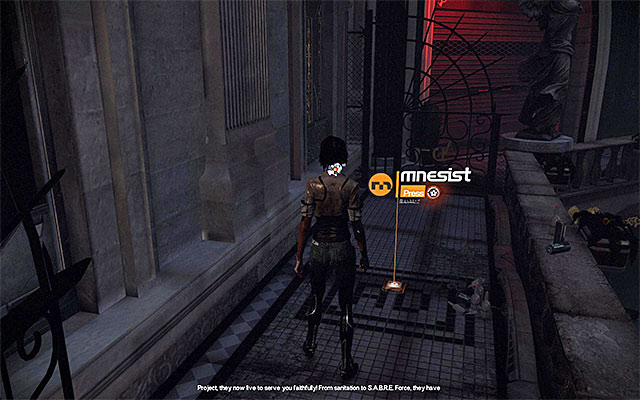
After you land onto the balconies, turn right to reach an area where there is a Mnesist Memory. You can now return to the starting point and go left. Listen to a longer conversation with Edge and locate an interactive, vertical fragment of the wall where you can start climbing.
[New Journal Entry: Neo-Paris Landmarks- Saint-Michel Dam]
Start climbing again. After you reach the top of the interactive wall, leap towards the ledge to your left. Shimmy to the left, and perform several additional leaps on the way. Finally, jump towards the ledge above and pull up to the balconies patrolled by combat drones.
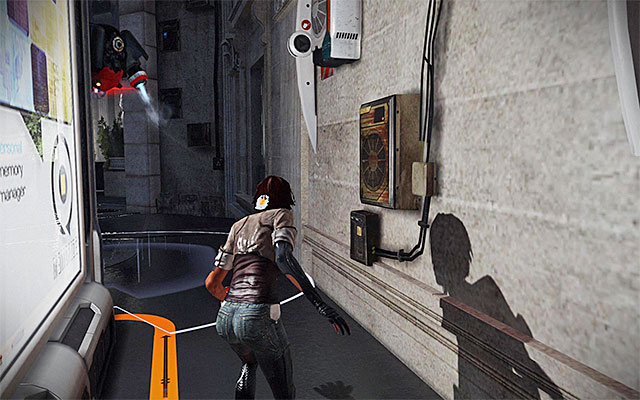
You can walk past the first one of the drones by hiding in the side area and waiting for the machine to pass you by. When it comes to the second one, you can use to your advantage the fact that it is going in circles around the information board and cannot, therefore, monitor the entire balcony.

Get acquainted with the video footage presented on the screen and approach, carefully, the last one of the drones. Use the Spammer here, to unlock the door in the distance (the above screenshot). Performing this action will result in the drone's beat being enlarged.
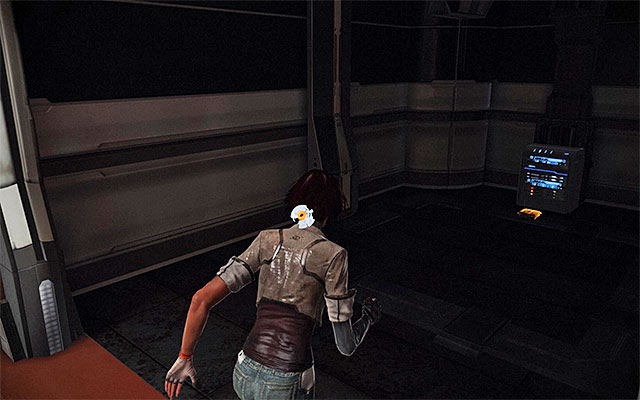
Wait for the drone to fly off and go straight ahead. Stop when you reach the passageway to the right. Do not leave this area straight away and wait for the drone to fly off the other direction. That is when you can explore the last part of the balconies, where you can find a Focus Boost shown in the above screenshot. Remain in this area and wait for the drone to fly off before you move on towards the exit.
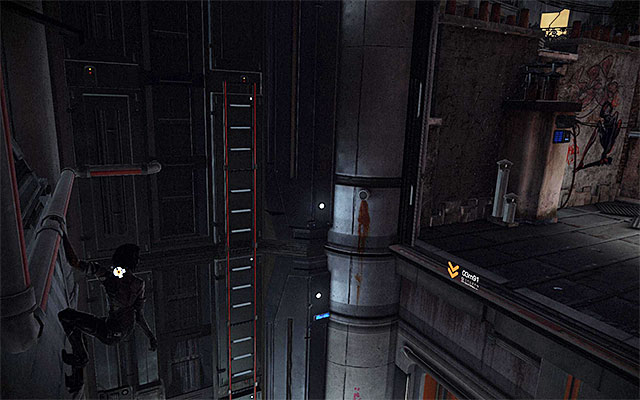
Jump over the balustrade and lean back to perform a leap. Drop down and go straight to reach a ladder to the left. Climb up the ladder and jump towards the pipe to the left. Shimmy to the left as far as you can, lean back an leap towards the larger ledge.

Examine the nearby interactive screen and climb onto the higher portion of the roof to explore the district that has been flooded after the destruction of the dam. Turn right and listen to the conversation with Edge, after which you should approach the edge of the roof. Hang down and hang down, then shimmy to the left (screenshot 1). Leap towards one ledge after another until you reach the balcony shown in screenshot 2, with a SAT Patch) on it. Carefully, return now to the starting point.

Turn now towards the neon light shown in the above screenshot and leap towards it. Jump over the neon light and leap towards the interactive element of the wall to the right. Move up and leap towards the ledge to the right.
Keep shimmying to the right and stop only when you see a small fragment of a rooftop below Nilin, which you need to drop down to. After you land, make a few steps forward and turn, which will allow you to locate a Scaramech clinging to a metal object (the above screenshot)
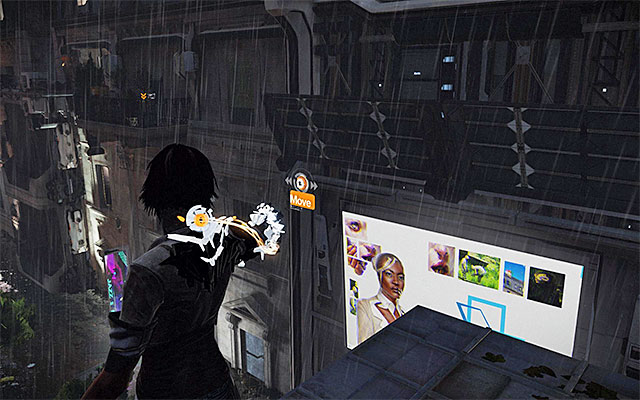
Walk over to the other end of the roof and enter the aiming mode to aim at the Solar Panel. Use the Force Spammer now to lower both of the panels. You can now leap towards the panels and land safely onto them.
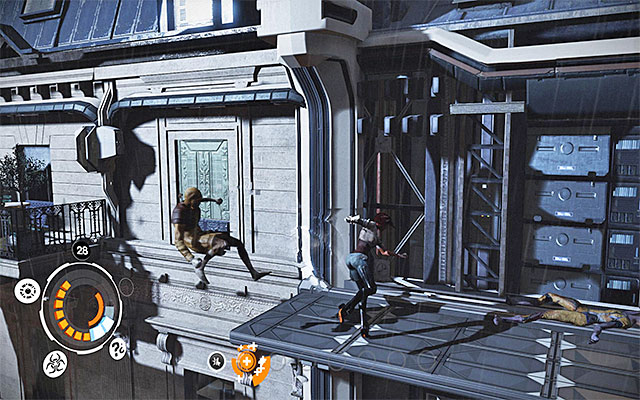
Right after you land onto the lowered panels, Nilin will be attacked by a group of Prowler Leapers. I recommend that you use the special moves to your aid because it is easy to lose your balance and fall down. The small size of the area can also be used to your advantage. You can knock the monster off by landing heavy blows. This will make the fight shorter.
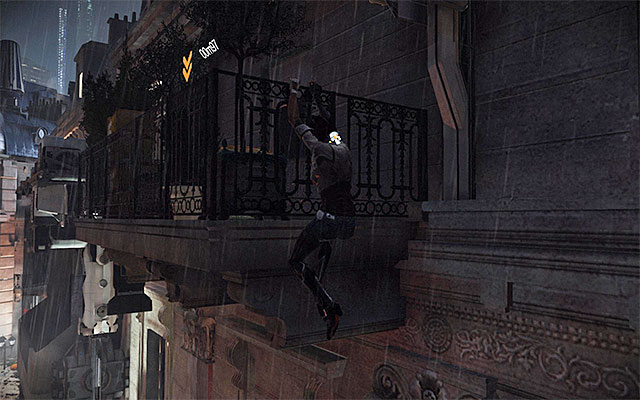
Turn towards the balustrade on your left and perform a longer leap towards it. It is worth mentioning that the jump must be very well timed because, you can make an easy mistake here and die as a result. After you grab onto one of the balconies, shimmy to the left, leap to the ledges to your left to make your way to a new stable platform.
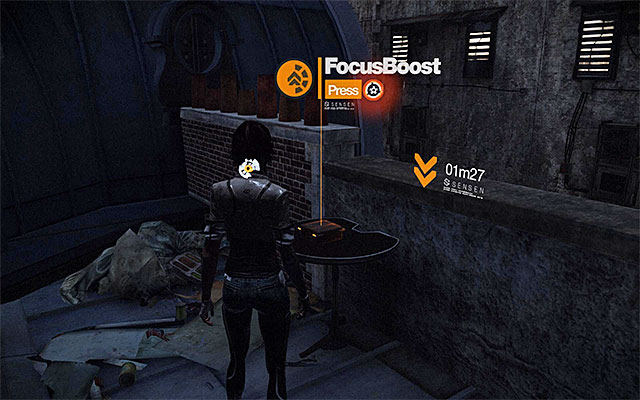
Examine the interactive screen and go ahead. Leap towards the roof fragment that you can see in the distance. Stop at the wall with a mural on it and jump towards one ledge after another. Do not shimmy left yet and lean to the right to leap towards a well-hidden ledge invisible to the camera. Shimmy to the right, which will allow you to reach the fragment of the roof above. The secret that you have recently seen is here, and it is a Focus Boost (screenshot 2).
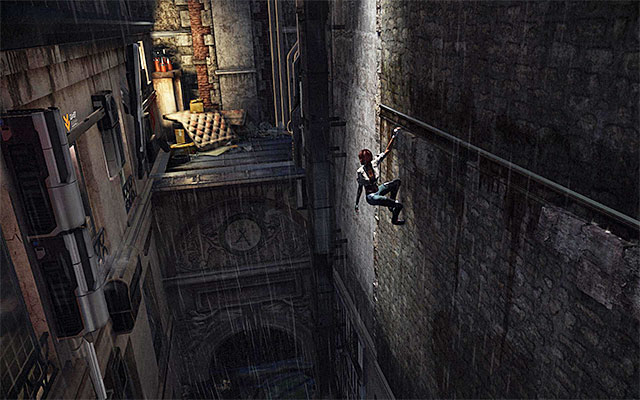
Return to the bottom and grab onto the ledges again, Start now to shimmy "the right way" to the left. After you reach the end of the ledge, lean back and leap towards the left side of the screen. Shimmy to the right here and drop down. You can now finish the process of moving to the right by reaching the area where Nilin will be able to grab onto another ledge.
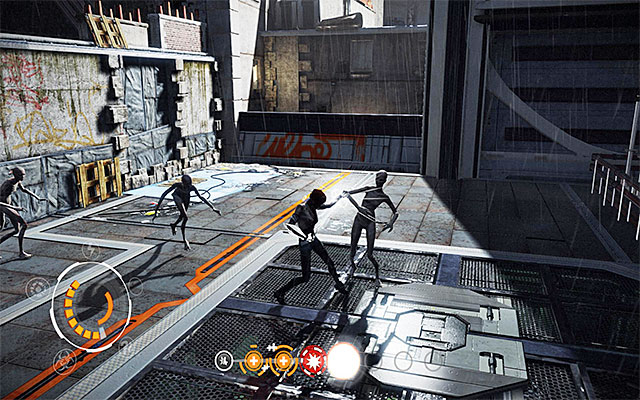
Go ahead and jump down onto the arena where you will have to fight mutants. At first use to your advantage the fact that the Strangler Leaper are well lit by the large neon light, which makes them an easy target.
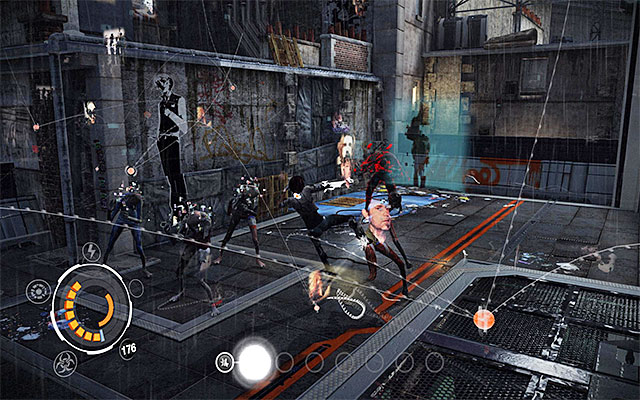
Things will get complicated after a while because the neon will shut down and also Prowler Leapers, and a Skinner Leaper will appear on the roof. From now on, keep focusing on initiating Sensen DOS as often as possible, which will allow you to locate the invisible mutants, which pose the largest threat.
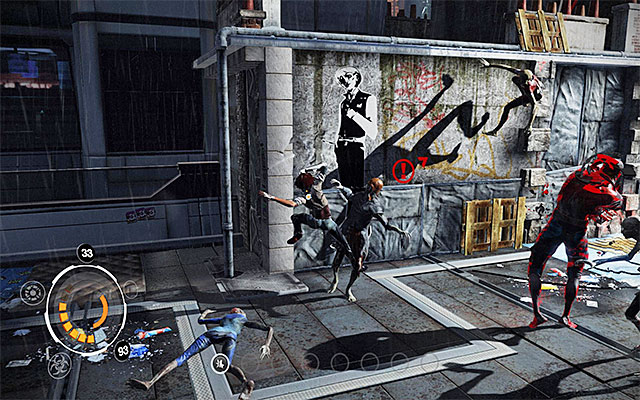
After some time, the neon will turn on again but, because this is only for a short period of time, it is still a good idea to rely on Sensen DOS. After you get rid of the invisible mutants, turn to the "regular" ones and, leave the Skinner for the end. While fighting, do not forget to initiate the remaining special attacks (the Logic Bomb, Sensen Fury) and also about using the Spammer, which is good against the mutants clinging to the walls.

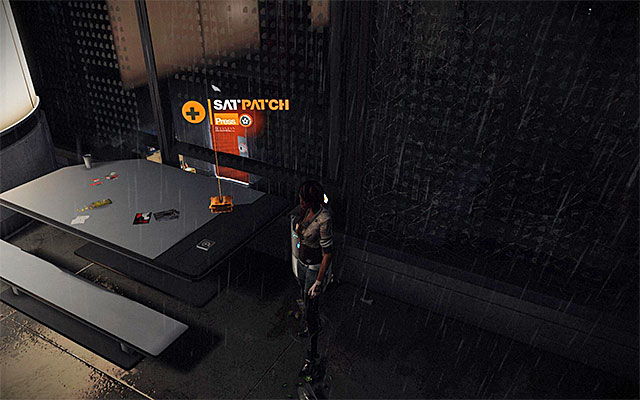
Listen to the conversation with Edge and use the drain pipe to reach a ledge above. Turn left here, and jump down to a lower fragment of the roof. Ignore, for the time being, the passage located here and locate the red drain pipe shown in screenshot 1. Climb the pipe and start jumping from a ledge to another on the left. Finally, pull up to reach the enclosed area shown in screenshot 2, where there is a SAT Patch.
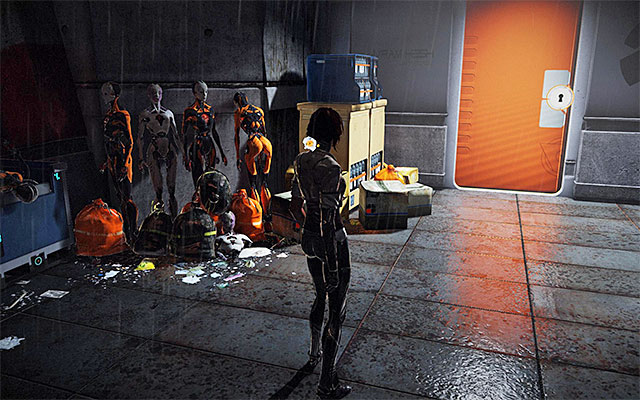
Grab onto a low wall again, jump over it and return, carefully, to the rooftop with the screen on it. You can now open the orange door and enter the Avram Hesh Laboratories.
Do not hurry to enter the building because, the first corridor is being patrolled by a combat drone. Wait for the machine to stop at the locked entrance to the right and, quickly go towards the door to the left. IF you need to, use the SAT Hatch and open the abovementioned door. Take several steps forward and, you will encounter an Elite Enforcer.
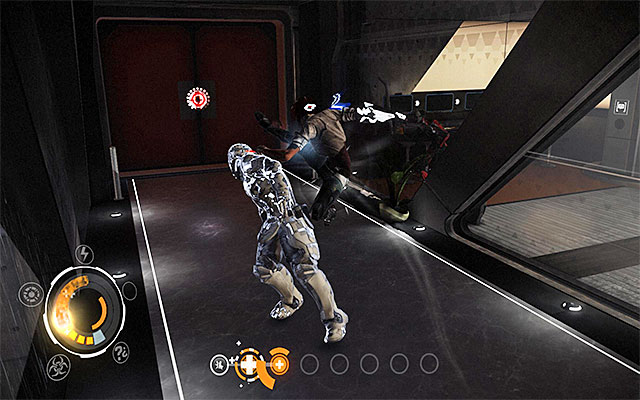
The most important piece of information concerning the elite enforcer is that he is equipped with a special armor and, any attacks on him deal damage to Nilin also. A solution to this problem is using combos that include Regen Pressens. For obvious reasons, this kind of combos cannot guarantee as much damage to the enforcer as you would wish for, but this will prevent losing precious health points too fast.
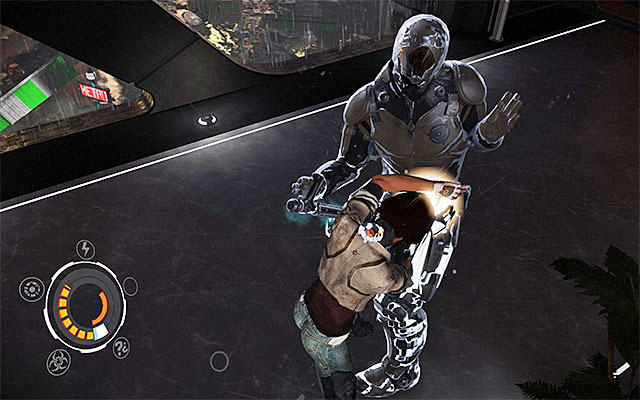
Apart from using the abovementioned Regen Pressens, it is also a good idea to wait for the moments in which your character accumulates enough Focus to launch special attacks. I recommend that you make use of the Logic Bomb because, this will prevent Nilin from losing health points. Continue fighting until you defeat the enemy (you receive 200 experience points for defeating Elite Enforcers).
[New Journal Entry: Enemy Information- Elite Enforcer]

Remain in the corridor in which you have just fought and use the Spammer on the Glass door of the office to the right. Explore this area to find a Mnesist Memory. You can now go towards the main door located at the end of the corridor.
[New Journal Entry: Neo-Paris History- Climate Migration]
Follow the linear corridors and stop only after you reach the area patrolled by two combat drones. This time around, it is going to be a bit more tricky to go around the machines. That is why you should make sure that you perform all of the actions described below. Start by entering the first area to the side (N.E.S.T. 1). Turn right, make sure that there is nobody in the neighboring stall and discharge the Spammer at the Shutter, which will close it.
Jump over to the next stall and the third one. Turn around and use the Spammer again to hit the shutter. Doing this will result in opening the shutter in the third side-area so, leave this location quickly and return to N.E.S.T. 1.
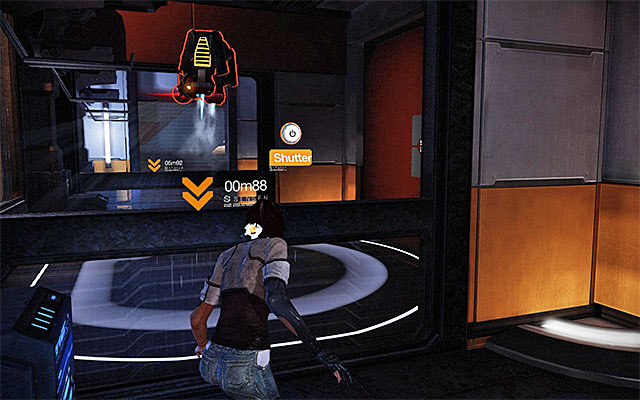
Turn around and hit the shutter button, connected with the second stall, again. Ahead of you, there is the most important action to make because, you need to wait for one of the drones to find its way into the second stall. Once it is there, shoot towards the switch for the shutter in stall two again. If you have done everything correctly, you have just imprisoned the drone inside the stall (the above screenshot).
You can now return to the main corridor. Wait for the second of the drones to enter stall three, where you have just raised the shutter. This will allow you to go around the hostile machine safely, and reach the interactive door. Continue along your path and, on your way, find a SAT Hatch. Soon you will reach the building's exit.
Listen to the conversation with Edge, concerning the possible means of accessing the Memorize headquarters, after which you should go left. Interact with the Crane control, to rotate it.
Remain where you have used the control panel and turn to the right a bit. Aim the Spammer at the Container shown in the above screenshot and use Force Spammer to move it to the left. Performance of this action should allow you to leap towards the container and grab onto the interactive ledge (make sure, of course, that you run-up first).

Shimmy to the left and lean back. Perform a leap and shimmy to the left again. This way you will reach a ladder, which will take you to the top of the crane.

Turn left and position yourself next to the control panel, which you can ignore for the time being. Enter the aiming mode and aim at the roof of one of the buildings, which is a bit to the left. This will allow you to locate another Scaramech shown in the above screenshot.
You can now turn to the second Crane control and interact with it. Wait for the crane to rotate and go towards the VIP entrance that you can see in the distance. Leap towards the upper balcony on the Memorize headquarters which will start a cutscene.

Captain Gabriel Trace will appear during the cutscene in a fighter jet, and he will intend to kill Nilin. You are up for a long chase scene which you need to start right after you regain control over your character.
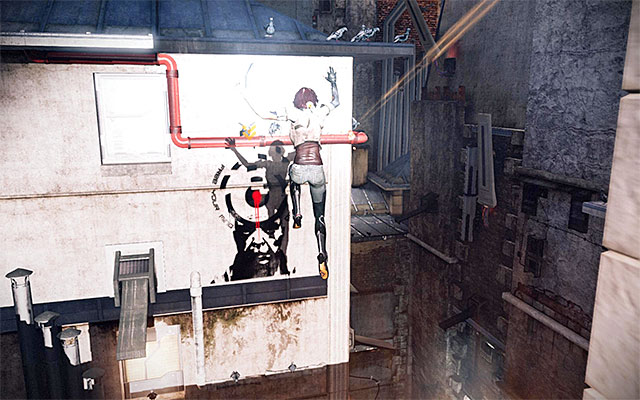
Go ahead and over the balustrade. After you land on a roof below, go towards the horizontal pipes that you also need to jump over. Continue running and jump towards a pipe attached to the neighboring building. Nilin will lose her balance here, for a moment but, you do not need to worry about that. Because this has been fully staged.
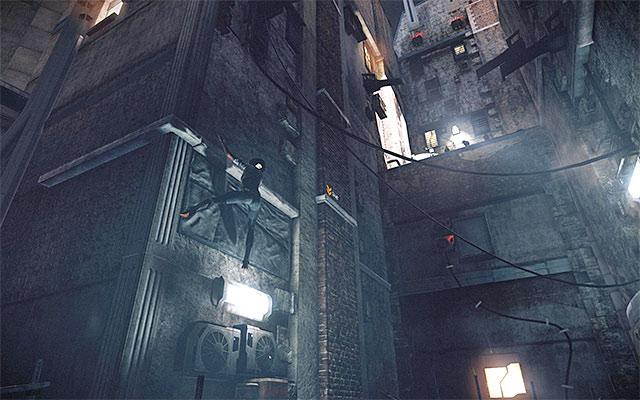
Wait for Nilin to grab onto the ledge and shimmy to the right. Leap towards the ledge to your right and then, to the one above. Shimmy to the right again and jump towards the roof that you can pull up onto. Go ahead and be ready for another encounter with the jet.
Go ahead and do not worry about the fact that you are running towards the enemy. Watch out after you reach the glass rooftop , get over to its right side to prevent falling into the building.

Get prepared to make a leap towards the nearest scaffolding and turn left. Nilin will fall down to a lower level after a while and that is when you should stop. Turn around, take a few steps forward and try to locate a Mnesist Memory as fast as you can.
[New Journal Entry: Neo-Paris Landmarks- Memorize HQ]
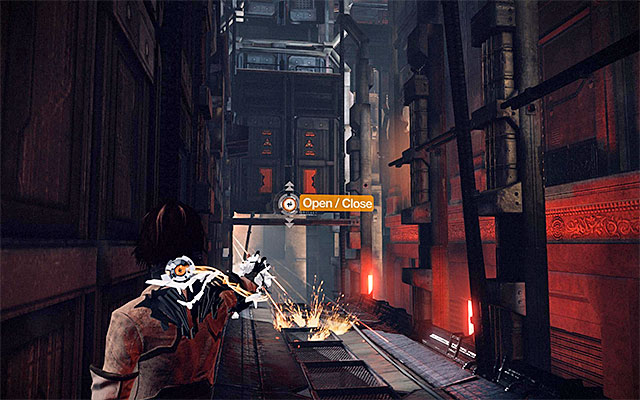
Turn around again and resume your escape quickly because, the enemy jet continues fire. Leap towards another scaffolding and after you see a short cutscene, turn towards the Shutter. Quickly use the Force Spammer to lower it (you cannot take too much time doing that or else you will come under fire).

Run up to the shutter that you have just lowered and grab onto the ledge here. Keep jumping up to grab the nearby ledges while, at the same time, shimmying to the left. Stop in the spot shown in the above screenshot. Wait for Trace to stop firing at this part of the scaffolding and ONLY THEN jump to reach the upper ledge. Perform the same actions in the case of the other damaged fragment of scaffolding.
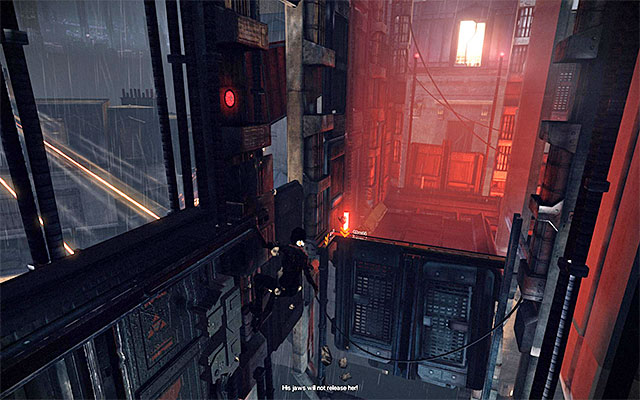
Shimmy to the left now, lean back and leap towards the platform. Turn around and aim at the button (Drone Access). Use the Force Spammer to lower the metal object and obstruct Trace's further operation.
Stay here and leap towards the interactive ledge next to the wall fragment that you have just lowered. Shimmy to the right to reach a stable balcony after a few moments. Keep running because you will get under fire again. Walk under the balustrade and leap towards the balcony that you can see in the distance.
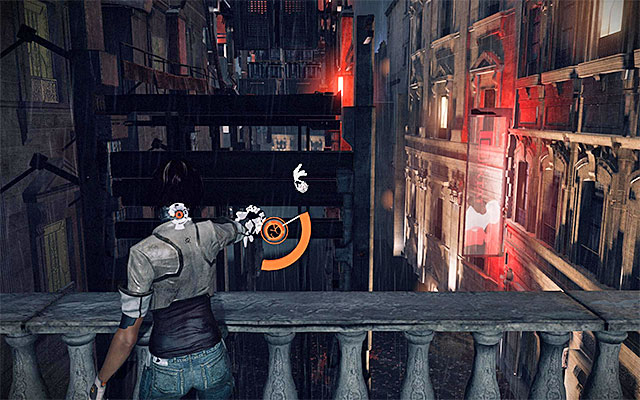
After you land on the balcony, turn around and eliminate the Scaramech shown in the above picture. Only after you eliminate the parasite, open the door. This will result in another cutscene being played.
Start running again because, as a result of the enemy fire, fragments of the floor will be destroyed. At first it is going to be easy to avoid the falling elements but, with time, you will have to perform jumps, which need to be precise. Right after you land, dash into the building to the right, which will stop enemy fire for a moment.
After a while, you will bump into two Enforcers, but it shouldn't be troublesome to deal with them. Reach the door and jump over the balustrade after you open it. Performance of this action will result in the appearance of Trace's jet so, QUICKLY start moving left.
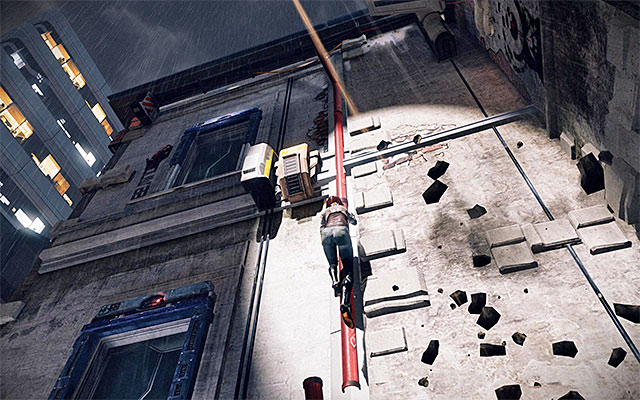
Keep jumping towards successive ledges and do not allow yourself any stops that would be too long. While making use of the red pipe, additionally, press the key/button that speeds up the climbing process. Otherwise, you may fail to escape the jet. Get to the top of the pipe and start jumping towards the ledges to the left.
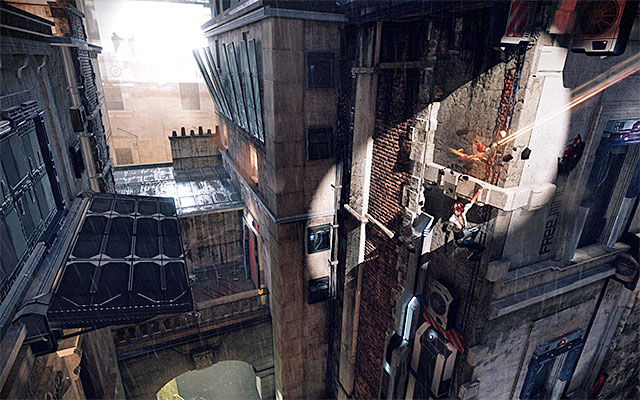
After you get past the building's corner, lean back and jump. Soon, the game will play a cutscene after which, you will find yourself in an apartment. Open the exit door and move along. Watch out here because, after you walk into a larger room, you will be attacked by Enforcers, Heavy Enforcers and Elite Enforcers.
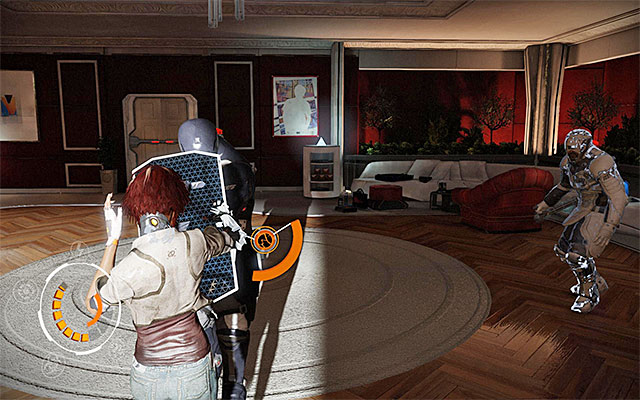
While fighting you, of course, really need to watch out for the elite enforcer. To the extent it is possible, try and avoid his attacks. At first, focus on the enemies equipped with shields. You probably remember that you can get rid of their shields at a distance with Junk Bolt or (a way better idea) with the special move called Logic Bomb.
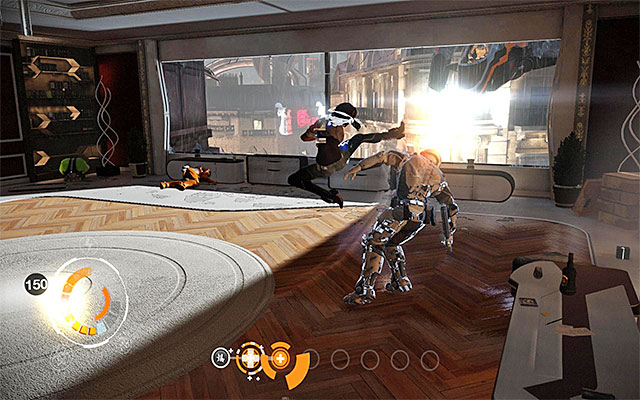
After you deprive all of the enforcers of their shields, focus on introducing long combos, combined with the remaining special moves. The elite mercenary leave for the end. You can, just like previously, try long combos or go for the Logic Bomb attack.
[New Journal Entry: Enemy Information- Heavy Enforcer]

After the victorious fights, leave this location because soon, you will come under Trace's fire again. Explore the next corridor and stop by the partially opened door shown in the above screenshot. Positioning yourself correctly will allow you to destroy another Scaramech.
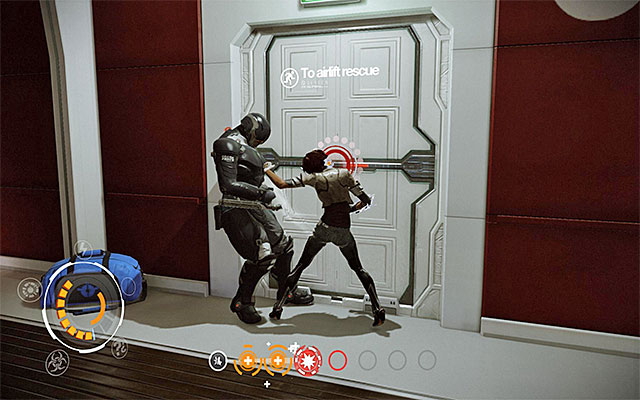
Go ahead and open the door to your left, which will take you to a staircase. After you climb up the stairs, deal with the single Enforcer and open the next door between the main corridors and the stairs. If you need it, use the SAT Hatch and climb the stairs to reach the building's rooftop. Soon you will be updated on your objectives.
To acquire Captain Trace's memories, you need to come close to the jet. The key to success is moving from cover to another quickly, to prevent being spotted by the aircraft. Wait for the right moment (when the jet turns around) and run up to the chimney to the left.

Reach the third chimney in the same way. That is when Trace should start lighting a nearby ladder so, you can take a look around this area. Remain at the third chimney and take a look at all of its sides thanks to which you will find another Scaramech (the above screenshot).
Turn right now and locate a Turbine in the distance. Use the Spammer to activate the turbine, thanks to which, Trace will direct the lights at the first part of the roof.
Dash towards the ladder and use it to make your way to the highest portion of the roof. After you get there, turn right and leap towards the jet.
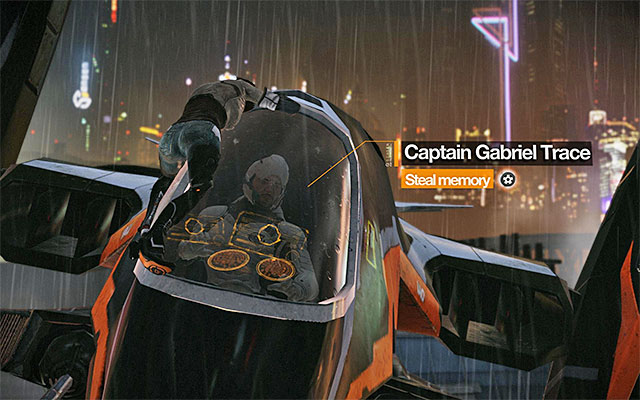
Wait for the moment in which the game informs you of the possibility to steal memory from Captain Trace (the above screenshot) and press the interaction key/button quickly for that to happen (you cannot be too slow or else, Nilin will fall off the jet and die).
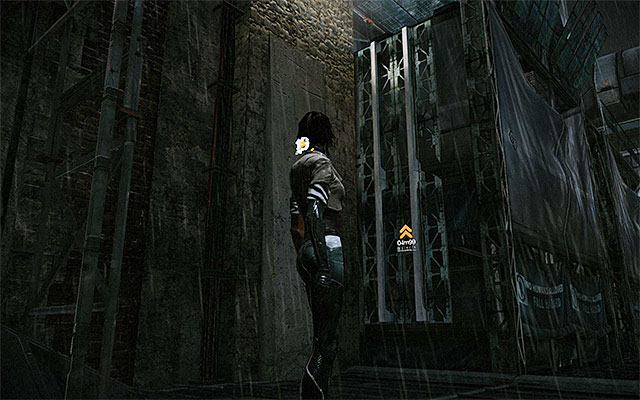
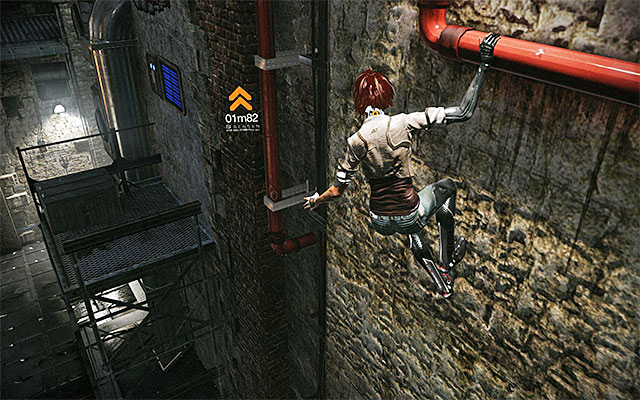
Wait for Trace's jet to crash and listen to the conversation with Edge Explore this location. Locate the interactive fragment of the wall shown in screenshot 1 and start climbing to get to the balcony above. Turn around and catch onto the red pipe to shimmy to the left (screenshot 2).
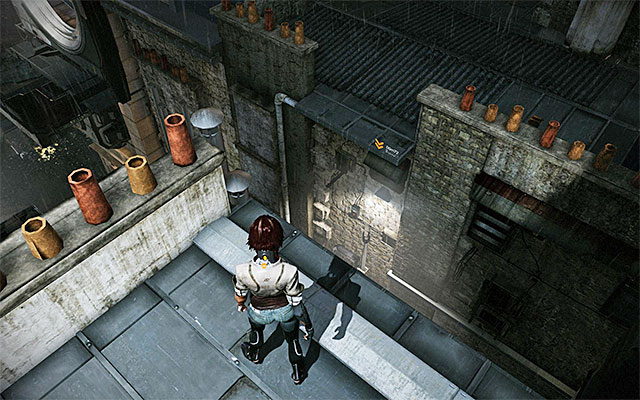
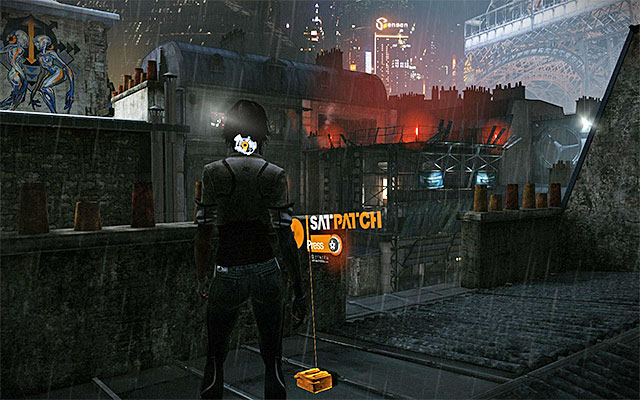
Leap towards the vertical pipe and then, towards the interactive ledge. Pull up and stop in the spot shown in screenshot 1. Leap towards the fragment of the roof that you can see in the distance. Explore this area thoroughly to find a SAT Patch, which you could see on one of the interactive screens that you passed by.
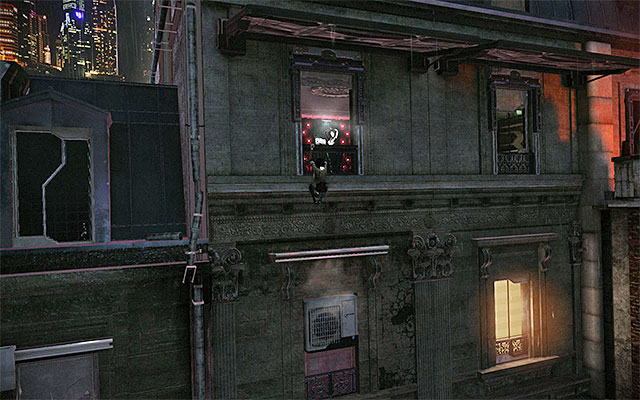
Return to the main roof and go towards the vertical pipe and the interactive ledges to the left. Start climbing to reach the shutter shown in the above screenshot.

Right after you get into a small office, turn your attention to the bushes to your left. Among the bushes there is a Scaramech. You can now go through the door to the right.

Follow the long corridor and take the first turn to the left. Stop right after you walk into the next corridor because there is a Mnesist Memory (the above screenshot) lying on the floor. Move on to reach the window that you need to leave the building through.
[New Journal Entry: Neo-Paris VIPs- Scylla Cartier Wells]
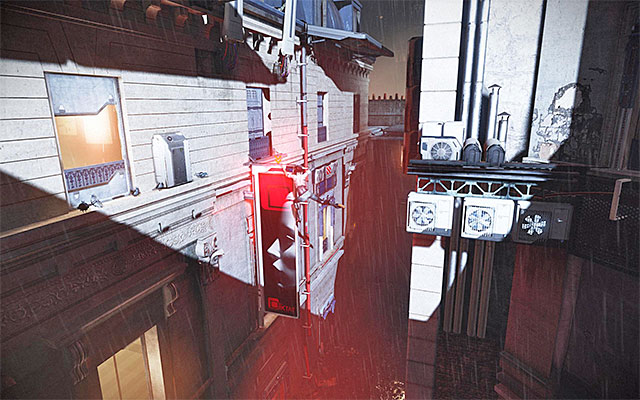
Shimmy to the right along the ledge and jump towards the neon light to the left after you reach the end of the ledge. Jump over the neon light and shimmy to the right to reach the red pipe. Slide down the pipe. Keep jumping from one ledge to the right to another. Thanks to this you will reach another shutter.

Go straight ahead and turn left after a while to approach the robots here. Examine all of the seats around to find a Mnesist Memory shown in the above screenshot. Return to the main corridor and raise the Shutter, thanks to which you can leave the building.
[New Journal Entry: Memorize and the Sensen- First Military Application]
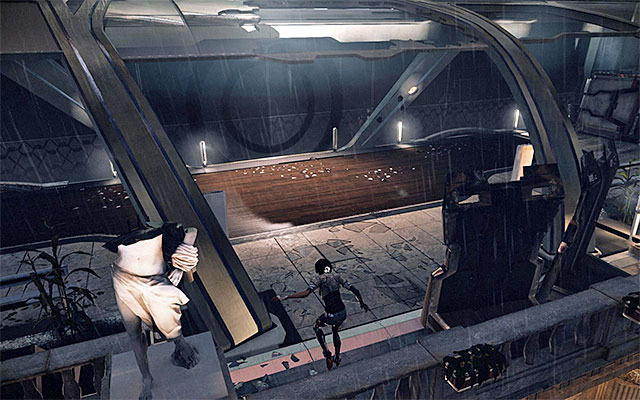
Reach the wall with the interactive vertical element and start climbing. After you reach the Memorize HQ upper balcony, shimmy to the right. Reach the place where you will be able to pull up. Get prepared because you are about to fight the largest battle of this episode!
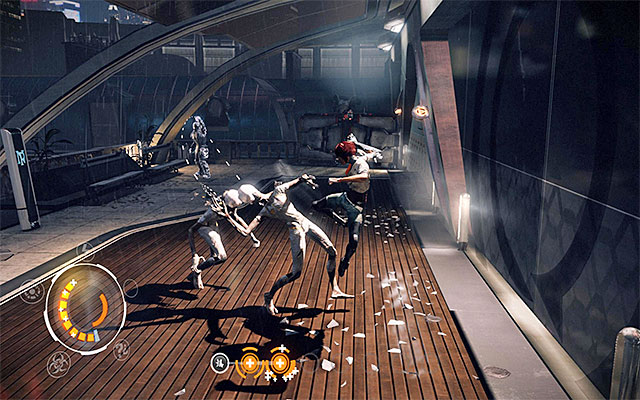
At first, you are going to match up against Elite Enforcers, accompanied by two Reconversion Leapers. Because there are no other enemies on the balcony yet, it is best to deal with the mutants first (I recommend introducing long combos) and then with the enforcer (regeneration moves or the Logic Bomb).
[New Journal Entry: Enemy Information- Reconversion Leaper]
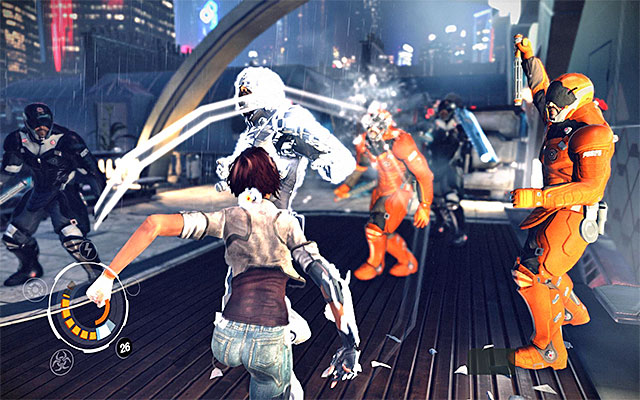
In the second phase of the battle, another Elite Enforcer, And a quite large number of standard Enforcers), plus Heavy Enforcers will join in. Because they should be initially deployed close to each other, I recommend a Logic Bomb. Further throughout the battle, focus on destroying the shields of the enforcers and, leave the elite enforcer for the end.
The third phase is definitely the most difficult one because, apart from the Elite Enforcer and regular Enforcers you will also have to deal with two AV-48N Nephilim robots. First of all, try to remain in constant motion because, due to the limited area, it is going to be easy to take damage. The best way to destroy the first Nephilim is by using Rust In Pieces, thanks to which, not only will it explode, but also deal damage or kill the remaining enemies.

When it comes to the other robot, you can wait for the special move to cool down (remember to use cooldown moves, then) or go for an alternative and use the Junk Bolt. Start fighting the enforcers only after you deal with the robots, first by eliminating the regular enforcers and then, the elite enforcers.
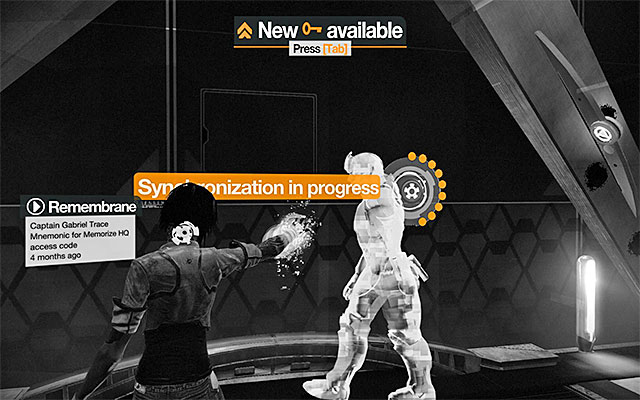
After you deal with the enemies, listen to the conversation with Edge and approach the first Remembrane connected with captain Trace. After you play the projection, prepare to synchronize, thanks to which you will unlock the opportunity to open the lock in the building's entrance.

Approach the second remembrane and activate it. Now, you will have to solve a simple puzzle. It consists in guessing the right combination to open the door, basing on the hints from captain Trace. The correct combination has been shown in the above screenshot, and it is : 2-0-5-8.

Enter the building and explore the first big hall thoroughly because, there is a Scaramech here (the above screenshot). Go ahead and stop after you reach an inactive elevator.

As you have probably noticed, you can make a decision if you want to take the stairs on the left, or on the right. The choice has no influence on the gameplay because, in both cases, you will run into combat drones that patrol this area. You need to make it ahead very carefully to avoid being detected by the drones. Regardless of which way you decide to go, you need to make a stop in one of the corners and wait for the first one of the drones to pass you by.

Do not hurry too much to leave this area and take to examining the red room shown in the above screenshot, where there is a Mnesist Memory.
[New Journal Entry: Technology- Pick-socket]
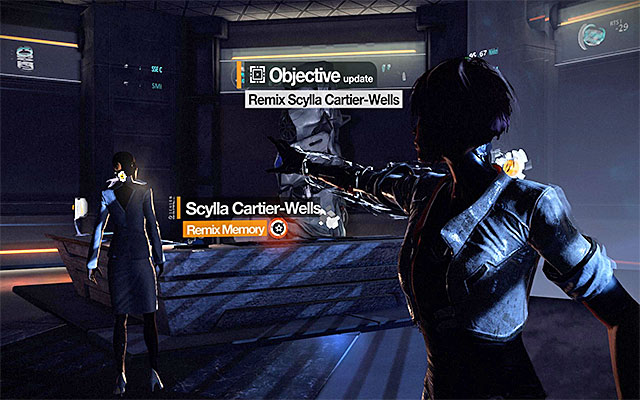
As soon as you do that, take the passage that leads to Scylla Cartier-Wells' office. Press the interaction key/button in the right moment, thanks to which you will initiate the process of remixing her memory.

First of all, you need, of course, to watch through Scylla's entire memoir. The most interesting discovery connected to it is that she is Nilin's mother. In the original version, Nilin caused an accident as a child which resulted in Scylla's losing her leg. The aim of remixing is to make Scylla guilty of the crash.


Rewind the entire memoir to the very beginning and start playing it. Stop the process (by pressing the right mouse button or the corresponding button on your game pad)where the game marks two simultaneous glitches. Select the Cup Holder shown in screenshot 2 and press the interaction key/button, thanks to which it will retract.
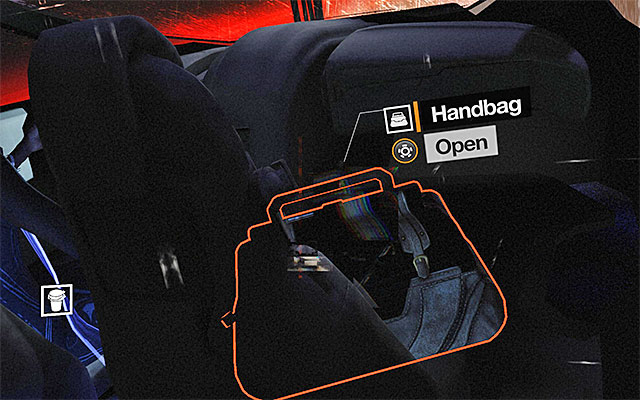
Another glitch of your interest is connected with the Handbag in the passenger seat. Selecting this glitch will result in the bag being opened, which will reveal a toy inside.
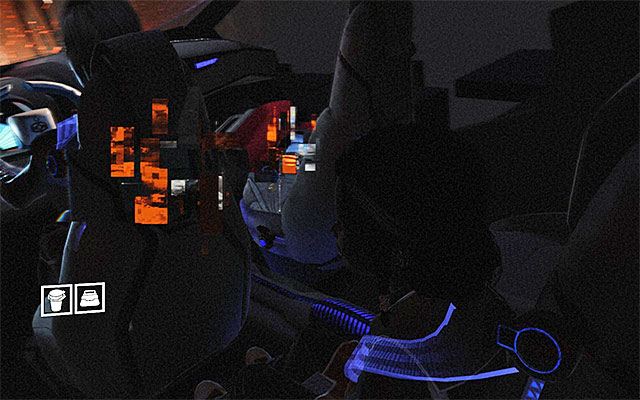
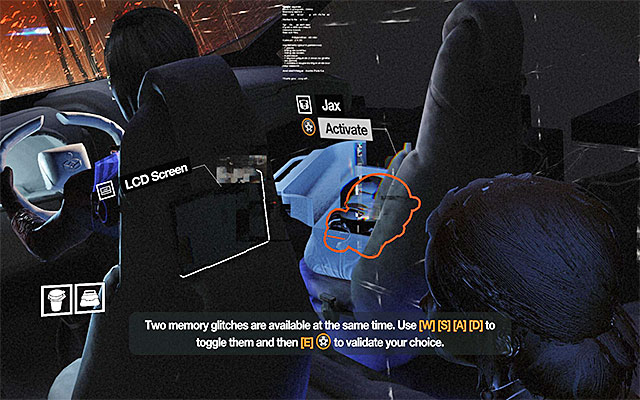
After you replay the memory, wait until two more glitches are marked by the game (screenshot 1). Select Jax - the toy shown in screenshot 2, and activate it.

Finally, select the glitch connected with the car's windshield and interact with it to make cracks appear.
You can now watch the memory until the end. In its remixed version, Scylla gets distracted by the crack that appears on the windshield, and the coffee cup will land inside the bag and finish the job. Soon, the game will start to load the next episode.


Go straight and climb onto the ledge above while listening to the conversation with Edge. As you go, keep looking around for the narrow plank located to the left (screenshot 1), which Nilin can climb onto. Make your way to the end part of the plank and turn left where you will notice a Scaramech.
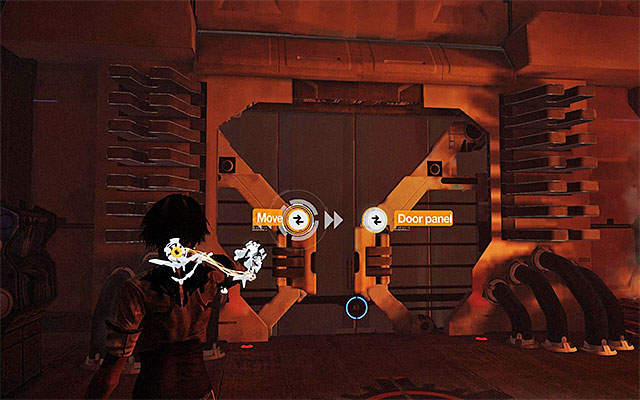
Return to the main corridor and go ahead. After you reach a locked passageway, use the Force Spammer, first to move both Door Panels apart, and then to raise the correct door. Approach the elevator and summon it by pressing the button.
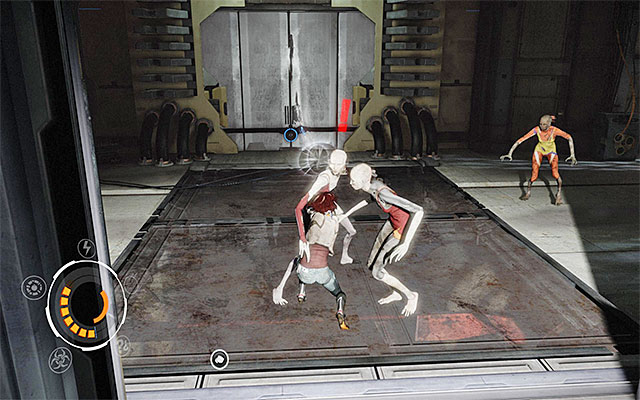
Your character will soon be attacked by the invisible Strangler Leapers. Because you, most probably, do not have enough power to initiate Sensen DOS, focus mainly on avoiding the mutants. The aim of this strategy is to win time until the elevator arrives, which will result in big portion of the room being lightened. As soon as this happens, you can finally start attacking the monsters. After you win the fight, enter the elevator and pres the button to start it running.
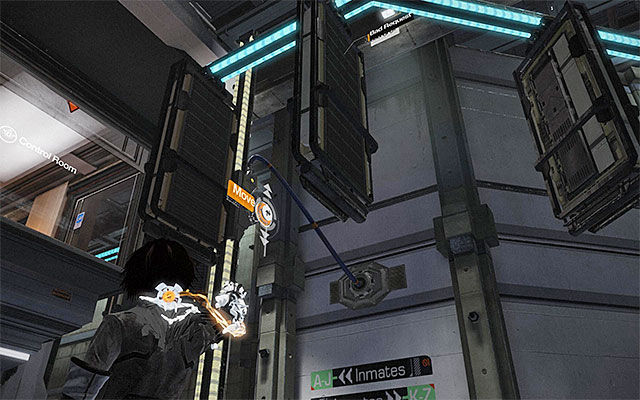
Leave the elevator and start exploring the nearby area. On your way, you will pass a SAT Hatch by, as well as an interactive screen. Climb down the stairs and aim at the Rack shown in the above screenshot. Use the Force Spammer to bring it down.
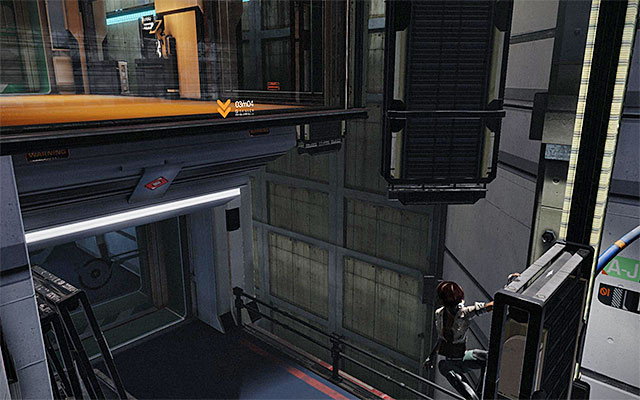
Grab onto the rack and jump towards its upper edge. Position Nilin in such a way, so as to enable her to lean back and leap towards the edge of the control room (the above screenshot). You can now pull up and walk into the room.
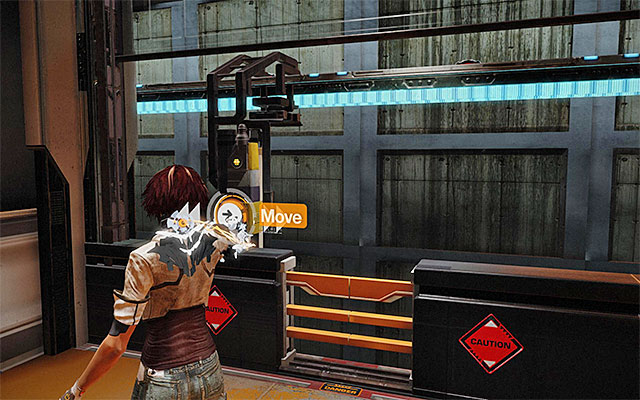
Approach the control panel with the chests of drawers of confiscated items, and use the Force Spammer to move the chests to the left.

IGNORE THE FACT that, at some point, you will see a chest with Bad Request's belongings. Move the chest to the left and do the same with the next one (belonging to Morris). Finally, you will see a crate with Nilin's belongings. Open the drawer and collect the Focus Boost (the above screenshot).
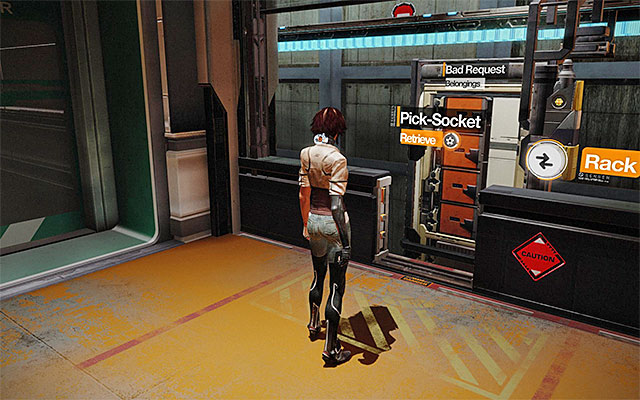
You now Reed to return to the chest with items confiscated from Bad Request. So, use the Force Spammer again and move two chests (Nilin's and Morris' ) back to the right. Examine Bad Request's chest (the interaction key/button), thanks to which you will obtain a Pick-Socket.
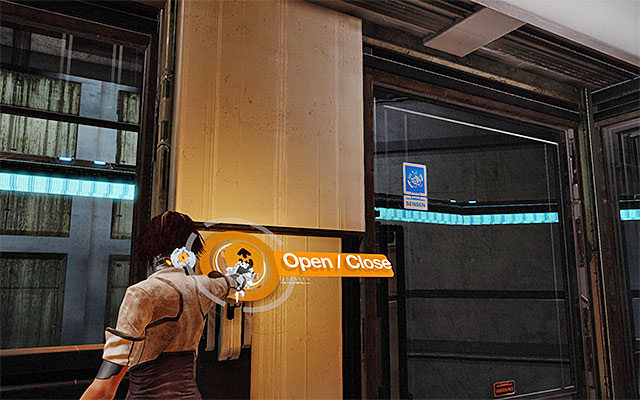
The pick socket that you have just obtained can be used to open locks but, the operation of this tool is a bit complicated because it needs energy. Fortunately, the game will allow you to learn what the procedure is. Start by positioning yourself next to the Window Panel, enter the aiming mode and press the left mouse button (or the corresponding button on your game pad). Performance of this action will allow you to drain the panel for energy.
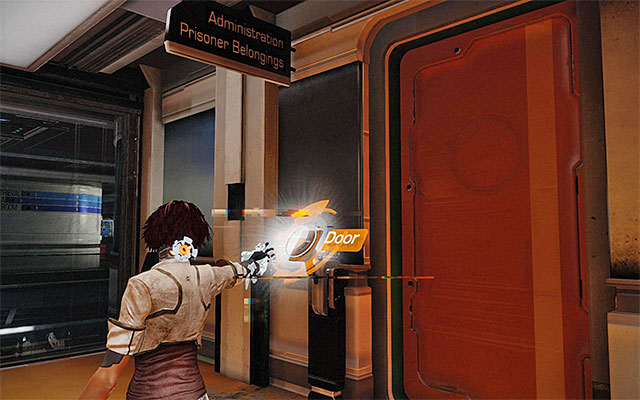
With your pick charged, approach the inactive door control and do the same, i.e. aim at the panel and press the left mouse button. As a result,, you will charge the panel and open the door to the Administration Room.

I recommend that you start by going into one of the storage rooms because in the place shown in the above screenshot, there is a Scaramech.
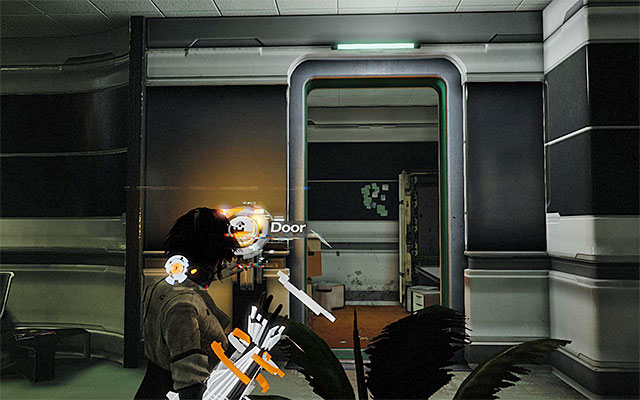
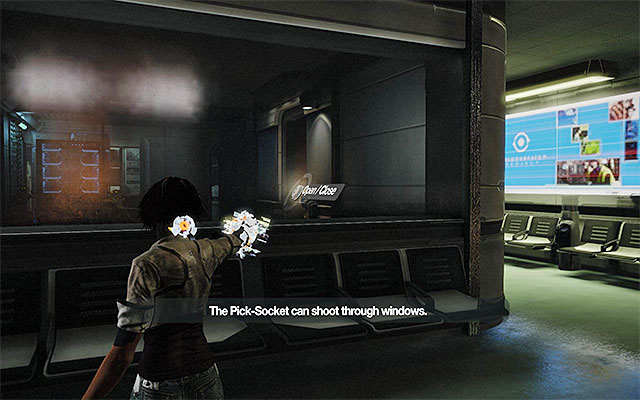
Destroy the parasite and leave the storage room but, stay here and use the Pick-Socket to drain the control panel (screenshot 1) for energy. Position yourself in the spot shown in screenshot 2, near one of the shutters. Use the Pick Socket to send the stored energy into the control panel that you can see in the distance, to open the door and leave this room.

After you walk into a large area, turn around and use the Pick Socket on the same control panel, because you are going to need that energy later on. More precisely, you are going to need it to gain access to Trauma Room, where there is a Mnesist Memory (the above screenshot).
[New Journal Entry: Neo-Paris History- New Economic Pact]
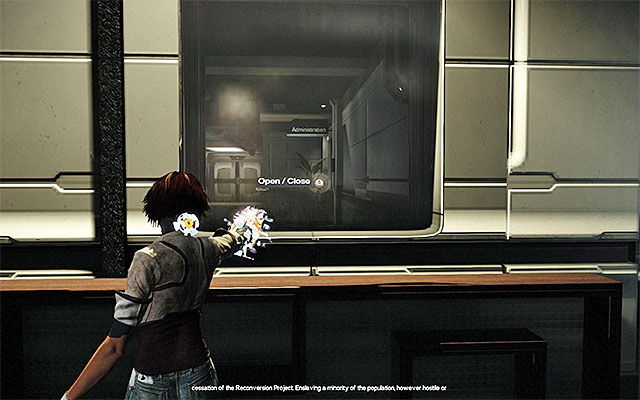
Return to the main room and position yourself next to the shutter shown in the above screenshot. Send the energy to the door control that you can see in the distance. Note that you have returned to your starting point. Right after you leave the administration room, turn around once again and use the Pick Socket on the same door control, to charge the tool.

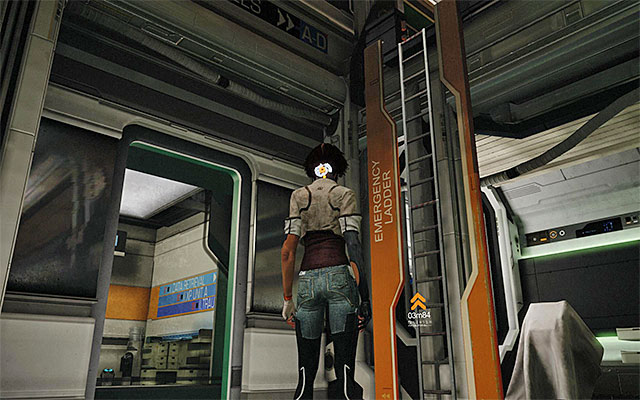
Remain in this location for a little bit longer and take the stairs once again. Approach the door shown in screenshot 1 (Maintenance) and use the Pick Socket to gain access. Explore the room to find the SAT Patch (screenshot 2).
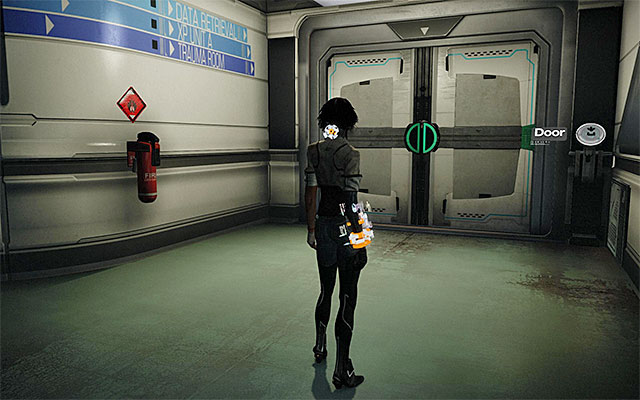
Exit the room and use the lock pick on the door control again to retrieve the energy. Return upstairs and take the corridor to the left of the elevator, which you took to reach this location. Approach the larger door and use the Pick Socket to open it.
Go ahead, stop at the door marked as XP Unit A and wait until further passage is unlocked automatically. Enter the room with the holding cells and there is Bad Request in one of them. Explore the ground floor to find a ladder that you can take to reach the balconies above.
Explore the balconies and, after you reach the end, do not approach Bad Request's cell straight away. First, take a look around to find the Scaramech shown in the above screenshot clinging to the ceiling. After you get rid of the parasite, approach the hunter's cell.

Right after you regain control over Nilin, jump over the balustrade as fast as you can, to avoid being detected by the approaching combat drone. Prepare yourself for a longer, and thus more demanding,, fight.
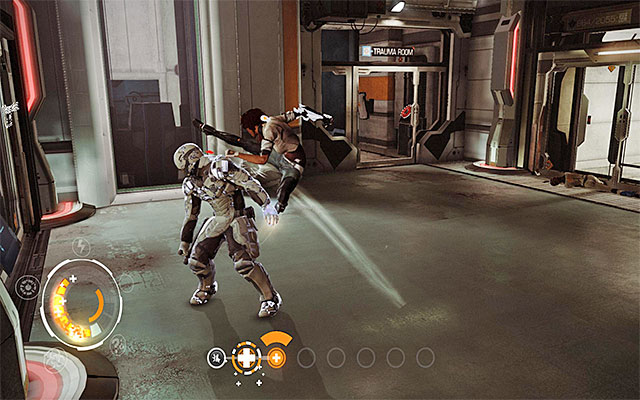
Soon, an Elite Enforcer accompanied by a group of Reconversion Leapers will enter the room. First of all, deal with the mutants and then, turn to the enforcer (I recommend that you make frequent use of the regeneration moves and the Logic Bomb).
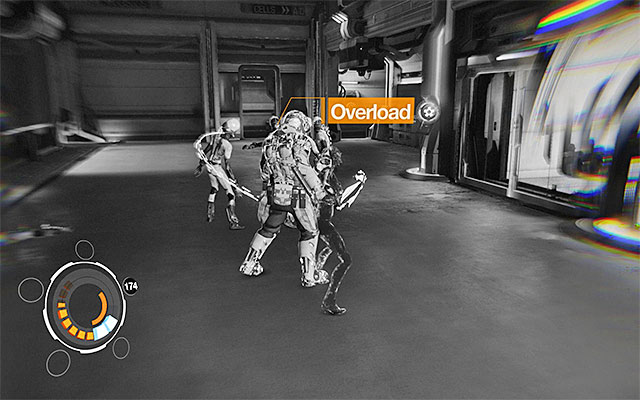
Defeating the first wave of enemies will result in the appearance of another elite enforcer accompanied by an even larger group of Reconversion Leapers. At this moment, the game will unlock access to a new special move - Sensen Camo. Select this one from the dial menu. The function of Sensen Camo is to make Nilin invisible for 30 seconds but, this mode terminates before the passage of this time if you decide to attack. Follow the game's suggestion and sneak up to the enforcer from behind and cause his Sensen chip to overload (the above screenshot). Thanks to this, you will be able to eliminate him in no time at all and, you won't have to fight him.
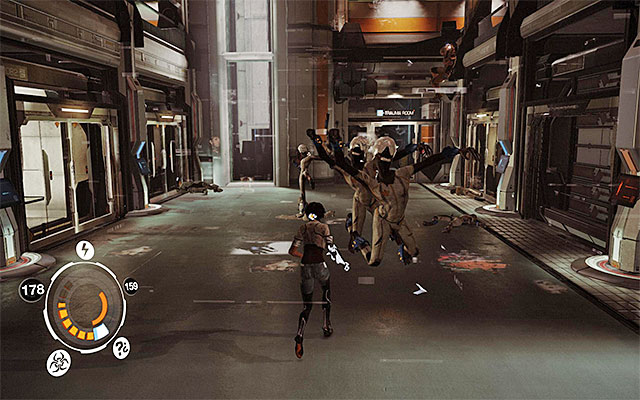
You have probably noticed that elimination of the enforcer decreased the aggression level in the mutants that he used to control. Thanks to this, you will be able to eliminate the mutants without any problems (you can, of course, make use of the special attacks if you want to make it even faster). Leave the elite enforcer for the end and deal with him in any way you want.

Take a look around the room where you have just fought and locate a generator that powers a ladder. The power that you drain from the generator will be best used to gain access to a room on the ground floor, where there is a collectible. To the left of the generator that you have just drained, there is a locked door shown in the above screenshot. Aim at the control panel, and power it with the energy from the lockpick.
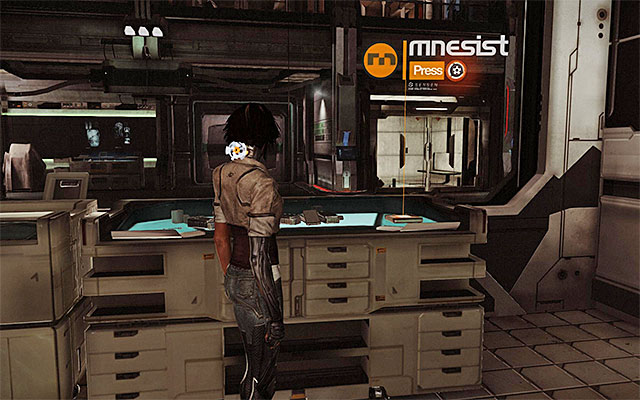
Walk into the area and take the corridor that leads to the room marked as XP Unit A. After you enter the room, approach the glass wall and locate the Mnesist Memory shown in the above screenshot.
[New Journal Entry: Neo-Paris Landmarks- Mnemopolis Tower]
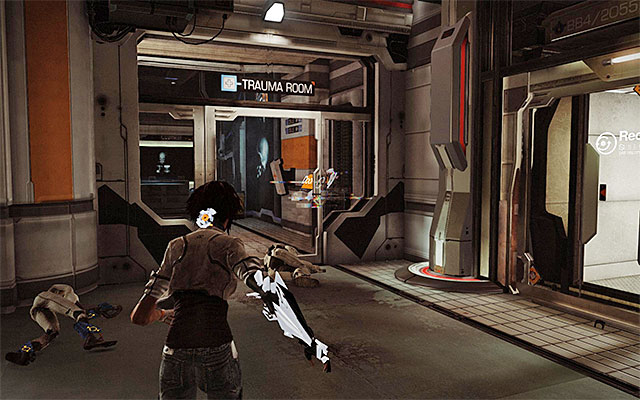
Return to the main location and retrieve the energy from the terminal that you have just activated. Go now towards the door marked as Trauma Room and power the door control with the energy from your lockpick (the above screenshot).

Right after you are past the abovementioned door, drain the nearby door control to get the energy back. While you are here, use the SAT Hatch here if you need to. Walk into the nearby elevator and power its control panel with the energy from your lockpick.
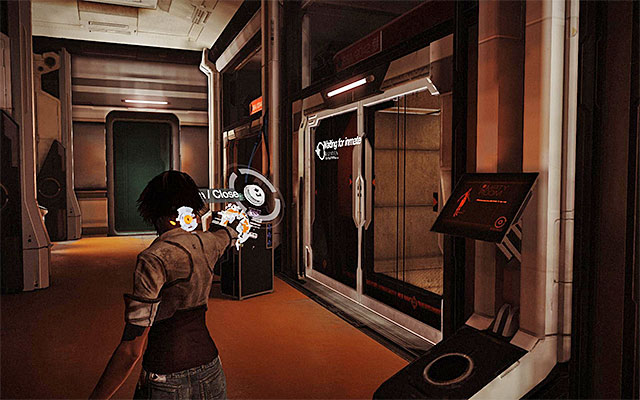

Wait for the elevator to take you to a higher level in the building and go right. Right after you leave the elevator, turn to face it and use the Pick Socket to gather the energy. Explore the upper balconies now, where there are several holding cells. Use the lockpick on the control panel shown in screenshot 1 and enter the cell. Check out the ceiling where there is a Scaramech.
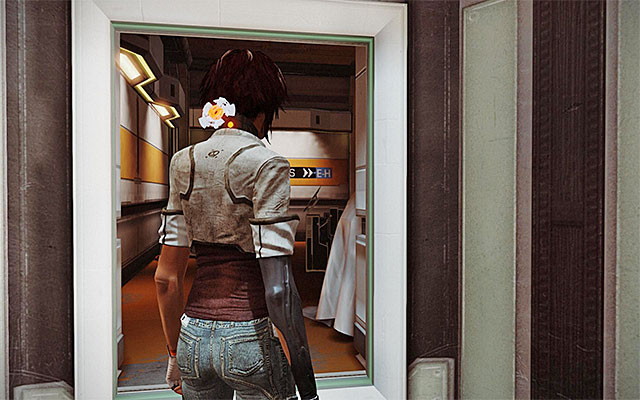
Exit the cell and gather the energy from the control panel and jump over the balustrade to return downstairs. You now need to repeat the actions described above, connected with gaining access to the elevator to get to the higher level. Go left after you leave the elevator (the above screenshot). Just like earlier, you need to retrieve energy from the control panel to your lockpick.
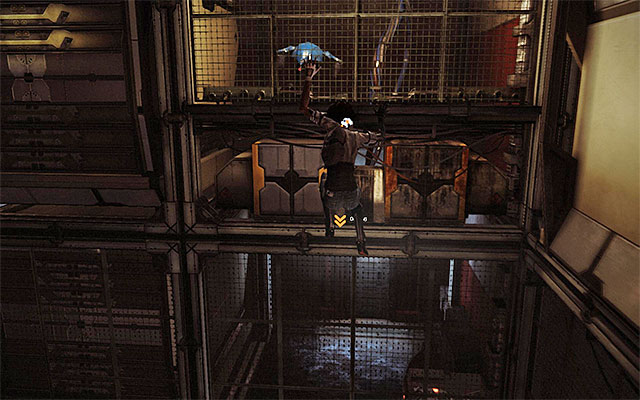
Approach the location where Bad Requests holding cell used to be and use the Pick Socket on the control panel, to unlock passage. Run up and leap towards the ledge that you can see in the distance. Then, shimmy to the right. Pull up to a larger shelf and do not worry about the hunter's cell being taken away, because you do not need to race against time.
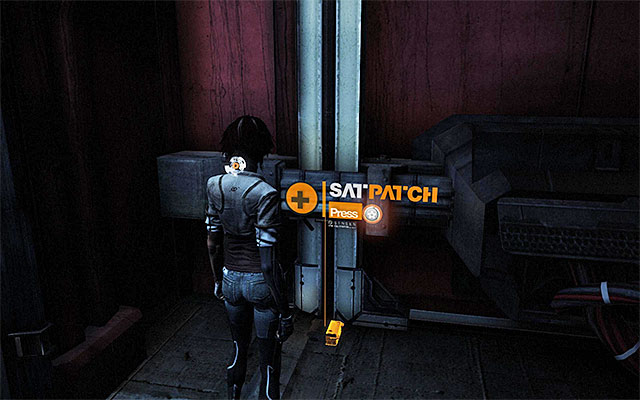
Approach the edge and leap towards the ledge below, to your right. After you do, examine the platform carefully to find a very narrow passage shown in screenshot 1. This way you will reach a SAT Patch (screenshot 2).
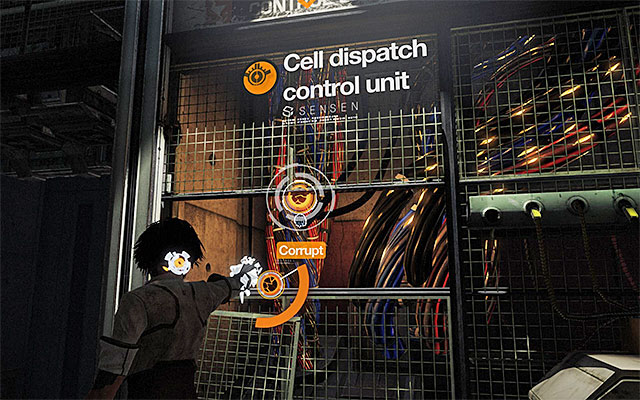
Return to the location where you landed after your leap and use the Junk Bolt (RMB) to destroy the Cell Dispatch Control Unit.
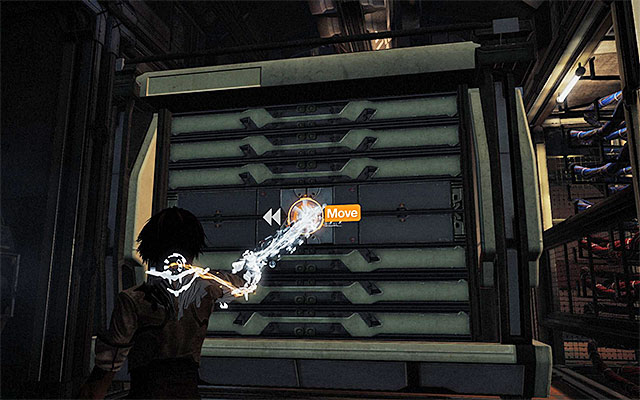
Start climbing to get to a large platform located to the left. Approach the big Cell, which you have seen in the cutscene and move it to the left, by using the Force Spammer (the above screenshot). You can now take the newly- unblocked passageway.

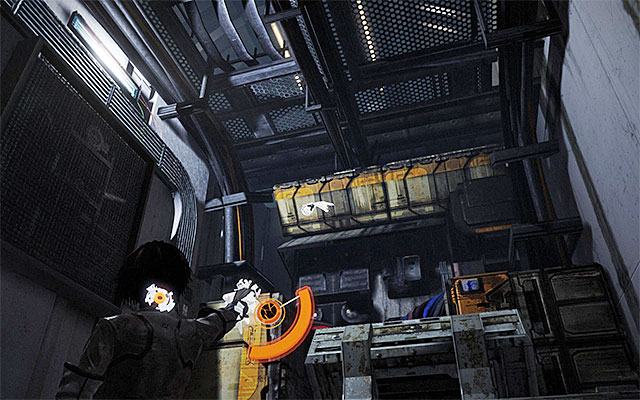
Stop after you reach the edge and look up. Target another cell and use the Force Spammer again to bring it down. Wait for a metal structure to appear here, which you need to leap towards. After you do, target the Cell Structure shown in screenshot 1. Send a Junk Bolt to the device and leap towards the passage that got revealed in front of your character. Explore this area to find a Scaramech shown in screenshot 2.

Return to the metal structure and leap towards the ledge located at the other side. Also here, there is a Scaramech in the location shown in the above screenshot. You can now go ahead and jump over the metal ledge to land on a platform below.
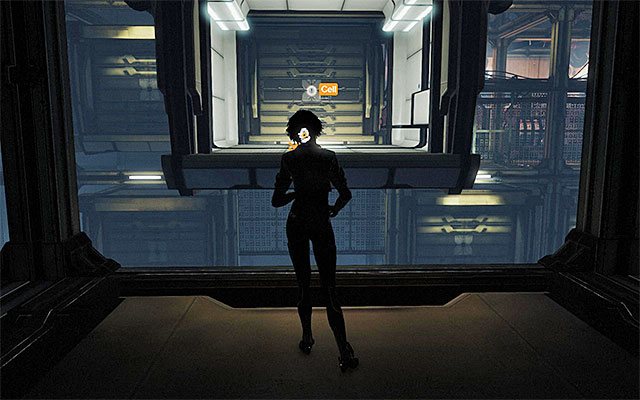
Turn left and aim at the cell located above Nilin. Use the Force Spammer to bring the cell down to make it land before your character. Use the Force Spammer again to lower the neighboring cell.
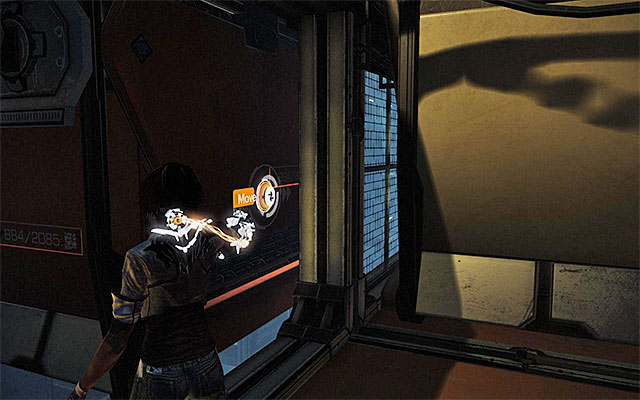
Take a leap towards the cell that you have just lowered and turn right. Approach the next cell in your way and use the Force Spammer to move it up. Walk under, turn right and locate yet another cell, which needs to be moved left.
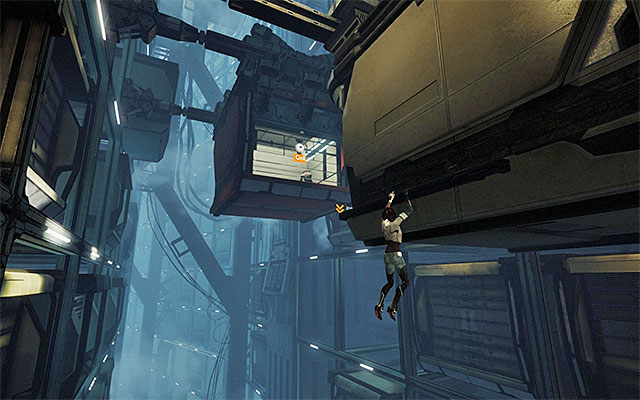
Leap towards the cell directly before you. Shimmy to the left as far as you can and pull up to get inside the cell.
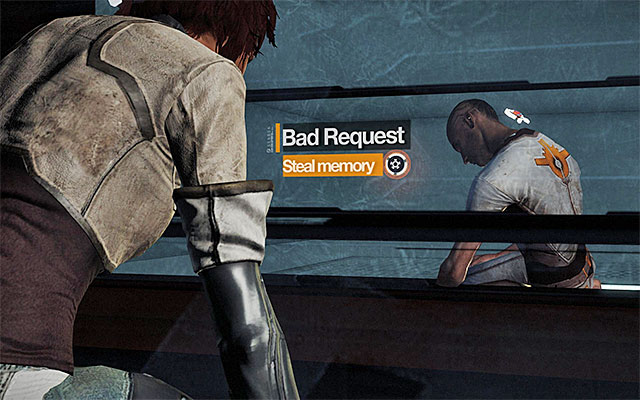
Turn to face the neighboring cell with Bad Request inside. Lower the cell with the Force Spammer, which will result in a cutscene being played. After the cutscene finishes, press the interaction key/button to collect the hunter's memories.
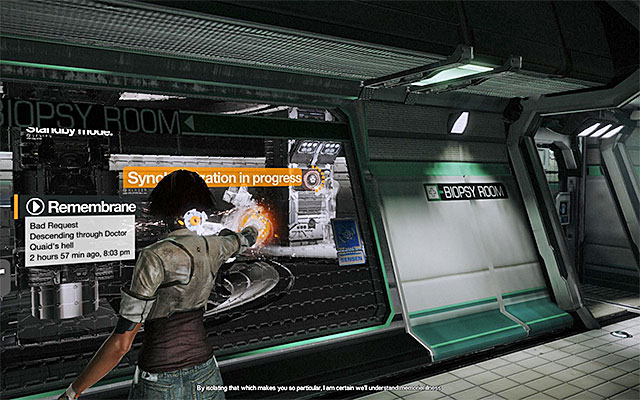
After you regain control over Nilin, listen to the conversation with Edge and leave the cell. Follow the linear corridors and stop where you run into a remembrane. Play it to learn about the process of Bad Request's conversion supervised by Doctor Quaid. Prepare to start the synchronization process at the right moment, after you position yourself next to the glass.


After successful synchronization, aim at the Medical Equipment and use the Pick-Socket to harvest energy. Return to the starting point and charge the control panel for one of the cells here (screenshot 1). You can now enter the cell and eliminate the Scaramech (screenshot 2). After you do, leave the cell and retrieve energy.
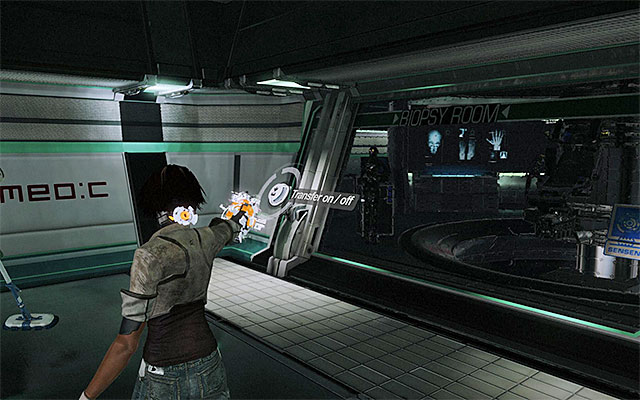
Return to the area marked as Biopsy Room and use the Pick Socket to charge the Medical Chair. Wait for the chair to get out of the room and follow it (do not stand in its way!). When you reach the checkpoint, stop next to the chair and wait for the scanning process to end.
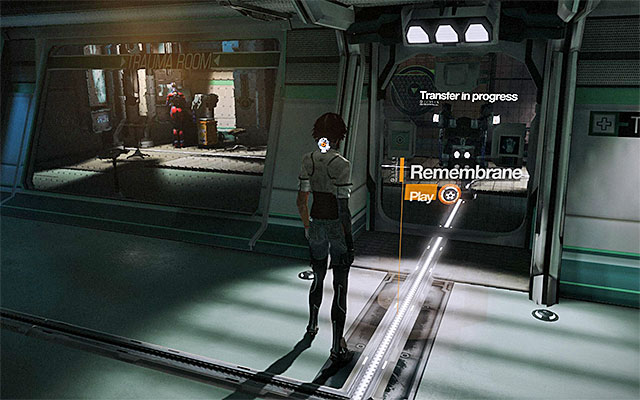
Just like in the previous location, start by starting the remembrane. This time, however, you do not need to worry about the necessity to synchronize. After the process of playing the projection ends, locate the stairs to a higher level. Turn your attention to the screen that you pass on your way and enter the larger area, where you are going to face enemies.
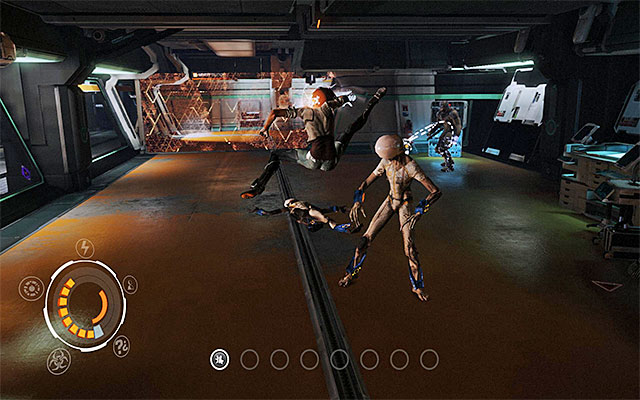
There is another encounter with the Elite Enforcer ahead of you. He is accompanied by a group of Reconversion Leaper. Attack the monsters and wait until you gather enough Focus to launch a special move. After you have gathered enough, activate Sensen camo, so that you can sneak up to the enforcer from behind and terminate him. After you eliminate the main opponent, deal with the rest.

After you have dealt with the enemies, locate another remembrane and activate it. Follow the virtual characters so as not to miss the moment where you will have to synchronize (the above screenshot). After successful synchronization, use the Pick Socket to harvest the energy from the Memory Extractor).


Take a look around the place where you fought the most recent battle. Apart from the SAT Hatch, you can also find here a Memory Deletion room. Use the lockpick on the control panel and walk inside. You can find here a Focus Boost shown in screenshot 2. You can now leave the room and retrieve the energy.
Go towards the larger medical room that you passed earlier. Locate here a Medical Chair control, that needs to be charged.

Just like earlier, you need to wait for the medical chair to get out of the room and follow it to reach another part in the facility. Stop soon after you go past the checkpoint to eliminate the Scaramech clinging to one of the walls (the above screenshot).

Climb down the stairs and begin another fight with the Elite Enforcer and the Reconversion Leapers. As you have noticed, the elite enforcer is equipped with a shield (Elite Heavy Enforcer). The most obvious and the safest way to eliminate him is to initiate the Sensen Camo, and it is worth knowing that destroying the enforcer's shield with a Junk Bolt, will not inflict any damage to Nilin.
[New Journal Entry: Enemy Information- Elite Heavy Enforcer]

After you win the fight, explore the smaller room Memory Storage. Turn your attention to the small robot staying in the room because, there is a Scaramech clinging to it. Apart from that, there is also a SAT Hatch around.
Take a look around the area where you have just fought the recent fight and find a remembrane. Right after you initiate it, run to the Memory Storage room QUICKLY. Position yourself in the spot shown in the above screenshot and perform synchronization. You can now target the control panel and drain it for energy.
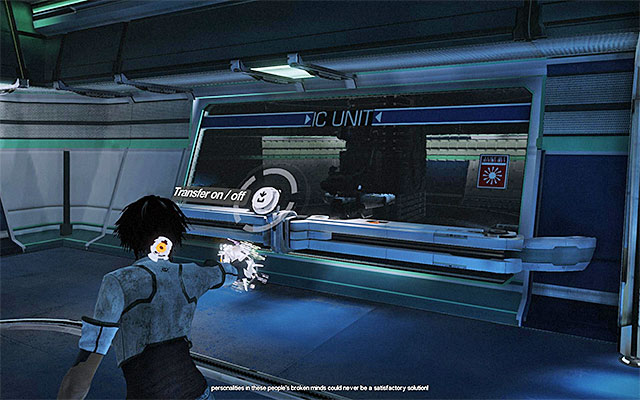
Locate the medical room marked as the IC Unit 1, enter the aiming mode and aim at the Medical Chair control panel. You need to charge the panel and follow another chair that gets out of the room. Stop next to the checkpoint and walk into the next area after the scanning process.

After you have walked into the new area, focus on locating the Mnesist Memory on the table (the above screenshot). Next, approach the nearby door and wait until you gain access.
[New Journal Entry: Memorize and the Sensen- First Civilian Application]
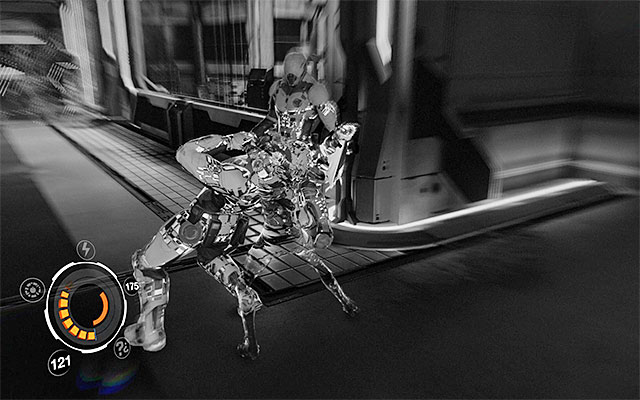
As you have already noticed, you are in the corridor that you walked through at the beginning of the game. Go ahead and watch Nilin's memory fragments on your way. Ultimately, you need to reach the holding cell in which Nilin was kept. Enter the cell and collect another Mnesist Memory (the above screenshot).
[New Journal Entry: Technology- SAT Technology]
You can now leave the cell and target the nearby control panel. Drain the panel for energy with your Pick Socket. Return now to the larger door that you walked by earlier and use the lockpick to unlock it. Go now towards the group of people that you can see in the distance, which will trigger a cutscene of the meeting with Doctor Quaid and Johnny Greenteeth (you are going to explore the area a bit later).
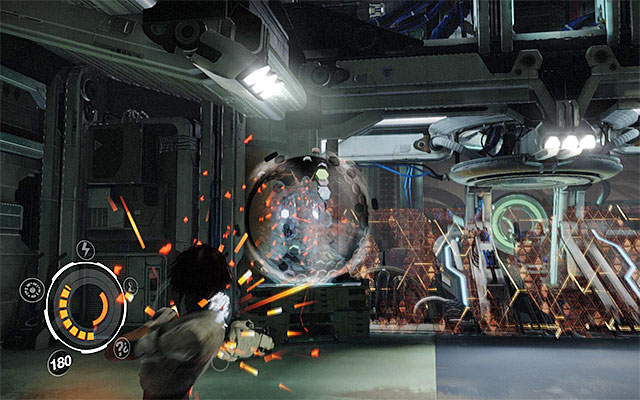
In the first phase of the battle, you will have to fight the regular Prison Enforcers, two Elite Enforcers and two AV-48S Seraphim robots. Right after you start the fights, focus on eliminating the airborne machines with Junk Bolts. I recommend that you eliminate one of them with Junk Bolts, whereas you can take control of the other one by using the special move called Rust In Pieces. Thanks to this, the machine will help you weaken the remaining enemies.
Focus on the elimination of the "living" enemies right after you have taken care of the mechanical ones. Use Sensen Camo to deal with the first one of the elite enforcers. You may get rid of the other one in the same way (this requires using the cooldown moves on the remaining enforcers).
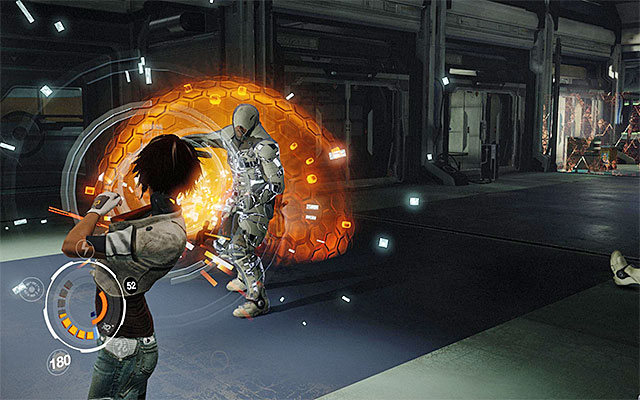
The second phase will require you to eliminate Heavy Prison Enforcers and Elite Enforcers but, instead of Seraphim, you will have to fight ale two AV-48N Nephilim robots. The initial part of this phase should be similar to the previous one. Focus on frequent avoiding and using the Rust In Pieces special move, on the first one of the robots. You can eliminate the second one with a Junk Bolt.

After you neutralize the threat from the Nephilim robots, focus on attacking the enforcers. It is worth remembering here that you can use the Junk Bolt to destroy the shields, and that you can use the Sensen Camo move to deal quickly with at least one of the elite enforcers. Continue fighting until you neutralize all enemy units and listen to the conversation with Edge after you are done.

Before you start chasing doctor Quaid, it would be a good idea to explore the area where you have just fought. First of all, turn your attention to the temporarily inactive machine for clearing the patients' minds because, in the place shown in the above screenshot, there is a Scaramech.

Return to the first part of this location and take a look around near the interactive screen. Shoot at the button located above the entrance to the room shown in the above screenshot and explore this area to find a SAT Patch.
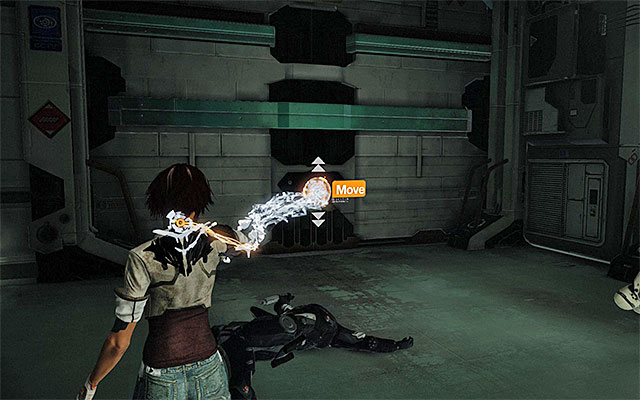
You can now use the Force Spammer to open the gate to the left of the armchair with the parasite you have just eliminated. If you need to, make use of the SAT Hatch, and go ahead to raise the other gate.
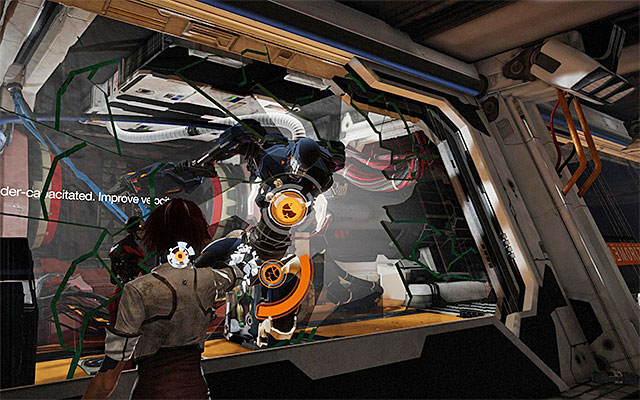
Approach the smashed glass wall with the damaged robot AV-78 Zorn shown in the above screenshot. Use the Junk Bolt to destroy the robot completely, which will allow you to target the Scaramech clinging to the robot.

Go towards the third gate. Explore thoroughly the next big area, and more precisely, the place where there is a small blue robot. In the place shown in the above screenshot, there is one more Scaramech. Open the last, fourth gate and walk into the big hall where, apart from meeting doctor Quaid you will have to fight a demanding battle.
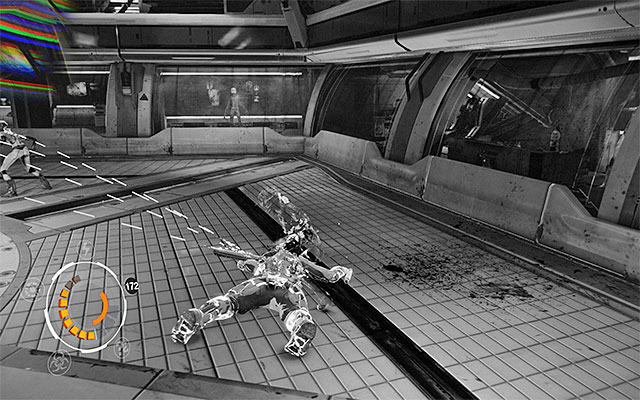
This battle, of course, consists of several phases and, at firs, you will have to fight a group of Reconversion Leapers "commanded" by an Elite Enforcer. You should already be familiar with the general strategy of dealing with such groups. Make sure that you start Sensen Camo as quickly as possible and, after dealing with the enforcer, deal with the leaderless monsters.
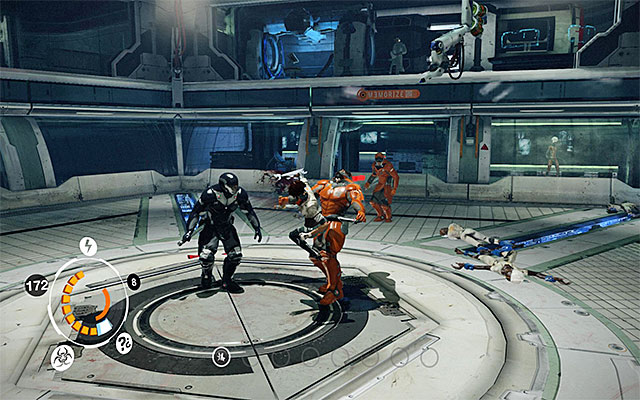
Phase two of the fight is definitely the easiest one because, you get to fight a group of Enforcers and Prison Enforcers. Take advantage of the fights and use them to replenish Nilin's health and to regenerate the special moves.
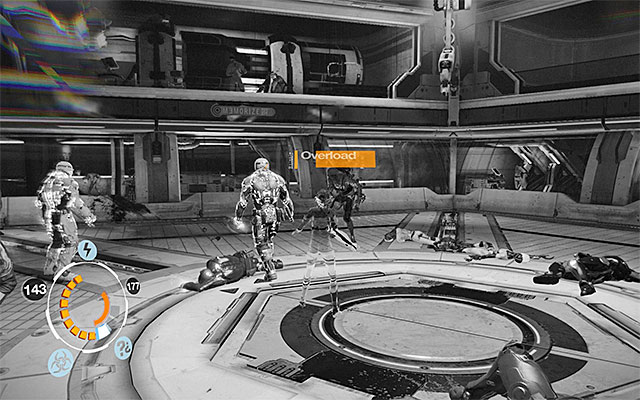
In the third phase, things will get more complicated because, Elite Enforcers and the strongest mutants Skinner Leaper will enter the arena in pairs. Start by initiating Sensen Camo and attacking the enforcers.

From now on, it would be a good strategy to avoid attacks from the hostiles. This is especially true for the charges performed by the mutants. You should also consider using a Logic Bomb combined with regeneration combos, which will help you eliminate the second elite enforcer. Still, the safer strategy here is to wait until your Sensen Camo regenerates.
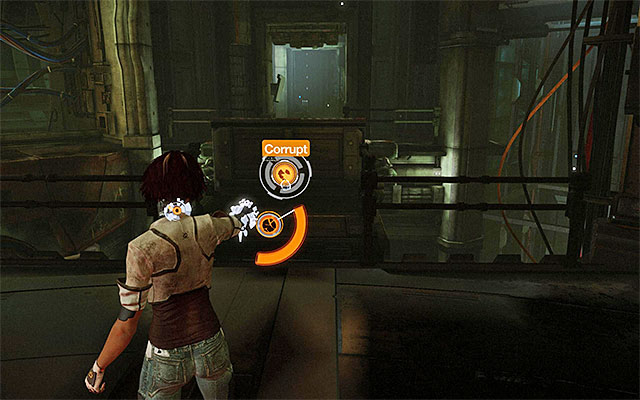
Leave the mutants for the end. Focus on one of the monsters and use special moves (e.g. Sensen Fury) to weaken the mutant. When there is only one Skinner remaining in the arena, the fight will become easier because it will lose its bodyguard. While attacking both mutants, remember to avoid frequently, because it is going to be more difficult to heal in the course of these fights.
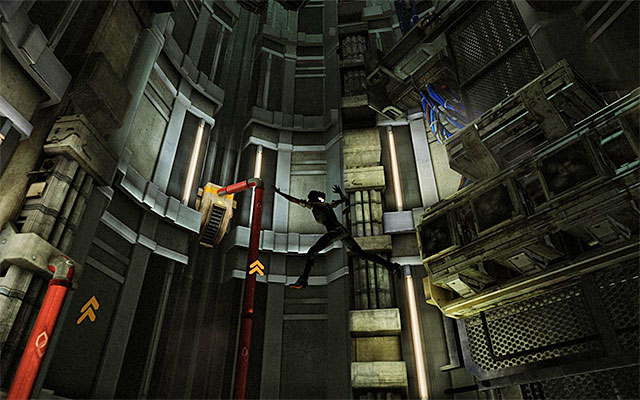
Your victory will trigger another cutscene featuring doctor Quaid and Johnny' Greenteeth. After you regain control over Nilin, start moving towards the bottom part of the big shaft. Let go of the first ledge and leap towards the red pipes to your left.
Leap towards the last one of the ledges and drop down to reach doctor Quaid's corpse. Do not approach Bad Request, yet, and explore the path to the right shown in the above screenshot, by destroying the Panel Structure with Junk Bolt.

Reach the end of the abovementioned path and approach an inactive fan to collect the Mnesist Memory lying next to it.
[New Journal Entry: Neo-Paris VIPs- Olga Sedova]
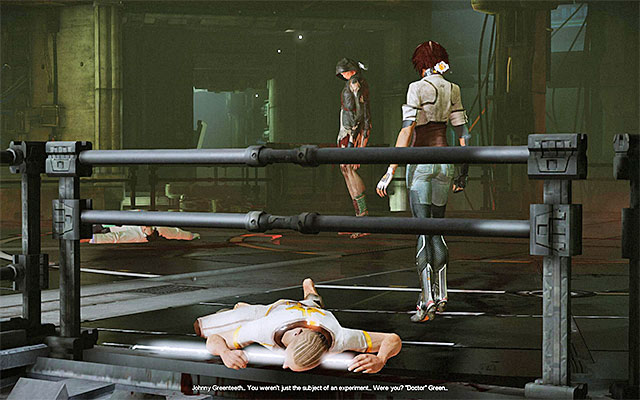
In your way back to the oval room, you definitely need to use the SAT Hatch. Approaching Bad Request will trigger a cutscene and start a fight with Johnny Greenteeth that performs the role of the boss here.
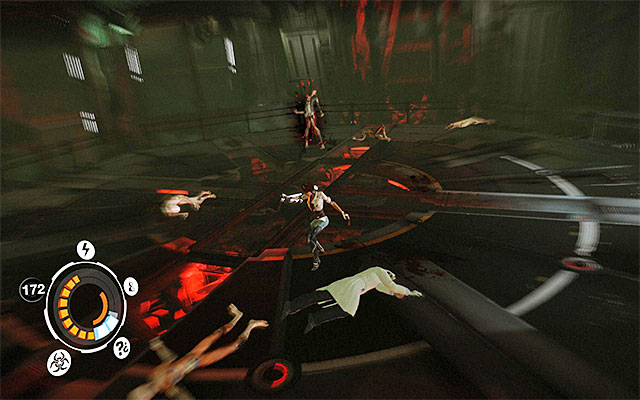
Johnny Greenteeth is arguably one of the weakest bosses , which does not mean you can trifle with him. While fighting him, try to remain in constant motion because he can approach Nilin easily by teleporting, and inflict damage (e.g. by performing a grab).
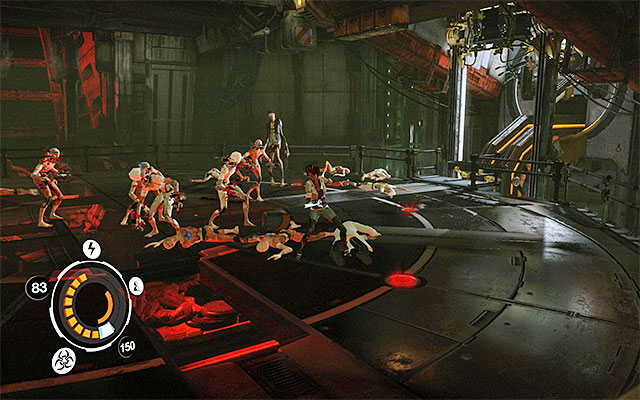
As you have noticed, there are also the standard Prowler Leapers, and Reconversion Leapers in the arena. Do not try to take on all of the monsters or else, they will be replaced with new ones. The mutants should, therefore, be used as a means of replenishing the health bar (regeneration moves) and to cut short cooldown times (Cooldown moves).
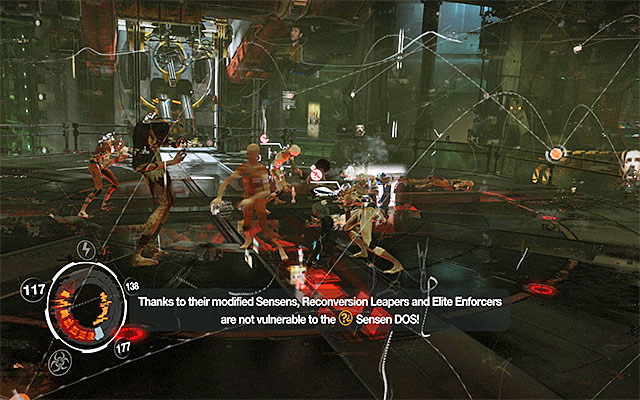
Since Johnny keeps moving around incessantly, you need to figure out a way to "ground" him. That is why you should make use of the Sensen DOS (the above screenshot).
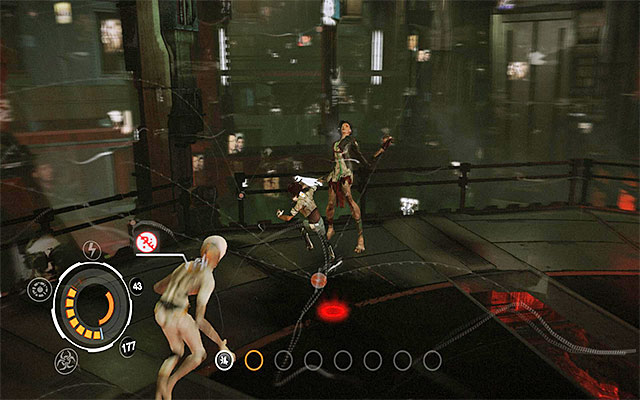
Right after you stun Johnny, run up to him and start attacking him. It is very important that you land the strongest blows possible (Power Sensen + Chain Sensen or Sensen Fury) because, Sensen DOS is ineffective to the reconversion Leapers. As a result, the beast will be constantly trying to harm Nilin.

You need to keep using the abovementioned moves interchangeably, i.e. initiate Sensen DOS combined with attacking the boss, and running around the arena while waiting for the special move to regenerate. Keep implementing this strategy over and over again until the information of the possibility to Terminate Johnny displays. Quickly, run up to the boss and press the interaction key/button.
This will be followed by a QTE event and, the correct combination here is: kick (RMB), punch (LMB), interact (the E key). For defeating the boss, you will be rewarded with 300 experience points.
[New Journal Entry: Enemy Information- Mourner Leaper]
The last thing to do in this episode is to hide inside the casket identical with the one that you saw at the end of the prologue.
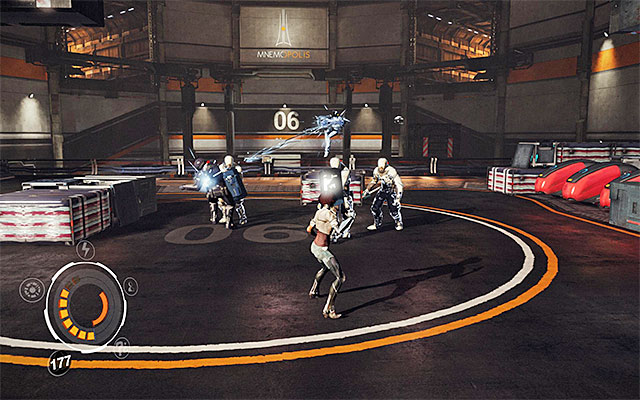
After this episode starts, make a few steps forward, which will result in a cutscene, featuring the frantic Captain Trace'a, being played, and the first battle of this episode. For starters, there are two Prison Enforcers, Elite Enforcers and Elite Heavy Enforcer, accompanied by AV-48S Seraphim to fight. First of all, I recommend that you take to the airborne enemy. Do it either with the Junk Bolts or with Rust In Pieces. In the case of the latter, it is, of course, required that you have the Focus meter charged.
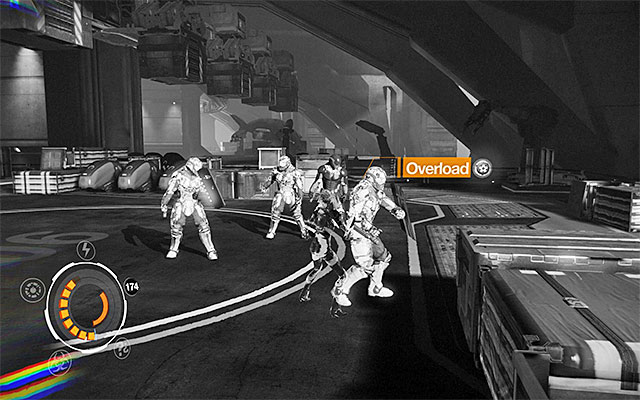
After you deal with the flying robot, focus on attacking the elite enforcers. It is worth reminding here that you can destroy their shields with impunity (Junk Bolts are the best here), and also that the best means of their quick elimination is Sensen Camo.
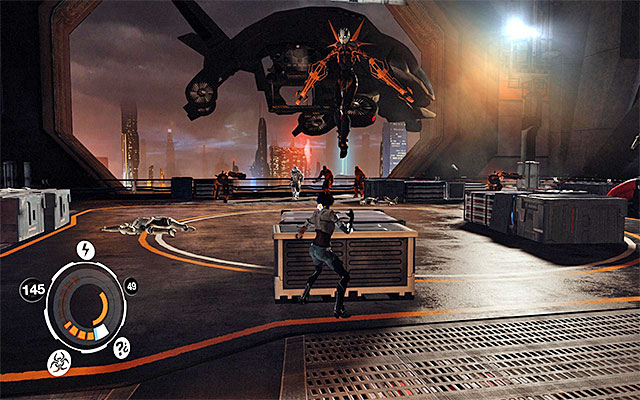
Don't you count on it that dealing with the first group of enemies will do, because the enemy aircraft will carry over here further enemies. You should also expect an even more difficult fight because, apart from the Prison Enforcers and Elite Enforcers, also an AV-48S Seraphim and two AV-48N Nephilim will appear on the platform.
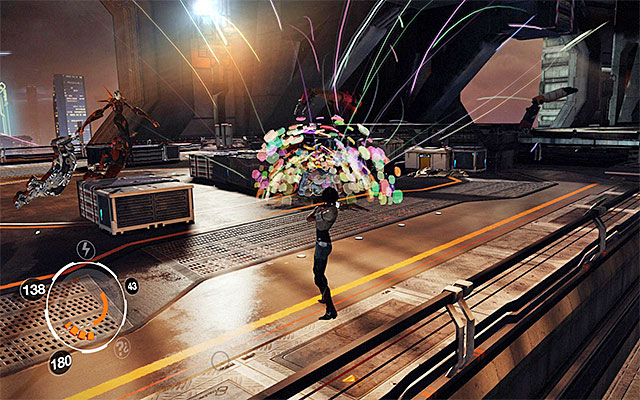
Just like previously, you should first focus on eliminating all of the hostile machines first. Try and perform frequent avoidances because, due to the presence of as many as three robots, you will have to pay a lot of attention to their attacks. Eliminate, at least, one more robot with the Rust In Pieces special attack, and destroy the remaining ones with Junk Bolts.
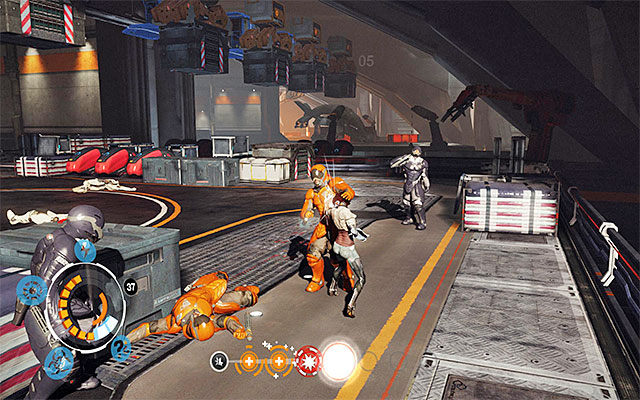
Eliminating the enforcers should not be as difficult although, you should watch out for the elite enforcer, and eliminate him with Sensen Camo or the Logic Bomb, combined with the regeneration moves. Finally, deal with the weakest, "standard" enforcers.
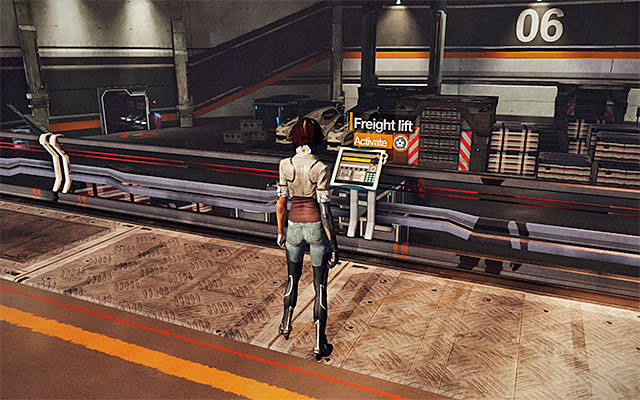
After you win the fight, listen to the conversation with Edge and approach the cargo elevator control panel. Doing this will set the platform into motion but, this is not the end of your problems because, AV-78 Zorn will appear in this area.
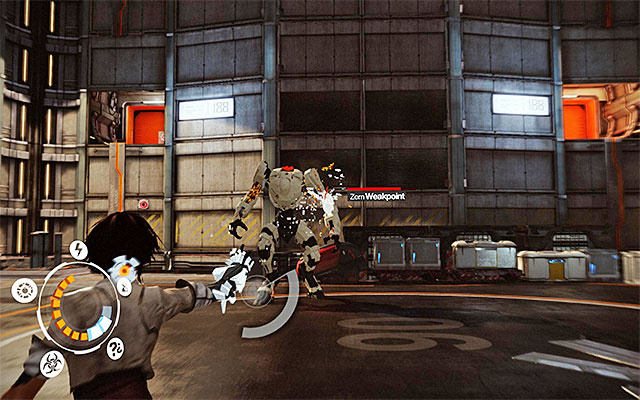
For the strategy of fighting Zorn, consult the final part of the walkthrough for the third episode of the game, especially that fighting this new version of the robot is no different. Just to remind you, you need to stay at a safe distance and avoid its attacks, while using the Spammer to weaken it and destroy its limbs.
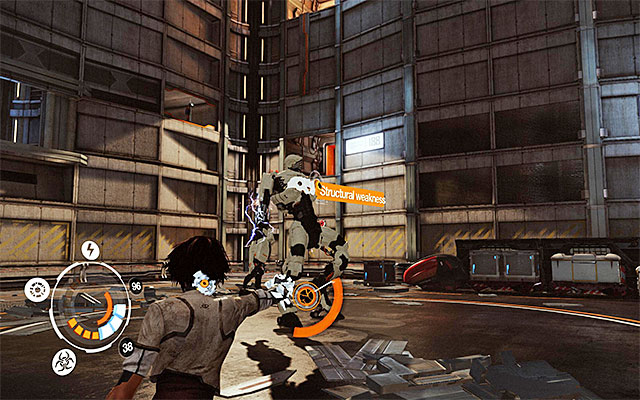
Continue your Spammer fire until you destroy Zorn's both limbs. From now on, avoid the shockwaves generated by the robot and wait for the moment in which you will be able to use the Junk Bolt (RMB).
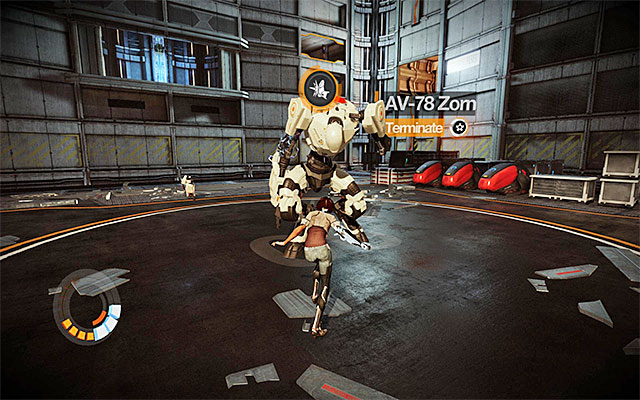
After you stun Zorn, approach the robot and press the interaction key/ button (to Terminate). The only thing left to do is to win the QTE event: kick (RMB), punch (LMB), kick (RMB).

After you win the fight with Zorn, explore the huge elevator shaft. This will allow you to locate a Scaramech located quite far away (the above screenshot).
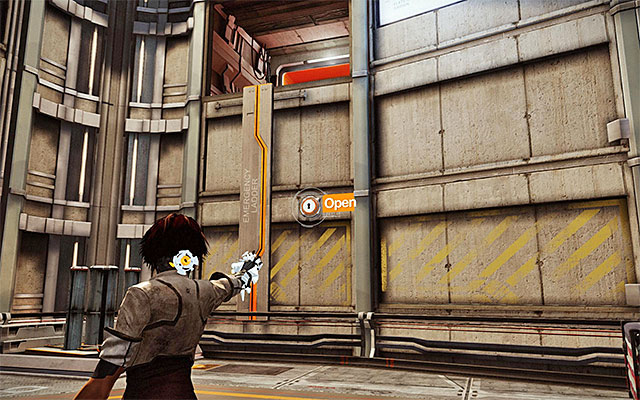
You can now aim at the only interactive button on the wall, which will result in a ladder being revealed. Grab onto the ladder and reach the balcony above, where there is a door.

Wait for the conversation with Edge to end and start exploring the location. Check out the screen that you pass by. Right after you climb the nearby stairs, examine the area under it. You can find here a SAT Patch shown in the above screenshot.

Go ahead and use the SAT Hatch on the wall to your right, if you need to. Open the door and watch the cutscene. Climb up the stairs and use the Spammer to hit the button to call the Delivery Cart.
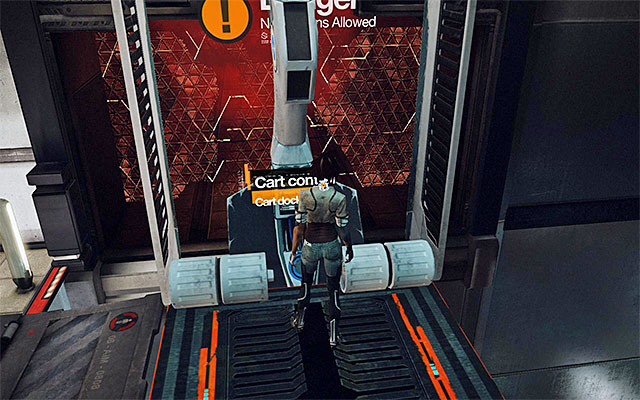
Wait until the cart arrives, mount onto it and use the control panel to set it into motion. You need to be extremely careful now, and stop the cart (interact) in the area shown in the above screenshot. You can't do this too late because, letting the platform cross the red barrier will result in Nilin's death.

Turn left and cross the balcony. Go towards the interactive ledge that you can see in the distance, which you, of course, need to leap towards. Shimmy to the left and, right after you leap towards a smaller ledge, let off it. Slide down now, carefully, and reach a bigger ledge this way.

Go left now and perform an easy leap on your way. Stop after you reach the nearest corner of the main hall and focus on finding a Scaramech shown in the above screenshot.

Approach the inactive mechanism and aim at the button that you can see a bit further. Wait for a platform to appear in front of Nilin and jump onto it. After that, turn right and leap towards a ledge nearby. Shimmy to the right and , after you grab onto the vertical element of the wall, slide to the very bottom.
Examine the interactive screen, and then, approach the button for summoning platforms. Just like earlier, you need to call the platform, walk onto it, and use the control panel to set it into motion. The platform needs to be stopped in the position shown in the above screenshot (you can't take too much time to do that!), i.e. close to the interactive ledges that Nilin can leap towards.

Start climbing again by jumping towards the ledge above, and then by shimmying gradually to the left. Ultimately, you need to reach the balcony with a large blue chest, which is located below. Drop onto that chest and explore the balcony thoroughly. This will allow you to find a SAT Patch shown in the above screenshot.
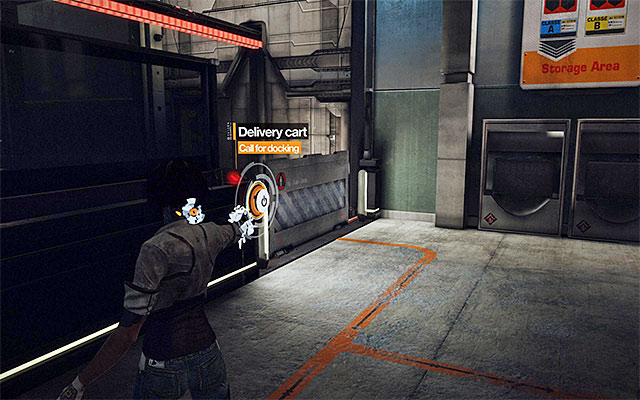
You can now approach the Control Panel and use it to modify the routes for individual platforms. After you do, locate another button for calling platforms, and use the Spammer on it.
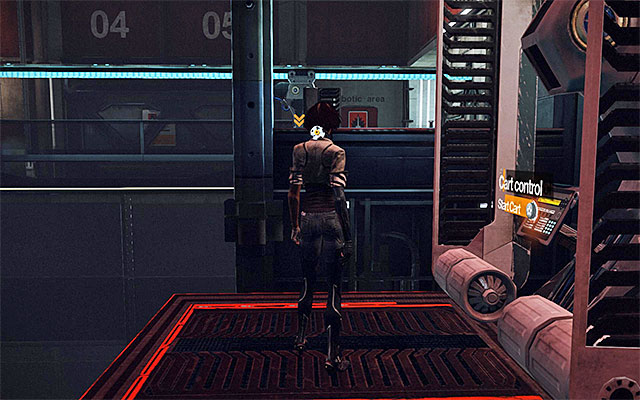
Walk onto the platform which will soon arrive and interact with its control panel. Once again, you need to be careful where you stop the platform. Use the console again when the platform reaches the point next to the interactive ledge shown in the above screenshot.
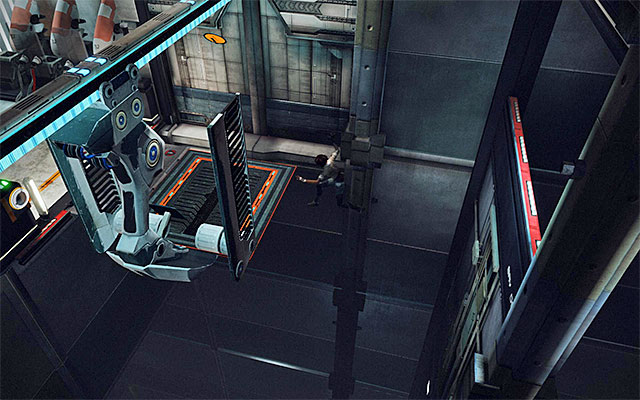
Leap towards the ledge and shimmy over to the other side. Lean back and perform a leap towards the inactive platform. Go left here to reach a vertical element of the wall that you used earlier. This time around, you need to return to the balconies above. So, start climbing, lean back and leap for the last time.
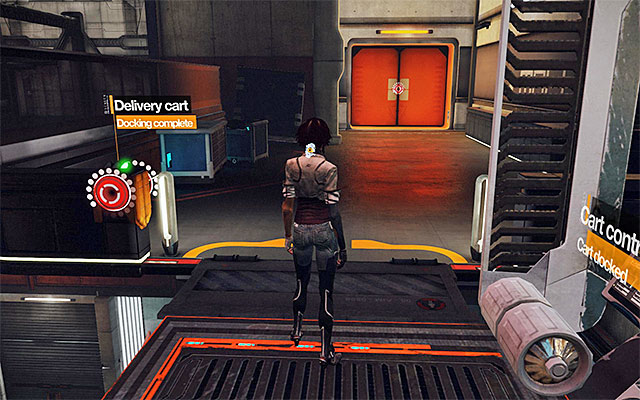
As you have probably noticed, the platform to the left is active now so, walk onto it and use the control panel. Stop the platform when it is below the balcony (shown in the above screenshot,), which is located in one of the corners of the hall. You can now approach the red door and open it to leave the location with platforms.

Listen to the conversation with Edge and start exploring the two small rooms to the side of the entrance, next to which there is a robot a mop standing. On one of the tables, in the second room, you should notice a Focus Boost. Collect it and return to the main corridor to continue the linear walk. Soon you will reach a door.
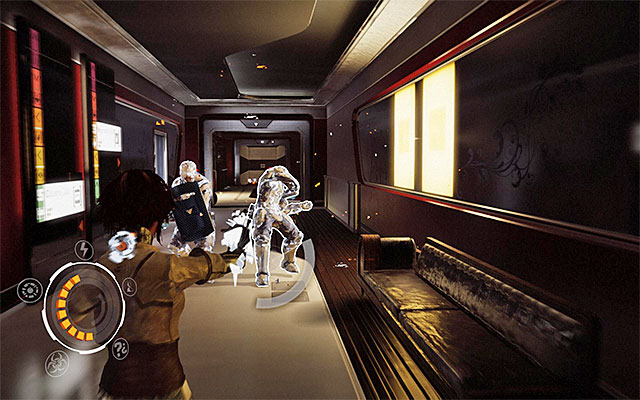
Ignore the inactive elevator for the time being, which is located to the left, and go right. Watch out because, in one of the corridors, Nilin will be attacked by two Elite Heavy Enforcers. Use the Junk Bolt to destroy their shields and deal with the enforcers thanks to Sensen Camo or Logic Bomb, combined with the regeneration moves.
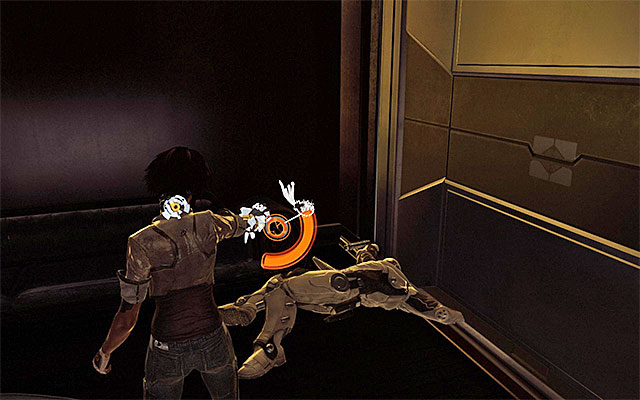
Remain in this corridor for a moment and explore it carefully to find a Scaramech in the place shown in the above screenshot.

Locate the entrance to apartment 205 and explore it. On the table shown in the above screenshot, next to the window there is a Mnesist Memory.
[New Journal Entry: Neo-Paris History- Deluge 2.0]
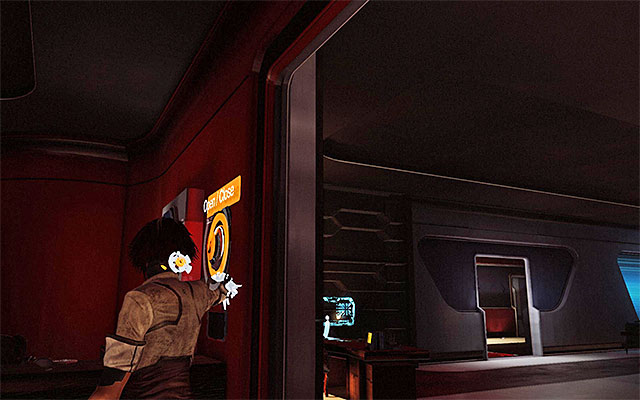
Explore the remaining part of the apartment and find a Fire Exit button. Stand to the right of the button in the place shown in the above screenshot. Aim at the button and use the Pick Socket to drain it for energy. Squeeze under the lowering fire door (if you weren't fast enough, repeat the operation).
You can now return to the starting point and go towards the elevator mentioned earlier. Use the lockpick to charge the panel next to the elevator, walk inside and press the button to set it into motion. Wait for the elevator to take you to a different level of the tenement, while listening to the conversation with Edge.

Leave the elevator and turn right to begin exploration. Do not worry, for now, about the mutants attacking the civilians. Stop as soon as you reach the destroyed shop shown in the above screenshot and eliminate a Scaramech. You may now continue along your path to reach an inactive escalator. Climb down the stairs and jump over a small obstacle to reach the place where you will be fighting another battle.
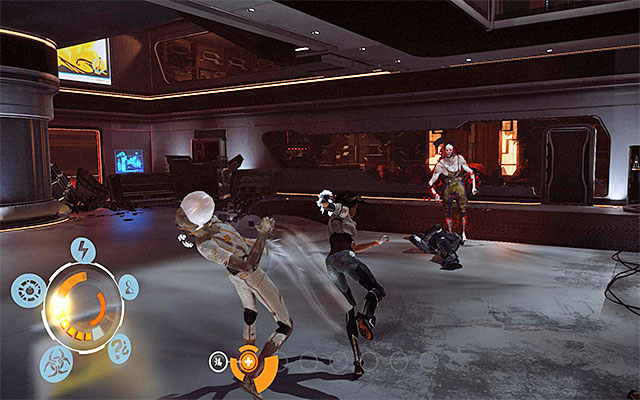
A very important characteristic of this battle (and also of the ones further in this episode) is that new enemies Reconversion Leapers and Skinner Leapers will be coming systematically, and not after you defeat the entire group. It is worth remembering not to use up your best special moves to eliminate the last opponents that you are currently fighting. When it comes to the monsters that assault Nilin, it is best to start with the reconversion leapers and use special moves to your aid (except for the Sensen DOS) and with the Spammer to bring them to the ground (after they cling to the walls).
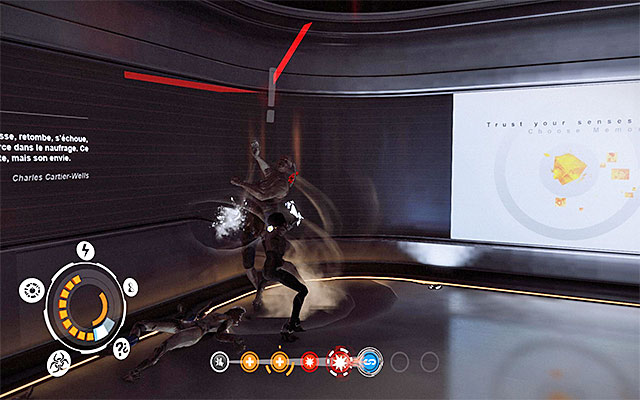
Attack the Skinner leaper only if all the weaker mutants have been defeated. Use the best attacks that you have at your disposal (power moves, the Logic Bomb, Sensen Fury) especially when there is more than one Skinner around (these can "cover" each other which increases their toughness). Keep fighting until you eliminate all of the mutants.

Go to the only available door and go towards the bar, while passing by a SAT Hatch on the landing. After you take the stairs, turn to the right and find a Scaramech clinging to the wall. Destroy the parasite and open the door to see a cutscene of the fleeing Captain Trace.
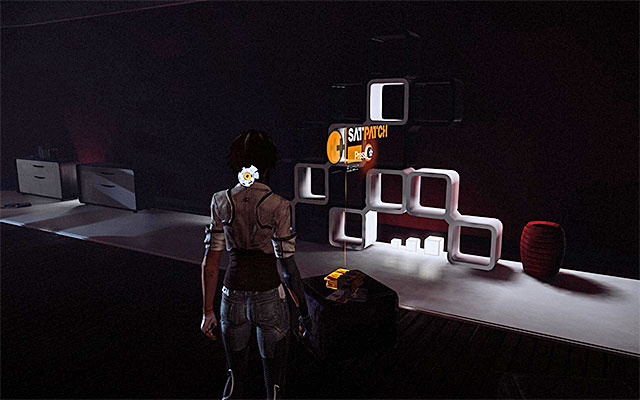
Approach the door. You do not need to hurry to enter the area because the corridor behind the door is patrolled by a combat drone. Start by going left. Walk around the drone to the right, and reach the entrance to a room to the side (screenshot 1). Explore the room thoroughly to find a SAT Patch (screenshot 2).

Return to the starting point carefully, and go right this time. After you watch a short cutscene featuring Captain Trace who is sitting at the counter, go left first, to enter an optional area with a Private Party going on.

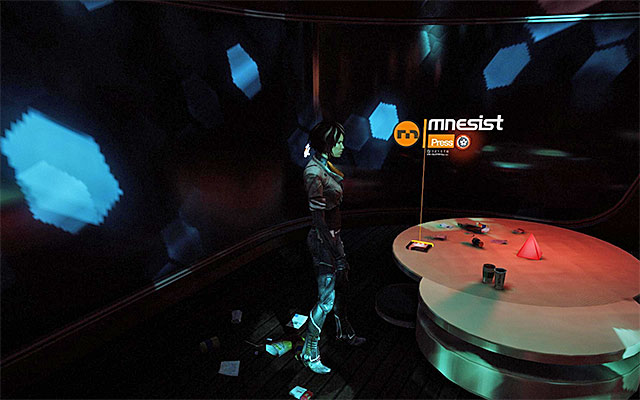
Start exploring the bar, watch out for the patrolling drones and keep following them. There is a Scaramech clinging to the piano located in the central part of the room (screen 1), and on one of the tables, there is a Mnesist Memory under the ball (screen 2).
[New Journal Entry: Memorize and the Sensen- Sensen 6: Response to the Memo Criminals]
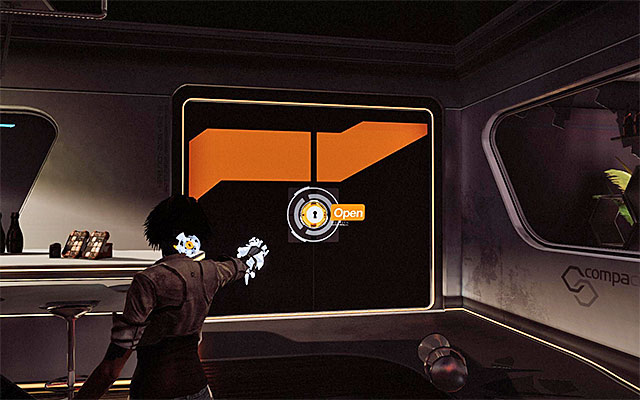
Only now, and take all precautions, can you return to the bar and go towards the door to the right, l the ones that captain Trace made away through. Enter the next location, where you will have to fight a big battle.
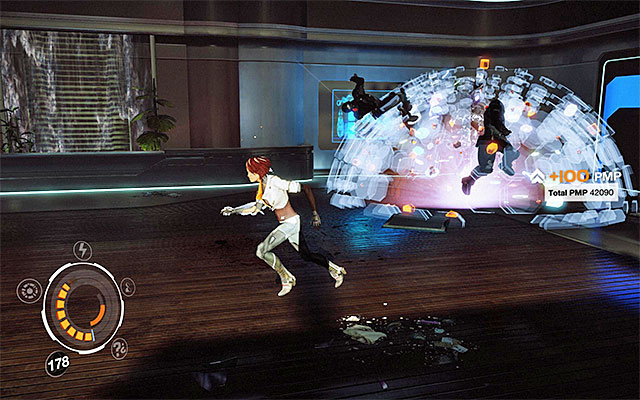
You are going to fight a battle with the regular Enforcers, Heavy Enforcers and the Elite Enforcers, as well as AV-48N Nephilim robots. Just like in the case of the earlier battles of this kind, first deal with the Nephilim that are attacking Nilin, either with special moves or with the Junk Bolts.
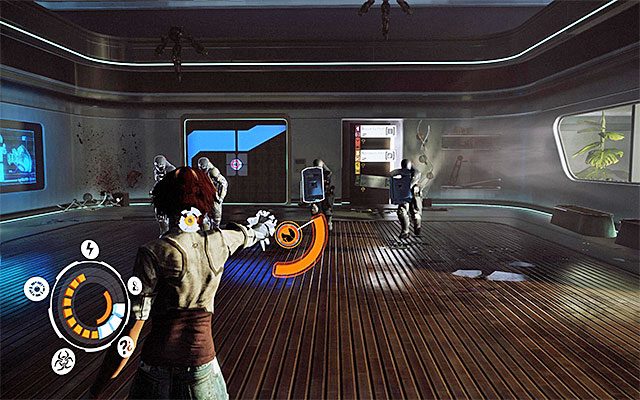
When it comes to the enforcers, first of all, you need to keep in mind that some of them will enter this location some time into the battle. Make sure that you deprive some of the enforcers of their shields, and be careful while fighting the elite enforcers. While dealing with these, rely mainly on the Sensen Camo and logic Bombs.
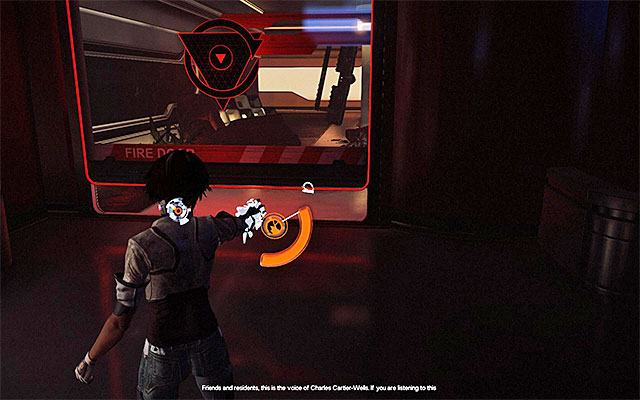
Having secured the area, take a look around to find an interactive door and, if you need, use the SAT Hatch. Also, turn to the right and check out the half-open fire cover, where there should be a Scaramech shown in the above screenshot. You can leave now, and approach the door to the Main Security Post.
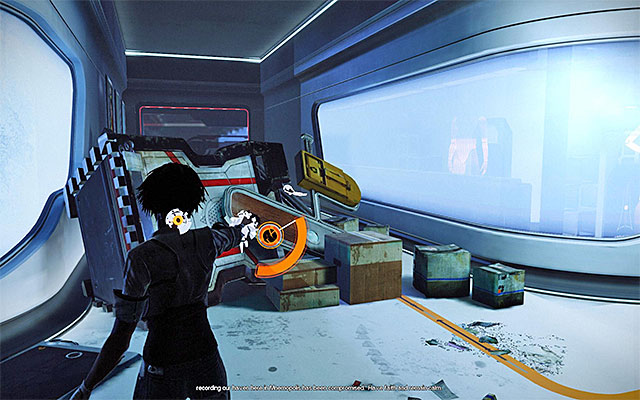
Pay attention to the combat drone that is patrolling this area. Try to reach the debris located opposite the entrance. While avoiding the drone, find another
Scaramech (the above screenshot).Go now to the right, towards the next, bigger door.
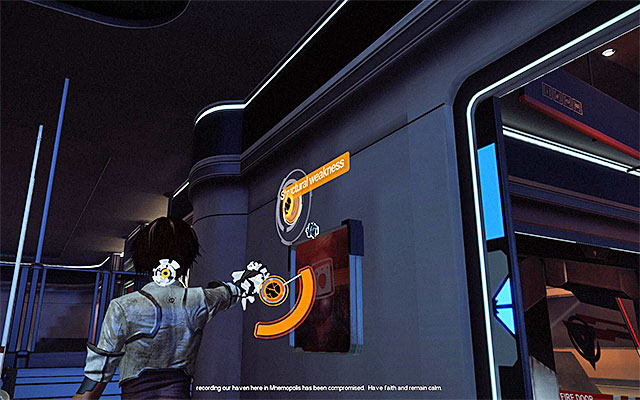
Right after you enter the next area, turn right and aim at the interactive object shown in the above screenshot. Destroy the item with the Junk Bolt. Doing this will reveal another Scaramech, which you need to eliminate.
You can now approach captain Trace whom you can se in the distance, which will play a cutscene showing the captain's death on the hands of two highly-developed Mourner Leapers.
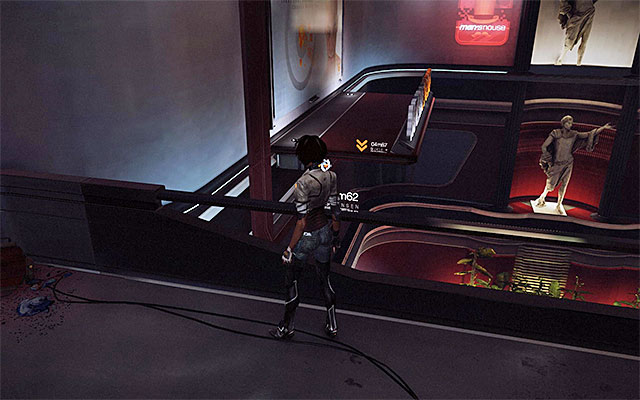
Approach the balustrade to the right and stand in the place shown in the above screenshot. Jump over the balustrade and lean back. Leap towards the ledge, which you need to climb.
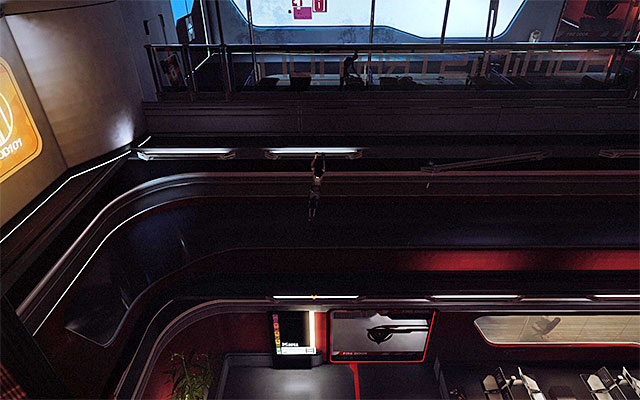
Run up and leap towards the interactive ledge that you can see in the distance. Shimmy to the right and keep leaping towards the further ledges. Keep doing that until you will have do drop down to reach a ledge below.
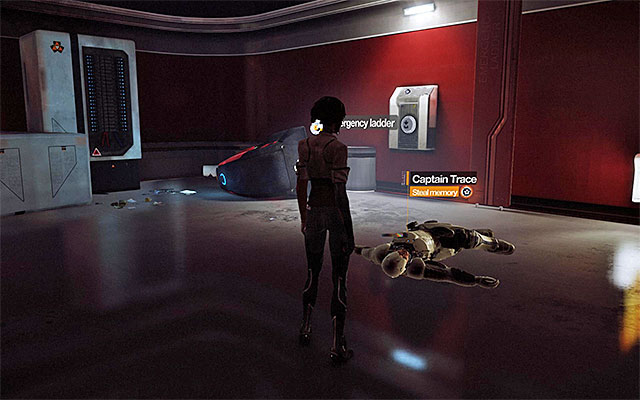
Wait for Nilin to get up and approach Trace's corpse in order to attempt memory steal. This will end in a partial success because, it will turn out, that his most important memories have been stolen by the mutants he has just been attacked by. This means, of course, that you will have to track the monsters down.

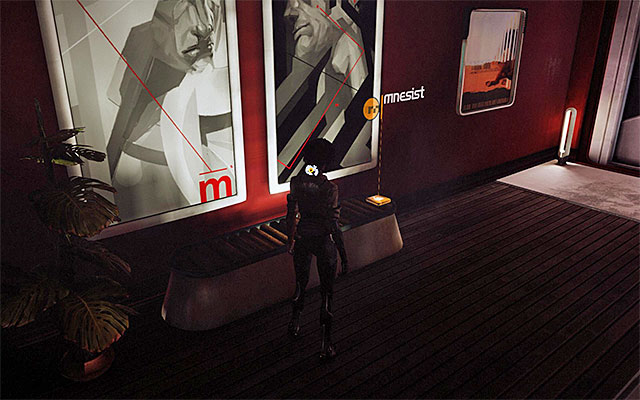
Remain in the room in which you stole captain Trace's memory. Take a look around to find a SAT Hatch as well as the tipped server shown in screenshot 1, which Nilin can climb. Continue climbing to reach a small balcony above. In here you can find a Mnesist Memory.
[New Journal Entry: Neo-Paris VIPs- Charles Cartier-Wells]
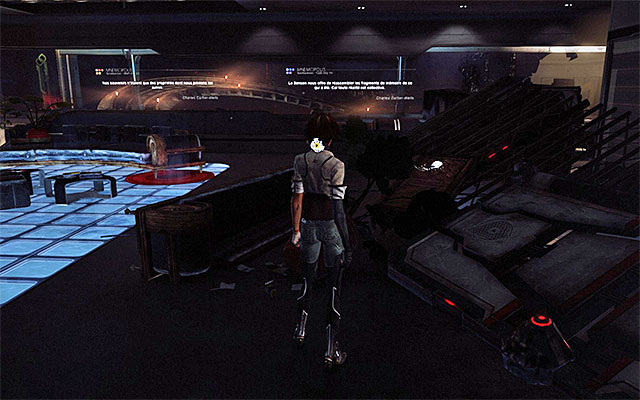
Return downstairs and go towards the only available door. Follow the linear path here to the mall. Stop after you reach a discernibly bigger hall and examine the debris shown in the above screenshot, where there is a Scaramech.
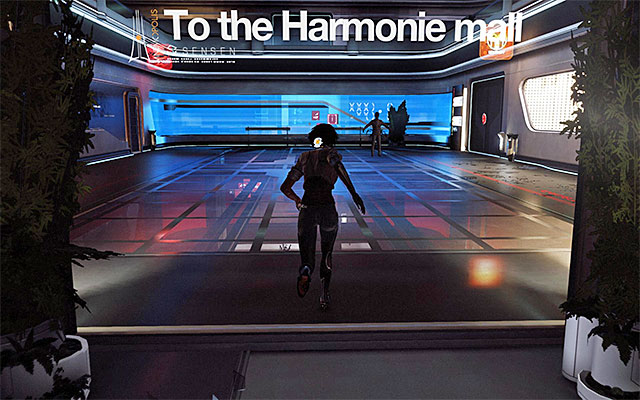
You can now continue along your path and open the next door. After you walk into the next area, you will have to put up a fight. Right now, you are fighting against Mourner Leapers, and you will be obstructed by the smaller Prowler Leapers and Reconversion Leapers.
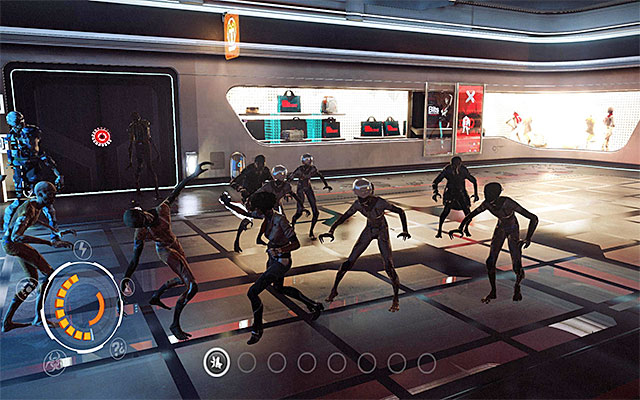
This fight is very similar to the one where you had to fight Johnny Greenteeth at the end of the previous episode. The mourner leapers have at their disposal skills identical to the ones that Johnny had. That is why you should employ the same strategy to defeat them. Use the "standard" mutants to keep Nilin's health high (regeneration moves) and to cut down the cooldown times Cooldown Pressen). In the meantime, also avoid frequently to prevent being hit by the teleporting monsters.
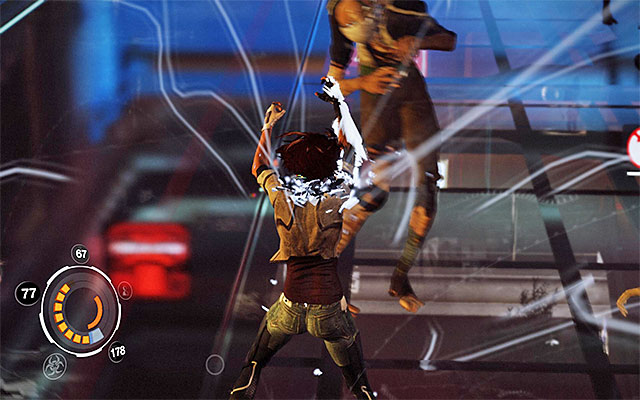
Analogically to the encounter with Johnny, you need to strive to prevent the mourner leapers from teleporting, by initiating the Sensen DOS special attack.

After you have stunned the mourner leapers, run up to them and launch against them the strongest attacks you can afford like Sensen Fury or the Logic Bomb. Try to inflict as much damage as possible because the Reconversion Leapers are immune to Sensen DOS and they may try to knock you off your pace, in the meantime.

The best method to eliminate the Mourner Leapers is to eliminate them one by one, especially that they have a lot of health points. While attacking, await the moment when you receive a message of the possibility to execute them (Terminate). That is when you should run up to the mutant and press the interaction key/ button to initiate the QTE event: kick (RMB), punch (LMB) kick (RMB). Eliminate both of the Mourner Leapers and deal with the standard ones, which, by this time, will be no challenge to you.

Listen to the conversation with Edge, and open the door closest to you. Approach the interactive Sprinkler mechanism, aim at it and use the Pick Socket to drain it for energy which you are going to need. For further actions.
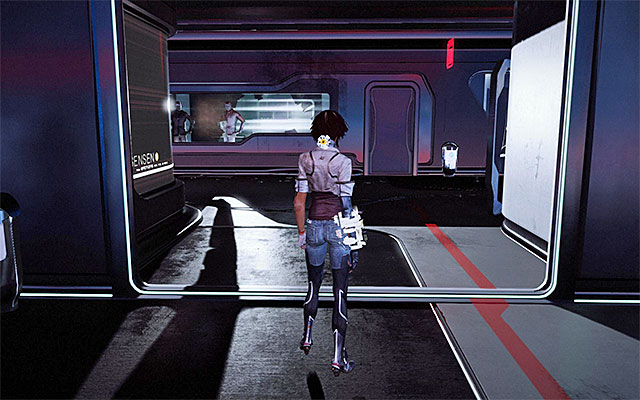
Use the SAT Hatch) if you need to and leave this location. You need to go back and towards the room where you earlier stole Trace's memory.
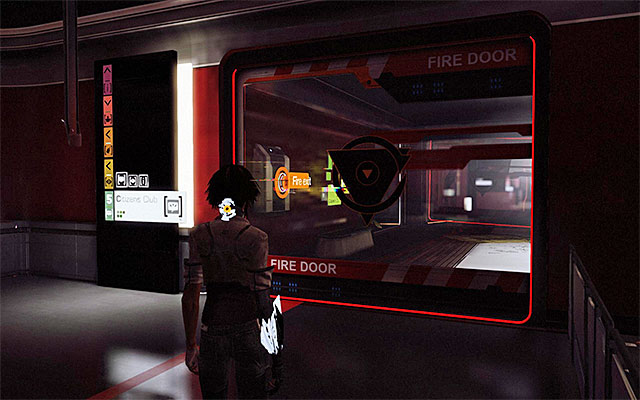

After you reach that location, turn your attention to the locked door shown in screenshot 1. Aim at the Fire Exit button behind the glass pane, and use the Pick Socket to charge the panel with energy that you have just harvested. After you unlock the area, explore it to find the Focus Boost lying on the floor (screenshot 2). After you collect it, return to the main area and drain the terminal to retrieve energy for the Pick Socket.
Go now towards the Emergency Ladder control and use your lockpick again. Wait for the ladder to appear and climb up it.
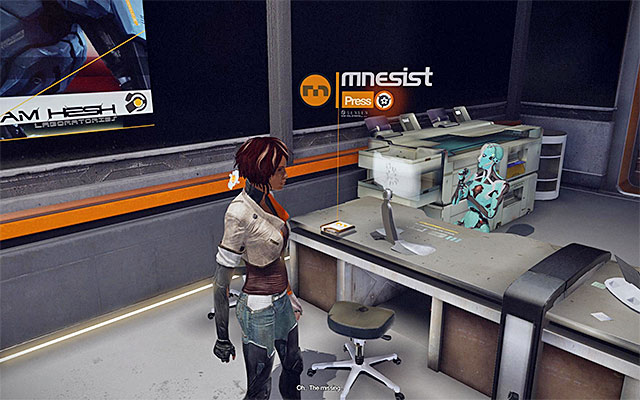
Right after you take the ladder, go towards the nearest door to the Security Posts. After you walk into the room, make sure that you have examined all of the desks because, on one of them, there is a Mnesist Memory shown in the above screenshot.
[New Journal Entry: Neo-Paris Landmarks- Meripherique]

Approach the door to the right and open it. Do not enter yet and wait for one of the combat drones to get by. Now, follow the drone Enter the Administration room shown in screenshot 1. Explore all of the side-areas and find the toilet. Check all of the stalls to find a SAT Patch shown in screenshot 2.
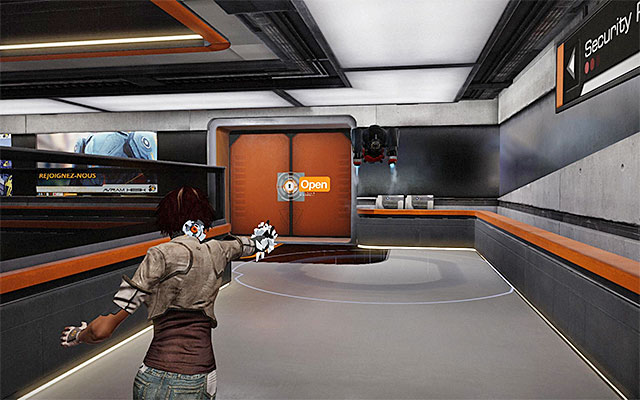
You can now return to the main area (keep all necessary precautions) and start following the combat drone again. This time, stop only after you reach a bigger door to the Central Security Post.
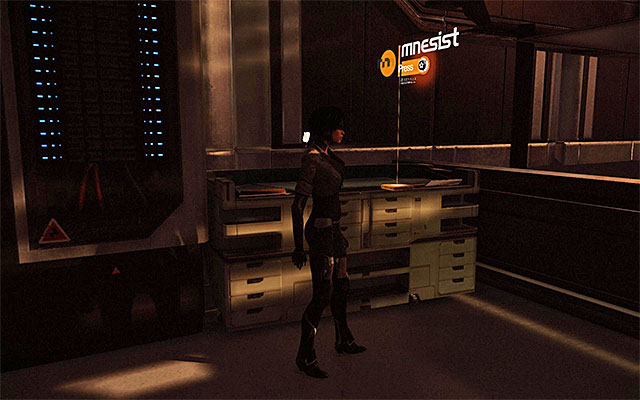
I recommend that you start by spending some time exploring this area thoroughly. The first one of the important things to find is the Mnesist Memory shown in the above screenshot.
[New Journal Entry: Technology- Scaramech]

The second collectible is much more difficult to find because the Scaramech is clinging to the upper part of one of the main pillars. The location of the parasite has been shown in the above screenshot and, it is the best idea to star searching for it after you make your way to the balconies above.
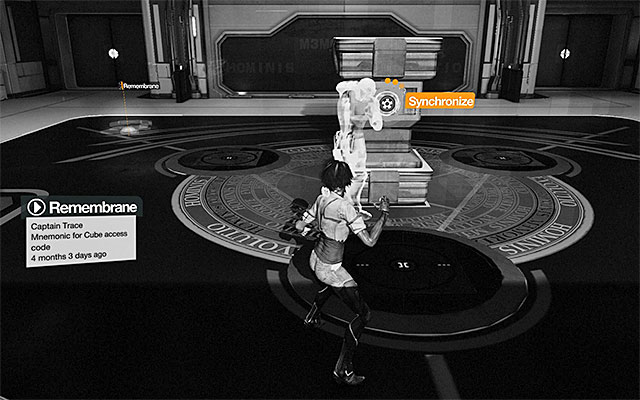
After you have performed all of the optional actions, locate a remembrane and the ground floor. Play it to see the virtual captain Trace, and be prepared to perform a quick synchronization. After you succeed, shoot the Spammer towards the Activate Cube Access System button.
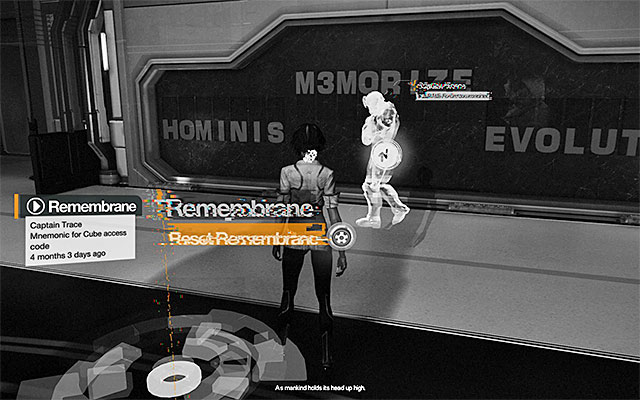
You need to solve the first one of the two puzzles here. Play the next remembrane and listen to Trace's monologue, which is a hint, in fact.
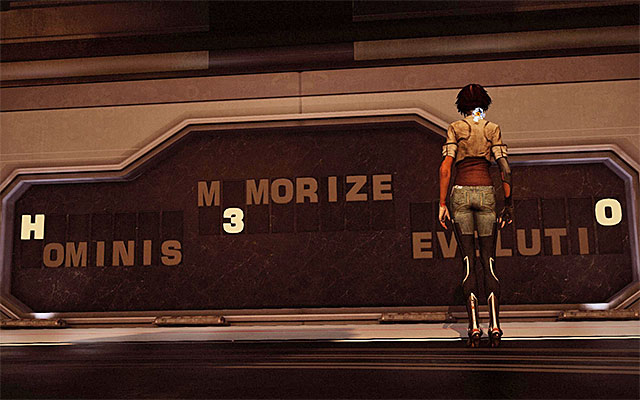
The puzzle assumes the use of the Spammer to move the individual elements of the inscription on the wall. The solution to the puzzle has been presented in the above screenshot - you need to select the letter H from the first word, number 3 from the second one, and the letter O from the third one.

Go towards the next remembrane. Right after it starts playing, go towards the balconies above, thanks to which you won't miss the moment of synchronization shown in the above screenshot.
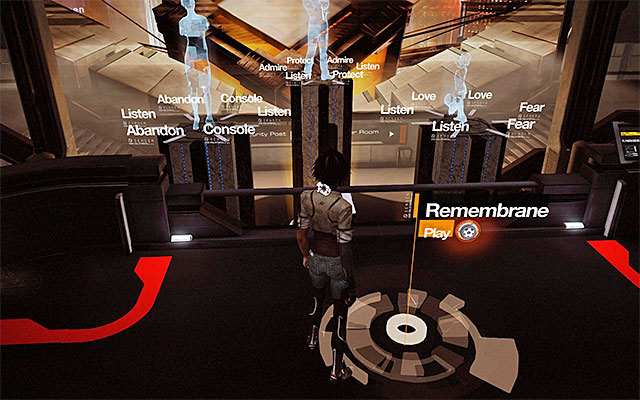
After the synchronization ends, fire the Spammer at the button (Activate Cube Access System), and get access to the second one of the puzzles. Just like before, activate the remembrane and listen to captain Trace telling you how to solve the puzzle.
This puzzle is definitely more demanding than the previous one. It consists in determining the correct connections between the mother (the figure to the left), the father (the figure in the middle) and the child (the figure to the right. The connections are established by shooting at the buttons under the virtual figures.
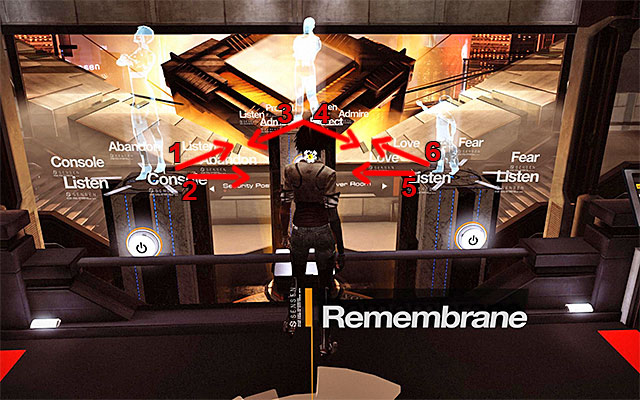
The solution to the puzzle is as follows:
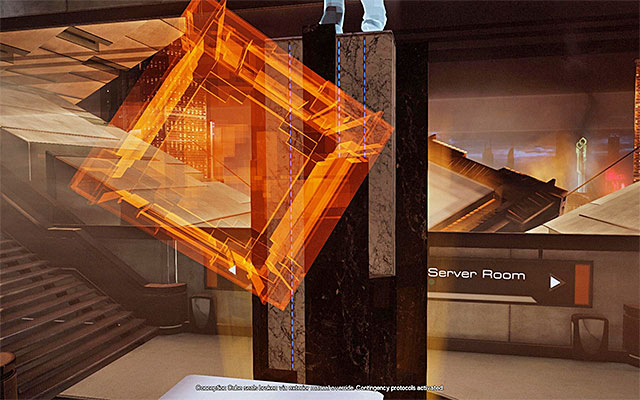
If you have done everything correctly, the game will start a cutscene of the unlocking of the Conception Cube.
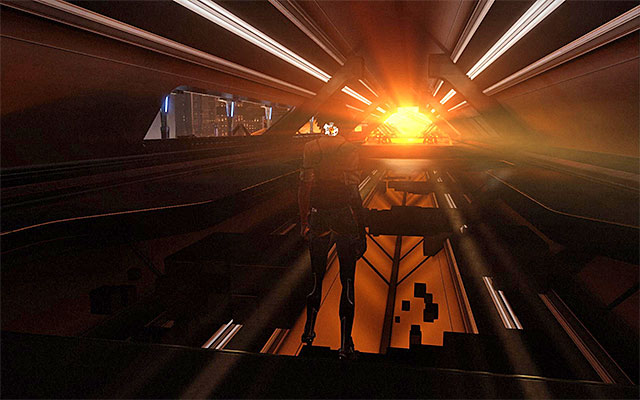
Listen to Edge's commentary and make sure that you already collected all the collectibles in this area. Enter the elevator which will take you, to a long tunnel leading to the Conception Cube. Go straight and get ready for the last fight of this episode.
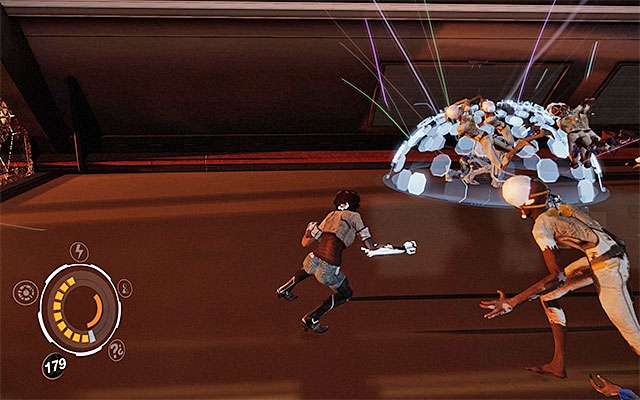
At first, you will have to face the Reconversion Leapers and the AV-48N Nephilim robots. Start by attacking the robots, and rely on two proved methods, i.e. the Rust In Pieces special move, and the Junk Bolt.
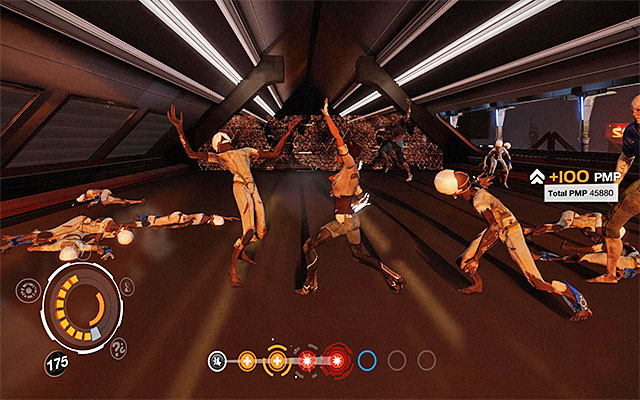
Take to eliminating the reconversion leapers only after you have dealt with the robots. While fighting the mutants, rely mainly on good territorial attacks (the Logic Bomb is going to be useful here).
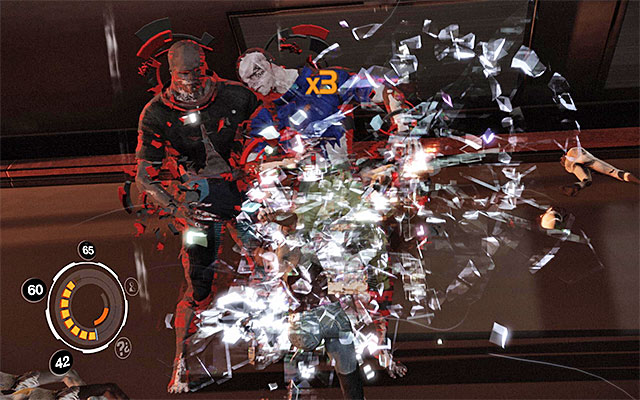
Unfortunately, you need to take into account the fact that, soon new monsters will join in. These will be, among others Skinner Leapers. I recommend that you leave these for the very end because, otherwise, you would have to put up with their increased toughness. After you eliminate all of the mutants, finish your walk into the Conception Cube, which will conclude this episode.

Right after this episode starts, listen to the conversation with Edge turn around and begin exploring the first part of the corridor, where there are statues. You can find here a Scaramech clinging to one of the statues.
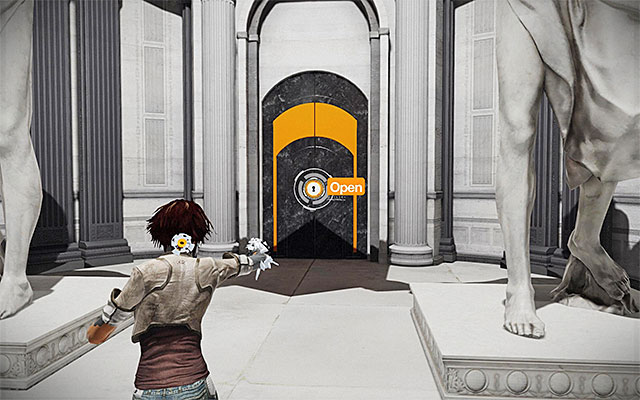
You can now return to the starting point and go straight to reach a door, which you need to open. Approach the next door and open it to walk into a large hall.
There is a lot of climbing ahead of you but, none of the actions is going to be too complicated and you will not have to race against time. Start by jumping over the balustrade and shimmy to the left. Lean back and perform a leap towards the interactive ledge behind your back.
Leap towards the ledge to the right and shimmy to the right, while passing a corner. After you reach the end of the ledge, drop down to let Nilin catch onto the ledge below. Leap now towards the ledge located a bit farther to the right. Shimmy to the right as far as you can and jump up towards the cube above.
Shimmy to the left and jump to reach the ledge above. You need now to shimmy to the right and stop where Nilin has to lean back to perform a leap. After your character reaches the structure, jump to reach the ledge above and shimmy to the left.
Soon, you will have to drop down. Shimmy to the left and leap back. Once again, drop down and, after you grab onto the ledge, leap towards the one to the left.

Jump to reach the ledge above and shimmy to the left as far as you can and drop down. Jump once again to reach the ledge to the right and start dropping down again, while moving, at the same time, towards the bottom of the hall. After you reach the bottom, shimmy to the right, lean back and perform a longer leap.
Shimmy to the right and drop down to grab one below. Shimmy to the right and drop down again, to land on a ledge, where you can catch some breath.
Approach the edge of the shelf and press the interaction key/button to hang down. Drop down to the ledge below and DO NOT DROP DOWN here. Instead, lean back and leap towards the balustrade.

Watch the cutscene starring Charles Cartier-Wells, at the end of which you will have to press the interaction key/button to start another memory remixing event.

Just like a number of times earlier, start by watching through the memoir which, apart from Charles Cartier-Wells features his daughter Nilin. In many respects, this memoir is unique because, you are going to modify his memory of him having used the Hunt Glove for the first time. More than 20 years ago, Charles used the glove to look into the mind of the young Nilin, to remix her memory of the accident in which her mother, Scylla lost her leg. The plan is that you make Charles believe that the experiment with the glove failed through, which resulted in Nilin's death instead of erasing the unpleasant memories from her past as planned.
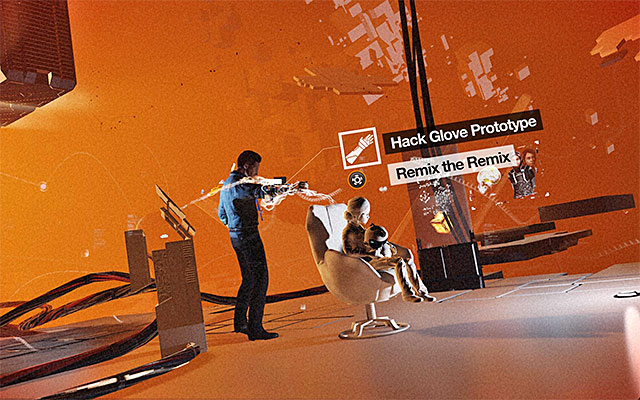
After the memory replay process is over, rewind the memory. There is one glitch to find and it appears at the moment when Charles stands behind the young Nilin while getting prepared to use the glove (Hunt Glove Prototype - the above screenshot). Stop here and press the interaction key/button.
Performance of the above action will allow you to look into the matters of remixing memory even deeper. After you watch to the successful attempt to use the prototype on Nilin, you will have to implement changes that will cause memory error and a completely reverse result.
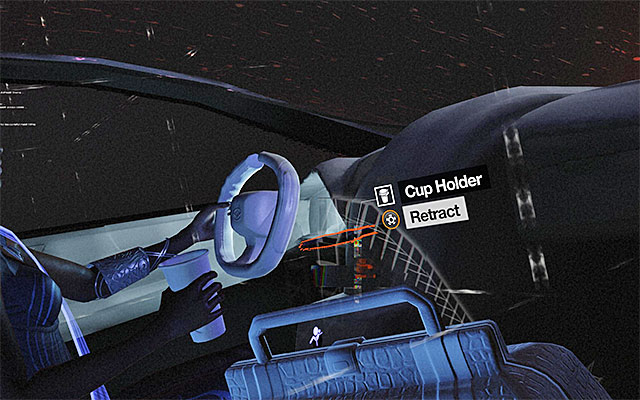
Rewind Nilin's recollection of the car crash, in which Nilin and Scylla participated, to the very beginning. Replay the memory in search for glitches (there will be six of them this time), to the very beginning. The first glitch is connected with the Cup Holder and, interacting with it will cause the holder to retract.
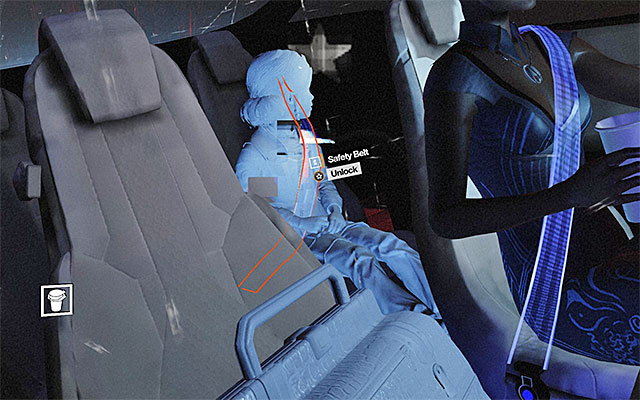
The second glitch is connected with the safety belts that Nilin is wearing. Make the belt unlock.
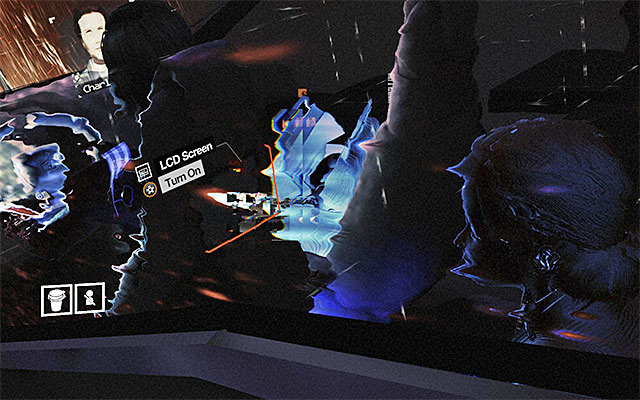
The third glitch is connected with the LCD screen inbuilt into the driver's seat. Press the interaction key/button to turn the screen on, which will turn Nilin's attention away from the toy.

It is difficult to notice the fourth glitch so, in case of any problems, have a look at the above screenshot. You need to interact with the Windshield to cause the appearance of cracks on it.

The chance to select the fifth glitch appears soon after Nilin's toy (Jax) is damaged). Interact with the robot to make it partially functional.
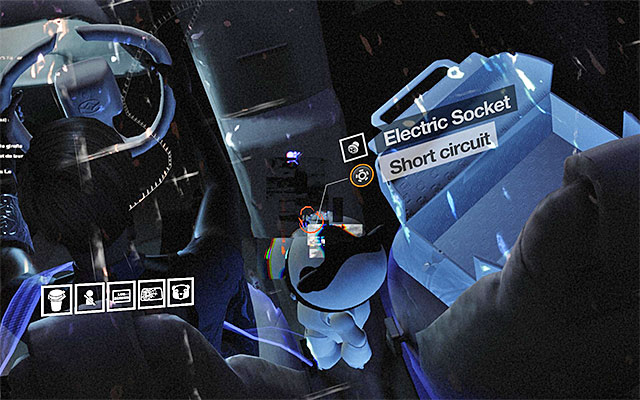
The last, sixth glitch is connected with the Electric Socket on the car's dashboard. Pressing the interaction key/button, will cause the socket to short-circuit.
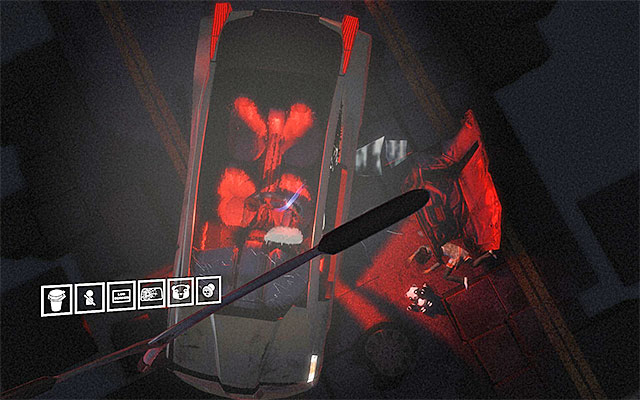
If you have performed all of the actions correctly, the car driven by Scylla will crash, resulting in Nilin's death. Wait for come back to Charles' memory and into the reality. Watch a cutscene featuring Charles and Scylla.
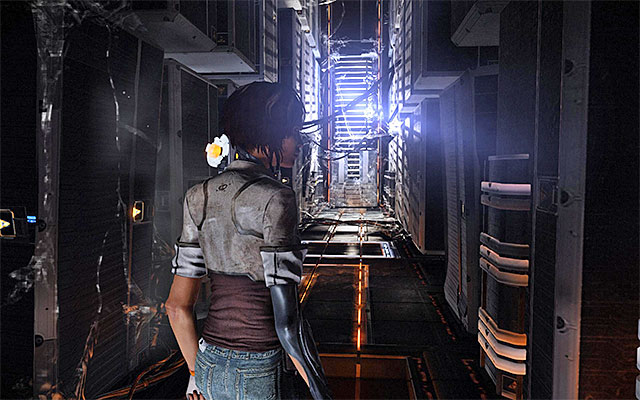
Listen to the conversation with Edge and go straight. The interesting thing here, is that you do not need to interact with the remembranes to play them. They will play themselves near your character.

You also do not need to be concerned about getting lost, because there is only one path leading up to the server. Each time you find an apparently blocked passage, turn around and backtrack a little to find an alternative way that will unlock automatically.
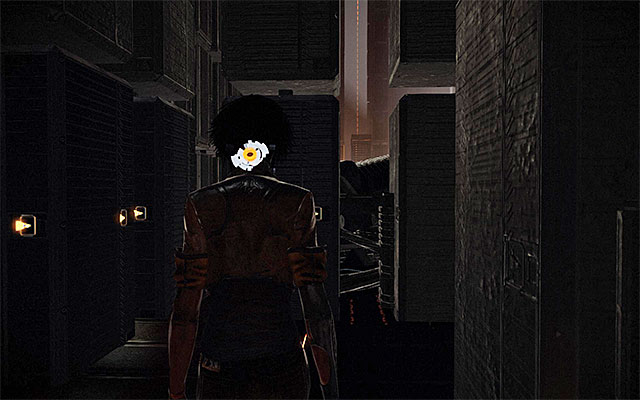

YOU NEED TO stop after you reach your destination, i.e. after you get into a large hall with the central server. Do not walk into that location yet, and explore the path to the left which should, in the meantime, change its situation. First, go into the dimly-lit path shown in screenshot 1 and take a look around for the last, shown in screenshot 2, Scaramech.

You can now return to the entrance to the central server. There are a several interesting cutscenes here to watch, during which you will learn about the true identity of Edge. After all of the cutscenes end, you will fight the final boss of the game.
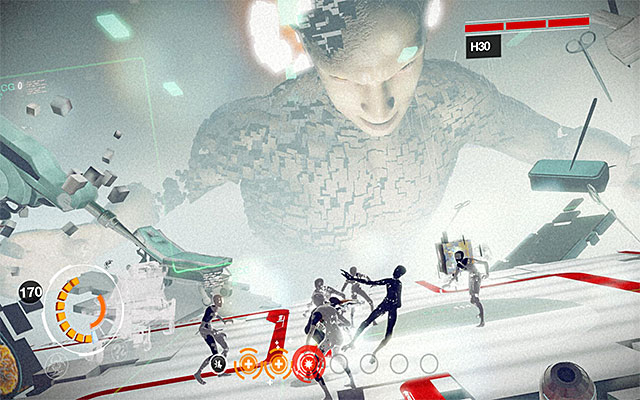
There are three phases to the combat with H3O and you will have to perform certain pre-defined actions. After the commencement of the first phase of the battle start attacking the virtual mutants that appear on the stage. You do not need to use very complicated combos because the monsters are easy to kill and, your main concern is to charge the Focus gauge.

After the special moves charge, initiate Sensen Fury and start taking it out on the black Memory Cube located in the arena. If you fail to break the cube during the first take (you may be obstructed by the mutants) repeat the previous actions and initiate the special move again.
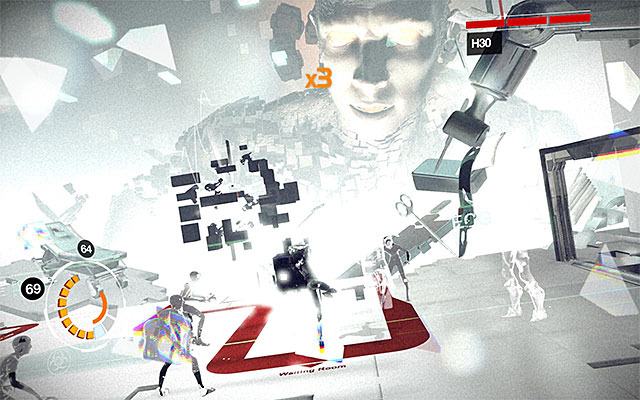
Soon after you break the first cube, another same object will appear. Start by launching combos with cooldown moves so you can regenerate Sensen Fury sooner. Initiate the special move and break the cube.
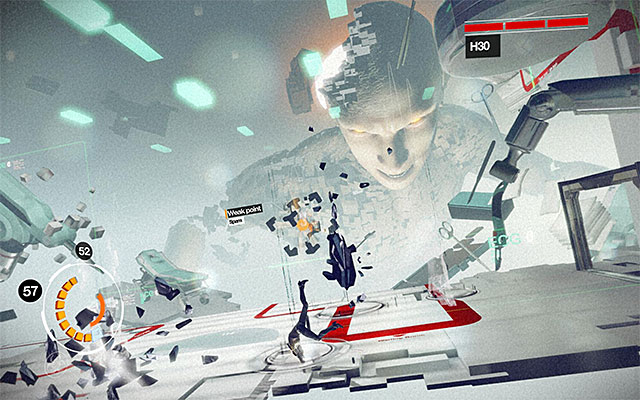
H3O will start to hail the arena with projectiles. As a result, you need to run around without stopping for anything and, to the extent it is necessary, perform the dodging moves.
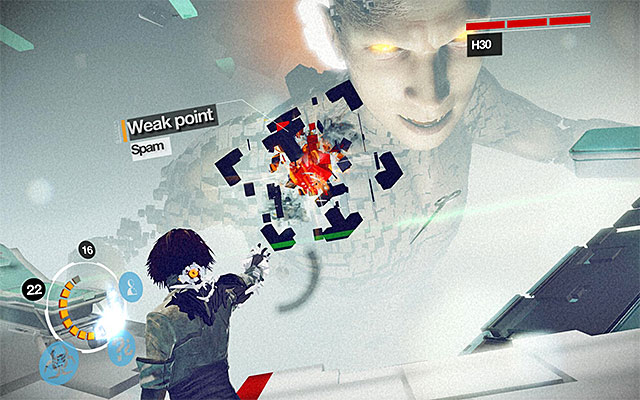
In between the individual "raids" aim at the Weak Point and use the Spammer to destroy it gradually. You can rely here both on the standard Spammer projectiles (LMB), and the Junk Bolt (RMB - the device needs to be fully charged).
Destroying the Weak Point will result in a stunning cut scene, of Nilin approaching H3O. Notice that your character has automatically initiated the Sensen Fury so, start attacking the vulnerable spot on the boss' "body".
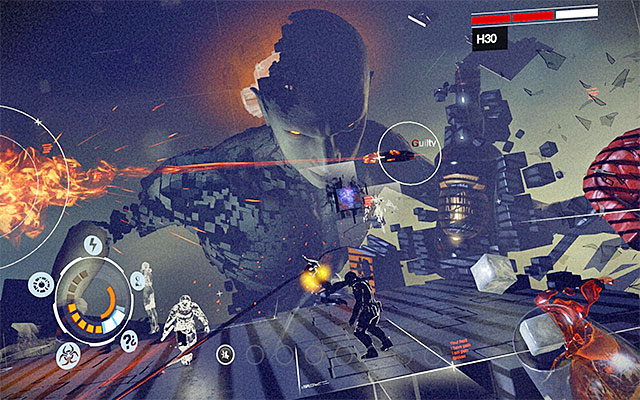
Soon, phase two of the battle begins. Start running around the arena and use the basic combos on the virtual enforcers in order to replenish Focus, and thus grant access to special moves. At the same time, avoid fire from the virtual Seraphim (do not attempt to destroy it with ranged attacks) and small shockwaves generated by H3O.
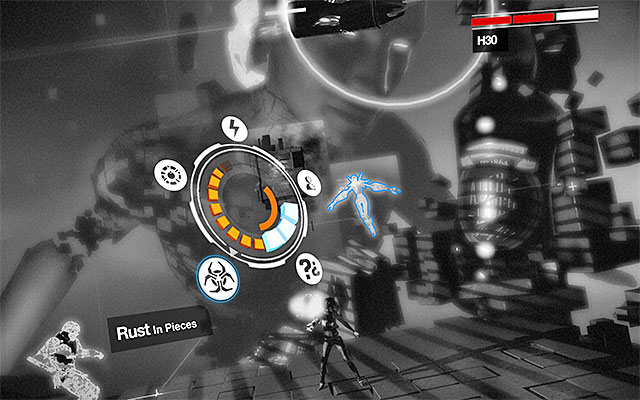
After you have accumulated enough Focus, initiate the Rust In Pieces special move, at the Seraphim, which makes it Nilin ally. The robot should now start firing at the cube which remains out of Nilin's sight. This will destroy the cube.
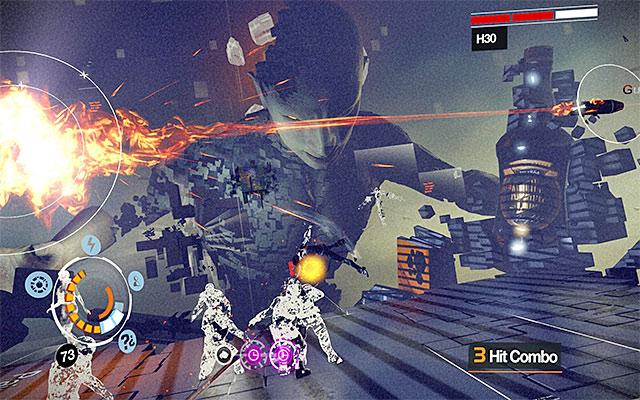
You now need to repeat the above actions for the second cube that appears above the arena. Start by regenerating Rust In Pieces by using the cooldown moves . After the special move is available again, use it to seize control over the Seraphim and wait for it to destroy the cube.
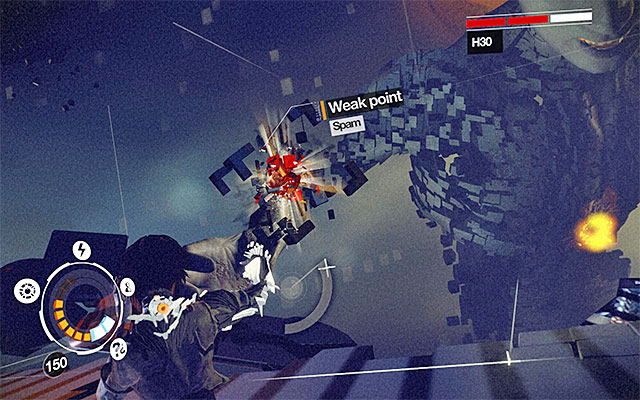
The steps you need to take next are very well known to you from the first phase of the battle. You need to keep running about the arena and dodge the projectiles thrown by H3O. At the same time, use the Spammer to attack the Weak Point at a distance, to finally destroy it.

Just like earlier, wait for Nilin to approach the boss and initiate the Sensen Fury automatically. Start launching your attacks and soon you will be promoted to the last, third phase of the battle.
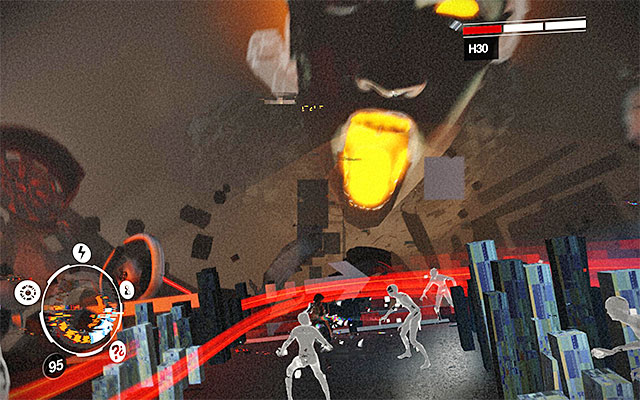
Start by attacking the new mutants to accumulate Focus again. Pay more attention, than earlier, to dodging the shockwaves generated by H3O.
Do not hurry too much to launch the special actions and try to accumulate at least two full units on the focus gauge. Start by initiating Sensen DOS, which will reveal the cube that remained invisible.
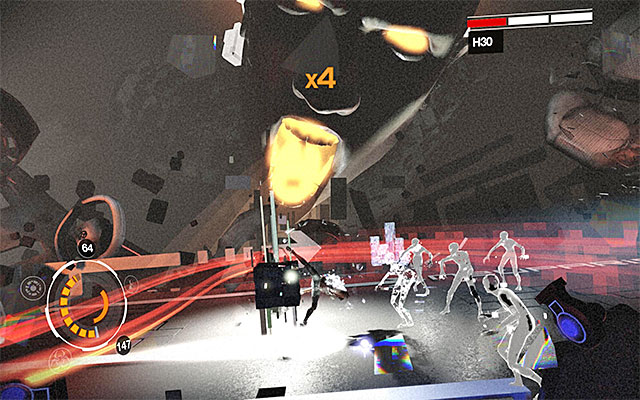
Just like in the case of the first phase, you cannot break the cube with regular attacks so, you additionally need to use the Sensen Fury. If you have acted in accordance with my suggestions and accumulated two units of Focus, you will be able to start sensen fury straight away. Otherwise, you will have to attack the mutants. The good news is that the cube will not disappear in the meantime so, you do not need to hurry that much while accumulating Focus.
After you destroy the first cube you, of course, will have to repeat all of the actions to destroy yet another such object. Start by attacking mutants to replenish the Focus Gauge but, also speed up the process of regeneration of the previously used special moves. After you accumulate enough focus, initiate Sensen DOS and then Sensen Fury.
After you destroy the second cube, a Weak Point will appear next to the boss. You need to watch out even more because, the enemies are not going to disappear this time and you will have to avoid not only the bombing but also the mutants. To attack the weak Point, I recommend using the Junk Bolt only. Thanks to this, your stops will only be long enough to take a single shot.
Destroying the Weak Point will play a cutscene. Wait for Nilin to land on the shelf next to H3O and initiates the Sensen Fury. Start attacking the boss. You need to land around 30 hits but, H3O won't be able to defend itself so, this is only a formality.
Congratulations. You have managed to defeat the End Boss (the reward is as much as 3000 experience points) so, watching the final cutscene is the only remaining thing to do.
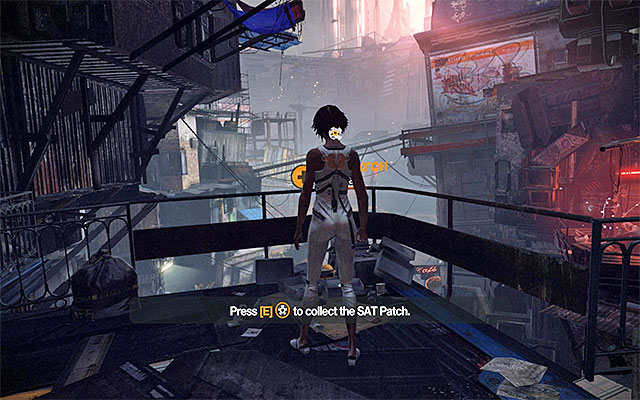
PATCH 1/5
The patch is on the balcony that you will reach at the beginning of your exploration on the surface. Since Nilin is crossing the area near the Tommy's bar, you virtually cannot miss it.
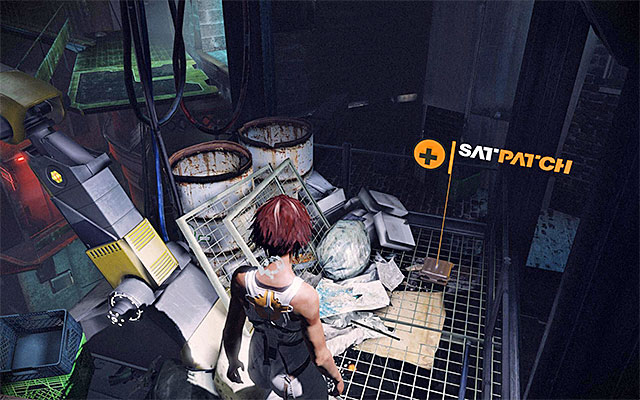
PATCH 2/5
It is located on the balcony that Nilin jumps to after the victorious battle with mutants on a small metal platform. After the jump, turn right and you will find the collectible without any problems.
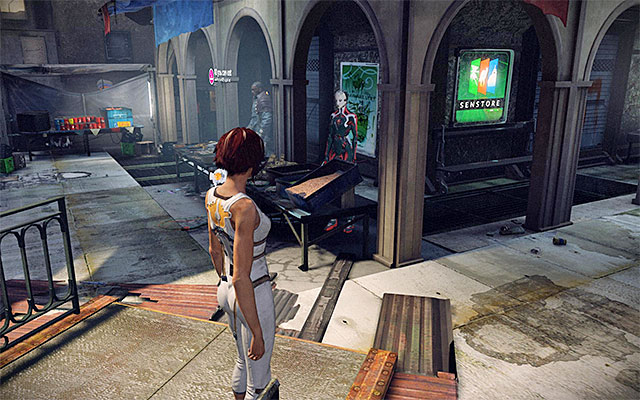
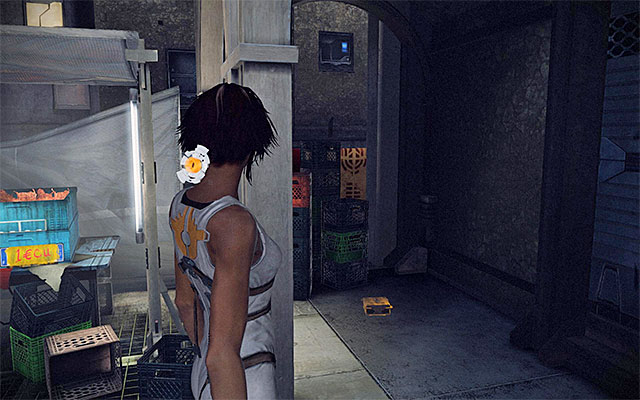
PATCH 3/5
The patch is lying on the ground in the initial part of the market place, i.e. the area occupied only by friendly characters. Stop in the area with the two merchants (screenshot 1) and explore the narrow passage behind them. The collectible is at the end of this path (screenshot 2).

PATCH 4/5
The patch is on the metal platform that you will reach towards the end of your exploration of the market place. There is a robot, a red neon light and bridge control next to the collectible. This should help you locate the patch.
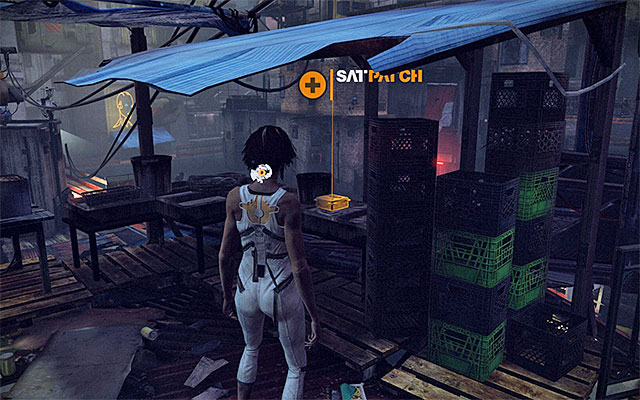
PATCH 5/5
The patch is lying under one of the market stalls, right next to Tommy's bar that you will reach towards the end of this episode. DO NOT APPROACH the bar too early, or a cutscene will start and you will not be able to find this collectible any more.


PATCH 1/4
The patch is lying on the ground in a small, enclosed area that you can reach right after you win your first fight with the enforcers. Grab onto one of the interactive ledges. Leap towards the next ledge and shimmy to the left to perform a leap towards the neighboring ledge. Do not continue up at this point. Instead drop down to the alley between buildings (screenshot 1). The collectible is near the cardboard boxes in one of the corners (screenshot 2).
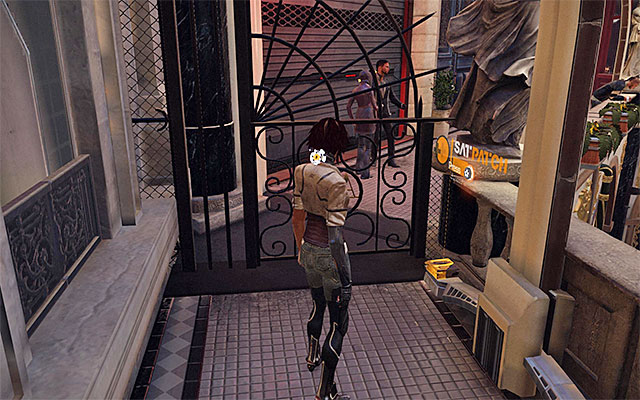
PATCH 2/4
The patch is lying near the balustrade in the rotunda, i.e. the location where you are supposed to meet the hunter named Bad Request. After you reach the rotunda, turn left and stop at the locked gate.
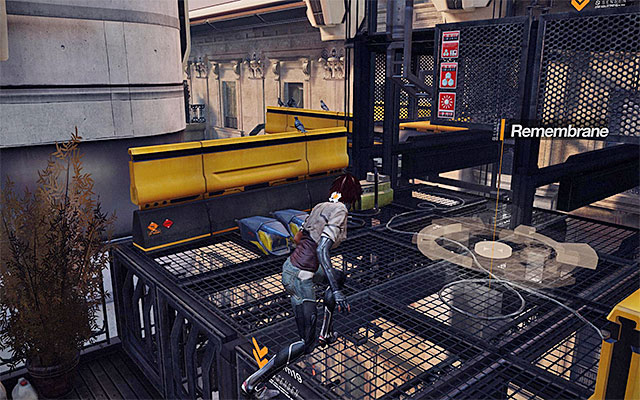

PATCH 3/4
The patch is lying on the yellow, metal platform hanging between the skyscrapers. You can reach it while following Bad Requests memories. Stop in the area where Nilin reaches a big black platform (screenshot 1) and make it to the top of that platform. Turn left to jump down to the abovementioned smaller platform (screenshot 2).
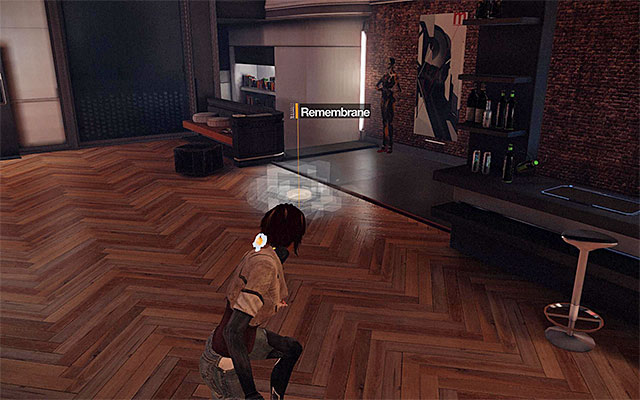
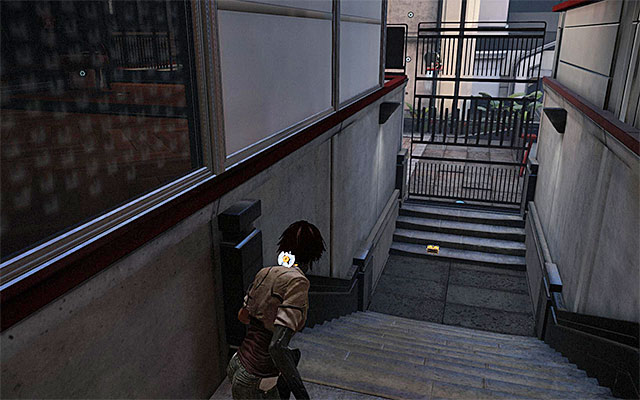
PATCH 4/4
The patch is lying on the ground and you can find it soon after you reach the apartment with the active remembrance (screenshot 1). Locate the stairs at the back of the apartment and follow it to a narrow passage between buildings (screenshot 2). Approach the locked grate and collect the patch.

PATCH 1/5
The patch is lying on a crate in one of the side-alleys near the derelict market. Nilin visits the market right after this episode starts and you need to collect the patch before you use the Spammer to raise the gate.
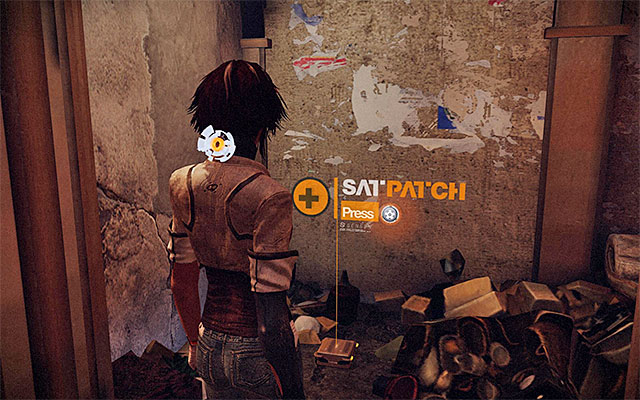
PATCH 2/5
The patch is lying on the ground and you can find it in the initial part of the slums exploration. More precisely, it is where Nilin gets into a fight with mutants (the location with the blazing passage). After you win the battle, explore the area to the right of the stairs. The patch is lying next to the building's wall.


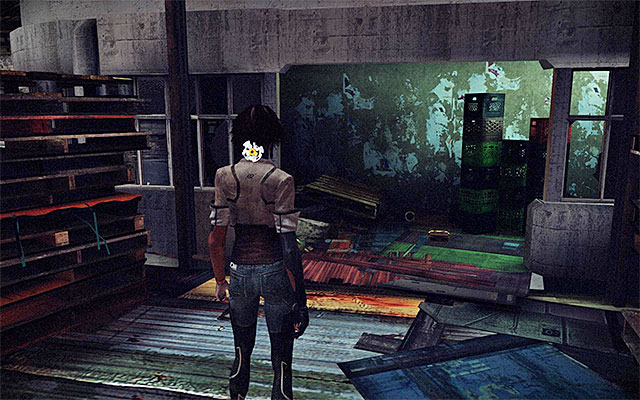
PATCH 3/5
The patch is on the rooftop in the first part of the slums, above the arena where Nilin fights the Skinner Leaper and the smaller mutants. It is not an easy task to get to the rooftop, though. After you win the battle, start climbing and stop in the spot shown in screenshot 1. DO NOT drop to the balcony below and shimmy to the left. Lean back and jump towards the ledge to the left. Now, shimmy to the right and make a few more leaps on the way. You will reach the rooftop shown in screenshot 2. Drop down to that roof and explore it thoroughly. You will find the collectible at the very end (screenshot 3).
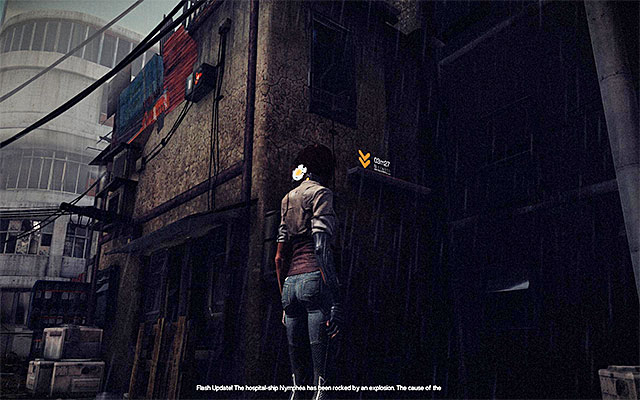
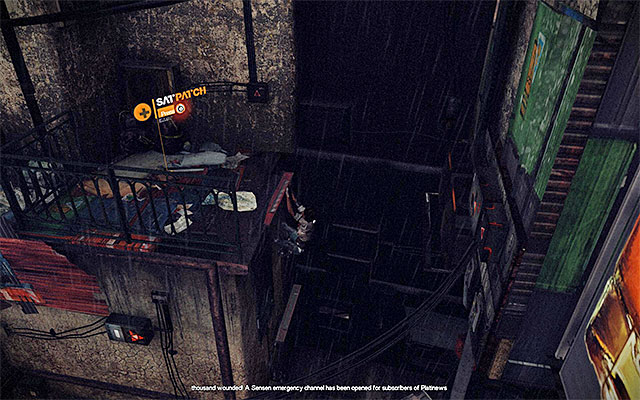
PATCH 4/5
The patch is on the balcony that you can get onto on your way to Tommy's bar. Stop soon after you go around the big fan and find interactive ledges on the side of the building to the left screenshot 1). Start climbing here and you will reach the balcony thanks to this (screenshot 2).
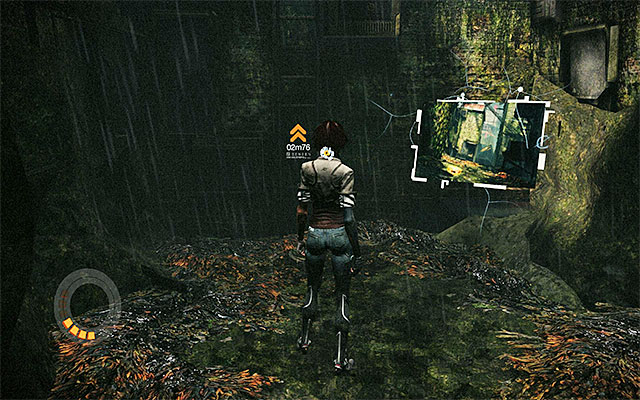

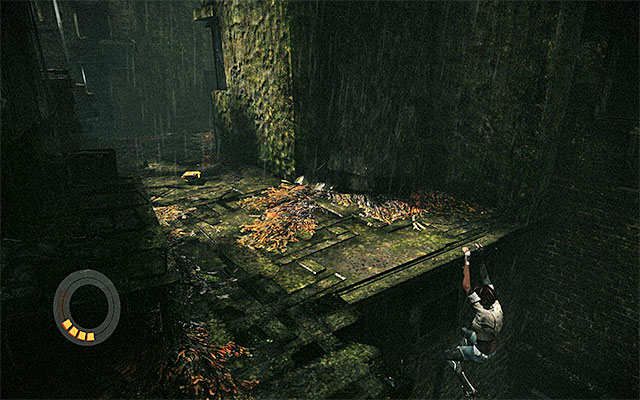
PATCH 5/5
The patch is on the shelf in the destroyed district with the mine fields, which Nilin explores towards the end of this episode (soon after the battle with Zorn). Stop after you reach the area where you need to start climbing (screenshot 1). Start climbing and stop after you reach the ledge shown in screenshot 2. You need to lean back and leap towards the ledge that you cannot see. The collectible is there (screenshot 3).
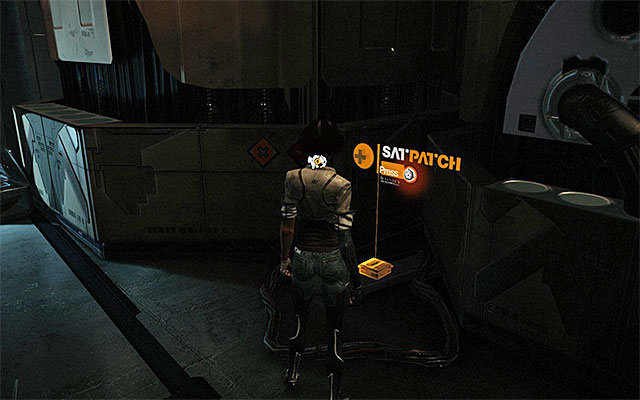
PATCH 1/1
The patch is on the floor in the big hall patrolled by two combat drones (screenshot 1). Wait for one of the drones pass you by and follow it, while keeping the distance from the machine. As you go, explore the second side-area to the right. This way you will obtain the patch (screenshot 2).
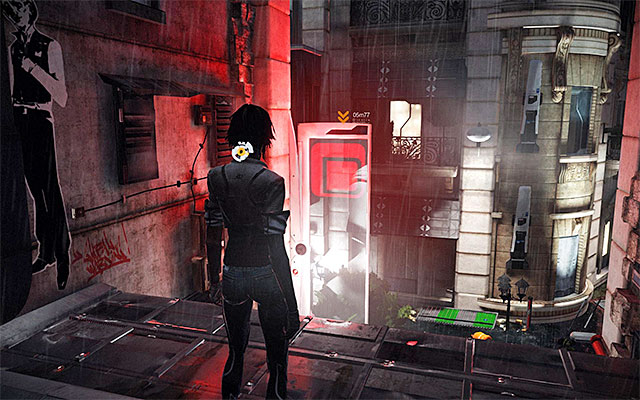
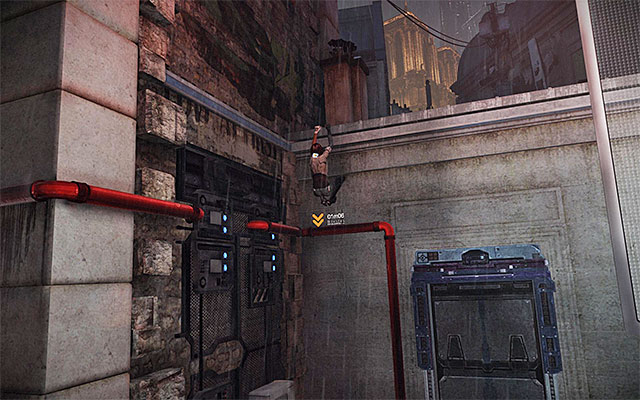

PATCH 1/3
The patch is lying on the balcony in the flooded district. It is not easy to get to. Stop right after you get to the first part of the flooded city (screenshot 1). Approach the edge and drop down to grab onto the red pipes (screenshot 2). Shimmy to the left which will get you to the balcony with the collectible on it (screenshot 3).
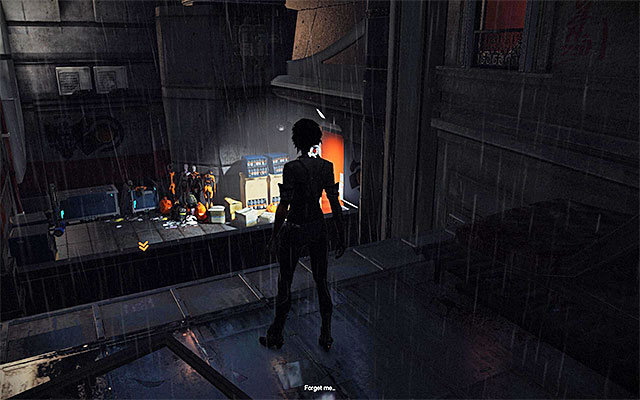
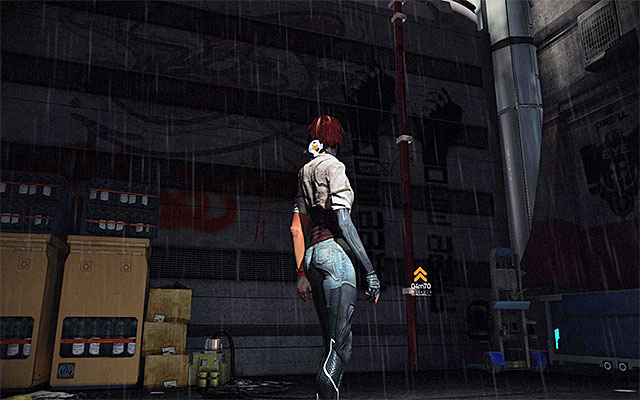

PATCH 2/3
The patch is on the table in the enclosed area that is difficult to access. While exploring this district, stop after you reach a rooftop with orange door (screenshot 1). Ignore the door and take a look around for a drain pipe that Nilin will be able to climb onto(screenshot 2). Climb the pipe to the very top and leap towards the ledges to the left. Finally, pull up and explore the optional area to collect the patch from the table.


PATCH 3/3
The patch is on the roof that is difficult to access, in the area where Nilin had to dodge from Captain Trace's jet for the last time. Focus on finding this collectible only after you get rid of the enemy plane, i.e. after you leap towards it in order to steal Trace's memory. Locate the scaffolding shown in screenshot 1, and make your way onto that structure. Turn around and grab onto the red pipe to shimmy to the left. Leap towards the vertical pipe and towards the ledge to the left. Climb onto the roof and stand in the spot shown in screenshot 2. Leap towards the lower fragment of the roof that you can see in the distance. Explore this area thoroughly, thanks to which you will find the patch.
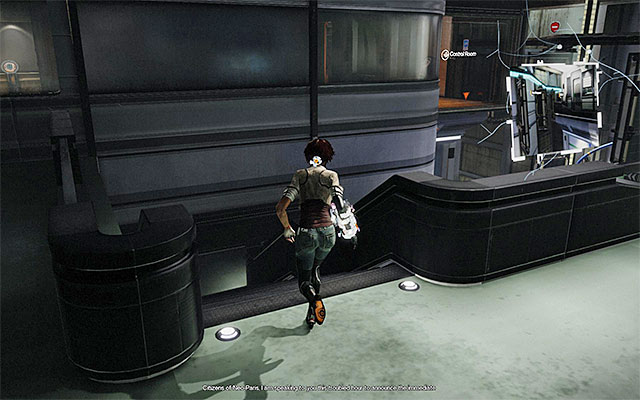
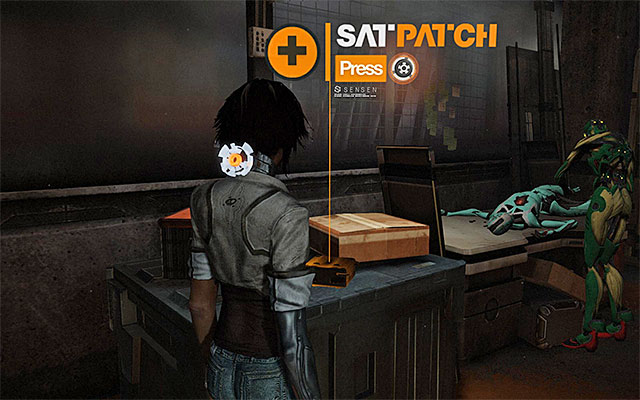
PATCH 1/3
The patch is on the table in a small storage room and you can get access to it shortly after you obtain the Pick Socket. Stop after you return to the area near the elevator, which you have been exploring before you obtained the lockpick. Climb down the stairs again (screenshot 1), to reach a location with chests of the confiscated belongings. Turn right here and locate the entrance to the storage room (screenshot 2). Unblock further passage by using the lockpick, explore the storage room and collect the patch from the table (screenshot 3).
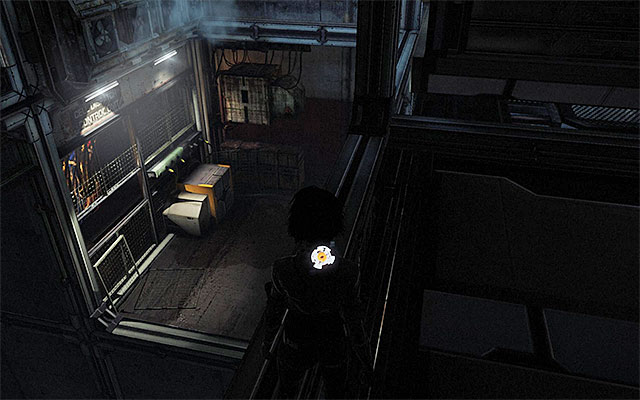


PATCH 2/3
The patch is in the big room with targets and reaching it is not that easy. Start searching for the patch soon after you started your "chase" after Bad Request's holding cell. Stop in the spot shown in screenshot 1, leap towards the ledge located to the right. Locate here a very narrow passage (screenshot 2) and enter. The collectible is on the floor (screenshot 3).
PATCH 3/3
The patch is in the laboratory side room in the room where Nilin meets Doctor Quaid (the room with the brain drainer that you have already visited in prologue). After you in your fights here, use the lockpick to open one of the rooms and approach the character sitting in the armchair.

PATCH 1/4
The Patch is under the staircase located at the beginning of this episode.. Nilin reaches the staircase right after she climbs out of the big elevator shaft where she fought a series of fights, before entering the room with moving platforms.
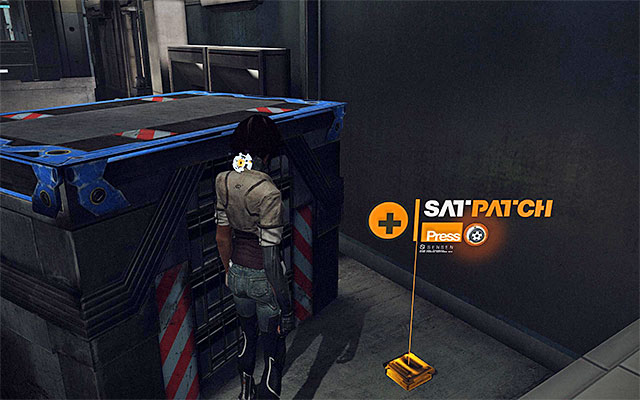
PATCH 2/4
The patch is in the room with the moving platforms. You need to start searching for it soon after you finish your journey over the ledges and land onto the big blue chest (screenshot 1). The patch is inside one of the smaller chests (screenshot 2).

PATCH 3/4
The patch is on the floor and you can find it during the chase after Captain Trace, and more precisely, on your way to the bar. Stop after you reach the area with a single combat drone(screenshot 1). Walk around the machine and explore the side area guarded by it, which will allow you to find the patch (screenshot 2).

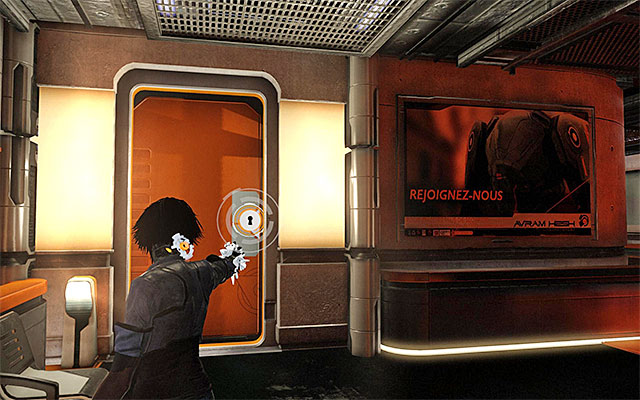
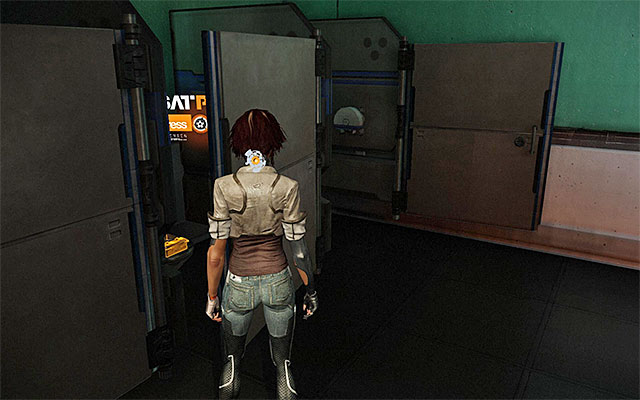
PATCH 4/4
The patch is in the toilet, and it is quite difficult to find. Start searching for the patch towards the end of this episode and more precisely, when you are on your way to the central security point. Stop after you reach the area patrolled by two combat drones and go towards the side door marked as Administration (screenshot 1). Explore the optional area to find an entrance to the toilets (screenshot 2). You will find the patch in one of the stalls (screenshot 3).
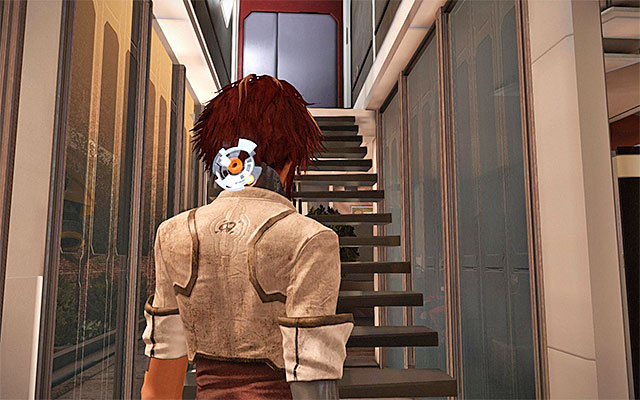

BOOST 1/2
The boost is on the floor of the room that Nilin cuts into through the glass roof. Walk over to the central part of the apartment and locate the stairs (screenshot 1) that lead to a locked door. This is where you will find the boost.
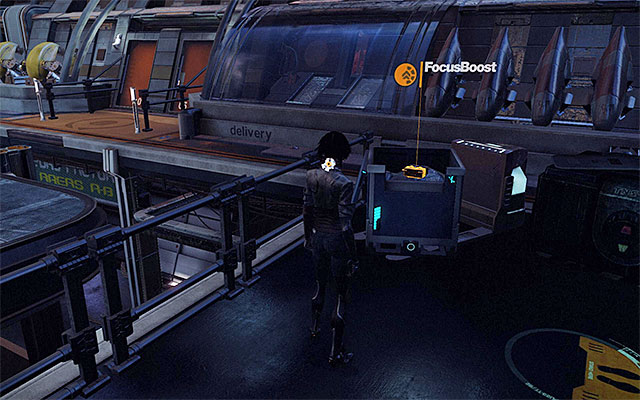
BOOST 2/2
The boost is on the roof on which you fought your battle with the boss of the second episode (Kid X-Mas). After you reach the roof, do not enter the "arena" and take the first turn to the right to find the boost.
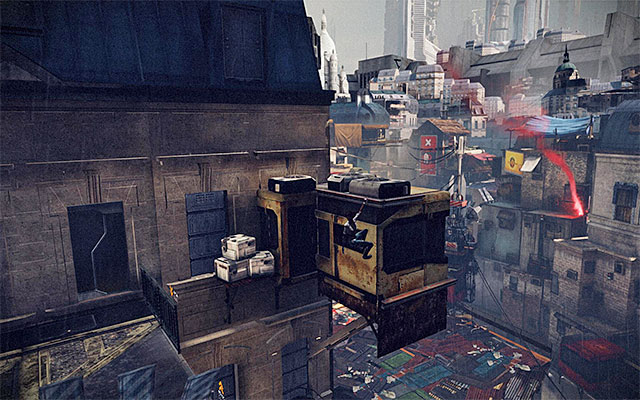

BOOST 1/2
The boost is on one of the balconies which you can access while making your way through the second part of the slums. Soon after you deal with a numerous group of mutants, you will have to start climbing. You need to stop after you reach the ledge shown in screenshot 1. Lean back and perform a leap but, instead of pulling up, drop down. Thanks to this, you will land on a ledge with the boost on it (screenshot 2).
BOOST 2/2
The boost is in the sewers that Nilin explores after the end of the defense of Tommy's bar. During the journey along the sewers, stop after you find yourself at a fork. Take the tunnel to the right to reach the boost.
BOOST 1/4
The boost is on the floor and you can find it right after the beginning of the fourth episode. Focus on the exploration of the corridors at the beginning (you can take your time before you go to the location of the first fight with the mutants). Focus on the corridor patrolled by the combat drone. Walk around the drone carefully and collect the boost from the floor.
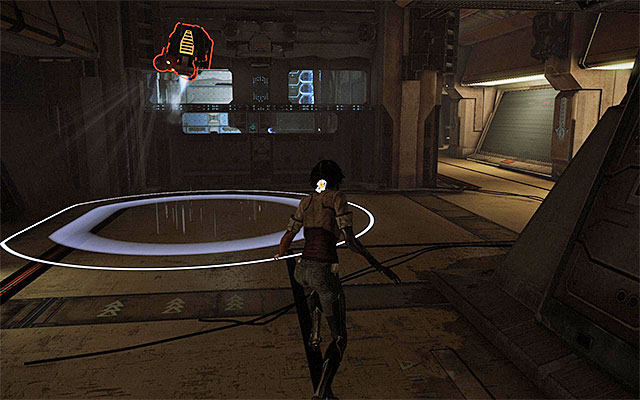

BOOST 2/4
The boost is lying on the floor and you can find it soon after you leave the first part of the jail. Stop after you reach the area patrolled by the combat drones and, more precisely, the small fork. Ignore the stairs to the right and go through the corridor shown in screenshot 1. The boost is at the end of the side corridor (screenshot 2).
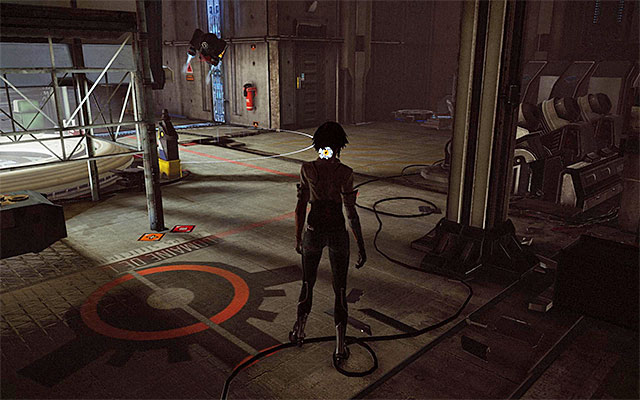
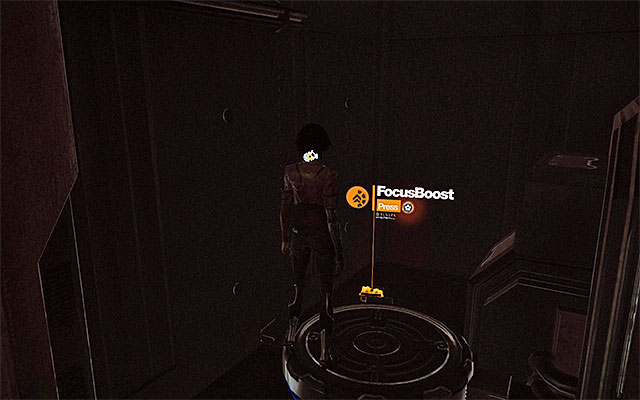
BOOST 3/4
The boost is on the floor and you get the opportunity to get it after the ride inside the holding cell, i.e. after you dodge the Brain Drainer. Take to the exploration of the area where the holding cell stopped and turn your attention to the corner guarded by the combat drone (screenshot 1). The boost is in a dimly-lit spot. (screenshot 2).
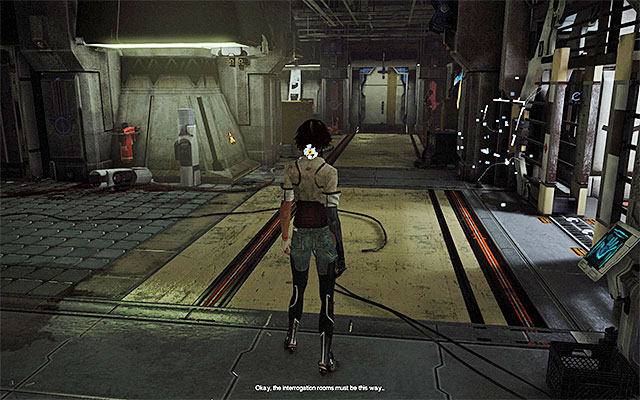

BOOST 4/4
The boost is on the floor and you can find it soon after the first battle with the Seraphim airborne robots, on your way to the interrogation room. Stand in the area shown in screenshot 1 . Explore all of the corners and find the boost in one of them (screenshot 2).

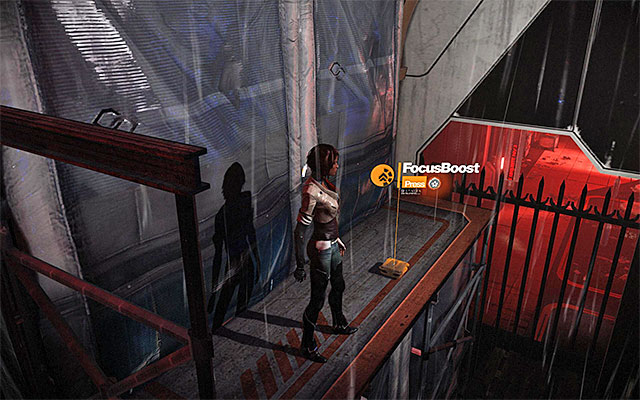
BOOST 1/3
The boost is on the scaffolding and you can obtain it at the beginning of the episode and, more precisely, after you deal with the first group of monsters. Remain in the alley where you have been attacked and explore its end part. Start climbing here (screenshot 1). You need to get to the abovementioned scaffolding and collect the boost (screenshot 2).
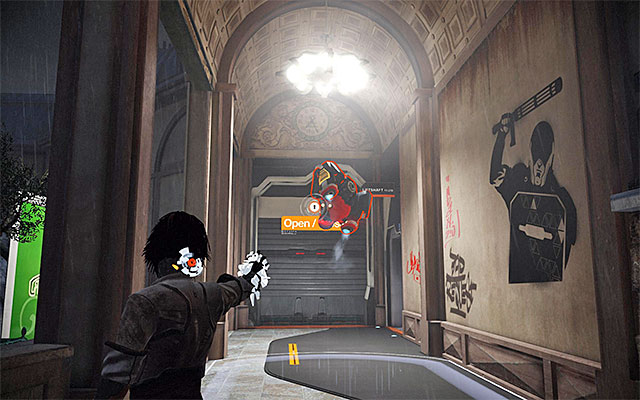

BOOST 2/3
The boost is in the hidden storage room and you can access it soon after you leave the rotunda. You need to reach the balconies above the rotunda that are patrolled by the combat drones. Stop at the last one (the third) drone and aim at the switch shown in screenshot 1 to unblock the storage room. This way you will find the boost (screenshot 2).
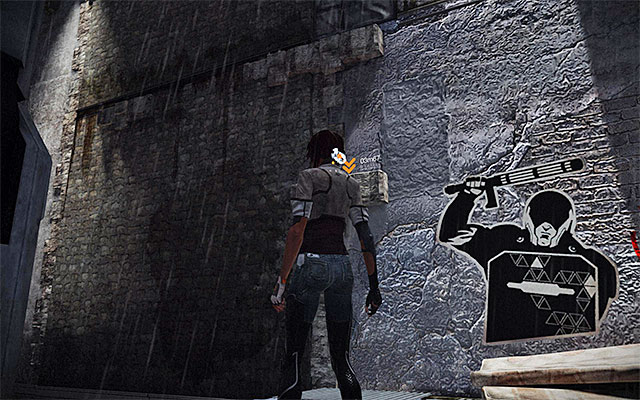


BOOST 3/3
The boost is on one of the more-difficult-to-access roofs in the flooded district. Stop after you reach the area shown in screenshot 1, i.e. near the interactive ledges next to a graffiti. Start leaping towards one ledge after another and stop after you reach the one that is located the highest. Do not shimmy to the left here, and lean to the right to leap towards the ledge that has been hidden from the camera's sight (screenshot 2). Continue shimmying to the right, which will allow you to reach a higher-located portion of the roof. Where there is the boost (screenshot 2).
BOOST 1/2
The boost is hidden inside one of the chests with the confiscated belongings. Wile moving the chests with the force spammer, DO NOT open the chest with Bad Request's belongings straight away (the one with the pick socket). Instead, follow through to the last one (Nilin's belongings). Open the chest to find the boost.


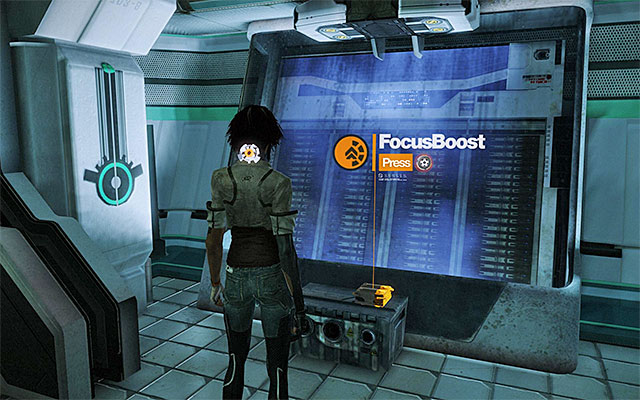
BOOST 2/2
The boost is in one of the side rooms which you can visit on your way to Doctor Quaid's staying place. Start in the place in which, after performing the process of synchronization, Nilin can drain energy from the Brain Drainer (screenshot 1). After you charge the lockpick, locate the door to the small room, marked Memory deletion. Unlock the door (screenshot 2). You can now walk inside and collect the boost (screenshot 3).
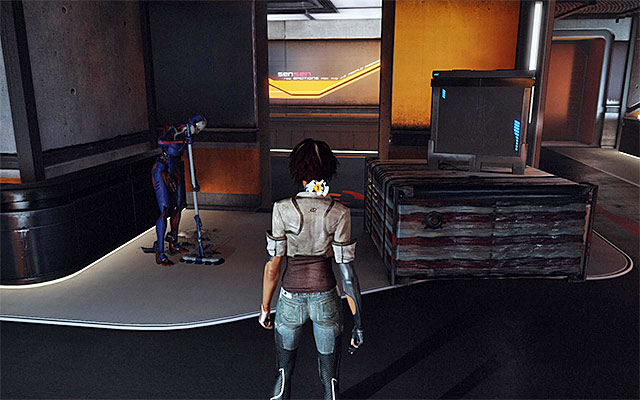

BOOST 1/2
The boost is on the table and you can find it here right after you leave the large room with platform. Stand in the spot in which you meet the robot with mop (screenshot 1). Use the passage behind the robot and go into the second corridor in the row. Check out the table. (screenshot 2).

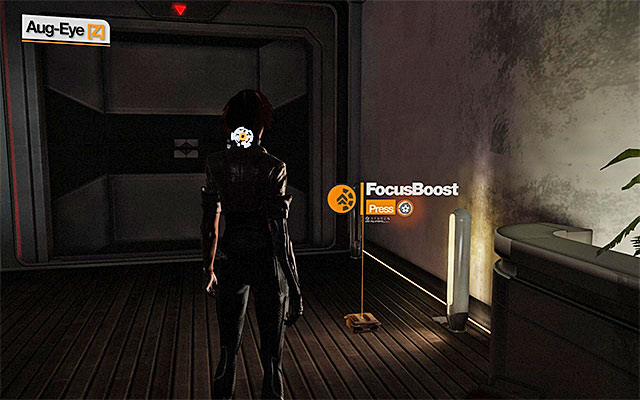
BOOST 2/2
The boost is on the floor and you can collect it on your way to the main security outpost . Stop in the room where you stole Captain Trace's memory and use the lockpick to raise the fire door (screenshot 1). Explore the corridor located behind the door, thanks to which, you will find the boost without major problems (screenshot 2).
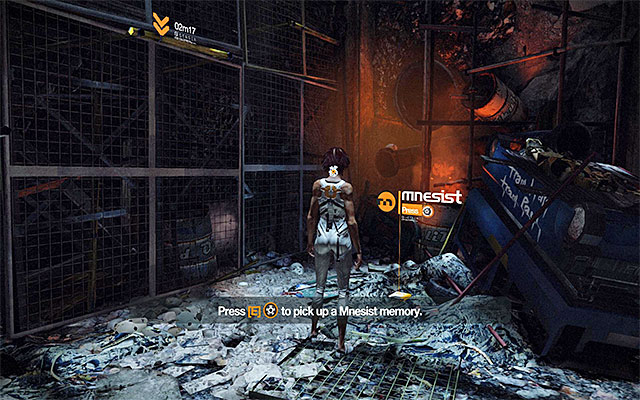
MNESIST MEMORY 1/6 - Neo-Paris History- Founding of Neo-Paris
You can find the memory on your way out of the mutants' den. Because it is located right next to the interactive ledge, you cannot actually miss it.
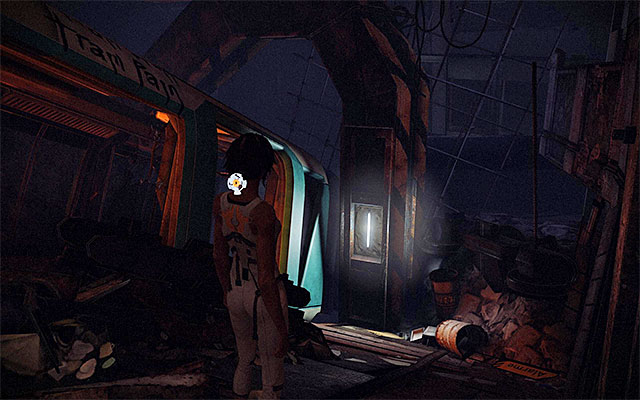
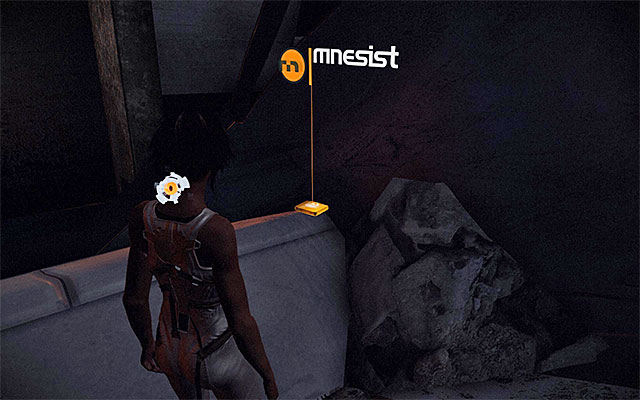
MNESIST MEMORY 2/6 - Neo-Paris Landmarks- The Nymphea Hospital Ship
The memory is lying on the low wall and you can get it right before you leave the mutants' den. Stop after you reach the demolished railcar shown in screenshot 1. Enter the car and turn right. Locate the wall with the memory on it.
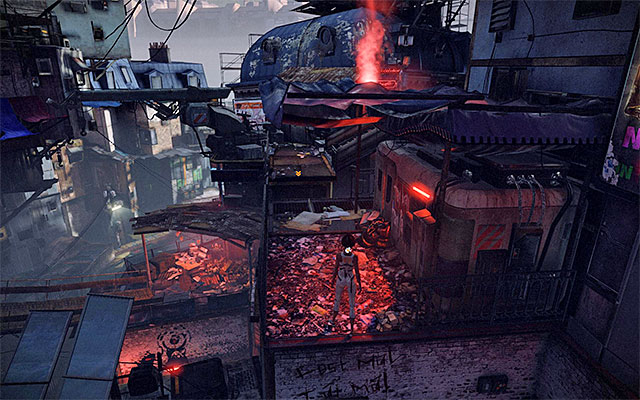
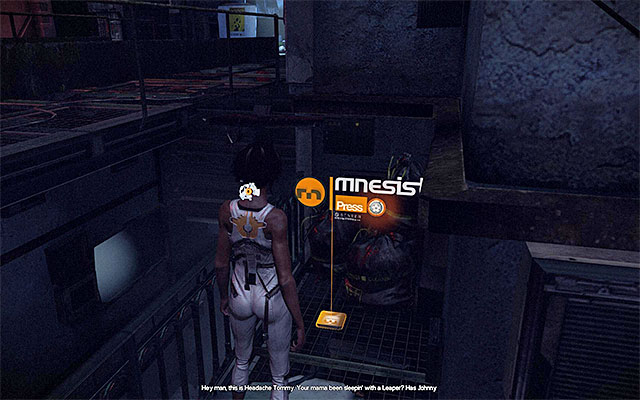
MNESIST MEMORY 3/6 - Memorize and the Sensen- Founding of Memorize
The memory is on the roof that you access while exploring the areas on the surface. Soon after you fight a major battle with mutants, you should make your way to the rooftop shown in screenshot 1. Approach the edge of the roof and turn right to find the memory.

MNESIST MEMORY 4/6 - Technology- Hunt Glove
The memory is lying on the ground in the initial part of the market, i.e. the area occupied by friendly NPCs only. Stop after you reach the first bridge. Do not walk over it and approach the memory to the right of the bridge, instead.

MNESIST MEMORY 5/6 - Neo-Paris VIPs- Edge: The Founder of Errorism
The memory is on the ground close to the place where you found the previous memory. Take the bridge in the market and, after you approach the two merchants, turn to the right a bit. Find the memory in a dimly-lit area before you make use of the ladder.
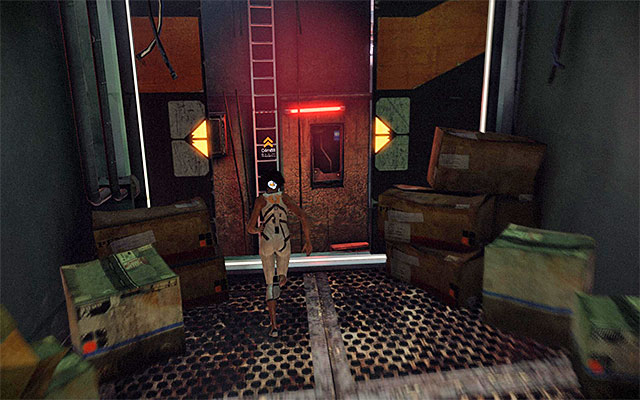


MNESIST MEMORY 6/6 - Memorize and the Sensen- First memoriel accident
The memory is located on a ledge that is difficult to access and you can get it on your way to Tommy's bar. Nilin will be made to leave quickly the corridor with the falling floor, at some point. Right after you make the last leap (screenshot 1), slide down the ladder and let go after you reach the bottom to grab onto a ledge below. Shimmy to the left and perform a leap. Start to slide down here again and make your way towards the ledges located below (screenshot 2). Finally, shimmy to the left as far as you can and climb onto the small ledge shown in screenshot 3, where there is the memory.

MNESIST MEMORY 1/6 - Neo-Paris History- Regulation of Firearms
The memory is lying on the ground and you can find it right after you start episode two. Reach the St Michael's square where there are civilians. Go right here, i.e. towards the NPC that gives a speech and explore the area next to the stairs.
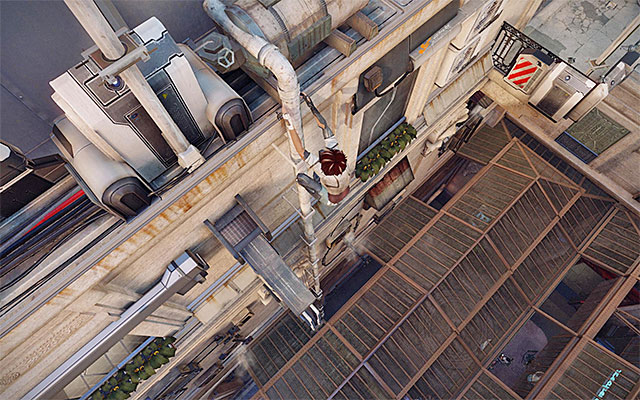
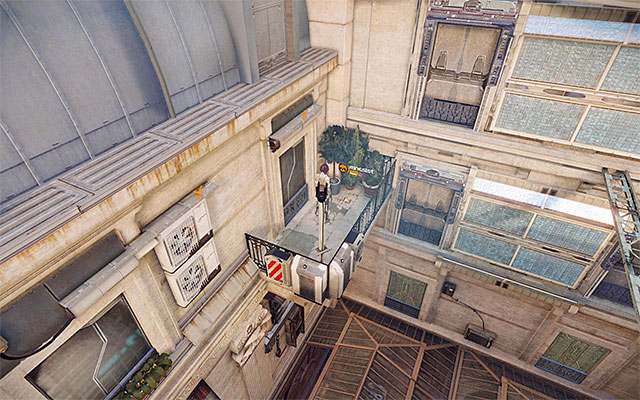
MNESIST MEMORY 2/6 - Neo-Paris Landmarks- Saint-Michel Comfortress
The memory is on the balcony and you can find it towards the end of your excursion to the rotunda. Make sure that you are not shocked with electricity and stop after you reach the vertical pipe shown in screenshot 1. Do not slide down and shimmy to the right instead, this will allow you to reach the balcony shown in screenshot 2.
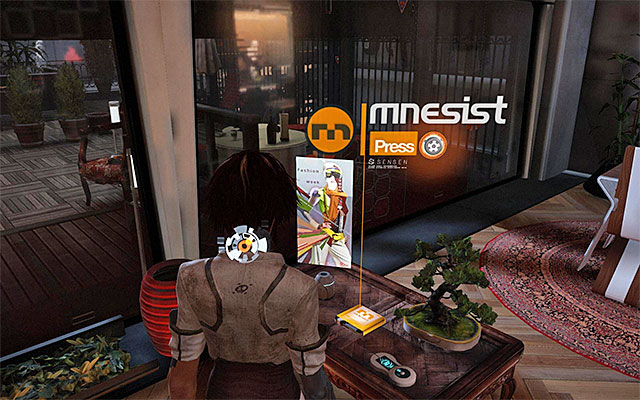
MNESIST MEMORY 3/6 - Technology- Remembrane
The memory is on the table in the apartment that Nilin cuts into through the glass roof. Walk over to the last room and collect the memory.
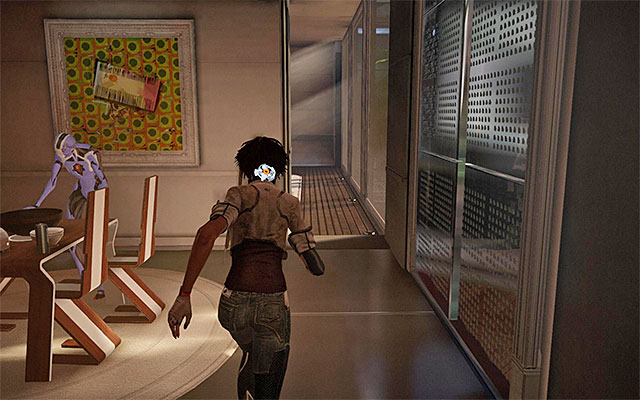

MNESIST MEMORY 4/6 - Neo-Paris VIPs- Kaori Sheridan
The memory is on the table, in the apartment with one of Bad Request's remembrances. Stand in the place where the remembrance is and turn right. Go through the passage to the dining room (screenshot 1). Go to the bedroom that neighbors the dining room to collect the memory from the table (screenshot 2).

MNESIST MEMORY 5/6 - Neo-Paris VIPs- Kid X-Mas
The memory is on the bench in a small yard where Nilin gets on her way to Kaori Sheridan's staying place, right after she leave s her apartment with the remembrance, and after she deals with the group of enforcers.
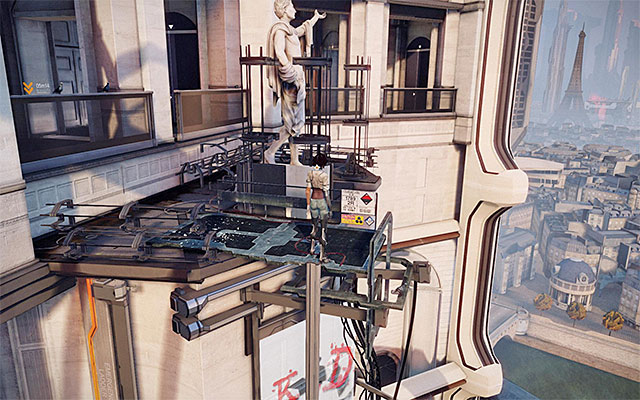

MNESIST MEMORY 6/6 - Memorize and the Sensen- First Sensen Prototype
The collectible is on the ground and you can find it after you steal Kaori Sheridan's memories, on your way to the roof where Nilin will have to fight a boss. Stop soon after you reach the scaffolding shown in screenshot 1. Jump over the balustrade and turn right to pick up the memory (screenshot 2).

MNESIST MEMORY 1/6 - Neo-Paris History- The Leapers Appear
The memory is lying on the ground and you can find it at the beginning of the exploration of the slums, still before you encounter the first group of monsters. Check out, as you walk through the slums, behind the shop with the half-open blind and collect the memory that is lying next to the blind.

MNESIST MEMORY 2/6 - Neo-Paris Landmarks- The Slum 404
The memory is lying on a small table which you can find at the beginning of your exploration of the second part of the slum. You can find the memory shortly before you reach the huge platforms on the roof, where Nilin fights a big battle with mutants.

MNESIST MEMORY 3/6 - Memorize and the Sensen- Philosophy of Charles Cartier-Wells
The memory is lying on the ground and you can find it while exploring the second part of the slum, right before the encounter with the first invisible mutant. Watch out after you pass by the blazing wreck, because after you take the nearby stairs, you need to turn around and explore the area lit with the red fluorescent lamp.
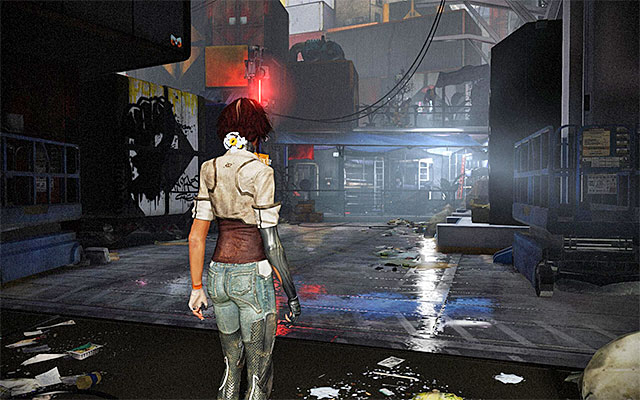

MNESIST MEMORY 4/6 - Neo-Paris VIPs- Nilin
The memory is lying on the chair and you can find it after you win the first fight with the invisible mutants, and reach the cargo bay shown in screenshot 1. Ignore the interactive element to the left and approach the closed shop to collect the memory from one of the chairs (screenshot 2).

MNESIST MEMORY 5/6 - Technology - AV-78 "Horn of Jericho"
The memory is lying on the ground and you can find it on your way to the metro tunnel exit, right after you met with Johnny Greenteeth. Stop after you reach the stairs. Do not climb the stairs and finish your exploration of the main corridor to find the memory next to the grates.
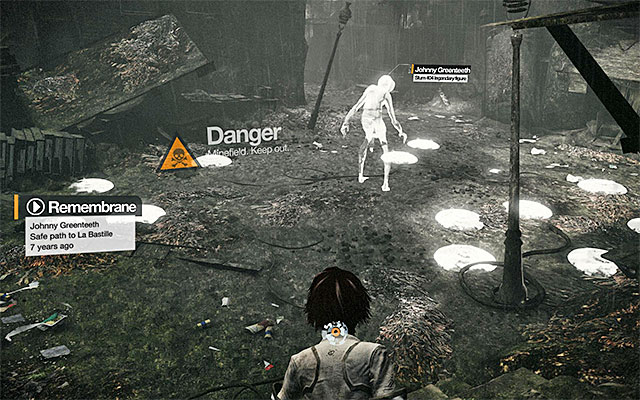

MNESIST MEMORY 6/6 - Technology- Spammer
The memory is lying on the ground in the destroyed district with the mine fields, which Nilin explores towards the end of this episode (not too long before the encounter with Zorn). Watch out where your character has to avoid the mine field while following the virtual Johnny Greenteeth (screenshot 1) because, you will have to stop in the right spot (screenshot 2) and collect the memory before you leave the mine field.
MNESIST MEMORY 1/6 - Neo-Paris History- Global Production Spike
The memory is lying on the ground on a balcony that is quite well hidden. You can gain access soon after this episode starts. More precisely, after you defeat the first group of the invisible mutants. After you deal with the monsters, look out for the interactive ledges shown in screenshot 1. Reach the uppermost ledge and shimmy to the right. After you reach the end on the ledge, jump even higher to reach the ledges above and explore the optional area where the memory can be found (screenshot 2).

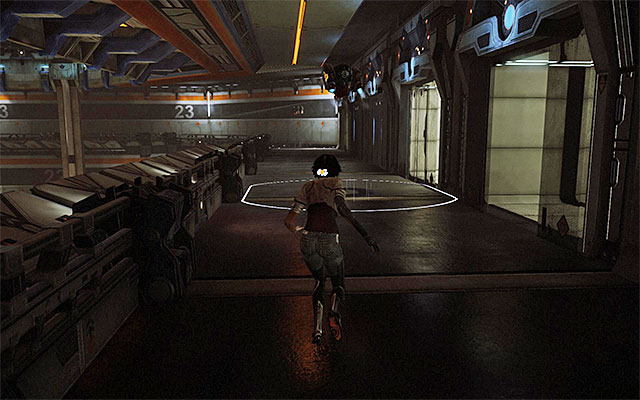

MNESIST MEMORY 2/6 - Neo-Paris History- The European Civil War in Ten Dates
The memory is on the bed in one of the holding cells in the first part of the jail. Start near the door shown in screenshot 1. DO NOT enter and go left, i.e. towards the corridor patrolled by a combat drone (screenshot 2). Hide in one of the cells to avoid the drone and, one it passes you by, go ahead. Stop after you reach the next one, stationary, drone and enter the cell to the right where the memory is (screenshot 3).
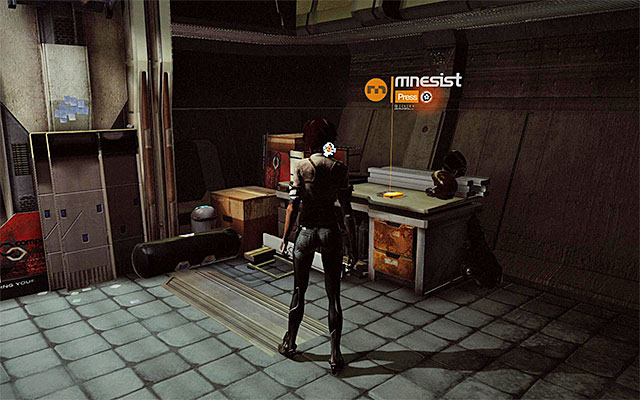
MNESIST MEMORY 3/6 - Neo-Paris Landmarks- La Bastille Fortress
The memory is on the desk inside the Enforcer Outfit Storage Room. The storage room neighbors the (Enforcer HQ) and you can visit it right after you deal with the first enforcer equipped with a shield.

MNESIST MEMORY 4/6 - Neo-Paris VIPs- Madame
The memory is lying on the floor in the Storage room which Nilin can visit right after she steals Madame's memories in the interrogation room. This happens before you go out to the yard where you fight the Nephilim robots for the first time.
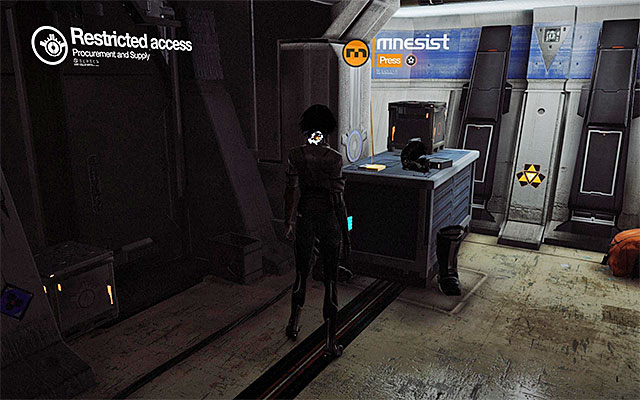
MNESIST MEMORY 5/6 - Technology- "Valet" robot
The memory is on the shelf and you can find it after you win a big fight with the enforcers and robots in the yard. Take the door marked as Tower Entrance screenshot 1) and explore the area thoroughly which will allow you to find the memory (screenshot 2).

MNESIST MEMORY 6/6 - Memorize and the Sensen- Globalization of Sensen
The memory is lying on the floor in the server room, where episode four ends. You can collect the memory after you win the fight with Madame in virtual reality, i.e. before you start moving the memory servers around.


MNESIST MEMORY 1/6 - Neo-Paris Landmarks- Saint-Michel Dam
The memory is on the balcony in the destroyed rotunda. You need to start where you need to leap towards the balcony with the Delicatessence in the background (screenshot 1). After you land onto the balcony, go right to find the memory at the grate (screenshot 2).
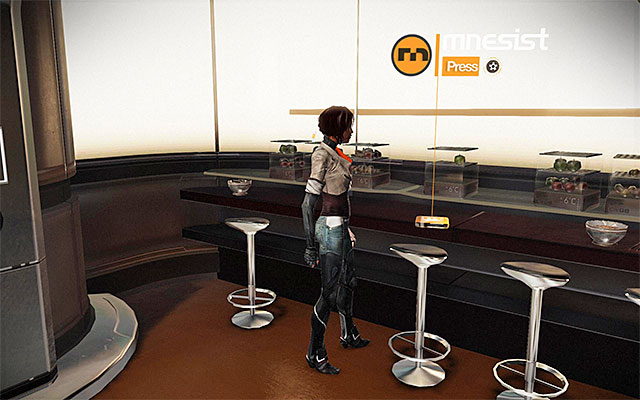
MNESIST MEMORY 2/6 - Neo-Paris History- Climate Migration
The memory is on the counter and you can obtain it right after you fight for the first time the elite enforcer equipped with the damage reflecting armor. After you finish the fight with the enforcer, do not go towards the door you can see in the distance straight away, and explore the area to the right, instead.
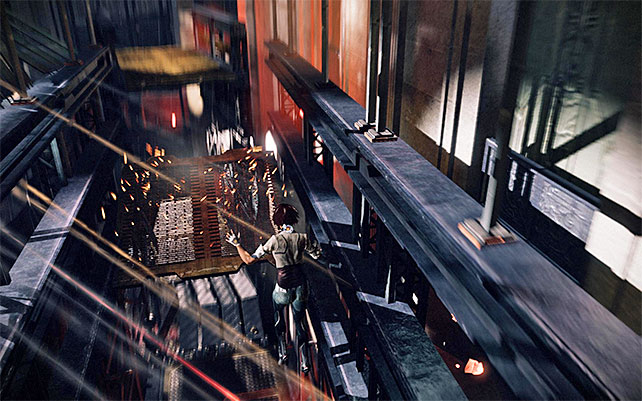
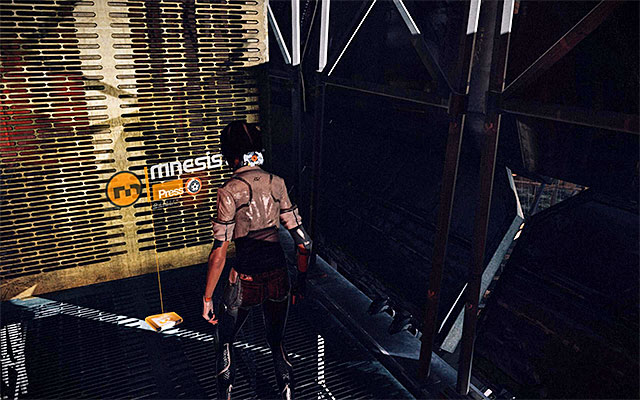
MNESIST MEMORY 3/6 - Neo-Paris Landmarks- Memorize HQ
The memory is on the scaffolding and you can find it during the initial phase of your escape from Captain Trace's jet.. More precisely, it is the place where Nilin loses her balance (screenshot 1). She will land on the lower level of the scaffolding. Turn back, quickly and run up to the memory (screenshot 2) and try to collect it before you come under fire from the jet.
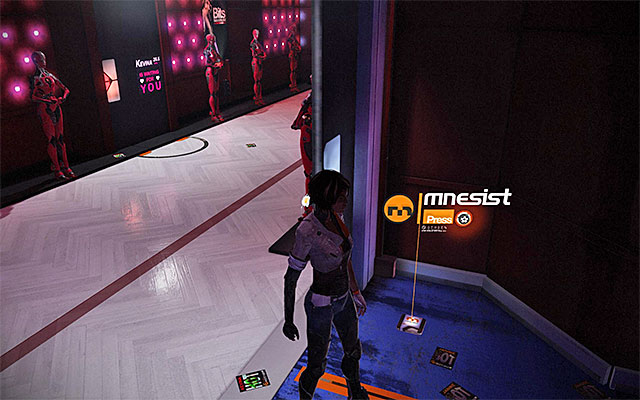
MNESIST MEMORY 4/6 - Neo-Paris VIPs- Scylla Cartier-Wells
The memory is on the ground and you get the opportunity to find it soon after you leave the area where Nilin stopped running away from Captain Trace's jet. Star exploring the area and stop after you reach the corridor with the robots standing at the walls. The memory is around the corner.
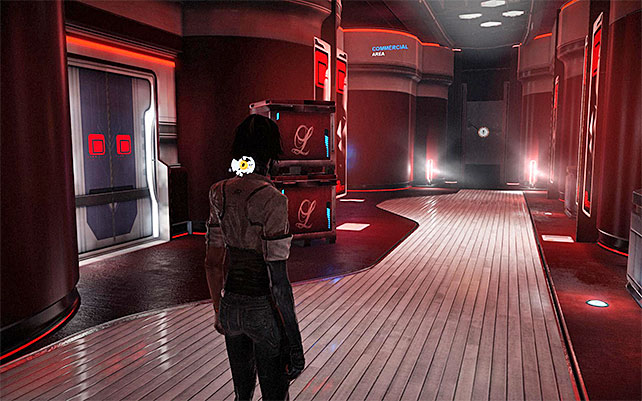

MNESIST MEMORY 5/6 - Memorize and the Sensen- First Military Application
The memory is on the hassock and you can find it soon after you obtain the previous memory. More precisely, after you start exploring the neighboring building (screenshot 1). Focus on the side corridor with two robots, to find the memory on one of the hassocks (screenshot 2) .
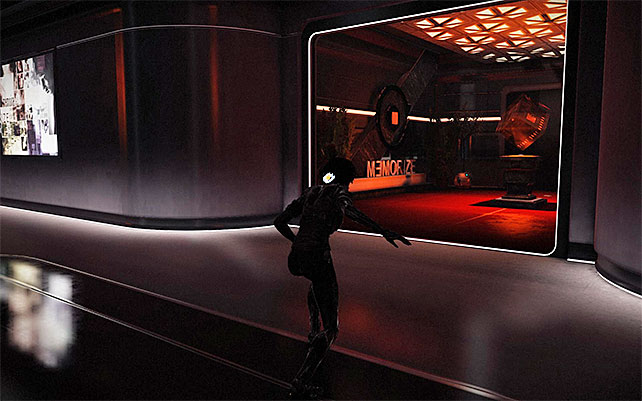

MNESIST MEMORY 6/6 - Technology- Pick-socket
The memory is on the floor and you can obtain it at the very end of this episode. After you reach the Memorize HQ, you need to walk around the combat drones and explore the area shown in screenshot 1, which is located opposite the entrance to Scylla Cartier-Welles's office. The memory is easy to find there (screenshot 2).
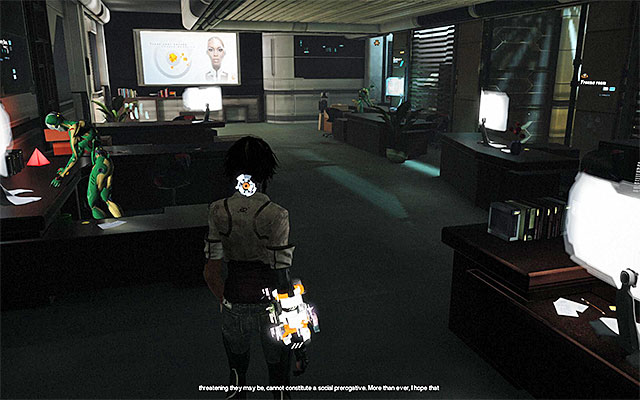
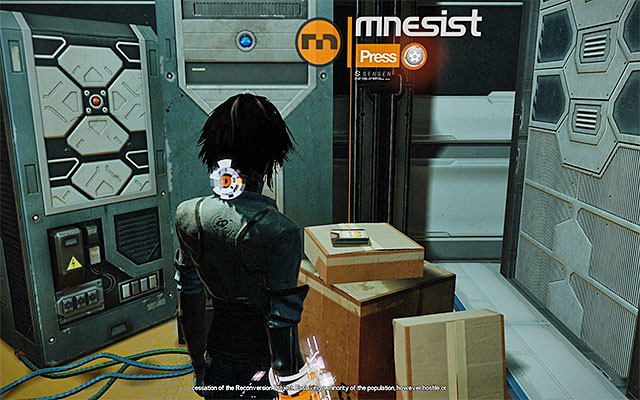
MNESIST MEMORY 1/5 - Neo-Paris History- New Economic Pact
The memory is on the boxes and you can find it soon after you collect the Pick-Socket from the chest with Bad request's belongings. You need to reach the administration room with several robots working there (screenshot 1) and take the passage marked as the Trauma Room. The memory is at the end of the corridor (screenshot 2).
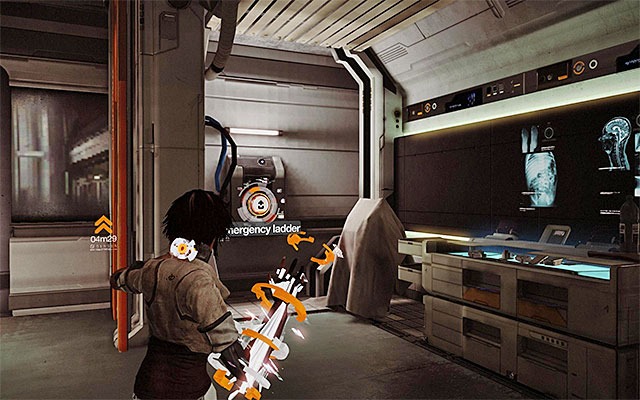
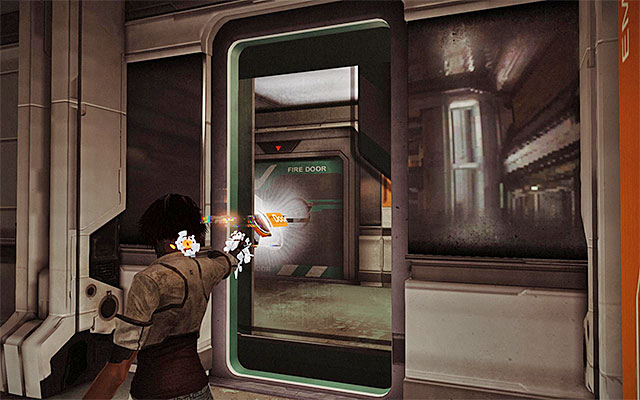

MNESIST MEMORY 2/5 - Neo-Paris Landmarks- Mnemopolis Tower
The memory is on the table in room marked as XP Unit A that you can access soon after you watch the cutscene with Bad Request's holding cell moving away, and deal with a bunch of enemies. Remain in the room where you fought the battle and locate the generator shown in screenshot 1 to drain it for energy. Power the door shown in screenshot 2 with the energy from the lockpick. Explore the area to reach the laboratory room (screenshot 3).
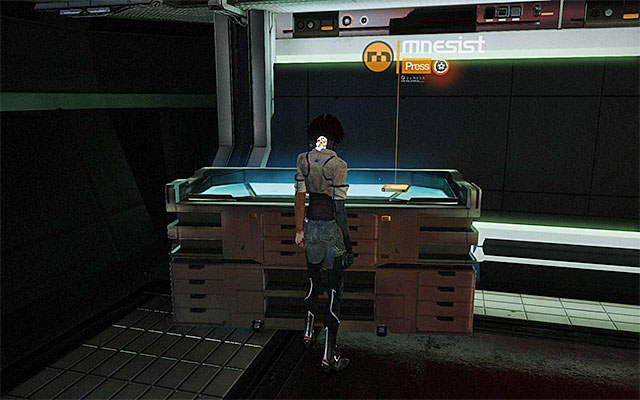
MNESIST MEMORY 3/5 - Memorize and the Sensen- First Civilian Application
The memory is on the table and you can find it while searching for Doctor Quaid. Look out for the collectible after Nilin walks through the checkpoint for the last time, while following the medical chair.
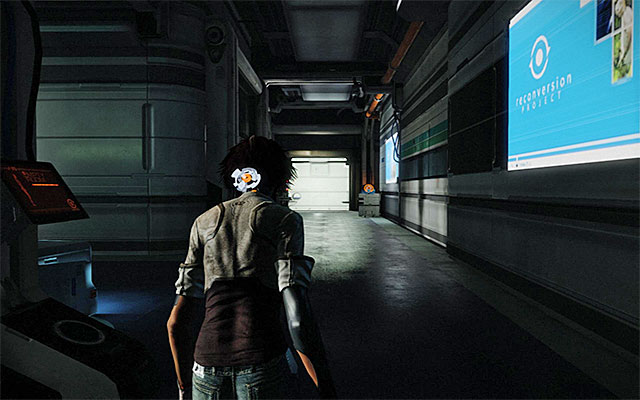
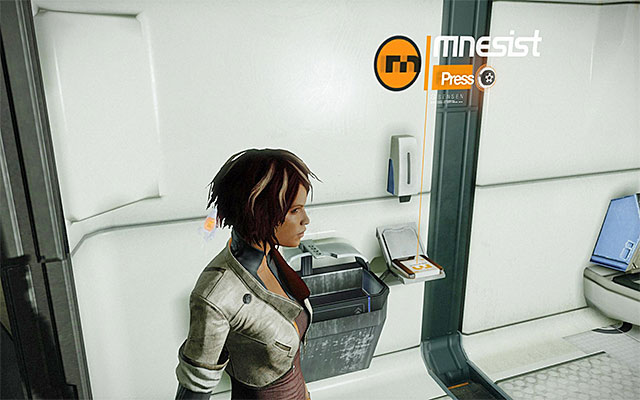
MNESIST MEMORY 4/5 - Technology- SAT Technology
The memory is on the shelf in a holding cell and you can obtain it right after your character returns to the location where much of the prologue took place. Walk through the corridor shown in screenshot 1 the opposite direction than you did previously. Reach Nilin's cell located at the end of this corridor (screenshot 2).

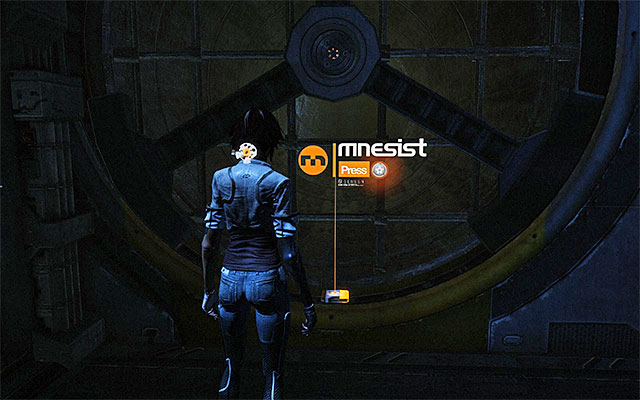
MNESIST MEMORY 5/5 - Neo-Paris VIPs- Olga Sedova
The memory is on the floor and you get the chance to obtain it towards the very end of this episode. You need to reach the oval room where you fight the battle with Johnny Greenteeth. Do not approach Bad Request just yet (which would initiate the boss battle), and locate the side passage. Use the Junk Bolt to make it accessible (screenshot 1). Check the corridors here to reach the inactive fan and the memory (screenshot 2).
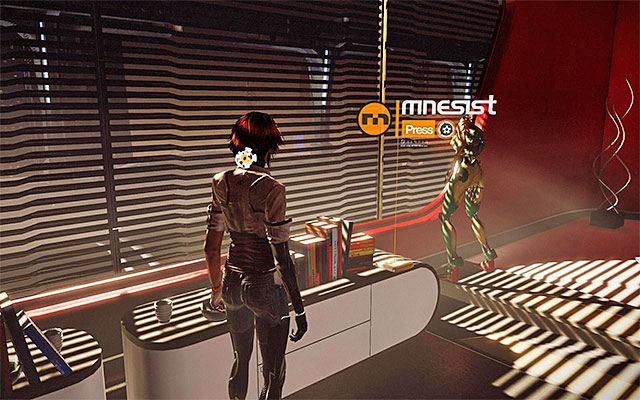
MNESIST MEMORY 1/5 - Neo-Paris History- Deluge 2.0
The memory is on the table in apartment 205 that Nilin needs to go through on her way to the current staying place of captain Trace.

MNESIST MEMORY 2/5 - Memorize and the Sensen- Sensen 6: Response to the Memo Criminals
The memory is on the big table in the part of the bar where the private party is being held (screenshot 1). Explore the location thoroughly and make sure that you do not come close to the combat drones. The memory is on the table under the blue disco ball (screenshot 2).

MNESIST MEMORY 3/5 - Neo-Paris VIPs (VIPs of Neo-Paris) - Charles Cartier-Wells
The memory is on the bench and you can obtain it after you steal Captain Trace's memories after he is murdered by mutants. Remain in the room where the captain's corpse is and locate the objects shown in screenshot 1. Start climbing here. You need to reach a balcony above and check the nearby benches to find the memory on one of them (screenshot 2).

MNESIST MEMORY 4/5 - Neo-Paris Landmarks- Meripherique
The memory is on the desk in a the Security Post room that Nilin needs to walk through on her way to the main security post.

MNESIST MEMORY 5/5 - Technology- Scaramech
The memory is on the chest of drawers in the main security post, where Nilin solves two puzzles to unlock the access to the Conception Cube.
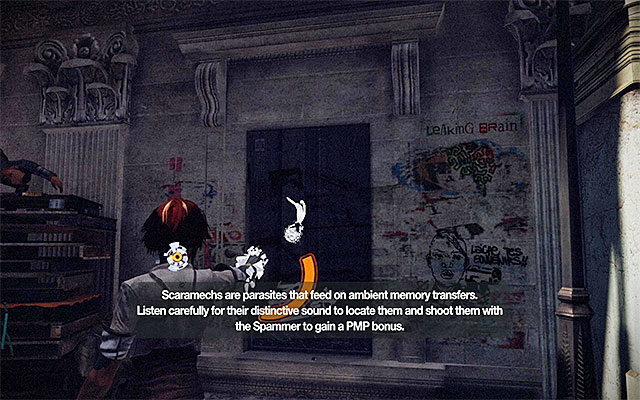
SCARAMECH 1/10
You can find the parasite during your exploration of the first part of the slum. More precisely, soon after you leave the market where the episode started.
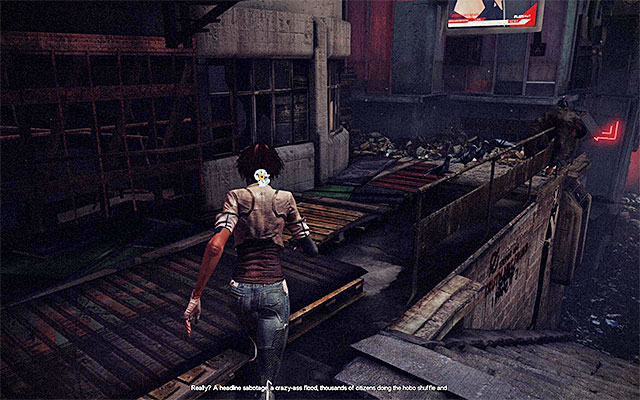
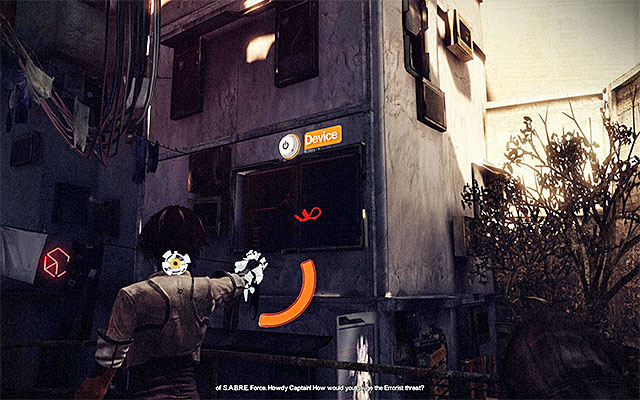
SCARAMECH 2/10
You can find the parasite while exploring the first part of the slum, soon after you defeat the first group of mutants. Stop after you reach a bigger staircase that is to your right and make your way to the balcony to the left, shown in screenshot 1. Turn right and explore the building to the right that you can see in the distance. You will find an interactive switch that exposes the parasite (screenshot 2).
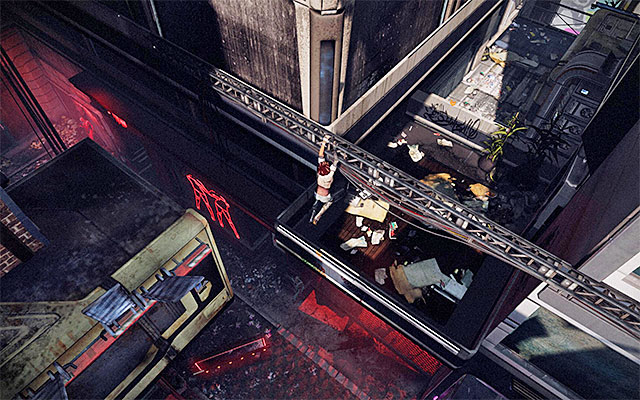
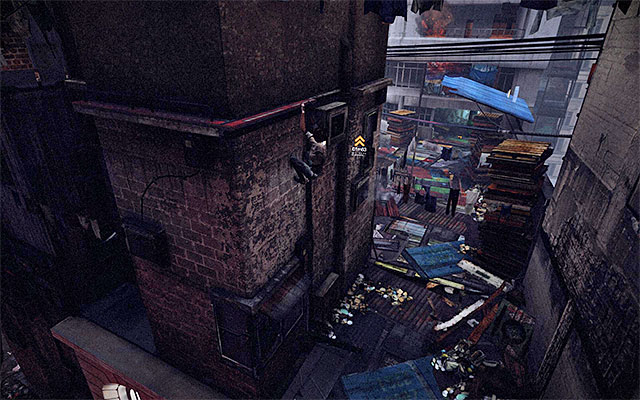

SCARAMECH 3/10
The parasite is on the roof in the first part of the slum and, more precisely, above the arena where your character fights her fight with the Skinner Leaper and the smaller mutants. It is pretty difficult to reach the rooftop, though. After you win the fight, start climbing and stop in the spot shown in screenshot 1. DO NOT drop down to the balcony below and shimmy to the left. Lean back after a few moments and leap towards the ledge to the left. Shimmy to the right now, make several more leaps and reach the rooftop shown in screenshot 2. Drop down to that roof and explore it thoroughly. The parasite is inside the manhole that you need to open with the Spammer (screenshot 3).

SCARAMECH 4/10
You can find the parasite on your way to Tommy's bar. Stop after you reach the area with the blazing wreckage (soon after you encounter the invisible mutant for the first time). Do not approach the wreck and explore the area around entrance to the location to notice the parasite clinging to a wall.

SCARAMECH 5/10
You can find the parasite soon after you find the previous one, i.e. also on your way to Tommy's bar. Soon after you go past the blazing wreck, Nilin will have to use the spammer to raise the panels standing in her way. Right after you raise the panels, look up because the parasite is clinging to one of them.

SCARAMECH 6/10
You can find the parasite towards the end of your journey to Tommy's bar. More precisely, after you reach the big, running fan. Do not stop the fan and turn around to locate the parasite clinging to a wall.


SCARAMECH 7/10
You can find the parasite in the sewers that Nilin explores after the successful defense of Tommy's bar. While exploring the sewers, look around fir the grate shown in screenshot 1, through which you can aim at the switch that you can see in the distance. This will result in the upper platform being moved. After you do that, RETURN to one of the previous grates to locate the parasite shown in screenshot 2.

SCARAMECH 8/10
The parasite is clinging to the wall and you can find it right after you set out for the exit from the metro tunnels, i.e. after you meet Johnny Greenteeth.
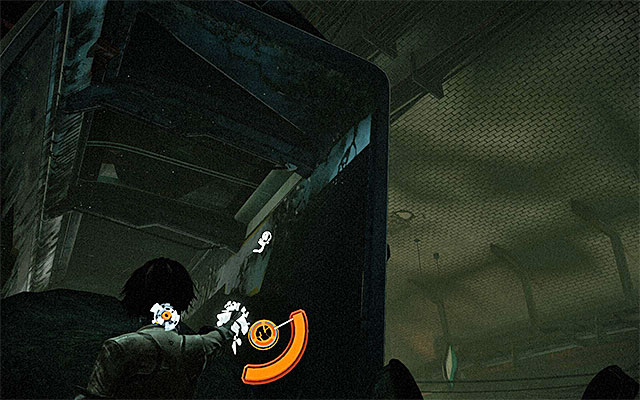
SCARAMECH 9/10
You can find the parasite right before you leave the metro tunnels and enter the destroyed district with the mine fields. It is clinging to one of the destroyed railcars in the last big location.

SCARAMECH 10/10
You can find the parasite clinging to the roof of one of the buildings located in the district with the mine fields. You find it after you finish climbing for a longer period of time, right before you jump down into the arena where you go past the last mine field and fight Zorn.

SCARAMECH 1/10
You can find the parasite clinging to the wall and you can find it after you reach the first part of the jail. Right after you leave the holding cell, go right and towards the stationary (but fully active) combat drone. Approach the drone and aim at the parasite behind it.
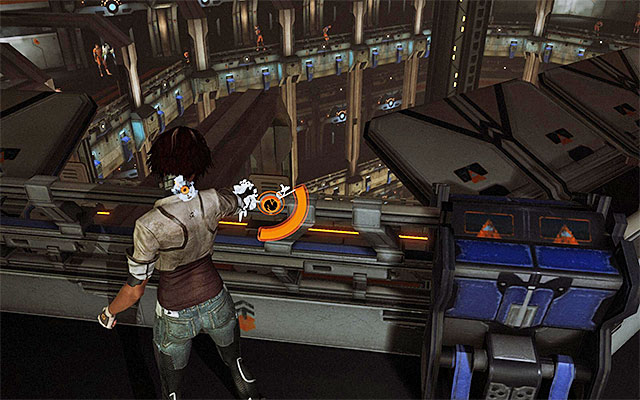
SCARAMECH 2/10
The parasite is in the first part of the jail, i.e. the same part where you found the previous one. Stop after you reach the door shown in screenshot 1. Do not walk through and approach the balustrade to locate the parasite in the distance (screenshot 2).
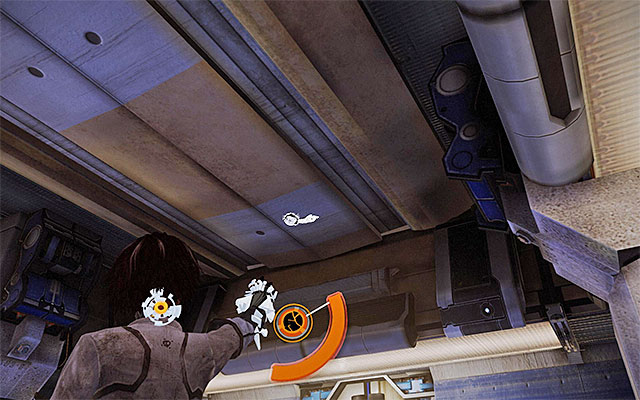
SCARAMECH 3/10
You can find the parasite right after you locate the previous one. Take the exit from the first part of the jail (marked Jail Staff Only) and go ahead. Check out the ceiling at the end of the corridor, where you will locate the parasite with no problems at all.
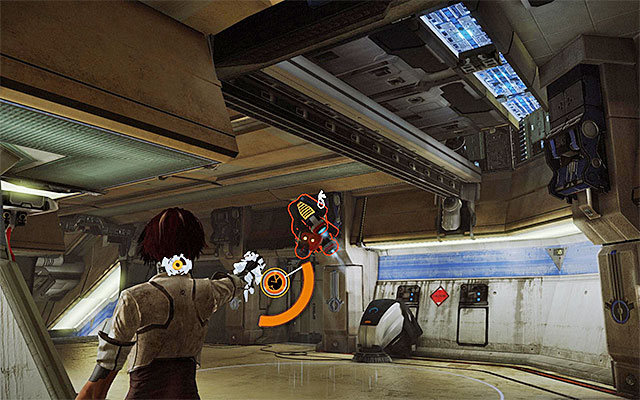
SCARAMECH 4/10
You can find the parasite soon after you go past the tech room on your way to Sergeant Vaughan's staying place. Stop after you reach the corridor that is patrolled by the combat drone and wait for the machine to move away from your character. Then, run up quickly and shoot at the parasite clinging to the wall.
SCARAMECH 5/10
You can find the parasite clinging to the ceiling in the second part of the prison, right after you deal with the first group of enforcers with shields. Open the door to Sector III and turn left right after you enter the corridor.
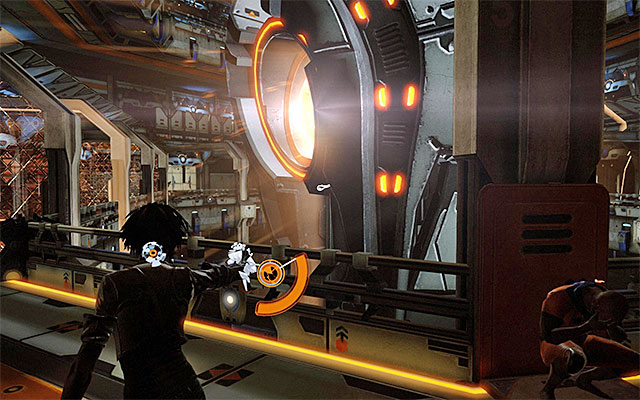

SCARAMECHS 6-7/10
You can find the parasites clinging to the Brain Drainer that you can find in the second part of the jail. While attempting to destroy them, you need to watch out for the Drainer's reflector.

SCARAMECH 8/10
The parasite is clinging to a wall and you can find it after you fight with the airborne Seraphim robots for the first time. Take the corridor to the next location and top after you reach the corner, in order to check the nearby walls.
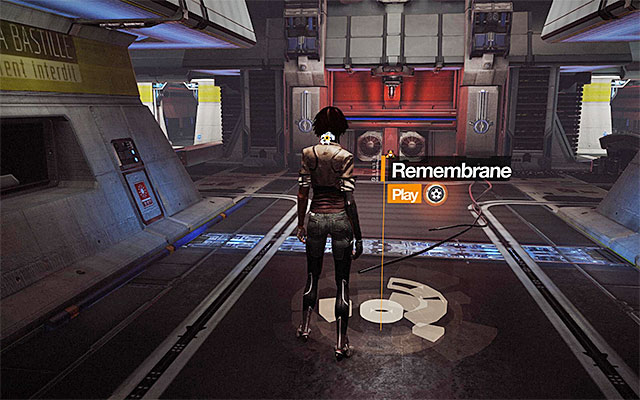
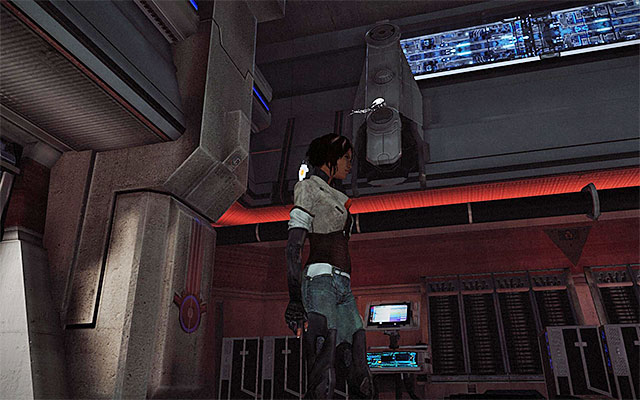

SCARAMECHS 9-10/10
The parasites are clinging to the walls in the side-corridors of the location that you explore on your way to the server room, i.e. right after you steal Madame's memories. Stop in the spot shown in screenshot 1, i.e. next to the remembrance. Explore the abovementioned corridors above, which will let you locate the parasites (screenshots 2 and 3).
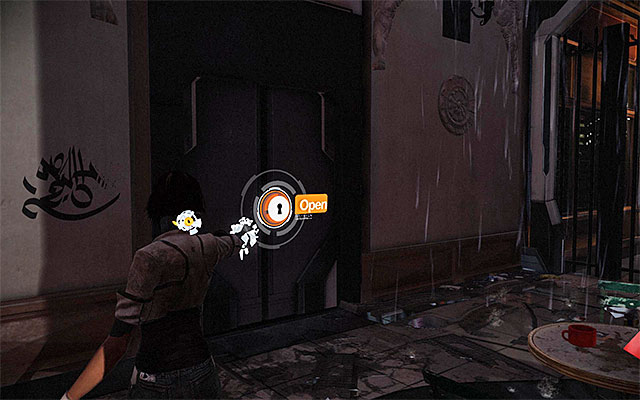
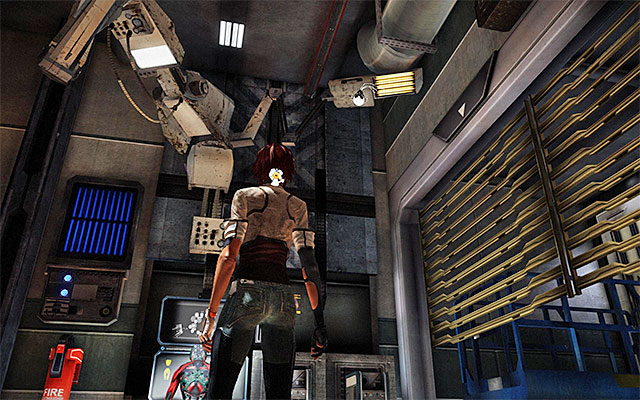
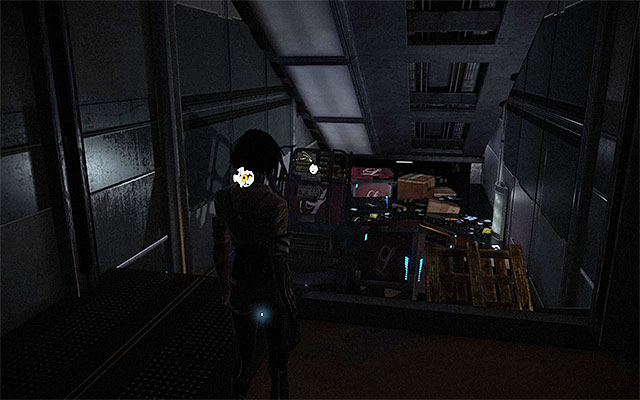
SCARAMECHS 1-2/10
You can find the parasites right after you start this episode. Remain in the starting point and locate the side-door shown in screenshot 1. Take to the exploration if the corridors, which will allow you to locate both parasites (screenshots 2 and 3).
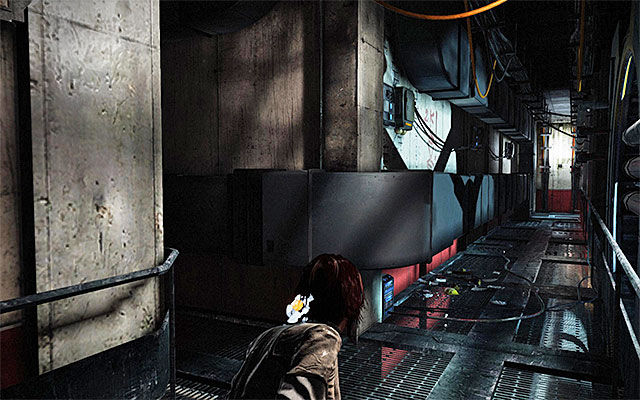

SCARAMECH 3/10
The parasite is clinging to a wall and you can find it on your way to the rotunda. Stop after you reach the fork shown in screenshot 1 and enter the corridor to the left. At the end of the corridor, there is an inactive fan shown in screenshot 2. The parasite is behind that fan.

SCARAMECH 4/10
The parasite is clinging to the big neon light and you get the opportunity to find it while you are exploring the initial part of the flooded district. After you make it onto one of the ledges above (still before you reach the solar panels) you need to turn around. This is the only way to find the parasite.

SCARAMECH 5/10
The parasite is clinging to the chimney and you can find it while climbing to reach the VIP entrance. Make your way over to the crane by using the ladder shown in screenshot 1 and reach the top of the structure. Turn left here and approach the crane controls. Do not interact with the panel and enter the aiming mode to find the parasite.

SCARAMECH 6/10
You can find the parasite while running away from Captain Trace's jet. Stop after you land on a bigger balcony where Nilin will be safe for some time. Turn around and locate the parasite.
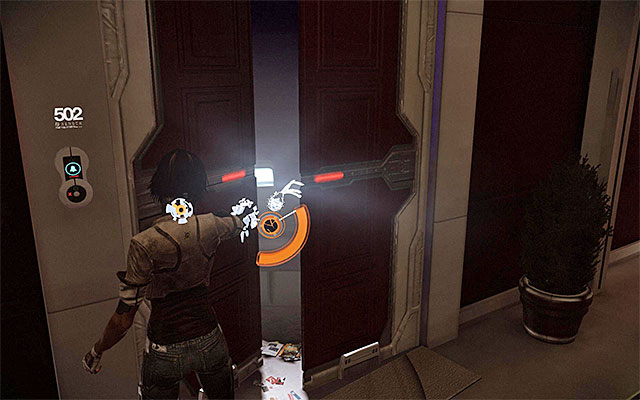
SCARAMECH 7/10
The parasite is in apartment 502 and you can find it towards the end of your escape from Captain Trace's jet, i.e. on your way to the roof where the final showdown with the hostile Captain will take place. You get the opportunity to find the parasite right after the major fight with the enforcers, and you need to stand next to the partially open door to the apartment.
SCARAMECH 8/10
The parasite is clinging to the chimney on the roof where you fight your final battle with Captain Trace to steal his memories. The collectible must be obtained still while dodging from the jet's fire or, after you cause the machine to emergency-land.
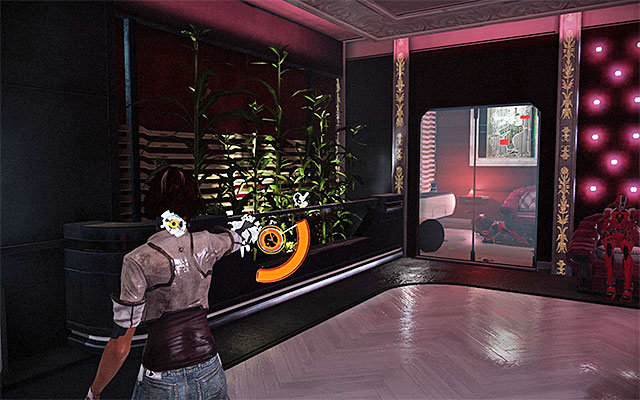
SCARAMECH 9/10
The parasite is hidden in the bushes and you get the opportunity to find it soon after you leave the area where Nilin stopped escaping from Captain Trace's jet. Stop right after you walk into the building and take a careful look at the plants to the left.

SCARAMECH 10/10
The parasite is clinging to a wall in the Memorize HQ, where Nilin gets towards the end of this episode. Explore the first big room, i.e. the one that you walk into after you solve the Captain Trace puzzle (you get to explore it before you reach Scylla's office).
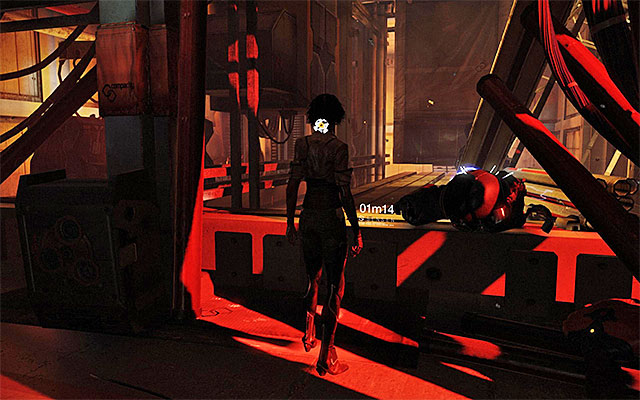
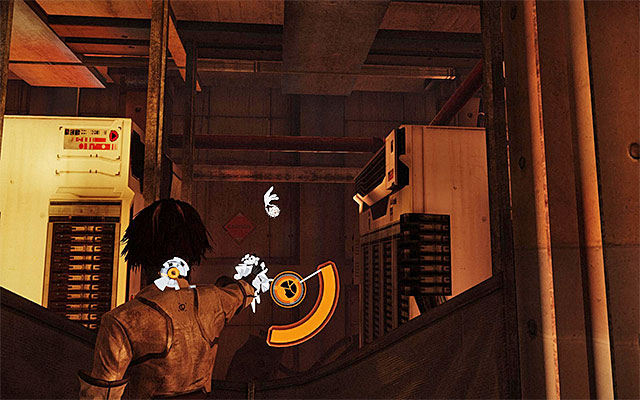
SCARAMECH 1/12
The parasite is clinging to the wall and you can find it right after the sixth episode starts, i.e. on your way to the elevator. As you go, keep looking around fir the narrow footbridge on the left (screenshot 1), that Nilin can climb onto. Make your way to the end of the footbridge and locate the parasite.
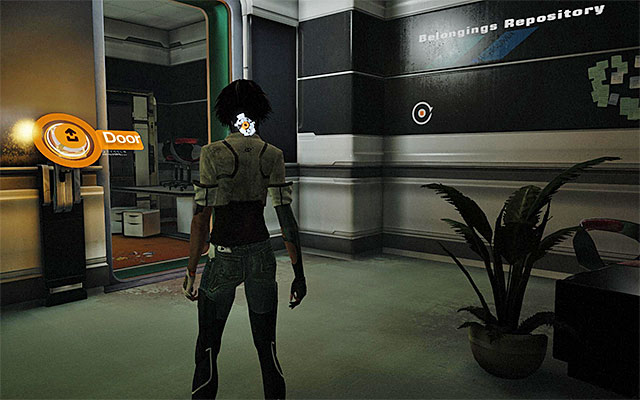
SCARAMECH 2/12
The parasite is clinging to a wall and you get the opportunity to find it right after you obtain the Pick-Socket. Unlock access to the administration section and enter the side store room shown in screenshot 1. The parasite is at the wall (screenshot 2).

SCARAMECH 3/12
The parasite is above the holding cell that Bad Request is staying in. After you locate the cell, do not approach it straight away (this would result in a cutscene), and examine the nearby girders to find the parasite.


SCARAMECH 4/12
The parasite is clinging to a wall and you can locate it soon after the holding cell with Bad request inside, moves from its position and Nilin will go chasing after it. Start by using the elevator shown in screenshot 1 and set it into motion with your pick socket. As soon as the elevator reaches the higher level, turn right. Drain the energy from the elevator's control and power with it the entrance to the holding cell shown in screenshot 2. Examine the cell to find the parasite below the ceiling.

SCARAMECH 5/12
The parasite is clinging to the wall and you get the opportunity to find it while walking to the big hall with Bad Request's holding cell moving farther and farther away. As you go, look around for the interactive point shown in screenshot 1, and shoot it with a Junk Bolt. Leap towards the passage that opens as a result, and explore this area. Thanks to this, you will find the parasite (screenshot 2).
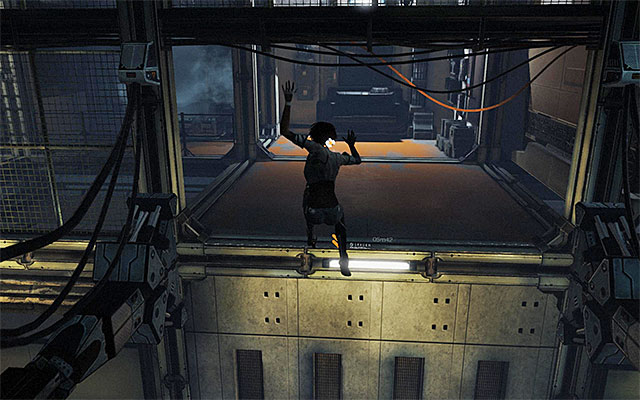
SCARAMECH 6/12
Just like the previous one, this parasite is in the big hall with Bad Request's cell moving away. After you obtain the previous collectible, return to the central platform and leap towards the opposite ledge shown in screenshot 1. Find here, the parasite clinging to the ceiling (screenshot 2).
SCARAMECH 7/12
The parasite is in the holding cell and you can reach it after Nilin steals Bad Request's memories. After that, she will be transported into a new area. Charge the lockpick and return to the starting point. Open the neighboring cell shown in screenshot 1. Enter the cell and eliminate the parasite (screenshot 2).
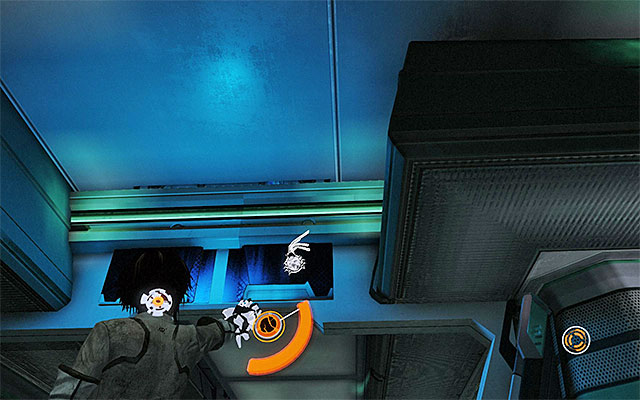
SCARAMECH 8/12
The parasite is clinging to the wall and you can find it while searching for Doctor Quaid. Look out for the parasite after Nilin walks through the checkpoint for the second time, while following the medical chair that she set into motion earlier.
SCARAMECH 9/12
The parasite is clinging to a small robot in the room marked as Memory Storage. You can explore this area on your way to Doctor Quaid's staying place, soon after you deal with a larger group of enforcers.
SCARAMECH 10/12
The parasite is in the room where Nilin met Doctor Quaid for the first time. After you eliminate all enemies, examine the interactive piece of equipment for draining brains ( the one that appeared in the prologue), to find the parasite clinging to it.

SCARAMECH 11/12
You can find the parasite while chasing after Doctor Quaid. Stop in the long corridor with the Zorn robot (screenshot 1) Use the Junk Bolt to destroy the robot completely, in order to expose the parasite (screenshot 2).
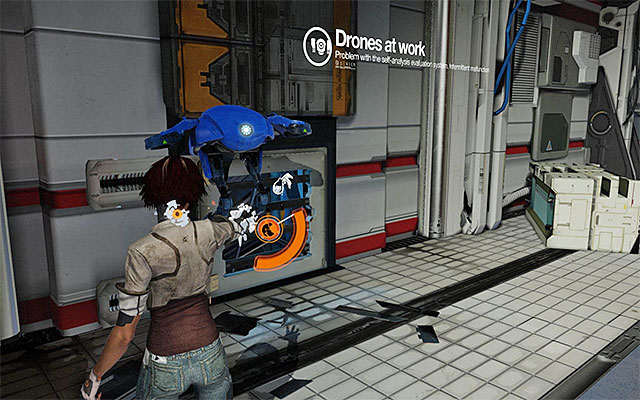
SCARAMECH 12/12
You can find the parasite soon after you have found the previous one, in the next part of the main tunnel that you run through to get Doctor Quaid. Approach the blue robot and examine the hole in the wall.

SCARAMECH 1/11
The parasite is clinging to the wall in the large elevator shaft where Nilin fights monsters at the beginning of the seventh episode. It is best to focus on finding the parasite only after you have eliminated all of the enemies, including the Zorn robot.
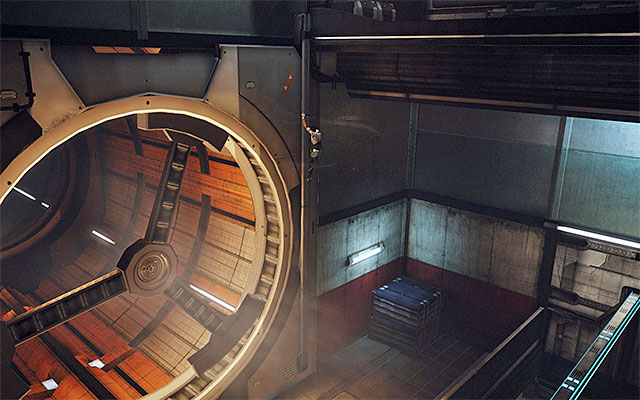
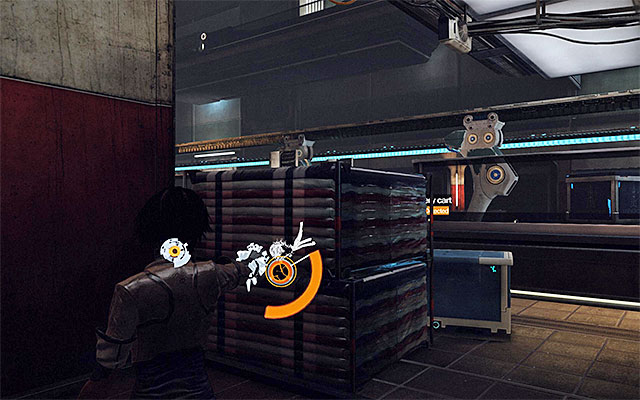
SCARAMECH 2/11
You can find the parasite while walking through the large hall with the moving platforms and, more precisely, after you slide down the pipe next to the big fans (screenshot 1). Go left and take a leap on the way. Stop after you reach the nearest corner and locate the parasite shown in screenshot 2.


SCARAMECH 3/11
You can find the parasite in the corridor that you visit while searching for Captain Trace, where Nilin has to fight the elite enforcers (screenshot 1). After you finish them off, examine the corridor carefully, thanks to which you will locate the parasite (screenshot 2).
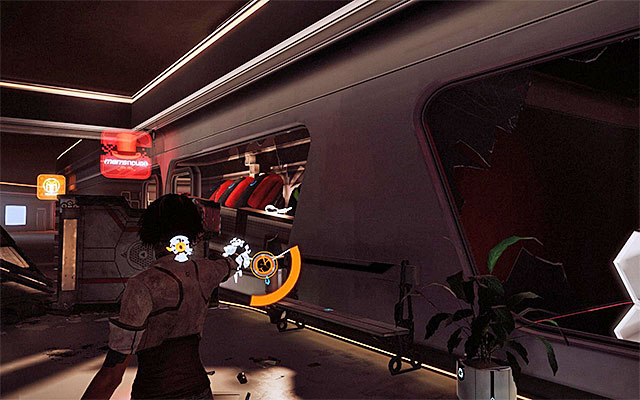
SCARAMECH 4/11
You can find the parasite while searching for Captain Trace, and more precisely, right after you make use of the elevator and reach the tenements with mutants attacking civilians. Explore the destroyed shop that you pass by (you will find it still before using the inactive escalator).
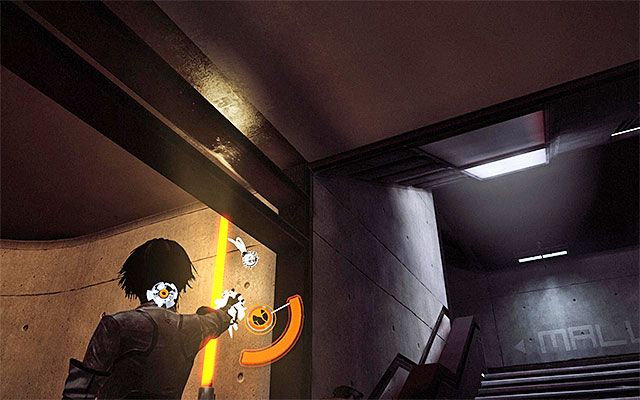
SCARAMECH 5/11
The parasite is clinging to the wall and you can find it towards the end of your search for Captain Trace, right next to the stairs and the door to the meeting place with Trace.

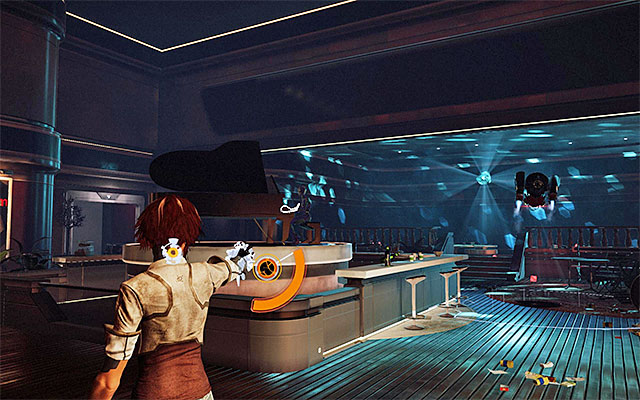
SCARAMECH 6/11
The parasite is located in the part of the bar that is delimited for the Private Party (screenshot 1). Explore this area thoroughly and make sure that you do not come close to the combat drones. You should notice the parasite clinging to the grand piano located in the central part of the room (screenshot 2).

SCARAMECH 7/11
You can find the parasite while chasing after Captain Trace, and more precisely soon after you deal with the enforcers equipped with shields. Look around for the locked fire door and approach it to find the parasite.
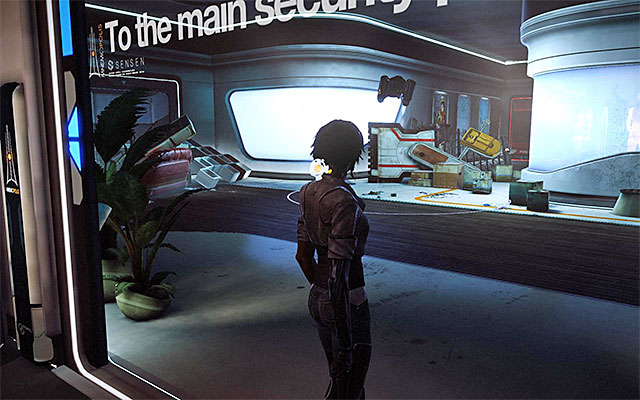

SCARAMECH 8/11
The parasite can be found (just like the previous one) while trying to find Captain Trace. Stop after you reach the area shown in screenshot 1, which is patrolled by a combat drone. Go slightly to the left of the entrance and check out the pile of debris to find the parasite (screenshot 2).

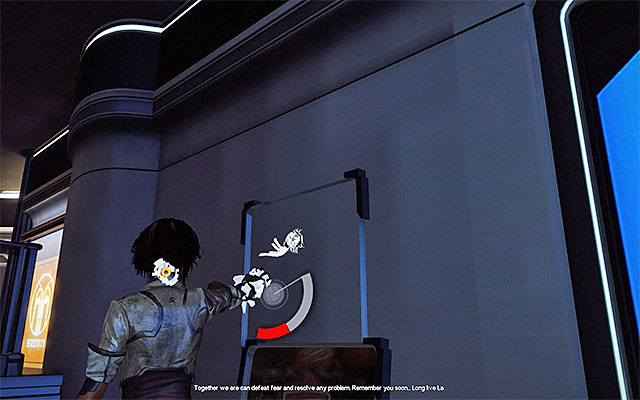
SCARAMECH 9/11
The parasite is in the security post, i.e. the place where Nilin goes to catch up with Trace. Before you come close to the captain, locate the item hanging at the wall to the right of the entrance (screenshot 1) and destroy it with junk bolt. This will reveal the parasite (screenshot 2).

SCARAMECH 10/11
You can find the parasite on your way to the place of staying of the mutants that stole Trace's memories. Stop in a larger room of the destroyed mall and explore it to find a pile of debris with the parasite hiding there.
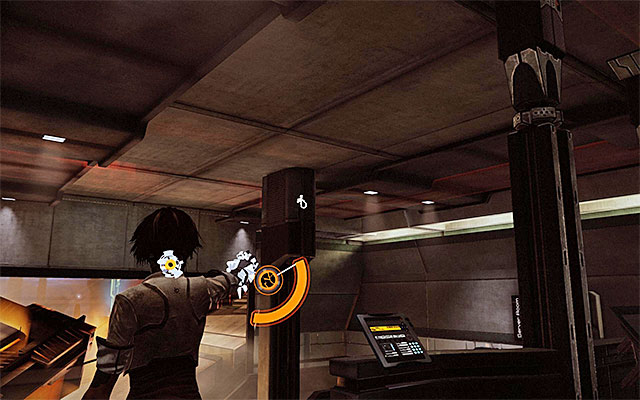
SCARAMECH 11/11
The parasite is in the main security post that you visit towards the end of this episode, where Nilin solves two puzzles to gain access to the Conception Cube. Turn your attention to the pillars in this room to find the parasite on top of one of them.
SCARAMECH 1/2
The parasite is in the room in which Nilin starts the exploration of the Conception Cube. Right after you start the episode, turn around and take a few steps forward to locate the parasite clinging to one of the statues.

SCARAMECH 2/2
The parasite is in the area that leads up to the central memory server, i.e. the area where you are going to fight the game's end-boss. Stand in the place shown in screenshot 1. DO NOT ENTER the large hall and start to walk back, using to your advantage the fact that the blocks changed their positions. Locate the narrow passage shown in screenshot 2 and look up to find the parasite (screenshot 3).
The below table lists all Steam achievements available in the version of the game for PC computers. These coincide with the achievements for the Xbox 360 version, and with trophies in the Playstation 3 version of the game.
ACHIEVEMENT NAME
MEANS OB ACHIEVING
400
Eliminate a total of 400 enemies
8-Hit Wonder
You need to perform 40 combos of 8 moves. You can start scoring for the achievement only after you unlock the last combo, because this one is the 8 move combo.
Are You My Mummy?
You get this achievement automatically and you cannot skip it.
Birthday Crash
You get this achievement automatically and you cannot skip it.
Biter Bit
You get this achievement automatically and you cannot skip it.
Can't Touch This
You need to defeat five Elite Enforcers without deploying combos or using the Spammer. As a result, you should rely only on special attacks and, more precisely on the Sensen Camo and the Logic Bomb.
Christmas is Over
You get this achievement automatically and you cannot skip it.
Crime of Passion
You get this achievement automatically and you cannot skip it.
Dead Man's Chest
You get this achievement automatically and you cannot skip it.
Droning By Numbers
You need to have Nilin attacked by a combat drone five times and die.
Dropping L-Bombs
You need to detonate two Logic Bombs within 15 seconds. Right after you place the first bomb, start attacking your enemies with the longest combos consisting only of the Cooldown Pressens, in order to regenerate the special attack very quickly. Once it becomes possible, attach another bomb to one of the enemies.
Errorist Agent
You need to beat the game at the normal difficulty level (Errorist Agent).
Fiat Lux!
You need to defeat a total of 15 Strangler Leapers without using the Sensen DOS special attack even once. This means that you need to fight your battles only in well lit areas, so as to make the monsters visible.
Final Overload
You get this achievement automatically and you cannot skip it.
Float Like a Butterfly
You need to defeat the episode two boss (Kid X-Mas), within five, or less, minutes. If you did not manage to get the achievement during your gameplay (it is not difficult because 5 minutes is a plenty of time) you can repeat the second episode at a lower difficulty level.
Forged Alliance
You get this achievement automatically and you cannot skip it.
Fury Lover
After initiating Sensen Fury, you need to get the x14 multiplier. The easiest way to do it is by attacking heavily armored enemies, like Skinner Leapers (one of the mutant types).
Fuzzy Logic
You need to stun, at least, 5 enemies simultaneously, with the special attack Sensen DOS, and then use the Logic Bomb special attack to eliminate all of them. The best way to do it is to attempt it in small rooms where the enemies will be standing close to each other.
God is a DJ
You need to find, and activate, all of the memory glitches in the scenes where you are supposed to modify memories of other people. This means that you also need to interact with those of the glitches that do not contribute to the desired effect of the remix.
Gotta Patch Them All!
You need to find all SAT patches. The patches are one of the collectible categories so, to learn more, see the walkthrough or the separate chapter devoted to collectibles.
Happy Birthday
You need to achieve a different result of the remix of Scylla Cartier-Wells' memories in episode five. Select the glitches connected with the Handbag and the toy (Jax).
I Do Like Spam!
You need to eliminate a total of 15 Enforcers using the Spammer.
I Know Kung Fu
You need to repeat combos by using 17 Pressens. You will probably obtain this achievement towards the end of the game because, thanks to obtaining higher levels of experience, you will gain access to even more moves than the required 17.
It's All In the Details
You need to find all of the Mnesist Memories. The memories are one of the collectible categories so, to learn more, see the walkthrough or the separate chapter devoted to collectibles.
Jail Break-In
You get this achievement automatically and you cannot skip it.
Leader of the Pack
You need to defeat the Mourner without attacking its helpers . The first mourner you encounter is Johnny Greenteeth, i.e. the boss of the sixth episode. There are two more in the seventh episode. Perform frequent dodges and use the Sensen DOS to prevent the Mourner from teleporting, which will expose the beast to Nilin's standard moves.
Lord of the Ring
You need to defeat at least 15 enemies by throwing them off platforms. One of the locations where you can do it, is the flooded district in the fifth episode of the game.
Machines Do It Better
You need to use the Rust In Pieces special attack to seize the control over the Seraphim or Nephilim robots, and kill a total of 20 enforcers with their aid.
Medical Malpractice
You get this achievement automatically and you cannot skip it.
MemHunter Elite
You need to beat the game at the high difficulty level (MemHunter Elite).
Mind Craft
You get this achievement automatically and you cannot skip it.
Mix'em All
You need to perform 10 combos consisting of al four move categories. This one is very easy because, it is enough to place, at least, one attack of a given type in any combo and perform it correctly.
Murder Incorporated
You get this achievement automatically and you cannot skip it.
Open Mind
You get this achievement automatically and you cannot skip it.
Out of the Friend Zorn
You need to defeat Zorn within less than 2 minutes. You fight Zorn for the first time towards the end of the third episode but, it is best to attempt at this achievement in the seventh episode. That is when you will already know what to expect. Quickly, deprive the robot of its upper limbs and hit it with the Junk Bolt the first time you get the chance to do that, which will enable you to perform execution.
Pest Control
You need to locate and eliminate all of the Scaramechs. Scaramechs are one of the collectible categories so, to learn more, see the walkthrough or the separate chapter devoted to collectibles.
Power Off
You need to achieve an alternative result while modifying Charles' Cartier-Wells' memories, in the eighth episode of the game. After you gain access to the memory connected with Scylla driving the car, you need to select the Glitches connected with the Cup Holder and the Windshield.
Queen of the Hill
You need to survive the mutant attack on Tommy's bar in episode 3, without using Power Pressens or Regen Pressens. Make sure that you use standard moves, Cooldown Pressens, Sensen Fury and the Spammer only.
Rust in Peace
Towards the end of the sixth episode (while chasing Doctor Quaid), you need to use the Junk Bolt to destroy the damaged Zorn robot, which you pass by in the long tunnel.
Script Kiddie
You need to beat the game at the low difficulty level (Script Kindle)
Serve the Servant
You need to eliminate a total of 20 robots.
The Fallen
You need to throw a total of 50 Prowler Leapers off the walls by using the Spammer.
The Shield Is Down!
Yu need to deprive 20 Enforcers of their shields. It's very easy to do because, you can destroy the shields with the Junk Bolt with ease.
The Wheat and the Chaff
You need to defeat Madame (episode four) without attacking her clones. You should focus on frequent dodging and use Sensen DOS to your aid, to throw Madame down to the ground, as well as to tell them apart from the clones.
Towering Inferno
You get this achievement automatically and you cannot skip it.
Trigger Unhappy
You need to get an alternative result while modifying Forlan's memories in the fourth episode. Interact with the Glitches connected with the bottle and with the Table.
Unbelievable Truth
You need to find and cause memory errors in all memory modification scenes. Errors should be perceived as causing a result different from the desired one (e.g. demise of the character that is supposed to live) . The Glitch list that are going to help you is as follows:
Olga Sedova (Episode 1) - Memory Flux
Forlan (Episode 4) - Gun - you Reed to select it at the first opportunity, instead of towards the end of the sequence
Scylla Cartier-Wells (Episode 5) - Bottle
Charles Cartier-Wells (Episode 8) -Airbag in the first sequence. Causing memory error In the second sequence is required to complete it successfully so, to learn about the details, see the walkthrough.
You Focus
You need to find all Focus Boosts . Memory Boosts are one of the collectible categories so, to learn more, see the walkthrough or the separate chapter devoted to collectibles.
You Missed Me
You need to dodge from five charges of the Skinner Leaper (one of the kinds of mutant). Do not attack the monster and focus only on the performance of dodges.
You Talkin' To Me?
You need to achieve and alternative result in the sequence of modifying Olga Sedova's memories, in the first episode of the game. Interact with the Glitch connected with the Anesthetic Mask.