Welcome to the unofficial guide to "Tom Clancy's Rainbow Six: Lockdown". This article consists mainly of a detailed walkthrough that's going to take you through a singleplayer campaign of the game. I have to warn you, though. "Lockdown" is by far less challenging than its predecessors, including the famous "Tom Clancy's Rainbow Six: Raven Shield" PC game. The walkthrough itself should become helpful in dealing with all kinds of problems you may encounter. You should also know that the opponents may appear in different locations, especially when you reload the whole level. Thankfully, for the most of the time you will be encountering them in very similar spots, so you shouldn't be worried too much about that. I'd strongly recommend visiting the rifle range before you decide to begin the main campaign. It would also be wise to memorize some of the most important keys (movement, shooting, team orders...). The game itself is not too complicated, although sometimes you will have to make quick and very precise decisions. Most of the important activities have been reminded in the following walkthrough. You shouldn't also forget about the possibility of saving the game. I'd recommend doing that often, especially since it's not limited in any way. Furthermore, autosaves will appear every time you start a new level. Well... that's it. I hope you'll enjoy the game and my guide. Have fun!
Stranger
Threats: There are a couple of sniper spots nearby, however you shouldn't worry about them too much. All of these spots have been reminded and pointed out in the following walkthrough. Furthermore, they are in a rather obvious locations. You will also have to escort a few hostages, that were taken by the terrorists.
Objectives: The main objective of this mission is to reach a spot where the civilians are being held (the vault of a nearby bank). Next, you will have to kill terrorists guarding them and escort the civilians back to safety.
Before you proceed to the mission itself, I'd strongly recommend taking a closer look at the Briefing section. You will be told that the president Mbelu has been captured. You will have to locate his position and take care of the nearby terrorists. In the Intel section you will be presented with a few maps. Each mission consists of two or three seperate levels. Once you've reached the extraction zone of the first part, you will be automatically transported to the next one, without the possibility of returning to previously completed levels. You should also spend some time in the Team Outfitiing section. Here you will be able to choose between several types of guns, grenades and other equipment. If you want to know more about these elements of the game, you should take a closer look at the final section of this game guide. Once you've taken care of all things click the Start Mission button to begin.
You start off near an underground parking lot. You might want to keep a crouching position at all times. In order to do that, you need to press the X (default) key. Start moving towards a glowing icon (#1). You will be presented with a lot of helpful hints. This one tells more about using guns. I'd recommend running towards one of the nearby covers (use the CAPS LOCK key). Start shooting at the visible terrorists (#2). It would be wise to zoom in the view, using the right mouse button. You should achieve more precise shots that way.
![1 - [Mission 01][Part: 1/3] South Africa - Walkthrough - Rainbow Six: Lockdown - Game Guide and Walkthrough](https://game.lhg100.com/Article/UploadFiles/201512/2015121619111515.jpg)
![Bear in mind that you may give orders to the other squad members - [Mission 01][Part: 1/3] South Africa - Walkthrough - Rainbow Six: Lockdown - Game Guide and Walkthrough](https://game.lhg100.com/Article/UploadFiles/201512/2015121619111582.jpg)
Bear in mind that you may give orders to the other squad members. You will have to leave them in the back at some points, however for the most of the time they will be very helpful. You can order them to go to a desired spot or, for example, to follow your lead. You will be using the SPACE key for the most of the time. Keep heading towards the nearest building, the same one that's been defended by the terrorists (#1). Enter the underground parking lot. Head on to the lower level. You should be doing that VERY CAREFULLY. Remember that you aren't rushed by anything or anyone. I'd recommend staying close to the left wall. You will encounter new enemy soldiers very soon (#1). If you're lucky, you should be able to make a surprise attack. Remember to aim at the heads of terrorist soldiers. The same goes with the other types of opponents, especially those who will be equipeed with bulletproof vests...
![2 - [Mission 01][Part: 1/3] South Africa - Walkthrough - Rainbow Six: Lockdown - Game Guide and Walkthrough](https://game.lhg100.com/Article/UploadFiles/201512/2015121619111677.jpg)
![You should be able to reach the fourth level of the parking lot very soon - [Mission 01][Part: 1/3] South Africa - Walkthrough - Rainbow Six: Lockdown - Game Guide and Walkthrough](https://game.lhg100.com/Article/UploadFiles/201512/2015121619111625.jpg)
You should be able to reach the fourth level of the parking lot very soon. Start moving forward. It would be best to use nearby cars for extra cover. Remember that the most efficient way to dispose of an enemy soldier is to aim at his head. You will reach a second glowing point within a few seconds (#1). This time you will learn more about giving orders to the other squad members. The game will also explain the meaning of the visible health bars. You could head on to the left tunnel, however I wouldn't recommend that, mainly because you'd be left without any cover. Instead, choose the nearby door (#2). Remember to keep the rest of the team with you.
![3 - [Mission 01][Part: 1/3] South Africa - Walkthrough - Rainbow Six: Lockdown - Game Guide and Walkthrough](https://game.lhg100.com/Article/UploadFiles/201512/2015121619111656.jpg)
![You should be able to reach a destroyed staircase very soon - [Mission 01][Part: 1/3] South Africa - Walkthrough - Rainbow Six: Lockdown - Game Guide and Walkthrough](https://game.lhg100.com/Article/UploadFiles/201512/2015121619111612.jpg)
You should be able to reach a destroyed staircase very soon. You can't go up, so head on the other direction. You will finally come across a single door (#1). It would be wise to use other team members to help you breach through to the next section. Use the SPACE button to pick a desired action. I'd personally recommend choosing 'Breach' and then 'Clear'. You won't have to use any grenades, because the parking lot area is too large for that. You've probably noticed by now that the crew members won't do anything UNLESS you've provided them with a 'Go Code'. You will once again find yourself in the main area of the lot. Start shooting at the remaining enemy soldiers (#2). Remember to use cars for much needed cover. Thankfully, your team members have probably killed most of the terrorists by now.
![4 - [Mission 01][Part: 1/3] South Africa - Walkthrough - Rainbow Six: Lockdown - Game Guide and Walkthrough](https://game.lhg100.com/Article/UploadFiles/201512/2015121619111781.jpg)
![Keep pushing forward - [Mission 01][Part: 1/3] South Africa - Walkthrough - Rainbow Six: Lockdown - Game Guide and Walkthrough](https://game.lhg100.com/Article/UploadFiles/201512/2015121619111787.jpg)
Keep pushing forward. Remember to use parked cars for extra cover. I'd also recommend keeping other crew members close to your position. You should be able to reach a new glowing icon very soon. You will find out more about opening doors. Head on to the nearest passageway (#1). You will encounter a next icon along the way. The message will remind you to reload the weapon as often as possible. You will also find out more about choosing a correct rate of fire. Use the stairs to reach the lowest level (#2). Head on to the nearby corridor. You will find a new icon over here.
![5 - [Mission 01][Part: 1/3] South Africa - Walkthrough - Rainbow Six: Lockdown - Game Guide and Walkthrough](https://game.lhg100.com/Article/UploadFiles/201512/2015121619111720.jpg)
![Open a nearby door - [Mission 01][Part: 1/3] South Africa - Walkthrough - Rainbow Six: Lockdown - Game Guide and Walkthrough](https://game.lhg100.com/Article/UploadFiles/201512/2015121619111771.jpg)
Open a nearby door. Just like the message said, you should turn on your night vision right now (#1). In order to do that, you will have to press the V key. You could also use the movement detector (B key), however in my personal opinion it's not that useful as it might have seemed at first glance. The night vision will help you in locating some of the nearby opponents. In most cases (the terrorists will be crouching behind cars), it would be best to shoot at their feet (#2). Keep pushing forward. Don't forget to use cars and pillars for extra cover.
![6 - [Mission 01][Part: 1/3] South Africa - Walkthrough - Rainbow Six: Lockdown - Game Guide and Walkthrough](https://game.lhg100.com/Article/UploadFiles/201512/2015121619111753.jpg)
![You should be able to reach a new corridor in a few seconds (#1) - [Mission 01][Part: 1/3] South Africa - Walkthrough - Rainbow Six: Lockdown - Game Guide and Walkthrough](https://game.lhg100.com/Article/UploadFiles/201512/2015121619111797.jpg)
You should be able to reach a new corridor in a few seconds (#1). There is a glowing icon nearby. Read the information. You may proceed to the next section. Once you've reached a closed door stand in a marked spot (#2). The game will load the next level shortly (#2).
![7 - [Mission 01][Part: 1/3] South Africa - Walkthrough - Rainbow Six: Lockdown - Game Guide and Walkthrough](https://game.lhg100.com/Article/UploadFiles/201512/2015121619111821.jpg)
First of all, it would be best to order your crew members to stay here for a while. The area is crawling with enemy troops, and your allies would probably be injured during these fights. You might want to consider reading the next hint (nearby glowing icon). Pick a crouching stance and start moving towards the nearby square. I'd recommend leaning out a lot. Take out some of the visible enemy soldiers (#1). Move back and wait for the other terrorists to arrive. Kill them. Repeat the last set of actions. You may proceed to the next section of the map. I'd recommend staying close to the wall of the left building. Turn around and kill an enemy sniper. He should be standing in one of the windows on the first floor (#2).
![1 - [Mission 01][Part: 2/3] South Africa - Walkthrough - Rainbow Six: Lockdown - Game Guide and Walkthrough](https://game.lhg100.com/Article/UploadFiles/201512/2015121619111869.jpg)
![You may rejoin with the rest of the squad if you want to - [Mission 01][Part: 2/3] South Africa - Walkthrough - Rainbow Six: Lockdown - Game Guide and Walkthrough](https://game.lhg100.com/Article/UploadFiles/201512/2015121619111889.jpg)
You may rejoin with the rest of the squad if you want to. Remember to stay close to the left wall. You will probably come across some new terrorists in a few seconds. They will appear on your left. Start shooting at them (#1). You may as well ignore some of the explosions that will occur shortly. Don't move towards the main square just yet! You have to make sure that the area is clear. Turn around for the second time. You will have to locate a new sniper (#2). Thankfully, you shouldn't have any problems with that. He is standing in a nearby window.
![2 - [Mission 01][Part: 2/3] South Africa - Walkthrough - Rainbow Six: Lockdown - Game Guide and Walkthrough](https://game.lhg100.com/Article/UploadFiles/201512/2015121619111834.jpg)
![Start moving towards the main square - [Mission 01][Part: 2/3] South Africa - Walkthrough - Rainbow Six: Lockdown - Game Guide and Walkthrough](https://game.lhg100.com/Article/UploadFiles/201512/2015121619111810.jpg)
Start moving towards the main square. You should be able to take out a third sniper from here, however this is not necessary. You may as well try avoiding him. Head on to the small alley that's been located on your left (#1). Bear in mind that new enemy troops may appear over here (#2). Deal with them swiftly. Step up to the designated zone in order to load the final map of this mission.
![3 - [Mission 01][Part: 2/3] South Africa - Walkthrough - Rainbow Six: Lockdown - Game Guide and Walkthrough](https://game.lhg100.com/Article/UploadFiles/201512/2015121619111892.jpg)
![4 - [Mission 01][Part: 2/3] South Africa - Walkthrough - Rainbow Six: Lockdown - Game Guide and Walkthrough](https://game.lhg100.com/Article/UploadFiles/201512/2015121619111982.jpg)
Just as before, I would recommend leaving the rest of the squad behind... at least for 15-20 seconds. Find a shooting spot near the left wall. First of all, you should take care of a single guy that's been standing near one of the destroyed cars (#1). Step up a little bit closer. A larger group of enemy soldiers is located on your left (#2). You might want to use the destroyed car for better cover, however this is not necessary.
![1 - [Mission 01][Part: 3/3] South Africa - Walkthrough - Rainbow Six: Lockdown - Game Guide and Walkthrough](https://game.lhg100.com/Article/UploadFiles/201512/2015121619111957.jpg)
![Before entering the large building you might want to check out the glowing icon - [Mission 01][Part: 3/3] South Africa - Walkthrough - Rainbow Six: Lockdown - Game Guide and Walkthrough](https://game.lhg100.com/Article/UploadFiles/201512/2015121619111916.jpg)
Before entering the large building you might want to check out the glowing icon. You will presented with some useful hints concerning some of the available actions (leaning out). I would recommend throwing a frag grenade inside (#1). That way, you will take out most of the terrorists without any problems. Enter the building with the rest of the squad. Head on to the second room. I would recommend leaving the rest of the group right here. Head on to the nearest exit. Start off by killing a single terrorist. He will be hiding by the big limousine (#2). You shouldn't have any problems with him.
![2 - [Mission 01][Part: 3/3] South Africa - Walkthrough - Rainbow Six: Lockdown - Game Guide and Walkthrough](https://game.lhg100.com/Article/UploadFiles/201512/2015121619111998.jpg)
![I have to warn you at this point - [Mission 01][Part: 3/3] South Africa - Walkthrough - Rainbow Six: Lockdown - Game Guide and Walkthrough](https://game.lhg100.com/Article/UploadFiles/201512/2015121619111936.jpg)
I have to warn you at this point. Some of the upcoming fights will be quite challenging. First of all, take out a single sniper that's been hiding on the roof of the bank building (#1). He's equipped with a rocket launcher, so you have to do it VERY quickly. Start pushing forward (#2). You may use some help from the rest of the team. Start shooting at the visible terrorists. Remember to use parked cars for much needed cover.
![3 - [Mission 01][Part: 3/3] South Africa - Walkthrough - Rainbow Six: Lockdown - Game Guide and Walkthrough](https://game.lhg100.com/Article/UploadFiles/201512/2015121619111915.jpg)
![Make sure you've killed all hostiles - [Mission 01][Part: 3/3] South Africa - Walkthrough - Rainbow Six: Lockdown - Game Guide and Walkthrough](https://game.lhg100.com/Article/UploadFiles/201512/2015121619111949.jpg)
Make sure you've killed all hostiles. Now head on to the bank entrance (#1). There are some new enemies over here (#2). They will be standing near the desk. You might want to consider throwing some of the carried grenades at them. Alternatively, you could try aiming at their heads. Enter the bank with the rest of the squad.
![Head on to the main room of the occupied bank - [Mission 01][Part: 3/3] South Africa - Walkthrough - Rainbow Six: Lockdown - Game Guide and Walkthrough](https://game.lhg100.com/Article/UploadFiles/201512/2015121619112043.jpg)
Head on to the main room of the occupied bank. First of all, you will have to deal with a guy standing on a nearby balcony (#1). Once he's down, leave the rest of the squad behind and start running towards the opposite exit. Turn right. If you're lucky, you should be able to surprise a single terrorist (#2). He will be crouching by one of the counters. You may order the team to follow your movements. There'a a small passageway nearby. Use the stairs to get to the upper floor.
![5 - [Mission 01][Part: 3/3] South Africa - Walkthrough - Rainbow Six: Lockdown - Game Guide and Walkthrough](https://game.lhg100.com/Article/UploadFiles/201512/2015121619112073.jpg)
![Leave the squad over here - [Mission 01][Part: 3/3] South Africa - Walkthrough - Rainbow Six: Lockdown - Game Guide and Walkthrough](https://game.lhg100.com/Article/UploadFiles/201512/2015121619112042.jpg)
Leave the squad over here. Enter the room located on your left. Find a good cover and start shooting at the visible enemy soldiers (#1). You should be able to score at least 2-3 decent headshots. BEFORE you move any further, make sure you've killed all of the nearby terrorists. Head on to the left corridor. Use the stairs to go back to the ground floor (#2).
![6 - [Mission 01][Part: 3/3] South Africa - Walkthrough - Rainbow Six: Lockdown - Game Guide and Walkthrough](https://game.lhg100.com/Article/UploadFiles/201512/2015121619112059.jpg)
![You will probably have to deal with one more opponent along the way - [Mission 01][Part: 3/3] South Africa - Walkthrough - Rainbow Six: Lockdown - Game Guide and Walkthrough](https://game.lhg100.com/Article/UploadFiles/201512/2015121619112084.jpg)
You will probably have to deal with one more opponent along the way... that is, if you've missed him before. DON'T go to the vault just yet!! There's a terminal on the left pillar. You will have to use it (#1) in order to disable the security system of the bank (to be exact - a nearby metal detector). Now you may proceed to the vault area. There are some terrorists over here, guarding the entrance (#2). You will have to deal with this problem. Enter the main vault.
![7 - [Mission 01][Part: 3/3] South Africa - Walkthrough - Rainbow Six: Lockdown - Game Guide and Walkthrough](https://game.lhg100.com/Article/UploadFiles/201512/2015121619112005.jpg)
![The hostages are being guarded by one of the terrorists (#1) - [Mission 01][Part: 3/3] South Africa - Walkthrough - Rainbow Six: Lockdown - Game Guide and Walkthrough](https://game.lhg100.com/Article/UploadFiles/201512/2015121619112163.jpg)
The hostages are being guarded by one of the terrorists (#1). You will HAVE TO deal with him swiftly, so he won't have an opportunity to hurt any of them. Step up to the glowing icon. You will find out more about hostage situations. Now you will have to escort rescued civilians to the bank entrance. A short cut-scene will appear shortly (#2). It looks like some new terrorists have entered the bank. I don't have to remind you that you must protect the hostages from being killed. It would be best to let them stay with the rest of the squad. You shouldn't have any problems with killing terrorists on your own...
![8 - [Mission 01][Part: 3/3] South Africa - Walkthrough - Rainbow Six: Lockdown - Game Guide and Walkthrough](https://game.lhg100.com/Article/UploadFiles/201512/2015121619112121.jpg)
![Leave the vault area - [Mission 01][Part: 3/3] South Africa - Walkthrough - Rainbow Six: Lockdown - Game Guide and Walkthrough](https://game.lhg100.com/Article/UploadFiles/201512/2015121619112193.jpg)
Leave the vault area. I would recommend zooming in the view, so you will be able to kill nearby enemy soldiers (#1). Start moving towards their positions. You will encounter at least 2-3 new terrorists along the way. Many of them will be hiding in the dark, so you must be very careful. Head on to the bank entrance (#2). Be sure to leave the hostages and the rest of the squad over here!! Don't let them get too close to the exit.
![9 - [Mission 01][Part: 3/3] South Africa - Walkthrough - Rainbow Six: Lockdown - Game Guide and Walkthrough](https://game.lhg100.com/Article/UploadFiles/201512/2015121619112183.jpg)
![Lean out CAREFULLY and start shooting at the new terrorists that have appeared in the bank area (#1) - [Mission 01][Part: 3/3] South Africa - Walkthrough - Rainbow Six: Lockdown - Game Guide and Walkthrough](https://game.lhg100.com/Article/UploadFiles/201512/2015121619112149.jpg)
Lean out CAREFULLY and start shooting at the new terrorists that have appeared in the bank area (#1). Most of them will be hiding near parked cars. Exit the building, BUT don't run to the extraction zone just yet. TURN AROUND and start shooting at the visible enemy snipers (#2). There will be at least two of them. In both cases, try aiming at their heads.
![The rest of the team (including the hostages) may rejoin with you now - [Mission 01][Part: 3/3] South Africa - Walkthrough - Rainbow Six: Lockdown - Game Guide and Walkthrough](https://game.lhg100.com/Article/UploadFiles/201512/2015121619112278.jpg)
The rest of the team (including the hostages) may rejoin with you now. Head on to the designated area. Wait for the hostages to arrive! A helicopter should appear shortly (#1). After that, the mission will come to an end.
![11 - [Mission 01][Part: 3/3] South Africa - Walkthrough - Rainbow Six: Lockdown - Game Guide and Walkthrough](https://game.lhg100.com/Article/UploadFiles/201512/2015121619112238.jpg)
Threats: The first part of the mission is going to be very simple. The second one, on the other hand, is much more challenging. You will have to deal with large groups of enemy soldiers. Some of the terrorists will be equipped with deadly rocket launchers. You will have to deal with those types of enemies very swiftly.
Objectives: A deadly nano-virus called The Legion has been stolen from the LNR Anderssen company headquarters. You will have to find terrorists responsible for these actions and acquire a list of potentional buyers.
You start off on a small square. There are no enemies over here, so you're not rushed by anything or anyone. Head on to the left door (#1). Remember that your crew members can do that for you, however in this case this is not necessary. I would recommend opening the following doors very carefully, though. You will have to use the mouse wheel. Be sure to keep a crouching stance at all times! You will probably notice some new terrorists (#2). They will be standing on a lower level, in front of you. It would be wise to aim at their heads.
![1 - [Mission 02][Part: 1/2] Algeria - Walkthrough - Rainbow Six: Lockdown - Game Guide and Walkthrough](https://game.lhg100.com/Article/UploadFiles/201512/2015121619112283.jpg)
![Rejoin with the rest of the squad - [Mission 02][Part: 1/2] Algeria - Walkthrough - Rainbow Six: Lockdown - Game Guide and Walkthrough](https://game.lhg100.com/Article/UploadFiles/201512/2015121619112204.jpg)
Rejoin with the rest of the squad. Use the nearby stairs. Once you're on a lower level, take care of the remaining enemy soldiers. Now head on to the main corridor of this part of the complex (#1). You shouldn't encounter any more terrorists at the moment. I would recommend visiting the glowing icon along the way. You will find out more about clearing unexplored rooms. It would be wise to test these types of actions right now. Gather your people by the door. Now you will have to place some new orders. Breach, bang & clear seems like a good idea (#2). Enter the new room. All the terrorists should already be dead, so you won't have to worry about them anymore.
![2 - [Mission 02][Part: 1/2] Algeria - Walkthrough - Rainbow Six: Lockdown - Game Guide and Walkthrough](https://game.lhg100.com/Article/UploadFiles/201512/2015121619112220.jpg)
![You will encounter some new enemies in one of the surrounding rooms - [Mission 02][Part: 1/2] Algeria - Walkthrough - Rainbow Six: Lockdown - Game Guide and Walkthrough](https://game.lhg100.com/Article/UploadFiles/201512/2015121619112312.jpg)
You will encounter some new enemies in one of the surrounding rooms. One of them will be standing near a small desk (#1). Kill him. You might want to check out a glowing icon. It will inform you about using various types of objects. Step up closer to the table. Press the 'use' button in order to acquire necessary things from the laptop (#2). Thanks to that, you will accomplish the main objective of this mission. Now you will have to reach the extraction zone.
![3 - [Mission 02][Part: 1/2] Algeria - Walkthrough - Rainbow Six: Lockdown - Game Guide and Walkthrough](https://game.lhg100.com/Article/UploadFiles/201512/2015121619112324.jpg)
![Open the nearby door CAREFULLY - [Mission 02][Part: 1/2] Algeria - Walkthrough - Rainbow Six: Lockdown - Game Guide and Walkthrough](https://game.lhg100.com/Article/UploadFiles/201512/2015121619112395.jpg)
Open the nearby door CAREFULLY. You should notice some terrorists on your left (#1). Take care of this problem. Now you can head on to the central part of this building (with the rest of your team). Turn right and start moving forward. New enemies will appear shortly (#2). Kill them. Be sure not to get too close to the barriers. Otherwise you would have been shot by one of the terrorists. Keep pushing forward. There are some rooms on your right. I'd strongly recommend checking them out for any additional terrorists.
![4 - [Mission 02][Part: 1/2] Algeria - Walkthrough - Rainbow Six: Lockdown - Game Guide and Walkthrough](https://game.lhg100.com/Article/UploadFiles/201512/2015121619112340.jpg)
![Your squad members will probably take care of the terrorists located on lower levels - [Mission 02][Part: 1/2] Algeria - Walkthrough - Rainbow Six: Lockdown - Game Guide and Walkthrough](https://game.lhg100.com/Article/UploadFiles/201512/2015121619112370.jpg)
Your squad members will probably take care of the terrorists located on lower levels. Once they're gone, head on to the nearby stairs (#1). Nevertheless, you must be very careful. You will be encountering new soldiers quite regularly. Thankfully, your teammates will dispose of them quickly... that is, if you decide to grant them with such an opportunity. Just as before, you will have to watch out for terrorists coming out of nearby rooms (#2).
![5 - [Mission 02][Part: 1/2] Algeria - Walkthrough - Rainbow Six: Lockdown - Game Guide and Walkthrough](https://game.lhg100.com/Article/UploadFiles/201512/2015121619112344.jpg)
![You should be able to reach a small corridor in a few seconds - [Mission 02][Part: 1/2] Algeria - Walkthrough - Rainbow Six: Lockdown - Game Guide and Walkthrough](https://game.lhg100.com/Article/UploadFiles/201512/2015121619112424.jpg)
You should be able to reach a small corridor in a few seconds. Head on to the nearby stairs. I have to warn you, though. You will probably come across at least TWO other terrorists along the way (#1). Furthermore, there's a third soldier hiding at the other end of the stairs. Once you've reached a junction, choose the path located on your left (#2). The other corridor leads to the main building area. You wouldn't find anything interesting there.
![6 - [Mission 02][Part: 1/2] Algeria - Walkthrough - Rainbow Six: Lockdown - Game Guide and Walkthrough](https://game.lhg100.com/Article/UploadFiles/201512/2015121619112496.jpg)
![You should reach a small market area really soon - [Mission 02][Part: 1/2] Algeria - Walkthrough - Rainbow Six: Lockdown - Game Guide and Walkthrough](https://game.lhg100.com/Article/UploadFiles/201512/2015121619112487.jpg)
You should reach a small market area really soon. DON'T SHOOT at the civilians! Otherwise you would have failed the whole mission. Start moving towards the opposite end of this location. There's a single terrorist here. Kill him (#1). Head on to the nearest corridor. Once you've reached its other end, lean out and take care of additional enemy units (#2). You may enter this area now. Be sure to keep your teammates nearby.
![7 - [Mission 02][Part: 1/2] Algeria - Walkthrough - Rainbow Six: Lockdown - Game Guide and Walkthrough](https://game.lhg100.com/Article/UploadFiles/201512/2015121619112499.jpg)
![Once you've secured the whole area, head on to the small door (#1) - [Mission 02][Part: 1/2] Algeria - Walkthrough - Rainbow Six: Lockdown - Game Guide and Walkthrough](https://game.lhg100.com/Article/UploadFiles/201512/2015121619112422.jpg)
Once you've secured the whole area, head on to the small door (#1). You might want to consider entering the nearby area by using the 'breach' option, however this is not necessary, especially since you probably won't encounter any hostiles at this point. Start moving towards the extraction zone. Sadly, a huge explosion will block the only possible way (#2). You will have to find a new path.
![8 - [Mission 02][Part: 1/2] Algeria - Walkthrough - Rainbow Six: Lockdown - Game Guide and Walkthrough](https://game.lhg100.com/Article/UploadFiles/201512/2015121619112580.jpg)
![Make sure to duck behind one of the nearby crates - [Mission 02][Part: 1/2] Algeria - Walkthrough - Rainbow Six: Lockdown - Game Guide and Walkthrough](https://game.lhg100.com/Article/UploadFiles/201512/2015121619112582.jpg)
Make sure to duck behind one of the nearby crates. A large group of enemy soldiers is heading this way (#1). Thankfully, the terrorists aren't that smart, as you might have probably suspected. You should be able to score at least 3-4 impressive headshots. You might also consider allowing your teammates to take part in these fights. Watch out for a single sniper, though (#2). He is located on the upper floor, so you might have some problems locating him.
![9 - [Mission 02][Part: 1/2] Algeria - Walkthrough - Rainbow Six: Lockdown - Game Guide and Walkthrough](https://game.lhg100.com/Article/UploadFiles/201512/2015121619112565.jpg)
![Once you've reached the destroyed passageway, head on to the small alley located on your right (#1) - [Mission 02][Part: 1/2] Algeria - Walkthrough - Rainbow Six: Lockdown - Game Guide and Walkthrough](https://game.lhg100.com/Article/UploadFiles/201512/2015121619112584.jpg)
Once you've reached the destroyed passageway, head on to the small alley located on your right (#1). You shouldn't encounter any more units here. Move closer to the designated area (#2) in order to proceed to the final map of this mission.
![10 - [Mission 02][Part: 1/2] Algeria - Walkthrough - Rainbow Six: Lockdown - Game Guide and Walkthrough](https://game.lhg100.com/Article/UploadFiles/201512/2015121619112586.jpg)
![11 - [Mission 02][Part: 1/2] Algeria - Walkthrough - Rainbow Six: Lockdown - Game Guide and Walkthrough](https://game.lhg100.com/Article/UploadFiles/201512/2015121619112633.jpg)
You start off in a rather challenging spot, mainly because there's not too much space to plan something more interesting. Furthermore, the nearby square is crawling with enemy troops. You will also have to watch out for the canisters filled with a deadly Legion virus (#1). It would be best to stay as far away from them as possible. I'd recommend leaving your crew members behind... at least for a while. Start moving towards the square. First of all, take care of the nearby terrorists (#1). It would be best to aim at their heads.
![1 - [Mission 02][Part: 2/2] Algeria - Walkthrough - Rainbow Six: Lockdown - Game Guide and Walkthrough](https://game.lhg100.com/Article/UploadFiles/201512/2015121619112612.jpg)
![WATCH OUT for the additional snipers, located on nearby balconies (#1) - [Mission 02][Part: 2/2] Algeria - Walkthrough - Rainbow Six: Lockdown - Game Guide and Walkthrough](https://game.lhg100.com/Article/UploadFiles/201512/2015121619112651.jpg)
WATCH OUT for the additional snipers, located on nearby balconies (#1). I should also warn you, that they will be replaced by new terrorists within a few seconds. The second group is stationed near the radio tower (#2). BEFORE you decide to move the whole team closer to the main square MAKE SURE you have taken out all visible terrorists.
![2 - [Mission 02][Part: 2/2] Algeria - Walkthrough - Rainbow Six: Lockdown - Game Guide and Walkthrough](https://game.lhg100.com/Article/UploadFiles/201512/2015121619112614.jpg)
![I'd personally recommend moving towards the left building - [Mission 02][Part: 2/2] Algeria - Walkthrough - Rainbow Six: Lockdown - Game Guide and Walkthrough](https://game.lhg100.com/Article/UploadFiles/201512/2015121619112704.jpg)
I'd personally recommend moving towards the left building... that is... if you've managed to clear out ALL of the surrounding balconies (#1). Start shooting at the terrorists hiding by the nearby bus. Once they're gone, start running towards the glowing icon (#2). Wait for the rest of the team to show up!
![3 - [Mission 02][Part: 2/2] Algeria - Walkthrough - Rainbow Six: Lockdown - Game Guide and Walkthrough](https://game.lhg100.com/Article/UploadFiles/201512/2015121619112745.jpg)
![You've probably noticed by now that the nearby door can't be opened - [Mission 02][Part: 2/2] Algeria - Walkthrough - Rainbow Six: Lockdown - Game Guide and Walkthrough](https://game.lhg100.com/Article/UploadFiles/201512/2015121619112798.jpg)
You've probably noticed by now that the nearby door can't be opened. You will have to spend a little more time here in order to successfully break the lock. You can do this on your own or ask one of the teammates for help (#1). If you chose the second option press the SPACE key and then choose the 'OPEN' function. Head on to the next room. You will encounter a single terrorist here. Kill him. Move on to the next door. Open it carefully and start shooting at the visible soldiers (#2). Enter the room with the rest of the team in order to deal with the remaining soldiers.
![4 - [Mission 02][Part: 2/2] Algeria - Walkthrough - Rainbow Six: Lockdown - Game Guide and Walkthrough](https://game.lhg100.com/Article/UploadFiles/201512/2015121619112719.jpg)
![You may proceed to the next room - [Mission 02][Part: 2/2] Algeria - Walkthrough - Rainbow Six: Lockdown - Game Guide and Walkthrough](https://game.lhg100.com/Article/UploadFiles/201512/2015121619112707.jpg)
You may proceed to the next room. You will probably notice some new terrorists. It would be wise to take care of them right now (#1). Headshots are most welcome in these types of situations. You could also ask your teammates for help. Once you've reached a new door enter the next corridor. You will encounter additional enemy forces here (#2).
![5 - [Mission 02][Part: 2/2] Algeria - Walkthrough - Rainbow Six: Lockdown - Game Guide and Walkthrough](https://game.lhg100.com/Article/UploadFiles/201512/2015121619112796.jpg)
![Turn left and start moving forward - [Mission 02][Part: 2/2] Algeria - Walkthrough - Rainbow Six: Lockdown - Game Guide and Walkthrough](https://game.lhg100.com/Article/UploadFiles/201512/2015121619112813.jpg)
Turn left and start moving forward. I would recommend leaving the rest of the team behind. Use the stairs in order to get to the upper floor. Stand by one of the windows. You should notice an enemy sniper (#1). Take him out. Thanks to that, you won't have any problems in the future. You may go back to your squad now. Head on to the nearby (right) corridor (#2).
![6 - [Mission 02][Part: 2/2] Algeria - Walkthrough - Rainbow Six: Lockdown - Game Guide and Walkthrough](https://game.lhg100.com/Article/UploadFiles/201512/2015121619112872.jpg)
![Start moving towards the nearby alley - [Mission 02][Part: 2/2] Algeria - Walkthrough - Rainbow Six: Lockdown - Game Guide and Walkthrough](https://game.lhg100.com/Article/UploadFiles/201512/2015121619112889.jpg)
Start moving towards the nearby alley. I would personally recommend staying close to the left wall. You will probably notice a small group of terrorists. It would be best to throw a couple of grenades at them (#1). An allied chopper will appear shortly. DON'T try following it!! Move a little bit closer, lean out carefully and take out a sniper hiding on the right balcony (#2). Chopper crew will inform you about the current situation. You will have to reach the extraction zone on your own.
![7 - [Mission 02][Part: 2/2] Algeria - Walkthrough - Rainbow Six: Lockdown - Game Guide and Walkthrough](https://game.lhg100.com/Article/UploadFiles/201512/2015121619112828.jpg)
![You may proceed to the next section of the map - [Mission 02][Part: 2/2] Algeria - Walkthrough - Rainbow Six: Lockdown - Game Guide and Walkthrough](https://game.lhg100.com/Article/UploadFiles/201512/2015121619112850.jpg)
You may proceed to the next section of the map. You will probably encounter some additional units along the way. Watch out for an enemy sniper, hidden in the nearby building (#1). Once you've reached the stairs, take out a single soldier (#2). Wait for the rest of the team members to show up. Move on to the first floor.
![8 - [Mission 02][Part: 2/2] Algeria - Walkthrough - Rainbow Six: Lockdown - Game Guide and Walkthrough](https://game.lhg100.com/Article/UploadFiles/201512/2015121619112817.jpg)
![Now you will have to enter a nearby building (#1) - [Mission 02][Part: 2/2] Algeria - Walkthrough - Rainbow Six: Lockdown - Game Guide and Walkthrough](https://game.lhg100.com/Article/UploadFiles/201512/2015121619112992.jpg)
Now you will have to enter a nearby building (#1). I have to warn you, though. The room is going to be filled with enemy soldiers. You might want to consider storming the place. Alternatively, you could throw some grenades inside. Once you've cleared the first room, head on to the next one. A single soldier will be waiting for you here. Exit the building. Move up closer to the steel barrier. You should notice a few additional opponents (#2). Take them out. After that, use the nearby stairs.
![9 - [Mission 02][Part: 2/2] Algeria - Walkthrough - Rainbow Six: Lockdown - Game Guide and Walkthrough](https://game.lhg100.com/Article/UploadFiles/201512/2015121619112999.jpg)
![The path is rather straightforward, so you shouldn't have any problems - [Mission 02][Part: 2/2] Algeria - Walkthrough - Rainbow Six: Lockdown - Game Guide and Walkthrough](https://game.lhg100.com/Article/UploadFiles/201512/2015121619112948.jpg)
The path is rather straightforward, so you shouldn't have any problems. Watch out for a single sniper, though (#1). He will be hiding in one of the windows located on the first floor. Move up closer to the steel gate in order to finish this mission (#2).
![10 - [Mission 02][Part: 2/2] Algeria - Walkthrough - Rainbow Six: Lockdown - Game Guide and Walkthrough](https://game.lhg100.com/Article/UploadFiles/201512/2015121619112913.jpg)
![11 - [Mission 02][Part: 2/2] Algeria - Walkthrough - Rainbow Six: Lockdown - Game Guide and Walkthrough](https://game.lhg100.com/Article/UploadFiles/201512/2015121619112924.jpg)
Threats: This is a first night mission, so you might have some problems with locating enemy soldiers, especially since you won't have an opportunity to use nightvision goggles all the time. Furthermore, you will be encountering some massive enemy forces. You have to be very careful. Terrorists may try attacking you from many different directions.
Objectives: You will have to locate one of the captured team members. His name is Dieter Weber. Once he's found, you must escort him back to safety.
The first part of this mission will require you to locate the entrace leading to an underground cave complex. You start off near one of the main streets of the city. Step up a little bit closer. You should be leaning out a lot. There are some new terrorists nearby (#1). Start shooting at them. I have to warn you, though. Another group of enemy soldiers will probably appear on your right (small alley). You must deal with this problem swiftly. Head on to the nearby (right) alley. You will probably encounter some new soldiers along the way (#2).
![1 - [Mission 03][Part: 1/3] Desert Village - Walkthrough - Rainbow Six: Lockdown - Game Guide and Walkthrough](https://game.lhg100.com/Article/UploadFiles/201512/2015121619113079.jpg)
![Keep moving forward - [Mission 03][Part: 1/3] Desert Village - Walkthrough - Rainbow Six: Lockdown - Game Guide and Walkthrough](https://game.lhg100.com/Article/UploadFiles/201512/2015121619113053.jpg)
Keep moving forward. You should be very careful at this point. There's a single sniper over here. He will appear in one of the windows located on the upper floor (#1). If you're lucky, your teammates will take care of this problem. Keep moving. You will be encountering new enemy units quite regularly (#2). The whole team should take part in these fights.
![2 - [Mission 03][Part: 1/3] Desert Village - Walkthrough - Rainbow Six: Lockdown - Game Guide and Walkthrough](https://game.lhg100.com/Article/UploadFiles/201512/2015121619113062.jpg)
![Once you've reached an archway (#1), find a good shooting spot - [Mission 03][Part: 1/3] Desert Village - Walkthrough - Rainbow Six: Lockdown - Game Guide and Walkthrough](https://game.lhg100.com/Article/UploadFiles/201512/2015121619113046.jpg)
Once you've reached an archway (#1), find a good shooting spot. New terrorists will arrive here shortly. You should also know that some soldiers may try attacking you from the right. You have to prepared for these kinds of attacks. Move up closer to the archway. You should notice some new terrorists here (#2). Remember to lean out a lot!
![3 - [Mission 03][Part: 1/3] Desert Village - Walkthrough - Rainbow Six: Lockdown - Game Guide and Walkthrough](https://game.lhg100.com/Article/UploadFiles/201512/2015121619113044.jpg)
![Keep moving forward (CAREFULLY - [Mission 03][Part: 1/3] Desert Village - Walkthrough - Rainbow Six: Lockdown - Game Guide and Walkthrough](https://game.lhg100.com/Article/UploadFiles/201512/2015121619113086.jpg)
Keep moving forward (CAREFULLY!!). You will probably notice a single soldier guarding the nearby wall (#1). Try aiming at him. You probably won't have an opportunity to score a headshot, but that's not a problem. Even if you don't kill him instantly, he won't be able to warn any of his colleagues. Wait for the rest of the team to show up. Stay close to the right wall. Enter the nearest building. There are some terrorists here (#2). Kill them. You might want to consider letting your teammates handle with this problem.
![4 - [Mission 03][Part: 1/3] Desert Village - Walkthrough - Rainbow Six: Lockdown - Game Guide and Walkthrough](https://game.lhg100.com/Article/UploadFiles/201512/2015121619113162.jpg)
![Move on to the next room - [Mission 03][Part: 1/3] Desert Village - Walkthrough - Rainbow Six: Lockdown - Game Guide and Walkthrough](https://game.lhg100.com/Article/UploadFiles/201512/2015121619113148.jpg)
Move on to the next room. You should see an exit, leading to a new courtyard. DON'T go there just yet. There are some terrorists guarding a nearby wall (#1). Kill them. You must do it quickly, so they won't have an opportunity to fight back. Once they're gone, stand near the exit and take care of the remaining enemy soldiers. They will appear on your right. You might also consider throwing a couple of grenades at them (#2), however this is not necessary.
![5 - [Mission 03][Part: 1/3] Desert Village - Walkthrough - Rainbow Six: Lockdown - Game Guide and Walkthrough](https://game.lhg100.com/Article/UploadFiles/201512/2015121619113100.jpg)
![MAINTAIN your current position - [Mission 03][Part: 1/3] Desert Village - Walkthrough - Rainbow Six: Lockdown - Game Guide and Walkthrough](https://game.lhg100.com/Article/UploadFiles/201512/2015121619113138.jpg)
MAINTAIN your current position. A second group of enemy soldiers will appear on your left. Start shooting at them (#1). Once they're gone, head on to the RIGHT courtyard. Use the nearby stairs to get to the upper floor (#2). Before you move any further, I'd recommend waiting for the rest of the squad to show up.
![6 - [Mission 03][Part: 1/3] Desert Village - Walkthrough - Rainbow Six: Lockdown - Game Guide and Walkthrough](https://game.lhg100.com/Article/UploadFiles/201512/2015121619113151.jpg)
![You should see a small entrance on your right - [Mission 03][Part: 1/3] Desert Village - Walkthrough - Rainbow Six: Lockdown - Game Guide and Walkthrough](https://game.lhg100.com/Article/UploadFiles/201512/2015121619113274.jpg)
You should see a small entrance on your right. It's being guarded by one of the terrorists (#1). Kill him and enter the new building. I'd recommend turning the night vision goggles on. There are a lot of enemy troops in this area. One of these groups will probably attack you from the right flank (#2). It would be best to send your teammates there. They should be able to handle with the situation without any problems.
![7 - [Mission 03][Part: 1/3] Desert Village - Walkthrough - Rainbow Six: Lockdown - Game Guide and Walkthrough](https://game.lhg100.com/Article/UploadFiles/201512/2015121619113290.jpg)
![Head on to the corridor located on your right - [Mission 03][Part: 1/3] Desert Village - Walkthrough - Rainbow Six: Lockdown - Game Guide and Walkthrough](https://game.lhg100.com/Article/UploadFiles/201512/2015121619113236.jpg)
Head on to the corridor located on your right. It was guarded by one of the larger groups of enemy soldiers (#1). I would recommend ignoring all of the surrounding rooms. Stay close to the right wall. You will come across a locked door (#2). Wait for the rest of the team to show up. You should try breaking the lock on your own. It's not too difficult. :-)
![8 - [Mission 03][Part: 1/3] Desert Village - Walkthrough - Rainbow Six: Lockdown - Game Guide and Walkthrough](https://game.lhg100.com/Article/UploadFiles/201512/2015121619113239.jpg)
![Open the door carefully - [Mission 03][Part: 1/3] Desert Village - Walkthrough - Rainbow Six: Lockdown - Game Guide and Walkthrough](https://game.lhg100.com/Article/UploadFiles/201512/2015121619113212.jpg)
Open the door carefully. There are some terrorists here. Kill them (#1). Thankfully, they shouldn't pose any threat. Enter this room. You've probably noticed a hatch leading to the cave complex (#2). Get closer to it. After that, the game will load a new map.
![9 - [Mission 03][Part: 1/3] Desert Village - Walkthrough - Rainbow Six: Lockdown - Game Guide and Walkthrough](https://game.lhg100.com/Article/UploadFiles/201512/2015121619113330.jpg)
![10 - [Mission 03][Part: 1/3] Desert Village - Walkthrough - Rainbow Six: Lockdown - Game Guide and Walkthrough](https://game.lhg100.com/Article/UploadFiles/201512/2015121619113328.jpg)
You should have the night vision goggles turned on all the time, even when you're closer to bright spots. As for the level itself, it's not that hard, mainly because it's rather straightforward. You will have to reach the opposite end of the cave complex. You will be encountering some enemy forces along the way (#1). Thankfully, with the night vision turned on you won't have any problems locating the terrorists. Nevertheless, you should be very careful. Slow down a little once you've reached the main cave (#2). Before entering this area make sure you've reloaded your weapon.
![1 - [Mission 03][Part: 2/3] Desert Village - Walkthrough - Rainbow Six: Lockdown - Game Guide and Walkthrough](https://game.lhg100.com/Article/UploadFiles/201512/2015121619113339.jpg)
![You should see a group of enemy soldiers - [Mission 03][Part: 2/3] Desert Village - Walkthrough - Rainbow Six: Lockdown - Game Guide and Walkthrough](https://game.lhg100.com/Article/UploadFiles/201512/2015121619113369.jpg)
You should see a group of enemy soldiers. Most of them will be stationed on the other end of this cave (#1). Use the fact that they can't hurt you, mainly because they're equipped with lame automatic weapons. Nevertheless, you should be careful. Some of the terrorists will attack you from the right flank. Once they're gone, head on to the only possible corridor. You will be encountering enemy forces quite regularly (#2).
![2 - [Mission 03][Part: 2/3] Desert Village - Walkthrough - Rainbow Six: Lockdown - Game Guide and Walkthrough](https://game.lhg100.com/Article/UploadFiles/201512/2015121619113351.jpg)
![The second important location is the wooden bridge area (#1) - [Mission 03][Part: 2/3] Desert Village - Walkthrough - Rainbow Six: Lockdown - Game Guide and Walkthrough](https://game.lhg100.com/Article/UploadFiles/201512/2015121619113362.jpg)
The second important location is the wooden bridge area (#1). First of all, take care of all nearby soldiers. Most of them will be hiding on the left side of the bridge. Make sure there's one left alive. Cross the bridge and keep moving forward. You should be able to reach the exit within a few seconds (#2). I have to warn you, though. This area will be guarded by at least two additional terrorists. Kill them. Get closer to the ladder and wait for the game to load the new level.
![3 - [Mission 03][Part: 2/3] Desert Village - Walkthrough - Rainbow Six: Lockdown - Game Guide and Walkthrough](https://game.lhg100.com/Article/UploadFiles/201512/2015121619113406.jpg)
![4 - [Mission 03][Part: 2/3] Desert Village - Walkthrough - Rainbow Six: Lockdown - Game Guide and Walkthrough](https://game.lhg100.com/Article/UploadFiles/201512/2015121619113480.jpg)
This is a very challenging level. You will have to deal with some massive enemy forces. I wouldn't recommend using night vision goggles anymore. There are too many bright spots and you'd have some major problems with locating enemy soldiers. Start off by killing a small group (4-5) of terrorists located on your right (#1). Watch out for a single sniper, though. He will be hiding in one of the central buildings of the complex. Once you've taken care of the hostiles start moving towards the right warehouse building (#2).
![1 - [Mission 03][Part: 3/3] Desert Village - Walkthrough - Rainbow Six: Lockdown - Game Guide and Walkthrough](https://game.lhg100.com/Article/UploadFiles/201512/2015121619113411.jpg)
![Lean out carefully and eliminate terrorists who were guarding the warehouse (#1) - [Mission 03][Part: 3/3] Desert Village - Walkthrough - Rainbow Six: Lockdown - Game Guide and Walkthrough](https://game.lhg100.com/Article/UploadFiles/201512/2015121619113428.jpg)
Lean out carefully and eliminate terrorists who were guarding the warehouse (#1). Move your team to the right side of the building. I would recommend leaving them near the sandbags (#2). You, on the other hand, should start running towards the nearest building.
![2 - [Mission 03][Part: 3/3] Desert Village - Walkthrough - Rainbow Six: Lockdown - Game Guide and Walkthrough](https://game.lhg100.com/Article/UploadFiles/201512/2015121619113436.jpg)
![Open the door carefully - [Mission 03][Part: 3/3] Desert Village - Walkthrough - Rainbow Six: Lockdown - Game Guide and Walkthrough](https://game.lhg100.com/Article/UploadFiles/201512/2015121619113491.jpg)
Open the door carefully. You should notice some new terrorists inside (#1). It would be best to surprise them. Now head on to the second door. If you're lucky, you should be able to take out some of the opponents located on your right (#2). You won't have any problems with that, especially since they will be concentrating their efforts on the members of your squad...
![3 - [Mission 03][Part: 3/3] Desert Village - Walkthrough - Rainbow Six: Lockdown - Game Guide and Walkthrough](https://game.lhg100.com/Article/UploadFiles/201512/2015121619113531.jpg)
![Rejoin with the rest of the squad - [Mission 03][Part: 3/3] Desert Village - Walkthrough - Rainbow Six: Lockdown - Game Guide and Walkthrough](https://game.lhg100.com/Article/UploadFiles/201512/2015121619113576.jpg)
Rejoin with the rest of the squad. There are two other buildings nearby. At least one of them is being occupied by an enemy soldier. It would be best to ignore this problem. Head on to the entrance leading to a smaller cave complex (#1). You will be attacked by some new terrorists along the way (#2). Get ready! Some of the upcoming fights are very challenging!! A cut-scene will appear shortly. You must hurry and rescue the wounded team member.
![4 - [Mission 03][Part: 3/3] Desert Village - Walkthrough - Rainbow Six: Lockdown - Game Guide and Walkthrough](https://game.lhg100.com/Article/UploadFiles/201512/2015121619113548.jpg)
![First of all, kill a single enemy sniper - [Mission 03][Part: 3/3] Desert Village - Walkthrough - Rainbow Six: Lockdown - Game Guide and Walkthrough](https://game.lhg100.com/Article/UploadFiles/201512/2015121619113578.jpg)
First of all, kill a single enemy sniper. He will be standing on one of the roofs (#1). Once he's gone, move a little bit closer to the main complex. Start shooting at the visible enemy soldiers. It would be wise to use cars, buildings and other large objects for much needed cover. Make sure you've taken care of most of the enemy troops. Head on to the nearby door (#2).
![5 - [Mission 03][Part: 3/3] Desert Village - Walkthrough - Rainbow Six: Lockdown - Game Guide and Walkthrough](https://game.lhg100.com/Article/UploadFiles/201512/2015121619113551.jpg)
![The first room will be occupied by at least two enemy soldiers (#1) - [Mission 03][Part: 3/3] Desert Village - Walkthrough - Rainbow Six: Lockdown - Game Guide and Walkthrough](https://game.lhg100.com/Article/UploadFiles/201512/2015121619113530.jpg)
The first room will be occupied by at least two enemy soldiers (#1). You will have to deal with them swiftly. Head on to the second room. One of the guards will be standing near the wounded soldier (#2). Send a bullet between his eyes. Wait for the cut-scene to end. Rescued soldier will get out of the building on his own. DON'T follow him. Get back to the main door (the same one you've used before).
![6 - [Mission 03][Part: 3/3] Desert Village - Walkthrough - Rainbow Six: Lockdown - Game Guide and Walkthrough](https://game.lhg100.com/Article/UploadFiles/201512/2015121619113604.jpg)
![Now you will have to reach the extraction zome, however DON'T do that just yet - [Mission 03][Part: 3/3] Desert Village - Walkthrough - Rainbow Six: Lockdown - Game Guide and Walkthrough](https://game.lhg100.com/Article/UploadFiles/201512/2015121619113605.jpg)
Now you will have to reach the extraction zome, however DON'T do that just yet. You will have to eliminate all of the remaining enemy soldiers (#1). Most of them will be hiding on your left. Once they're gone, you'll be notified. Start running towards the landing zone (#2). Make sure you don't hit the rescued soldier! At first, he may look like one of the terrorists.
![7 - [Mission 03][Part: 3/3] Desert Village - Walkthrough - Rainbow Six: Lockdown - Game Guide and Walkthrough](https://game.lhg100.com/Article/UploadFiles/201512/2015121619113626.jpg)
![You'll be informed that an allied chopper is on its way here - [Mission 03][Part: 3/3] Desert Village - Walkthrough - Rainbow Six: Lockdown - Game Guide and Walkthrough](https://game.lhg100.com/Article/UploadFiles/201512/2015121619113665.jpg)
You'll be informed that an allied chopper is on its way here. That's not all. He won't be able to land unless you kill all of the nearby terrorists. The enemies will be attacking from two different directions. Larger groups of terrorists will be coming from the right side (#1). You should concentrate all of your efforts on this passageway. It's been located between two large buildings. Once you've taken care of the hostiles, a chopper will appear (#2) and this mission will come to an end.
![8 - [Mission 03][Part: 3/3] Desert Village - Walkthrough - Rainbow Six: Lockdown - Game Guide and Walkthrough](https://game.lhg100.com/Article/UploadFiles/201512/2015121619113680.jpg)
![9 - [Mission 03][Part: 3/3] Desert Village - Walkthrough - Rainbow Six: Lockdown - Game Guide and Walkthrough](https://game.lhg100.com/Article/UploadFiles/201512/2015121619113731.jpg)
Threats: This is a very challenging mission. You will have to make quick and precise decisions. Otherwise, innocent people will die and you will fail one of the main objectives. The most difficult area is the occupied prison. You will also have to be on a look out for enemy snipers.
Objectives: You must deal with a serious terrorist threat. Furthermore, you will have to rescue a group of hostages and then escort them back to safety.
You start off inside one of the local police stations. The building is being overrun by enemy troops. You must hurry, otherwise you will fail the whole mission. Head on to the nearest door (#1). Open it. You should see a group of police officers. They will be shooting at terrorists. You CAN'T have any casualities among the police units. Otherwise, you would have failed this mission. Order your team to storm the place (#2). Enter the room and stand by one of the shelves. Start shooting at visible enemy soldiers. You might also consider throwing a couple of grenades at them, although this is very risky. The room is too small for these types of actions.
![1 - [Mission 04][Part: 1/2] Amsterdam - Walkthrough - Rainbow Six: Lockdown - Game Guide and Walkthrough](https://game.lhg100.com/Article/UploadFiles/201512/2015121619113714.jpg)
![Once you've cleared your surroundings open the left door - [Mission 04][Part: 1/2] Amsterdam - Walkthrough - Rainbow Six: Lockdown - Game Guide and Walkthrough](https://game.lhg100.com/Article/UploadFiles/201512/2015121619113733.jpg)
Once you've cleared your surroundings open the left door. You will find yourself in a large corridor. Keep moving forward. You should see a single terrorist in a few seconds (#1). Take him out quickly. You will be encountering other soldiers along the way (#2). Thankfully, they won't be hard to kill, especially since you've got the whole team with you.
![2 - [Mission 04][Part: 1/2] Amsterdam - Walkthrough - Rainbow Six: Lockdown - Game Guide and Walkthrough](https://game.lhg100.com/Article/UploadFiles/201512/2015121619113782.jpg)
![You will have to reach a small room - [Mission 04][Part: 1/2] Amsterdam - Walkthrough - Rainbow Six: Lockdown - Game Guide and Walkthrough](https://game.lhg100.com/Article/UploadFiles/201512/2015121619113702.jpg)
You will have to reach a small room. Use the nearby stairs (#1) to get to the upper floor. A short cut-scene should appear on your screen. You will have to avoid one of the security cameras. Otherwise the terrorists would have spotted your team. Thankfully, you will have an opportunity to disable this camera. First of all, check out a glowing icon. Now open the door and kill a single guard. He is patrolling a corridor located near the camera (#2). You don't have to worry about that, though. The camera won't react to his body in any way.
![3 - [Mission 04][Part: 1/2] Amsterdam - Walkthrough - Rainbow Six: Lockdown - Game Guide and Walkthrough](https://game.lhg100.com/Article/UploadFiles/201512/2015121619113875.jpg)
![Leave your squad members behind - [Mission 04][Part: 1/2] Amsterdam - Walkthrough - Rainbow Six: Lockdown - Game Guide and Walkthrough](https://game.lhg100.com/Article/UploadFiles/201512/2015121619113822.jpg)
Leave your squad members behind. This is VERY important. Start moving towards the camera. You will have to stick close to the left wall. Stop once you're under the camera (#1). You may stand up. Press and hold the 'use' key in order to disable this device. You may rejoin with the rest of the squad now. BEFORE you move any further I would strongly recommend clearing out nearby rooms. Let's start off with the left one (closer to the camera). It's being guarded by a single terrorist (#2). Remember to use shelves for extra cover!
![4 - [Mission 04][Part: 1/2] Amsterdam - Walkthrough - Rainbow Six: Lockdown - Game Guide and Walkthrough](https://game.lhg100.com/Article/UploadFiles/201512/2015121619113877.jpg)
![Now head on to the right room - [Mission 04][Part: 1/2] Amsterdam - Walkthrough - Rainbow Six: Lockdown - Game Guide and Walkthrough](https://game.lhg100.com/Article/UploadFiles/201512/2015121619113827.jpg)
Now head on to the right room. One of the entrances is located near the camera (blue door). This time you will have to deal with two terrorists (#1). Get back to your team and continue moving forward. I have to warn you, though. This corridor is being patrolled by another enemy soldier (#2). You will have to kill him. Proceed to the next part of the police station.
![5 - [Mission 04][Part: 1/2] Amsterdam - Walkthrough - Rainbow Six: Lockdown - Game Guide and Walkthrough](https://game.lhg100.com/Article/UploadFiles/201512/2015121619113870.jpg)
![There's a door on your left - [Mission 04][Part: 1/2] Amsterdam - Walkthrough - Rainbow Six: Lockdown - Game Guide and Walkthrough](https://game.lhg100.com/Article/UploadFiles/201512/2015121619113864.jpg)
There's a door on your left. The next room is the main armory, so you have to be very careful. There are a lot of enemy soldiers here. You might want to consider storming the place with the help from the rest of your squad. Most of the terrorists will be standing on your right (#1). Furthermore, some of them are crouching behind lockers. Once you've dealt with this problem, you should receive a short message. The prison will be your next objective. Innocent civilians are being held there. Head on to the left corridor (#2). It's located near the lockers.
![6 - [Mission 04][Part: 1/2] Amsterdam - Walkthrough - Rainbow Six: Lockdown - Game Guide and Walkthrough](https://game.lhg100.com/Article/UploadFiles/201512/2015121619113918.jpg)
![You should come across a new door within a few seconds - [Mission 04][Part: 1/2] Amsterdam - Walkthrough - Rainbow Six: Lockdown - Game Guide and Walkthrough](https://game.lhg100.com/Article/UploadFiles/201512/2015121619113907.jpg)
You should come across a new door within a few seconds. Open it and start shooting at the terrorists (#1). You'd probably have to deal with two of them. Order your team to STAY here. Don't get too close to the nearby stairs!! Get back to the armory. Head on to the central platform. You should find a new door with a lock on it (#2). Break it and enter the next corridor.
![7 - [Mission 04][Part: 1/2] Amsterdam - Walkthrough - Rainbow Six: Lockdown - Game Guide and Walkthrough](https://game.lhg100.com/Article/UploadFiles/201512/2015121619113923.jpg)
![Lean out CAREFULLY in order to take out an enemy soldier (#1) - [Mission 04][Part: 1/2] Amsterdam - Walkthrough - Rainbow Six: Lockdown - Game Guide and Walkthrough](https://game.lhg100.com/Article/UploadFiles/201512/2015121619113957.jpg)
Lean out CAREFULLY in order to take out an enemy soldier (#1). He will be guarding this corridor. Thankfully, you should be able to surprise him. Now for the hard part. There are some windows on your right. You can't stay close, because this whole area is being monitored by at least THREE skilled snipers. You will have to deal with each and every one of them (#2). Don't even bother scoring headshots, because there's not too much time for an attack. MAKE SURE you've killed all of them. Now you may order your teammates to get back to you. Thankfully, they will only have to use nearby stairs.
![8 - [Mission 04][Part: 1/2] Amsterdam - Walkthrough - Rainbow Six: Lockdown - Game Guide and Walkthrough](https://game.lhg100.com/Article/UploadFiles/201512/2015121619113924.jpg)
![Start moving forward - [Mission 04][Part: 1/2] Amsterdam - Walkthrough - Rainbow Six: Lockdown - Game Guide and Walkthrough](https://game.lhg100.com/Article/UploadFiles/201512/2015121619114002.jpg)
Start moving forward. You will have to open a few doors along the way (#1). Thankfully, there aren't any opponents nearby, so you don't have to be prepared for anything. Nevertheless, I would recommend staying close to the RIGHT wall. Thanks to that, you should be able to reach your destination without any problems. You will come across a locked door (#2). Break the lock in order to enter the new room.
![9 - [Mission 04][Part: 1/2] Amsterdam - Walkthrough - Rainbow Six: Lockdown - Game Guide and Walkthrough](https://game.lhg100.com/Article/UploadFiles/201512/2015121619114041.jpg)
![You will probably find yourself on the roof of this building - [Mission 04][Part: 1/2] Amsterdam - Walkthrough - Rainbow Six: Lockdown - Game Guide and Walkthrough](https://game.lhg100.com/Article/UploadFiles/201512/2015121619114036.jpg)
You will probably find yourself on the roof of this building. Turn right. You should see a terrorist. He is standing in a nearby room (#1). Shoot through the glass in order to get rid of him. You may proceed to the other end of this corridor. Open the door located on your right. There's only one corridor leading to your destination. Be careful, though. You may encounter some additional units along the way (#2).
![10 - [Mission 04][Part: 1/2] Amsterdam - Walkthrough - Rainbow Six: Lockdown - Game Guide and Walkthrough](https://game.lhg100.com/Article/UploadFiles/201512/2015121619114074.jpg)
![Keep moving forward - [Mission 04][Part: 1/2] Amsterdam - Walkthrough - Rainbow Six: Lockdown - Game Guide and Walkthrough](https://game.lhg100.com/Article/UploadFiles/201512/2015121619114062.jpg)
Keep moving forward. You should come across a new door (#1) in a few seconds (on your right). Enter this room. In order to end first part of the mission step up closer to the elevator shaft (#2).
![11 - [Mission 04][Part: 1/2] Amsterdam - Walkthrough - Rainbow Six: Lockdown - Game Guide and Walkthrough](https://game.lhg100.com/Article/UploadFiles/201512/2015121619114077.jpg)
![12 - [Mission 04][Part: 1/2] Amsterdam - Walkthrough - Rainbow Six: Lockdown - Game Guide and Walkthrough](https://game.lhg100.com/Article/UploadFiles/201512/2015121619114045.jpg)
The second part of this mission is by far more challenging than the previous one. First of all, try taking out a single terrorist who's hiding in the security checkpoint (#1). Go there now. Step up to the console and press the white button (#2) in order to disable the metal detector. You can enter the main complex of the prison. I'd recommend keeping rest of the team close to your position.
![1 - [Mission 04][Part: 2/2] Amsterdam - Walkthrough - Rainbow Six: Lockdown - Game Guide and Walkthrough](https://game.lhg100.com/Article/UploadFiles/201512/2015121619114124.jpg)
![You shouldn't encounter any more terrorists at this point, however bear in mind that you're getting closer to the main area of the prison - [Mission 04][Part: 2/2] Amsterdam - Walkthrough - Rainbow Six: Lockdown - Game Guide and Walkthrough](https://game.lhg100.com/Article/UploadFiles/201512/2015121619114175.jpg)
You shouldn't encounter any more terrorists at this point, however bear in mind that you're getting closer to the main area of the prison. That's where the hostages are being held. You can reach that spot by choosing one of two different paths. For now let's concentrate on the nearby stairs (#1). They will be located on your left. Go to the upper floor. Step up closer to the window, brake the glass and start shooting at visible enemy units. You HAVE TO kill a guy who's armed with a rocket launcher (#2). Otherwise he would have killed you or the hostages (#2).
![You should be able to kill about 4-5 terrorists - [Mission 04][Part: 2/2] Amsterdam - Walkthrough - Rainbow Six: Lockdown - Game Guide and Walkthrough](https://game.lhg100.com/Article/UploadFiles/201512/2015121619114155.jpg)
You should be able to kill about 4-5 terrorists. Bear in mind that some of them may be located on the same floor. They will be attacking you from the left side. After you're done with them, return to the lower level and go left. Crouch by the entrance and kill the remaining terrorists (#1). I'd recommend ordering your team to storm the place. Enter the main area. TURN AROUND and kill a guy who should be standing above you (#2). You have to do it quickly, because he may start killing off the hostages!! Now it would be best to make sure that the whole area has been secured.
![3 - [Mission 04][Part: 2/2] Amsterdam - Walkthrough - Rainbow Six: Lockdown - Game Guide and Walkthrough](https://game.lhg100.com/Article/UploadFiles/201512/2015121619114190.jpg)
![Use the stairs leading to the upper level - [Mission 04][Part: 2/2] Amsterdam - Walkthrough - Rainbow Six: Lockdown - Game Guide and Walkthrough](https://game.lhg100.com/Article/UploadFiles/201512/2015121619114165.jpg)
Use the stairs leading to the upper level. They are located near the killed terrorist (I've mentioned him before). The hostages should be hiding in both holding cells (#1). Use the SPACE key (on both of them) in order to add them to your team. Now you will have to escort these civilians to the extraction zone. Remember that they can't be harmed in any way!! It would be wise to leave them behind (with the rest of the squad) whenever you decide to enter unexplored area. Go back to the lower level. Star moving towards the right door (#2).
![4 - [Mission 04][Part: 2/2] Amsterdam - Walkthrough - Rainbow Six: Lockdown - Game Guide and Walkthrough](https://game.lhg100.com/Article/UploadFiles/201512/2015121619114264.jpg)
![You have to be very careful - [Mission 04][Part: 2/2] Amsterdam - Walkthrough - Rainbow Six: Lockdown - Game Guide and Walkthrough](https://game.lhg100.com/Article/UploadFiles/201512/2015121619114235.jpg)
You have to be very careful. The corridor you're about to enter is being guarded by at least 2-3 other terrorists (#1). Remember to keep the hostages in the back! Furthermore, you should be monitoring their movements, so they won't do anything stupid. You should finally come across a locked door (#2). Pick the lock in order to get through to the next section of the prison.
![5 - [Mission 04][Part: 2/2] Amsterdam - Walkthrough - Rainbow Six: Lockdown - Game Guide and Walkthrough](https://game.lhg100.com/Article/UploadFiles/201512/2015121619114210.jpg)
![You should be able to reach the roof of the prison building within a few seconds - [Mission 04][Part: 2/2] Amsterdam - Walkthrough - Rainbow Six: Lockdown - Game Guide and Walkthrough](https://game.lhg100.com/Article/UploadFiles/201512/2015121619114236.jpg)
You should be able to reach the roof of the prison building within a few seconds. Leave the rest of the team (including the hostages!!) behind. Start moving towards the main part of the roof. You should see a sniper on your right (#1). Kill him. Maintain your position. You will have to deal with few waves of enemy soldiers. Some of them will appear near your position (#2). You might want to consider moving a little bit closer, however this is a risky manoeuvre. MAKE SURE the roof area has been cleared of hostile forces before you rejoin with the rest of the team!!
![6 - [Mission 04][Part: 2/2] Amsterdam - Walkthrough - Rainbow Six: Lockdown - Game Guide and Walkthrough](https://game.lhg100.com/Article/UploadFiles/201512/2015121619114262.jpg)
![Go back to the lower platform and turn night - [Mission 04][Part: 2/2] Amsterdam - Walkthrough - Rainbow Six: Lockdown - Game Guide and Walkthrough](https://game.lhg100.com/Article/UploadFiles/201512/2015121619114339.jpg)
Go back to the lower platform and turn night. You should see a small ladder (#1) over here. Some of the terrorists have used in the past. Now it's your turn. In order to do that you will have to stand close to it. Press the 'use' key. Once you're down, WAIT for the other team members and the hostages to show up!! Head on to the nearest door (#2).
![7 - [Mission 04][Part: 2/2] Amsterdam - Walkthrough - Rainbow Six: Lockdown - Game Guide and Walkthrough](https://game.lhg100.com/Article/UploadFiles/201512/2015121619114386.jpg)
![You will find yourself in a luxurious restaurant - [Mission 04][Part: 2/2] Amsterdam - Walkthrough - Rainbow Six: Lockdown - Game Guide and Walkthrough](https://game.lhg100.com/Article/UploadFiles/201512/2015121619114395.jpg)
You will find yourself in a luxurious restaurant. This building has also been occupied by the terrorists. You will have to deal with most of them. Start off by killing soldiers located in the nearby room (#1). You might want to consider "asking" your teammates for help, however this is not necessary. You should be able to take down enemy forces on your own. Watch out for a guy hiding under the bar!! Make sure the room is clear. The rest of the team may join you now. Head on to the left corridor. You will be attacked by additional enemy units (#2). Watch out for the hostages! They can't be harmed!
![8 - [Mission 04][Part: 2/2] Amsterdam - Walkthrough - Rainbow Six: Lockdown - Game Guide and Walkthrough](https://game.lhg100.com/Article/UploadFiles/201512/2015121619114378.jpg)
![Keep pushing forward - [Mission 04][Part: 2/2] Amsterdam - Walkthrough - Rainbow Six: Lockdown - Game Guide and Walkthrough](https://game.lhg100.com/Article/UploadFiles/201512/2015121619114315.jpg)
Keep pushing forward. You will be encountering enemy forces quite regularly. Once you've reached the main corridor head on to the kitchen area. It's located on your right. Kill all enemy soldiers (#1). Enter this room with the rest of the team. Keep moving towards the opposite exit. Before you decide to leave the kitchen make sure you've cleared the room located on your right. One of the terrorists may be hiding in this cold-storage facility (#2). You have to kill him. Otherwise he would have surprised your team in the future.
![9 - [Mission 04][Part: 2/2] Amsterdam - Walkthrough - Rainbow Six: Lockdown - Game Guide and Walkthrough](https://game.lhg100.com/Article/UploadFiles/201512/2015121619114420.jpg)
![You will find yourself inside a small warehouse - [Mission 04][Part: 2/2] Amsterdam - Walkthrough - Rainbow Six: Lockdown - Game Guide and Walkthrough](https://game.lhg100.com/Article/UploadFiles/201512/2015121619114482.jpg)
You will find yourself inside a small warehouse. Before you move any further turn left. There's a window on the upper floor (#1). A terrorist should be standing by it. Kill him. You may proceed to the next corridor. The extraction zone will be guarded by a large group of enemy soldiers. You've got to take care of this problem. Now turn left. There's a passageway here (#2). Throw a couple of grenades inside in order to get rid of the remaining terrorists.
![10 - [Mission 04][Part: 2/2] Amsterdam - Walkthrough - Rainbow Six: Lockdown - Game Guide and Walkthrough](https://game.lhg100.com/Article/UploadFiles/201512/2015121619114499.jpg)
![Make sure the area is clear before you decide to move the hostages to this location - [Mission 04][Part: 2/2] Amsterdam - Walkthrough - Rainbow Six: Lockdown - Game Guide and Walkthrough](https://game.lhg100.com/Article/UploadFiles/201512/2015121619114497.jpg)
Make sure the area is clear before you decide to move the hostages to this location. Step up closer to the extraction point (#1). An allied chopper will arrive here shortly (#2). This marks the end of this mission.
![11 - [Mission 04][Part: 2/2] Amsterdam - Walkthrough - Rainbow Six: Lockdown - Game Guide and Walkthrough](https://game.lhg100.com/Article/UploadFiles/201512/2015121619114444.jpg)
![12 - [Mission 04][Part: 2/2] Amsterdam - Walkthrough - Rainbow Six: Lockdown - Game Guide and Walkthrough](https://game.lhg100.com/Article/UploadFiles/201512/2015121619114407.jpg)
THREATS: This is a second night mission, so once again you will have to deal with a low visibility problem. That also includes the Parliament itself. Furthermore, the final part of this mission will require you to rescue and secure a small group of politicians. They are being held in the main hall of the building.
Objectives: First of all, you will have to find and neutralize a Legion bomb. Terrorists have planted it somewhere inside the Parliament building. The second objective involves rescuing hostages. After that, you will have to protect them for a few additional seconds.
You start off near the Parliament building. I would recommend using your night vision goggles. That way you should be able to spot enemy terrorists faster than usual. It would also be wise to move up to the left wall. You will encounter some enemy soldiers in a few seconds (#1). Make sure you've killed all of them before you decide to run to the main entrance (#2).
![1 - [Mission 05][Part: 1/2] Parliament - Walkthrough - Rainbow Six: Lockdown - Game Guide and Walkthrough](https://game.lhg100.com/Article/UploadFiles/201512/2015121619114598.jpg)
![A small group of enemy soldiers is guarding one of the first corridors of the Parliament complex (#1) - [Mission 05][Part: 1/2] Parliament - Walkthrough - Rainbow Six: Lockdown - Game Guide and Walkthrough](https://game.lhg100.com/Article/UploadFiles/201512/2015121619114504.jpg)
A small group of enemy soldiers is guarding one of the first corridors of the Parliament complex (#1). You will have to deal with them swiftly. Thankfully, they're not that hard to locate. I wouldn't recommend going left, because you wouldn't be provided with any cover. Instead, choose the right corridor. You will encounter a new door in a few seconds (#2).
![2 - [Mission 05][Part: 1/2] Parliament - Walkthrough - Rainbow Six: Lockdown - Game Guide and Walkthrough](https://game.lhg100.com/Article/UploadFiles/201512/2015121619114519.jpg)
![Start shooting at the visible enemy soldiers - [Mission 05][Part: 1/2] Parliament - Walkthrough - Rainbow Six: Lockdown - Game Guide and Walkthrough](https://game.lhg100.com/Article/UploadFiles/201512/2015121619114568.jpg)
Start shooting at the visible enemy soldiers. Most of them will be hiding in a small room surrounded with glass (#1). It's located on your right. Before you decide to leave this corridor make sure you've taken care of all visible hostiles. Start moving towards the right room. About a half way through, turn around and kill some new terrorists. They're located on the upper level (#2). You don't have to go there, though. Just make sure they're dead.
![3 - [Mission 05][Part: 1/2] Parliament - Walkthrough - Rainbow Six: Lockdown - Game Guide and Walkthrough](https://game.lhg100.com/Article/UploadFiles/201512/2015121619114596.jpg)
![The rest of the team may join you now - [Mission 05][Part: 1/2] Parliament - Walkthrough - Rainbow Six: Lockdown - Game Guide and Walkthrough](https://game.lhg100.com/Article/UploadFiles/201512/2015121619114557.jpg)
The rest of the team may join you now. Start moving towards the glass room (#1). Like I've said before, it should be located on your right. You will have to open a few doors along the way. Thankfully, surrounding rooms aren't occupied by any terrorists. The enemies will appear once you've reached one of the larger corridors of the complex (#2). Make sure you have killed all of them, before you decide to move any further!!
![4 - [Mission 05][Part: 1/2] Parliament - Walkthrough - Rainbow Six: Lockdown - Game Guide and Walkthrough](https://game.lhg100.com/Article/UploadFiles/201512/2015121619114638.jpg)
![You should be getting closer to a small passage guarded by a metal detector - [Mission 05][Part: 1/2] Parliament - Walkthrough - Rainbow Six: Lockdown - Game Guide and Walkthrough](https://game.lhg100.com/Article/UploadFiles/201512/2015121619114677.jpg)
You should be getting closer to a small passage guarded by a metal detector. Don't go there just yet. First of all, take care of the surrounding terrorists (#1). The rest of the team should join you in these fights. Now enter a small room located on the left of the metal detector. Step up to the glowing console and use it (#2) in order to shut down the device. You may proceed to the next section of the building.
![5 - [Mission 05][Part: 1/2] Parliament - Walkthrough - Rainbow Six: Lockdown - Game Guide and Walkthrough](https://game.lhg100.com/Article/UploadFiles/201512/2015121619114619.jpg)
![Once you've reached a junction, head on to the small door that's been located on your right - [Mission 05][Part: 1/2] Parliament - Walkthrough - Rainbow Six: Lockdown - Game Guide and Walkthrough](https://game.lhg100.com/Article/UploadFiles/201512/2015121619114633.jpg)
Once you've reached a junction, head on to the small door that's been located on your right. Open it CAREFULLY. I would recommend throwing a couple of grenades inside. Don't forget to move back to a safe distance!! Once the explosion has occured order your team to go there (#1). You may want to join them, especially since some of the terrorists will be hiding among the destroyed equipment. One of these soldiers is in the right room (#2). You will have to kill him before he decides to attack members of your team.
![6 - [Mission 05][Part: 1/2] Parliament - Walkthrough - Rainbow Six: Lockdown - Game Guide and Walkthrough](https://game.lhg100.com/Article/UploadFiles/201512/2015121619114673.jpg)
![Now step up to the glowing console - [Mission 05][Part: 1/2] Parliament - Walkthrough - Rainbow Six: Lockdown - Game Guide and Walkthrough](https://game.lhg100.com/Article/UploadFiles/201512/2015121619114615.jpg)
Now step up to the glowing console. Use it in order to gain knowledge of the bomb's location (#1). It turns out it's been planted in one of the other sections of the Parliament. You will have to go there now. Exit the room. Go back to the junction. This time choose the unexplored LEFT path. Move up closer to the only door (#2). The game will upload a new map very shortly.
![7 - [Mission 05][Part: 1/2] Parliament - Walkthrough - Rainbow Six: Lockdown - Game Guide and Walkthrough](https://game.lhg100.com/Article/UploadFiles/201512/2015121619114781.jpg)
![8 - [Mission 05][Part: 1/2] Parliament - Walkthrough - Rainbow Six: Lockdown - Game Guide and Walkthrough](https://game.lhg100.com/Article/UploadFiles/201512/2015121619114760.jpg)
You will have an opportunity to listen to some radio chatter during this mission. You may ignore this. There's only one path leading to your goal, so you shouldn't be worried about anything else. You start off on a staircase. Start moving towards the upper floor (#1). Open a door. You should be able to see some terrorists (at least 2) on the other side of this corridor (#2). Start shooting at them. It would be best to zoom in the view. You might as well use the scope (if you have one...).
![1 - [Mission 05][Part: 2/2] Parliament - Walkthrough - Rainbow Six: Lockdown - Game Guide and Walkthrough](https://game.lhg100.com/Article/UploadFiles/201512/2015121619114785.jpg)
![Start moving forward - [Mission 05][Part: 2/2] Parliament - Walkthrough - Rainbow Six: Lockdown - Game Guide and Walkthrough](https://game.lhg100.com/Article/UploadFiles/201512/2015121619114795.jpg)
Start moving forward. I have to warn you, though. You will be encountering enemy soldiers quite regularly (#1). Remember that you're not rushed by anything. You should be able to reach a bigger room in a few seconds (#2). The Legion bomb has been placed here, so you can't use any grenades. Start off by killing one of the nearest terrorists. He will be hiding by the machine. Once he's gone, storm the place with a little help from the rest of the team.
![2 - [Mission 05][Part: 2/2] Parliament - Walkthrough - Rainbow Six: Lockdown - Game Guide and Walkthrough](https://game.lhg100.com/Article/UploadFiles/201512/2015121619114745.jpg)
![Step up closer to the bomb itself - [Mission 05][Part: 2/2] Parliament - Walkthrough - Rainbow Six: Lockdown - Game Guide and Walkthrough](https://game.lhg100.com/Article/UploadFiles/201512/2015121619114885.jpg)
Step up closer to the bomb itself. Press and hold the 'use' key in order to successfully disable it (#1). You don't have to do anything else with this object. Now you will have to reach the main room of the complex. That's where the hostages are being held. Open the nearby door and start shooting at visible enemy soldiers (#2). The terrorists will be coming from many different directions. You will have to be very careful!!
![3 - [Mission 05][Part: 2/2] Parliament - Walkthrough - Rainbow Six: Lockdown - Game Guide and Walkthrough](https://game.lhg100.com/Article/UploadFiles/201512/2015121619114801.jpg)
![Once you've taken care of the hostile forces move on to the large room - [Mission 05][Part: 2/2] Parliament - Walkthrough - Rainbow Six: Lockdown - Game Guide and Walkthrough](https://game.lhg100.com/Article/UploadFiles/201512/2015121619114876.jpg)
Once you've taken care of the hostile forces move on to the large room. Bear in mind that enemy soldiers will probably use a couple of smoke grenades (#1). Make sure you've secured the whole area. It would be wise to ask your teammates for help. Once you've eliminated the terrorists use the nearby stairs (on the left and on the right of the main archway) in order to get to the upper floor (#2).
![4 - [Mission 05][Part: 2/2] Parliament - Walkthrough - Rainbow Six: Lockdown - Game Guide and Walkthrough](https://game.lhg100.com/Article/UploadFiles/201512/2015121619114813.jpg)
![You have to be very careful - [Mission 05][Part: 2/2] Parliament - Walkthrough - Rainbow Six: Lockdown - Game Guide and Walkthrough](https://game.lhg100.com/Article/UploadFiles/201512/2015121619114933.jpg)
You have to be very careful. The area you're about to enter is guarded by at least two additional terrorists. One of them will be standing by the stairs, the other one (#1) is hiding on your left. Head on to the next corridor. You should be able to see a single terrorist unit (#2). Kill the enemy soldier. You may proceed to the next section (with the whole team).
![5 - [Mission 05][Part: 2/2] Parliament - Walkthrough - Rainbow Six: Lockdown - Game Guide and Walkthrough](https://game.lhg100.com/Article/UploadFiles/201512/2015121619114934.jpg)
![You will probably notice a small door along the way - [Mission 05][Part: 2/2] Parliament - Walkthrough - Rainbow Six: Lockdown - Game Guide and Walkthrough](https://game.lhg100.com/Article/UploadFiles/201512/2015121619114959.jpg)
You will probably notice a small door along the way. Open it. The room will be guarded by one of the terrorists (#1). Kill him. Use the nearby laptop in order to deactivate the metal detector. Keep moving forward. You should be able to reach the archive room in a few seconds. Watch out for a guy who's standing behind one of the shelves (#2). Take care of this problem. Head on to the stairs leading to the upper level.
![6 - [Mission 05][Part: 2/2] Parliament - Walkthrough - Rainbow Six: Lockdown - Game Guide and Walkthrough](https://game.lhg100.com/Article/UploadFiles/201512/2015121619114932.jpg)
![There is an enemy soldier over here, so you must be very careful (#1) - [Mission 05][Part: 2/2] Parliament - Walkthrough - Rainbow Six: Lockdown - Game Guide and Walkthrough](https://game.lhg100.com/Article/UploadFiles/201512/2015121619115065.jpg)
There is an enemy soldier over here, so you must be very careful (#1). Kill him. Turn around and start moving towards the opposite exit. You will come across a new door. Open it and enter the new room. Kill a single terrorist while you're at it (#2). I'd recommend waiting for the rest of the team to show up. You're going to need their help in the future.
![7 - [Mission 05][Part: 2/2] Parliament - Walkthrough - Rainbow Six: Lockdown - Game Guide and Walkthrough](https://game.lhg100.com/Article/UploadFiles/201512/2015121619115073.jpg)
![Start running towards the next room - [Mission 05][Part: 2/2] Parliament - Walkthrough - Rainbow Six: Lockdown - Game Guide and Walkthrough](https://game.lhg100.com/Article/UploadFiles/201512/2015121619115057.jpg)
Start running towards the next room. A short cut-scene should appear on your screen (#1). It looks like the hostages are being held in the central room of the Parliament. Stand by one of the windows and start shooting at the visible enemy soldiers (#2). You MUST kill terrorists standing near the hostages! They are the main threat you had to deal with. Once they're gone, kill the rest of them. Don't hit any of the hostages. Otherwise you would have lost the whole mission.
![8 - [Mission 05][Part: 2/2] Parliament - Walkthrough - Rainbow Six: Lockdown - Game Guide and Walkthrough](https://game.lhg100.com/Article/UploadFiles/201512/2015121619115043.jpg)
![Now you will have to get down to the hostages - [Mission 05][Part: 2/2] Parliament - Walkthrough - Rainbow Six: Lockdown - Game Guide and Walkthrough](https://game.lhg100.com/Article/UploadFiles/201512/2015121619115090.jpg)
Now you will have to get down to the hostages. The easiest way will require you to move to a second room. There's a small passageway located on your left (#1). I have to warn you, though. You will be encountering additional terrorists along the way (#2). Thankfully, they're not too hard to kill, mostly because you should be able to surprise most of them. I would recommend that you clear out all of the surrounding rooms.
![9 - [Mission 05][Part: 2/2] Parliament - Walkthrough - Rainbow Six: Lockdown - Game Guide and Walkthrough](https://game.lhg100.com/Article/UploadFiles/201512/2015121619115173.jpg)
Once you've dealt with the terrorist threat gather your people around you. Use the stairs leading to the board room (#1). That's where the hostages were being held. Before you come any closer MAKE SURE you've reloaded your weapon. I would also suggest that you try and find a suitable cover. Approach one of the hostages (#2). You will be presented with a short cut-scene. It appears that new terrorist groups have appeared nearby. You must defend the hostages from being killed. Get ready!!
![10 - [Mission 05][Part: 2/2] Parliament - Walkthrough - Rainbow Six: Lockdown - Game Guide and Walkthrough](https://game.lhg100.com/Article/UploadFiles/201512/2015121619115165.jpg)
![Duck behind previously picked cover - [Mission 05][Part: 2/2] Parliament - Walkthrough - Rainbow Six: Lockdown - Game Guide and Walkthrough](https://game.lhg100.com/Article/UploadFiles/201512/2015121619115166.jpg)
Duck behind previously picked cover. Start shooting at the enemy soldiers. I would recommend firing with long bursts. That way you should be able to get rid of the terrorists faster than usual. Most of the soldiers will be coming from the nearby stairs, however you should be concentrated on guys standing by the windows (#1). You shouldn't have too much problem with this part of the mission. Once the terrorists are gone a short cut-scene will appear (#2) and the mission is going to end.
![11 - [Mission 05][Part: 2/2] Parliament - Walkthrough - Rainbow Six: Lockdown - Game Guide and Walkthrough](https://game.lhg100.com/Article/UploadFiles/201512/2015121619115197.jpg)
![12 - [Mission 05][Part: 2/2] Parliament - Walkthrough - Rainbow Six: Lockdown - Game Guide and Walkthrough](https://game.lhg100.com/Article/UploadFiles/201512/2015121619115102.jpg)
Threats: The area is somewhat dark, however this isn't a serious problem. The main threat involves the hostages and the terrorists guarding them. You will have to get rid of them quickly, so they won't hurt any of the civilians.
Objectives: You will have to save a small group of hostages. They are being held by the members of a terrorist group, known as The Revolutionary Brotherhood.
Before you will be able to proceed to the place where the hostages are being held you will have to take care of a second problem. This part of the mission will require you to cut off the electricity to the whole complex. Start off by opening a nearby door (#1). One of the crew members should already be standing next to it. Ready your weapon! You should be able to locate a first group of terrorist within a few seconds (#1). Start shooting at them. Bear in mind that your opponents will try to use pillars for extra cover. Some of them will also be hiding on the upper floor.
![1 - [Mission 06][Part: 1/2] University - Walkthrough - Rainbow Six: Lockdown - Game Guide and Walkthrough](https://game.lhg100.com/Article/UploadFiles/201512/2015121619115254.jpg)
![Once you've dealt with the first wave of enemy troops enter the area they were trying to defend - [Mission 06][Part: 1/2] University - Walkthrough - Rainbow Six: Lockdown - Game Guide and Walkthrough](https://game.lhg100.com/Article/UploadFiles/201512/2015121619115203.jpg)
Once you've dealt with the first wave of enemy troops enter the area they were trying to defend. It would be best if you stopped by one of the nearby objects. You should use them for much needed cover (#1). I would also recommend letting your teammates take part in these fights. Kill all of the remaining terrorists. Keep moving towards the opposite end of this room. There's a large staircase on your left. I would recommend checking the upper floor for any potential hostiles (#2). That way they won't be able to surprise you in the future. Go back to the lower level.
![2 - [Mission 06][Part: 1/2] University - Walkthrough - Rainbow Six: Lockdown - Game Guide and Walkthrough](https://game.lhg100.com/Article/UploadFiles/201512/2015121619115241.jpg)
![Gather the rest of the team around you - [Mission 06][Part: 1/2] University - Walkthrough - Rainbow Six: Lockdown - Game Guide and Walkthrough](https://game.lhg100.com/Article/UploadFiles/201512/2015121619115216.jpg)
Gather the rest of the team around you. Proceed to the nearby door (#1). Thankfully, there aren't any new terrorist in the next room. Enter it and keep moving forward. Once you've reached a small junction turn left. You should be able to spot a few terrorists on a staircase (#2). Take them out. Be careful, though. More of them will show up very soon. You have to be ready for that!!
![3 - [Mission 06][Part: 1/2] University - Walkthrough - Rainbow Six: Lockdown - Game Guide and Walkthrough](https://game.lhg100.com/Article/UploadFiles/201512/2015121619115223.jpg)
![Keep heading towards your current destination - [Mission 06][Part: 1/2] University - Walkthrough - Rainbow Six: Lockdown - Game Guide and Walkthrough](https://game.lhg100.com/Article/UploadFiles/201512/2015121619115306.jpg)
Keep heading towards your current destination. There's only one available path. You can't miss it. Open the new door. Start shooting at visible enemy soldiers (#1). Be careful, though. Some of them may try attacking you from the right. Once you've taken out those enemies who were closest to your position enter the central part of the room. Take care of the rest of the terrorists. Most of them will be hiding near balconies (#2) located on the upper floor. Thankfully, they don't pose too much of a threat to your team.
![4 - [Mission 06][Part: 1/2] University - Walkthrough - Rainbow Six: Lockdown - Game Guide and Walkthrough](https://game.lhg100.com/Article/UploadFiles/201512/2015121619115316.jpg)
![There are some rooms on your left, however you shouldn't be interested in them - [Mission 06][Part: 1/2] University - Walkthrough - Rainbow Six: Lockdown - Game Guide and Walkthrough](https://game.lhg100.com/Article/UploadFiles/201512/2015121619115351.jpg)
There are some rooms on your left, however you shouldn't be interested in them. There aren't any enemies over there. Instead, choose the corridor located on your right. It leads to a huge scaffolding (#1). After that, you will come across a locked door. Deal with this problem accordingly. Open the door and head on to the nearby stairs (#2). You will find yourself in the basement.
![5 - [Mission 06][Part: 1/2] University - Walkthrough - Rainbow Six: Lockdown - Game Guide and Walkthrough](https://game.lhg100.com/Article/UploadFiles/201512/2015121619115375.jpg)
![The corridor will lead you to a small storage room - [Mission 06][Part: 1/2] University - Walkthrough - Rainbow Six: Lockdown - Game Guide and Walkthrough](https://game.lhg100.com/Article/UploadFiles/201512/2015121619115469.jpg)
The corridor will lead you to a small storage room. First of all, you will have to take care of the enemy soldiers (#1). One of the terrorists will be standing near the entrance. Kill him first. Enter the room with the whole squad and kill the rest of the terrorists. Keep moving forward. You should come across a single blue door (#2). Don't worry, you should be able to open it without any problems... even if you can't see an orange icon.
![6 - [Mission 06][Part: 1/2] University - Walkthrough - Rainbow Six: Lockdown - Game Guide and Walkthrough](https://game.lhg100.com/Article/UploadFiles/201512/2015121619115474.jpg)
![You shouldn't be surprised to see new terrorists in the next room (#1) - [Mission 06][Part: 1/2] University - Walkthrough - Rainbow Six: Lockdown - Game Guide and Walkthrough](https://game.lhg100.com/Article/UploadFiles/201512/2015121619115495.jpg)
You shouldn't be surprised to see new terrorists in the next room (#1). I would recommend killing only few of them. After that, send your squad inside. If you're lucky, your teammates should deal with this problem quite nicely. Enter the room and turn left. There was a single terrorist in a nearby booth (#2). Now he's probably dead. Head on to the main part of this room.
![7 - [Mission 06][Part: 1/2] University - Walkthrough - Rainbow Six: Lockdown - Game Guide and Walkthrough](https://game.lhg100.com/Article/UploadFiles/201512/2015121619115481.jpg)
![Now you will have to reach the other end of the basement - [Mission 06][Part: 1/2] University - Walkthrough - Rainbow Six: Lockdown - Game Guide and Walkthrough](https://game.lhg100.com/Article/UploadFiles/201512/2015121619115476.jpg)
Now you will have to reach the other end of the basement. There's only one path leading there, so you can't get lost. Be careful, though. The area may be heavily guarded. Once you've reached your destination wait for the other crew members to show up (#1). Start moving towards the next room. I'd recommend leaning out a lot. Thanks to that, you should be able to take out a single terrorist (#2). He was guarding this area. Head on to the nearby stairs. You will find a door here.
![8 - [Mission 06][Part: 1/2] University - Walkthrough - Rainbow Six: Lockdown - Game Guide and Walkthrough](https://game.lhg100.com/Article/UploadFiles/201512/2015121619115405.jpg)
![This time you will have to deal with two enemy soldiers (#1) - [Mission 06][Part: 1/2] University - Walkthrough - Rainbow Six: Lockdown - Game Guide and Walkthrough](https://game.lhg100.com/Article/UploadFiles/201512/2015121619115550.jpg)
This time you will have to deal with two enemy soldiers (#1). Thankfully, the terrorists will be standing in very obvious spots. There's no need to use grenades or any other heavy equipment. After you're done with them, step up closer to the main console. Press the glowing button (#2). A short cut-scene should appear on your screen. Wait for the new map to load itself.
![9 - [Mission 06][Part: 1/2] University - Walkthrough - Rainbow Six: Lockdown - Game Guide and Walkthrough](https://game.lhg100.com/Article/UploadFiles/201512/2015121619115570.jpg)
![10 - [Mission 06][Part: 1/2] University - Walkthrough - Rainbow Six: Lockdown - Game Guide and Walkthrough](https://game.lhg100.com/Article/UploadFiles/201512/2015121619115593.jpg)
Now for the hard part. You will have to rescue a few hostages and escort them back to safety. Use the nearby stairs to get to the upper floor. I have to warn you, though. There are some enemy troops nearby (#1). You should try aiming at their heads, however sooner or later you will have to ask your team for help. Start moving towards their positions. Bear in mind that you might have missed someone before. After that, go right (#2). Be careful! A single terrorist may be hiding here!! You must kill him before he's able to respond!
![1 - [Mission 06][Part: 2/2] University - Walkthrough - Rainbow Six: Lockdown - Game Guide and Walkthrough](https://game.lhg100.com/Article/UploadFiles/201512/2015121619115541.jpg)
![Start moving CAREFULLY - [Mission 06][Part: 2/2] University - Walkthrough - Rainbow Six: Lockdown - Game Guide and Walkthrough](https://game.lhg100.com/Article/UploadFiles/201512/2015121619115596.jpg)
Start moving CAREFULLY. You will encounter some new enemies in a few seconds (#1). Thankfully, they should be standing at the other end of this corridor, so you might consider using your scope. Steo up a little bit closer. You should notice a small door on your left (#2). Go there now. Sadly, they're closed. You will have to pick the lock. I hope that's not a problem anymore...
![2 - [Mission 06][Part: 2/2] University - Walkthrough - Rainbow Six: Lockdown - Game Guide and Walkthrough](https://game.lhg100.com/Article/UploadFiles/201512/2015121619115554.jpg)
![Enter the new room WITH the rest of the team - [Mission 06][Part: 2/2] University - Walkthrough - Rainbow Six: Lockdown - Game Guide and Walkthrough](https://game.lhg100.com/Article/UploadFiles/201512/2015121619115617.jpg)
Enter the new room WITH the rest of the team. Start shooting at visible enemy soldiers (#1). Most of them will be standing at the other end of this hall. I would recommend choosing long bursts, so you won't have to worry about being hit. After that, use the stairs to reach both exits. Open a door (left or right). Be careful! There are some new enemies here (#2). You will have to deal with them.
![3 - [Mission 06][Part: 2/2] University - Walkthrough - Rainbow Six: Lockdown - Game Guide and Walkthrough](https://game.lhg100.com/Article/UploadFiles/201512/2015121619115668.jpg)
![Exit the room and turn right - [Mission 06][Part: 2/2] University - Walkthrough - Rainbow Six: Lockdown - Game Guide and Walkthrough](https://game.lhg100.com/Article/UploadFiles/201512/2015121619115655.jpg)
Exit the room and turn right. Keep heading towards the opposite end of this corridor. There's a single terrorist here (#1). Kill him. Keep moving. Stay on the main corridor at all times (#2). Once you've reached its end STOP and wait for the rest of the team to get here. Reload your weapon. You will be rescuing hostages in a few seconds. You've got to prepared for that.
![4 - [Mission 06][Part: 2/2] University - Walkthrough - Rainbow Six: Lockdown - Game Guide and Walkthrough](https://game.lhg100.com/Article/UploadFiles/201512/2015121619115678.jpg)
![There's a huge balcony in front of you - [Mission 06][Part: 2/2] University - Walkthrough - Rainbow Six: Lockdown - Game Guide and Walkthrough](https://game.lhg100.com/Article/UploadFiles/201512/2015121619115650.jpg)
There's a huge balcony in front of you. That's where the hostages are being held. Wait for one of the terrorist to show up. Aim for his head (#1). Order your team to storm the library area. You have to join them in these fights. Thankfully, there aren't many opponents here (#2). Just be sure to check every possible hiding spot.
![5 - [Mission 06][Part: 2/2] University - Walkthrough - Rainbow Six: Lockdown - Game Guide and Walkthrough](https://game.lhg100.com/Article/UploadFiles/201512/2015121619115783.jpg)
![Now you will have to use the stairs (#1) - [Mission 06][Part: 2/2] University - Walkthrough - Rainbow Six: Lockdown - Game Guide and Walkthrough](https://game.lhg100.com/Article/UploadFiles/201512/2015121619115731.jpg)
Now you will have to use the stairs (#1). They should be located on your left. Be careful, though. There may be some additional units nearby! Go to the place where the hostages were being held. Talk to them in order to add both civilians to your team (#2). Now you will have to escort them to a nearby extraction zone. Go back to the lower floor. Make sure the rest of the team is following you.
![6 - [Mission 06][Part: 2/2] University - Walkthrough - Rainbow Six: Lockdown - Game Guide and Walkthrough](https://game.lhg100.com/Article/UploadFiles/201512/2015121619115717.jpg)
![Start heading towards the LEFT exit - [Mission 06][Part: 2/2] University - Walkthrough - Rainbow Six: Lockdown - Game Guide and Walkthrough](https://game.lhg100.com/Article/UploadFiles/201512/2015121619115724.jpg)
Start heading towards the LEFT exit. It's located beneath the balcony (#1). I don't have to remind you to be very careful. You will be encountering some massive enemy forces along the way. Keep pushing forward. You might want to consider checking out some of the nearby classrooms (#2). Most of them will be occupied by terrorists. It would be best to get rid of them right now. Otherwise they would have probably surprised you in the future.
![7 - [Mission 06][Part: 2/2] University - Walkthrough - Rainbow Six: Lockdown - Game Guide and Walkthrough](https://game.lhg100.com/Article/UploadFiles/201512/2015121619115772.jpg)
![You should be able to reach a small junction within a few seconds (#1) - [Mission 06][Part: 2/2] University - Walkthrough - Rainbow Six: Lockdown - Game Guide and Walkthrough](https://game.lhg100.com/Article/UploadFiles/201512/2015121619115828.jpg)
You should be able to reach a small junction within a few seconds (#1). Don't go there just yet! This area will be heavily defended. You must take care of most of the nearby terrorists. Now you should start moving towards a large cafeteria (#2). Enter it. Start shooting at visible enemy soldiers. Thankfully, they won't pose too much of a threat. Most of the terrorists will be located on your right. After that, rejoin with the rest of the squad.
![8 - [Mission 06][Part: 2/2] University - Walkthrough - Rainbow Six: Lockdown - Game Guide and Walkthrough](https://game.lhg100.com/Article/UploadFiles/201512/2015121619115883.jpg)
![In order to exit the cafeteria start moving towards the opposite corridor - [Mission 06][Part: 2/2] University - Walkthrough - Rainbow Six: Lockdown - Game Guide and Walkthrough](https://game.lhg100.com/Article/UploadFiles/201512/2015121619115880.jpg)
In order to exit the cafeteria start moving towards the opposite corridor. You should be able to spot additional enemy units very shortly (#1). Take care of them swiftly. Keep moving. There aren't any new terrorists nearby. Head on to the extraction zone (#2). Wait for the hostages to show up. After that, the mission will come to an end.
![9 - [Mission 06][Part: 2/2] University - Walkthrough - Rainbow Six: Lockdown - Game Guide and Walkthrough](https://game.lhg100.com/Article/UploadFiles/201512/2015121619115809.jpg)
![10 - [Mission 06][Part: 2/2] University - Walkthrough - Rainbow Six: Lockdown - Game Guide and Walkthrough](https://game.lhg100.com/Article/UploadFiles/201512/2015121619115800.jpg)
Threats: The enemies will probably try and organize surprise attacks. You will have to be ready for that. I would also recommend that you visit all of the surrounding rooms and not just keep heading towards the main goal.
Objectives: You will have to locate a secret base belonging to the United Fatherland Brigade terrorist organization. It's probably located underground, near one of the subway stations.
This is one of the easiest and more enjoyable levels of "Lockdown", despite even having to explore three different maps. You start off near one of the big warehouse buildings. Step up a little bit closer. Turn left. You should be able to see some terrorists inside (#1). Start shooting at their legs, so you wouldn't have to worry about them in the future. Furthermore, they won't have an opportunity to respond to these actions. Once they're gone rejoin with the rest of the squad. Start moving towards a small door located on your left (#2).
![1 - [Mission 07][Part: 1/3] Catacombs - Walkthrough - Rainbow Six: Lockdown - Game Guide and Walkthrough](https://game.lhg100.com/Article/UploadFiles/201512/2015121619115884.jpg)
![You may enter the warehouse now - [Mission 07][Part: 1/3] Catacombs - Walkthrough - Rainbow Six: Lockdown - Game Guide and Walkthrough](https://game.lhg100.com/Article/UploadFiles/201512/2015121619115963.jpg)
You may enter the warehouse now. Start shooting at the remaining enemy soldiers (#1). Head on to the opposite side of the building. Use a small passage in order to get to the next room. Just as before, you will have to deal with a small and unexperienced group of terrorists (#2). You might want to consider letting your teammates to handle this problem.
![2 - [Mission 07][Part: 1/3] Catacombs - Walkthrough - Rainbow Six: Lockdown - Game Guide and Walkthrough](https://game.lhg100.com/Article/UploadFiles/201512/2015121619115910.jpg)
![Head on to the fridge area - [Mission 07][Part: 1/3] Catacombs - Walkthrough - Rainbow Six: Lockdown - Game Guide and Walkthrough](https://game.lhg100.com/Article/UploadFiles/201512/2015121619115969.jpg)
Head on to the fridge area. You should be able to spot a single ladder over here (#1). Thanks to it, you will be able to get down to the catacombs. Once you're there, wait for the other crew members to join you. It may take them some time. Start moving forward. You should be able to reach the stairs in a few seconds (#2). Get down to the lower level of the catacombs.
![3 - [Mission 07][Part: 1/3] Catacombs - Walkthrough - Rainbow Six: Lockdown - Game Guide and Walkthrough](https://game.lhg100.com/Article/UploadFiles/201512/2015121619115997.jpg)
Start moving towards the opposite exit of this tunnel. A small group of terrorists will attack you in a few seconds (#1). Deal with them swiftly. I wouldn't recommend leaning out too much. There's not much time for that. The enemies would have used that advantage to throw a couple of grenades at your team. Keep moving forward. Once you've reached the junction, choose the path located on your right. You will be encountering some additional enemy forces along the way (#2). Furthermore, some of the terrorists may show up near the previous junction. You have to be very careful at this point.
![4 - [Mission 07][Part: 1/3] Catacombs - Walkthrough - Rainbow Six: Lockdown - Game Guide and Walkthrough](https://game.lhg100.com/Article/UploadFiles/201512/2015121619115906.jpg)
![You should be able to reach a tunnel with a lot of crates at both sides - [Mission 07][Part: 1/3] Catacombs - Walkthrough - Rainbow Six: Lockdown - Game Guide and Walkthrough](https://game.lhg100.com/Article/UploadFiles/201512/2015121619120075.jpg)
You should be able to reach a tunnel with a lot of crates at both sides. Turn right and kill one of the terrorists (#1). He was trying to surprise your team. Keep moving forward. Stand by the open gate. I would recommend throwing a couple of grenades at the visible enemy soldiers (#2). Alternatively, you could try and score a few decent headshots.
![5 - [Mission 07][Part: 1/3] Catacombs - Walkthrough - Rainbow Six: Lockdown - Game Guide and Walkthrough](https://game.lhg100.com/Article/UploadFiles/201512/2015121619120010.jpg)
![The next group of terrorists will be located on your right (#1) - [Mission 07][Part: 1/3] Catacombs - Walkthrough - Rainbow Six: Lockdown - Game Guide and Walkthrough](https://game.lhg100.com/Article/UploadFiles/201512/2015121619120032.jpg)
The next group of terrorists will be located on your right (#1). Enemies are guarding both corridors, so you have to be very careful. Don't bother aiming at their heads. There isn't any time for these types of actions. Make sure you've killed all enemy soldiers before you decide to push any further. Start moving towards the small icon (#2). Once you're there, the game will load a second map.
![6 - [Mission 07][Part: 1/3] Catacombs - Walkthrough - Rainbow Six: Lockdown - Game Guide and Walkthrough](https://game.lhg100.com/Article/UploadFiles/201512/2015121619120083.jpg)
![7 - [Mission 07][Part: 1/3] Catacombs - Walkthrough - Rainbow Six: Lockdown - Game Guide and Walkthrough](https://game.lhg100.com/Article/UploadFiles/201512/2015121619120085.jpg)
I would recommend leaving the team in the start area. Start moving forward (CAREFULLY!!). You will have to take care of a security camera (#1). It's been located on your left. You should know what has to be done by now. Once you've dealt with this problem gather the whole squad around you. Keep moving forward. You should be able to see a few terrorists in the distance (#2). If you have a scope, you might want to consider taking them out right now.
![1 - [Mission 07][Part: 2/3] Catacombs - Walkthrough - Rainbow Six: Lockdown - Game Guide and Walkthrough](https://game.lhg100.com/Article/UploadFiles/201512/2015121619120043.jpg)
![Make sure you have cleared the area - [Mission 07][Part: 2/3] Catacombs - Walkthrough - Rainbow Six: Lockdown - Game Guide and Walkthrough](https://game.lhg100.com/Article/UploadFiles/201512/2015121619120056.jpg)
Make sure you have cleared the area. Enter the main cave with your team in order to deal with the remaining terrorists. After that, head on to a small door (#1). It's locked, so you will have to spend some time working on it. Open the door. Be careful! The next room is being occupied by AT LEAST three additional units. Start off by killing a guy who's standing on your left (#2).
![2 - [Mission 07][Part: 2/3] Catacombs - Walkthrough - Rainbow Six: Lockdown - Game Guide and Walkthrough](https://game.lhg100.com/Article/UploadFiles/201512/2015121619120180.jpg)
![Remaining terrorists will probably use smoke grenades in order to blind you and your team members - [Mission 07][Part: 2/3] Catacombs - Walkthrough - Rainbow Six: Lockdown - Game Guide and Walkthrough](https://game.lhg100.com/Article/UploadFiles/201512/2015121619120187.jpg)
Remaining terrorists will probably use smoke grenades in order to blind you and your team members. I would recommend sending the whole squad inside (#1). You could deal with the terrorist threat on your own, however this would be very risky. Keep moving forward. You will find yourself in an engine room. Choose the only available passageway (#2). I would recommend leaving the rest of the squad right here.
![3 - [Mission 07][Part: 2/3] Catacombs - Walkthrough - Rainbow Six: Lockdown - Game Guide and Walkthrough](https://game.lhg100.com/Article/UploadFiles/201512/2015121619120198.jpg)
![Zoom in the view and start eliminating visible enemy soldiers (#1) - [Mission 07][Part: 2/3] Catacombs - Walkthrough - Rainbow Six: Lockdown - Game Guide and Walkthrough](https://game.lhg100.com/Article/UploadFiles/201512/2015121619120145.jpg)
Zoom in the view and start eliminating visible enemy soldiers (#1). I have to warn you, though. The area is being guarded by large groups of terrorists. Don't even try attacking all of them at the same time. Step up a little bit closer. You should notice a security camera on your left. Get back to the junction. Head on to the LEFT path. Now you will have to get closer to the camera. Make sure you're not spotted (#2)!! Neutralize this object. The rest of the team may join you now.
![4 - [Mission 07][Part: 2/3] Catacombs - Walkthrough - Rainbow Six: Lockdown - Game Guide and Walkthrough](https://game.lhg100.com/Article/UploadFiles/201512/2015121619120153.jpg)
![Enter the main building of the underground complex - [Mission 07][Part: 2/3] Catacombs - Walkthrough - Rainbow Six: Lockdown - Game Guide and Walkthrough](https://game.lhg100.com/Article/UploadFiles/201512/2015121619120290.jpg)
Enter the main building of the underground complex. The door is located beneath the camera. Once you're there, stop by the destroyed wall. You will have an opportunity to make a surprise attack against two enemy soldiers (#1). Leave the rest of the team near the destroyed wall. Go back to the camera. Turn left. You will be encountering some massive forces along the way (#2), mainly because the terrorists were planning on attacking your team by surprise.
![5 - [Mission 07][Part: 2/3] Catacombs - Walkthrough - Rainbow Six: Lockdown - Game Guide and Walkthrough](https://game.lhg100.com/Article/UploadFiles/201512/2015121619120259.jpg)
![Keep heading towards the main hall - [Mission 07][Part: 2/3] Catacombs - Walkthrough - Rainbow Six: Lockdown - Game Guide and Walkthrough](https://game.lhg100.com/Article/UploadFiles/201512/2015121619120212.jpg)
Keep heading towards the main hall. Remember that some of the terrorists are coming this way (#1)!! Start moving towards the carriage. You should be able to spot some new enemies on the other side of it (#2). Eliminate them. Once they're gone, gather the team around your position.
![6 - [Mission 07][Part: 2/3] Catacombs - Walkthrough - Rainbow Six: Lockdown - Game Guide and Walkthrough](https://game.lhg100.com/Article/UploadFiles/201512/2015121619120293.jpg)
![Use the small stairs in order to get to the other side of the tracks - [Mission 07][Part: 2/3] Catacombs - Walkthrough - Rainbow Six: Lockdown - Game Guide and Walkthrough](https://game.lhg100.com/Article/UploadFiles/201512/2015121619120222.jpg)
Use the small stairs in order to get to the other side of the tracks. You will have to neutralize the remaining terrorists (#1). Thankfully, they're not that hard to find. After that, you will receive a short message. It turns out that some of the terrorists have escaped to a nearby subway station. You will have to hunt them down. Keep heading towards a marked spot. You will find a door here (#2). Stand close to it. The game will load the next map in a few seconds.
![7 - [Mission 07][Part: 2/3] Catacombs - Walkthrough - Rainbow Six: Lockdown - Game Guide and Walkthrough](https://game.lhg100.com/Article/UploadFiles/201512/2015121619120225.jpg)
![8 - [Mission 07][Part: 2/3] Catacombs - Walkthrough - Rainbow Six: Lockdown - Game Guide and Walkthrough](https://game.lhg100.com/Article/UploadFiles/201512/2015121619120300.jpg)
This is by far the most challenging part of this mission, mainly because you'll have to watch out for innocent civilians. Start moving forward. One of the first terrorists will be standing near a fork lift (#1). Take him down. DON'T go there just yet. Enemy soldiers will appear in the area. If you'll stay in this corridor you shouldn't have any problems killing them. Once they're gone, enter the warehouse with the whole team. Make sure that the area is clear. Head on to the right corridor (#2).
![1 - [Mission 07][Part: 3/3] Catacombs - Walkthrough - Rainbow Six: Lockdown - Game Guide and Walkthrough](https://game.lhg100.com/Article/UploadFiles/201512/2015121619120359.jpg)
![You will encounter at least three additional terrorists in a few seconds - [Mission 07][Part: 3/3] Catacombs - Walkthrough - Rainbow Six: Lockdown - Game Guide and Walkthrough](https://game.lhg100.com/Article/UploadFiles/201512/2015121619120345.jpg)
You will encounter at least three additional terrorists in a few seconds. Two of them will be standing by the right corridor (#1), the last one is on your left. I would recommend letting your teammates deal with this problem. Head on to the only door. Open it. You will find yourself on a staircase. Start moving towards the upper level (#2).
![2 - [Mission 07][Part: 3/3] Catacombs - Walkthrough - Rainbow Six: Lockdown - Game Guide and Walkthrough](https://game.lhg100.com/Article/UploadFiles/201512/2015121619120303.jpg)
![Once you're on a highest level, zoom in the view and start shooting at the visible enemy soldiers (#1) - [Mission 07][Part: 3/3] Catacombs - Walkthrough - Rainbow Six: Lockdown - Game Guide and Walkthrough](https://game.lhg100.com/Article/UploadFiles/201512/2015121619120325.jpg)
Once you're on a highest level, zoom in the view and start shooting at the visible enemy soldiers (#1). Go there now. You should be able to spot a new group of terrorists. Shoot through the glass in order to get rid of them quickly (#2). Alternatively you could do it later, however my method seems to be a lot safer.
![3 - [Mission 07][Part: 3/3] Catacombs - Walkthrough - Rainbow Six: Lockdown - Game Guide and Walkthrough](https://game.lhg100.com/Article/UploadFiles/201512/2015121619120471.jpg)
![Head on to the nearest door - [Mission 07][Part: 3/3] Catacombs - Walkthrough - Rainbow Six: Lockdown - Game Guide and Walkthrough](https://game.lhg100.com/Article/UploadFiles/201512/2015121619120458.jpg)
Head on to the nearest door. Open it and enter the new room. I would recommend ordering your men to guard the nearby stairs (#1). They will shoot any terrorist that tries to get here. You, on the other hand, must pick the lock on the left door (#2). You probably know by now what has to be done. Don't open the door just yet. It would be best if you secured the lower level on your own. Thanks to that, you won't be surprised in the future.
![4 - [Mission 07][Part: 3/3] Catacombs - Walkthrough - Rainbow Six: Lockdown - Game Guide and Walkthrough](https://game.lhg100.com/Article/UploadFiles/201512/2015121619120464.jpg)
![Open the door and start moving forward - [Mission 07][Part: 3/3] Catacombs - Walkthrough - Rainbow Six: Lockdown - Game Guide and Walkthrough](https://game.lhg100.com/Article/UploadFiles/201512/2015121619120426.jpg)
Open the door and start moving forward. You won't be encountering any new terrorist at the moment. Get to the other end of this corridor (#1). Reload your weapon here and wait for the rest of the team to show up. You may enter the main area of the subway station. I have to warn you, though. There are A LOT of terrorists here. Start off by moving forward. You should be able to see a small group of enemy soldiers in the distance (#2). Use the scope to get rid of them more effectively. DON'T hit any of the civilians!!!
![5 - [Mission 07][Part: 3/3] Catacombs - Walkthrough - Rainbow Six: Lockdown - Game Guide and Walkthrough](https://game.lhg100.com/Article/UploadFiles/201512/2015121619120436.jpg)
![In the meantime, the rest of your team should be dealing with those terrorists who have decided to make a surprise attack from the left flank (#1) - [Mission 07][Part: 3/3] Catacombs - Walkthrough - Rainbow Six: Lockdown - Game Guide and Walkthrough](https://game.lhg100.com/Article/UploadFiles/201512/2015121619120520.jpg)
In the meantime, the rest of your team should be dealing with those terrorists who have decided to make a surprise attack from the left flank (#1). You have to go there now. Stop by the stairs, turn right and kill all of the remaining enemy soldiers (#2). You shouldn't have any problems with that, especially since most of them are already dead.
![6 - [Mission 07][Part: 3/3] Catacombs - Walkthrough - Rainbow Six: Lockdown - Game Guide and Walkthrough](https://game.lhg100.com/Article/UploadFiles/201512/2015121619120542.jpg)
![Use the stairs to get down to the main platform of the subway station - [Mission 07][Part: 3/3] Catacombs - Walkthrough - Rainbow Six: Lockdown - Game Guide and Walkthrough](https://game.lhg100.com/Article/UploadFiles/201512/2015121619120531.jpg)
Use the stairs to get down to the main platform of the subway station. There's a large corridor on your left. Go there now (#1). Bear in mind that you will come across a large group of terrorists in just a few seconds. You will have to take care of them swiftly. Keep moving forward. There is a second group stationed at the other end of this corridor (#2). I would recommend using your scope to get rid of the enemies quickly.
![7 - [Mission 07][Part: 3/3] Catacombs - Walkthrough - Rainbow Six: Lockdown - Game Guide and Walkthrough](https://game.lhg100.com/Article/UploadFiles/201512/2015121619120594.jpg)
![Move up closer to the opposite end of this corridor - [Mission 07][Part: 3/3] Catacombs - Walkthrough - Rainbow Six: Lockdown - Game Guide and Walkthrough](https://game.lhg100.com/Article/UploadFiles/201512/2015121619120649.jpg)
Move up closer to the opposite end of this corridor. Use your scope once again. This time you should be aiming at those terrorists who will be hiding on the nearby balconies (#1). Watch out for the innocent civilians, though! Thankfully, you won't have to rescue them. Once the area is clear they will go back to the main platform on their own. After you've taken care of enemy snipers, order the rest of your team to get here (#2).
![8 - [Mission 07][Part: 3/3] Catacombs - Walkthrough - Rainbow Six: Lockdown - Game Guide and Walkthrough](https://game.lhg100.com/Article/UploadFiles/201512/2015121619120654.jpg)
![You will have to hunt down and kill the remaining terrorists - [Mission 07][Part: 3/3] Catacombs - Walkthrough - Rainbow Six: Lockdown - Game Guide and Walkthrough](https://game.lhg100.com/Article/UploadFiles/201512/2015121619120604.jpg)
You will have to hunt down and kill the remaining terrorists. The ground floor is probably safe. Use the stairs to get to the upper level (#1). Be sure to check ALL suspicious spots (#2). Once you've killed all hostiles a short cut-scene will appear on your screen. After that, the mission is going to end.
![9 - [Mission 07][Part: 3/3] Catacombs - Walkthrough - Rainbow Six: Lockdown - Game Guide and Walkthrough](https://game.lhg100.com/Article/UploadFiles/201512/2015121619120618.jpg)
![10 - [Mission 07][Part: 3/3] Catacombs - Walkthrough - Rainbow Six: Lockdown - Game Guide and Walkthrough](https://game.lhg100.com/Article/UploadFiles/201512/2015121619120620.jpg)
Threats: For the first time during the singleplayer campaign, some of the terrorists will be equipped with bulletproof vests. You should have that in mind while aiming at them. Headshots are most welcome. Otherwise you would have to sacrifice a whole clip in order to take down a group of 2-3 terrorists. Furthermore, some of the soldiers are carrying heavy machine guns or shotguns.
Objectives: You must reach an entrance leading to the main terrorist base. Once you're there, you will have to capture Derek Mergen (terrorist leader).
Before you proceed to the main area you will have to deactivate defensive systems of the terrorist base. In order to do that you must reach a certain checkpoint. You start off in a small rest room area. Open the nearby door (#1). You should be able to reach a larger area very soon. It's been occupied by enemy forces (#2). Start off with those soldiers who will be standing near the entrance. Don't make any sudden moves. Be sure to check all suspiciously looking spots for additional units.
![1 - [Mission 08][Part: 1/3] Distillery - Walkthrough - Rainbow Six: Lockdown - Game Guide and Walkthrough](https://game.lhg100.com/Article/UploadFiles/201512/2015121619120666.jpg)
![The rest of the team should join you now - [Mission 08][Part: 1/3] Distillery - Walkthrough - Rainbow Six: Lockdown - Game Guide and Walkthrough](https://game.lhg100.com/Article/UploadFiles/201512/2015121619120723.jpg)
The rest of the team should join you now. Duck behind one of the crates. It would be best to shoot at the terrorists from here (#1). You might as well try zooming in the view, to help you out. After that, head on to the next section of the distillery. Be careful! One of the terrorists will be hiding on your right (#2). You've got to take him out quickly.
![2 - [Mission 08][Part: 1/3] Distillery - Walkthrough - Rainbow Six: Lockdown - Game Guide and Walkthrough](https://game.lhg100.com/Article/UploadFiles/201512/2015121619120787.jpg)
![Make sure you've cleared out the whole area before moving on - [Mission 08][Part: 1/3] Distillery - Walkthrough - Rainbow Six: Lockdown - Game Guide and Walkthrough](https://game.lhg100.com/Article/UploadFiles/201512/2015121619120759.jpg)
Make sure you've cleared out the whole area before moving on. Head on to the small door that's located on your right (#1). There are some new terrorists inside this building (#2). Be careful! Some of them will use crates for cover. You can't let them surprise your team. Head on to the next door. Don't open it just yet. Wait for the rest of the team to show up.
![3 - [Mission 08][Part: 1/3] Distillery - Walkthrough - Rainbow Six: Lockdown - Game Guide and Walkthrough](https://game.lhg100.com/Article/UploadFiles/201512/2015121619120715.jpg)
![Open the door and enter a new room - [Mission 08][Part: 1/3] Distillery - Walkthrough - Rainbow Six: Lockdown - Game Guide and Walkthrough](https://game.lhg100.com/Article/UploadFiles/201512/2015121619120732.jpg)
Open the door and enter a new room. There are some new terrorists on your right (#1) and more of them will show up very soon. You will have to kill all enemy soldiers. Remember to aim at their heads, because some of them will be wearing bulletproof vests. Head on to the next room. Before you proceed any further, take out a single sniper and one of his buddies (#2). If you're lucky, you should be able to surprise both of them.
![4 - [Mission 08][Part: 1/3] Distillery - Walkthrough - Rainbow Six: Lockdown - Game Guide and Walkthrough](https://game.lhg100.com/Article/UploadFiles/201512/2015121619120705.jpg)
![You can exit the warehouse building - [Mission 08][Part: 1/3] Distillery - Walkthrough - Rainbow Six: Lockdown - Game Guide and Walkthrough](https://game.lhg100.com/Article/UploadFiles/201512/2015121619120792.jpg)
You can exit the warehouse building. There aren't any new enemies in the vicinity, so you might as well start running towards your current objective. Choose the path located on your left (#1). Here is where you will come across a new group of enemy soldiers (#1). I have to warn you. Some of them will be equipped with heavy machine guns, so you must kill them quickly. It would be wise to ask your teammates for much needed help.
![5 - [Mission 08][Part: 1/3] Distillery - Walkthrough - Rainbow Six: Lockdown - Game Guide and Walkthrough](https://game.lhg100.com/Article/UploadFiles/201512/2015121619120811.jpg)
![Watch out for the canisters filled with a Legion virus - [Mission 08][Part: 1/3] Distillery - Walkthrough - Rainbow Six: Lockdown - Game Guide and Walkthrough](https://game.lhg100.com/Article/UploadFiles/201512/2015121619120837.jpg)
Watch out for the canisters filled with a Legion virus!! You can't hit any of them!! New enemies will appear in a distance (#1). It would be best to kill them right now. Don't allow the terrorists to get to the left balcony. After that, start moving forward. Turn left. You should see a door. Once you're in a new corridor, keep moving forward. You shouldn't be worried about any new encounters at the moment. Once you've reached the stairs STOP and wait for the rest of the team to join you (#2).
![6 - [Mission 08][Part: 1/3] Distillery - Walkthrough - Rainbow Six: Lockdown - Game Guide and Walkthrough](https://game.lhg100.com/Article/UploadFiles/201512/2015121619120882.jpg)
![Use the stairs to get to the upper platform - [Mission 08][Part: 1/3] Distillery - Walkthrough - Rainbow Six: Lockdown - Game Guide and Walkthrough](https://game.lhg100.com/Article/UploadFiles/201512/2015121619120819.jpg)
Use the stairs to get to the upper platform. This area is being guarded by at least three additional terrorists (#1). It would be best to find a suitable cover. Surrounding tanks seem like a good idea. You may also use some grenades. Head on to the opposite side of the room. You will have to pick a lock on a nearby door (#2). Be sure to keep the rest of the team with you.
![7 - [Mission 08][Part: 1/3] Distillery - Walkthrough - Rainbow Six: Lockdown - Game Guide and Walkthrough](https://game.lhg100.com/Article/UploadFiles/201512/2015121619120826.jpg)
![Open the door CAREFULLY - [Mission 08][Part: 1/3] Distillery - Walkthrough - Rainbow Six: Lockdown - Game Guide and Walkthrough](https://game.lhg100.com/Article/UploadFiles/201512/2015121619120869.jpg)
Open the door CAREFULLY. If you're lucky, you should be able to surprise one of the nearby guards (#1). Start moving forward. There's only one path leading to your current destination, so you can't get lost. Once you've reached a new door, reload your weapon. The new room is being guarded by a large group of enemy soldiers (#2). The terrorists will be coming from many different directions. Additionaly, one of them will be hiding on a nearby (left) balcony. You might also consider attacking their positions with a help from the rest of the team, however this can be very risky.
![8 - [Mission 08][Part: 1/3] Distillery - Walkthrough - Rainbow Six: Lockdown - Game Guide and Walkthrough](https://game.lhg100.com/Article/UploadFiles/201512/2015121619120899.jpg)
![BE CAREFUL - [Mission 08][Part: 1/3] Distillery - Walkthrough - Rainbow Six: Lockdown - Game Guide and Walkthrough](https://game.lhg100.com/Article/UploadFiles/201512/2015121619120924.jpg)
BE CAREFUL!! One of the terrorists will probably use a Legion-gas grenade! You can't get too close to the green mist (#1)! Otherwise your hero would have died almost instantly. Thankfully, the effects of the gas are only temporary, so the best thing to do is wait for a few seconds. Take care of the remaining terrorists. After that, head on to the nearest stairs (#2). They will lead you to the upper floor.
![9 - [Mission 08][Part: 1/3] Distillery - Walkthrough - Rainbow Six: Lockdown - Game Guide and Walkthrough](https://game.lhg100.com/Article/UploadFiles/201512/2015121619120969.jpg)
![This area is being guarded by a single enemy soldier (#1) - [Mission 08][Part: 1/3] Distillery - Walkthrough - Rainbow Six: Lockdown - Game Guide and Walkthrough](https://game.lhg100.com/Article/UploadFiles/201512/2015121619120976.jpg)
This area is being guarded by a single enemy soldier (#1). He will probably try and surprise your team. You have to be ready for that. Head on to the only possible door. The new room is going to be guarded by a large group of heavily armed terrorists (#2). It would be wise to throw a couple of grenades at them, although this is not a necessary action.
![10 - [Mission 08][Part: 1/3] Distillery - Walkthrough - Rainbow Six: Lockdown - Game Guide and Walkthrough](https://game.lhg100.com/Article/UploadFiles/201512/2015121619120992.jpg)
![Take care of all of the remaining terrorists - [Mission 08][Part: 1/3] Distillery - Walkthrough - Rainbow Six: Lockdown - Game Guide and Walkthrough](https://game.lhg100.com/Article/UploadFiles/201512/2015121619120949.jpg)
Take care of all of the remaining terrorists. Turn left. You should see a single laptop. Use it (#1). Thanks to that, you will deactivate the defensive systems of the complex. Head on to the nearest door (#2). Make sure the rest of the team is following you.
![11 - [Mission 08][Part: 1/3] Distillery - Walkthrough - Rainbow Six: Lockdown - Game Guide and Walkthrough](https://game.lhg100.com/Article/UploadFiles/201512/2015121619120927.jpg)
![You should be able to reach a ladder in a few seconds (#1) - [Mission 08][Part: 1/3] Distillery - Walkthrough - Rainbow Six: Lockdown - Game Guide and Walkthrough](https://game.lhg100.com/Article/UploadFiles/201512/2015121619121087.jpg)
You should be able to reach a ladder in a few seconds (#1). Use it. This time you won't have to wait for your teammates. Head on to the nearest stairs. You will be attacked by a few terrorists (#2). Thankfully, they won't pose too much of a threat, especially since they're not armed too well. Use the stairs to get to the upper floor.
![12 - [Mission 08][Part: 1/3] Distillery - Walkthrough - Rainbow Six: Lockdown - Game Guide and Walkthrough](https://game.lhg100.com/Article/UploadFiles/201512/2015121619121008.jpg)
![In order to finish this part of the mission head on to the designated exit (#1) - [Mission 08][Part: 1/3] Distillery - Walkthrough - Rainbow Six: Lockdown - Game Guide and Walkthrough](https://game.lhg100.com/Article/UploadFiles/201512/2015121619121062.jpg)
In order to finish this part of the mission head on to the designated exit (#1). You won't have to do anything else. Wait for the new map to load itself.
![13 - [Mission 08][Part: 1/3] Distillery - Walkthrough - Rainbow Six: Lockdown - Game Guide and Walkthrough](https://game.lhg100.com/Article/UploadFiles/201512/2015121619121064.jpg)
You start off near a small passageway. Start moving forward. Open the nearby door carefully. Enter the new corridor. You should see a single terrorist on the other side of the glass (#1). Kill him and one of his colleagues, that should arrive there shortly. You may continue moving towards the opposite end of this corridor. Open a new door and enter the next room. Zoom in the view. Thanks to that, you should be able to take out new terrorists without any problems (#2).
![1 - [Mission 08][Part: 2/3] Distillery - Walkthrough - Rainbow Six: Lockdown - Game Guide and Walkthrough](https://game.lhg100.com/Article/UploadFiles/201512/2015121619121042.jpg)
![Enter the next room - [Mission 08][Part: 2/3] Distillery - Walkthrough - Rainbow Six: Lockdown - Game Guide and Walkthrough](https://game.lhg100.com/Article/UploadFiles/201512/2015121619121009.jpg)
Enter the next room. Start shooting at visible enemy soldiers (#1). Keep moving at all times. Don't stop, because that would have made you an easy target. I would also recommend using nearby pillars for extra cover. Furthermore, you mustn't forget about reloading your weapon frequently. Ignore the laptop located in the central part of the room. Head on towards the opposite exit. After a while, you should locate a ladder (#2). Use it in order to get to the lower level of the complex.
![2 - [Mission 08][Part: 2/3] Distillery - Walkthrough - Rainbow Six: Lockdown - Game Guide and Walkthrough](https://game.lhg100.com/Article/UploadFiles/201512/2015121619121056.jpg)
![Don't wait for the rest of the team to get here - [Mission 08][Part: 2/3] Distillery - Walkthrough - Rainbow Six: Lockdown - Game Guide and Walkthrough](https://game.lhg100.com/Article/UploadFiles/201512/2015121619121191.jpg)
Don't wait for the rest of the team to get here. Stand by one of the barriers. A group of enemy soldiers will arrive here shortly (#1). If you're lucky, they won't even have an opportunity to turn around. Get down to one of the lower levels. Start shooting at those terrorists who will be guarding the main entrance (#2). You might also consider throwing a couple of grenades at them, however this is a risky manoeuvre.
![3 - [Mission 08][Part: 2/3] Distillery - Walkthrough - Rainbow Six: Lockdown - Game Guide and Walkthrough](https://game.lhg100.com/Article/UploadFiles/201512/2015121619121138.jpg)
![Start moving towards the ground floor - [Mission 08][Part: 2/3] Distillery - Walkthrough - Rainbow Six: Lockdown - Game Guide and Walkthrough](https://game.lhg100.com/Article/UploadFiles/201512/2015121619121156.jpg)
Start moving towards the ground floor. Bear in mind that the entrance may still be guarded by a large group of enemy soldiers (#1). It would be best to send your team to handle this problem. After that, head on to the nearby corridor. Start moving forward. Lean out carefully. I would recommend throwing a couple of grenades at the guys standing in the elevator (#2). Alternatively, you could try and score a few heashots...
![4 - [Mission 08][Part: 2/3] Distillery - Walkthrough - Rainbow Six: Lockdown - Game Guide and Walkthrough](https://game.lhg100.com/Article/UploadFiles/201512/2015121619121136.jpg)
![Enter the elevator - [Mission 08][Part: 2/3] Distillery - Walkthrough - Rainbow Six: Lockdown - Game Guide and Walkthrough](https://game.lhg100.com/Article/UploadFiles/201512/2015121619121172.jpg)
Enter the elevator. Sadly, you can't activate it. There's a ladder on your right. Use it to get to the top of the elevator (#1). Once you're there, head on to the second ladder (#2). This time you will have to go down. WAIT for the rest of the team to get there. It will probably take them some time (at least 30-40 seconds...).
![5 - [Mission 08][Part: 2/3] Distillery - Walkthrough - Rainbow Six: Lockdown - Game Guide and Walkthrough](https://game.lhg100.com/Article/UploadFiles/201512/2015121619121286.jpg)
![You will find yourself in a large basement - [Mission 08][Part: 2/3] Distillery - Walkthrough - Rainbow Six: Lockdown - Game Guide and Walkthrough](https://game.lhg100.com/Article/UploadFiles/201512/2015121619121216.jpg)
You will find yourself in a large basement. Start off by killing all nearby hostiles (#1). You have to be very careful. Some of the terrorists will probably attack you from the left flank. Once they're gone, start moving forward. You will be encountering additional enemy units along the way (#2). Use barrels and pillars for much needed cover. I would also recommend letting your teammates take part in these fights.
![6 - [Mission 08][Part: 2/3] Distillery - Walkthrough - Rainbow Six: Lockdown - Game Guide and Walkthrough](https://game.lhg100.com/Article/UploadFiles/201512/2015121619121248.jpg)
![There's only one more thing to do here - [Mission 08][Part: 2/3] Distillery - Walkthrough - Rainbow Six: Lockdown - Game Guide and Walkthrough](https://game.lhg100.com/Article/UploadFiles/201512/2015121619121233.jpg)
There's only one more thing to do here. Step up to the designated area (#1). Wait for the rest of the team to show up. The game should load the new map in just a few seconds.
![7 - [Mission 08][Part: 2/3] Distillery - Walkthrough - Rainbow Six: Lockdown - Game Guide and Walkthrough](https://game.lhg100.com/Article/UploadFiles/201512/2015121619121227.jpg)
Start off by moving forward. I would recommend learning the right way from the map, so you won't get lost during the mission. Nevertheless, I will show show you the easiest way to your current destination. You should be able to reach a small junction in a few seconds. Wait here. A small group of terrorists will appear on your left (#1). Kill them. After that, turn around and start moving towards the right door (#2).
![1 - [Mission 08][Part: 3/3] Distillery - Walkthrough - Rainbow Six: Lockdown - Game Guide and Walkthrough](https://game.lhg100.com/Article/UploadFiles/201512/2015121619121343.jpg)
![Open the door and start shooting at visible enemy soldiers (#1) - [Mission 08][Part: 3/3] Distillery - Walkthrough - Rainbow Six: Lockdown - Game Guide and Walkthrough](https://game.lhg100.com/Article/UploadFiles/201512/2015121619121378.jpg)
Open the door and start shooting at visible enemy soldiers (#1). There's probably two of them over here. Headshots are most welcome. Head on to the door located on your left. Open it and kill a new terrorist (#2). Turn around and take care of a new group of enemy soldiers. You may proceed to the next section of the complex.
![2 - [Mission 08][Part: 3/3] Distillery - Walkthrough - Rainbow Six: Lockdown - Game Guide and Walkthrough](https://game.lhg100.com/Article/UploadFiles/201512/2015121619121385.jpg)
![Open a new door carefully - [Mission 08][Part: 3/3] Distillery - Walkthrough - Rainbow Six: Lockdown - Game Guide and Walkthrough](https://game.lhg100.com/Article/UploadFiles/201512/2015121619121364.jpg)
Open a new door carefully. I would recommend leaning out a lot. Once again, you will have to deal with a small, but well-equipped group of terrorists (#1). I wouldn't recommend asking your teammates for help. They would probably be injured during these fights, especially since some of the enemies are equipped with powerful shotguns. Head on to the right corridor. There's a new door on your left (#2). Gather your team around it.
![3 - [Mission 08][Part: 3/3] Distillery - Walkthrough - Rainbow Six: Lockdown - Game Guide and Walkthrough](https://game.lhg100.com/Article/UploadFiles/201512/2015121619121461.jpg)
The tactics remain the same. Open the door carefully and start shooting at visible enemy soldiers. Be careful, though. One of them will be hiding near a couch (#1). You will have to take care of him quickly, especially since he is equipped with a powerful weapon. Head on to the next door. You will have to kill a new terrorist here. Keep moving. You should find yourself inside a long tunnel (#2). Head on to the opposite end of this corridor. Don't be scared by the strange noises. No one's attacking your team. ;-)
![4 - [Mission 08][Part: 3/3] Distillery - Walkthrough - Rainbow Six: Lockdown - Game Guide and Walkthrough](https://game.lhg100.com/Article/UploadFiles/201512/2015121619121405.jpg)
![Stand by the next door and open it CAREFULLY - [Mission 08][Part: 3/3] Distillery - Walkthrough - Rainbow Six: Lockdown - Game Guide and Walkthrough](https://game.lhg100.com/Article/UploadFiles/201512/2015121619121447.jpg)
Stand by the next door and open it CAREFULLY. It appears this is a shooting range. Use the fact that the enemies are more concentrated on aiming on their targets, rather than guarding this place. I would recommend throwing a couple of grenades at them (#1). Keep moving forward. You should see a single terrorist in a distance. Kill him. You should be able to reach a small maze surrounded with wooden walls (#2). Before you move any further, make sure you've reloaded your weapon!
![5 - [Mission 08][Part: 3/3] Distillery - Walkthrough - Rainbow Six: Lockdown - Game Guide and Walkthrough](https://game.lhg100.com/Article/UploadFiles/201512/2015121619121432.jpg)
![Head on to the left room - [Mission 08][Part: 3/3] Distillery - Walkthrough - Rainbow Six: Lockdown - Game Guide and Walkthrough](https://game.lhg100.com/Article/UploadFiles/201512/2015121619121402.jpg)
Head on to the left room. It's going to be guarded by a small group of enemy soldiers. Be careful, though. A new group will appear on your left (#1). You will have to take care of all hostile units. The next group of terrorist is located in the next room, on your left (#2). Just as before, new enemies will show up in just a few seconds, so you have to be ready for that.
![6 - [Mission 08][Part: 3/3] Distillery - Walkthrough - Rainbow Six: Lockdown - Game Guide and Walkthrough](https://game.lhg100.com/Article/UploadFiles/201512/2015121619121517.jpg)
![Start moving towards a small door (#1) - [Mission 08][Part: 3/3] Distillery - Walkthrough - Rainbow Six: Lockdown - Game Guide and Walkthrough](https://game.lhg100.com/Article/UploadFiles/201512/2015121619121539.jpg)
Start moving towards a small door (#1). You're going have to pick the lock on it in order to reach Mergens' location. Open a door and use the stairs to get to the lower level. There's a single terrorist here. Kill him (#2). DON'T shoot at the wounded Mergen. Otherwise you would have jeopardized the whole mission!
![7 - [Mission 08][Part: 3/3] Distillery - Walkthrough - Rainbow Six: Lockdown - Game Guide and Walkthrough](https://game.lhg100.com/Article/UploadFiles/201512/2015121619121518.jpg)
![A short cut-scene should appear on your screen in just a few seconds - [Mission 08][Part: 3/3] Distillery - Walkthrough - Rainbow Six: Lockdown - Game Guide and Walkthrough](https://game.lhg100.com/Article/UploadFiles/201512/2015121619121521.jpg)
A short cut-scene should appear on your screen in just a few seconds. Thankfully, you won't have to do anything else at the moment (#1). The mission is going to end in a few seconds.
Threats: Innocent civilians are being held by the terrorists. You will have to be very careful. They can't get killed or even injured. Thankfully, the terrorists won't be equipped as well as those from the previous mission. Nevertheless, you must be very careful, mainly because they will be hiding near beds or some other medical equipment. As a result, you might not notice them at first glance.
Objectives: You will have to kill all members of the United Fatherland Brigade terrorist organization. They have taken control of a nearby hospital, the same one that's been looking out for of the injured Mergen. Terrorists are also holding some hostages. You will have to escort them back to safety.
Start off by moving a few steps forward. You should notice a civilian in just a few seconds (#1). DON'T SHOOT him. The man was running away from the terrorists. One of them will show up here very soon. You must take care of him swiftly. Be careful, though. More enemy units have stationed themselves nearby (#2). Keep pushing forward. I would recommend taking down the terrorists on your own, mainly because your teammates would have probably suffered unnecessary injuries.
![1 - [Mission 09][Part: 1/2] Hospital - Walkthrough - Rainbow Six: Lockdown - Game Guide and Walkthrough](https://game.lhg100.com/Article/UploadFiles/201512/2015121619121598.jpg)
Keep moving towards the opposite end of this corridor. You shouldn't encounter any terrorists at the moment. Use the stairs to get to the lower level of the complex (#1). Once you're there, lean out CAREFULLY. Try and take out some of the nearby terrorists (#2). You will probably have to deal with three soldiers.
![2 - [Mission 09][Part: 1/2] Hospital - Walkthrough - Rainbow Six: Lockdown - Game Guide and Walkthrough](https://game.lhg100.com/Article/UploadFiles/201512/2015121619121509.jpg)
![Leave the rest of the team behind - [Mission 09][Part: 1/2] Hospital - Walkthrough - Rainbow Six: Lockdown - Game Guide and Walkthrough](https://game.lhg100.com/Article/UploadFiles/201512/2015121619121520.jpg)
Leave the rest of the team behind. This is very important! You should be able to see a security camera. It's located at the other end of this corridor (#1). Start running towards one of the rooms located on your RIGHT. This area has been guarded by the terrorists. Enter the new room. Turn left. You should see a glowing button on a desk (#1). Press it. Thanks to that, you will deactivate all of the security cameras. Get back to the main corridor. The rest of the squad may join you now.
![3 - [Mission 09][Part: 1/2] Hospital - Walkthrough - Rainbow Six: Lockdown - Game Guide and Walkthrough](https://game.lhg100.com/Article/UploadFiles/201512/2015121619121644.jpg)
![Start heading towards a nearby door - [Mission 09][Part: 1/2] Hospital - Walkthrough - Rainbow Six: Lockdown - Game Guide and Walkthrough](https://game.lhg100.com/Article/UploadFiles/201512/2015121619121613.jpg)
Start heading towards a nearby door. You should be able to see a single terrorist unit (#1). Sadly, you won't be able to shoot through the glass. Open a door and take care of an enemy soldier. The second terrorist will probably be located on your right. Once he's gone, head on to a nearby door (#2) that's located at the opposite end of this room.
![4 - [Mission 09][Part: 1/2] Hospital - Walkthrough - Rainbow Six: Lockdown - Game Guide and Walkthrough](https://game.lhg100.com/Article/UploadFiles/201512/2015121619121675.jpg)
![The next room is going to be filled with hostile units (#1) - [Mission 09][Part: 1/2] Hospital - Walkthrough - Rainbow Six: Lockdown - Game Guide and Walkthrough](https://game.lhg100.com/Article/UploadFiles/201512/2015121619121626.jpg)
The next room is going to be filled with hostile units (#1). Remember that you have to be very careful. Some of the terrorist may be hiding by the surrounding beds. Furthermore, you are getting closer to the place where the hostages are being held. Choose your targets carefully, so you won't harm any innocent person. Move up closer to the passageway leading to a second room. Start off by killing all nearby terrorists (#2).
![5 - [Mission 09][Part: 1/2] Hospital - Walkthrough - Rainbow Six: Lockdown - Game Guide and Walkthrough](https://game.lhg100.com/Article/UploadFiles/201512/2015121619121701.jpg)
![Turn left QUICKLY - [Mission 09][Part: 1/2] Hospital - Walkthrough - Rainbow Six: Lockdown - Game Guide and Walkthrough](https://game.lhg100.com/Article/UploadFiles/201512/2015121619121791.jpg)
Turn left QUICKLY. One of the terrorist should by standing by the hostages (#1). You will have to kill him before he decides to get rid of them. Enter this area with the rest of the team. There are some new terrorists in the distance (#2). Kill them all. Remember to use pillars and desks for extra cover.
![6 - [Mission 09][Part: 1/2] Hospital - Walkthrough - Rainbow Six: Lockdown - Game Guide and Walkthrough](https://game.lhg100.com/Article/UploadFiles/201512/2015121619121730.jpg)
![Make sure that the area is clear - [Mission 09][Part: 1/2] Hospital - Walkthrough - Rainbow Six: Lockdown - Game Guide and Walkthrough](https://game.lhg100.com/Article/UploadFiles/201512/2015121619121723.jpg)
Make sure that the area is clear! You can approach the hostages now (#1). They must join your team in order to get to the extraction zone. I don't have to remind you that they should stay behind, so they won't get shot by the terrorists. You could explore all of the surrounding rooms and even find new terrorists there, although this is not necessary. Head on to the RIGHT corridor (#2). It'll lead you to your next mission goal.
![7 - [Mission 09][Part: 1/2] Hospital - Walkthrough - Rainbow Six: Lockdown - Game Guide and Walkthrough](https://game.lhg100.com/Article/UploadFiles/201512/2015121619121750.jpg)
![I guess you wouldn't be surprised if I told you that the area is crawling with enemy troops (#1) - [Mission 09][Part: 1/2] Hospital - Walkthrough - Rainbow Six: Lockdown - Game Guide and Walkthrough](https://game.lhg100.com/Article/UploadFiles/201512/2015121619121785.jpg)
I guess you wouldn't be surprised if I told you that the area is crawling with enemy troops (#1). Thankfully, you should be able to surprise most of the terrorists. Keep pushing forward. You will reach a small staircase in a few seconds (#2).
![8 - [Mission 09][Part: 1/2] Hospital - Walkthrough - Rainbow Six: Lockdown - Game Guide and Walkthrough](https://game.lhg100.com/Article/UploadFiles/201512/2015121619121899.jpg)
![Be careful - [Mission 09][Part: 1/2] Hospital - Walkthrough - Rainbow Six: Lockdown - Game Guide and Walkthrough](https://game.lhg100.com/Article/UploadFiles/201512/2015121619121831.jpg)
Be careful! There are some enemy troops nearby (by the stairs). You have to take care of this problem (#1). I would recommend aiming at the legs of enemy soldiers, so you wouldn't have to go all the way down to meet them. After that, head on to a big room. You will have to face a new groups of terrorists here (#2). Remember to use pillars and other huge objects for much needed cover. I would also like to remind you that some of the terrorists may still be hiding nearby!
![9 - [Mission 09][Part: 1/2] Hospital - Walkthrough - Rainbow Six: Lockdown - Game Guide and Walkthrough](https://game.lhg100.com/Article/UploadFiles/201512/2015121619121861.jpg)
![You will have to reach an opposite end of this room - [Mission 09][Part: 1/2] Hospital - Walkthrough - Rainbow Six: Lockdown - Game Guide and Walkthrough](https://game.lhg100.com/Article/UploadFiles/201512/2015121619121833.jpg)
You will have to reach an opposite end of this room. You will be encountering some masive enemy forces along the way (#1). You might consider letting your teammates take part in these fights. Keep moving forward. There's a small group of terrorists in the next corridor (#2). Thankfully, they won't be expecting you, so might consider scoring some headshots.
![10 - [Mission 09][Part: 1/2] Hospital - Walkthrough - Rainbow Six: Lockdown - Game Guide and Walkthrough](https://game.lhg100.com/Article/UploadFiles/201512/2015121619121859.jpg)
![Keep heading towards the exit - [Mission 09][Part: 1/2] Hospital - Walkthrough - Rainbow Six: Lockdown - Game Guide and Walkthrough](https://game.lhg100.com/Article/UploadFiles/201512/2015121619121965.jpg)
Keep heading towards the exit... the one with the wheelchair next to it. There's a single enemy soldier on your right (#1). Take him out. After that, start moving forward. You should notice a small group of soldiers in the distance (#2). DON'T SHOOT at them. These are the members of the Bravo squad. You have to join them now. That way, you will get rid off the protected hostages. You will also find out that some terrorists have barricaded themselves in the morgue. You'll have to get there in order to take care of this problem.
![11 - [Mission 09][Part: 1/2] Hospital - Walkthrough - Rainbow Six: Lockdown - Game Guide and Walkthrough](https://game.lhg100.com/Article/UploadFiles/201512/2015121619121981.jpg)
![Keep heading towards the next section of the hospital - [Mission 09][Part: 1/2] Hospital - Walkthrough - Rainbow Six: Lockdown - Game Guide and Walkthrough](https://game.lhg100.com/Article/UploadFiles/201512/2015121619121985.jpg)
Keep heading towards the next section of the hospital. Head on to the room located on your right. You will have to deal with a large group of enemy soldiers. Watch out for a single terrorist. He is crouching by the central console (#1). Make sure that the area is clear. Start heading towards a nearby door. The new corridor is being guarded by at least one additional terrorist (#2). You might want to consider throwing a couple of grenades at him.
![12 - [Mission 09][Part: 1/2] Hospital - Walkthrough - Rainbow Six: Lockdown - Game Guide and Walkthrough](https://game.lhg100.com/Article/UploadFiles/201512/2015121619121907.jpg)
![You can use the stairs now in order to get to the lower level of the hospital - [Mission 09][Part: 1/2] Hospital - Walkthrough - Rainbow Six: Lockdown - Game Guide and Walkthrough](https://game.lhg100.com/Article/UploadFiles/201512/2015121619121935.jpg)
You can use the stairs now in order to get to the lower level of the hospital. Order your team to stop in the designated area (#1). The game will load a new map within a few seconds.
![13 - [Mission 09][Part: 1/2] Hospital - Walkthrough - Rainbow Six: Lockdown - Game Guide and Walkthrough](https://game.lhg100.com/Article/UploadFiles/201512/2015121619122032.jpg)
Use the stairs to get to the lower floor. Open a single door. I would recommend zooming in the view. You should be able to spot a single terrorist in a distance (#1). Kill him. Start moving forward. It would be best if you'd let your teammates take part in these fights. You will come across a large are that's occupied by hostile forces (#2). You might want to consider using your night vision goggles, although this is not necessary.
![1 - [Mission 09][Part: 2/2] Hospital - Walkthrough - Rainbow Six: Lockdown - Game Guide and Walkthrough](https://game.lhg100.com/Article/UploadFiles/201512/2015121619122090.jpg)
![Keep heading towards the RIGHT entrance - [Mission 09][Part: 2/2] Hospital - Walkthrough - Rainbow Six: Lockdown - Game Guide and Walkthrough](https://game.lhg100.com/Article/UploadFiles/201512/2015121619122012.jpg)
Keep heading towards the RIGHT entrance. It leads to a new section of the complex. Be careful, though. The entrance might be guarded by one of the terrorists (#1). He will be hiding on your left. Kill him. Open the next door. You will find yourself in a large cafeteria. Bear in mind that it's occupied by a large group of enemy soldiers. Order your men to defend this positoon (#2). They will automatically use nearby objects for cover. You might want to help them in taking out some of the terrorists.
![2 - [Mission 09][Part: 2/2] Hospital - Walkthrough - Rainbow Six: Lockdown - Game Guide and Walkthrough](https://game.lhg100.com/Article/UploadFiles/201512/2015121619122042.jpg)
![Once you've taken care of the nearby hostiles leave the rest of the team behind - [Mission 09][Part: 2/2] Hospital - Walkthrough - Rainbow Six: Lockdown - Game Guide and Walkthrough](https://game.lhg100.com/Article/UploadFiles/201512/2015121619122047.jpg)
Once you've taken care of the nearby hostiles leave the rest of the team behind. Start moving towards the right corridor (#1). You should be able to reach a central part of the cafeteria within a few seconds. Duck behind one of the pillars. This is a good spot to take care of the remaining terrorists (#2). After that, gather the rest of the team around you.
![3 - [Mission 09][Part: 2/2] Hospital - Walkthrough - Rainbow Six: Lockdown - Game Guide and Walkthrough](https://game.lhg100.com/Article/UploadFiles/201512/2015121619122009.jpg)
![Make sure that the area is clear - [Mission 09][Part: 2/2] Hospital - Walkthrough - Rainbow Six: Lockdown - Game Guide and Walkthrough](https://game.lhg100.com/Article/UploadFiles/201512/2015121619122073.jpg)
Make sure that the area is clear. Start moving forward. At about half way through, turn right and choose a small corridor (#1). It leads to a new section of the complex. You have to go there now (with the whole team). There aren't any enemies in the vicinity, so you can as well start running towards your current destination. Stop the moment you've reached metal doors (#1). Make sure you have reloaded your weapon!!
![4 - [Mission 09][Part: 2/2] Hospital - Walkthrough - Rainbow Six: Lockdown - Game Guide and Walkthrough](https://game.lhg100.com/Article/UploadFiles/201512/2015121619122184.jpg)
![First of all, I would recommend taking down a single terrorist (#1) - [Mission 09][Part: 2/2] Hospital - Walkthrough - Rainbow Six: Lockdown - Game Guide and Walkthrough](https://game.lhg100.com/Article/UploadFiles/201512/2015121619122183.jpg)
First of all, I would recommend taking down a single terrorist (#1). He is hiding by one of the beds located on the left side of the room. The area is occupied by a large group of enemy soldiers. I would recommend throwing a couple of grenades inside. Storm the place with the rest of the squad (#2). Watch out for the additional terrorist. He can also be found by one of the beds.
![5 - [Mission 09][Part: 2/2] Hospital - Walkthrough - Rainbow Six: Lockdown - Game Guide and Walkthrough](https://game.lhg100.com/Article/UploadFiles/201512/2015121619122198.jpg)
![Exit the room and turn right - [Mission 09][Part: 2/2] Hospital - Walkthrough - Rainbow Six: Lockdown - Game Guide and Walkthrough](https://game.lhg100.com/Article/UploadFiles/201512/2015121619122197.jpg)
Exit the room and turn right. You will come across a new terrorist (#1). Kill him. Keep moving towards your next destination. There's only one path leading to the basement, so you can't get lost. Be sure to use the stairs to get down there. Order your team to stop the moment you've reached a small door (#2). You have to pick a lock in order to reach the morgue section.
![6 - [Mission 09][Part: 2/2] Hospital - Walkthrough - Rainbow Six: Lockdown - Game Guide and Walkthrough](https://game.lhg100.com/Article/UploadFiles/201512/2015121619122136.jpg)
![You are getting closer to one of the main objectives of this mission - [Mission 09][Part: 2/2] Hospital - Walkthrough - Rainbow Six: Lockdown - Game Guide and Walkthrough](https://game.lhg100.com/Article/UploadFiles/201512/2015121619122222.jpg)
You are getting closer to one of the main objectives of this mission. Open the door carefully. DON'T enter the new area just yet! I would recommend that you hold your position for now. Start shooting at visible enemy soldiers (#1). Make sure that most of them are gone. Enter this room with the whole team. Start moving forward. You'll probably encounter some additional units along the way (#2). Remember to use all visible objects (pillars, machines...) for extra cover. You should be able to reach a new door within a few seconds.
![7 - [Mission 09][Part: 2/2] Hospital - Walkthrough - Rainbow Six: Lockdown - Game Guide and Walkthrough](https://game.lhg100.com/Article/UploadFiles/201512/2015121619122248.jpg)
![Open this new door - [Mission 09][Part: 2/2] Hospital - Walkthrough - Rainbow Six: Lockdown - Game Guide and Walkthrough](https://game.lhg100.com/Article/UploadFiles/201512/2015121619122211.jpg)
Open this new door. Be careful! There are some new terrorists on your left (#1). If you're lucky, you should be able to surprise most of them. Enter this new corridor. There's a small room on your right. Go there now. Be careful, though. There's at least one enemy soldier here. He will be standing by the table. Kill him. As you've probably noticed, one of the hostages was being held in this room (#2). He must join the rest of the team. Get back to the main corridor.
![8 - [Mission 09][Part: 2/2] Hospital - Walkthrough - Rainbow Six: Lockdown - Game Guide and Walkthrough](https://game.lhg100.com/Article/UploadFiles/201512/2015121619122260.jpg)
![This time you will have to go to opposite room (located on your left) - [Mission 09][Part: 2/2] Hospital - Walkthrough - Rainbow Six: Lockdown - Game Guide and Walkthrough](https://game.lhg100.com/Article/UploadFiles/201512/2015121619122228.jpg)
This time you will have to go to opposite room (located on your left). It's going to be guarded by two additional terrorists (#1). You might want to consider opening the door carefully. Thanks to that, you should be able to surprise at least one of them. Rescue the second hostage. Now you must go back to the upper floor. Start moving. Thankfully, there aren't any new enemies in that area. Once again, you will have to use nearby stairs (#2). After that, wait for the rest of the team (including the hostages) to show up.
![9 - [Mission 09][Part: 2/2] Hospital - Walkthrough - Rainbow Six: Lockdown - Game Guide and Walkthrough](https://game.lhg100.com/Article/UploadFiles/201512/2015121619122345.jpg)
![Lean out CAREFULLY - [Mission 09][Part: 2/2] Hospital - Walkthrough - Rainbow Six: Lockdown - Game Guide and Walkthrough](https://game.lhg100.com/Article/UploadFiles/201512/2015121619122353.jpg)
Lean out CAREFULLY. There are some new terrorists in a nearby room (#1). Just as before, you've got to be very careful. Some of them will probably be hiding. You have to remember that. One of these terrorists should be located on your left. Head on to the opposite end of this room (#2). Reload your weapon!
![10 - [Mission 09][Part: 2/2] Hospital - Walkthrough - Rainbow Six: Lockdown - Game Guide and Walkthrough](https://game.lhg100.com/Article/UploadFiles/201512/2015121619122336.jpg)
![Once again, I would recommend that you lean out in order to kill some of the nearby terrorists - [Mission 09][Part: 2/2] Hospital - Walkthrough - Rainbow Six: Lockdown - Game Guide and Walkthrough](https://game.lhg100.com/Article/UploadFiles/201512/2015121619122355.jpg)
Once again, I would recommend that you lean out in order to kill some of the nearby terrorists. Most of them will be standing by the metal door (#1). Start moving forward. You've got to be very careful!! There's only one more thing to do here. You will have to clear out one of the surrounding rooms (#2). Remember to use all possible cover. Just as before, some of the terrorists may still be hiding in that area. It would also be wise to let your teammates join you in these fights. They won't have to protect the hostages anymore.
![11 - [Mission 09][Part: 2/2] Hospital - Walkthrough - Rainbow Six: Lockdown - Game Guide and Walkthrough](https://game.lhg100.com/Article/UploadFiles/201512/2015121619122406.jpg)
![Make sure that the area is clear before you decide to move the hostages to this location - [Mission 09][Part: 2/2] Hospital - Walkthrough - Rainbow Six: Lockdown - Game Guide and Walkthrough](https://game.lhg100.com/Article/UploadFiles/201512/2015121619122465.jpg)
Make sure that the area is clear before you decide to move the hostages to this location. Gather everyone at the extraction zone (#2). A short cut-scene should appear on your screen shortly (#2). After that, this mission will come to an end.
![12 - [Mission 09][Part: 2/2] Hospital - Walkthrough - Rainbow Six: Lockdown - Game Guide and Walkthrough](https://game.lhg100.com/Article/UploadFiles/201512/2015121619122450.jpg)
![13 - [Mission 09][Part: 2/2] Hospital - Walkthrough - Rainbow Six: Lockdown - Game Guide and Walkthrough](https://game.lhg100.com/Article/UploadFiles/201512/2015121619122484.jpg)
Threats: Once again you will have to deal with heavily armed opponents. Most of them will also be wearing bulletproof vests. Furthermore, the final part of this mission will require you to eliminate a large group of terrorists before they manage to kill members of an allied team.
Objectives: You will have to clear out the docks. They are being occupied by hostile forces. The terrorists are planning a major arms deal. You can't allow that to happen. Later in the mission, you will also help members of an allied team.
This mission is one of the shortest ones, however it's going to be filled with a lot of difficult challenges. You start off in a warehouse area. Head on to the next room. Once you're there, turn left. Lean out carefully. There are some enemy soldiers nearby (#1). It would be best to aim at their heads. Alternatively you could also throw a couple of grenades at them. Be careful, though. Once the first group is one, more terrorists will appear in the area (#2). I would recommend leaving the rest of the squad behind. You should be able to deal with this problem on your own.
![1 - [Mission 10][Part: 1/2] Docks - Walkthrough - Rainbow Six: Lockdown - Game Guide and Walkthrough](https://game.lhg100.com/Article/UploadFiles/201512/2015121619122492.jpg)
![Start moving towards the opposite end of the warehouse - [Mission 10][Part: 1/2] Docks - Walkthrough - Rainbow Six: Lockdown - Game Guide and Walkthrough](https://game.lhg100.com/Article/UploadFiles/201512/2015121619122550.jpg)
Start moving towards the opposite end of the warehouse. Be careful, though. One of the enemy soldiers will be hiding by the machinery (#1). He's well equipped, so you have to take him out quickly. There's a small corridor on your right. Go there now. You should see a single sniper (#2). He's stationed on the top of the nearby stairs. Dispose of him quickly.
![2 - [Mission 10][Part: 1/2] Docks - Walkthrough - Rainbow Six: Lockdown - Game Guide and Walkthrough](https://game.lhg100.com/Article/UploadFiles/201512/2015121619122506.jpg)
![As for the building itself, there are dwo different doors - [Mission 10][Part: 1/2] Docks - Walkthrough - Rainbow Six: Lockdown - Game Guide and Walkthrough](https://game.lhg100.com/Article/UploadFiles/201512/2015121619122541.jpg)
As for the building itself, there are dwo different doors. Let's start with the passage located on your right (#1). Open the door, but don't enter the warehouse just yet! Maintain your position. Try to kill as many terrorists as possible. One of them will be guarding a nearby balcony (#2). Once he's gone, take down the rest of the visible soldiers. Most of the terrorists will appear on your right. Thankfully, they're not too hard to kill.
![3 - [Mission 10][Part: 1/2] Docks - Walkthrough - Rainbow Six: Lockdown - Game Guide and Walkthrough](https://game.lhg100.com/Article/UploadFiles/201512/2015121619122561.jpg)
![Order your team to maintain this position - [Mission 10][Part: 1/2] Docks - Walkthrough - Rainbow Six: Lockdown - Game Guide and Walkthrough](https://game.lhg100.com/Article/UploadFiles/201512/2015121619122587.jpg)
Order your team to maintain this position. You, on the other hand, will be trying to surprise remaining soldiers from the left flank. In order to do that, you will have to use the left passage, located on the top of the stairs (#1). Open the door carefully. Move up a little bit closer to the railing. Start shooting at the remaining terrorists (#2). Bear in mind that some of them are will be hiding by the crates. Keep moving towards the opposite end of the warehouse.
![4 - [Mission 10][Part: 1/2] Docks - Walkthrough - Rainbow Six: Lockdown - Game Guide and Walkthrough](https://game.lhg100.com/Article/UploadFiles/201512/2015121619122524.jpg)
![Keep pushing forward - [Mission 10][Part: 1/2] Docks - Walkthrough - Rainbow Six: Lockdown - Game Guide and Walkthrough](https://game.lhg100.com/Article/UploadFiles/201512/2015121619122605.jpg)
Keep pushing forward. Once you've taken care of most of the terrorists order the rest of the team to get here (#1). If you're lucky, your teammates should take full control of this building within just a few seconds. Use the nearby stairs in order to join them. Head on to the only visible door (#2). It leads to next section of the map.
![5 - [Mission 10][Part: 1/2] Docks - Walkthrough - Rainbow Six: Lockdown - Game Guide and Walkthrough](https://game.lhg100.com/Article/UploadFiles/201512/2015121619122626.jpg)
![There is a new group of enemy soldiers in the vicinity - [Mission 10][Part: 1/2] Docks - Walkthrough - Rainbow Six: Lockdown - Game Guide and Walkthrough](https://game.lhg100.com/Article/UploadFiles/201512/2015121619122649.jpg)
There is a new group of enemy soldiers in the vicinity. Terrorists will be standing by one of the trucks (#1). Furthermore, more of them will arrive here shortly. I would recommend using the scope. Thanks to that, you should be able to eliminate them more efficiently. Keep pushing forward. You will be encountering new doors along the way (#2). Make sure you've reloaded your weapon before entering one of the next warehouse buildings.
![6 - [Mission 10][Part: 1/2] Docks - Walkthrough - Rainbow Six: Lockdown - Game Guide and Walkthrough](https://game.lhg100.com/Article/UploadFiles/201512/2015121619122687.jpg)
![Open the door - [Mission 10][Part: 1/2] Docks - Walkthrough - Rainbow Six: Lockdown - Game Guide and Walkthrough](https://game.lhg100.com/Article/UploadFiles/201512/2015121619122602.jpg)
Open the door. Terrorists will probably use smoke grenades in order to blind your movements (#1). Move back to the entrance. Start shooting at those soldiers who will actually appear near the entrance. You should also take care of a small group of snipers. They will be hiding on the left balcony (#2), mostly near the occupied entrance.
![7 - [Mission 10][Part: 1/2] Docks - Walkthrough - Rainbow Six: Lockdown - Game Guide and Walkthrough](https://game.lhg100.com/Article/UploadFiles/201512/2015121619122782.jpg)
![I would recommend waiting for the effects of the smoke grenades to wear off - [Mission 10][Part: 1/2] Docks - Walkthrough - Rainbow Six: Lockdown - Game Guide and Walkthrough](https://game.lhg100.com/Article/UploadFiles/201512/2015121619122769.jpg)
I would recommend waiting for the effects of the smoke grenades to wear off. Otherwise you'd have some serious problems. Enter the warehouse and start shooting at the nearby enemy soldiers (#1). You should also ask your teammates for help. You won't have any serious problems, however you must watch out for opponents armed with heavy gear. Some of them will be equipped with powerful shotguns. Head on to the next door (#2). You shouldn't encounter any new units at the moment.
![8 - [Mission 10][Part: 1/2] Docks - Walkthrough - Rainbow Six: Lockdown - Game Guide and Walkthrough](https://game.lhg100.com/Article/UploadFiles/201512/2015121619122757.jpg)
![You will find yourself in a new warehouse - [Mission 10][Part: 1/2] Docks - Walkthrough - Rainbow Six: Lockdown - Game Guide and Walkthrough](https://game.lhg100.com/Article/UploadFiles/201512/2015121619122734.jpg)
You will find yourself in a new warehouse. Start moving forward. You should be very careful. I would also recommend using the sniper rifle. You will notice a first group of enemy soldiers on your right (#1). Shoot through the small crates in order to get rid of them. There's a small passageway nearby. Some of the terrorists will probably use it (#2). You have to be ready for that. Keep moving towards that corridor. Order the rest of the team to follow you.
![9 - [Mission 10][Part: 1/2] Docks - Walkthrough - Rainbow Six: Lockdown - Game Guide and Walkthrough](https://game.lhg100.com/Article/UploadFiles/201512/2015121619122789.jpg)
![There's a small passageway leading to the next building - [Mission 10][Part: 1/2] Docks - Walkthrough - Rainbow Six: Lockdown - Game Guide and Walkthrough](https://game.lhg100.com/Article/UploadFiles/201512/2015121619122710.jpg)
There's a small passageway leading to the next building. It's been located in one of the corners of this warehouse. Go there now. You will be encountering additional units along the way. Most of the terrorists will be hiding (mostly by the containers), so you have to be very careful (#1). I would recommend using the scope often. Keep pushing forward. An icon will appear on your screen in a few seconds (#2). DON'T go there just yet. This area is swarming with enemy troops. You will have to take care of this problem.
![10 - [Mission 10][Part: 1/2] Docks - Walkthrough - Rainbow Six: Lockdown - Game Guide and Walkthrough](https://game.lhg100.com/Article/UploadFiles/201512/2015121619122758.jpg)
![I have to warn you - [Mission 10][Part: 1/2] Docks - Walkthrough - Rainbow Six: Lockdown - Game Guide and Walkthrough](https://game.lhg100.com/Article/UploadFiles/201512/2015121619122862.jpg)
I have to warn you. Most of the terrorists are equipped with bulletproof vests and powerful weapons. Furthermore, they will be sweeping through the whole warehouse. First of all, take out one of the snipers. He will be located on the left balcony (#1). Remember to use nearby containers for extra cover. Keep pushing forward. Eliminate anyone who stands in your way (#2).
![11 - [Mission 10][Part: 1/2] Docks - Walkthrough - Rainbow Six: Lockdown - Game Guide and Walkthrough](https://game.lhg100.com/Article/UploadFiles/201512/2015121619122827.jpg)
![The designated zone is going to be guarded by AT LEAST two additional terrorists - [Mission 10][Part: 1/2] Docks - Walkthrough - Rainbow Six: Lockdown - Game Guide and Walkthrough](https://game.lhg100.com/Article/UploadFiles/201512/2015121619122888.jpg)
The designated zone is going to be guarded by AT LEAST two additional terrorists. One of them will be hiding on your left, by the container (#1). Make sure you've taken them out!! After that, head on to the marked spot (#2). You don't have to wait for the rest of the team to show up. Wait for the new map to load itself.
![12 - [Mission 10][Part: 1/2] Docks - Walkthrough - Rainbow Six: Lockdown - Game Guide and Walkthrough](https://game.lhg100.com/Article/UploadFiles/201512/2015121619122802.jpg)
![13 - [Mission 10][Part: 1/2] Docks - Walkthrough - Rainbow Six: Lockdown - Game Guide and Walkthrough](https://game.lhg100.com/Article/UploadFiles/201512/2015121619122885.jpg)
You'll probably have more problems with this part of this mission, especially in its final moments. Start off by moving forward. You should encounter a first group of enemy soldiers in just a few seconds (#1). Remember to aim at the heads of enemy soldiers. Thanks to that, you should be able to get rid of them quickly. Keep moving forward. There's a single opponent on your right (#2). He's guarding a nearby building. Kill him.
![1 - [Mission 10][Part: 2/2] Docks - Walkthrough - Rainbow Six: Lockdown - Game Guide and Walkthrough](https://game.lhg100.com/Article/UploadFiles/201512/2015121619122866.jpg)
![Head on to a nearby door - [Mission 10][Part: 2/2] Docks - Walkthrough - Rainbow Six: Lockdown - Game Guide and Walkthrough](https://game.lhg100.com/Article/UploadFiles/201512/2015121619122984.jpg)
Head on to a nearby door. You will have to deal with two additional enemy units. One of the terrorists will be standing near a ladder (#1), the second one is on your right. He's hiding in the shadows, so you must be careful. Move on to the next room. Start shooting at the enemy soldiers. A large group of terrorists will arrive here shortly (#2). They will appear on your right. I would recommend letting your team members take part in these fights.
![2 - [Mission 10][Part: 2/2] Docks - Walkthrough - Rainbow Six: Lockdown - Game Guide and Walkthrough](https://game.lhg100.com/Article/UploadFiles/201512/2015121619122910.jpg)
![Keep moving forward - [Mission 10][Part: 2/2] Docks - Walkthrough - Rainbow Six: Lockdown - Game Guide and Walkthrough](https://game.lhg100.com/Article/UploadFiles/201512/2015121619122986.jpg)
Keep moving forward. Make sure you've cleared out all of the surrounding rooms and corridors. You will be encountering some additional forces (#1) along the way, however this shouldn't be much of a problem, especially since most of the terrorists are standing in fairly obvious spots. You will have to reach the stairs (#2). Head on to the upper floor.
![3 - [Mission 10][Part: 2/2] Docks - Walkthrough - Rainbow Six: Lockdown - Game Guide and Walkthrough](https://game.lhg100.com/Article/UploadFiles/201512/2015121619122962.jpg)
![Be careful - [Mission 10][Part: 2/2] Docks - Walkthrough - Rainbow Six: Lockdown - Game Guide and Walkthrough](https://game.lhg100.com/Article/UploadFiles/201512/2015121619122995.jpg)
Be careful! One of the terrorists may be standing in the middle of the stairs (#1). You have to kill him before he injures one of your team members. Keep moving towards the upper level. There are some new enemies on your left (#2). Thankfully, you should be able to kill them without any problems. Just be sure to shoot through the unfinished wall. They won't even fight back. Once you've cleared out most of the area, send your team to deal with the remaining terorists.
![4 - [Mission 10][Part: 2/2] Docks - Walkthrough - Rainbow Six: Lockdown - Game Guide and Walkthrough](https://game.lhg100.com/Article/UploadFiles/201512/2015121619123045.jpg)
![Head on to the left side of the room - [Mission 10][Part: 2/2] Docks - Walkthrough - Rainbow Six: Lockdown - Game Guide and Walkthrough](https://game.lhg100.com/Article/UploadFiles/201512/2015121619123075.jpg)
Head on to the left side of the room. You should notice some new units along the way. One of the terrorists will be standing on the other side of the glass (#1). Try aiming at his head. Keep moving forward. Use the stairs to get to the lower level of the complex. There's a locked door over here (#2). You should know exactly by now what has to be done...
![5 - [Mission 10][Part: 2/2] Docks - Walkthrough - Rainbow Six: Lockdown - Game Guide and Walkthrough](https://game.lhg100.com/Article/UploadFiles/201512/2015121619123020.jpg)
![Open the door and start shooting at visible enemy units (#1) - [Mission 10][Part: 2/2] Docks - Walkthrough - Rainbow Six: Lockdown - Game Guide and Walkthrough](https://game.lhg100.com/Article/UploadFiles/201512/2015121619123054.jpg)
Open the door and start shooting at visible enemy units (#1). One of the terrorists will be crouching on your right and a large group of enemy units will arrive here shortly. Kill them all. You may proceed to the next room. You won't encounter any new units at the moment. Head on to the right door (#2). Don't open it just yet. Gather the rest of the team around your position.
![6 - [Mission 10][Part: 2/2] Docks - Walkthrough - Rainbow Six: Lockdown - Game Guide and Walkthrough](https://game.lhg100.com/Article/UploadFiles/201512/2015121619123012.jpg)
![Open the door carefully - [Mission 10][Part: 2/2] Docks - Walkthrough - Rainbow Six: Lockdown - Game Guide and Walkthrough](https://game.lhg100.com/Article/UploadFiles/201512/2015121619123010.jpg)
Open the door carefully. One of the terrorists will be guarding this section of the docks (#1). Kill him. Once he's gone, start shooting at more distant units (#2). Move towards the ship that's located on your left. I would recommend turning on the night vision goggles, especially since the final part of this mission is going to be very difficult.
![7 - [Mission 10][Part: 2/2] Docks - Walkthrough - Rainbow Six: Lockdown - Game Guide and Walkthrough](https://game.lhg100.com/Article/UploadFiles/201512/2015121619123182.jpg)
![Turn right - [Mission 10][Part: 2/2] Docks - Walkthrough - Rainbow Six: Lockdown - Game Guide and Walkthrough](https://game.lhg100.com/Article/UploadFiles/201512/2015121619123146.jpg)
Turn right. There's a large group of enemy units stationed near the truck (#1). Kill them. Now you should order the rest of the team to stay here. Get back to the entrance. You should be able to spot at least 4-5 additional units on your left (#2). The enemies were trying to surprise you. Start shooting at them. Make sure you haven't missed anyone.
![8 - [Mission 10][Part: 2/2] Docks - Walkthrough - Rainbow Six: Lockdown - Game Guide and Walkthrough](https://game.lhg100.com/Article/UploadFiles/201512/2015121619123118.jpg)
![Sweep the whole area for any additional units - [Mission 10][Part: 2/2] Docks - Walkthrough - Rainbow Six: Lockdown - Game Guide and Walkthrough](https://game.lhg100.com/Article/UploadFiles/201512/2015121619123188.jpg)
Sweep the whole area for any additional units. Order the rest of the team to follow you. Head on to the truck. There's a small alley on your right (#1). Go there now. Be careful, though. You may encounter some additional units along the way (#2). You should be able to receive a distress call from an allied team. It appears that it's been surrounded by the terrorists. YOU MUST HURRY! The death of one of the allied units will jeopardize the whole mission! Stand up and start RUNNING towards that position. Remember that you have only a few seconds to get there.
![9 - [Mission 10][Part: 2/2] Docks - Walkthrough - Rainbow Six: Lockdown - Game Guide and Walkthrough](https://game.lhg100.com/Article/UploadFiles/201512/2015121619123291.jpg)
![Keep moving straight - [Mission 10][Part: 2/2] Docks - Walkthrough - Rainbow Six: Lockdown - Game Guide and Walkthrough](https://game.lhg100.com/Article/UploadFiles/201512/2015121619123287.jpg)
Keep moving straight. You should be able to spot a few terrorists in the distance (#1). Start shooting at them. Remember that there's no need to save up the remaining ammunition. Once you're there, turn right. Head on to the open container (#2).
![10 - [Mission 10][Part: 2/2] Docks - Walkthrough - Rainbow Six: Lockdown - Game Guide and Walkthrough](https://game.lhg100.com/Article/UploadFiles/201512/2015121619123254.jpg)
![Keep running - [Mission 10][Part: 2/2] Docks - Walkthrough - Rainbow Six: Lockdown - Game Guide and Walkthrough](https://game.lhg100.com/Article/UploadFiles/201512/2015121619123298.jpg)
Keep running. You might as well start shooting at the new group of terrorist units (#1). The enemies will choose the corridor located on your right. Ignore the second container and head on to the same passageway. After that, you must turn LEFT. Thanks to that, you should be able to surprise the terrorists (#2). Start killing them. Since the enemies are unaware of your current position, you should be able to score at least one headshot.
![11 - [Mission 10][Part: 2/2] Docks - Walkthrough - Rainbow Six: Lockdown - Game Guide and Walkthrough](https://game.lhg100.com/Article/UploadFiles/201512/2015121619123259.jpg)
![Approach one of the members of an allied team (#1) - [Mission 10][Part: 2/2] Docks - Walkthrough - Rainbow Six: Lockdown - Game Guide and Walkthrough](https://game.lhg100.com/Article/UploadFiles/201512/2015121619123338.jpg)
Approach one of the members of an allied team (#1). THIS IS NOT OVER YET! The terrorists are planning a major counteroffensive. You will have to surprise them once again. Turn left. There's an open containter over here. Get to other side of it. Once you're there, turn left and start shooting at the terrorist units (#2). You should be able to kill at least one of the enemy soldiers. Start running there.
![12 - [Mission 10][Part: 2/2] Docks - Walkthrough - Rainbow Six: Lockdown - Game Guide and Walkthrough](https://game.lhg100.com/Article/UploadFiles/201512/2015121619123379.jpg)
![The remaining terrorists will be stationed on your left - [Mission 10][Part: 2/2] Docks - Walkthrough - Rainbow Six: Lockdown - Game Guide and Walkthrough](https://game.lhg100.com/Article/UploadFiles/201512/2015121619123393.jpg)
The remaining terrorists will be stationed on your left. You have to take care of them quickly (#1). You can't allow them to injure any of the allied soldiers. After that, a short cut-scene should appear on your screen (#2). That's it for this mission.
![13 - [Mission 10][Part: 2/2] Docks - Walkthrough - Rainbow Six: Lockdown - Game Guide and Walkthrough](https://game.lhg100.com/Article/UploadFiles/201512/2015121619123380.jpg)
![14 - [Mission 10][Part: 2/2] Docks - Walkthrough - Rainbow Six: Lockdown - Game Guide and Walkthrough](https://game.lhg100.com/Article/UploadFiles/201512/2015121619123362.jpg)
Threats: Most of the terrorists will be equipped with bulletproof vests and heavy weapons (machine guns, shotguns...). You will have to keep that in mind while aiming at them. Headshots seem to be a perfect solution. This mission will require you to rescue and protect a small group of innocent civilians. You will also have to disarm the bomb within a 5-minute time limit.
Objectives: Members of the Marxist Radical Front terrorist organization have taken control of a ferry. You will have to kill them all, secure the hostages and disarm a bomb that's located near the engine room.
You start off inside a ferry, so you wouldn't have to worry about getting aboard. Move a few steps forward. Head on to a nearby door. Open it carefully. You should notice a few terrorists in the distance (#1). Start shooting at them. A second group of enemy units will appear on your right (#2). You should remain here all the time. Don't worry, the terrorists won't use any grenades.
![1 - [Mission 11][Part: 1/2] Channel Ferry - Walkthrough - Rainbow Six: Lockdown - Game Guide and Walkthrough](https://game.lhg100.com/Article/UploadFiles/201512/2015121619123423.jpg)
![Make sure you've killed all of the surrounding terrorists - [Mission 11][Part: 1/2] Channel Ferry - Walkthrough - Rainbow Six: Lockdown - Game Guide and Walkthrough](https://game.lhg100.com/Article/UploadFiles/201512/2015121619123402.jpg)
Make sure you've killed all of the surrounding terrorists. Enter the bridge with the rest of the team. Head on to the left door. You should see a single terrorist. He is patrolling the lower deck (#1). Open the door, step up to the railing and kill him. I would recommend aiming at his head. Order the rest of the team to follow you. Use the nearby stairs to get to the lower level (#2).
![2 - [Mission 11][Part: 1/2] Channel Ferry - Walkthrough - Rainbow Six: Lockdown - Game Guide and Walkthrough](https://game.lhg100.com/Article/UploadFiles/201512/2015121619123489.jpg)
![Turn around - [Mission 11][Part: 1/2] Channel Ferry - Walkthrough - Rainbow Six: Lockdown - Game Guide and Walkthrough](https://game.lhg100.com/Article/UploadFiles/201512/2015121619123415.jpg)
Turn around. There's an entrance located beneath the stairs (#1). You must go there now. You will come across a new staircase. Head on to the lower level. There aren't any new enemies in the vicinity, so you don't have to be worried about that. Keep moving forward. Once you've reached the deck, look for a new entrance. It will be located on your right (#2).
![3 - [Mission 11][Part: 1/2] Channel Ferry - Walkthrough - Rainbow Six: Lockdown - Game Guide and Walkthrough](https://game.lhg100.com/Article/UploadFiles/201512/2015121619123455.jpg)
![You will come across a small door - [Mission 11][Part: 1/2] Channel Ferry - Walkthrough - Rainbow Six: Lockdown - Game Guide and Walkthrough](https://game.lhg100.com/Article/UploadFiles/201512/2015121619123460.jpg)
You will come across a small door. Make sure you've reloaded your weapon! I would also recommend waiting for the rest of the team to show up. You will find yourself in one of the main ballrooms of the ferry. Be careful, though. There is a terrorist on your left (#1). Make sure he's gone before you decide to move any further. Start shooting at the visible enemy soldiers (#2). Just as before, I wouldn't recommend getting close to them.
![4 - [Mission 11][Part: 1/2] Channel Ferry - Walkthrough - Rainbow Six: Lockdown - Game Guide and Walkthrough](https://game.lhg100.com/Article/UploadFiles/201512/2015121619123586.jpg)
![Once you've taken out most of the terrorists, enter the ballroom - [Mission 11][Part: 1/2] Channel Ferry - Walkthrough - Rainbow Six: Lockdown - Game Guide and Walkthrough](https://game.lhg100.com/Article/UploadFiles/201512/2015121619123568.jpg)
Once you've taken out most of the terrorists, enter the ballroom. There are some additional units on your left (#1). You probably couldn't notice these terrorists before. Kill them. Remember to use walls, pillars and other objects for cover. Head on to the locked door (#2). You will have to pick the lock in order to reach the next section of the ship.
![5 - [Mission 11][Part: 1/2] Channel Ferry - Walkthrough - Rainbow Six: Lockdown - Game Guide and Walkthrough](https://game.lhg100.com/Article/UploadFiles/201512/2015121619123591.jpg)
![Open the door that's located on your left - [Mission 11][Part: 1/2] Channel Ferry - Walkthrough - Rainbow Six: Lockdown - Game Guide and Walkthrough](https://game.lhg100.com/Article/UploadFiles/201512/2015121619123551.jpg)
Open the door that's located on your left. Keep moving towards the main objective of this mission. You will be encountering additional terrorists along the way (#1). If you're lucky, you should be able to surprise one of the nearest groups. There are some additional units in the vicinity (#2). Bear in mind that these terrorists are located at the other end of this corridor. I would recommend zooming in the view or using the scope.
![6 - [Mission 11][Part: 1/2] Channel Ferry - Walkthrough - Rainbow Six: Lockdown - Game Guide and Walkthrough](https://game.lhg100.com/Article/UploadFiles/201512/2015121619123550.jpg)
Keep moving forward. There's a large passageway on your right (#1). Go there now. Remember to keep the rest of the team close to your position. You'll receive a new information. It appears that the hostages are being held in a nearby room. Head on to the right path. Lean out carefully and start shooting at visible enemy soldiers (#2). Once they're gone, enter the room with the rest of the team. Deal with the remaining units. It shouldn't be much of a problem.
![7 - [Mission 11][Part: 1/2] Channel Ferry - Walkthrough - Rainbow Six: Lockdown - Game Guide and Walkthrough](https://game.lhg100.com/Article/UploadFiles/201512/2015121619123642.jpg)
![The hostages were being held in a small room, located on your right (#1) - [Mission 11][Part: 1/2] Channel Ferry - Walkthrough - Rainbow Six: Lockdown - Game Guide and Walkthrough](https://game.lhg100.com/Article/UploadFiles/201512/2015121619123684.jpg)
The hostages were being held in a small room, located on your right (#1). You should go there right now. Both civilians must be safely escorted to the extraction zone. Sadly, the landing pad is located on the other side of the ferry, so there's a long walk ahead of you. Head on to the opposite end of this room. There's a small passageway over here (#2). Use the stairs to get to the lower level. I would recommend leaving the rest of the team (including the hostages) behind, mostly because you will have to deal with a lot of heavily armed terrorists.
![8 - [Mission 11][Part: 1/2] Channel Ferry - Walkthrough - Rainbow Six: Lockdown - Game Guide and Walkthrough](https://game.lhg100.com/Article/UploadFiles/201512/2015121619123671.jpg)
![Move on to the right corridor - [Mission 11][Part: 1/2] Channel Ferry - Walkthrough - Rainbow Six: Lockdown - Game Guide and Walkthrough](https://game.lhg100.com/Article/UploadFiles/201512/2015121619123607.jpg)
Move on to the right corridor. You will find yourself in a large cafeteria. This area is being occupied by at least 8-10 terrorists. You will have to deal with most of them on your own. Start off with the nearest soldiers (#1). Be careful, though. Some of them may surprise you from the left flank. Now you should zoom in the view. Deal with the remaining units (#2). Most of the terrorists are stationed on the opposite end of this room. Remember to use walls and pillars for cover.
![9 - [Mission 11][Part: 1/2] Channel Ferry - Walkthrough - Rainbow Six: Lockdown - Game Guide and Walkthrough](https://game.lhg100.com/Article/UploadFiles/201512/2015121619123603.jpg)
![You have to be careful - [Mission 11][Part: 1/2] Channel Ferry - Walkthrough - Rainbow Six: Lockdown - Game Guide and Walkthrough](https://game.lhg100.com/Article/UploadFiles/201512/2015121619123638.jpg)
You have to be careful. Some of the terrorists may go after the rest of your team (#1). Thankfully, your soldiers should deal with them quickly. The last remaining group of terrorists will be located by the bar (#2). You might want to consider throwing a couple of grenades at them. After that, rejoin with the rest of the squad.
![10 - [Mission 11][Part: 1/2] Channel Ferry - Walkthrough - Rainbow Six: Lockdown - Game Guide and Walkthrough](https://game.lhg100.com/Article/UploadFiles/201512/2015121619123648.jpg)
![Head on to the bar area - [Mission 11][Part: 1/2] Channel Ferry - Walkthrough - Rainbow Six: Lockdown - Game Guide and Walkthrough](https://game.lhg100.com/Article/UploadFiles/201512/2015121619123743.jpg)
Head on to the bar area. There's a small door on your right. You have to use it now. You should be able to reach a new passage in a few seconds (#1). Open the door carefully. I would recommend that you lean out. Take out all of the nearby terrorists (#2). Meanwhile, rest of the team should attack them from the right flank. Just make sure to point out where do they to go.
![11 - [Mission 11][Part: 1/2] Channel Ferry - Walkthrough - Rainbow Six: Lockdown - Game Guide and Walkthrough](https://game.lhg100.com/Article/UploadFiles/201512/2015121619123725.jpg)
![Start moving towards the right passageway - [Mission 11][Part: 1/2] Channel Ferry - Walkthrough - Rainbow Six: Lockdown - Game Guide and Walkthrough](https://game.lhg100.com/Article/UploadFiles/201512/2015121619123757.jpg)
Start moving towards the right passageway. BE CAREFUL! Some new terrorists will arrive here shortly (#1). You've got to take them out quickly, especially since they're armed with heavy weapons. Use the stairs to get to the lower level (#2). I would recommend that you leave the rest of the squad behind, mostly because you have a responsibility of protecting the hostages.
![12 - [Mission 11][Part: 1/2] Channel Ferry - Walkthrough - Rainbow Six: Lockdown - Game Guide and Walkthrough](https://game.lhg100.com/Article/UploadFiles/201512/2015121619123778.jpg)
![Once you're there, start off by killing one of the nearby terrorists - [Mission 11][Part: 1/2] Channel Ferry - Walkthrough - Rainbow Six: Lockdown - Game Guide and Walkthrough](https://game.lhg100.com/Article/UploadFiles/201512/2015121619123789.jpg)
Once you're there, start off by killing one of the nearby terrorists. Lean out CAREFULLY and take care of the rest of enemy soldiers (#1). Remember that the team must stay behind. Make sure that the area is clear. Rejoin with the rest of the squad. Head on to the designated landing pad (#2). Wait for the hostages to get here. The first part of this mission will end in a just a few seconds.
![14 - [Mission 11][Part: 1/2] Channel Ferry - Walkthrough - Rainbow Six: Lockdown - Game Guide and Walkthrough](https://game.lhg100.com/Article/UploadFiles/201512/2015121619123853.jpg)
Now you will have to take care of a bomb. The terrorist have planted it in the engine room. You start off near a parking lot (#1). Start moving forward (carefully). There's a junction here. I would recommend that you find a suitable cover. Start shooting at the enemy soldiers (#2). Most of them will be hiding on the other side of the parking lot. The rest of your team should stay behind... at least for now.
![1 - [Mission 11][Part: 2/2] Channel Ferry - Walkthrough - Rainbow Six: Lockdown - Game Guide and Walkthrough](https://game.lhg100.com/Article/UploadFiles/201512/2015121619123870.jpg)
![Try and move closer to the cars (#1) - [Mission 11][Part: 2/2] Channel Ferry - Walkthrough - Rainbow Six: Lockdown - Game Guide and Walkthrough](https://game.lhg100.com/Article/UploadFiles/201512/2015121619123832.jpg)
Try and move closer to the cars (#1). You should know that the parking lot is probably unsafe. You have to be very careful. Some of the terrorists may still be hiding. Make sure you've cleared out the whole area. Head on to the opposite end of the parking lot. Turn around. You should see a door. Enter the new corridor (#2). Use the stairs in order to get to the lower level.
![Enter the new room CAREFULLY - [Mission 11][Part: 2/2] Channel Ferry - Walkthrough - Rainbow Six: Lockdown - Game Guide and Walkthrough](https://game.lhg100.com/Article/UploadFiles/201512/2015121619123855.jpg)
Enter the new room CAREFULLY. Take out a new group of enemy soldiers. Head on to the only possible corridor (#1). Be careful, though. The area is guarded by a large group of terrorists (#2). It would be wise to ask your teammates for help. Make sure you've taken care of all enemy units.
![3 - [Mission 11][Part: 2/2] Channel Ferry - Walkthrough - Rainbow Six: Lockdown - Game Guide and Walkthrough](https://game.lhg100.com/Article/UploadFiles/201512/2015121619123966.jpg)
![You should be able to reach the engine room within a few seconds - [Mission 11][Part: 2/2] Channel Ferry - Walkthrough - Rainbow Six: Lockdown - Game Guide and Walkthrough](https://game.lhg100.com/Article/UploadFiles/201512/2015121619123911.jpg)
You should be able to reach the engine room within a few seconds. Here's where the bomb has been located, however that's not your main concern right now. You will have to take care of all remaining terrorists (#1). Once they're gone (at least most of them), enter the room with the rest of the team. It would be best to let your teammates handle this situation. Meanwhile use the stairs located on your right. Start moving forward (#2).
![4 - [Mission 11][Part: 2/2] Channel Ferry - Walkthrough - Rainbow Six: Lockdown - Game Guide and Walkthrough](https://game.lhg100.com/Article/UploadFiles/201512/2015121619123935.jpg)
![The bomb will be located on your right - [Mission 11][Part: 2/2] Channel Ferry - Walkthrough - Rainbow Six: Lockdown - Game Guide and Walkthrough](https://game.lhg100.com/Article/UploadFiles/201512/2015121619123929.jpg)
The bomb will be located on your right. Step up closer to it and press the use key in order to disarm the device (#1). A short cut-scene will appear on your screen (#2). Sadly, it looks like the bomb can also be detonated remotely. You will have to locate a laptop in order to disable it once and for all. Bear in mind that you will only have FIVE MINUTES to do that. Don't worry. You should be able to locate the laptop in less than 3 minutes... that is, if you hurry. :-)
![5 - [Mission 11][Part: 2/2] Channel Ferry - Walkthrough - Rainbow Six: Lockdown - Game Guide and Walkthrough](https://game.lhg100.com/Article/UploadFiles/201512/2015121619123933.jpg)
The rest of the team should be following you from now on, however don't wait for the soldiers to show up. Instead, start running towards a small entrance, located at the opposite side of the engine room (#1). You should be on the move, if you want to make it to your destination in time. You should be able to reach a small warehouse area in a few seconds (#2). Start shooting at visible enemy soldiers. DON'T STOP here. You have to keep pushing forward.
![6 - [Mission 11][Part: 2/2] Channel Ferry - Walkthrough - Rainbow Six: Lockdown - Game Guide and Walkthrough](https://game.lhg100.com/Article/UploadFiles/201512/2015121619124047.jpg)
![There are some passageways leading to the next sections of the map (#1) - [Mission 11][Part: 2/2] Channel Ferry - Walkthrough - Rainbow Six: Lockdown - Game Guide and Walkthrough](https://game.lhg100.com/Article/UploadFiles/201512/2015121619124021.jpg)
There are some passageways leading to the next sections of the map (#1). You shouldn't have any problems finding them. You have to be careful, though. Some of the terrorists may still be hiding. Don't let them surprise you. There's a hatch leading to a new warehouse (#2). Gather your team around it.
![7 - [Mission 11][Part: 2/2] Channel Ferry - Walkthrough - Rainbow Six: Lockdown - Game Guide and Walkthrough](https://game.lhg100.com/Article/UploadFiles/201512/2015121619124012.jpg)
![Get ready - [Mission 11][Part: 2/2] Channel Ferry - Walkthrough - Rainbow Six: Lockdown - Game Guide and Walkthrough](https://game.lhg100.com/Article/UploadFiles/201512/2015121619124090.jpg)
Get ready. You will take part in one of the most difficult fights of this mission. The objective is to reach the opposite exit of a nearby room (#1). You will have to deal with several terrorist along the way, including the one who's hiding on your left. I would recommend using some of the carried grenades. You should also ask your teammates for help. Once you're there, start shooting at the rest of the soldiers (#2). Most of them will be standing on your left. Don't give them ANY chance to fight back!!
![8 - [Mission 11][Part: 2/2] Channel Ferry - Walkthrough - Rainbow Six: Lockdown - Game Guide and Walkthrough](https://game.lhg100.com/Article/UploadFiles/201512/2015121619124097.jpg)
![Keep pushing towards your current objective - [Mission 11][Part: 2/2] Channel Ferry - Walkthrough - Rainbow Six: Lockdown - Game Guide and Walkthrough](https://game.lhg100.com/Article/UploadFiles/201512/2015121619124037.jpg)
Keep pushing towards your current objective. I don't have to remind you to be very careful. You will be encountering additional forces along the way (#1). It would be best to let the rest of the team take part in these fights. Watch out for a single sniper, hiding on the left balcony. Head on to a nearby room (#2). It's being guarded by a single enemy soldier. Dispose of him quickly.
![9 - [Mission 11][Part: 2/2] Channel Ferry - Walkthrough - Rainbow Six: Lockdown - Game Guide and Walkthrough](https://game.lhg100.com/Article/UploadFiles/201512/2015121619124175.jpg)
![The laptop is hidden behind big crates (#1) - [Mission 11][Part: 2/2] Channel Ferry - Walkthrough - Rainbow Six: Lockdown - Game Guide and Walkthrough](https://game.lhg100.com/Article/UploadFiles/201512/2015121619124132.jpg)
The laptop is hidden behind big crates (#1). Thankfully, you won't have to kill anyone else. Use it in order to disable the bomb. A short cut-scene will appear shortly (#2). That's it for this mission.
![10 - [Mission 11][Part: 2/2] Channel Ferry - Walkthrough - Rainbow Six: Lockdown - Game Guide and Walkthrough](https://game.lhg100.com/Article/UploadFiles/201512/2015121619124179.jpg)
![11 - [Mission 11][Part: 2/2] Channel Ferry - Walkthrough - Rainbow Six: Lockdown - Game Guide and Walkthrough](https://game.lhg100.com/Article/UploadFiles/201512/2015121619124116.jpg)
Threats: Most of the terrorists will be equipped with heavy machine guns (or shotguns) and bulletproof vests. As a result, you've got two alternatives. You can either take a heavy machine gun with you, or pick one of the standard weapons and concentrate most of your efforts on scoring headshots. Furthermore, you will have to protect an important civilian and escort him back to the extraction point.
Objectives: You will have to go Marseilles in order to capture one of the terrorists - a man named Yezhov. He wants to cooporate with the authorities, in exchange for a safe extraction from the location.
You start off in a small room. There aren't any enemy units here, so you may as well prepare for the mission. You've probably noticed by now that your team is much smaller this time. As a result, you will be giving orders to only one man. Head on to the nearest door (#1). Open it. Be VERY careful. There are a lot of enemy units nearby (#2). I would recommend leaning out a lot. Don't waste any grenades on them. You'll need these objects in the future.
![1 - [Mission 12][Part: 1/2] Marseilles - Walkthrough - Rainbow Six: Lockdown - Game Guide and Walkthrough](https://game.lhg100.com/Article/UploadFiles/201512/2015121619124219.jpg)
![You should be able to reach a large warehouse area in a few seconds - [Mission 12][Part: 1/2] Marseilles - Walkthrough - Rainbow Six: Lockdown - Game Guide and Walkthrough](https://game.lhg100.com/Article/UploadFiles/201512/2015121619124224.jpg)
You should be able to reach a large warehouse area in a few seconds. Start off by killing a guy who was standing on a balcony (#1). Once he's down, take care of the remaining terrorist units (#2). Don't get to close to the railing, or you might get shot. You probably won't have problems with these terrorists.
![2 - [Mission 12][Part: 1/2] Marseilles - Walkthrough - Rainbow Six: Lockdown - Game Guide and Walkthrough](https://game.lhg100.com/Article/UploadFiles/201512/2015121619124201.jpg)
![Use the nearby stairs to get down to the lower floor - [Mission 12][Part: 1/2] Marseilles - Walkthrough - Rainbow Six: Lockdown - Game Guide and Walkthrough](https://game.lhg100.com/Article/UploadFiles/201512/2015121619124200.jpg)
Use the nearby stairs to get down to the lower floor. There aren't any new enemies in this area, so you might as well start running towards the opposite exit (#1). Before you decide to move any further, make sure you've reloaded your weapon. Lean out CAREFULLY. There are some new terrorists in a distance (#2). It would be wise to kill them right now. After that, start moving forward.
![3 - [Mission 12][Part: 1/2] Marseilles - Walkthrough - Rainbow Six: Lockdown - Game Guide and Walkthrough](https://game.lhg100.com/Article/UploadFiles/201512/2015121619124298.jpg)
![You have to reach the opposite end of this alley - [Mission 12][Part: 1/2] Marseilles - Walkthrough - Rainbow Six: Lockdown - Game Guide and Walkthrough](https://game.lhg100.com/Article/UploadFiles/201512/2015121619124230.jpg)
You have to reach the opposite end of this alley. Turn right. Enter a new building. Be careful! The entrance is going to be guarded by one of the terrorists (#1). He will be hiding, so you probably won't notice him at first glance. Start moving towards the exit. There are some new terrorists on your left (#2). Headshots are most welcome here...
![4 - [Mission 12][Part: 1/2] Marseilles - Walkthrough - Rainbow Six: Lockdown - Game Guide and Walkthrough](https://game.lhg100.com/Article/UploadFiles/201512/2015121619124312.jpg)
![It would be best if you had taken down one of the snipers - [Mission 12][Part: 1/2] Marseilles - Walkthrough - Rainbow Six: Lockdown - Game Guide and Walkthrough](https://game.lhg100.com/Article/UploadFiles/201512/2015121619124303.jpg)
It would be best if you had taken down one of the snipers. He is located on the roof of the right building (#1). Once he's gone, start moving forward. You will be attacked by a group of enemy troops (#2). Remember to use large objects for extra cover. It would also be wise to ask your teammate for help. Make sure everyone's dead before moving on.
![5 - [Mission 12][Part: 1/2] Marseilles - Walkthrough - Rainbow Six: Lockdown - Game Guide and Walkthrough](https://game.lhg100.com/Article/UploadFiles/201512/2015121619124320.jpg)
![You might want to consider looking everywhere - [Mission 12][Part: 1/2] Marseilles - Walkthrough - Rainbow Six: Lockdown - Game Guide and Walkthrough](https://game.lhg100.com/Article/UploadFiles/201512/2015121619124315.jpg)
You might want to consider looking everywhere. That way, terrorists won't be able to surprise you in the future. Head on to the right alley (#1). There are some stairs over here. Keep moving forward. You won't encounter any new units at the moment. Terrorists will appear once you've reached a small passageway (#2). I would recommend leaning out a lot. Thanks to that, you should be able to get rid of them without any serious problems.
![6 - [Mission 12][Part: 1/2] Marseilles - Walkthrough - Rainbow Six: Lockdown - Game Guide and Walkthrough](https://game.lhg100.com/Article/UploadFiles/201512/2015121619124336.jpg)
![I would recommend that you use your scope in order to get rid off the remaining opponents (#1) - [Mission 12][Part: 1/2] Marseilles - Walkthrough - Rainbow Six: Lockdown - Game Guide and Walkthrough](https://game.lhg100.com/Article/UploadFiles/201512/2015121619124413.jpg)
I would recommend that you use your scope in order to get rid off the remaining opponents (#1). Most of them will be standing by the trashcan. Start moving towards the next building. You have to be VERY careful. New enemies will appear on a nearby staircase (#2). Start shooting at them. Remember to aim at the heads of the terrorist units. You have to be quick about it, so they won't have a chance to fight back.
![7 - [Mission 12][Part: 1/2] Marseilles - Walkthrough - Rainbow Six: Lockdown - Game Guide and Walkthrough](https://game.lhg100.com/Article/UploadFiles/201512/2015121619124435.jpg)
![Head on to the left side of the building - [Mission 12][Part: 1/2] Marseilles - Walkthrough - Rainbow Six: Lockdown - Game Guide and Walkthrough](https://game.lhg100.com/Article/UploadFiles/201512/2015121619124491.jpg)
Head on to the left side of the building. Use the stairs. There's a small passageway that's leading to the building itself (#1). Go there now. Be careful, though. There are some new terrorists in the vicinity (#2). You might want to consider throwing a couple of grenades at them. Alternatively, you could try leaning out. There are also many large objects that can be used as cover. Make sure you've secured the whole area, before you decide to move on.
![8 - [Mission 12][Part: 1/2] Marseilles - Walkthrough - Rainbow Six: Lockdown - Game Guide and Walkthrough](https://game.lhg100.com/Article/UploadFiles/201512/2015121619124462.jpg)
![You should be able to reach an occupied night club in a few seconds - [Mission 12][Part: 1/2] Marseilles - Walkthrough - Rainbow Six: Lockdown - Game Guide and Walkthrough](https://game.lhg100.com/Article/UploadFiles/201512/2015121619124487.jpg)
You should be able to reach an occupied night club in a few seconds. Start off by killing some of the nearby terrorists (#1). Now it would be best to storm the place with your teammate. If you're lucky, you will have to eliminate only one more opponent. Head on to the right corridor (#2). It leads to the next section of this map. Make sure you've reloaded your weapon!!
![9 - [Mission 12][Part: 1/2] Marseilles - Walkthrough - Rainbow Six: Lockdown - Game Guide and Walkthrough](https://game.lhg100.com/Article/UploadFiles/201512/2015121619124582.jpg)
![The first terrorist is going to be located on your left (#1) - [Mission 12][Part: 1/2] Marseilles - Walkthrough - Rainbow Six: Lockdown - Game Guide and Walkthrough](https://game.lhg100.com/Article/UploadFiles/201512/2015121619124523.jpg)
The first terrorist is going to be located on your left (#1). He's hiding in a small room. You have to take him out quickly. Headshots are most welcome in these type of situations. You'll probably have some problems with new soldiers hiding in the right corridor (#2). Use your grenades... that is, if you have some of them left. After that, kill all of the remaining terrorists. You may continue moving towards the main objective.
![One of the terrorists may have escaped you - [Mission 12][Part: 1/2] Marseilles - Walkthrough - Rainbow Six: Lockdown - Game Guide and Walkthrough](https://game.lhg100.com/Article/UploadFiles/201512/2015121619124502.jpg)
One of the terrorists may have escaped you. In this case, he would be hiding on a staircase (#1). Finish him off quickly. Use the stairs to get to the upper floor. You should be able to reach a ladder very soon (#2). Use it. Once you're there, wait for the other team member to join you. I would recommend ordering him to stay here.
![11 - [Mission 12][Part: 1/2] Marseilles - Walkthrough - Rainbow Six: Lockdown - Game Guide and Walkthrough](https://game.lhg100.com/Article/UploadFiles/201512/2015121619124574.jpg)
![Lean out carefully - [Mission 12][Part: 1/2] Marseilles - Walkthrough - Rainbow Six: Lockdown - Game Guide and Walkthrough](https://game.lhg100.com/Article/UploadFiles/201512/2015121619124539.jpg)
Lean out carefully. You have to take out a single enemy sniper (#1). He will be standing on a roof of an opposite building. You may proceed to the next area. Get closer to a new ladder. DON'T USE IT just yet! There are some terrorists on the lower levels. Start off by killing one on the right (#2). You have to be quick about it. Otherwise he would have shot you.
![12 - [Mission 12][Part: 1/2] Marseilles - Walkthrough - Rainbow Six: Lockdown - Game Guide and Walkthrough](https://game.lhg100.com/Article/UploadFiles/201512/2015121619124662.jpg)
![It's not over yet - [Mission 12][Part: 1/2] Marseilles - Walkthrough - Rainbow Six: Lockdown - Game Guide and Walkthrough](https://game.lhg100.com/Article/UploadFiles/201512/2015121619124695.jpg)
It's not over yet! There's a second terrorist. He's hiding on your left. You've got two choices. You can either throw a couple of grenades at him or wait for him to use the ladder (#1). If he decides to do that - KILL HIM. :-) Make sure that both terrorists are gone. Use the ladder (#2). Just as before, you should wait for the other crew member to get here.
![13 - [Mission 12][Part: 1/2] Marseilles - Walkthrough - Rainbow Six: Lockdown - Game Guide and Walkthrough](https://game.lhg100.com/Article/UploadFiles/201512/2015121619124694.jpg)
![You should be able to reach a new ladder very soon - [Mission 12][Part: 1/2] Marseilles - Walkthrough - Rainbow Six: Lockdown - Game Guide and Walkthrough](https://game.lhg100.com/Article/UploadFiles/201512/2015121619124637.jpg)
You should be able to reach a new ladder very soon. There's a single terrorist on the lower level, so you must kill him first. I would recommend throwing a grenade at him. Make sure that the blast killed him!! Once you're done, use the ladder to get down to the ground floor (#1). Start moving forward. You shouldn't encounter any new terrorists along the way. Head on to the designated area (#2) in order to end first part of this mission.
![14 - [Mission 12][Part: 1/2] Marseilles - Walkthrough - Rainbow Six: Lockdown - Game Guide and Walkthrough](https://game.lhg100.com/Article/UploadFiles/201512/2015121619124627.jpg)
![15 - [Mission 12][Part: 1/2] Marseilles - Walkthrough - Rainbow Six: Lockdown - Game Guide and Walkthrough](https://game.lhg100.com/Article/UploadFiles/201512/2015121619124692.jpg)
You start off in a small room. Head on to a nearby door. Open it carefully. There are some terrorists in the next room. Start shooting at them (#1). Remember to aim at their heads. Make sure you've killed all hostile units. Yezhov was being held in this room. He may join your team now (#2). You will have to escort him to the extraction site. I guess I don't have to remind you that he can't get shot. Otherwise you would have failed the mission.
![1 - [Mission 12][Part: 2/2] Marseilles - Walkthrough - Rainbow Six: Lockdown - Game Guide and Walkthrough](https://game.lhg100.com/Article/UploadFiles/201512/2015121619124757.jpg)
![Head on to the nearby stairs (#1) - [Mission 12][Part: 2/2] Marseilles - Walkthrough - Rainbow Six: Lockdown - Game Guide and Walkthrough](https://game.lhg100.com/Article/UploadFiles/201512/2015121619124792.jpg)
Head on to the nearby stairs (#1). You should be able to reach a small marketplace area within a few seconds. DON'T shoot at the innocent civilians!! Their deaths would have jeopardized the whole mission. I would also recommend that you leave the rest of the team (including Yezhov) behind. Head on to the right wall. Start moving forward. You should be able to spot one of the first groups very soon (#2). Make sure you don't hit anyone else. You should also aim at the heads of your opponents.
![2 - [Mission 12][Part: 2/2] Marseilles - Walkthrough - Rainbow Six: Lockdown - Game Guide and Walkthrough](https://game.lhg100.com/Article/UploadFiles/201512/2015121619124785.jpg)
![The second group of terrorists will be located on your left (#1) - [Mission 12][Part: 2/2] Marseilles - Walkthrough - Rainbow Six: Lockdown - Game Guide and Walkthrough](https://game.lhg100.com/Article/UploadFiles/201512/2015121619124756.jpg)
The second group of terrorists will be located on your left (#1). Some of them will be hiding, so you must be very careful. Take your time and aim at the heads of the terrorists. Don't let any of them surprise you. The rest of the team may join you for a few seconds. Star moving towards the exit. You should be able to reach a small alley very shortly (#2). Leave the rest of the team behind. You should also reload your weapon.
![3 - [Mission 12][Part: 2/2] Marseilles - Walkthrough - Rainbow Six: Lockdown - Game Guide and Walkthrough](https://game.lhg100.com/Article/UploadFiles/201512/2015121619124771.jpg)
![Try getting closer to the entrance leading to a new building - [Mission 12][Part: 2/2] Marseilles - Walkthrough - Rainbow Six: Lockdown - Game Guide and Walkthrough](https://game.lhg100.com/Article/UploadFiles/201512/2015121619124889.jpg)
Try getting closer to the entrance leading to a new building. There's going to be an explosion. Furthermore, new terrorists will appear in the area. Move back to the previous corridor and start shooting at them from the distance (#1). Thankfully, you should be able to score at least a few headshots. Make sure you've killed all terrorists. Head on to the new building with the rest of the team. You will find a new door here (#2). Before you decide to open it, make sure everyone's ready. I would also recommend that you leave Yezhov behind.
![4 - [Mission 12][Part: 2/2] Marseilles - Walkthrough - Rainbow Six: Lockdown - Game Guide and Walkthrough](https://game.lhg100.com/Article/UploadFiles/201512/2015121619124833.jpg)
![Open the door CAREFULLY - [Mission 12][Part: 2/2] Marseilles - Walkthrough - Rainbow Six: Lockdown - Game Guide and Walkthrough](https://game.lhg100.com/Article/UploadFiles/201512/2015121619124811.jpg)
Open the door CAREFULLY. The area is crawling with enemy troops (#1). You have to be careful, though. There are also some civilians here. If you're lucky, you should be able to surprise most of the terrorists. One of them will be hiding amongst cars (#2).
![5 - [Mission 12][Part: 2/2] Marseilles - Walkthrough - Rainbow Six: Lockdown - Game Guide and Walkthrough](https://game.lhg100.com/Article/UploadFiles/201512/2015121619124852.jpg)
![You should be able to take out most of the terrorists on your own - [Mission 12][Part: 2/2] Marseilles - Walkthrough - Rainbow Six: Lockdown - Game Guide and Walkthrough](https://game.lhg100.com/Article/UploadFiles/201512/2015121619124880.jpg)
You should be able to take out most of the terrorists on your own. Your teammate may join you now (#1). Nevertheless, you must be very careful. Some of the terrorists may still be hiding. Be sure to check the whole area! Start heading towards a nearby alley (#2). You will have to deal with few additional units. After that, rejoin with the rest of the team (including escorted Yezhov).
![6 - [Mission 12][Part: 2/2] Marseilles - Walkthrough - Rainbow Six: Lockdown - Game Guide and Walkthrough](https://game.lhg100.com/Article/UploadFiles/201512/2015121619124883.jpg)
![In order to reach the extraction zone you will have to enter a new building (#1) - [Mission 12][Part: 2/2] Marseilles - Walkthrough - Rainbow Six: Lockdown - Game Guide and Walkthrough](https://game.lhg100.com/Article/UploadFiles/201512/2015121619124989.jpg)
In order to reach the extraction zone you will have to enter a new building (#1). Thankfully, there aren't any soldiers inside, so you don't have to worry about that. Exit the building. You will come across a large group of terrorists (#2). Start shooting at the nearby soldiers, mostly because they pose a serious threat. You could also start throwing grenades at them, especially since you won't need them in the future.
![7 - [Mission 12][Part: 2/2] Marseilles - Walkthrough - Rainbow Six: Lockdown - Game Guide and Walkthrough](https://game.lhg100.com/Article/UploadFiles/201512/2015121619124912.jpg)
![Remember to leave the rest of the team behind - [Mission 12][Part: 2/2] Marseilles - Walkthrough - Rainbow Six: Lockdown - Game Guide and Walkthrough](https://game.lhg100.com/Article/UploadFiles/201512/2015121619124987.jpg)
Remember to leave the rest of the team behind! You will have to clear out the whole area on your own. Start moving towards the opposite end of this alley. Be sure to take care of the remaining units along the way (#1). That's not all. The opposite building is going to be guarded by at least 5-6 additional soldiers. I would recommend using the scope to take out most of them from a safe distance (#2).
![8 - [Mission 12][Part: 2/2] Marseilles - Walkthrough - Rainbow Six: Lockdown - Game Guide and Walkthrough](https://game.lhg100.com/Article/UploadFiles/201512/2015121619124927.jpg)
![Keep moving forward - [Mission 12][Part: 2/2] Marseilles - Walkthrough - Rainbow Six: Lockdown - Game Guide and Walkthrough](https://game.lhg100.com/Article/UploadFiles/201512/2015121619124995.jpg)
Keep moving forward. You have to be very careful. There's a guy with a rocket launcher on your left (#1)!! You MUST take care of him quickly, before he sees you. This is VERY important. There's also a single sniper on the left balcony (#2). You should also take care of this problem. Since there are no additional units nearby, the rest of the team may join you now.
![9 - [Mission 12][Part: 2/2] Marseilles - Walkthrough - Rainbow Six: Lockdown - Game Guide and Walkthrough](https://game.lhg100.com/Article/UploadFiles/201512/2015121619124974.jpg)
![Use the nearby stairs - [Mission 12][Part: 2/2] Marseilles - Walkthrough - Rainbow Six: Lockdown - Game Guide and Walkthrough](https://game.lhg100.com/Article/UploadFiles/201512/2015121619125029.jpg)
Use the nearby stairs. Start heading towards the main building. The entrance will be located on your left (#1). Use the stairs to get to the upper floor. There's a single terrorist here. Dispose of him quickly. Enter the room located on your right. It's going to be guarded by two additional soldiers (#2). Thankfully, you should be able to surprise at least one of them.
![10 - [Mission 12][Part: 2/2] Marseilles - Walkthrough - Rainbow Six: Lockdown - Game Guide and Walkthrough](https://game.lhg100.com/Article/UploadFiles/201512/2015121619125007.jpg)
![Step up closer to the designated zone - [Mission 12][Part: 2/2] Marseilles - Walkthrough - Rainbow Six: Lockdown - Game Guide and Walkthrough](https://game.lhg100.com/Article/UploadFiles/201512/2015121619125075.jpg)
Step up closer to the designated zone. You will receive new objectives in a few seconds. An allied chopper is on its way. You will have to defend this area against terrorist attacks. Order your teammate to stay here (#1). He should already be standing by one of the windows, so he'll probably help you. The enemies will be coming from a nearby alley (#2). You CAN'T let them get closer to the occupied building! Once you've dealt with the first wave, be sure to reload your weapon.
![11 - [Mission 12][Part: 2/2] Marseilles - Walkthrough - Rainbow Six: Lockdown - Game Guide and Walkthrough](https://game.lhg100.com/Article/UploadFiles/201512/2015121619125078.jpg)
![You will have to deal with at least 2-3 additional waves - [Mission 12][Part: 2/2] Marseilles - Walkthrough - Rainbow Six: Lockdown - Game Guide and Walkthrough](https://game.lhg100.com/Article/UploadFiles/201512/2015121619125137.jpg)
You will have to deal with at least 2-3 additional waves. There's also a single sniper standing on a roof of the right building (#1). You should take him out as soon as possible. Some of the terrorists will probably get closer to the building. Use the stairs to get back to the ground floor. Stand by one of the windows and start shooting at the visible terrorists (#2). You might also consider throwing all of the remaining grenades at them.
![12 - [Mission 12][Part: 2/2] Marseilles - Walkthrough - Rainbow Six: Lockdown - Game Guide and Walkthrough](https://game.lhg100.com/Article/UploadFiles/201512/2015121619125165.jpg)
![An allied chooper should arrive here shortly (#1) - [Mission 12][Part: 2/2] Marseilles - Walkthrough - Rainbow Six: Lockdown - Game Guide and Walkthrough](https://game.lhg100.com/Article/UploadFiles/201512/2015121619125108.jpg)
An allied chooper should arrive here shortly (#1). You might want to observe its attacks, however this can be a little risky. Thankfully, you won't have to do anything else. This is the end of this mission (#2).
![13 - [Mission 12][Part: 2/2] Marseilles - Walkthrough - Rainbow Six: Lockdown - Game Guide and Walkthrough](https://game.lhg100.com/Article/UploadFiles/201512/2015121619125174.jpg)
![14 - [Mission 12][Part: 2/2] Marseilles - Walkthrough - Rainbow Six: Lockdown - Game Guide and Walkthrough](https://game.lhg100.com/Article/UploadFiles/201512/2015121619125272.jpg)
Threats: Thankfully, most of the terrorists won't be heavily equipped. This doesn't mean that the mission is going to be very simple. There's going to be a lot of small rooms along the way. You have to check them out. Otherwise the opponents would have probably surprised you in the future. You will also have to escort a small group of hostages back to safety.
Objectives: There are two main objectives. During the first part of the mission you will have to locate and neutralize a Legion bomb. The second part, on the other hand, will require you to save some hostages that are being held by the terrorists.
This is a very short mission, although it can be pretty challenging, especially when you're in a hurry. Start moving forward. Open a nearby door carefully. There are some terrorists in the next room. You have to take them out quickly (#1). Order to the rest of your team to stay here. Turn left. You will have to disable a security camera (#2). Thankfully, you should know exactly what has to be done. After that, rejoin with the rest of the squad.
![1 - [Mission 13][Part: 1/2] NATO Summit - Walkthrough - Rainbow Six: Lockdown - Game Guide and Walkthrough](https://game.lhg100.com/Article/UploadFiles/201512/2015121619125262.jpg)
![Turn right - [Mission 13][Part: 1/2] NATO Summit - Walkthrough - Rainbow Six: Lockdown - Game Guide and Walkthrough](https://game.lhg100.com/Article/UploadFiles/201512/2015121619125205.jpg)
Turn right. I would recommend waiting for the new group of enemy soldiers to get here (#1). It shouldn't take them too long. Remember to use desks and pillars for much needed cover. Once the enemies are gone, step up to the main desk. There's a glowing button on the left side of it (#2). Press it. Thanks to that, you will deactivate all of the remaining cameras.
![2 - [Mission 13][Part: 1/2] NATO Summit - Walkthrough - Rainbow Six: Lockdown - Game Guide and Walkthrough](https://game.lhg100.com/Article/UploadFiles/201512/2015121619125254.jpg)
![Head on to the nearest corridor (#1) - [Mission 13][Part: 1/2] NATO Summit - Walkthrough - Rainbow Six: Lockdown - Game Guide and Walkthrough](https://game.lhg100.com/Article/UploadFiles/201512/2015121619125293.jpg)
Head on to the nearest corridor (#1). You should stick to the right wall. Thanks to that, you will reach the next section of the complex very soon. There's a neutralized camera over here. You won't have to worry about that anymore. Be careful, though. The area is being guarded by a small group of enemy soldiers (#2). I would recommend using your scope (or zooming in the view) to get rid of them more efficiently.
![3 - [Mission 13][Part: 1/2] NATO Summit - Walkthrough - Rainbow Six: Lockdown - Game Guide and Walkthrough](https://game.lhg100.com/Article/UploadFiles/201512/2015121619125393.jpg)
![Keep moving forward - [Mission 13][Part: 1/2] NATO Summit - Walkthrough - Rainbow Six: Lockdown - Game Guide and Walkthrough](https://game.lhg100.com/Article/UploadFiles/201512/2015121619125359.jpg)
Keep moving forward. You will be encountering some terrorists along the way. Once you've reached a new room, head on to the right corridor. Make sure you've taken care of the nearby hostiles (#1). You should be able to reach a locked door within a few seconds (#2). Pick the lock in order to proceed further. I would also recommend gathering the rest of the team around you.
![4 - [Mission 13][Part: 1/2] NATO Summit - Walkthrough - Rainbow Six: Lockdown - Game Guide and Walkthrough](https://game.lhg100.com/Article/UploadFiles/201512/2015121619125327.jpg)
![You should be getting closer to the main security station - [Mission 13][Part: 1/2] NATO Summit - Walkthrough - Rainbow Six: Lockdown - Game Guide and Walkthrough](https://game.lhg100.com/Article/UploadFiles/201512/2015121619125314.jpg)
You should be getting closer to the main security station. Start off by killing all of the nearby terrorists (#1). If you're fast enough, you should be able to surprise them. Remember to aim at their heads, so you wouldn't have to worry about finishing them off. Start moving towards the central area of this room. You have to be very careful. Turn left. Shoot through the glass in order to kill one of the terrorists (#2). Bear in mind that the first bullet will only brake the glass!
![5 - [Mission 13][Part: 1/2] NATO Summit - Walkthrough - Rainbow Six: Lockdown - Game Guide and Walkthrough](https://game.lhg100.com/Article/UploadFiles/201512/2015121619125329.jpg)
![The second room is going to be located by the left wall (#1) - [Mission 13][Part: 1/2] NATO Summit - Walkthrough - Rainbow Six: Lockdown - Game Guide and Walkthrough](https://game.lhg100.com/Article/UploadFiles/201512/2015121619125374.jpg)
The second room is going to be located by the left wall (#1). I would recommend letting your teammates handle this situation. They will eliminate all of the remaining terrorists. Head on to the only possible corridor. It's located on the left side of the big screen. You will come across at least one additional terrorist (#2). Take care of this small problem.
![You should be able to reach a new door within a few seconds (#1) - [Mission 13][Part: 1/2] NATO Summit - Walkthrough - Rainbow Six: Lockdown - Game Guide and Walkthrough](https://game.lhg100.com/Article/UploadFiles/201512/2015121619125409.jpg)
You should be able to reach a new door within a few seconds (#1). Wait for the other crew members to get here. You should also reload your weapon. Open the door. Move up closer to the stairs and start shooting at the visible enemy soldiers (#2). You shouldn't have ANY problems with them, especially since they can't aim at you properly. You could even try and score a few headshots, if you want to. :-)
![7 - [Mission 13][Part: 1/2] NATO Summit - Walkthrough - Rainbow Six: Lockdown - Game Guide and Walkthrough](https://game.lhg100.com/Article/UploadFiles/201512/2015121619125441.jpg)
![Make a few steps forward - [Mission 13][Part: 1/2] NATO Summit - Walkthrough - Rainbow Six: Lockdown - Game Guide and Walkthrough](https://game.lhg100.com/Article/UploadFiles/201512/2015121619125498.jpg)
Make a few steps forward. Now you will have to deal with the remaining terrorists. Most of them will be standing by the stairs (#1). You could also send your teammates to this location. They should deal with this problem within a few seconds. Start moving forward. There's a laptop over here (#2). You will have to use it.
![8 - [Mission 13][Part: 1/2] NATO Summit - Walkthrough - Rainbow Six: Lockdown - Game Guide and Walkthrough](https://game.lhg100.com/Article/UploadFiles/201512/2015121619125496.jpg)
![Turn around - [Mission 13][Part: 1/2] NATO Summit - Walkthrough - Rainbow Six: Lockdown - Game Guide and Walkthrough](https://game.lhg100.com/Article/UploadFiles/201512/2015121619125449.jpg)
Turn around. You will probably notice a small passageway that's located beneath the stairs. You will have to go there now. Be careful, though. This area is being guarded by at least two additional terrorists (#1). I would recommend taking them out from a distance. Start moving forward. Use the stairs to get to the lower floor. Open a nearby door. You should be able to surprise one of the terrorists (#2). He was guarding a nearby corridor.
![9 - [Mission 13][Part: 1/2] NATO Summit - Walkthrough - Rainbow Six: Lockdown - Game Guide and Walkthrough](https://game.lhg100.com/Article/UploadFiles/201512/2015121619125455.jpg)
![You should be able to reach one of the main rooms of the complex very soon - [Mission 13][Part: 1/2] NATO Summit - Walkthrough - Rainbow Six: Lockdown - Game Guide and Walkthrough](https://game.lhg100.com/Article/UploadFiles/201512/2015121619125452.jpg)
You should be able to reach one of the main rooms of the complex very soon. That's where the bomb has been placed. Start off by killing most of the nearby terrorists. I would recommend throwing grenades at the passageways, located on your left and right (#1). Order your teammates to storm the place. Turn right. There are two additional terrorist over here (#2). Get rid of them quickly. After that, rejoin with the rest of the squad.
![10 - [Mission 13][Part: 1/2] NATO Summit - Walkthrough - Rainbow Six: Lockdown - Game Guide and Walkthrough](https://game.lhg100.com/Article/UploadFiles/201512/2015121619125590.jpg)
![You have to make sure that the area is clear - [Mission 13][Part: 1/2] NATO Summit - Walkthrough - Rainbow Six: Lockdown - Game Guide and Walkthrough](https://game.lhg100.com/Article/UploadFiles/201512/2015121619125538.jpg)
You have to make sure that the area is clear. Thankfully, your teammates probably took care of that problem. Use the laptop (#1) in order to disarm the bomb. New objectives will appear on your screen shortly. You will have to rescue a group of hostages. They are being held in a different section of the complex. Start heading towards the designated area (#2). Once you're there, wait for the new map to load itself.
![11 - [Mission 13][Part: 1/2] NATO Summit - Walkthrough - Rainbow Six: Lockdown - Game Guide and Walkthrough](https://game.lhg100.com/Article/UploadFiles/201512/2015121619125540.jpg)
![12 - [Mission 13][Part: 1/2] NATO Summit - Walkthrough - Rainbow Six: Lockdown - Game Guide and Walkthrough](https://game.lhg100.com/Article/UploadFiles/201512/2015121619125560.jpg)
Get ready. There are some challenging fights ahead of you. Start moving forward (#1). Don't use the nearby stairs just yet. One of the terrorists will arrive here shortly. You have to take care of him. Now it would be best if you let the rest of the team do their jobs. Once most of the terrorists are gone, start moving towards the upper level. Turn around and throw a couple of grenades to there (#2). Make sure that they will all land on the upper level.
![1 - [Mission 13][Part: 2/2] NATO Summit - Walkthrough - Rainbow Six: Lockdown - Game Guide and Walkthrough](https://game.lhg100.com/Article/UploadFiles/201512/2015121619125535.jpg)
![Wait for the explosions to occur - [Mission 13][Part: 2/2] NATO Summit - Walkthrough - Rainbow Six: Lockdown - Game Guide and Walkthrough](https://game.lhg100.com/Article/UploadFiles/201512/2015121619125563.jpg)
Wait for the explosions to occur. Start moving towards the upper level. The rest of the team should be following your lead. Take care of the remaining terrorists (#1). Thankfully, most of them died as a result of the explosions. Proceed to a nearby corridor. You will come across a small door. Enter this room It's being guarded by two enemy soldiers (#2). You HAVE to kill them. Otherwise they would have attacked your team in the future. While you're at it, you should also check a second room. It's been located nearby.
![2 - [Mission 13][Part: 2/2] NATO Summit - Walkthrough - Rainbow Six: Lockdown - Game Guide and Walkthrough](https://game.lhg100.com/Article/UploadFiles/201512/2015121619125602.jpg)
There's a single terrorist at the opposite end of this corridor. I would recommend that you use the scope in order to get rid of him swiftly (#1). Keep moving forward. You should be able to reach a junction in a few seconds. Turn right. Start off by killing a single terrorist. That's not all. More enemies will appear on your right (#2). You have to be ready for this attack. Kill them quickly.
![3 - [Mission 13][Part: 2/2] NATO Summit - Walkthrough - Rainbow Six: Lockdown - Game Guide and Walkthrough](https://game.lhg100.com/Article/UploadFiles/201512/2015121619125603.jpg)
![Head on to the left door - [Mission 13][Part: 2/2] NATO Summit - Walkthrough - Rainbow Six: Lockdown - Game Guide and Walkthrough](https://game.lhg100.com/Article/UploadFiles/201512/2015121619125670.jpg)
Head on to the left door. Open it. There's a new door on your right (#1). Gather your team around it. The hostages are being held in that room, so you must be careful. Open the door and start shooting at the visible enemy soldiers (#2). Thankfully, they won't be wearing any bulletproof vests, so you don't have to aim at their heads. Enter the room with a whole team.
![4 - [Mission 13][Part: 2/2] NATO Summit - Walkthrough - Rainbow Six: Lockdown - Game Guide and Walkthrough](https://game.lhg100.com/Article/UploadFiles/201512/2015121619125656.jpg)
![You may approach the civilian hostages now (#1) - [Mission 13][Part: 2/2] NATO Summit - Walkthrough - Rainbow Six: Lockdown - Game Guide and Walkthrough](https://game.lhg100.com/Article/UploadFiles/201512/2015121619125742.jpg)
You may approach the civilian hostages now (#1). They must join your team in order to escort them to the extraction zone. It's going to be located on the roof, so there's a long walk ahead of you. Exit the room and return to the junction. Head on to the unexplored LEFT corridor (#2). Make sure that are everyone are following your lead.
![5 - [Mission 13][Part: 2/2] NATO Summit - Walkthrough - Rainbow Six: Lockdown - Game Guide and Walkthrough](https://game.lhg100.com/Article/UploadFiles/201512/2015121619125715.jpg)
![There are some additional rooms nearby - [Mission 13][Part: 2/2] NATO Summit - Walkthrough - Rainbow Six: Lockdown - Game Guide and Walkthrough](https://game.lhg100.com/Article/UploadFiles/201512/2015121619125706.jpg)
There are some additional rooms nearby. You should have them cleared out. The first room on the left is going to be guarded by a single terrorist (#1). Kill him. Get back to the main corridor. Head on to the second room. Just as before, you will have to deal with only one enemy soldier (#2). You shouldn't have any problems with him.
![6 - [Mission 13][Part: 2/2] NATO Summit - Walkthrough - Rainbow Six: Lockdown - Game Guide and Walkthrough](https://game.lhg100.com/Article/UploadFiles/201512/2015121619125718.jpg)
![One of the terrorists will be guarding the main corridor (#1) - [Mission 13][Part: 2/2] NATO Summit - Walkthrough - Rainbow Six: Lockdown - Game Guide and Walkthrough](https://game.lhg100.com/Article/UploadFiles/201512/2015121619125793.jpg)
One of the terrorists will be guarding the main corridor (#1). Kill him quickly. Be careful, though. He may be wearing a bulletproof vest. Keep moving towards your main objective. You should be able to reach a staircase within a few seconds (#2). One of the soldiers will be guarding it. Kill him. I would recommend leaving the rest of the team behind. You should be able to take out the remaining terrorists on your own.
![7 - [Mission 13][Part: 2/2] NATO Summit - Walkthrough - Rainbow Six: Lockdown - Game Guide and Walkthrough](https://game.lhg100.com/Article/UploadFiles/201512/2015121619125745.jpg)
![Head on to a nearby door - [Mission 13][Part: 2/2] NATO Summit - Walkthrough - Rainbow Six: Lockdown - Game Guide and Walkthrough](https://game.lhg100.com/Article/UploadFiles/201512/2015121619125860.jpg)
Head on to a nearby door. You will have to open it carefully. Start shooting at the visible enemy soldiers (#1). It would be wise to use your scope frequently. You could also try leaning out a lot, however this can by risky. Make sure you've taken out soldiers located on your right (#2). They were probably trying to surprise you.
![8 - [Mission 13][Part: 2/2] NATO Summit - Walkthrough - Rainbow Six: Lockdown - Game Guide and Walkthrough](https://game.lhg100.com/Article/UploadFiles/201512/2015121619125843.jpg)
![The second group is going to be located on your left (#1) - [Mission 13][Part: 2/2] NATO Summit - Walkthrough - Rainbow Six: Lockdown - Game Guide and Walkthrough](https://game.lhg100.com/Article/UploadFiles/201512/2015121619125862.jpg)
The second group is going to be located on your left (#1). Be careful, though. More terrorists may appear in that area in a few seconds. You have to remember that. Otherwise you might get shot. Start moving forward (SLOWLY!!!). Take out all of the remaining terrorists (#2). They will be standing on a roof of a nearby building.
![9 - [Mission 13][Part: 2/2] NATO Summit - Walkthrough - Rainbow Six: Lockdown - Game Guide and Walkthrough](https://game.lhg100.com/Article/UploadFiles/201512/2015121619125885.jpg)
![Once you've taken care of all hostiles units, a short cut-scene will appear on your screen (#1) - [Mission 13][Part: 2/2] NATO Summit - Walkthrough - Rainbow Six: Lockdown - Game Guide and Walkthrough](https://game.lhg100.com/Article/UploadFiles/201512/2015121619125957.jpg)
Once you've taken care of all hostiles units, a short cut-scene will appear on your screen (#1). Well... this is it for this mission. You might as well prepare yourself for the next one.
![10 - [Mission 13][Part: 2/2] NATO Summit - Walkthrough - Rainbow Six: Lockdown - Game Guide and Walkthrough](https://game.lhg100.com/Article/UploadFiles/201512/2015121619125952.jpg)
Threats: Once again you will have to deal with a lot of heavily armed opponents. Most of them will also be wearing bulletproof vests, however you're probably getting used to that by now. You might also have some problems with finding a correct path. There are a lot of empty rooms in the mansion. Thankfully, for the most of the time they won't be occupied by any additional units.
Objectives: You will have to hack into one of the computers owned by a leader of the Global Liberation Front terrorist organization. The device is being guarded by a state of the art security system. You will have to shut it down in the first place.
This part of the mission will require you to reach an office complex of the mansion. Start moving forward. You should be using your night vision goggles from time to time, however at this point they won't be of any use to you. Open a door and head on to a new corridor (#1). You will come across a first group of enemy units very soon (#2).
![1 - [Mission 14][Part: 1/2] Estate - Walkthrough - Rainbow Six: Lockdown - Game Guide and Walkthrough](https://game.lhg100.com/Article/UploadFiles/201512/2015121619125923.jpg)
![You should be able to reach a staircase very soon (#1) - [Mission 14][Part: 1/2] Estate - Walkthrough - Rainbow Six: Lockdown - Game Guide and Walkthrough](https://game.lhg100.com/Article/UploadFiles/201512/2015121619125938.jpg)
You should be able to reach a staircase very soon (#1). Head on to the upper level. Lean out CAREFULLY and start shooting at visible enemy soldiers. I would recommend taking out snipers who were standing on a balcony (#2). They pose a serious threat to you and your team.
![2 - [Mission 14][Part: 1/2] Estate - Walkthrough - Rainbow Six: Lockdown - Game Guide and Walkthrough](https://game.lhg100.com/Article/UploadFiles/201512/2015121619125909.jpg)
![Start shooting at the remaining soldiers (#1) - [Mission 14][Part: 1/2] Estate - Walkthrough - Rainbow Six: Lockdown - Game Guide and Walkthrough](https://game.lhg100.com/Article/UploadFiles/201512/2015121619130005.jpg)
Start shooting at the remaining soldiers (#1). Most of them will be located on the same floor. Don't expose yourself too much. I would also recommend finding a suitable cover. Watch out for a single sniper. He's located on the left balcony, by the stairs (#2). You probably couldn't notice him earlier. You have to take him out quickly.
![3 - [Mission 14][Part: 1/2] Estate - Walkthrough - Rainbow Six: Lockdown - Game Guide and Walkthrough](https://game.lhg100.com/Article/UploadFiles/201512/2015121619130067.jpg)
![You don't have to go to the upper level, because you won't find anything interesting here - [Mission 14][Part: 1/2] Estate - Walkthrough - Rainbow Six: Lockdown - Game Guide and Walkthrough](https://game.lhg100.com/Article/UploadFiles/201512/2015121619130066.jpg)
You don't have to go to the upper level, because you won't find anything interesting here. Head on to a small door that's located on your left (#1). You will find yourself in a new corridor. Start moving forward. You should be able to reach a small warehouse in a few seconds. Be careful. Some of the upcoming fights will be very challenging. Start off by killing all nearby terrorists. Most of them will be standing by the shelves (#2), so you shouldn't have any problems locating them.
![4 - [Mission 14][Part: 1/2] Estate - Walkthrough - Rainbow Six: Lockdown - Game Guide and Walkthrough](https://game.lhg100.com/Article/UploadFiles/201512/2015121619130025.jpg)
![The second group of terrorists will be located on your right (#1) - [Mission 14][Part: 1/2] Estate - Walkthrough - Rainbow Six: Lockdown - Game Guide and Walkthrough](https://game.lhg100.com/Article/UploadFiles/201512/2015121619130028.jpg)
The second group of terrorists will be located on your right (#1). Try aiming at the enemy soldiers from a distance. Don't get too close to them. The last group is in one of the next rooms. You will have to shoot through the glass in order to get rid of these terrorists (#2). You might also consider using your night vision goggles. Thanks to that, you should be able to locate most of the terrorists faster than usual. You must be standing behind the shelves all the time. They will serve as a great cover. Don't hit any of the Legion gas canisters!! This is VERY important!
![5 - [Mission 14][Part: 1/2] Estate - Walkthrough - Rainbow Six: Lockdown - Game Guide and Walkthrough](https://game.lhg100.com/Article/UploadFiles/201512/2015121619130110.jpg)
![You don't have to visit any of the surrounding rooms - [Mission 14][Part: 1/2] Estate - Walkthrough - Rainbow Six: Lockdown - Game Guide and Walkthrough](https://game.lhg100.com/Article/UploadFiles/201512/2015121619130104.jpg)
You don't have to visit any of the surrounding rooms. There's only one passageway leading to your main objective. It's located near one of the gas canisters (#1). The rest of the team should be following your lead. You will come across a small door. Open it and start shooting at the visible terrorists (#2). Enter the room with the whole team. Your teammates will probably deal with the remaining terrorists.
![6 - [Mission 14][Part: 1/2] Estate - Walkthrough - Rainbow Six: Lockdown - Game Guide and Walkthrough](https://game.lhg100.com/Article/UploadFiles/201512/2015121619130189.jpg)
![Head on to the nearby stairs (#1) - [Mission 14][Part: 1/2] Estate - Walkthrough - Rainbow Six: Lockdown - Game Guide and Walkthrough](https://game.lhg100.com/Article/UploadFiles/201512/2015121619130119.jpg)
Head on to the nearby stairs (#1). Use them to get to the upper floor. Be careful, though. You will come across a small group of terrorists in just a few seconds (#2). There's going to be at least two of them. I would recommend that you use the night vision goggles.
![7 - [Mission 14][Part: 1/2] Estate - Walkthrough - Rainbow Six: Lockdown - Game Guide and Walkthrough](https://game.lhg100.com/Article/UploadFiles/201512/2015121619130116.jpg)
![You might want to consider visiting one of the nearby rooms - [Mission 14][Part: 1/2] Estate - Walkthrough - Rainbow Six: Lockdown - Game Guide and Walkthrough](https://game.lhg100.com/Article/UploadFiles/201512/2015121619130148.jpg)
You might want to consider visiting one of the nearby rooms. There won't be anyone here when you enter. Be careful, though. Enemy soldiers will open a small door (it's located on your left) to get here. You will have to take them out. I would recommend letting your teammates take part in these fights. Alternatively, you could throw a couple of grenades at the enemy soldiers. There's nothing interesting in the remaining rooms. Head on to a small door (#2). It will lead you to one of the next sections of the map.
![8 - [Mission 14][Part: 1/2] Estate - Walkthrough - Rainbow Six: Lockdown - Game Guide and Walkthrough](https://game.lhg100.com/Article/UploadFiles/201512/2015121619130289.jpg)
![You should be able to reach a large office complex in just a few seconds - [Mission 14][Part: 1/2] Estate - Walkthrough - Rainbow Six: Lockdown - Game Guide and Walkthrough](https://game.lhg100.com/Article/UploadFiles/201512/2015121619130230.jpg)
You should be able to reach a large office complex in just a few seconds. Start off by killing all of the nearby terrorists (#2). Remember to use computer stations and other large objects for much needed cover. Once you're done with the enemy soldiers, head on to a small door (#2). Be sure to gather the rest of the squad around you.
![9 - [Mission 14][Part: 1/2] Estate - Walkthrough - Rainbow Six: Lockdown - Game Guide and Walkthrough](https://game.lhg100.com/Article/UploadFiles/201512/2015121619130279.jpg)
![Open the door CAREFULLY - [Mission 14][Part: 1/2] Estate - Walkthrough - Rainbow Six: Lockdown - Game Guide and Walkthrough](https://game.lhg100.com/Article/UploadFiles/201512/2015121619130272.jpg)
Open the door CAREFULLY. This entrance is going to be guarded by at least two additional units. You will have to deal with these terrorists quickly (#1). You might also consider storming the place with the whole team. Make sure you've killed all hostiles. Head on to a large desk. There's a computer here. You must use it now (#2). This time you won't have to reach any designated zones. The game will load a new map automatically.
![10 - [Mission 14][Part: 1/2] Estate - Walkthrough - Rainbow Six: Lockdown - Game Guide and Walkthrough](https://game.lhg100.com/Article/UploadFiles/201512/2015121619130224.jpg)
The second part of the mission is going to be much more interesting, mostly because you will have to deal with all primary goals. Start moving forward. There's only one path leading to your destination, so you can't get lost. One of the first terrorists is going to be hiding in a nearby kitchen (#1). DON'T go there. Instead, turn left. Two groups of enemy soldiers will appear in the vicinity (#2). You will have to deal with them accordingly. The rest of the team should be helping you during these fights.
![1 - [Mission 14][Part: 2/2] Estate - Walkthrough - Rainbow Six: Lockdown - Game Guide and Walkthrough](https://game.lhg100.com/Article/UploadFiles/201512/2015121619130295.jpg)
![Head on to the left door, the same one that's been occupied by enemy soldiers - [Mission 14][Part: 2/2] Estate - Walkthrough - Rainbow Six: Lockdown - Game Guide and Walkthrough](https://game.lhg100.com/Article/UploadFiles/201512/2015121619130337.jpg)
Head on to the left door, the same one that's been occupied by enemy soldiers. You will find yourself in a new corridor. Be careful, though. It's going to be guarded by some new terrorists (#1). Thankfully, they won't be acting as a team, so you shouldn't have any problems killing them. Keep pushing forward. Watch out for a single enemy soldier. He will be located on your right (#2). Make sure you've taken care of this problem quickly.
![2 - [Mission 14][Part: 2/2] Estate - Walkthrough - Rainbow Six: Lockdown - Game Guide and Walkthrough](https://game.lhg100.com/Article/UploadFiles/201512/2015121619130312.jpg)
![You should be able to reach a new room in just a few seconds (#1) - [Mission 14][Part: 2/2] Estate - Walkthrough - Rainbow Six: Lockdown - Game Guide and Walkthrough](https://game.lhg100.com/Article/UploadFiles/201512/2015121619130350.jpg)
You should be able to reach a new room in just a few seconds (#1). There's going to be a small brick wall on your right. You will have to use it for extra cover. Start moving forward (CAREFULLY!). I would recommend that you leave the rest of the team behind. One of the enemy soldiers will be standing on your right (#2). Kill him. Don't get to close to the left entrance!!!
![3 - [Mission 14][Part: 2/2] Estate - Walkthrough - Rainbow Six: Lockdown - Game Guide and Walkthrough](https://game.lhg100.com/Article/UploadFiles/201512/2015121619130362.jpg)
![There's going to be an explosion in just a few seconds - [Mission 14][Part: 2/2] Estate - Walkthrough - Rainbow Six: Lockdown - Game Guide and Walkthrough](https://game.lhg100.com/Article/UploadFiles/201512/2015121619130383.jpg)
There's going to be an explosion in just a few seconds. As a result, enemy soldiers will begin coming out from a nearby corridor. I would recommend throwing a couple of grenades at them (#1). Start moving forward. Be sure to check the right hall once again. It may still be occupied by additional enemy forces (#2). The rest of the team should deal with this small problem.
![4 - [Mission 14][Part: 2/2] Estate - Walkthrough - Rainbow Six: Lockdown - Game Guide and Walkthrough](https://game.lhg100.com/Article/UploadFiles/201512/2015121619130404.jpg)
![Head on to the left corridor - [Mission 14][Part: 2/2] Estate - Walkthrough - Rainbow Six: Lockdown - Game Guide and Walkthrough](https://game.lhg100.com/Article/UploadFiles/201512/2015121619130466.jpg)
Head on to the left corridor. That's where the opponents showed up. You should be able to notice a new staircase (#1). Start moving towards an upper floor. You will reach one of the largest room of the estate in just a few seconds (#1). I would recommend remembering this place, because you will have to go back here in a few minutes. Before you proceed any further, make sure that the rest of the team is left behind. You should also reload your current weapon.
![5 - [Mission 14][Part: 2/2] Estate - Walkthrough - Rainbow Six: Lockdown - Game Guide and Walkthrough](https://game.lhg100.com/Article/UploadFiles/201512/2015121619130441.jpg)
![Most of the terrorists will be located by the stairs - [Mission 14][Part: 2/2] Estate - Walkthrough - Rainbow Six: Lockdown - Game Guide and Walkthrough](https://game.lhg100.com/Article/UploadFiles/201512/2015121619130413.jpg)
Most of the terrorists will be located by the stairs. They are on your left (#1). I would recommend zooming in the view or using the scope. Thanks to that, you should be able to take them out quickly. Remain here. Don't even try moving closer to the stairs! Activate your night vision goggles. Turn around. You should be able to notice a balcony. It's located above your current position. There are some additional units here (#2). You will have to take care of these terrorists. There's probably going to be three of them. Headshots are most welcome in these types of situations. You may proceed to the upper floor. Take the rest of the team with you,
![6 - [Mission 14][Part: 2/2] Estate - Walkthrough - Rainbow Six: Lockdown - Game Guide and Walkthrough](https://game.lhg100.com/Article/UploadFiles/201512/2015121619130482.jpg)
![Head on to the RIGHT corridor (#1) - [Mission 14][Part: 2/2] Estate - Walkthrough - Rainbow Six: Lockdown - Game Guide and Walkthrough](https://game.lhg100.com/Article/UploadFiles/201512/2015121619130427.jpg)
Head on to the RIGHT corridor (#1). There's also going to be a left one, although you may as well ignore it for now. Be careful. The new corridor is going to be guarded by additional terrorist units (#2). One of the enemies will be hiding by the destroyed bookcase (on your right). You will have to take him out quickly. Head on to a small door that's located on your LEFT.
![7 - [Mission 14][Part: 2/2] Estate - Walkthrough - Rainbow Six: Lockdown - Game Guide and Walkthrough](https://game.lhg100.com/Article/UploadFiles/201512/2015121619130536.jpg)
![Open the door carefully - [Mission 14][Part: 2/2] Estate - Walkthrough - Rainbow Six: Lockdown - Game Guide and Walkthrough](https://game.lhg100.com/Article/UploadFiles/201512/2015121619130561.jpg)
Open the door carefully. You should notice one of the terrorists (#1). Kill him quickly. You may enter the room now. Keep moving forward. Be careful. One of the terrorists will probably be hiding by the pool table. More of them may also show up here very soon. You must reach a single locked door (#2). You should know exactly by now what has to be done. Well... get to work, then! ;-)
![8 - [Mission 14][Part: 2/2] Estate - Walkthrough - Rainbow Six: Lockdown - Game Guide and Walkthrough](https://game.lhg100.com/Article/UploadFiles/201512/2015121619130534.jpg)
![The new room is going to be guarded by three terrorists - [Mission 14][Part: 2/2] Estate - Walkthrough - Rainbow Six: Lockdown - Game Guide and Walkthrough](https://game.lhg100.com/Article/UploadFiles/201512/2015121619130529.jpg)
The new room is going to be guarded by three terrorists. Two of them will be standing by the entrance, so you shouldn't have any problems killing them. The third soldier is hiding by the bed (#1). You might not see him at first glance, so it's best to be careful. There's a small console located on your right (#2). You will have to use it in order to disable some of the security systems of the estate.
![9 - [Mission 14][Part: 2/2] Estate - Walkthrough - Rainbow Six: Lockdown - Game Guide and Walkthrough](https://game.lhg100.com/Article/UploadFiles/201512/2015121619130656.jpg)
![Now you will have to go back to the main hall of the estate (the one with the huge stairs) - [Mission 14][Part: 2/2] Estate - Walkthrough - Rainbow Six: Lockdown - Game Guide and Walkthrough](https://game.lhg100.com/Article/UploadFiles/201512/2015121619130691.jpg)
Now you will have to go back to the main hall of the estate (the one with the huge stairs). You shouldn't encounter any new units along the way, so you might as well start running. Be careful, though. The hall is going to be guarded by some new terrorists (#1).Start off by killing those who will be located on a lower level. Head on to the opposite LEFT corridor. It's located on the same floor, so you shouldn't have any problems finding it (#2). Take out a single terrorist. You should also wait for your team to get here.
![Be careful - [Mission 14][Part: 2/2] Estate - Walkthrough - Rainbow Six: Lockdown - Game Guide and Walkthrough](https://game.lhg100.com/Article/UploadFiles/201512/2015121619130663.jpg)
Be careful! There's a second soldier in a nearby corridor (#1). I would recommend using some of the carried flashbangs in order to blind him for a few seconds. Thanks to that, you should be able to score an effective headshot. Head on to the left door (#2). Before you decide to open it, make sure that the rest of the team is with you. Don't forget to reload your weapon!!
![11 - [Mission 14][Part: 2/2] Estate - Walkthrough - Rainbow Six: Lockdown - Game Guide and Walkthrough](https://game.lhg100.com/Article/UploadFiles/201512/2015121619130652.jpg)
![Open the door carefully - [Mission 14][Part: 2/2] Estate - Walkthrough - Rainbow Six: Lockdown - Game Guide and Walkthrough](https://game.lhg100.com/Article/UploadFiles/201512/2015121619130771.jpg)
Open the door carefully. There's a single enemy soldier over here (#1). You have to take him out quickly. If you're lucky, you should be able to surprise him. Head on to a nearby desk. You've probably noticed a laptop. Use it in order to neutralize all of the security systems (#2).
![12 - [Mission 14][Part: 2/2] Estate - Walkthrough - Rainbow Six: Lockdown - Game Guide and Walkthrough](https://game.lhg100.com/Article/UploadFiles/201512/2015121619130751.jpg)
![You may proceed to the next section - [Mission 14][Part: 2/2] Estate - Walkthrough - Rainbow Six: Lockdown - Game Guide and Walkthrough](https://game.lhg100.com/Article/UploadFiles/201512/2015121619130766.jpg)
You may proceed to the next section. Open a nearby door carefully (#1). The entrance is being guarded by one of the terrorists. You have to take him out right now. Enter this room. The second terrorist will be hiding by the window that's located on your left (#2). Be careful!! Kill him quickly.
![13 - [Mission 14][Part: 2/2] Estate - Walkthrough - Rainbow Six: Lockdown - Game Guide and Walkthrough](https://game.lhg100.com/Article/UploadFiles/201512/2015121619130790.jpg)
![Start moving towards the desk - [Mission 14][Part: 2/2] Estate - Walkthrough - Rainbow Six: Lockdown - Game Guide and Walkthrough](https://game.lhg100.com/Article/UploadFiles/201512/2015121619130792.jpg)
Start moving towards the desk. You will find Vanderwaal's computer here (#1). Use it in order to gain necessary information (#2). Thanks to that, you will complete the main objective of this mission.
![14 - [Mission 14][Part: 2/2] Estate - Walkthrough - Rainbow Six: Lockdown - Game Guide and Walkthrough](https://game.lhg100.com/Article/UploadFiles/201512/2015121619130818.jpg)
![15 - [Mission 14][Part: 2/2] Estate - Walkthrough - Rainbow Six: Lockdown - Game Guide and Walkthrough](https://game.lhg100.com/Article/UploadFiles/201512/2015121619130822.jpg)
Threats: This mission isn't too complicated, especially when you compare it to the previous assignments. You won't have to worry about any hostages. There aren't any bombs in the area. This mission will only require you to deal with heavily equipped opponents. They will also be armed with heavy weaponry (machine guns, shotguns, rocket launchers...).
Objectives: You will have to neutralize all of the security systems, protecting Vandervaal's base. You must also capture this terrorist alive. He mustn't escape in his private helicopter. Thankfully, this will be an easy task, so you shouldn't worry about it too much.
I would recommend taking a scope for this mission. There are a lot of open spaces. Some of the enemies will be visible in a distance, so you will have to be very precise. Start moving forward. One of the first terrorists will be located on your right (#1). Use the scope in order to eliminate him from a safe distance. Keep moving forward. You've probably expected more terrorists to show up. Well... they won't. :-) The next group of enemy soldiers will be located in a small room. Additionally, you will have to take out a single sniper, hiding by the crates on your right (#2). Head on to this corridor with the rest of the squad.
![1 - [Mission 15][Part: 1/3] Mercenary Base - Walkthrough - Rainbow Six: Lockdown - Game Guide and Walkthrough](https://game.lhg100.com/Article/UploadFiles/201512/2015121619130873.jpg)
![You should be able to reach a ladder in a few seconds - [Mission 15][Part: 1/3] Mercenary Base - Walkthrough - Rainbow Six: Lockdown - Game Guide and Walkthrough](https://game.lhg100.com/Article/UploadFiles/201512/2015121619130820.jpg)
You should be able to reach a ladder in a few seconds. Use it in order to get down to the lower level (#1). Once you're there, you will have to wait for the rest of the team to show up. Open a nearby door CAREFULLY. Start killing visible enemy soldiers (#2). You will have to shoot through the glass in order to take out some of them.
![2 - [Mission 15][Part: 1/3] Mercenary Base - Walkthrough - Rainbow Six: Lockdown - Game Guide and Walkthrough](https://game.lhg100.com/Article/UploadFiles/201512/2015121619130834.jpg)
![If you want to reach your destination faster, you must stick close to the right wall - [Mission 15][Part: 1/3] Mercenary Base - Walkthrough - Rainbow Six: Lockdown - Game Guide and Walkthrough](https://game.lhg100.com/Article/UploadFiles/201512/2015121619130998.jpg)
If you want to reach your destination faster, you must stick close to the right wall. It would also be wise to look at the map from time to time. You will have to reach the biggest, northern warehouse area. Watch out for the additional terrorists. They will be located on your right (#1). You must shoot through the glass in order to get rid of them. I would recommend leaving the rest of the squad behind. There's a security camera nearby. You will have to neutralize it (#2). Once this is done, rejoin with the whole team.
![3 - [Mission 15][Part: 1/3] Mercenary Base - Walkthrough - Rainbow Six: Lockdown - Game Guide and Walkthrough](https://game.lhg100.com/Article/UploadFiles/201512/2015121619130993.jpg)
![There's a door located beneath the camera - [Mission 15][Part: 1/3] Mercenary Base - Walkthrough - Rainbow Six: Lockdown - Game Guide and Walkthrough](https://game.lhg100.com/Article/UploadFiles/201512/2015121619130997.jpg)
There's a door located beneath the camera. Open it CAREFULLY. The next room is being occupied by a LARGE group of enemy soldiers (#1). You will have to start taking them out. You shouldn't have any problems with the group located ahead of you. Once these terrorists are gone, turn left. There are some snipers on a nearby balcony (#2). You will have to kill them quickly, so they won't be able to fight back.
![Make sure that the area is clear - [Mission 15][Part: 1/3] Mercenary Base - Walkthrough - Rainbow Six: Lockdown - Game Guide and Walkthrough](https://game.lhg100.com/Article/UploadFiles/201512/2015121619130972.jpg)
Make sure that the area is clear. Leave the rest of your squad behind. Head on to the left corridor. There's a second security camera over here (#1). Just as before, you will have to take care of this problem. Just make sure you're not being noticed. After that, head on to the nearby stairs (#2). The rest of the team may join you now.
![5 - [Mission 15][Part: 1/3] Mercenary Base - Walkthrough - Rainbow Six: Lockdown - Game Guide and Walkthrough](https://game.lhg100.com/Article/UploadFiles/201512/2015121619130958.jpg)
![Head on to the left room - [Mission 15][Part: 1/3] Mercenary Base - Walkthrough - Rainbow Six: Lockdown - Game Guide and Walkthrough](https://game.lhg100.com/Article/UploadFiles/201512/2015121619131038.jpg)
Head on to the left room. It's located above one of the entrances. You shouldn't have any problems locating it (#1). Step up to the desk. Press the use key in order to hack into the security system of the complex (#2). Bear in mind that this will NOT shut down all of the surrounding cameras. You must still avoid being seen. Thankfully, there aren't many of these objects left.
![6 - [Mission 15][Part: 1/3] Mercenary Base - Walkthrough - Rainbow Six: Lockdown - Game Guide and Walkthrough](https://game.lhg100.com/Article/UploadFiles/201512/2015121619131046.jpg)
![Now you will have to go back to the main entrance, the same one that was leading to this part of the complex - [Mission 15][Part: 1/3] Mercenary Base - Walkthrough - Rainbow Six: Lockdown - Game Guide and Walkthrough](https://game.lhg100.com/Article/UploadFiles/201512/2015121619131007.jpg)
Now you will have to go back to the main entrance, the same one that was leading to this part of the complex. Before you do that, you must deal with a new group of enemy soldiers. Start off by killing soldiers located on your left (#1). The second grup is located beneath you (#2). Find a good spot (by the railing) and start shooting at the remaining terrorists.
![7 - [Mission 15][Part: 1/3] Mercenary Base - Walkthrough - Rainbow Six: Lockdown - Game Guide and Walkthrough](https://game.lhg100.com/Article/UploadFiles/201512/2015121619131036.jpg)
![You might want to consider taking a closer look at the left passageway - [Mission 15][Part: 1/3] Mercenary Base - Walkthrough - Rainbow Six: Lockdown - Game Guide and Walkthrough](https://game.lhg100.com/Article/UploadFiles/201512/2015121619131112.jpg)
You might want to consider taking a closer look at the left passageway. There's a large group of terrorists stationed there. Thankfully, they won't even notice you coming. I would recommend throwing a grenade at the terrorists (#1). DON'T use the nearby stairs. Otherwise you would have to deal with a new camera. Go back using the same way. An icon will appear on your screen. Head on to the designated area (#2). Wait for the other crew members to show up. The game will load a new map in just a few seconds.
![8 - [Mission 15][Part: 1/3] Mercenary Base - Walkthrough - Rainbow Six: Lockdown - Game Guide and Walkthrough](https://game.lhg100.com/Article/UploadFiles/201512/2015121619131146.jpg)
![9 - [Mission 15][Part: 1/3] Mercenary Base - Walkthrough - Rainbow Six: Lockdown - Game Guide and Walkthrough](https://game.lhg100.com/Article/UploadFiles/201512/2015121619131184.jpg)
There are a lot of corridors and warehouse areas ahead. Thankfully, you won't have do anything else, besides killing enemy units. Furthermore, there's only one path leading to your destination, so you probably won't get lost. You should encounter a first terrorist very shortly (#1). Be careful, though. More enemy soldiers will arrive here shortly. Head on to the right corridor. You will come across a large door (#2). Gather your team around it.
![1 - [Mission 15][Part: 2/3] Mercenary Base - Walkthrough - Rainbow Six: Lockdown - Game Guide and Walkthrough](https://game.lhg100.com/Article/UploadFiles/201512/2015121619131125.jpg)
![Open the door and proceed to the next corridor - [Mission 15][Part: 2/3] Mercenary Base - Walkthrough - Rainbow Six: Lockdown - Game Guide and Walkthrough](https://game.lhg100.com/Article/UploadFiles/201512/2015121619131133.jpg)
Open the door and proceed to the next corridor. You will be encoutering enemy units along the way (#1). Thankfully, they won't be equipped too well, so you don't have to worry about them too much. You should be able to reach a large room in a few seconds. I would recommend using barrels and other large objects for extra cover (#2). Eliminate all of the nearby terrorists.
![2 - [Mission 15][Part: 2/3] Mercenary Base - Walkthrough - Rainbow Six: Lockdown - Game Guide and Walkthrough](https://game.lhg100.com/Article/UploadFiles/201512/2015121619131143.jpg)
![I would recommend that you send your team down there in order to deal with the remaining enemy units (#1) - [Mission 15][Part: 2/3] Mercenary Base - Walkthrough - Rainbow Six: Lockdown - Game Guide and Walkthrough](https://game.lhg100.com/Article/UploadFiles/201512/2015121619131271.jpg)
I would recommend that you send your team down there in order to deal with the remaining enemy units (#1). Join your teammates and start moving towards the new corridor. The next terrorist will be located on your right (#2). Kill him. DON'T go there just yet. You should also leave the rest of the team right here.
![3 - [Mission 15][Part: 2/3] Mercenary Base - Walkthrough - Rainbow Six: Lockdown - Game Guide and Walkthrough](https://game.lhg100.com/Article/UploadFiles/201512/2015121619131218.jpg)
![You should remember from the previous missions, that all of the surrounding rooms must be checked out - [Mission 15][Part: 2/3] Mercenary Base - Walkthrough - Rainbow Six: Lockdown - Game Guide and Walkthrough](https://game.lhg100.com/Article/UploadFiles/201512/2015121619131254.jpg)
You should remember from the previous missions, that all of the surrounding rooms must be checked out. This time you will have to explore two of them. Start with the left room. It's going to be guarded by two terrorists (#1). You might want to consider throwing a couple of grenades at them, although this is not necessary. The second room is being occupied by a single terrorist (#2). Dispose of him quickly.
![4 - [Mission 15][Part: 2/3] Mercenary Base - Walkthrough - Rainbow Six: Lockdown - Game Guide and Walkthrough](https://game.lhg100.com/Article/UploadFiles/201512/2015121619131228.jpg)
![Use the scope - [Mission 15][Part: 2/3] Mercenary Base - Walkthrough - Rainbow Six: Lockdown - Game Guide and Walkthrough](https://game.lhg100.com/Article/UploadFiles/201512/2015121619131235.jpg)
Use the scope. You should be able to notice a security camera in a distance (#1). Wait for it to turn right. Start moving towards the camera. Stick close to the LEFT wall. Once you're there, neutralize the device (#2). You shouldn't have any problems with that. The rest of the team may rejoin with you now. Head on to a nearby corridor. You will come across a new door very soon.
![5 - [Mission 15][Part: 2/3] Mercenary Base - Walkthrough - Rainbow Six: Lockdown - Game Guide and Walkthrough](https://game.lhg100.com/Article/UploadFiles/201512/2015121619131370.jpg)
![Open the door carefully - [Mission 15][Part: 2/3] Mercenary Base - Walkthrough - Rainbow Six: Lockdown - Game Guide and Walkthrough](https://game.lhg100.com/Article/UploadFiles/201512/2015121619131365.jpg)
Open the door carefully. You will have to take care of two enemy soldiers. Both of them will be hiding by the crates (#1). Thankfully, they're not that hard to kill. Head on to the next door. You should be able to reach one of the first metal doors in a few seconds. In order to open it you will have to use a nearby console (#2). Bear in mind that the door will open automatically, so you have to be ready to start shooting at potential hostiles.
![6 - [Mission 15][Part: 2/3] Mercenary Base - Walkthrough - Rainbow Six: Lockdown - Game Guide and Walkthrough](https://game.lhg100.com/Article/UploadFiles/201512/2015121619131314.jpg)
![The next room is going to be occupied by a small group of enemy soldiers (#1) - [Mission 15][Part: 2/3] Mercenary Base - Walkthrough - Rainbow Six: Lockdown - Game Guide and Walkthrough](https://game.lhg100.com/Article/UploadFiles/201512/2015121619131353.jpg)
The next room is going to be occupied by a small group of enemy soldiers (#1). You will have to kill them quicky. I would recommend that you crouch near the console, so the terrorists won't be able to surprise you. Head on to the next door. Just as before, you will have to deal with some terrorist units (#2). Thankfully, the soldiers will be standing at the opposite end of this room, so you might consider using your scope.
![7 - [Mission 15][Part: 2/3] Mercenary Base - Walkthrough - Rainbow Six: Lockdown - Game Guide and Walkthrough](https://game.lhg100.com/Article/UploadFiles/201512/2015121619131308.jpg)
![Head on to the right corridor - [Mission 15][Part: 2/3] Mercenary Base - Walkthrough - Rainbow Six: Lockdown - Game Guide and Walkthrough](https://game.lhg100.com/Article/UploadFiles/201512/2015121619131315.jpg)
Head on to the right corridor. Thankfully, you won't have to use any consoles this time. You will come across a single opponent (#1). Kill him quickly, before he's able to fight back. Head on to the next metal gate. Use the console in order to open the door. There are some challenging fights ahead of you. Start off by killing terrorists located on the right balcony (#2). You won't have to enter the new room. Just make sure you're aiming at their legs.
![8 - [Mission 15][Part: 2/3] Mercenary Base - Walkthrough - Rainbow Six: Lockdown - Game Guide and Walkthrough](https://game.lhg100.com/Article/UploadFiles/201512/2015121619131343.jpg)
![Start moving forward (CAREFULLY - [Mission 15][Part: 2/3] Mercenary Base - Walkthrough - Rainbow Six: Lockdown - Game Guide and Walkthrough](https://game.lhg100.com/Article/UploadFiles/201512/2015121619131497.jpg)
Start moving forward (CAREFULLY!). There are some new enemy soldiers on your left (#1). Start shooting at them. Alternatively you could throw a couple of grenades at the terrorists, however this won't be necessary. The rest of the team should join you now. Deal with the remaining soldiers. After that, head on to the nearby stairs (#2). You may proceed to the upper level.
![9 - [Mission 15][Part: 2/3] Mercenary Base - Walkthrough - Rainbow Six: Lockdown - Game Guide and Walkthrough](https://game.lhg100.com/Article/UploadFiles/201512/2015121619131465.jpg)
![In order to finish this level you will have to get closer to the last door (#1) - [Mission 15][Part: 2/3] Mercenary Base - Walkthrough - Rainbow Six: Lockdown - Game Guide and Walkthrough](https://game.lhg100.com/Article/UploadFiles/201512/2015121619131420.jpg)
In order to finish this level you will have to get closer to the last door (#1). Open it. There's only one map left here.
![10 - [Mission 15][Part: 2/3] Mercenary Base - Walkthrough - Rainbow Six: Lockdown - Game Guide and Walkthrough](https://game.lhg100.com/Article/UploadFiles/201512/2015121619131425.jpg)
This is a very short level, however this doesn't mean that you'll be able to finish it without any problems. I would recommending having your night vision goggles turned on all the time. Most of the areas are very dark, so they will come in handy. You should be able to spot first terrorist units very soon (#1). If you're lucky, you will score at least one headshot. Keep moving forward. You will find yourself in a long corridor. Start shooting at the enemy soldiers (#2). You might want to use the scope.
![1 - [Mission 15][Part: 3/3] Mercenary Base - Walkthrough - Rainbow Six: Lockdown - Game Guide and Walkthrough](https://game.lhg100.com/Article/UploadFiles/201512/2015121619131528.jpg)
![Head on to the RIGHT wall - [Mission 15][Part: 3/3] Mercenary Base - Walkthrough - Rainbow Six: Lockdown - Game Guide and Walkthrough](https://game.lhg100.com/Article/UploadFiles/201512/2015121619131583.jpg)
Head on to the RIGHT wall. There are some enemy snipers (at least two) in a distance (#1). You will have to take care of all of them. Keep moving forward. New enemy soldiers will arrive here shortly. They will be using crates for extra cover. You might want to score a few headshots (#2). Grenades also seem like a good idea.
![2 - [Mission 15][Part: 3/3] Mercenary Base - Walkthrough - Rainbow Six: Lockdown - Game Guide and Walkthrough](https://game.lhg100.com/Article/UploadFiles/201512/2015121619131566.jpg)
![Head on to the right door - [Mission 15][Part: 3/3] Mercenary Base - Walkthrough - Rainbow Six: Lockdown - Game Guide and Walkthrough](https://game.lhg100.com/Article/UploadFiles/201512/2015121619131594.jpg)
Head on to the right door. You will find yourself inside a sleeping quarters. Some of the terrorists will be hiding by the beds (#1). It would be best to aim at their heads. Be careful! There's a large group of enemy soldiers in the right room. Shoot through the glass in order to get rid of them safely (#2). You can't let them surprise your team!!
![3 - [Mission 15][Part: 3/3] Mercenary Base - Walkthrough - Rainbow Six: Lockdown - Game Guide and Walkthrough](https://game.lhg100.com/Article/UploadFiles/201512/2015121619131699.jpg)
![Head on to the next door - [Mission 15][Part: 3/3] Mercenary Base - Walkthrough - Rainbow Six: Lockdown - Game Guide and Walkthrough](https://game.lhg100.com/Article/UploadFiles/201512/2015121619131682.jpg)
Head on to the next door. You will find yourself in a new corridor. Be careful, though. The area is crawling with enemy troops (#1). Thankfully, you don't have to save up your ammo anymore. You should be able to reach a ladder in a few seconds (#2). DON'T use it just yet! There's a terrorist down there. You will have to kill him first. In order to do that you must use one of the carried grenades. After that, use the ladder to get down to the lower level. Wait for the rest of the team to show up.
![4 - [Mission 15][Part: 3/3] Mercenary Base - Walkthrough - Rainbow Six: Lockdown - Game Guide and Walkthrough](https://game.lhg100.com/Article/UploadFiles/201512/2015121619131657.jpg)
![The terrorist I was talking you about should already be dead (the explosion killed him) - [Mission 15][Part: 3/3] Mercenary Base - Walkthrough - Rainbow Six: Lockdown - Game Guide and Walkthrough](https://game.lhg100.com/Article/UploadFiles/201512/2015121619131612.jpg)
The terrorist I was talking you about should already be dead (the explosion killed him). You will find a second ladder over here (#1). Thankfully, you can use it without any problems. Once you're on a lower level, wait for one of the team members. Sadly, the room is too small for the rest. Turn on your night vision goggles. Open the door carefully. You will find yourself inside a hangar. Start off by killing all of the nearby terrorists. One of the soldiers will be standing on an opposite balcony (#2). He must be killed quickly.
![5 - [Mission 15][Part: 3/3] Mercenary Base - Walkthrough - Rainbow Six: Lockdown - Game Guide and Walkthrough](https://game.lhg100.com/Article/UploadFiles/201512/2015121619131671.jpg)
![Turn right - [Mission 15][Part: 3/3] Mercenary Base - Walkthrough - Rainbow Six: Lockdown - Game Guide and Walkthrough](https://game.lhg100.com/Article/UploadFiles/201512/2015121619131694.jpg)
Turn right. Use the ramp to get down to the hangar. Start shooting at the remaining terrorists (#1). Most of them will be hiding near the chopper. You will have to secure the whole landing pad area. It would be best to stick close to the right wall, so you won't miss anyone along the way. You will be encountering new terrorists quite regularly (#2). Some of them will be located in nearby rooms. You can't let them surprise your team!! Once all the terrorists are gone, this mission will come to an end.
![6 - [Mission 15][Part: 3/3] Mercenary Base - Walkthrough - Rainbow Six: Lockdown - Game Guide and Walkthrough](https://game.lhg100.com/Article/UploadFiles/201512/2015121619131608.jpg)
![7 - [Mission 15][Part: 3/3] Mercenary Base - Walkthrough - Rainbow Six: Lockdown - Game Guide and Walkthrough](https://game.lhg100.com/Article/UploadFiles/201512/2015121619131706.jpg)
Threats: Most of the enemy soldiers will be wearing bulletproof vests, so you have to be very precise. I would recommend that you aim at their heads. You will also be dealing with terrorists armed with rocket launchers. You will have to kill these soldiers quickly, so the rockets won't hit any of your teammates. There are also enemy snipers in the area, although you don't have to be worried about them too much.
Objectives: This is a very straightforward mission. You will have to hunt down and kill a terrorist leader - Vanderwaal. He is hiding in a nearby castle.
You start off in a small tunnel. The area is pretty dark, so you might as well use your goggles. Start moving forward. You should be able to reach the stairs in a few seconds. After that, you will come across a small door. Start moving towards the top of the tower (#1). Be careful, though. This area is being guarded by a large group of enemy soldiers (#2). Don't expose your position too much. Remember to aim at the heads of enemy soldiers.
![1 - [FINAL MISSION][Part: 1/3] Castle - Walkthrough - Rainbow Six: Lockdown - Game Guide and Walkthrough](https://game.lhg100.com/Article/UploadFiles/201512/2015121619131716.jpg)
![There are more terrorists in the vicinity (#1) - [FINAL MISSION][Part: 1/3] Castle - Walkthrough - Rainbow Six: Lockdown - Game Guide and Walkthrough](https://game.lhg100.com/Article/UploadFiles/201512/2015121619131799.jpg)
There are more terrorists in the vicinity (#1). Start off by killing the nearby soldiers. Be careful, though. A new group will arrive here shortly. The terrorists will use a small corridor (#2). You can't give them a chance to fight back. Make sure you've taken out all enemy soldiers. Head on to the corridor (the same one that the terrorists have used).
![2 - [FINAL MISSION][Part: 1/3] Castle - Walkthrough - Rainbow Six: Lockdown - Game Guide and Walkthrough](https://game.lhg100.com/Article/UploadFiles/201512/2015121619131732.jpg)
![One of the terrorists will be probably hiding somewhere over here (#1) - [FINAL MISSION][Part: 1/3] Castle - Walkthrough - Rainbow Six: Lockdown - Game Guide and Walkthrough](https://game.lhg100.com/Article/UploadFiles/201512/2015121619131778.jpg)
One of the terrorists will be probably hiding somewhere over here (#1). You must be very careful. You can't give him a chance to fight back. Keep pushing forward. You will come across a small door. Open it. You should find yourself in the central area of the castle. I have to warn you. The upcoming fights will be VERY challenging. I would recommend that you leave the rest of the team behind. Use the scope in order to locate some of the nearby terrorists (#2).
![3 - [FINAL MISSION][Part: 1/3] Castle - Walkthrough - Rainbow Six: Lockdown - Game Guide and Walkthrough](https://game.lhg100.com/Article/UploadFiles/201512/2015121619131712.jpg)
![Now you should start taking care of the remaining soldiers - [FINAL MISSION][Part: 1/3] Castle - Walkthrough - Rainbow Six: Lockdown - Game Guide and Walkthrough](https://game.lhg100.com/Article/UploadFiles/201512/2015121619131710.jpg)
Now you should start taking care of the remaining soldiers. Most of them will be patrolling the surrounding walls. Remember that you shouldn't expose yourself too much. Otherwise you would have been attacked by everyone at the same time. Reload the weapon inside one the previous buildings (the rest of the team should be waiting for your orders here). BE CAREFUL! A guy with a rocket launcher may appear in front of your current position (#2). You've got to take him out quickly!! This is VERY important!!
![4 - [FINAL MISSION][Part: 1/3] Castle - Walkthrough - Rainbow Six: Lockdown - Game Guide and Walkthrough](https://game.lhg100.com/Article/UploadFiles/201512/2015121619131756.jpg)
![One of the allied snipers will appear on your left - [FINAL MISSION][Part: 1/3] Castle - Walkthrough - Rainbow Six: Lockdown - Game Guide and Walkthrough](https://game.lhg100.com/Article/UploadFiles/201512/2015121619131851.jpg)
One of the allied snipers will appear on your left. He's on a top of a tower. DON'T kill him. The sniper will help you to reach the opposite end of this area. Gather the rest of the team around your position. Start moving forward. You will be encountering new soldiers along the way (#1). Thankfully, they won't be too hard to kill. You might want to consider using the night vision goggles, although they aren't necesarry. Enter the new corridor. You will come across a small staircase (#2).
![5 - [FINAL MISSION][Part: 1/3] Castle - Walkthrough - Rainbow Six: Lockdown - Game Guide and Walkthrough](https://game.lhg100.com/Article/UploadFiles/201512/2015121619131818.jpg)
![Head on to the upper level - [FINAL MISSION][Part: 1/3] Castle - Walkthrough - Rainbow Six: Lockdown - Game Guide and Walkthrough](https://game.lhg100.com/Article/UploadFiles/201512/2015121619131897.jpg)
Head on to the upper level. Once you're there, take care of the remaining terrorist units (#1). You probably couldn't notice them before. Wel... now's your chance. :-) You should be able to reach new stairs very soon. Turn around. I would recommend that you throw a couple of grenades to the upper floor (#2). Thanks to that, you should kill all of the remaining terrorists. Otherwise you would have to take care of them on your own. You may proceed to the upper floor. The rest of the squad should be following your lead.
![6 - [FINAL MISSION][Part: 1/3] Castle - Walkthrough - Rainbow Six: Lockdown - Game Guide and Walkthrough](https://game.lhg100.com/Article/UploadFiles/201512/2015121619131880.jpg)
![That's not the end of your problems - [FINAL MISSION][Part: 1/3] Castle - Walkthrough - Rainbow Six: Lockdown - Game Guide and Walkthrough](https://game.lhg100.com/Article/UploadFiles/201512/2015121619131861.jpg)
That's not the end of your problems. The last group of enemy soldiers is hiding on the top floor. This time you should use your scope (#1). If you're lucky, you will be able to take out most of the terrorists. Head on to this area with the whole team. Step up to the designated zone (#2) and wait for the game to load a new map.
![7 - [FINAL MISSION][Part: 1/3] Castle - Walkthrough - Rainbow Six: Lockdown - Game Guide and Walkthrough](https://game.lhg100.com/Article/UploadFiles/201512/2015121619131896.jpg)
![8 - [FINAL MISSION][Part: 1/3] Castle - Walkthrough - Rainbow Six: Lockdown - Game Guide and Walkthrough](https://game.lhg100.com/Article/UploadFiles/201512/2015121619131957.jpg)
Start moving forward. There's a single opponent in the vicinity (#1). You will have to take him out quickly. If you're lucky, you should be able to surprise him. Use the stairs to get down to the lower level. Enter a large structure. You will be attacked by enemy soldiers almost instantly (#2). Remember to aim at their heads!
![1 - [FINAL MISSION][Part: 2/3] Castle - Walkthrough - Rainbow Six: Lockdown - Game Guide and Walkthrough](https://game.lhg100.com/Article/UploadFiles/201512/2015121619131999.jpg)
![Keep pushing forward - [FINAL MISSION][Part: 2/3] Castle - Walkthrough - Rainbow Six: Lockdown - Game Guide and Walkthrough](https://game.lhg100.com/Article/UploadFiles/201512/2015121619131940.jpg)
Keep pushing forward. Remember that the structure is going to be defended by some massive enemy forces (#1). Thankfully, you will be able to surprise most of your opponents. Use walls and large objects for extra cover. You should reach the exit (#2) in just a few seconds.
![2 - [FINAL MISSION][Part: 2/3] Castle - Walkthrough - Rainbow Six: Lockdown - Game Guide and Walkthrough](https://game.lhg100.com/Article/UploadFiles/201512/2015121619131950.jpg)
![You should be able to locate a new staircase very soon - [FINAL MISSION][Part: 2/3] Castle - Walkthrough - Rainbow Six: Lockdown - Game Guide and Walkthrough](https://game.lhg100.com/Article/UploadFiles/201512/2015121619131948.jpg)
You should be able to locate a new staircase very soon. Head on to the upper floor. Be careful, though. The new corridor is going to be guarded by a large group of enemy soldiers (#1). One of them is probably equipped with a rocket launcher! You've got to take him out quickly!! Otherwise he would have killed or seriously injured your team. Keep moving towards your destination. You will be encountering additional units along the way (#2). I would recommend that you take out most of the terrorists on your own.
![3 - [FINAL MISSION][Part: 2/3] Castle - Walkthrough - Rainbow Six: Lockdown - Game Guide and Walkthrough](https://game.lhg100.com/Article/UploadFiles/201512/2015121619131976.jpg)
![Head on to the right corridor - [FINAL MISSION][Part: 2/3] Castle - Walkthrough - Rainbow Six: Lockdown - Game Guide and Walkthrough](https://game.lhg100.com/Article/UploadFiles/201512/2015121619131933.jpg)
Head on to the right corridor. Once again, you will have to deal with a large group of enemy units (#1). Try to use brick walls for extra cover. Wait for the opponents to expose their positions. I would recommend that you aim at their heads. There are new stairs near your current position (#2). Make sure that the rest of the team is following your lead. You should also reload the weapon.
![4 - [FINAL MISSION][Part: 2/3] Castle - Walkthrough - Rainbow Six: Lockdown - Game Guide and Walkthrough](https://game.lhg100.com/Article/UploadFiles/201512/2015121619132006.jpg)
![There are at least TWO enemies guarding the stairs (#1) - [FINAL MISSION][Part: 2/3] Castle - Walkthrough - Rainbow Six: Lockdown - Game Guide and Walkthrough](https://game.lhg100.com/Article/UploadFiles/201512/2015121619132000.jpg)
There are at least TWO enemies guarding the stairs (#1). You will have to eliminate both of them. Thankfully, you should be able to surprise these terrorists, so you won't have to worry about them too much. Once you're on a top floor, a short cut-scene will appear on your screen. Get ready. There are some challenging fights ahead of you! Start off by killing visible enemy units (#2).
![5 - [FINAL MISSION][Part: 2/3] Castle - Walkthrough - Rainbow Six: Lockdown - Game Guide and Walkthrough](https://game.lhg100.com/Article/UploadFiles/201512/2015121619132014.jpg)
![Once again you will have to deal with a guy who's equipped with a rocket launcher (#1) - [FINAL MISSION][Part: 2/3] Castle - Walkthrough - Rainbow Six: Lockdown - Game Guide and Walkthrough](https://game.lhg100.com/Article/UploadFiles/201512/2015121619132045.jpg)
Once again you will have to deal with a guy who's equipped with a rocket launcher (#1)!! You MUST be very careful. He is tough to beat. Once he's gone, start shooting at the remaining enemy soldiers (#2). Most of them will be standing on the upper floor, so you must choose your targets carefully. The rest of the team should help you in these fights.
![6 - [FINAL MISSION][Part: 2/3] Castle - Walkthrough - Rainbow Six: Lockdown - Game Guide and Walkthrough](https://game.lhg100.com/Article/UploadFiles/201512/2015121619132026.jpg)
![Make sure that the area is clear - [FINAL MISSION][Part: 2/3] Castle - Walkthrough - Rainbow Six: Lockdown - Game Guide and Walkthrough](https://game.lhg100.com/Article/UploadFiles/201512/2015121619132037.jpg)
Make sure that the area is clear. Use the nearby stairs in order to get to the upper floor (#1). You shouldn't encounter any new units. Start moving forward. Turn left. Keep heading towards your current destination. Stop in the designated area (#2). The final challenge awaits you!
![7 - [FINAL MISSION][Part: 2/3] Castle - Walkthrough - Rainbow Six: Lockdown - Game Guide and Walkthrough](https://game.lhg100.com/Article/UploadFiles/201512/2015121619132129.jpg)
![8 - [FINAL MISSION][Part: 2/3] Castle - Walkthrough - Rainbow Six: Lockdown - Game Guide and Walkthrough](https://game.lhg100.com/Article/UploadFiles/201512/2015121619132111.jpg)
The final mission of the singleplayer campaign is going to be very simple. You won't have to worry about anything in particular. Start off by moving forward. You should be able to locate a locked door in just a few seconds (#1). Pick the lock and enter a new corridor. Keep moving forward. There's a single opponent in a nearby room (#2). You should be able to eliminate him quietly. He wasn't expecting your team to show up here.
![1 - [FINAL MISSION][Part: 3/3] Castle - Walkthrough - Rainbow Six: Lockdown - Game Guide and Walkthrough](https://game.lhg100.com/Article/UploadFiles/201512/2015121619132181.jpg)
You don't have to visit all of the surrounding rooms, because you won't find anything interesting there. Head on to the LEFT room (#1). Be careful, though. You will be encountering additional enemy units along the way. Most of the terrorists will be standing near a door that's leading to a nearby room (#2). Remember to aim at their heads, however you don't have to save up your ammunition anymore.
![2 - [FINAL MISSION][Part: 3/3] Castle - Walkthrough - Rainbow Six: Lockdown - Game Guide and Walkthrough](https://game.lhg100.com/Article/UploadFiles/201512/2015121619132121.jpg)
![Lean out carefully - [FINAL MISSION][Part: 3/3] Castle - Walkthrough - Rainbow Six: Lockdown - Game Guide and Walkthrough](https://game.lhg100.com/Article/UploadFiles/201512/2015121619132180.jpg)
Lean out carefully. Some of the terrorists will be hiding by the destroyed wall (#1). Just as before, it would be best to aim at their heads. Be careful, though. Some of the enemy soldiers may surprise you from the left flank. You have to be ready for these types of attacks. Head on to the next corridor. One of the terrorists will be hiding here (#2). You may try aiming at his hand/leg or send him a grenade or two.
![3 - [FINAL MISSION][Part: 3/3] Castle - Walkthrough - Rainbow Six: Lockdown - Game Guide and Walkthrough](https://game.lhg100.com/Article/UploadFiles/201512/2015121619132128.jpg)
![Keep pushing forward - [FINAL MISSION][Part: 3/3] Castle - Walkthrough - Rainbow Six: Lockdown - Game Guide and Walkthrough](https://game.lhg100.com/Article/UploadFiles/201512/2015121619132273.jpg)
Keep pushing forward. You will be encountering new units quite regularly (#1). Thankfully, the terrorists will be operating in very small groups, so you shouldn't have any problems eliminating them. You will reach a new location in just a few seconds (#2). Stop here and get ready! This is the final area of this mission. Make sure you've reloaded your current weapon!!
![4 - [FINAL MISSION][Part: 3/3] Castle - Walkthrough - Rainbow Six: Lockdown - Game Guide and Walkthrough](https://game.lhg100.com/Article/UploadFiles/201512/2015121619132282.jpg)
![Despite what you're probably thinking, you won't have to do anything out of the ordinary - [FINAL MISSION][Part: 3/3] Castle - Walkthrough - Rainbow Six: Lockdown - Game Guide and Walkthrough](https://game.lhg100.com/Article/UploadFiles/201512/2015121619132293.jpg)
Despite what you're probably thinking, you won't have to do anything out of the ordinary. I would recommend that you pick your targets wisely. Remember that you're not rushed by anything. The main group of enemy soldiers is going to be located on your left (#1). Start shooting at the terrorists. Remember that it would be best to aim at their heads. You might also consider using all of the remaining grenades. You won't need them in the future. Once you're done with the first group of terrorists, concentrate all of your efforts on the soldiers standing by the landing pad (#2).
![5 - [FINAL MISSION][Part: 3/3] Castle - Walkthrough - Rainbow Six: Lockdown - Game Guide and Walkthrough](https://game.lhg100.com/Article/UploadFiles/201512/2015121619132221.jpg)
![Start moving towards the nearby stairs (#1) - [FINAL MISSION][Part: 3/3] Castle - Walkthrough - Rainbow Six: Lockdown - Game Guide and Walkthrough](https://game.lhg100.com/Article/UploadFiles/201512/2015121619132215.jpg)
Start moving towards the nearby stairs (#1). You have to be very careful, especially since there might still be some terrorists in the area. Get down to the lower level. TURN RIGHT. There's probably a single opponent hiding here (#2). You have to get rid of him quickly.
![6 - [FINAL MISSION][Part: 3/3] Castle - Walkthrough - Rainbow Six: Lockdown - Game Guide and Walkthrough](https://game.lhg100.com/Article/UploadFiles/201512/2015121619132341.jpg)
Start moving forward. Be sure to stick close to the LEFT wall (#1), so you won't get lost. You shouldn't encounter any new units at the moments. Order your team to STOP, once you've reached the stairs (#2). Make sure you've reloaded your weapon!
![7 - [FINAL MISSION][Part: 3/3] Castle - Walkthrough - Rainbow Six: Lockdown - Game Guide and Walkthrough](https://game.lhg100.com/Article/UploadFiles/201512/2015121619132386.jpg)
![Use the stairs to get to the landing pad - [FINAL MISSION][Part: 3/3] Castle - Walkthrough - Rainbow Six: Lockdown - Game Guide and Walkthrough](https://game.lhg100.com/Article/UploadFiles/201512/2015121619132365.jpg)
Use the stairs to get to the landing pad. TURN RIGHT. You should see at least two additional units. Take care of the left soldier first. The second terrorist will be Vanderwaal (#1). You might want to consider aiming at his head, however this is not necessary.
CONGRATULATIONS! You've just finished the game!!!
![8 - [FINAL MISSION][Part: 3/3] Castle - Walkthrough - Rainbow Six: Lockdown - Game Guide and Walkthrough](https://game.lhg100.com/Article/UploadFiles/201512/2015121619132478.jpg)
The following tips refer to the SINGLEPLAYER campaign of the game. We'll start with some informations regarding the types of missions of the campaign mode. You should know that "Lockdown" isn't a complicated game. As a result, you shouldn't find yourself in a situation where the carried equipment (mostly guns) is useless, because of the terrain or the terrorists themselves. You won't have to restart any mission because of that, however if you pick your equipment wisely, you should be able to get rid of most of the opponents without any problems. You will also have an opportunity to take part in more spectacular fights, mostly because the terrorists won't stand any chance. Here are a few types of missions you will encounter during the campaign.
1) Night missions; tight outdoor areas and/or small rooms.
I would recommend that you take one of the available submachine guns. These weapons must be handy, because most of the fights are very fast. You might also consider attaching supressors to the guns, although you should remember that "Lockdown" isn't concentrated on that aspect of the gameplay. You may be able to surprise some of the opponents, however don't expect to finish the whole mission without getting spotted by enemy soldiers. Furthermore, you will be encountering large groups of terrorists very frequently. It's almost impossible to surprise all soldiers at the same time. You should also take some additional equipment with you. I would recommend choosing smoke grenades and/or flashbangs, however you won't have to use these objects too often. Don't forget about the possibility of using night vision goggles. You have them with you all the time.
2) Night missions; wide outdoor areas with large rooms and/or corridors.
You might want to consider taking one of the available assault rifles with you. In order to get rid of most of the opponents safely, you will have to aim at their heads. It would be best to stick to the supressor upgrades, especially since you should be able to surprise more enemy soldiers. You can also activate the motion detector from time to time, however this won't be necessary. You should be able to take out all enemy soldiers without this upgrade. Don't forget about the possibility of choosing an additional equipment. I would recommend that you take smoke grenades with you. They will come in handy, especially inside buildings. Flashbang grenades would also seem like a good idea, however in that case they would have be thrown precisely in order to stun all of the surrounding enemy troops.
3) Daytime missions; tight outdoor areas and/or small rooms.
You will have to choose between two different strategies. The first one includes staying with the submachine guns, however in this case the supressor upgrade seems useless. Furthermore, it would only make your weapon less powerful, and you wouldn't gain anything by taking it with you. I would recommend that you take the scope, instead. Thanks to that, your shots will be very precise. Alternatively, you could take the high capacity magazine, although this upgrade will only lower your mobility. The second approach involves taking shotguns or heavy machine guns. Bear in mind that these guns will be useful ONLY in very small areas, because the effective range of heavy weapons is VERY limited. Don't forget about the additional equipment. Frag grenades seem like a good idea, especially since you will HAVE to use them from time to time. Thanks to these objects you will be able to take out even large groups of enemy soldiers without any major problems.
4) Daytime missions; wide outdoor area with large rooms and/or corridors.
I would recommend that you take one of the assault rifles with you. The weapon must be powerful and precise. As you've probably suspected, the SCOPE upgrade is the best option here, mostly because you will have to eliminate enemy soldiers from a large distance. Nevertheless, one of the team members should be equipped with a shotgun or a heavy machine gun. He will deal with those terrorists who have decided to surprise your team. You'll probably have some problems with the grenades. Frag versions of these objects aren't that useful here, mostly because they would have to be thrown very precisely. If you don't feel to comfortable with that, you may take the smoke grenades instead. They will allow you to blind some of the terrorists, however in some situations they can be pretty useless, so you can't depend on them all the time.
You will be able to choose between five different groups of weapons. Here they are:
ASSAULT RIFLES:
These weapons are both quite powerful and precise. As a result, you should be using them for the most of the time, however later in the game they become less useful. It's mostly because enemy soldiers will be equipped with bulletproof vests and better weapons. Nevertheless, you should be interested in these guns, especially since you will be able to upgrade them with most of the available components (scopes, supressors...).
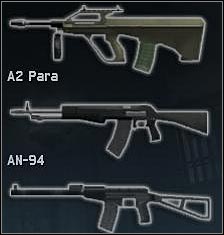
SUBMACHINE GUNS
The weapons from this group are very light and offer a possibility of attacking enemy soldiers almost instantly. It's best to use them during the missions that will require you to make quick decisions. Submachine guns are also very useful in areas filled with a lot of small rooms and corridors. Bear in mind that you will have to decide on long bursts in order to take down most of the terrorists. Furthermore, submachine guns aren't too precise. Thankfully, in most cases you will be able to upgrade them with all of the available components. I will recommend choosing the high capacity magazine. Thanks to that, you won't run out of ammo during a fight.
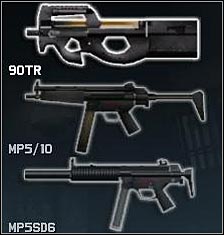
HEAVY MACHINE GUNS
You should know exactly what to expect from these kinds of weapons. Heavy machine guns are very powerful, however some of these weapons can also be used to fire single shots. In that case, you might want to consider upgrading them wth a scope. You won't need the high capacity magazine, because these weapons are so powerful, that you won't have to sacrifice a whole clip in order to get rid of the nearby enemy soldiers.
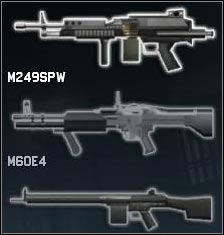
Two remaining groups include SHOTGUNS and GRENADE LAUNCHERS. I wouldn't recommend using any of these weapons. They are pretty useless during the singleplayer campaign. As for the shotguns, they are very powerful, however you wouldn't have a chance to use them. In order to inflict some serious damage you would have to operate at a very small range. Most of the missions have larger corridors or outdoor areas and you'd be defensless out there. I would recommend, on the other hand, giving a shotgun to one of your teammates. Thanks to that, he will be taking care of the terrorists who have decided to surprise you or the rest of the team. You can ignore the grenade launcher. There's also an additional gun. Each member of the team can carry it. You can choose between several types of weapons, however for the whole time you should be using the main weapon. Be sure to fire single shots, whenever it's possible. Thanks to that, you won't run out of ammo during the mission.
You will be able to choose between four different components for your guns. Bear in mind that some weapons can't be equipped with all of these upgrades. Furthermore, most of the heavy machine guns aren't upgraded at all. If you want to have one of these components, I would recommend that you take a submachine gun or an assault rifle.
RED DOT is a big dissapointment, at least in my personal opinion. This upgrade seemed like a good idea, at least in theory. Sadly, it's almost useless during the game. This component will only help you to aim at the heads of the enemy soldiers. In order for it to work they should be standing near your position. Red dot doesn't offer any kind of zoom, so you won't be able to use it while exploring large areas of the map. It would be best if you just skipped this component and concentrate on something else.
SCOPE is, on the other hand, one of the most useful components of the game. You should definately consider using it, especially during the missions with large areas to explore. The scope can be mounted on most of the available weapons, even on some of the heavy machine guns. You should really consider using it.
HIGH CAPACITY MAGAZINE is only useful if you plan on shooting at the enemy soldiers with long bursts. I would recommend taking it with one of the submachine guns. These weapons aren't too powerful, so you will have to fire more shots in order to get rid of surrounding enemy troops.
SUPRESSOR has already been mentioned before. This upgrade can be helpful, although you won't have to use it all the time. Sadly, supressor makes weapons less powerful, so I would recommend mounting it on assault rifles. Don't use it with the submachine guns, because they are relatively weak and it would only make it worse.
You will be dealing with two different groups of objects. Let's start with the GRENADES, because they are far more important during the game. Furthermore, you will be using them very often. FLASHBANG GRENADES are used to blind enemy soldiers. Thanks to that, you are able to kill them without having to use cover or moving a lot. Bear in mind that the enemies are stunned only for 2-3 seconds. After that, they will start shooting at your team. You have to be quick about it, especially while trying to blind a whole team of enemy soldiers. Alternatively you could use this time to find a better cover or let the squad take new positions. FRAG GRENADES are very common. I guess I don't have to explain how they work. The most important thing in this case is to throw them precisely at the enemy team. Otherwise you would have sacrificed this object for nothing. Thankfully, grenade throwing is a very simple task, especially since a path will be shown on your screen. Frag grenades are also very useful to kill enemies standing by ladders. These situations have been mentioned in the walkthrough section of the guide. SMOKE GRENADES are commonly being used in order to organize a surprise attack against enemy soldiers. Bear in mind that these objects won't blind terrorists completely. They will still be shooting at your teammates. The only difference is that they will have a hard time spotting your colleagues. Smoke grenades can also be used to help you move to a more suitable cover. PHOSPHORUS GRENADES for the most of the time are pretty useless. I would recommend that you pick something else instead. Frag grenades seem like a good idea. You can also combine different types of grenades (frag & flashbang, frag & smoke...). The second group consists of the ADDITIONAL EQUIPMENT. I wouldn't recommend using any of these objects. It's just a waste of time, at least in my personal opinion. You will be able to choose between a HAMMER and some BREACH CHARGES. Both of these objects are being used while opening doors, however I'd recommend more traditional methods. Remember that you can order your teammates to storm the nearest room with or without using flashbang grenades.
Good luck!!!

 Randals Monday Game Guide & Walkthrough
 RIFT Game Guide & Walkthrough
 Resident Evil 6 Game Guide & Walkthrough
 Resonance Game Guide & WalkthroughRisen 2: Dark Waters Game Guide & Walkthrough