
Welcome to the unofficial guide for Neverwinter Nights 2. You will find here a detailed walkthrough for the main campaign mode and all of the side quests in the game. Since the gameplay structure is quite specific, most of the subquests have been discussed alongside the main plot - due to their being quite closely related to them, which would make it pointless to discuss them separately. The ones, whose completion is completely independent of the maim plot, have been discussed at the very end of this guide. Apart from that, we have also included an extensive set of hints on the development of the Keep, which the player receives at some point during the game. Virtually all secrets, which you can find throughout the game, are connected with this matter. Good luck!
Krzysztof "Lordareon" Gonciarz ()
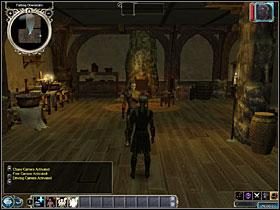
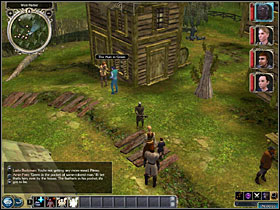
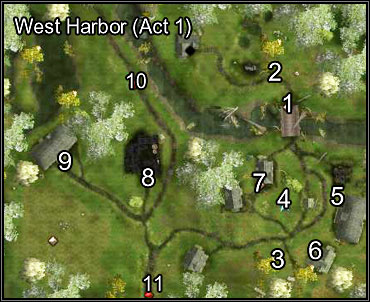
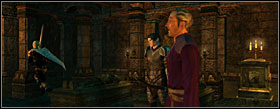
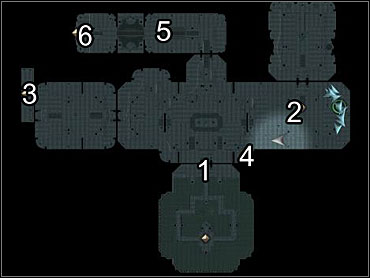
Your story begins in your foster father Daeghun's house (1). He tells your to take the furs out of the nearby chest. Do so and talk to him again. You'll get two journal entries: The Fur Trade and High Harvest Fair. Leave the house.

Quest from: Daeghun Farlong
Pay a visit to a merchant named Galen (2). Along the way you'll meet two friends of your - Amie and Bevil. Join up with them. You'll also have a chat with Georg Redfell who'll explain to you the rules of this year's tournament. Sell the furs to Galen and buy a Duskwood Bow for the money you got. Take it to Daeghun.

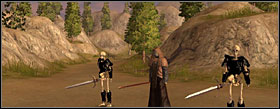
HINT: Don't grow accustomed to Amie and Bevil, they're here just for training purposes.
Quest from: Georg Redfell
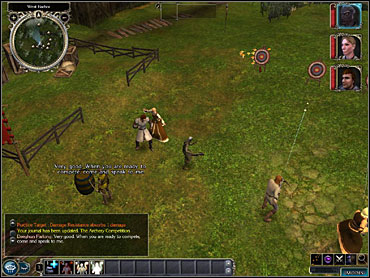
The Archery Competition
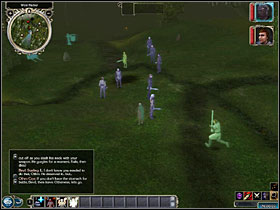
Talk to Daeghun (3) and take a crossbow from the barrel nearby. Shoot one of the training targets and talk to Falong once again. Now stand in the spot shown on the screenshot below and shoot all the barrels. In order to win you have to hit more than 5 of them - you should manage to succeed despite your statistics and abilities.
The Harvest Brawl
Talk to Brother Merring (4) and tell him you're ready to go. Train a bit on the targets nearby and talk to him again. You'll find your first set of opponents. After the fight talk to Mossfelds and tell them you're all set to take them on. They will propose a bet, you can take it and loose some influence on Bevil (-5). Defeat them and you'll win the second contest.
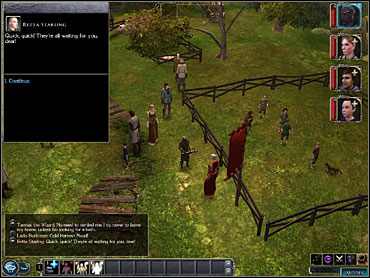
The Tourney of Talent
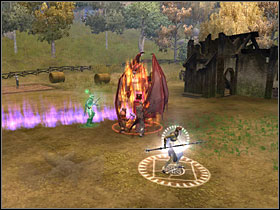
Talk to Retta Starling who's standing near one of the pens (5) and agree for Amie to take part in the competition. Once you're inside the pen, cast Summon Creature 1, Enlarge Person (on Bevil) and Ray of Frost (on the barrel nearby).
When you win the contest, a man named Orlen will approach you and tell you he's suspecting one of the entries n the biggest big competition to be a fraud. Take a look at Lewy's Hog and Amie will tell you that it's in fact enchanted. Talk to Lewy - threaten him and he'll offer a vial of some potion in exchange for covering him up. Agree or use a scroll of Lesser Dispel (you've won it in the Tourney of Talent) on the hog. You can even do both. Go back to Orlen (150 XP).
HINT: The hog-related quest is a separate entry in the journal named A Man and his Hog.
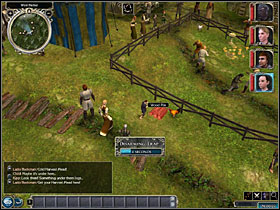
The Knaves' Challenge
Talk to Tarmas (6) and ask him to explain the competition. Listen to the poem and talk to the kid standing nearby. Ask him to join your party, you'll need his thievery skills. Your goal is to find three feathers.
The first one is below some planks near the Harvest Brawl arena. Have Kipp disable the trap in there.
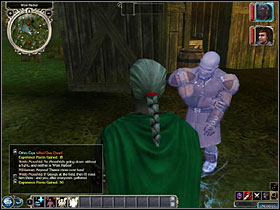
The second one is in the man dressed in green. Steal it from him using Sleigh of Hand as Kipp. Even if you're detected it doesn't matter.
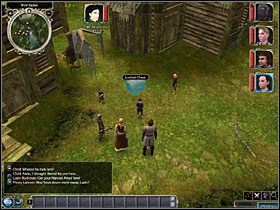
The third one is in a locked chest near the main path. Use Kipp's skills again to get it.
Talk to Tarmas again and he'll confirm your victory.
When you win all 4 competitions go back to Georg and after speaking with him head to the stage (7). And that concludes the tutorial.
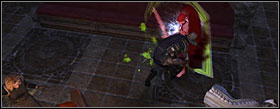
The village has been attacked. Talk to Bevil and Amie and take your equipment out of the chest. Enter Daeghun's room, you'll find Arvoreen's Amulet of Aid in there. Arm your character and level up your companions. Go down. You'' be attacked by three monsters. Defeat them and grab the stuff from the desk. Leave the building.
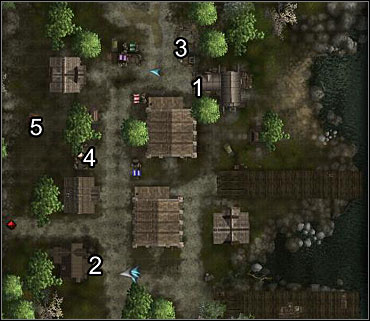
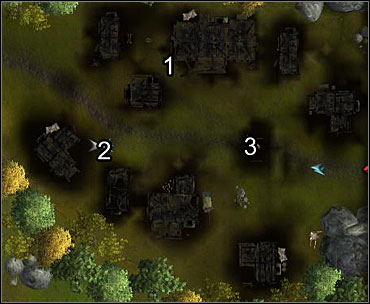
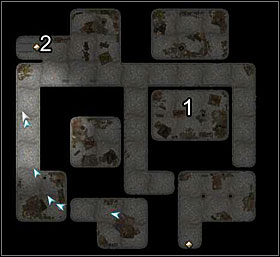
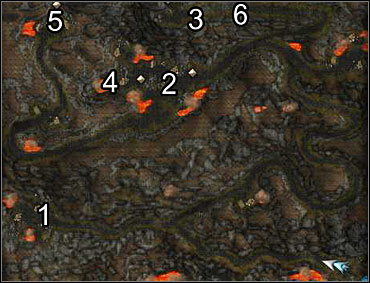
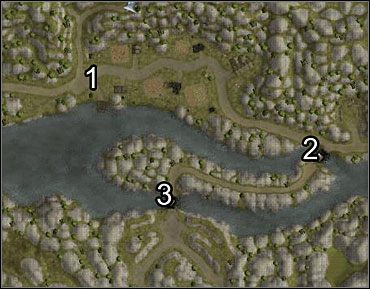
Talk to Merring. He'll bless you and tell you to report by the bridge (1). Defeat any enemies there and speak with Georg. You now have to gather some men to defeat the enemy's main force.
Quest from: Georg Redfell
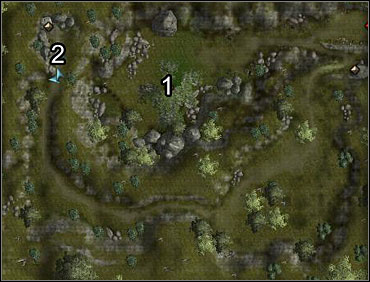
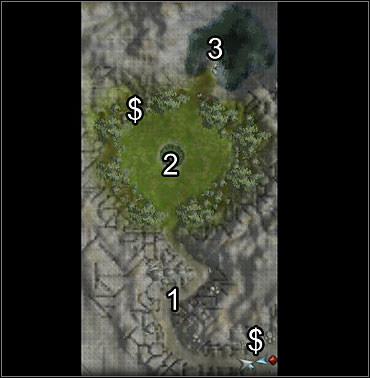
War Mossfeld is standing nearby wounded (2) - talk to him. You can go to Merring to grab some herbs and rescue him or finish him off (3 Evil points). Now that your quest is to gather some men, it's better to help him after all.
Go a bit further to the South and defeat more enemies. You'll see a cut-scene in which Amie gets killer. Well, that's it for her. Talk to Tarmas and then try to convince the following men to join the militia: Wyl Mossfeld (3, give him Merring's herbs), Lazlo Buckman (4), Ian Harman (5, you have to persuade him or even hit him in order for him to join). Open or smash the door to Pierson's house (6) and inside talk to the proprietor. When he leaves you alone in there, you can just as well rob his house.
Enter Tarmas' house (7) and take everything you can find (the mage actually let you do that by giving a small side-quest of his own). There's a trap in the closet, but it won't harm you too much.
Continue on and talk to Pitney Lannon - cure him using Merring's herbs. And that completes the militia. Near the flaming barn (8) you'll see a wounded enemy. You can get some evil points for threatening and finishing him.
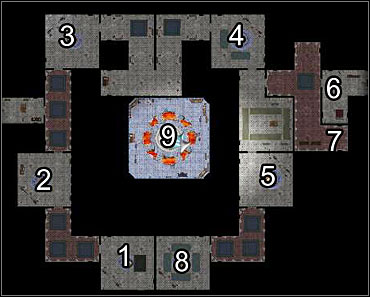
Talk to Georg and the battle will begin. When you defeat the two waves of the enemies, some evil dwarves will enter the nearby building (9) and you'll have to choose whether to go and help the civilians or hold your ground. It's generally better to choose the former. Defeat all the enemies in the house and talk to the children in there. If you talk to Retta before the fight she'll let her guard dogs help you. Before leaving the building look around and grab any loot you can find.
HINT: The children rescue is a separate quest called Starling Standoff.
Defeat the rest of the enemies. Daeghun will appear and help you hold off the final wave. A Cut-scene will commence, in which foster father will order you to go to nearby Swamp (10) and retrieve a certain artifact. Before leaving the area talk to Tarmas to buy and sell.

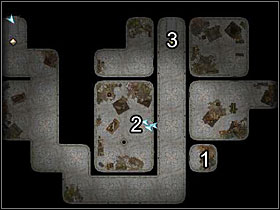
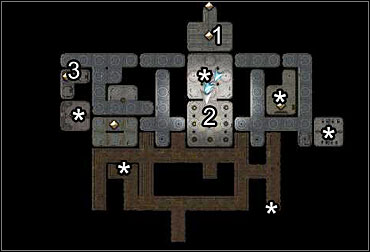
The swamp itself is a simple level where you have to reach the ruins (1). Along the way you'll find some equipment hidden in a chest (2). When you defeat the lizardfolk guarding the entrance, head down.
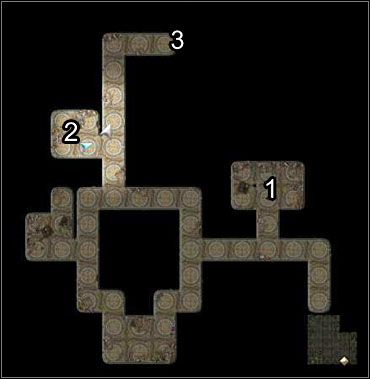
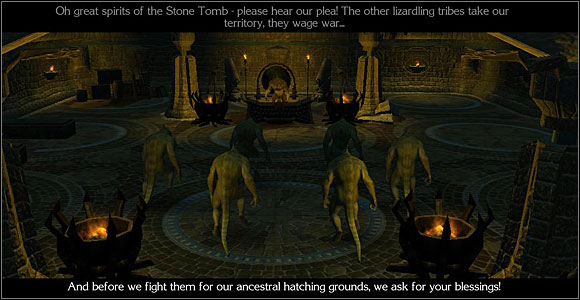
Points you should pay a visit in there are: a chest containing an armor (1), a few scrolls (2) and the lizardfolk chapel (3). When you enter the chapel, you'll be engaged in a conversation with a shaman. You can convince them not to fight in a few ways, depending on your verbal skills. If they all fail, you'll have to face a large group of enemies. When you're done either way, take the contents of the chest in the corner of the room and leave this place. Daeghun will tell you that your next assignment will be to go to Neverwinter. And also, that'd be it when it comes to Bevil's company.
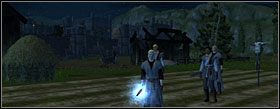
Before you hit the road, talk to everyone in the village asking for help. You'll get a few useful items. Most of all don't miss Retta Starling who'll give you a quest (A Soldier's Story) that you'll be able to complete no sooner than Act 2. When you're ready, head to weeping Willow Inn (11 on West Harbor map).
Near the entrance of the inn you'll see a dwarf named Khelgar being threatened by a few goons. It doesn't matter which dialog options you choose, you'll either way end up helping him defeating them. You'll both go inside to have a drink of the local ale. Your conversation will be interrupted by some more enemies. Defeat them all and talk to Gera. She'll ask you to go upstairs and rescue her husband.
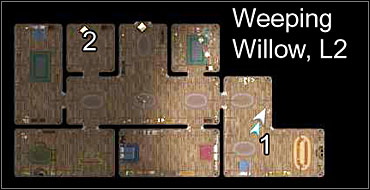
Defeat all the monsters here, and then talk to Galen (1) and Zachan (2). Look through all the closets and chests around. Go back downstairs and talk to Gera again. Before you leave the inn, speak with the innkeeper Jorik to trade.
When you're back outside, Khelgar will propose traveling together. You don't have a real choice in here, all the dialog options lead to an agreement.
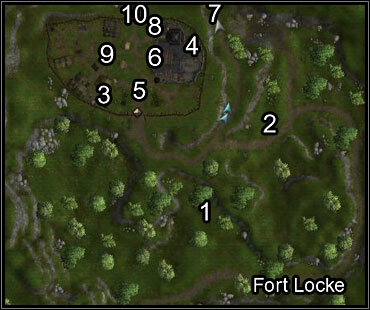
Immediately after entering the are you'll see Galen (1), whose bodyguards have decided to turn against him. You can rescue him (150 GP, 1 point Good) or kill all 3 of them (1500 GP, a nice Rapier and 3 points Evil).
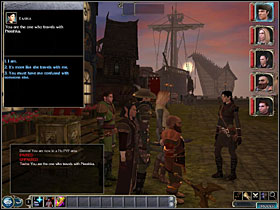
Go further and you'll meet Neeshka (2) ambushed by 3 Fort Locke guards. Help her defend against them (what you say is once again unimportant, hah). Her skills will prove invaluable during the rest of the game, provided your main character is not a rogue.
You'll eventually reach Fort Locke, where you'll get a few interesting quests. You'll also find an armorer in here (3) and a craftmaster, who'll explain the basics of crafting to you (4).
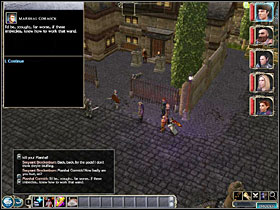
Quest from: Marshal Cormick, Vallis Anton
First talk to Marshal Cormick (5), then to Vallis Anton (6). There will be two new quests in your journal that both can be completed almost simultaneously. Gather your strengths and head for the cemetery (7). Before you reach it, you can optionally pay a visit to Swamp Cave for some experience and equipment.
The Mere of the Dead Men
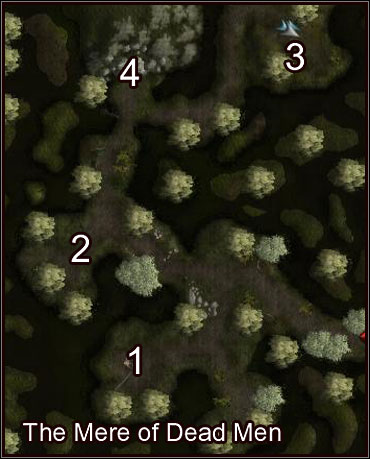
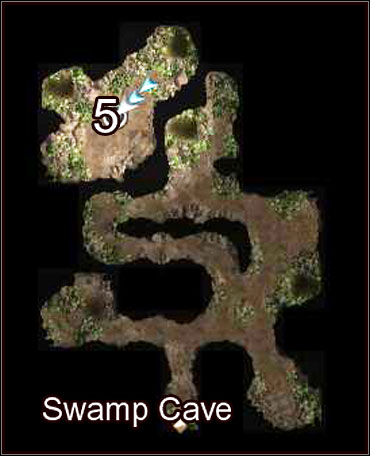
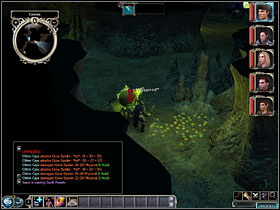
This area is not related with any quest, it's plain exercise. You'll find some gold here [(1) and (2)], a miniboss spider (3) and a cave entrance (4). In the latter there's the chieftain's chamber (5). You'll get some interesting equipment off him. Look around the dungeon and then leave.
Graveyard
On your way to the graveyard you'll be approached by a group of bandits who'll want some money from you in exchange for safe passage. You can negotiate or fight, the choice is yours. Don't miss their chest near the encampment, there are gauntlets that give you +6 Concentration in there.
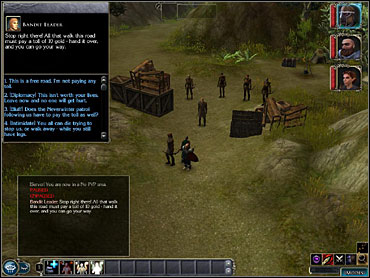 The same thing happens if you decide to go to Bandit Camp first.
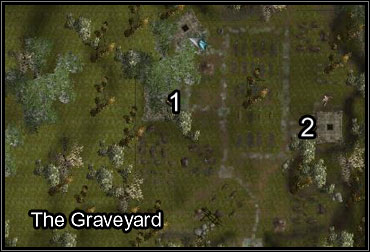
When you're at the graveyard at last, you'll face a large group of the undead. There are two crypts in here: (1) and (2). Let's start with the first one.
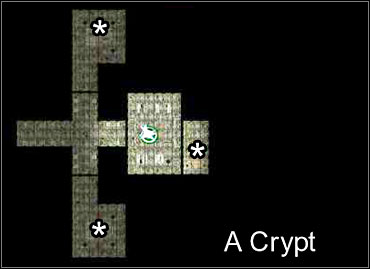
This level is full of traps, but all of them can be easily disabled by Neeshka. There's nothing quest-related in here, but it's still worth to check out the chests' contents (*) and have some exercise fighting the undead. When you're done here, leave and head for the second crypt.
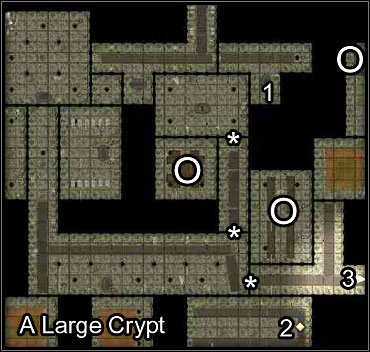
Again, most of the doors and corridors are trapped, so don't hurry and disarm them one by one. You won't find any special treasures in here, but take your time to penetrate the whole level. There's a chest containing a Falchion +1 and a Ring of Insight (1).
In (2) you'll see a dark priest conducting some unholy ritual. Defeat him (focus your attacks on him, leaving the zombies for later), and then grab all the items he had on himself. Also, search through the chest by the wall. Talk to Tann who's standing nearby - he's the one you were searching for. Join up with him and use the lever nearby. That will open the unpickable locks around (*).
Tann will ask you to find three of his missing men (O). One of them will be already dead - click on his body and he'll be counted as found. When you're done with everything around here, leave using the shortcut (3).
When you're back to the fort it will turn out that Vallis isn't going to let go of his power that easily. You can fight him or convince him to give up. Once again talk to Cormick and Tann.
Quests from: Vallis Anton/Commander Tann (depending on whether you've already completed Safer Travels, 6 on Fort Locke map), Liza (9 on Fort Locke map), Tor Millows (8 on Fort Locke map).
The above three missions as so closely connected to each other, that it's best to complete them all at once. When you have all the journal entries (settling things with the bandits, taking back the prisoners, finding the missing symbol) head for the Bandit Camp (10 on Fort Locke map).
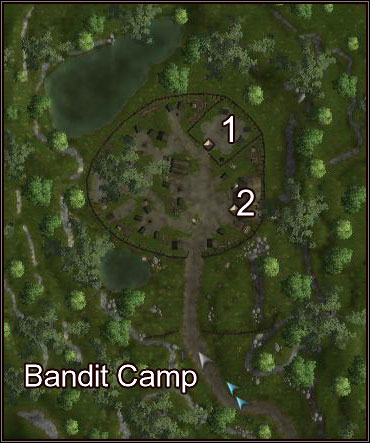
Bandit Camp
First, defeat all the bandits around. They all attack you only if you approach them closely enough, so don't walk around thoughtlessly and eliminate them group by group. When you manage to kill them all, go to the prison pen (1) and talk to the prisoners. Some more bandits will spawn around, engage them and don't let the prisoners get harmed. Lead the prisoners out of the camp, then go back and enter the building (2).
Bandit Den
Go forth, steadily eliminating groups of bandits ahead. Tor's Holy Symbol can be found in a chest along the way (1).
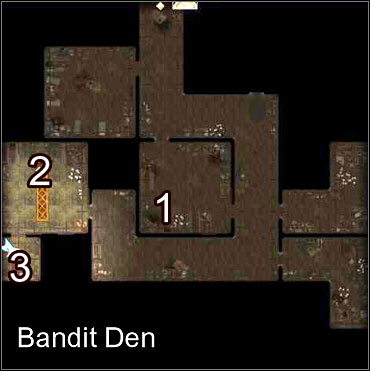
When you reach the chief's chamber (2) you can negotiate a treaty between him and Fort Locke, or just fight and kill him. The latter pays off better, as you can get some cool equipment off his body. It's good to position your party by the door, in a way that will require the enemies to attack you one by one. Look to the chief's private room as well (3) for some additional equipment.
When the fight is over look around the area and go back to Fort Locke. Talk to all three quest-givers and gather the rewards. If you're done with all the missions in the fort, you can now move to Highcliff.
Maiden's Glade
On your way to Highcliff you'll be once again attacked by a group of monsters. An elf named Elanee will help you with these. Talk to her once you're done and let her join your party. She'll lead you to Highcliff through a sacred druid sanctuary called Maiden's Glade.
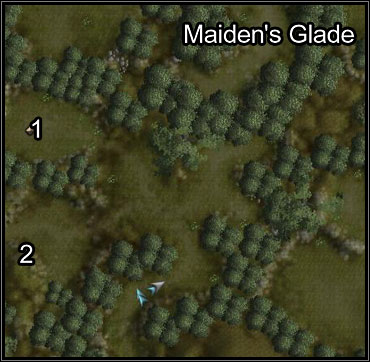
You'll be assaulted by a group of wolves. A conversation will commence between your party members and you'll have to choose whether to support Elanee (charm the animals) or Khelgar and Neeshka (kill them). A little bit further you'll have to fight some more enemies, and then once again settle an argument between Neeshka and Elanee - go straight to Highcliff or check out the big clearing ahead (1). If you choose the latter, you'll have to fight a big bear. Either way you choose, you'll eventually end up in Highcliff (2).
Highcliff
It turns out that no ship can leave the port as the lizardfolk are sabotaging anything that sails out of there. Go upstairs. A bunch of drunkards will accost you - you can fight (+ influence on Khelgar) or ignore them (+ influence on Elanee).
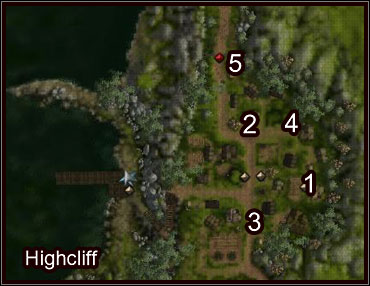
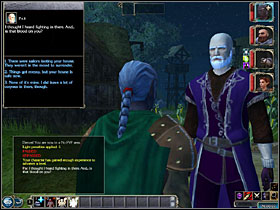
Quest from: Par (1)
Par will ask you to check out what's making these strange noises in his house. Enter it and you'll see that it's being robbed by a group of bandits. Get rid of them and look around, in one of the chests you'll see a Ring of Resistance +1. Go back to Par and tell him about the goons inside. You'll get some magic potions for that.
Quests from: Elder Marne (2), Gera (3), Juni (4), Mozah (5)
Talk to all 4 quest-givers (the quest Ship Sabotage is obligatory, the rest are side-quests, but they can be easily completed all at once) and agree to help them, then head North, to Shandra's farm. Talk to Shandra and she'll tell you to go to Highcliff Castle. Do so.
Highcliff Castle
The first person you'll see around here will be William (1). As it turns out, he escaped his wife Juni deliberately and doesn't want to go back. You can solve this in a few ways, but the reward will always be the same. Do as you will, convince him to go back or lie to Juni that he was killed or anything.

Next, find the two kids, Alex and Andrew (2). Defeat the wolves surrounding them and talk to them. You can agree to lie to their parents or rebuke them. It doesn't matter when it comes to rewards.
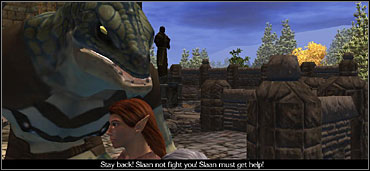
Head to the castle. You'll see a lizard named Slaan (3) in there who's fighting the undead. Help him defeat them and he'll propose a deal: you help him find the missing kin (lost somewhere around the ruins) and he'll take you to his chief. There is another way of solving this, you can just kill him and take the lizardfolk hideout map off him. The second solution is more evil of course. We'll go through both of them.
Killing Slaan
If you decide to kill Slaan, you'll see a message on your screen saying that you've found the Lizardfolk Lair map. Go there. Slash through the guards to the cave entrance.
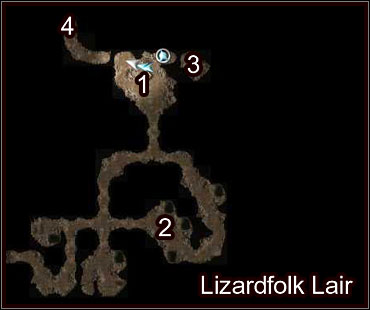
Inside, you have to reach the chieftain's chambers (1). Along the way it's good to grab a chest (2) and get a cool weapon (One of Many) from it. The chief is a tough opponent, as he's got a lot of bodyguards near him. You'll get a few cool magical items from him, though. Check out the vault (3) and leave the area using the shortcut (4). Go back to Highcliff and tell Mayne about your deed. The ship will be ready for you.
HINT: Skipping the castle ruins makes it impossible to complete Mozah's Backpay.
Helping Slaan
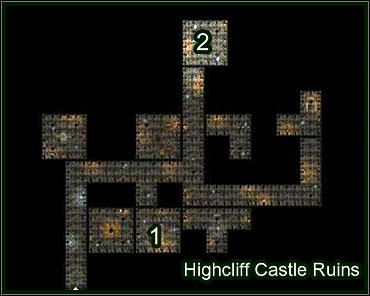
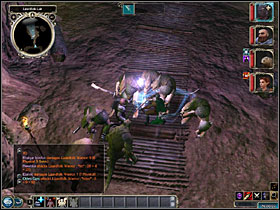
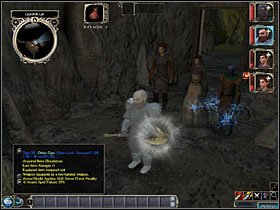
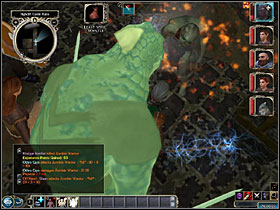
The second, more interesting way of completing this quests leads through the castle ruins. Agree to help Slaan find his folk and go down to the dungeon (4 on Highcliff Castle map). Go along the main corridor and you'll see a cut-scene with another shadow priest (1). You have to fight him. Just as before, focus your attacks on the priest himself, ignoring his undead soldiers. Notice that the zombies around here are Undead Adventurers, apparently the ones that Mozah wanted you to find. When you kill them all, search the bodies and take all the items (especially Mozah's Backpay).
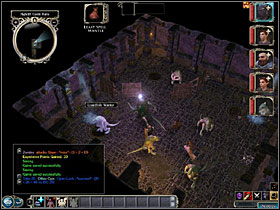
Besides that, there's not much to find around here, but nonetheless take your time to search the whole level. The warriors you are looking for are at (2). Talk to them and tell them that you just want to talk with their chief. When you're there, try to negotiate (it doesn't take any special skill to succeed in that) or just kill everyone around. The latter pays off very well (you get items for completing both ways in this quest), but is extremely difficult. When the fight breaks out, you're standing in the middle of the room that's practically filled with enemies. If you feel confident in your abilities, go ahead and try. If not, try the peaceful solution.
When you're back to Highcliff, it will be time to gather rewards for the quests you completed. You can give the 500GP you found to Mozah or lie that you weren't able to find it (your reward would be 150 GP if you gave the gold back). Tell Juni about William (truth or lies). Talk to Gera and Zachan and you'll get their family amulet for finding their kids. Last but not least, talk to Mayne. If you decided to negotiate with the lizards, you'll also have to convince him that it's the right thing. If you succeed, he'll ready the ship to Neverwinter for you.
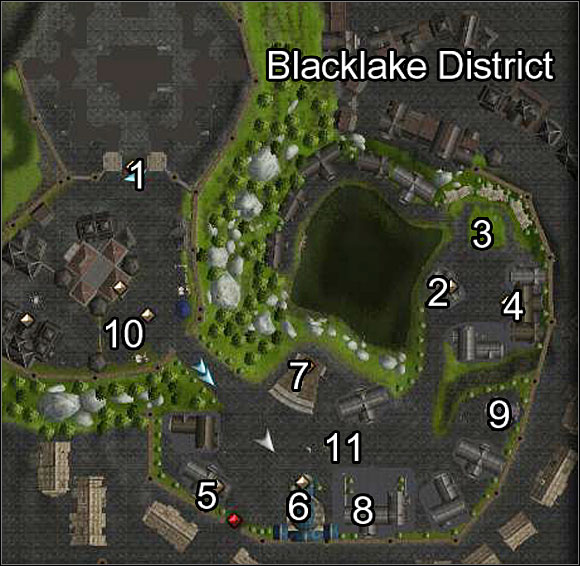
So here we are in Neverwinter, the most important city in the game. Start with visiting The Sunken Flagon (N1-1) that from now on will be your base of operations - all NPCs that you don't want to follow you at the moment will be waiting for you there. Talk to Duncan and after a long conversation you'll know that you have to enter Blacklake District that is currently off-limits. There are 2 way to do that: joining up with the local gang or joining the City Watch. This choice is quite important and will determine your cooperators for the rest of the game, so choose wisely.
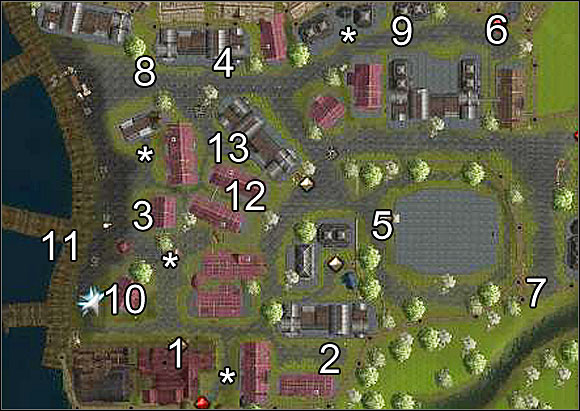
* - City Watch posts
1 - Sunken Flagon
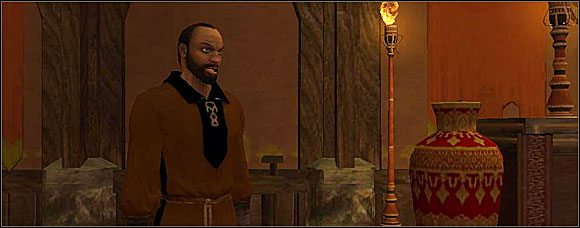
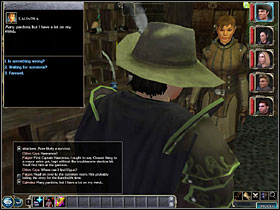
2 - Caleb
3 - Hagen's shop
4 - Moire's hideout
5 - City Watch quarters
6 - Back Alley
7 - Raylene (you can get some protection money from her)
8 -A group of drunkards (when you're with City Watch, you can tell them to take their party inside)
9 -A gang of smugglers, you can convince them to bribe you or kill them and take the whole load
10 - Sand's shop
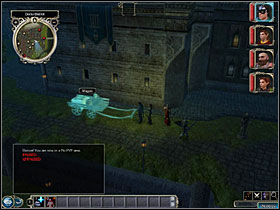
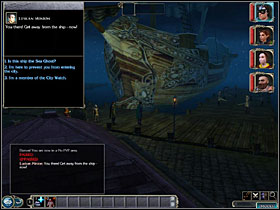
11 -Sea Ghost ship
12 - A Wounded Wolf (you can talk to it if you have Elanee in your party to start a character-specific quest for her).
13 - Two bandits trying to break into somebody's house, you can threaten them a bit once you're with Moire or the City Watch.

1 -Axle Devrie's house
2 - City Watch HQ
3 - Bandit warehouse
4 - Fihelis' house
5 - Githyanki hideout
6 - Moonstrone Mask
7 - Landon's hideout
8 -Blacklake district
Extortion
Quest from: Caleb
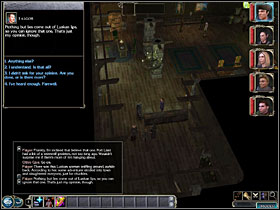
First let's suppose you want to be with the bad guys. Find Caleb in the docks (N1-2). Talk to him and ask for a job. He'll tell you to get some protection money from a merchant named Hagen (N1-3). When you enter his house, talk to his daughter Reesa and tell her you're here to see Hagen. When you talk to the man himself, you can either reason with him or just intimidate. Both ways lead to the same result, which is him giving the money to you. When you get the money, go back to Caleb. He'll tell the City Watch you're the one they want and you'll have to fight them. When you defeat them, talk to him again and he'll tell you that you passed. He'll mark Moire's hideout on your map.
Speak with Moire / Sweep Through the Docks
Quest from: Caleb / Moire
When you finish Caleb's initial quest, Moire's hideout will be marked on your map (N1-4). Talk to her in there and she'll tell you to go around the docks and corrupt or kill any city watch wandering around.
HINT: There's 600 GP in Moire's hideout and you're free to take it, she apparently won't mind.

You now have to pay a visit to 4 city watch units stationing in the docks and talk to their leaders, trying to persuade them to work for you. It's all a matter of diplomacy/intimidate - if your skills are high enough, you won't have to fight anyone in this quest. Every time you fail you'll have to eliminate a group of city watch. They're not too tough, luckily. When you deal with all 4, go back to Moire.
HINT: There are a few new event appearing on the map this time around, check out (N1-7), (N1-8), (N1-9), (N1-13). You'll also meet Qara near the Sunken Flagon - after the cut-scene you'll be able to join forces with her. She'll be waiting inside Duncan's tavern (check out Qara's personal quest for details on her).
Destroy the City Watch Post
Quest from: Moire
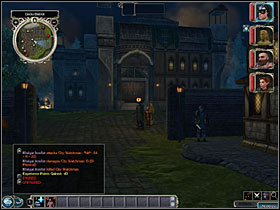
Wanting to enforce her position in the docks, Moire orders you to set the local city watch quarters on fire. She'll give you a torch for that - "arm" with it and go to your destination (N1-5). Use the torch on the two crate piles and a wagon standing by the post's walls. If you're noticed by one of the guards, you'll probably have to fight your way out of here. When all three piles of junk are on fire, just leave the vicinity and you'll see an appropriate cut-scene. Go back to Moire for further orders.
Speak with Axle Devrie / Smuggling Weapons for Moire
Quest from: Moire / Axle Devrie
Despite what you were meant to believe to this point, Moire also has a boss, and that boss is Axle Devrie, who you are now going to meet. Moire will tell you that he is expecting you in the Merchant Quarter (N2-1). Head over there. Once you're in his mansion, talk to Moire again and meet your new boss.
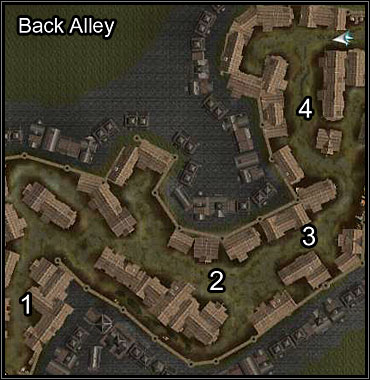
Your goal is to secure a weapon shipment that's going to strengthen your gang in the Docks. Talk to Moire once more and go to the Back Valley (N1-6). You'll meet the smugglers near its entrance. Talk to them and enter the valley itself.
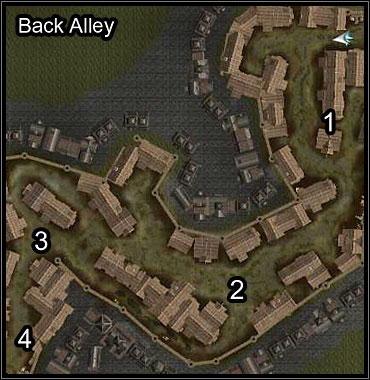
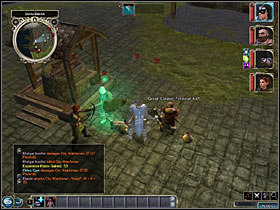
Steadily move forwards through the alley, gradually eliminating the enemies. You can avoid fighting with a group of city guards by going behind one of the buildings near them (1). In order to get through the second post (2) without fighting, tell Neeshka, Elanee or Qara to light something up in order to distract them (the conversation will commence itself once you approach the guards). At the end of the passage you'll encounter a huge band of thugs (3). This time there's nothing to do but fight. Remember to rest and use some positive buffs before the fight. Also, rest afterwards, before it's not over yet. Talk to the warehouse supervisor (4) and go inside with him.
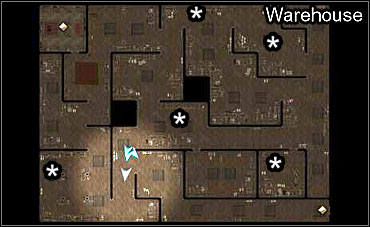
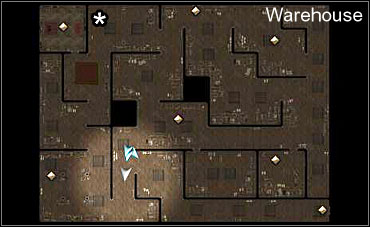
The warehouse has been attacked by the city watch and you have to defend it. For you it means going to each of the (*)-marked points and defeating all the enemies in there. You don't have any time limit, so don't hesitate to rest when you need to. The guards have an irritating habit of appearing out of nowhere around this level, so don't get caught by thoughtless wandering around. After you defeat them all, the supervisor will reward you by allowing you to buy some magical items from him. Nothing interesting, but hey, always a pleasure to search through arcane stuff. Leave through the door in the South-Eastern corner to go directly to Merchant Quarter and visit Axle. He'll send you to Old Owl Well far to the East so that you investigate the matter of a missing emissary from Waterdeep. In there, the two stories - the gang one and the city watch one - will meet each other.
HINT: The only difference between City Watch quest and Axle quest in Old Owl Well is that as a gang member you have to speak to Katrina in there first, she'll give you the papers that you have to show to Callum.
When you're finished talking to Duncan and Sand, go to the city watch quarters (N1-5) and talk to your old friend Cormick.
Neverwinter's Newest Watchman
Quest from: Marshal Cormick
Your first goal will be to help a merchant named Hagen (N1-3) defend against Caleb's cronies. Go to his house and talk to Reesa. After a short conversation Caleb's men will appear. You can either kill them or accept their bribe (the quest will be done either way). Go back to the quarters to get your next assignment, which will be killing Caleb (N1-2). The bandit will try to bribe you, but don't pay attention to his pleads and finish him. Go back to Cormick.
Enforcing Order In the Docks
Quest from: Marshal Cormick
You now have to go around the Docks and talk to each of the guard post's leaders to find out it they're turncoats or not. As it turns out, most of them is corrupted - you can try to reason with them (Diplomacy, Intimidate) and bring them back to the light side of the force, or just kill them. When you visit all 4 posts and deal with their problems, go back to the HQ - it's on fire. Talk to one of the guards around and you'll know that you should go to Captain Brelaina in the Merchant Quarter.
HINT: There are a few new event appearing on the map this time around, check out (N1-7), (N1-8), (N1-9), (N1-13). You'll also meet Qara near the Sunken Flagon - after the cut-scene you'll be able to join forces with her. She'll be waiting inside Duncan's tavern (check out Qara's personal quest for details on her).
Speak with Brelaina / Weapon Smugglers
Quest from: Brelaina
Captain Brelaina can be found in the City Watch HQ in Merchant Quarter (N2-2). She'll tell you that your next quest will be to stop the weapon smugglers who are moving a large shipment through the Back Alley (N1-6). Head over there.
At the beginning of the level you'll see a group of city watch taking bribe from some bandits (1). You can intimidate them so they let you through without any problems, or fight them. At (2) there's a huge group of guards and bandits - someone from your party will propose to distract them by lighting something up. Send somebody (Qara, Neeshka, or Elanee) to do so and you'll only have to fight the bandits. At (3) there's a group of bandits that are initially neutral to you and can be reasoned with. If you can't convince them that you want the same thing to happen, you'll have to kill them.
At the end (4) there's the weapon shipment and a numerous crew guarding it. This time the fight will be necessary. There's a lot of enemies, so if you have Qara with you just use some fireballs on them before they scatter. When you defeat them all, Neeshka will propose that you pawn some of the weapons before taking the rest back to Brelaina. If you agree, you'll gain some influence on her but loose it on Khelgar.
The Warehouse
Quest from: Brelaina
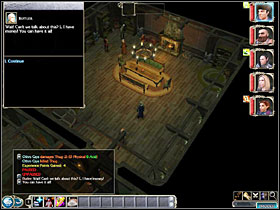
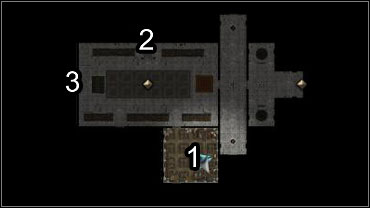
This time you have to destroy the warehouse the gang is using as a weapon stash. You'll find the entrance in the Merchant District (N2-3). Inside there's a lot of bandits to deal with. You goal is to reach (*), where you'll find a goon named Barlowe, hiding behind some crates. Destroy them and kill him. Next to his body you'll find some documents. Look through them and the quest will be complete. Neeshka will now want some time for herself to find some additional loot, let her do so if you wish.
When you leave the area, you'll meet an ambitious guard named Damon, who's just preparing his men to strike the warehouse. When you tell him that you've already done the job, he'll gladly take his team to The Sunken Flagon for an ale or two. Go back to Brelaina, then.
Protect the Watch's Informant
Quest from: Brelaina
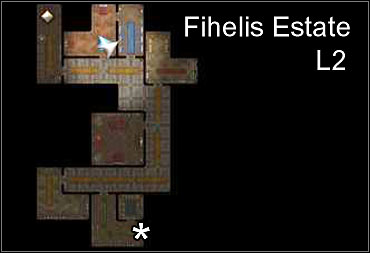
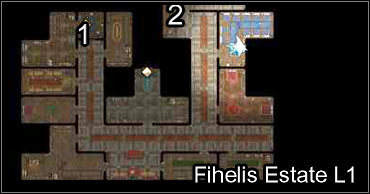
Your quest is to defend the watch's informant named Fihelis against his fellow bandits' revenge. Go to his mansion (N2-4). On Level 1 there will be several rogue-type bandits sneak-attacking you, so watch out for their criticals. At (1) there's a vault (not much to get there, but it's worth checking out), and at (2) you'll find stairs that'll lead you to L2.

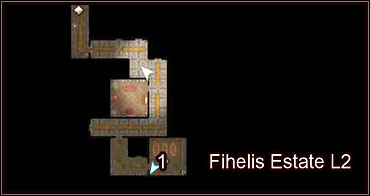
At the second level find a door (*) that'll lead you to Fihelis' room, where Moire is trying to take her revenge. Kill her and take her stuff (some interesting items for Neeshka in there). Talk to Fihelis and persuade him to give him a reward if you want to [you can take it even further, forcing him to give you the location of his hidden gem stash (N2-*)]. Go back to Brelaina, who'll now send you to Old Owl Well to find a missing Waterdeep emissary.

When you take off to Old Owl Well, along the way you'll meet a gnome bard named Grobnar, who'll want to join your party. He's not much of a fighter, but his bard enchantments can come in useful. Agree for him to join you and make him wait in the Sunken Flagon. For now you'll need someone more.. capable. It's best to have Qara in your party during the Old Owl Well missions, because you'll be facing a lot of weak enemies in there and her high-range fiery spells are perfect for that.
Quest from: Callum
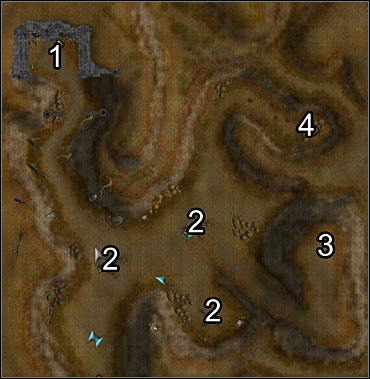
Once you're there, look around the area. If you're with the gang, talk to Katrina first. Talk to Callum and help him defeat the Orcs. After a long talk he'll send you off to find Yaisog Bonegnasher, the leader of the Bonegnasher Clan, who's probably holding the missing emissary. On you way, then.
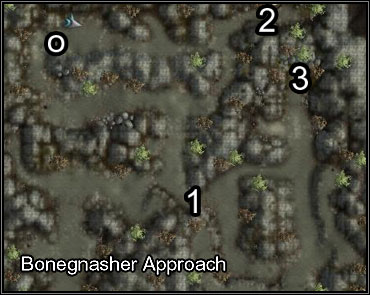
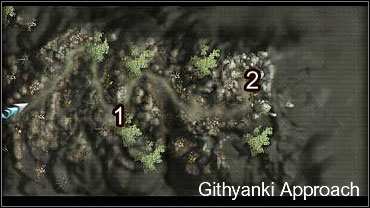
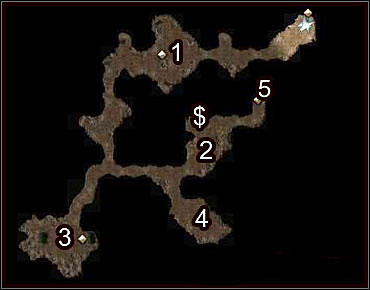
In order to gain access to Bonegnasher Lair (3), you have to get through the blocked passage (1). You'll need some explosives for that. To get them, you have to go to another cave (2). Along the way you can avoid combat with a large group of orcs (O) if you successfully imitate troll's yell (hah). You'll encounter real trolls in here as well - in order to finish them off, you'll need fire or acid damage (and here comes Qara). Enter the cave (2) and go through the tunnel till the end. You'll find a box of something that is a fantasy equivalent of grenades, take the whole package and head back to the passage (1). The way is now clear, so defeat all the orcs along the way and enter their lair (3). The guard near the entrance can be intimidated into letting you in without a fight.
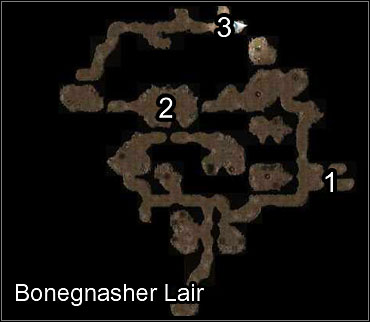
There's not much to be found on this level. At (1) you can free a group of miners. Yaisog is at (2). At first he'll leave you to fight his guards, so follow him to the next chamber. This time you'll fight the boss himself. Concentrate your attacks on him, ignoring all the other orcs. If you harm him enough, he'll try to negotiate with you. You can all the info you want from him or finish him (or do both). Note the fact that he has a decent equipment on him and there's only one way to get it. Go further and talk to a man there (3), then free him and leave through the back door. Go back to Old Owl Well.
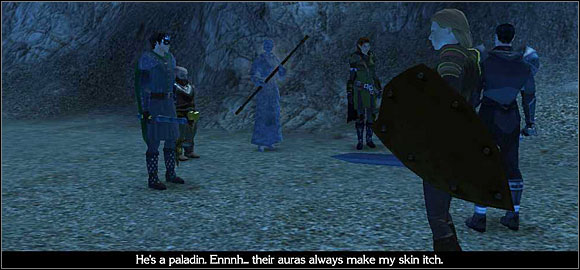
On the way you'll be attacked by a group of orcs. When you defeat them, a second wave will reveal itself, but you'll be helped by a mysterious paladin named Casavir. He's the one that Callum was talking about. Agree to join up with him. You'll get a new NPC to your party, hooray. Leave this place and head to Eyegouger lair.
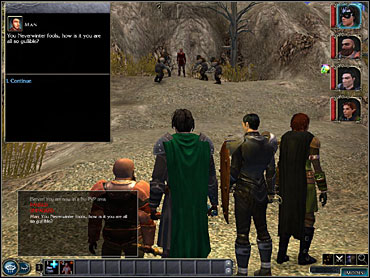
HINT: If you try to go to Neverwinter now (and you probably want to do that, in order to get some better equipment for Casavir), you'll be ambushed by some orcs led by.. the man you freed in Bonegnasher cave. Apparently he wasn't the emissary after all.
Quest from: Callum / Casavir
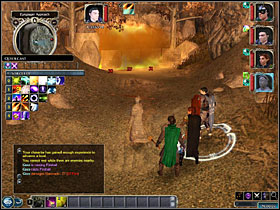
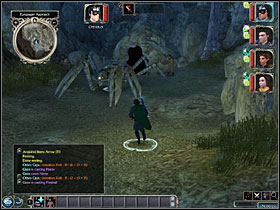
To get into the Eyegouger cave, you'll have to cross another approach, this time it's without any puzzles though. Just reach the other end of the level, eliminating orcs and spiders along the way. Use Qara's fireballs on barricades for quick results. At the end you'll find a miniboss enemy, a giant spider. When you defeat it, go underground.
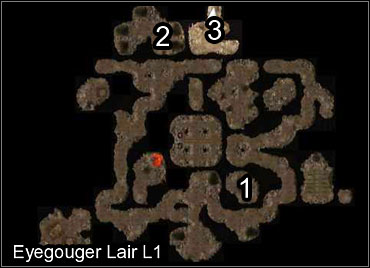
Eyegouger Lair L1
On the first level of the cave you'll find 2 interesting spots. The first one is a group of wolves (1) that you can talk to if you have Elanee with you (not much from it, they just follow you around and help you fight). The second thing is a unit of wounded orcs (2) who you can attack (Evil points) or show mercy to (Good points). Besides that, the level is all about fighting off orcs. You can go lower using the passage at (3).
Eyegouger Lair L2
On the second level there's a group of interrogators who are talking about the emissary's resistance to persuasion (1). Slay them and go further towards the barricade (2), then destroy it. You'll reach the chieftain's chamber (3). You'll have a short talk with him that'll eventually lead to combat. Before leaving (5), check out the vault (5).
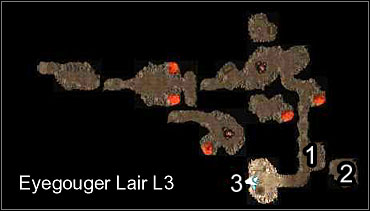
Eyegouger Lair L3
At the beginning of this level you'll see a large number of stacked human bodies - a conversation will commence between your party members. If you want to get some easy influence on Casavir, admit that you have to check out what's going on and that the bodies deserve a proper burial. At (1) you'll see a guy named Wynn laying on the floor and screaming. In a moment another Shadow Priest will appear together with his two zombie spellcasters. This can be a tough fight, but these mages don't have any decent immunity to physical hits, so just strike forth with your fighters and you'll eventually bring them down. When they're all dead, check out the nearby cell (2) to find the true emissary at last. Leave the cave using the shortcut (3). Go back to Old Owl Well to give the report to Callum. You'll get a cool weapon for Khelgar for your efforts. Defend Casavir in the conversation to get some influence on him.
The following quests are almost identical no matter if you're with the gang or with the city watch, the only difference between them is from whom you get the instructions: Axle Devrie or Captain Brelaina.
Quest from: Axle Devrie (only if you're with his gang)
When you were chasing orcs in the mountains, Axle and Moire found the traitor among their ranks. His name is Fihelis and he's living in Merchant Quarter (N2-4). Eliminating him will be your next task. Axle suggests that you do that without unnecessary bloodshed, while Moire wants you to send a message that your gang can kick butt when it needs to.
The guards near the entrance can't be avoided - you have to fight them. Once you're inside, you can either kill everyone or send a sneaking person (preferably Neeshka) to reach the stairs (2). You can also pay a visit to a vault (1).
Your true intentions of dealing with the matter quietly will be now blown apart by a sergeant who'll know of your presence no matter how well you are hidden (that's lame scripting there!). You'll have to fight his unit. Go where Fihelis is hiding (1). He'll propose a deal - you cover his escape and he'll give you 1000 GP and a gem stack Access (N2-*). Do as you will, Axle won't know even if you cheat him on this.
Quest from: Axle Devrie or Brelaina
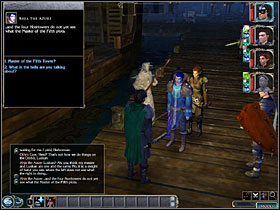
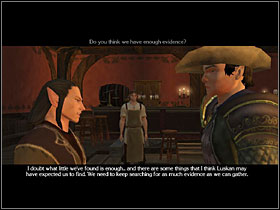
There's a Luskan ship in the docks and you have to take out the spy that it brought to Neverwinter. Go there (N1-11) and kill all who oppose you. Your main target is named Ahia the Azure and is quite a resistant little spellcaster. When you defeat him, go back to Axle or Brelaina for your next assignment.
Quest from: Axle Devrie or Brelaina
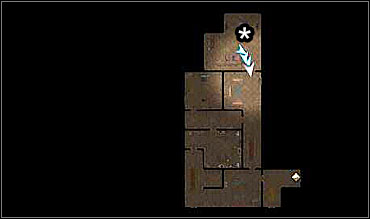
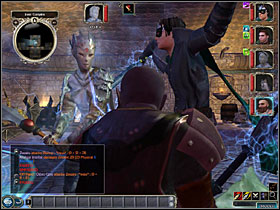
You now have to take down Githyanki's hideout in Merchant Quarter (N2-5). Head over there and kill everyone inside. In the last room (*) you'll see a golem attacking the giths. Wait for him to finish them off and then strike him yourself. Go back to Axle or Brelaina to find out that you can FINALLY (I mean F I N A L L Y, LOL) access Blacklake.
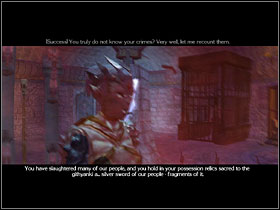
Depending on which side you're on, you'll be escorted by a city guard or your acquaintance Katrina. You can't walk freely around the district, you'll be shown directly under Aldernon's door. Talk to the elder through it and convince him to let you in. Once you're inside, have a long talk with him, and you'll find out a few interesting thing about the shards. You now have to access Neverwinter Archives. When you leave Aldernon's house, tell your escort to lead you there.
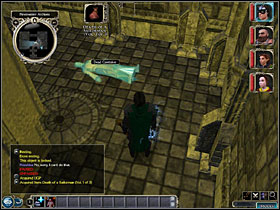
Just after you enter the building it will turn out that something isn't right here. One of the caretakers will ask for your help. You need a caretaker veil, so if you want to you can kill this guy, but you can also get one from the one already dead (1). Put on the veil and you'll be able to interact with the panels around here (O). They contain puzzles, answers to which can be found in the books scattered around the archives. When you gather them all, you don't have to read them - just take your best shot answering, and if you fail, you'll be given another chance. The questions are randomly chosen, so each time you'll have different one upon you.
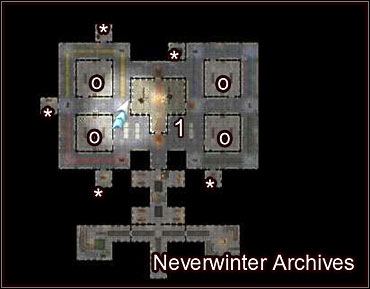
HINT: Spots on the map indicated with (*) are secret rooms that can only be accessed with the veil on. There are some decent items in there, so don't miss them.

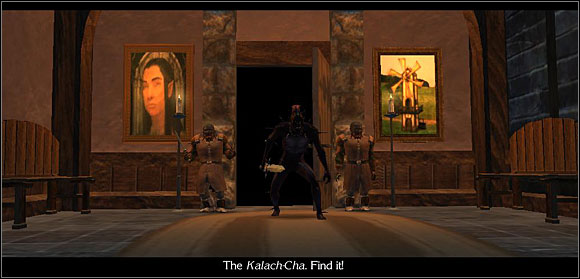
When you solve the puzzle, the central room will be open. You'll encounter a Githyanki mage in there, the very same that killed Amie in West Harbor. He'll run away and leave you to kill his warriors. Defeat them all and check out the open book in the middle. It'll turn out that the person you're looking for is Shandra, the cynical Highcliff farmer you've met a long time ago. Pay a visit to her farm.
Defeat all the enemies around here and enter the building. Shandra will run away from you a few times, always follow her and make sure she's safe. When the house is on fire, follow her out. Rescue her one more time and she'll agree to join you. Go to The Sunken Flagon.
After a long conversation you'll all go to your rooms to rest. During the night the inn will be attacked. Run out of your room and help the others defeat all the enemies. It will turn out that the Githyanki have taken Shandra. Settling his own debt with Duncan, a chaotic evil ranger named Bishop will join you. Get him some better equipment (you must have him in your party before leaving to save the girl), and then go to the village of Ember.
HINT: The last part of the first act begins now, so choose your party wisely. Qara will come in handy more than a dozen times, and so will Neeshka. Provided you must take Bishop, does that leave you without the brawl-loving Khelgar? Up to you.
The Githyanki have set up a trap in Ember for you. You have to hold off two waves of enemies. They are numerous, so remember to use high-range spells. When you're done, talk to Bishop. You'll loose influence on him if you show any compassion to the locals. A woman named Alaine will appear and tell you where the Giths have taken Shandra. Before you leave, talk to a boy named Marcus. He'll want Bishop's knife from you. Agree of refuse, it doesn't matter. This subject will return sooner or later.
On this level you just have to slash your way through the guards and reach the cave entrance (2). The only peculiarity along the way will be a traveling bard (1) whom you can save. He'll also appear in the game later on.
At the beginning of the cave your old friend the Githyanki mage will be awaiting you (1). At last you can take your revenge for Amie. When you defeat him and his unit of evildoers, go forth. You'll witness some serious confusion around here, as apparently there's a third side of the conflict in here, the one that brought succubi in here. These are best dealt with using dispel magic and such, as they tend to buff themselves with immunity spells.
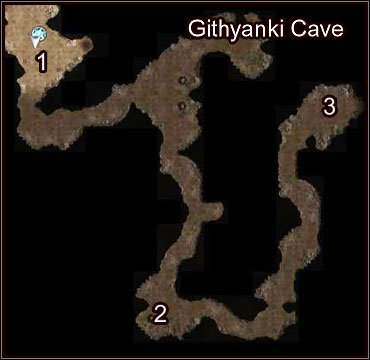
At (2) there's a construct that you fought in Githyanki hideout in Neverwinter. Now it's inactive. A conversation will commence between your party members - agree to come back for it when the fight is over. To get to the lower level, reach (3).
Once you're inside the Inner Complex, you'll see a devil trapped by two succubi (1). Defeat them and talk to the prisoner. You can get some influence from Neeshka if you show him distrust. He'll propose that if you send him off using his real name, he'll let you go through the magic barrier he's creating. Do so and he'll keep the promise. Remember to rest before what's coming.
You'll meet a demon named Zaxis in (2). He's a tough one, but if you're good with words you can avoid fighting him. In our case, when we tested this solution with a well-speaking character, the best results were achieved using the following dialog options:
[Taunt] If I were a door, I might be afraid...
Won't your master be displeased?
Wait... If your task was to breach the door, you've already failed...
[Bluff] Your master won't understand your explanation...
If you succeed, you'll skip a pretty rough fight. In other case you'll have to deal with Zaxis the traditional way. First take down the succubi that are supporting him, then concentrate the attacks on Zaxis himself. When he's down, look around the map and rest. The final fight of Act I is upon you (3).
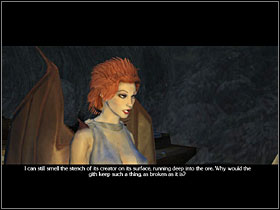
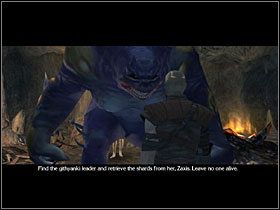
Your final opponent in this act will be the Githyanki leader, Zeeaire. First you'll have to have a long talk with her - if you speak to her correctly, you can get some of her soldiers to leave the room without fighting you (choose to Taunt her whenever possible). When the battle commences, first take down all the remaining Giths and then strike Zeeaire's portal as hard as you can. The best way to do this is to cast a Fireball on it. When Zeeaire is left without her protective barrier, she can be brought down as easily as any of her soldiers.
When you defeat her, she'll do some doomsaying and eventually die. Gather all the items laying around and free Shandra who's being held in a nearby cell. Go back to Sunken Flagon to celebrate the end of Act I.
1 - Castle Never;
2 - Collector's Mansion;
3 - Crypt (related to a sidequest called My sister, the rebel);
4 - Tavorick's Estate;
5 - A house in which you do the Arms Deal quest in Act II;
6 - Church of Lathander;
7 -A bard named Cain Lethellon will challenge you for a duel here. You have to remember his tunes and play them back to the audience, using your verbal and bard (if any) skills. The melodies are 44124754, 234451122, 2332233175. Before the last round you can order Sand to go into the audience and talk back at your competitor. The last melody is 35345271725. If you fail to beat him, you can also set him on fire and take his lute by force;
8 - Aldanon's Mansion;
9 - Tamar's Mansion;
10 - Chests with imps in them. When you approach them for the first time, you'll see a guard talking to one of the creatures, an imp named Kiggo. You'll find the beast a few steps away to the North. He'll ask you to open the crates with his mates and give you the appropriate key. If you agree and do so, you'll get +10 Chaotic points;
11 - Pepin Pollo, a painter who'll be glad to paint Shandra's portait (some considerable amounts of influence to be gained here, just agree and buy his work when he's done)
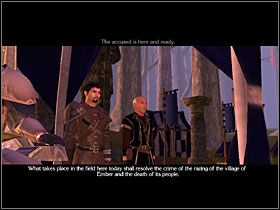
You were accused of destroying Ember and killing all of its people! Sir Nevalle visits the Sunken Flagon to tell you about the accusations. If you're with the city watch, he'll tell you to go to Sir Grayson in order for him to make you his squire and therefore force the trial to be held here in Neverwinter. If you're with the gang, a kid named Wolf will visit you after Nevalle leaves and tell you to go to Sir Edmund and do the same thing.
Two new characters will join your party now - Shandra, who's a constant party member from now on, and quite a powerful yet cynical mage named Sand, who you already know from the first act.
HINT: After you leave the Flagon, a woman named Tasha will trigger a conversation with you. That's related to Neeshka's personal quest, co check the appropriate section of the guide.
HINT: The following steps are pretty identical for both city watch member and a made man, so we'll just take you through the gang route. The only real difference is that you obviously visit Brelaina instead of Axle.
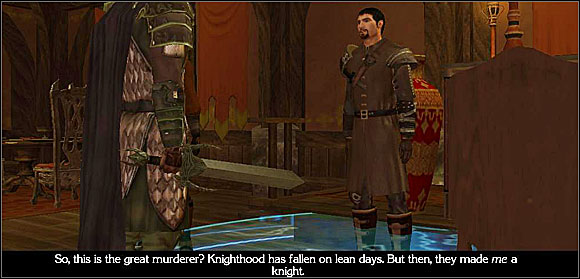
Visit Axle in the Merchant Quarter and talk to Sir Edmund. The corrupt knight will preach you a little and tell you to follow him in order to go through your initiation. Agree and you'll be taken to a little clearing. He'll leave you alone for a while. Shandra will appear - no matter how you react to that, she'll stay with you either way to help you defend against some assassins. Defeat them and talk to Shandra and Edmund. After a while you'll be taken to Lord Nasher's palace. You'll be allowed to leave the city for investigation purposes. Head to Port Llast.
Sand'll tell you to find Haeramos, so enter the local garrison (1) and talk to the man. Persuade him to let you interrogate the witness. You won't get much from Alaine, but every piece of information will eventually prove valuable.
Go to Aliance Arms Inn (2). Talk to Felgor the innkeeper and Elgun, who's spreading some serious gossip about you. Talk to a ranger names Malin using all the dialogue options and you'll probably notice that some of what she says contradicts Elgun's version of what happened. Now go and ask Haljal Trondor (3) a few questions. He'll also point out that Elgun is not to be trusted. You now have enough proof to tell Elgun to never spread any gossip again.
Look around the city and start the two side-quests indicated below, then go to Duskwood.
HINT: Malin might not be in the inn until you're back from ruined Ember, so if you haven't been there yet don't panic if you don't see her.
HINT: Before entering the inn you'll be engaged in a conversation by some local guards wanting to impose law on you. You can fight them or talk your way out of that.
Bradbury's Disappearance
In Alliance Arms Inn (2) in Port Llast you'll meet a girl named Calindra who's waiting there for her missing father Bradbury. He was last seen in Duskwood. You'll find him in Milli & Jilla's cave in there. Check out the Overly Clever Arachnid quest for details. When you find him, she'll ask you to find a job for her. You'll be able to help her later in the game, when you take over Crossroads Keep.
Nya's Duty
Nya, the owner of a little store in the central part of Port Llast (4) will ask you to take care of the dead bodies left in Ember. When you're on the spot, use the magical powder you got from her on each body. When you deal with all of them, you'll get a journal entry confirming the completion of this mission. Go back to Nya and she'll give you a decent amulet for your trouble.
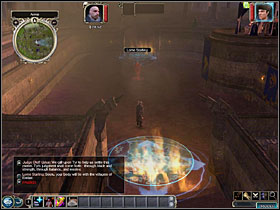
Duskwood
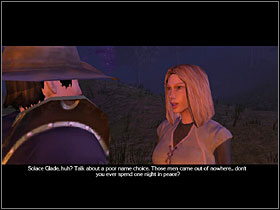
You'll meet a dryad named Lyssa here. She'll take you for Garius' man, a warrior called Lorne. Bluff throughout the conversation and you'll get some of the powder that he used the day before to change his appearance. If you're bluff ability is not high enough, you'll have to bring her the goblins' sacred stone. We'll get to that, meanwhile go to Ember.
Ember
Look around the area. By one of the bodies Sand will notice a trace of poison (1) - it'll be another evidence for your case. And so will the Quartermaster's journal (2).
Go down the rope in the well (3) (HINT: there's an ore deposit down there, near the hanging bucket!). You'll enter a quite large set of caves inhabited by goblins. Tell their watchman, Ulip, that you come in peace and ask him to take you to his leader, Glek.
Glek (1) will turn out to be quite a peaceful goblin and will tell you that you can have the ring that you seek if you help his people with a little spider problem. Just go to the South (2) and defeat some arachnids. It should be no problem for you.
At (3) you'll see a sacred stone that you have to get if you weren't able to bluff to the dryad. If you take it, all the goblins will attack you. They're not very strong, but quite capable in magical arts.
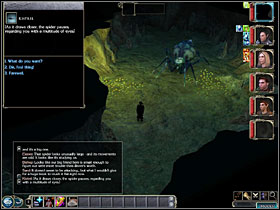
At (4) you'll encounter a gigantic spider who'll try to communicate with you. You'll understand that he's actually hungry and wants you to bring him some insects to eat. Hey, you're an RPG superhero, you should be used to such kind of tasks.
HINT: The spider's quest is called An Overly Clever Arachnid and its target is closely related to Bradbury's Disappearance.
Leave through the exit that leads straight to Duskwood (5).
If you've taken the goblin's stone earlier, you can now give it to the dryad here (1). Head to a cave (2). You'll meet two gnomes by the entrance. Talk to them and go inside. When you reach the dead end, you'll find Bradbury's body. It'll turn out that the gnomes are actually werewolves. They'll surround you together with some overgrown wolves. Defeat them all and you'll find an insect collection by one of the bodies, it's a perfect food for a starving spider. Go back to the goblin caves and give the jar to Kistrel, and he'll pledge his loyalty to you. You'll be seeing some more of him later. Also, drop by Port Llast to tell Calindra about Bradbury's fate. Go back to Neverwinter. You now have all the evidence you need to proof your innocence.
You now have everything you need for the trial. Go back to Blacklake and talk to Sir Nevalle in Castle Never. The trial itself is a very cool part of the game in which your communication skills can flourish. At any time you can leave things for Sand to handle, also there's a possibility of speeding the trial up and hearing the immediate verdict.
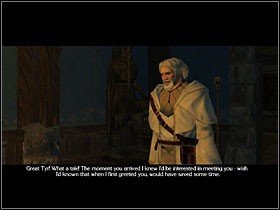
It'll turn out that your behavior can alter the outcome of the trial, but it doesn't actually matter if you win or loose - either way you'll have to fight Lorne in the Temple of Tyr in Merchant Quarter.
When the trial is over, go to the Temple of Tyr. Renew your strengths before you proceed. When you enter the temple, Khelgar will volunteer to fight in your place (that will conclude one part of his personal quest). Do as you will, but keep in mind that Lorne is quite a capable fighter and won't go down easily. Your character will be left at the back chamber of the temple to meditate before the duel.

A few more character will visit you. Qara will want to fight Lorne instead of you, just as Khelgar, and Neeshka will offer her skills to weaken your opponent's weapon and armor. Each decision is entirely up to you, there are no better or worse options here, so just follow your nose. At the end you'll be visited by Sir Nevalle who'll tell you that it's time for the fight.
Before the duel you'll talk to Shandra and Grobnar. You'll have the last chance to switch your character with one of the volunteers. When you finally proceed to battle, you'll find yourself standing against Lorne Starling, a powerful warrior who was born in West Harbor just as you (remember his mother's quest from the very beginning of the game?). The only trick in this combat is that he can't be killed while in battle frenzy mode, so every time he goes berserk just run away as fast as your can. When his uber-mode is over, hit him as hard as your can. He's just a warrior, so no real tactics is required in here.

When you defeat Lorne, you'll be back in the Sunken Flagon. Under the wall you'll see two chests - the warrior's equipment (there's a cool sword for evil characters in there) and Lord Nasher's gift (the Amulet of Truth). You'll also be told that Aldanon was looking for you and you should pay him a visit.
HINT: After this part of the game it's good to go to Retta Starling in West Harbor to finish the Soldier's Story side-quest.
When you go to Aldanon's mansion in Blacklake (N3-8) it will turn out that it's been attacked by bandits. Cormick is being held near the entrance as a hostage. Try to negotiate his release - you can fight them or ensure them that they will be free to go if they agree to cooperate. Talk to everyone and go inside. There's a bunch of bandits around the house to be defeated - clear the whole level and go to the basement using the western door.
In the cellar you'll see the bandits' leader and the rest of his hostages. Defeat all hostiles around and talk to Aldanon's servants. His master has been kidnapped. Go to Castle Never to tell Nasher about this. He'll give you a quest of ensuring the safety of Lord Tavorick. Also, talk to Nevalle to receive a short side-quest concerning a tailor named Larim.
Quest from: Sir Nevalle;
You'll get this quest from Sir Nevalle somewhere in Act II. It's entirely optional, and quite easy as well. Go to Tamar's mansion (N3-9) and talk to his butler Arren. You'll meet Tamar and Larim in person. Negotiations will be short and you'll have to kill everyone in vicinity. Take some interesting stuff from their bodies and go back to Nevalle.
Quest from: Lord Nasher;
Head to Lord Tavorick's estate (N3-4). Go to the main hall to see a short cut-scene. Talk to both Captain Ballard and Lord Tavorick himself. You'll find some explosives in one of the surrounding rooms (1). Suggest Ballard to use them in the barricades. Also, tell him to block all the doors. Give them orders to secure the house and go upstairs (2).
After a short scene one of the guards will alarm you that the situation downstairs has gotten pretty nasty. Tell the two guards to stay with Tavorick and go down the stairs. You'll be attack by some Mephits, Succubi and Erinyes. When you fend them off, you'll hear a scream from the upper floor - run over there to defeat some more enemies. Talk to Tavorick. Go down again and make your way to the crypt (3).
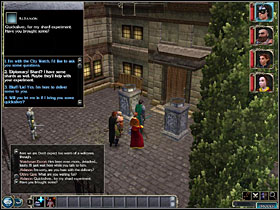
When you are finally in the last room down there, you'll get a short chat with the attack's leader, a demon named Qaggoth-yeg. You'll have to fight him. When you're done, once more talk to the Neverwinter noble - it will turn out that he gave the shard to Melia, the girl that he was talking to when you entered the mansion in the first place. You'll find her in Moonstone Mask in Merchant Quarter (N2-6). After you enter the inn, talk to Ofala and head upstairs.

Defeat all the lesser demons and find the warlock, who's already killed Melia. He'll summon two lesser demons and disappear. When you deal with them, head back to the castle to tell Nasher about everything you've seen.
Quest from: Lord Nasher;
You'll meet the new Luskan ambassador, Syney Natale (funny because you know her from Qara-related cut-scenes and already can tell that she's up to no good). After a short speech you'll know that your next target will be the Crossroads Keep, a fortress that now serves as Black Garius' base of operations.
Before the walls you'll meet a unit of Neverwinter knights led by Vale. When he gives you the sign, join his men in battle. Defeat all the enemies near the walls and on the courtyard. Apparently the mages can't deal with the magically sealed gate, so you'll have to try the other way - a secret escape tunnel. You'll find the entrance on your world map.
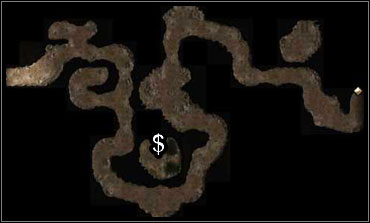
In the tunnel you'll be fighting a few kinds of overgrown beetles. Notice the ore deposit ($) and make sure you get experience for finding it - you'll make good use of ore soon enough.
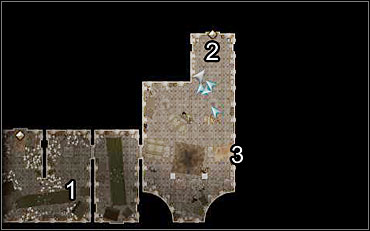
When you reach the keep, you'll find yourself in Aldanon's cell (1). Talk to the elder and look through the bookshelves around to grab the Ancient Art of Golemcraft. In the next room you'll have to fight a large group of enemies. Eventually Vale will appear and support you. The key that you need to proceed is by one of the dead mages' body (2). You now have to face some shadow priests (3). When you defeat them, head down.
A blade golem will attack you as soon as you enter. Defeat it and go further. You'll now have to kill Black Garius's bodyguards that secure the ritual. Their leader will be consumed by evil magic and drop dead without you raising your fist. Take the shard from his body and talk to Vale to go back to Neverwinter.
Quest from: Sir Nevalle;
You'll be taken to the city watch's HQ, where Aldanon and Brelaina are discussing the matter of a githzerai prisoner named Zhjaeve. She's the next NPC to join your team. Take her with you and go back to the Keep. Apparently Lord Nasher decided to give you the honor of managing it - you have to take care of its development so that it's back to its former glory. Check out the appropriate guide section for details on Crossroads Keep. You'll also have a long chat with Zhjaeve, who'll point you towards your next goal: the Ritual of Purification.
HINT: Now is a very good moment to take care of numerous side-quests you've encountered on your journeys. Take your time to finish all the loose ends, such as NPC's quests (Khelgar), collecting employees for the Keep (especially Orlen from West Harbor, who'll become unavailable once you take the main plot one step further), and raise some experience.
Quest from: Zhjaeve;
When you set off for Arvahn, you'll encounter a peasant on your way who's chased by some hunters. You can either let them kill him or save him.
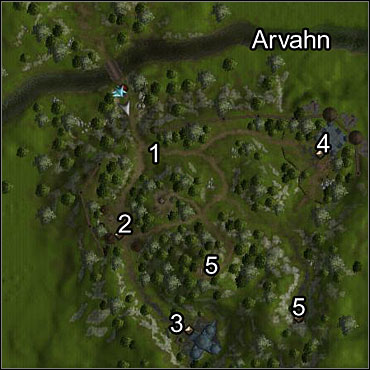
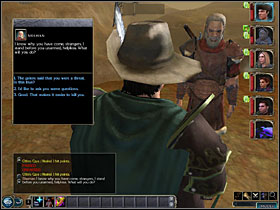
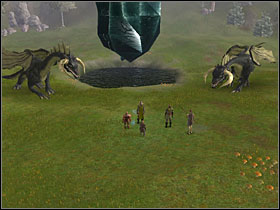
When you're on the spot, you'll immediately see the first statue of purification (A1). Your goal is to find all of these. Head for the nearby Orc encampment (A2) and talk to their leader, Uthanck. He'll propose a deal - his clan will let you be and you kill an Ogre named Ghellu. First of all, though, head for the Temple of Seasons (A3).
HINT: In the orc encampment you'll also see a local shaman named Ilrah, who'll give you an interesting view of your future.
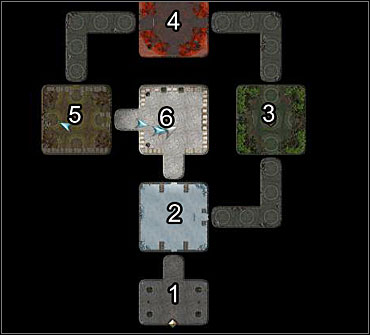
Once you're inside, touch the statue in the middle of the first room (1) and read the inscription on it. In the next room open the book of winter (2) and you'll have to face some snow wolves. When you're done with them, go right, and you'll see the book of spring (3). In here you'll be attacked by earth elementals. In the summer room (4) you'll fight an iron golem, and in the autumn room (5)- a group of sylphs. Eventually you'll reach the statue you seek (6). When you get the new ability from it, look around the area for some loot and leave.
On the first level at (1) you'll meet a bugbear leader Ralidur. Tell him that you'll kill Ghellu for him and you won't have to fight him now. Go for the second level (2).
In one of the rooms (1) you'll see a man named Ribsmasher. Free him and he'll help you to defeat all the enemies here. At (2) defeat the enemy leader and take a shield that he was holding. Proceed to the lower level (3).
Monsters around here won't attack you, so just go to their leader, an ogre named Ghellu. You can now choose to fulfill the promise you made to Uthanack and Ralidur, or agree to kill them both for Ghellu. It's obviously quicker to just whack the ogre now. Take its head with you when you do so.
Nearby you'll see a door that leads to the statue room. In order to open it you have to gather the whole set of dungeon master's equipment (Ghellu has the scepter and Ralidur hold the blade, the shield should already be in your possessions). The other way to get past it is to let Ribsmasher kill himself while trying (you'll get some evil alignment points and loose influence with Shandra). Also, you can just take the damage it deals and open it for yourself. Either way you do it, activate the statue and leave using the shortcut nearby. Ralidur is waiting for you outside - give him Ghellu's head and you'll avoid fighting with his unit. You can also pay a visit to Uthanack now to tell him about the events that have come to pass.
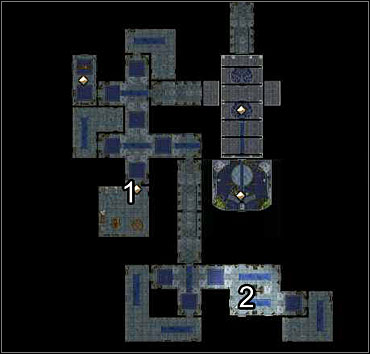
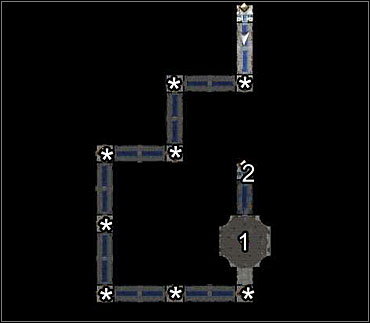
It's time to deal with the most frustrating puzzle in whole Neverwinter Nights 2. Talk to Balaur's ghost (1) to get some details on the situation. In the next hall defeat all the undead and you'll see the first ghost. You have to find six of them (*) and lead them to the tree in the middle of the level (2).
HINT: At (3) you'll find a rune needed to reactivate the construct.
Each time you find a ghost, you'll first have to defeat its lich form, and then talk to him in order to tell him to follow you. The trick is that they don't just "follow" you as other NPC, but move along paths set by the lanterns you can see all around the mine. When a lantern is lit, the ghost can't use the path it guards. You have to switch the lanterns on and off in order to set the proper routes for the ghosts. Each time you click the ghost, he'll move one "step" forward. Be sure to cut off his retreat then because they generally tend to head anywhere but where they should. It's best to ensure that a ghost has only one possible move to make, and it's the right one obviously. You just have to get the hang of it, it might seem weird but it gets simple if you don't hurry too much.
When you gather all the ghosts, the tree will transform into the next statue. Activate it and leave, then go through the portal in the middle of Arvahn (A5).
Now that's a surprise, you're back in your home village of West Harbor. Go through the village and head for the swaps. You might remember that next to the ruins where you got the shard there was a second ancient construction - this time you're headed there.
Enter the ruins to meet your first Shadow Reaver. You'll witness the destruction of the last statue. Defeat all the enemies and use the portal in here. It's time to go back to the Keep.
When you're in the Keep, talk to Aldanon. He'll deceive you a bit but eventually you'll get the map indicating the spot where the haven's supposed to be. At last some good new. Take your time to collect all the Keep-related stuff for Act II now, because some quests and locations won't be available once you complete the haven.
Once you're there, head for the main gate (1) to meet a guard. He tells you that you are to pass three trials in order to get inside. D'oh!
Path of Sight
Kill all the Huge Elementals that appeared around the map and take the Fiery Hearts they drop. Use them to light the braziers (2), and defeat the shadows that spawn around them.
Path of Rightness
On a high mountain nearby you'll meet a shaman (3) who you've been told to assassinate. You can either do as the guardian ordered you or let him live. In that case you'll fight off some barbarians.
Path of Determination
You have to reach the geyser (4) that's surrounded by damage-dealing gases coming out of the ground. Choose the most damage resistant party member and go for it.
When you complete all the trials, you'll be let inside, but Shandra will disappear.
Inside you'll meet a devil named Mephasm (1). You've met him before at the end of Act I. Talk to him - he'll prove to be quite helpful. You'll know that in order to get to the center of the laboratory you have to convince three demons to help you. Go through the only open door to meet the first one of them.
Baalbisan (2) tells you that he'll help you if you kill the succubi servants of his neighbor, Hezebel (3). She, on the other hand, will give you a counterproposal: know Baalbisan's mother's true name and you'll get her help. You can either fight the succubi or go back to Baalbisan and provoke him so that he shouts his mother's name in anger (Bethshiva). When you get help from one of them, proceed further into the dungeon.
In the next chamber you'll meet Zaxis (4), whom you already know from Githyanki's cave. After a short chat she'll summon a few demons to fight you. Defeat them and go further, you can't make anything of her now. The next one is Koraboros (5). He'll ask you to find his imp servant. He can be found At (6). Take the ancient book from the shelf that he's staring at and use it, reading the phrase "Tilo ut lon". You'll free him this way and Koraboros will be glad to help you.
HINT: At (7) you'll find some interesting equipment.
In the next room you'll be attacked by a group of succubi, servants of Blooden (8). Talk to their mistress. She'll want you to go back to Koraboros and ask him to attack her forces with his hell hounds. If you do so, join one of the sides in a battle and Blooden will open her piece of the portal for you.
HINT: You can also get Zaxis' help on that, just get her real name from Blooden and use it to command her to help you.
Once you've got 3 demons on your side, go back to Mephasm's room and use the portal. You're now in the laboratory (9). A mysterious warlock will appear. You have to fight him. If you deal enough damage to him, you'll see a long cut-scene in which it'll turn out that your opponent is actually Amon Jerro himself. After a heartbreaking set of events you'll see Shandra die and Amon take her place at your side. When you're finished talking to everyone in the Keep, you'll be summoned by Lord Nasher to Castle Never.
Minutes before your knighting the castle was attacked by shadow reavers. Help Nevalle defeat the attackers and follow him to the guardhouse (1). He'll tell you to enter the chambers of Neverneath. The entrance is at (2). Along the way you'll have to fight some more enemies.
Going through this level you'll encounter Mephits and some statues (*), each of which will ask you a question concerning Neverwinter. If you fail to give the right answer, you'll have to fight quite a powerful guardian. Here are the right answers:
- Nine
- Blacklake
- Tomb of Betrayers
- Neverwinter River
- [Say nothing]
- Three
- [Pledge allegiance to Neverwinter]
When you reach Lord Never's tomb (1) defeat the flying swords and look around the area - there's a lot of chests in here. Take Lord Never's scepter from the sarcophagus and go up the stairs (2). You're in the throne room. Defeat the reaver and talk to Nasher. You will be officially knighted and invited to join the Neverwinter Nine (you can refuse). You'll also be given a number of quests that will actually fill the rest of the game.
Start with talking to all your allies in the Keep - Bevil, Sand, Aldanon, Kana, Torio, Uncus and so on. You'll get some new information on current events. Deaghun will visit you as well, bearing news of the Circle of the Mere. Let's begin with sealing some alliances for war that's upon you now.
HINT: If your character is a paladin, be sure to build a Temple of Tyr in your Keep before you go on this mission - you'll get a quest that'll lead you to find the best paladin weapon in the game - the Holy Avenger. It can be found in one of dragon's treasure chests.
You won't be let inside the fortress if you don't have Khelgar on your party. Talk to Khayar and go to the throne room to talk to Keros. He'll reject your proposal, but on your way out you'll be approached by Khulmar. He'll tell you the story of Ironfist Hammer that cannot be lifted without Belt of Ironfist. Picking it up would definitely earn you some respect amongst the dwarves, so.. off you go to Mount Galardrym.
Grab the first ore deposit in the area (1) and climb the mountain. Near the giants' encampment (2) you'll meet some prisoners. Free them once you clear the area of enemies (you can kill some of them by pushing the huge stones from above, (3)). You'll also see another ore deposit nearby (4). Go through the passage to the North (5).

You'll meet the giants' king himself. He'll tell you that if you agree to kill the dragon that lives nearby, he'll give you the belt you seek. Go to the dragon's lair (6). Thol will have another proposal for you - she will help you annihilate the giants. Support whoever you wish in this conflict, either way you'll have at least one difficult battle ahead of you. Keep in mind that killing the dragon is very hard, but just as rewarding. Her treasure will greatly increase your Keep's funds, and you'll get some cool equipment for yourself as well. Notice the ore deposit near the dragon. If you decide to fight her, remember to buff your fire resistance, otherwise you just don't stand a chance.
When you're back to the fire giant king, he'll betray you and you'll have to fight him and his men after all (you knew this was coming, didn't you?). It's a difficult battle, as you have to face numerous enemies at once. When you manage to win, take the belt from the king's body and free a drow merchant named Caelryna, who will gladly open a store in your Keep.
Get back to Ironfist Stronghold and talk to Keros once more. After a cut-scene Khelgar will be proclaimed the clan's leader, but will immediately forward the command back to Keros. The alliance will be sealed, and your fellow dwarf will get to keep the hammer.

When you decide to travel to Highcliff, your voyage will be interrupted by a lizardfolk attack on some civilians. Defeat all the attackers and talk to Gera and Zachan. Highcliff has been attacked!
HINT: There's an ore deposit in this area, the single most maliciously hidden one in the whole game. It's on the big rock behind your back as you start the level.
When you reach the village, talk to Elder Mayne. Not very far from there you can find a dying, wounded lizardman named Vissk - tend to his wounds and interrogate him to know that a powerful leader named Batha united their tribes. Go to the southern part of the village, the one that's currently under lizardfolk control. The guards will take you to their leader.
Batha is actually a shadow king's puppet, he has been clouded by shadows and will challenge you for a duel. Defeat him and he will regain his own senses. Agree for him to look inside your mind, and he will believe your good intentions and agree to seal the alliance with the Keep.
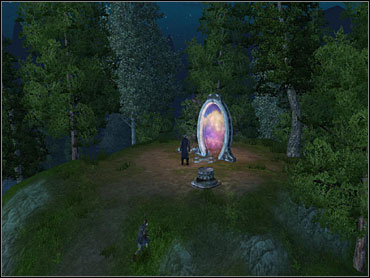
Go to Port Llast and talk to two gnome elders living in a tent there. You'll need Grobnar to make anything of the rubbish they're saying. Talk to them until your character automatically resigns and walk away - it'll turn out that they have a map to Wendersnaven Glade. Grobnar will solve the riddle it contains and you'll be able to go there - choose the Strange Clearing on your world map as your next destination.
When you're in the mysterious forest, notice the ore deposit to the right. Approach the body in the middle of the clearing and take the journal. A cut-scene will commence in which Grobnar finds an invisible instrument, the Wenderkazoo. It's a decent piece of equipment for him. Before you can leave you'll have to defeat some orcs.
Take Elanee with you and go to the Circle of the Mere. It turns out that the druids are consumed by shadows as well. A few influence checks on Elanee will be made - if they're successful, she will join you in battle. If they're not, she will remain neutral, and after the battle decide to leave your side forever. If you don't like her as much as we do, you can just as well kill her now.
When you're back to the Keep after doing some of the alliance-quests, you'll meet Khralver, Sydney's assistant, who tells you that his mistress asked you to meet her somewhere in the wilds, and take Qara and Zhjaeve with you. Sounds like a trap? Sure it does, but what are you to do?
Once you're there, you'll first have to fight the Animus Elemental, which is the evil (ahm, evil-er) version of Qara that you saw in one of the cut-scenes some time ago. Sydney has a mercenary on her side, Jalboun - try to bribe him to join up with you. When you defeat the ambassador (she will teleport around the area and regenerate her health), suggest Jalbourn to work for you in the keep. Also, snatch an ore deposit in here.
When you're back to the Keep it'll turn out that Jerro is also capable of pronouncing the ancient shadow reavers' names, just as Zhjaeve. Enter the Keep - Kana knows a location of one of the reavers' encampment. It's a good opportunity to test your new weapon against them.
This is simple - you just have to defeat the Reaver, using either Amon or Zhjaeve's true name scrolls. Rest of the party should provide cover for the spellcaster you've chosen. Reaver has a strong team of undead to support him: a few shadows and 2 golems. Deal with them in the first place, as the reaver himself cannot be harmed in any way except the true name spell. When you manage to recite the name, he'll become vulnerable and will go down quickly. Take the shard from his body and go back to the Keep.
Zhjaeve thinks that you now have enough silver shards to reform the sword. Amon will suggest that you consult a great dragon named Nolaloth. Take Zhjaeve on your party and leave Jerro behind (he has some unfinished business with the creature), then go to the Ancient Valley.
HINT: You'll find the last two ore deposits on this level ($).
When you walk along the path towards the valley, an earth elemental will attack you (1). Proceed further and reach the green paradise that's spread here in the mountains. Go past the heart-shaped crystal (2) and reach the pond to the North (3). Dragon's spirit will appear before you. He'll trap you and will refuse to talk to you until you mention the shadow that threatens the land. You'll be told that in order to reforge the sword you have to travel back to your home village.
Just before you leave the area, the dragon will ask you for a favor - you are to kill him by destroying his heart. When you try to strike the crystal, you'll be attacked by two black dragons at once. They are dealing huge acid-based damage, so try to buff your resistance before the battle. When you bring them down, destroy the heart by right-clicking it and choosing "Bash".
To get to West Harbor you first have to visit the Illefarn ruins that you've come through when performing the ritual of purification. Zhjaeve opens a portal in there and you're able to pass through and see West Harbor at its worst. Leave the ruins and go through the swamp back to the village. You'll meet Mossfeld brothers' ghosts - when you talk to them for a while it'll turn out that they are actually shadows in disguise. Defeat them and find 4 wooden planks to make a bridge.
A little bit ahead you'll see another ghost - Danan Starling. Some shadows will attack you once more, so fend them off and reach the spot where you can finally reform the sword. After a while you'll be holding the legendary blade, but a shadow reaver will appear and ruin the moment for you.
First of all eliminate all of his cronies, then use Jerro or Zhjaeve's true-name scroll to defeat the beast just as you did previously. Leave the area and you'll be back to the portal. Go through it and back to the Keep.
When you're back to the Keep, you'll get message that Callum has been ambushed somewhere along the coast nearby. Hurry to the rescue. Another Shadow Reaver fight is at hand in here. You won't be able to save the brave dwarf. Dead with all the golems, then use the true name scroll on their leader. Take a book from his body - it'll enable you to make the final attack later in the game.
When you go back to the Keep, you can tell Nevalle that your fortress is ready for war. You won't be able to expand it any further from that point, so if you still have some unfinished business, deal with it now. You'll see a cut-scene in which Neverwinter forces led by Lord Nasher are defeated and retreat to the Keep.
When the battle is over, talk to Nevalle once more, then enter the Keep. Aldanon will tell you that Amon is missing. Take your party and go to look for him. You'll be automatically taken to Shandra's farm, where Amon is going to battle his former prisoner Koraboros. Defeat the monster and talk to Jerro. If you can convince him to feel guilty about Shandra (there will be influence checks on Amon himself and Shandra), you'll get some XP and a neat amulet. Go back to the Keep.
Talk to Nevalle and tell him that you're ready for battle. After a long council you'll agree that the first thing to do is to blow up bridges that separate you from the enemy. Choose two companions that will fight on your side and commence the mission. Kana will support you with a unit of Greycloaks.
After talking to Daeghun, proceed forwards. You'll meet a group of soldiers fighting the undead (1). Help them and they'll join you. Smash through some more enemy groups and reach the first bridge (2). Go forth - near the second one (3) you'll meet Black Garius himself. The villain will disappear, but leave a huge number of enemies for you to fight with. Daeghun will also join you on this one. When you defeat them all, the bridges will be destroyed and you'll be back home.

When you're back to the Keep, you'll have to make some decisions concerning the forthcoming battle. Most importantly, you are to choose two companions that will fight by your side during the siege. It's good to go with Qara, as her fire-based magic will prove essential to destroying the siege towers. You can also choose the supporting units that will be on the battlefields with you - the range of possibilities depends on which alliances you made before. The battle itself is not easy at all, but in the first phase you'll only be facing regular undead troops, no bosses nor shadow reavers. Destroying the siege towers will save you a lot of trouble, so focus on them first. When you hold off all of the towers that can be seen from the distance, you'll be taken to the courtyard.
Bishop will betray you and tell you that he purposely destroyed the gate mechanism so that you can't close it. Well, his loss, really. You can now change you buddies, choosing 2 other characters to support you. When you defeat enough enemies, Black Garius will show himself and make a little mess, summoning the Shadowalker (Shadow King's avatar). Focus your attacks on the shadow beast, avoiding Garius' magic whenever possible. You must have the Sword of Gith equipped to deal real damage to it. When the creature is down, choose either Zhjaeve or Ammon to recite Garius' true name - after a while the enemy leader will have to retreat. Hazzaa!
When you're back inside the Keep, it turns out that Aldanon is ready to open a portal that will take you directly under Shadow King's nose. This quest is to be done with all party members on board. After a while you'll be taken way behind enemy lines. Neeshka's been captured! That might complicate things if you're not a rogue yourself, but you can't really do anything about it.
HINT: Around this area your chances of successful resting are about 25% - in most cases enemies will interrupt it. In most cases it's really worth the risk.
Look around the area and grab some equipment if you like. Open the door leading North (1) and go through it. The whole area here is about defeating enemies and crossing misty portals in the right order: (2), (3), and (4). Eventually you'll reach a room where three shadow reavers await you for battle (5).
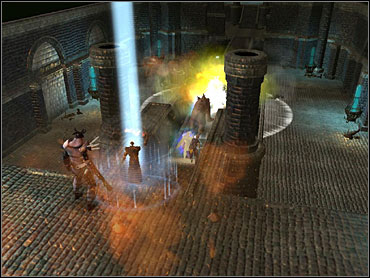
This battle is extremely difficult, especially that the tight path that you're on is a very uncomfortable spot to defend yourself. It's good to back off from it and take them on in a more open area. One of the reavers will actually teleport behind your back, so try to take him out first. As usual, the key is reciting their true names - be sure that both Ammon and Zhjaeve are safe, as without them you're doomed. When you manage to defeat the enemies, the only thing left is the grand finale.
When you enter the sanctuary, Black Garius will welcome you. Before the battle begins, he'll try to deceive some of your companions and make them turn to his side - it's all about Influence checks. Here are the possible outcomes:
- Bishop betrayed you earlier, but if your influence on him is high enough, he'll refuse to fight on Garius' side and just leave. In the other case he'll fight together with your enemy and...
- ... tell you that he can now control the Construct. An influence check on Grobnar will be done, and if it succeeds, the gnome will be able to keep the golem at your side.
- Garius will try to tempt Neeshka. She can either join him or stay with you.
- The reavers' leader will then try to convince Sand and Qara to join his side. They hate each other so much that you will always loose one of them and keep the other - obviously, the one with higher influence will stay.
- At the end Garius tries to lure Ammon, but the warlock cannot be actually convinced to betray you, the influence check is only the matter of the response he gives him.
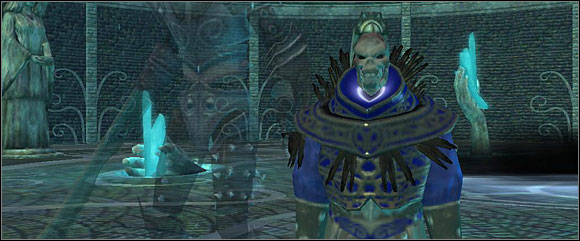
HINT: If you want to make things easier in the following battle, after you see the outcome of influence check revert to the previous save and take all the equipment from NPC that are going to betray you.
You'll be separated from Garius with a magical barrier. A Balor will be summoned behind your back, so take it out in the first place. Some greaters shadows will appear when he goes down, they are no real threat.
The magical barriers seem to be quite buggy and there's no real logic to their behavior. Truth is, you should be able to take some of the characters to the other side and fight the enemies directly. First take down your former companions that decided to abandon you (serves them right). You don't have to recite Garius' true name for the second time, he's vulnerable from the start, so just hit him as hard as you can and he will go down sooner or later.
Now is yours last chance to rest and regroup. When you're ready, activate the portal in the middle of the room. The King of Shadows will show himself at last.
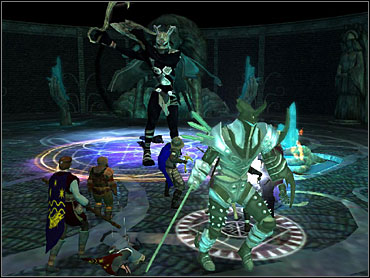
The battle consists of three separate phases. In the first one you're fighting a moderately strong form of the King of Shadows - just strike him fast and hard (but leave the best spells for later). When he disappears, you'll be attacked by smaller versions of him. They're quite strong and come in great numbers. You just have to defeat enough of them and the statues that surround you will be purified. You'll then face the final form of the enemy.
This time you first have to bring down all 5 of the statues. You can't normally attack them, so you'll have to right-click them and choose "Bash". It's best to divide the party into at least two teams and destroy the statues simultaneously. Keep the enemy busy by summoning creatures that he can kill. When all 5 statues are destroyed, use the Sword of Gith (you don't have to use the main character with it) to destroy the portal in the middle of the hall. It's quite resistant to damage, but there's no real way of speeding things up here. When you destroy it, all that's left it to finish off the King himself. Plus, watch a pretty lame ending scene. And that's it, folks.
HINT: The commentaries that you'll hear at the end depend on multiple choices you made throughout your adventure, such as Shadow Thieves' position in Neverwinter or the strength of the Keep.
After you successfully interrupt Black Garius' ritual in Crossroads Keep, Lord Nasher appoints you as its new supervisor. It's a very nicely developed side-quest that seems to be a little non-lineal. It mainly consists of two parts, one of which is seeking for certain NPC and objects around the world map, and the second is managing them in the Keep itself. The two most important characters are Kana, who is your lieutenant and will enforce your orders, and Master Veedle, who's responsible for rebuilding the structures in the area. You kick off with about 70000 gold to spend on new building. If your keep funds run low, you can always pay from your own sack.
HINT: Each "round" when managing the Keep passes when you enter the main building and talk to Kana. Each time the time will pass for another 2-3%.
HINT: Wolf, a kid that you should remember from Act I, will live here with his mates and enable you to fast travel around your property. Just talk to one of the kids and tell him where you want to go.
You can find two miners who might be invited to work for you. The first one is Pentin who you probably saved in Bonegnasher Lair (he's standing in Old Owl Well since then). The second is Calindra, whom you can hire after doing the Bradbury's Disappearance quest (she's waiting for you in Alliance Arms Inn in Port Llast). When you have them both on your side, just inform them about each ore deposit you find throughout your travels. Ore is not easy to find in this game, in fact it's the most difficult "secret" in NWN2. There are 15 ore deposits to be found, and most of them are one-timers: if you miss them, there's no going back to the area they're in. You need the ore to upgrade your unit's weaponry and armor. The former can be upgraded three times, the latter - four times. The number of deposits required for each upgrade varies from one to another, so just ask Edario or Jacoby if they're ready to work whenever you find one of them.
HINT: You must get the miners in Act II, they become unavailable later on.
HINT: After doing some quest in Act III, Pentin will try to leave you. You can try to convince him to stay (threaten him or ask, whatever), or just let him go. It's not very important if you have Calindra.
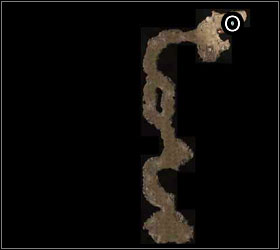
Troll Cave (near where you find the explosives to get through Bonegnasher Approach).
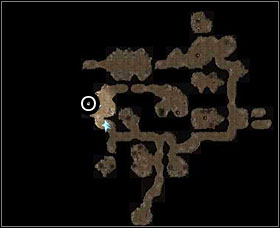
Bonegnasher Lair.
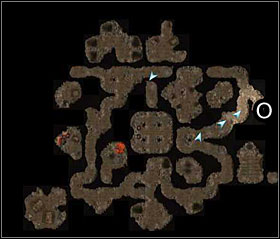
Eyegouger Lair, L1.
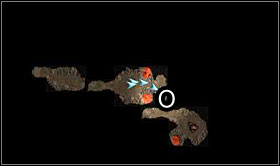
Eyegouger Lair, L3.
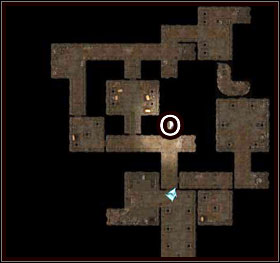
Ironfist Clanhold that you visit while doing Khelgar's vision quest in Act I or II.
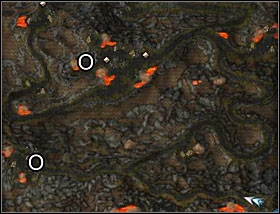
In a cave below Ember well, near the bucker.
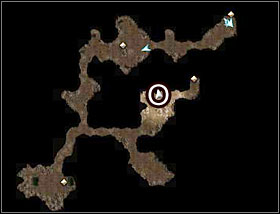
In Duskwood caves.
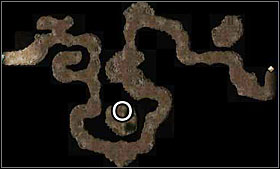
Escape tunnel from the Keep (you cannot return here after you cross it once!)
Mt Galardryn (there are 2 of these).
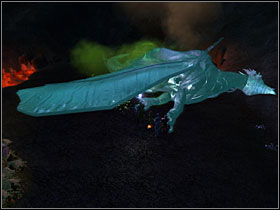
In the dragon's lair at Mt Galardrym.

When you first travel to Highcliff in Act III, you encounter some lizardmen fighting the peasants. It's by the huge rock near the map transition marker.
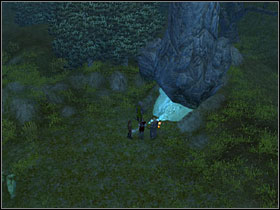
Wendersnaven Glade.
Where you fight Sydney Natale.
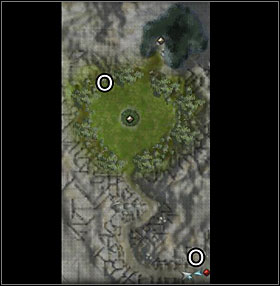
Nolaloth's Valley (there are 2 of these).
Each of the characters below will gladly live in the Keep and work for you if you construct the building they need (for example show for a trader). It's definitely worth to gather all of the below NPC.
ACT II
The below characters are only available in Act II - most of them will become unavailable after the Jerro's haven quest.
Katriona (Old Owl Well) - You must have Casavir on your team to talk to her. Convince her to come to the Keep and then assign them to train your troops (that's actually the only way to get the "Best of the best" rating in training).
Edario (Highcliff) -Visit him in Highcliff and tell him to move top the Keep, and he'll enable you to upgrade the weaponry of your men.
Jacoby (Fort Locke) - Same as Edario, but he upgrades the armor.
Kistral (Duskwood Caves) - If you do the Overly Clever Arachnid quest, he'll appear in the basement of the Keep and prepare a cool cloak for you.
Deekin (Merchant Quarter) - this kobold will gladly open a shop in your Keep.
Orlen (West Harbor) - West Harbor farmer that can raise your peasants' standard of living (HINT: you must get him before visiting the Illefarn ruins!).
Uncus - He'll join you automatically when you take over the Keep. If you've worked with Axle before, he'll be supervising your connections with Shadow Thieves. If not, he'll just be a merchant.
Torio - You great adversary can actually become a formidable ally if you decide to let her live. Kana will tell you about that after a few initial rounds of keep-management.
Guyven - Now this is complicated, as this scout will join you only if you've found him three times around the world map. The first encounter is on Bonegnasher Approach, then Githyanki Approach, and finally Ember in Act II. He's also said to be quite buggy and that sometimes he doesn't appear at all, even if you've done everything correctly. If you miss him, don't feel bad because he doesn't play any important role in the Keep - he just tells you to find some areas for him (such as the dragon's lair) and give you some XP afterwards.
ACT III
Bevil - He'll be waiting near the gate of the Keep at the beginning of Act III. It's best to assign him to patrols.
Joy - She's a dancer and can be found near the Blacklake gates in the Merchant Quarter. You just have to convince her to work in your inn.
Caelryna - She's the giants' prisoner at the top of Mt Galardrym. She'll open a shop with rogue-oriented stuff in it.
Light of Hope - you first meet her in Merchant Quarter, near Axle's mansion. She'll challenge you for a duel. Accept the challenge and defeat her. Next you'll meet her in Port Llast, near the merchants in the northern part of the town. You'll have to duel her once again. The final duel will take place near the Keep's main gate. It's best to assign her to recruit new Greycloaks.
Jalboun - You'll meet him during the Sydney Natale ambush. If you pay him well enough, he will switch sides and join you. Assign him to perform special missions.
Mephasm - He's Ammon's former prisoner and can appear in the Keep to trade a little with you. In order to kick off a quest related to him, step into the summoning circle in the basement of the Keep. Jerro should tell you that you ought to be careful with this kind of stuff. Talk to him to find out that you can actually summon the cynical devil. You'll just need a Faint Power Essence, a Glowing Fire Essence, a Star Sapphire and a Gold Necklace. You also must have a feat called Craft Wondrous Item. If you have everything in your possession, place all ingredients on the mage's workshop in the keep's basement and cast Darkness on it. Go to the summoning circle again - this time Mephasm will appear and give you a list of recipes for magical items that interest him. They are useless to you, but if you manage to craft one of them, then you can exchange it for a decent piece of equipment or a big amount of gold by talking to the Devil. Also, keep in mind that you have to be Evil or Neutral to barter with Mephasm.
The following parts of the Keep can be rebuilt by talking to Master Veedle. The order doesn't matter in most cases, as eventually you'll buy everything one way or another.
The Keep interior:
Captain's Suite (15000)
Library (15000)
West Wing (15000)
The Courtyard:
Blacksmith (10000)
Shop (10000)
Fortifications:
Wall repair (25000)
Reinforcing the walls (50000)
Building towers (75000)
Surrounding Lands:
Widening the merchant trail (10000)
Cobbling the trail (35000)
Renovating other roads (50000)
Adding bridges and towers (100000)
In Act III there will be 2 new buildings to raise: the Church and the Tower. Here you'll have to decide how to use them, choosing between 2 possibilities for the church and 3 for the tower. The choice is mostly dependant on your liking, so don't expect to find any better and worse solutions.
Church -> Monk Order (50000)
A shop with a few decent items and training for monk characters.
Church -> Temple of Tyr (50000)
Some healing equipment to be bought here, as well as a shield that costs a whopping 250000 (and isn't really worth it). It's important to get this building if you're a paladin, because it will enable you to get the Holy Avenger. Check out the Mt Galardrym section of the guide for details.
Tower -> Neverwinter Nine's quarters (50000)
A good shop for warriors and other physically-based characters.
Tower -> Mage's Tower (100000)
A shop with lots of cool stuff for magic-based characters. You get the possibility of building it from talking to Startear who appears near the Keep gates a bit into Act III.
The first step to getting a high training level is to get Katriona and assign her to training the men. Also, tell Kana to recruit only the best volunteers. Lift the taxes for merchants and peasants - you shouldn't have problems with money and your Keep will develop quicker if you do so.
After a few rounds, you should see a cut-scene in which Kana and Katriona introduce you to your new elite unit - that will confirm that your training level reached its peak and won't improve any more. You can lower the requirements for recruits now, as it won't drop either.
Don't divide your men between patrolling lands and roads, it just doesn't work well. Focus on one area and reassign them each few rounds.
If you accumulate enough farmers (about 30), you'll be visited by a entrepreneur wanting to settle a village on your lands. You can use your appraise skill to negotiate the terms to your favor. To increase the number of farmer, lower the taxes, raise the security and their morale (it kind of goes together).
A similar thing will happen if you have enough traders on your lands - at about 50 some trading companies will inform you that they want to form their branches on your lands. You just have to choose one of them.
From time to time you'll be visited by neutral mercenaries who want to join your ranks. Hiring them has both ups and downs, but it's generally good to agree.
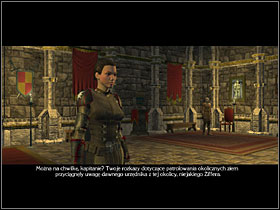
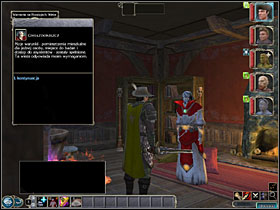
Soldiers' morale kind of succumbs to the overall Keep's condition - if things go right, it won't be a problem for you.
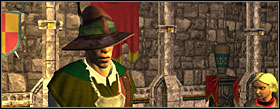
One time you'll be visited by a group of beginner adventurers - ask Kana what to do with them and she will suggest what quest to give them. They will appear in the Keep two more times- tell them to investigate the King of Shadows, and lastly: Illefarn ruins. They will always send you a hilarious report on their progress, and eventually present you with a Ring of Optimism (hah).
Special missions are little side-events that Kana tells you about and awaits your decision whether to send the men or not. It's generally better to deal with all of them, as you'll get some gold from each one, and your soldiers gather experience this way. The outcome of a special mission is based on your unit's overall condition.
If you decided to join up with Moire and Axle, Uncus will be your go-between, informing you about the situation in Neverwinter. You'll be facing some thieves-related events, such as a demand to pay them a share of your incomes, or to give back them the goods that were confiscated by your men. Eventually it will come to an assassination - when you enter the keep, some thieves disguised as greycloaks will try to kill you. A few rounds later, Axle will send you an invitation to his mansion. It'll turn out that Moire has formed a separate gang now and he wants you to kill her - your reward for that would be further independence from Axle. Moire's hideout is near Leldon's house (the one you visited on Neeshka's quest). To know the password, approach the warehouse in the north-western corner of Merchant Quarter and follow one of the thieves back to the hideout. Inside you'll meet Moire and have to choose - to kill her or to support her and go back to whack Axle. You can just as well kill them both. It's up to you.
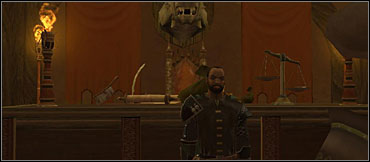
The reward is of course the guarantee that you'll have no further problems with the thieves, plus a lot of magical items from the enemies' bodies and hideouts. The outcome on this quest will determine one of the aspect of the game's ending.
Our likable dwarf will tell you about his quest at the very beginning of the game, during your first longer conversation. He wants to go to Neverwinter and pay a visit to Temple of Tyr there to begin his training as a monk. Once you can go to Merchant Quarter, you're free to enter the temple. Take Khelgar there and a monk named Hlam will tell you about 3 trials that the dwarf has to take.
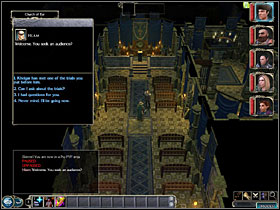
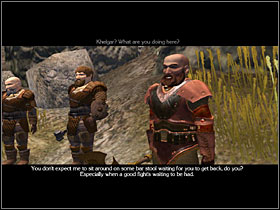
Trial of the Maimed
A location called Dwarven Scouts will be revealed on the world map once you talk to Hlam. Go there to meet some dwarves preparing to take back their stronghold, which is currently overrun by bugbears. Offer your help and process forwards. At (1) you'll see a dead scout's body and a monsters' trap. At (2) there's a chest with some worthwhile items. At (3) there's an imprisoned dwarf that you should set free once you defeat the bugbears around him. Go to the end of the area (4) and enter the caves.
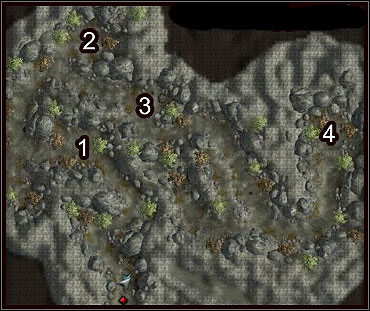
At (1) there's a piece of mechanism that you have to use in order to open the door at (3). Along the way (2) you'll see a group of bugbears fighting over some gold. If you successfully hide in shadows, you'll only have to fight the remaining two of them and grab the gold.
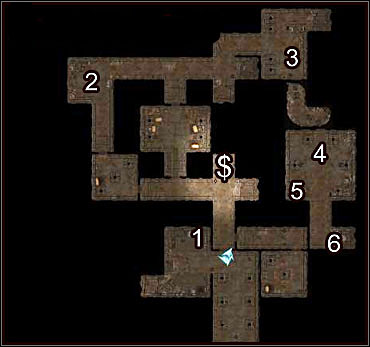
At (4) there's a mini-boss, a moderately tough ogre. When you defeat it, check out the nearby chest (5) to find an Ironfist relic. Admit that Khelgar's the one to keep it and you'll get +4 Influence on him. Go to (6) and make sure you get the journal entry about the dead end, and then go back to the scouts and tell them of your findings.
Trial of the even-handed
The second of Khelgar's sub-quests is admitting that Neeshka and Elanee aren't as bad as he initially though and said. You just have to work on him in conversation, and the only way to succeed is to have a high influence. To raise influence on Khelgar, be supportive when he starts to argue with someone and generally behave in a way that satisfies his in-your-face attitude.
Trial of justice
The last trial before Khelgar is to be able to tell the difference between a just and unjust battle. This quest is integrated in the game's main plot - it'll be completed at the beginning of Act II, when Khelgar volunteers to take your place in a duel against Lorne.
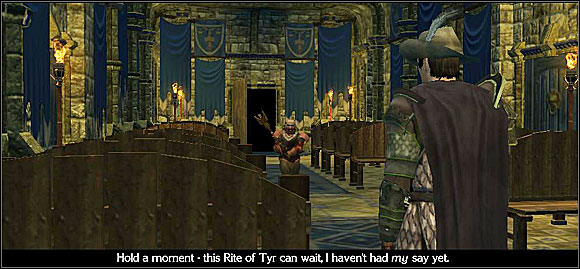
When you do all the three side-quests, go back to Hlam and tell him that you did. Once more an influence check will be performed, and if you succeed, Khelgar will loose all of his warrior abilities and become a monk (you can build him from level 1 up to the current level of your party, as he keeps the experience points). Does it make any sense? Well... Not necessarily, as Khelgar is a great tank and one of the most powerful fighters in your party. As a monk, he's... well, just a monk.
Neeshka and Leldon
<br>Soon after you arrive at Neverwinter your party will be ambushed by a mercenary named Bennon. He was hired by a man called Leldon who apparently had had some relations with Neeshka. Defeat the assassins and talk to the girl to hear their story.
Some time later, you'll be attacked again. This time it will happen in Merchant Quarter and the assassin will be named Tremmel. The fight is unavoidable. From the conversation that'll commence later you'll know that you just have to make Leldon learn a lesson. Neeshka will suggest robbing his own house. Go to Moonstone Mask in Merchant Quarter and talk to Ophala. She'll point Leldon's hideout on your map.
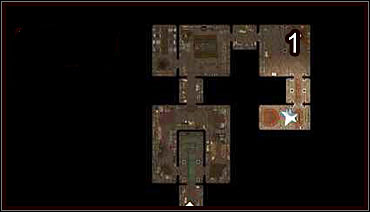
Avoiding the traps, go through the hideout all the way to the treasure room (1). In there you'll encounter Leldon himself, so buff yourself before entering and fight him and his goons. When you deal enough damage to him, he'll run away. Rob his treasure chest and leave.
Neverwinter's Greatest Thief
At the beginning of Act II when you leave the Flagon you'll be approached by a woman named Tasha. She'll tell you that Leldon is going to make his greatest heist and then quit the job of being a thief. Neeshka wants to beat him to that goal and rob the Collector's mansion (N3-2) before he does. Be supportive to her and you'll get some influence bonus. Head for Blacklake.
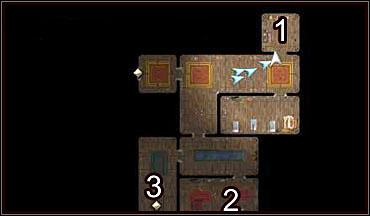
Pick the lock to enter the mansion (N3-2). Inside you can either fight the guards or choose one character and separate it from the rest to sneak past them. You won't find any treasures here, but go to the kitchen (1), pick up a bottle and place in the water container to fill it up, then take it again. Now go to the collector's wife (2) - if you're good with words, you'll be able to convince her to help you rob her husband. In the other case kill her or steal a key from her, it will enable you to go upstairs (3).
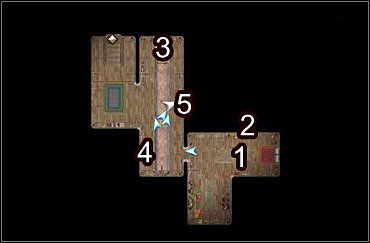
First of all talk to the Collector (1). He will resist you, even if you threaten to kill his wife. In order to break him without resorting to violence, grab a picture from the wall (2) and threaten to destroy it. He will give you one of the keys you need to open the safe (5). Now use the filled bottle on a fireplace (3) to get the second key. Grab a book from the shelf (4), it contains the riddle that gives you the password you need - it's 513. Use the two keys and enter the password to get the safe open. Leldon will show himself and you'll have to fight him. When you defeat him, the mission will be over. All that's left is to loot the safe from all the valuables that are in there.
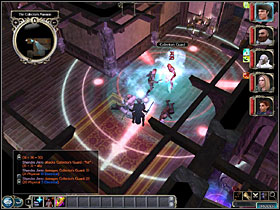

You find the Construct in the Githaynki caves at the end of Act I. Grobnar will suggest that you bring it back to life. It is a quest that requires you to find a few certain items in various places you visit throughout Act II.

The first item, the one that actually triggers the quest, is a book "Ancient art of Golemcraft" that can be found in Aldanon's cell in Crossroads Keep first time you visit it.
The "glowing liquid" can be found in Duskwood Caves - you must have Grobnar on your party for him to notice that. It's near where you find the goblin's sacred stone.
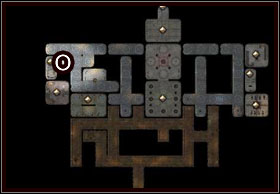
A piece of original runes is in one of the rooms in Gem Mines, Arvahn.
When you get all the ingredients, visit Grobnar in the Keep basement. He'll rebuild the Construct, who will now be a fully-privileged NPC in your party. You can also upgrade the Construct using your crafting skills (just "talk" to him and you'll see the appropriate options).
Take Elanee with you and find a Wounded Wolf in the docks (N1-12). Tend to his wounds and after a short conversation you'll get a new location on your world map - Skymirror. Go there before the end of Act I.
Open Elanee's spell book and make her remember the following spells: Bull's Strength, Barkskin, Cat's Grace and Owl's Wisdom. When you're there, you'll have to use them on the enchanted trees around the area.
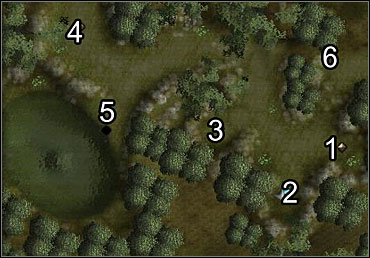
(1) - Bull' s Strength; (2) - Barkskin; (3) - Cat's Grace; (4) - Owl's Wisdom.
When you succeed, take the object that appeared on the last free and stand by the lake (5). Elanee will have a chat with one of the elder druids. When she's done, leave the area. On your way you'll be ambushed by a group of bandits led by a Shadow Priest.
This plot will see its end in Act III.
Quest from: Judge Oleff (Temple of Tyr, Merchant Quarter);
Talk to Judge Oleff in the Temple of Tyr - he'll tell you to find a missing monk who was last seen entering the Tomb of Betrayers (N2-9). When you're there, you'll see that the place is overrun by the undead.
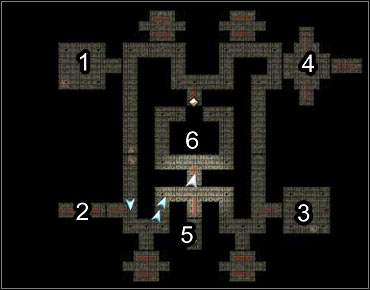
At (1) you'll find a trap that will throw fireballs at the characters that cross the room. In order to get past it, use the nearby lever - it will move a stone block. Use it as a cover for one of the characters, and have a second one turn the lever a few more times. You'll get Caitlyn's Ring.
At (2) you have to be quick and cross the room so fast that you don't get hit by a fireball. At the end of the room you'll find a chest with some equipment in it.
At (3) all the square raised plates trigger arrow-based traps. Get through that to grab a cool shield.
At (4) use one character to stand on a raised plate in the middle and meanwhile use the other one to get past the grate and to the chest.
The priest that you seek (his name is Onan, hah) it at (5). He'll tell you that the exit has been cut off by the undead. Go to room (6) and defeat Fenthick who's waiting for your there. He'll try to run from you, thus making you step on some traps. When you defeat him, grab what you can find and use the lever. Tell Onan that the passage is safe, then escort him to the exit. When you're back to the temple, Oleff will gratefully reward you with some gold. You can persuade him to pay even more if you have the skills.
Quest from: Axle Devrie or Brelaina;
The quest-giver varies depending on the path you've decided to take in Act I. If you're with the city watch, your goal will be to imitate an arms dealer and close the deal with a thieves' representative. If you're a thief yourself, then... you have to avoid getting caught like that.
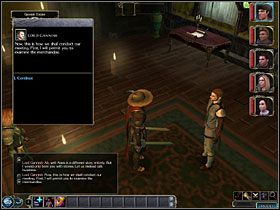
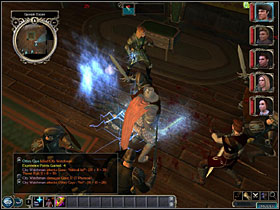
The quest takes place in Blacklake, in a house labeled (N3-5). If you're a thief, you have to start the conversation by asking a man there if he's ever been to Amn - that's the password Axle gave you. Go trough the conversation as cleverly as you can, and take a closer look at the goods you're buying when you are told to. The outcome depends on some of your character's abilities - if you succeed, you'll notice some flaws and be able to negotiate better prices. Also, if you're smart enough, you'll be able to see that that dealer is a phony. The fight will commence either way, but if you notice that, you'll get more experience.
When you do this quest as a city watch undercover agent, the mechanism is quite similar - it's up to your verbal skills whether you're able to deceive the thief or not, and eventually it will always come to a fight.
Quest from: Natrisse (N3-6);
One of the Lathander's priests in Blacklake will ask you to deliver a package to Brother Merring in West Harbor. You can just do as he asked or open the package for yourself - but that will require a high Tumble skill.
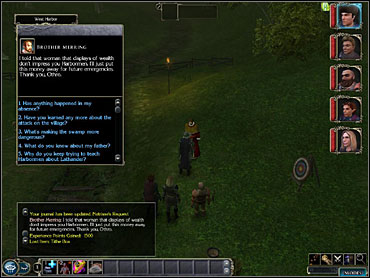
Quest from: Kyli (N3-3);
Near the cemetery in Blacklake you'll see a small girl named Kyli arguing with her older sister, Lisbet, who's up to something suspicious inside the local tomb. Talk to Kyli and promise you'll bring Lisbet back, then enter the crypt.
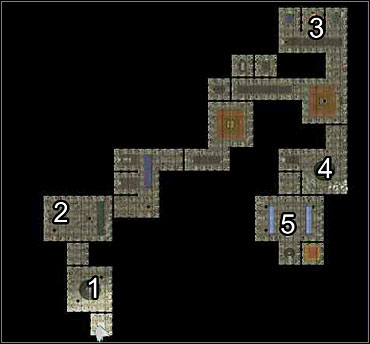
At the beginning of the dungeon (1) tell everyone that Lisbet invited you and you won't have to fight these youngsters. At (2) it won't be that easy any more. It turns out that the teenagers here are practicing necromancy. Fight your way through these shadow adepts, going through more and more chambers and corridors. Watch out for their spells, some of them can cause instant death even to a powerful character.

At (3) you'll see some chests containing a lot of interesting equipment. Go further to meet a large group of teenagers (4). Use your Diplomacy on Savanna and she won't fight you alongside her friends. Take a key from Raven's body and use it to open the nearby door. You'll witness a dark ritual (5) - interrupt it by killing everyone except Lisbet. The girl will foolishly cast a spell that'll change all the dead bodies in the WHOLE level into shadows. That means that your way out won't be exactly a walk in the park. Take Arval's journal from a small room to the left and convince Lisbet to go with you. You have to keep an eye on her, as she tends to get in the way and, well, die a lot. If she dies, the mission will be over, but it's obviously better to help her get out of here alive. Once you're back outside, talk to Kyli and take Aval's journal to Lord Nasher.

 Neverwinter Nights 2 Game Guide & Walkthrough
 Naruto Shippuden: Ultimate Ninja Storm 3 Game Guide & Walkthrough
 Neverwinter Nights 2: Storm of Zehir Game Guide & Walkthrough
 Need For Speed: ProStreet Game Guide & Walkthrough
 Nightmares from the Deep: The Sirens Call Game Guide & Walkthrough