Welcome to the Need For Speed: Pro Street guide. The newest installment in the NFS series is still an arcade game but is also an attempt to return to the classic racing simulator. The game resolves not around buying cars, but tuning them for optimal efficiency. This guide was written on the basis of 1.0 version of the game.
As Ryan Cooper you'll fight for the title of Street King. In order to do that you will have to gain fame and respect and, most of all, beat the Kings of each organization. In order to get started with the Battle Machine.
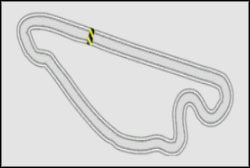
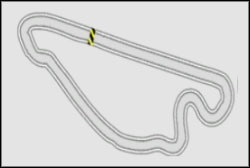
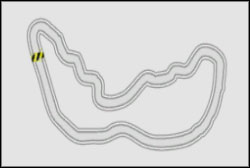
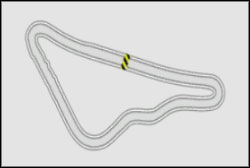
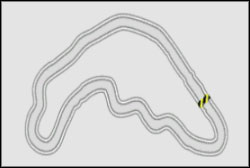
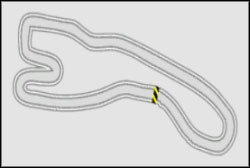
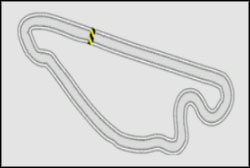
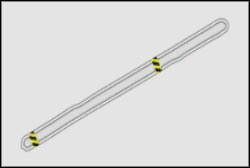
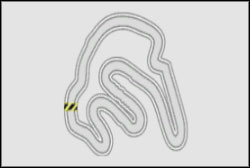
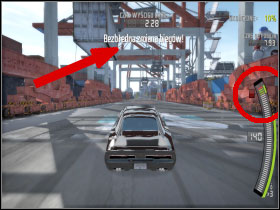
Welcome at first Race Day. Since you're a rookie you don't have to worry about damaging your cars - you can repair them here for free. Battle Machine consists of four races - in order to get all the bonuses you'll have to win every one of them.
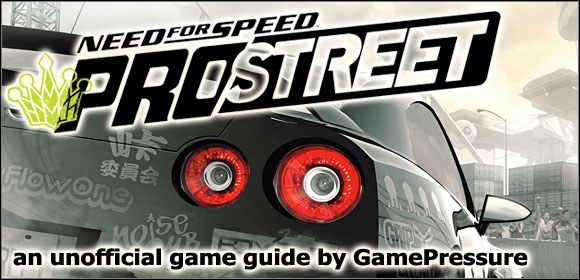
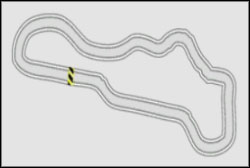
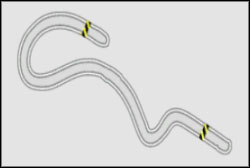
Grip: Cheyenne
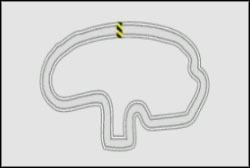
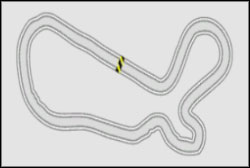
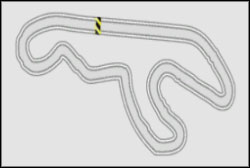
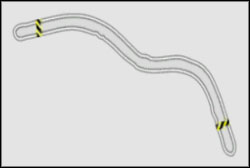
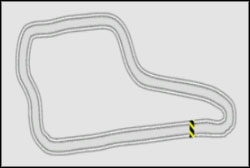
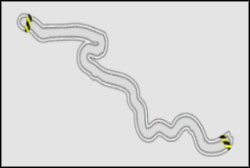
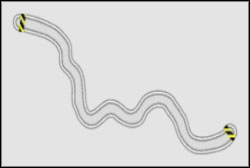
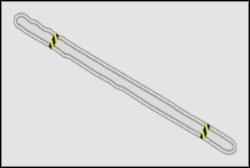
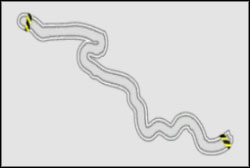
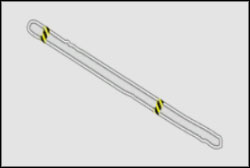
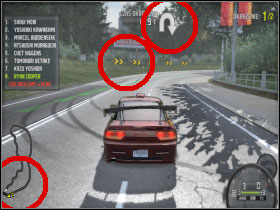
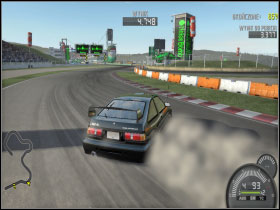
First race is rather easy, consisting of two laps. Be sure to slow down before the U-turn at the end of the runway and watch out for the three hard turns. The only car available here is Golf GT.
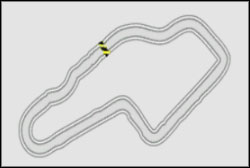
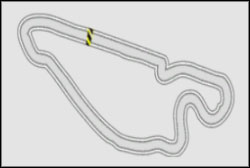
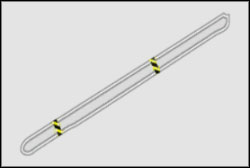
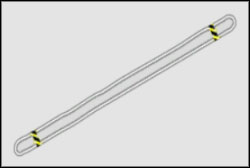
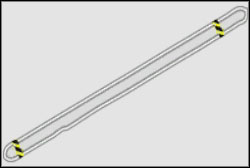
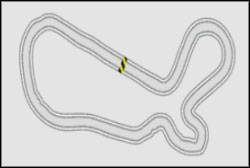
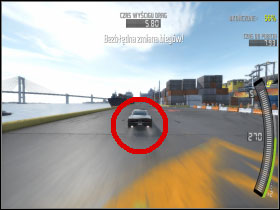
Time Attack: Dakota
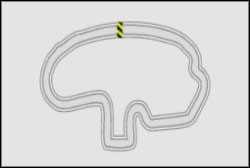
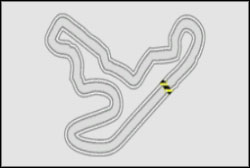
The track is almost identical to the previous one, but you're going to race in the opposite direction again, watch out for the hard turns and for the U-turn just before the final runway. You need to make three laps before finishing this race.
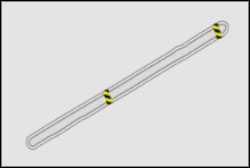
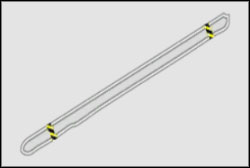
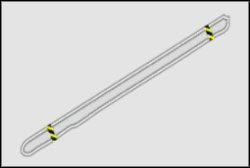
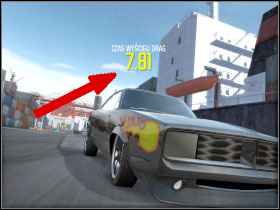
1/4 Mile Drag: 1/4 Mile Drag Strip
Since it's your first drag remember two things: it's crucial to warm up your tires and you have three chances at this one. Cobalt SS seems to be the best choice for Drag this early in the game. For more info on how to drag scroll down to the next section of this walkthrough.

1/4 Mile Drag: 1/4 Mile Drag Strip
The race is no different from the previous one, and if you won all of the other races in this Race Day you don't even have to approach this one - points from the other races should easily give you domination over the event. If you decide to compete anyway, you'll get some nice bonuses.
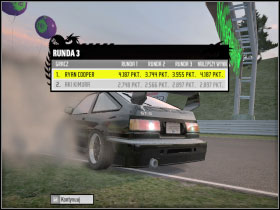
After you dominate this Race Day you'll receive: (1) 5000 cash; (2) car of your choice (I recommend Cobalt); (3) your choice of one of five bonuses (randomly generated)
At Career Map go up. This time round you'll have to bring your own cars and choose which one to use before each of the races. You don't need to tune your cars this early in the game, but if you'll experience difficulties be sure to spend some time in the garage.
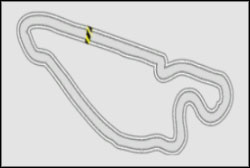
Grip: GP Circuit
Another fairly easy track. You should be able to beat this track with an untuned Nissan.
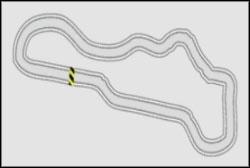
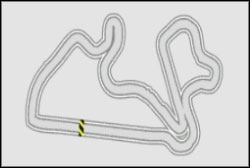
Grip Class: Short Circuit C
This is the hardest track up until now - with so many hard turns and four opponents at your back the acceleration is crucial. Watch out not to fall out of the track and notice that you can cut some of the turns.
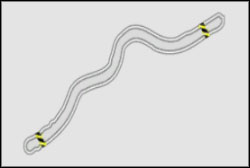
Time Attack: Short Circuit B
You'll only have to do a single lap on this very curvy track - be sure to watch your map on this one, and don't speed up too much - with three U-turns you should focus on breaking and not losing too much speed.
1/4 Mile Drag: 1/4 Mile Drag Strip
Drag Remains fairly easy so just crush your opponents in your Cobalt
If you didn't tune your cars before, now is the time to start - be sure to buy level 1 upgrades of Engine, Suspension, Drivetrain and Brakes in your Grip car. If you're racing in your Nissan don't worry about being left behind at the straight parts of the track - you'll make it up with acceleration and at turns.
Grip: GP Circuit
Another easy race - you should be able to complete it with your Nissan. If you have access to nitrous, use it at the long runway near the starting line, as you won't get much use of it further down the road. Be sure to break before the hardest of turns.
1/4 Mile Drag: 1/4 Mile Drag Strip
First challenging Drag - acceleration upgrade is quite important here, and if you want to win, you should get to the finish line in less than 13 seconds.
1/2 Mile Drag: 1/2 Mile Drag Strip
This strip is longer than the previous ones, and speed becomes as important as the acceleration.
Time Attack: Festival Circuit
This track is almost identical to the first track of this Race Day. You'll only need one good lap time, so use the first lap to know the curves and bends. At the end of the first lap use nitrous to speed up for the second, and burn it all up on the straight part of the road, as you won't need it further along the track.
As you progress through the game your opponents are getting better and better - for now, your tuning should be enough, but if you're having problems spend some cash on the new parts for your ride.

Time Attack: Airfield Long
Mediocre difficulty - due to limited visibility you'll have to relay on your map - the track itself, though curvy, shouldn't be much of a problem to you.
Sector Shootout: Center Field Loop
Another fairly easy track if you manage to block your opponents.
Grip Class: Center Field Club
Only four turns here, which makes the track fairly easy. Watch out for the two turns before the U-turn, but don't slow down before the U.
Grip: Airfield GP
Another remake of a known track - if you know the turns, you should do just all right (green arrows are pretty useful here, remember though that they aren't always right. Burn nitrous near the starting line.
1/4 Mile Drag: 1/4 Mile Drag Strip
If you haven't tuned your car for this kind of the race, now is the time to do it - be sure to focus on acceleration.
1/2 Mile Drag: 1/2 Mile Drag Strip
No big changes here, just use guidelines for 1/4 mile Drag.
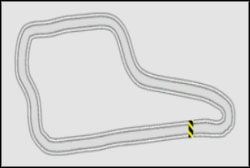
This is the last Race Day above the Battle Machine. Since it's a challenge you won't have to worry about car damage - you'll race in two preset cars, same as everyone else. In order to win here you'll have to prove your racing skill.

Grip: Club Circuit
Again, pretty easy track - you can cut some of the curves by going through the sand. Also be sure to use nitro in the straight part of the track.
Grip: Short Circuit A
350Z seems a better choice here. You can take a shortcut through black-yellow barricade at the end of the lap.
Grip: GP Circuit B
350Z is again a better choice. Watch out for the U-turns at the end of the lap.
Sector Shootout: Short Circuit B
350Z time again, as this car seems to be cut out for this track. Try to gain advantage in the first few checkpoints - that should secure your position and grant you an easy win in this race.
Sector Shootout: Short Circuit A
A well-known track again, with quite a few shortcuts - 350Z seems a better choice here, but feel free to use either.
Time Attack: GP Circuit A
This track's pretty much the same as the third in this series, but you're going in the opposite direction. Watch out, as some of the road curves are harder to notice when going in this direction, also try to gain some ground by turning on the grass.
After dominating this challenge you'll be given a choice between 350Z and Golf GTI - the former is faster, while the latter can be tuned a bit more effectively. Also, you'll have to pick your main car - I advise sticking with Nissan, as it proves quite powerful after some tweaking.
Time to start dominating Race Days below Battle Machine. Since you now have two Grip cars you should choose which one should be your backup. It's also a good moment to spend some cash on your rides - Engine, Suspension and Nitrous should be your main interests, but improving car's body can also probe useful. Be sure to invest some cash in your drag car and leave some money for the repairs.

Grip: Center Field Loop
Completely new track - if you aren't sure about your chances, take a practice run first. Only few of the turns require you to lose momentum, so don't overuse the brakes. Pay some attention to the map.
Grip Class: Airfield GP
Not much to say, since you already know the map from previous Race Days. Don't rush, as many of the turns require you to slow down. Quite easy.
1/4 Mile Drag: 1/4 Mile Drag Strip
Check previous Drag entries.
Time Attack: Center Field Club
You already know the track, and you need only one good lap, so stay focused - it shouldn't be difficult.
Time Attack: North Field
Acceleration is of the essence here, as you'll have to gain momentum quickly after losing it on some of the tracks hard turns.
Grip Class: GP Circuit
Golf isn't the best possible choice here, as you may lose the edge during the turns, but that can be easily fixed by level one tuning. Other than that, the track proves fairly easy.
1/4 Mile Drag: 1/4 Mile Drag Strip
Some tuning may be required to beat this one - other than that it's just another drag.
1/2 Mile Drag: 1/2 Mile Drag Strip
Check above.
Sector Shootout: Festival Circuit
Opponents are becoming challenging from now on, but you can take shortcuts through sand and grass. Use nitro on the runway near the start/finish line.
At this point it's worth remembering that you don't have to win every single race - you just need enough points to dominate the challenge. If you have the cash, sell your Drag car and buy a new one - preferably Charger. If you need guidelines on tuning your rides, check the tuning section of this walkthrough.
If you can, try and beat next Race Days without spending too much cash - you probably noticed that you can't afford to buy all the possible upgrades.
Grip: GP Circuit (Reversed)
Reverse version of a track you already know - nothing new can be really said about it
Grip Class: Short Circuit B
Golf won't be of much use on this track - you'll definitely have problems with turning. Try sticking to the middle of the road, as the tires and boarders can cause you a lot of trouble on this track.
Grip: Short Circuit A
This track is very curvy - try to use it to your advantage and pick a car that does well in turning. Also you should watch out and try to block your opponents as some of them are really fast.
1/4 Mile Drag: 1/4 Mile Drag Strip
This should be a piece of cake if you have the Charger
Time Attack: Short Circuit C
Use nitrous on the runway and try to be very precise when turning - since you already know this track this shouldn't be much of a problem.
For this Race Day you'll need a Drift car - Nissan Silvia is a very good choice, but if you are short on funds Toyota Corolla GTS is the next best one - Silvia is easier at handling though.

Time Attack: Cheyenne
You know the track - be very precise when taking the U-turn and the three hard turns that follow.
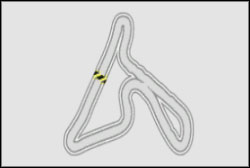
Sector Shootout: Tornado
This track is definitely a tough one - bumpy and curvy all along. This race is all about securing sectors, but do your best to stick to the track - there are many things along the sides that might wreck your car.
1/2 Mile Drag: 1/2 Mile Drag Strip
With Charger this shouldn't be much of a problem - you might consider improving the gears though, as the basic version has only three.
Drift: Drift Track B
It's your first Drift
and while it's fairly easy you should watch out for your speed so you won't fall out of the track on the second curve.
Drift: Drift Track A
You should be able to get through this track in one long drift, though it's not obligatory to win this one.
Grip Class: Dakota
This track is resembles the one from the time attack, though the bump is in the different place.
Your basically through the Battle Machine so now's the time for some championships before starting another league. With the super-drag-machine, the Charger and Nissan who should serve you well in Grip winning those championships shouldn't be much of a problem. As usual, if you're currently high on cash you should consider investing in tuning - getting to third level in Engine, Suspension, Transmission and probably Brakes for your Nissan. You'll probably have to learn how to drive your ride after those upgrades, but it most certainly pays back. No novelties in tracks so you shouldn't have much problems with them.
Grip: Airfield Long
Your car's got more power under the hood since you last visited this track, and the curves may prove more difficult, but if you won't charge too much, you should beat this track fairly easily.
Sector Shootout: Center Field Club
Sector boarders are pretty close, so you should be very precise when trying to beat this track. Try to keep to the optimal driving path.
Time Attack: Center Field Loop
Watch out for the curves right after the U-turn. You already know the track so beating your opponents shouldn't be hard... if you manage to keep the right speed.
1/4 Mile Drag: 1/4 Mile Drag Strip
With Charger you shouldn't have any problems here
1/2 Mile Drag: 1/2 Mile Drag Strip
Same as before. Check previous entries if you experience any difficulties.
Welcome to the second organisation. Whatever you use for Grip probably needs tuning to level three Engine, Transmission, Forced Induction, Suspension and probably Nitrous upgrades. If you want to upgrade Charger add more gears and tune the Engine a bit. Luckily your Drag car shouldn't require any tuning as of now, since it's the most skill based type of the race. Good luck!
Again you're down to pre-set cars. If you expect any difficulties you can have a few practice swings. It's worth remembering that GTO has a nasty tendency to skid, so be careful on the hardest curves.
Grip: GP Circuit
Watch out on the U-turns and don't charge - this track may be a bit tough, but don't worry much about your opponents since they don't seem to grip the full abilities of their cars.
Grip: Short circuit
The track is quite easy, but the U-turns may be treacherous. Remember that your ride is exactly the same as your opponents' so you won't be able to make up the loses if you fall too much behind.
Drift: Drift track B
Nothing difficult here - even quite average score should secure your win.
Sector Shootout: GP Circuit
You and your opponents are literally on the same rides, so this track may not be easy. You have to beat the sectors faster than the other guys - if you fall behind, you already lost.
Drift: Drift track E
Track's quite long so do your best and try not to fall out of it. Other than that, you should beat it quite easily.
Time to pick your new Drift car - either is good, though if you decide to choose Corolla, remember to spend some cash on it's acceleration.
Go down from the Challenge
Grip: Gilza Go
This track is both fast and quite easy. If you're nearing the maximum performance upgrades, your ride, should do just fine. Beating turns while sticking to the outer bands is a good idea here.
Sector Shootout: Kyobashi Attack
The only difference between this track and the previous one are the two extra curves - it's better to slow down a bit before reaching them. Other than that, stick to the guidelines above.
1/4 Mile Drag: 1/4 Mile Drag Strip
Even without upgrades your Charger should do just fine, though it's worth to spend some cash on it now, as it will definitely pay you back in the future.
Drift: Drift Track C
Time for something a bit harder - you need to know your car well, to get a high score here. You can get a lot of points on the last bend.
Time Attack: Shimbashi
Back to the slightly modified Grip track... watch out for the curves near the starting line, and check the guidelines above for more info
Another Race Day...
Grip: Club Circuit
Short track with two tight curves and a series of bends after the starting line runway. Burn your nitrous on the runways
1/4 Mile Drag: 1/4 Mile Drag Strip
You've probably upgraded your Charger a bit by now. Remember, if you experience any problems in switching gears you can "stretch" the short gear.
Drift: Drift Track A
You need to literally stay on the track. After getting into the left curve, counter ant switch to the right, then hit the U-turn and keep on drifting until the finish line.
Drift: Drift Track B
Time to relax a bit - on this track you should be able to get 3000 points in one drift without much difficulty. Just remember to keep to the right track, as one wrong turn can send you out of it.
Sector Shootout: Short Circuit B
Speed is the main factor here, so push it on the runways and make aggressive turns near the inner axis.
Time Attack: Short Circuit A
Beating the turns is the key here - try do be as fast as possible
Again you're out of your car, and you have to quickly accustom yourself with what you get.
Grip: Southern Track
You have to be aggressive here - cut every possible turn and don't be afraid to use your opponents' cars to make your turns even easier. Burn nitrous on the runways.
Time Attack: Togue Track
Very hard and annoying track - you've got to be very precise and fast here, as your opponents won't give you an easy time here. It's best to use nitrous at the beginning of the lap.
Drift: Drift Track D
Time for something rather easy - just keep on turning and drifting - this shouldn't be a problem if you manage to control Supra.
Drift: Drift Track F
You only need to get through two bends drifting here, so not much of a problem.
Time Attack: Fukushima A
Quite an easy track set to introduce you a new race mode - Time Attack Stay on the track, and use the occasion to test both Supra and BMW - after completing this challenge you will be able to choose one of them as your ride for this mode.
Top Speed Run: Fukushima
On this short track you'll have to race as fast as you can, since speed is the factor that determines your points here. Use nitro just before passing through the control points.
Time Attack: Fukushima C
Pick whichever car suits you (my choice was BMW). The track's quite long and a single mistake can steal a win from you. Watch out for the hillsides and when faced with the risk of falling of the track, slow down a bit.
Pick your car (my suggestion is the BMW) and start tuning it - start of with the parts that you got with the car, but if you can afford it buy next levels of Engine, Drivetrain etc. Your main car (I assume it's still Nissan) should have all the level 3 upgrades by now.
Will still to the south from the starting point.
Grip Class: Southern Track
Be careful on the U-turns and beat the turns just behind the starting line along the outer rim.
Sector Shootout: Western Track
Long runways, hard turns, hills and flat parts - this track has it all. Try to beat the turns as fast as possible and be patient, as it's one of the hardest tracks.
Drift: Drift Track C
The key here is to beat the first turns in drifts, followed by getting into very long drift near the finish line.
Drift: Drift Track A
You need to get into long drifts on both turns. After getting out of the second U-turn keep on drifting until the finish line (track's wide enough)

Time Attack: Fukushima B
You know the track and you probably know it's quite easy. Watch out on the two long turns and keep an eye out for a closed section of the road.
Top Speed Run: Fukushima A
Use nitro just before getting through the control points and watch out for the guts and closed sections of the road.
Time for the last Race Day in the lower part of the table.
Grip Class: GP Circuit
Pretty complicated track, but many of the turns can be cut. If you can, try to push your opponents off the track on the sharp bends by bumping into their sides.
Grip: Short Circuit A
It's pretty much the same track as before, only shorter. You have to watch out only on four sharp turns here, other than that just push the tempo.
1/4 Mile Drag: 1/4 Mile Drag Strip
By now your Charger should have a 700 horsepower engine. Be sure to set the tire pressure right, as well as the nitro pressure and other settings mentioned in the description of Drag set up
Drift: Drift Track C
Gently drift through the first few bends, then go slowly through the U-turn so that you don't fall off the track and then drift a bit more on the long runway - nothing too hard.
Sector Shootout: Club Circuit
Apart from three sharp turns there's nothing to watch out for here, so just step on it.
Time Attack: Short Circuit B
This track's quite short, so you need to be very precise in order to win here. You'll have to slow down before the three sharp turns, but the first one and the second to last don't require you to lose too much speed - use it to your advantage
Upper part of the React tree.
Grip Class: A-54 Express Way
Quite an easy track which allows you to speed up - there are no spots where you have to rapidly lose speed.
Grip: Autobahn GP
Track's quite easy, but every mistake here counts. Watch out for stacks of tires and few spots without bands where you risk running into a tree if you fall out. In the latter part of the track consists of a long runway through the tunnels - you can really speed up there, but be careful.
Sector Shootout: A-54 Loop
You know some parts of this track - you have to stay focused, but don't lose your grip, as your opponents won't wait for you. Watch out for the turn sequence after the starting line, then use nitrous in the curving tunnel leading to finish line.

Drift: Drift Track A
After getting to the first turn initiate a long drift, that can be lengthened on the series of smaller bends. If you keep drifting until the finish line, you should secure your win.
Time Attack: Autobahnring A
Short and quite fast track - If your in the BMW it should be tuned quite a bit by now. The track consists of big and small bends, but you should be able to speed up here. Try to leave your opponents behind as soon as possible.
Top Speed Run: Autobahnring B
This race is extremely fast and the track is quite curvy taking into consideration speed you're supposed to achieve. At the beginning of the track try to stay away from the bands as it's easy to fall of the track. The U-turn shouldn't be much of a problem.
More races, more money, more tuning...
Grip: Kyobashi Attack
Since you've been here so many times, there's not much to add - keep on speeding, turn on the bands and watch out for the two final turns.
Grip Class: Exit 4
Speed up on the runways and be careful on the two sharp turns. You won't have to lose much speed to beat the bend right after the starting line.
Time Attack: Gilza Go
Don't worry about breaking too much on this well-known track.
1/4 Mile Drag: 1/4 Mile Drag Strip
It all comes down to proper tuning here.
Drift: Drift Track B
Wide and easy track. Watch out for the bands on the runway. You should be able to beat the whole track in one, long drift.

Drift: Drift Track A
Don't waste your time on the first runway, just focus on entering the first turn properly. Watch out for obstacles and try to beat the last two turns in one long drift.
Grip: A-54 Express Way
Check the previous entry on this track

1/4 Mile Drag: 1/4 Mile Drag Strip
By now you should have level two upgrades of all key parts, so with little agility this shouldn't be much of a problem.
Time Attack: Autobahnring C
Even though it seems complicated, this track's actually quite fast and easy. By now you should already know all the turns here. Pay attention not to fall out of the track or you risk huge time and speed loss.
Top Speed Run: Autobahnring B
Don't risk all throughout the track, switch to top gear and burn nitrous only few metres before the checkpoints.
Sector Shootout: Autobahnring GP
Beating this track with Nissan might come as a problem. Watch out for a turn sequence near the starting line, then focus, so that you won't fall out of the track in the grassy area and once your through it it's a long, almost straight tunnel leading up to the finish line.
Top Speed Run: Autobahnring A
Track's pretty short, but you'll need a lot of power under the hood to win this one. Remember, you don't have to race your opponents here, so you might want to just let them pass, so that they won't get in your way. Right after the starting line switch to the fourth gear and burn nitrous to boost your score.
If you're having problems winning with Nissan, consider buying a new car, paying most attention to Engine Power and Acceleration. I you're short on cash, just go back to one of the Race Days.

Time Attack: Short Track
In general, the track isn't too hard, but the three sharp turns may pose a bit of the problem. You should speed up as much as you can on the remaining parts.

Grip: Lakeside
It's really a two-part race: in the first part you can cut the corners and speed up, then you go to the second, where you get into a bunch of U-turns, which may be problematic, as on this thin strip of road your opponents can give you hell. It's better to gain distance at the very start by burning nitrous and cutting through the grass.
1/4 Mile Drag: 1/4 Mile Drag Strip
Charger - nothing more to add
Drift: Drift Track A
Drift to the right, then pull to the left, then slow down before the U-turn to the right and keep on drifting till the finish line.
Back to your old trash - Mondello Park.
Grip Class: Short Circuit A
The three U-turns are the key here, you have to get through them as precisely as possible. It's not worth to cut the corners here, just slow down and pass them the old fashioned way.

Grip: GP Circuit
You already know this one, and you probably know, how problematic can the U-turns be here. Try to take these turns from the outer band towards the inner one, and be sure to cut the track through the grass a bit in it's latter part.
Time Attack: Club Circuit
Two U-turns require you to lose some speed, other than that you can push it.
1/4 Mile Drag: 1/4 Mile Drag Strip
Charger - no further comments.
Congratulations, you're through React Team Session. Get ready for the championship.
It's the last trial before getting to next organisation!
Grip Class: Short Track
Apart from two U-turns it's a rather fast track, and it's wide, giving you a lot of space to get past your opponents. Other turns don't require much of a speed loss from you.
Grip: GP Circuit
Longer version of the previous track - in the latter part the turns a re a bit more requiring. Try to get in your opponents' way on the runways, as they can be faster than you there.
1/4 Mile Drag: 1/4 Mile Drag Strip
Charger
Drift: Drift Track F
You should be able to get through this one in one long drift. It's rather long, but easy. Try to get through the U-turn on the side to improve your score.
Drift: Drift Track A
Another well-known track, drift to the right, then to the left drifting on the side, then switch to the right (slowing down so that you won't fall of the track) and you're done!
This organisation requires some changes from you. The changes below should provide you with everything you need for the Super Promotion.
Grip - If you're still using Nissan, you probably have all the maximum upgrades for him by now, and there's nothing much you can improve - time for a change. My choice is Mitsubishi Evolution (X not IX!). It's fast, but not as stable as Nissan, so if you're going to race on a really curvy road, switch back to your old chum.
Drag - Time for maximum tuning of your Charger if you haven't performed it before. Also, be sure to check the car settings and set them to optimal values.
Drift - If you picked Corolla, you might want to stick with it, as it should win you most (if not all) of the races. Buying a new car is not worth it, you just need to get a "feel" of your car.
Time Attack - Use Viper, BMW or buy something else. This race mode is all about skill and control, so the car choice is up to you, but be sure to tune it as much as you can.
If you can afford it, or you won a free car coupon you might consider picking up one of the higher class cars, such as Porsche.
Back to pre set cars. It's all about skill here, and if you're having problems in King mode, maybe it's not worth the effort?
Time Attack: A-54 Express Way
You can really speed up here, but be careful on the turns. Burn nitrous on the starting runway.
Grip: A-54 Loop
Another known track - you have to drive perfectly through the first part of the course, and then push it in the tunnels.
Drift: Drift Track B
Kiper drives a whole lot different than
Corolla - mainly it's faster, so you'll have to really control your speed gauge. This track is quite testing, as there aren't a lot of sharp turns you can use, so you have to stick to every bend.
Time Attack: Autobahnring C
Pay attention to staying on the road and don't worry about the U-turns, they only seem grim. Since all of your opponents ride the same cars, you might expect a crowd near the starting line.
Top Speed Run: Autobahnring A
If you're not sure which car to choose spend some time and test both. Track's not too difficult, but remember to burn nitrous near the checkpoints.
Drift: Drift Track D
Finally, a real challenge. In the first long bend you have to limit yourself to subtle drifts, then just keep switching from right to left, and if you enter the last turn properly, you might be able to keep drifting right up to the finish line.
If you liked the Viper, you might just pick it and use it for Top Speed Run. Skyline GT-R seems a poorer choice to me, but the decision's up to you.
Grip Class: GP Circuit
Quite an annoying track - when you get to speed up, you're forced to suddenly slow down before a sharp turn. The story's the same all throughout the track, so you just have to stay focused.
Sector Shootout: Long Track
Very challenging track covered with sharp turns. In the first part there are some short runways in between the turns, and the track gets even worse in the second part, as you are faced with U-turns that additionally slow you down. You have to feel when to start breaking, so that you don't lose to much momentum.
1/4 Mile Drag: 1/4 Mile Drag Strip
Charger is a powerful tool, but you have to get real focused here - it ain't as easy as before. Be precise when switching gears.
Drift: Drift Track A
Track's wide and easy, and you can score loads of points on the big U just before the finish line.
You know the area, but your opponents' abilities might come as a surprise.
Grip: North Field
Your car's quite fast, but you have to control it real good here - especially on the bends. Track doesn't prove much of a challenge, but your opponents are pretty fast. Keep to the outer rim when entering the big turns, and watch out for the railings.
1/2 Mile Drag: 1/2 Mile Drag Strip
You had a long break form 1 mile race, so you might want to tweak aerodynamics so that you won't hit the maximum speed in the middle of the track.
Drift: Drift Track C
You can get through this one in one long drift - pay attention to speed and turning. You have to feel the moment when to switch sides in the drift.
Drift: Drift Track A
Get into the turn drifting to the right, and then switch to the left. Since the track's turning left, you can pull it all the way to the runway before the finish line. Drift through the final two bends, and you're done!
Grip Class: Center Field Loop
You main focus here should be controlling the car. Drive swiftly through the turns, and if you're having problems, check the hints few sections earlier.
Sector Shootout: Long Airstrip
Track's quite complicated, but it's not new - try to break just before the turns, and leave your opponents behind as early as possible.
Back to the old thrash again
Grip Class: Western Track
Watch out for the U-turns, and try to get past your opponents in the first one. Nitrous is pretty insane considering your horsepower, so burn it only on runways.
Time Attack: Southern Track
Slow down before the two U-turns - if your suspension is stiff be careful not to topple your car on the bumps. Burn nitrous in the middle of the first long turn, so that you gain advantage at the very beginning of the track
Time Attack: Fukushima A
It's not a free ride anymore, you have to get above 300 km/h in order to win here - pick BMW, Kiper or whatever you like.
Top Speed Run: Fukushima C
Track's quite long and requires a lot of focus. Checkpoints are so close, that you don't really have any room to slow down. Watch out for the closed sections and bumps - don't turn before them.

Top Speed Run: Fukushima B
It's a bit easier here, since there aren't so many checkpoints. Burn nitrous just before them

Drift: Drift Track B
You can get through here in one long drift, drive on the side, but be careful not to turn around here.

Grip Class: GP Circuit
Loads of U-turns and regular turns... again. Try to get past your opponents on the first U

Drift: Drift Track C
Forget about the starting bend - drift through the further ones, and get past the U-turn in one big drift that should end behind the finish line.
Time Attack: Short Circuit A
No further comment required.
Time for the most annoying location, especially when considering Top Speed Run

Grip Class: Tornado
Set the suspension to soft and the car as high as possible. Don't speed up too much, as the road is bumpy. Use the bands to your advantage.

1/2 Mile Drag: 1/2 Mile Drag Strip
You need to get a perfect start and be very precise when switching gears in order to win here.
Drift: Drift Track C
Key here is getting through the track in one long drift. Enter the first bend and push it to maximum, so that you keep drifting on the straight part. Switch sides on the final part and get through the finish line.
Time Attack: Nevada Highway B
Quite an annoying track where almost every mistake means getting out of the road. Push the tempo, slow down only on turns and burn nitrous on runways.

Top Speed Run: Nevada Highway A
You have to know this track perfectly in order to beat it - otherwise you'll have problems knowing when exactly can you speed up. Stay away from the sides.
Sector Shootout: Dakota
If you got through the two previous tracks, this should be a piece of cake. Watch out for the treacherous bump!
Time Attack: Nevada Highway C
It's the longest variant of this Highway. Watch out for the turns marked with yellow arrows, and pay extra attention when passing through narrow turns. Other than that, your car should provide you with enough power to secure the win.
Dominating this mode on the King, difficulty might prove a challenge or become a source of a great frustration.
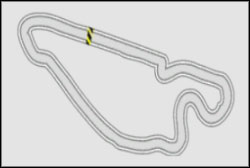
Grip: GP Circuit A
Taking into account the long runway you'll need a really fast car (maybe Evo?) You should know the track already, but remember that the turns in the middle of the course can be beaten without losing too much momentum, but you'll have to slow down before entering the U-turn. Push your car to it's limit on the runway.

Grip Class: Oval Track
Track's quite simple, but your opponents should probe a challenge. It all comes down to horsepower here, so speed up and maintain your speed all throughout the race. Burn nitrous when leaving the bends.
Sector Shootout: GP Circuit B
Track's nearly the same as the one from the Grip, so there's nothing much to add. You have to get the best score possible in the first lap, and remember that winning four sectors in a single lap grants you extra 500 points.
Time Attack: Short Circuit B
You'll need a really fast car here. <br>You already know the track, so remember about the turn sequence in the middle of the course.

1/4 Mile Drag: 1/4 Mile Drag Strip
You'll only need to get below 8 seconds to win this one.
Two Wheel Stand: 1/4 Mile Strip
Remember the basic rules: you need a car with very much power under the hood, you need to warm up the tires and have to start and switch gears perfectly. If you keep to those principles, you should be able to get through the whole track on two wheels.
Drift: Drift Track D
Speed up and start drifting on the first turn then get through the U with maximum speed and drift. You can also try to manoeuvre a bit on the straight parts of the course.

Drift: Drift Track A
Two turns up the hill should be beaten in one drift. Then get straight and enter the turn to the right, switch to the left and back to the right in a gentle arch. Straighten your car again and get a clean entry into the final turn downhill - you should finish that drift on the finish line.
Grip Class: Short Track
Track's quite short and easy, but you have to watch out for the three sharp turns which will require you to really slow down (you can cut the latter two). Rest of the track is mainly the downhill turn and a runway which allows you to burn all the nitrous.

Grip: GP Circuit
Watch out for the first few turns, then speed up, between next few turns, but watch out so that you won't fall of the track. Slow down before the U-turn or get through it along the outer band.

1/2 Mile Drag: 1/2 Mile Drag Strip
Warm up the tires, get a perfect start and be very precise when shifting gears - that's all to it.
Drift: Drift Track B
Speed up before the left turn and if you can drift through it until you reach the next turn. Switch to the other side and get drifting through the next two turns.

Time Attack: Short Track
You only finished this one few moments ago, so my advice stays the same, but be sure to burn up all the nitrous in one lap, to improve your score.
You're through the upper part of the tree. If your short on repair coupon enter and leave previous Championships few times, and you'll get more.
Grip Class: Horse Thief Mile
For this track, Nissan will do just fine. Loads of U-turns in the first part of the course, and lots of room to speed up in the second part - watch out for the treacherous turn just before the finish line.
Time Attack: GP Circuit
Quite a wide track where sharp turns seem to be the only true difficulty. Pay attention to the map (or screen tags if you turned them on) and don't slow down too much before the larger turns. You'll need one of the faster cars here.
Drift: Drift Track C
It's quite easy: start off with a left turn that then switches to the right. Watch out for the sharp left turn and slow down, so that you can switch to the left after getting out of it and drift until you cross the finish line.

Drift: Drift Track D
You can get through here in one long drift. Get into the sharp left turn, switch to the right, then left, and then finally the familiar right turn which, when entered on the side should allow you to finish the drift just behind the finish line.
Drift: Drift Track E
This track's quite wide, so speed up before the first turn and drift as far as you can, then straighten up and get drifting through the large turn (you don't have to pass it in one drift to win)
Two Wheel Stand: 1/2 Mile
Watch out for the roadsides.
Grip: Ilkura Canyon
A longer version of this track. Watch out for the wide, sharp turns in the middle of the course, other than that just ride along the bands and push it.
Grip Class: Ginza Go
If you have any trouble turning here, just stick to the bands. Burn nitrous on the runways - it is up to you to decide on which ones.
1/4 Mile Drag: 1/4 Mile Drag Strip
No further comments.

Two Wheel Stand: 1/4 Mile
No further comments.

Sector Shootout: Road 4 Exit
This one's rather easy, but be sure to get the first turn right and watch out for the turn sequence at the end of the course. Both Evo and Nissan should do good here.
Grip Class: Festival Circuit
There's a nasty set of small turns at the end of the starting line runway. Then, you'll have to get through few more turns which are the only difficulties here. Nissan seems to be set perfectly for this track.
Sector Shootout: GP Circuit
The track is nearly the same as the previous one, but the small turns at the end of the runway have been removed. You'll need a faster car here, so Evo is probably a good choice.

1/4 Mile Drag: 1/4 Mile Drag Strip
If you stay below 8 seconds, you shouldn't have any problems here

Two Wheel Stand: 1/4 Mile
Your opponents won't be able to ride more than 100-200 metres, while your powerful 1000 horsepower engine should allow you to ride for about 400 metres.
Drift: Drift Track A
The track is really narrow, and you'll have to get through it in one drift. Speed up and enter the turn to the left, then to the left again, switch sides and pass the right turn and drift just until the finish line.

1/2 Mile Drag: 1/2 Mile Drag Strip
Your car is set more towards 1 mile races, preferring acceleration over top speed, so if you want to win this one, you'll have to change it's settings. On the other hand if you won all of the previous races, you've probably already dominated this Race Day
Time Attack: A-54 Loop
Another return to the well known track. Drive carefully through the first turn sequence until you reach the U-turn. Start burning nitrous just before entering the tunnel and right after getting out of it so that you get past the starting line at your top speed and start breaking just after passing it.

1/4 Mile Drag: 1/4 Mile Drag Strip
Perfect start and precise gear shifts are all that you need here.
Two Wheel Stand: 1/4 Mile
Since your opponents won't be able to ride more than 250 metres here, you shouldn't have any problems with winning this race.
Drift: Drift Track C
Speed up as much as you can and get into the left turn drifting, and continue until you reach the sharp turn. At this point you should set your car further to the side and get through the finish line
Drift: Drift Track D
A rather challenging track. Thanks to the slope you might have problems staying away from the inner band in the first turn, but the track gets easier further on and you can just drift through all the turns, pulling the final drift all throughout the two final turns and through the finish line.

Time Attack: Autobahnring B
You've got to be really fast here, but watch out for the black and yellow turn signs. The U-turn shouldn't be much of a problem.

Top Speed Run: Autobahnring C
Longer and closed version of the previous track. Watch out for the sharp turns, and don't worry much about the U-turns. Since there are nine checkpoints on this track you will be able to burn nitrous only before some of them

Grip: Dakota
This one can be easily won with Nissan. Watch out for the series of turns preceding the final turn and use the band to get through it.
Grip Class: Canyon
If you pick a weaker car you will be sent to a weaker group. Since you already know the track i can only say that you should watch out for the two bumpy turns right after the starting line and two series of small turns in a narrowing in the middle of the track
Time Attack: Tornado
Apart from the lack of the narrowing, the track's identical to the previous one

Time Attack: Nevada Highway A
Terrifying track, but it still can get worse. A few smooth turns can lead you to your doom with speeds you manage to achieve - each turn can be a surprise here, so stay focused. If you're using keyboard you'll have a really hard time getting through this one.

Time Attack: Nevada Highway C
This one's even longer and harder than the previous one. The wider turns require you to slow down a bit, or have an uncanny precision. Be especially careful when passing through the two U-turns in the middle of the track.

Top Speed Run: Nevada Highway C
The only difference between this track and the previous one are the 10 checkpoints all throughout the track.

Top Speed Run: Nevada Highway B
It's your third championship, so you probably gathered some amount of cash by now - consider buying a Porsche or other high end car for races requiring high speeds.
Grip Class: Autobahn GP
Get through the first part of the track on the low gear, passing through series of turns, watch out for the forest part as you can fall out of the track there and then speed up as the remaining track is a soft bend which allows you to gather much speed.
1/2 Mile Drag: 1/2 Mile Drag Strip
Ruts on the road increase the difficulty a bit as you can swerve of the track thanks to them, but other than that it's just a regular drag.
Drift: Drift Track A
Great, wide track, giving you loads of room to initiate drifts. Start off with a long turn followed by a room to switch or straighten, then a few softer turns and a long turn allowing you to set up a really nice drift towards the finish line.

Time Attack: Autobahnring A
The greatest difficulty here are the soft but suddenly emerging turns and the ones marked with black and yellow signs. Track is quite short though

Top Speed Run: Autobahnring C
Once more you'll have to get through 9 checkpoints, but watch out for the marked turns and approach them carefully, so that you don't lose too much momentum as some of the checkpoints are set right behind this turns.
Drift: Drift Track
You won't get much points from the first part of the track - drive with a slight skid and make it up in the second part. When you reach the last broad turn, skid up to the finish line.
Ryo has come! You've won three championships and he's noticed you - he'll challenge you to a showdown instantly. As for the duel... it's not that difficult. The problem is on the Novice level Ryo is pathetic, and on the King level he crashes 80% of the time.
You must complete the tracks in the shown order - only when you pass one does another become available.

Time Attack: Nevada Highway C
You know the track, but the opponent is specific. You'll need a high-end car (Ford GT, Porsche) You know the track fairly well, remember about the nasty turn just before the end.
Two Wheel Stand: 1/4 Mile
If your Charger is fully tuned and properly set, you shouldn't have any problems with Ryo.
Top Speed Run: Nevada Highway B
A tiny track, which you'll win easily with the BMW. Four checkpoints, three uses of nitro (first three checkpoints). Brake right after the last checkpoint. There's a difficult turn right before the finish line..
1/2 Mile Drag: 1/2 Mile Drag Strip
Unbelievably enough, Ryo not only can't stay on the road, but he manages to crash his car. The road is bumpy, so try not to fall off it.

Time Attack: Nevada Highway A
You'll need a really good car - the Porsche 911 GT2. The track is much simpler, and Ryo crashes less often. You'll need to catch up as soon as possible, cut him off and get him off the road, then hightail it to the finish line.
Congratulations, you've beat him without dueling four kings. Take care of them now. To access the next four leagues, you'll have to meet the mentioned conditions - break the point record on 10 tracks from each race type (records are written next to each race, under the minimap.
Time to take care of the Lord of Drag - Charles Monroe. If you have the Dodge Charge or a similar car you should have no trouble.
1/4 Mile Drag: 1/4 Mile Drag Strip
If you get less then 8 seconds on the track, your opponents will have no chance whatsoever.

1/4 Mile Drag: 1/4 Mile Drag Strip
See above.

1/4 Mile Drag: 1/4 Mile Drag Strip
See above.

1/2 Mile Drag: 1/2 Mile Drag Strip
See above.

1/2 Mile Drag: 1/2 Mile Drag Strip
See above.

1/2 Mile Drag: 1/2 Mile Drag Strip
See above.

1/2 Mile Drag: 1/2 Mile Drag Strip
Nothing changes here, the opponents are marginally better, which is no factor considering your car and your experience. Remember to tweak your car depending on the length of the strip.
1/4 Mile Drag: 1/4 Mile Drag Strip
See above.

1/4 Mile Drag: 1/4 Mile Drag Strip
See above.

1/4 Mile Drag: 1/4 Mile Drag Strip
See above.

1/2 Mile Drag: 1/2 Mile Drag Strip
See above.

Two-wheel Driving: 1/4 Mile Strip
See above.

1/2 Mile Drag: 1/2 Mile Drag Strip
See above.
1/4 Mile Drag: 1/4 Mile Drag Strip
See above.

1/4 Mile Drag: 1/4 Mile Drag Strip
See above.
1/2 Mile Drag: 1/2 Mile Drag Strip
See above.

Two-Wheel Driving: 1/4 Mile Strip
See above.

Two-Wheel Driving: 1/4 Mile Strip
See above.
This is the final showdown... If you expected something more after the king, you'll be disappointed.

Two-Wheel Driving: 1/4 Mile Strip
Charles Monroe does 200 meters at most. A charger or similar will take him on easily.

1/4 Mile Drag: 1/4 Mile Drag Strip
Just pathetic... 10 seconds is no threat for you. Get less then 8 seconds here.

1/2 Mile Drag: 1/2 Mile Drag Strip
Charles doesn't exactly show off here. 15 seconds is no match for you. Do what you have to do and become the new King of Drag!
As victor, you just got a load of cash (50000) and the former champion's car.
Time to take on the King of Drift. Remember that to access this league, you must break the point records on at least ten other tracks. As for cars, there's a wide selection, but I suggest to stick to the Toyota Corolla, the Nissan Silvia or the Mazda RX-8. Whichever you choose, tweak it to the limit (you can afford it)

Drift: Drift Track A
Easy track. Get some speed and enter the first turn, without crashing into the barrier. Come out of the turn and into another (again, make sure you don't skid out). Then shift your slide to the other side of the car and complete the track.
Drift: Drift Track C
This one's harder - you must use the 3 turns perfectly to get that 3000 points. Come in - not too fast - into the right turn, shift your slide to the left side and keep skidding as long as possible to switch the direction of your slide again. If you manage to keep sliding that long, shift to the left side again and slide all the way to the finish line.
Drift: Drift Track B
Very pleasant track (though it doesn't look like it). The first long arc is worth 2000 points when done properly. Finish the job on the U-turns and keep sliding until the finish line.
Drift: Drift Track D
This track is a combination of the two previous ones, so drive according to the pointers for B, then C. It's just a little longer, which should pose no problem.
Drift: Drift Track E
Do the left turn well (without crashing into the barrier) shift your slide to the right and ride the arc. Swing your car to the right and ride the arc again. On the end you can swing to your left again and slide up to the finish line,
Drift: Drift Track G
VERY hard track - it's narrow, uphill, and really steep. Drive slowly and make each turn with a delicate slide. Use a couple of U-turns well. Oh, and use a small, narrow car here.

Drift: Drift Track C
You know this track already, although your handling must be perfect on the first turns. Drifting all the way to the finish line will make most of your points.

Drift: Drift Track B
After the long right arc there are two hard turns: one right and one left (doable on one slide). You can prolong your slide on the broad runway, dodging the obstacles. Another left turn - with a lot of space - one to the right and you're at the finish line.

Drift: Drift Track A
After the long runway, on which you gain speed, enter the right turn and drift up to the next right turn.

Drift: Drift Track A
See above.
Drift: Drift Track B
See above.
Drift: Drift Track C
See above.
Drift: Drift Track A
A pleasant track. Speed up and enter the right turn in a drift, through the runway up to the next left turn. Then the U-turn and the finish line.
Drift: Drift Track B
Another pleasant track. After the U-turn and a light right turn enter the long left turn at an acute angle. If you lose too much speed, use nitro. You can use the runway by drifting the right-turn arc.
Drift: Drift Track C
Quick and easy. Doable on one drift, you just have to adjust the drift direction depending on the turn. Use nitro on the long turns.
Drift: Drift Track E
Identical to the previous one, just in reverse direction.
Drift: Drift Track F
Turn right, swing to the left in the middle of the runway up to the U-turn before which you should slow down. After the U-turn, there's a long runway with a turn (use nitro again)
Drift: Drift Track D
Really short track (part of one you already know)Drift into the right turn, swing to the left for a moment, enter the longer right turn on nitro, swing to the left. Easy.
After you ace the Race Day you'll be challenged to a duel.
Time for the final showdown.

Drift: Drift Track C
You just did this, and even though it's a duel with a King the rules are the same.

Drift: Drift Track F
You just did this, and even though it's a duel with a King the rules are the same.

Drift: Drift Track E
You just did this, and even though it's a duel with a King the rules are the same.
Congratulations. 50000 in cash and the King's car are yours.
Welcome to the Time Attacks. A really fast car is the bare minimum. By now, you should have a lot of cash. You could, of course, use the BMW or something like that, but my personal favourite is the Porsche 911 GT2. Although faster cars are available, the Porsche is well balanced in terms of speed and handling. If you're rich enough, get the Zonda for 741000. If you have trouble finishing, for example, Nevada, you can finish the other competitions first, then buy a supercar (like the aforementioned Zonda) for the winnings and move over to this part of the game after that.
Back to the freeway, the tracks are well known to you - have fun approaching the sound barrier.

Time Attack: Autobahnring C
As always, the problem with these tracks are the hard (for such speeds) turns marked with yellow arrows on a black background. Be wary of those turns, the rest is simple. Push the pedal to the metal and slow down only on the tighter turns.
Time Attack: Autobahnring B
This is a fragment of the above track, so the rules stay the same.
Time Attack: Autobahnring A
The track is a fragment of track C, so everything is the same. You'll need to get to know the track by heart to complete it at 300 km/h.

Top Speed Run: Autobahnring A
The track's the same as the previous one, with the exception that there are now 4 checkpoints. You have 3x nitro, so use it right.

Top Speed Run: Autobahnring B
Same as above, but there are 4 checkpoints. You have 3 uses of nitrous, use them before the checkpoints.
Top Speed Run: Autobahnring C
Same as above. The only difference is the 9 checkpoints. Use the nitro only on the ones on straight parts.

Time Attack: Fukushima C
Very long track. Watch out for the turns just after the tunnels. Some turns are obscured by hills. After two U-turns one of the lanes ends, plus there's construction. Along the way, the road narrows in some places (bridges etc.). There's a lot of streetlights and telephone poles, so keep to the middle of the road.

Time Attack: Fukushima B
Part of the C track, but in reverse. Watch yourself on the first two turns, look out for construction and the bridge near the finish line.

Time Attack: Fukushima A
The track is the beginning of track C, so the rules are the same. First and foremost, look out for the tunnels (brake near the end) and on the turn after the second tunnel.
Top Speed Run: Fukushima A
Same thing as before, but with 4 checkpoints. Use nitro before them to get the maximum speed.
Top Speed Run: Fukushima B
This is identical to a track you already did except for 5 checkpoints, including one on the U-turns (don't use nitro there as it's too easy to skid off the road).

Top Speed Run: Fukushima C
This is the same as the first track you did here except for the 9 control points. Use nitro, as usual, just before the checkpoints and in places where you'll manage to maintain speed until the next checkpoint.
You're to that awfully infuriating track. However, you've done a lot since the last time (beaten Ryo, for instance) so you should find this less difficult.
Time Attack: Nevada Highway C
The longest version of the track, difficult and dangerous as usual. You must learn it by heart. If you drive something light, look out on the bumps. No golden rules can be established here, the smallest mistake will send you hurtling into a wall. It goes without saying you'll have to go really fast to win.

Time Attack: Nevada Highway B
A short fragment of C track. It's definitely easier, just watch out on the bumps and near the end.

Time Attack: Nevada Highway A
Another piece of track C, although there's a lot less time to make a mistake. Watch out on the U-turns. Don't ram the roadsigns and under no circumstances drive off the road.

Top Speed Run: Nevada Highway A
Same as above, but with checkpoints, 6 to be exact. You have enough nitrous, of course, use it only at the checkpoints after the turns you've had to brake before. Apart from that, winning is a question of dexterity.

Top Speed Run: Nevada Highway B
You know this perfectly, there's only 4 checkpoints, three difficult turns and enough nitro for the whole thing.
Top Speed Run: Nevada Highway C
The longest version of the track, 10 checkpoints. You'll have to drive as fast as in the Time Attack because you don't have enough nitro to make up for the loss of speed. Even so, an emergency brake is OK now and then.
This is the final race. Again, the King isn't a very demanding opponent.
Top Speed Run: Nevada Highway A
You know the track, there's 6 checkpoints in addition. Take a really good car and get cracking. This one relies mostly on how skilled you are.

Top Speed Run: Nevada Highway B
Short part of the whole track, 4 checkpoints. Take an ubercar and it'll be a cakewalk.

Time Attack: Nevada Highway C
Same rules as in the beginning. Get the best car you've got and you'll make it.
Congratulations, another wad of cash and a car are yours.
Your first Nissan (good for twisted tracks) and the Evo X (good for straight tracks) are enough to defeat everyone. Remember you can also use the cars you won earlier.
Grip Class: Club Circuit
Really short track. Two U-turns, 2 runways and a series of small turns which you can just breeze through. You'll need a fast car, of course.

Grip: GP Circuit
The longest version of the track for which you'll need a car that handles well. The imperative is to make each U-turn perfectly. There's a shortcut (through the grass in the second part of the track, which - thankfully - isn't too narrow.
Grip Class: Short Circuit B
Three U-turns and a hard right-turn is everything you'll encounter here. You know most of the turns, although if you choose a more powerful car, try not to get reckless and skid off the road.

Grip: Short Circuit B
You just won this, I believe, so the rules are the same. Just take a faster car now as there are no groups.

Time Attack: GP Circuit
You know the GP Circuit perfectly by now, just remember you have to do one lap perfectly. Accumulate nitro for this lap.
Sector Shootout: GP Circuit
As always, full speed ahead. You must get the lead in this race. Aside from that, just drive and make points.
You're back home now. Just get the fastest car you can get for the Oval Racetrack. Get a second car for this occasion, like the Grip-specialized Porsche.
Grip Class: Club Circuit
You'll need a fast car. Two U-turns after the start, two small turns, then a entry into the right turn, then a runway one which you should use nitrous. Watch out at the end - it's narrow.

Grip: Oval Circuit
Really easy, it just takes skill to do the turns. You must not lose speed there, which - one a keyboard- is not easy. You have 4 laps to do here.

Grip: Short Circuit B
The only problematic part can be the middle. - it's a part of the club circuit, so apply the same techniques here. After entering the long arc look out for the yellow barriers.

Sector Shootout: GP Circuit A
Once again, the middle has a lot of turns, which aren't very demanding. Accelerate between them, making up for the speed losses you incur on them. Pass the yellow barriers before entering the long arc.

Time Attack: GP Circuit B
Practically the same thing as the previous track.

Time Attack: Oval Track
Already done. To win it, use nitro during a lap to make your best time better.

Grip Class: Short Circuit A
Really long track, crooked and you're doing 4 laps to boot. A lot of U-turns after the start, after which there's a runway with a couple of small turns you can pass through without much turning. The last part is a lot of narrow, hard turns - drive slowly. After a long right turn, use nitro.

Grip: Short Circuit B
A shorter version of the former track. After starting, doing two U-turns and a couple of hard turns there's a long U-turn and a lot of turns that'll make speeding up impossible. Use nitro on the last runway.

Grip: GP Circuit (Reversed)
You've done this a lot of times, just the other way around. It's easy and lets you get good max speed. After a turn and a long turn to the left use the runway well. It gets narrower, and on the hill there's a hard left turn. There's another hard turn before the finish line.
Time Attack: Horse Thief Mile
Another perfectly known track. The key things to do are: maximum acceleration, well-executed braking, a U-turn, repeat several times. After the last one there's a straight path (just look out for the turns).
Sector Shootout: Short Circuit A
You've done this Race Day. The rules are the same, just pay attention to the shootout rules!

Sector Shootout: GP Circuit (Reversed)
You've already done this, so nothing changes, except for the addition of four sector boundaries. Stick to the elementary regulations and try to get the lead as soon as possible.
Time to take out the King of Grip... A Mitsubishi Evolution X is sufficient. And be vigilant during the start, after the cutscene showing the competitors, floor it (no countdown).
Time Attack: Short Circuit B
You've just done this, so no comments are required. The King isn't that good, you can easily get a 10 second lead on him.
Sector Shootout: Reversed Horse Thief
Again, you know this, but it's reversed. First the long runway with an ever-harder right turn. Then the U-turns - use the barriers, and where there's none, make sure not to skid off the road. Especially on the last, hard U-turn. Your opponent still shows no real skills.
Grip: GP Circuit (Reversed)
Another perfectly known track. Just make sure you don't skid off the road, many stretches have no barriers, just sandbars which can flip your car over. Again, look out in the middle, as it's full of hard turns. Floor it on the runways. Use a fast car. As always, the King isn't hard to beat.
Congratulations! You've managed to defeat everyone. You can now savor this screen:
Need For Speed: Pro Street is about competing with opponents during racing events. You must choose the cars you want to race with before each event (Race Day). It's worth to mention the fact that certain types of races require cars with specific traits (for example, a Drift race requires a rear-wheel drive). Unfortunately, you can only assign a single car to one type of competition. You can also take a spare car to the meet.
Several tips:
The newest NFS has three steering assistance levels set in the game options:
- Casual - The game will brake for the player and plot the best path to take. I recommend it for no-one - perhaps except very little children or their grandparents, or anybody with no motor function or experience relative to racing games.
- Race - here, the game will only help with hard turns. Good for gamers with little experience or with little liking to the new (more demanding) model of driving
- King - no assistance here. I recommend this to real veterans of racing games.
These will also determine the opponent's difficulty level. This guide was written on King difficulty. If at some point you have trouble winning, you can change the difficulty settings in the Options menu.
Pro Street is still an arcade game, although it leans towards simulation a bit. It doesn't, however, require as much attention (compared to simulators) while driving a car. Although seasoned drivers can make things more challenging by switching off all assistance options (ABS, traction control)
I also recommend using manual transmission, which gives you more control over your car. You have to use manual in Drag anyway.
Some tracks can be hard to win with a keyboard (which doesn't mean it's impossible). If you have a pad, though, use that. The best option, of course, is a steering wheel.
The more seasoned players have a clutch option available, although in an arcade game it's more of a pleasant and unpractical addition (which makes a difference only in Drag races).
Pro Street has a whole varied range of cars, both low and high-end. Each car has a use here (even the 16000 worth Toyota Corolla can be used to beat the King of Drift). After buying a car, you must decide what type of competition you'll use it for - this can't be changed later! Some cars are useless in Drift, here you'll have to rely on rear-wheel drive. As the game progresses, you'll need at least one car for each competition type. Some cars are absolutely useless for Drift races - use rear-wheel drive cars for this only. If your short on cash, sell the cars you don't use.
It goes without saying that Pro Street has a few gems which are, at once, the fastest cars in the game: The Zonda, the 911, the Ford, the Murcielago etc. while the truth is, with new parts and good tuning every car can be somehow useful.
The game has a wide range of online gameplay possibilities. You can duel on different Race Days (even in Drift or Drag). What's more, you can create your own Race Day. You can also share car settings, send your records along with your replay clips and compare the results. If you have a lot of friends into Pro Street, the online capabilities will give you many additional hours of fun.
Grip
The oldest category of races. The goal is to do a given number of laps on a closed circuit.
#1
#2
We can distinguish several types of competition:
1. Grip (Grip) - The most basic race (formerly known as circuit) where the only goal is to cross the finish line first - what goes on between start and finish doesn't matter at all. Most commonly played in two laps. Remarks:
2. Time Attack (Time Attack) - The goal is to get the best lap time compared to the opponents. The order at the finish line doesn't count, just who has the best lap time. Most commonly a three lap race. Remarks:
#3
#4
3. Grip Class - 8 cars on the track, but they're racing in two groups: better and worse. You must only overtake the cars from your group (it's highlighted under the cars). Most commonly done in 3 laps. Remarks:
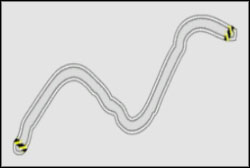
Speed Challenge
Another group of races, which differs from Grip in that it's a simple crossing from point A to point B.
#1
#2
We can distinguish two modes here:
1. Time Attack (Sprint) [#1], where the goal is to reach the finish line first.
2. Top Speed Run (Top Speed Run) [#2], where the goal is to get the best speed near the deployed speed cameras - the winner is the one who gets the best speed.
Remarks:
Drag
The goal is to pass a 1/2 or 1/4 mile strip. Two types are available:

#1
#2
1. Drag - you must pass the distance as fast as possible.
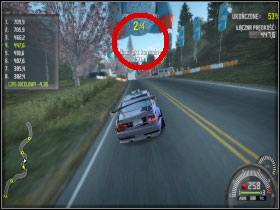
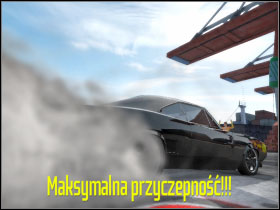
Burn some rubber first by pressing the accelerator in such a way that the RPM gauge is in the green for as long as possible. The time to burn rubber passes in the upper part, along with messages about the amount of grip you've managed to scrounge up.[#1]. After the time passes, you can see the result [#2].
#3
#4
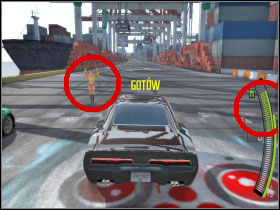
Time for the race itself. First, you have to start well. Burn rubber and DO NOT go into first gear before the command is given! Watch the race queen or the traffic lights[#3]. After the start, when the RPMs go into the green, change to a higher gear. [#4].
#5
#6
Use nitro only in high gear [#5] (definitely not in 1st or 2nd, probably 3rd or even better, just after going into 4th ). Do it early enough to use the last few meters to gain speed. Finally, have a look at your score and classification[#6] If, after tuning, you get a time below 8 seconds for a 1 mile strip, you can rest assured you'll win. Rarely does the computer get such a score.

#7
#8
2. Wheelie Competition
The whole procedure is identical to Drag, you just have a different goal: drive as far as possible on a single axis. You'll need a really fast car. To win, follow the Drag instructions. After you take off, the car will lift up slightly. [#7] If you shift gears perfectly, and adding nitro later, you can get as much as 400 meters here.[#8]
General remarks regarding both modes:
Drift
The goal is to get as much points as possible by driving in a skid (drifting)
#1
#2
You need to swing the rear of the car and tweak your acceleration and steering to keep your car in a sideways skid[#1] and, simultaneously, not falling out of the road, crashing into barriers etc. Of course you don't have to do this on one skid, the thing that counts is the number of points at the finish line(visible at the top of the screen)
Remarks:
This is the magic of NFS - the new parts, setting the engines and other things, the windtunnel - this world may enrapture for longer than the races themselves. To win, a great car doesn't suffice - you must invest in new, better parts and set them up.
#1
#2
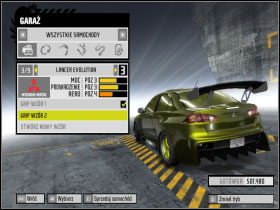
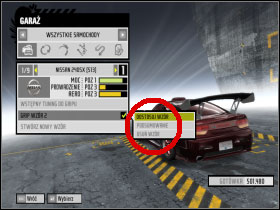
Lets start with the Garage, in which you have access to all your cars[#1]. The cars are divided by competition mode. Next to each car there's information regarding HP, handling and aerodynamics. Plus, each car has three settings slots - thus, you can make three versions of your car and change groups of settings when you want (you just can't change or check the settings for won cars, but you can make your own settings for them) To change the settings, choose the pattern you want, and adjust it [#2]. Welcome to a land of opportunity.
Gives you an opportunity to buy a whole packages which saves you time - if you have the cash, use it, although I advise buying single parts according to your needs.
#1
#2
Welcome home! This is a vault of car parts. You can buy parts in the following categories: [#1]:
Remember that most parts have 3 levels. Try to buy parts with roughly the same level: don't buy a 3rd level Engine and Drivetrain and leave the Tires and Suspension at level 1 ( They simply can't handle that much power) At first, when you're short on cash, buy several parts from a new level. When you've completed level 2, start buying level 3 equipment.
While plowing through Race Days, upgrade your car gradually. Pay attention as to whether you've won any parts, which could prove useful (sometimes, a 4th level part becomes available.) Oh, and one more thing: most expensive DOES NOT equal the best.
#1
#2
After buying better parts, you gain access to your car settings[#1]. You can change them in three tabs: Suspension, Engine, Drivetrain and Brakes. Remember, that you have to buy some parts - stock parts won't grant you access to tuning. Each tab has several options to set. Everything's done with the scrollbars. [#2] the better the part, the bigger the room the scrollbar has. Clicking 2 on each of the options will give you more information.
General Remarks regarding the settings:
1. Suspension - all the options regarding stiffness depend on what car is in question and what you want to use it for. Balance it for Grip of Drift. Stiffen it for Drag and Time Attacks. Suspension Height depends on how well the car sticks to the road, although I recommend setting medium to low (especially for Time Attacks), although this depends on other settings as well. Set Tire Air Pressure to a fairly low level for better grip. The question of balancing the other options is an individual decision. Power Steering also depends on what the car is for. Set to Stiff if the car is for Time Attacks or Drag. Set to Soft for Grip or Drift.
2. Engine - Set the camshaft phase to the right for a car that's supposed to go fast, for acceleration set it to the left. All settings regarding turbo or nitro you should max out. Just don't forget the tires.
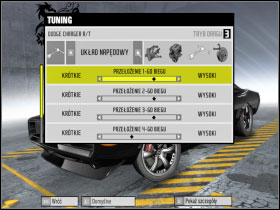
3. Drivetrain - This is just gear control. Very important in Drag. If you see that one of the gears is too short and you have no time to shift in the RPM green zone, set the corresponding scrollbar to the right. This can also play a role in Time Attacks, even if you're on Auto transmission. Improper tweaking can result in low acceleration.
4. Brakes - It's best to divide the braking strength in favor of the forward axle. Max out the pressures, but only if you've got good tires.

#1
#2
This lets you check the most fundamental info regarding the car, e.g. Horsepower, torque, braking speed or 0-60 time. Note, however, that different gameplay modes will influence the results for a given car differently. For example, the Time Attack car [#1] will have info not only about the acceleration in different speed brackets, but also your max speed. A Grip car's test results don't have this info, although it does have braking distance. [#2] This test lets you ascertain what has changed since your last round of tweaks.

#1
#2
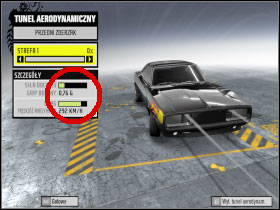
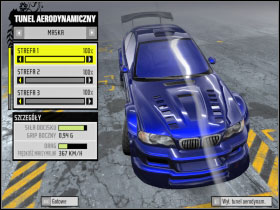
This lets you check the influence of aerodynamic parts on the car's possibilities. When buying a Spoiler, Hood etc. you have the capability of setting the Autosculpt [#1] Increasing this gives you better Aerodynamics, which is good for a Drag, Drift or Time Attack car [#2].
#1
#2
1. Grip
This car should get the best parts as soon as possible, from the Engine to the Brakes. The question of Suspension differs from car to car, although a stiff setting is the best. [#1]. Use the general tips when setting the Brakes. Same for the Engine: shift camshaft phase to the left, the rest to the right. [#2]. Recommended cars are the Nissan 240SX and the Mitsubishi Evo X.
#3
#4
2. Drag
All parts to third level (You can leave the Brakes subpar as you won't obviously need them). Set Suspension to Stiff, low height above ground and air pressure. As for the camshaft phase, it depends on the distance. On the quarter mile, set the camshaft phase to the left, if the half mile, you can balance it. Remember that you can change tuning settings during the Race Days. Drivetrain settings depend on the vehicle and the other settings. If any of the gears is short, set the respective scrollbar to the right.[#3] Don't even bother tweaking the brakes. Oh, and remember that in the Windtunnel, the second scrollbar should be as long as possible[#4] - even if you buy a part, don't screw around with Autosculpt. Best car is definately the Dodge Charger.
3. Drift
#5
#6
You'll need a car that can skid well, no more. Either the Toyota Corolla or the Nissan Silvia. Don't upgrade such a car at first, only when you get the other cars and have a spare pile of dough should you do the full 3rd level upgrade, along with the ever-useful nitro. Play around with aerodynamics and the general look for your satisfaction. As for the settings, there's little to mention: Set the Brakes according to the standard rules, change nothing in Suspension, shift the camshaft phase scrollbar to the left and maximise turbo and nitro to the right. As for the Drivetrain, it depends on your feel for the car - the default values should be ok, but if not, do as you wish. And remember: horsepower doesn't count! You can start against 900 HP cars as the last one[#5] and win the race. [#6].
4. Time Attack
#7
#8
Of course, get the best parts with the full aerodynamic workup, Suspension as stiff as possible. Engine: camshaft phase in 3 length of the scrollbar, turbo and nitro maxed out to the right. Brakes in favor of the front axle, all Brake settings maxed out to the right. Drivetrain, as usual, depends on the car itself. Best cars for this job are: Zonda, 911 GT2, Ford GT and the other supercars. My personal favorites, though, are the BMW M3 [#7] and the Porsche 911 GT2 [#8]. This is enough to win any race in this category.

 Neverwinter Nights 2: Mysteries of Westgate Game Guide & Walkthrough
 Naruto Shippuden: Ultimate Ninja Storm Revolution Game Guide & WalkthroughNeed For Speed: ProStreet Game Guide & Walkthrough
 Need for Speed: Most Wanted (2005) Game Guide & Walkthrough
 Neverwinter Game Guide & Walkthrough