This unofficial guide for LEGO The Hobbit includes all of the key information, whose knowing may help you complete the game's storyline, and the side missions, in an easy and a stress-free way. Also, thanks to this guide, you will b able to find all of the collectibles hidden in the world of the virtual Middle Earth. This guide consists of two different ways . The first one is LEGO The Hobbit in 10 easy steps. In an easy way, that text explains all of the key matters, which you should know about, if you want to start the fun with the game. You will learn about the ways of completing missions, the attractions that await you in the Middle Earth, connected with the game, collecting of studs and supplies finding of collectibles, solving of minigames or about the requirements that you need to meet to complete the game in 100%. The second part of the guide includes, predominantly, a detailed walkthrough of the main missions in the game, although you can also find there chapters devoted to the attractions that you find in free exploration of the Middle Earth, and to the whereabouts of collectibles. The whole has been enriched with a chapter concerned with the obtaining of achievements/trophies. This guide stands out as one that is enriched with multiple, high-quality illustrations. Apart from that, maps of the Middle Earth have been prepared, where you can find the most important locations, and the collectibles' whereabouts, marked. LEGO The Hobbit is another installment of the famous franchise, developed by Traveller's Tales, during which you can follow the events in the novel of J.R.R. Tolkien, as well as in the Hobbit: The Unexpected Journey and Hobbit: Desolation of Smaug.
Jacek "Stranger" Halas ()

LEGO The Hobbit in 10 easy steps is a guide to LEGO The Hobbit which is aimed, to a large extent, to the players that start their adventure with the virtual Middle Earth, constructed out of the renowned Danish bricks. This guide presents all of the key issues and relationships concerned in the game. Knowing them, may prove very useful, while completing the successive stages, correct exploration of the elaborate open world, as well as finding collectibles hidden throughout the game, whose multitude exceeds that in the previous games of the Traveller's Tales Studios. The first chapter of this guide revolves around the game's storyline, informs about the way in which you start the successive stages and what the conditions to replay them are. The main focus of the second chapter are all the issues connected with the Middle Earth, which you can explore between completing the individual missions. The third chapter elaborates on the rules of interaction with the environment, which is often hindered, by the necessity of having appropriate characters, or items, with you. In chapter four, there is information on the types of enemies and the whole variety of dangers that await the main characters. The fifth chapter focuses on the topic of cooperation, used to deal with the successive obstruction, along your path across the Middle Earth, and to defeat enemies. The main topic of the sixth chapter are the Studs, which are associated with the Lego series and are the colorful coins that you spend on, e.g. new characters. Chapter seven informs you of the ways to obtain, and the meaning of, the various types of resources. In chapter eight, you can find a list of the most frequent minigames, which occur in the game. Each of these minigames comes with instructions and a number of hints. Chapter nine concentrates on one of the most important elements in the game, i.e. collectibles. From the last, tenth, chapter you will learn what you need to do to complete the game in 100%. In LEGO The Hobbit you get to explore the rich world that is entirely made up of bricks. The plot of the game is based on the world-famous novel by J.R.R. Tolkien, as well as on the movie trilogy by Peter Jackson, and it allows you to take part in the most important events.
In this chapter, you will find all of the basic information concerning the individual stages of the game's storyline mode. It explains the way in which you start the successive missions, what is the easiest way to replay them and when it is best to decide to do that.
This chapter revolves, entirely, around the Middle Earth and on the ability to explore it freely, between the individual main stages. You will learn, among others, how to travel, in a fast and easy way, between distant locations, what attractions are awaiting the main characters and when they become available.
In this chapter, you will find detailed information on the meaning and the way to interact with the environment. Much significance has been attached to explaining the matter of "unavailability" of certain elements of the surroundings, due to the lack of appropriate characters or items.
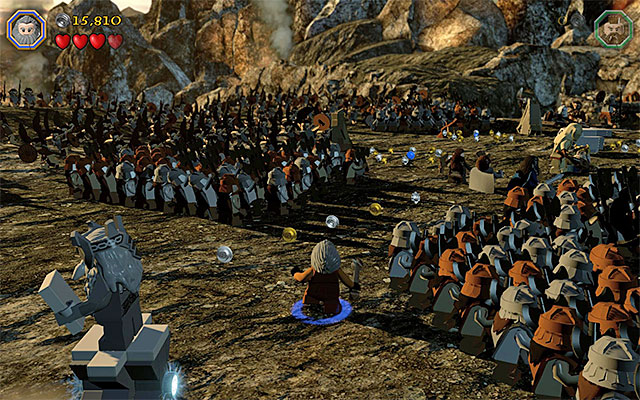
This chapter is concerned, mainly with the enemies that you encounter in the game world. Apart from that, you can find there information on the other dangers that await the characters, which can deprive them of the health-bar hearts (traps, falls into chasms, etc.).
It this chapter, you will find information on how to cooperate (either with the AI-controlled or with a human player), which is inescapable, when it comes to solving many puzzles and defeating some of the strongest opponents.
The main issue raised by this chapter are the Studs, i.e. the coins that you find throughout the world (the local currency). You will learn about the types of studs, as well as about the most interesting ways to earn and spend them.
This chapter is entirely concerned with resources and it informs you of the available types of these, as well as about the circumstances in which you obtain them. The chapter explains the issue with marking the resources that you have, for the construction of various structures. The importance of this is that collecting of resources is often required to progress.
This chapter lists those of the minigames that are likely to be most frequently encountered, while completing the successive stages, and during the free exploration of the Middle Earth. each minigame has been provided with a description, basic assumptions and a number of hints that will help you achieve the highest score (this is often rewarded with additional studs or resources).
In this chapter, you will find the information concerning collectibles, which come in heaps in this game. By reading this chapter, you will learn about the types of the available collectibles and in which circumstances they can be found.
This chapter lists all of the requirements, which need to be met if you want to complete the game in 100%. This is additionally rewarded (depending on the platform) with an achievement or a trophy.
Jacek "Stranger" Halas ()
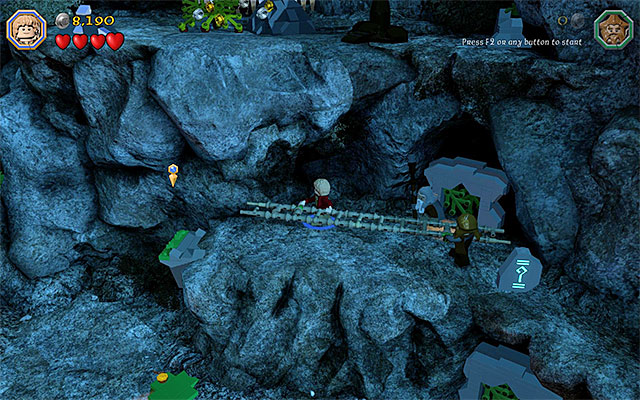
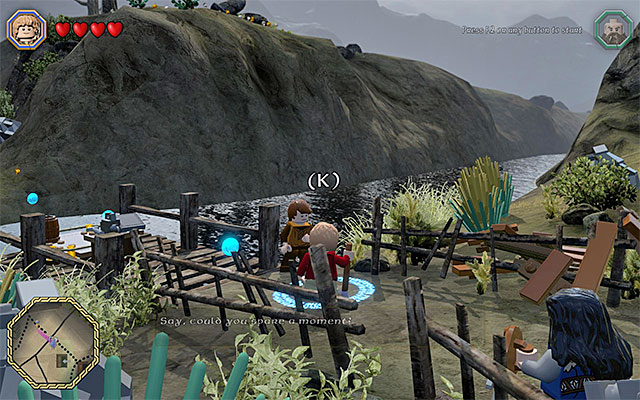
 After you complete a mission, you still need to reach the spot where you start the next one. The way there is indicated by the trail of blue studs
In the basic version of LEGO The Hobbit (with the exception of the DLCs), there are sixteen chapters to complete, all told. The game starts right away with the first chapter where, after you complete it, you will not be automatically promoted to the next one. This is so, because the party is exploring the Middle Earth, between these stages, which is an open world. In reality, this means that just like in the other open-world games, you can postpone the moment of starting the next main mission and indulge in the other activities, which were described, in detail, in step 2. Personally, I recommend against doing that, though, and wait until you have completed all sixteen chapters. Otherwise, you will not be able to reach many of the locations or collectibles (to learn more about this type of restrictions, see step 3).
If you want to start another main mission, you need to reach the point marked on the world map. If this is your first try on that mission, it will start as soon as you come to the starting point sufficiently close (the way to that point is additionally marked with the trail of blue studs).
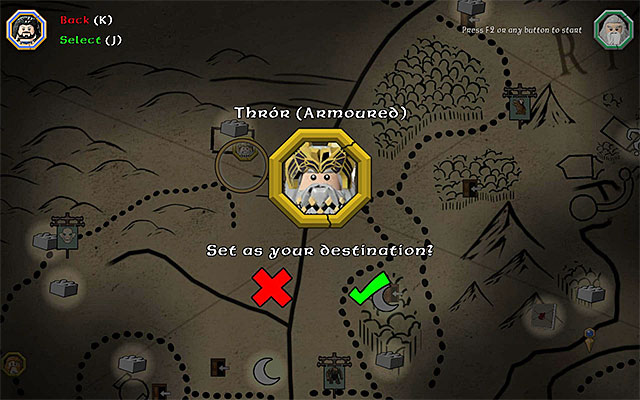
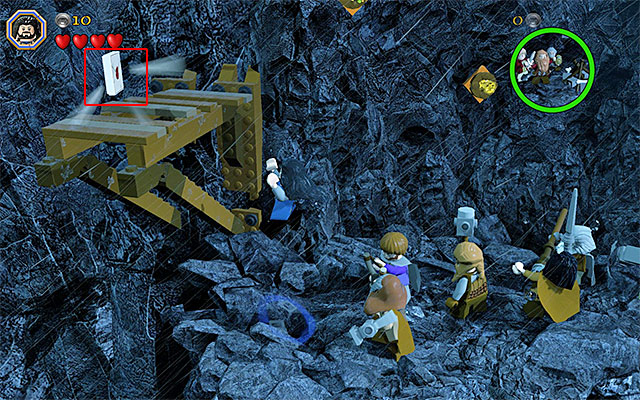
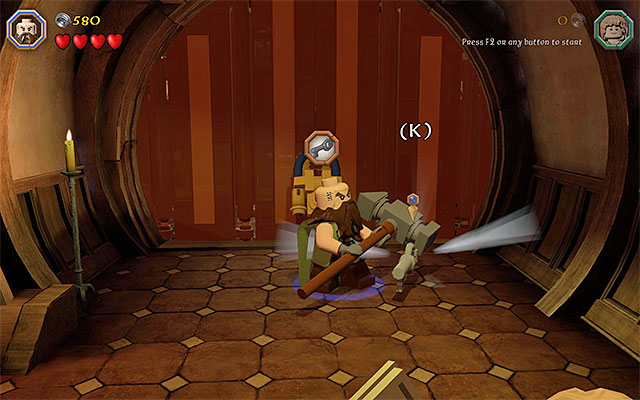
The situation is a bit different, if you have already played that stage of the game and you simply want to give it another try, e.g. to collect more studs, or to collect the treasures that you missed earlier. LEGO The Hobbit, just like the previous installments, has the mission-replay mechanism but, I recommend against doing that, until you have completed the entire storyline of the game. Each main stage can be replayed in two different ways. The first one assumes that you select one of the main mission markers, just like the one presented in screenshot 1. What is interesting, you do not need to run around to find the specific marker that you are interested in (e.g. for mission 1) because you can switch between missions, after you choose any one. The second way assumes that you reach the mission marker, directly in the game world and an example of such a marker has been shown in screenshot 2.
After you have chosen the mission that you are interested in replaying, you will be asked about the rules that you want to replay that stage, with adherence to. I recommend that you choose the free play, because this will allow you to choose freely from among all of the characters and, as a result of that, to reach the treasures that are unavailable for the regular set of characters.
 An example summery screen
While we are at it, it is worth reminding that the game keeps track of each of the main stages and assesses you. After you complete each such stage, you get to view the summary screen. It informs you, first of all, about the coins that you have collected (more about this, in step 6) and about the collectibles that you have found (more about this, in step 6), about the characters although you have found, as well as about the events on the world map.
 The presence of, e.g. a river that you cannot cross, or of a barricade on your path, may mean that that area is not yet available for you to explore
In LEGO The Hobbit, just like in LEGO The Lord of the Rings, You can explore the Middle Earth in between the individual missions. The game attempts to diversify that experience in a multitude of ways and the majority of attractions have been described further in this chapter. I recommend that you decide on the exploration of the world after you have completed the storyline , because many of the areas will be inaccessible to you at first (a river, a barricade, a destroyed bridge, etc.), which is the result of insufficient progress in the storyline mode.
Note - The world map can be freely zoomed in and out, as well as moved. To do that, you use the keys that you use to manipulate the camera view.
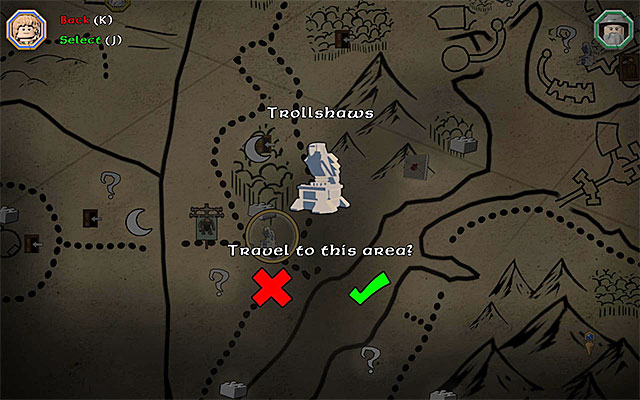
You can travel the individual locations, on the world map, in two different ways. The first one assumes using main paths, which have been traced on the map with small dots. The second variant is the fast-travel option, which becomes available after you have completed the eighth chapter of the game (Out of the Frying Pan...), i.e. after the second encounter with Azog the defiler. If you want to travel, quickly, to a different location, you need to find, in the game world, or select the Eagle Statue - the above screenshots) and define your destination. This is a definitely superior way to travel, especially if you want to reach a distant location quickly.
Note - The icons of a door and an arrow symbolize the locations where you can access some other, separate locations (e.g. a cottage, a cave, etc.).
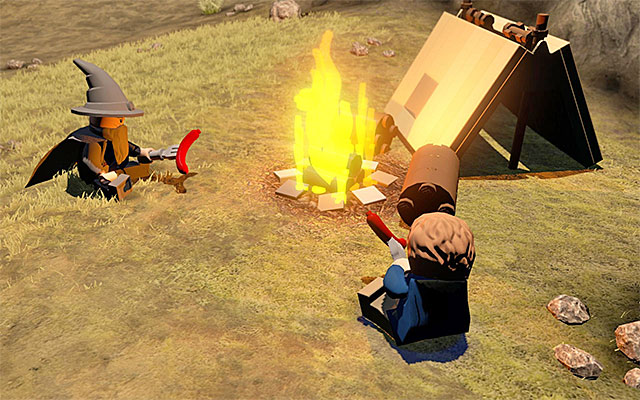 An example encampment
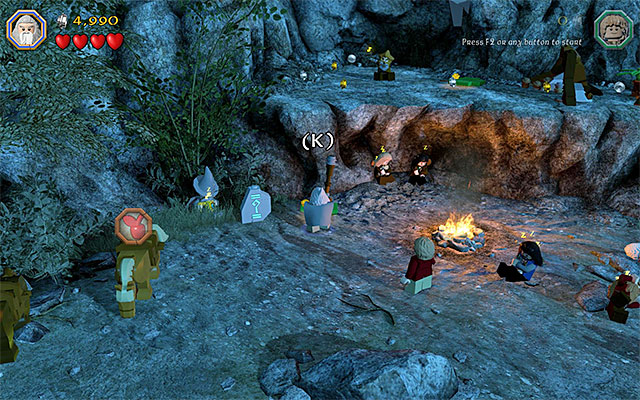
In LEGO The Hobbit there is no full day and night cycle, although it is possible to choose between the day and night. The purpose of this is, predominantly, to ensure yourself with access to the individual additional activities in the Middle Earth, because some of the side quests, collectibles or playable characters become available, in the given area of the map, e.g. only at night. If you want to change the current time of day, you need to visit one of the encampments and take rest at the campfire. This action is free of charge and it does not include any adverse consequences )e.g. supply loss, etc.).
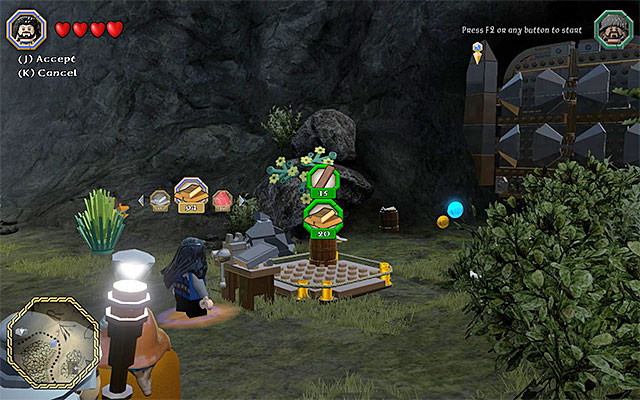
On the world map, there are many different icons and the game does not really help you find out about what they refer to, because the legend is missing. A frequent sight are the red and white question marks, which symbolize the starting points for side missions (an example in the above screenshot) and the consecutive small tasks, of this kind, are unlocked with your progress in the game's storyline. Detailed descriptions for each of these tasks have been provided in the main walkthrough for the game and they usually require you to perform some simple actions r to complete a minigame. I recommend that you take them on, on a regular basis, because they are rewarded with coins, mithril bricks or silver bricks.
Important note - not all of the side missions that you unlock are available at a given moment. The moon and sun icons mean that the appropriate moment to start them is the right time of the day!
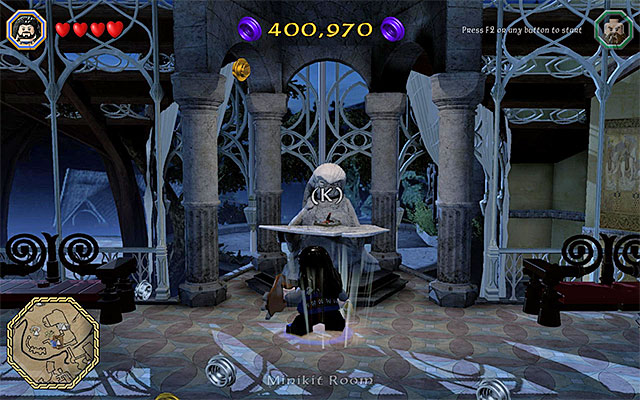 One of the special locations
Another category of icons are the ones that symbolize special locations. each such location is unique and an example of such a place is the storage building for the minikits that you find, in Rivendell.
Note - Special locations appear on the map only after you discover that. It is crucial, therefore that you explore, the cities and villages that you visit for the first time, thoroughly (you should especially look for icons with door, which inform you of entrances to separate locations).
 An example collectible found on the main map
On the map of the Middle Earth, also whereabouts of the select collectibles have been marked. These are the mithril bricks (the white brick icon) and schematics (the icon of a closed envelope; to learn more about this, see step 9). Still, I recommend against looking for these collectibles at the very beginning of the game, because the access to many of these is hindered and requires you to have more "advanced" items or characters in your party.
 One of the icons of a character to hire
The last important category of icons, displayed on the world map, are the images of characters. The mode of operation is simple in this case - if you reach that location, you will be able to recruit that character. Very often, the characters that you unlock, bring in unique abilities, or equipment, to the party. Also, in this case, haste is not recommended, because hiring a given character, almost always, means expenses of the order of several hundreds of thousands of coins (Studs).
Note - not all of the additional characters are available at a given moment. The Sun and the Moon icons symbolize when you need to meet up with the character in question.
 It is a good idea to start the exploration of each new location by destroying the objects
LEGO The Hobbit shows a great likeness to the previous games, developed by Traveller's Tales, when it comes to interaction with the game environment. The game strongly encourages you to smash the objects in the area and this is done, for the purpose of collecting more studs (coins). This is not the only reason, though, for which it is worthwhile to clear the successive locations of the interactive elements. It is also possible to find there loot or items that can be thrown.
What is interesting, in certain situations, the party needs to take actions opposite to destroying, i.e. construction of new objects. I recommend that you do that each time that you notice the "jumping" elements, scattered on the ground. In such cases, after you hold down an appropriate key, you can construct an item or a mechanism.
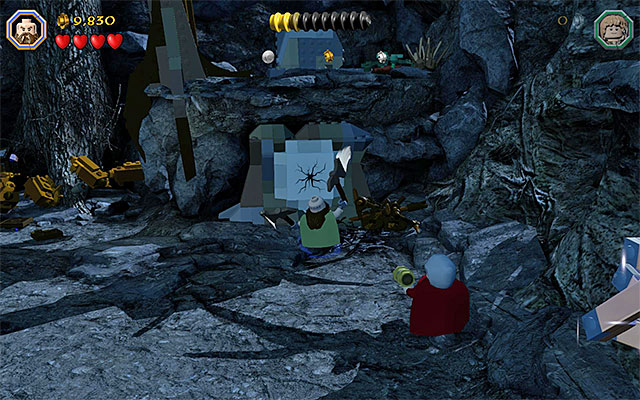 Axe is a good example of an unique equipment item- you need it to smash the cracked plates
I have already informed, in the previous chapters of this guide, about the fact that access to many of the locations and objects in the environment (e.g. ledges, collectibles) is often impossible, when you visit that place for the first time. This makes you return to the same location, later into the game. These restrictions can be divided into two different groups.
The first one are the restrictions resulting from the necessity to have certain items in your inventory. These may require, e.g. a bow, with which to hit a target or a warhammer, to move a particularly heavy object with. Do not worry if a given path is blocked at a moment, because you will be able to get across, later into the game (best, after you complete all of the main stages of the storyline).
Note - some of the items that are helpful, while exploring the game world, are owned by various characters (e.g. all of the dwarves have an axe). In such a situation this does not matter which character you choose, because what matters is having the required item. Also, it is possible to find new gear, directly during missions. Also then, it does not matter which one of the characters decides to include that item into his inventory.
 Only goblins can climb walls
The second group of restrictions are the ones connected with the characters themselves, as opposed to restriction on their equipment. In this case, what is meant, are goblins among others tat can climb certain walls (the characteristic grid), or elves that can take longer jumps. Unlike in the case of the first group, described above, you usually need to have a certain character selected, in order to be able to perform a given action. I recommend, again, that you complete the entire storyline mode, because the characters that you require will then join the roster of your allies.
Note - the game usually hints on the character that you need to select, or which items need to be used in a given place, which encourages you to switch to the character that has the right abilities or items. To learn detailed information, on crossing locations and obtaining certain collectibles, see the main walkthrough for the game.
 Monsters often wear, additionally, armors
Fights with enemies and monsters are not a rarity, in the case of LEGO The Hobbit, but the majority of them are not too demanding. In spite of that, it is worth knowing several important things, which have been discussed later in this chapter.
Definitely, most frequently in the game, you will be running into groups of orcs and goblins, which are similar to each other. First of all, it is worth knowing that goblins and orcs come in several varieties. The one that you run into most frequently is warriors and they can come without additional equipment or use a more or less durable armor. Of course, you will have more fun with the ones that do wear armors, because this kind of monster cannot be defeated after one or two attacks. What is even more, it may turn out that you also need to play a short minigame, which consists in wrestling. The premises of such duels, one on one, are always the same and they require you to tap, rhythmically, one of the indicated keys ( to learn more about minigames, see step 8).
 While attacking archers, strive for as quick a melee battle, as possible
Warriors are not the only type of enemies that you need to handle during the game. At the specific moments, you will also have to deal with archers and, regardless if the circumstances of the battle, it is a good idea to target then in the first place, because they can very quickly deprive you of your health hearts. Strive for battle at close quarters then, at which point the enemy archers are, virtually, defenseless.
Important note - some of the battles that you fight have an additional handicap, which consists in respawning of the enemies. This is undesirable, of course, because prolonged battles increase the risk of losing the entire health bar. The only way to break the cycle is to perform an activity required by the game, e.g. activation of a mechanism or reaching a ledge above.
 You can mount wargs and deal with the enemies this way
Another category of opponents, which is quite common, are wargs, i.e. big wolves. What is interesting, these monsters are quite often ridden by the orcs and, for obvious reasons, this increases the threat that they pose. The presence of the "tamed" wargs can be used to your advantage, though. After you throw the rider off the animal, you can try to mount the warg yourself (by pressing the character switch key). At the same point, it is worth knowing that the game does not allow you to eliminate wargs, because they are easy to drive away, with one or two hits, landed in melee.
 Also, do not ignore the smaller spiders
Finally, what is worth mentioning is the spiders, which you will be running into on a regular basis, since the moment at which you visit the Mirkwood Forest for the first time. Spiders are, usually, very aggressive so, you should not ignore them and elimination of them has the highest priority. The majority of spiders can be neutralized in the regular ways, although there appear, in the select locations of the game, ones that you can weaken only through a surprise attack. In such a situation, you need to switch to Bilbo, put on The Ring and approach the monster only then. Note - many fights with spiders are also participated by the much smaller varieties. Do not ignore them, because they too, can deprive you of health points!
Regardless of the type of the enemies that you encounter, pay attention to the hearts that they drop. If your character's health bar is not full, try to pick them up, thanks to which will return you to full health. At this point, it is worth pointing out that the health bar is COMMON for all of the party members. Therefore, replacing a wounded character with another one will not do the job. The good news, though, is the fact that the game does not recognize damage taken by the AI-controlled characters (therefore, do not worry if they have not been doing that well without your support), but only by the player-controlled one.
 You should watch your back, among others, in the locations where you need to take well-aimed jumps, onto the platforms suspended above chasms.
Battles with enemies are not the only situations, in which you risk losing your health. Just as important is to avoid improper interaction with the environment. What I mean here are, mainly, falls into chasms, which result from incautious movement along ledges or poorly-aimed jumps. Apart from that, you should watch out for traps, whose springing may have grave consequences. Fortunately, not all of the missteps mean instantaneous depletion of the health bar. An important piece of information is, e.g. that the game takes lightly to falling into streams that flow across the Middle Earth. Accidental falling into a stream results in a short cutscene of drowning, after which the character returns, sound and safe, to the nearest bank.
In LEGO The Hobbit the characters that you control cannot die so, losing all of the hearts in your health bar does not mean the necessity to start the game from the most recent checkpoint. However, this does not mean that there is no way, in which you are being punished for careless playing because, each depleting of the entire health bar, means the loss of 1000 studs (coins). I recommend, therefore, that you avoid making mistakes and watch your back during battles. This will allow you to gather studs faster and reach the Master Burglar status in the consecutive stages.
 Cooperation may, e.g. serve the purpose of getting selected allies into the places inaccessible for them
All of the previous LEGO games, focused on active cooperation between the characters that are available at any given moment. The thing is no different in the case of LEGO The Hobbit. There are two distinct categories, in which the characters cooperate and their basics are much the same, regardless of whether you are cooperating with an AI-controlled character or a human-controlled one, e.g. in split screen.
The first category of cooperation are the ones that serve the purpose of reaching seemingly inaccessible places. Typical examples of such a cooperation is, e.g. grabbing a character that is swinging on a chain, cutting through a wall together or standing with a long pole, in the spot in which another character can climb/ The spots that require the cooperative approach have been presented in the main guide for the game (walkthrough and discussion of the whereabouts of individual collectibles).
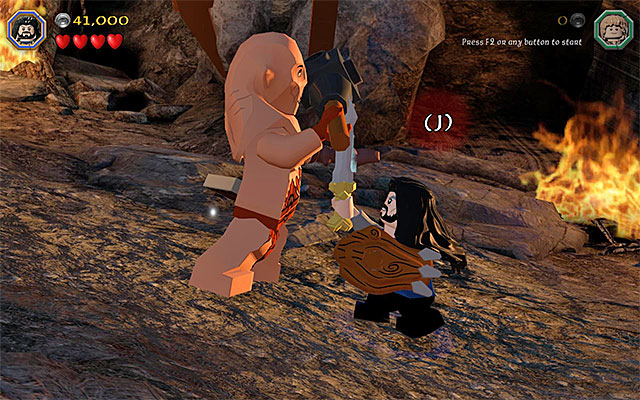
Another category of cooperation is the one, is the type that is helpful (or even required) while weakening opponents. This type of action is useful, mainly, in the case of boss battles (an example in the above screenshot). At this point, it is worth pointing out that it does not really matter which character you choose for this type of cooperation, because the process is automatic (you only need to approach the enemy, press the correct key and you can "enjoy the show").
Note - if you are playing alone, then the character that you cooperate with, usually positions himself in the correct spot automatically, for the most part e.g. next to the stunned opponent, which needs to be finished off, in the course of cooperation. In the case, in which you play with a friend, you will often need to position the character, in the right position, yourself, although this does not cause too many problems, anyways.
 An example of a highly-valuable violet coin
The mechanism of acquiring studs, i.e. the special coins is not much different, as compared with the previous LEGO games. Still, they appear in several color varieties, which symbolizes their value. I recommend that you, first of all, search for the blue and the violet ones, because they are worth, respectively, 1000 and 10000 points.
You can acquire coins in many various ways, where the most obvious one is collecting the ones that are within sight. Also, it is advisable that you smash the objects in the environment because, nearly always, they are hiding some coins. Apart from that, you can acquire studs thanks to building objects, from the bricks that are lying on the ground, by solving minigames or by defeating enemies.
Note - in the case of the coins that are not permanently put where you can see them, you need to take into account the fact that they mat, irreversibly, disappear. Therefore, you should try to collect all of the studs and always start with the ones that are the most valuable (golden, blue and violet).
 The Master Burglar status is awarded after you collect the required number of points (the value is different for each stage)
The collection of coins takes place not only for your own satisfaction, because there are several important mechanisms of the game connected with them. One of such mechanisms are the challenges, in the main stages of the game. If you collect a pre-determined number of coins in a given mission (at the first stage, it is 130000), you will be awarded the status of Master Burglar and it is one of the requirements for the completion of the game in 100%.
You can spend the studs that you find, on various things and in my opinion, the most important of these are the new playable characters. You can find them during the free exploration of the game world (more information about that in step 2) and, unfortunately, hiring them is very costly (several hundreds of thousands of studs, on average). Therefore, I recommend that you comb through all of the locations tat you explore and collect as many as possible.
Note - do not worry if you fail to obtain the abovementioned status of Master Burglar, during a given stage in the game's storyline. Often, this becomes possible only during the Free Plat, because many of the secret chambers, apart from collectibles, also hide many coins.
Resources (in the game, they are simply called "loot") is a complete innovation to the LEGO games and this is the key information about them, which you should keep in mind:
 Smashing of the tougher bricks with the pickaxe is a good method of obtaining various bars
I have already mentioned that you obtain supplies in a way very similar to obtaining of studs (coins). Still, there are methods that increase the probability of finding the particular type of supplies and it is worth remembering, especially in situations, in which you need to obtain them in order to progress in the storyline, or forge a specific item in the Free Play mode:
 An example supplies merchant
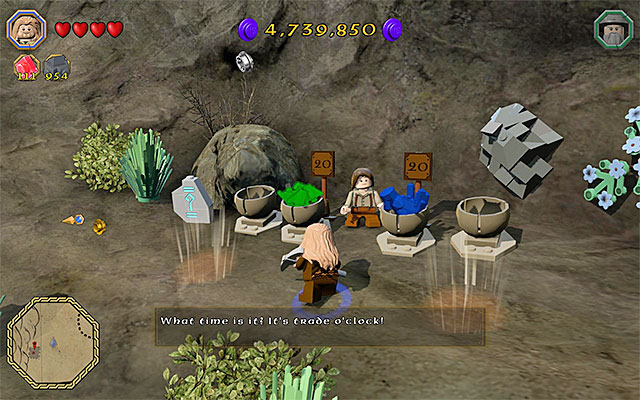
An alternative way to obtain supplies in large quantities, is to barter with the merchants that you meet throughout the game world. Each such character usually has several tens of pieces of a rare item, in stock. Still, you need to keep in mind that if you want to obtain that supplies, you will have to spend large amounts of supplies of another type. As a result, it is better to consider if you are really going to profit from that exchange.
 Example window of resource spending
You do not gather resources only for your own satisfaction, because they also have a practical use. They can be used for building of new objects (Craft Table), crafting of single items (after you visit the blacksmith) or feeding the selected members of the party (e.g. Bombur).
In the situation, in which you do not have the required number of resources, at the moment of starting a given action, you will be disallowed to progress. Fortunately, in the majority of cases, this does not make you start the tedious process of searching for the loot all around the game world. Usually, all you need to do is destroy the objects in the immediate area (this mainly concerns the missions of the storyline mode), thanks to which, by pure luck, you obtain just the resources that you need.
In LEGO The Hobbit you can play various minigames, and the below list presents the ones that occur the most often. Apart from discussing the basics of each one, you will find here valuable hints on how to score the highest. In spite of what it may seem, this is an important issue, because performing the required actions quickly and avoiding making too many mistakes, is often additionally rewarded (studs, resources, retaining the health bar, etc.).
 tap rhythmically the key indicated by the game
One of the most common minigames are the ones connected with fighting battles and they come in several varieties. A minigame may, for example, start at the moment at which you are trying to push your opponent in melee, or when you want to throw one off his warg. Regardless of the circumstances, the key to success is tapping, rhythmically, the keys displayed on the screen. In the case of the simplified version of the minigame, it is one key only. In the more advanced version, there is no one specific key to tap. You need to be prepared for that so, it is important that you keep an eye on the information on the screen and react appropriately.
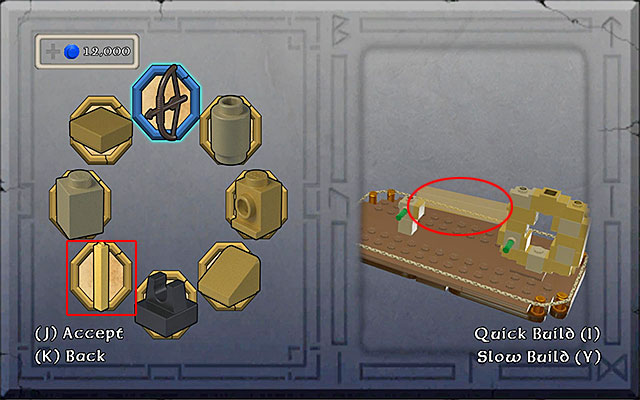
Another, very popular, minigame is the one, where you start building various objects, after you designate resources (e.g. mechanisms that you can use to reach the neighboring location). In this case, the key to success is being able to find the objects quickly, on the list on the left side of the screen, which correspond to the ones highlighted in the construction site. An example of the correct solution has been presented in the above screenshot. Speed and accuracy are rewarded here because, on how well you do, depends how many studs (coins) you receive after you have performed the plan.
Two important notes - you can always replay the building minigame , without any consequences (press the key that exits the minigame) and it is a good idea to use it each time ho have not done too well. The arrangement of the elements on the right is always different but, which ones are required for the construction is always the same. If you know what you are looking for, you can always perform better than during the first try.
The third one of the most frequent minigames is the one where you assume the role of the miner. It starts always when you encounter a bigger cluster of bricks and is capable of smashing them, using the pickaxe. First of all, it is worth knowing that you cannot fail at this minigame, but you can strive for better results. Try to press the button at the moment at which the arrow points to in the indicated fragment of the semicircle (an example in the above screenshot). You do not need to do that at the very beginning of the game, though - allow the arrow to take several cycles and time the moment, at which you press the button, well. depending on your precision, you may hope to receive additional studs and/or resources.
 You turn into a blacksmith still during the initial part of the campaign
A minigame that is similar to the one, where you play a miner, is the game where you turn into a blacksmith. Also in this case, you receive bonuses especially for pressing the appropriate key at the correct moment but, in this case, you need to wait until it appears in the center of the full circle. Additionally, you need to keep in mind that the keys may change, in the case of the more advanced varieties of this minigame.
From among the rarer minigames, there are two more that are worth a mention. In the dancing minigame the key to success is pressing the indicated keys. You can receive additional studs (coins) if you time ideally a given action, i.e. when you press the key indicated on the screen at the moment at which there appears a halo around the dancer (an example in the above screenshot). This is risky, of course, because if you time this incorrectly, you miss your chance to score any points.
 An example fishing minigame
Another one of the rarer minigames in the one where you take on the role of a fisherman. The general premise is very similar to the one in the abovementioned games. You need to press the keys that appear on the screen. If you wait for the circle to shrink to the maximum, before you press the button, you will gain additional studs or resources but, if you fail to time it well, you will miss the chance to gain your rewards.
Collectibles, in LEGO The Hobbit, are divided into several categories. Some of them are collector's items, where the others (e.g. unique weapons), can be used during the game, Later in this chapter, you can find a list of the most important groups of collectibles, along with the explanations of the circumstances in which you obtain them.
Note - A detailed list of collectibles, and their whereabouts can be found in the main guide for LEGO The Hobbit.
 An example minikit
Definitely, the most common type of collectibles are the minikits. In each of the main stages of the game, you can find 10 of them. Since there are 16 main missions, you can obtain as many as 160 minikits. At this point, it is worth adding that the game rewards you for completing minikits (all 10 objects from a given kit) with lots of studs (coins).
Note -a great majority of the minikits become accessible only after you have unlocked new characters and items. Therefore, it is best to go out and search for them only after you complete the main campaign and, additionally, while playing in the free play mode.
 An example schematic
Another category of collectibles are schematics (the envelope icon). You can find 32 of them - on each one of the main stages, there is one schematic, whereas the rest of them have been hidden throughout the game world. After you find a schematic, you can visit the blacksmith's in order to craft a new item.
 An example of a unique treasure
The next group of collectibles are the unique treasures, which are symbolized by an icon of a chest with presents. On each of the main stages of the game, there are four such treasures, which makes for a total of 64. After you find the unique loot, you gain access to a new item in the equipment, which usually has interesting properties (e.g. receiving of additional supplies thanks to attacking enemies).
 An example mithril brick
Another category are the special variations of the LEGO bricks. You receive the red LEGO bricks as a reward for completing the missions marked with red question marks (note - you additionally need to buy them, after you complete an individual mission!). Mithril LEGO bricks can be obtained in three different ways - by completing the main stages (for flawless completion of a stage, you can receive as many as five of these), by completing side quests, marked with white question marks and by finding them in the game world.
 New characters appear here on a regular basis
Finally, it is also worth mentioning the opportunity to collect character chards. In the game, there are 98 characters. Access to some of them is unlocked automatically, i.e. as you progress in the game. Many of the characters, however, you need to add on your own, e.g. by finding them on the world map (the icons with a character's face) and by spending a pre-determined number of studs (coins).
 The game displays the current percentage of the game's completion, among others, on the loading screen and after you pause the game, while exploring the main map
Completing LEGO The Hobbit in 100% is rewarded with an achievement (f you are playing on the PC or the Microsoft's console) or with a trophy (In the case of the Sony's console). You can view your current progress during the loading screen or by pausing the game during the free exploration of the Middle Earth.
The below list names the elements that are included into the completion of the game in 100%:
1) Completion of all 16 main missions in the Story Mode
2) Obtaining the status of the Master Burglar in each of the story mode missions
each mission has a separate requirement, when it comes to the amount of points that need to be obtained (e.g. 100000 studs), which you need to face up to.
Note - After you obtain the Master Burglar status, it remains active until the end of the mission, even if you lose your studs, along the way (e.g. as a result of frequent falls into chasms) and you fall back below the required amount of coins.
Note - if you are experiencing any problems collecting the required amount of studs, in a given mission, you can use the "legal facilitations", i.e. the red LEGO bricks that multiply the number of the coins that you collect.
3) Finding all of the 160 Minikits
In each of the storyline missions, there are 10 minikits to collect.
4) Finding all of the 32 Schematics
In each one of the 16 main stages of the game, there is one schematic to be obtained. As for the remaining 16, they have been hidden all around the game world.
5) Crafting of all the 32 Mithril Items, basing on the schematics that you obtain.
You craft mithril items at the blacksmith's in Bree, but this option becomes available only after you have completed the side mission connected with the smith (white question mark). In order to craft a new mithril item, apart from the schematic, you also need the mithril bricks and supplies.
6) Finding all of the Treasure Items
In each one of the missions, there are 4 unique treasures to obtain.
7) Completing all of the 105 optional quests, marked with white question marks.
These usually require you to solve a simple puzzle, complete a minigame or defeat a group of monsters.
8) Completing all of the 32 optional quests marked with red question marks
All of the "Red Quests" are identical in their premises - you need to supply the questgiver with a mithril item that you craft at the forge.
9) Buying all of the 32 Red LEGO Bricks
It becomes possible to buy the red LEGO bricks, thanks to completing the side missions marked with red question marks. After you complete such a quest, the red brick appears next to the questgiver.
10) Obtaining all of the 250 Mithril LEGO Bricks
80 mithril bricks can be obtained as a result of completing storyline missions. In each one of these missions, there are, at most, five bricks to obtain - one for completing the mission, one for obtaining the Master Burglar status, one for finding 10 minikits, one for finding the schematic and one for finding all 4 Treasure Items.
105 mithril bricks can be obtained for completing the optional missions marked with white question marks.
65 mithril bricks can be found during the free exploration of the game world.
11) Completing the bonus level
The Bonus Level is unlocked after you have completed the entire Story Mode of the game.
12) Unlocking all of the 98 playable characters
Some of the characters are unlocked automatically, whereas you need to obtain the rest of them on your own.
This guide for LEGO The Hobbit - walkthrough and collectibles, is a comprehensive guide across the LEGO brick-built version of the Tolkien's Middle earth. It should prove helpful, while completing all of the main and optional stages of the game, as well as for finding all of the carefully hidden collectibles, This guide has been divided into several various chapters. The first chapter is one of the most voluminous ones and it includes a detailed, richly illustrated walkthrough for all the sixteen main stages of the storyline. The next chapter also includes information on the collectibles that you find across the main stages. The third chapter is centered around the descriptions walkthroughs for side quests which you get heaps of in LEGO The Hobbit. Several of the following chapters concern the attractions that await you in the Middle Earth, which you can explore, as much as you want, in between the main stages. What is meant here are, predominantly schematics, mithril LEGO bricks and new playable characters, who you can recruit during the game. Also, it is worth noting that the majority of the chapters, connected with the Middle Earth, have been provided with high-res maps, which should prove helpful for proper navigation. In the final part of the guide, you can find three smaller chapters. They are connected with completing the bonus stage, the requirements for the completion of the game in 100%, as well as with unlocking all of the achievements available in the game. LEGO The Hobbit is yet another game released by the Traveller's Tales, where you explore an environment that is completely constructed out of Lego bricks. This game references to the novel by J.R.R. Tolkien, and to Peter Jackson's trilogy based on the novel.
The guide LEGO The Hobbit - walkthrough and collectibles includes:
Jacek "Stranger" Halas ()
Note! The below table presents the default key-mapping for the first player. If you want to play co-op, or split screen you need to define the key-mapping, for the second player, in the game menu or (which is an even better idea) get an additional controller.

Movement

Character selection (holding this key opens a drop-down menu)

Special ability

Jump

Action

Character swap (downwards)

Character swap (upwards)
Start / Pause

Map

Pan camera: left

Pan camera: right

Pan camera: up

Pan camera: down
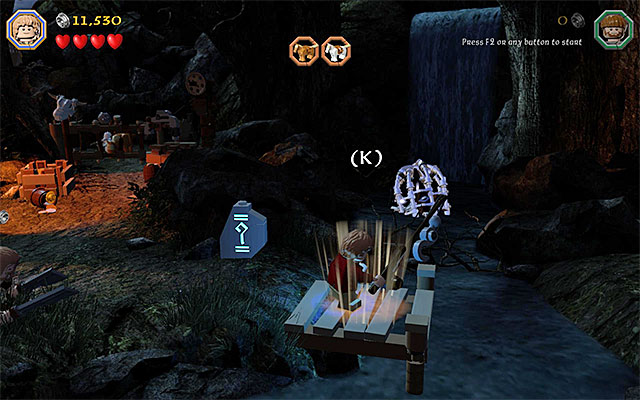
 The way to the locked gate
At the beginning of the game, you control the young Thorin. You can now switch to the Armored Dwarf Guard, but this is not necessary, for the time being. Start by destroying all of the interactive objects around the throne, where King Thror sits. Then, take the stairs to the right. Approach the locked gate and hold down the appropriate key, to build a structure.
Note - It is a good idea to check all of the question mark signs (press the appropriate key, while around them), because they display important clues.
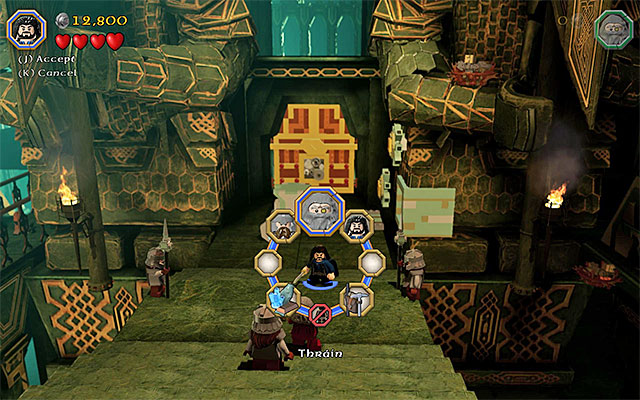
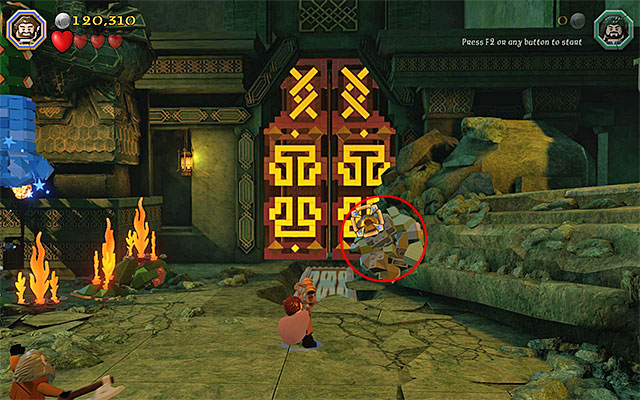
You now need to switch to another character, to Thrain, who is standing by the gate. To do that, press, and hold down, the character selection key/button Select Thrain from the list (the above screenshot) and confirm your selection. As Thrain, approach the object that you have just built and press the appropriate key, to smash it with the hammer (Thrain's Warhammer) and move it to the right. You can now take the newly-revealed passage.
Follow the path and remember to smash all of the objects in the area. Stop after you approach the three dwarves that are blocking off the passage. Destroy the objects to the left and to the right of them. Locate the interactive rock and pick it up. Hold down the action key now, to activate the aiming mode. You need to aim at the area shown in the above screenshot and throw the rock. This will result in a funny cutscene being started and in the unlocking of another area.
 You need to grab on to the lever and remain in that position
After you have destroyed all of the objects in the new location, switch to Thrain and slam the big object, with the hammer, located close to the starting point. After it moves to the right, jump onto the crate and grab the small lever. Note that, under Thrain's weight, the structure changed its position.
 The second lever
Remain in the hanging position and press the character swap button, to switch back to Thorin. Go to the right and examine the area to the right of the new, locked door. You need to jump to the crates here and grab on to the other lever. After that structure moves also, the passage ahead will be unlocked. You no can go towards the big hall with the anvil.
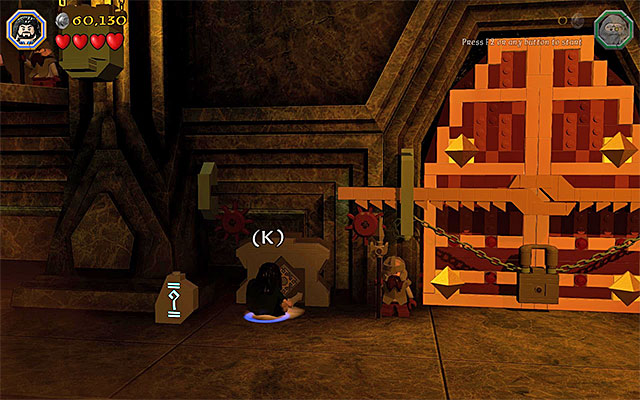
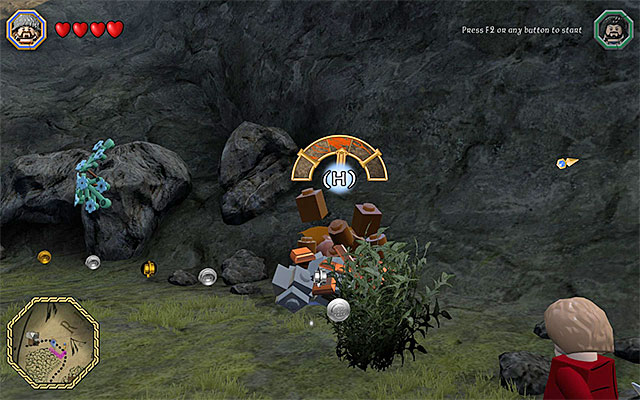
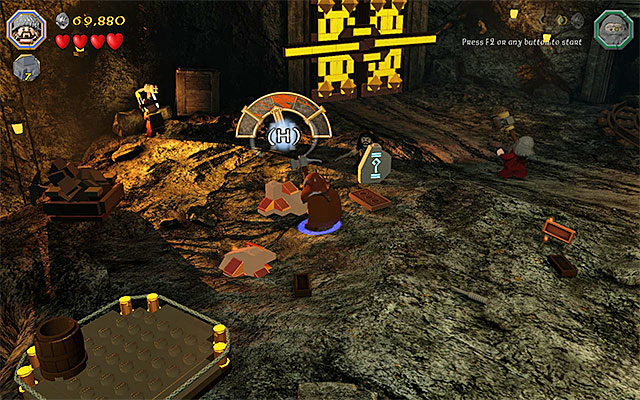
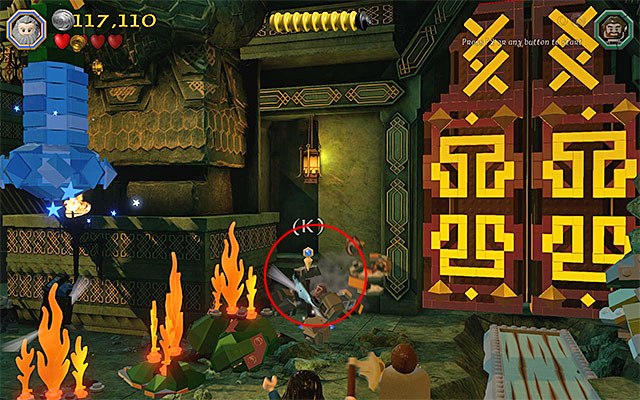
Ignore the anvil for a moment and start smashing the objects in this location. Note that, apart from the studs (which are nothing more than colorful coins) you will be also obtaining various resources, from now on. You are going to need them in just a moment. While exploring this location, locate the manhole shown in the above screenshot ( it is hidden behind the objects to destroy) and press the appropriate key to walk through it. After you end up on the ledge above, press the same key, as you did just a moment ago, thanks to which you will close the valve. wait for lava to stop flowing down the wall and collect, among others, gold bars.
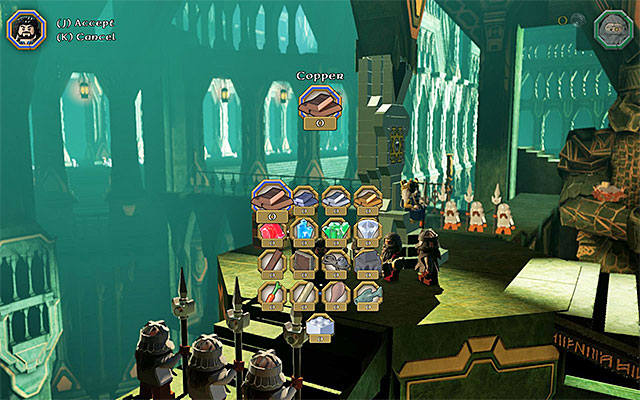
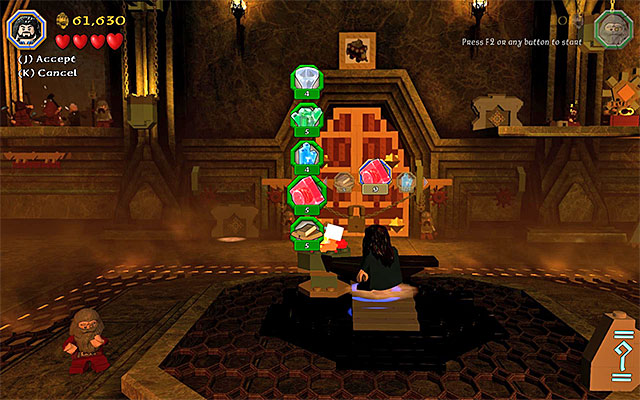 Select the resources, one after another, and choose which ones you want to use to craft the key
Approach the Anvil only after you have smashed all of the objects and collected all of the resources around. The plan is to craft the key for the locked gate and to do that, you need to select the supplies from the inventory. What you are going to need is 4 Diamonds, 5 Emeralds, 4 Sapphires, 5 Rubies and 5 Gold. If you have explored the area thoroughly, you should have all of them on you.
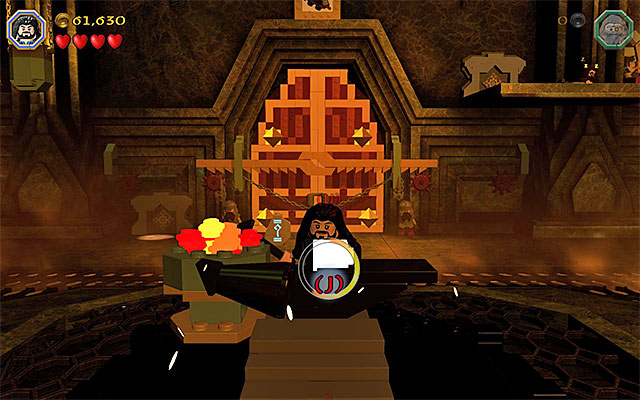
The next step is forging the key. You need to press the appropriate buttons, at the moment at which each one of them appears in the center of the circle in the center. An example has been presented in the above screenshot - in this situation, the "J" key (the PC version) needed to be pressed. If you miss, you will not fail the minigame but, you will make it unnecessarily longer. After you obtain the key, approach the gate and put it in the keyhole. You can now enter the huge mine.
 You need to give to Bofur the item that you have found.
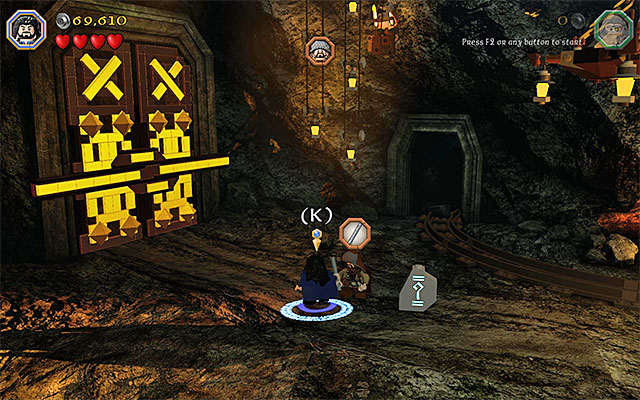
You need to start, of course, by clearing the mine of new studs and supplies. Pick up the item from one of the tables and go to Bofur with it. Stop in the blue circle and press the appropriate key to give it to the dwarf. Thanks to this, he will become a playable character.
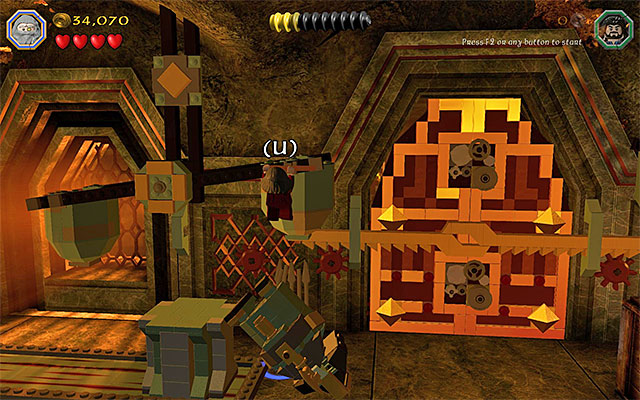
 Try to press the key/button that the game prompts you to, at the appropriate moment.
Now, it is a good idea to cut to Bofur for a moment, because he is equipped with a pickaxe. Start using the pickaxe on the stacks of the tougher bricks. There is a mining minigame associated with this action. Note the semi-circle that appeared on the screen - if you press the action button, as soon as the arrow reaches the marked area, you will obtain more studs and supplies. After you use the pickaxe on all of the stacks of bricks, press and hold down another key to build a new object.
Note - If Bofur, for some reason, does not have his pickaxe selected by default, then press the button for switching the current item, or bring up the scroll-down menu and access the inventory.
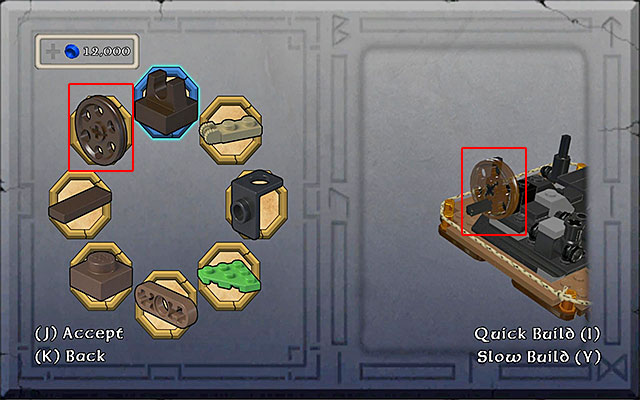
You can now stand on the Craft Plate, located on the left. Start by marking those of the items that are necessary to build the structure (you can find all of them in this location) - 2 Stones), 2 Ropes, 4 Wood and 4 Copper. Soon, the game will start another minigame, and the purpose of this is to help build a much bigger structure. In the key moments of the minigame, you need to select, quickly, from the dial menu, those of the objects that are currently highlighted on the plan (an example of the perfect solution has been presented in the above screenshot). It is a good idea to work fast here, without any mistakes, because you receive a reward of studs, whose number depends on how fast you have completed the entire project.
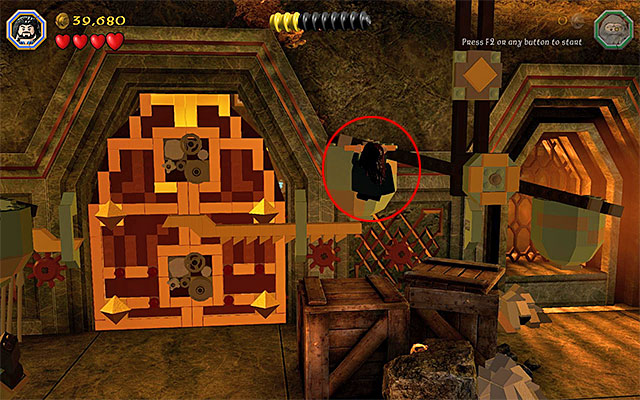
 Just like before, try to complete the mining minigames as well as you can
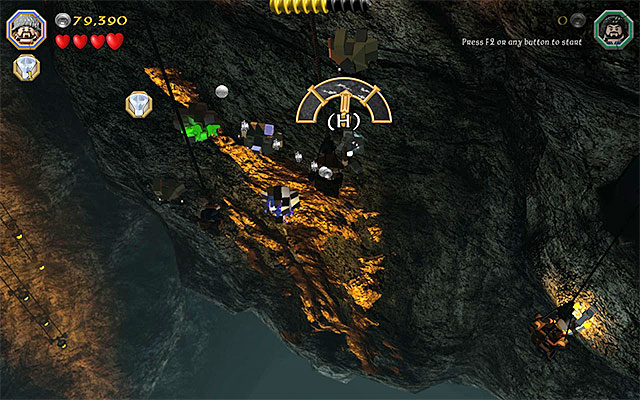
Thorin and Bofur will soon start abseiling down the ropes. Use Thorin's standard equipment and the pickaxe to destroy the new stacks of bricks and conduct the mining work. Destroying one of such big stacks of bricks results in the obtaining of the artifact that you are looking for (Arkenstone) and completing the first part of this stage.
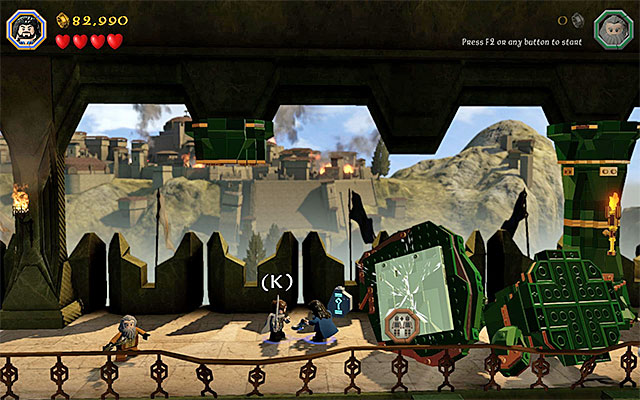
 You need to aim at the fallen pillar
Right after you regain control over Thorin (Thorin (Young)) approach the statue that is closest to you (Save Statue), press the appropriate key and confirm that you want to save your current progress. Go right and, after you reach the fallen pillar, switch to Dori (Dori (Young)). Make sure that he has the Flail equipped (you change weapons with one of the keys, or by selecting that item from the inventory, in the drop-down menu), stop next to the barricade and press the key/button that the game suggests. You now need to press the same key, several times, thanks to which you will unlock the passage.
 Make sure that you have selected the axe from the inventory.
The next obstacle is the cracked slab. You need to remove it with the axe and this is where one of the weapons of Dori, Balin (Balin (Young)) or Thorin comes to your aid. Select the Dwarf Axe as the active item. You can now approach the elements on the ground and press the action key to get rid of them efficiently.
 Removing the elements requires the cooperation of two characters
Collect the studs and approach the bigger heap of rubble. In here, it is the first time that the cooperation of the characters is required (Buddy-Up). Select any of the dwarves, approach one of the remaining playable characters (or get the both players closer to each other, if you are playing with another person) and press the key/button that you can see on the screen. After one of the dwarves jumps onto the other, stand on the fallen elements of the structure and press the action key. After that, go over to the right and watch a short cutscene.
As usually, stop at the next barricade and select Dori (if he has taken part in the most recent Buddy-Up, he needs to detach from the other dwarf first). In the way that you have learned earlier, use the flail to clear the way. Climb down the stairs and "join" the two characters together again. As the dwarves, jump onto the cracked slab shown in the above screenshot and press the action key, thanks to which the cracked elements in the area will be destroyed. You can climb to the very bottom and approach the big gate, which will start another cutscene, featuring Smaug and King Thror.
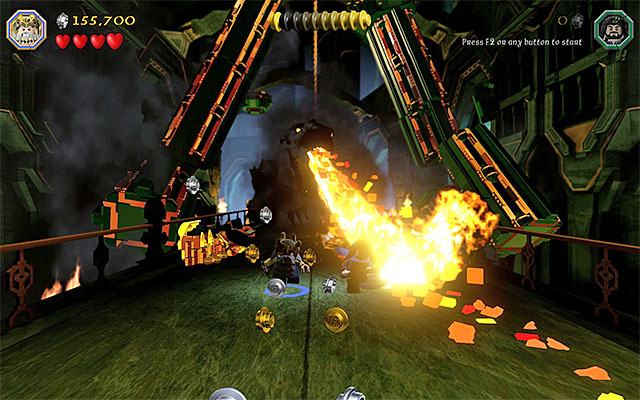
 The object that you need to aim the flail at
After you regain control over the allies, consider destroying the new elements in the area, but watch out for the flames, because you can lose the precious health hearts, as a result of coming into contact with them. While clearing the area, you need to perform several actions. Start by selecting Dori again and use his flail to target the catch on the right. Press the appropriate key, several times and, after a fragment of the structure comes off, start building a small clock (you need to hold down the key).
 A stand with the concealed warhammer
You can now send one of the characters to collect the Dwarven Warhammer, from the stand on the left, approach the block that you have recently erected and press the action button to give it a push. This action will unlock the door to the treasure.
 Use Dori's weapon to tip the statue over
I recommend that you destroy all of the interactive elements of the surroundings, along your path across the treasure. The characters will find much more supplies here and these are going to come in handy, later throughout the game. Approach the big statue in the treasure and switch to Dori. Use the flail, in the way that you have already learned, target the catch ad bring the entire structure down. Walk over the fallen statue and, after you walk onto a small ledge, hold down the appropriate key to build a bridge.
After you watch a short cutscene, walk over the bridge, to the right. Make sure that you are still controlling Dori and grab on to another catch. Dori will start to swing on the hook and you need to press the action key, at the appropriate moment to leap towards another ledge. Learn about another hint and grab onto the catch, which you have just used. Allow Dori to start swinging and switch to one of the remaining characters (Balin and Thorin). Stand next to the edge and wait for Dori to be close enough.. Then, press the jump key/button (the above screenshot) to leap towards him, thanks to which you will reach, safely, another ledge. repeat all of the above actions now, with the last one of the dwarves (leaping towards Dori on the rope and leap again towards the safe ledge).
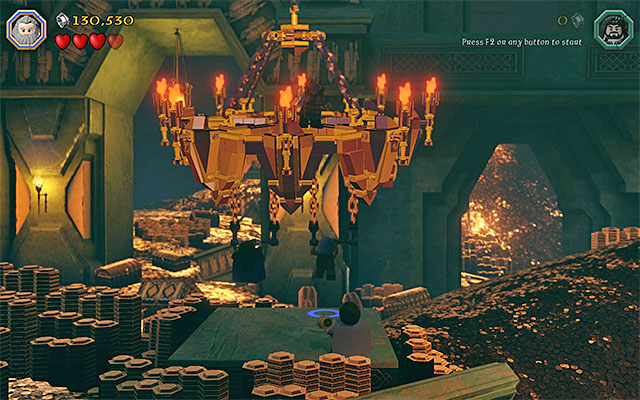 Jump towards the handles, thanks to which the chandelier will break loose
Walk over the fallen pillar to the ledge above. Select any of the characters here and leap towards one of the two grips, next to the gigantic chandelier. Leave that character in the hanging position and switch to any other dwarf. Now, jump towards the other of the grips. Wait for the chandelier to break loose and another cutscene starts.
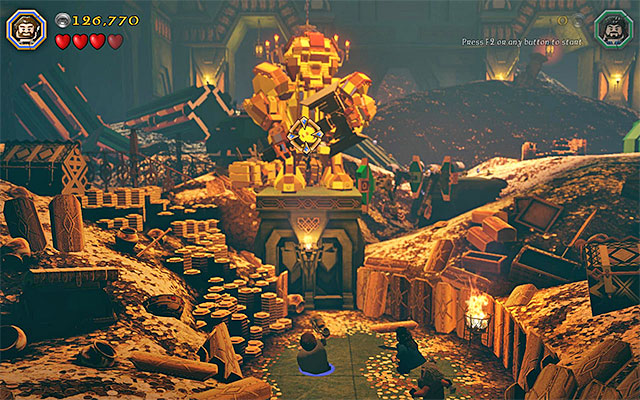
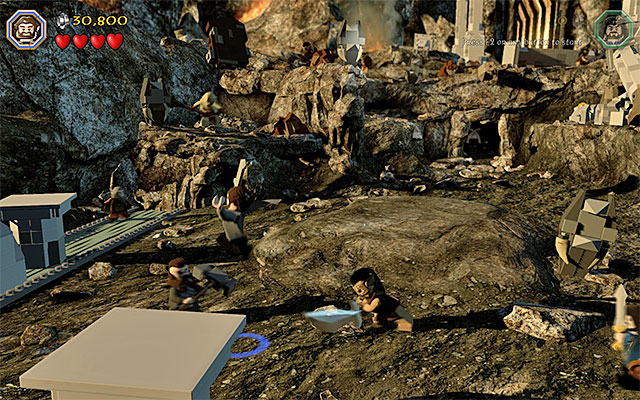
 Do not stop and collect the studs along your way.
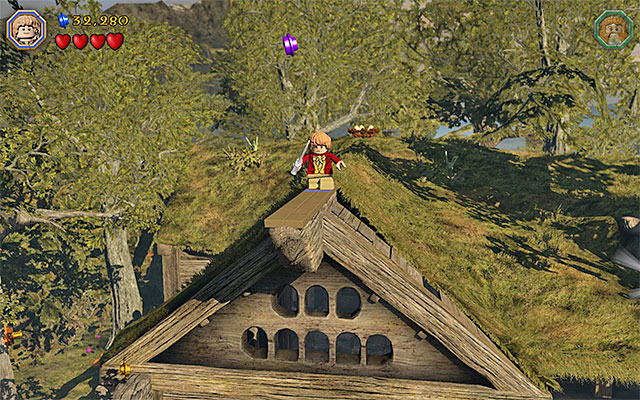
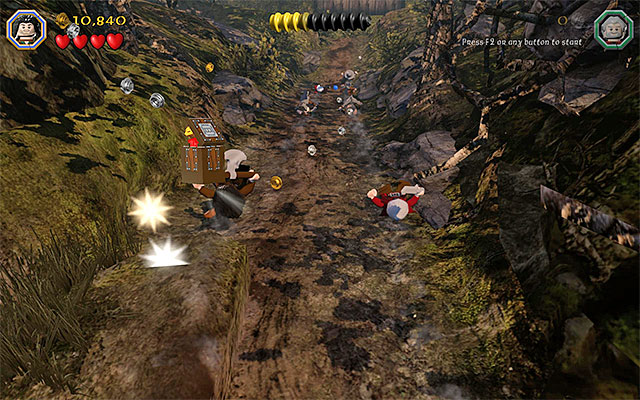
Towards the end of this stage, you can control either Thorin or King Thror. Go towards the background, thanks to which you will start a chase scene. During the escape from the dragon, remain in constant movement and strafe to the sides to avoid the fire attacks and collect the studs. At the very end, there also will appear an opportunity to collect a minikit but, do not worry if you miss that (it is best to clear this stage, of its secrets, in the free-exploration mode). Escaping the dragon will complete this stage and display statistics.
For the first time, you will be out in the open, where you can roam freely, take on side missions and find many collectibles. Personally, I recommend that you leave that kind of things for later, because you do not have access to the characters yet, who will help you reach the better-hidden collectibles.
Note - The information about the attractions that await you, during the exploration of the world, and the whereabouts of all the collectibles, can be found in the following chapters of this guide.
 The place where Bilbo Baggins lives
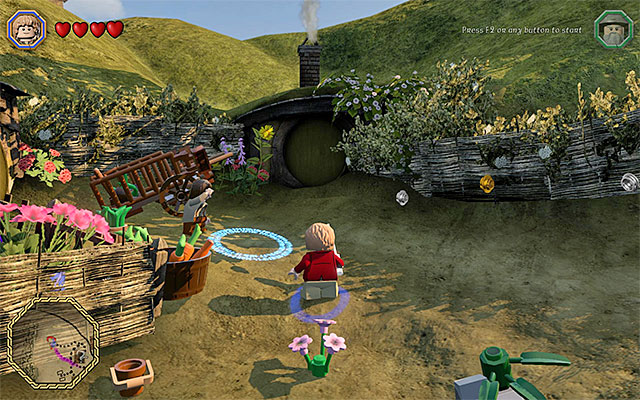
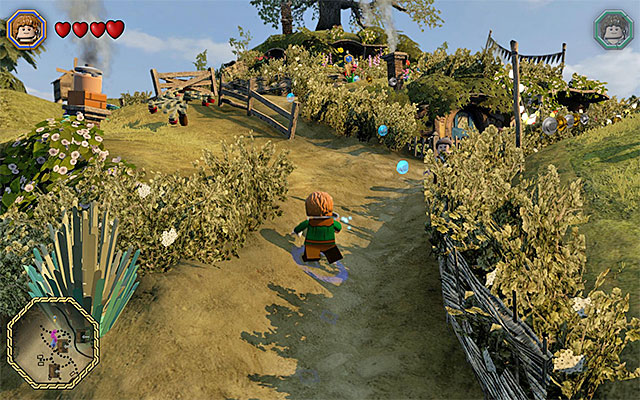
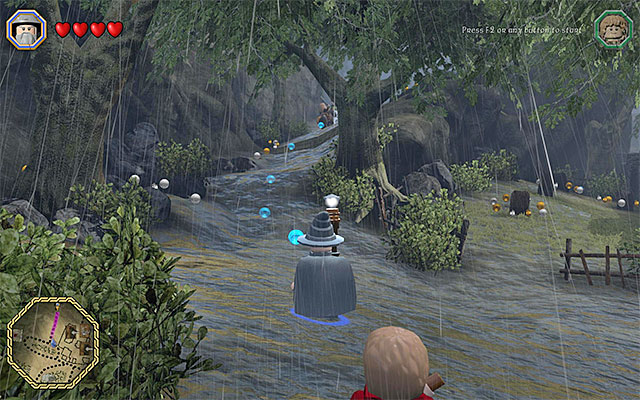
I recommend that you now reach the location, where you start the second stage of the game's storyline. Depending on your preferences, you can do that, while playing as Frodo, or Sam. Your current destination is Bilbo Baggins' cottage in Shire. You can get there by following the trail of blue studs and the readings on the map. After you approach the cottage, you will start the next stage.
 You need to pick up the key and use it on the door
The playable characters, in this part of the stage, are Bilbo Baggins and the dwarf Dwalin. Select the dwarf and start smashing the surrounding objects. Destroying the porch will allow you to find the key that you need to pick up and use on the door. After you walk into the next part of the hut, go ahead. Keep destroying the objects located on the right and hold down the appropriate key to fix the fragment of the floor.
 The spot where you push the obstacle
You can now approach, from the left, the cabinet that is blocking your passage. Make sure that you are playing as Dwalin and that you have the Dwalin's Warhammer equipped. Press the action button to hit the obstacle, thanks to which it will move to the right. Now, you are going to watch a short cutscene of the appearance of Balin in the hut, where cutting to him is not necessary.
 The dining room
Walk into the room that used to be inaccessible, on the left, where there are more elements to destroy. I recommend that you do not skip this step, because you are going to need new supplies, soon. Cross the living room and another, smaller, room, thanks to which you will reach the dining room. Destroying one of the cupboards will unlock the building option so, hold down the appropriate key.
 If you are missing some supplies, try searching in Bilbo's hut
Stand at the Craft Plate and start spending the supplies that you have- 15 Stone, 10 Rope, 5 Leather and 15 Wood. Note - If you do not have sufficient supplies, return to the previous locations in Bilbo's hut (you did not manage to explore one of them, after Balin appeared) and explore them thoroughly. The next step is the building of the kitchen table and this is a minigame that you have already played, in the previous stage. Just like earlier, you need to search out, and add, the objects displayed by the game, on the building site. The value of the reward depends on how well you did.
After you watch another cutscene, you will gain control over two new characters - Kili and Fili. Select Kili and make sure that you have Kili's Bow equipped. walk over to the Northern room and start aiming (by holding down the action key). Aim at the interactive target shown in the above screenshot. If you manage to hit it, meat will fall onto the ground. Pick up the meat and walk over to the dining room, stand at the table and give it to the guests.
 In the pantry, there also are a pitcher and cheese
Return to the pantry and destroy the objects in the part farther away. Find the pitches and cheese here, collect both of these (you can deliver them to the dwarves one by one) and return to the dining room with each. Just like earlier, you need to give the items to the guests, who came here for the party (the action key/button after you approach an empty bowl).

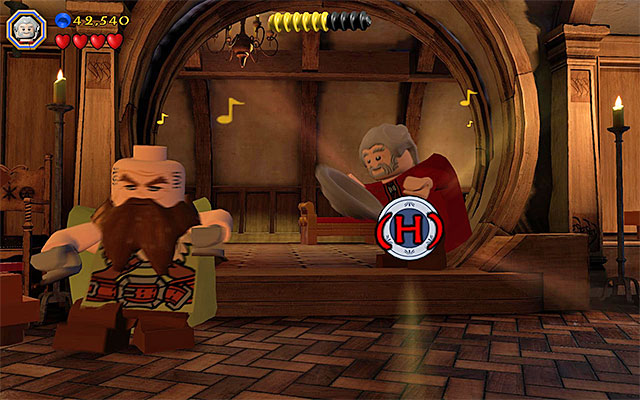
The final part of this (short) stage starts at the moment, at which the will arrive the largest party, at Bilbo's hut. You will have to play a little dancing minigame here. While playing the minigame, you need to press the keys/buttons that appear on the screen, at the right moment. If you want to gain the maximum amount of points, you always need to wait, until the dancer on the screen, is highlighted, for a fraction of second (an example in the above screenshot). Press the correct key only when this happens. The minigame will take several tens of minutes, after which, the stage summary screen will appear.
 Use Gandalf's staff on the object that is blocking the passage
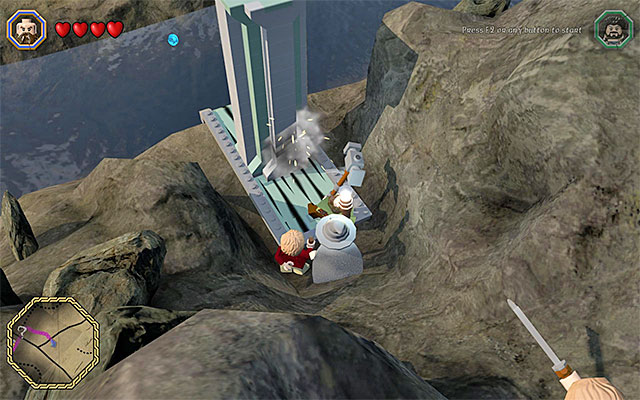
You start the journey at Bilbo Baggins' hut in Shire. You can either control Bilbo or Gandalf and I recommend that you take the wizard, because his staff will soon come in handy. Go East and follow the blue studs, and optionally use the minimap. If you are going to reach Bree, according to the map, after some time, you will run into a wooden cart that is obstructing the way. You need to use the abovementioned, Gandalf's staff to clear the way.
 The region in which you start the third stage of the game
Proceed onwards, while remaining on the main path. After you reach Bree, take the path to the nearby hill, which will start the third stage of the game.
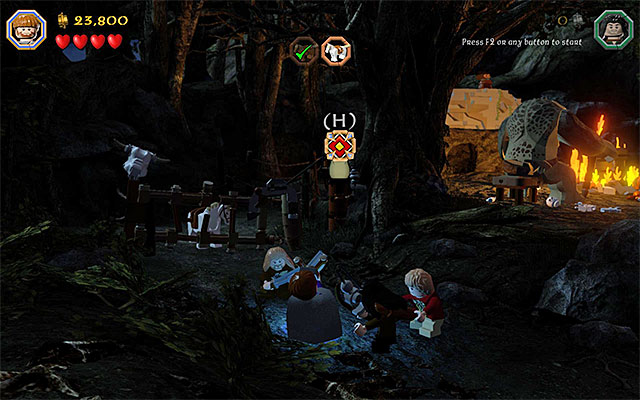
At the beginning of this part of the mission, you will have access to Bilbo and Oin and it is a good idea to cut to the latter one. Start by clearing the entire main camp of all of the objects that can be destroyed. As Oin, stand at the cliff, shown in the above screenshot, and make sure that you have the Oin's Staff equipped. Then press the button. Leave Oin in here and switch to Bilbo. You need to approach Oin, climb onto him and reach the ledge above (press the action key/button at the end).
 Make a "tower" of Nori and Oin, and only then climb onto these characters, as Bilbo
Here, the available characters will be joined by Nori, but you do not need to select him right now. Start by destroying all of the destructible objects on the right and hold down the indicated key/button, to build a ladder. This will allow Oin to reach that ledge. Select Nori or Oin, stand at the new ledge and press the appropriate button. Switch to the other of the dwarves and climb onto the character at the cliff. Finally, cut to Bilbo. Approach the dwarves (Oin and Nori have made a kind of a tower) and start climbing onto them. The purpose of this action is to reach the ledge above.
 The spot where you use the axe
Just like earlier, start by destroying the objects on the right. This will allow Bilbo to unlock the manhole, which the dwarves are going to use. This way, they will reach the ledge. Now, use the axe to destroy the cracked slab.
 Pick up the ladder, with two characters, and walk over to the left with it
Hold down the indicated key/button, in order to build a ladder. Select any character, stand next to the right end of the ladder and press the appropriate key. After that character picks up the ladder, switch to another character. Approach the left end of the ladder and press the required key/button, again. Now, you only need to carry the ladder over slightly to the left. The characters that are holding the ladder, will throw it over to the left automatically, which will gain you access to another ledge.
 You need to build another "tower" of the dwarves
At this point, the party will be joined by Bifur. It is a good idea to select him immediately and make sure that he has his spear equipped (Bifur's Boar Spear). Approach the cliff and press the indicated key/button. Now, both Oin and Nori need to climb onto Bifur (each one of them also needs to have the staff equipped!). Finally, select Bilbo and start climbing over the dwarves, who have created a tall wall. As a reward for this, you will reach the top ledge.
 Stand in the center of the blue circle
Approach the tree on the right, destroy it and collect the red fruit You can now return to the camp (jump down onto the ledges below). Approach one of the horses, stand in the center of the blue circle and press the appropriate key/button. The game will soon start another cutscene and the second part of this stage will start.
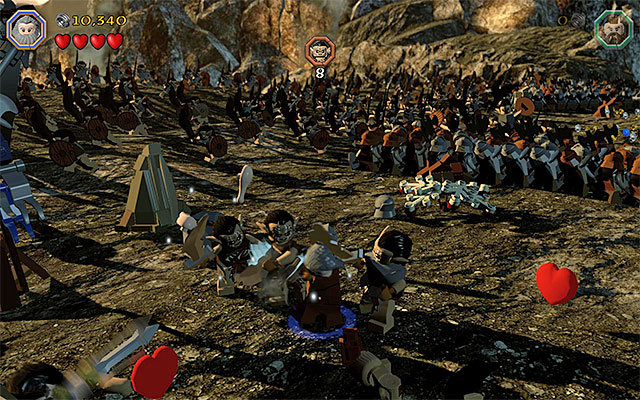 You can eliminate the orcs with standard attacks
During the battle with the orcs, you can control any of the dwarves. Your first task is to defeat 10 regular orcs. Attack only the ones that charge directly the main protagonists. To eliminate the opponents, use standard attacks with the blade.
 The charged attacks are good for the elimination of groups of orcs
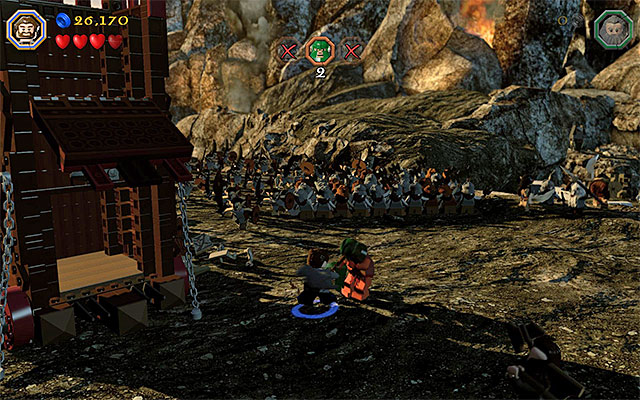
An alternative way to defeat the orcs is holding down the other combat key, which introduces the character that you control, into a kind of a spin. It is a good method to eliminate, simultaneously, even several orcs but, while charging this attack, you are completely defenseless. During the fight, you should remember that you should collect the hearts dropped by some of the orcs. Also, do not attempt to step outside of the delineated battlefield (the moving/ fighting armies), because you would suffer additional, and needless, damage.
 Passage to the next area of fights
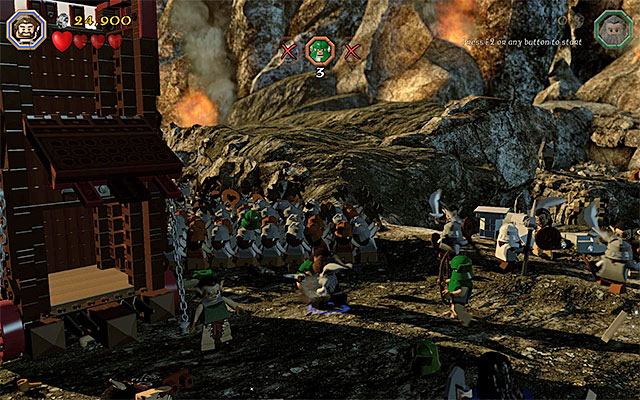
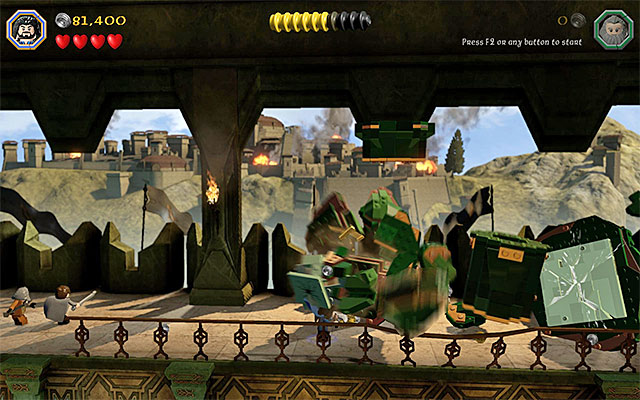
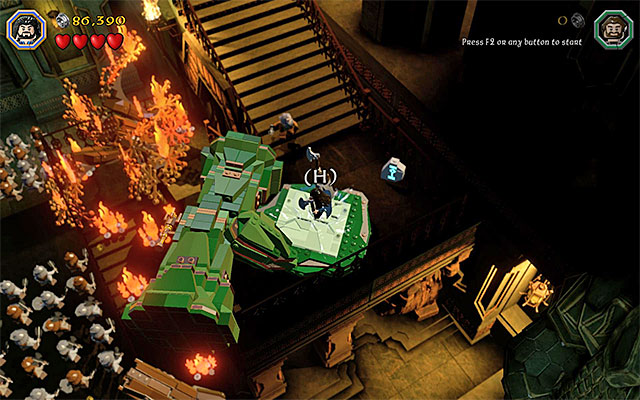
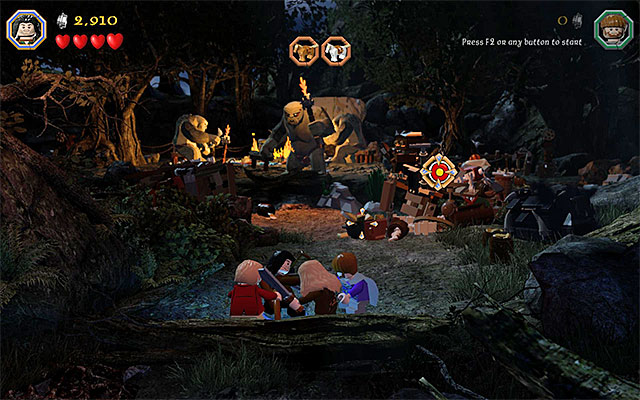
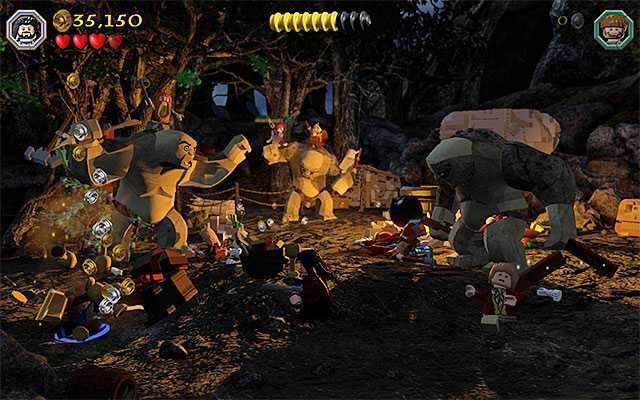
After you defeat the ten orcs, this will form a kind of a corridor, thanks to which you will be able to walk over to the next arena. Before you do that, I recommend that you destroy the objects around, because you will be able to gain new studs and supplies, this way. After you reach the next arena, the game will start a short cutscene, featuring Azog. As a result, you will have to defeat five, better-armored, orcs. An even more important thing here is to collect hearts, because it is easy to deplete the entire health bar.
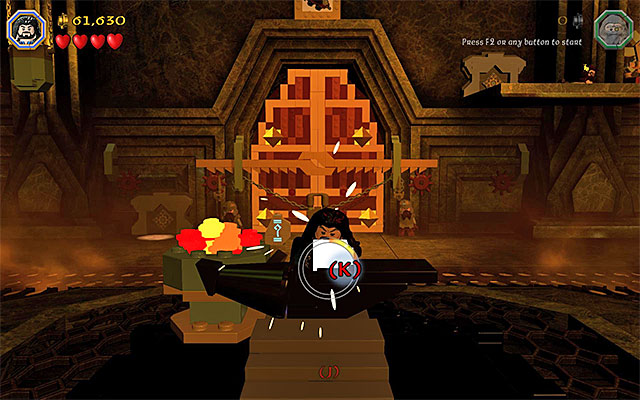
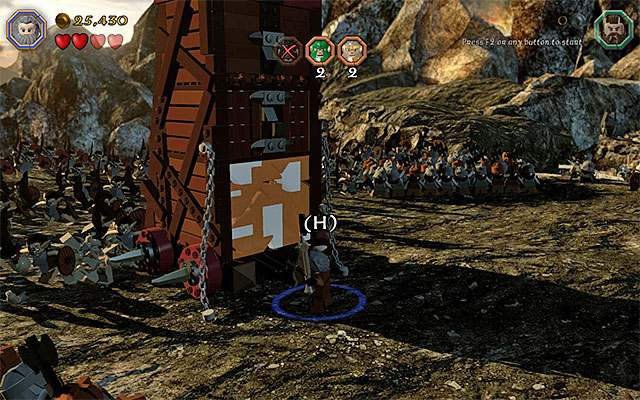
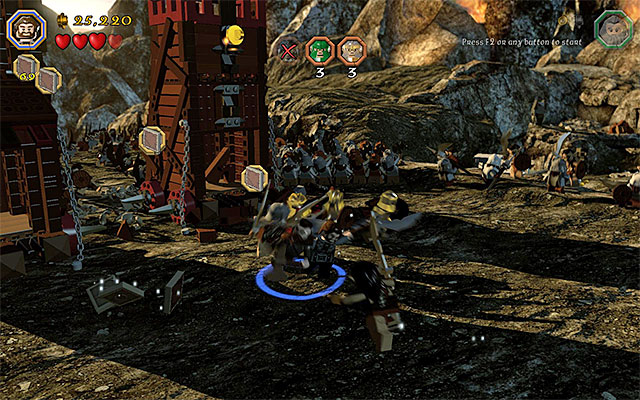
 The big orc needs to be attacked by two dwarves, who are, additionally, cooperating.
At the battlefield, there will soon appear a much bigger orc, who is towing a siege tower. Do not attempt to attack it. Instead, position any two playable characters next to each other and press the Buddy-Up key/button. Only after that, approach the big orc and start dealing damage to it. The successful attacks will be depriving it of fragments of its armor and will finally defeat it.
 Use team action to destroy one of the walls of the siege tower
Remain in the Buddy-Up mode and approach the unguarded tower, with the two dwarves. You need to press the action key/button in order to bring down one of the tower's walls. This action, if successful, will bring in more orcs to the battlefield.
As you have probably noticed, the two new orcs are wearing gold armors. They are much tougher, and more difficult to defeat, than the regular orcs. At the same time, you can attack them with one character only. While landing your attacks, there will probably be several situations in which you will have to fight at close quarters (an example in the above screenshot). In such situations, try to tap, rhythmically, the indicated keys/buttons. This will allow you to deal damage and avoid losing hearts, at the same time.
 Grab onto the grip and rip it off
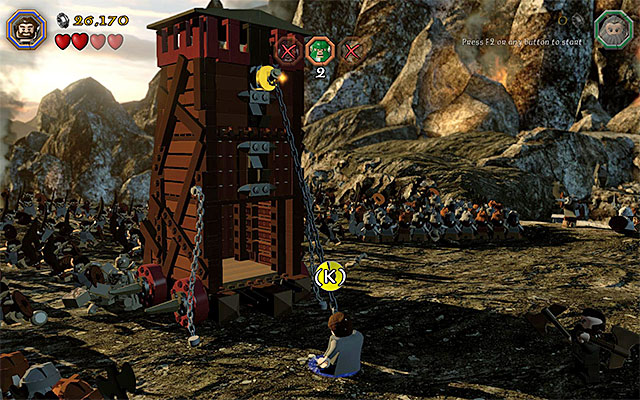
After you have defeated the warrior orcs, switch to Dori and make sure that he has his flail equipped. Approach the tower and press the appropriate key/button, thanks to which Dori will grab on to the golden grip, in its upper part. Press the same key several times, thanks to which you will damage the tower and cause another group of orcs to appear.
 Keep eliminating the archers in melee and do not allow them to attack at a range
In the battlefield, there will appear two orcs, wearing green armors, now. Since the monsters are archers, start jumping around the battlefield, to avoid taking damage. You need to strive for a close quarters fight, as soon as possible. Thanks to this, the orcs will be incapable of attacking at a range.
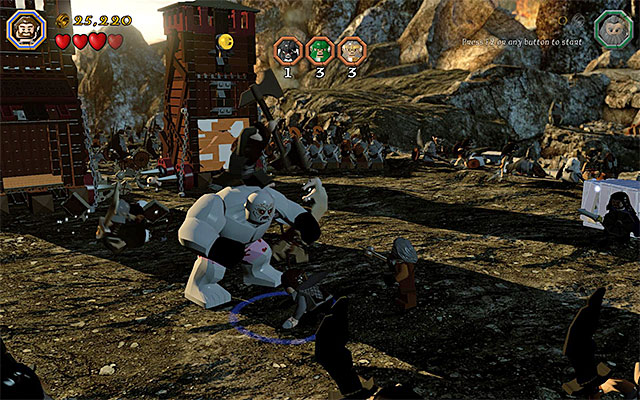
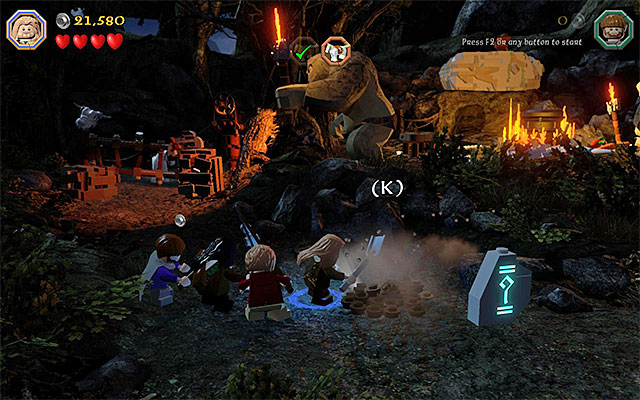
In a safe spot, combine forces and defeat the big orcThe next part of the battle is similar to the one that you have fought. The main handicap is that the biggest orc starts moving around the battlefield. Avoid coming into contact with this monster, because you can easily lose all of the hearts here. Ignore the smaller orcs and wait for a good moment to activate Buddy-Up, i.e. to join forces with any other dwarf. After you combine the two dwarves, start attacking the monster.
 There are three orc warriors and orc archers more to defeat
Use any two dwarves, now, to destroy the lower wall of the tower. The next steps are defeating the three orcs in gold armors and rip off the upper wall of the tower, using Dori's flail. Finally, defeat the three archer orcs (green armors). After you perform these actions, you will be granted the opportunity to square off against Azog.
 Around, there are many objects that can be destroyed
The battle with Azog will be participated by the same characters that you have been controlling in the previous part of this stage. Use, to your advantage, the fact that the boss is, initially, disinterested in attacking the dwarves and explore the area, in search of studs, supplies and unique treasures.
 Press the buttons that appear on the screen
Try to walk into the arena at which you will not be pushed away by the boss (you can play as any dwarf here). Start attacking. Just like in the case of the fights with the orcs in yellow armors, it may be necessary to tap, rhythmically, the indicated key/button (note - the keys will be changing, every now and then so, you should keep an eye on what actually displays on the screen!). After you have dealt enough damage to Azog, he will escape to the upper-left ledge and you will be promoted to the next part of the battle.
 Avoid stones tossed by the boss
Starting with the moment, in which Azog jumps onto the ledge above, you need to watch out for his ranged attack. The boss will be hurling large boulders and, if you want to avoid taking damage, you need to remain in constant movement. Apart from that, there will be the regular orcs arriving at the arena. Ignore most of them and eliminate only the ones that pose a direct threat to you.
In order to make it over to the ledge, where Azog is, you need to stand next to the big block shown in the above screenshot. Switch to Dwalin and make sure that he has his hammer equipped, Use the hammer to push the block over (the action key), which is the way in which you reach the boss. Just like earlier, you need to land several melee attacks (remember to press, rhythmically, the indicated buttons).
The final, third, part of the battle starts at the moment, at which Azog moves over to the upper-right ledge. This time around, select Dori and make sure that his flail is his active item. Use the flail on the golden catch shown in the above screenshot, by pressing the indicated key/button several times. You can now walk over the fallen pillar, to the ledge above.
 Swing and leap towards the ledge with Azog on it
You need to use Dori's Flail for the last time, to catch the grip above. Start swinging and leap towards the ledge, with Azog on it, at the right moment. Attack the boss (it is best to select some other weapon from the inventory). After he takes some more damage, Azog will flee the battlefield. This is the end of this demanding stage and the only thing left to do, is acquaint yourself with the summary screen.
You need to push the block, using Dwalin's WarhammerDuring your journey to the troll dwellings, you can control any of the characters. Just like in the case of the previous visits to the map, follow the trail of blue studs. After you reach the river, switch to Dwalin and make sure that you have equipped his Warhammer. Approach the big, vertical block and press the action key/button to give it a push. You can now jump onto that block (accidental falling into the river does not cost you a life) and reach, safely, the other bank.
 The place where you are tasked with a side mission
Go to the South-East and stop next to the destroyed bridge. Here, you need to complete one of the game's side-missions- Bridge Over Water Trouble. Approach the character standing next to the bridge and press the appropriate key/button, to initiate a conversation.
 Select the supplies and build the bridge with them
Approach the Craft Plate now. After you activate it, you will have to spend some of the supplies that you have - 25 Stone, 15 Rope and 25 Wood. If, in the previous main stages, you have been destroying the objects, you will have enough on you. Otherwise, start travelling around the area, destroy all of the objects that you find and defeat the enemies that you find (you can check out on your current progress in the drop-down menu).
 The vicinities of the area where you start the fourth chapter of the game
After you have spent the supplies on the bridge, you still need to build it. And you get to play, here, the minigame that you have already played, where you need to choose the appropriate elements, from the sets on the left side of the screen (also, you could try to perform as well as possible). For building the bridge, you will be rewarded with the opportunity to cross it and, apart from that, from the quest-giver, you will receive a Mithril Brick. You can now walk over the bridge and go to the place, where you start the fourth stage of the game.
 You need to hit the target, thanks to which you will flush out the owl
The playable characters, at the beginning of the first part of the fourth stage, are Ori, Kili, Fili and Bilbo, and you can switch to any of them. Go towards the troll camp. Along the way, you cannot jump (instead, your character will be performing rolls), but you can still destroy the surrounding objects (studs and supplies). Follow the linear path and stop after one of the trolls starts illuminating the area, with a torch. It is worth adding that, you do not need to worry about being, accidentally, spotted, because your character will refuse to enter the illuminated area. Switch to Kili and make sure that his bow is set as the active item. Aim the bow at the target, on the right, and shoot.
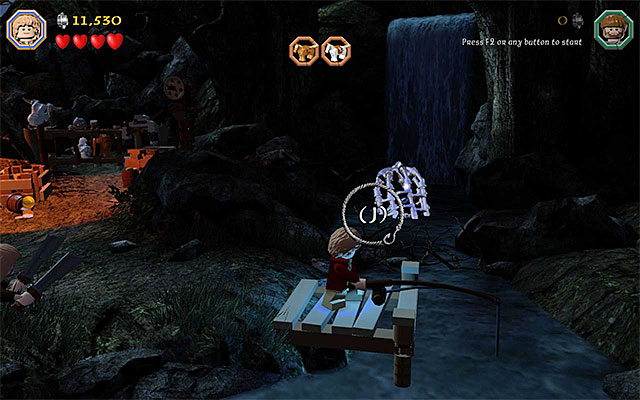
 The spot where you start the fishing mini-game
If you perform this action correctly, the troll with torch will return to the camp, thanks to which you can go right. Ignore the fact that another troll started illuminating the main path and go to the right, as far as you can. You need to switch to Bilbo here and make sure that he starts using the Fishing Rod. Stand on the pier, indicated by the game, and start the fishing minigame. While performing this task, it is a good idea to press the indicated keys/buttons only after the circle shrinks as much as possible, because this means additional studs as your reward.
Regardless of how well you do with the minigame, around there will appear a new interactive item - the lobster. Pick it up and enter the aiming mode. You need to aim the lobster at the cauldron, at which there are the trolls sitting (the above screenshot). Thanks to the successful throw, the troll that has been illuminating the path, will return to the others.
 Aim at the target
Follow the newly-unlocked path. Destroy the objects near the first horse pen and hold down the indicated key/button, to build a target. In this case, you need to switch to Ori and select the Ori's Slingshot from his inventory. Enter the aiming mode and start shooting marbles at the target. In total, you need to hit the target three times, thanks to which you will free the first horse.
Go left now and take the path there, which has been unblocked by the escaping horse. Do not approach the area illuminated by the troll and remain next to the hint plate. Switch to Fili and select Fili's Shovel from his inventory. You need to start digging in the spot shown in the above screenshot. After you dig some of the soil up, locate a new interactive item. You need to pick it up and start aiming at the cauldron, into which it needs to go.
 Hit the target with marbles
Wait for the troll on the left to return to the main part of the camp and approach the second horse pen. Also here, it is required that you build a target. After you do, switch to Ori. Use Ori's Slingshot to hit the target three times. Freeing the second horse ends the first part of this stage.
 In the camp, there are many destructible objects
You can start the battle with the trolls, as any of the dwarves. Use the opportunity to destroy the objects in the camp, thanks to which you will obtain studs and supplies. while doing that, stay away from the closest of the trolls, as well as from the other ones, which the allies jumped.
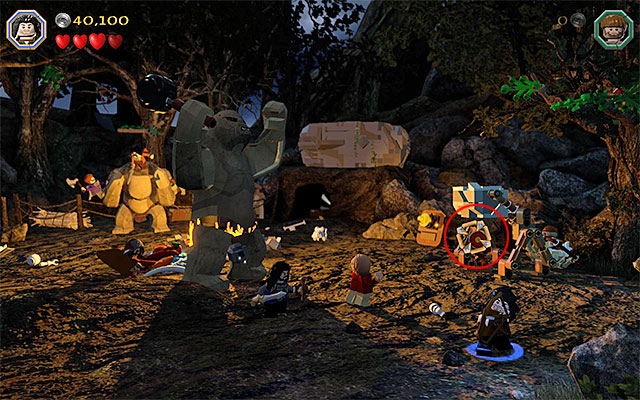
Turn to the right side of the camp. You need to hold down the indicated key/button here and build a catapult. Once the catapult is ready, switch to Kili and select Kili's Bow. Aim at the catapult's target (the above screenshot), and stat the entire structure running. If you have done everything correctly, the first one of the trolls will be stunned.
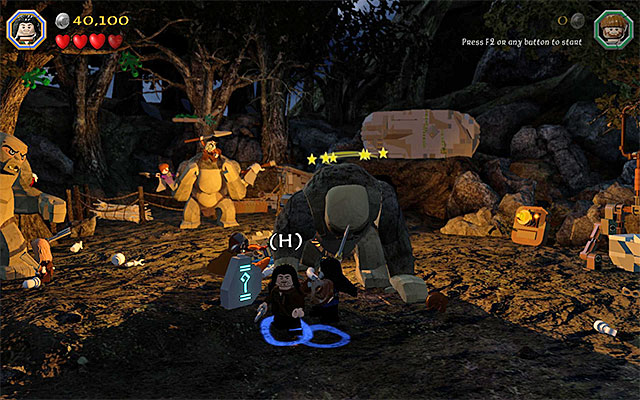 Approach the dwarf and Buddy-Up with him.
Approach one of the dwarves, who should be standing next to the stunned troll, and press the Buddy-Up key/button. After your character jumps onto the ally, he should land an automatic attack and eliminate the first troll.
Note - If you are playing with a human player, you will most probably have to approach the stunned troll, before you land the attack.
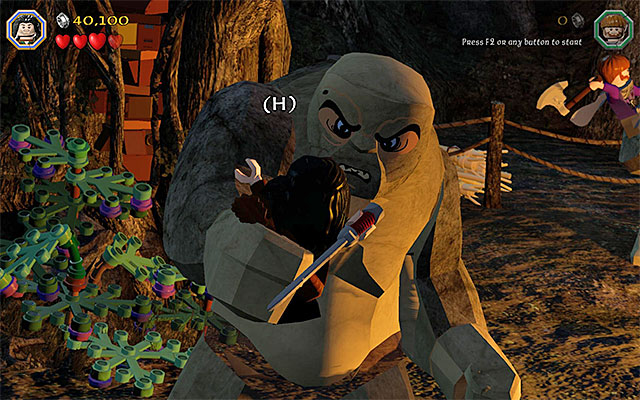 Press the keys that appear on the screen
Right after the first troll is defeated, a cutscene of the tussle with the other troll. In this case, the key to success is pressing the keys indicated by the game, rhythmically (they will change, occasionally!). The second troll will soon be incapacitated.
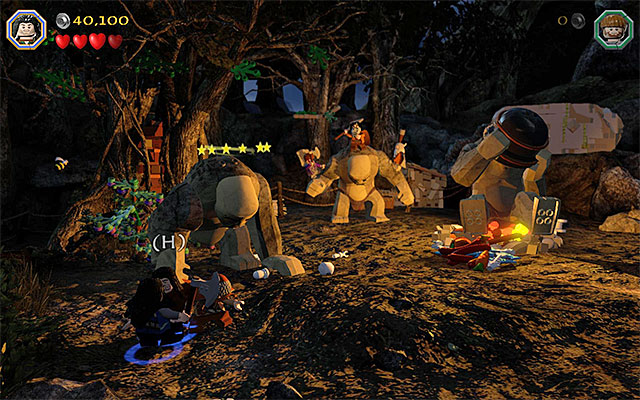 Eliminate the second troll, thanks to teamwork
Just like in the case of the first troll, you need to switch to any of the dwarves, approach the ally standing next to the stunned monster and press the Buddy-Up key/button. There is still one more to eliminate.
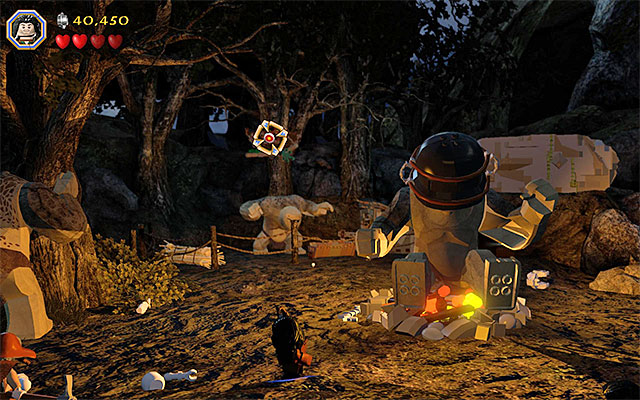
Be careful here, because the last troll will start throwing heavy objects at the protagonists. Avoid them and additionally, switch to Kili. Prepare Kili's Bow and aim it at the nest shown in the above screenshot. However, shoot only when the troll walks directly under the nest, thanks to which he will be stunned. You can now approach the monster and, in the way that you have already learned, Buddy-Up. Unfortunately, defeating all of the trolls does not end this stage.
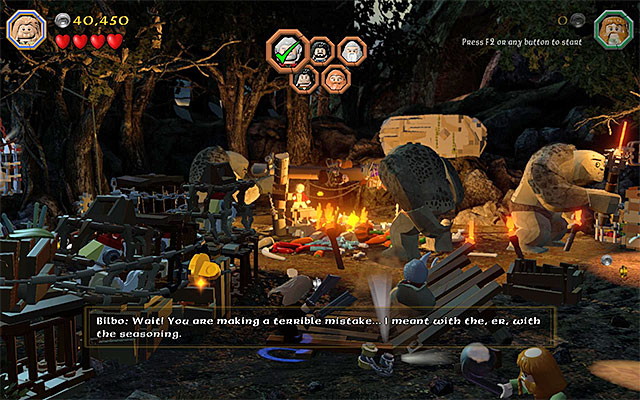 Destroy the table
The playable characters, in the final part of this stage, are Fili and Bombur. Their task is to defeat five allies imprisoned by trolls. If you want to, you can use the Save Statue here, to save your progress. Switch to any of the characters and start smashing the objects near the starting point. Destroying the big table will result in freeing the first one of the dwarves.
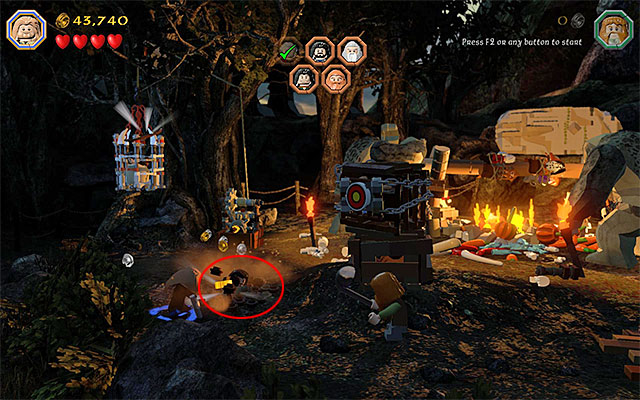
After the successful action, pick up the Flail from the ground and select it from the inventory. You need to use it against the golden catch on the left. Press the indicated key/button several times, which will rip the cages with the chickens. Take a look around, switch to Fili and select Fili's Shovel from the inventory. You need to dig out the second one of the dwarves, from under the ground.
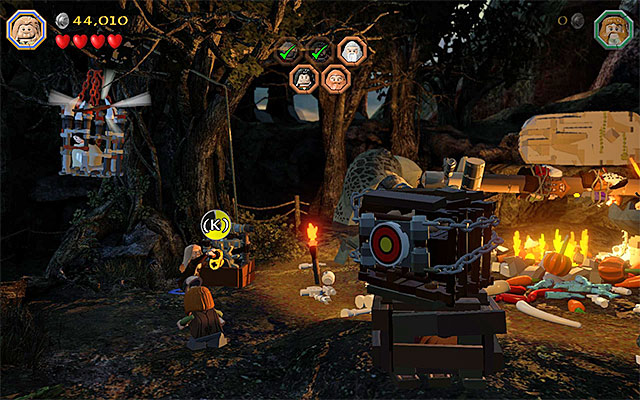 Use the knob to destroy the cage with the prisoner
Pick up the knob, which you have dug out with the most recent of the allies and approach the nearby mechanism. After you fit the knob in, give it a turn, thanks to which you will rescue the third ally, who was being kept in the cage on the left.
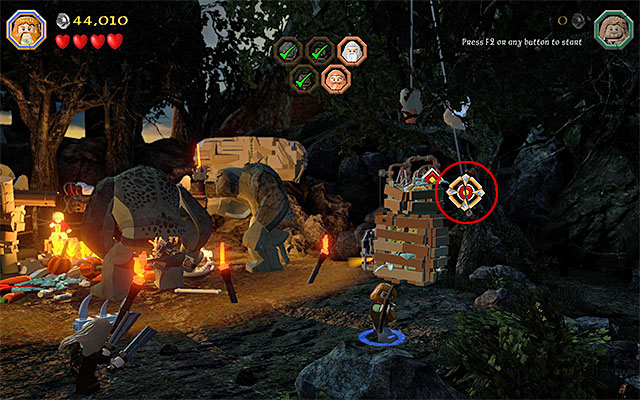
Find a Bow lying on the ground, pick it up (any character) and go towards the right side of the camp. Aim the bow at the target shown in the screenshot, which will free the fourth ally.
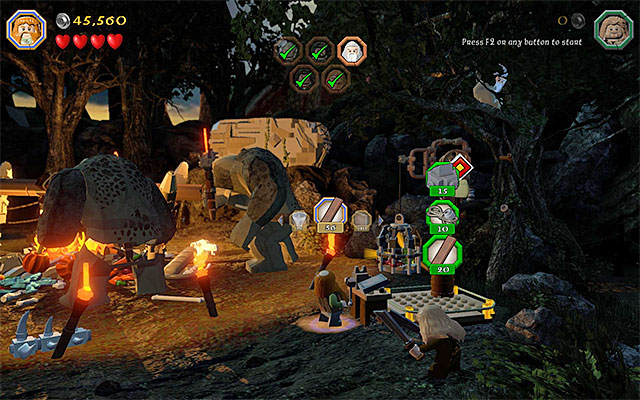 Select the appropriate supplies and select them for the construction
Destroy the cage, in which the most recently rescued ally was being kept and hold down the key/button indicated by the game. After you have built a Craft Plate, interact with it. You now need to spend some of the supplies that you have on you (you can find all of them by destroying the objects in the area) - 15 Stone, 10 rope and 20 Wood. This, of course, is not all, because you still need to complete the minigame, which consists in finding the objects highlighted in the building site. Try to do well at it, in order to obtain as many studs as possible.
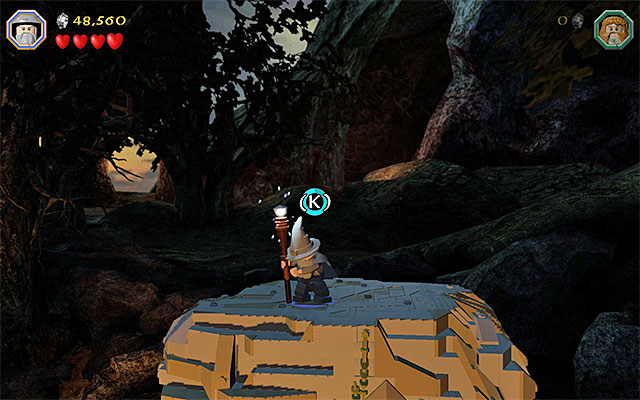 Hold down the Charge Gandalf's special attack
There wills soon appear Gandalf, above the camp and it is a good idea to switch to him immediately. Hold down the special charged attack key/and do not release it, until the moment, in which Gandalf's staff reaches maximum power. You can now fire the powerful attack, which will end this stage.
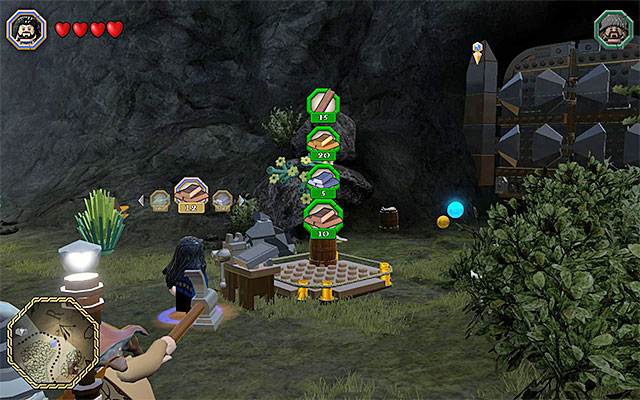 The craft plate
Follow the quite linear path to the South. Your destination is the troll cave and, right next to the cave, there is a Craft Plate. After you interact with it, it turns out that you need to spend more supplies - 15 Wood, 20 Gold, 5 Iron and 10 Copper.
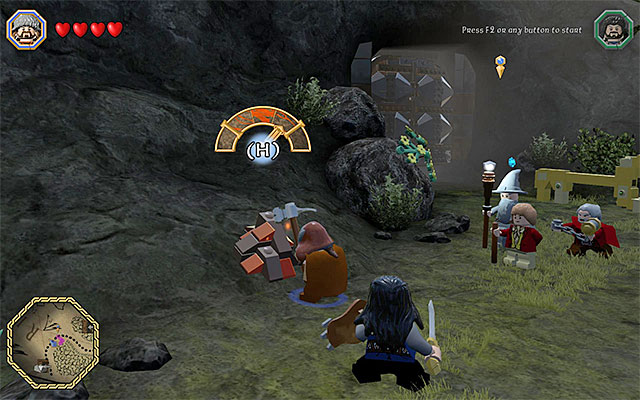 Destroying the heaps of bricks, with the pickaxe allows you to obtain ingots
If your supplies are insufficient, start smashing the objects in the area. It is the easiest to obtain wood. When it comes to gold, you need to switch to the character with a pickaxe (e.g. Bofur). Approach the heaps of the harder bricks and use the pickaxe on them. Of course, it is a good idea to press the indicated key at the right moment, thanks to which you will obtain more studs and resources.
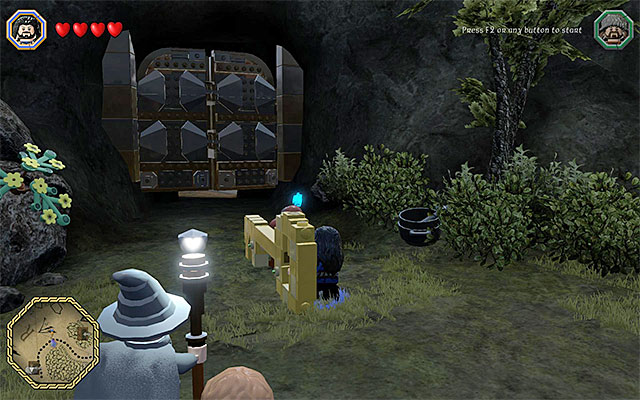 Force the gate open
Regardless of whether you actually had the resources on you, or you had to search around for them, you are up for another building minigame. Just like always, try to find the highlighted elements quickly and efficiently. Completing this minigame results in the construction of a huge key. Pick up the front side of the key, as any of the characters. Switch to another character and pick up the rear part of the key. You can now go to the gate, with the key. Thanks to smashing it, you will be able to proceed.
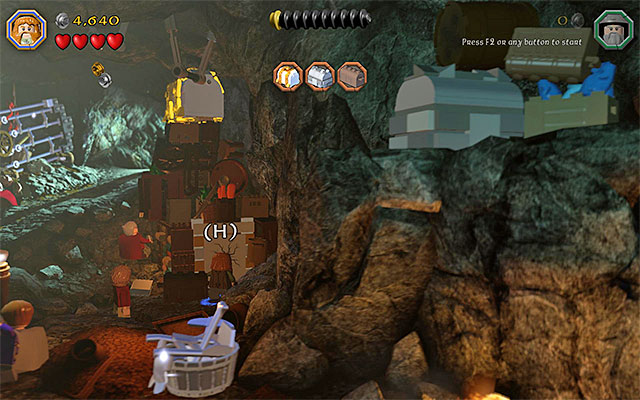
Start exploring the troll cave, where there are three chests with elven swords hidden (initially, you can play as any of the characters). Smash all of the interactive objects around the cave entrance. Approach, then, the interactive bricks, hold down the appropriate key/button on order to start building and build an interactive catch. Switch to Dori and use his flail to catch the grip shown in the above screenshot.
You need to use the axe on the cracked plateLeave Dori hanging and switch to any other character. Press the appropriate key to leap towards Dori and grab him. The purpose of this action is to increase the weight, which will raise the cage on the right. After the cage is raised, let go of the grip., thanks to which it will fall to the ground and smash. Switch to any dwarf now and select the Dwarf Axe, as the active item. You need to use the axe to smash the cracked plate, which was exposed by the cage that has just smashed.
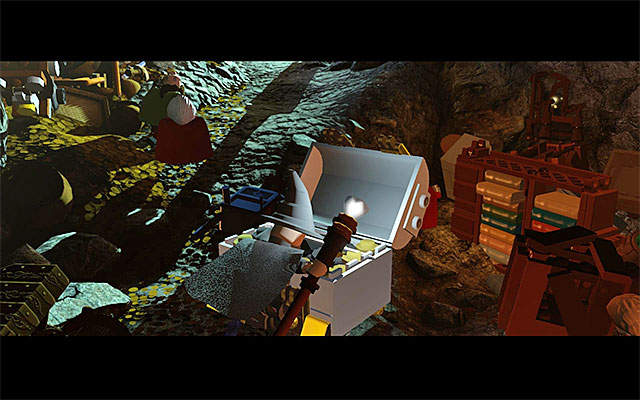 As Gandalf, open the chest
For performing all of the above sections, you will be rewarded with collapsing of the entire structure. Switch to Gandalf and approach the gilded chest to open it. This way, you will obtain the first one of the elven swords (Glamdring). You can now go to the right, with all the characters.
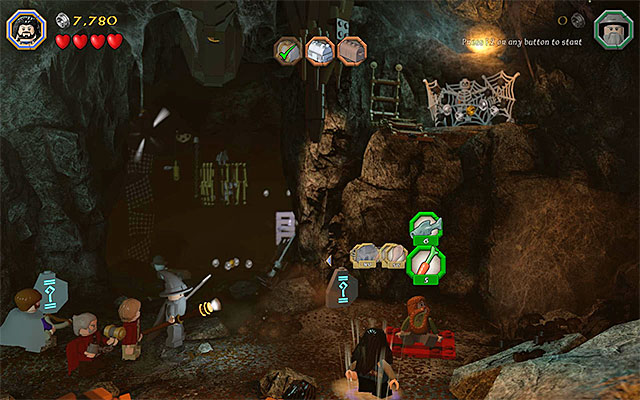 You need to feed Bombur
Stop in the location with spiders and switch to Bombur. Drive the spiders away and interact with the red blanket to lie down on it. Switch to any other character now and approach the glowing circle and interact with Bombur. You need to feed the ally, using the following- 6 Fish and 5 Carrot.
Note- if you do not have the required items, explore the rest of the cave (especially the area where you found the first chest) and smash all of the interactive objects.
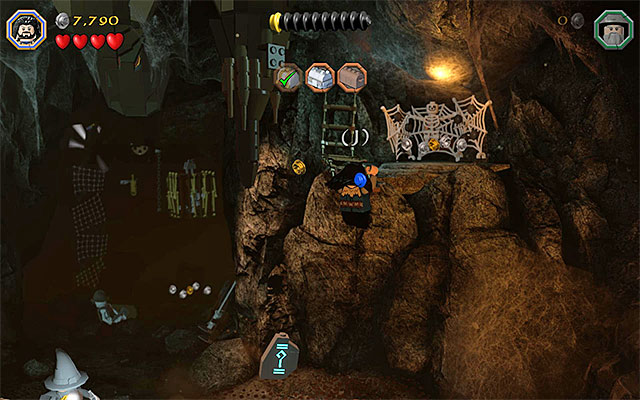 Bounce off Bombur, and try to reach the upper-right ledge
Switch to Dori, approach the fed Bombur and start bouncing off him. You need to grab the edge of the ledge above and climb onto it, while lowering, at the same time, the ladder. Attack the skeleton on the right and hold down the building key/button, after you defeat it. This will result in the construction of another interactive catch, which will be located on the left.
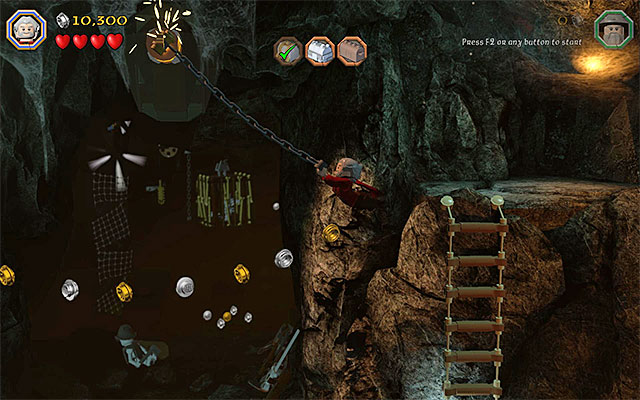 The second catch
Make sure that Dori has the flail selected, approach the left edge of the ledge and grab on to the catch. Press the indicated key/button several times. This will collapse a part of the ceiling and reveal another catch. Grab on to the catch, using the flail, swing and leap towards the ledge on the left, which was inaccessible earlier.
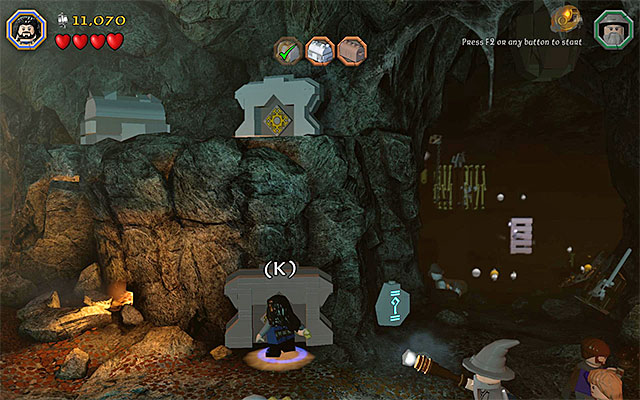 Walk through the bottom manhole to reach the ledge with the chest
After you reach the ledge, smash the objects around, thanks to which you will unlock access to the manhole here. Switch to Thorin and walk through the bottom manhole, to make it over to the ledge on the upper-left. You can now open the chest (silver) and collect the second Elven sword (Orcrist).
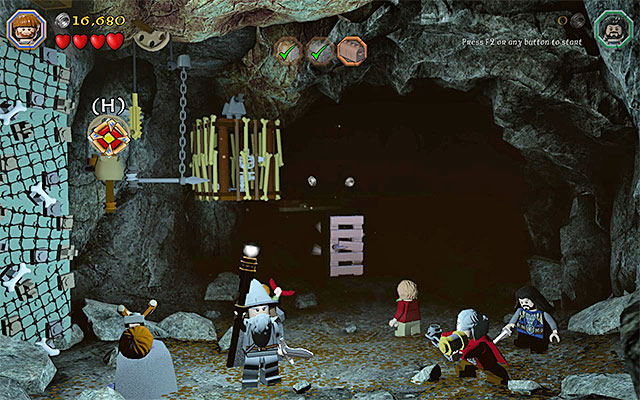 Use marbles to hit the target
Switch to Gandalf again and walk into the darkest part of the cave, thanks to which it will be illuminated. Smash the interactive objects round and start building, in the left part of the cave. Above the heads of the characters, there will appear a target, as a result. Switch to Ori and use the slingshot to hit the target. Three successful hits will lower the cage.
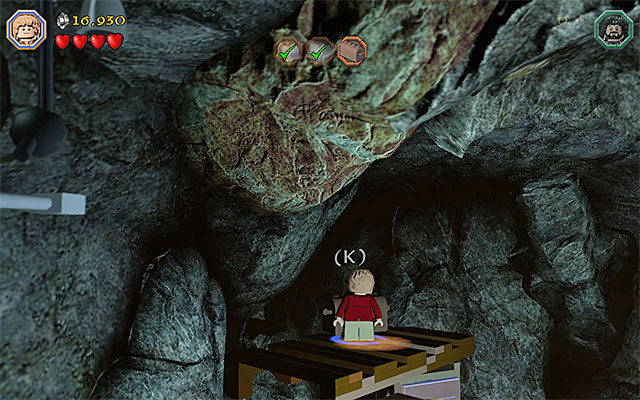 The last chest
Approach the smashed cage and hold down the indicated key/button, thanks to which you will build stairs here. Switch to Bilbo, climb up the stairs and open the last chest (brown). Thanks to this, you will obtain the third Elven sword (Bilbo's Sword). You will now watch several cutscene and this stage will end.
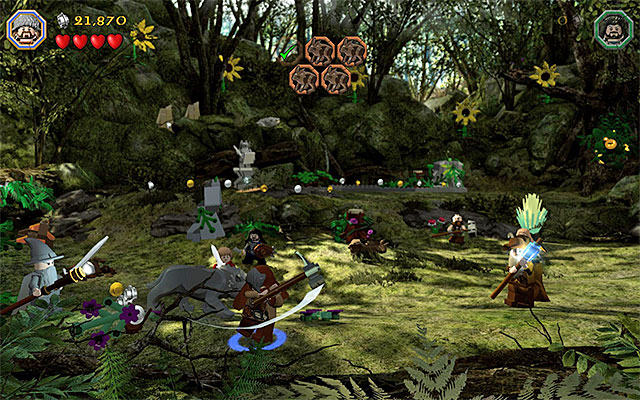 A single hit will drive a warg away
While playing the scene in the Big Green Forest, you can control any of the characters, for the majority of the time. Your current mission is to save the rabbits and you will be obstructed, from performing this mission, by wargs. Attack the wargs only when they are posing a threat to the character that you are controlling and, each time, land only one blow, which will drive the animal away (you cannot defeat them). Apart from that, it is worth adding that in the left part of the meadow, there is a Save Statue, and it is a good idea to use it, still at the beginning of the fight.
You can reach the individual rabbits in any order> I recommend that you start with the one shown in the above screenshot. It is close to the starting point and you need to destroy a heap of bricks, to find it. Start by switching to Radagast and make sure that you have selected his staff. Approach the rabbit and hold down the indicated key/button to save the animal (the rabbits will then go over to the right, where they are safe).
 The second rabbit
Another rabbit is lying down on the ground, in the middle of the mead, and you should have no problems finding it. Also in this case, it is required that you intervene as Radagast (use his staff).
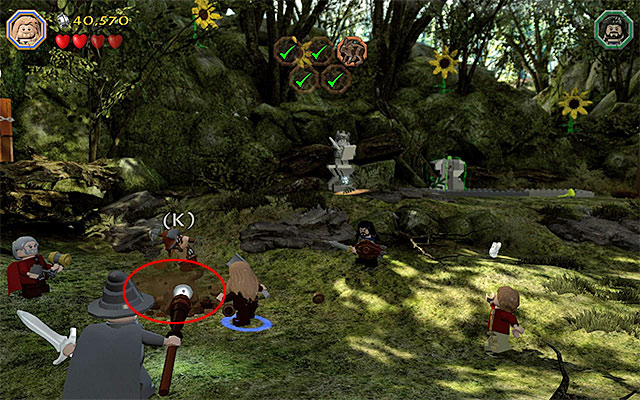 You need to dig out the third rabbit, from under the ground
The third rabbit is partially buried and you can find it on the left side of the glade/ Switch to Fili and use his shovel to dig the rabbit out. After you do, heal the rabbit, as Radagast.
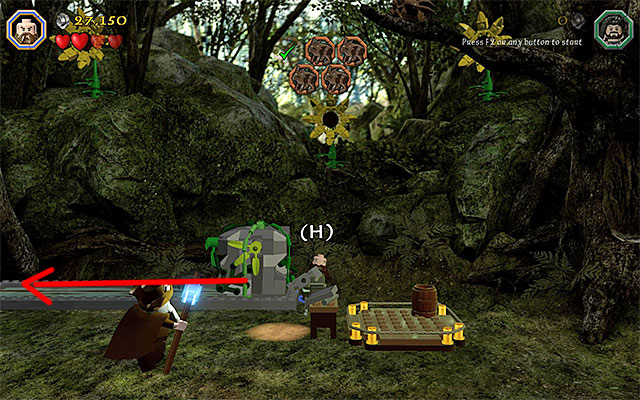
There are two more rabbits to save and it is going to be a bit more difficult to reach them. Switch to Dwalin and select his warhammer, as the active item. Explore the upper part of the glade and stop in the place shown in the above screenshot. Hit the big block, with the hammer, thanks to which it will move to the left. Jump onto the block and attack the warg that caught one of the rabbits. Catch up with the wolf and kill it. You can now approach, as Radagast, the rabbit on the ground and heal it.
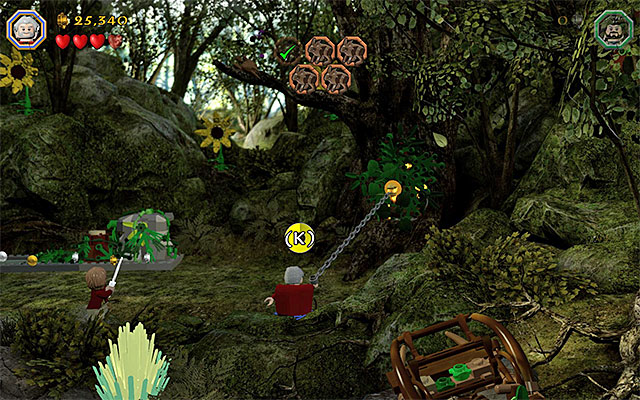
Finally, explore the right side of the mead, as Dori. Use the flail and target the catch shown in the above screenshot. Press the indicated key several times, to rip the catch off and start building, thanks to which you will build a Craft Plate. Interact with the plate and spend 10 Rope, 15 Wood and 8 Copper.
Note - if you do not have enough supplies, smash the objects in the area, In the case of copper, you may need to use Bofur's pickaxe on the heaps of harder bricks.
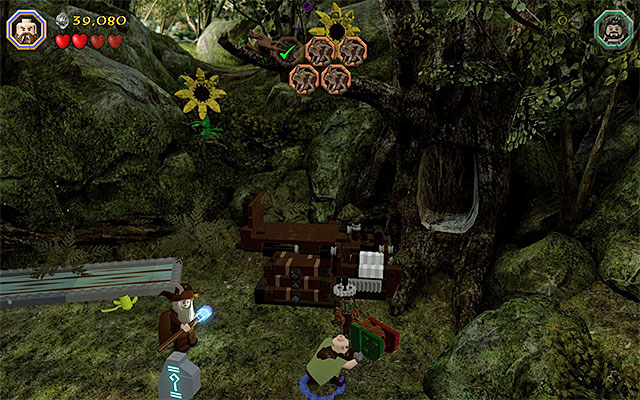 Use the rotary mechanism
After you spend the resources, you will start the building minigame and, as always, it is best to avoid making too many mistakes and taking too much time, while selecting the elements. Approach the rotary mechanism that you have built and start turning it, by pushing the green panel (move in the counterclockwise direction). Wait for the rabbit to be delivered to the ground, safely and heal it, after switching to Radagast. Saving all of the rabbits will end the second part of this stage.
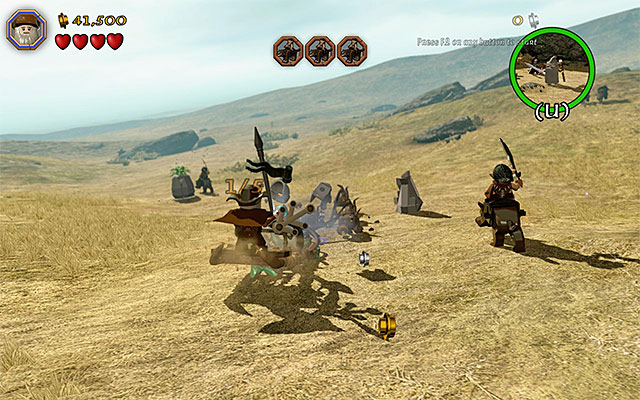 During the chase, keep an eye out for treasures
The third part of the stage is unique, because you can freely switch between Radagast and the remaining characters. I recommend that you take care of the chase scene in the first place, while playing as Radagast. At this point, it is worth noting that that you can interrupt it at any moment. and this is the recommended thing to do, when you, e.g. lose your health hearts (it is easy to replenish them by playing as the remaining characters). Apart from that, it is a good idea to keep an eye out for the object that can be smashed, during the chase, which takes place over a looping track (Radagast will not lose health, as a result of that). This way, you will obtain two minikits (you can leave obtaining them for later, of course).
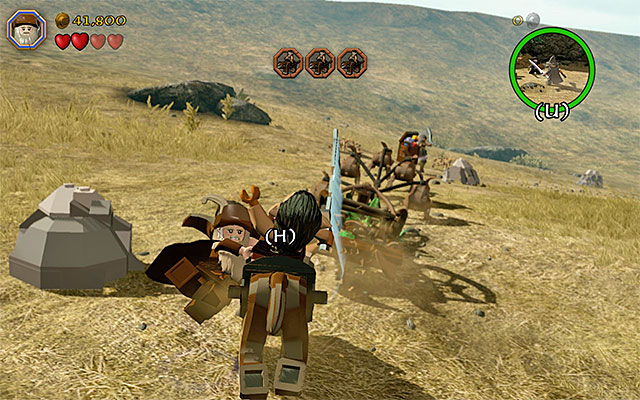 Tap rhythmically the indicated keys
The primary objective of the chasing scene is to get rid of the three orcs riding wargs. Each time, you will have to wait for the enemy rider to come close to Radagast and press the action key/button, to jump towards it. Then, start tapping, rhythmically, the indicated keys (they will be replaced with the other ones, occasionally!), thanks o which you will eliminate the orc, once and for all. As I have already pointed out, you can eliminate all three riders in one take, do that one-by-one o(by switching between the characters) or leave this task for later (at some point, the game will make you complete Radagast's scene).
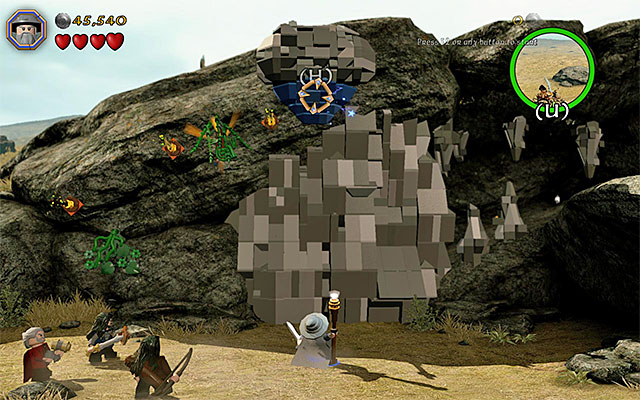 You need to aim the staff at the blue object above
In the case of the remaining allies (the characters that do not participate the chase) you can switch to any one. Start the exploration of the first area, smash the objects in the area and eliminate the single orcs. After you have explored the area sufficiently enough, stand at the big vertical wall and switch to Gandalf. Use Gandalf's Staff to destroy the big element right above him (you need to aim at it manually). Then, switch to any of the dwarves and use the Dwarf Axe to cut through the cracked plate below.
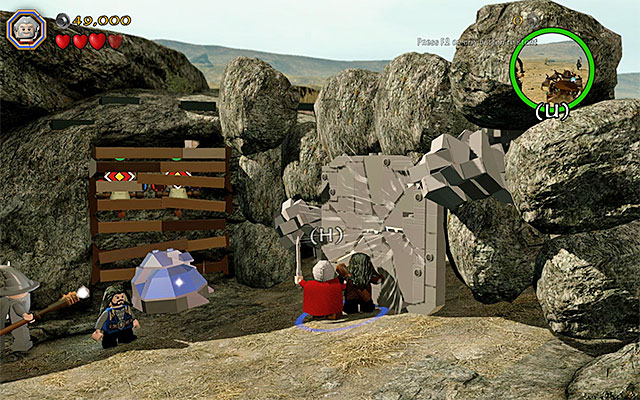 To destroy the wall, you need to cooperate
The wall should collapse so, take the passage that was revealed and go right. Stop after you reach the seemingly indestructible wall on the right. You need to Buddy-Up here, to combine the efforts of two characters. Approach the wall on the right, with the combined characters and press the attack key/button to clear the way.
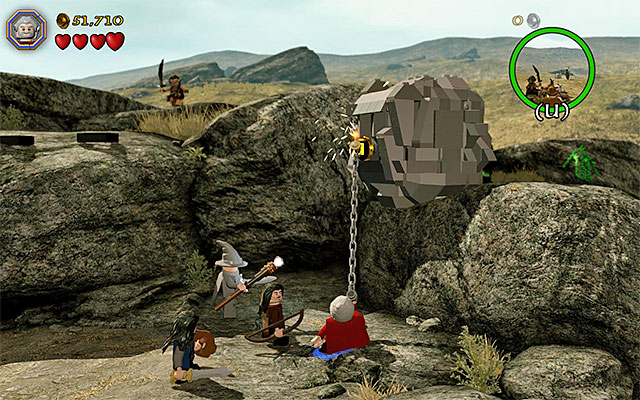 You need to build a catch and grab onto it
Proceed to the right and be prepared to kill several regular orcs. Switch to Kili and use Kili's Bow, to hit the two targets at the big rock. Use the bricks that fell to the ground to construct an interactive catch. You now need to switch to Dori and use his flail you reach the golden catch. Press the indicated key/button several times and wait for the large boulder to fall to the ground. You can jump onto it and go right. Jump down here.
Note - if you still have not completed the Radagast's chase scene, you should take care of that now, because you will not be able to finish the last battle of this stage, then.
 You can mount the warg and eliminate the orcs this way
Start by clearing the area, in order to obtain studs and resources. In this location, apart from the standard monsters, you will also be attacked by orcs on wargs. It is them that you should deal with, in the first place. An important piece of information is that you can, after you dismount an orc, mount the warg yourself, which will facilitate the process of eliminating orcs.
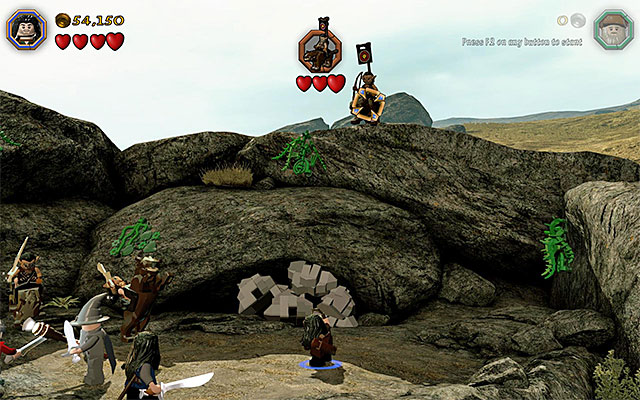
If you have completed Radagast's chase scene, then there will soon appear the orc leader, above the field, and he is a mini-boss. In free time, between attacking the rest of the monsters, switch to Kili and use his bow to deal damage to the boss (an example in the above screenshot). Ultimately, you need to deprive the orc leader of all of his three hearts, which will end this stage in success.
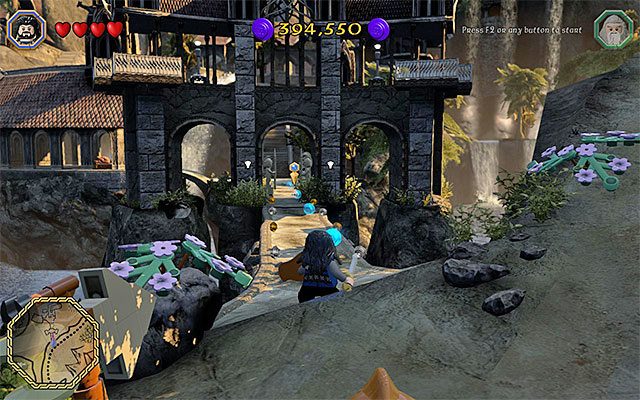 Rivendell
After you get back to the world map, you will be close to Rivendell (it is located to the North of the starting point) so, reaching the famous Elven city should not take too much time.
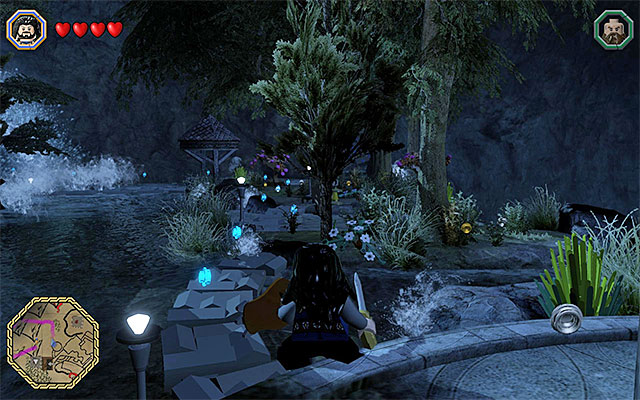 The path towards the altar
After you have reached your destination, watch the cutscene of the meeting with Elrond. You now need to go towards the place, where there is the altar, which means that you need to cross the main part of Rivendell. As always, follow the trail of blue studs and the one on the map and you will not get lost. Walk through the waterfall and the cave. Finally, take the stairs to the altar and watch yet another cutscene. Finally, you will lead a group of dwarves. Go eastwards and you will reach, after several moments, the starting point for the sixth stage of the game.
Note - just like in the previous stage, the characters will be divided into two teams. Further in this walkthrough, the group where there is Thorin, among others, will be called group 1 It starts on the upper path). The one where there is Bilbo, will be called group 2 (it starts on the bottom path).
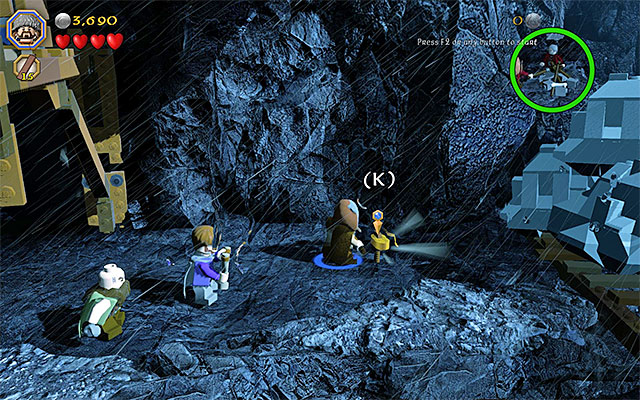 The knob that you are looking for
First, switch to one of the characters in group 1 and destroy all of the objects in the area. Now, select the axe from the inventory of any dwarf and use it to cut through the cracked plate on the right. Go right and, after you have smashed the objects there, locate the interactive knob, which you are going to need in several moments.
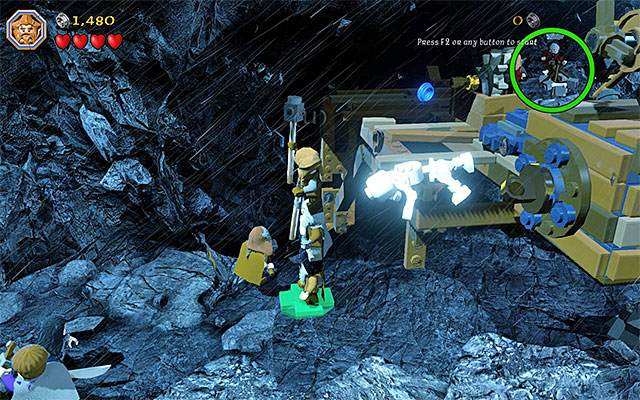
Approach the big structure. You are going to need to form a "tower" , with the main characters so, select those of the characters that use long weapons, e.g. Nori. with his Mace or Oin with his staff. You need to form the tower consisting of three dwarves (the above screenshot)
Note - if you find it difficult to select the suiting characters, simply press the character swap button (skips the drop-down) menu and the game will automatically switch to the right character.
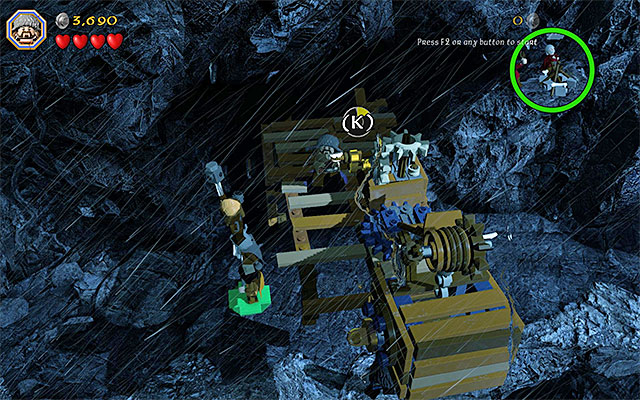 The place where you use the knob
Select any other character from group 1 and pick up the knob that you found earlier. Start climbing, as that character, over the ones that formed the tower. After you reach the top of the structure, put the knob into the slot and interact with it. This will result in the lowering of a chest, at which point you can switch to group 2.
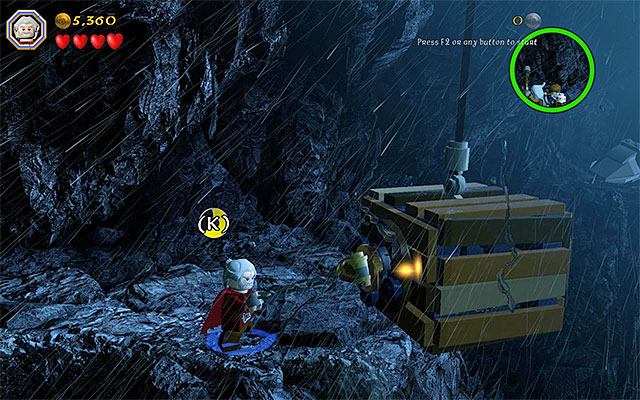 The interactive catch
Just like in the case of group 1, start by smashing the interactive objects in the area. Switch to Dori, select his flail and go right. You need to reach the golden catch on one of the walls, of the chest that you lowered earlier. Then, press the indicated key/button.
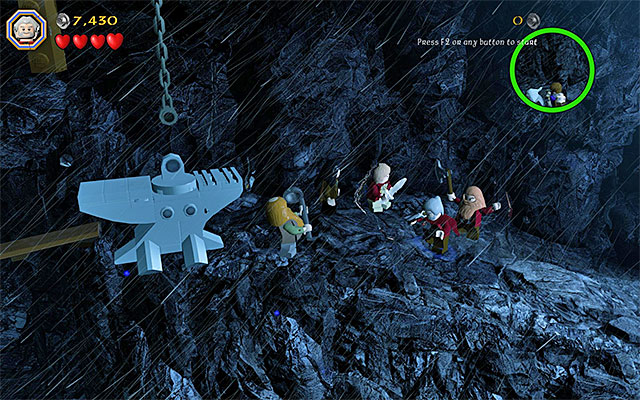 You need to build a bridge, and an anchor, a bit ahead
After you have performed that activity, stand next to the destroyed chest and hold down the appropriate key, thanks to which you will build a narrow bridge. Walk over the bridge, carefully, and go right. Stop in the area with more interactive objects. You need to smash them and hold down the building key/button again. Wait until the large anchor is constructed. Since it will unlock further part of the path above, you need to return to group 1.
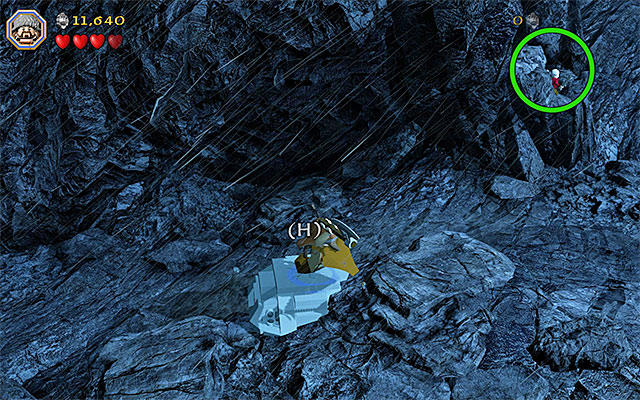
Go right. Soon, you will have to avoid the falling stones. It is a good idea to walk away from the spots, where the stones fall on a regular basis although, even if you are hit, the character loses only one health heart. Remember to smash the interactive objects around. At some point, on the upper path, you will be allowed to build another object, out of the elements that you smashed. After you do that, switch to a dwarf with the axe and stand on the cracked plate shown in the above screenshot. You need to bounce off the ground and smash the plate, right after you jump (two different key/buttons). You can now return to group 2.
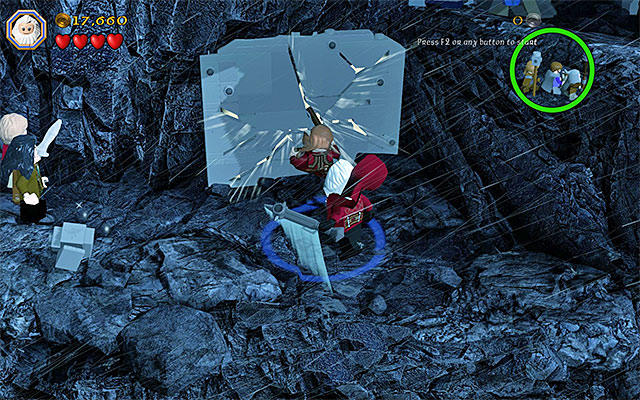 The place where you smash the cracked wall
Switch to any character in group 2 and go right. The most recent action of a member of group 1 unlocked a small ledge, which you can jump onto, along your way to the next area. Stop only after you reach a big, cracked wall. You need to Buddy-Up here so, join forces of any two characters and make them smash the wall. Note that you can now jump onto the blue chest and jump towards the ledge above.
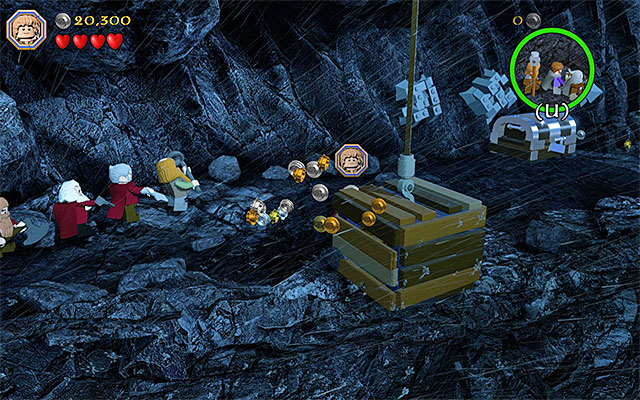 Build a crate that will be attached to the rest of the structure
Keep moving to the right and stop only after you reach the area with the metal rope, with catch, hanging down. You need to hold down the building key/button to build a crate that will be, automatically, attached to the rest of the hanging structure. This is it, when it comes to group 2. You can now return to group 1.
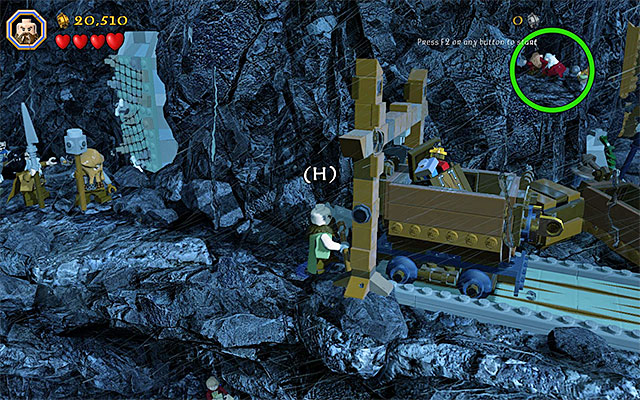
Switch to Dwalin and go right. Along your way, you can destroy the objects in the area and, this is going to be easier now, due to the fact that you do not need to fear the falling rocks. Stop after you reach the cart shown in the above screenshot. You need to use Dwalin's Warhammer to unlock further passage.
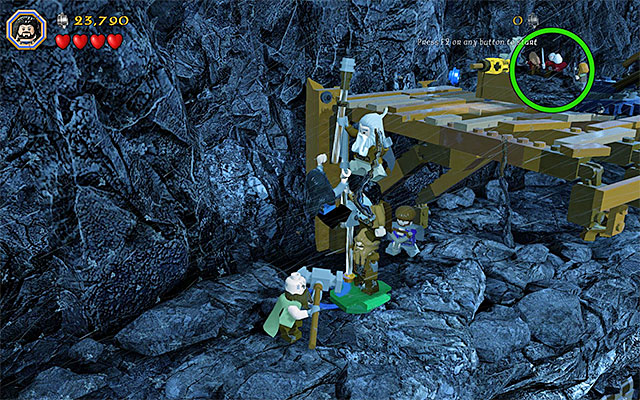 Climb over the allies and use the knob
Smash all of the objects here and go towards the bigger structure. You need to repeat here the action from the beginning of this stage. Start to select the characters with long weapons, arrange them standing one on top of the other and form, this way, a tower. Form a tower of three characters, switch to the fourth one (any of the characters) and start climbing onto the tower. After you get to the very top, interact with the knob, in order to raise the crate built by group 2.
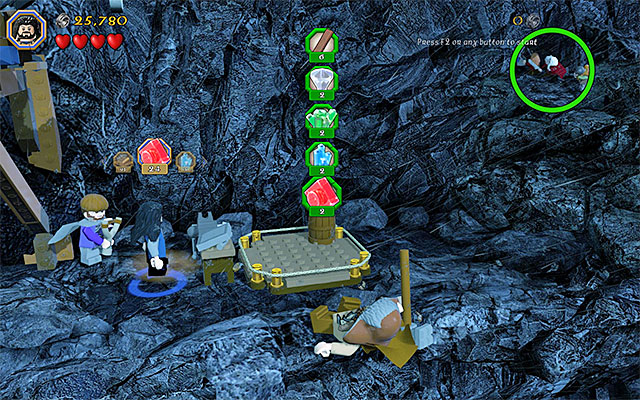 Spend the resources that you have gathered (if you do not have them, smash some of the objects in the area)
After the crate smashes, jump down and start building (hold down the appropriate key/button)/ The result will be a Craft Plate. Interact with the plate and start spending the supplies - you need to spend 6 Wood, 2 Diamond, 2 Emerald, 2 Sapphire and 2 Ruby. Finally, take part in the minigame, quickly and correctly find the objects highlighted in the schematics. after you have built a lightning rod, go right. After a while, the second part of this stage will start.
Note - if you do not have the stones that you need to build with, select a dwarf with a pickaxe and start smashing the heaps of the harder bricks.
 The area at which you need to aim
You are now going to play an unique scene, whose aim is to reach the head of the stone giant. Fortunately, you do not need to hurry here so, it is a good idea to move slowly to avoid falling down. Start by interacting with the Save Statue and saving the game. Jump over to the ledge on the right and climb onto the upper platform. Smash the objects here and pick up the single item from the ledge. You need to throw it towards the plants on the left.
 Grab onto the ledge and climb the ladder
Jump down onto the ledge below and hold down the building key/button. You can now grab on to the ledge that you have built. Jump towards the ladder and climb up. Take the stairs and watch the cutscene of the battle of stone giants. You do not need to bother with the result of the fight, because they will not put your characters to threat.
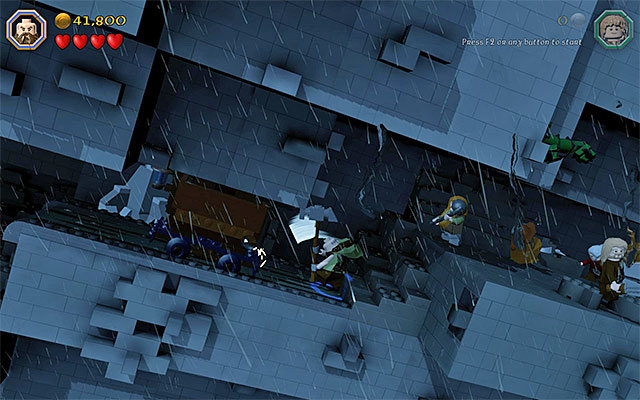 Use the warhammer to push the cart
After you regain control over the dwarves, go left and select the axe from the inventory of any of the characters. Use the axe to smash the cracked plate and clear the way. Go left. Stop after you reach the cart, switch to Dwalin and use his warhammer to push the obstacle. You can now go ahead. After several moment you will reach a cracked wall so, use the dwarven axe.
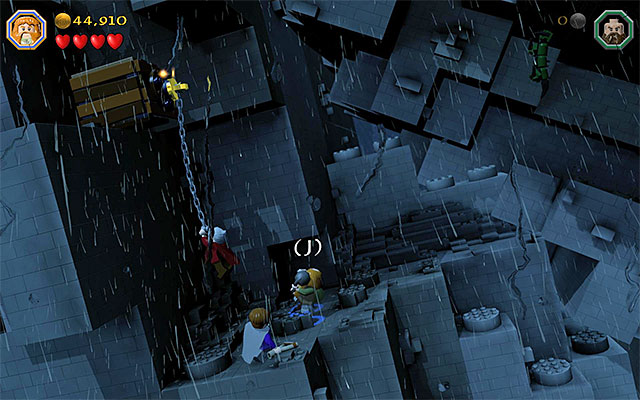 After Dori reaches the catch, you need to leap towards him, as any character
Watch a cutscene of the giants battling and be on your way. After you reach a larger ledge, switch to Dori and use his flail to reach the golden catch above. Wait for Dori to hang on the chain, switch to any other character and leap towards Dori. As a result, you will throw the crate on the ledge above. Stand at the crate and hold down the building key/button, thanks to which you will construct a ladder.
Before you use the ladder, smash the objects in the area, which will allow you to locate the second object that can be thrown. Pick it up and go towards the ladder on the left. After you reach the ledge above, throw the item towards the flowers (the above screenshot). Just like before, you need to stand in the correct spot and hold down the correct key, thanks to which, after the seconds that you spend building, there will appear an interactive ledge, above your character.
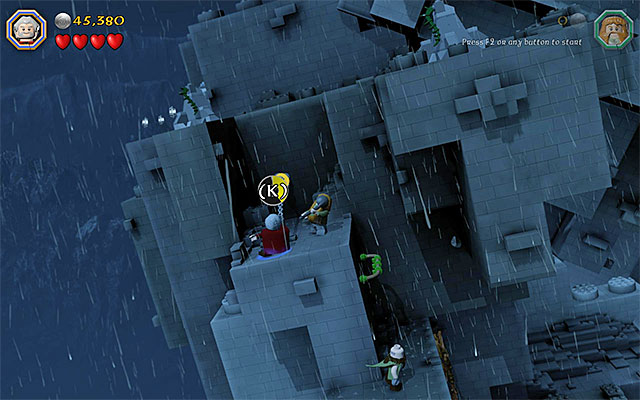 The spot where you need to pull the stone block
Grab onto the ledge that you have built and reach the platform above. Here, you need to use Dori's flail again and pull out the stone block. Jump onto the block and then, on the ledge above. Go right and watch another cutscene of the Giants' battle. After it ends, start an easy walk to the right. The game will soon start a cutscene with the giants starring.
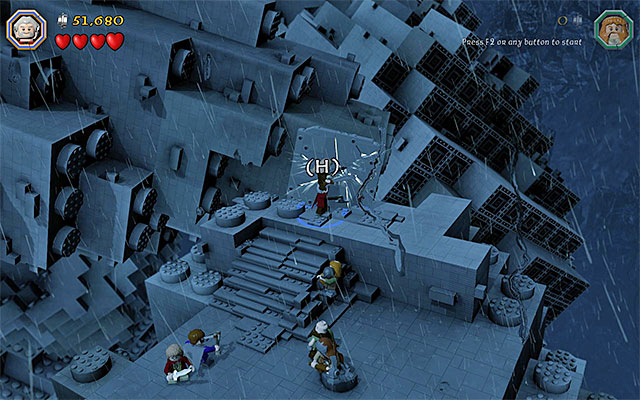 You need to join two characters in cooperation, in order to destroy the plate
You now need to Buddy-Up so, take any two characters. Approach the cracked plate (it is attached to one of the giant's limbs) and smash it. You will now watch a longer cutscene. Finally, you need to save Bilbo and Thorin from falling down into the chasm and, in both cases, you need to tap, rhythmically the indicated key/button.
Resume along the narrow mountainous path. After you approach one of the smashed stone giants, switch to the character with a staff, or any other long weapon, e.g. Oin. Stand, with that character, in the spot shown in the above screenshot. Switch now to and other character, climb onto the character that you put there and reach the ledge above.
 You need to stand on the plate and Buddy-Up
Start climbing here and jump towards the successive ledges, while moving up. In just a moment, you will have to Buddy-Up so, combine any two characters. Stand, with these characters, on the cracked plate and press the action key/button thanks to which the plate will be smashed. wait for the big fragment of the giant to detach from the rest and falls into the void. Continue along the mountainous path. IT will lead you o a cave, where the next main stage of the game starts.
 The fence with a passage behind it
At the beginning of this stage the playable characters are Bilbo and the confused goblin. Switch to any character and start smashing the objects in the area, including the barricade between you and the next part of the cave. After you get there, explore the area on the left and smash the small fence. You can now switch to Bilbo and walk through the passage here.
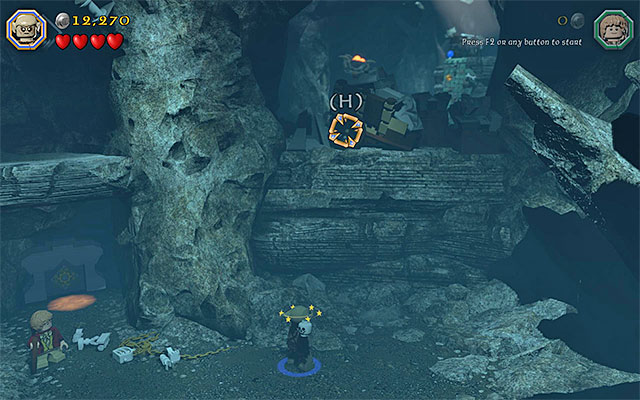 You need to throw the skull at the barricade
The passage will take you to the upper balcony. Walk over to the right here and use the stick, or the sword from the hobbit's inventory, to release the skeleton hanging on the chain. You can now return to the lower level and pick up the skull. You now need to go right, enter the aiming mode and throw the skull at the barricade above. Wait for the barricade to fall apart and approach the elements scattered around the place. Hold down the building key/button. For your efforts, you will be rewarded with three small platforms, which you can use to reach the ledge above and continue the exploration of the cave.
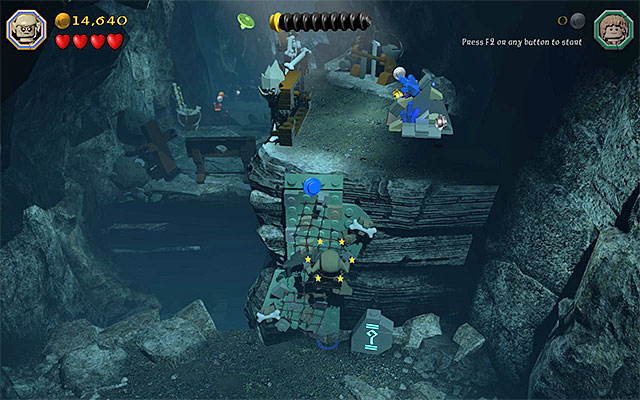
Switch to the confused goblin and use the fact that goblins can climb over the select walls. In this particular case, you need to climb the wall shown in the above screenshot. Go a bit ahead, jump down and stop. Smash the barricade right next to the chasm and start building again. The purpose of this action is to build a bridge for Bilbo to walk over . You can now go ahead.
 Throw down the crate and build the Craft Plate
Stop after you reach another big cave and start smashing the objects located on the right. One of them is a skeleton, thanks to which you will obtain another skull. Also in this case, you need to throw the skull and you need to aim it at the crate hanging on the left. After the crate falls to the ground and falls apart, start building again. You will build a Craft Plate. Interact with the plate and spend some of the supplies. What is required is 10 Rope, 15 Wood and 10 Iron.
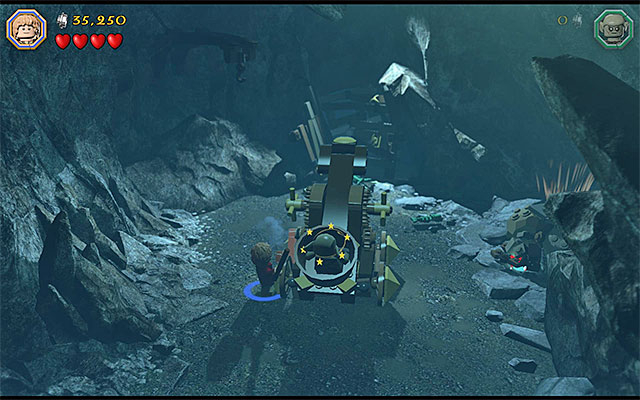
As for the supplied named above, you could find all of them during the exploration of the cave, assuming that you have been destroying the objects meticulously. Wait for the minigame to start and try to handle it as well as possible. Approach the catapult and jump into it, as one of the characters. Switch to the other one, now, stand in the spot shown in the above screenshot and perform a regular attack, to activate the catapult. You can now enter the newly-unlocked cave, where you will meet the Gollum.
 The solution to the first puzzle
You will have to solve Gollum's three puzzles and all of them are very simple. They assume that you manipulate the objects in the area. The first one of the puzzles is the least time-consuming. Destroy the objects on the right (right next to the rock behind Gollum) and some of them will become interactive. You need to hold down the building key/button thanks to which you will build the mountain that Gollum referred to in his puzzle. .
 You need to climb onto the balcony above
Remain in the spot, where you have just erected the mountain. Also this time, you need to hold down the appropriate button, thanks to which you will build the climbing place for the confused goblin. Switch to goblin and reach the balcony above. Destroy the objects here and return to the lower level.
 The solution to the second puzzle
Start by building the main mechanism, by holding down the appropriate key/button. Pick up the knob from the ground and put it in the slot. Start turning it than (press several times the appropriate button). Building a functioning fan is the solution to Gollum's second puzzle.
 Throw down the crate and build a manhole for Bilbo
Explore the area around the fan that you have just built and find the interactive item, which you can pick up. Go left and throw the object at the crate suspended from above. wait for the crate to fall down and smash. Hold the building key/button here, thanks to which you will unblock the manhole. Switch to Bilbo and walk through the manhole. After you get to the higher level, smash the elements in that area and build a ladder. Thanks to this, the confused goblin will be able to reach the ledge above.
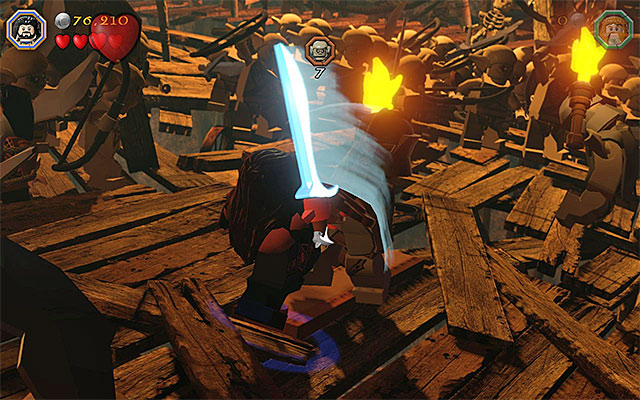
The next thing to do is grab the two chains shown in the above screenshot (each of the characters need to grab one chain). Wait for the huge structure to collapse, approach it and hold down the building key/button in order to build the Craft Plate. You now need to spend your supplies (all of them can be found in the vicinity) - 10 Stone, 5 Rope, 10 Wood and 5 Copper. Finally, complete the building minigame. After you build a huge sandglass, the third of Gollum's puzzles will be completed.
You need to eliminate then goblinsYou will fight the first part of the battle with the boss in a small arena but, you will not have too many problems with that. Unlike in the case of the battle with Azog the Defiler, you do not need to worry about stepping outside of the delimited area, because you will then be pushed back into the arena, without losing any health hearts. First of all, you need to defeat ten smaller goblins. While fighting, remember to collect the hearts dropped by the monsters that you defeat, and to tap, rhythmically, the attack key/button in situations, in which the game focuses on the fighting characters (this, usually, occurs in the case of the armored goblins).
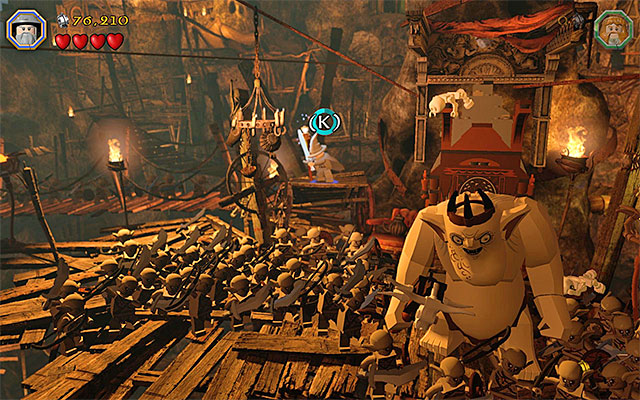 Hold down the key for Gandalf's special attack
After you have eliminated ten "regular" goblins, wait for Gandalf to appear near the arena and switch to him. Hold down the special attack key/button. This will lead to another cutscene and to the battle proper with the Grand Goblin, which you are going to fight in a larger arena.
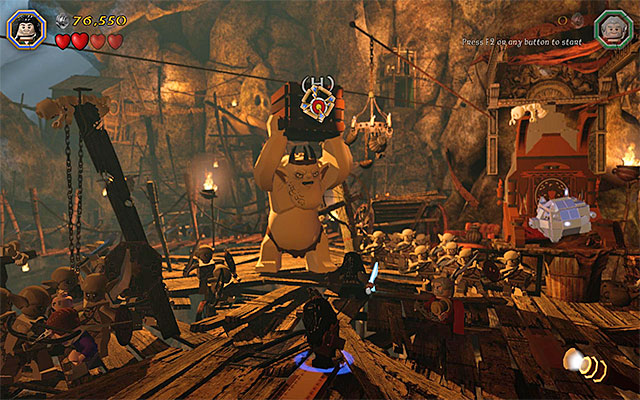
Start attacking the smaller goblins, but pay attention to the actions of the Grand Goblin. Once you notice that the boss picked up a big crate, switch to Kili and use his bow to hit the target with the arrow (the above screenshot). If performed correctly, this will stun the Grand Goblin.
Note- if you fail to use the bow on time, the boss will throw the crate at the characters (the risk of losing health hearts), which will, unnecessarily, extend the battle.
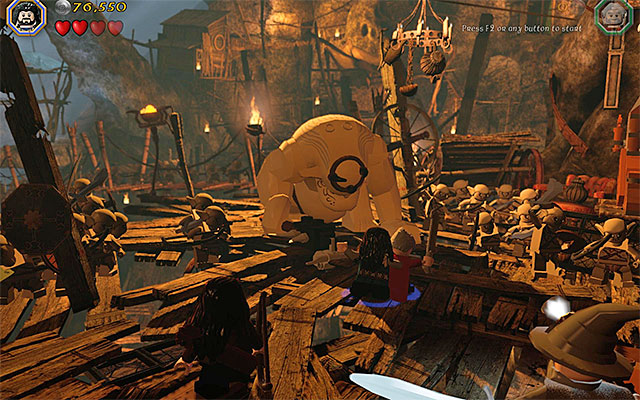 Buddy-Up will allow you to wound the stunned boss
After you have stunned the boss, it is time for you to Buddy-Up, i.e. to pair two characters and attack the Grand Goblin in cooperation. Also in this case, you cannot wait for too long with the cooperation attack, because the boss may return to full health.
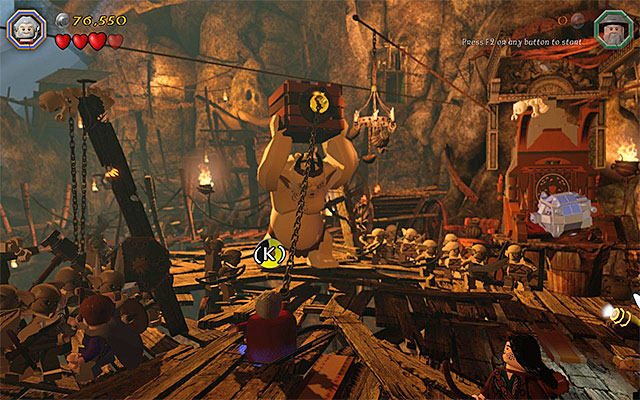 You need to use the flail on the crate's catch
Continue attacking the regular goblins and, just like earlier, wait for the moment, in which the Grand Goblin picks up a crate. This time, switch to Dori and attach the flail to the crate's catch. Press the indicated key/button for several times, which will stun the boss. The following part is the same as previously - Buddy-Up (team action) and wound the Grand Goblin.
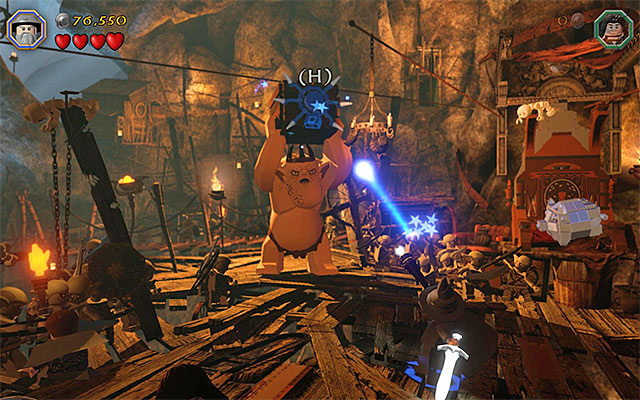 Switch to Gandalf and fire the magic missile at the crate
You are now close to winning this battle. Attack the regular goblins until the moment, in which the Grand Goblin picks up another crate. Switch to Gandalf and fire the magic projectile at the blue point, on one of the crate's walls. Again, pair any two characters in Buddy-Up and perform a team action on the stunned boss. Thanks to this, you will achieve victory, although this is not the last time that you encounter the Grand Goblin.
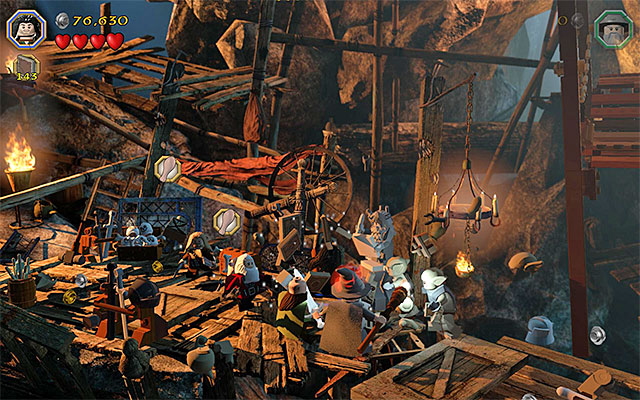 The goblins will be obstructing your escape, on a regular basis
During your escape from the goblin city, you will be following several characters, but the game itself will decide which one is going to be in the center of events, at any given moment. Start by using the Save Statue and go right. Along your path, you need to remember that you r party will be attacked constantly by the weaker goblins. It is a good idea to eliminate them, because they will, nearly always, focus their attention on your character.
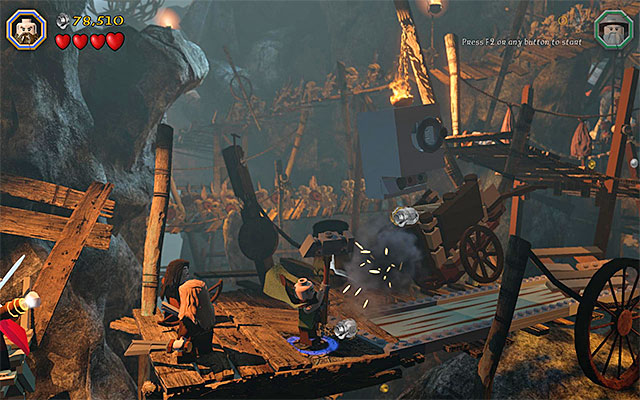 Use the warhammer on the obstacle
Jump down to the ledge below and take two jumps towards the ledges there (try not to fall down, into the void, here, because you will then, unnecessarily, lose some of your studs). Stop at the cart standing in the way, switch to Dwalin and use his warhammer to push the cart. Jump onto the cart and walk over the drawbridge (watch out for a bigger group of goblins that may jump you here).
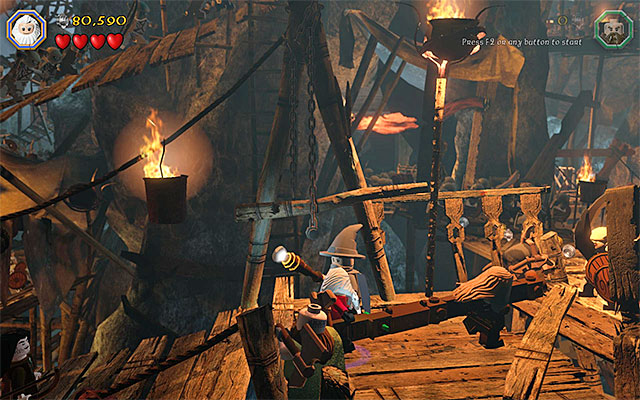 You need to use the beam to clear the area of goblins
Stop in the spot where you run into a group of goblins in your way. Switch to Gandalf here and fire the magic projectile at the blue wooden element. Switch to any dwarf and pick up the front side of the beam. Switch to another dwarf now and pick up the other end. Rush towards the goblins, which will clear the path for you. Walk over to the right and stop at the interactive mechanism. Interact with the knob and walk over the bridge that unlocks.
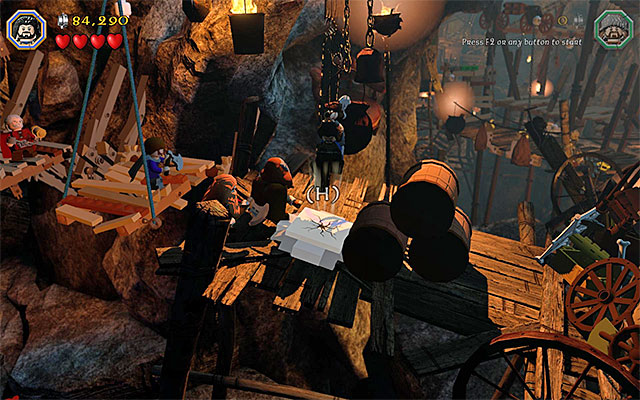
The game will soon start following another group. Also in this case, you need to go right and eliminate the waves of the standard goblins, on a regular basis. Stop in the area with three targets. You need to solve a simple puzzle here, which consists in using Ori's Slingshot. The plan is that the colors next to each of the targets need to correspond to the colors of the ropes that suspend the wooden ledges (each hit into the target changes its color and you often need to repeat that step). The solution to this puzzle has been presented in the above screenshot - above the target on the left, there needs to be a green circle, a red one above the middle target and above the one on the right - blue one.
Smash the cracked plateIf you have done everything according to the plan, then all three of the platforms will go up and you will be able to cross, over them, to the other side (be accurate while jumping over the platforms!). After you reach a stable ledge, switch to any dwarf and select the axe. Jump over the cracked plate and press the attack key/button to slam against it, with great power. Go right, i.e. in the direction that the barrels rolled.
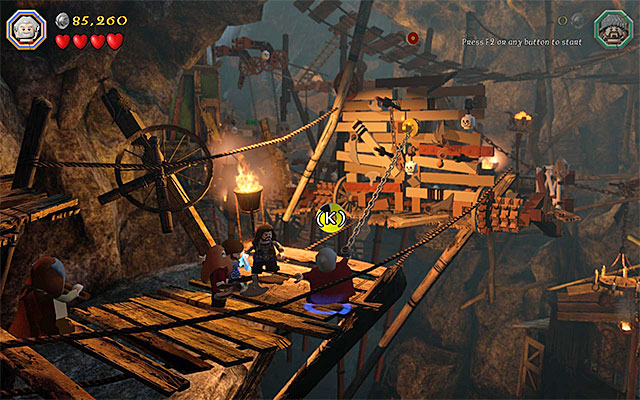 Reach the catch and lower the bridge
Goblins will soon attempt to make things more difficult for you and will raise the drawbridge. Switch to Dori and use his flail to reach the interactive catch. You need to press the indicated key/button several times, which will lower the bridge.
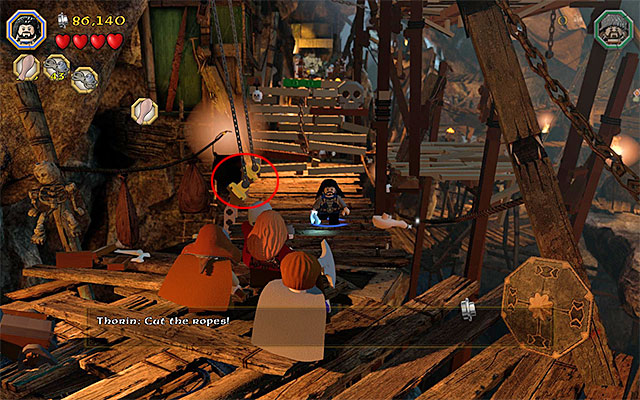
Walk over the lowered drawbridge and deal with the goblins. Turn your attention to the two ropes on the left (the above screenshot). Use any weapon on these ropes, to cut them. You now need to pick up the big ladder, with any two characters - pick up one end of the ladder first. Then, switch to another character and pick up the other end of the ladder. carry the ladder over towards the background and put it up. Climb the ladder and, after you reach the top balcony, use the axe to smash the cracked plate.
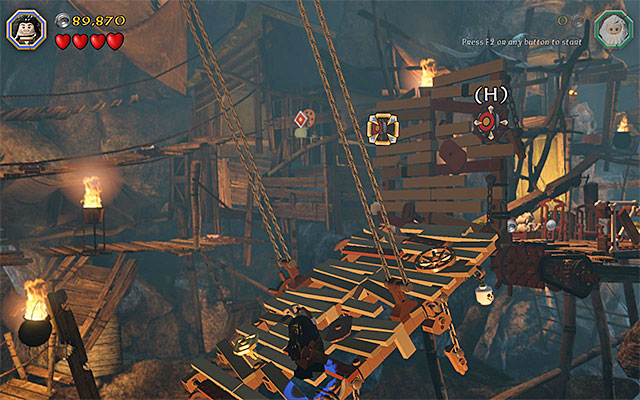 Aim the arrows at the targets
Wait for the camera to cut to the other group of characters. Go right and stop where you can pick up a torch. Approach, with the torch, the rotary mechanism and set it on fire. Wait for the ropes to burn up, which will set the platform here into motion. Switch to Kili, wait for the platform to approach your character and jump over to it. Now, you need to use the bow against the two targets on the right. If you hit both of the targets with arrows, this will destroy the barricade on the right so, you can jump over to the ledge. Eliminate the goblins and go right. Build a mechanism here and find the interactive knob to the left of it, which you need to pick up. Put the knob into the appropriate slow and start turning it. This will result in raising a bridge, which you need to walk over.
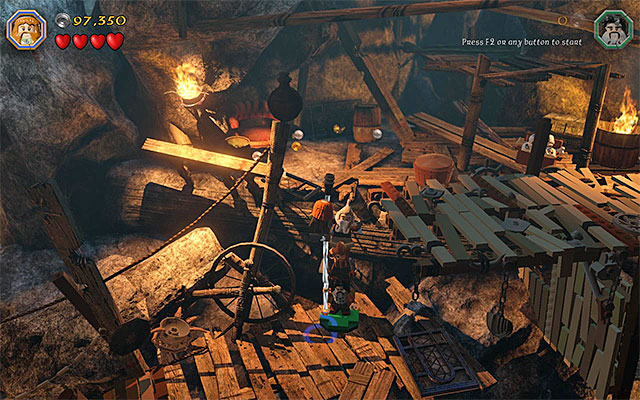 Dorm a dwarf tower
In a moment, the game will again cut to the other group and currently, it is made up of four dwarves. Go right and be prepared to eliminate a bit bigger group of goblins. After you reach the seemingly inaccessible ledge, you need to form a tower of three dwarves (select the ones that have long weapons). After you make the tower, switch to Bombur and climb over the allies. Try to walk over, as Bombur, to the right, as a result of which he will captured by goblins. Try to wrestle with the monsters (tap rhythmically the action key/button), thanks to which you will land on a balcony below.
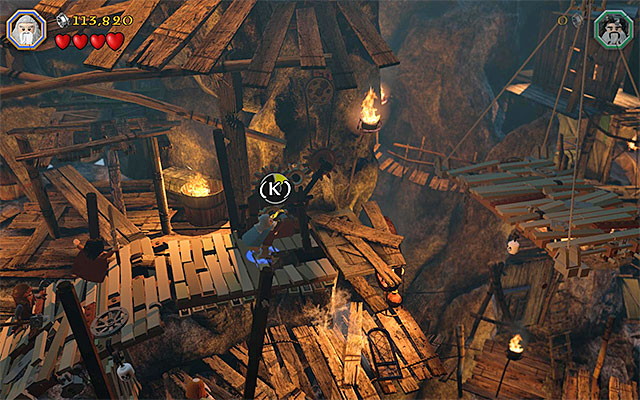 The rotary mechanism is a result of a successful building minigame
Smash the objects in the area and turn your attention to the barrels, because smashing them will lower the platform and unlock passage for the rest of the dwarves. Switch to any of these and approach the Craft Plate. Start by spending some of the supplies - you need 5 Stone, 10 Rope and 20 Wood. Additionally, you need to complete the building minigame, at which need to do as well as possible. Completing the minigame will result in building the rotary mechanism, which you need to use straight away (it will unlock passage for Bombur). Go right, eliminate goblins and reach the place where you cut to the other group.
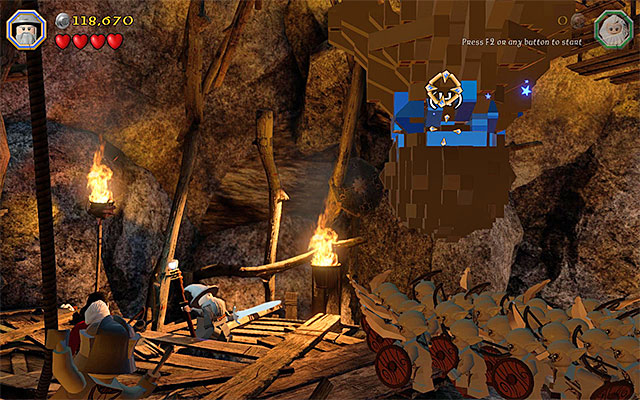 Drop down the boulder and set it into motion
Continue to the right, eliminate the goblins and stop only after you approach a larger group of these. Switch to Gandalf and aim at the blue fragment of the ceiling, above the goblins. Firing the magic projectile will unlock access to another cracked plate. Approach the plate, as one of the dwarves, jump and smash it. For doing that, you will be rewarded with rolling the big boulder at the group of goblins. Go right and reach the area where you fight the second battle with the Grand Goblin.
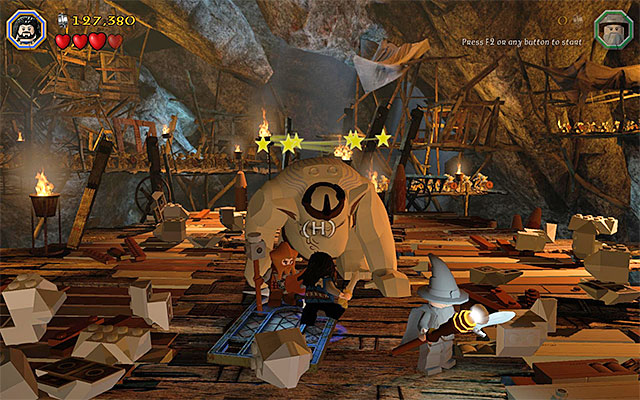 Run around the arena and keep a safe distance from the boss
The second battle with the Grand Goblin differs, in some aspects, from the previous one. The Grand Goblin will move around the arena, first of all. You need to avoid his attacks with the huge club so, run around the arena, as any of the characters, and jump wherever necessary. Occasionally, there will appear weaker goblins in the arena - attack them only when they pose a direct threat to your character.
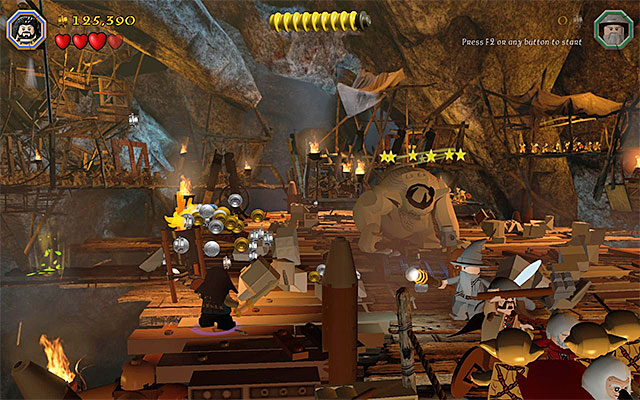 The stunned boss
Do not attempt to attack the boss, while attempting to avoid his attacks. You need to avoid any direct confrontations, up until the moment in which the Goblin slams against the ground with greater power, as a result of which a chunk of the ceiling falls onto its head. This will stun it temporarily.
The next step should be obvious to you. You need to Buddy-Up, i.e. to pair any two playable characters and perform a team attack, against the boss (the above screenshot).
The rest of the battle with the Goblin is identical. Avoid its attacks and wait for it to stun itself. Only after that, deal damage while working in team. All told, you need to attack three times, in this way.
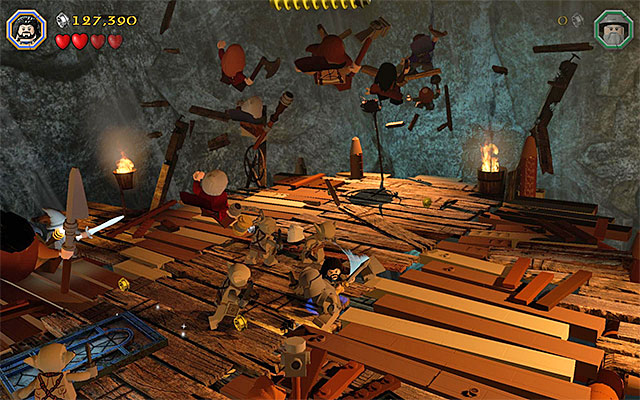 Attack the goblins and avoid stepping on the lest stable elements of the platform
Finally, you are going to take part in an eventful scene connected with the large falling platform. Keep eliminating the goblins and try to remain on the part of the platform which is made up of more resilient boards, because its remaining elements (the light- and dark-brown wide planks) will fall off gradually. After several moments, this stage will end.
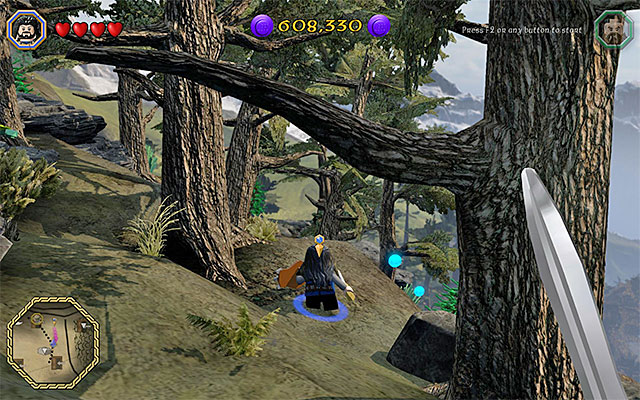 Walk through the forest to the starting point for the next stage
After you regain control over your party, go Eastwards. Follow the trail of the blue studs, which is additionally shown on the map. Quite unusually, reaching the destination will not take long. During the march across the wood, you will watch a cutscene of the orc attack that are commended by Azog the Defiler. It is the appearance of the orcs that is the central theme of the next stage of the game.
 Do not worry if you do not collect the minikit, because you can return here in the free play mode.
This stage starts with an escape and it resembles the scene with the dragon, at the very beginning of the game. You need to keep running towards the bottom of the screen and strafe to the left, or right, occasionally. The purpose of this is to obtain the studs, although there also will appear an opportunity to obtain a minikit. After you reach a slightly bigger location, you will gain control over the party. It is worth noting here that you can find a Save Statue here, but it is not necessary to use it.
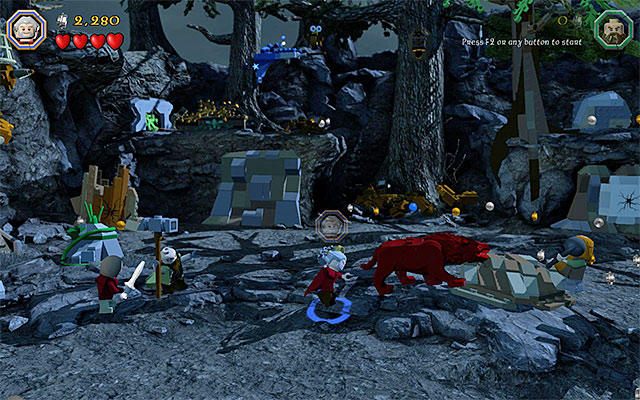 Land standard attacks at the wolves and avoid being bitten
In the first part of the forest, you need to keep in mind that you will be attacked, on a regular basis, by wargs appearing in this area. Remember that you always should drive the wolves away, which will prevent you from losing your health hearts. Do not attempt to finish off the wargs, because it is impossible, as a matter of fact, to eliminate them. While you are here, start smashing the objects in the area, especially that there is a lot of them here.
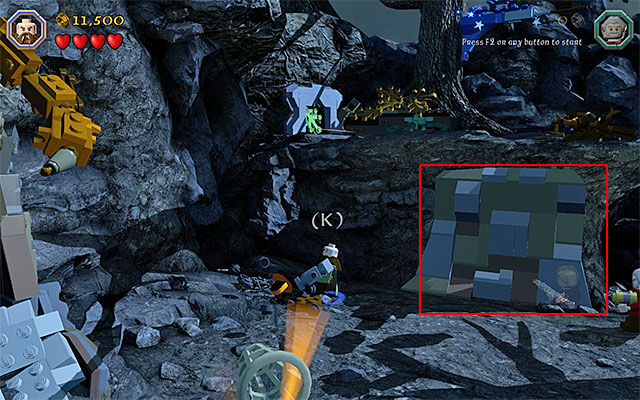
Turn your interest to the heap of blocks shown in the above screenshot. Destroy the objects to the left of it and hold down the building key/button thanks to which, there will appear an interactive catch here. Switch to Dori and use his flail on the catch. Doing this will rip off a fragment of the wall, and unlock the manhole, which you should enter (you should be playing as Dori for the whole time).
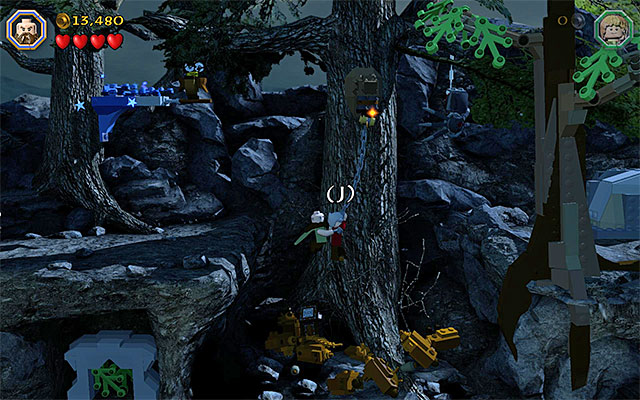 You need to leap towards Dori swinging on the chain
After you reach the balcony above, start by smashing the objects in the area. Approach the right side of the ledge and use Dori's flail again, this time on the interactive catch on the tree. This will allow Dori to start swinging on the chain. Switch to Dwalin. Stand on the ledge above and wait for Dori to get close enough for you o jump towards him. After you grab Dori, wait until you swing over to the ledge on the right and jump towards it. Approach the big block here and push it with Dwalin's Warhammer.
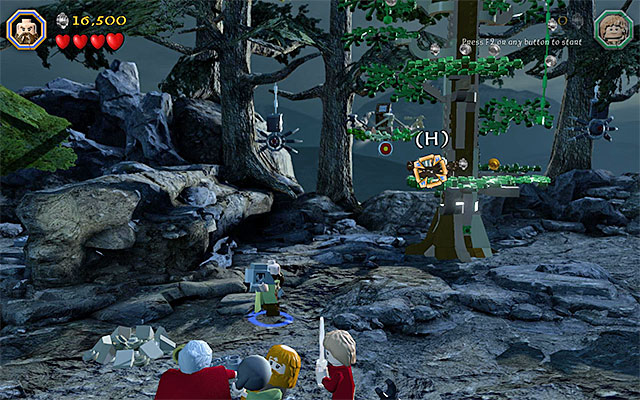 The area where you need to throw the object
Jump onto the block and then, towards the ledge above (watch out for a surprise attack of one of the wargs!). Jump down and clear the glade with the several big trees. Exploration of the left side of the glade will result in finding the object that you can take with you. Pick it up and throw it at the tree on the left. You can now approach the tree and hold down the indicated key/button to build an interactive ledge.
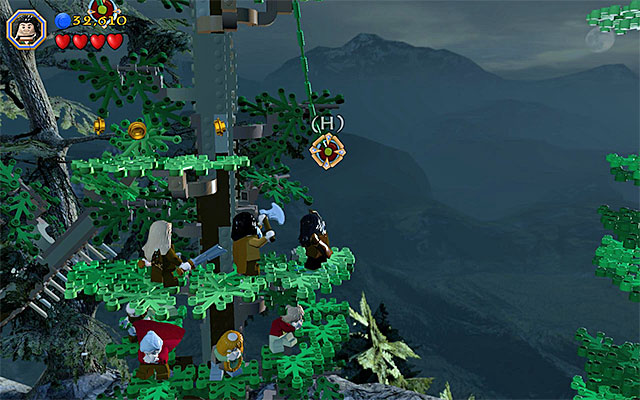 Use Kili's bow
Grab the ledge and climb onto it. Then, climb on. You need to grab on to ropes and move higher and higher. After you reach the top, you will watch a short cutscene of the fall of a big tree. wait until you regain control over new characters, switch to Kili and use his bow to hit the nearby target. Grab on to the rope and get over to the left. Use the bow again.
 Climb onto Bifur
After you reach one of the ledges on the other tree, switch to Bifur. Stand in the spot highlighted by the game. Switch to any other character, then and climb onto Bifur. Another short cutscene will show the fall of another big tree.
 Aim at the spots where the enemy wolves stop
Towards the end of this stage, you are going to have some fun throwing flaming objects at the monsters. Use the reticule to target the wargs that appear at the foot of the tree and press the action key/button to perform the throws. All told, you need to eliminate eight, this way (two groups of four).
 Keep pressing the indicated keys, thanks to which you will stun the boss's warg
You are going to fight another battle with Azog and it is a good idea to start it by destroying all the interactive objects on the glade. Then, try to approach the boss, who is riding a white warg, and press the action key/button to grab him. After you succeed, start pressing rhythmically the buttons that appear on the screenshot (they will be replaced with different ones, occasionally!). This way, you will stun the white warg, which will make the boss walk on foot.
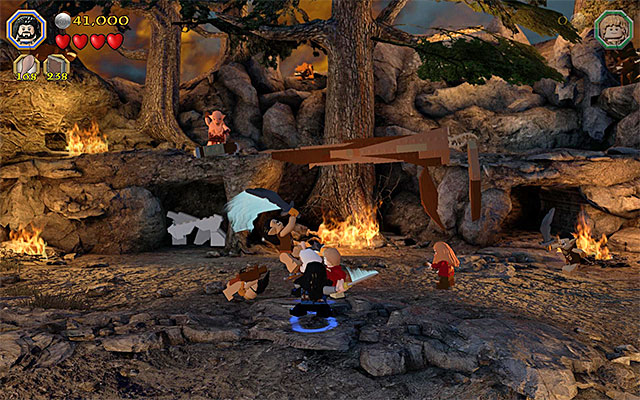 Keep weakening the boss
Just like earlier, you need to watch out for opportunities to approach the boss safely (e.g. when he is fighting someone else, or when he is turned the other way) and land your blows. Also in this case, in time it will become necessary to start tapping the indicated keys/buttons rhythmically (after the close-up of both of the fighting characters).
Eliminate orcs and avoid the stones thrown by the bossAfter you have deprived Azog of sufficient amount of energy, he will escape to the ledge on the left. In this situation, start attacking his minions (the regular orcs) and avoid the boulders that he throws at you. Wait for the moment at which he jumps back down to the arena and focus on him, while striving for another direct confrontation (pressing the indicated keys rhythmically). Azog will soon mount the white warg again and you will watch a short cutscene.
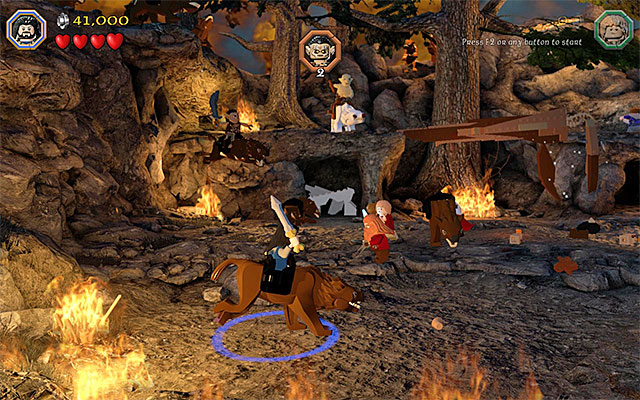 Seize control over the warg and, in this way, eliminate the orcs
During this part of the battle, your primary task will be to defeat the five orcs that ride wargs. First of all, on one of the monsters and, after you throw it off the warg, mount the wolf yourself. This will make it much easier for you to move around and eliminate the rest of the riders. After you have eliminated the orcs, Azog will summon five riders more. The strategy is the same in this case.
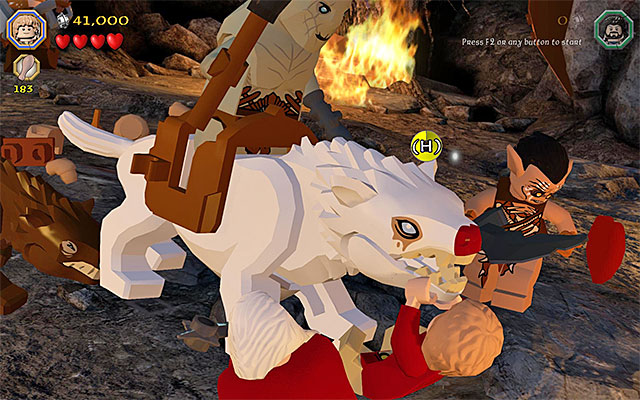 Press the indicated keys to save Bilbo
Towards the end of the battle, Azog will jump down to the arena and attack Bilbo. Your task is to tap the keys rhythmically, until the yellow circle fills up, which will allow you to save the hobbit from death. This is the end of this stage.
 The path to the very bottom
If you want to, you can take to descending from the Lonely Mountain, straight away, or explore its peak in the first place. This is so, because this is the first time that you will have access to the Eagle Statue, in the game. This type of statues are usually used for fast traveling, all around the Middle Earth. After you learn about the option to fast-travel, take the narrow path to the bottom. Take the first turn to the South, which will allow you to remain on the trail. Soon, you will watch a cutscene and another stage of the campaign will start.
 During the escape from the bear, collect coins and the minikits
Ahead of you, there is another chase scene. Just like in the case of the previous ones, you only need to make sure that you strafe to the right, or to the left, at the right moments. You do not need to bother, unlike in the previous chases, about getting into contact with the other, smaller, obstacles, especially that smashing them will allow you to obtain more studs. Apart from that, while completing the chase scene, you can obtain as many as three minikits but, do not worry if you miss them the first time around. The chase is over as soon as you reach a cabin in the woods.
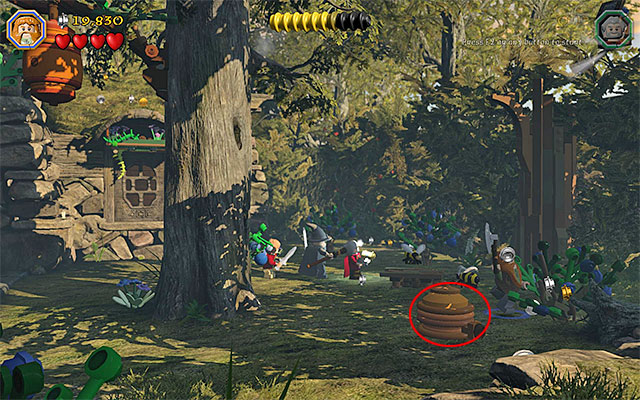
First of all, explore the region of the cabin and destroy all of the interactive objects (you do not need to hurry with finding the key). If you want to, you can use the local Save Statue and save the game. After you approach the locked door to the cabin, you will watch a short cutscene, which features a bee "escaping" with the key. Follow it to the right. Destroy the beehive shown in the above screenshot, which will make the bee move elsewhere.
 The flower pot
Now you need to destroy a big flowerpot located right next to the cabin, in the roofed area with the other door. Just like earlier, destroying the hiding place will make the bee escape elsewhere.
 The place where you need to build a grip and catch on to it
Go left and examine another beehive located near the gate, at which there are the remaining allies, who are trying to prevent the bear from entering this location. Hold down the appropriate key/button here, thanks to which you will build a golden grip. Switch to Dori and select his Flail. Use it on the grip (press the appropriate key several times), thanks to which the big flowerpot will fall onto the hive. Additionally, you need to select Gandalf here and use his staff to hit the hive with the magic projectile (the action key/button).
 You now need to catch on to the grip, as Dori, and jump towards that dwarf as any other character.
If you have performed the above actions properly, the bee will fly over to the right, with the key, again, which is where you also need to go. Switch to Dori again and use his flail on the new grip, attached to one of the branches. wait for Dori to catch the grip and switch to any other character. Leap towards Dori, as that character and wait for the branch to break off (as a result of that, the key will fall onto the cabin's rooftop).
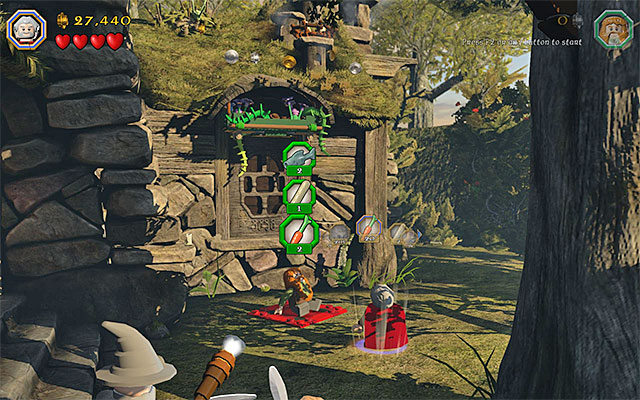 Give food to Bombur
Remain in the spot, in which the branch snapped and hold down the building key/button. wait for a red carpet to appear, switch to Bombur and lay down on the blanket. Select any other character, approach Bombur and interact with him. You need to give some of your supplies to the ally- 2 Fish, 1 Bread and 2 Carrot.
Note - You can find all of the food items near the cabin - you simply need to destroy all of the interactive objects.
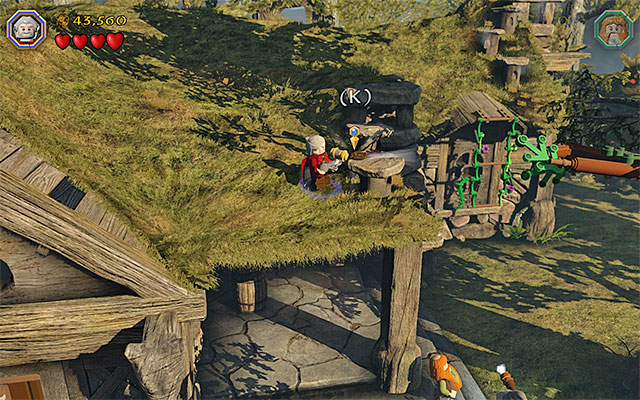 The key
After you have fed Bombur, you will be able to jump onto him, as any of the characters and start to bounce off him. After several bounces, grab the interactive ledge. Wait for the ledge to fall off and hold down the building key, in order to build a ladder. You can now climb up the ladder to the rooftop. Search it through, go left and collect the key. Finally, jump down and use the key to open the cabin's door. This is the end of this short stage.
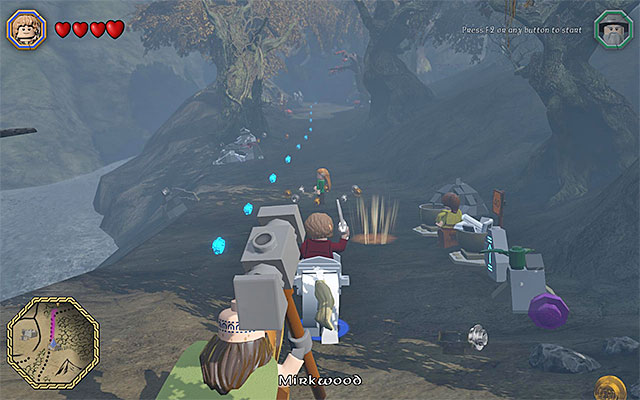 The path to the forest
You have probably noticed that the characters are using horses. You can reach the Dark Forest either on the horseback, but there will nothing bad happen if you dismount the horses and go there on foot. Your current destination is to the North of Beorn's household and the easiest way to get there is by following the trail (of blue studs). After you get to the forest, the tenth stage will start.
 Climb onto Nori and Bifur
Start exploring the forest by destroying the objects around the starting point. At the same time, avoid contact with the swamps, because this way, your character may drown, which means losing some of the valuable studs. Destroy the bush on the right and hold down the building key/button. You can now stand, as Nori and Bifur, in the highlighted spot. Switch to the latter and climb onto the former. Finally, switch to Dwalin and start climbing over the two allies.
As Dwalin, leap towards the ledge, approach the big block from the left side and hit it with Dwalin's Warhammer to move it to the right and smash it. You can now proceed to the right. Follow the linear path and stop only after you approach the swamps. Switch to Ori here and use Ori's Slingshot to hit the target shown in the above screenshot. Jump over to the float and use the slingshot again. Jump over to the next float and onto the other side.
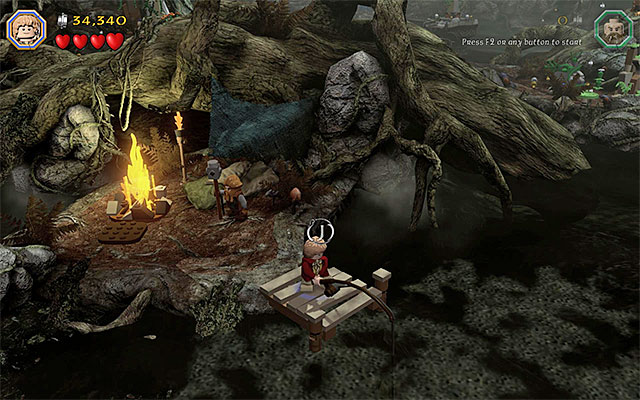 The pier where you need to complete the fishing minigame
Switch to Bilbo and destroy the new objects around. You should, especially, turn your attention to the small pier, where there is a skeleton. Disposing of the skeleton will allow you to start a fishing minigame. Select the Fishing Rod from Bilbo's inventory and start the minigame. remember always to tap the key at the last possible moment, thanks to which you will obtain additional studs.
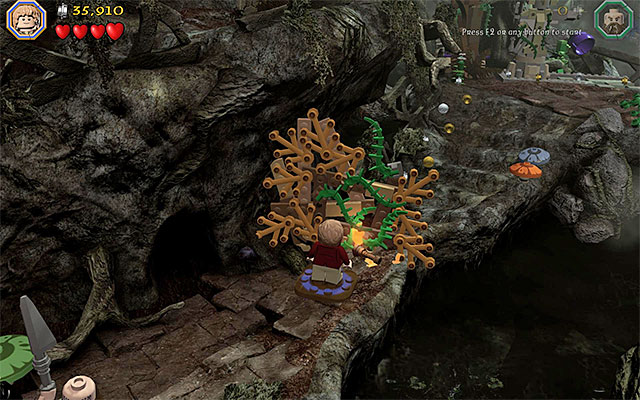 You need to set the barricade on fire
Regardless of how well you did at the minigame, a torch will fall to the ground. Pick it up and approach the flames to set it on fire. Carefully, jump over the two floats and return to the other side of the swamp. You need to go towards the background here, i.e. towards the barricade that you have ignored earlier. Use the torch to set it on fire, which will clear the path for you.
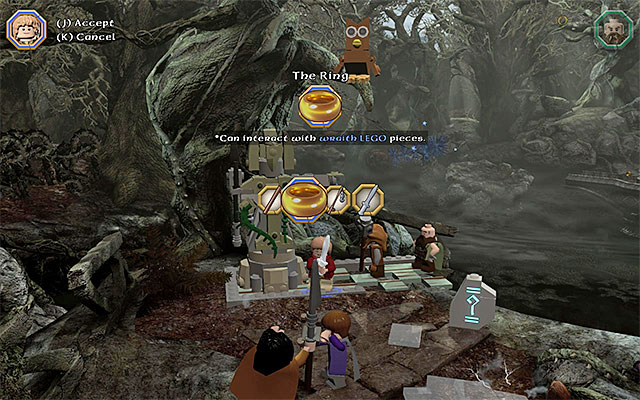
After you approach a larger glade, switch to Bilbo. You need to put on the Ring, which you can find in the Hobbit's inventory. You can do that by selecting this item from Bilbo's inventory (the above screenshot) or by standing next to the hint sign and pressing the key/button displayed on the screen.
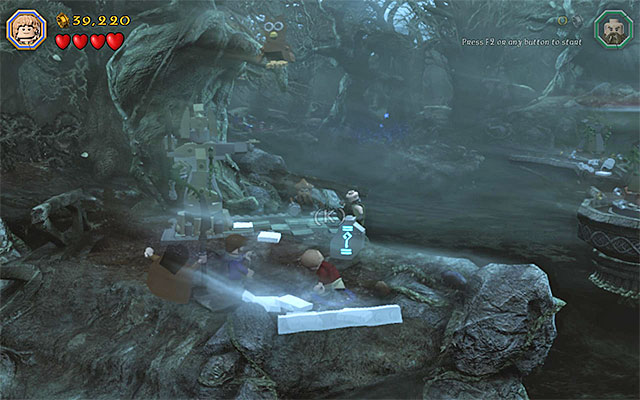 Make sure that the ring is active and start building
After you put on the ring, approach the hopping objects on the ground and hold down the appropriate key/button to complete the construction here. You can now switch to Dwalin. Approach the newly-built object and push it down to the water, by hitting it with Dwalin's Warhammer.
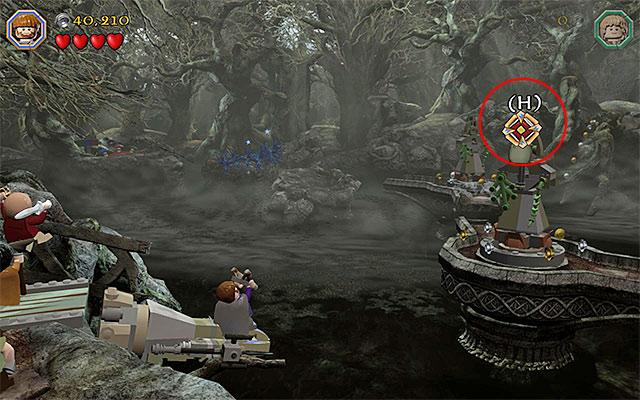
Switch to Ori and select Ori's Slingshot again. You need to stand on the block that has just been tipped over, i.e. right next to the swamp. Aim the slingshot at the target shown in the above screenshot. Hitting the target results in rotating the entire structure. Jump towards the platform (be accurate here to prevent falling into water!). Wait for until Dori is joined by the rest of the characters and hit the same target again, so that the platform returns to its initial position.
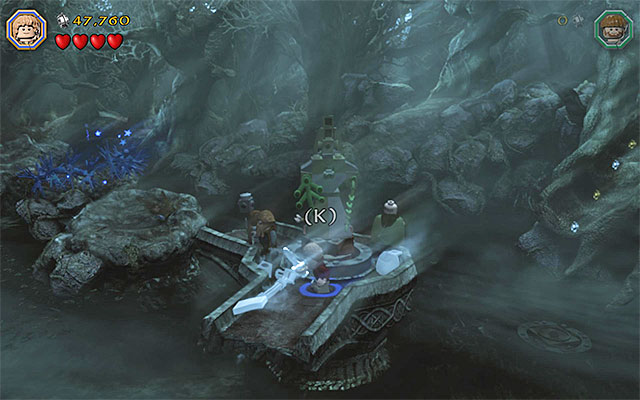 Start building only after you put the ring on
Switch to Bilbo and jump towards the neighboring platform. You need to put on The Ring again, because only then are the elements on the ground available. Build another target off them, switch to Ori and hit the target with a pebble shot from the slingshot. wait for the platform to rotate again and take the last jump towards the circular platform/ After a while, your party will join the rest of the allies and the next part of this stage will start.
In the spider cave, you need to rescue five allies. Start by switching to Bilbo and using the Save Statue. Enter Bilbo's inventory and put on the ring to turn invisible. You can now approach the spider on the right (it will not attack you, because it does not see you) and press the action key/button (the above screenshot) to eliminate it with a surprise attack.
Note- the other playable character in this [art of the stage is Dori, and you need to liberate him first, by pressing the action key/button several times. Do the same always when your character's movement are restricted, as a result of entanglement in the spider web.
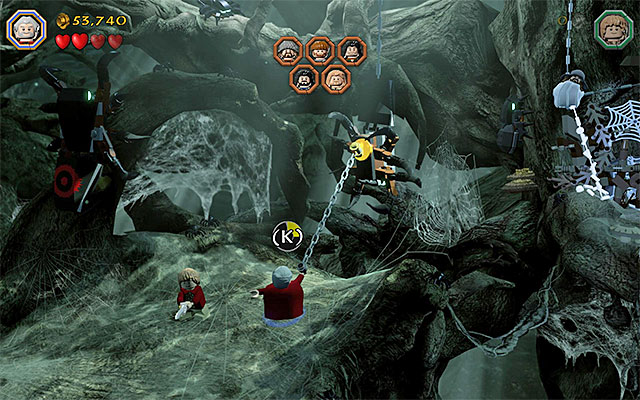 You need to catch on to the spider
Switch to Dori and move to the right, a bit. Wait for the spider that is hanging on the web, turns and use Dori's Flail to reach the golden catch. Press the indicated key/button several times, thanks to which you will eliminate the spider and clear the path to the right. Destroy the objects here and cut through the spider webs to free the two nearby allies.
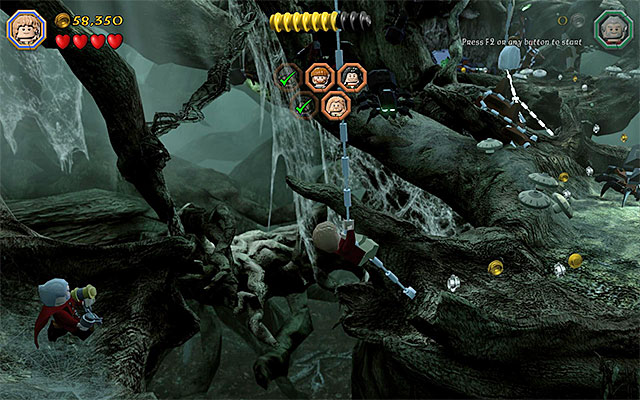 Use the rope, along your path
Turn your attention to the objects on the ground and build a new catch. Reach to the catch, as Dori, and cause the barricade here to be ripped apart. This will allow the characters to use the manhole behind it. walk through the manhole and go right. Along your path, destroy all of the interactive objects. Reach to the rope, take a swing and leap towards the ledge on the right.
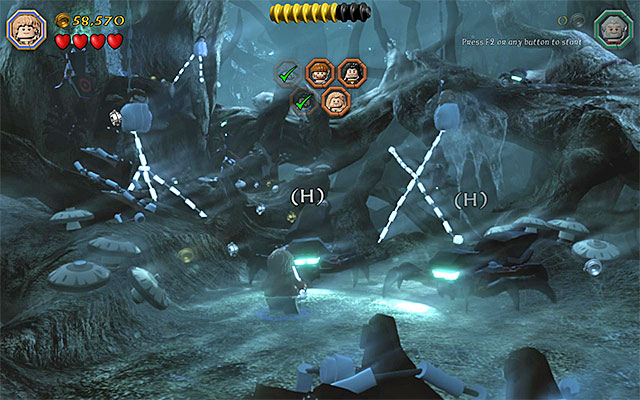 Make sure that you are wearing the ring and then deal with the spiders
Bilbo needs to put on The Ring again, because you will have to eliminate two more spiders here (do not take the ring off, after you have eliminated h first one). After you have secured the area, approach the two spider webs and cut through them, using any weapon, thanks to which you will free two more companions.
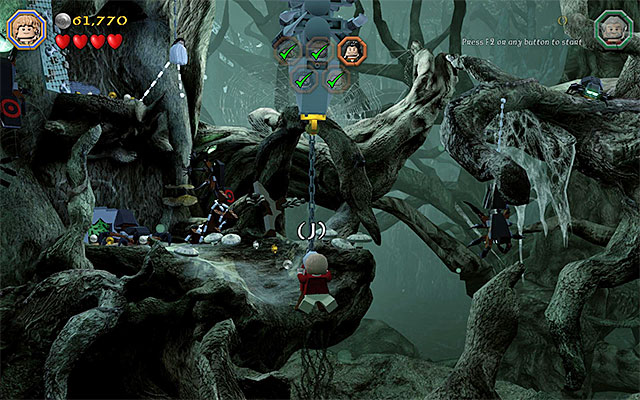 You need to jump towards Dori on the chain
Switch to Dori and use Dori's Flail to reach another golden catch located under the ceiling. After you do that, switch to Bilbo and jump towards the ally on the chain. Jump over to the ledge and activate the ring to eliminate the last spider, in a safe way. Finally, walk through the last manhole and free the final ally (cut through the spider web).
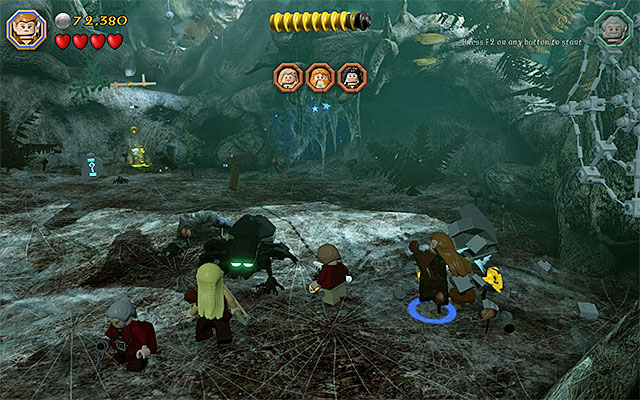 Eliminate the spiders if they pose any threat to your character
In the final part of this mission, you need to free three more allies. You will be obstructed from that by spiders, which arrive in the cave on a regular basis. The good news is that you can count on the elven reinforcements and that you can use the Save Statue. First of all, take a look around the location. Destroy the objects and determine the whereabouts of the imprisoned allies. Also, do not forget to attack spiders, if any comes within your character's reach.
Note- If you take damage, while fighting the huge spiders, you can easily restore your health hearts easily, by attacking the smaller ones.
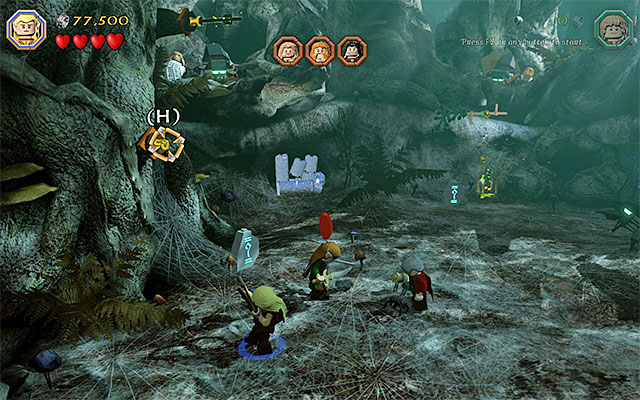
You can free the allies in any order you like but, to keep things orderly, start with the left side of the cave. Switch to Bilbo and put on the ring. Stand in the spot shown in the above screenshot and destroy the block on the left. Remain here and hold down the building key/button. this will create an active slot.
You need to shoot at the slot that you have just builtSwitch to Legolas, for the first time, and select the bow from his inventory. Use it to send an arrow into the slot built by Bilbo. You can now jump towards the arrow stuck in the tree (elves jump higher) and then grab the one that is above this one. Finally, jump towards the upper-left ledge with the spider on it. You need to deal with the creature at close quarters so, tap, rhythmically, the indicated keys/buttons. Eliminating the first spider results in freeing the first ally.
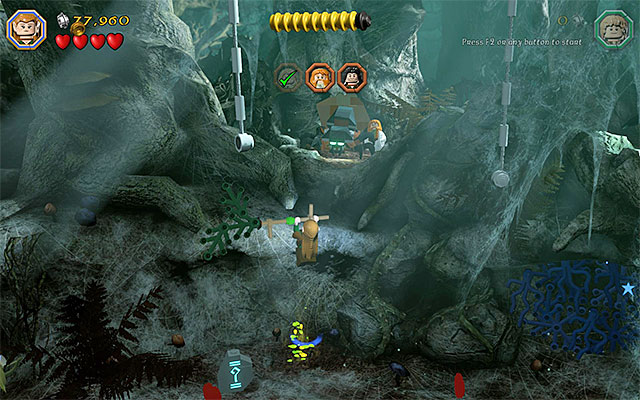 The spot where you jump
As any elf, stand in the point marked in green, which is located in the central part of the cave. You only need to take a standard jump and, thanks to the fact that elves jump higher, you will reach the edge, jump towards the ledge above and eliminate the spider, in the way that you have already learned, which is blocking your access to the second ally.
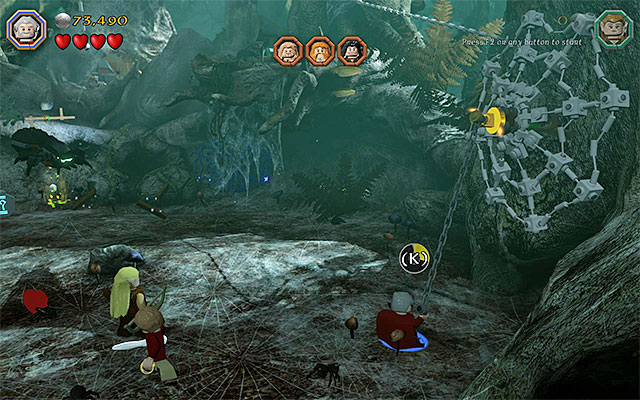 Reach the catch to the right and rip it off
There is still the right side of the cave, left to explore. After you have demolished some of the area, you will be able to start building, whose effect will be the catch in the middle of the big spider web. Reach the catch as Dori and rip it off.
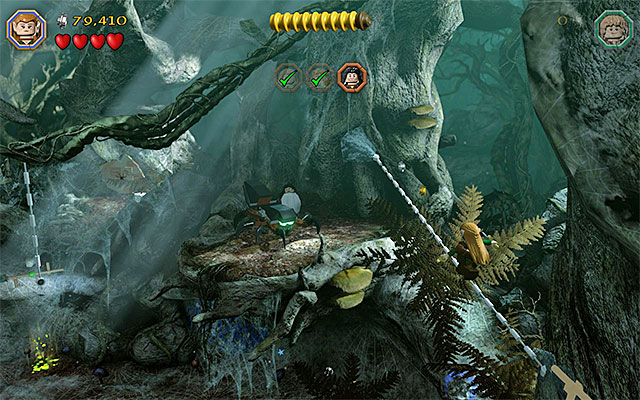 The rope to the last imprisoned ally
Thanks to the action described above, you will gain access to the ledge high above, which you can jump towards as any of the elves (from the spot marked in green)/ After you grab the edge, jump towards the one above. Jump over to the rope on the left, then, and reach the ledge with the last one of the imprisoned allies. After you deal with the spider here, this stage will end.
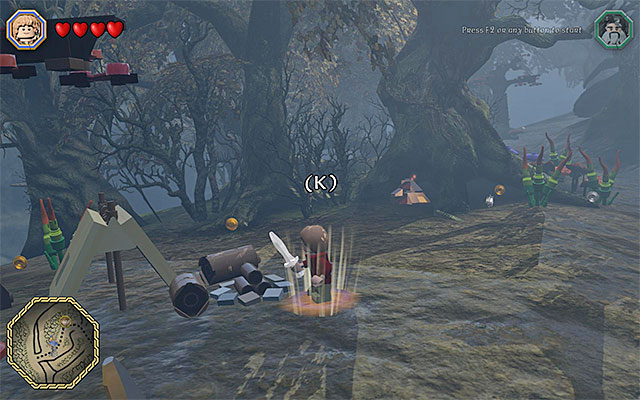
GO Northwards. After you attempt entering the Elven Kingdom, you will learn that the guards are not letting you pass and this restriction is connected with the game's mechanics. During the game, you can use the bonfires, whose purpose is to change the current time of the day (daylight to night, night to daylight). You are going to use this, later in the game, mainly to unlock some of the side missions but, in this case, the thing is that the elves need to rest. The closest bonfire is to the South of the bridge and it has been presented in the above screenshot.
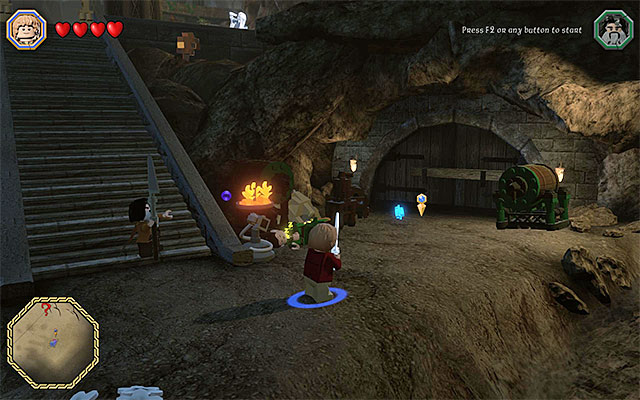 The cellar entrance
Wait for the nightfall and go towards the entrance to the Elven Kingdom. Since all the elves are asleep now, you can follow the linear path across the kingdom. Your destination is the gate to the cellar, where the eleventh stage starts.
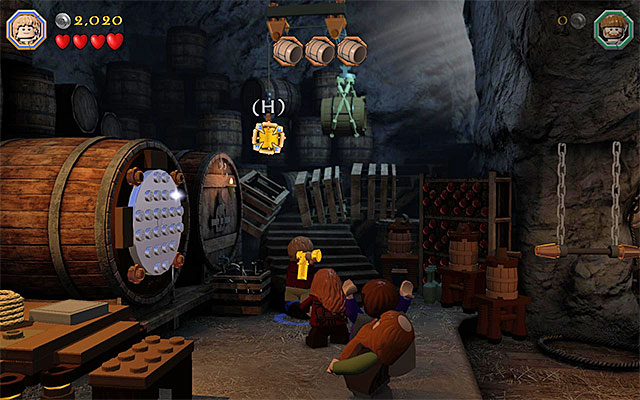
Your main objective, in the cellar, is to obtain three additional barrels for the main characters, but you should start with smashing the objects in the area, collecting studs and supplies. In order to obtain the first barrel, explore the left side of the cellar. Pick up the golden valve, which fell onto the ground as a result of smashing the objects here, and aim it at the weight shown in the above screenshot.
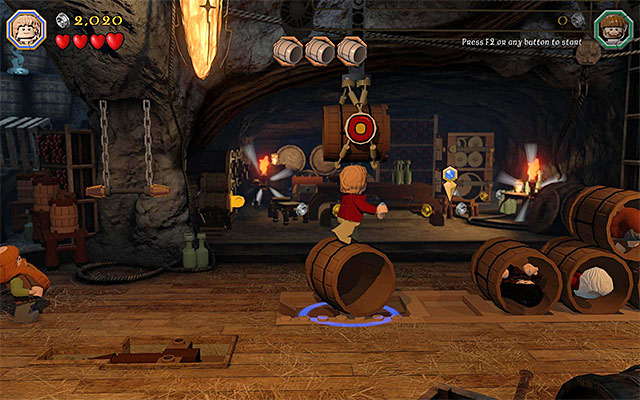 The pot where you need to place the barrels
Wait for the first barrel to fall down, approach it with any character and press the character switch key/button. After your character jumps onto the barrel, roll it over to the other ones.
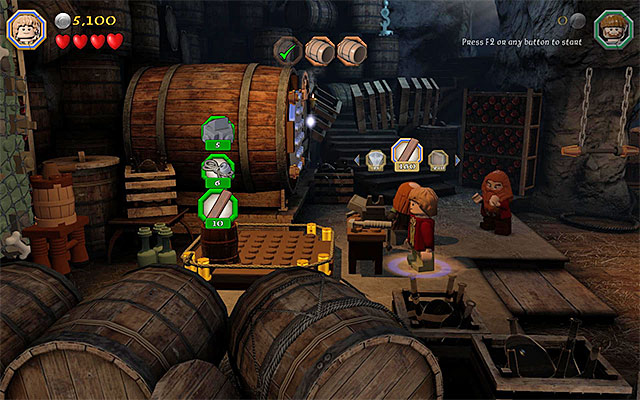 You need to spend more supplies
Return to the left side of the cellar and finish the act of smashing the object in the environment (if you haven't yet). After you clear the area, hold down the indicated key/button and wait until you create a Craft Plate. Interact with it and start by spending some of your supplies- 5 Stone, 6 Rope and 10 Wood (you can obtain all of them by demolishing the cellar). You will have to solve here the building minigame that you know very well. Wait for the armor cabinet to be built and...destroy it. You can now look around for the bow on the ground and pick it up as any of the characters.
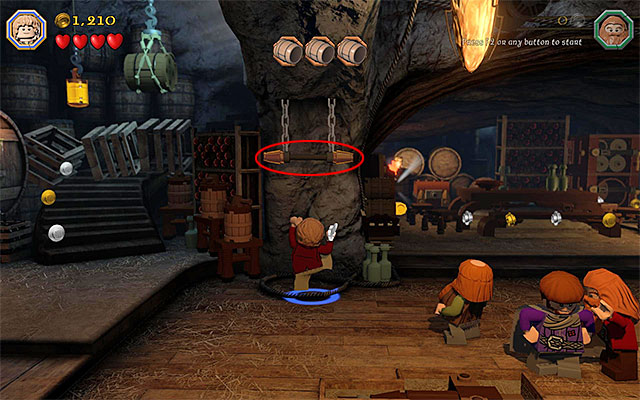 The lever that you need to grab onto
Locate the bar-like lever now, in the central part of the cellar, which you can grab onto. Thanks to this, there will appear another barrel in the cellar. Switch to the character that picked up the bow and w aim at the target next to the barrel. After the successful shot, jump onto the barrel and transport it over to the remaining ones.
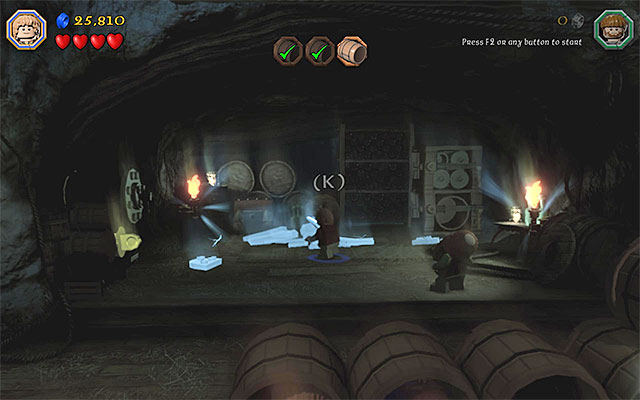 You need to put on the ring and hold down the building key
Finally, take to the exploration of the area located behind the barrels, where there are the remaining characters in. Smash the objects in the area and switch to Bilbo. Open his inventory and put on the ring. Approach, then the hopping bricks and hold down the appropriate key/button to start building.
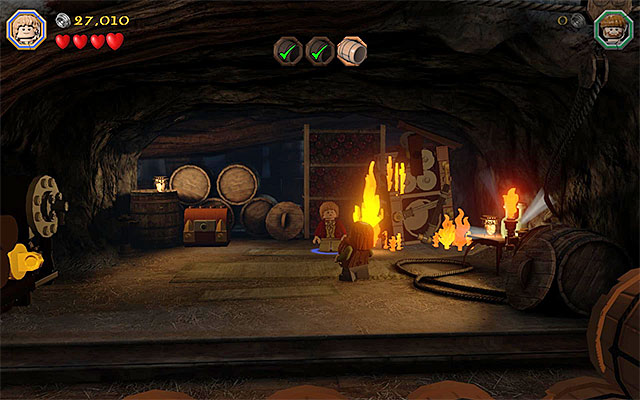 Use the torch in the right spot
You can now remove the ring, or switch to another playable character. Take one of the two available torches with you and use it to set the element of the area, which you have just built, on fire. Wait for the fire to be put out automatically, approach the last, third, barrel and roll it over to the other ones. Soon, you will watch a cutscene and another part of this stage will start.
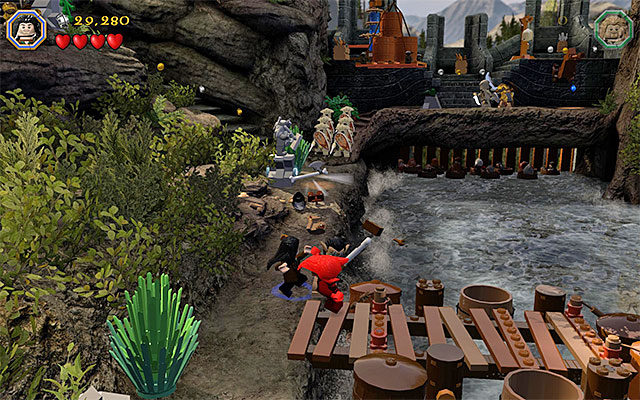 The monsters will drop axes and it is a good idea that each of the characters collects a weapon
Select one of the characters, swim up to the pier and press the indicated key/button, to jump out of the barrel. You can now start a quite linear walk, during which your party will be constantly attacked by goblins. Since the characters start the game without their default weapons, pay attention to the items dropped by the killed monsters and obtain, this way, a Goblin Axe. Apart from that, it would be a good idea if you used the Save Statue, although it is not compulsory.
Take the path to the hill on the left. Around, there are three goblins in golden armors and you need to deal with all of them. You need to keep in mind that they will take 2-3 attacks, before you defeat each. Apart from that, you may have to tap, rhythmically, the attack key, while fighting at close quarters. After you have dealt with all of the monsters, there will appear five more, around, in silver armors this time. The general combat pattern remains unchanged. Finally, there will appear an enemy archer, in the battlefield. Start avoiding his ranged attacks (run + jump) and wait for an opportunity to approach the cracked plate shown in the above screenshot. Jump near the plate and hit it with the axe.
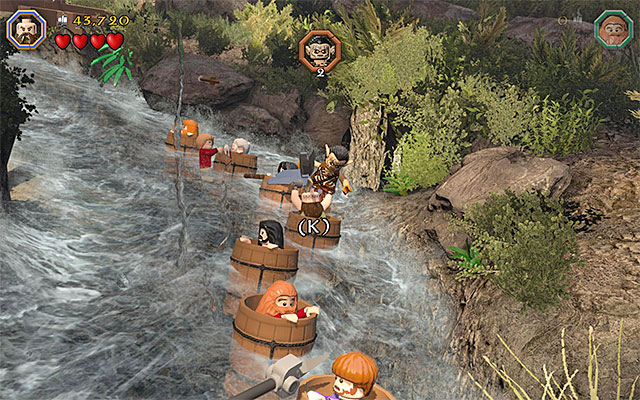 The lever to operate the dam with
You may have probably noticed, already, that the recent action resulted in the appearance of a bow in the area. Pick it up, with any character, and return downstairs. Stop by the river. Aim the bow at the target, which you have seen in the most recent cutscene (in the meantime, keep driving the goblins away). After you hit the target with an arrow, the load will fall and eliminate the elves, which have been blocking access to the dam. Walk onto the dam and grab the brown lever, which will lower the dam on the river.
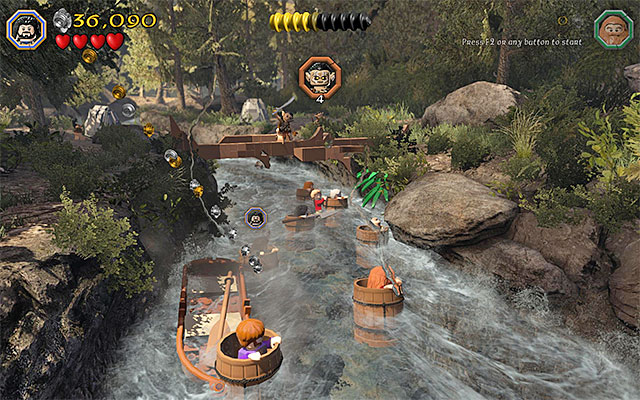 Collect the studs hovering above the surface of the river
Rafting down the river is divided into two parts and the first one is less complicated. First of all, it is worth knowing that the first part of the rafting loops, i.e. you do not need to bother about the fact that this scene will end unexpectedly. This will happen only after you have performed the actions described below. This, of course, is an opportunity for you to collect all of the studs, especially that you will be allowed to switch between the characters in the barrels, freely.
You need to tap the indicated keys rhythmically, thanks to which you will be throwing goblins offIn order to complete the first part, you need to start disposing of those of the goblins that are jumping towards some of the allies. Each time this happens, start by pressing the character swap key/button, thanks to which you will switch, automatically to the character that is being attacked. In order to get the goblin off, you need to play a minigame, which consists in rhythmical tapping of the indicated keys/buttons (they will be different each time). Eliminate four monsters this way.
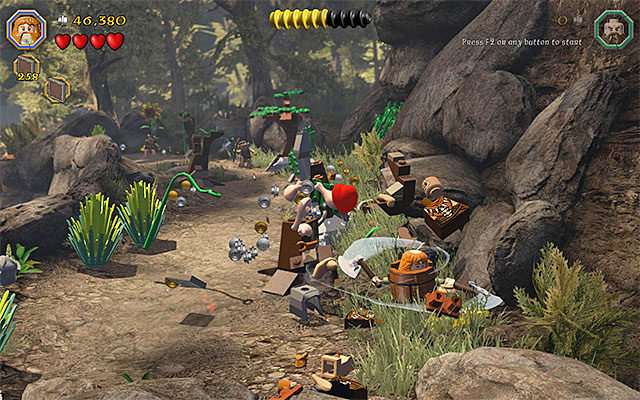 Attack the monsters and keep destroying the environment
Soon, the party will reach a small bay. You can ignore the enemies that remained in the water, unless you want to gain some more studs (note - your characters may be attacked by more goblins, which involves completing the game of wrestling!). Instead, focus on Bombur, who came out to the shore as the only one and started using the barrel as an additional protection. Start eliminating the new wave of goblins and, at the same time, keep destroying the elements in the area, because there are, exceptionally, many of them.
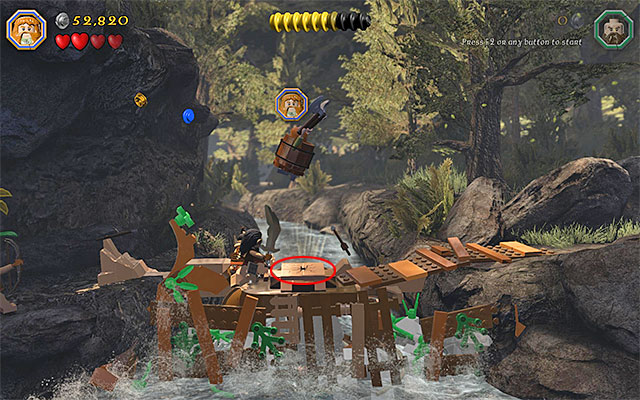 The spot where you need to destroy a wooden bridge
Go into the background, continue eliminating goblins that appear in Bombur's path. Go left then and walk onto the wooden bridge. You need to stop in the central part of the bridge, jump and slam against the cracked plate.
Note - If you want to give the left bank a better scrutiny, do not destroy the dam by slamming against the cracked plate, because the second part of the rafting will, otherwise, start too early.
 Use the bow to eliminate goblins on both sides of the river
The second part of rafting is a bit different than the first one, in that you will be controlling elves only. Just like earlier, this part does not end before you achieve certain, predetermined, ends, which is a good thing to take advantage of, in order to collect all of the studs (there also is a minikit here). This time around, you need to eliminate 20 goblins that occupy both banks of the river. You do not need to aim at them manually, and only press the ranged attack key/button instead, at the moment at which your elf is sufficiently close to the enemy. After you dispose the required number of monsters, this stage ends.
For the first time in the game, you will have to use a ship. You are going to take a relatively short cruise, because Esgaroth is close to the starting point (to the North of it)/ After you get to your destination, listen to the short conversation with the guards, to learn that you are not allowed into the city, if you do not have fishes on you. Leave the area of the locked gate (if the ship got stuck, switch to Bilbo for a moment) and sail Eastwards. You need to reach the pier shown in the above screenshot.
 Toss fishes over to the ship
Stop the ship near the pier and press the character swap button to go ashore briefly. Approach the shovel and pick it up, as any of the characters. You now need to stand at the successive crates with fish and press the indicated key/button to toss them over to the ship (do not worry if some of the fishes fall into the water). After you load all the fishes onto the ship, take control over it again. Return to the gate and wait for the party to be allowed into Esgaroth.
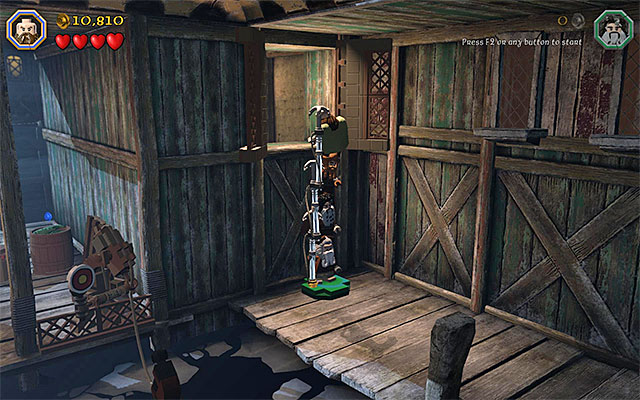 The place where you form the dwarven tower
Switch to any of the dwarves, available for this mission, and start the demolition of the area neighboring the armory. You should especially pay attention to the objects located under the left open window. Destroy them and hold down the building key/button there. You can now start arranging the dwarves, with long weapons, on the green-and-blue plate. Form a tower and climb onto it as Dwalin. You can now jump into the armory.
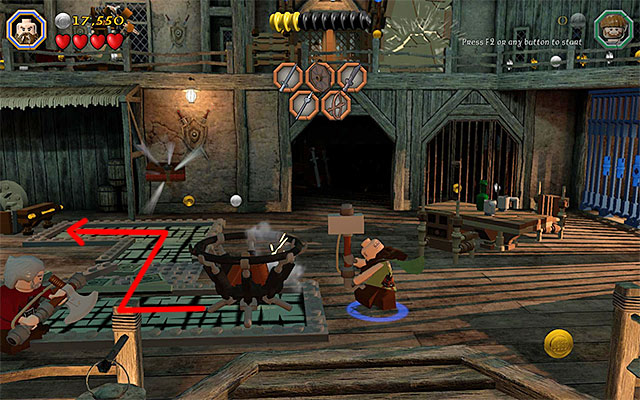
There are five high-end pieces of weaponry to obtain in the armory. You can reach them in any order that you want. I recommend that you start by smashing the objects located in the central part of the building. You should notice that, after you have sufficiently smashed the environment, the option to reconstruct a fragment of the floor become available (hold down the indicated key/button). You can now switch to Dwalin and push over the fireplace - shown in the above screenshot - with the warhammer. First, to the left, then towards the background and then to the left again.
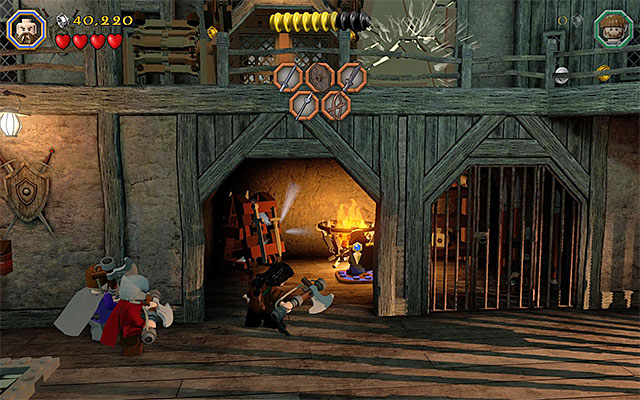 The area that you need to illuminate with a torch
Remain in the area where the fireplace has been pushed and interact with the mechanism on the left. After you press the indicated key several times, flames will appear. Collect the torch from the wall and approach the fireplace with it. Go right then and enter the dark area with the torch. Approach another fireplace here and use the lit torch on it, thanks to which this area will be permanently illuminated. You can now destroy the weapon stand on the left. After that, switch to any character and pick up the sword (Lake-Town Sword). This will result in an attack by the guards but, they are not too much of a threat (collect the heats that they drop, if you have lost too much health).
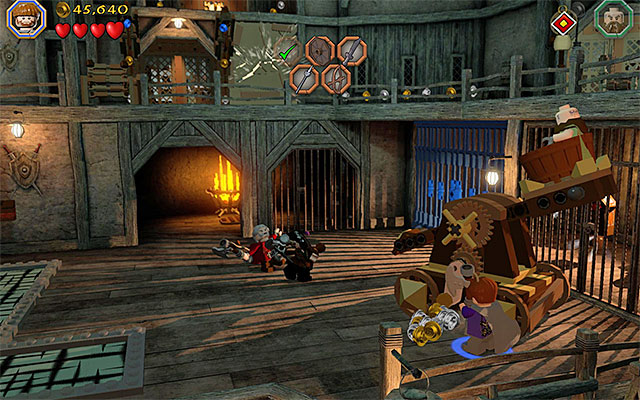 Hit the catapult, after one of the dwarves jumps in there
Explore the right side, of the lower level, now and destroy the objects. Locate the hopping bricks and use them to build a Craft Plate. You need to spend your supplies here- 1 Stone, 1 Rope and 4 Wood. Complete the building minigame, thanks to which a catapult will appear here. Jump into the catapult, as any of the characters, switch to another dwarf and stand on the left side of the catapult. Press the attack key/button to spring the machine. This will unlock (for all of the dwarves) access to the upper level in the armory.
 Keep using the slingshot on the target, until the gate is fully raised
I recommend that you go to the right first, as far as you can. Switch to Ori and prepare his Makeshift Slingshot. You need to hit the target three times, thanks to which you will raise the grate on the right, as much as possible. Destroy the weapon stand and collect the Iron Hills Rounded Shield, as any of the characters. Be prepared, of course, to fight back another group of guards.
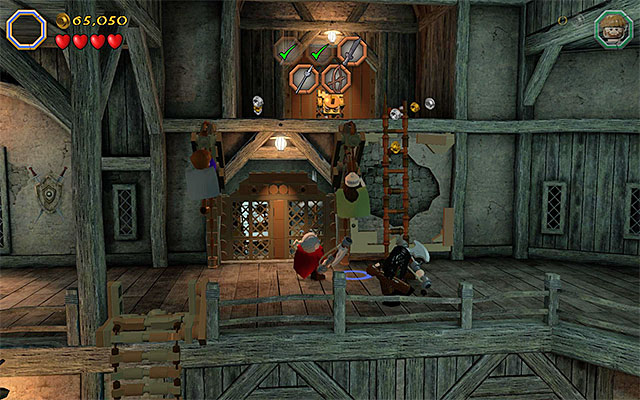 Each of the characters needs to reach another catch
Now, examine the central part of the armor's upper level. There are two catches here and each one needs to be grabbed by another character. Wait for the grate to raise and destroy the weapon stand. Collect the Lake-Town Spear and eliminate another wave of enemies.
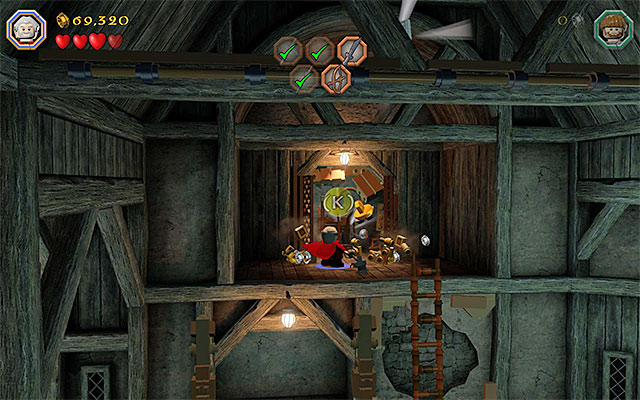 Use Dori's flail
Remain in the central part of the upper balcony. Buddy-Up any two dwarves and cut through the large cracked plate, in this mode. Hold down the building key/button now, to build a ladder. Then climb up. Switch to Dori and use his Makeshift Flail to reach the catch. Rip t off the wall, enter the stash with the weapon stand and obtain another weapon - Lake-Town Bow.
 Build a catch and use the flail on it
Finally, explore the left side of the armory's upper level, walk past the Windlance and smash the nearby objects. You can now hold down the building key in order to build an interactive catch. Also here, Dori needs to move into action. Use the flail to reach the catch and activate the lance, thanks to this.
 You need to walk over the chain to the balcony on the left
Eliminate the guards and reach the chain, as any of the characters, which was launched by the lance. This way, you will reach the top-left balcony. Switch to the character that collected the bow and aim arrows at the two targets. You can now destroy the last weapon stand and collect another sword. Here, you will watch a longer cutscene and the next part of this stage will start.
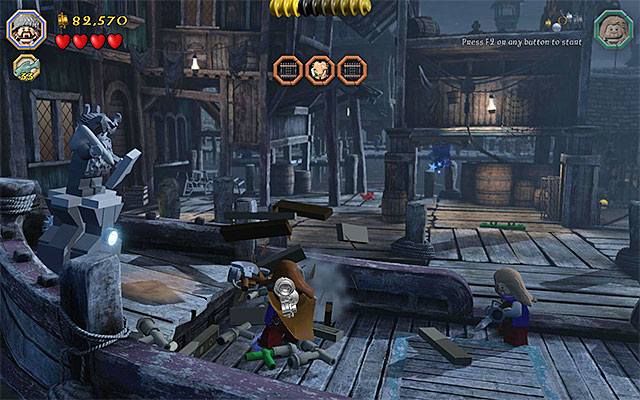 The ship with the statue and elements necessary to build a ladder
The primary objective of this part of the mission is to catch the swine that has the medicine with it and therefore, you will have to explore three pens (the swine is in the last one that you check). Go right and destroy all of the elements in this area. Take the first turn towards the foregrounds and go aboard the ship moored in the docks. You will find here a Save Statue and the hopping bricks, which you can use to start building.
 The rotary mechanism
As a result, you will build a big ladder. One of the characters needs to pick up one of its ends, whereas the another one needs to pick up the other end. walk over to the background, with the ladder and wait until it is erected. You now can climb the ladder to the balcony of the tower. Here, there is a rotary mechanism and you need to start cranking in the counterclockwise direction. This will result in the revealing of the first enclosure, where there the swine, that you are looking for, is not.
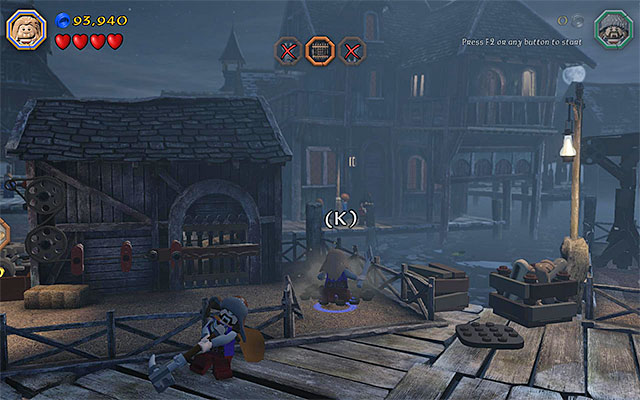
Jump down and go right, stop at the next pen that you find here. You need to switch to Fili. Open the inventory and select the Fili's Shovel and start digging in the ground, in the spot shown in the above screenshot. After you find a knob, walk over, with it, to the mechanism on the left. Put the knob in place and use it (press several times the indicated key/button). Also this time, the search was to no avail.
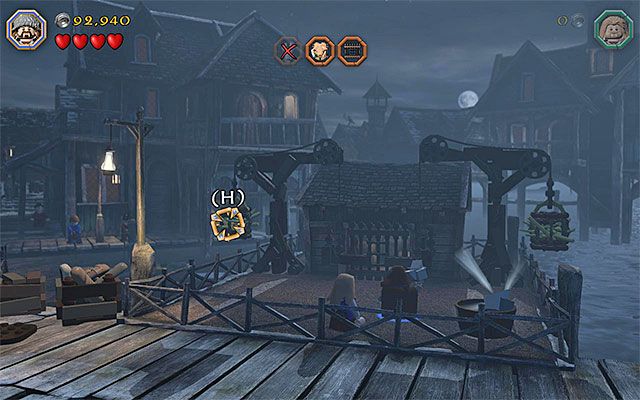 Send the bricks towards the crates suspended on the chains
Go to the right, as far as you can and reach the third pen. Hop over the fence and approach the basket with two big bricks. You need to throw the items at the crates, first on the left and then on the right (both of them are hanging on chains).
 You need to complete a minigame to retrieve the medicine from the swine
Regardless of the order in which you checked out on the enclosures, you find the swine only towards the end of the stage. Start the minigame and tap, rhythmically, the keys/buttons that appear on the screen Obtaining the medicine ends this part of the stage and starts another one.
 Eliminate the standard varieties of monsters
The final part of the twelfth stage will be participated by elves and your first task is to defeat eight regular goblins. This is a quite easy thing to do, although you should remember to pick up the hearts that the killed monsters drop (if you took damage, in the meantime).
 While fighting Bolg, you need to press the buttons that appear on the screen
After you eliminate the required number of goblins, Bolg will jump down to the arena. Attack the boss, as any of the elves, and after the camera focuses on you and the boss, prepare to start tapping the buttons that appear on the screen, rhythmically. Just like in the case of the previous boss battles, the keys are, occasionally, different ad you need to keep that in mind.
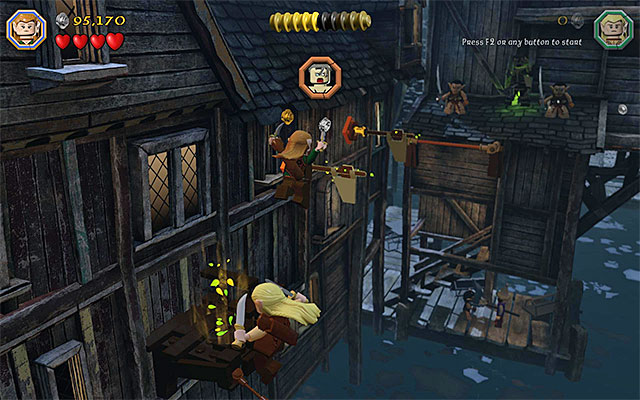 Rely on the long jumps of the elves
Bolg will soon flee this location. Start chasing the boss. Stand in the spot with the green and yellow leaves and press the jump key/button, to grab on the upper edge. Jump towards the balcony and walk carefully over two ropes. You now need to take two more jumps, whose purpose is to grab one of the bars sticking out of the walls. Land on a small roof, with Bolg. Do not attack, because he will escape immediately. Instead, get rid of his minions.
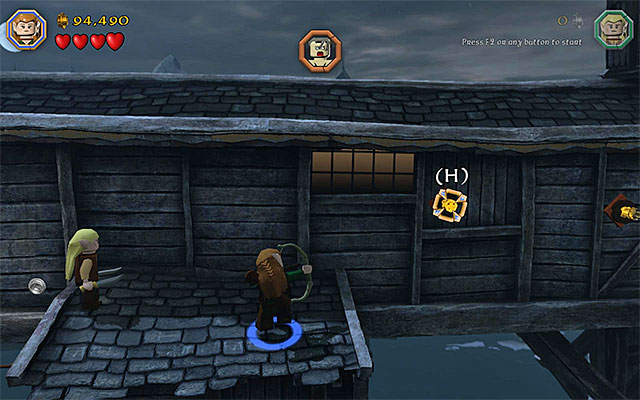 Use the bow, along your way
You now need to go right and watch your back at the next jump down, Try to land exactly on the rope below (otherwise, you will unnecessarily lose studs). Stop on the next rooftop and select the bow from the inventory. Aim an arrow at the interactive point. You can now jump towards the arrow attached to the wall and continue your chase after Bolg.
 The new spot where you fight Bolg and goblins
After you get to the docks, walk over to the right and attack the goblins, as fast as possible, because they are using bows. Try to shorten the distance between you and them and eliminate them in melee. Defeating the goblins will result in the appearance of Bolg. Just like earlier, you need to land the first attack and focus on tapping the keys/buttons/ displayed on the screen. Keep fighting until Bolg escapes on the boat.
 You need to set sails, thanks to Buddy-Up
Walk over to the right and start jumping from platform to platform, floating on the water. After you reach the ship, jump onto the left mast, as one of the elves. Switch characters and grab the right side of the mast, as the other one. This will result in setting sails and, as a result, you can start controlling the ship. Sail up to the pier on the right, eliminate the four goblins and defeat Bolg once again, in a direct fight (tapping the keys/buttons displayed on the screen).
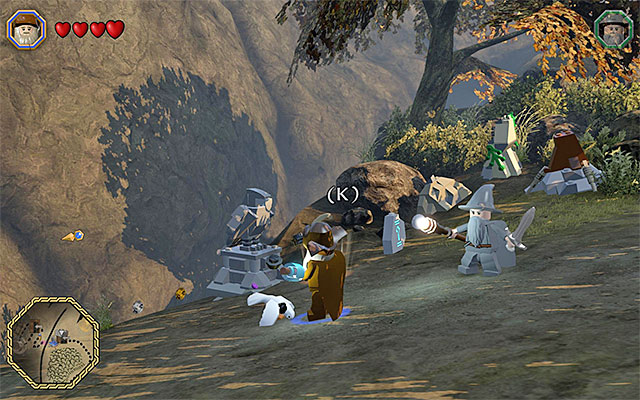 You need to tend to the wounded bird
Switch to Radagast and go towards the starting point, to the North-West of the raised drawbridge. Approach the wounded bird on the ground and hold down the indicated key/button. This will allow Radagast to heal the bird. You now need to wait for the bird to sit on the drawbridge, which will result in lowering it. Go towards the mountainous path, where you start the next stage of the game.
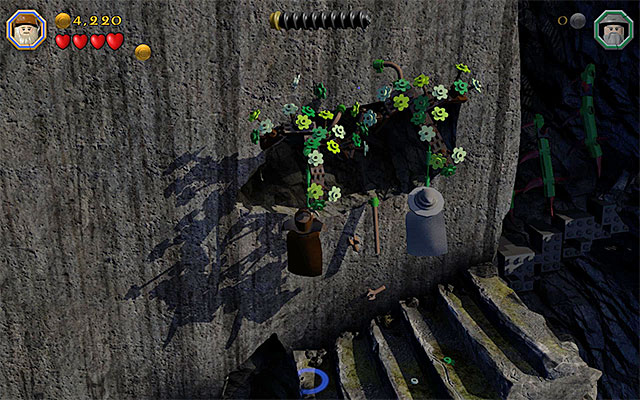 Wizards need to grab on the two ropes
Along your path to the tomb's entrance, destroy all of the elements in the area and watch out for the chasms, because it is going to be easy to take a wrong step here. Go right, jump towards the successive fragments of the destroyed stairs. Stop where there is a wider gap and examine the cliff. There are two ropes here and a separate character needs to grab each. Remain at the interactive elements that landed on the stairs and hold down the building key/button. Thanks to this, you will reconstruct the right edge, which you can jump towards.
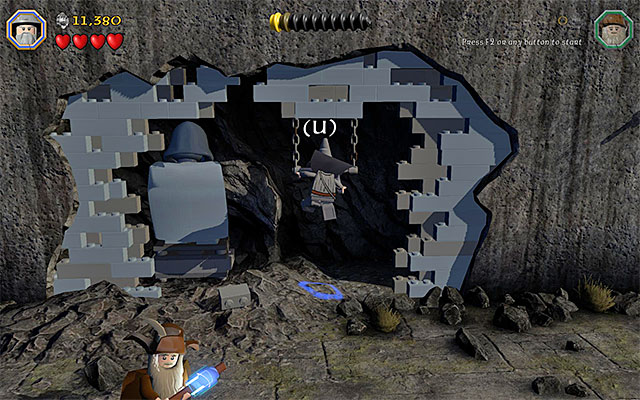 The lever is hidden behind the blue wall
Climb up the stairs and proceed. After you reach another barricade, use the staff of one of the wizards and aim at the big blue block. Further passage will unlock after you send a magic projectile at the block. In the next, bigger location, you will have to use the staff again. This time, send a projectile towards the tall blue wall. Thanks to this, you will reveal an interactive lever, which you need to jump to (as any of the characters).
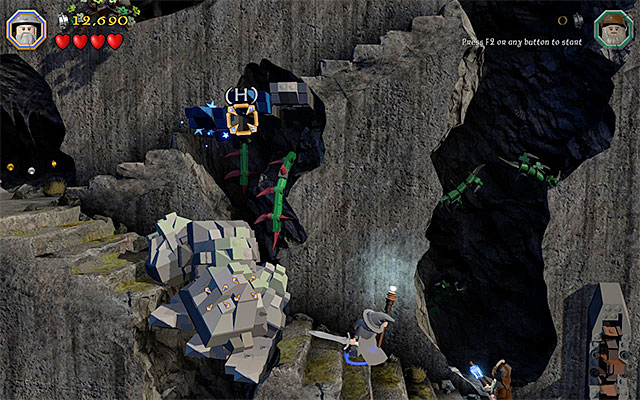 Another barricade
Wait for your character to grab on to the lever, which will reveal a blue target on the left. Switch to the other wizard and destroy the target, using the staff. Go left and stop at the barricade. Just like before, careful use of the staff is required - the magic projectile needs to hit the blue objects. VERY CAREFULLY, walk over the plank, because it is very easy to fall down here. After you make it to the larger ledge, locate the wounded raven and heal it with Radagast's special ability. Wait for the raven to fly away and unlock further passage, for the wizards.
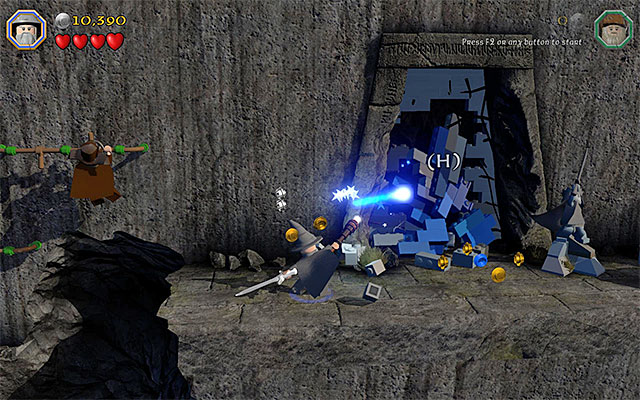 The wall with the entrance to the tomb behind it
You can now proceed on your path and go right now. Stop at the stairs and hold down the building key/button, to build a beam connecting the stairs. Walk over the beam carefully, because also here, it is easy to lose the studs. Jump towards the edge above and towards the next one, thanks to which you will land on a larger, more stable ledge. You need to use the staff here, as any of the wizards, to unlock access to the tomb.
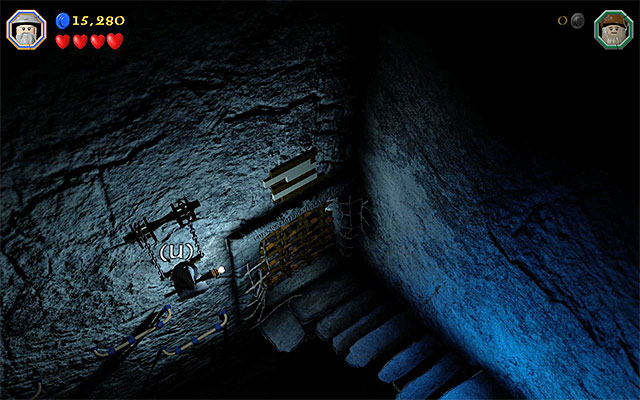
The best way to start the tomb's exploration is by using the Save Statue. Climb down the stairs and, also here, watch your steps, to prevent losing the ground under your feet. After you reach the locked gate, jump towards the, barely visible, interactive edge on the left. Then, jump towards another edge and leap towards the catch shown in the above screenshot.
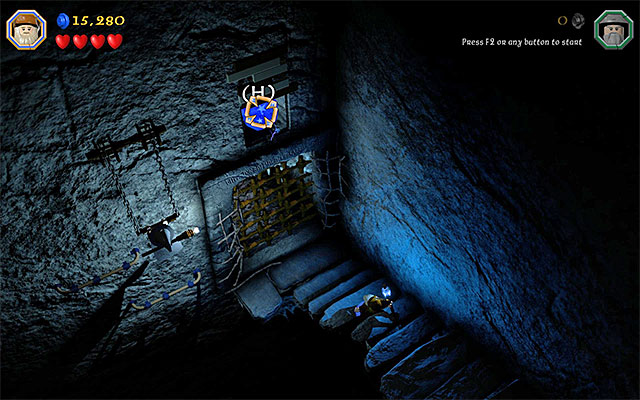 You need to hit the blue object above the gate, with the magic projectile
After you reach the catch mentioned above, this will unlock a blue object above the locked gate. Switch to the other wizard and use his staff to shoot a magic projectile and unlock the passage. Walk into the next location in the tomb. The location is a quite easy labyrinth, although the only purpose of the exploration of the side branches is to obtain more studs, supplies and treasures.
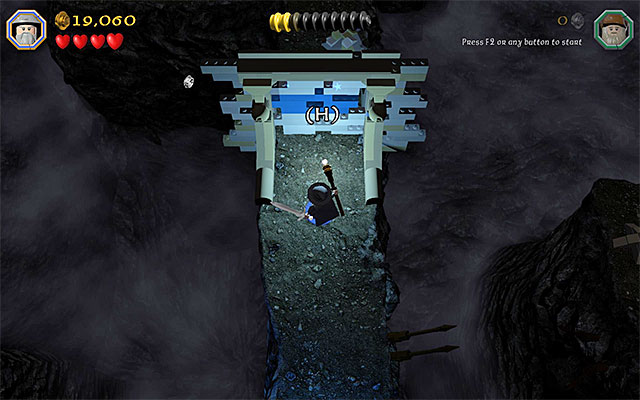 The barricade
If you want to get through this part of the tomb, as quickly as possible, after you reach the first fork, take the path to the right. This way, you will reach a barricade, through which you can cut, using the staff of one of the wizards.
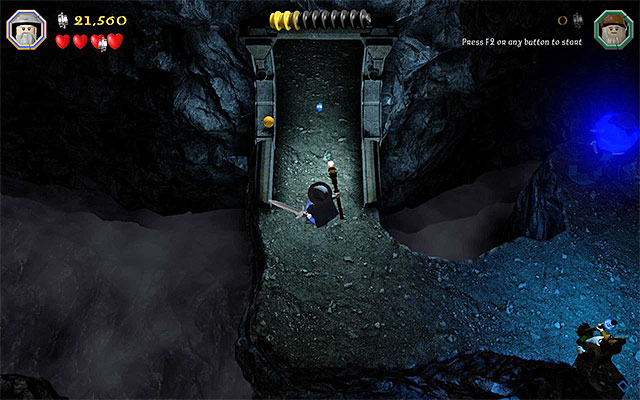 The labyrinth's exit
Then, during the exploration of the labyrinth, turn left twice, thanks to which the wizards will reach the passage to the next location. The camera view will change here to the third-person perspective. As for the exploration of the sarcophagus chamber, start by destroying all of the interactive objects in this area (you can hit the sarcophagus itself, several times).
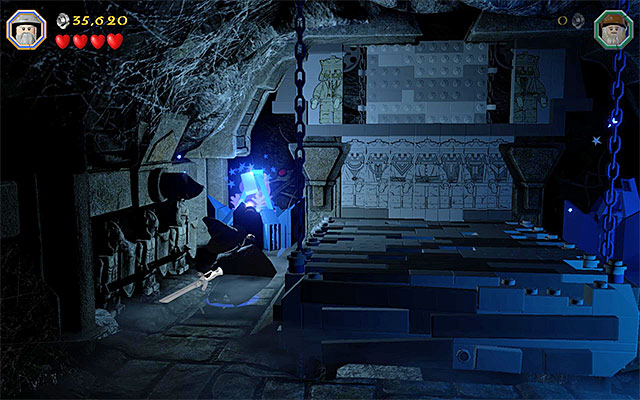 Use the staff to start fire in two spots
There is an easy way to leave the sarcophagus chamber, i.e. by using the staff (the action key/button) on the blue fireplaces to the left and to the right of the sarcophagus (you can do that as one character only, no cooperation required). Climb down the stairs and go ahead. Stop after you reach a much larger gate. You will have to solve a simple puzzle here.

Start by switching to Radagast and healing the bat. The abovementioned puzzle consists in firing the magic projectiles at the blue targets, which needs to be done in the order in which they are highlighted. First, fire at targets 1, 2, 3 and 4 (the above screenshot), and then at targets 4, 2, 1 and 3. If you make a mistake, you will have to repeat only the last part of the puzzle. Completing it, will gain you access to the next part of the tomb.
Note- while solving the puzzle, aim manually, i.e. hold down the action key/button!
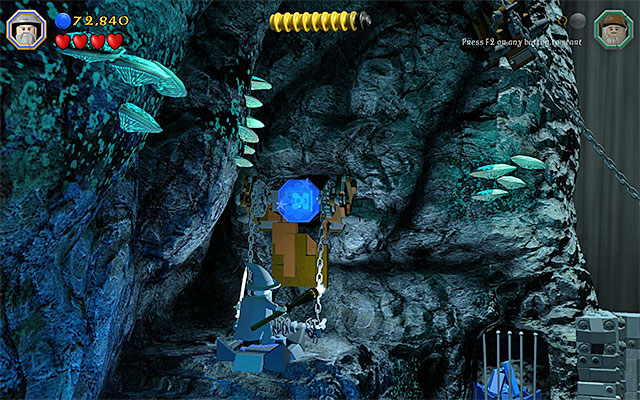
Go ahead, destroy the successive interactive objects. After you reach a big cavern, explore its left part, in the first place and take the path to the pressure plate shown in the above screenshot. Stand on the plate and, after another blue element is revealed, fire a magic projectile at it. Go now to the Right side of the cavern (you can do that as the same character). Destroy the objects here and hold down the building key/button to build a ladder. Climb up the ladder, to the upper ledge. Just like earlier, you need to walk onto the pressure plate and send the magic projectile towards the blue object.
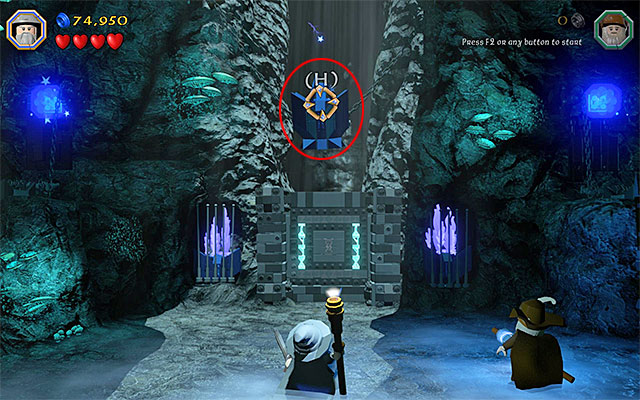 Hitting the upper blue object unlocks access to the next location
Jump down and stand at the locked gate. Look up here and use the staff to fire at the big blue object, located above the gate. Wait for the passage to unlock and go ahead. After you get at the chasm, shimmy along the edge carefully. Along your way, you will have to destroy several smaller obstacles that are standing in the way (a standard attack with melee weapon) and jump towards several successive neighboring edges (the jump key/button).
 Tap rhythmically the appropriate key to avoid falling into chasm
Stop after you find a big blue padlock. As you probably figured out, you need to use the staff. After the successful attack, jump down to a lower level and go left. Apart from the abovementioned obstacles, you also need to be prepared to stat tapping, rhythmically, the action key/button. This will allow your character avoid falling into the chasm.
 The catches are on the left and on the right side of the gate
Keep using the narrow edges until you reach the last locked gate. To the left and to the right of the gate, there are catches and each of the wizards needs to reach them. This being done, stand at the gate and fire a projectile towards the blue object above it. This is the end of this long journey across the tomb.
 The vicinities of the keep
The Dol Guldur Keep is located, directly to the South of the place, where you gain control over Gandalf and Radagast again. Go towards the fortress and try to keep to the main path (as always, the suggested route is marked with a trail of blue studs). After you have approached the keep, the fourteenth stage of the game will begin automatically.
 Build a tower and use it to send the stream of energy
Start the exploration of the vicinities of the keep and, as always, try to spend some time smashing the objects in the area. To leave the bridge, you need to use the staff of one of the wizards, on the blue barricade. After you reach a new location, demolish the main square and hold down the building key/button, thanks to which you will build a short tower. Stand in front of the tower and fire a magic projectile towards it.
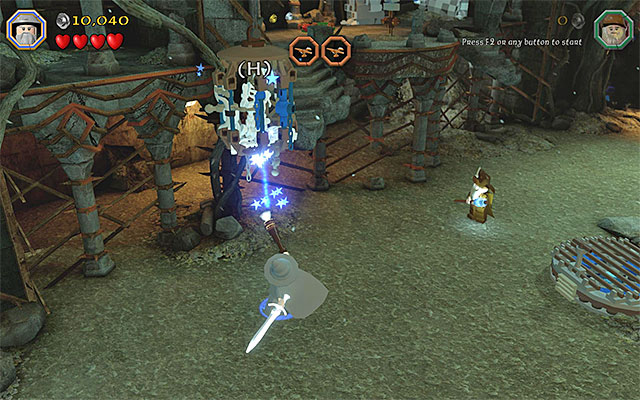
If you have performed the most recent action correctly, the stream of light will be sent towards the nearby target, thanks to which the passage at the stairs will unlock. Walk into a much larger location, where you will have to activate three new towers. First of all, I recommend that you explore the left side of the yard. Use the staff of one of the wizards, on the cage with the skeleton in it (the above screenshot).
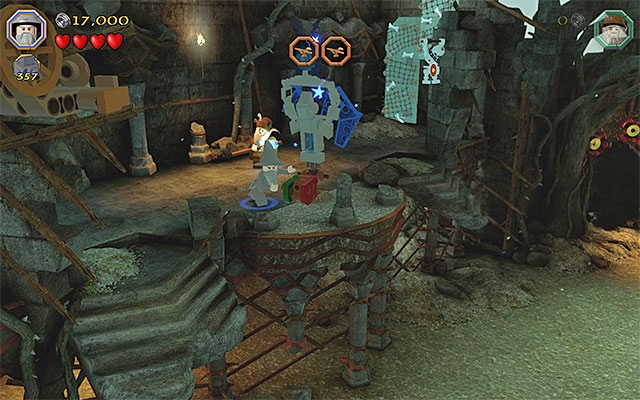 Turn the tower and use the staff only then
Wait for the cage to smash and approach it. You can now start bouncing off the roof of the cage, which will allow you to land on the balcony on the left. Approach the interactive objects here and hold down the building key/button to build another tower. You now need to use the tower's rotary mechanism to turn it in the correct direction (turn it in the counterclockwise direction). Finally, fire the magic projectile towards the tower, thanks to which, the energy stream will reach one of the three targets.
 The second stream of energy also needs to hit a target
Jump down and go to the right part of the yard. Destroying the objects here will allow you to build a ladder and reach the balcony on the right. Smash the objects in the dimly-lit corner and build another tower. You do not need to spin it so, use the staff immediately to charge it and hit another target.
 One of the wounded birds
Switch to Radagast now and explore the central part of the yard. There are two wounded birds here (one of them on the elevation on the right and one next to the balcony on the right). You need to stand at each of the birds and hold down the hold down the appropriate key/button to heal it.
 The building site of the third tower
After being healed, the birds will grab the huge grate in the central part of the yard and fly away. Approach there and hold down the building key/button to build the last tower. You can now use the staff on the tower. After the third stream hits the target, the entrance to the keep will be open for you.
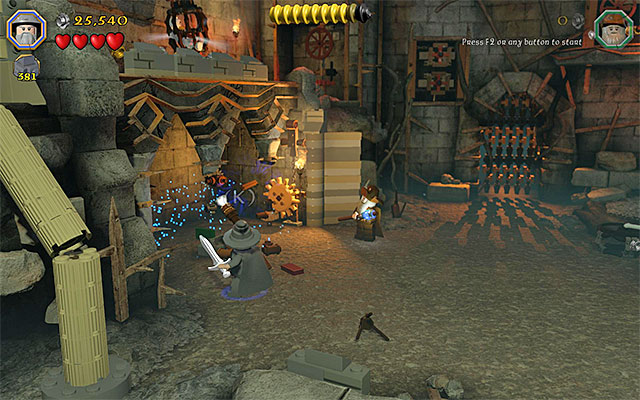 The mechanism that you eject the stairs with
Of course, start by smashing the objects in the area. This will allow you to find a Dwarf Axe, which you are going to need in several minutes (the weapon can be used by any of the characters)/ On the left, there also is a Save Statue, although you do not need to activate it. Explore the left side of the location and, after you demolish it, hold down the building key/button. wait until a rotary mechanism is built and interact with it, in order to slide out the stairs to the upper-left balcony.
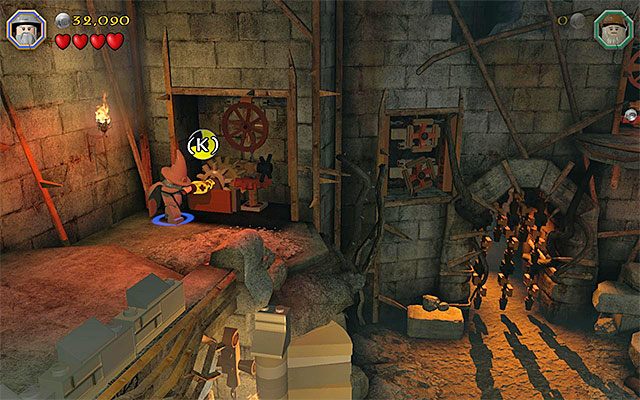 The place where you put the knob in place
Climb up the stairs, to the balcony on the left. Destroy the cage with skeleton here and examine the remains, thanks to which you will obtain a knob. Approach, with the knob, the nearby mechanism, click it into the slot and use it straight away. This will slide apart the grates to the exit from this location.
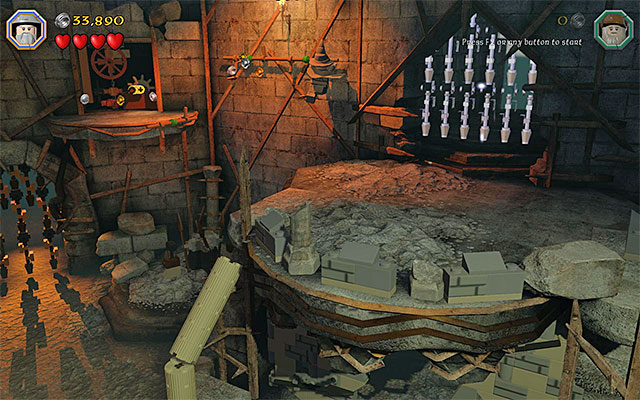 You will reach the shelf with the second knob, by grabbing the ledge
Jump down and explore the right side of the room. Here, you need to use the axe that you have just obtained, to smash the cracked plate. Hold down the building key/button now and jump onto the shelf that you have built. You can now jump towards the balcony on the right, and towards the edge on the wall. Shimmy to the left and jump over to the ledge with another knob on it, which you need to interact with. Do not expect that you will be able to leave this location straight away, because Azog, and his minions, will enter here.
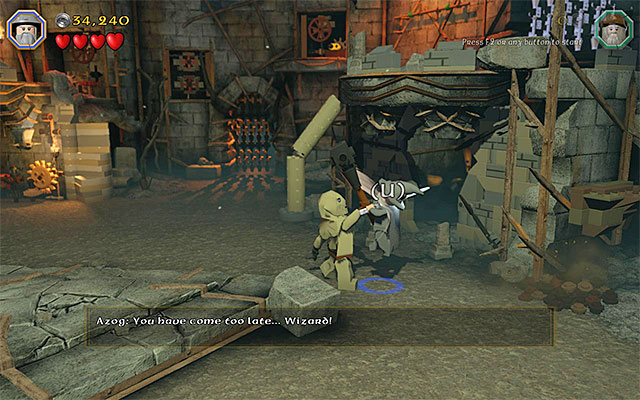 Let Azog grab Gandalf or Radagast
As any character, run up to Azog and allow him to grab that character. This happens, because you cannot prevent it, and this is the only way to allow you to progress the battle.
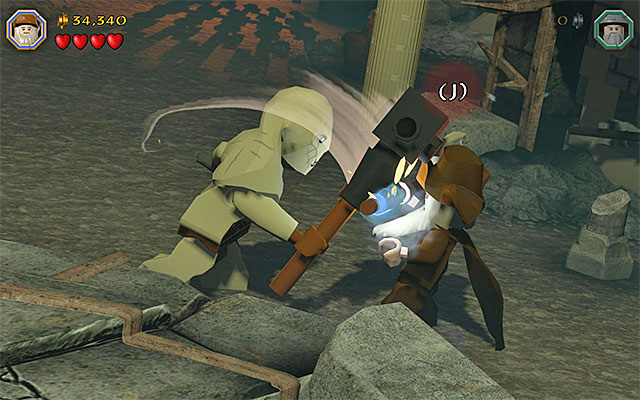 deal damage to the boss in direct fight
Once one of the wizards is grabbed by the boss, switch to the other character and attack the him. To deal the right amount of damage to Azog, you need to start tapping, rhythmically, the buttons displayed on the screen, after a moment's break. Of course, the keys will be replaced with another ones on a regular basis.
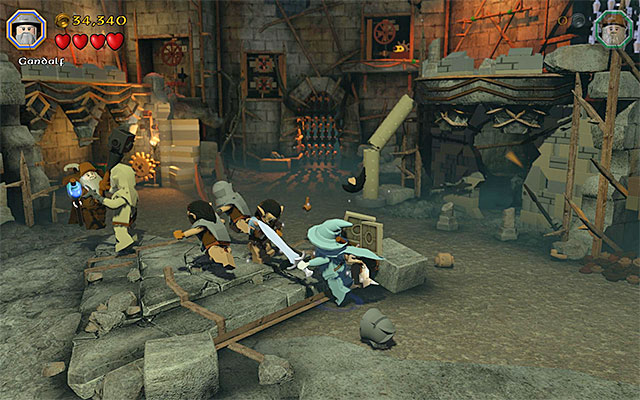 Attack the regular orcs when they pose direct threat to you, or whenever you need the hearts to replenish your health bar
Later in the battle, there will also appear the regular orcs. Try to ignore them and focus on the boss only, unless you want to regenerate your health bar. Allow Azog to grab one of the characters, switch to the other quickly and attack the boss, before he releases the wizard that he grabbed.
 The escape scene, which is short and easy
Continue this combat pattern. In total, you need to deal damage to Azog for three times, at close quarters (rhythmical tapping of the buttons). This will start a simple chase scene, during which it is a good idea to smash the objects in your way, thanks to which you will obtain more studs. Soon, you will reach a huge chamber, where you will have to fight the final boss - Sauron.
 Run, jump around the arena and avoid the bricks that the boss throws
The battle with Sauron is definitely the most demanding of all the boss battles, which you have already dealt with. It is very easy to lose all your health here and, additionally, you may have difficulties figuring out the right pattern. Spend some time on learning the boss's attacks. dodge from the violet and blue projectiles that he fires, by remaining in constant movement and by dodging.
 Try to ignore the regular orcs
Later into the battle, there will appear the regular orcs around. Just like in the case of the recent battle with Azog, try to ignore them (frequent jumps and incessant running), especially that you might miss Sauron's next powerful attack and lose more than you could gain.
Continue avoiding Sauron's attack and wait for the moment in which he tries to pepper your characters with a hail of blue projectiles. Stop then in one spot and press the key/button displayed on the screen, which will form a force field (screenshot 1). This is not it, because you now need to press the action key/button several times (screen 2).
 Use the bricks on the ground to build a tower
Performance of the above actions will result in the appearance of interactive bricks, in of the areas of the arena. Run up to them, quickly and hold down the appropriate key/button to start building another tower.
Important note - the building process, in this case, cannot be interrupted by the regular orcs so, do not worry if, in the meantime, they will stand near your character.
This is not it, however, because in the initial part of this stage, you need to send a magic projectile towards the recently built tower. This will send out a stream of powerful energy towards the boss (the above screenshot).
Later into the battle, you need to repeat all of the above steps. Therefore, you should wait for an opportunity to deploy the force fields and build towers. Then, shoot the magic projectiles at them, using the staff. You need to build, and activate, three such towers, thanks to which the battle with Sauron will draw to an end.
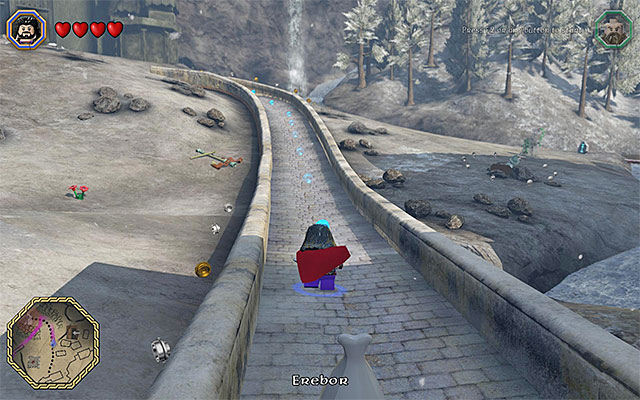 The path to the starting point of the next mission
First, go down the elevation and go Eastwards. After you reach the city of Dale, continue on the path indicated by the map and the blue studs. You need to take the North-Western exit from the city. Also here, it is a good idea to use the current readings on the map, to your advantage, walk over the long wall. You current destination are the vicinities of the Lonely Mountain and this is where the game starts the fifteenth chapter of the campaign.
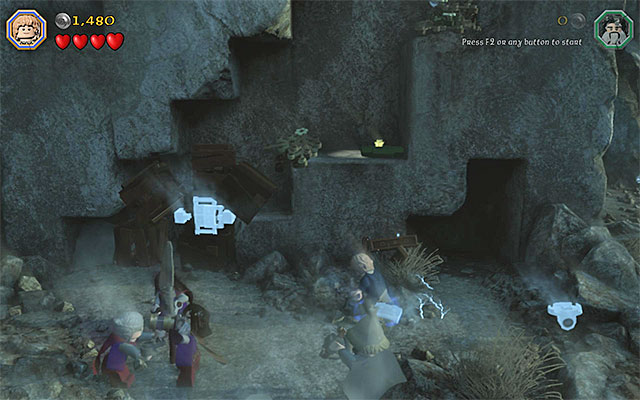 You need to put the ring on and start building only then
Start, of course, by smashing all of the objects located near the starting point. Switch then to Bilbo. Open his inventory and put on the ring. After you do that, approach the bricks hopping on the ground and hold down the building key/button to build an interactive catch. Switch then to Dori and use Dori's Flail to rip the catch off and make climbing possible.
 Form a dwarf tower and climb onto it
Switch to any of the dwarves, with the long weapon (e.g. Bifur) and climb onto one of the ledges higher above. Stand in the spot marked by the game and press the appropriate key. Switch to another character with a long weapon and jump onto the companion to form a tower. You can now select any character, climb onto the dwarves forming the tower and reach the ledges above. Destroy the bush on the right, thanks to which a ladder, for the rest of the allies, will be extended.
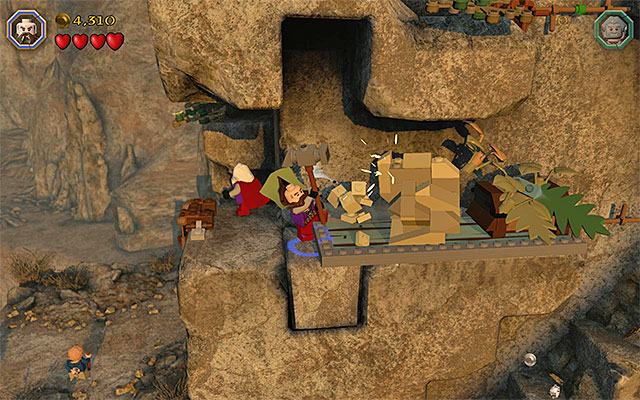 An obstacle that you can push
Switch to Dwalin, now, and explore the area close the ladder that has just extended. There is a big block here and you need to push it over, using Dwalin's Warhammer. Walk over to the right and hold down the building key/button to build a green base. Just like earlier, you need to select the characters with long weapons and use two of them to form a tower. Then, select any character, climb onto the tower and reach the edge above.
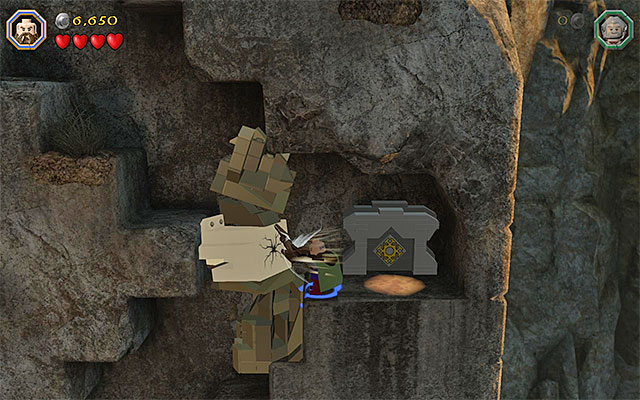 A cracked plate
Continue climbing, jump towards the interactive edges and find an interactive manhole, through which to walk. After you get to the next ledge, switch to any of the dwarves and use Dwarf Axe to cut through the cracked plate. Keep climbing up (below, there only are studs and collectibles). After you reach a much larger ledge, watch a short cutscene and take the stairs on the left.
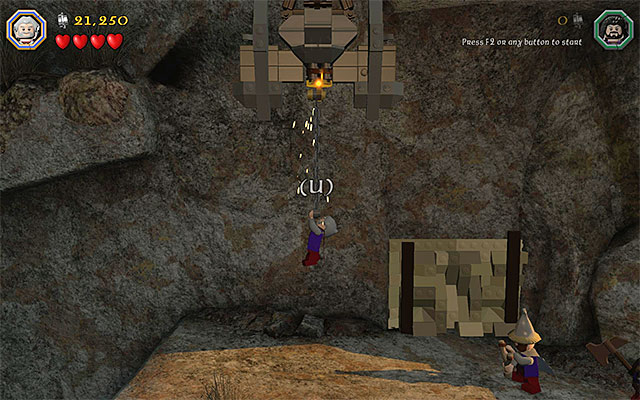
Go left and stop only after you reach the interactive catch shown in the above screenshot. Start here by using Dori's Flail and, after this character reaches the catch, switch to any other character. Jump towards Dori, as this character, to add weight to the mechanism and gain access to the manhole. Take the manhole to reach a new location.
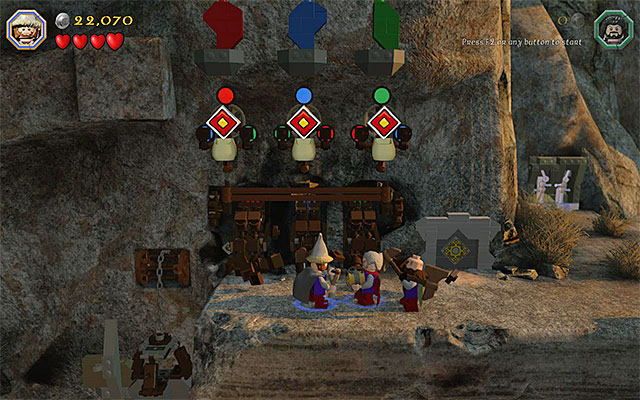
In here, there is a quite simple puzzle to solve. It is Ori that needs to do that. Select Ori's Slingshot and start hitting the targets. The premise of this puzzle is that you make the colors, above the targets, correspond to the colors of the mechanisms. The solution to this puzzle has been presented in the above screenshot - above the left target, there needs to be a red circle, a blue circle above the one in the middle and a green circle above the target on the right.
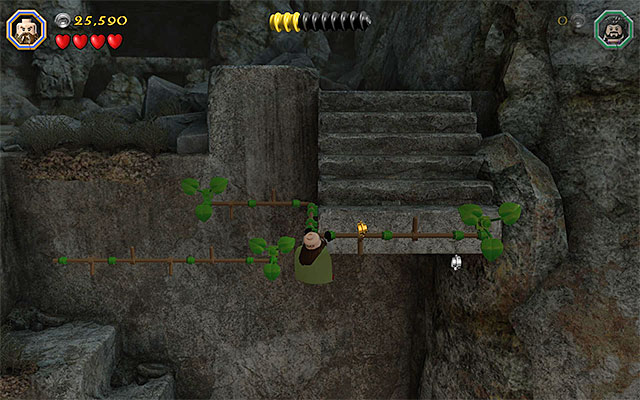 While climbing, use ladders and interactive edges
Jump down and use the newly unlocked bridge leading to the left. Locate a new cracked plate, in this location, which you need to smash with Dwarf Axe in the inventory of one of the dwarves. After you do that, switch to Dwalin and use Dwalin's Warhammer to push over the large block, to the right. You can now jump onto that clock and continue climbing. Along the way, use the ladder and several interactive edges, which will allow you to reach stairs.
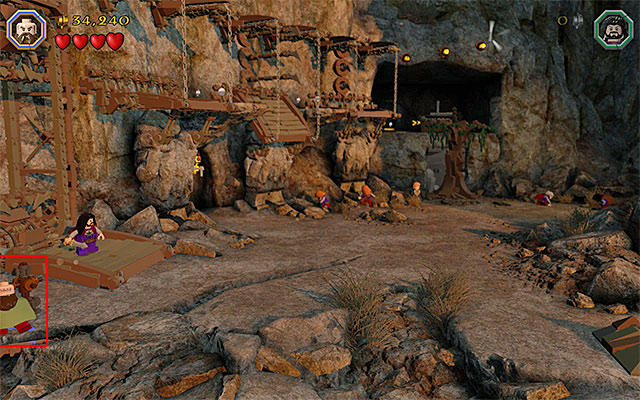
Start the exploration of the larger area by using the Save Statue. Smash then all of the objects in the area. As one of the characters, stand on the wooden platform on the left and switch to any other character. You need to use the barely visible rotary mechanism, which has been shown in the above screenshot. This will allow the character on the platform to reach the ledges above.
 A catch
Switch to the character standing on a ledge above and go right. Stop after you reach a lowered platform. Switch to any other character and locate a catch on the lower level (on the left), which you can reach. Doing that will raise the upper-middle platform.
 Interact with the mechanism
Continue along your path, as the character on the upper level, and stop on the next ledge. Switch again to the character that reached the catch earlier and let go. You can now switch to the character on the upper level, for the last time. Jump over onto the platform to the right and to a larger ledge. You need to approach the big mechanism and interact with its knob (press the indicated key/button several times). This is the end of this, relatively, short stage.
 The vicinities of the game's last stage
The visit to the Middle Earth, in this case, is exceptionally short, because you will get close to the starting point of the sixteenth stage, after you complete stage fifteen. Watch your step, though, because you could fall into the chasm and lose some of your studs, unnecessarily. Go towards the vault entrance, marked by the game, and wait for the next stage to load.
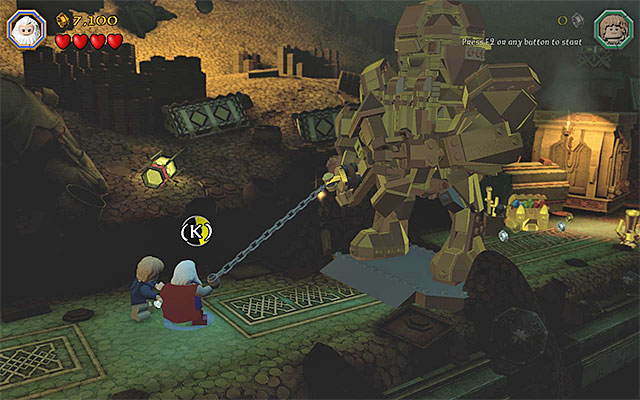 Avoid the well-lit areas, which are at that moment investigated by Smaug
Destroy the objects in the area and do not worry about Smaug, for now. Your laud actions will not attract the dragon's attention prematurely. After you have smashed the right side of the area, hold down the building key/button to build a ladder. You will have to watch your steps only after you reach the location that is being watched by Smaug. You need to avoid the illuminated areas, which are being watched by the dragon or else, you will lose the entire health bar immediately. Wait for Smaug to turn to another area and go right then.
Pick up the flail and use it on the golden statueYou will watch a short cutscene, soon and your characters will enter the lower level of the vault, after a short ride down. Switch to Balin here and use his Dwarf Axe to cut through the cracked plate on the right. A flail will fall to the ground and you need to pick it up. Select this item from the inventory and use it to reach the big golden statue. After you do that, press the indicated key/button several times. Go right and wait for Bilbo and Balin to reach the lower level.
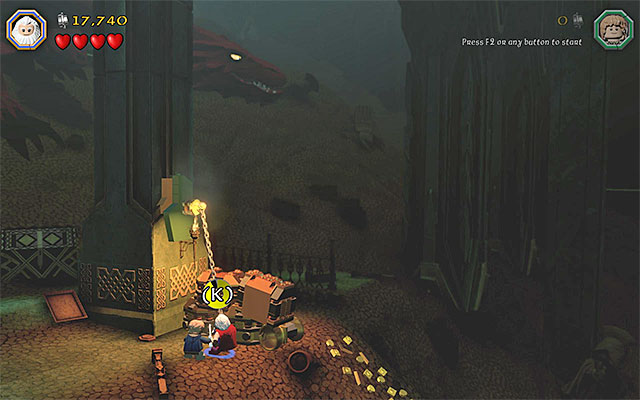 You need to build a new catch here
Also in this part of the vault, you need to go to the right, where you will reach another cracked plate. Smash it with the axe and then hold down the building key/button to build the right ramp. Of course, use the ramp immediately. After you get to the next area, smash the objects here and hold down the appropriate key/button to build a catch. You now need to use the flail that you have obtained, to reach the catch and rip it off.
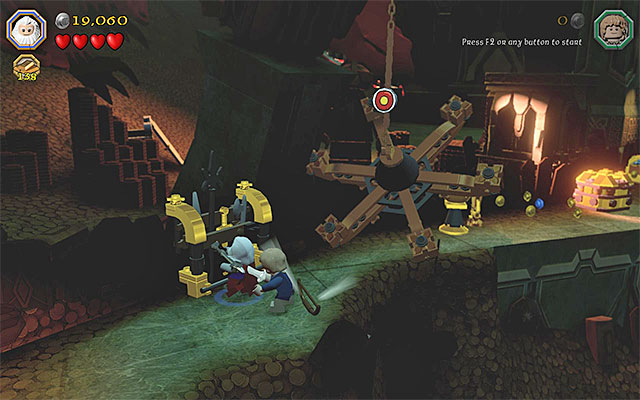 After you destroy the weapon stand, you will be able to collect the bow
After you reach the lower level in the vault, select the axe again and cut through the cracked plate. At the same time, destroy the weapon stand, on the left, and pick up the bow (Lake-town Bow), as any of the characters. Use the bow now to hit the nearby target.
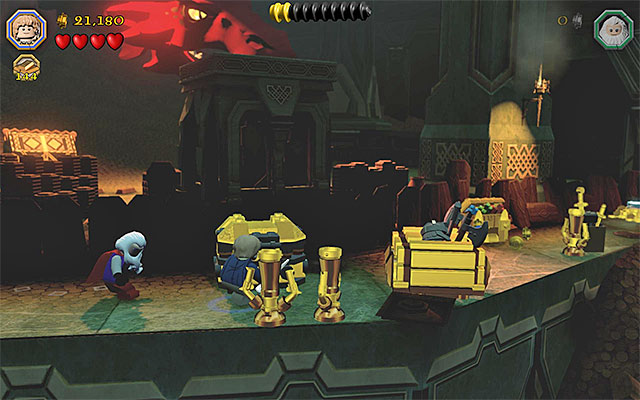 Move only if Smaug is currently, now watching the area directly in front of the characters
Wait for Smaug to stop belching fire and move to the right a bit. Just lie in the earlier phase of the stage, you need to avoid remaining in the areas investigated by Smaug (the well-lit areas). Wait for the right moment and dash to the right and hide behind the wall. Again, wait for several moments and when it is safe, clear your way to the artifact shown in the recent cutscene - Arkenstone.
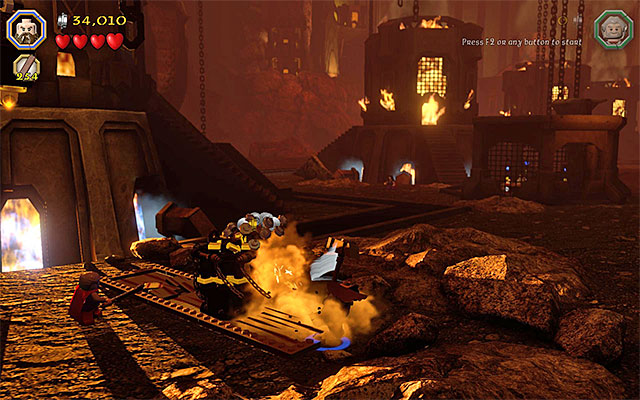 You need to give the block a push and start building
As it will turn out, defeating Smaug is time consuming and will require the cooperation of several pairs of characters. First of all, smash all of the objects in the area and consider using the Save Statue. For starters, switch to Dwalin and walk over to the right. Use Dwalin's Warhammer to push over the block. Go where the block stopped and hold down the building key/button. Wait until the first part of the Craft Table to be built.
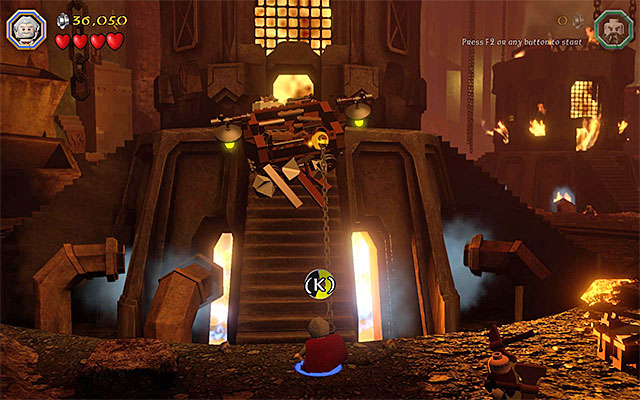 Use the catch and complete the Craft Table
Now, switch to Dori and go left. You need to reach the catch located at the objects on the stairs, with the Dori's Flail. Press the indicated key/button several times and, after the items fall apart, complete the construction of the Craft Table. Approach the Table and spend the supplies on the construction - 15 Rope, 20 Wood and 15 Silver. The next step is, of course, completing the building minigame, thanks to which you will build a pair of huge bellows.
 Climb onto Nori
After you see the cutscene, the game will focus on another group of characters. Smash, thoroughly, all of the objects in the area and switch to Nori. Position him in the highlighted area and switch to Bilbo. Climb onto the dwarf and jump over to the balcony. Destroy the object on the left, return down and hold down the building key/button to build a ladder. You can now set out, with the main characters, towards the upper level of the structure.
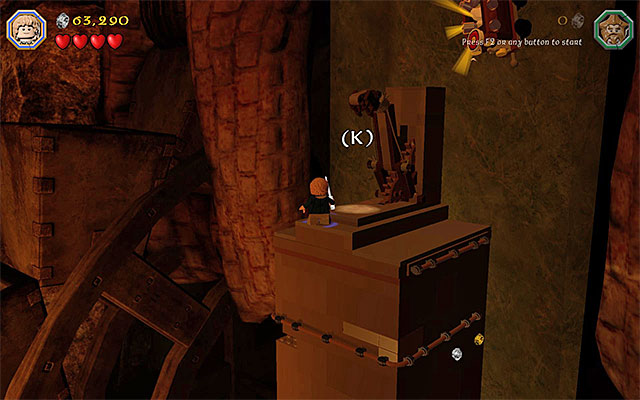 You need to reach the very top of the structure and press the appropriate button
Along your path, stop only where there are flames and wait, always, until Smaug stops belching fire. As Bilbo, put on the ring and activate it. Only then, you will get the opportunity to build another interactive plate. Switch back to Nori and walk onto the plate. As Bilbo, you can now climb on the shoulders of the dwarf. Grab the edge and wait until it is safe. Then, shimmy to the right, as far as possible. Finally, stand at the mechanism above and press the indicated key/button.
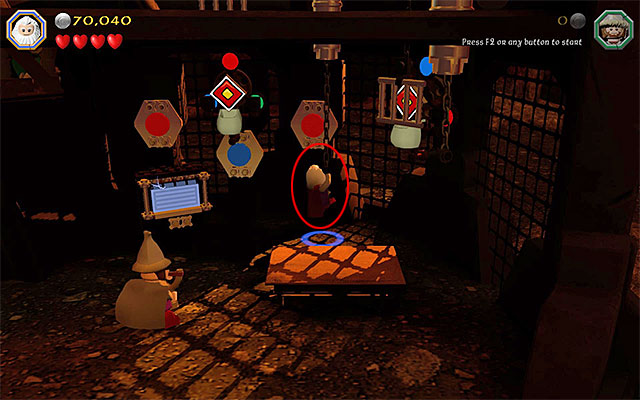
Wait until you cut to another group and start again, by smashing the objects in the area, While there, also hold down the building key/button at the hopping bricks. Thanks to this, you will build three circles of various colors. You will have to solve puzzle here, which is about arranging colors in the way in which they correspond to the big circles that you have built. You always need to start with revealing one of the targets, as Balin and you do that by reaching the catches, like the one shown in the above screenshot.
After you have revealed a target, switch to Ori and use his Slingshot. The solution to this puzzle has been presented in the screenshot - above the left and the right target, there needs to be a red circle, whereas above the middle one - a blue circle. After you solve this puzzle, hold down the building key/button and interact with the table on the right, which used to be inaccessible.
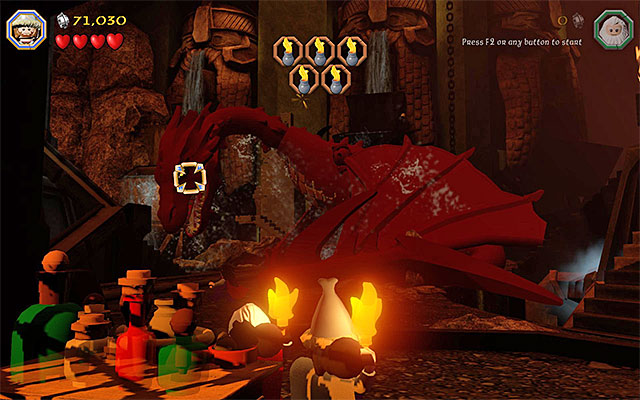 Wait until Smaug is targeted and throw
You will watch another cutscene and Smaug will be peppered with explosive potions. You do not need to use your brains here, too much. Wait for the monster's head to be within the line of shooting and press the action key/button to throw. You need to hit the dragon five times and an additional facilitation is the fact that he does not respond to your attacks.
 Fire the slingshot at the targets
Watch a longer cutscene and, after you get to a new location, smash all of the objects in the area. Explore the central part of the location and hold down the building key/button. wait for the target to be built and switch to Ori. Use his slingshot three times and aim at the target each time. You can now climb up the ladder to the balcony above.
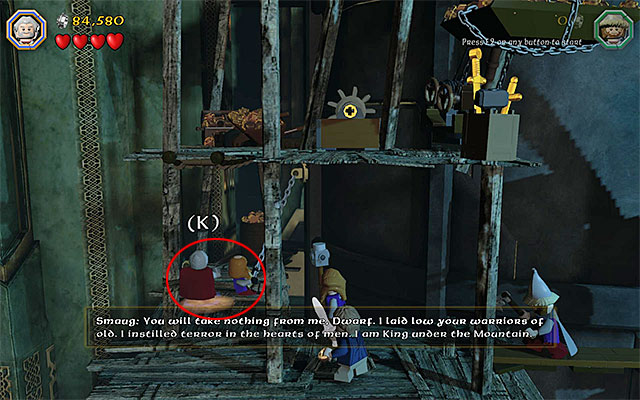
Switch to Dori now and approach the left part of the balcony. Use the flail on the catch. Press the indicated key/button several times, thanks to which there will appear a bridge here. Walk over to the left and order Dori to defend the structure - you need to position him in the highlighted spot (the above screenshot) and press the appropriate key/button.
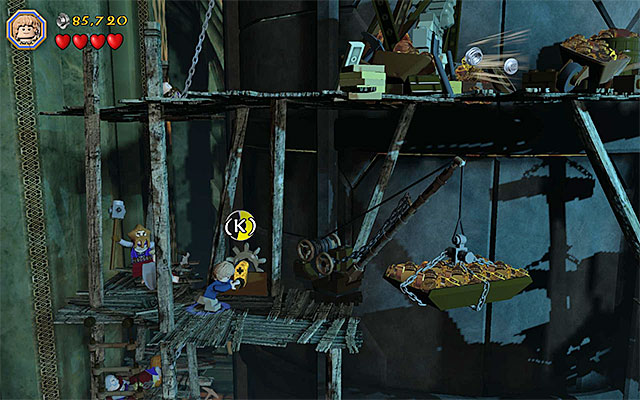 Use the knob to lower the load
Climb up the ladder and find a knob around. It needs to be placed in the slot of the nearby mechanism and used immediately. Jump over to the lowered load and jump towards the balcony on the right. Just like earlier, you will have to help one of the allies. Switch to Ori and position him in the highlighted spot.
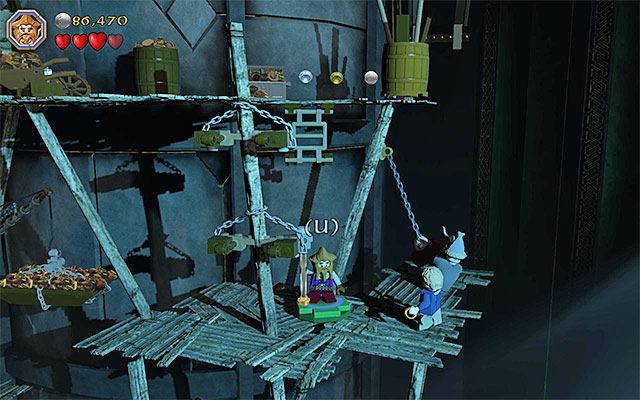 The spot where Nori needs to stop
After you watch a short cutscene, switch to Nori and deploy him in the marked spot. Switch to Bilbo, climb onto Nori and jump towards the balcony above.
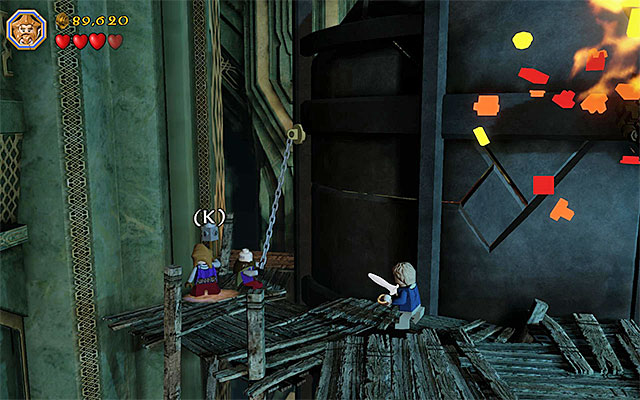 The last one of the allies requires help
Make sure that you have destroyed here one of the chains, thanks to which Nori will be able to climb and reach the balcony with Bilbo on it. Switch to Nori and use his axe on the cracked plate, on the left. You only need to approach, as Nori, the last one of the inactive allies and provide him with help.
This is the end of the last, sixteenth, stage of the game but, your journey has not yet finished. After you watch the final cutscene and the credits roll, you will return to the main world map. I recommend that you now focus on the attraction that you missed out on (side missions, collectibles, etc.) and also on replaying the main stages in free play mode. All of the activities of this kind have been described in the following chapters of this guide.
 You can select the option to replay a stage, in any location of the game world
The main campaign in LEGO The Hobbit consists of sixteen stages and in each of the missions, you can find a dozen-or-so various collectibles/challenges. Precisely speaking, you can find:
It is best to start searching for collectibles, at individual stages, only after you have completed the entire campaign mode because, otherwise, you will not have the required characters and/or items. You can replay and individual mission by doing either of the two things. It is much more convenient to open the world map and roll over any marker of a main quest. After you make the selection, you can freely switch between the stages, which you have completed earlier, and select the one that you are interested in. The second way assumes that you travel to the marker located directly in the game world and this is recommended only if you are currently staying within short distance of that marker.
Note! Regardless of the way in which you start a given mission, remember to select the Free Play mode, while replaying a stage, because only then will all the unlocked characters available.
Note! In the following pages of this guide, the collectibles have been described in the order in which they are found. This should make it easier to collect them all at one take, without the necessity to replay an individual mission, for a number of times.
A VERY IMPORTANT piece of information, connected with finding collectibles, is that you, unfortunately, need to unlock two bonus characters, on your own. This is so, because the two do not you in the character list automatically, while completing the successive stages. The two characters in question are Saruman and Sauron. Their whereabouts have been marked on the map presented on this page.
 Sauron
Sauron can be found close to the path to Dol Guldur and recruiting him requires you to spend 70000 studs (coins). Sauron is the only one that has the Morgul Blade and is the only one capable of destroying the objects under dark powers (they are surrounded with black fog).
 Saruman
Saruman can be found in the Eastern part of Rivendell and recruiting him requires you to spend 50000 studs (coins). Saruman is the only one that can destroy the silver mithril elements of the surroundings.
 The chest is behind King Thror's throne
Requirements: flail (e.g. Dori)
Way to obtain: Remain in the throne room in which the first stage of the game starts and use any character with flail to open the chest on the left.
Reward: Jester's Cane - each character that you hit with the can bursts out in uncontrollable laughter.
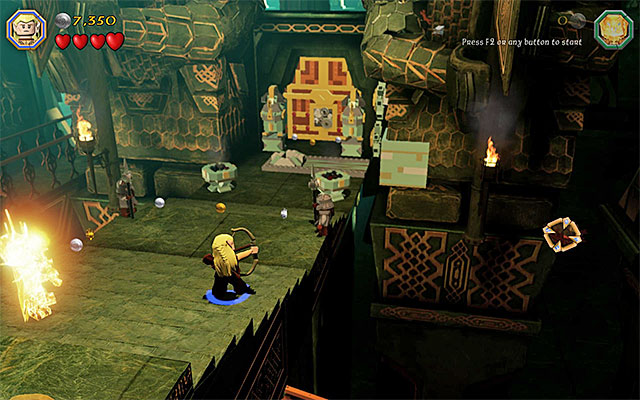
Requirements: bow (e.g. Kili or any elf)
Way to obtain: You need to destroy a total of five nests in the throne room, where you start the first stage of the game. Keep destroying the nests, one after another, with ranged attacks, using the bow. The nest that is the most difficult to locate has been shown in the above screenshot. After you destroy all of the five nests, you will receive a minikit automatically.
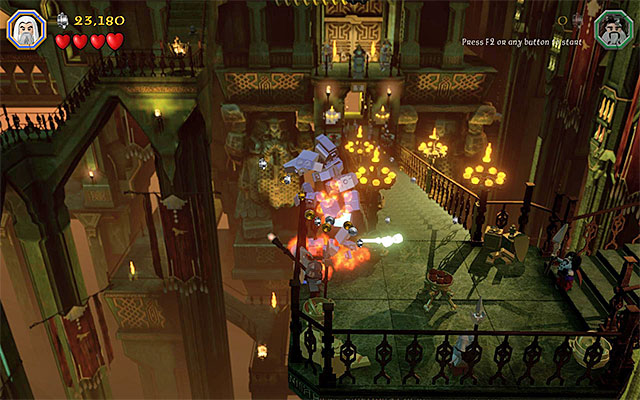
Requirements: Saruman's staff
Way to obtain: While climbing the stairs, stop in the spot shown in the above screenshot. Switch to Saruman and use Saruman's Staff to smash the big silver (mithril) object.
Reward: Glowing Hammer - apart from its main functionality (pushing over of heavy items) illuminates the area around.
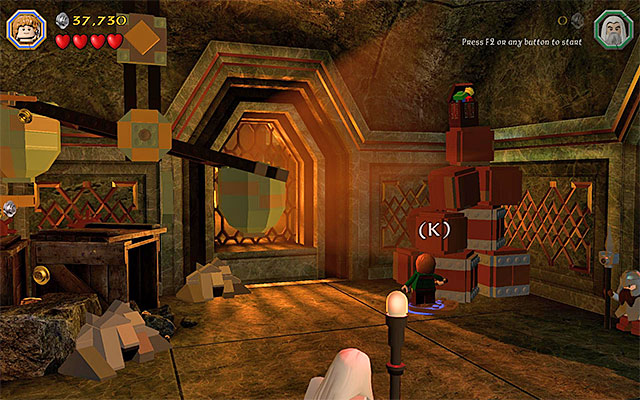 The spot where you need to start fire
Requirements: ability to set fire (e.g. Sam)
Way to obtain: You need to reach the chamber with two levers that unlock access to the room with the forge. Ignore the levers, for the time being, an explore the right side of this chamber. You need to smash a small, red cart here and hold down the building key/button. Switch to the character with the ability to start fire (e.g. to Sam) and stand on the small plate. Wait for the flames to consume the structure and jump towards the minikit.
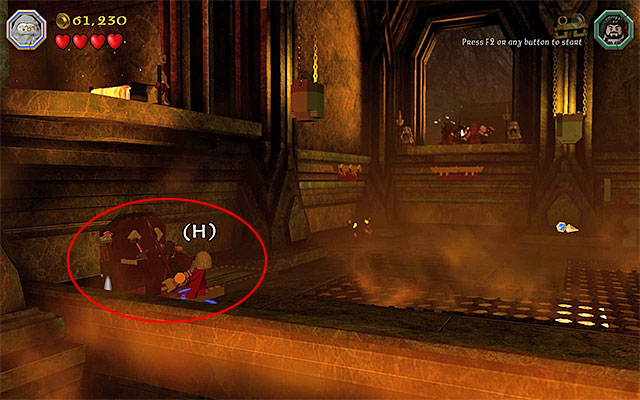 The place where you push over the big obstacle
Requirements: Hammer (e.g. Dwalin)
Way to obtain: Explore the left side of the bug chamber with the forge and find the big element that can be pushed over. Use the Warhammer here and enter the stash, to collect the minikit.
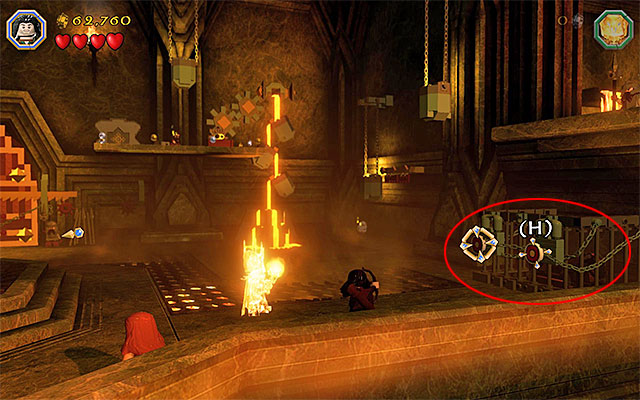 Use the bow twice and, as Sauron, reach the collectible
Requirements: bow (e.g. Kili or any elf), the Morgul Blade (Sauron)
Way to obtain: Explore the right side of the big chamber with the forge and find two targets, which you need to fire at, using a bow. after you have unlocked the access to the cage, switch to Sauron and use the Morgul Blade to gain access to the collectible.
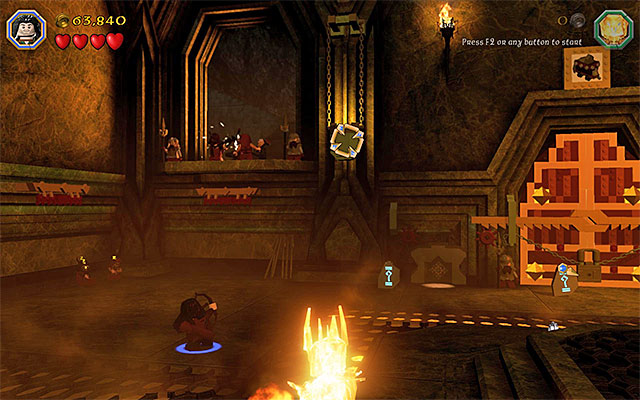 One of the cauldrons
Requirements: bow (e.g. Kili or any elf)
Way to obtain: You need to destroy a total of five cauldrons in the big chamber with the forge. Keep destroying the cauldrons, one after another, with ranged attacks, using the bow (you need to fire several times at each cauldron). After you have destroyed all five, you will receive a minikit automatically.
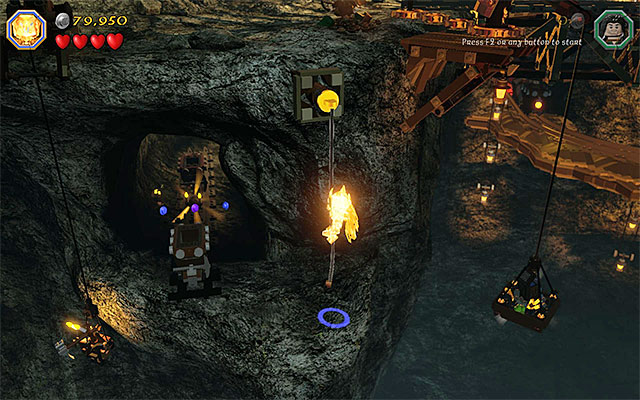
Requirements: Morgul Blade
Way to obtain: After you reach the mine, explore the lower part of that area and locate the rope shown in the above screenshot, over which you can zip down. Make sure that you are playing as Sauron, walk into the dimly-lit area and use the Morgul Blade on the objects here. You can now collect the treasure.
Reward: Mining Hat - automatic illumination of the surrounding area
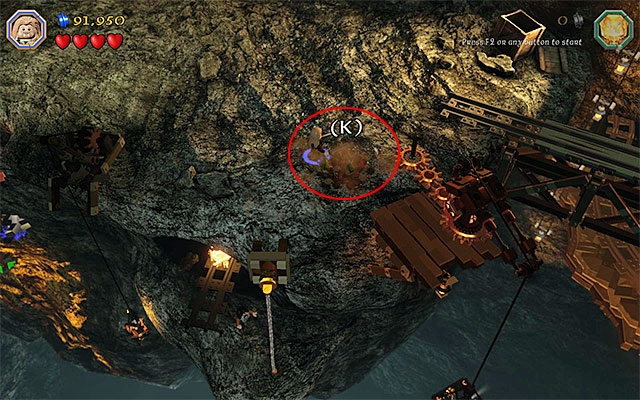 The spot where you need to use the spade
Requirements: spade (e.g. Fili)
Way to obtain: After you reach the mine, explore the lower part of that area and locate the spot where you can use the spade to dig up several objects. Hold down the building key/button and interact with the rotary mechanism then. Wait for the load to be lifted and jump onto it, to collect the minikit.
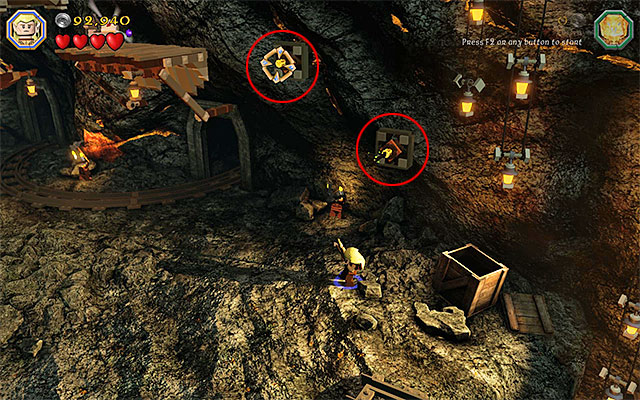
Requirements: bow (e.g. Kili or any elf), ability to take long jumps (any elf)
Way to obtain: After you reach the mine, explore its central part. You need to use the bow here, to fire at two different slots shown in the above screenshot. Switch to any elf now and jump towards the first arrow in the wall. Jump towards the other one, now and make it over to the ledge above, from there. You can now collect the schematic from here.
Reward: Mithril Mirror Armour Schematic
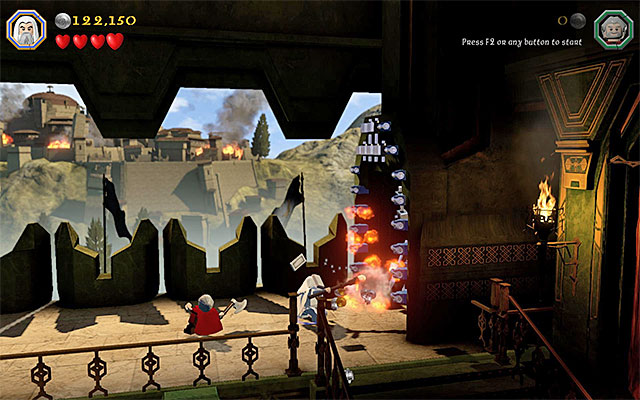 The gate that can be smashed
Requirements: Saruman's staff
Way to obtain: After you get to the first area that is constantly being attacked by Smaug, go to the right, as far as you can. Stop right at the stairs, which you should ignore for now. Switch to Saruman and use Saruman's Staff to cut through the big gate on the right and collect the minikit.
 Destroy the blue object with a staff
Requirements: a staff (any wizard)
Way to obtain: Stop close to the treasure's entrance, i.e. in the area that has been partially destroyed by the dragon. Switch to any of the wizards (e.g. Gandalf or Saruman) and send the magic projectile towards the big blue object. Wait for that object to fall apart and collect the minikit.
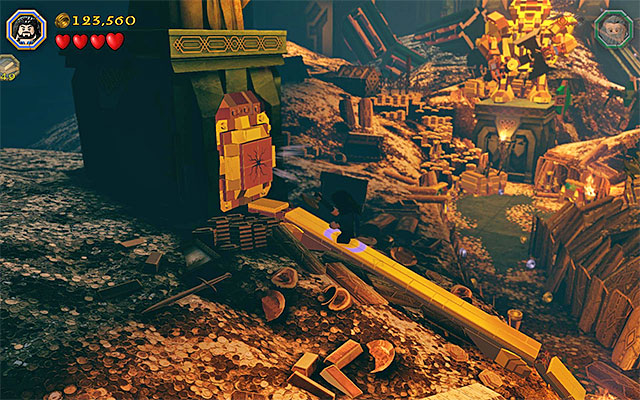
Requirements: axe (any dwarf)
Way to obtain: Right after you reach the treasure, take a look around for the narrow path on the left, shown in the above screenshot. Walk through that path and use the axe to cut through the cracked plate on the left. You can now collect a new minikit.
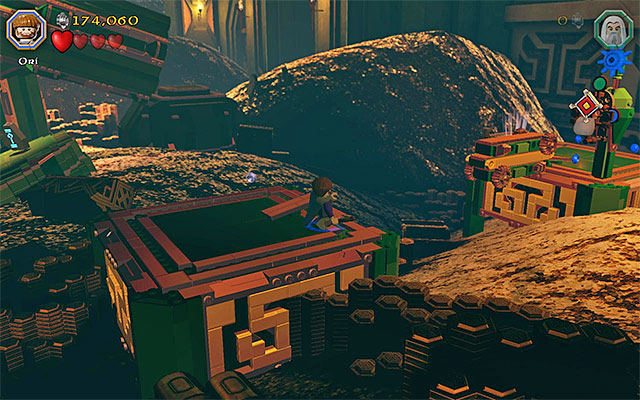
Requirements: slingshot (e.g. Ori), fishing rod (e.g. Bilbo)
Way to obtain: While exploring the treasure, stop in the spot where you need to use Dori's Flail. Do not do that now, and jump towards the small ledge on the right. Jump over, then, to the above ledge, shown in the above screenshot, and switch to the character with the slingshot.
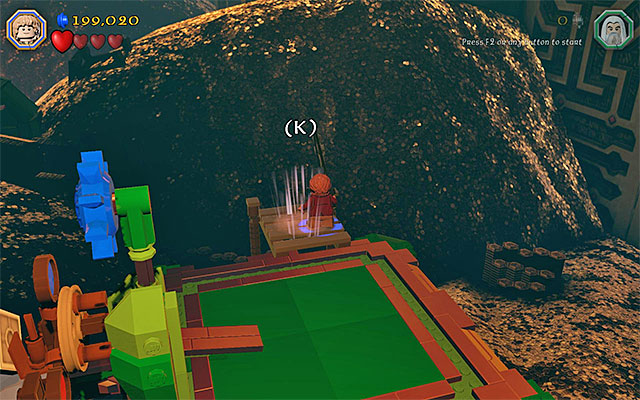 You need to use the fishing rod
Use the slingshot, twice, on the target on the right and walk over the narrow bridge. Stand now in the spot where you need to use the fishing rod and select the character that has one (e.g. Bilbo). After you complete the fishing minigame, you will be rewarded with a minikit.
Reward: Shield of Song - playing of the sad song
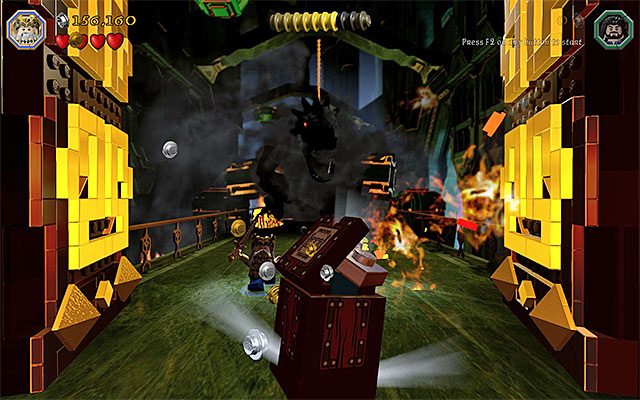 Keep looking around for the minikit, during the chase scene
Requirements: -
Way to obtain: You can collect the last minikit during the escape from the dragon and you, virtually, cannot miss it.
To obtain the Master Burglar Status, you need to amass, at least, 130000 studs. remember that you need to be on the lookout for the blue and violet studs (many of them are near the better-hidden collectibles) and try to complete the building minigame, at the mine, as well as possible.
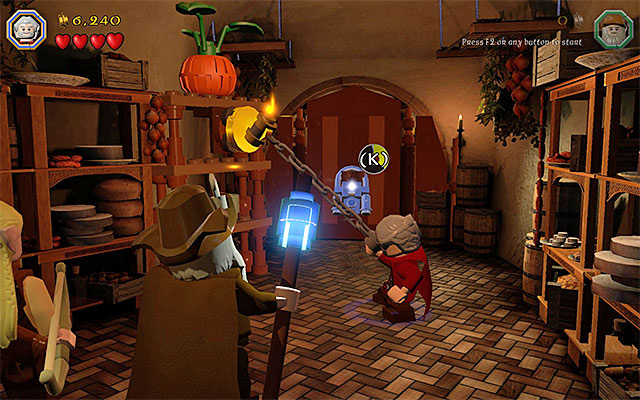 The interactive catch is in the side storage area
Requirements: Flail (e.g. Dori)
Way to obtain: Soon after you start the second stage, you will find yourself in the side storage (you reach it by pushing the large object out of the way). Use the flail on the catch on the left and take a look around for the collectible.
Reward: Pumpkin Crown
During the second stage of the game, in the storyline mode, you do not het the opportunity to explore the garden adjacent to Bilbo Baggins' cottage. While completing the second mission in the Free Play mode, this is possible and also required, because there are many of the collectibles that you are looking for, in the garden. Remain in the side storage, where you found the Unique Treasure mentioned above. Switch to Saruman here and prepare the Saruman's Staff. Enter the targeting mode (hold down the action key/button) and aim at the padlock shown in the above screenshot.
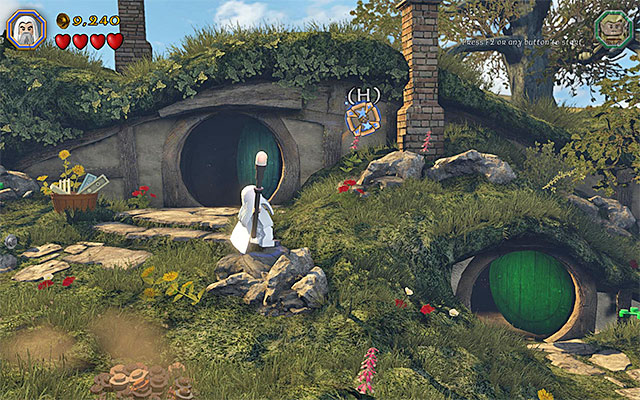 The object that you need to fire the magic projectile at
Requirements: staff (any wizard)
Way to obtain: After you get to the garden, find a circular blue object on the right. Send a magic projectile towards it and collect the shield.
Reward: Window Shield
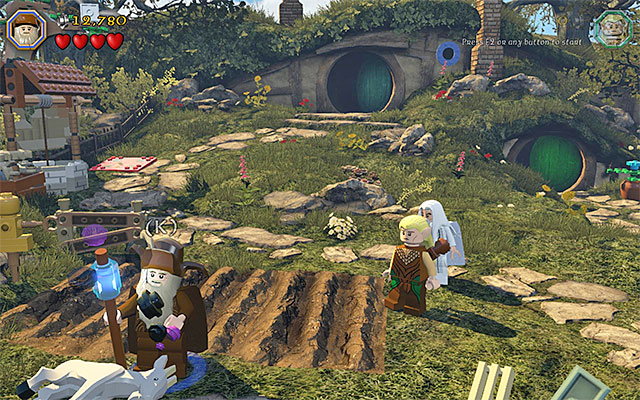 The wounded goat
Requirements: the ability to heal animals e.g. Radagast)
Way to obtain: In the left side of the garden, you will find a wounded goat. Approach the animal and use the unique healing ability. As a reward, where there has been the goat, there will appear a minikit.
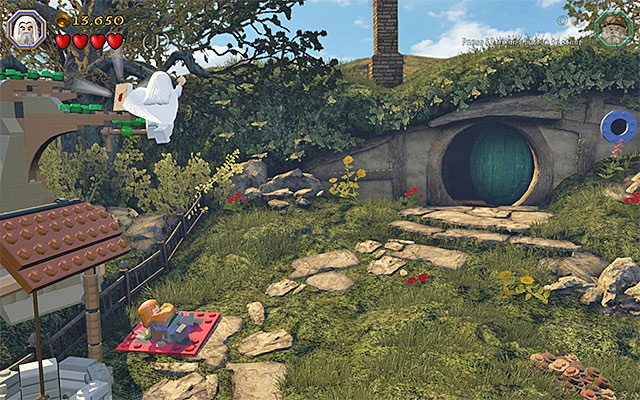 You need to bounce off the stomach of the well-fed ally
Requirements: the ability to eat (e.g. Bombur)
Way to obtain: In the left part of the garden, there is a red blanket. Stand on it, as a character that has the ability to eat food (e.g. Bombur). Switch to another character, approach the one on the blanket to feed them - 2 Bread and 2 Meat (you can find these around the location). After you do that, start bouncing off the stomach of the well-fed ally, try to reach the branch of the tree and make the schematic fall down.
Reward: Mithril Tornado Axe Schematic
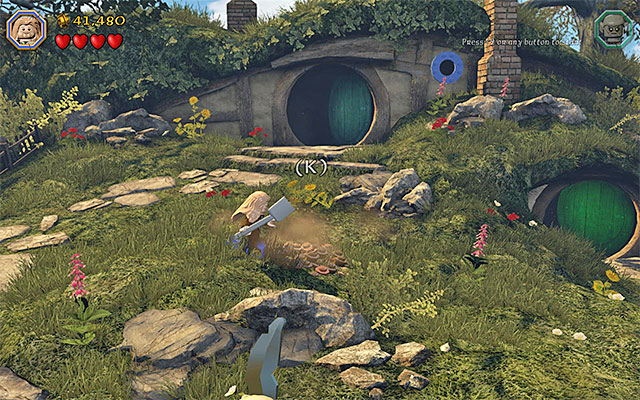
Requirements: spade (e.g. Fili)
Way to obtain: In the center of the garden, find the place shown in the above screenshot, where you can use the spade. Start digging, thanks to which you will obtain a knob. Take the knob to the well, click it into the slot and use it. Wait for the minikit to be drawn from the well and collect it.
 One of the garden gnomes
Requirements: -
Way to obtain: You need to destroy five garden gnomes in Bilbo Baggins's garden (you can use any weapon). After you have done that, you receive the minikit automatically.
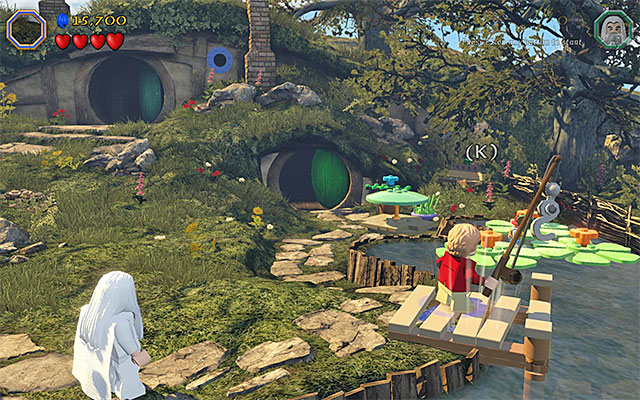 The spot where to use the fishing rod
Requirements: fishing rod (e.g. Bilbo)
Way to obtain: In the right part of the garden, find the pond. Stand on the pier, switch to the character with fishing rod and start the fishing minigame. After you complete it. you will be rewarded with the collectible.
Reward: Gaffer's Trowel - the functioning of the trowel is identical to the spade (digging objects out of the ground and planting)
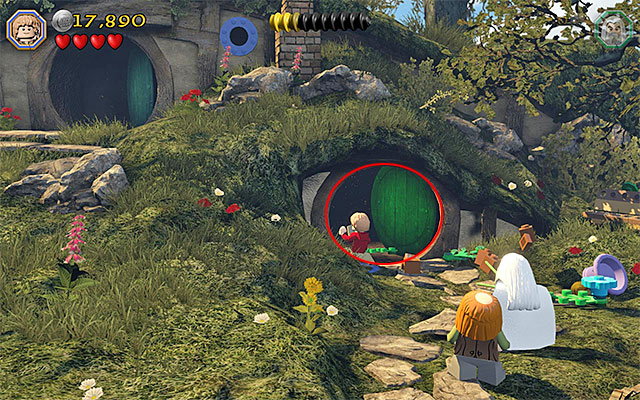
The cellar is another one of the bigger locations, which have not been available, while completing the second stage of the game, for the first time. The entrance to the cellar is in the spot shown in the above screenshot, i.e. in the right side of the garden.
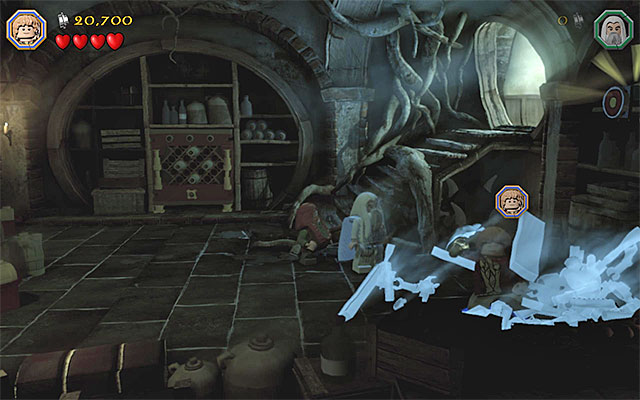
Requirements: The Ring
Way to obtain: After you get to the cellar, start by putting The Ring on, while playing as Bilbo. Interact with the objects shown in the above screenshot, thanks to which you will build the first bottle stand.
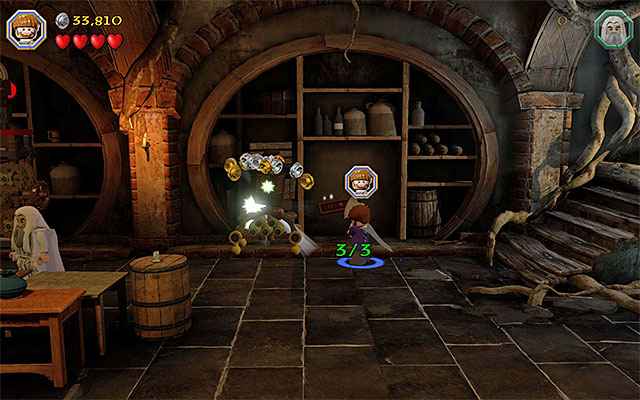 One of the remaining stands
You can now take off the ring and explore the rest of the cellar. Look out for the hopping bricks and, each time you approach them, hold down the building key/button. This way, you will build two more stands and receive the minikit automatically.
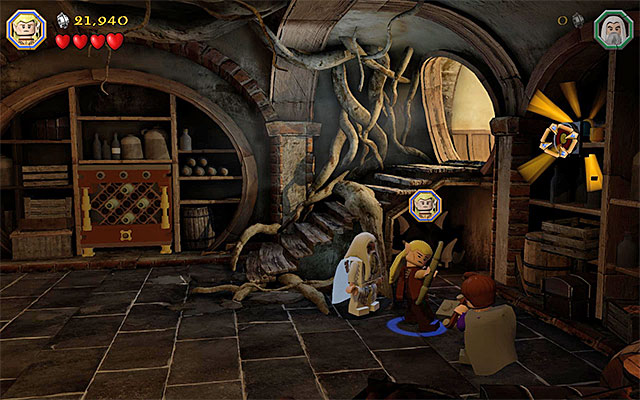 The target
Requirements: bow (e.g. Kili or any elf)
Way to obtain: Explore the right side of the cellar and locate a target, which you can fire the bow at. Performing this, will let you access an unique treasure.
Reward: Tea Hat
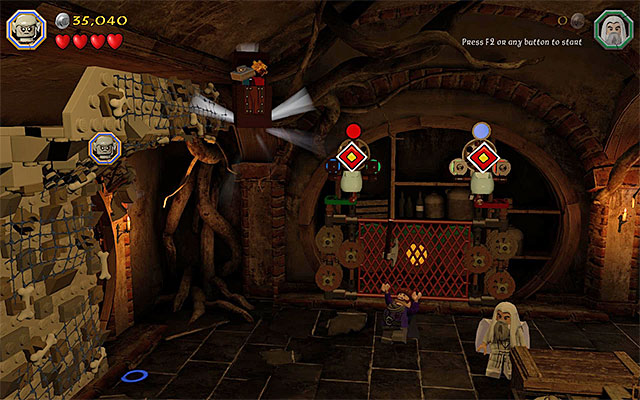 The area under the stairs
Requirements: Morgul Blade
Way to obtain: Switch to Sauron and explore the right side of the cellar. You need to enter the dimly-lit area under the stairs and destroy the object there. Thanks to this, you will gain access to a minikit.
Requirements: the ability to climb walls (e.g. goblin)
Way to obtain: Examine the left side of the cellar, thanks to which you will find an interactive wall. You need to switch to the goblin here and start climbing that wall (the above screenshot). After you reach the very top, grab the hovering minikit.
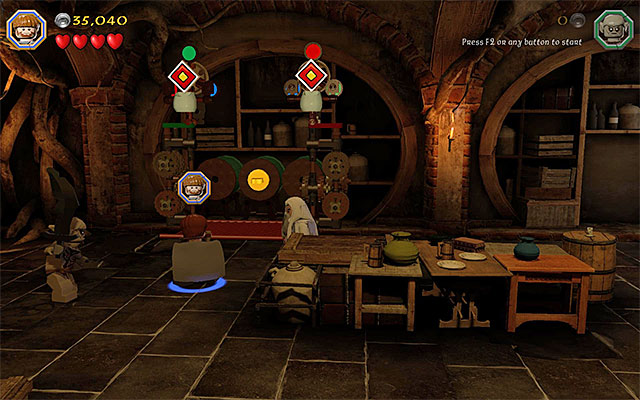
Requirements: slingshot (e.g. Ori), flail (e.g. Dori)
Way to obtain: Examine the left side of the cellar and turn your attention to the two targets here. You need to hit them with slingshot. The solution to the puzzle here has been shown in the above screenshot - above the target on the left, there needs to be a green circle, above the one on the right, a red one. Wait for the grate to slide open, switch to the character with flail and rip the golden catch off. You can now collect the minikit.
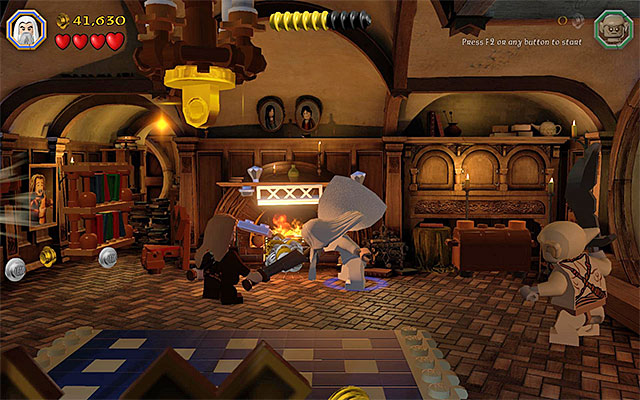 The spot where you use Saruman's staff
Requirements: Saruman's staff
Way to obtain: reach the main area in Bilbo's hut, i.e. the one where the fireplace is. Approach the fireplace and use Saruman's staff to destroy the silver mithril fence. You can now collect the minikit.
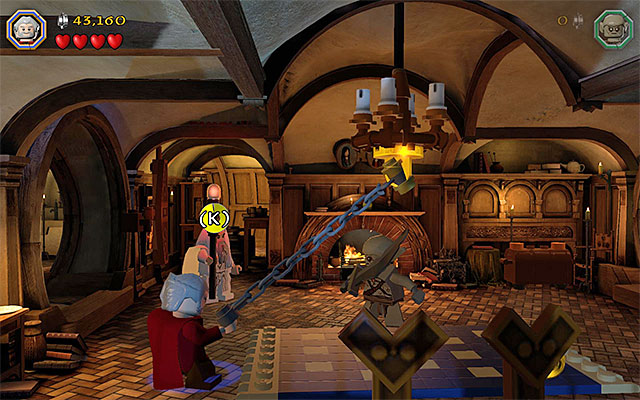 Use the flail to make the chandelier fall down and use the spade
Requirements: flail (e.g. Dori), spade (e.g. Fili)
Way to obtain: Remain in the main area of Bilbo's hut and switch to the character with flail. Use the flail to reach the chandelier under the ceiling. Wait for the chandelier to smash and approach it, as the character with the spade. You can now start digging, thanks to which you will obtain a minikit.
 The first map
Requirements: -
Way to obtain: To obtain the last, tenth, minikit, you need to build three maps in various locations of Bilbo's hut. You can prepare the first map at the fireplace, where you have obtained the two collectibles mentioned above.
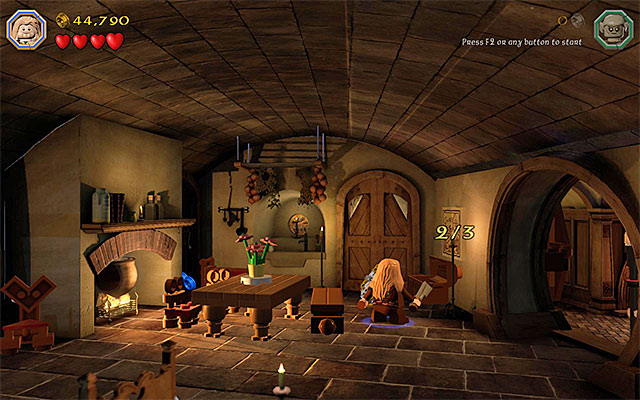 The second map
You need to build the second map in a smaller area, between the main area and the dining room.
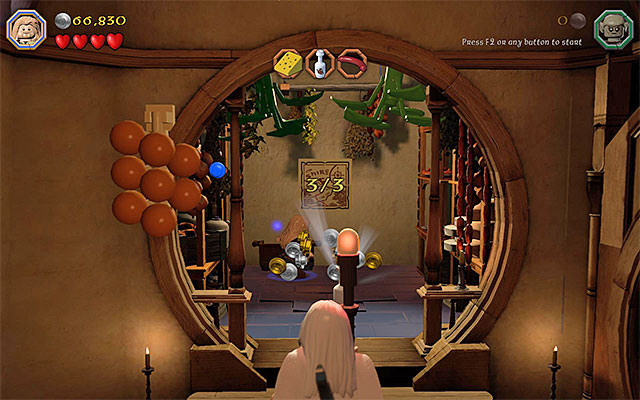 The third map
To build the third map, you need to go to the main pantry in Bilbo's hut, i.e. in the area where you find the items for the guests.
To obtain the Master Burglar Status, you need to amass, at least, 70000 studs. This becomes possible only in the Free Play mode because, in the story mode, the garden and the cellar are inaccessible. Apart from that, try to complete the dancing minigame, without a fail (each time you press the indicated key, at the correct moment, provides you with extra 1000 studs).
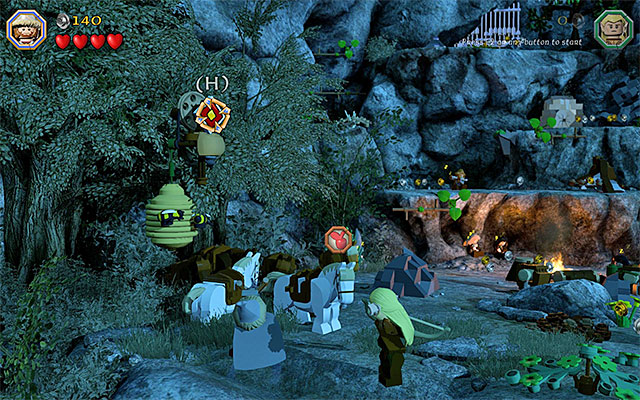 Use the slingshot on the target on the left
Requirements: slingshot (e.g. Ori)
Way to obtain: Explore the left side of the camp, where the third stage of the game starts, and start hitting it with pebbles fired from the slingshot. Keep repeating that, until the Unique Treasure lands on the ground.
Reward: Beehive Gloves - increases the size of the attacking characters
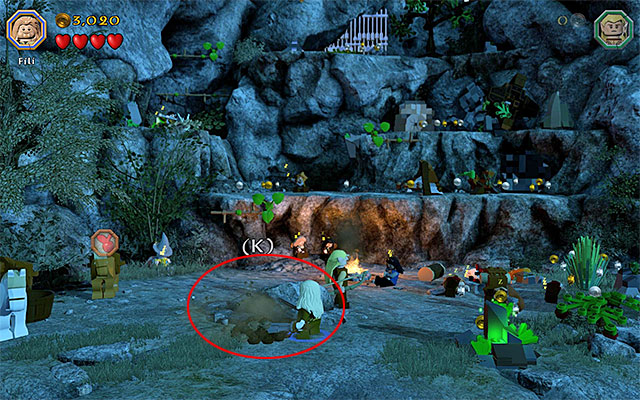 The place where you dig the key up
Requirements: the spade (e.g. Fili)
Way to obtain: Examine the central part of the camp, where the third stage of the game starts, You need to use the spade here, to dig up the key, and approach the chest on the right. Open the chest with the key and collect the unique collectible.
Reward: Camomile Teapot - puts selected characters to sleep
 Jump towards the successive bars
Requirements: Long jumps (any elf)
Way to obtain: You need to reach the highest ledge neighboring the camp (the location where you obtain the fruit for one of the horses. There are catches here, located high above, which you can jump to, as any of the elves (e.g. as Legolas). Finally, jump towards the minikit, which you need to grab in mid-air.
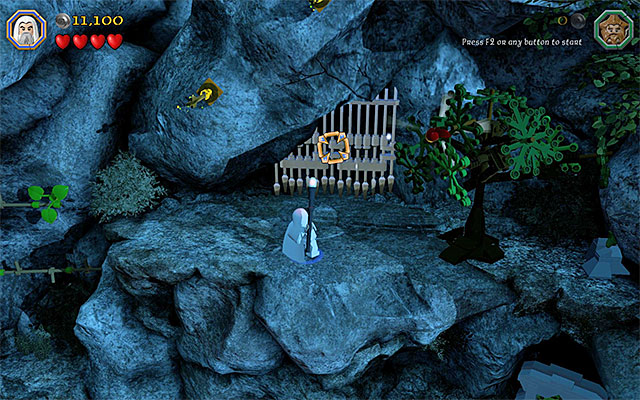
While completing the third stage in the story mode, you were unable to access the cave neighboring the camp. While completing the stage again, in the Free Play mode, it is possible, or even necessary, because that location houses many collectibles. Remain on the highest ledge, where you have obtained the minikit mentioned above. Switch to Saruman here and prepare his Saruman's Staff. Enter the aiming mode (hold down the action key/button) and aim at the silver, mithril gate, shown in the above screenshot. You can now enter the cave.
 The Minikit is right above the cave's exit
Requirements: -
Way to obtain: After you have accessed the cave, take any staircase and collect the minikit from that location.
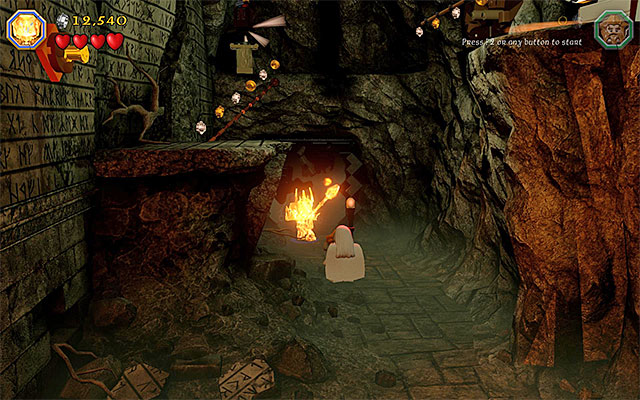
Requirements: axe (any dwarf), The Ring, wall climb (e.g. goblin)
Examine the left side of the cave and smash the cracked plate with the axe of any of the dwarves. Switch to Bilbo now and activate The Ring that he has. You can now stand in the spot shown in the above screenshot and hold down the building key/button.
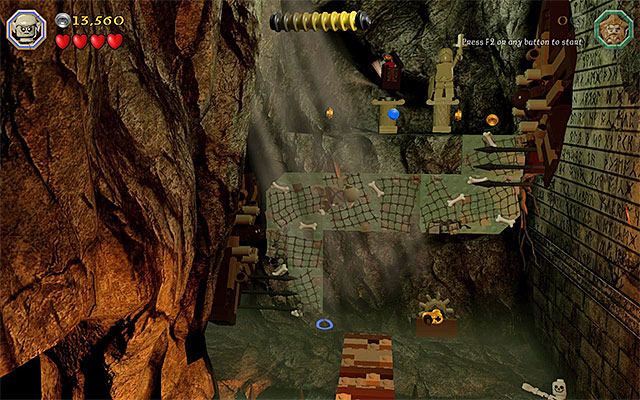 While climbing the wall, watch out for the side spikes
Wait for the bridge to extend and, VERY CAREFULLY, walk over it (getting stabbed with the spikes means losing all of the hearts). After you reach a small ledge, switch to the goblin and start climbing. An important note - do not move sideways, because there also appear spikes there. Instead, try to jump towards the interactive wall fragment above and immediately, towards the ledge above. Here, you will find the minikit.
The bottom area is for Sauron onlyRequirements: Morgul Blade
Way to obtain: Examine the right side of the cave and turn your attention to the bottom level, which can be approached by Sauron only. Use the Morgul Blade to destroy the interactive objects and collect the minikit.
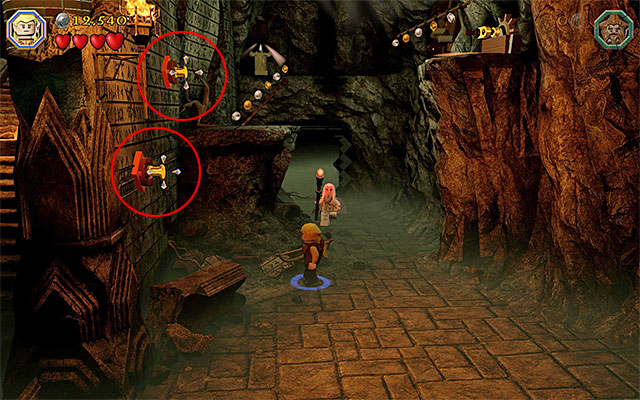
Requirements: bow (e.g. Kili or any elf), long jumps (any elf)
Way to obtain: Explore the right side of the cave and use the bow on the two interactive slots, shown in the above screenshot. Switch to any elf now (e.g. Legolas) and start jumping towards the successive arrows, stuck into the wall. Finally, go into the background of the screen, walk over the rope and reach a small ledge with the collectible.
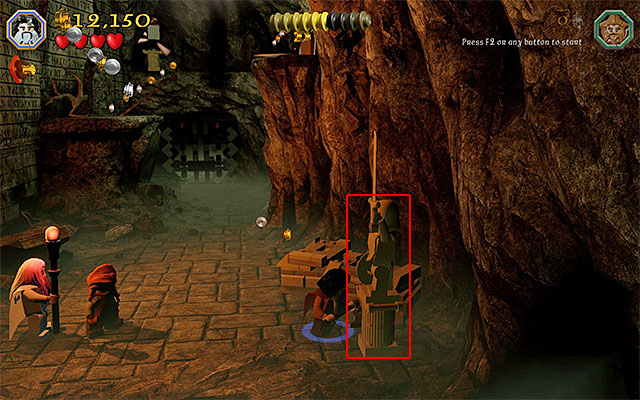 One of the statues
Requirements: axe (any dwarf), The Ring, wall climb (e.g. goblin)
Way to obtain: You need to destroy three different statues in the cave (you can use any weapon). Two of them can be easily located, because they are to the left and to the right of the cave's exit.
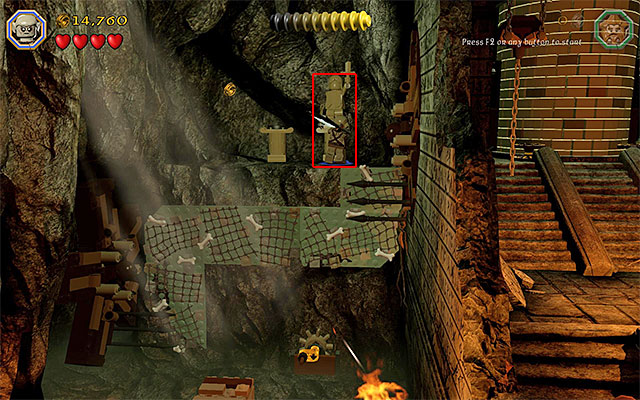
The third statue is in the spot shown in the above screenshot, i.e. on a more distant ledge on the left. The way to reach the ledge has been presented in the description of the third minikit.
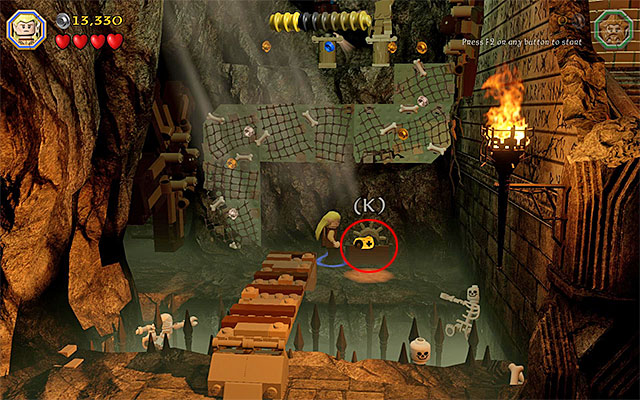
Requirements: axe (any dwarf), The Ring, bow (e.g. Kili or any elf), long jumps (any elf)
Way to obtain: The third unique treasure is the last one left in the cave and, arguably, this is the hardest one to get. First of all, you need to reach two different knobs. The first one is on the ledge in the distance, on the left (shown in the above screenshot). The way to access that ledge has been presented in the description of the third minikit.
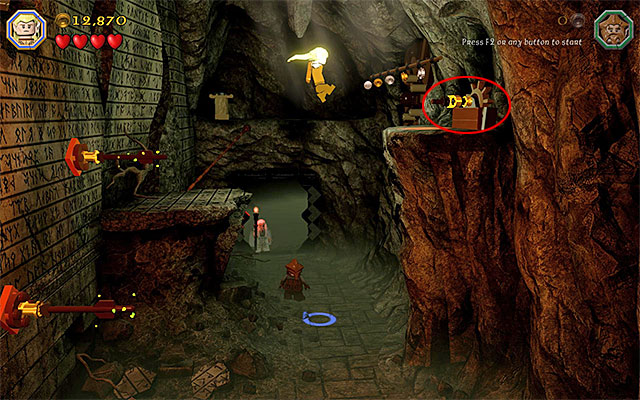
The second knob is on the ledge high above shown in the above screenshot, which is located in the right side of the cave. In this case, start by taking the steps presented in the description of the fifth minikit (use the bow and long jumps). Then, switch t any elf to jump towards that ledge and interact with the knob.
 You need to reach to two chains
Finally, return to the area of the cave's exit. Take the stairs here and catch, as any two characters, the chains on both sides. Wait for the unique treasure to be revealed and collect it.
Reward: Yodelling Shield - the character with the shield starts yodeling
Requirements: the ability to set fire (e.g. Sam)
Way to obtain: You need to reach the location where you fight your first battle with the orcs. After you have dealt with the regular ones, do not haste to the next part of the battlefield and explore this area. You need to find the wooden structure shown in the above screenshot and switch to Sam. Use the ability to start fire, stand on the plate and collect the minikit, after the flames disappear.
 The crate that you can smash
Requirements: Saruman's staff
Way to obtain: After you reach the part of the battlefield, where there appear the siege engines, switch to Saruman and locate the silver mithril crate, which you can destroy. The unique collectible is what will remain.
Reward: Boomerhammer - The hammer, apart from its default functions, also works like a boomerang. It can be used for ranged attacks, after which it returns to the thrower.
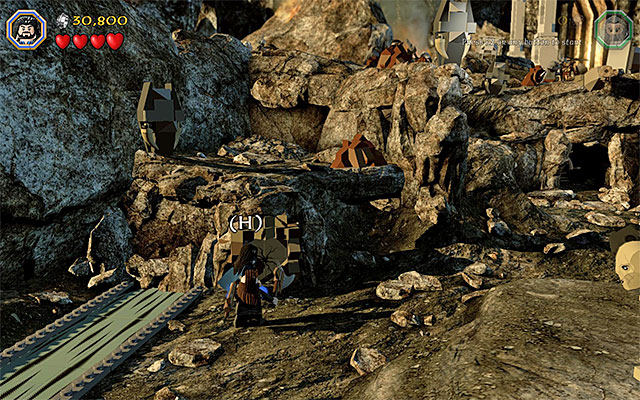 The cracked plate
Requirements: axe (any dwarf)
Way to obtain: After you get to the location where you fight Azog, ignore the boss and explore the left side of the arena. Locate the cracked plate and smash it, thanks to which you will obtain the minikit.
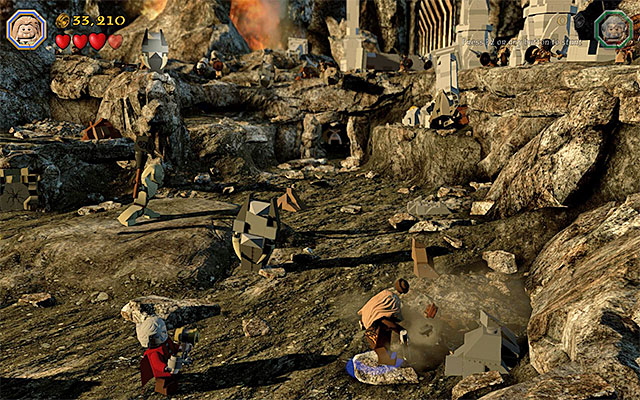 The spot where you need to use the spade
Requirements: spade (e.g. Fili)
Way to obtain: Explore the right side of the arena where you fight the boss. Locate a spot where you can use the spade and start digging. After you are done, hold down the building key/button and wait for a load, with a minikit, to land on the ground.
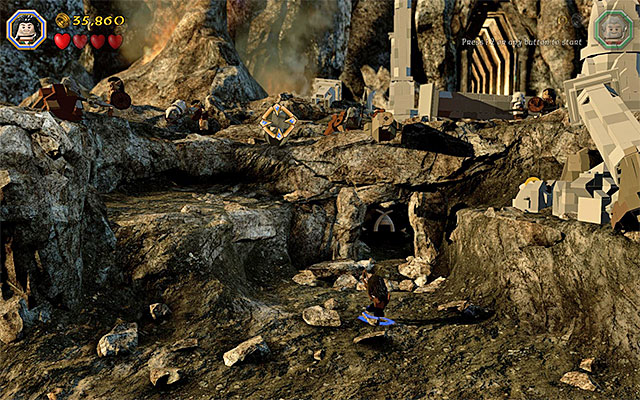
Requirements: bow (e.g. Kili or any elf)
Way to obtain: You need to destroy five concrete objects in the location, where you fight Azog. Two of them can be destroyed with a melee weapon. In the case of the remaining ones, you need to use the bow. The most difficult one to locate, has been presented in the above screenshot. After you have destroyed all five of them, you will receive a minikit.
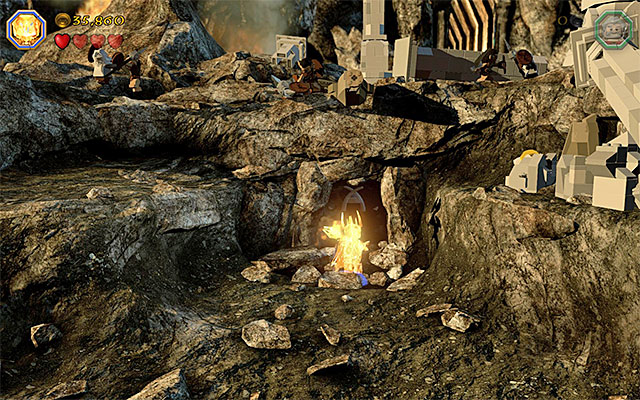 The cave is on the right
Requirements: Morgul Blade
Way to obtain: The schematic is in the area where you fight Azog. Switch to Sauron and go to a small cave on the right. Enter the cave and use the Morgul Blade, thanks to which you will obtain the schematic.
Reward: Mithril Warhammer Schematic
In order to obtain the Master Burglar Status, you need to amass, at least 25000 studs. This should not be too difficult, even while completing the third stage in the story mode. Paradoxically, the most studs are in the battlefield, because the majority of them are blue. Still, watch your back while fighting monsters and try not to die too often.
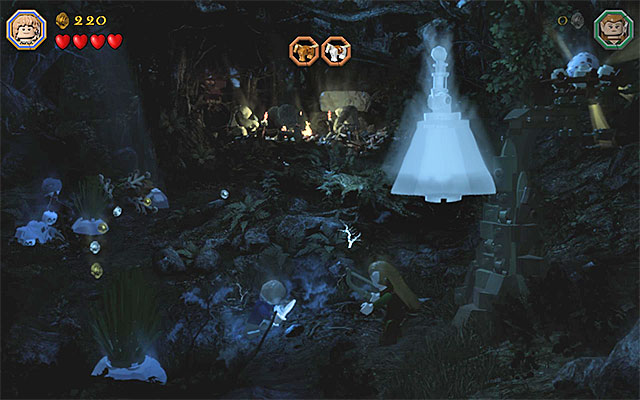 Put on the ring and build a huge weight
Requirements: The Ring
Way to obtain: You need in the starting point of the fourth stage of the game. Smash all of the objects in this area and put the Ring on, which is in Bilbo's inventory. You can now start building, thanks to which you will craft a huge weight. Wait for the tree to sag and the Unique Treasure to become available.
Reward: Dragon Egg - illuminates the surrounding area and sets objects, in the vicinity, on fire
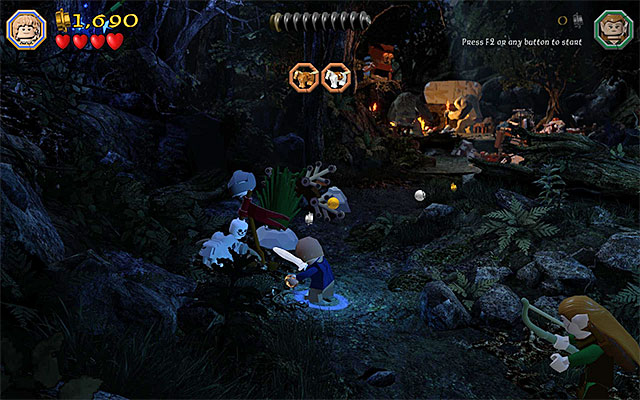 The first skeleton
Requirements: -
Way to obtain: You need to smash five skeletons (with any weapon) and some sort of handicap here is the fact that you encounter them within long distance of each other. The first skeleton is to the left of the starting point and you can take to him straight away. As for the remaining skeletons, you need to remember about them, along your path. Their locations have been presented below.
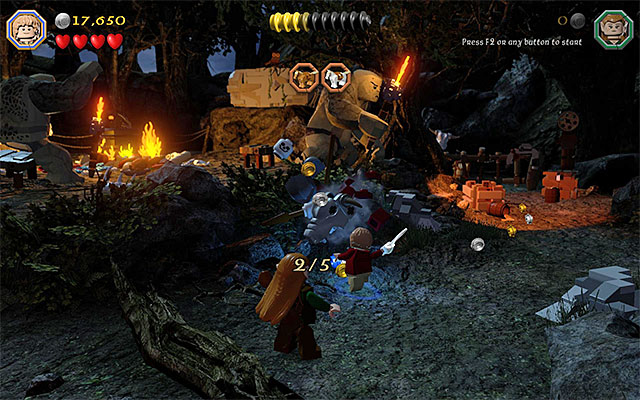 The second skeleton
You encounter the second skeleton along your way to the spot where you free the first horse. It is at the main path.
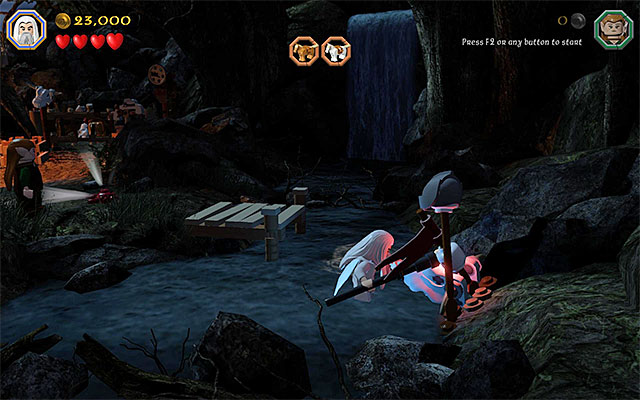 The third skeleton
The third skeleton is in the river (at the one where you complete the fishing minigame).
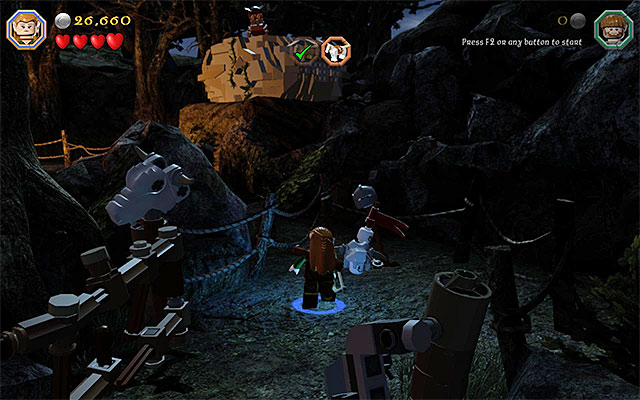 The fourth skeleton
The fourth skeleton is in the corral in which the first one of the freed horses was (enter the corral after you free the horse).
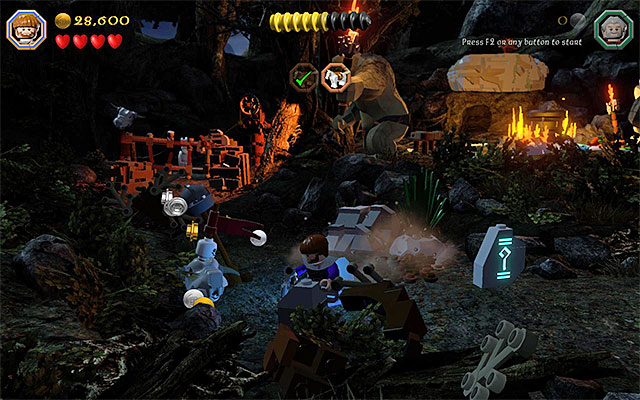 The fifth skeleton
You encounter the fifth skeleton along your way to the place where you free the second one of the captive horses.
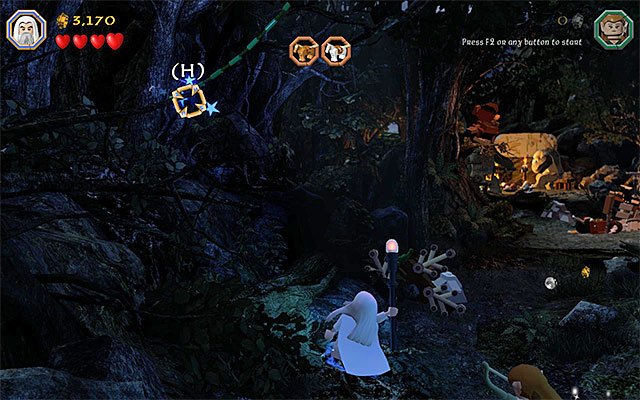
You do not gain access to the tree house, while completing the fourth stage in the story mode. While replaying it, in the Free Play mode, this becomes possible and even necessary, because the house holds several of the collectibles that you are looking for. Go left of the starting point of the fourth stage, switch to Saruman and prepare the Saruman's Staff. Enter the aiming mode (hold down the action key/button) and aim at the rope shown in the above screenshot. Grab the rope and reach the tree house.
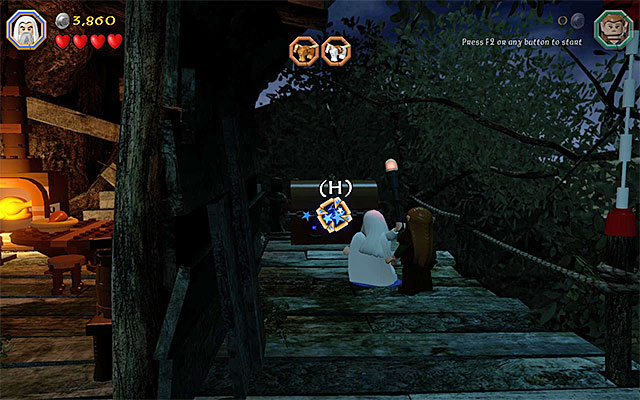 The chest that requires you to use the staff
Requirements: staff (any wizard)
Way to obtain: Explore the right side of the tree house (the area close to the rope that you used to get here). Use the staff and aim at the blue padlock on the chest here. You can now smash the chest and collect the minikit.
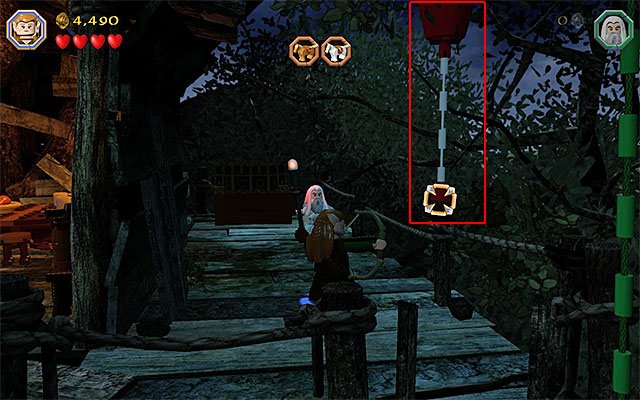
Requirements: -
Way to obtain: While exploring the tree house, you need to find five balloons, and one of them has been shown in the above screenshot. Approach the balloons and pop them with your melee weapon (you can also use a ranged weapon). After you have popped all five, you will obtain the minikit automatically.
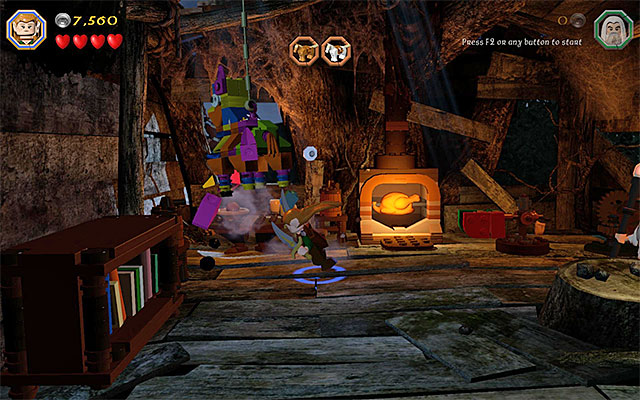 The pinata appears only after you use the rotary mechanism
Requirements: -
Way to obtain: Explore the central part of the tree house and smash the objects here. Then, hold down the building key/button, wait for the rotary mechanism to be built and use it immediately. On the left, there will appear a pinata, which you need to smash with any melee weapon.
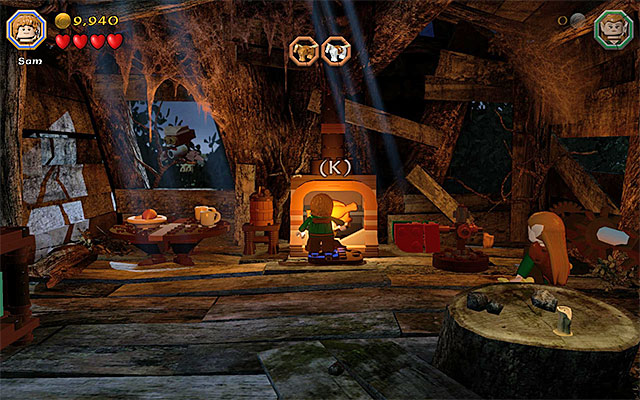 The spot where you use Sam's ability
Requirements: ability to set fire (e.g. Sam)
Way to obtain: Explore the central part of the tree house and approach the stove, with chicken roasting in. You need to stand here as the appropriate character (e.g. Sam) on a small plate at the stove and start fire. You now only need to wait for the minikit to appear in front of the stove.
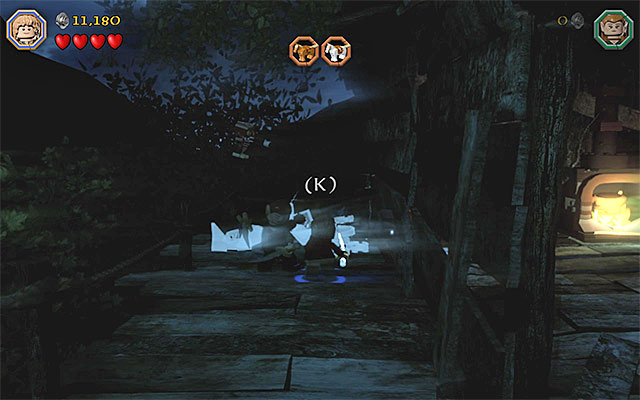 The spot where you need to use Bilbo's ring
Requirements: The Ring
Way to obtain: Explore the left side of the tree house. Smash all of the objects here and put on the Ring, while playing as Bilbo. Hold down the building key/button. Now, you only need to wait until the owl delivers the Unique Treasure.
Reward: Make-up Stick - adding make-up and unique wigs to the characters.
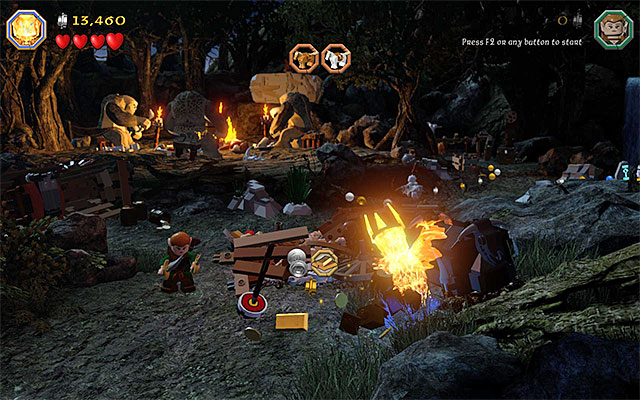 Use Sauron's blade
Requirements: Morgul Blade
Way to obtain: Stop after you approach the troll encampment for the first time, i.e. in the spot where you need to scare the owl out, to distract one of the monsters. On the right there is an object that can be destroyed by Sauron only, using his Morgul Blade. Doing that, will allow you to collect the schematic.
Reward: Mithril Fishing Pole Schematic
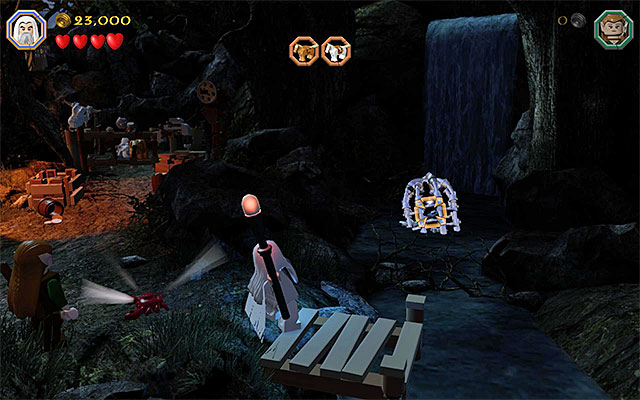
Requirements: Saruman's staff
Way to obtain: You need to reach a small river, i.e. where you complete the fishing minigame. Switch to Sauron here and use the Saruman's Staff against the silver mithril cage shown in the above screenshot. wait for the minikit to be released and flow, a bit, down the river. You can now jump into the river and collect it.
 The interactive catch
Requirements: flail (e.g. Dori)
Way to obtain: Along your path to the corral on the left, where the second one of the horses is being kept, look around for the interactive golden catch. Reach to the catch, using the flail, which will reward you with a minikit.
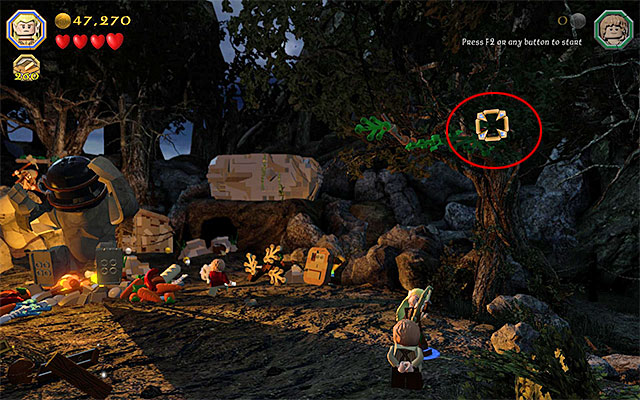
Requirements: bow (e.g. Kili or any elf)
Way to obtain: After you start the battle with three trolls, eliminate, at least, one of them and explore the right side of the camp afterwards. You now need to fire the bow at the branches shown in the above screenshot. After several successful shots, you will reveal the actual target. After you hit it, you will be rewarded with a minikit.
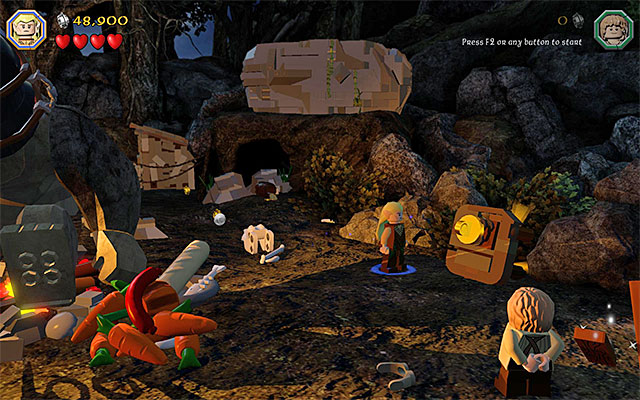 Build a catch and rip it off, afterwards
Requirements: flail (e.g. Dori)
Way to obtain: Explore the right side of the camp, where you fight the three trolls. Smash the objects around and hold down the building key/button, to build a catch. You can now use the flail on the catch and pick up the unlocked Unique Treasure.
Reward: Baffling Beaker - stuns the attacked characters
 The cave that you need to illuminate with the staff
Requirements: staff (any wizard)
Way to obtain: Explore the camp where you fight the three trolls. Go into the background, smash the objects there and find the entrance to a small cave. You need to enter that cave as a wizard, who has the illuminating staff on him, or as any other character with an illuminating object, In the cave, there is a minikit.
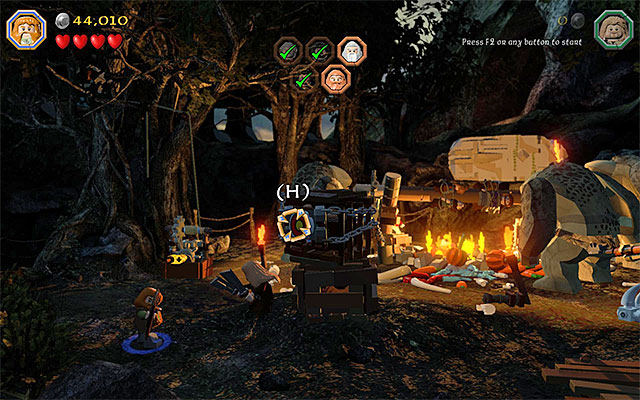 The crate with the target
Requirements: bow (e.g. Kili or any elf)
Way to obtain: Explore the left side of the location, where you rescue the five allies kept by the trolls. You need to locate a crate with a target inside, ad fire your bow at it.
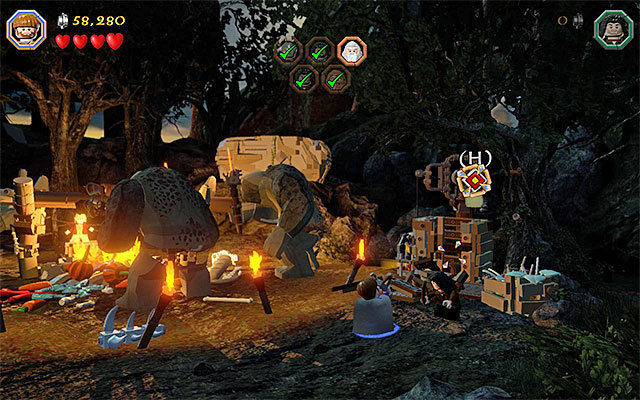 You need to hit the target several times
Requirements: slingshot (e.g. Ori)
Way to obtain: Explore the right side of the location where you rescue the five allies kept by the trolls. Still before you rescue the fifth one, you need to use the slingshot (several times) against the target.
Reward: Snotty Armour
In order to obtain the Master Burglar Status, you need to amass, at least, 50000 studs. This is possible in the story mode, although in the Free Play mode this is much easier to obtain, because you then, additionally, visit the tree house. Try not to die to many times, while fighting the trolls and complete the building game, which ends this mission, as well as possible.
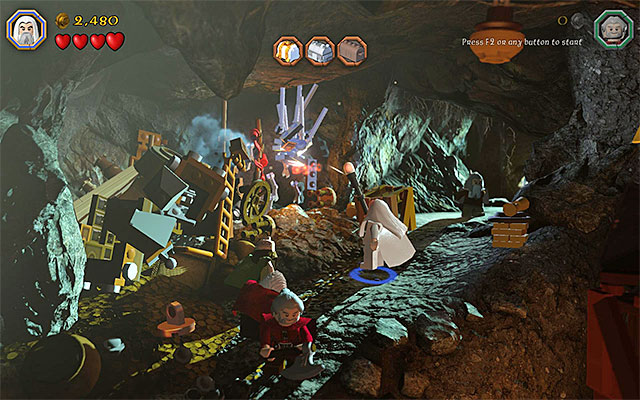 The barricade that can be smashed by Saruman only
Requirements: Saruman's staff
Way to obtain: Approach the unavailable exit from the cave that the fifth stage starts in. Switch to Saruman here and use the Saruman's Staff to destroy the mithril barricade on the left. You can now examine the pile of rubble, where you will find the Unique Treasure.
Reward: Archaeologist's Pick - this item allows you to collect more studs and resources, after you complete mining minigames.
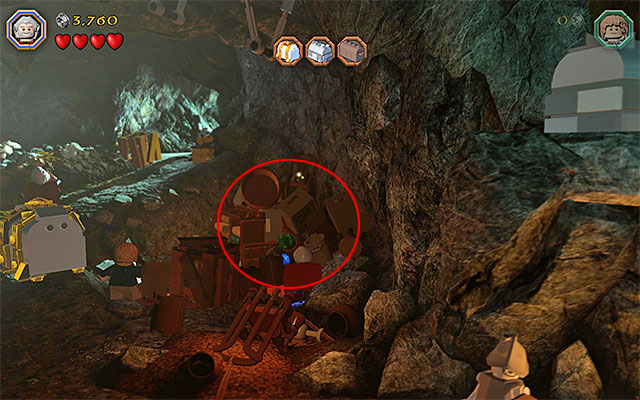
Requirements: flail (e.g. Dori), axe (any dwarf)
Way to obtain: Obtaining the first one of the minikits is connected with bringing down the golden chest, which is required to obtain one of the elf swords. Just to remind you, you need to build an interactive catch and grab it, as two characters. After you do that, you additionally need to cut through the cracked plate, using the axe. After the golden chest falls to the ground, ignore it and check out the area to the right (the above screenshot) and you will find a well-hidden minikit.
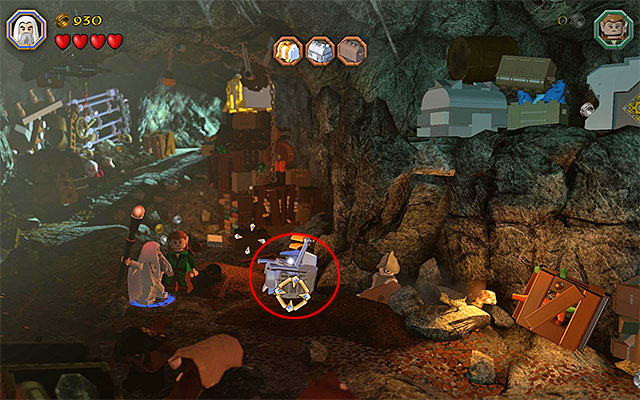 The object the t you need to use Saruman's staff on
Requirements: Saruman's staff, The Ring, flail (e.g. Dori)
Way to obtain: Remain in the left part of the cave. Start by switching to Saruman and using the Saruman's Staff, with which to hit the small mithril bowl. After the bowl falls apart, switch to Bilbo and put on The Ring. Hold down the building key/button, near the hopping bricks, and wait for a new catch to be built. Finally select the character with flail and reach for the catch. Ripping off the catch will result in obtaining a minikit.
 Use the spade in the appropriate spot
Requirements: spade (e.g. Fili)
Way to obtain: Examine the central part of the cave. There is a buried collectible here and you need to use the spade. Thanks to this, you will dig up a schematic.
Reward: Mithril Skeleton Crank Schematic
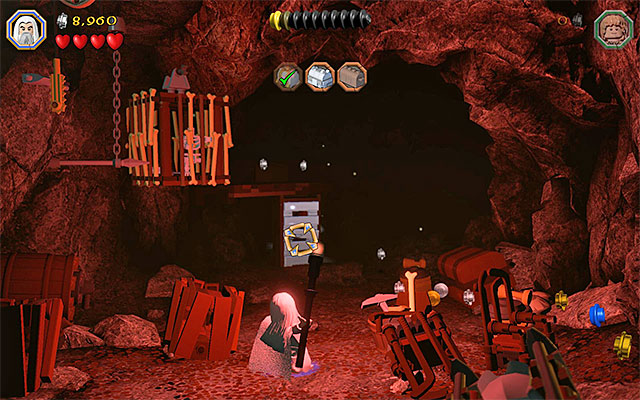 Mithril door
Requirements: Saruman's staff
Way to obtain: As Saruman, enter the dark area in the cave and use the Saruman's Staff to smash the mithril door on the right ( it is best to aim manually here) Behind the door, there is a minikit.
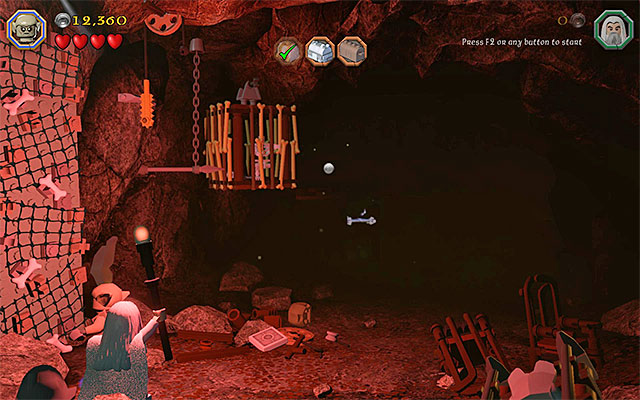
Requirements: staff (any wizard), wall climbing (e.g. goblin)
Way to obtain: As any of the wizards (e.g. Saruman) enter the dark part of the cave and leave him there. Switch now to the goblin. Walk into the same cave, which is now illuminated by the wizard (the staff). In the area indicated in the above area, start climbing over the wall, which will allow the goblin to reach the minikit.
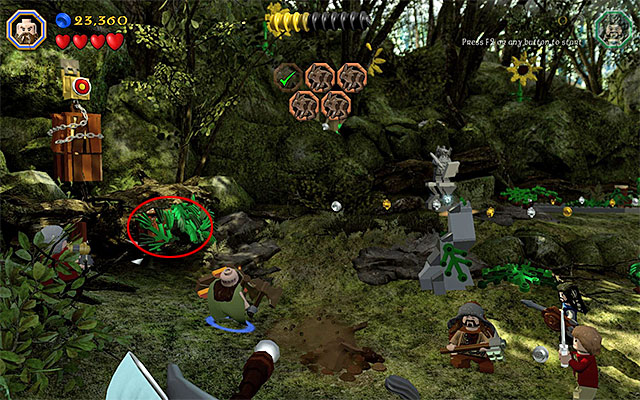 The bush where the collectible is hidden
Requirements: -
Way to obtain: Explore the left side of the meadow, where you save the rabbits of Rhosgobel. The minikit that you are looking for is behind one of the bushes. .
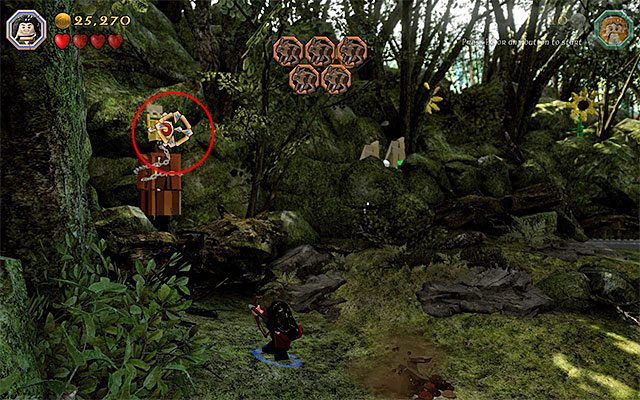 The target is on the left
Requirements: bow (e.g. Kili or any elf)
Way to obtain: Explore the left side of the meadow and use the bow to hit the target. Wait for the Unique Treasure to drop to the ground and pick it up.
Reward: Trophy Mallet - the purpose of this item is the same as that of the Warhammer
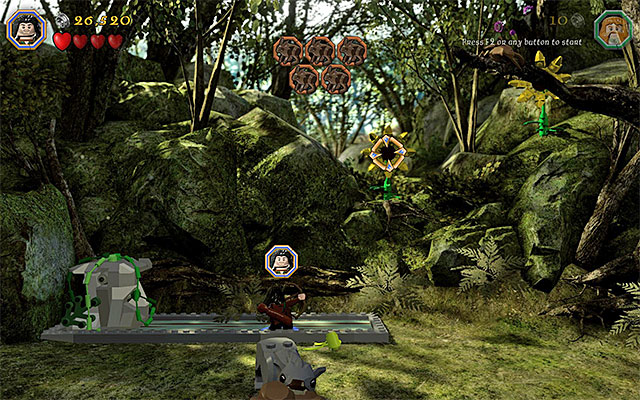 One of the flowers
Requirements: bow (e.g. Kili or any elf)
Way to obtain: You need to smash five big yellow flowers around the meadow. Destroy the successive flowers with the bow. After you have destroyed all of them, you will receive a minikit automatically.
Requirements: Warhammer (e.g. Dwalin), The Ring, axe (any dwarf)
Way to obtain: Make it over to the ledge above, neighboring the glade, i.e. the one where one of the wargs is keeping a rabbit, Just to remind you, you need to use the Warhammer to push the big block over to the left and jump onto it. After you have driven the enemy away, switch to Bilbo and put on the Ring. Start building in the spot shown in the above screenshot. After you have built a cracked plate, smash it with axe.
Reward: Bananarang - works just like a regular boomerang, i.e. can be used to smash bricks over distance and it always returns to the thrower.
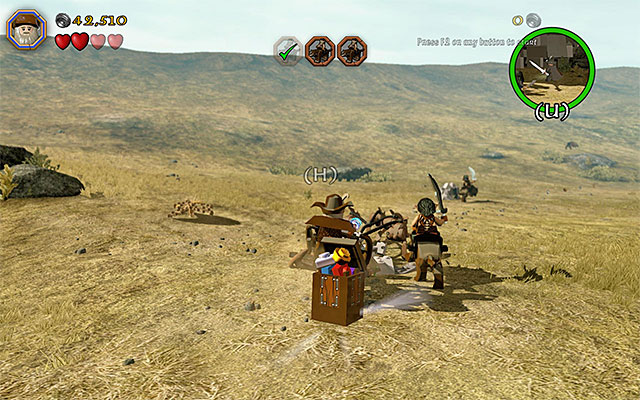 Minikit
Requirements: -
Way to obtain: During the chase scene, in which Radagast takes part, keep looking around for the minikit and ride over it to collect it.
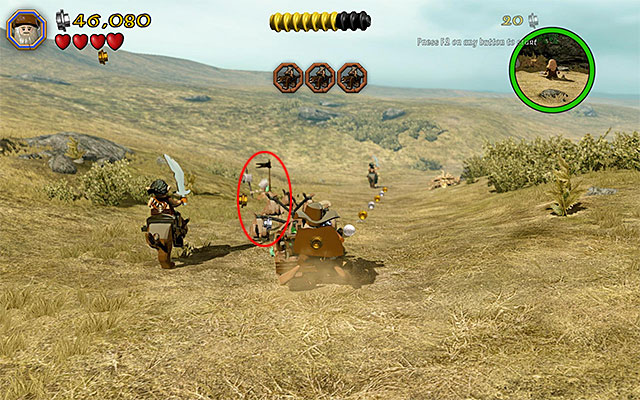
Requirements: -
Way to obtain: During the chase scene, keep looking around for the objects that are similar to the one shown in the above screenshot. In total, you need to destroy five of them (collide with them), thanks to which you will receive the minikit automatically.
 You need to reach the successive arrows, stuck in the wall, as elf
Requirements: bow (e.g. Kili or any elf), long jumps (any elf)
Way to obtain: While completing the scene parallel to Radagast's chase, select the bow from the inventory and fire it against the interactive slot in the wall. Switch to any elf now and start jumping towards the successive arrows. Along your way, an Unique Treasure drops and you will have to return down to get it.
Reward: Paint Bow - apart from its basic function, this bow also spills pant over characters
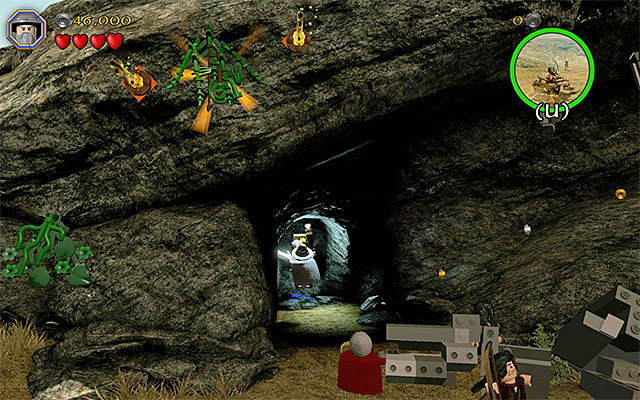 The collectible is in the cave
Requirements: staff (any wizard)
Way to obtain: During the scene parallel to the Radagast's chase scene, you need to stop where a big portion of the wall was smashed. Use the staff of any of the wizards and enter the small dark cave.
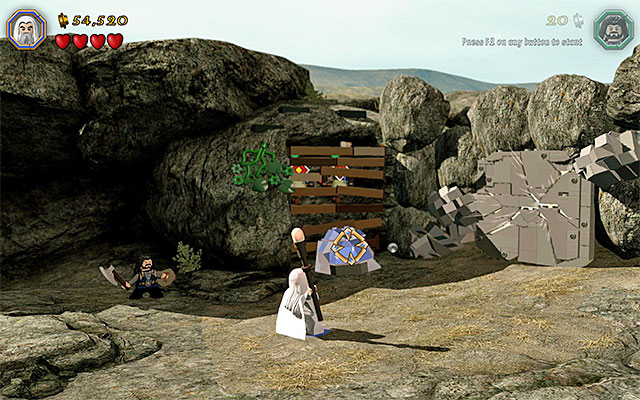
Requirements: Saruman's staff, ability to set fire (e.g. Sam), slingshot (e.g. Ori)
Way to obtain: Along your path to the place where you fight the leader of the warg riders, stop in the spot shown in the above screenshot. Switch to Saruman here and use the Saruman's Staff, to destroy the mithril object. Note that a plate appeared here. You need to stand on it, as the character that can set fire (e.g. Sam) and wait for the flames to consume the wooden barricade.
Switch to a character with slingshot now and start firing pebbles at the targets and try to bring about the situation, where above the above the target on the left, there appears a red circle, and a blue one above the one on the right. Finally, you need to use the slingshot to hit the targets resembling the orcs, which appear on the hill - aim manually and always wait for the given target to be fully revealed. One of the targets is hidden behind the rock on the right and its location has been shown in the above screenshot. Performing all of the above actions will grant you access to the minikit.
To obtain the Master Burglar Status, you need to amass, at least, 65000 studs. Unfortunately, this is difficult, because the point limit is steep. First of all, try to complete the building minigame, in the forest ideally, and to score 20000 studs at it. Apart from that, you should remember to smash all of the objects around you and try not to lose the entire health bar too often, while playing the scene with the orcs and wargs.
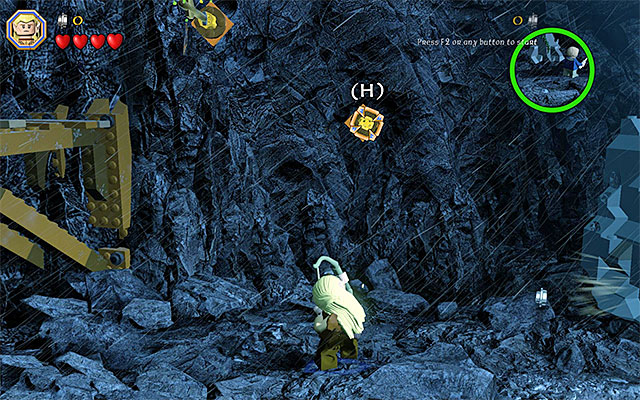
Requirements: bow (e.g. Kili or any elf), long jumps (any elf)
Way to obtain: Explorer the left part of the upper path, i.e. the vicinities of the starting point. Use the bow against the interactive slot shown in the above screenshot. After the arrow connects to the wall, switch to any elf. Start reaching the successive catches and take a jump towards the small ledge o the left, where the schematic is.
Reward: Mithril Flail Schematic
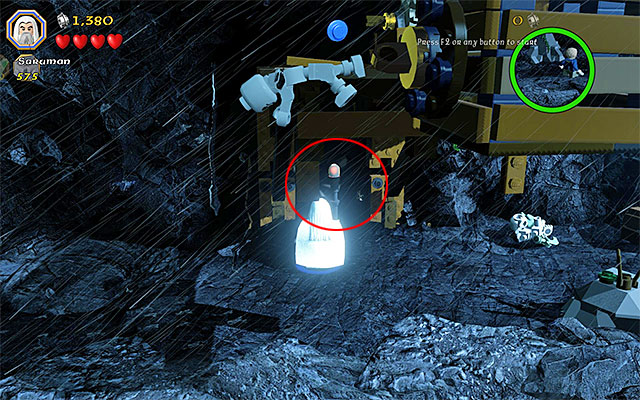 The cave
Requirements: staff (any wizard)
Way to obtain: Examine the left side of the upper path, i.e. the vicinities of the starting point. You need to locate a small, dark cave and enter it as a wizard, or any other character that can light up dark areas.
 The first skeleton
Requirements: -
Way to obtain: You need to smash five skeletons (with any weapon) and some sort of handicap here is the fact that you encounter them within long distance of each other. The first skeleton is to the left of the starting point and you can take to him straight away. As for the remaining skeletons, you need to remember about them, along your path. Their locations have been presented below.
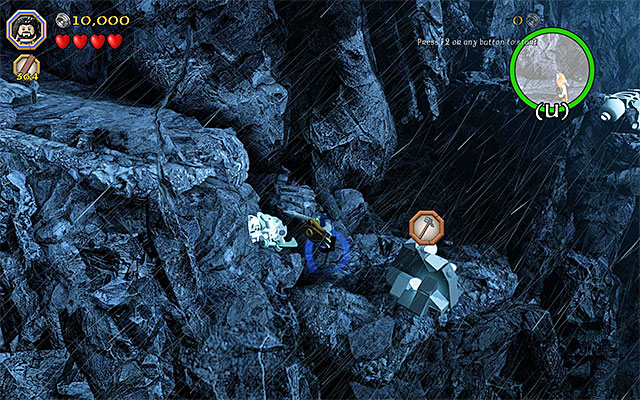 The second skeleton
The second skeleton is on the left side of the bottom path, at the point at which the main path is blocked, at first.
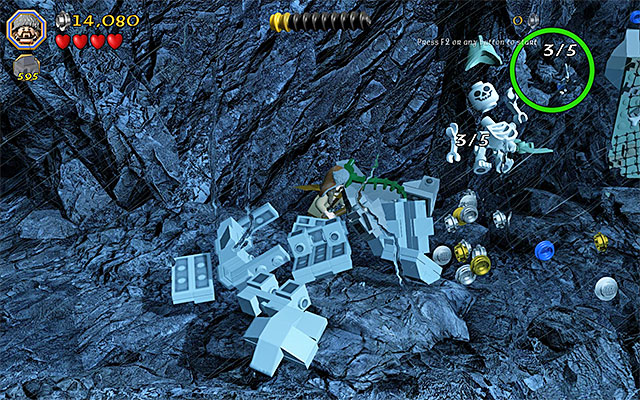 The third skeleton
The third skeleton is halfway through the upper path, where large boulders fall down.
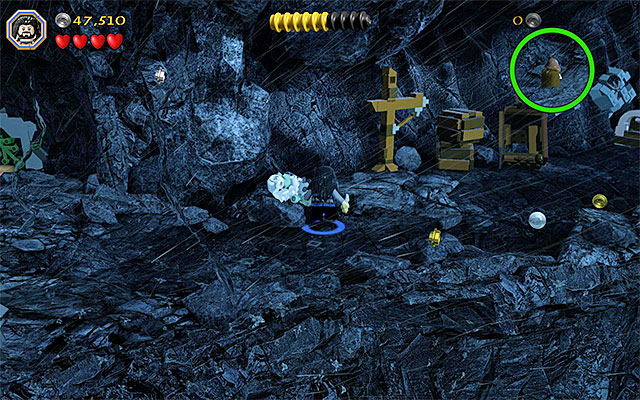 The fourth skeleton
The fourth skeleton is near the chasm, towards the end of the path, i.e. in the spot in which you push the cart over.
The fifth skeletonThe final, fifth, skeleton is in the right part of the bottom path.
 The spot where you use Saruman's staff
Requirements: Saruman's staff
Way to obtain: After you start the sixth stage of the game, switch to the characters on the bottom path and remain there. Switch to Saruman and use his staff to smash the mithril object on the left. Interact with the newly-revealed knob and, carefully, jump over to the ledge on the left, to collect the unique treasure.
Reward: Yo-yo - the purpose of this item is identical as the flail's and, apart from that, makes the attacked characters drop more loot.
 The wall with minikit behind
Requirements: axe (any dwarf)
Way to obtain: Examine the left part of the bottom path and find the fragment of the wall, through which you can cut with axe. The minikit is behind the wall. Note- if you are playing in the story mode, it will be necessary to Buddy-Up to smash the wall!
 Use the flail on the cart at the chasm
Requirements: flail (e.g. Dori)
Way to obtain: You need to reach the right part of the upper path. After you push over the cart, using the Warhammer (this is required for the storyline to progress) approach its upper part, which detached from the rest. This time, use the flail. Wait for the cart to be destroyed and collect the minikit.
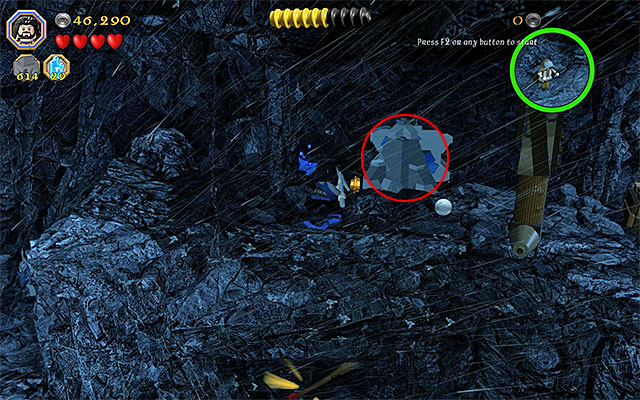
Requirements: staff (any wizard)
Way to obtain: While on the bottom path, look around for the rocks shown in the above screenshot. Smash the rocks with any melee weapon. Then, use one the wizard staffs to get rid of them completely. Thanks to this, you will gain access to the manhole, through which to walk,, as a dwarf or the hobbit. The manhole will take you to the ledge below, where there is the unique collectible.
Reward: Workman's Axe - the use of this item is identical with the regular axe
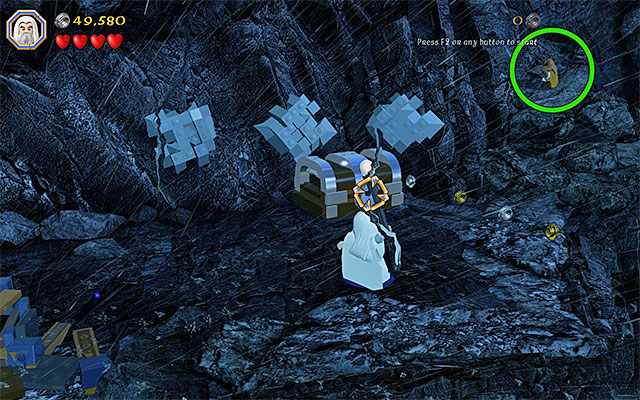 Aim Saruman's staff at the padlock on the chest
Requirements: Saruman's staff
Way to obtain: You need to reach the right end of the bottom path. Start by switching to Saruman. Use Saruman's Staff to destroy the mithril padlock on the chest here.
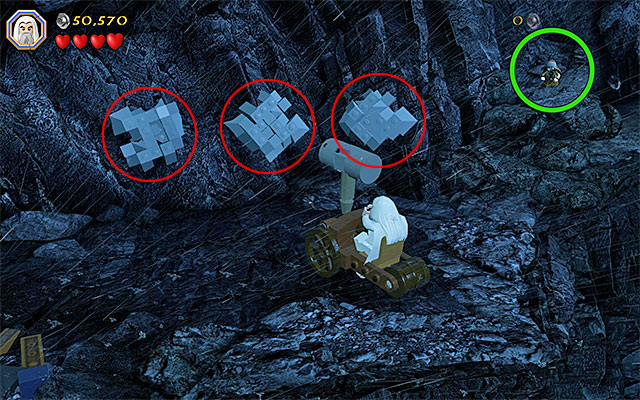
After you have smashed the chest, hold down the building key/button, thanks to which you will build an unique vehicle. Mount the machine and drive up to the rocks shown in the above screenshot. Each time, you need to press the action key/button to set the huge hammer into motion and smash a rock. Destroying all of the interactive rocks will result in the appearing of the minikit.
While completing the sixth stage in the story mode, you will not be capable to explore the interior of one of the stone giants, over which the main characters need to climb. While completing it again, in the Free Play mode, you can do that and it is even required, because you will then reach a cavern housing several of the collectibles that you are looking for. Stop after you see the first cutscene with the giants fighting. Locate the big mithril element of the environment, shown in the above screenshot, switch to Saruman and use the Saruman's Staff to unlock a new location.
 Position the characters on separate plates
Requirements: -
Way to obtain: Explore the left side of the cavern inside the stone giant. Smash the elements around and build the two pressure plates. On the plates, you need to position two different characters. Wait for the minikit to be revealed.
 Put on the ring and build a ladder
Requirements: The Ring
Way to obtain: Explore the left side of the cavern inside the stone giant. Smash the elements around and switch to Bilbo. Select the Ring, put it on and build a ladder. After that, take the ring off and climb up the ladder to the balcony. Use the rotary mechanism, which will set the map on fire and reveal the minikit.
 The spot where you need to start digging
Requirements: spade (e.g. Fili), axe (any dwarf)
Way to obtain: Examine the central part of the cavern inside the stone giant, thanks to which you will locate the spot where to use the spade. After you dig out the stone plate, switch to any character with axe. Jump and, while in mid-air, press the action key/button to slam against the stone plate. After a while, a minikit will appear here.
 Build a pier and complete a fishing minigame
Requirements: fishing rod (e.g. Bilbo)
Way to obtain: Explore the right side of the cavern inside the stone giant. Smash the objects around and hold down the building key/button. Walk onto the pier now and complete the fishing minigame, as the character with the fishing rod active. Wait until you fish out the unique collectible from the water.
Reward: Misty Mountain Shield
Requirements: slingshot (e.g. Ori)
Way to obtain: Explore the right side of the cavern inside the stone giant. Turn your attention to the three targets that you need to hit with pebbles fired from the slingshot. The solution to this puzzle has been shown in the above screenshot - above the left target, there needs to be a green circle, a red over the middle target and a blue over the right target.
Reward: Stone-giant Gloves - raises strength
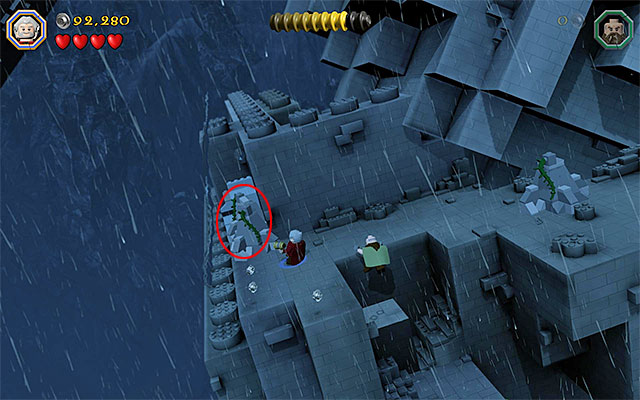
Requirements: axe (any dwarf)
Way to obtain: While climbing over the stone giant, stop after you reach the ledge shown in the above screenshot. Smash the objects here, on the left, which will reveal a cracked plate. You now only need to smash the plate with axe.
Requirements: Morgul Blade
Way to obtain: Towards the end on the sixth stage, you need to take cooperative action on one of the limbs of the stone giant. DO NOT DO THAT and go left instead. Stop after you reach the dark object shown in the above screenshot. You need to destroy that object using the Morgul Blade, used by Sauron.
To obtain the Master Burglar Status, you need to collect, at least 80000 studs. It is difficult to do in the story mode, especially that in the Free Play mode, you receive the opportunity to explore an additional cavern. Apart from that, try to complete the building minigame, as well as possible, and switch to goblin at the right moment, thanks to which you will be able to reach the cave with blue and violet studs.
 The first plant
Requirements: bow (e.g. Kili or any elf), wall climbing (e.g. goblin)
Way to obtain: You need to smash five green plants and a some sort of handicap here is that you encounter them within long distance of each other. The first plant is in the starting point, of the seventh chapter, and you can use any melee or ranged weapon here. As for the remaining plants, you unfortunately need to remember about them and their whereabouts have been provided below.
 The second plant
The second plant is a bit ahead, to the right of the skeleton hanging on the chain. You need to use bow to destroy it.
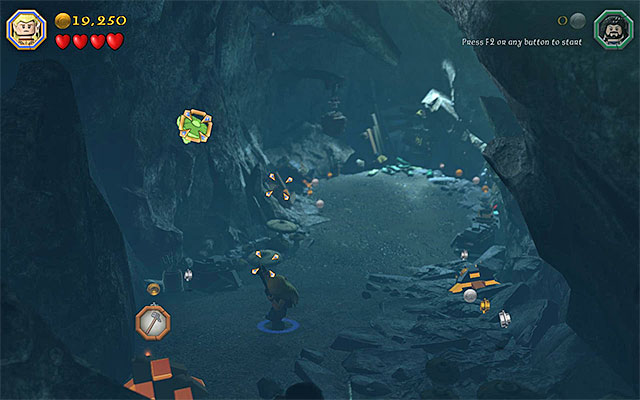 The third plant
You can find the third plant ahead, after you complete the first climb, as goblin. Also in this case, you need to use bow.
 The fourth plant
You can find the fourth plant in the cave, where you solve Gollum's puzzles. After you start the second puzzle, as goblin, make it over to the ledge above and destroy the plant.
 The fifth plant
The fifth plant is also in the cave with Gollum. After you stat the last, third, puzzle, reach the ledge on the left and use bow.
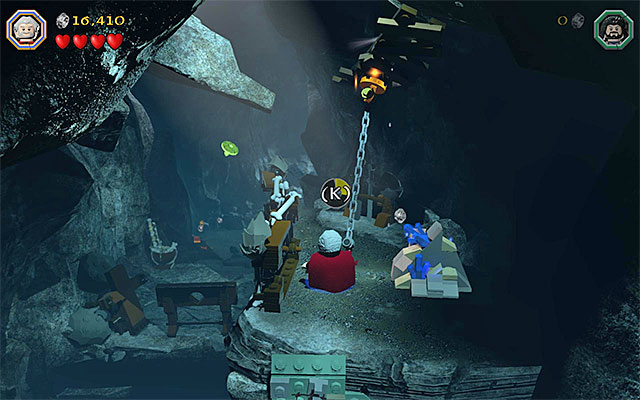 The spot where you need to use flail
Requirements: flail (e.g. Dori)
Way to obtain: While exploring the first cave, at some point you will have to reach the ledge above, as the goblin. After you do that, stop and switch to the character with flail. You need to use that gadget on the catch below the ceiling.
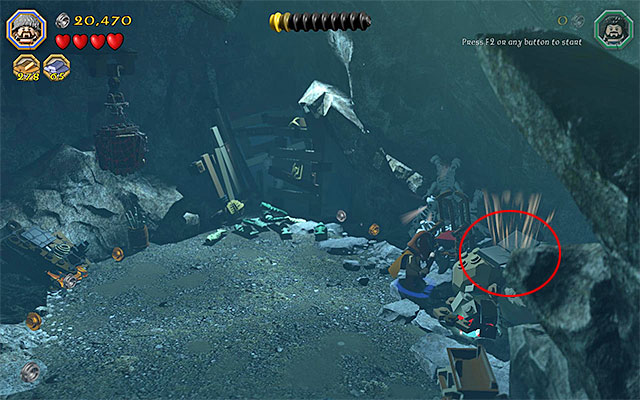
Requirements: axe (any dwarf)
Way to obtain: After you reach the final part of the first cave (still before the meeting with the Gollum), explore the area on the right. There is a hardly visible cracked plate there (the above screenshot), which you need to smash (jump and attack with the axe while in mid-air).
Reward: Crystal Goblin Crown
 Stand in the appropriate spot and use the spade
Requirements: spade (e.g. Fili)
Way to obtain: In the left part of the cave, where you solve Gollum's puzzles, you should notice a treasure buried in the ground. Use the spade to obtain it.
Reward: Happy Mallet - the use of the item is the same as in the case of a regular warhammer.
 Stand at the water and use flail
Requirements: flail (e.g. Dori)
Way to obtain: Go to the right side of the cave, where you solve Gollum's puzzles and stop at the water. Select the character with flail and reach out for the nearby catch. You only need to wait for the boat, with a minikit in it, reaches the bank and jump into it carefully.
Requirements: Saruman's staff
Way to obtain: After you get promoted to the first battle with the Grand Goblin (you first need to defeat 10 regular goblins), ignore the boss at first and turn to the mithril throne, shown in the above screenshot, on the right. Switch to Saruman and use Saruman's Staff to smash it. You can now jump onto its remains and collect the minikit.
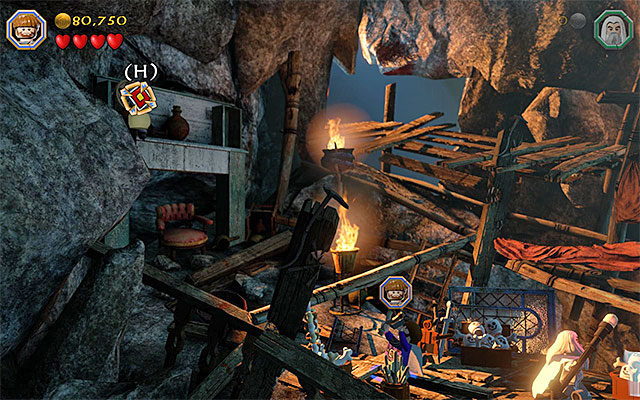 The target
Requirements: slingshot (e.g. Ori)
Way to obtain: Right after the escape from the goblin city starts, stop and check out on the area on the left. There is a target here, which you can hit with the stone fired from slingshot. After several successful attempts, there will appear a schematic in the area and you need to catch it.
Reward: Mithril Claws Schematic
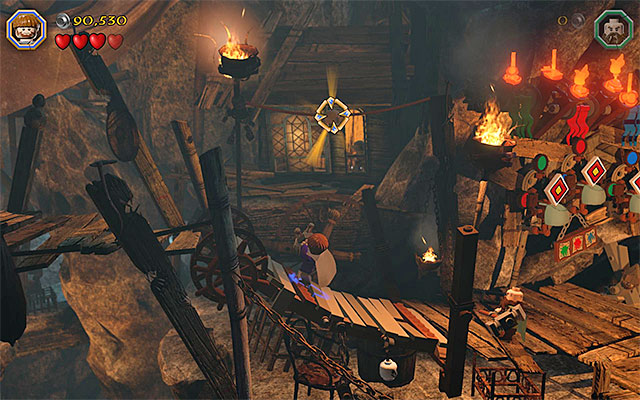
Requirements: slingshot (e.g. Ori)
Way to obtain: During the exploration of the goblin city, stop on the bridge hanging to the left of the area, where you solve the puzzle with the three targets. Switch to the character with slingshot and aim at the golden object shown in the above screenshot. Wait for the unique collectible to reach the bridge and pick it up.
Reward: Goblin Hat - goblins do not attack your character
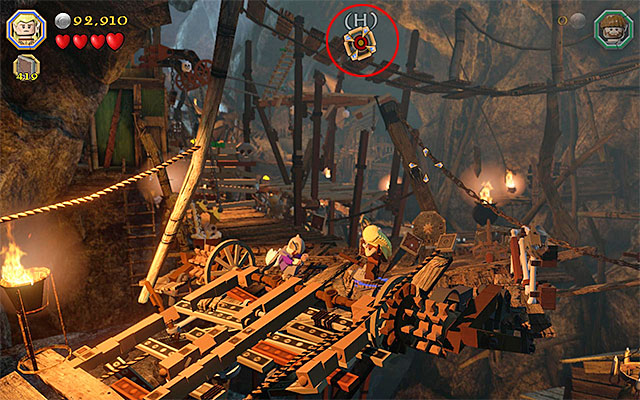
Requirements: bow (e.g. Kili or any elf), long jumps (any elf)
Way to obtain: While exploring the goblin city, stop right after you lower the drawbridge and reach the area with two ropes. Ignore the ropes and focus on locating the target shown in the above screenshot. Send an arrow its way.
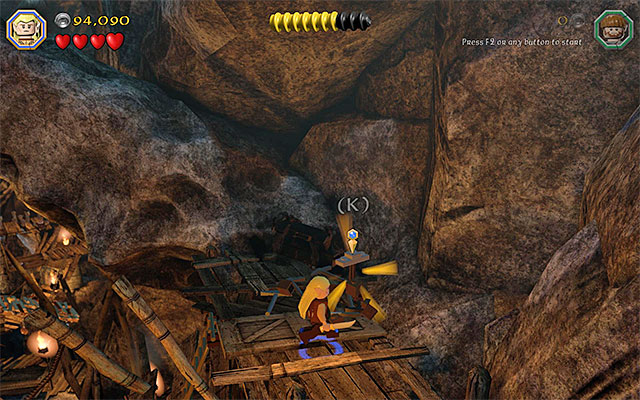 A barrel with unique collectible
You can now reach for the chain, which detached from the target. Walk over the small bridge to the right and smash the barrel, where there is the unique collectible.
Reward: Pixel Pickaxe - you score better at mining minigames
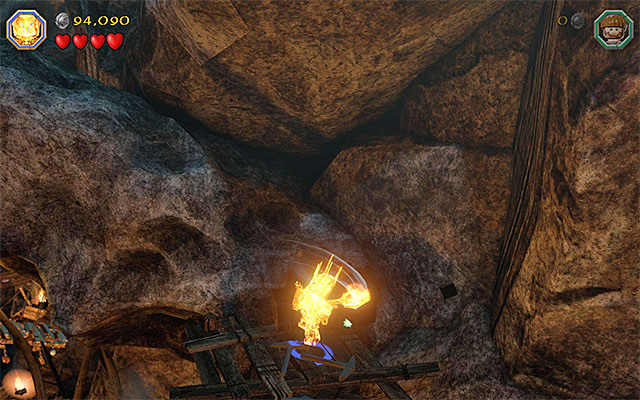 Switch to Sauron
Requirements: bow (e.g. Kili or any elf), long jumps (any elf), Morgul Blade
Way to obtain: Remain in the area where you have obtained the abovementioned Unique Treasure. Switch to Sauron and destroy the dark object, thanks to which you will obtain a minikit
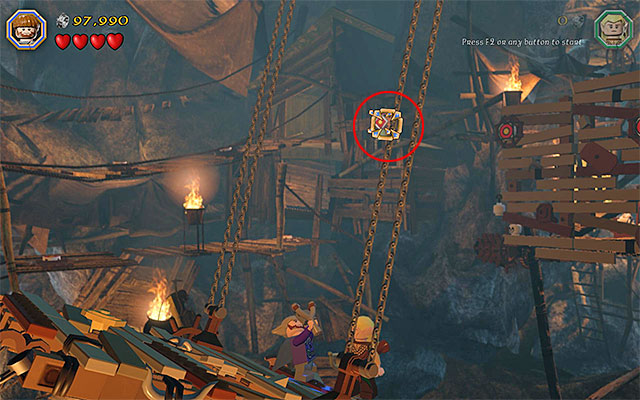
Requirements: slingshot (e.g. Ori)
Way to obtain: While exploring the goblin city, stop after you walk onto the big swinging platform. Start by using the slingshot on the target on the right (the above screenshot).
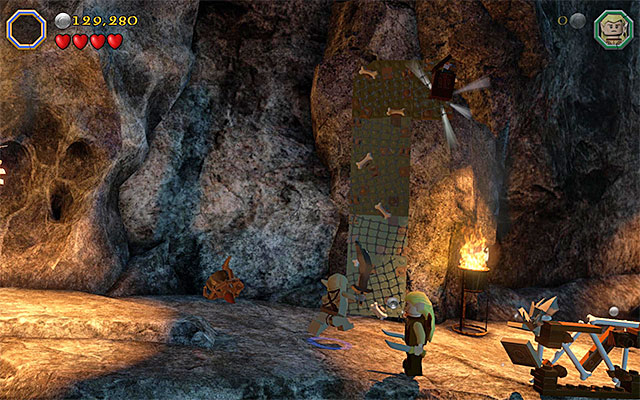 Use the slingshot on the successive targets
Hitting the target will result in the appearing of new ones in the background. Shoot the slingshot at them also. Destroying all of the five targets is rewarded with a minikit.
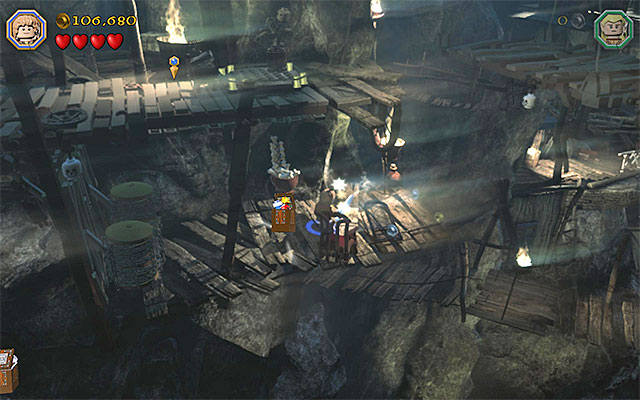 You only need to put on the Ring and approach the minikit
Requirements: The Ring
Way to obtain: While exploring the goblin city, at some point, you will have to smash a cracked plate and, as a result, you will fall down onto the balcony below. Switch to Bilbo here and put on The Ring. You just need to approach the minikit now.
Use the interactive wallRequirements: wall climbing (e.g. goblin)
Way to obtain: Towards the end of the exploration of the goblin city, you will walk out on a wider path, neighboring a chasm. Leek around for the spot, where there is an interactive wall. Switch over to the goblin, climb to the very top and collect the minikit.
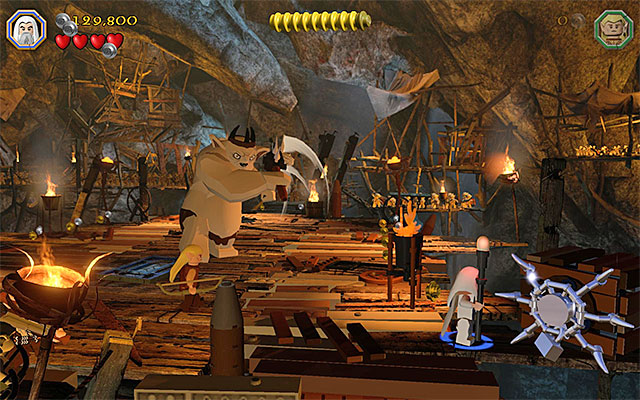 The blockade
Requirements: Saruman's staff
Way to obtain: After the second battle with the Grand Goblin starts, ignore the boss at first and examine the arena's right wall. Switch to Saruman and use the Saruman's Staff to destroy the silver mithril blockade . You just need to smash the crate now and collect the minikit.
 The spot where you take the jump
Requirements: long jumps (any elf)
Way to obtain: After the second battle with the Grand Goblin starts, ignore the boss for now and explore the left side of the arena. Stand in the green and yellow circle and switch to any elf. Take a standard jump here, grab the rope and reach the collectible.
To obtain the Master Burglar Status, you need to amass, at least, 135000 studs. This is a quite steep limit of coins. First of all, try to avoid falling into the chasm, while escaping the goblin city and to look around for blue and violet coins (one of them is behind Gollum's rocks), as well as about scoring perfectly at building minigames.
 Be on the lookout for the minikit during the escape scene
Requirements: -
Way to obtain: You can obtain the first minikit during the chase with the orcs.
 The spot where Bilbo needs to use The Ring
Requirements: The Ring, axe (any dwarf)
Way to obtain: Explore the left side of the glade where the party is constantly being attacked by the wargs and destroy the objects in the area. Switch to Bilbo then, put on The Ring and hold down the building key/button. After you build a cracked plate here, smash it, as any character with axe.
Reward: Bug Net - the opponents that you attack drop more items
 Set the objects at the tree on fire
Requirements: ability to set fire (e.g. Sam)
Way to obtain: Explore the central part of the glade and, after you demolish the area, hold down the building key/button. Turn to the interactive plate now. Walk onto the plate, as the character hat is capable of setting fire. Wait for the flames to consume the nearby objects and locate the minikit.
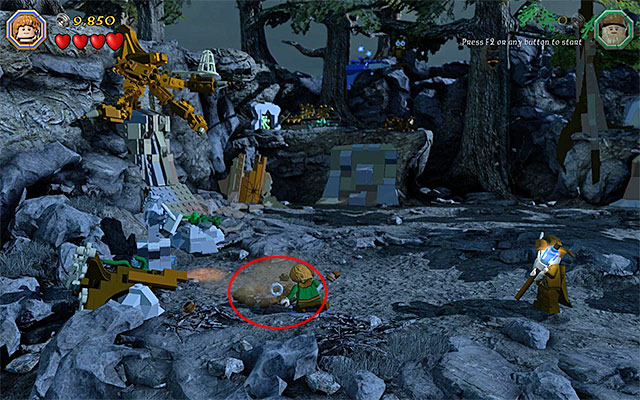 The key has been buried under the ground
Requirements: spade (e.g. Fili), axe (any dwarf), Morgul Blade (Sauron)
Way to obtain: Explore the left side of the glade and locate the spot where the key has been buried. Switch to the character with spade and dig out the key.
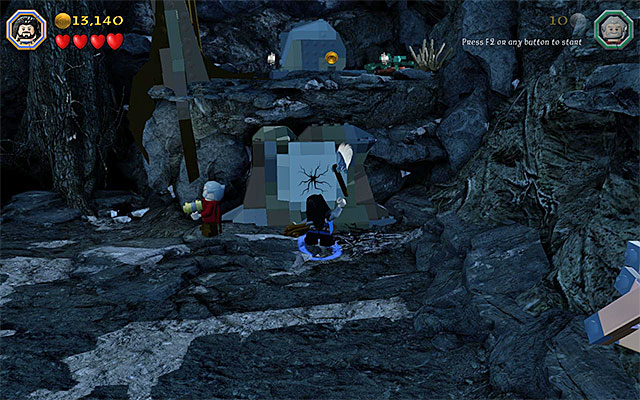 The cracked plate
Turn your attention, now, to the central part of the glade and locate the cracked plate, through which you need to crack as a character with axe. After you do that, switch to Sauron and collect the key that you have dug out earlier. Take the key to the small cave that has just been unlocked and use it to open the chest.
Reward: Mithril Music Kit Schematic
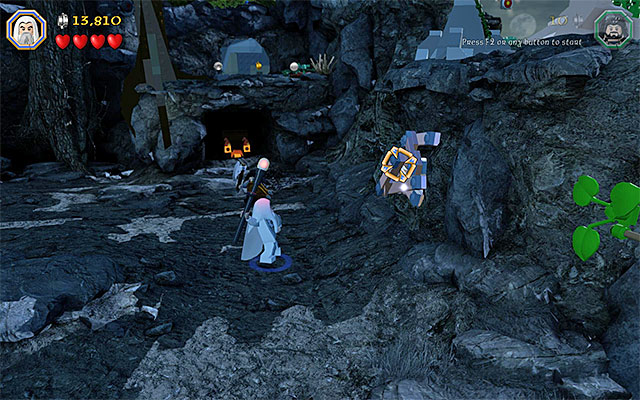 The spot where Saruman needs to use his staff
Requirements: Saruman's staff, The Ring
Way to obtain: Examine the right side of the glade and locate the silver mithril blockade. You need to smash it, as Saruman, using the Saruman's Staff. Switch to Bilbo now and put on the Ring. You now only need to hold down the building key/button, thanks to which you will build the minikit.
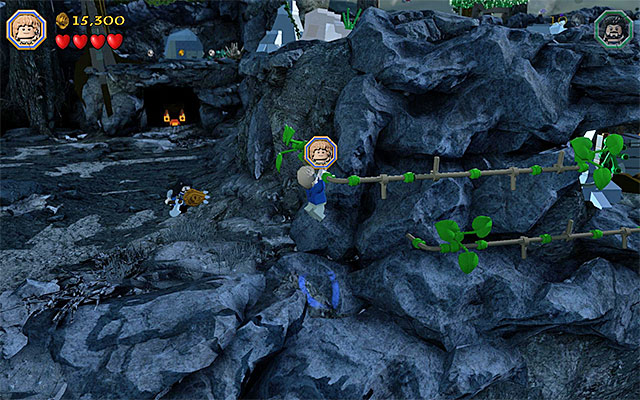
Requirements: -
Way to obtain: Examine the right side of the glade and locate the interactive ledge shown in the above screenshot, which you can grab on to. Start moving to the right, carefully, thanks to which you will reach a small recess. Destroying the objects here will grant you another minikit.
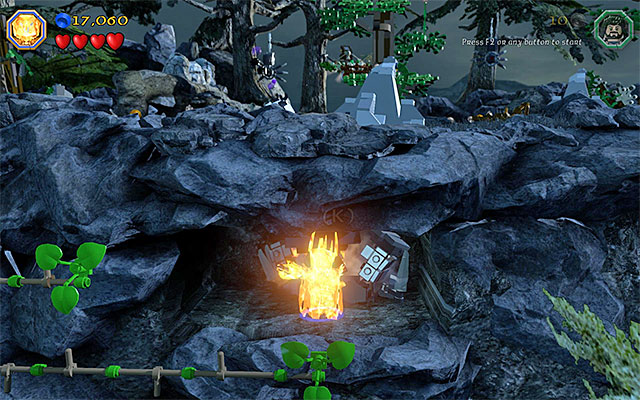 Use the Morgul Blade
Requirements: Morgul Blade (Sauron)
Way to obtain: remain in the recess, where you have found the fourth minikit, described above, and switch to Sauron. Use the Morgul Blade to smash the chest on the right and pick up the treasure.
Reward: Pine Cone Bomb - there are several uses to the bomb: it may be used to wound the enemies, destroy mithril objects (a use identical with the functioning of Saruman's Staff), set objects on fire and illuminate dark locations.
 Use any staff on the heap of blue bricks
Requirements: staff (any wizard)
Way to obtain: Make it over to the upper left ledge, which neighbors the glade (the one where the wargs appeared). Use any staff here, to destroy the heap of blue bricks above and wait until the treasure lands on the ledge.
Reward: Tuning Fork - this item's use is identical with staff's and additionally, it plays a tune after each successful action.
Requirements: -
Way to obtain: Make it over to the upper right ledge, which neighbors the glade. Do not move towards the big block here and jump onto it instead. Then, take a step towards the minikit hidden behind the tree (the above screenshot).
Requirements: bow (e.g. Kili or any other elf), long jumps (any elf)
Way to obtain: You need to destroy three different targets with a bow. The first target is in the place shown in the above screenshot, i.e. above the right ledge neighboring the glade.
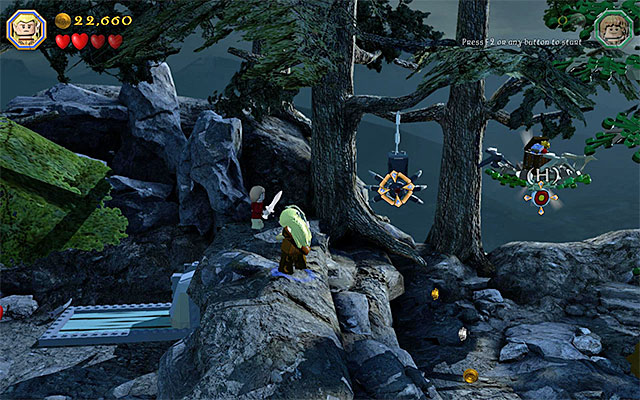
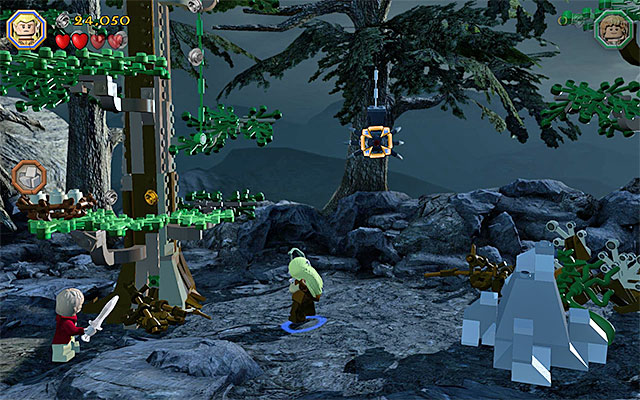 The two remaining targets
You will find the second target in the left side of the forest and the third one in the right side of the forest. They are much easier to locate but, after you destroy the third target, you will also have to jump towards the minikit to reach it ( it is a good idea to switch to any of the elves, to do that).
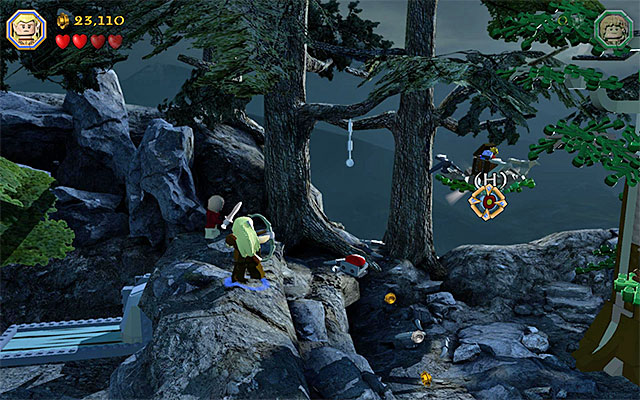 The ledge with the minikit
Requirements: bow (e.g. Kili or any other elf)
Way to obtain: Explore the left side of the forest, thanks to which you will locate a small ledge with the minikit on it. Aim the bow at the target, next to the ledge, and pick up the collectible, after it falls to the ground.
 The wounded animal
Requirements: the ability to heal animals (e.g. Radagast)
Way to obtain: Explore the left side of the forest, thanks to which you will locate a wounded mole. Switch to Radagast here and approach the animal. Use Radagast's unique ability here. Wait for the mole to hide under the ground and collect the minikit.
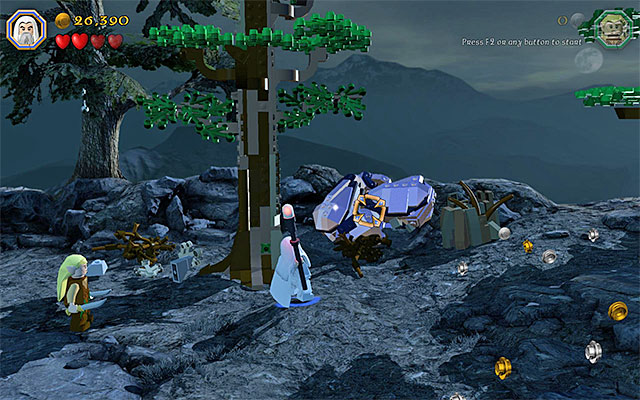
Requirements: Saruman's staff
Way to obtain: Explore the right side of the forest and turn to the heap of the silver mithril bricks shown in the above screenshot. You need to use the Saruman's Staff, for several times, thanks to which you will smash the bricks. You can now pick up the collectible.
Reward: Goblin Feet - the ability to climb over the walls, like goblins
 Aim at the violet plants
Requirements: -
Way to obtain: Wait until the scene, n which you throw explosives at the wargs, starts. At first, ignore the hostile wolves and aim at the violet flowers at the foot of the tree. In total, you need to destroy three such objects.
Requirements: bow (e.g. Kili or any other elf)
Way to obtain: After you start the final battle with Azog and his orc minions. ignore all of the monsters in the mead. Switch to the character with bow and aim at the orc archers on the hill in the background. You will have the hardest time eliminating the orc on the hill shown in the above screenshot - try to stand in the center of the glade, so that the arrow can reach the target without any problems.
In order to obtain the Master Burglar Status, you need to amass, at least, 40000 studs. This should not give you too hard a time, and you can achieve this still in the story mode. Remember always to smash the objects in the areas and about thorough exploration (there is a violet coin in the right part of the forest), and also do not let the wargs and orcs to deprive your characters of all the hearts.
 You will grab one of the minikits in the mid-air, where the character will take the jump automatically
Requirements: -
Way to obtain: The first three minikits can be obtained during the escape from the bear, which starts stage nine. At first, keep to the right side of the screen. After the path turns right, remain in the upper part of the screen (the character grabs the minikit after taking a jump). Finally, you will be sliding down, where you need to keep to the left side of the screen.
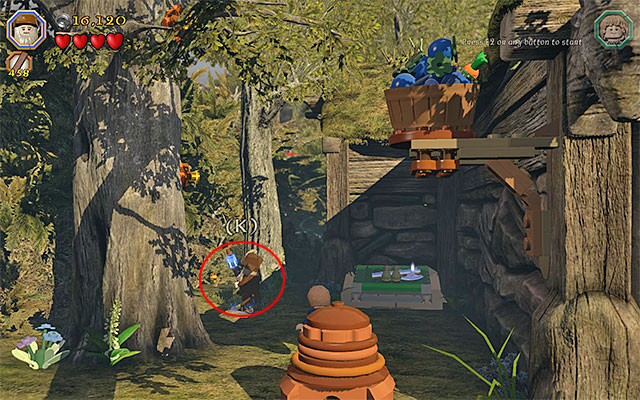
Requirements: the ability to heal animals (e.g. Radagast)
Way to obtain: Explore the area to the right of the hut. Behind the tree, there is a quite well-hidden wounded squirrel (the above screenshot). Heal it, using Radagast's unique ability.
Reward: Mithril Multi-bow Schematic
 You need to use the bow and then, as an elf, grab the arrows stuck into the tree
Requirements: bow (e.g. Kili or any other elf), long jumps (any elf)
Way to obtain: Explore the area to the left of the hut and use the bow on the two interactive slots, worked into the big tree here. Switch to any elf then and jump to reach the first arrow stuck in the tree.
 The spot where you find the unique treasure
Again, press the jump key/button to grab the arrow above. Finally, you need to jump to the small ledge on the left, where there is the collectible.
Reward: Kite of Fancy - this use of this item is identical to that of the flail
 Start bouncing off the trampoline to reach the minikit
Requirements: -
Way to obtain: Examine the area to the right of the hut. Destroy the objects here and hold down the building key/button. After you have built a small trampoline, start bouncing off it, thanks to which you will grab the minikit high above.

While completing the last, ninth chapter of the game in the story mode, you have been unable to explore the hut's cellar. While replaying the ninth mission in the Free Play mode, this is available and even required, because there are several collectibles in the cellar. Go left of the hut. Switch to Saruman and prepare his staff. Enter the aiming mode (hold down the action key/button) and aim at the mithril axe, that is blocking the access to the cellar. You may now jump into the hole.
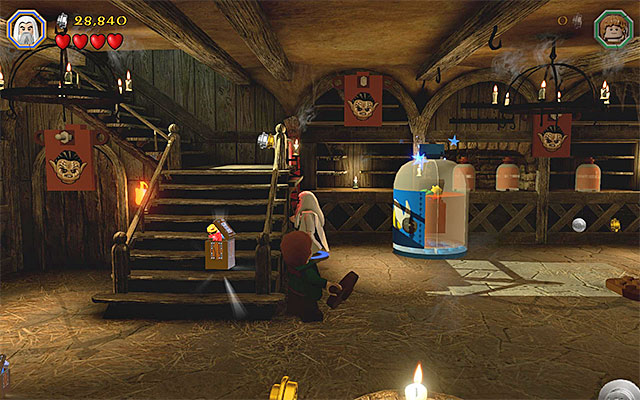 Check out the area under the stairs
Requirements: -
Way to obtain: After you access the cellar, check out the area under the stairs. You can collect the minikit without the necessity to use any additional tools.
 One of the three targets
Requirements: bow (e.g. Kili or any other elf)
Way to obtain: After you get to the cellar, start using a ranged weapon (ideally a bow) to destroy the targets with goblin faces on them. All around the cellar, there are three such targets and destroying them all, will reward you with a minikit.
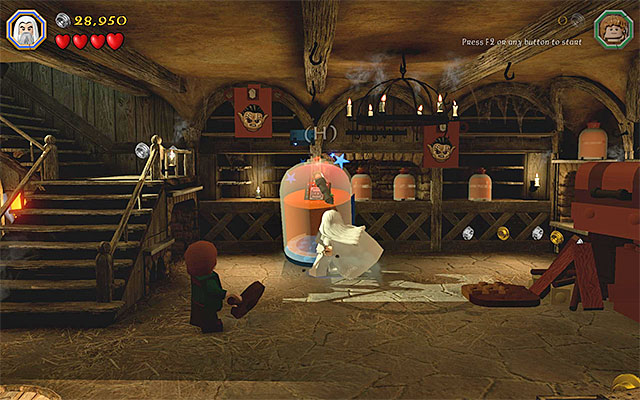 Use the staff on the container
Requirements: staff (any wizard)
Way to obtain: After you get to the cellar, examine the area to the right of the stairs. Use the staff on the large container here, to destroy it. You can now collect the minikit.
 Set fire to the area around the chest
Requirements: ability to set fire (e.g. Sam)
Way to obtain: After you get to the cellar, examine the area to the right of the stairs. Walk onto the plate and switch to the character that can set objects on fire. Wait until the flames consume all of the objects around the chest and smash it, thanks to which you will gain access to the collectible.
Reward: Cooking Apron - allows you to find more food
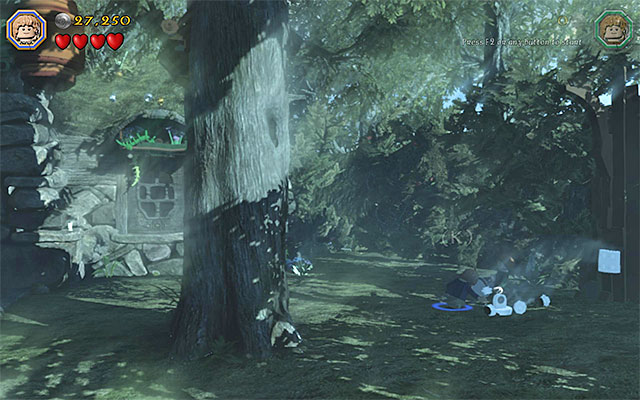
While completing the last, ninth chapter of the game in the story mode, you have been unable to explore the garden neighboring the hut in the forest. While replaying the ninth mission in the Free Play mode, this is available and even required, because there are several collectibles in the garden. Go to the right of the hut and locate the spot where you can use the spade. After you use the spade, switch to Bilbo and put on The Ring. You can now start building (the above screenshot), which will result in constructing an interactive catch. Finally, switch to the character with flail and rip off the catch, thanks to which, you will clear the way to the garden.
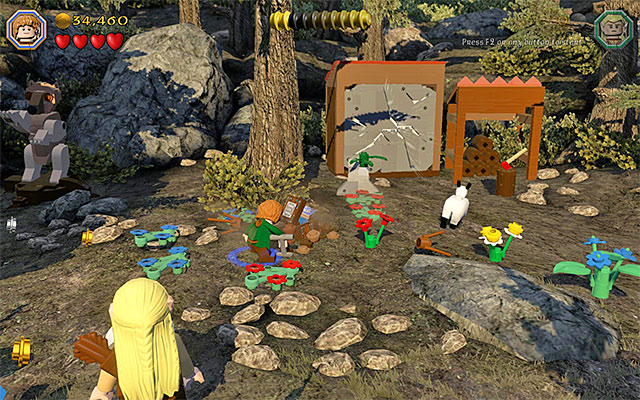 Dig out the minikit, using the spade
Requirements: spade (e.g. Fili)
Way to obtain: Explore the central part of the garden and smash the objects in the area. Locate the minikit, buried under the ground, and switch to the character with spade, thanks to which you will obtain the collectible.
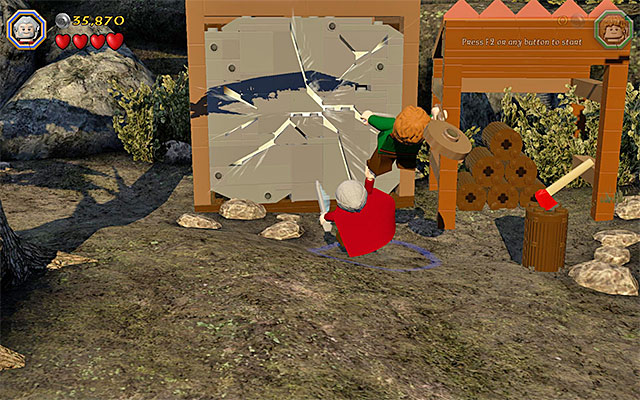
Requirements: Buddy-Up
Way to obtain: Examine the central part of the garden. In the spot shown in the above screenshot, you need to Buddy-Up so, pair-up two characters and smash the large cracked plate with them. Note - if it is impossible to pair up the two characters, make sure the you have selected the "standard" characters for that (e.g. two dwarves).
Reward: Farmer's Flight Fleece - instead of fast-traveling around the game world, on eagles, you use piglets.
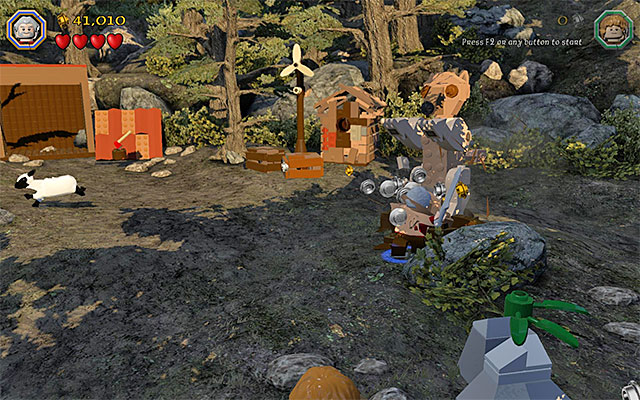 One of the teddies
Requirements: -
Way to obtain: Around the garden there are three statues of bears. You need to smash them all, using any melee weapon.
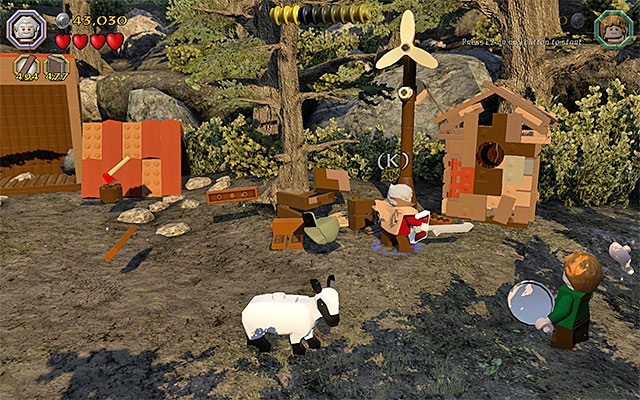 The location where you need to build a target
Requirements: slingshot (e.g. Ori)
Way to obtain: Examine the central part of the garden, around the latrine. Now, hold down the building key/button and wait until a target is built here. You need to hit the target with pebbles, several times, using the slingshot. Wait for a sheep to run out of the latrine and collect the minikit.
 You need to be playing as Sauron
Requirements: Morgul Blade (Sauron)
Way to obtain: Examine the right side of the garden, and turn your attention to the area where there is a chicken hanging on the rope. Switch to Sauron and use his Morgul Blade to destroy the object on the right, which is unreachable for the rest of the party. Freeing the chicken will grant you a special treasure.
Reward: Chicken Hat - making funny noises
In order to obtain the Master Burglar Status, you need to amass, at least, 30000 studs. This is very easy to achieve, still in the story mode. If you still fail to do that, take a look around the rooftop of the hut, because among others, there is a violet coin there, which is worth 10000 studs.
 Use Radagast
Requirements: the ability to heal animals (e.g. Radagast)
Way to obtain: Remain in the point where the tenth stage started and switch to Radagast. You need to heal the crab-like creature that you find on the right. For that, you will be rewarded with a minikit.
 The first owl
Requirements: bow (e.g. Kili or any other elf), slingshot (e.g. Ori), staff (any wizard)
Way to obtain: You need to drive away a total of five different owls that you run into, while exploring the Dark Forest. Each time, you need to use the bow. The first owl is on the tree, close to the starting point for the tenth stage. A sort of a handicap is that more owls are further into the mission so, you need to remember about them, while exploring this location. Their whereabouts have been provided below.
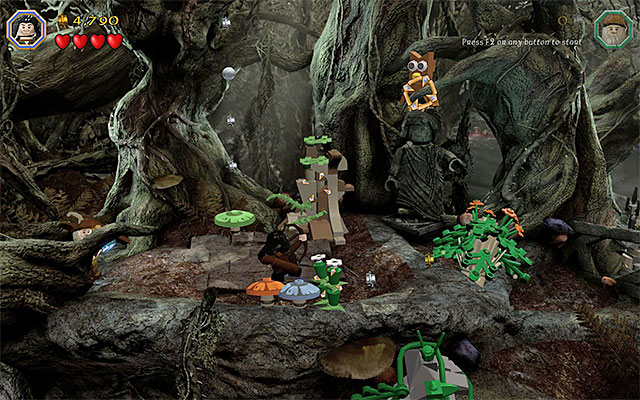 The second owl
You run into the second owl after a while, after you walk over the large fallen tree.
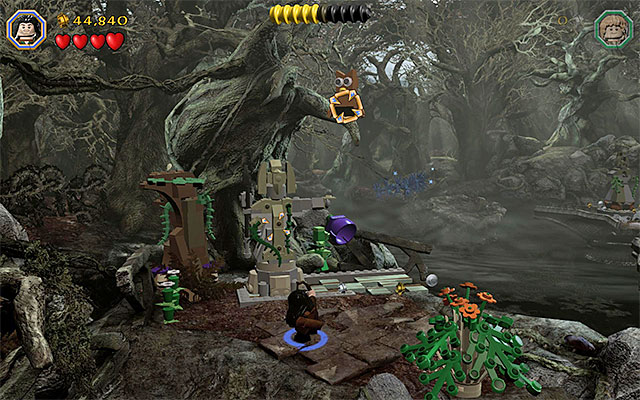 The third owl
The third owl can be found shortly after setting the barricade on fire (this is required to unlock the path ahead). It is in the area in which you push the big block, down to the water.
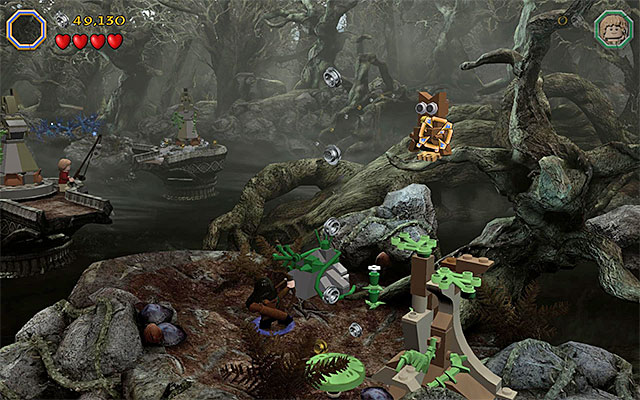 The fourth owl
The fourth owl is in the location to the right of the two platforms that you spin using the slingshot.
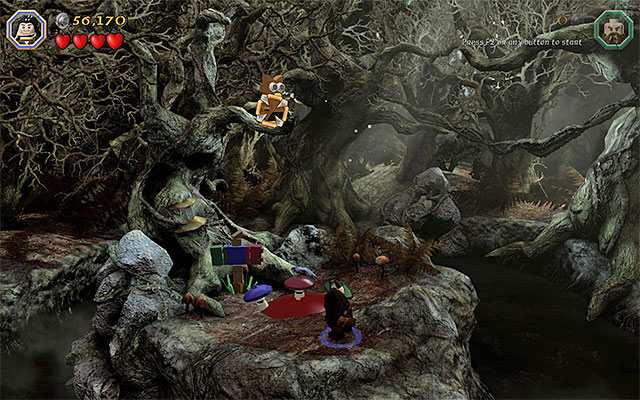 The fifth owl
You can reach the last, fifth, owl soon after you make it over to the second spinning platform. Before you take the path towards the exit, you need to jump to the ledge on the left and smash the blue barricade, with any staff. All of these actions have been described in the description of the obtaining of the first unique treasure.
 The spot where the knob has been buried
Requirements: spade (e.g. Fili)
Way to obtain: While exploring the first part of the forest, (still before setting the barricade on fire) keep looking around for the spot where you can use the spade. Using it, will allow you to obtain the knob.
 Minikit
With the knob, approach the nearby mechanism and interact with it. This will result in the appearing of a boat at the shore and you need walk onto it VERY CAREFULLY (it is easy to fall into water here). Steer the boat towards the background, where you will find the minikit.
Requirements: slingshot (e.g. Ori), staff (any wizard)
Way to obtain: During the exploration of the first part of the forest, stop in the location with two platforms, which you spin using the slingshot. Reach the second one and jump over to the ledge on the left (the above screenshot). Here, you need to use the staff to smash the blue objects in your way.
Take another jump and land on the ledge with three mushrooms. You will have to solve a simple puzzle here, which consists in jumping onto the mushrooms, thanks to which they change colors (one jump onto a mushroom equals one change). The solution has been shown in the above screenshot - the mushroom on the left needs to be green, the middle one needs to be blue and the one on the right - red. Wait for a large mushroom to surface from below the ground and pick up the collectible.
Reward: Mirkwood Phial - distraction of others and illuminating of areas
Note - In this location, there also is the last, fifth owl connected with the second minikit!
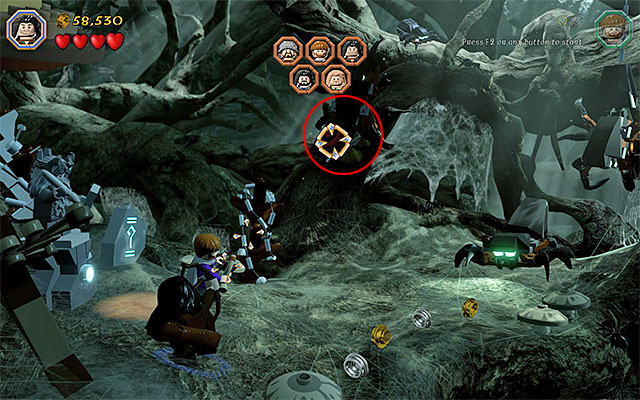 The first spider (you will know it by the red markings)
Requirements: bow (e.g. Kili or any other elf)
Way to obtain: While exploring the first spider cave (the one where you need to rescue five allies), you need to attack the select spiders with the bow. The first one is close to the starting point and the next four are farther ahead so, you need to remember about them, while reaching the captive allies. The whereabouts of the spiders have been given below.
 The second spider
The second spider is hiding behind the spider web, in the location where you rescue two allies.
 The third and the fourth spider
The third and the fourth spider are in the main part of the cave, in the location where Bilbo deals with two other creatures, using The Ring.
 The fifth spider
The fifth spider is close to the manhole to the location, where you rescue the last ally.
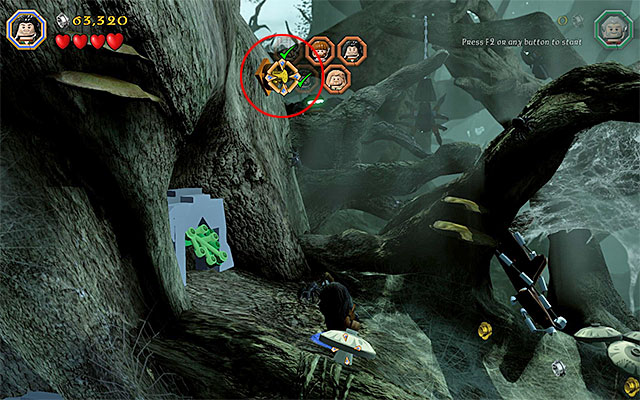 The spot where you need to use the bow and then, long jumps
Requirements: bow (e.g. Kili or any other elf), long jumps (any elf)
Way to obtain: During the exploration of the first spider cave, stop after you walk through the first manhole. Use the bow here, against the slot above. After the arrow sticks into the wall, switch to any elf and jump to reach it. Jump again and grab the minikit high above, in mid-air.
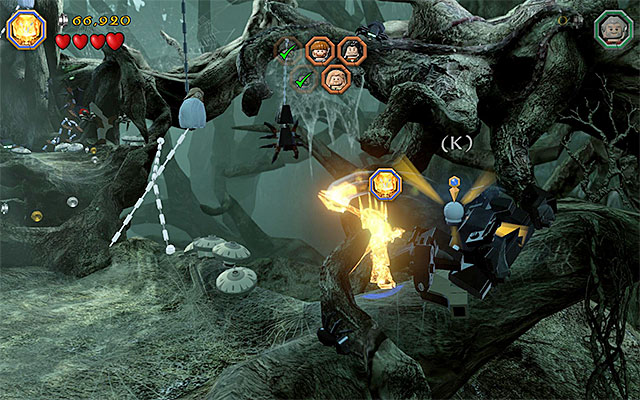 Use Sauron's blade
Requirements: Morgul Blade (Sauron)
Way to obtain: After you reach the main part of the cave, allow Bilbo to defeat the spiders and, after you have secured the area, examine the right part of this location. You need to switch to Sauron and use the Morgul Blade to smash the interactive objects.
Reward: Spider Bomb - a swarm of spiders appears, as a result of the explosion
 Climb over the wall on the left
Requirements: climbing walls (e.g. goblin)
Way to obtain: While exploring the first spider cave, stop after you reach the last one, of the five, captive allies. Before you take to freeing him, switch to the goblin and climb up the wall on the left, thanks to which you will reach a minikit.
Requirements: staff (any wizard), the ability to heal animals (e.g. Radagast)
Way to obtain: After you reach the second spider cave (the one where you fight spiders and rescue three more allies) explore the right side. First of all, you need to use the staff of any of the wizards, on the blue objects shown in the above screenshot.
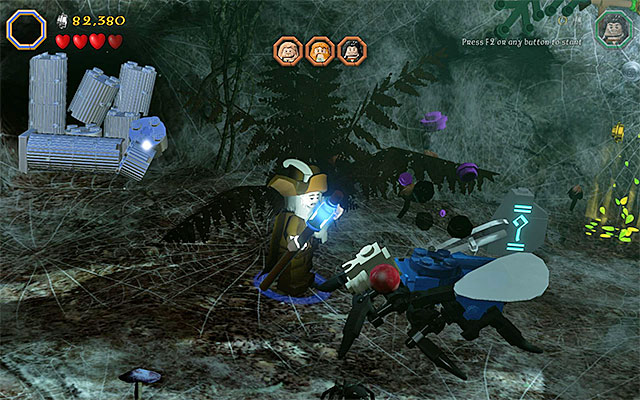 Use Radagast's ability to heal flies
Note that there appeared huge flies, in the cave. In free time, switch to Radagast, approach each fly and heal them with the wizard's ability.
 It is necessary that you eliminate the red spiders
After you have healed both of the flies, mount one of them and start riding it across the cave. You need to wait for new, red, spiders to appear in the cave. Attack them, by pressing the action key/button, at the correct moment. Defeating ten spiders will be rewarded with a minikit and, additionally, from now on, the bigger spiders will stop appearing in the cave.
 from the ledge on the left, jump towards the minikit
Requirements: bow (e.g. Kili or any other elf), long jumps (any elf)
Way to obtain: You need to reach the ally on the left, imprisoned in the other spider cave. Just to remind you, you are required to use the bow, use the bow to stick the arrow to the slot and switch to any elf to take a long jump. After you have dealt with the spider, in a direct fight, make sure that you are playing as an elf and jump towards the minikit hovering near the ledge on the left.
 Cut through the cracked plate
Requirements: long jumps (any elf), axe (any dwarf)
Way to obtain: You need to reach the middle ally, kept in the second spider cave. Just to remind you, you are expected to use one of the elves, in order to take the jump and grab to the edge above. After you defeat the spider, in a direct fight, switch to the character with axe and smash the cracked plate. Behind the plate, there is a schematic.
Reward: (Mithril Bomb Blade Schematic)
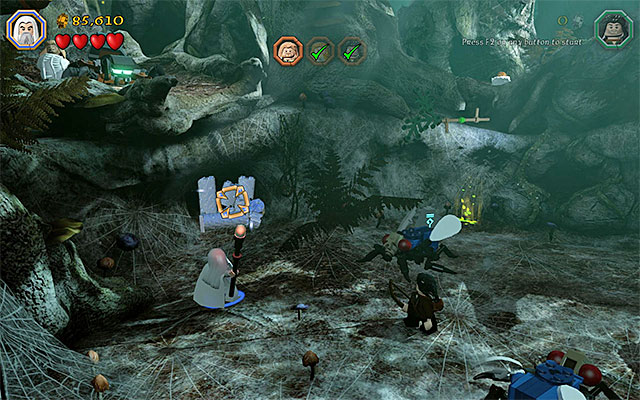
While completing the tenth chapter of the game in the story mode, you have been unable to explore the third cave, neighboring the one, where you liberate the three captive allies. While replaying the tenth mission in the Free Play mode, this is available and even required, because there are, as ,many as, four collectibles in the cave. First, explore the left side of the second cave. Switch to Saruman here and prepare his staff. Enter the aiming mode (hold down the action key/button) and aim at the silver, mithril objects shown in the screenshot. You can now walk into the new location.
 The skeleton with the knob on it
Requirements: -
Way to obtain: Examine the left side of the third cave. You need to locate the skeleton with a knob on it.
 The location where you use the knob
Collect the knob and take it to the mechanism, in the center of the cave. Click the knob in place and interact with it. Doing that will result in all the nearby skeletons dancing. Note that there is a minikit on one of them and you can collect it immediately.
 Bounce off, while playing as elf
Requirements: long jumps (any elf)
Way to obtain: Explore the left side of the cave. There is an inflatable castle here. Switch to any of the elves and start bouncing off the castle, thanks to which you will reach a minikit high above, after several moments.
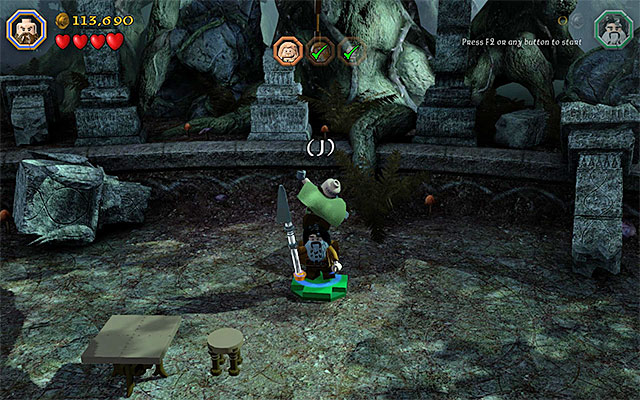 You need to climb onto the character on the plate and jump
Requirements: long pole arm (e.g. Bifur)
Way to obtain: explore the central part of the third cave. There is an interactive plate here, which one of the characters, armed with a pike or a spear, needs to stand on. (this may be, e.g. Bifur). After you do that, switch to the second character. Climb onto the ally on the plate and jump to reach the rope above. Climb over the rope, to the very top, and jump towards the nest on the right, where there is the collectible.
Reward: Staff of Wisdom - the function of this staff is identical as that of any other staff
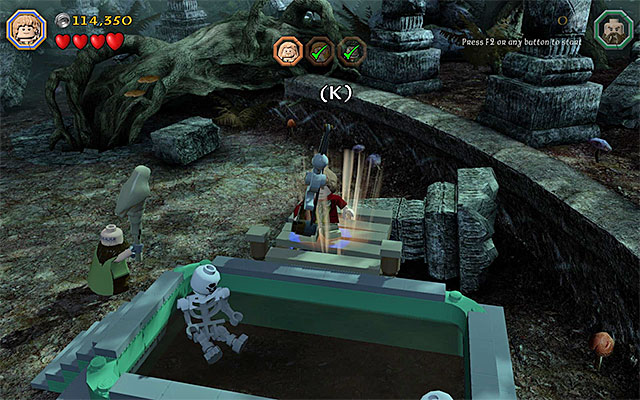 The place where you complete the fishing minigame
Requirements: fishing rod (e.g. Bilbo)
Way to obtain: Explore the right side of the third cave and smash the interactive objects here. Hold down the building key/button and wait for a wooden plank to be built. Switch to the character with the fishing rod, stand on the plank and complete the fishing minigame, thanks to which you will obtain the unique treasure.
Reward: Dazzle Wig - confusing of the other characters
In order to obtain the Master Burglar Status, you need to amass, at least, 85000 studs. It is best to obtain the required number of points in the Free Play mode, because this is when you unlock the third cave. As always, you should remember to smash the interactive elements in the area and about keeping an eye out for the more valuable studs (two violet studs are in the forest) and about avoiding losing all of the hearts, while fighting the spiders.
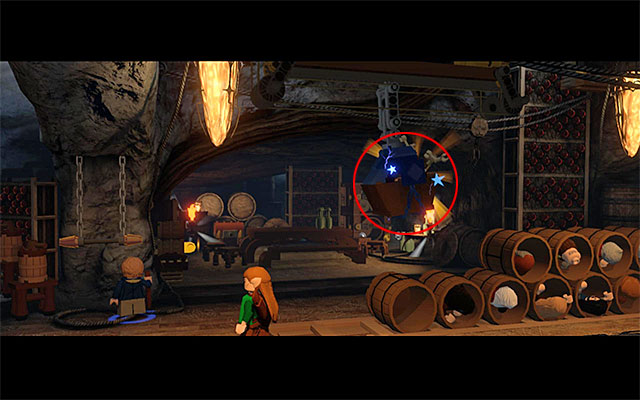
Requirements: staff (any wizard)
Way to obtain: During your stay in the cellar, you need to roll the barrel that appears in this location, after you pull the middle lever. After you do that, grab that lever again, thanks to which the load shown in the above screenshot will appear. Smash it, using the staff and collect the item.
Reward: Elk Mallet - the function of this mallet is identical as that of a standard warhammer
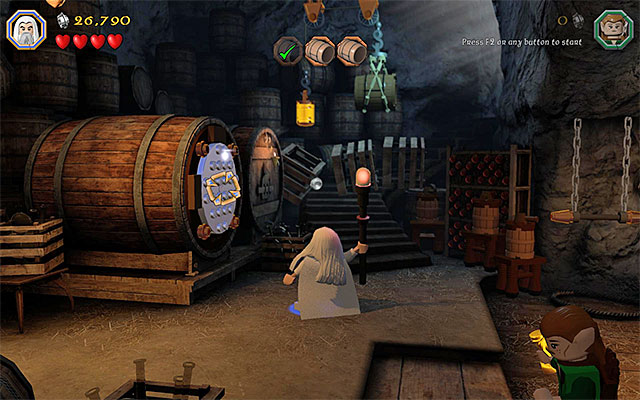 Target the barrel and fire a magic projectile
Requirements: Saruman's staff
Way to obtain: Smash all of the objects in the left side of the cellar. Switch to Saruman and use Saruman's Staff to smash the mithril wall of the huge barrel. Thanks to this, the schematic will pop out of the barrel. Note - if you find it difficult to target the mithril wall of the barrel, remove the golden object first, which may be on the ground somewhere around.
Reward: Mithril Pickaxe Schematic
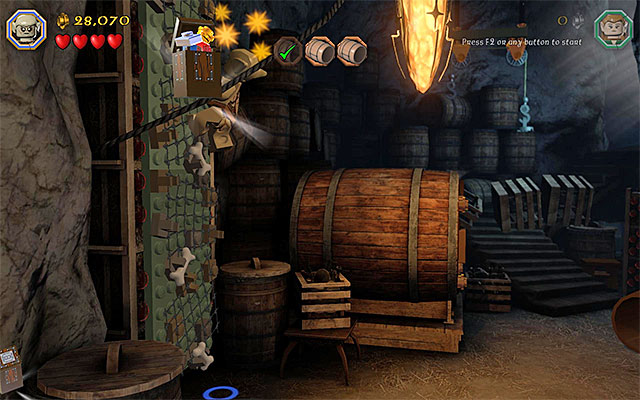 Use goblin's ability
Requirements: climbing walls (e.g. goblin)
Way to obtain: Examine the left side of the cellar, thanks to which you will find an interactive wall. You need to switch to the goblin here and climb up the wall, to the place where the minikit is hidden.
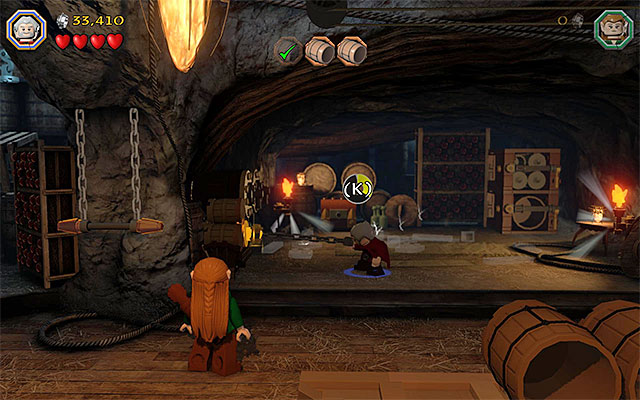 The catch and the chest are in the middle part of the cellar
Requirements: flail (e.g. Dori)
Way to obtain: Remain in the central part of the cellar and go into the background. Turn your attention to the golden catch and rip it off, using the flail. Along with the catch, a key will fall out, which you need to pick up. Use the key to open the nearby chest and collect the treasure.
Reward: Firefly Jar - lights up the area
While completing the last, eleventh chapter of the game in the story mode, you have been unable to explore the stone ledge neighboring the first dam. While replaying the ninth mission in the Free Play mode, this is available and even required, because there are several collectibles around. Right after you complete the scene with the cellar and reach the dam, remain on the pier, where you get after you jump out of the barrel. Switch to Saruman here and use his staff to destroy the mithril objects shown in the above screenshot. Carefully, jump over to the rock (it is easy to fall into water here!) and over to the bigger ledge that you have just unlocked, on the right.
 The first bell
Requirements: -
Way to obtain: In total, you need to destroy three bells near the first dam (each time, use any weapon) and a sort of a handicap is the fact that they are within a big distance of each other. The first bell is on the ledge to the right, where you get after using the above trick (using Saruman's staff).
 The second bell
The second bell is in the left part of the location with the dam, i.e. in the area where you fight the "elite" goblins.
The third bellThe final, third bell is on the dam. You need to destroy it before you open the dam and start the next part of the stage.
 Use the flail and destroy the rest of the wall, in any way you want
Requirements: flail (e.g. Dori)
Way to obtain: After you reach the bottom, right ledge, switch to the character with flail and use this item to rip off a big portion of the wall. Smash what remains of the wall (with any weapon you want to) and use the newly-unlocked stairs, which will take you to the minikit.
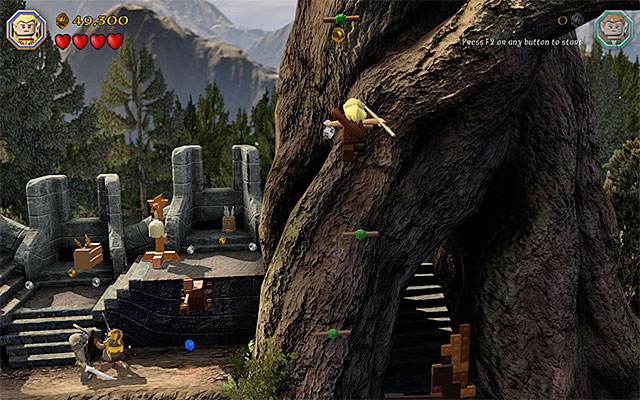 Grab on to successive ledges
Requirements: long jumps (any elf)
Way to obtain: After you reach the ledge on the right, switch to any of the elves and jump towards the successive ledges. Eventually, this will allow you to make it over to the nest on the tree and it is here that you find the treasure.
Reward: Eggapult - the use of this item is identical with that of a standard slingshot and the only difference is that it fires eggs, instead of pebbles
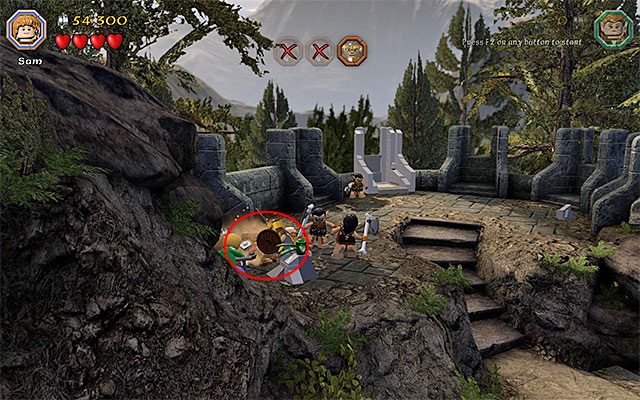 Use the spade to dig out the treasure
Requirements: spade (e.g. Fili)
Way to obtain: You need to examine the left part of the location where you fight the waves of stronger and stronger goblins. You should notice a minikit buried in the ground here and you need to use the spade to obtain it.
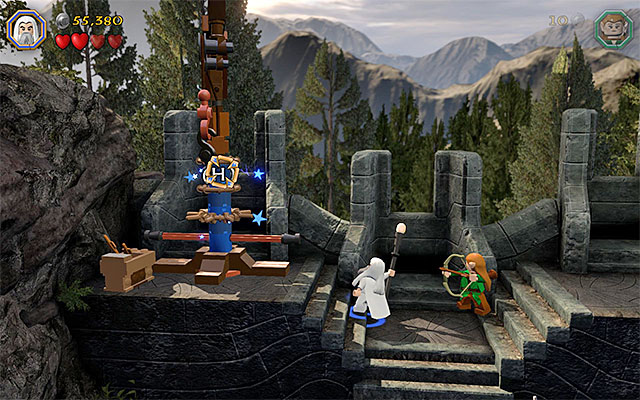 The blue structure
Requirements: staff (any wizard)
Way to obtain: After you have gained access to the first dam, examine its left side. Here, you need to use the staff to destroy the characteristic blue structure. Then, examine the rubble and collect the minikit.

Requirements: axe (any dwarf)
Way to obtain: After you reach the second dam, switch to Bombur, who is using a barrel as his armor, and start demolishing the area. In the spot shown in the above screenshot, you need to cut through with the axe, through the cracked plate. Enter the cave and collect the minikit.
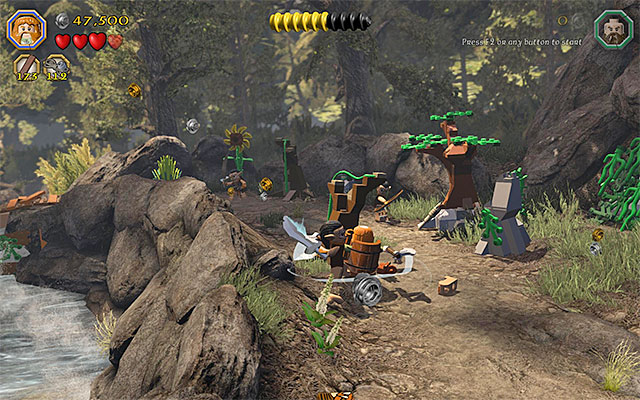 Goblins will soon cease to appear in this area
Requirements: -
Way to obtain: In the location with the second dam, you need to defeat all of the goblins. It is best to use Bombur for that, because he will handle it very well.
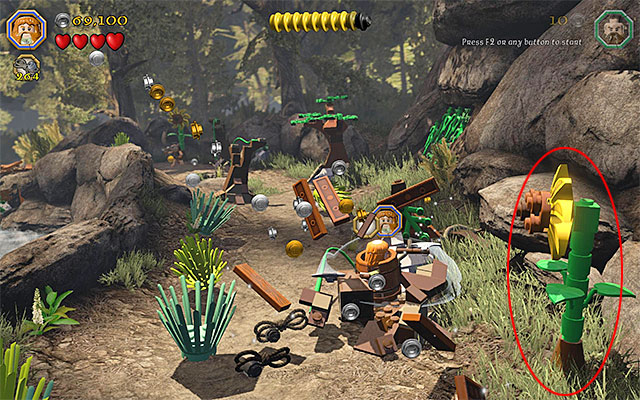 One of the flowers
Requirements: -
Way to obtain: In the location with the second dam, there are four big flowers - two on each side of the dam. You need to destroy all of them (any weapon), for which you will be rewarded with a minikit.
Note - While exploring the area, try not to smash the second dam too early (slamming down on the plate), because you will then prevent yourself from accessing this particular collectible (as well as the one below).
 Use the flail in the right spot
Requirements: flail (e.g. Dori)
Way to obtain: You need to reach the area on the left, which neighbors the second dam, i.e. walk over the dam without smashing it. Locate the interactive catch here, which you can reach using the flail.
Reward: Traveller's Tool - the use of this item is identical as that of the pickaxe
 Steer into the minikit above the river to obtain it
Requirements: -
Way to obtain: while going down the river, keep to the right and you will reach the minikit in a while. You obtain it by coming into contact with it.
Requirements: bow (e.g. Kili or any other elf)
Way to obtain: While going down the river, use the bow to destroy the hives at the bank ( an example hive has been shown in the above screenshot). After you destroy five of these, you will be rewarded with a minikit.
In order to obtain the Master Burglar Status, you need to amass, at least, 80000 studs, and it is best to attempt to achieve in the Free Play mode. Keep your eye out for the blue and the violet studs (around the first and the second dam), and also try to complete the building minigame with a perfect score (20000 studs). Apart from that,, avoid falling into the rushing river.
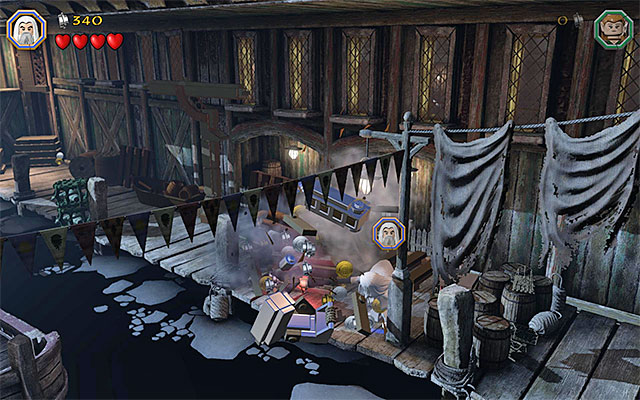 Use Saruman's staff in the appropriate spot
Requirements: Saruman's staff, fishing rod (e.g. Bilbo)
Way to obtain: Remain where you have started the twelfth stage of the game and switch to Saruman. Use the staff that he is equipped with and destroy the mithril crane to the right. Hold down the building key/button then and wait for pier to be built. Finally, switch to the character with the fishing rod and complete the fishing minigame.
Requirements: bow (e.g. Kili or any other elf)
Way to obtain: Remain in the spot where the twelfth chapter started and select the character with bow. Aim the bow at the target shown in the above screenshot, which is located on the left side of the armory entrance. wait for a boat to arrive here. Jump over to the boat and jump towards another ledge. Explore the area to obtain a minikit.
 The dummies are in the right side of the armory
Requirements: staff (any wizard)
Way to obtain: At the armory's lower level, there are four training dummies and you need to smash all of them. (the first two are on the right (use any weapon).
 Use the staff to smash the fragment of the cage
The two remaining ones are in the right side of the armory, inside a huge cage. In order to gain access to them, you need to use the staff and aim it at the blue element. After you smash all four dummies, you will receive a minikit.
In the cage on the right, there also is the fourth minikit and you simply need to approach it to collect it.
 Use Saruman's staff
Requirements: Saruman's staff
Way to obtain: After you gain access to the cage on the right, which is at the armory's lower level, you need to switch to Saruman and use Saruman's Staff to smash the mithril objects here. This will allow you to pick up the collectible.
Reward: Sir Moustaff - the use of this item is identical with that of a standard staff
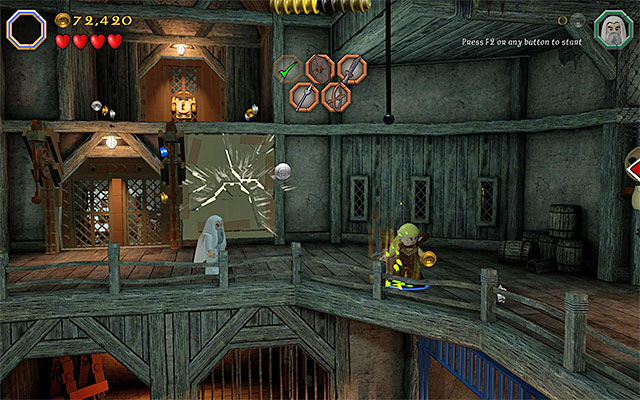
Requirements: long jumps (any elf)
Way to obtain: After you reach the armory's upper level, stop in the spot shown in the above screenshot and switch to any elf. You need to jump and grab the end of the rope.
Climb up the rope and grab on to the small ledge. Shimmy to the left and stop in the spot shown in the above screenshot, i.e. directly opposite the schematic. Only then, climb up and reach out for the collectible.
Reward: Mithril Booty Blade Schematic
 An example cage
Requirements: -
Way to obtain: After you reach the first part of the docks (the chase after the piglet), you need to smash all of the interactive elements in the area. TO smash, there are five cages with crabs inside. After you free all of them, you will be rewarded with a minikit.
 Reach the catch
Requirements: flail (e.g. Dori)
Way to obtain: Examine the first part of the docks (the area close to the armory) and note the catch, which you need to rip off with flail. You can now collect the treasure.
Reward: Singing Fish Blade - a standard blade that produces sounds
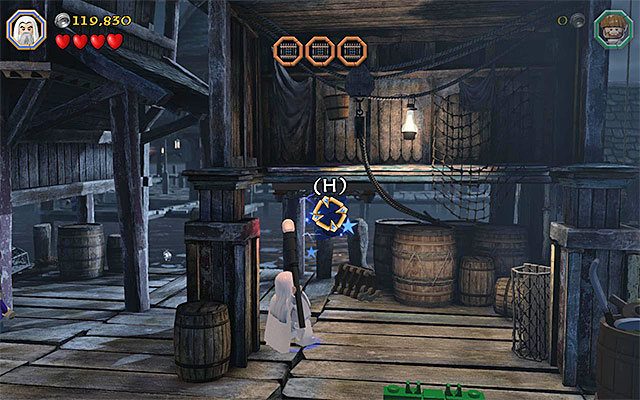 The spot where you use the staff
Requirements: staff (any wizard)
Way to obtain: Examine the central part of the docks (the area close to the first of the three pens) and locate the blue object in the environment. You need to use the staff here.
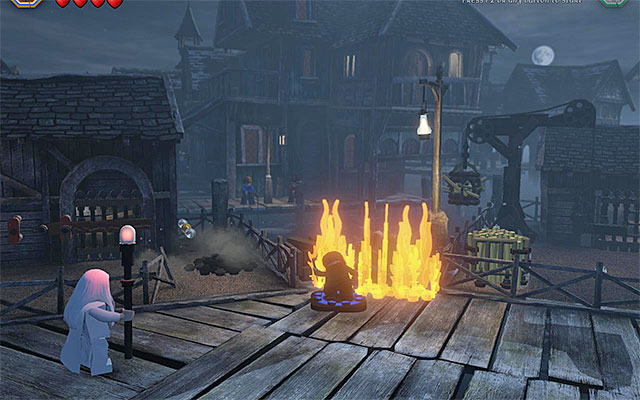 walk onto the plate and set the objects here on fire
Requirements: ability to set fire (e.g. Sam)
Way to obtain: Examine the central part of the docks and locate the spot where you can set fire. After you do that, wait for the collectible to appear.
Reward: Duck Cap - makes funny sounds
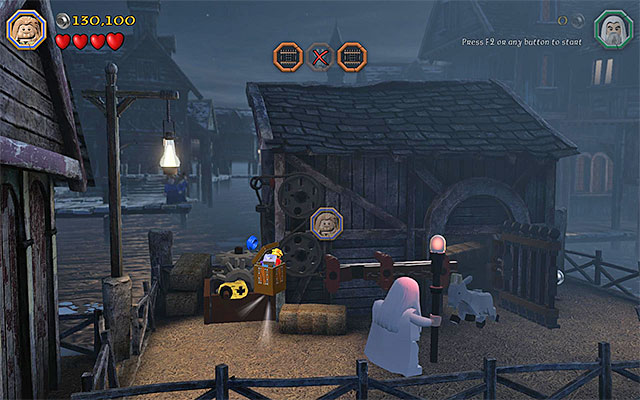 The minikit is in the middle pen
Requirements: -
Way to obtain: After you have gained access to the middle pen (this is required to push the story forward) enter, thanks to which you will pick up the hidden minikit.

Requirements: bow (e.g. Kili or any other elf), long jumps (any elf)
Way to obtain: After the first battle with Bolg and his goblin minions, you need to explore the area. Note the bird shown in the above screenshot. Use the bow, on the bird, to drive it away. This is not it, though so, along the docks, you need to remember about the bird at all times. The actions that you need to perform, in connection with the bird have been described below.
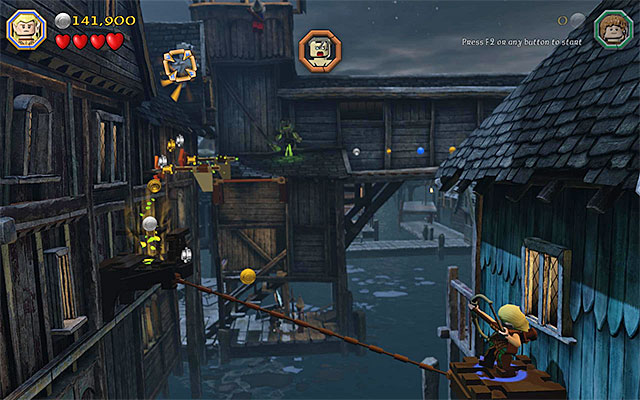 The place where you use the bow for the second time
Again, use the bow after you walk over the rope and reach a small balcony. Just like earlier, aim at the bird.
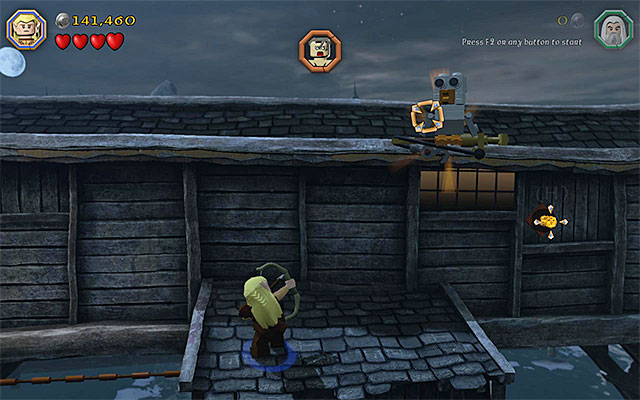 The spot where you use the bow for the third time
Attack the bird with the bow after you reach one of the small fragments of the rooftop. This time around, the bird drops the collectible, thanks o which you will be able to collect it.
Reward: Loot Rod - during the fishing minigames, you obtain resources
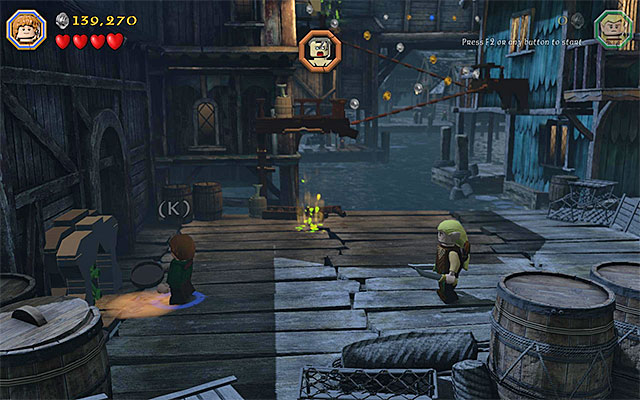 The manhole
Requirements: -
Way to obtain: After the first battle with Bolg and his minion goblins, you need to explore the area. Turn your attention to the manhole, thanks to which you will reach an inaccessible balcony with the treasure.
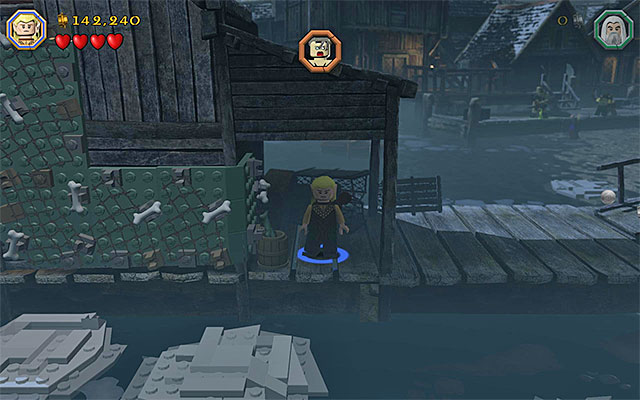
Requirements: climbing walls (e.g. goblin)
Way to obtain: While chasing after Bolg, stop in the part of the docks shown in the above screenshot. Switch to the goblin here and grab on to the interactive wall, thanks to which you will reach a place with the minikit.
 The target is attached to one of the boats
Requirements: slingshot (e.g. Ori)
Way to obtain: After the second battle with Bolg, remain on the big platform, where the battle took place. Select the slingshot and hit the target on the boat that you can see in the distance. After several successful hits, the boat goes down, to the bottom and you obtain the minikit.
In order to obtain the Master Burglar Status, you need to amass, at least, 60000 studs. This is not too steep an amount. If, in spite of that, in the story mode, you failed to amass the required number of studs, do that in the Free Play mode, especially that with many of the collectibles (e.g. in the armory) you will find the blue and violet coins. Apart from that, try to complete the building minigame, as well as possible and avoid losing hearts during the fights with the goblins.
 Use Saruman's staff to smash the mithril object
Requirements: Saruman's staff
Way to obtain: To the left of the thirteenth chapter's starting point, there are mithril objects. Switch to Saruman and smash them, using the Saruman's Staff.
Reward: Wraith Snorkle - grants to access to the underwater mithril objects and enhances vision.
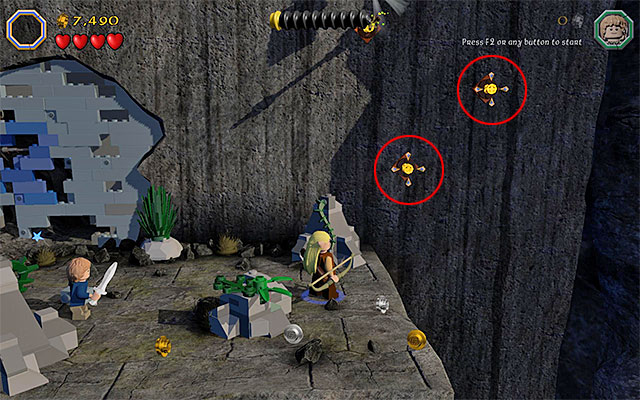
Requirements: bow (e.g. Kili or any other elf), long jumps (any elf)
Way to obtain: While following the mountain path, explore the area to the right of the spot where you smash the big blue wall. You need to use the bow on two interactive slots shown in the screenshot. Switch then to any of the elves and climb over the arrows stuck in the wall. The last jump you take allows you to grab the minikit in mid-air.
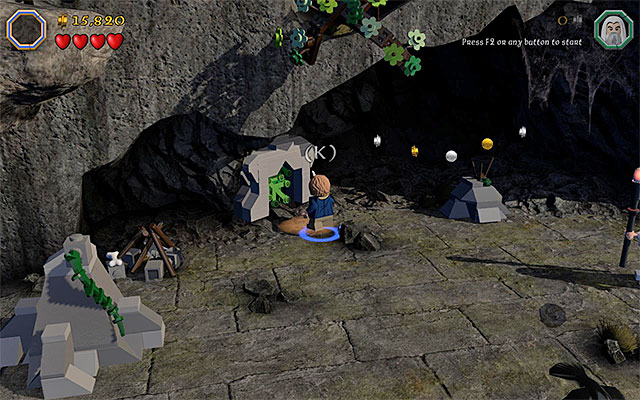 The manhole to the ledge with the catch
Requirements: flail (e.g. Dori)
Way to obtain: While following the mountain path, keep an eye out for an interactive manhole. Walk through it, e.g. as a dwarf, and switch to a character with flail. Use the flail on the interactive catch and pick up the treasure.
Reward: Po-tay-to - the use of this item is identical to that of Saruman's staff (destroys mithril objects)
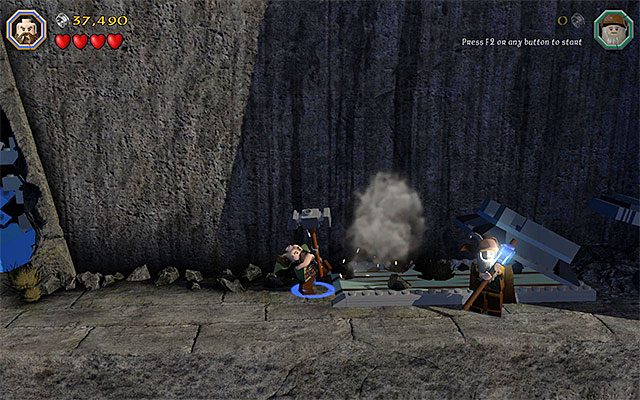 Use the warhammer only after you complete the path
Requirements: Warhammer (e.g. Dwalin)
Way to obtain: Stop after you reach the tomb's entrance and examine the area on the right. Start by holding down the appropriate key/button, thanks to which you will complete the path. Then, take the character with warhammer and use it to push over the huge block, to the right. You can now collect the minikit.
 The spot where the goblin may start climbing
Requirements: climbing walls (e.g. goblin)
Way to obtain: Right after you gain access to the tomb, climb down the stairs and stop in the corner with an interactive wall. You need to switch to the goblin here, thanks to which you will reach the schematic.
Reward: Mithril Giddy-up Staff Schematic
Requirements: -
Way to obtain: Right after you access the tomb, climb down the stairs and, after you reach a blocked passage, jump to the edges on the left. Do not haste to reach the interactive lever. Instead, focus on reaching the left-most edge shown in the screenshot, which is quite well concealed. This is here that you find the minikit.
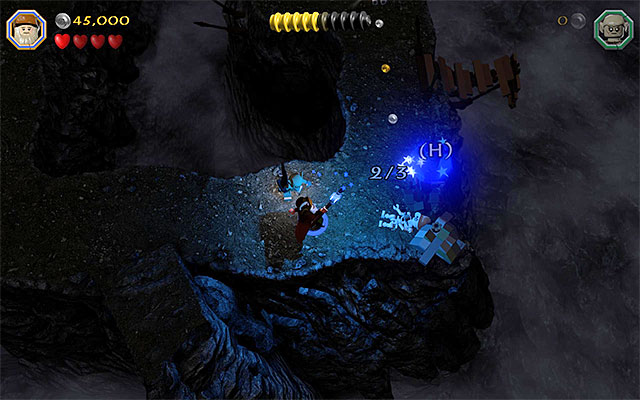 One of the three objects that you need to fire the magic projectile at
Requirements: staff (any wizard)
Way to obtain: You need to reach the part of the tomb that resembles a labyrinth. In various locations of this, relatively, small location, there are blue spheres. You need to tire magic projectiles at them, fired from the staff. After you activate all three spheres, you will be rewarded with a minikit.
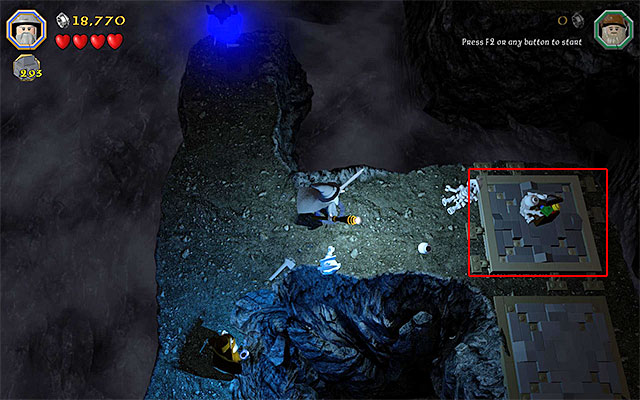
Requirements: -
Way to obtain: You need to reach the part of the tomb that resembles a labyrinth. Explore the left side of the labyrinth and locate the interactive plate shown in the above screenshot. An important piece of information is that you need to approach the plate from the left, thanks to which you will avoid springing one of the traps.
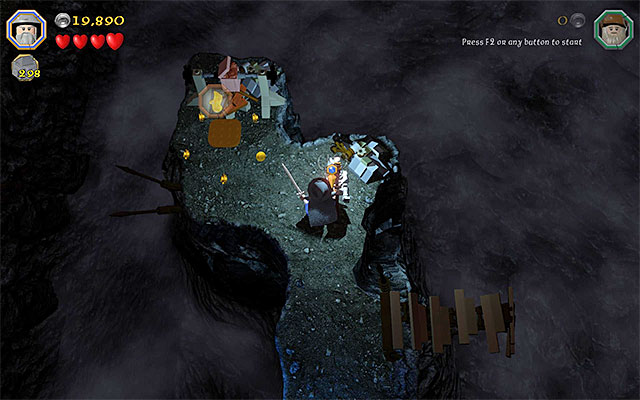 Use torch
Requirements: -
Way to obtain: You need to reach the part of the tomb that resembles a labyrinth. Explore the right side of the labyrinth and locate the interactive objects, which you need to set on fire. You do not need to switch to the character that can do that, because there is a torch at the skeleton on the right. Wait for the minikit to jump out of the flames.
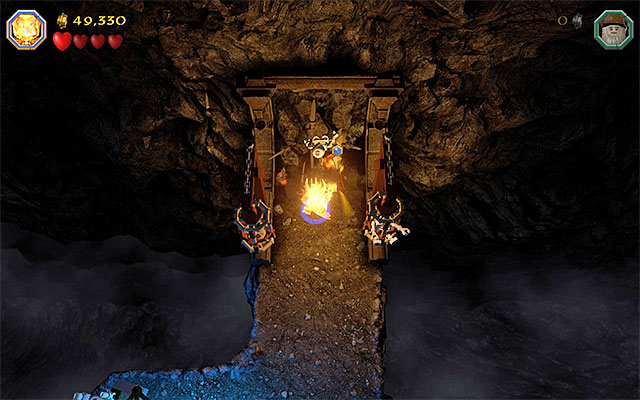 You need to switch to Sauron
Requirements: Morgul Blade (Sauron)
Way to obtain: You need to reach the part of the tomb that resembles a labyrinth. Explore the Northern side of the labyrinth, i.e. the one that you visit right after you smash the blue wall. You will find here an area, which may be approached by Sauron only. Use the Morgul Blade, destroy the elements in the area and pick up the collectible.
Reward: Troll's Bane - apart from its basic functions, this item can also freeze the other characters.
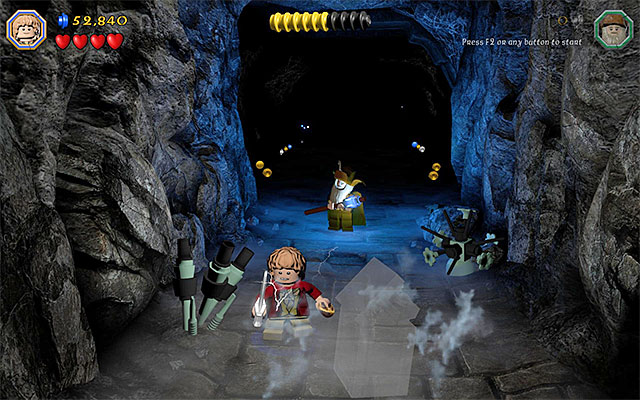
Requirements: The Ring
Way to obtain: Stop right after you leave the labyrinth. Before you approach the sarcophagus that you can see in the distance, turn back and walk into the foreground. After you get to the place shown in the above screenshot, switch to Bilbo and put on the Ring. You can now collect the minikit.
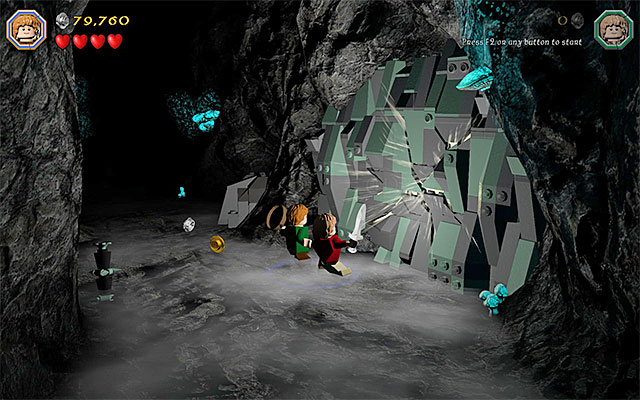 Use two characters to smash the wall on the right
Requirements: Buddy-Up
Way to obtain: While exploring the tomb, you will encounter a larger cracked wall. Here, you need to Buddy-Up so, pair up two of the characters and smash the wall. Note - if the game does not allow you to pair up two playable characters, make sure that you choose two "standard ones", e.g. dwarves.
 The target
Requirements: bow (e.g. Kili or any other elf), long jumps (any elf)
Way to obtain: Reach the cave with the big blue block hanging down. Explore the left side of the location, thanks to which you will locate an interactive target. Use the bow here.

After you use the bow and see a short cutscene, switch to any of the elves and reach the rope shown in the above screenshot. Jump from rope to rope, and grab the hovering minikit.
 Attack the skeletons and retrieve the treasure from one of them
Requirements: spade (e.g. Fili)
Way to obtain: Reach the cave with the big blue block hanging down. Examine the right side of this location and destroy all of the interactive elements, thanks to which you will locate the spot where you can use the spade. Using the spade will allow you to dig out a skeleton, which will return to life. Approach the dancing skeletons and attack them with any weapon. After you eliminate the skeletons, pick up the treasure dropped by one of them.
Reward: Glowstick - illuminates the area
 The catch
Requirements: flail (e.g. Dori)
Way to obtain: Towards the end of this stage, the characters follow very narrow paths. Stop right after you use the staff to smash the blockade and jump o the lower level. You should note an interactive catch here and you need to use flail to rip it off. Finally, hold down the building key/button and wait for the last, tenth, minikit to be constructed.
In order to obtain the Master Burglar Status, you need to amass, at least, 85000 studs. Most probably, you will be able to reach this threshold only in the Free Play mode, because many of the more valuable studs are in the "bonus" areas. Remember also to smash the elements of the surrounding and about avoiding traps, and falling into voids (it is easy to fall into one, by accident, while climbing before you enter the tomb).
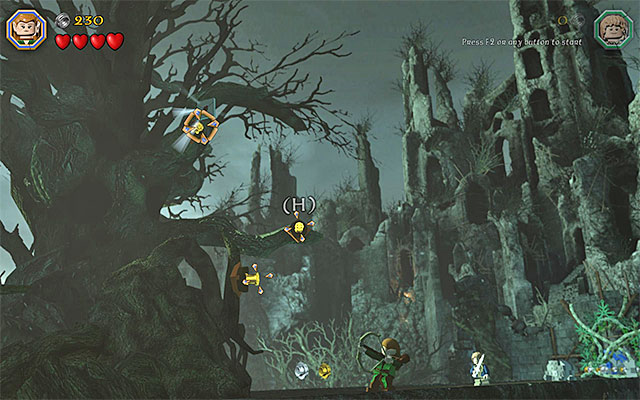 The place where you need to climb on bars
Requirements: bow (e.g. Kili or any other elf), long jumps (any elf)
Way to obtain: Right after the fourteenth chapter starts, instead of going right, go left. After you reach the edge of the map, use the bow against some of the nearby interactive slots. Switch then to any of the elves and climb over the bars, thanks to which you will reach the location of the schematic.
Reward: Mithril Wraith Armour Schematic
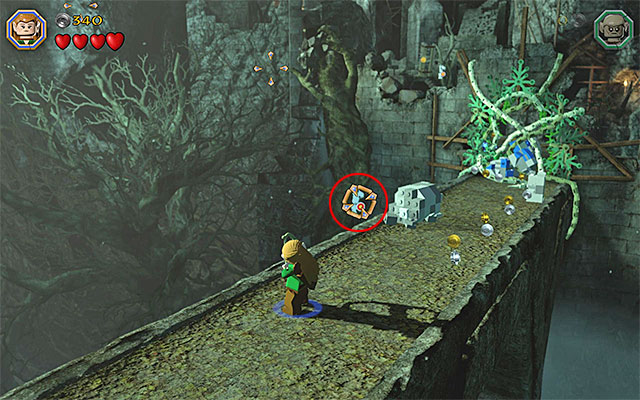 The first target
Requirements: bow (e.g. Kili or any other elf)
Way to obtain: In total, you need to fire the bow at five different targets, located inside the stronghold. A handicap here is that they are spread all around. You should run into the first target close to the starting point, i.e. on a big bridge. Unfortunately, you need to keep in mind that you need to fire at the remaining targets. Their whereabouts have been provided below.
 The second target
You will notice the second target on the right, soon after you cut through the first barricade.
 The third target
You will notice the third target in the distance, on the left, soon after you cut through the first barricade.
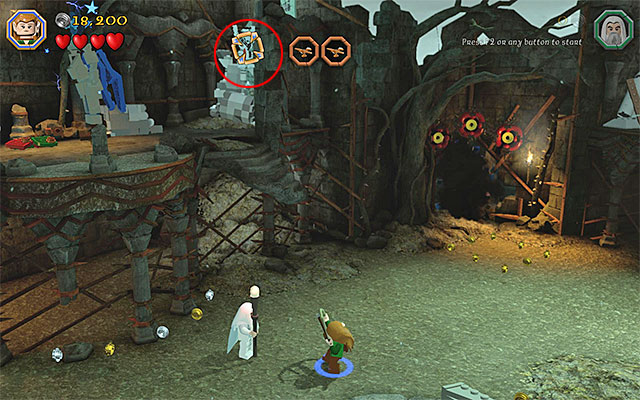 The fourth target
You will find the third target in the left side of the area with the three poles that generate the energy streams.
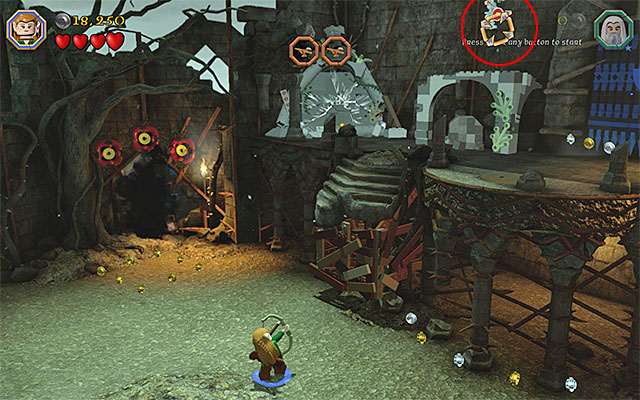 The fifth target
You will find the fifth target in the right side of the area with the poles that generate energy streams.
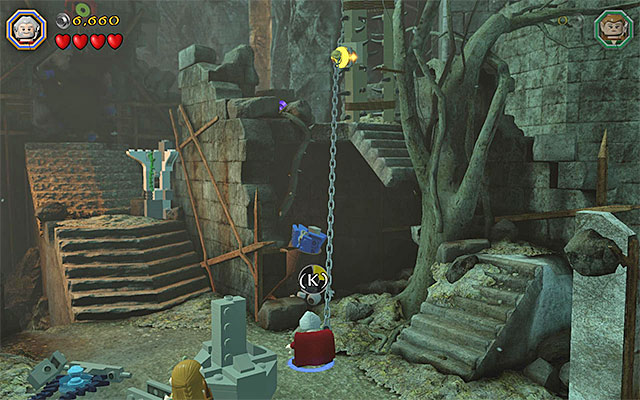 Use flail on the catch to the right
Requirements: flail (e.g. Dori)
Way to obtain: Soon after the stage starts, you will reach a location where you need to build the first pole for energy transmission. Before you do that, switch to any character with flail and use the item against the interactive catch on the right.
 Reveal the climbing wall
Requirements: climbing walls (e.g. goblin)
Way to obtain: Explore the yard balcony on the left, where you build three more poles. Smash all of the interactive objects around, thanks to which you will reveal the climbing wall. You can now switch to the goblin and reach the minikit.
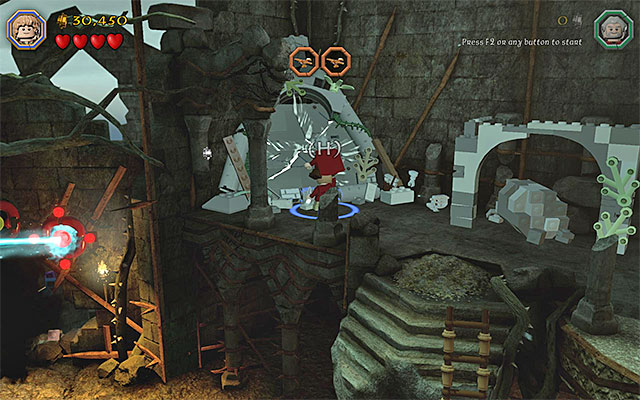 Pair up two of the characters and smash the tall wall
Requirements: Buddy-Up
Way to obtain: Examine the balcony on the right, where you build three more poles. There is a large cracked plate here and you need to Buddy-Up to smash it. Pair up two of the characters and, after you position yourself at the plate, press the action key/button. Note - if the game does not allow you to combine two playable characters, make sure that you have selected the "standard" ones, e.g. two dwarves.
 The blue gate with a minikit behind it
Requirements: staff (any wizard)
Way to obtain: Explore the yard's right balcony, where you build three more poles. You need to find a blue gate here and smash it with the staff. Illuminate the area past the destroyed gate and jump to grab the minikit.
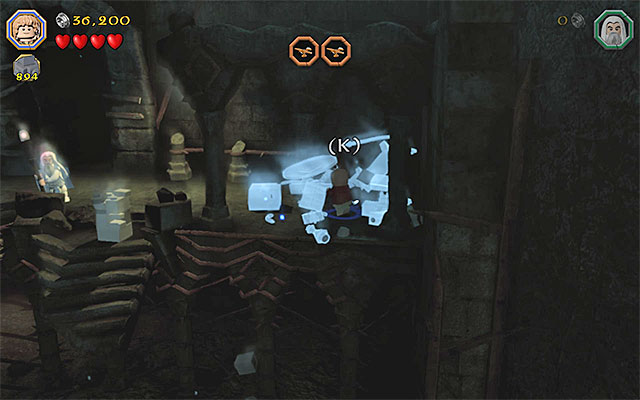 Put on The Ring and complete the structure
Requirements: The Ring
Way to obtain: Explore the yard's right balcony, where you build three more poles. Smash all of the objects in the right side of the balcony and switch to Bilbo. Put on The Ring and hold down the building key/button to build a... hot-dog stand.
Reward: Hot Dog Shield
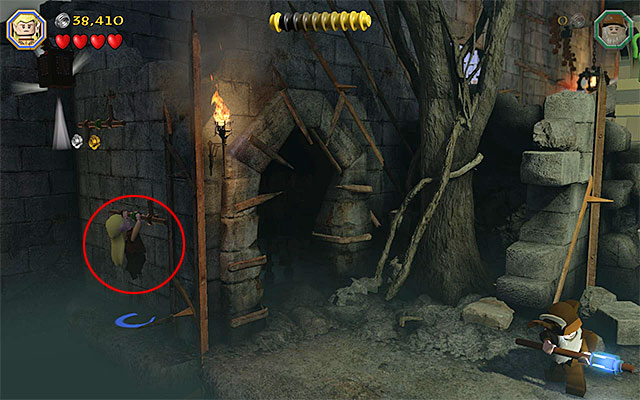
Requirements: long jumps (any elf)
Way to obtain: After you enter the keep, switch to any of the elves and go left. Stop close to the Save Statue. You need to take a precise jump here, in order to grab on the ledge shown in the above screenshot. Jump then, towards the second ledge and to the minikit.
 As Sauron' smash the nearby objects
Requirements: Morgul Blade (Sauron)
Way to obtain: After you enter the keep, examine the right side of the yard. Switch to Sauron here and walk into the small area under the balcony on the right. After you smash the objects here, you will be allowed to pick up the collectible.
Reward: Morgul-blade - it is a weapon identical with the one that Sauron has.
 The spot where you use the spade
Requirements: spade (e.g. Fili), The Ring
Way to obtain: After you enter the keep, explore the right side of the yard. Locate the area where you can use the spade. After you dig up all of the interactive elements, switch to Bilbo and put on his ring. You only need to hold down the building key/button, thanks to which you will build the minikit.
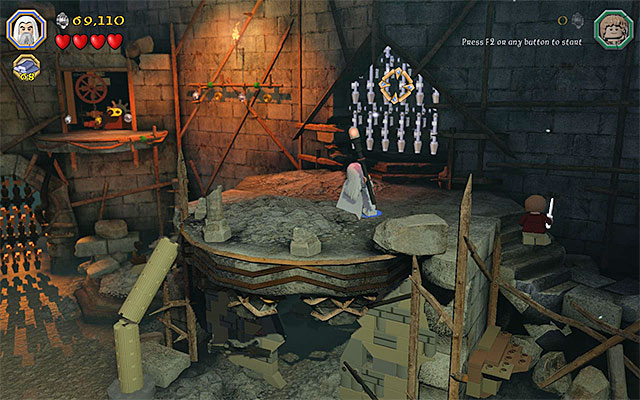
While completing the fourteenth chapter of the game in the story mode, you have been unable to explore the tomb neighboring the external yard. While replaying the fourteenth mission in the Free Play mode, this is available and even required, because there are several collectibles in the tomb. After you make it into the inside of the keep, take all of the steps necessary to get to the upper-right balcony. Switch to Saruman here and prepare the Saruman's Staff. Enter the aiming mode (hold down the action key/button) and aim at the mithril gate shown in the above screenshot. You can now enter the tomb.
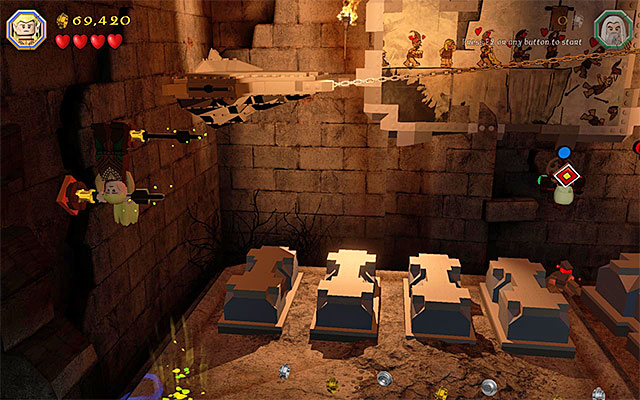 Grab the arrow stuck in the wall
Requirements: long jumps (any elf)
Way to obtain: You need to explore the left side of the tomb and stop in the spot marked with green and yellow leaves. Switch to any elf here and jump to reach the bar above.
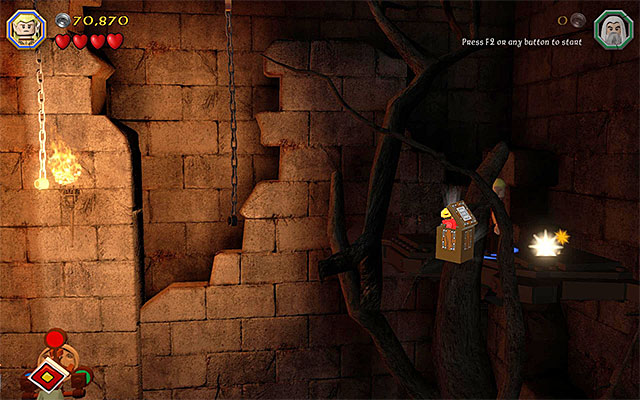 The ledge with the minikit
Jump over to the neighboring bar and then, to the small ledge in the corner of this chamber. walk over the chain, carefully. Towards the end, take a jump. Grab on to the chains hanging down from the ceiling and, finally, jump towards the slightly visible ledge in the right corner. This is where the minikit is.
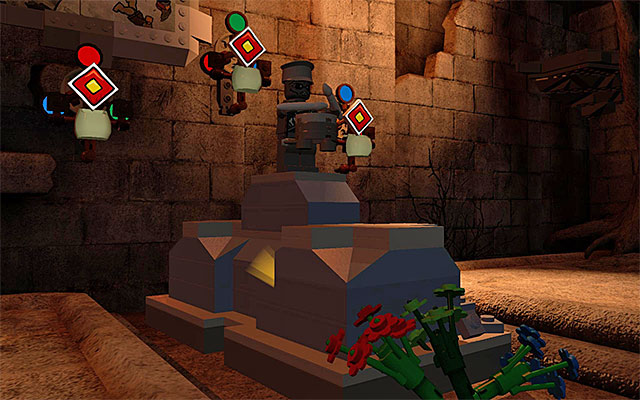
Requirements: slingshot (e.g. Ori)
Way to obtain: explore the central part of the tomb and note the three targets. You need o hit them with pebbles, fired from the slingshot. The plan is that the colors need o match the flowers at the sarcophagus. The solution to this puzzle has been presented in the above screenshot - above the left target there needs to be a red circle, green above the middle one and blue above the right one.
Reward: Marching Baton
 The place where you start fire
Requirements: ability to set fire (e.g. Sam)
Way to obtain: Explore the right side of the tomb and walk onto a small plate. You need to switch to the character that can start fire. wait for the flames to appear and for the reward.
 Minikit
Requirements: -
Way to obtain: While escaping the monsters (after you have fought with Azog) keep to the upper path, thanks to which you will obtain the tenth minikit, along your way.
Requirements: spade (e.g. Fili)
Way to obtain: After you start the battle with Sauron, ignore the boss initially and explore the area on the right. In the area shown in the above screenshot, you can use spade to dig up a single brick.
Note - If you find it difficult to set the appropriate camera angle, move the two available characters to the right.
Wait for Sauron to finish one of his attacks, pick up the brick that you dug up and throw it at the skeleton on the right, shown in the above screenshot. You only need to collect the treasure now, which dropped to the arena.
Reward: Whistling Flail - the use of this item is identical to that of a regular flail, where this one whistles when it is used.
In order to obtain the Master Burglar Status, you need to amass, at least, 30000 studs. It is an easy requirement, which you should be able to meet still before you fight the final battles. If, however, you failed to do that in the story mode, in Free Play, turn your interest to the gate on the left of the keep's interior. Destroying it (Saruman's staff) will grant you access to several blue and violet studs.
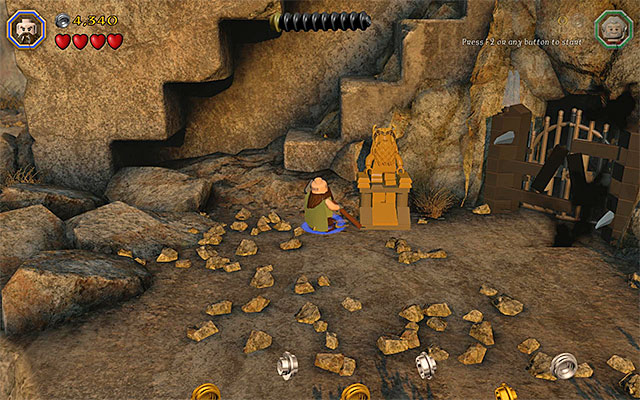 The first statue
Requirements: -
Way to obtain: In total, you need to destroy five statues of dwarves (use any weapon) and a handicap here is that they are quite far away from each other. The first statue is close to the starting point for the fifteenth stage. At the first opportunity, you need to take the path down, thanks to which you will reach a big ledge with the statue. As for the rest of the statues, you need to remember about them, and their whereabouts have been provided below.
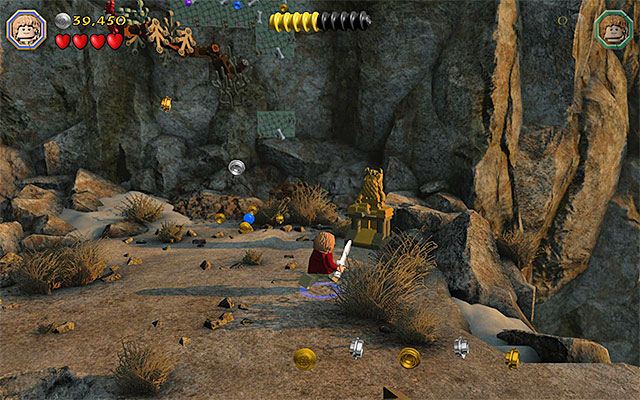 The second statue
The second statue is on one of the ledges above (at this point, the game starts a short cutscene that suggests the necessity to solve a puzzle nearby).
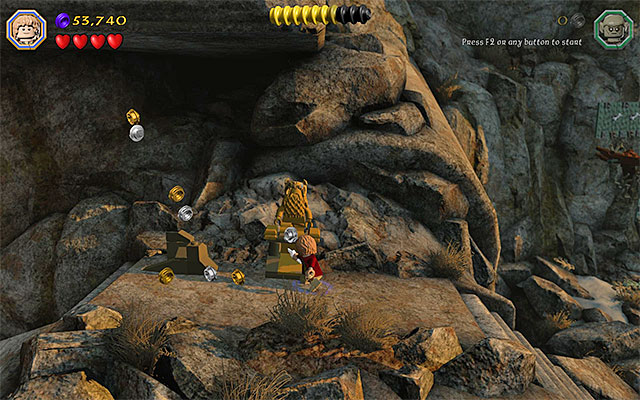 The third statue
The third statue is to the left of the above one. You pass it by on your way to the interactive manhole.
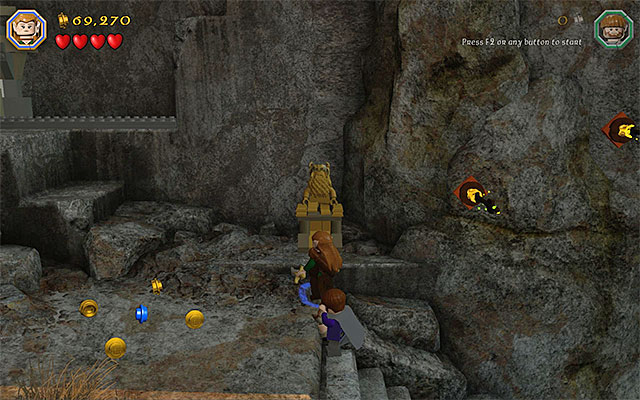 The fourth statue
The fourth statue is to the right of the place, where you complete the puzzle, i.e. of the colorful targets that you hit with pebbles fired from slingshot.
The fifth statueYou find the last, fifth statue soon after you complete the puzzle and go left. It is on one of the bigger ledges so, you cannot miss it.
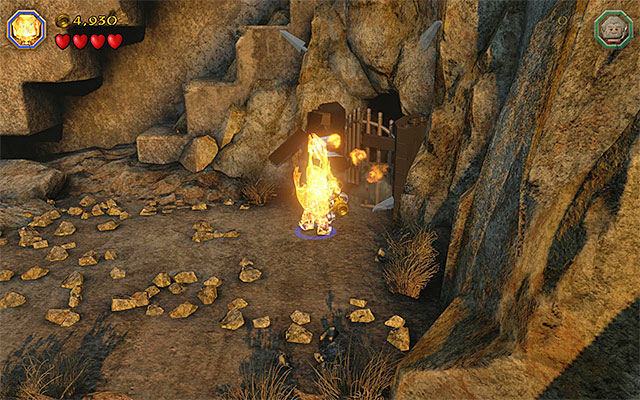
While completing the fifteenth chapter of the game in the story mode, you have been unable to explore the small cave. While you are replaying the fifteenth mission in the Free Play mode, this is available and even required, because there are many of the collectibles there, which you are looking for. After you start the mission, at the first opportunity, you need to take the path downwards. Stop on the bigger ledge (there is the first one of the five statues here) and switch to Sauron. You need to use the Morgul Blade which he is equipped with, to unlock the passage shown in the above screenshot.
 Jump to reach the successive ledges
Requirements: far jump (any elf)
Way to obtain: Explore the left side of the optional cave and stand in the green point with yellow leaves. Switch to any elf here and jump to reach the successive ledges above. Finally, take a leap towards the rope on the right, because this is where the minikit is.
 Watch your steps and do not wall into the chasm
Requirements: -
Way to obtain: Explore the left side of the optional cave and smash all of the interactive objects. Hold down the building key/button and wait for a long beam to be built. Climb onto it and collect the minikit ate the end of the beam.
 You need to smash the blue padlock on the gate
Requirements: staff (any wizard)
Way to obtain: Explore the central part of the cave. There is a locked gate here. You need to cut through it, by using any cave and firing a magic bolt at it. Walk into the new area and locate the unique treasure.
Reward: Pom Poms
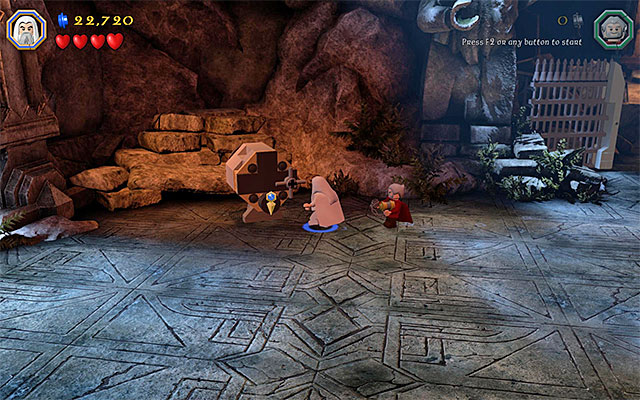
Requirements: -
Way to obtain: Explore the area past the gate in the optional cave, where you found the first unique collectible, described above. There also is a key here, which you need to pick up. Go left and smash all of the objects in the area. You can now use the key on the container shown in the above screenshot and collect the minikit.
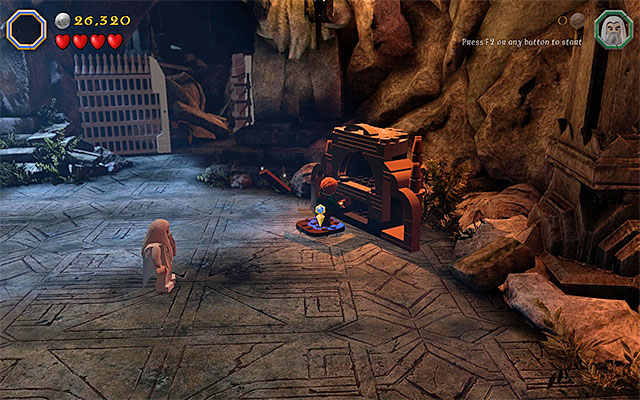 After you start building, set on fire
Requirements: setting on fire (e.g. Sam)
Way to obtain: Explore the right side of the optional cave. You need to smash all of the objects in the area and hold down the building key/button, thanks to which toy will build a miniature stronghold. Switch to the character that can set fire, stand on the place and light a fire. After several moments, you will be able to collect the unique treasure.
Reward: Breaduchet - the functioning of this item is identical with that of the regular slingshot but, instead of pebbles, it fires loaves of bread.
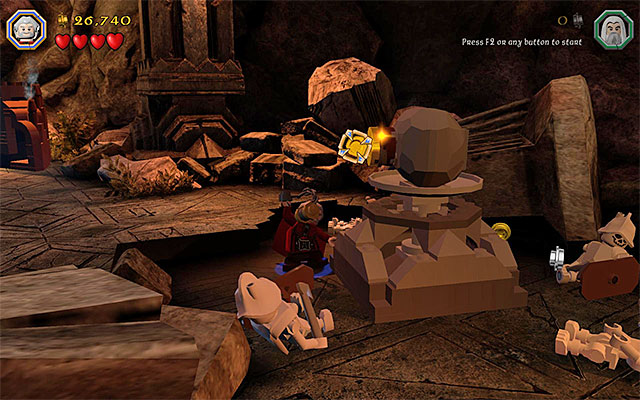 The catch
Requirements: flail (e.g. Dori)
Way to obtain: Explore the right side of the optional cave and find the golden interactive catch. Reach for that catch, using flail, and rip it off, to obtain the minikit.
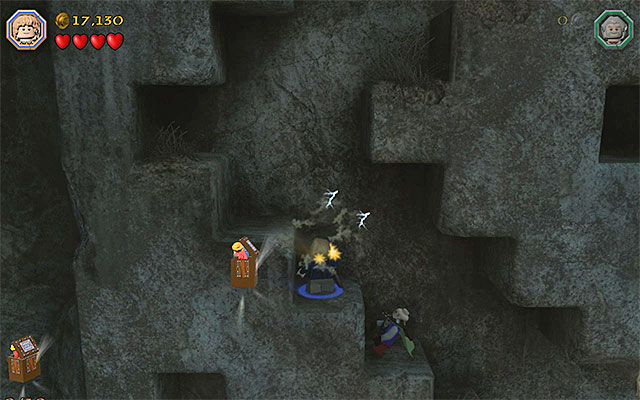
Requirements: The Ring
Way to obtain: Right after you get through one of the manholes, you will have to smash a cracked plate. After you do that, go downwards. Locate the area shown in the above screenshot and switch to Bilbo. You need to put on the ring, which the hobbit is equipped with and obtain the minikit.
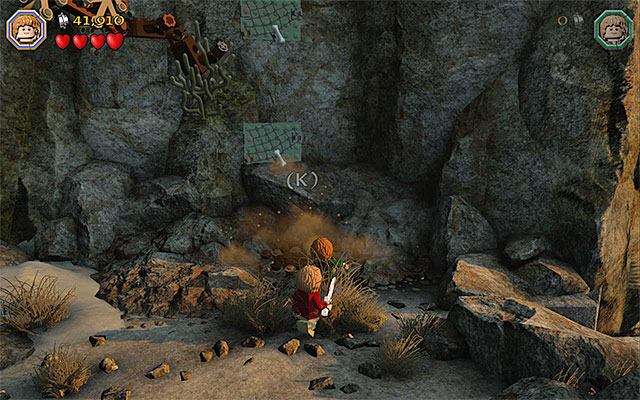 Complete building the climbing wall
Requirements: wall climb (e.g. goblin)
Way to obtain: First, you need to reach one of the larger ledges, i.e. the one at which the game starts a short cutscene, which suggests that you will soon need to solve a puzzle. Take a look around (there is the second dwarf statue here) and locate the spot where you need to use the spade. After you dig new objects out, hold down the building key/button, thanks to which you will complete the climbing wall.
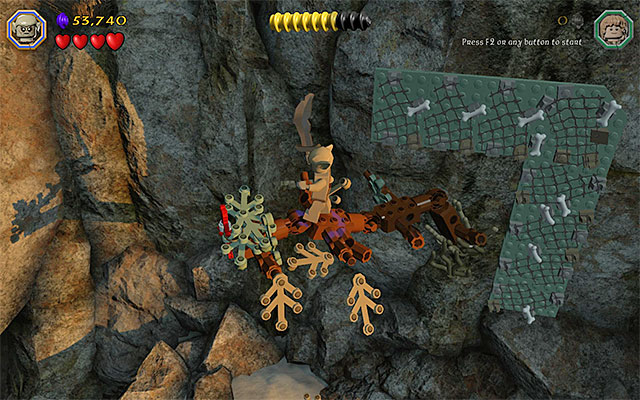 Throw the collectible down
Switch to the goblin and start climbing over the wall. This way, you will reach a big branch, to which you need to jump over. walk to the left and throw the collectible off the tree. Now, jump down to a lower ledge and pick up the collectible.
Reward: Dragon Kite - the functioning of this item is identical to that of a regular flail
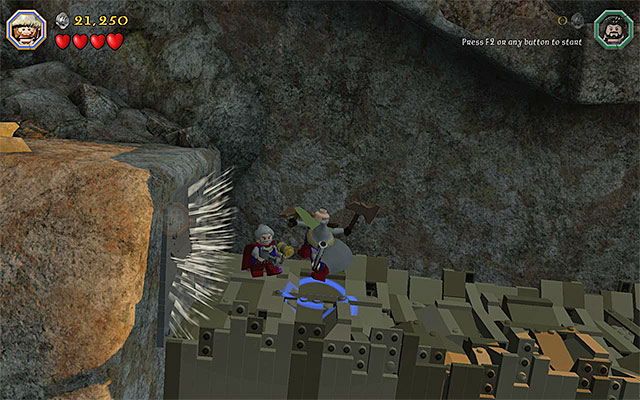 You need to smash the plate in Buddy-Up
Requirements: Buddy-Up
Way to obtain: Go left of the area, where you found the most recent collectible (along your way, you will be passing by the third dwarf statue) and jump down to the bridge below, after a while. Here, you will find a big cracked plate and you can cut through it, only by Buddying-Up. Make sure that you pair up two of the characters and smash the plate with them. You can now access a small recess and collect the "invisible" minikit. Note - if the game does not pair up two of the playable characters, make sure that you have chosen the "standard" characters (e.g. two dwarves) for that. You need to obtain the collectible still before the puzzle with the targets, because that will raise the bridge.
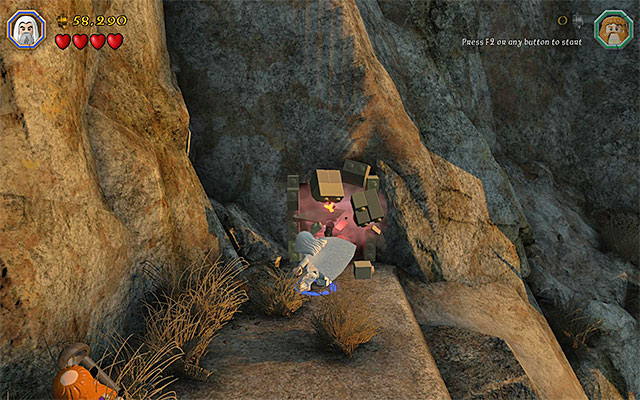 The barricade needs to be smashed by Saruman
Requirements: Saruman's staff
Way to obtain: Explore the area to the right of the puzzle with the colorful targets (there is the fourth dwarf statue around). You should notice the mithril barricade here. Switch to Saruman and use the staff that this character is equipped with (Saruman's Staff) to smash the barricade. walk into the small area and collect the minikit.
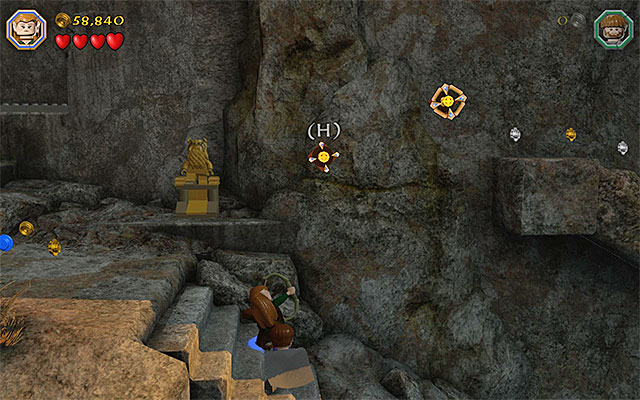
Requirements: bow (e.g. Kili or any elf), far jump (any elf)
Way to obtain: After you solve the puzzle with the targets, jump down and walk over to the left, over the bridge that has just been raised. Stop in the spot shown in the above screenshot (right next to the final, fifth, dwarf statue) and use the bow on the interactive slots above. After you fire two arrows at them, switch to any of the elves and jump towards the first bar. Move to the right now, thanks to which you will soon reach the rope with the minikit.
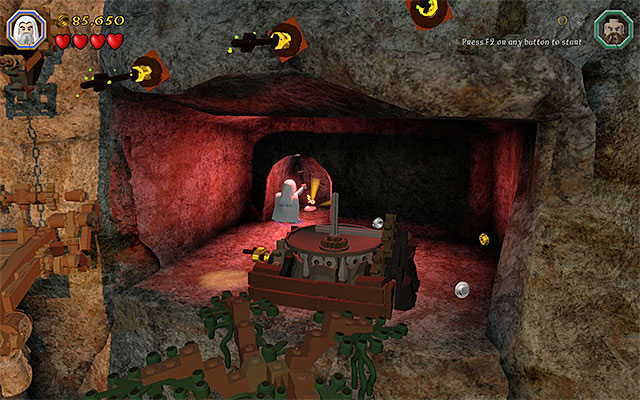 The Minikit
Requirements: -
Way to obtain: You need to reach the top stone ledge, where you get to watch a short cutscene. Go towards the bottom of the screen and start smashing the objects near the edge. Approach, then, the hopping bricks and hold down the building key/button, thanks to which you will build the passage to the last minikit.
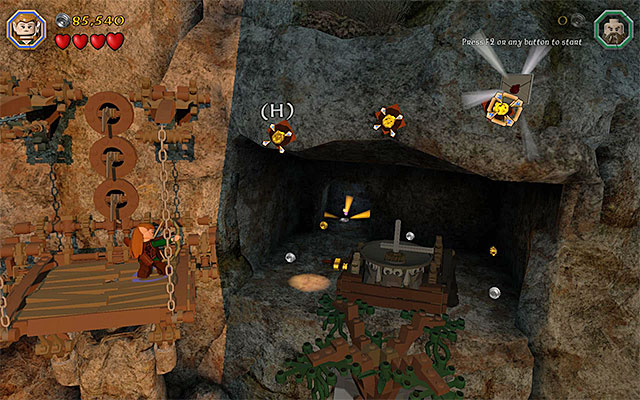
Requirements: bow (e.g. Kili or any elf), far jump (any elf)
Way to obtain: Start the puzzle that consists in raising platforms and walking over them, as another character. Stop after you reach the last platform, shown in the above screenshot. First, use bow to stick arrows into the three slots on the left. After that, switch to an elf and start jumping towards the bars, thanks to which you will grab the schematic in mid-air.
Reward: Mithril Hammerhands Schematic
You need to illuminate the area around the collectibleRequirements: staff (any wizard)
Way to obtain: You need to reach the ledge with the mechanism, whose using ends the fifteenth mission. Before you use the mechanism, switch to any of the wizards and go towards the background. walk into the dark area and collect the unique collectible from there.
Reward: Friendship Slippers - any attempt to Buddy-Up results in the characters hugging.
In order to obtain the Master Burglar Status, you need to amass, at least, 80000 studs. Since this limit has been set high, it is best to obtain this status, as late as in the Free Play mode. There are two factors that speak for that - only in this mode is the additional cave available and at many of the collectibles which are more difficult to get, there are blue an violet studs.
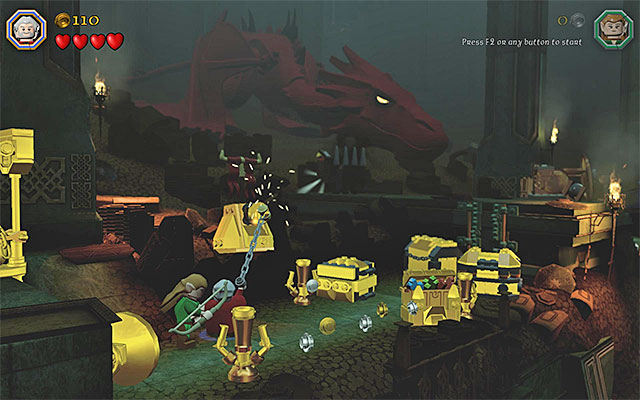 The catch
Requirements: flail (e.g. Dori)
Way to obtain: Remain in the starting point for the sixteenth stage and use the flail on the nearby interactive catch. After you rip the catch off, pick up the collectible.
Reward: Dale Standard
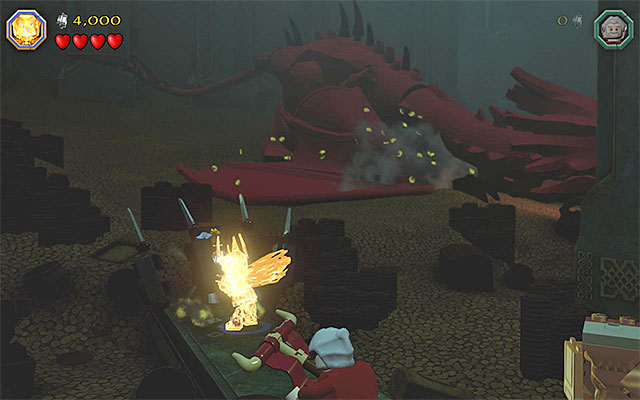 Use Sauron's blade
Requirements: Morgul Blade (Sauron)
Way to obtain: While exploring the treasure, look out for a side path to the area in darkness. Switch to Sauron here and use his blade to pave the way to the minikit.
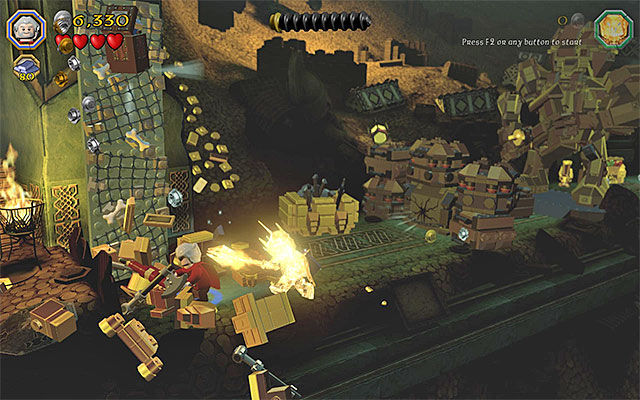 The wall
Requirements: wall climb (e.g. goblin)
Way to obtain: While exploring the treasure (right after the first time you slide down) keep looking around for the interactive wall on the left, behind interactive objects. Smash the objects in the area and switch to the goblin. Grab on to the wall to reach the next collectible.

Requirements: spade (e.g. Fili), axe (any dwarf)
Way to obtain: During the exploration of the treasure (soon after the second time you slide down) keep looking around for the spot shown in the above screenshot, where there is a key buried. Use spade to dig it out.
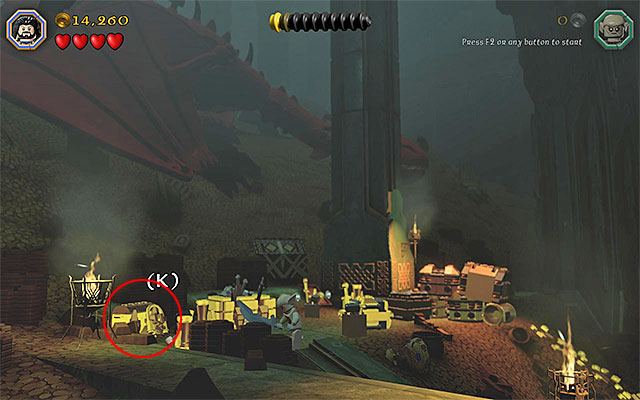 The chest
Before you pick up the key, clear the path ahead for yourself (you need to smash the cracked plate and hold down the building key/button). Only then, move ahead. After you walk into the next area, find a chest on the left and open it with the key.
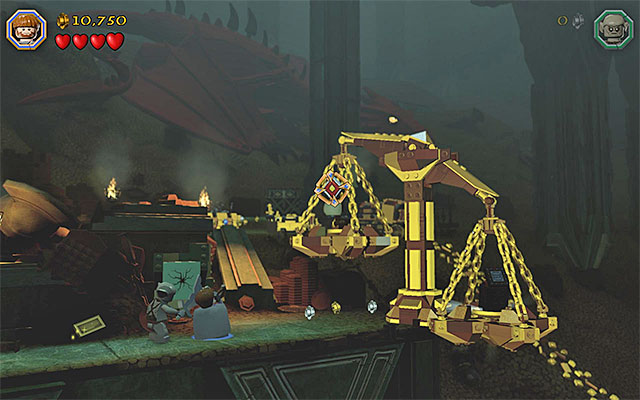 Fire the slingshot at the target
Requirements: slingshot (e.g. Ori)
Way to obtain: Return, for a moment, to the previous area, i.e. to the one where you dug up the key connected with the third minikit. Switch to a character with slingshot here and aim at the target on the right. You need to hit it several times, with pebbles fired from the slingshot. Wait for the pans of the large scales move and collect the minikit.
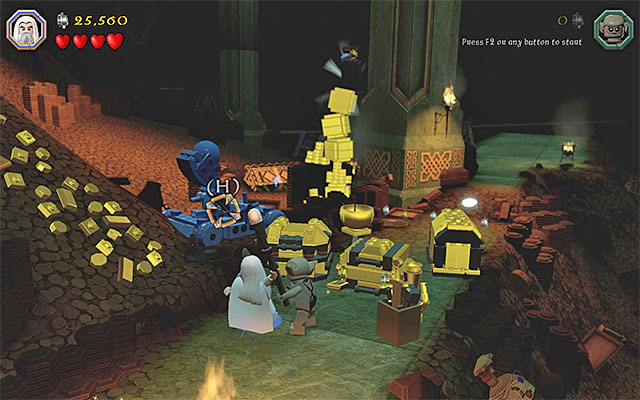 Aim at the blue catapult
Requirements: staff (any wizard)
Way to obtain: During the exploration of the treasure (right after the last time you slide down), note the blue catapult on the left and fire a magic projectile at it. This will allow you to obtain a minikit. Note - up until the moment in which you collect the minikit, do not approach the white artifact on the right (Arkenstone)!
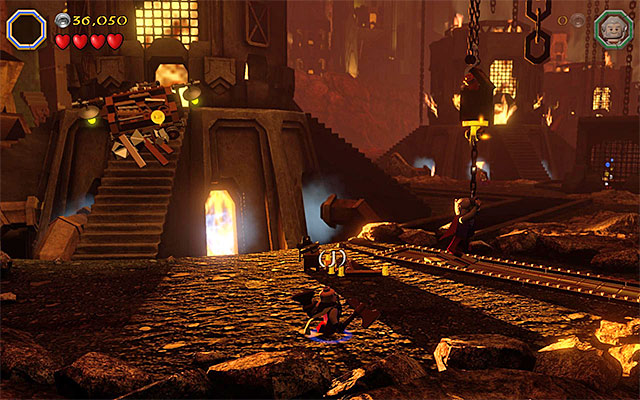 You need to attach weight to the chain, by hanging down from it with two characters
Requirements: flail (e.g. Dori)
Way to obtain: After you walk to the large chamber with inactive furnaces (the beginning of the second part of the stage connected with defeating Smaug), switch to the character with flail and aim at the catch on the right. wait for the character to grab that catch and switch to another character. Jump towards the ally to put weight on the chain and make the minikit appear
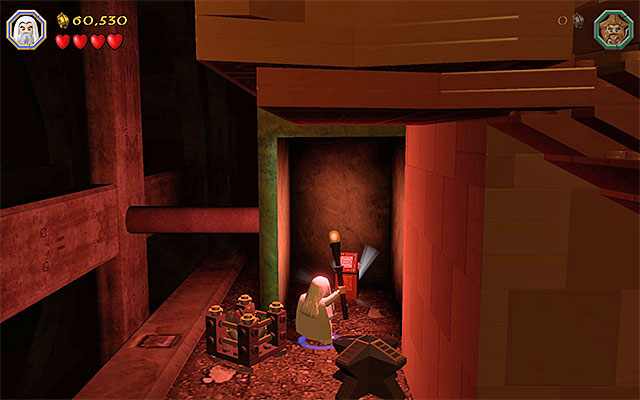 Illuminate the area and locate the collectible
Requirements: staff (any wizard)
Way to obtain: wait until the game teleports you to the second part of the large chamber with furnaces (the tower with a mechanism on its top). Switch to any of the wizards here and explore the area to the left of the main tower. You need to enter the area in darkness and collect the item hidden there.
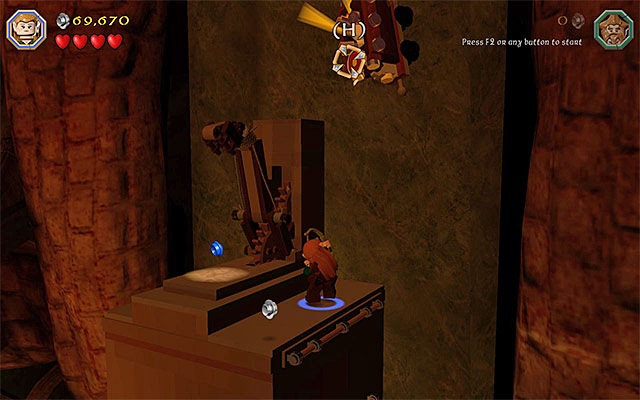 The target is at the top of the screen
Requirements: bow (e.g. Kili or any elf)
Way to obtain: You need to reach the very top in the second area of the large chamber. DO NOT USE the mechanism here and select bow instead. Aim the arrow at the nearby target, thanks to which an unique treasure will fall down.
Reward: Cluckarang - this item works just like the boomerang, i.e. it can be used to smash bricks over distance and it always returns to the thrower.
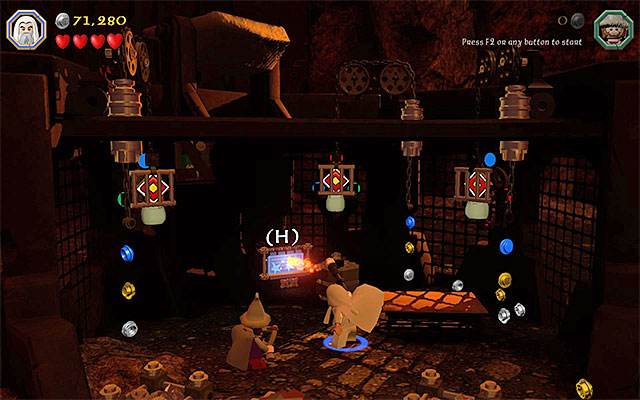 You need to use a staff
Requirements: staff (any wizard)
Way to obtain: wait until you are transferred to the third area in the large chamber with furnaces (three targets and colorful circles). Switch to any wizard here and use the staff to destroy the small cover, behind which there is the collectible.
Reward: Doily Shield
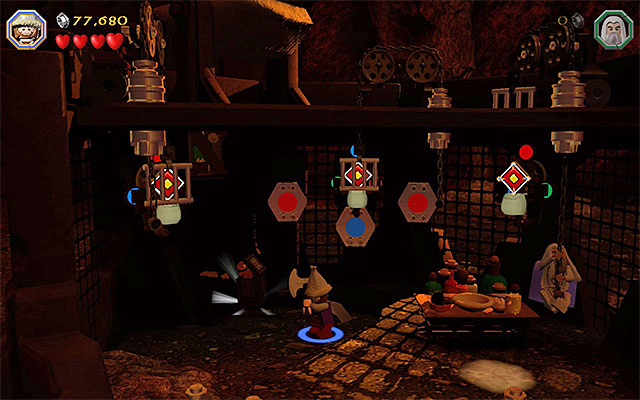
Requirements: slingshot (e.g. Ori)
Way to obtain: After you solve the puzzle with the three targets, do not use the table on the right yet. Instead, repeat the puzzle, whose solution has been presented in the above screenshot - above the target on the left, there needs to be a red circle, a blue over the middle one and a red above the one on the right. If you have done everything correctly, there will appear the minikit, on the left.
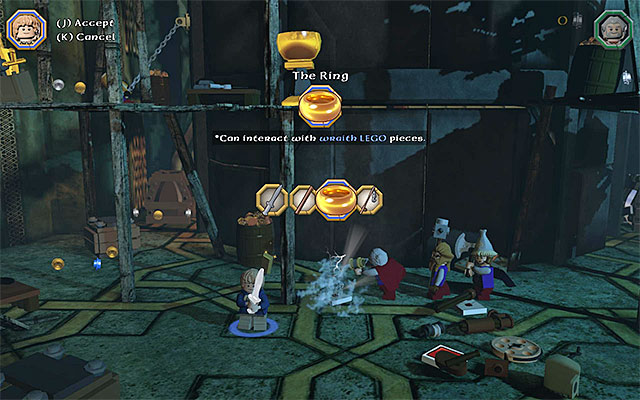 You can collect the schematic only after you put on The Ring
Requirements: The Ring
Way to obtain: After you are promoted to the last location connected with defeating Smaug, start by smashing the objects on the lowest level. Then, switch to Bilbo, put on The Ring and locate the schematic on the ground.
Reward: Mithril Firework Bow Schematic
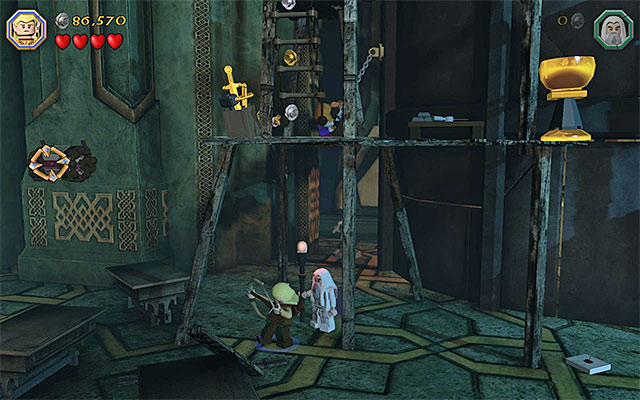
Requirements: bow (e.g. Kili or any elf)
Way to obtain: After you are promoted to the last location connected with defeating Smaug, select bow to hit three different spots and extend the flags, as a result. Te first spot has been shown in the above screenshot and it is located on the left. Note - if the flag does not unfold, try changing your position a little and fire again. Unfortunately, the game is quite "picky" when it comes to the spot in which you use the bow.
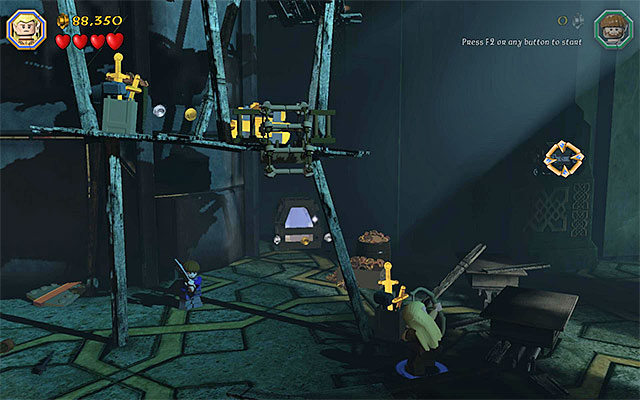 The second flag
The second flag can also be unfolded while staying at the lowest level and it is located to the right of the central structure.

The final, third flag can be unfolded only towards the end of the climbing over the central structure. The spot in which you need to fire the bow has been shown in the above screenshot. For unfolding all of the flags, you will be rewarded with a minikit.
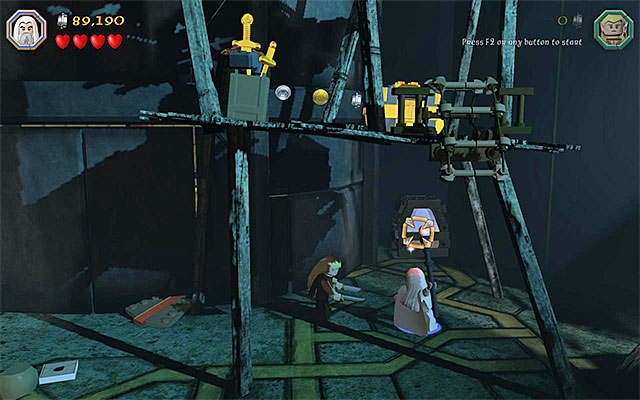 destroy the mithril cover using Saruman's staff
Requirements: Saruman's staff
Way to obtain: After you get to the final location connected with defeating Smaug, explore the area to the right of the central structure. Switch to Saruman here and use Saruman's Staff to destroy the small mithril cover with the treasure behind.
Reward: Dragon Hat - illuminates the nearest area and starts fires
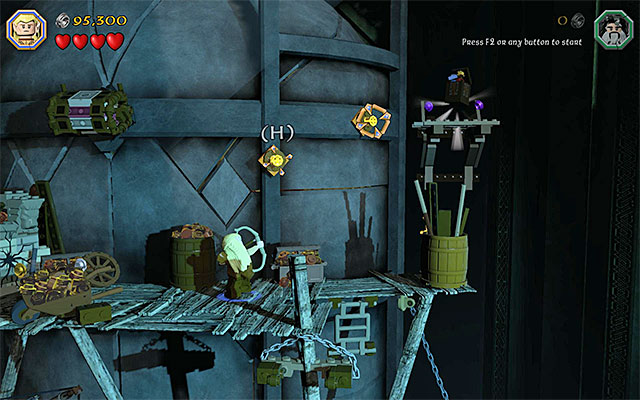 Use the bow and far jumps afterwards
Requirements: bow (e.g. Kili or any elf), far jump (any elf)
Way to obtain: You need to reach one of the higher levels of the central structure (the one with the last, third flag). Use the bow here, on the slots to the right. After you stick the arrows into the slots, switch to any elf and start jumping towards the bars, thanks to which you will make it over to a small ledge with the last minikit on it.
In order to obtain the Master Burglar Status, you need to amass, at least, 100000 studs. You can achieve that only in the Free Play mode. Try to destroy, thoroughly, all of the elements in the areas and complete the building minigame, as well as possible. Do not worry if you, towards the end of the mission, still have some of the points left, because you can find two violet coins (20000 studs) at the last minikit.
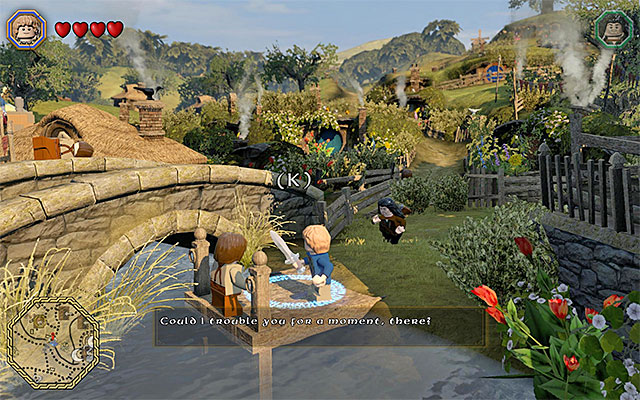 An example location, where you start a mission
In LEGO brick The Hobbit, there is a multitude of side missions to complete. You can complete them between completing the individual stages, i.e. during the free exploration of the Middle Earth. Personally, I recommend that you start completing the side missions after you have completed the entire storyline because only then, will all of the optional missions be available (finishing an individual stage unlocks several side quests).
The places in which you can meet questgiver for side quests, have been marked on the world map. You can tell them by the white and red question marks, which at the same time symbolize two types of the available quests:
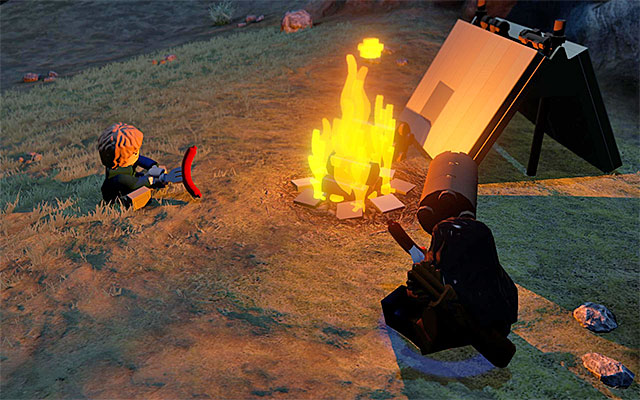 Using campfires allows you to change the time of the day
The only restriction on the side quests is that some of them become available at the predefined time of the day. If, instead of the question mark, you can see the icon of the Sun, this means that you need to wait until the next day. If, however, instead of the question mark, there appears the icon of the Moon, this means that you need to wait until the nightfall.
Since there is no passage-of-tine system in the game, the only way to change the current time of the day is be visiting one of the camps marked on the world map. After you interact with the camp, the transition will take place and you will be able to start completing the quests that you missed earlier.
The above map presents the starting points for the individual side quests marked with white question marks. Apart from that, on the map, there have been marked several other important locations, which visiting may prove necessary to complete some of the optional missions.
Detailed walkthroughs for the individual side missions, from the above map, have been presented further in this chapter. Of course, you do not need to complete them in the order suggested here, but this will allow you to reach their respective walkthroughs more easily.
Location: Hobbiton
Walkthrough: You are asked, by a hobbit, to find his Chicken Hat. It is one of the unique treasures that you obtain in the ninth main stage of the game (Queer Lodgings). After you obtain the artifact, return to the questgiver and give it to him.
Reward: mithril LEGO brick
 The entrance to the hobbit's cottage
Location: Hobbiton
Walkthrough: The questgiver is staying in one of the cottages, which you need to enter. The Hobbit asks you to build a new bed. Stand in the correct spot and spend the supplies - 10 Gold, 5 Ruby, 40 Wood and 20 Leather. Then, complete the building minigame.
Rewards: studs for completing the building minigame, a mithril LEGO brick
Location: Hobbiton
Walkthrough: A hobbit asks you to dress up as a chicken. In order to do that, you need to visit the Character Customiser in Esgaroth. This location has been shown in the above screenshot and it also has been marked on the world map, attached to this chapter (the black "Mod" point in the Eastern side of the map).
 The chicken outfit
After you reach the shop, enter and start shopping. You need to buy a Chicken Hat (1500 studs) and the Chicken Body (2000 studs). Select the modified character and return to the questgiver.
Reward: mithril LEGO brick
Location: Hobbiton
Walkthrough: The questgiver is in one of the cottages that you need to enter. The hobbit asks you to obtain the Tea Hat. It is one of the unique treasures that you obtain in the second main stage of the game An Unexpected Party. After you obtain the artifact, return to the questgiver and give it to him.
Reward: mithril LEGO brick
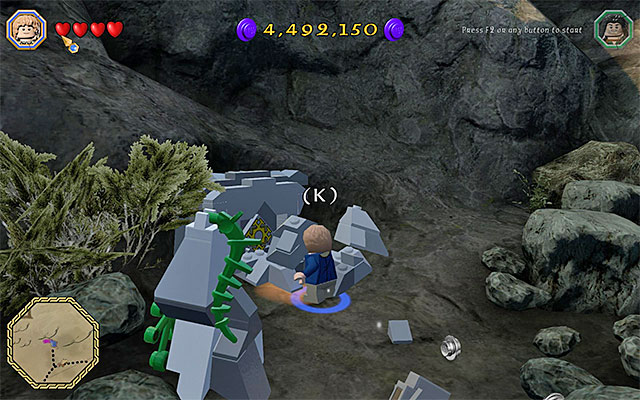 You reach the last goat through the manhole behind the rocks
Location: Hobbiton
Walkthrough: The Hobbit asks you to find five escaped goats and bring them back to the pen. Each time, you need to follow the map (the red circles) and additionally listen out for the sounds of the goats. Once you find a goat, jump onto it (the character change button) and return it to the pen. It is a bit more difficult to find the last, fifth goat, because it is staying on a ledge high above. The solution to this problem is to walk through the nearby manhole, as the hobbit or a dwarf.
Reward: mithril LEGO brick
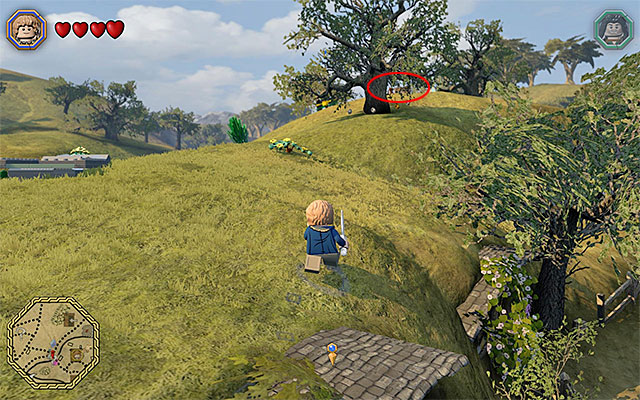
Location: Hobbiton
Walkthrough: The Hobbit ass you to help him deliver the parts necessary to rebuild the watermill. You need to watch the cutscene carefully and climb to the hill shown in the above screenshot.
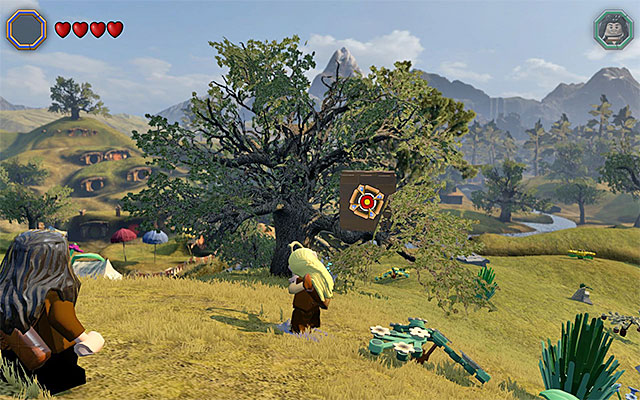 Along your way, you will have to use the bow, among others
Switch to a character with warhammer (e.g. Dwalin) and slam it against the big chest with parts. After it moves, select the character with bow and fire an arrow at the target. Finally, use the warhammer again.
Reward: mithril LEGO brick
 The scarecrow outfit
Location: Hobbiton
Walkthrough: A hobbit asks you to dress up as a chicken. In order to do that, you need to visit the Character Customiser in Esgaroth. This location has been shown in the above screenshot and it also has been marked on the world map, attached to this chapter (the black "Mod" point in the Eastern side of the map). After you reach the shop, enter and start shopping. You need to buy a Scarecrow Hat (1500 studs) and the Scarecrow Body (2000 studs). Select the modified character and return to the questgiver.
Reward: mithril LEGO brick
Location: Hobbiton
Walkthrough: A Hobbit asks you to build a new watermill. Stop in the appropriate area (the floating platform) and spend the supplies 5 Sapphire, 40 Wood, 20 Stone and 10 Fish. Then, complete the building minigame.
Rewards: studs for completing the building minigame, a mithril LEGO brick
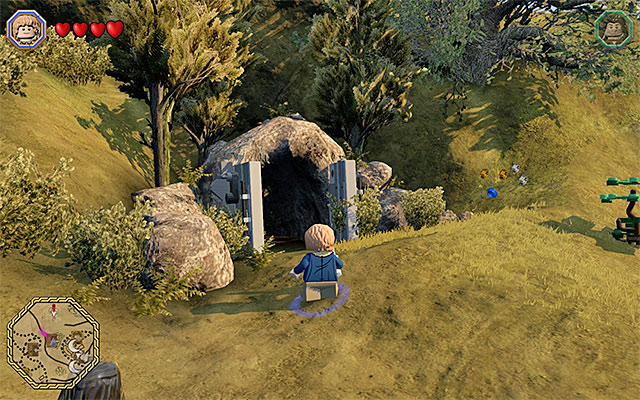 the passage to the glade
Location: Hobbiton
Walkthrough: The questgiver is staying on the glade and the passage to that place is to the North-East of the white question mark. The hobbit asks you to build the statue of Gandalf. Stand in the appropriate position and spend the supplies- 2 Sapphire, 20 Wood, 80 Stone, 1 Carrot and 5 Meat. Then, complete the building minigame.
Rewards: studs for completing the building minigame, a mithril LEGO brick
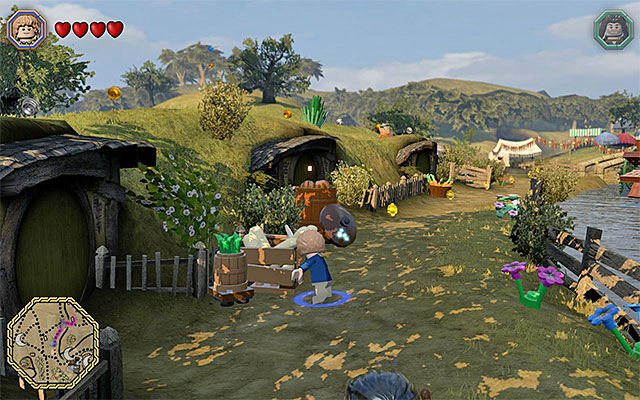 An example bread basket
Location: Hobbiton
Walkthrough: The questgiver is in one of the cottages that you need to enter. The hobbit asks you to deliver 50 loaves of bread necessary to bake a pie. If you have as many on you, you can approach the large bowl. Otherwise, you need to go to search for them. Keep an eye out for bread baskets.
Reward: mithril LEGO brick
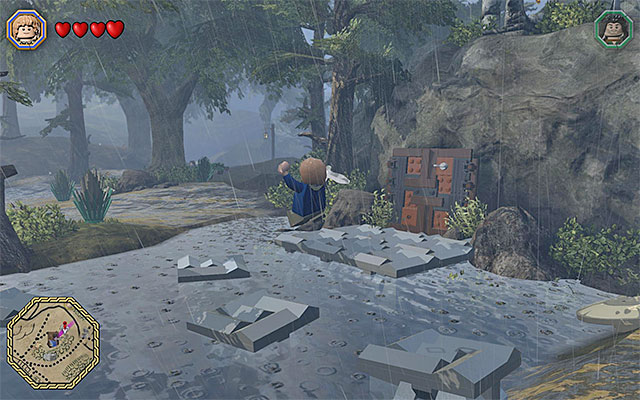 The cave entrance
Location: Hobbiton
Walkthrough: The questgiver is staying in the cave and the entrance to the cave is surrounded by water so, jump over from one platform to another. The hobbit asks you to build a well. Stand in the appropriate spot and spend the supplies - 5 Iron, 20 Wood, 5 Rope and 15 Stone. Then, complete the building minigame.
Rewards: studs for completing the building minigame, a mithril LEGO brick
Location: Hobbiton
Walkthrough: A hobbit asks you to obtain the Morgul Blade. It is one of the unique treasures that you obtain in the fourteenth main stage of the game (The Necromancer).
After you obtain the artifact, return to the questgiver and give it to him.
Reward: a mithril LEGO brick
 Attack the goblins that you run into on the road
Location: Hobbiton
Walkthrough: A hobbit asks you to escort a team of horses, en route to Bree. Along the way, remain within short distance of the team and be prepared to eliminate three groups of goblins.
Reward: a mithril LEGO brick
 Switch to the character that fights well at close quarters
Location: Hobbiton
Walkthrough: A hobbit asks you to get rid of the wolves that attack the farm. They will appear in the area right after you start this quest. You need to eliminate a total of fifteen wolves.
Reward: a mithril LEGO brick
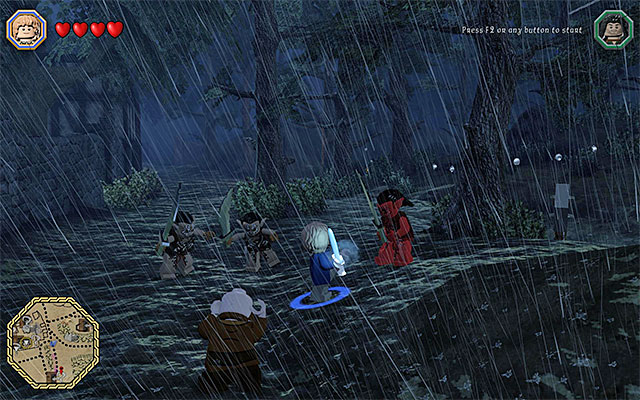 Drive the incoming groups of goblins away
Location: Bree
Walkthrough: A dwarf asks you to explore the cave of the goblin leader. Follow him. Along the way, be prepared to eliminate several groups of goblins and try not to lose the questgiver off your sight, because the location is not marked on the world map.
 The cave entrance
The destination is to the South of the starting point and it is an entrance to the cave. After you get inside, eliminate one more group of monsters.
Reward: a mithril LEGO brick
Location: Bree
Walkthrough: A dwarf asks you to rescue his cousin and you need to visit the cave, which you have explored in mission 15 (The Goblin King's Head), once again. After you reach the cave, deal with another group of goblins. Secure the area and talk to the dwarf that you have rescued. Then, return with him to the questgiver.
Reward: a mithril LEGO brick
Location: Bree
Walkthrough: The questgiver is in the tavern of Bree that you need to enter. The dwarf asks you to obtain the Mining Hat. It is one of the unique treasures that you obtain in the first main stage of the game (Greatest Kingdom in Middle-Earth). After you obtain the artifact, return to the questgiver and give it to him.
Reward: a mithril LEGO brick
Location: Bree
Walkthrough: The questgiver is staying in one of the cottages that you need to enter. You will be asked to build a new fireplace. Stand in the appropriate spot and spend the supplies - 30 Copper, 20 Ruby, 20 Wood and 50 Stone. Then, complete the building minigame.
Rewards: studs for completing the building minigame, a mithril LEGO brick
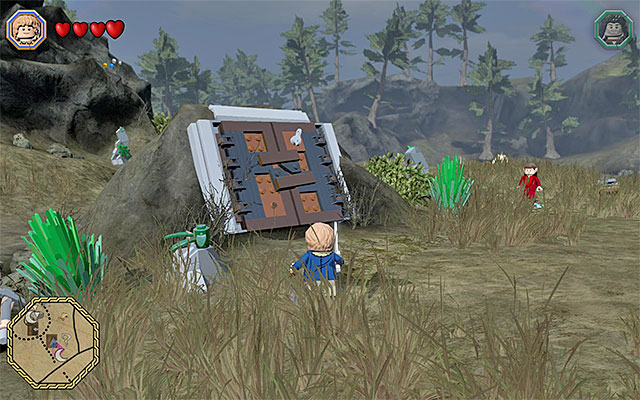 The cave entrance
Location: Bree
Walkthrough: A dwarf asks you to find the smith and to do that, you need to go East. After you reach your destination, locate the cave entrance, jump down to a lower level and have a short chat with the smith. You now need to take him back the point, where you started this quest.
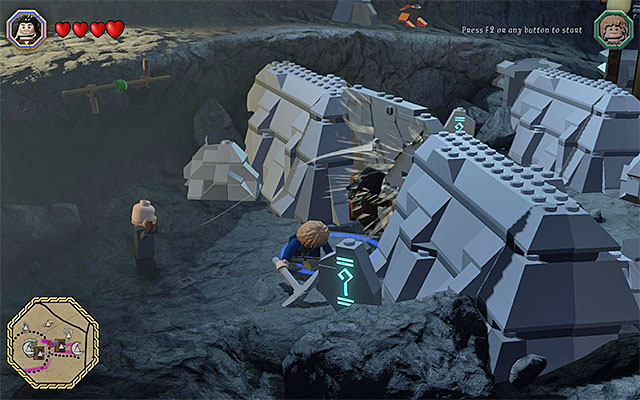 Buddy-Up and smash the wall
In order to leave the cave, you will have to take several steps. First of all, pair up two of the characters (Buddy-Up) and smash the big plate on the right. Then, switch to the character with the bow and fire at the target high above.
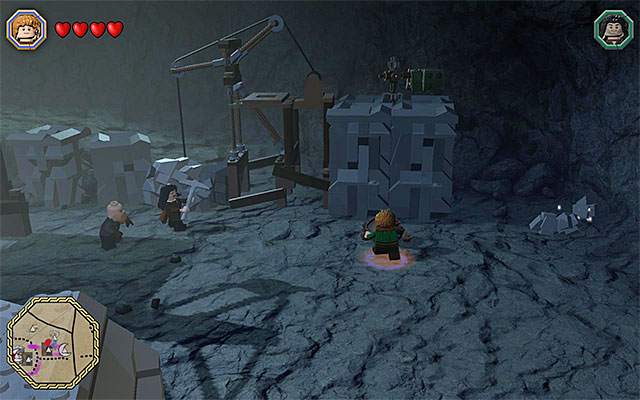 You need to switch to the character that can sow seeds
The next step is to sow seeds so, switch, e.g. to Sam. Stand in the highlighted area and press the appropriate key/button. wait for the plant to start blooming and start bouncing off it, in order to reach the ledge above. Here, you need to use the rotary mechanism. You can now leave the cave and return to the questgiver.
Rewards: a mithril LEGO brick, the option to use the blacksmith's services
 Check in the bushes
Location: Bree
Walkthrough: The questgiver proposes that you play hide and seek. You need to find three people in Bree. definitely, the easiest person to find is the one hiding in the bushes.
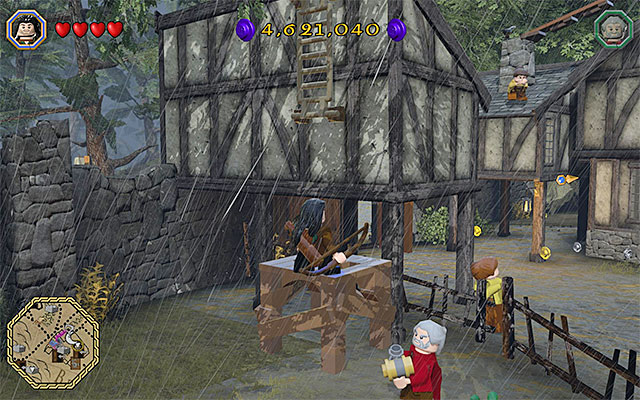
The next one is hiding on one of the village's rooftops. To reach that person, you need to build a quite big object, in the place shown in the above screenshot. Then, you need to grab the ladder. After you reach the first rooftop, use the narrow beam to make it over to the next roof.
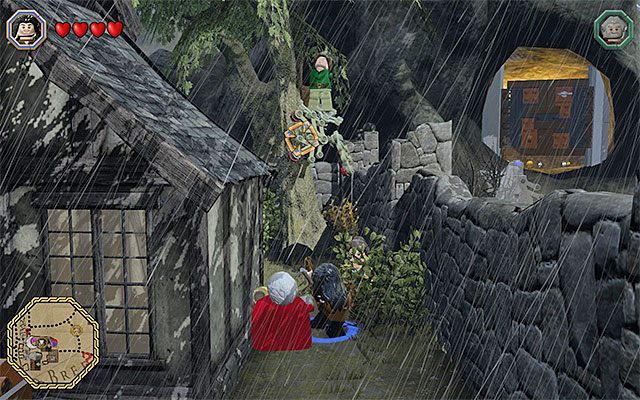 The last person is on the tree
The last person is hiding on one of the trees. After you locate them, switch to the character with bow and use that bow to destroy the ledge that the person is standing on. After you have found each of the people, return to the starting point.
Reward: a mithril LEGO brick
Location: Weathertop
Walkthrough: You will be asked by an elf to build a catapult. Stand in the appropriate spot and spend the supplies - 10 Iron, 50 Wood, 10 Leather, 20 Rope and 20 Stone. Then, complete the building minigame. A little piece of information - Since the moment that you complete the quest, you can use the catapult, every now and then (a rotary mechanism) and hit the owl with the projectile. Each time you do that, you will be rewarded with free supplies.
Rewards: studs for completing the building minigame, a mithril LEGO brick
Note - this quest is unique in that it is required to complete it, in order to get to the starting point for main stage four (to learn more, see the page entitled: Middle Earth Reach the Troll Dwellings) Therefore, there is no point in searching for it, after you complete the main storyline.
Location: Weathertop
Walkthrough: The questgiver asks you to build a bridge. Stand in the appropriate spot and spend the supplies - 25 Stone, 15 Rope and 25 Wood. Then, complete the building minigame.
Rewards: studs for completing the building minigame, a mithril LEGO brick
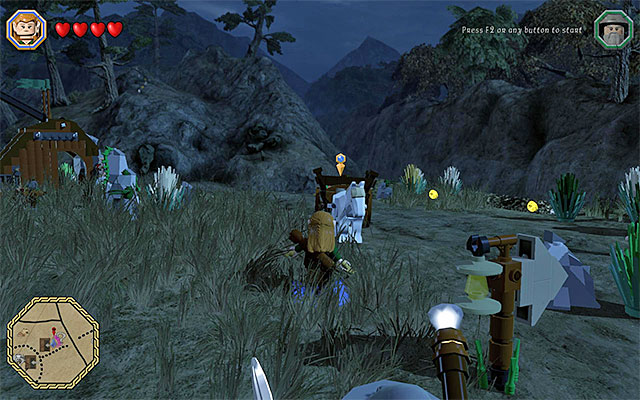 You will find the team of horses close to Weathertop and the bridge to the Troll Dwellings
Location: Bree
Walkthrough: A hobbit asks you to find his team of horses. To do that, you need to go East. Along your way, you should be prepared to fight several groups of goblins. Explore the area in which there appear red circles on the map (the vicinity of Weathertop), thanks to which you will be able to locate the team. Take your seat in the cart (character swap button) and return to Bree.
Reward: a mithril LEGO brick
 The orc outfit
Location: Weathertop
Walkthrough: The questgiver is staying atop Weathertop, and there is only one path that leads there. You will learn from the friendly orc that he needs one more monster for his expedition, which means the necessity to put on an appropriate outfit. You need to go to the Character Customiser in Esgaroth, which has been marked on the world ma, attached to this chapter (the black "Mod" point in the Eastern part of the map). After you reach the shop, enter and start shopping. You need to buy an Orc Hat - 1500 studs and the Orc Body - 2000 studs. Switch to the modified character and return to the questgiver.
Reward: a mithril LEGO brick
Location: Weathertop
Walkthrough: The questgiver asks you to get rid of the orc group atop Weathertop. Take the only path that leads there and start attacking the orcs. You need to eliminate 15 monsters, in total.
Reward: a mithril LEGO brick
Location: Weathertop
Walkthrough: The questgiver asks you to escort him to Bree, which is located to the West of here. Along your way, you will be attacked by three groups of goblins that you need to deal with. The quest ends at the moment, at which you reach Bree.
Reward: a mithril LEGO brick
 It is best to attack the monsters one by one
Location: High Fells
Walkthrough: The questgiver asks you to help him defeat a group of wargs. Go towards the nearby mountain and be prepared to fight the wargs. You need to dispose of six overgrown wolves.
Reward: a mithril LEGO brick
 The cave entrance is quite well hidden
Location: Troll Dwellings
Walkthrough: The questgiver is staying in a small cave. The dwarf asks you to kindle several fires, which will prove instrumental in eliminating orcs staying in the area. Switch to the character that is capable of starting fire (e.g. Sam) and start approaching the interactive plates, one after another. In total, you need to start five fires.
Reward: a mithril LEGO brick
 To reach the starting point of this quest, it is best to take the boat
Location: Troll Dwellings
Walkthrough: The questgiver is staying in the place that is easiest to reach by the boat. The dwarf asks you to obtain the Archaeologist's Pick. It is one of the treasures that you obtain in the fifth main stage of the game (The Troll Hoard). After you obtain the artifact, return to the questgiver and give it to him.
Reward: a mithril LEGO brick
Location: Rivendell
Walkthrough: An elf asks you to obtain Mirkwood Phial. It is one of the treasures that you obtain in the tenth main stage of the game (Flies and Spiders). After you obtain the artifact, return to the questgiver and give it to him.
Reward: a mithril LEGO brick
Location: Rivendell
Walkthrough: An elf asks you to obtain Po-tay-to. It is one of the treasures that you obtain in the thirteenth main stage of the game (Looking for Proof). After you obtain the artifact, return to the questgiver and give it to him.
Reward: a mithril LEGO brick
An example barrel with fishLocation: Rivendell
Walkthrough: An elf asks you to deliver 25 Fish necessary to prepare a dish. If you have as many on you, you can approach the big bowl. Otherwise, go and search for it - keep looking around near the water (e.g. in Bree or Esgaroth) for crates and barrels filled with fish.
Reward: a mithril LEGO brick
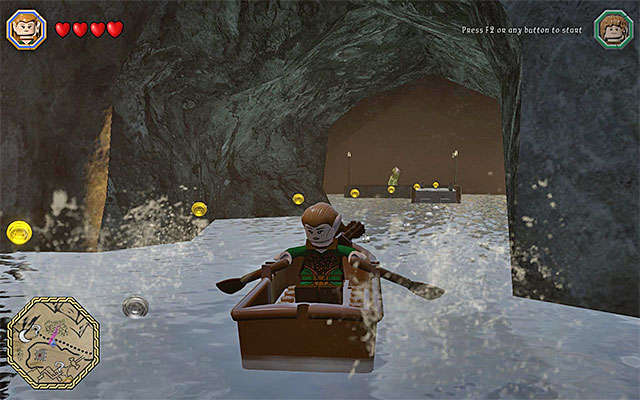 You need to take the boat to reach the elf's place of staying
Location: Rivendell
Walkthrough: An elf asks you to bring back his friend who is staying in the nearby cave. Go South and follow the trail of golden studs. After you reach the pier, jump into the boat (the character swap key) and steer towards the nearby cave. Go ashore, approach the elf and wait for him to join your character. Return to the boat and wait for the elf to jump into the boat. Go then towards the starting point of this quest. The quest ends at the moment at which the elf returns to your questgiver (this may take a while).
Reward: a mithril LEGO brick
Location: Rivendell
Walkthrough: The dwarf is staying near the waterfall and he asks you to deliver 25 Stone that he needs to reinforce the dam. If you have as many on you, you can approach the big bowl. Otherwise, go and search for it. Fortunately enough, stones are one of the most common supplies so, you should have lots of them, at this point.
Reward: a mithril LEGO brick
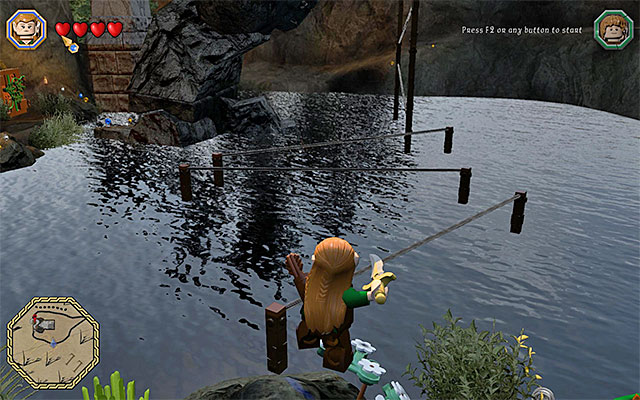
Location: Rivendell
Walkthrough: The house of the elven smith is located in a seemingly inaccessible area, because it is a large structure surrounded by water. Do not be influenced by the trail of golden studs, because this is an incorrect path. Start to the North-West of the white question mark. Stand near the water, in the spot shown in the above screenshot.
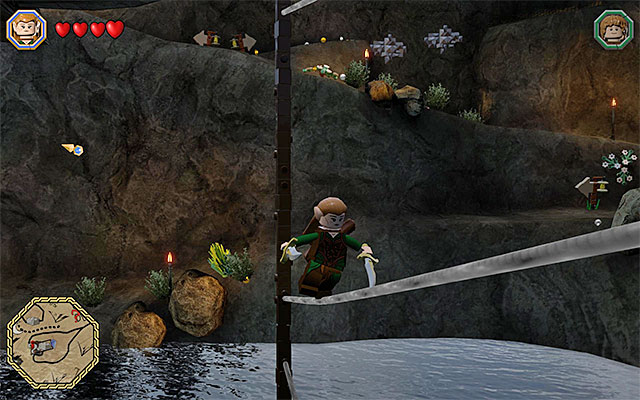 Jump towards the successive lianas
Switch to any elf and jump over to the first rope hanging over the water. You now need to jump towards the successive ropes- first the horizontal, then the diagonal ones.
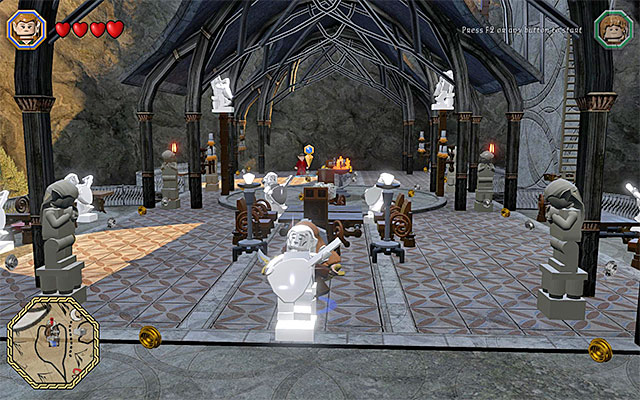 The platform that the elven smith is on
If you have performed all of the actions correctly, you will reach a big mining platform. Find the questgiver here. The elf will ask you to build a new forge for him. Stand in the appropriate spot and spend the supplies - 20 Copper, 30 Iron, 10 Gold, 20 Wood and 40 Stone. Then, complete the building minigame. Note - if you do not have enough supplies on you, visit, e.g. one of the many mines or caves in the game world.
Rewards: studs for completing the building minigame, a mithril LEGO brick
 The stone giant outfit
Location: Mountain trail
Walkthrough: The questgiver is staying near the defeated stone giant. You will learn from him that he does not believe the existence of smaller stone creatures, which means that you need to put on an appropriate outfit. You need to visit the Character Customisation in Esgaroth. This location has been shown in the above screenshot and it also has been marked on the world map, attached to this chapter (the black "Mod" point in the Eastern side of the map). After you reach the shop, enter and start shopping. You need to buy a Stone giant Hat (1500 studs) and the Stone-giant Body (2000 studs). Switch to the modified character and return to the questgiver.
Reward: a mithril LEGO brick
 Along your path, watch out for the fire
Location: High Fells
Walkthrough: The questgiver proposes that you take part in a race against time. Switch to the goblin and then approach the first checkpoint gate, to start the competition. While climbing, watch your steps where there appear flames. Try not to get into contact with them, because you will then lose valuable time and you can, additionally, fall down. If you manage within the allotted time limit (it regenerates at each gate that you pass) complete s the quest.
Reward: a mithril LEGO brick
 The cave entrance
Location: High Fells
Walkthrough: The questgiver is staying inside a cave with a large gate leading into it. After you enter, switch to any wizard and illuminate the area to reach the character that you are looking for. After you find them, you will be asked to lead them out of the cave so, you need to follow a quite linear path towards the exit. Along your way, you need to make frequent stops, because the person that you are escorting, gets scared and stops following you. The quest ends at the moment at which you leave the cave.
Reward: a mithril LEGO brick
 Stop on a regular basis and wait for the flames to disappear
Location: High Fells
Walkthrough: The questgiver proposes that you take part in a race against time. It is very similar to the one from mission 37 but, it is longer and more demanding. Switch to the goblin and start the competition. Along your way, you need to stop in the places where there appear flames and wait until they disappear. Do not attempt covering too large a distance at a time, because you may fail to make it to the next gate before you, run out of time, as a result of coming into contact with fire and falling down. You do not need to haste, because each checkpoint grants you enough time. The race ends after you reach the finish line.
Reward: a mithril LEGO brick
 The orc outfit
Location: High Fells
Walkthrough: From the troll, you will learn that he admits orcs only, which means that you need to put on the appropriate outfit. In order to do that, you need to visit the Character Customiser in Esgaroth. This location has been shown in the above screenshot and it also has been marked on the world map, attached to this chapter (the black "Mod" point in the Eastern side of the map). After you reach the shop, enter and start shopping. You need to buy a Orc Hat (1500 studs) and the Orc Body (2000 studs). Select the modified character and return to the questgiver.
Reward: a mithril LEGO brick, a new location: disco in the cave
Location: Troll Dwellings
Walkthrough: The questgiver asks you to build a camp in the woods. Stand in the appropriate spot and spend the supplies - 10 Wood), 30 Leather, 20 Rope, 10 Bread and 10 Meat. Then, complete the building minigame.
Rewards: studs for completing the building minigame, a mithril LEGO brick
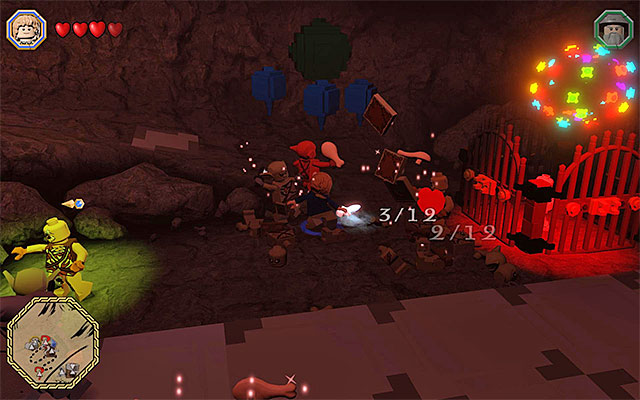 Attack the goblins coming from the cave entrance
Location: High Fells
Walkthrough: The questgiver is staying inside the cave with a big entrance gate. The troll asks toy to help him get rid of the attacking goblins. You need to eliminate twelve monsters and they will be approaching from the direction of the cave entrance.
Reward: a mithril LEGO brick
 The manhole
Location: Troll Dwellings
Walkthrough: The questgiver is staying on a small ledge and to reach him, you need to walk through the manhole (best as the hobbit or as a dwarf). He will ask you to help him get rid of trolls responsible for a theft. Enter the local cave.
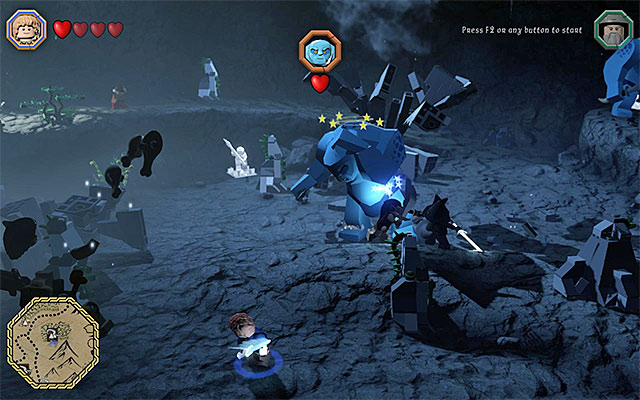 Attack in Buddy-Up only if the troll is stunned
After you enter the cave, you start a battle in which you need to defeat three trolls. Keep running around to avoid the troll that is currently active and deal with the goblins, optionally. You need to wait for the troll to knock himself down, as a result of a strong bang against the ground. Then, Buddy-Up two characters and perform an action to eliminate the troll. After you have defeated all three of them, this mission ends.
Reward: a mithril LEGO brick
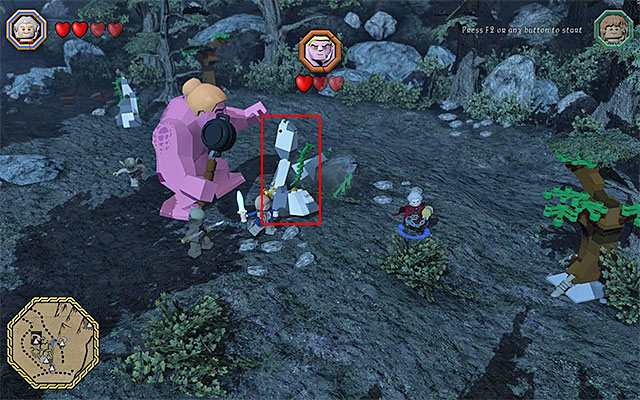
Location: Troll Dwellings
Walkthrough: The questgiver asks you to accompany him, while exploring the troll camp. Enter the cave and initiate the battle with Mother Troll. After you start the battle, start running around the area, avoid direct contact. Stand at the obstacles, like the one shown in the above screenshot, and wait for the Troll Mother to charge at you. With a bit of luck, she will get stunned. You then need to Buddy-Up two of the characters and perform a co-op action. Repeat that three times to deprive the Mother Troll of the entire health bar.
Reward: a mithril LEGO brick
 An ent outfit
Location: Troll Dwellings
Walkthrough: The questgiver tells you that he does not believe the existence of ents, which means that you need to put on an appropriate outfit. In order to do that, you need to visit the Character Customiser in Esgaroth. This location has been shown in the above screenshot and it also has been marked on the world map, attached to this chapter (the black "Mod" point in the Eastern side of the map). After you reach the shop, enter and start shopping. You need to buy a Ent Hat (1500 studs) and the Ent Body (2000 studs). Switch to the modified character and return to the questgiver.
Reward: a mithril LEGO brick
Location: Troll Dwellings
Walkthrough: The questgiver is in a troll camp. Mother Troll asks you to obtain a Cooking Apron. It is one of the treasures that you obtain in the ninth main stage of the game (Queer Lodgings). After you obtain the artifact, return to the questgiver and give it to him.
Reward: a mithril LEGO brick
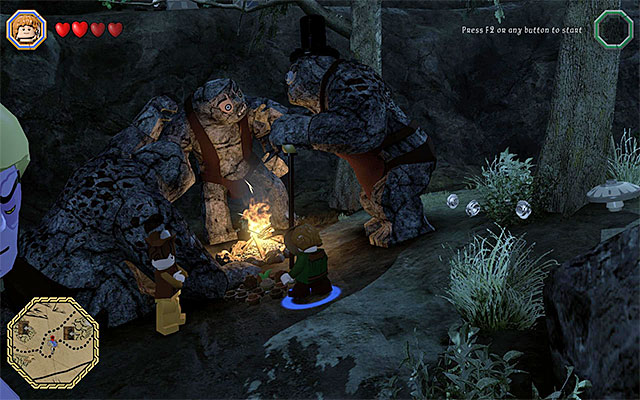 The spot where you use the seeds
Location: Troll Dwellings
Walkthrough: Mother Troll asks you to adorn three of her stone sons. Start by locating the spot, where you need to hold down the building key/button. Then, switch to the character that can use seeds, stand in the appropriate spot and sow the seeds.
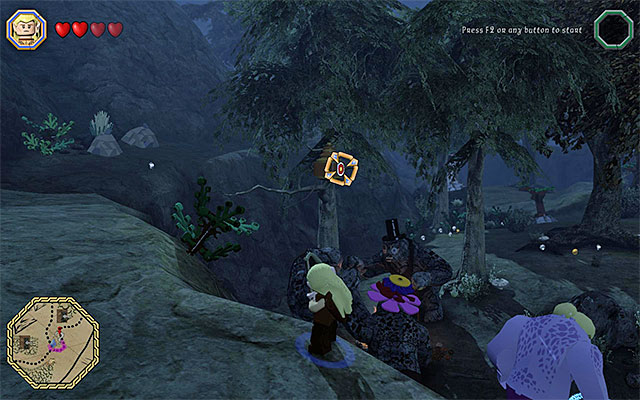 Target
The last action that you need to take requires you to use bow. You need o aim at the target on one of the nearby trees.
Reward: a mithril LEGO brick
 Jump onto the successive fragments of the defeated giant and try not to fall down
Location: Mountain trail
Walkthrough: The questgiver asks you to help him reach the top of the stone giant. Go East and be prepared that you will have to eliminate several groups of goblins, along your path. I recommend that, after you reach the region where the stone giant is, switch to the elf, thanks to which it is going to be easier to jump from ledge to ledge. After you reach the top, the quest will end.
Reward: a mithril LEGO brick
Location: Mountain trail
Walkthrough: A dwarf asks you to help him reach a secret stash of supplies. Go towards the destination, as that character, and defeat a few groups of goblins, along your path. Reaching the secret location ends this mission. It is worthwhile to use the pickaxe and obtain new supplies.
Reward: a mithril LEGO brick
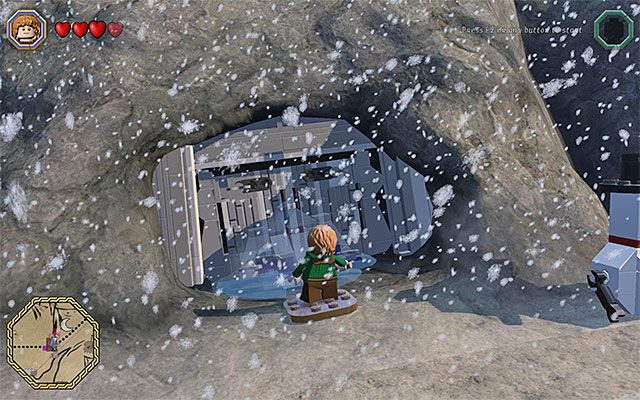 Melt the ice covering the entrance to the cave
Location: The Pass of Caradhras
Walkthrough: The questgiver is staying in the cave and, to gain access, you need to kindle fire. To do that, switch to Sam, or any other character that can do that. After you melt the ice, enter the cave. The troll asks you to help him illuminate the area and the plan is that you kindle four fires. Again, switch to the character that can start fire and walk onto the nearby interactive plates. You will have no problems starting two of the four fires.
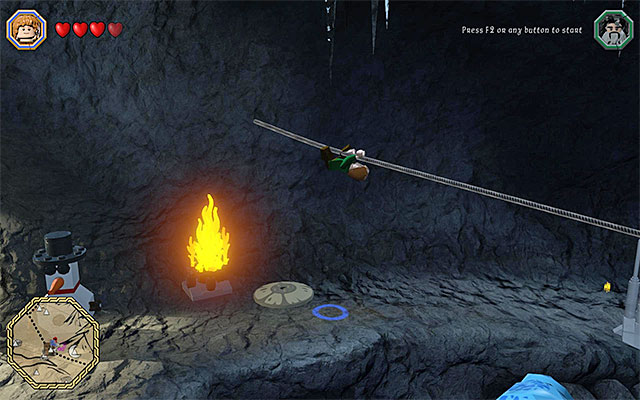 If you bounce off the plant, you will be able to reach the rope
The third fire needs to be started atop a small platform to the right of the troll. Explore the upper part of the cave and find the plant, off which you can start bouncing. Performing this will allow you to grab on to the rope, thanks to which you will reach the spot, where you need to start the fire.
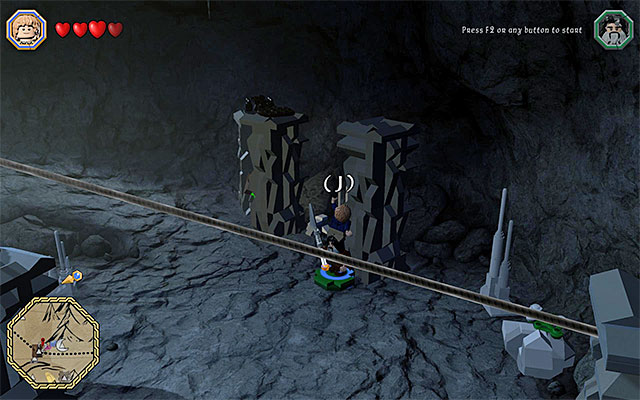 You need to climb onto a character with long weapon
The final, fourth fire needs to be started in the right side of the cave and also in this case, you will have to make it over onto a seemingly inaccessible ledge above. Start by selecting a character with a long weapon (e.g. Bifur). As that character, stand in the center of the highlighted circle and switch to Sam. Climb onto the ally and jump to reach the ledge above, in order to light the last fire.
Reward: a mithril LEGO brick
Location: The Pass of Caradhras
Walkthrough: The questgiver is staying in a cave. The troll will ask you, this time, to help him build a big means of transport. Stand in the appropriate spot and spend the supplies - 20 Iron, 60 Wood, 40 Stone and 10 Carrot. Then, complete the building minigame.
Rewards: studs for completing the building minigame, a mithril LEGO brick
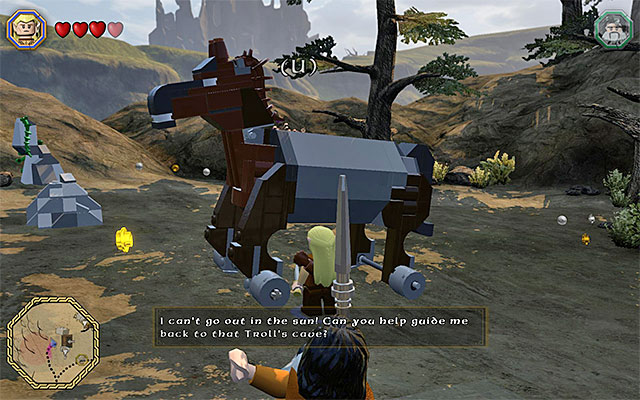 Jump onto the big mechanical horse and go towards the cave of the friendly troll
Location: The Pass of Caradhras
Walkthrough: The questgiver is in a cave. This time, the troll asks you to help him find the goblin that was supposed to reach this place. Exit the cave and go towards the red circles on the map, i.e. to the East of the starting point. After you reach the destination, locate the means of transport identical with the one that you built in mission 51. Jump onto the mechanical horse (the character swap key) and ride to the West. Reaching the cave entrance ends this mission.
Reward: a mithril LEGO brick
Location: Moria
Walkthrough: The questgiver is staying in the mine. The dwarf asks you to help him build a mine cart. Stand in the appropriate spot and spend the supplies - 50 Copper, 50 Iron, 5 Gold and 50 Wood. Then, complete the building minigame. Note - if you do not have enough copper, visit e.g. one of the many mines or caves in the game world. .
Rewards: studs for completing the building minigame, a mithril LEGO brick
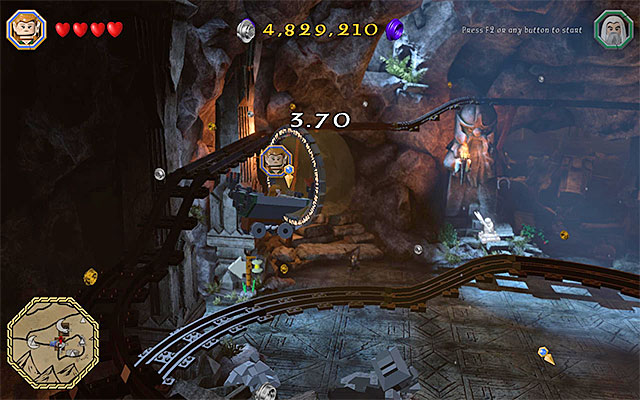 To fit into the middle of the rings, you need to press the jump key, at the appropriate moments
Location: Moria
Walkthrough: The questgiver is staying in the mine. This time around, the dwarf proposes that you take a time trial. It consists in covering the whole trail on the mine cart that you constructed in mission 53. After you start the race, focus only on pressing the jump key at the appropriate moments, to jump through the rings along the track. It is very important because you will probably be unable to finish the race in time, if you start again after making a mistake. After several attempts and learning the track you should finally be able to reach the finish line.
Reward: a mithril LEGO brick
 The passage to the location with the questgiver
Location: Elven Woods
Walkthrough: The questgiver is in a separate location that you get to, through a small gate. The elf asks you to help him build a garden house. Stand in the appropriate spot and spend the supplies - 30 Emerald, 10 Diamond, 40 Wood and 50 Stone. Then, complete the building minigame.
Rewards: studs for completing the building minigame, a mithril LEGO brick
Location: Elven Woods
Walkthrough: The questgiver is staying in one of the houses. The elf asks you to retrieve Sir Moustaff for him. It is one of the treasures that you obtain in the twelfth main stage of the game (A Warm Welcome). After you obtain the artifact, return to the questgiver and give it to him.
Reward: a mithril LEGO brick
Location: Elven Woods
Walkthrough: The elf asks you to deliver 99 Fish necessary to feed the cat. If you have as many on you, you can approach the big bowl. Otherwise, go and search for it - look around near water (e.g. in Bree or Esgaroth) for crates and barrels filled with fish.
Reward: a mithril LEGO brick
 Jump onto the consecutive platforms only after they flip to horizontal position
Location: Elven Woods
Walkthrough: The questgiver is in a separate arena, which a big gate leads to. The elf proposes that you take part in a race against time. Join any elf and only then approach the start, gate to start the competition. During the race, try to perform jumps ideally, land on the ledges and grab on to the interactive edges. You should pay attention especially in the spot with the two moving platforms - you need to wait until they flip into horizontal position and run over them quickly. If you make it within the allotted time limit (it will regenerate at each gate that you pass) completes this quest.
Reward: a mithril LEGO brick
 Wait for the last platform to be raised and jump towards the finish line after that
Location: Elven Woods
Walkthrough: The questgiver is staying in a separate area with a big gate leading to it. The elf proposes that you take part in one more time trial and it will be, of course, more difficult than the race in quest 58. Switch to any of the elves and approach the first gate on the track, which will start the competition. Along the track, you should especially pay attention to the spots, in which there are the moving platforms because taking a wrong action ends in falling down (and usually failing the race). Towards the end of the trial, try to take ideal jumps towards the small ledges that change their position vertically.
Reward: a mithril LEGO brick
Location: Troll Dwellings
Walkthrough: The starting point of this quest is on a seemingly, inaccessible island located to the South of the main part of the Troll Dwellings and to the West of the Pass of Caradhras. There are several ways in which you can reach the island but I recommend that you approach it from the Northern direction. Take the upper path and reach the raised drawbridge ( it has been marked as a bridge on the map attached to this chapter). Switch to the character with slingshot and shoot at the target. The solution to the puzzle has been presented in the above screenshot - there needs to be a green circle above the target on the left, red one above the target in the middle and green circle above the one on the right.
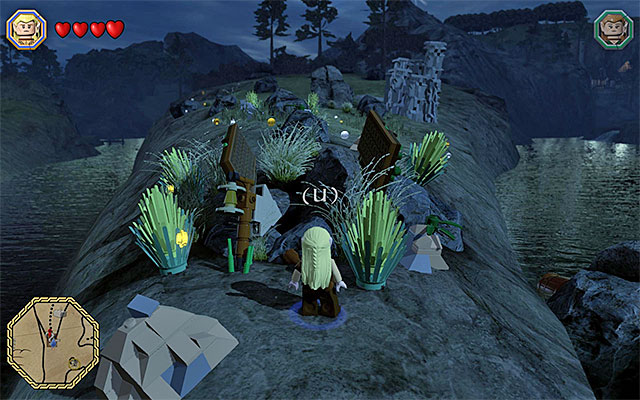 The cave entrance
GO Southwards. You need to find a well-hidden cave entrance and take it. Jump down here and approach the lost orc, who will ask you for help leaving the cave.
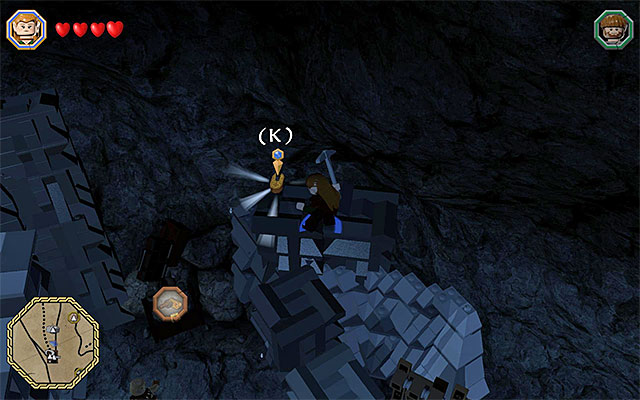 The place where you find the knob
Follow the linear corridor. In its initial fragments, you need to stand on the pressure plates, which unlocks further passage for the orc. Towards the end of the crossing, you are going to have to climb onto the ledge above. Smash the object here, pick up the knob and take it to the mechanism below. Reaching the exit ends this mission.
Reward: a mithril LEGO brick
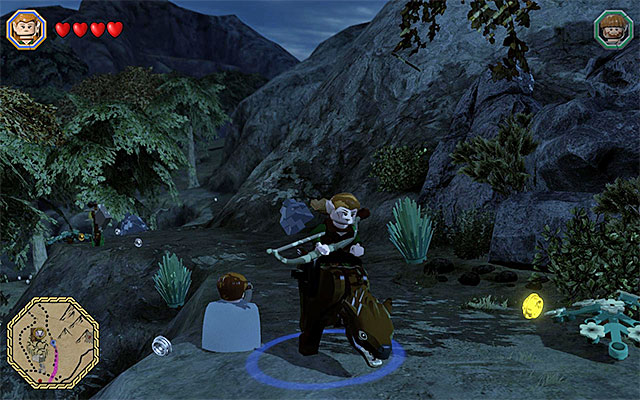 You need to jump onto the warg that you have found
Location: Troll Dwellings
Walkthrough: You will be asked by the orc to find his warg that has gone lost. To do that, go to the North and take the lowered drawbridge. You will find the warg on the upper path and you need to approach it and jump onto its back. Finally, ride that warg to the questgiver.
Note - if the drawbridge is still raised, jump down and take the way around to the warg's whereabouts. The way to lower the bridge has been provided in the walkthrough for quest 60.
Reward: a mithril LEGO brick
 The gorilla outfit
Location: The Pass of Caradhras
Walkthrough: After you try interacting with the dozing troll, it will turn out that it is dreaming about a gorilla, which means that you need to put on an appropriate outfit. You need to go to the Character Customiser in Esgaroth, which has been marked on the world ma, attached to this chapter (the black "Mod" point in the Eastern part of the map). After you reach the shop, enter and start shopping. You need to buy a Gorilla Hat - 1500 studs and the Gorilla Body - 2000 studs. Switch to the modified character and return to the questgiver.
Reward: a mithril LEGO brick
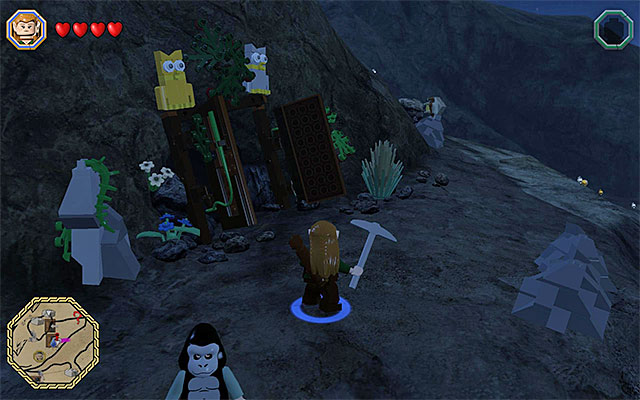 The entrance to the arena
Location: Moria
Walkthrough: The questgiver is in the arena, to which you need to cross a quite big gate.. The dwarf asks you to eliminate a big group of orcs and, right after the conversation ends, the battle starts. In total, you need to defeat 30 orcs so, make sure that you have switched to the character that is good at combat at short distance.
Reward: a mithril LEGO brick
Location: Pine woods
Walkthrough: The elf asks you to obtain the Pine Cone Bomb. It is one of the treasures that you obtain in the eighth main stage of the game (Out of the Frying Pan...). After you obtain the artifact, return to the questgiver and give it to him.
Reward: a mithril LEGO brick
Location: Mirkwood Forest
Walkthrough: The questgiver asks you to deliver 50 Carrot that he needs to feed his horses with. If you have as many on you, you can approach the big bowl. Otherwise, go and search for it - keep an eye out for crates full of carrots, especially in Hobbiton.
Reward: a mithril LEGO brick
Location: Mirkwood Forest
Walkthrough: The questgiver asks you to build a tree house. Stand in the appropriate spot and spend the supplies - 10 Iron, 50 Wood, 10 Leather, 20 Rope and 10 Bread. Then, complete the building minigame.
Rewards: studs for completing the building minigame, a mithril LEGO brick
 Eliminate the spiders, one after another
Location: Mirkwood Forest
Walkthrough: The questgiver is on the glade that a quite big gate leads to. The dwarf asks you to help him get rid of the despised spiders. There are 10 big spiders to eliminate and winning the battle ends this quest.
Reward: a mithril LEGO brick
 Tap rhythmically the keys that appear on the screen
Location: Mirkwood Forest
Walkthrough: The dwarf asks you to get rid of the title spider queen. Enter the cave and jump to the lower level to start the fight. Approach the spider queen and try avoiding its ranged attacks (they will unnecessarily slow down your character and strip you of one, or two hearts). After you land the first attack, start a simple minigame, where you need to tap rhythmically the keys/buttons displayed on the screen.
 The queen does not resume the battle, until you have eliminated the smaller spiders
Completing the minigame correctly makes the spider queen lose one heart and retreats from the battlefield. Focus now on eliminating the ten standard spiders and await the moment in which the queen returns. Later in the battle, you need to weaken the queen and eliminate the smaller spiders, in turns.
Reward: a mithril LEGO brick
 The rabbit starts to follow you only after you press the key displayed on the screen
Location: Radagast's house
Walkthrough: The questgiver asks you to bring back the five escaped rabbits from Rhosgobel. Each time, you need to follow the map's suggestion (red circles). After you locate a rabbit, approach it and press the indicated key/button to make it follow your character. You then need to return with the furball to the starting point. The quest ends after you bring all five rabbits to the questgiver.
Reward: a mithril LEGO brick
 The entrance to the questgiver's staying place
Location: Dol Guldur
Walkthrough: The questgiver is staying in one of the buildings of the Dol Guldur stronghold and there is a big gate that leads into it. The elf asks you to help him defeat the hostile bats. In total, you need to eliminate thirty of them so, switch to the character that is good at melee combat.
Reward: a mithril LEGO brick
Location: Dol Guldur
Walkthrough: The questgiver is staying in one of the buildings in the Dol Guldur stronghold and there is a big gate that leads into it. The questgiver asks you to build a huge battering ram. Stand in the appropriate spot and spend the supplies - 20 Iron, 50 Wood, 10 Rope and 20 Wood. Then, complete the building minigame. Note - if you want to, right after you are done building, you can bang the ram with warhammer, which unlocks access to a room with additional supplies (a mining minigame).
Rewards: studs for completing the building minigame, a mithril LEGO brick

Location: Pine woods
Walkthrough: The elf asks your help at eliminating the huge goblin. Enter the cave and start the battle with the gigantic goblin. Also, there are some smaller monsters. Start running around the area, avoid coming into direct contact with the boss and eliminate the weaker goblins that obstruct you. Stand at the obstacles, like the one shown in the above screenshot and wait for the big goblin to charge at you. With a bit of luck, it will get stunned. At this point, you quickly need to pair up two characters and attack the goblin in Buddy-Up. Repeat three times to deprive the goblin of its entire health bar.
Reward: a mithril LEGO brick
Location: Pine woods
Walkthrough: The goblin asks you to obtain the Crystal Goblin Crown. It is one of the treasures that you obtain in the seventh main stage of the game (Goblin-town). After you obtain the artifact, return to the questgiver and give it to him.
Reward: a mithril LEGO brick
Location: Pine woods
Walkthrough: The new "goblin king" asks your help at eliminating several groups of the regular goblins that refuse to recognize him as the king. You only need to eliminate seven monsters so, this should not be a problem to you.
Reward: a mithril LEGO brick
 Follow the trail of yellow studs
Location: Mountain trail
Walkthrough: It is not an easy task to reach the questgiver, because he is staying in a difficult-to-access area. Start on the mountain trail to the North-West of the white question mark. You need to start climbing here, over the defeated stone giant, while moving Southwards.
After you reach the end part of the stone giant, start jumping down, carefully, onto the platforms below. Ultimately, you need to reach the ledge shown in the above screenshot. You need to switch to a character with flail (e.g. Dori) and reach the golden catch above.
 The goblin outfit
You can now enter the cave, in which the questgiver stays. You will learn from the goblin that he is waiting for his companion, which means the necessity to put on an appropriate outfit. You need to go to the Character Customiser in Esgaroth, which has been marked on the world ma, attached to this chapter (the black "Mod" point in the Eastern side of the map). After you reach the shop, enter and start shopping. (the black "Mod" point in the Eastern part of the map). After you reach the shop, enter and start shopping. You need to buy a Goblin Hat (1500 studs) and the Goblin Body (2000 studs). Switch to the modified character and return to the mountain trail.
 You can reach to the golden catch as Dori and leap towards him as the goblin
Again, getting back to the goblin is not an easy thing to do, because you need to go all the way back there. After you get to the ledge described above, select the flail, from the list of the unique treasures, or switch to Dori, reach the golden catch and leap towards your ally, as the character dressed up as a goblin.
Reward: a mithril LEGO brick
 Pressing the keys at the appropriate moments means receiving more studs
Location: Pine woods
Walkthrough: The elf asks you for help at eliminating a new powerful monster. Enter the cave and approach the goblin with the crystal crown, whom you dealt with in quests 73 and 74. First of all, you are going to play a dancing minigame here. While playing the game, try to press the indicated keys/buttons at the ideal moments, i.e. when the dancer is highlighted, for a fraction of second. Due to the fact that only the regular goblins take part, it is going to be very easy to win.
Reward: studs for completing the dancing minigame, a mithril LEGO brick
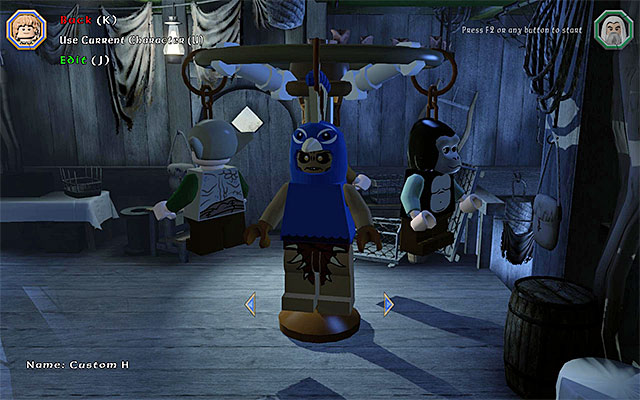 The peacock outfit
Location: Mirkwood Forest
Walkthrough: You will learn from the elf that he is looking for a peacock and this means that you need to put on an appropriate outfit. You need to go to the Character Customiser in Esgaroth, which has been marked on the world map, attached to this chapter (the black "Mod" point in the Eastern side of the map). After you reach the shop, enter and start shopping. You need to buy a Peacock Hat (1500 studs) and the Peacock Body (2000 studs). Switch to the modified character and return to the questgiver.
Reward: a mithril LEGO brick
Location: Lonely Mountain
Walkthrough: The goblin asks you to find his friends that you needs to sing a song with. each time, you need to reach the area marked on the ma with red circles. After you have located a goblin, press an appropriate key/button to make him follow you. Then, return to the questgiver. Bring back two goblins this way.
Reward: a mithril LEGO brick
Location: Dol Guldur
Walkthrough: The orc asks you to escort him back to the place where his kin are staying. Along the way, you need to defeat several groups of spiders (it is a good idea to attack them one-by-one as a character that is good at melee combat). Apart from that, towards the end of the quest, you will have to handle goblins.
Reward: a mithril LEGO brick
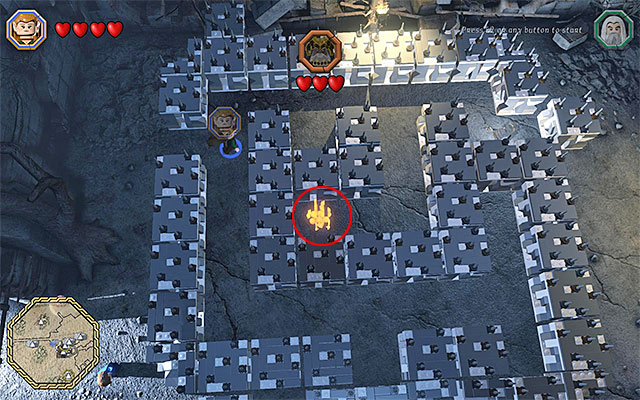 The ghost needs to reach successive fires
Location: Dol Guldur
Walkthrough: The questgiver asks you to deal with the ghost of the Dwarf King. Take the gate into the big maze and get into action, while avoiding direct contact with the ghost. The solution to this puzzle is not that obvious - the king always moves in the inverse direction to that, which the player goes. For example, if you press the button that commands your character to go right, the king goes left. You need to use this to your advantage in the way, in which you direct the king into three different fires in the maze. A big facilitation is the fact that the game allows your character to run, while at a wall, thanks to which you do not need to follow the maze ideally. After several attempts, you should be able to lead the ghost into each one of the fires.
Reward: a mithril LEGO brick
Location: Dol Guldur
Walkthrough: The goblin asks you to deliver 50 Meat that he needs to feed his group. If you have as many on you, you can approach the big bowl. Otherwise, go and search for it - paradoxically, the easiest way to obtain meat is to attack the other goblins.
Reward: a mithril LEGO brick
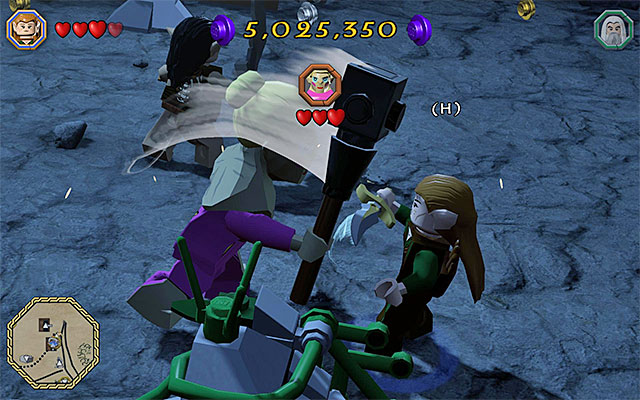 Press the keys that appear on the screen
Location: Pine woods
Walkthrough: The goblin asks you for help killing Azog's mother. Enter the cave, which starts the fight. Approach Azog's mother and after you land the first blow, start a simple minigame, in which you need to press the keys/button that display on the screen.
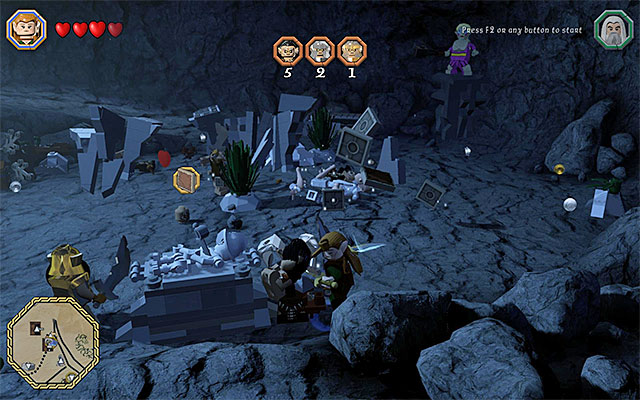 Azog's mother does not resume attacking until you defeat the weaker orcs
After you complete the minigame, Azog's mother will lose one heart of her health bar and walks away for a moment. Focus on eliminating the regular orcs. You should especially watch out for the orc archers and for the heavily armored monsters. After you have eliminated the current group of monsters, Azog's mother returns to the arena. in the following part of the battle, you need to weaken Azog's mother and fight the groups of monsters, in turns.
Reward: a mithril LEGO brick
Location: The Pass of Caradhras
Walkthrough: The goblin asks you to obtain the Dragon Hat. It is one of the treasures that you obtain in the sixteenth main stage of the game (Inside Information). After you obtain the artifact, return to the questgiver and give it to him.
Reward: a mithril LEGO brick

Location: Erebor
Walkthrough: It is not that easy to reach the armory because it is located in a seeming inaccessible part of the mountain range. Since the starting point for the secret stage is also located here, I recommend that you see the description on the page entitled Bonus Stage. Just to remind you, you can either climb using the nearby tower (the "Tower" point on the map attached to this chapter) or through the Elven Kingdom (the "Kingdom " point on the map attached to this chapter). I recommend that you go for the latter (start in the place shown in the above screenshot), because then, you will not have to use any items along your path and you will reach your destination within around one minute.
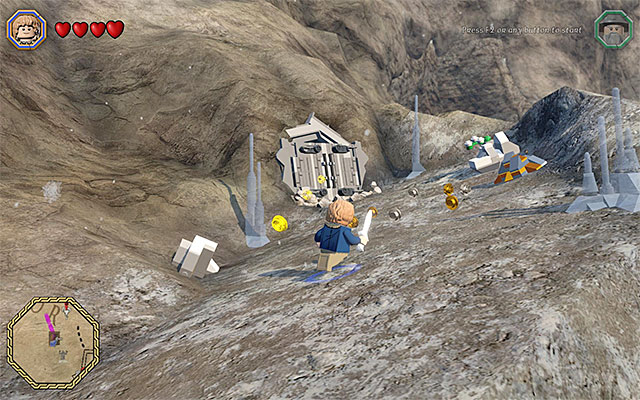 The cave entrance
After you reach the mountain range, neighboring the white question mark, you only need to locate a small gate to the new cave. Talk to the dwarf here, who will ask you to rebuild the armory. Stand in the appropriate spot and spend the supplies - 35 Copper, 35 Iron, 10 Ruby, 10 Diamond and 40 Leather. Then, complete the building minigame.
Rewards: studs for completing the building minigame, a mithril LEGO brick
Location: Erebor
Walkthrough: The questgiver is staying in a huge cave, which you can access through the gate. You will be asked to build organs here. Stand in the appropriate spot and spend the supplies - 20 Copper, 20 Gold, 60 Wood and 40 Rope. Then, complete the building minigame.
Rewards: studs for completing the building minigame, a mithril LEGO brick
 The spot where you start the first fire
Location: Dale
Walkthrough: The questgiver is staying in a cave that you can access through the gate. You will be asked to find the treasure hidden here. The quests consists in lighting fires, in the order suggested by the word puzzle, which you can learn after you interact with the plate with question mark on it. Switch to the character that can start fire (e.g. Sam) and start by reaching the hearth in the right side of the cave (you need to bounce off the plant several times, to reach the ledge above).
 The spot where you start the second fire
Go left, as far as you can, and start a fire next to the trees.
 The spot where you start the third fire
Walk over to the right a little and start a fire in the spot, where there is the dwarf statue, among others.
 The spot where you start the fourth fire
Finally, start fire in the place with the elven statues. Appropriate performance of all the steps results in completing this quest.
Reward: a mithril LEGO brick
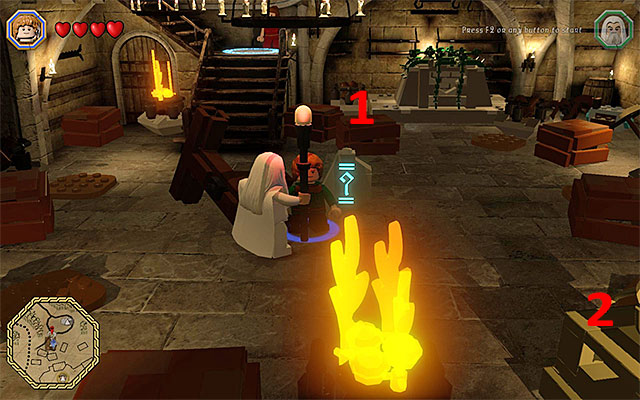
Location: Dale
Walkthrough: The questgiver is staying in the storage. You will be tasked with finding a treasure here. The quest consists in starting fires in the order suggested by the word puzzle, which you learn after you interact with the plate with the question mark on it. Switch to the character that can start fires (e.g. Sam) and start two fires shown in the above screenshot, i.e. the top and the bottom-right one. This will result in fire bursting in all the interactive spots and completing the puzzle.
Reward: a mithril LEGO brick
Location: Dale
Walkthrough: From the questgiver, you will learn that he fears dragon attack. After a while, there will appear monsters in the area, although goblins, disguised as dragons, only. Deal with all of them, which you should have no problems with.
Reward: a mithril LEGO brick
Location: Esgaroth
Walkthrough: The questgiver asks you to obtain the Yodelling Shield. It is one of the treasures that you obtain in the w third main stage of the game (Azog the Defiler). After you obtain the artifact, return to the questgiver and give it to him.
Reward: a mithril LEGO brick
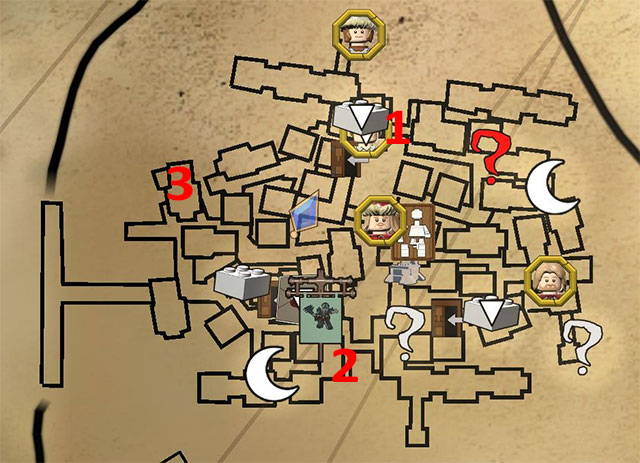
Location: Esgaroth
Walkthrough: The questgiver proposes that you play hide and seek. In the city, you need to find three different people. Their whereabouts have been provided in the above screenshot and you can reach them in any order you want to. After you have found each one, return to the starting point with them.
Reward: a mithril LEGO brick
Location: Esgaroth
Walkthrough: The questgiver asks you to find two other people that he needs to sing a song with. Each time, you need to reach the area marked, on the map, with red circles. After you locate a singer, press the appropriate key/button to make them follow you and return to the questgiver. Find two people, in this way.
Reward: a mithril LEGO brick
Location: Esgaroth
Walkthrough: The questgiver asks you to build a ballista. Stand in the appropriate spot and spend the supplies - 10 Iron, 50 Wood, 20 Rope and 30 Stone. Then, complete the building minigame.
Rewards: studs for completing the building minigame, a mithril LEGO brick
 Target the goblin boats
Location: Esgaroth
Walkthrough: The questgiver asks you to get rid of the goblins that perpetrated a theft of a boat. Jump onto the ballista that you have built, during quest 92, and get to action. A big facilitation is the fact that the game will be, visibly, helping you target the boat. So, you only need to wait until the moments in which you need to launch another projectile. After you sink then goblin boats, this quest will end.
Reward: a mithril LEGO brick
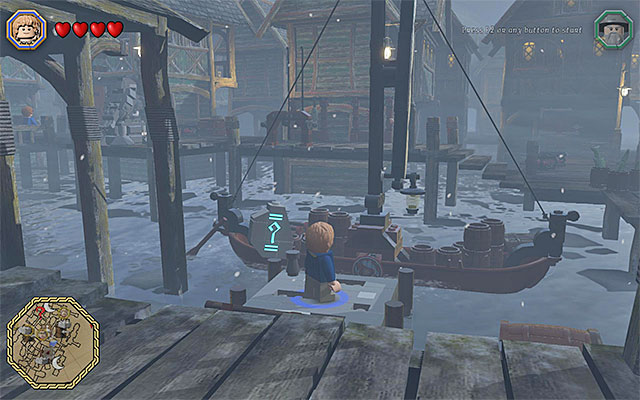 The boat found in the city
Location: Esgaroth
Walkthrough: The questgiver is staying in the eastern part of the map and you need to get there on boat. It is best to obtain this means of transport, while exploring the Southern side of the Lake-town, because you will find a moored boat here, which you can easily jump into (the character swap button).
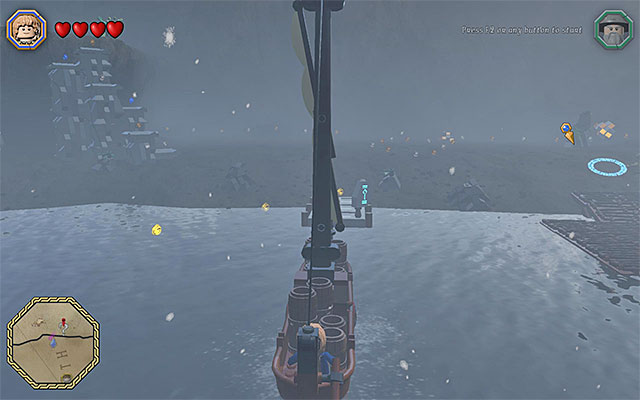 The spot, where you need to moor the boat
After you start sailing, steer towards the pier, near the white question mark. Moor the boat in approach the questgiver. He will ask you to build a huge swing. Stand in the appropriate spot and spend the supplies - 20 Iron, 15 Sapphire, 80 Wood, 50 Rope and 50 Stone. Then, complete the building minigame.
Rewards: studs for completing the building minigame, a mithril LEGO brick
Location: Dale
Walkthrough: The dwarf asks you to find his lost wife. Go South and be prepared to eliminate a small group of skeletons. Approach the woman and press the appropriate key/button to make her follow you. Along the return way, eliminate some more skeletons.
Reward: a mithril LEGO brick
 The dragon outfit
Location: Erebor
Walkthrough: The questgiver will be trying to convince you that he is not afraid of dragons and this means that you need to put on an appropriate outfit. You need to go to the Character Customiser in Esgaroth, which has been marked on the world ma, attached to this chapter (the black "Mod" point in the Eastern side of the map). After you reach the shop, enter and start shopping. You need to buy a Dragon Hat (1500 studs) and the Dragon Body (2000 studs). Switch to the modified character and return to the questgiver.
Reward: a mithril LEGO brick
 The ladder
Location: Dale
Walkthrough: The questgiver is staying on the rooftop of one of the buildings and the only way to reach him is to use the barely visible ladder. The person asks you to obtain the Dragon Kite. It is one of the treasures that you obtain in the fifteenth main stage of the game (On the Doorstep). After you obtain the artifact, return to the questgiver and give it to him.
Reward: a mithril LEGO brick
Location: Dale
Walkthrough: The dwarf asks you to build a carousel. Stand in the appropriate spot and spend the supplies - 50 Copper, 30 Iron, 20 Gold, 30 Emerald and 50 Wood. Then, complete the building minigame. Note - if you do not have enough gold, iron or emerald on you, visit e.g. one of the many caves or mines in the game world.
Rewards: studs for completing the building minigame, a mithril LEGO brick
Location: Dale
Walkthrough: The questgiver is staying on the rooftop of one of the buildings and the only way to reach him is to use the barely visible ladder. The person asks you to build a kite. Stand in the appropriate spot and spend the supplies - 5 Emerald, 10 Wood, 75 Leather and 50 Rope. Then, complete the building minigame.
Rewards: studs for completing the building minigame, a mithril LEGO brick
Location: Esgaroth
Walkthrough: The questgiver asks you to rescue his cousin. Go West and after you reach the docks. be prepared to eliminate a relatively small group of spiders. After the victorious battle, approach the rescued person and press the appropriate key/button to make him follow you. you can now return to the starting point.
Reward: a mithril LEGO brick
Location: Esgaroth
Walkthrough: The questgiver asks you to obtain the Firefly Jar. It is one of the treasures that you obtain in the eleventh main stage of the game (Barrels Out of Bond). After you obtain the artifact, return to the questgiver and give it to him.
Reward: a mithril LEGO brick

Location: Esgaroth
Walkthrough: The questgiver asks you for help with pushing over the crate with wood. Start by selecting the character with the warhammer e.g. Dwalin. Start by using the warhammer to position the two white clocks in the correct position. Their correct arrangement has been shown in the above screenshot. That screenshot also shows the path over which you need to push the crate with wood, thanks to which you will be able to get it where you want it, without fails (if the crate falls into water, you will have to start over).
Reward: a mithril LEGO brick
Location: Esgaroth
Walkthrough: The questgiver asks you to obtain Stone-giant Gloves. It is one of the treasures that you obtain in the sixth main stage of the game (Over Hill and Under Hill). After you obtain the artifact, return to the questgiver and give it to him.
Reward: a mithril LEGO brick
 Tap rhythmically the keys that appear on the screen
Location: Mirkwood Forest
Walkthrough: The elf asks you to help him eliminate the title spider. Enter the cave and jump down to the lower level, to start the battle. Approach the huge spider, while attempting to avoid its ranged attacks (they will unnecessarily slow you down and strip you of one, or two, hearts). After you land the first attack, start the minigame, where you need to tap, rhythmically, the keys/buttons that appear on the screen.
 The huge spider does not resume attacking until you eliminate the smaller spiders
Completing the minigame correctly will make the spider lose one health heart and walks away from the battlefield, for a moment. Focus now on eliminating the yen standard spiders and await the moment, at which the huge spider enters the arena again. Throughout the rest of the battle, you need to weaken the boss and eliminate the smaller spiders, in turns.
Reward: a mithril LEGO brick
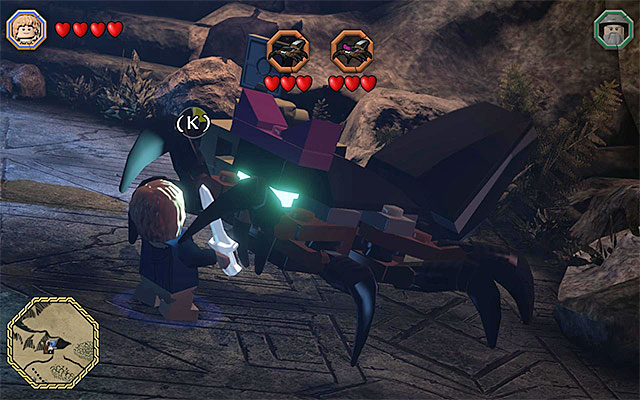 The battle with two huge spiders is one of the "attractions" of the arena
Location: Mirkwood Forest
Walkthrough: The goblin will convince you to take part in several skirmishes on the title arena and, to start, you need to enter the cave. In total, there are three fights and they are subject to the same rules as the fights with the other bosses of the previous side quests:
Reward: a mithril LEGO brick
The side missions marked with the red question marks are different from the side quests marked with white question marks. The premises of all of the red-question-mark quests are identical. After you reach the questgiver, you are asked to bring a unique mithril item, which starts the below process.
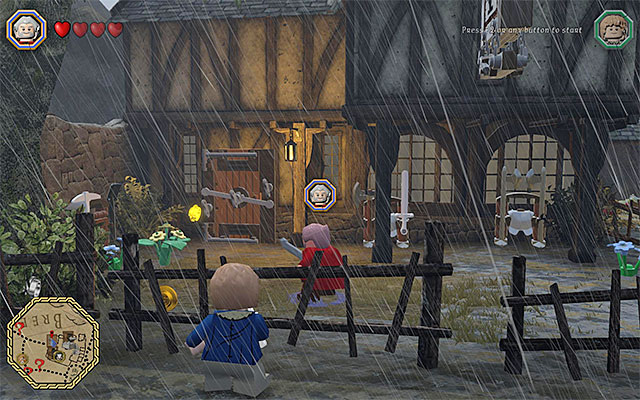 Blacksmith in Bree
The first step is obtaining the schematic for the item that has been requested by the questgiver. The information on finding schemata, during the main missions, have been given in the chapter entitled Main Stages - Collectibles, and the information on the whereabouts of schemata, which you find during the free exploration of the game world, has been provided in the chapter entitled Middle Earth - Schematics.
The next step to take is to prepare the item, basing on the schematic that you have obtained. To do that, you need to visit the local blacksmith, whose location has been shown on the above map. The important piece of news is that the smithy is unavailable, at first. The smithy in Bree becomes available as late as after the completion of the "Smithy in Peril" side quest (no. 19, white question mark).
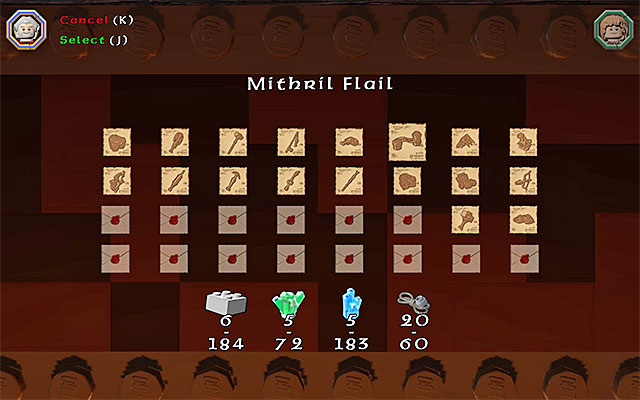 Pick the schematic and choose the supplies that are necessary to forge the item
After you enter the smithy, you need to interact with the forge inside and then, select the appropriate schematic from the list (only the ones that you have already obtained are on the list).
Unfortunately, it is possible to craft an item only after you spend some of the supplies. If you have the required supplies, you need to complete the minigame that you have already played in the first stage of the game. Otherwise, you first need to search around for the required supplies.
Note - one of the "supplies" that you need are the mithril LEGO bricks. To find the information on how to obtain them, see among others, the chapters entitled How to complete the game in 100%? and Middle Earth - Mithril LEGO bricks.
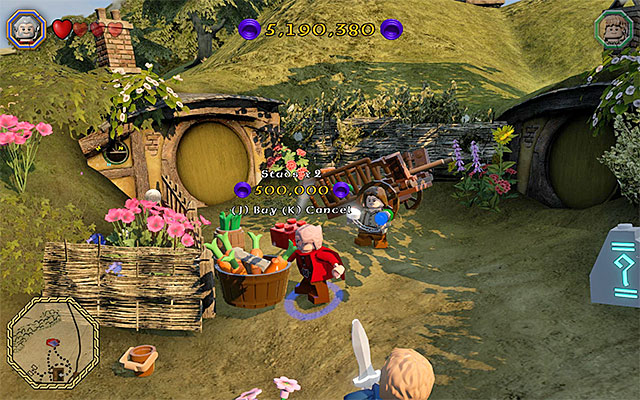 You need to buy, each one of the red bricks, in the first place
After you complete the minigame and forge the unique mithril item. you can finally return to the person that placed the request. After you complete each "red" mission, you are rewarded with the option to buy, for studs (coins), a red LEGO brick. There is a practical function to each such brick and it unlocks a hidden function of the game (e.g. using special outfits), or makes further game easier (e.g. by awarding you with a considerable of studs).
Note - The functions connected with the individual LEGO bricks can be enabled and disabled, as much as you want. To do that, you need to stop the game and select the Extras option, in the pause menu.
In LEGO The Hobbit there are 32 various Schematics to be found, where you can find 16 of them only during the free exploration of the Middle Earth (the remaining ones are spread all around the main stages). Since the majority of these Schematics are very well-hidden, I recommend that you acquaint yourself with the markers presented on the above map, as well as with the following pages of this chapter. It is there that the whereabouts of these Schematics have been elaborated upon, in detail.
Note - the application of these Schematics (in the forge) has been described on the page entitled red Question Marks in Middle Earth - Side Quests.
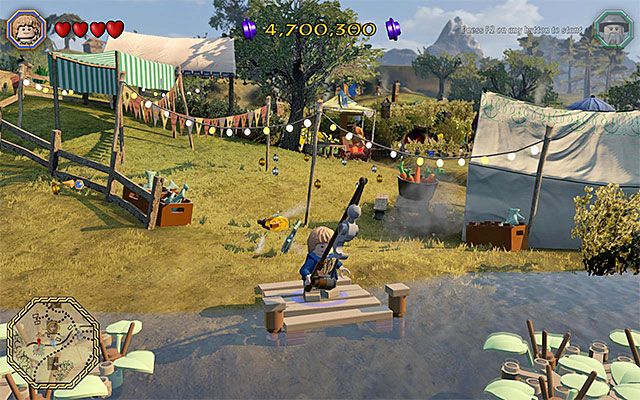 Thanks to completing the fishing minigame, you will obtain the knob, among others
Location: Hobbiton
Description: This schematic is in a seemingly inaccessible storage. Take a look around near this collectible and locate the spot where you can start the fishing minigame (requires the fishing rod, which e.g. Bilbo has on him). Thanks to finishing this minigame, you will obtain the crank. return with this crank to the area, where the schematic is and use it on the mechanism here.
Schematic type: Mithril Stud Spade
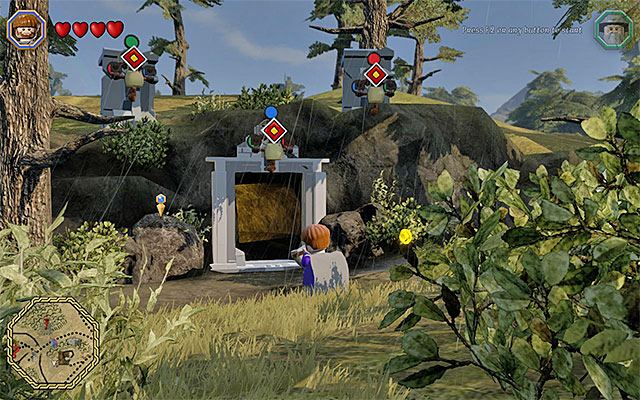
Location: Hobbiton
Description: This schematic is in a small cave. Start a bit to the South of the marker and locate three interactive targets. Switch to a character with slingshot (e.g. Ori) and start shooting pebbles at the targets. The solution to this puzzle has been shown in the above screenshot - above the target on the left, there should be a green circle, blue above the middle one and a red above the target on the right. You can now enter the cave and smash all of the interactive objects, thanks to which you will find the schematic inside one of the chests.
Schematic type: Mithril Megapult
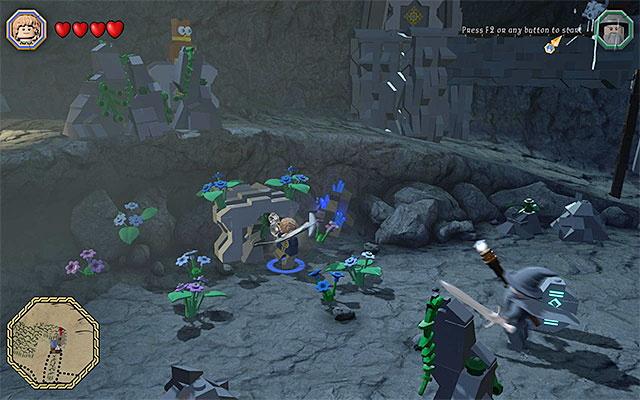 The first manhole
Location: Bree
Description: The schematic is inside a big cave with a gate to. After you reach the cave, examine its middle part and smash all of the interactive objects in the area overgrown with flowers. Thanks to this, you will gain access to the manhole here. After you cross the tunnel (best with a hobbit or with a dwarf) you will reach the ledge above on the right. On the ledge, there is a key, which you need to collect.
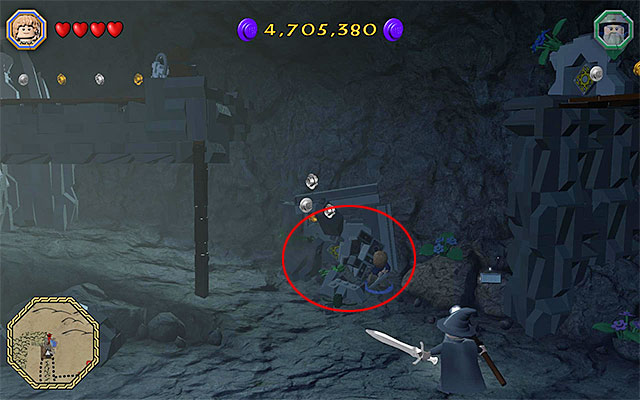
Now, locate the rocks marked in the above screenshot. You need to smash them, using any ranged or melee weapon. Destroying the rocks will reveal the access to a shaft, which you need to approach with the character that collected the key. By following the shaft, you will reach the upper-left ledge. Approach the locked chest and use the key on it, thanks to which you will be able to collect the schematic.
Schematic type: Mithril Mushroom Crown
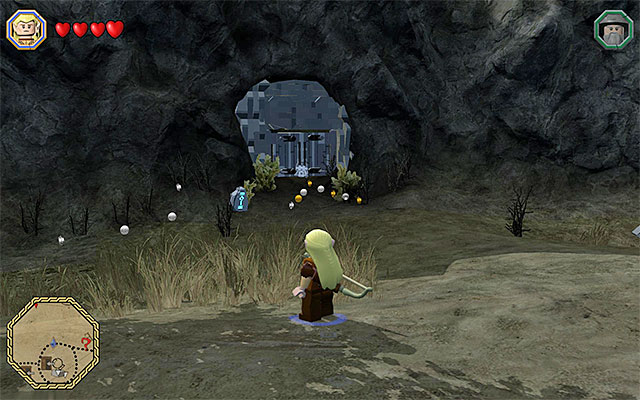
Location: Weathertop
Description: The best way to start is to the North of the location of the marker that marks the location of this schematic, at best somewhere near the Weathertop. Go South and find the big gate shown in the above screenshot Hit the plate with the question mark on the left, thanks to which you will start the first puzzle.
 Following the correct path will result is the appearing of markers
The abovementioned puzzle consists in following the in the direction in which the signs, which appear from under the ground, point. Yellow means that you need to go in the direction that the arrow points towards. Violet, on the other hand, means that you need to go THE OPPOSITE DIRECTION, than the one that the arrow points towards. This way, walk around the entire area, which will take you back to the locked gate.
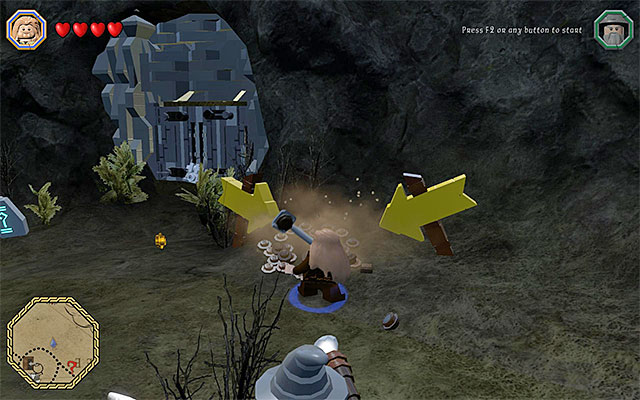 You need to use the spade to dig up the key
Note that this activated a fragment of the ground so, you need to switch to the character with spade (e.g. Sam or Fili). Dig up the key from the ground. You can now enter the next area and walk over towards the collectible. Here, you will have to solve two more puzzles.
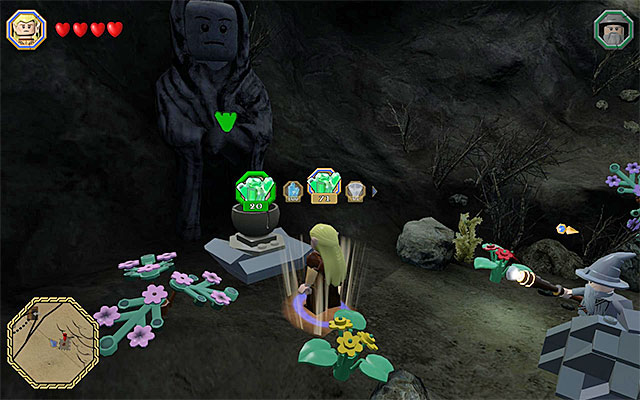 Approach each and every altar and make an offering of gems
Start by switching to the character with bow (e.g. Kili or any other elf) and fire arrows towards the three nearby targets. Doing this will result in emerging of three small platforms from under the water. You need to reach the ledge with three statues. The final puzzle is about making an offering at each one of the statues. You need to spend 20 rubies this way 20 Sapphire and 20 Emerald. wait to the schematic to be revealed and collect it.
Note - if you do not have enough gems on you, use the pickaxe on the nearby interactive points, or visit any cave or mine. Apart from that, you can barter with the character staying here and exchange some of the supplies for gems.
Schematic type: Mithril Shadow Blade
 Stand on the pressure plate and wait for the slabs to slide out
Location: Troll Dwellings
Description: Start to the South-West of the marker that points you to the schematic, thanks to which you will find a big locked gate. Start by switching to any wizard and using the staff on the big blue heap of bricks. After you smash this obstacle, walk onto the pressure plate, thanks to which several ledge will slide out, from the wall.
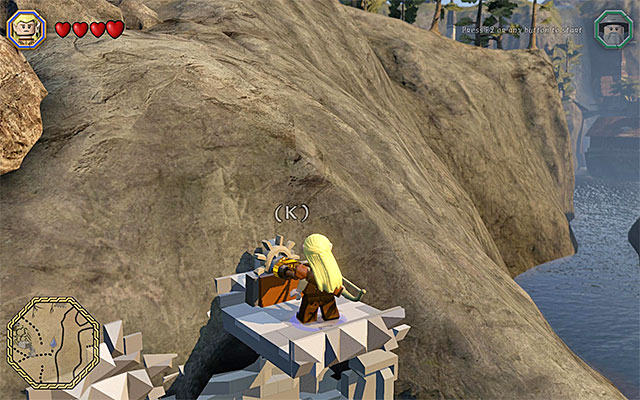 You need to reach the mechanism above the locked gate
Switch to any other character (I recommend the elf), start climbing and jump to reach the successive interactive ledges. Eventually, you will reach the top ledge and you need to use the interactive mechanism here.
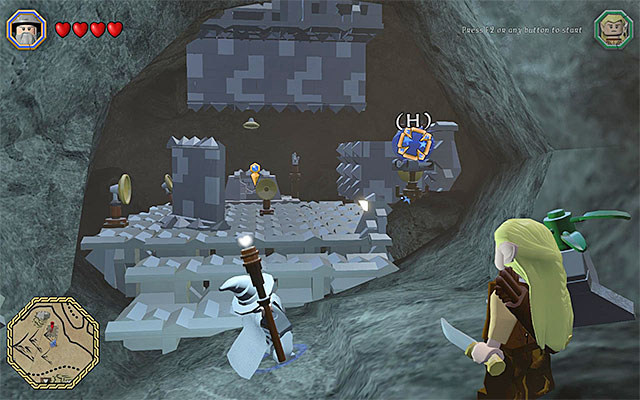 Hit the blue spheres with magic bolts
You can now walk into the cave, Also in this case, you need to use the wizard. You need to reach the last chamber in the cave and use the staff again. This time around, aim at the blue spheres underneath the ceiling. After you hit all the spheres with the magic bolt (the successive ones will be revealed as you perform this task), you will be able to collect the schematic.
Schematic type: Mithril Skull Cap
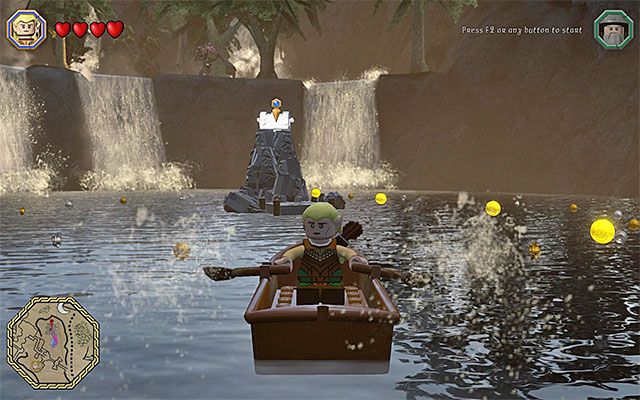 Paddle the boat towards the ledge with the chest
Location: Rivendell
Description: Follow the trail of yellow studs (you need to set the schematic as your destination, of course), thanks to which you will reach the pier to the North-West of the collectible. There is a boat here and you need to jump inside (the character swap key). Use the boat, now, to reach a small stone ledge.
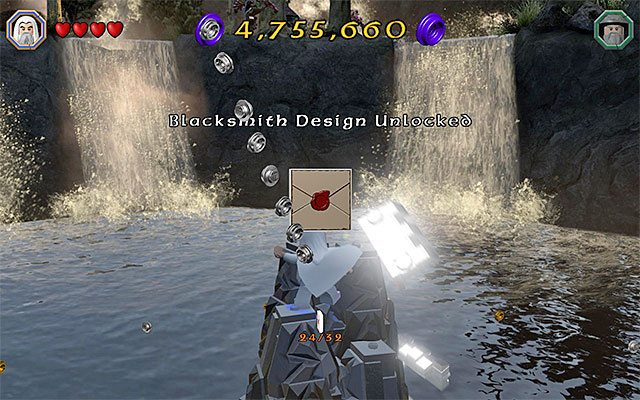 Smash the chest as Saruman
Jump out of the boat and switch to Saruman, because he is the only one capable of smashing the mithril chest. You can now collect the schematic.
Schematic type: Mithril Rhythm Stick
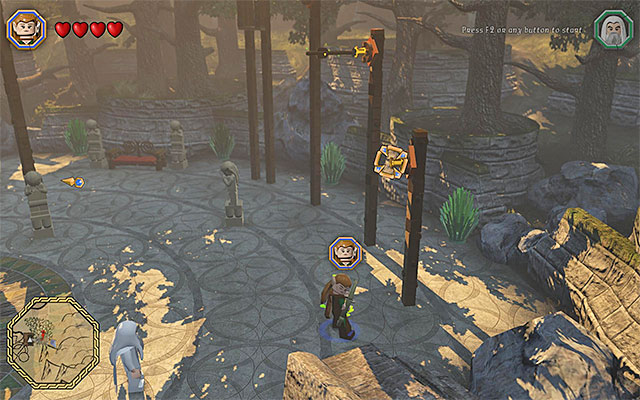 The interactive slot
Location: Rivendell
Description: Start by locating a small door to another, separate location in Rivendell. Here, there are three interactive levers that you need to reach (the order, in which you do that is purely up to you). Start with exploring the right side of this location. Switch to an elf and use bow to hit the interactive slot. After you do that, jump towards the arrow stuck in the vertical pole. Jump towards the successive bars and after the last jump, grab on to the lever and give it a pull.
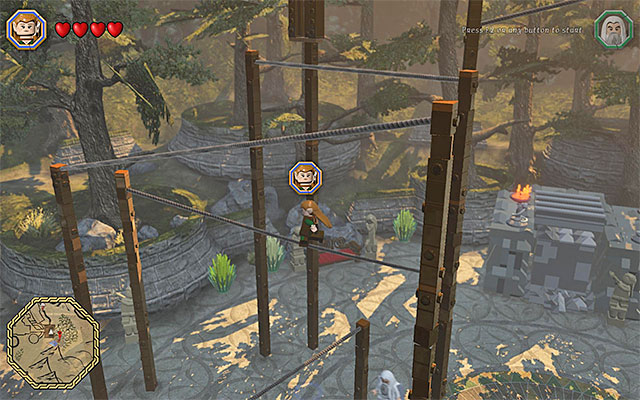 Jump towards the successive ropes
On the left side of this area, there are several ropes. As the elf, jump towards the first one and start climbing. Jump from rope to rope, to reach the second lever.
 You need to resume your path aver the ropes
Remain in the spot, in which you grabbed on to the second lever, move a bit to the right and jump towards the next rope. Here, you need to climb again. Finally, walk over the narrow beam and interact with the last lever. You can now jump down and claim your reward.
Schematic type: Mithril Dance Boots
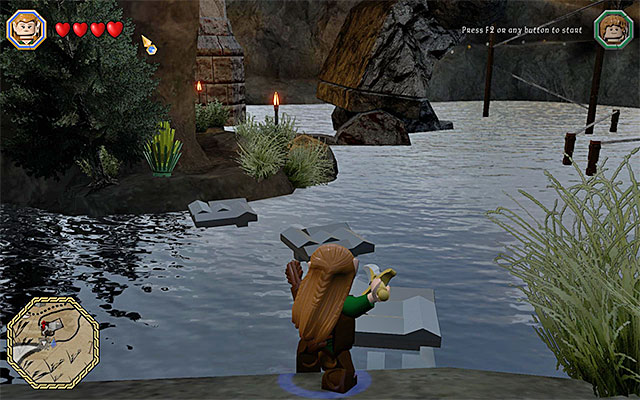
Location: Rivendell
Description: Start at the water, a bit to the West of the marker of the schematic's location. Turn Southwards and jump over the three platforms shown in the above screenshot. Thanks to this, you will reach a gate to a separate location.
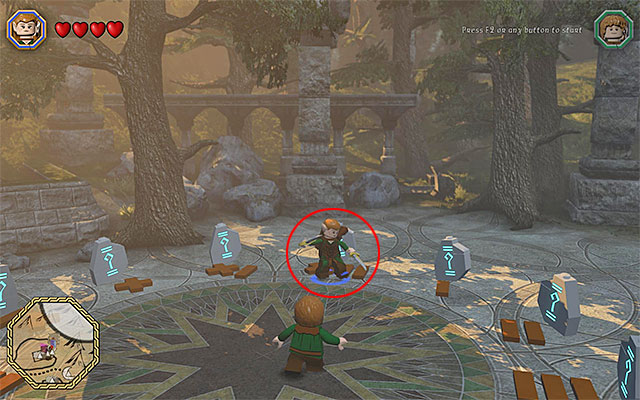 The slab at twelve o'clock (XII)
Here, you need to solve one long puzzle. First of all, approach the big clock on the floor. The first part of the puzzle is about hitting the stone slabs with question marks, in the predetermined order (use any melee weapon). Start by hitting the slab at twelve o'clock (XII). Then, knock the slabs at four (IV) and six (VI) o'clock.
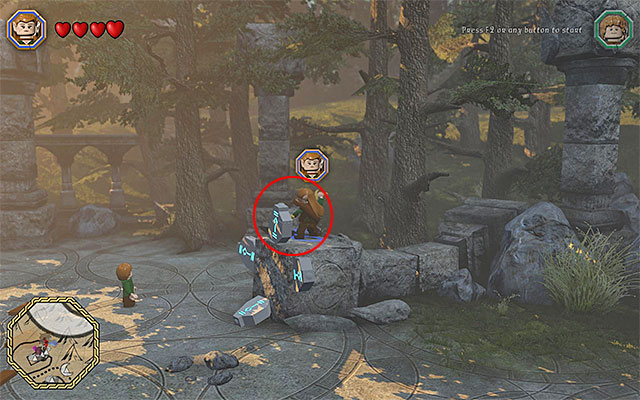 Hit the slab on the highest level
Go into the background and hit the slab with the question mark, located behind the tree. Go right now and jump onto the big rock and hit the slab atop the block. Jump down, walk even farther to the right and hit the slab in the thickets.
Finally, return to the central part of this location. You need to hit the second slab on the left, which has been marked in the above screenshot. If you have performed all the actions correctly, you will receive the schematic.
Schematic type: Mithril Horse Shoes
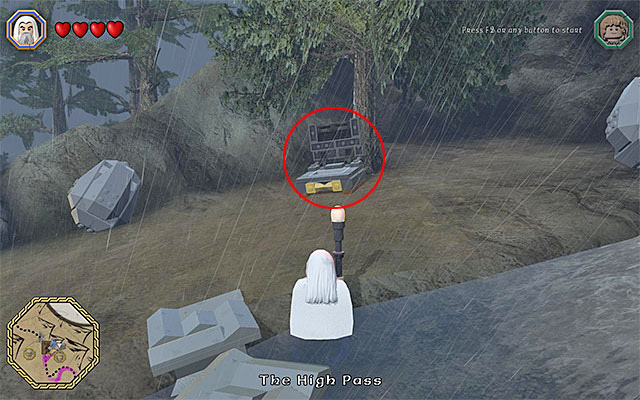 Open the chest in the camp
Location: Mountain Pass
Description: In the encampment neighboring the Mountain Pass, you should note a chest with a mithril lock. Switch to Saruman and use Saruman's Staff to open the chest.
Schematic type: Mithril Catchphrase Mallet
 Use Saruman's staff
Location: The Pass of Caradhras
Description: This schematic has been hidden behind the mithril rocks, right next to the snowman. Switch to Saruman and use Saruman's Staff to remove the rocks and gain access to the collectible.
Schematic type: Mithril Beanstalk
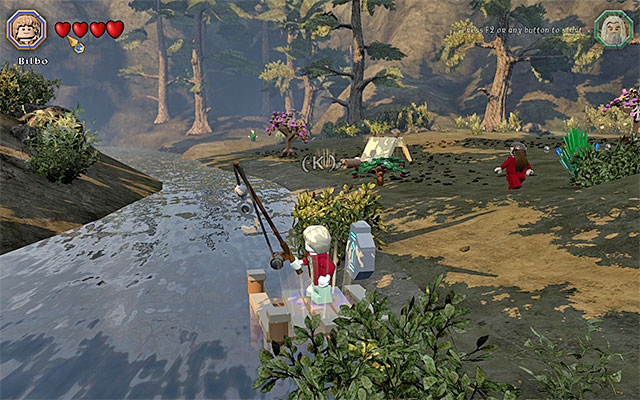 The place where you need to complete the fishing minigame
Location: The elven forest
Description: This schematic is lying on a seemingly inaccessible ledge. First of all, take a look around for a small pier and switch to the character with the fishing rod. (e.g. Bilbo) to start the fishing minigame. Completing the minigame will result in catching, among others, a knob. Take the item to the mechanism on the left and use it immediately, thanks to which there will emerge platforms from under the surface of the water.
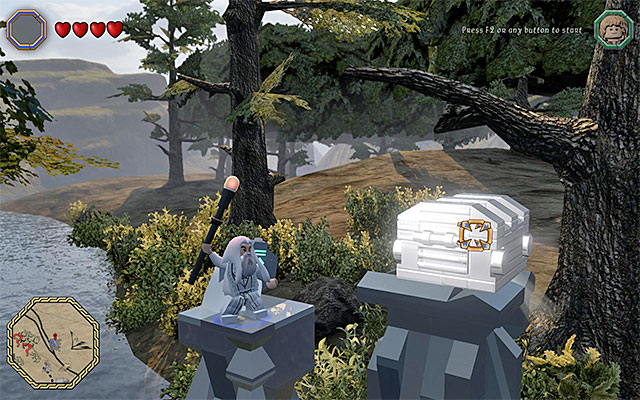 You need to jump from platform to platform and use Saruman's staff at the very end.
Switch to the character with warhammer now (e.g. Dwalin) and push the big block into the water. After that, switch to any elf and start jumping towards the ledges above. Finally, switch to Saruman and smash the chest that the collectible is in.
Schematic type: Mithril Slippers
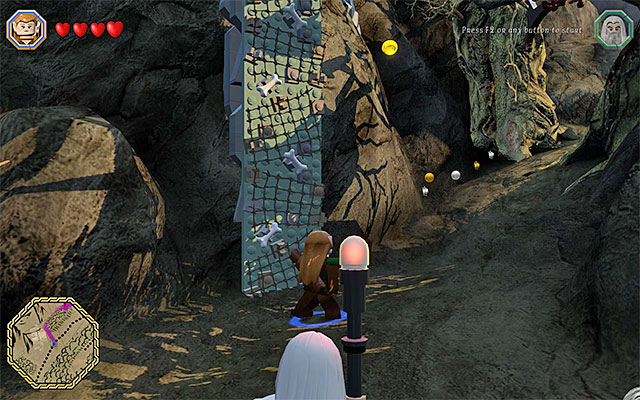
Location: Mirkwood Forest
Description: Approach the marker of the schematic from the North-Eastern direction, by taking one of the main paths across the Mirkwood Forest. During the exploration, (it is a good idea to follow the trail of yellow studs) keep an eye out for the climbing wall shown in the above screenshot. After you have located the wall, switch to the goblin and reach the ledge above.
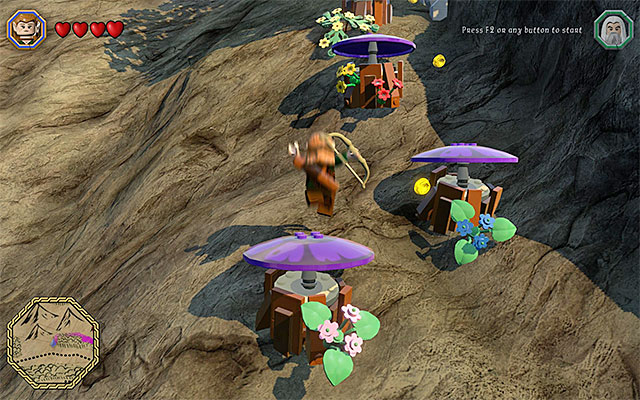 Make sure the you have switched to the elf, because this is the only way in which you can reach the first flower.
Walk onto the pressure plate and, jump quickly over the small platforms that emerged on the right. Switch to any elf now. You need to jump onto the first violet flower and start bouncing off it. Keep jumping towards the successive flowers, thanks to which you will reach the path above, after several moments. You can now go East, make it over to the cave entrance, where there is the collectible.
 Start pushing over the block after you have "cleared" the white path
Inside the cave, there are several more things to do. Start by smashing the objects on the white path, using the staff of any of the wizards. Go left now and switch to a character with the warhammer (e.g. Dwalin). Start pushing over the big block on the right, jump over to the ledge above and set the objects here on fire (you can use e.g. Sam for that).
Schematic type: Mithril Construction Hat
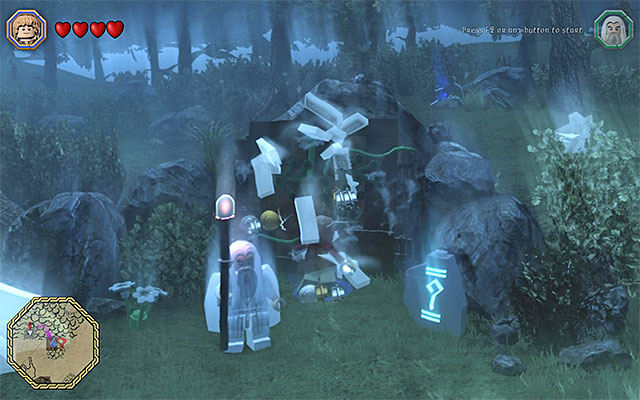 You need to put the Ring on because, only then will you be able to gain access to the cave
Location: Dol Guldur
Description: The schematic is in the cave and you need to approach it from the Northern direction. Switch to Bilbo here and put on The Ring. Smash the objects that are blocking the way into the cave, take The Ring off and walk over to the next location.
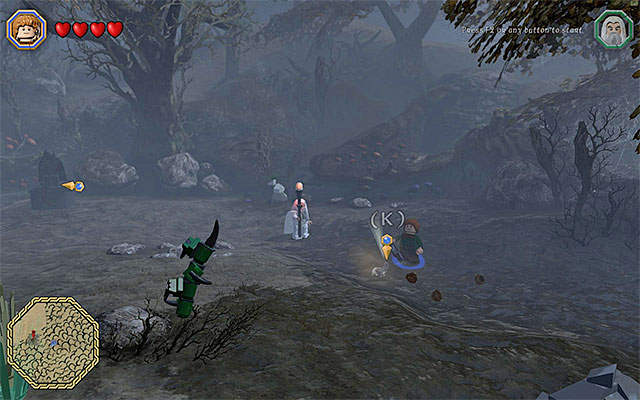 Check out the excavation sites
In order to gain access to the schematic, you need to obtain three different keys. Two of the three can be obtained as a character with spade (e.g. Sam or Fili) and by interacting with the ground, where you can.
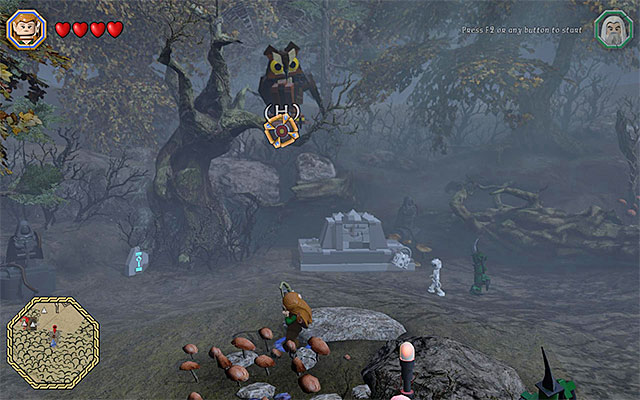 The target
The last, third, key can be obtained by switching over to a character with bow (e.g. Kili or any other elf) and firing the bow at the target on the tree. Put the keys into the padlocks (in any order) and collect the schematic.
Schematic type: Mithril Candle Staff
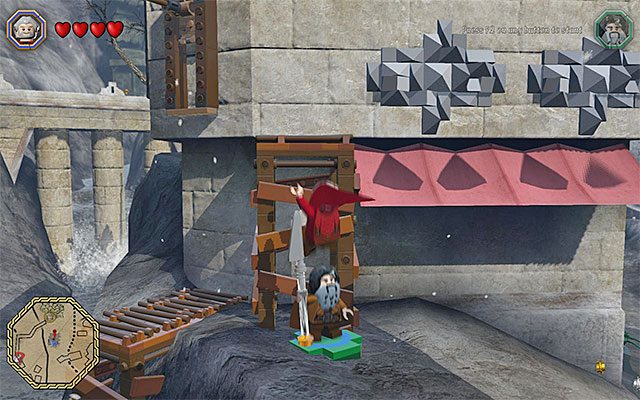 Climb onto the ally, using his long weapon
Location: Dale
Description: The schematic is on the rooftop of the building. Approach the building from the South and switch to a character with a long melee weapon, e.g. to Bifur. Stand in the highlighted area, switch to any other of the characters and climb onto the ally. Jump to reach the ledge above and then, towards the lever on the left, which you need to pull.
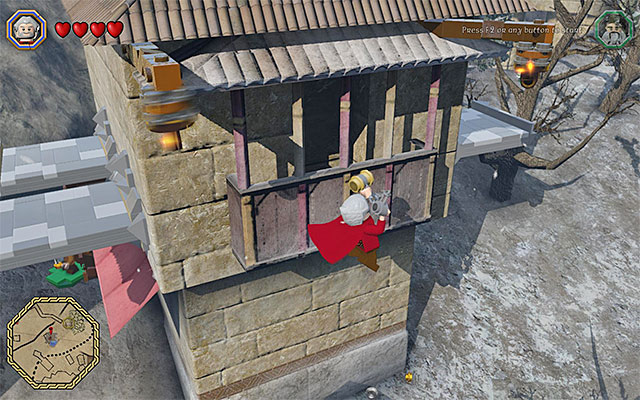
Make use of the two platforms that appear. After you reach the second one, switch to Dori and use the flail to reach the first golden catch. Now, the hardest step to make. After you swing, you need to jump towards the second catch, and press the appropriate key/button, in mid-air (the above screenshot), This will allow you to grab it and resume the crossing. You can now get to the rooftop and destroy the objects on it, thanks to which you will obtain the schematic.
Schematic type: Mithril Falcon
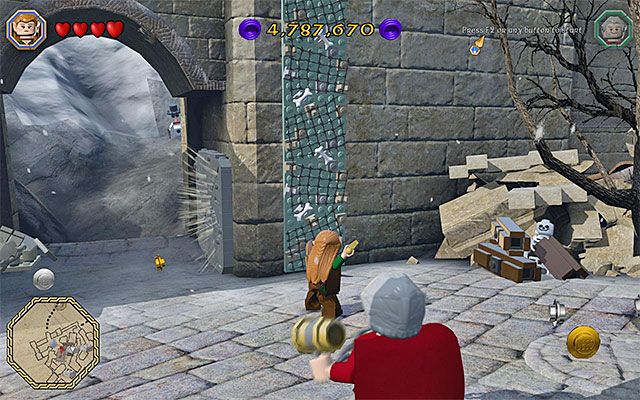 The interactive wall
Location: Dale
Description: The schematic is on the rooftop of one of the buildings in Dale but unfortunately, it becomes available only after you perform a number of actions. Start by examining the area to the South-West of the schematic's marker. To the right of the gate, you should notice an interactive climbing wall and you need to climb on to it, as the goblin. This way, you will reach a small rooftop.
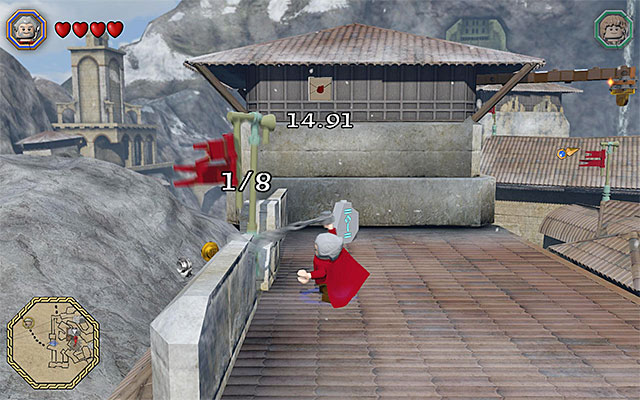 The first flag
Switch to Dori now and smash the nearby red flag. Performing this action will start a countdown. You need to reach seven other flags and smash them also, before the time is up.
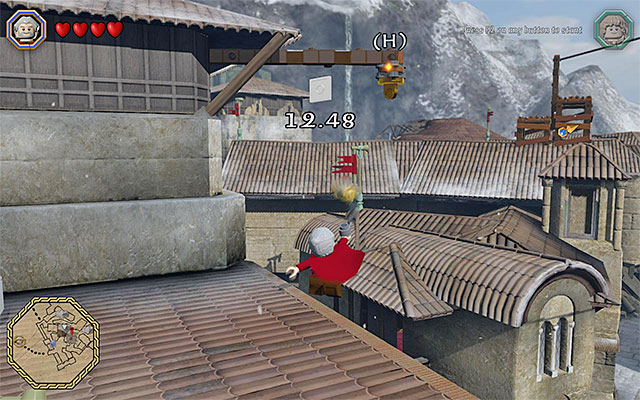 Use the flail to grab the golden catch
Start by using the flail on the nearby golden catch. Smash the second flag here (the allotted time limit slightly regenerates each time) and go towards the flags on the left. As you complete this challenge, try not to fall off the roofs, because you will then have too little time to return onto them and you will have to start over.
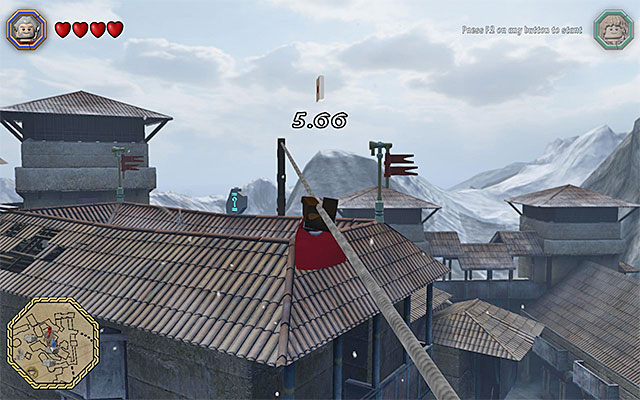 Use the ropes and the wooden beams
Towards the end of the race with time, use the rope to make it over to one of the neighboring rooftops and walk over several wooden beams carefully If you completed the challenge within the allotted time, the schematic will appear in the spot shown on the map. Go there and collect it.
Schematic type: Mithril Snowapult
 The door to the building's basement
Location: Esgaroth
Description: In Lake-town, locate the door to the basement of one of the buildings. It is here that you will have to perform a number of actions, thanks to which you will gain access to the schematic. Start by smashing the objects on the right, with the flail, (e.g. Dori). Examine the pile of rubble and pick up the crank. Take the crank to the mechanism on the left and use it immediately. Using the mechanism will result in revealing a small pressure plate, onto which you need to walk.
Switch to the archer and fire an arrow at the target on the left. Switch to the character with slingshot now (e.g. to Ori) and aim at the target next to the stairs (you need to hit it several times). The game will unlock two more targets on the right. The solution to this puzzle has been presented in the above screenshot - above the target on the left, there should by the red circle and blue above the one on the right. Collect the key from the chest on the left and approach the chest on the right, where there is the schematic.
Schematic type: Mithril Bandit Gloves
On the world map, there are several tens of mithril LEGO bricks. I recommend that you try to find them, because collecting all of them (you also receive them while completing the main stages) is necessary to complete the game in 100%. Apart from that, you can use the mithril bricks in the forge. Further in this chapter, there are descriptions of the locations, in which you obtain the individual bricks. They have been described in the order, in which they have been marked on the above map.
Note - Just like in the case of the optional quests, some of the mithril LEGO bricks are available only during the day (the Sun icon on the world map) or only at night (the Moon icon on the world map)! You can change the time of the day by interacting with the bonfire, in one of the camps.
 Try taking well-aimed jumps towards the platforms
Location: Elven harbor
Description: Stand at the water and start jumping over to the successive platforms. You need to hurry, while doing that, because the platforms will immerse in water, soon after you jump onto them. Ultimately, you need to make it over to the stable ledge and grab on to the rope extended over the water. Make it over the rope to the left and let go after you are directly above the floating platform with the mithril brick on it.

Location: Elven Harbor
Description: Locate the gate with orange catch, which you need to rip off. You can do that as one of the strong characters that you purchased, or by using one of the unique treasures with similar properties. An example of such a treasure would be the Stone-giant Gloves; the above screenshot, which you can obtain in the sixth main stage of the game. Regardless of your method, tap rhythmically the indicated key/button to rip the gate off.
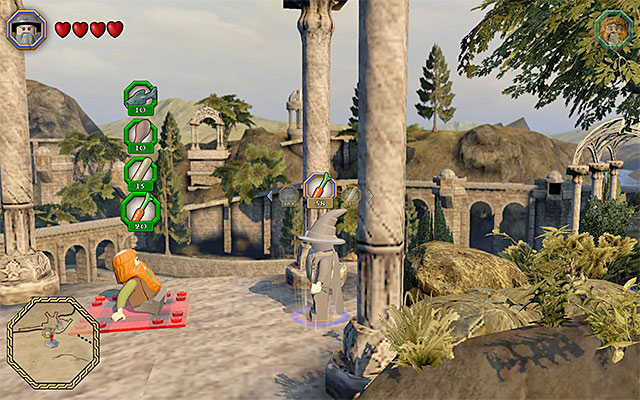 You need to feed Bombur
Take the path that you have just unlocked. After you reach the red blanket, switch to Bombur and lie down on the blanket. Now, switch o another character, approach Bombur and feed him - you need 20 Carrot, 15 Bread, 10 Meat and 10 Fish. You can now start bouncing off Bombur's belly, thanks to which you will be able to grab the mithril brick in mid-air.
 You can reach the brick only by using the boat
Location: Elven Harbor
Description: Mark the brick as your destination, thanks to which the trail of yellow studs will take you to the harbor. Jump into the boat here (the character swap key/button) and steer Northwards/ The collectible is in a small side cavern.
 You need to bounce off the yellow flower and grab on to the rope
Location: Hobbiton
Description: To the South of the collectible, find the door. Switch to the character that can sow plants (e.g. Sam) and interact with the point on the ground, to the left. Thanks to this, a yellow flower will grow. Another important step, is connected with the wizard (any one). Use the staff to smash two blue objects above. You can now bounce off the abovementioned yellow flower and go right. Along your path, jump down to a rope below and move to the left, to grab the collectible.
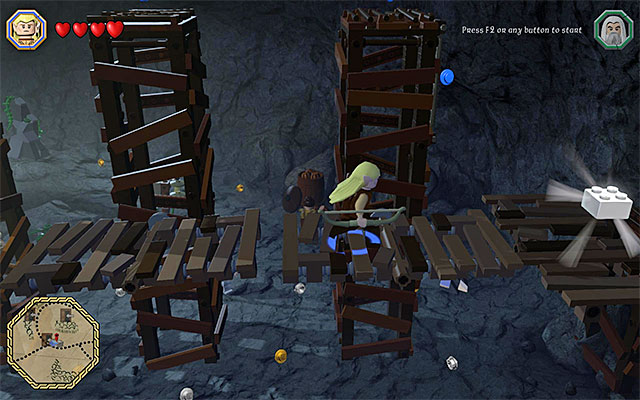 Run over the platforms, as soon as they are oriented horizontally
Location: Hobbiton
Description: Start by locating an inaccessible gate, which is overgrown with lianas. Switch to the character that can start fire (e.g. Sam) and set the lianas on fire, thanks to which you will gain access to the cave. Switch to any elf now and start jumping onto the moving. Of course, you need to wait each time before they are in the horizontal position. This way, you will reach the balcony with the mithril brick on it.
 Saruman needs to destroy the mithril padlock
Location: Hobbiton
Description: The brick is in the chest on an islet. Start by destroying the plants surrounding the chest. Switch then to Saruman and use the wizard's staff, to smash the mithril padlock.
Location: Hobbiton
Description: Locate the gate with orange catch on it, which you need to rip off. You can do that by playing as one of the strong characters that you purchased, or by using one of the unique treasures with similar properties. An example of such treasure are the Stone-giant Gloves, which you can obtain in the sixth main stage of the game. Regardless of your method, you need o tap, rhythmically, the indicated key/button to rip the gate off.
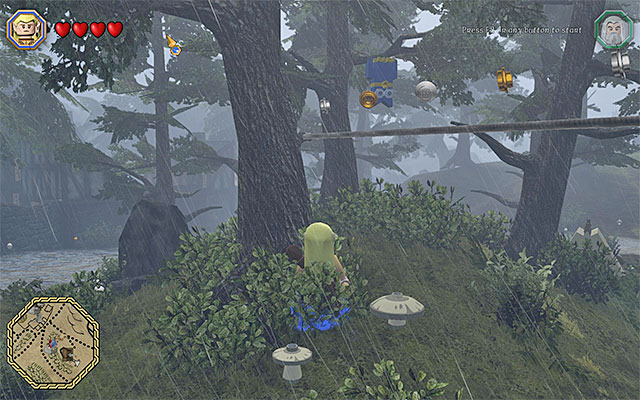 The spot where you jump to reach the first rope
Location: Bree
Description: The brick is hovering among the trees and to reach it, you need to use the ropes hanging around here. Switch to any elf and locate the spot where you can jump and reach the first rope. Make it over the ropes, until you get under the mithril brick. You will be able to grab it in mid-air.
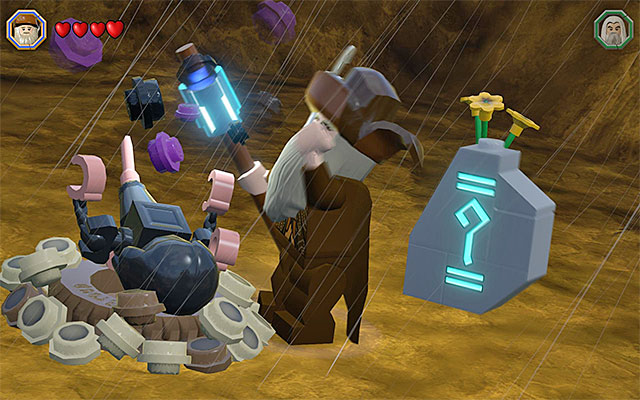 Use Radagast's ability to heal the mole
Location: Bree
Description: Locate the gate with orange catch on it, which you need to rip off. You can do that by playing as one of the strong characters that you purchased, or by using one of the unique treasures with similar properties. An example of such treasure are the Stone-giant Gloves, which you can obtain in the sixth main stage of the game. Regardless of your method, you need o tap, rhythmically, the indicated key/button to rip the gate off. Enter the cave and switch to Radagast. Healing the mole (the wizard's unique ability) will reward you with another mithril brick.
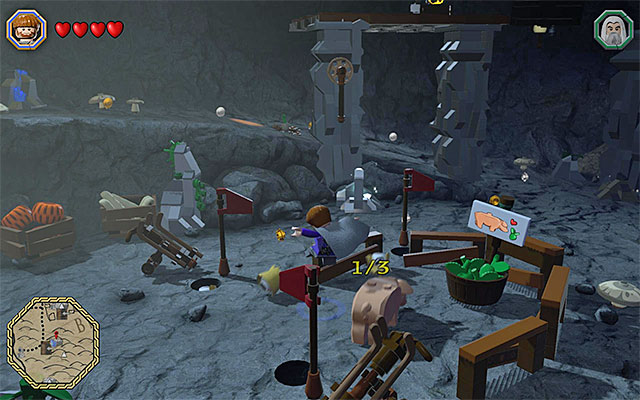 The piglet needs to go to the pen on the right
Location: Bree
Description: The brick is in the cave, but you will be able to obtain it only after you solve the puzzle connected with this location. Start by switching to a character with slingshot (e.g. Ori) and hit the target on the right, several times. After there appears the first piglet in the cave, mount it and lead it to the pen on the right (the one with food in it).
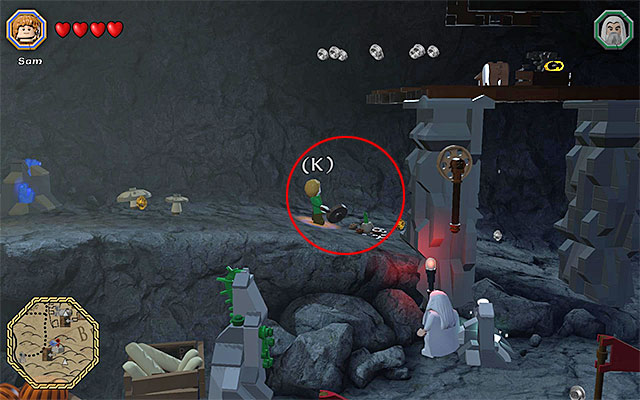
Smash the objects at the bottom level of the left part of the cave. Thanks to this, you will unlock the manhole, which it is best to cross as a hobbit or a dwarf. After you reach the upper-left balcony, select a character with slingshot and hit the target several times. Now, explore the right side of the cave. In the spot show in the above screenshot, switch to the character that can sow seeds (e.g. Sam) and bring about the appearance of a flower here. Start bouncing off the flower, thanks to which you will reach the balcony above. Jump onto the second piglet here and take it to the pen below.
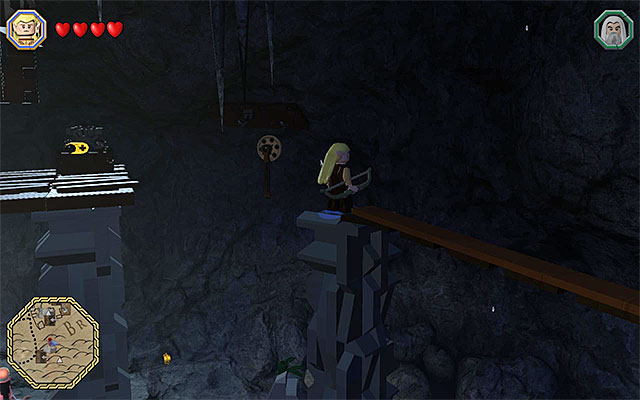
Return to the balcony above, where you have just found the second piglet. Interact with the mechanism here and use the slingshot on the target, on the right. Switch to any elf now and jump towards the small ledge on the right (the above screenshot). Walk over the wooden beam and jump onto the last piglet. Now, you need to take it back to the pen.
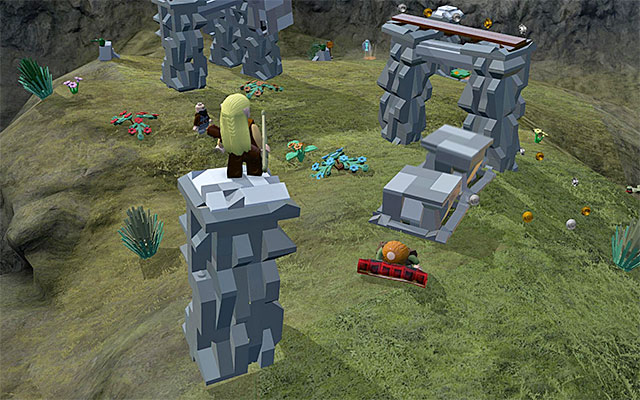 The first pressure plate
Location: Bree
Description: Reach the red blanket and switch to Bombur. Lie down on the blanket. Switch to another character now and approach Bombur to feed him - you need 2 Carrot, 1 Bread, 1 Meat and 1 Fish. Switch to the elf now and bounce off the stomach of the fed Bombur. You need to land on the pole on the left and activate the pressure plate here.
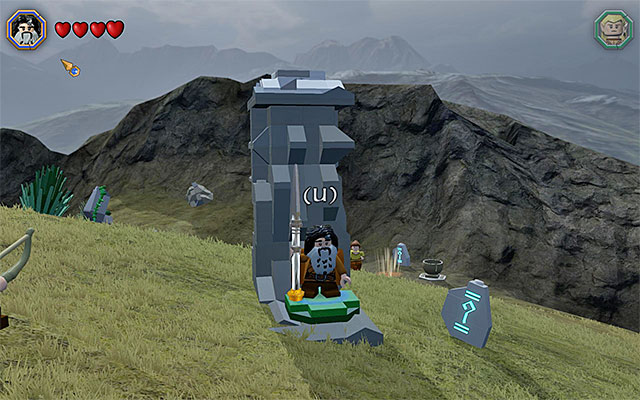 The spot where a character with long melee weapon needs to stand
Switch, now, to the character with long melee weapon (e.g. Bifur) and locate the interactive spot, where you need to stand, as that character. Switch to another character now and climb onto the ally, next to the pole. The purpose of that is to reach the second pressure plate. The ending is very simple - jump over the protruding blocks, thanks to which you will get near the mithril brick.
Location: Weathertop
Description: Locate the gate with orange catch on it, which you need to rip off. You can do that by playing as one of the strong characters that you purchased, or by using one of the unique treasures with similar properties. An example of such treasure are the Stone-giant Gloves, which you can obtain in the sixth main stage of the game. Regardless of your method, you need o tap, rhythmically, the indicated key/button to rip the gate off.
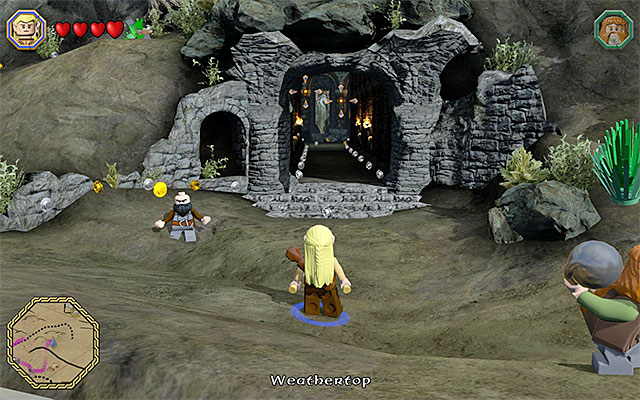
Location: Weathertop
Description: Explore the area to the South-West of this mithril brick's marker. You need to find the tomb entrance shown in the above screenshot. Take the entrance and walk into the main chamber in that location, immediately. You need to push over three stone blocks and each time, you need to use a character with warhammer (e.g. Dwalin). You do not need to rack your brains too much, here, because the paths over which you need to push the blocks is linear and it ends where they are automatically "swallowed" by the ground.
 The final part of the climbing
After you have pushed all three blocks into their places, the other stone plates will appear. Start climbing over them, thanks to which you will make it over to the location above, where there is a new character to recruit (King Thror), among others. Turn your attention to the chest here and collect the mithril brick from it.
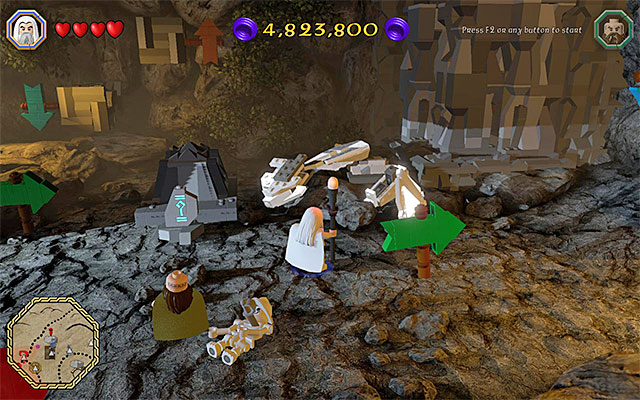 While smashing the objects in the area, use Dori and Saruman, to your aid
Location: Weathertop
Description: The brick is in the cave and the entrance is located a bit to the South of the collectible's marker. After you access the cave, start by smashing all of the objects in the area. An important piece of information is that some of the elements can be smashed only by certain characters. You need to switch to a character with flail (e.g. Dori) here, to rip off the golden catch, and Saruman to smash the heaps of mithril bricks.
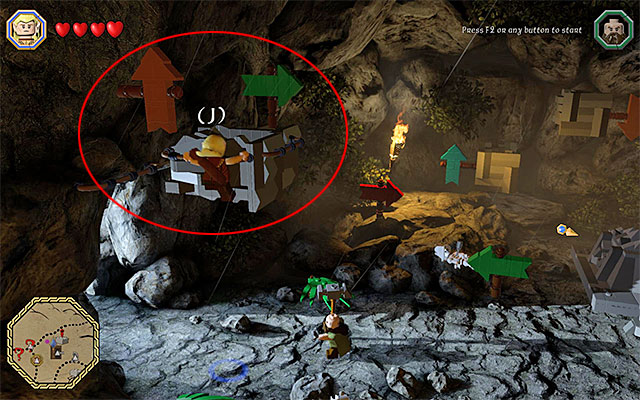
Only then, start solving the puzzle, which consists in turning the colorful arrows in the correct way:
You should experience little to no problems reaching the individual arrows and you can also turn them, using a ranged weapon. The only exception are the two arrows shown in the above screenshot, which are located near the ledge above. If you want to reach them, you need to bounce off the plant, hidden behind the rock, several times.
 reach the second pressure plate before spikes appear
Location: Weathertop
Description: The brick is in the cave and the entrance to that cave is directly under the Weathertop. After you enter the cave, stand in the first pressure plate. Now, run to the right, QUICKLY, reach the second pressure plate, before spikes stick out of the ground again. You can now collect the crank from the nearby chest and put it in the mechanism on the left. Finally, start a simple climb and reach the mithril brick under the ceiling.
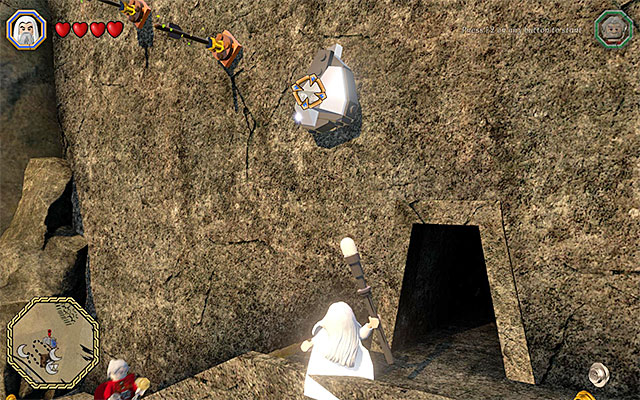
Location: High Fells
Description: Reach the very top of the cliff and switch to Saruman. Use his staff to smash the mithril bricks shown in the above screenshot. Switch to an elf now and use the bow to stick an arrow into the wall. Then, jump to reach it. Take jumps towards the successive bars and grab the collectible in mid-air.
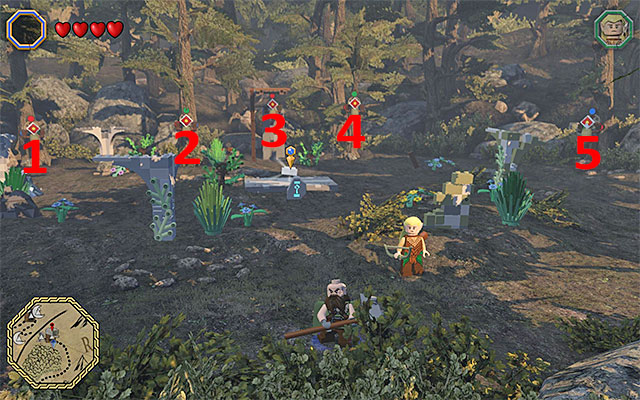
Location: High Fells
Description: The Mithril brick is near the location that a small gate leads to. After you walk into the next location, start by smashing all of the objects in the area, thanks to which you will find two targets. Apart from that, use the rotary mechanism, thanks to which you will reveal one more target. Only then, switch to a character with slingshot (e.g. Ori) and start hitting the targets, of which there are five here. The solution to this puzzle has been presented in the above screenshot - above target 1, there needs to be a red circle, above target 2, a green one, a red circle above target 3, green above target 4 and blue above target 5.
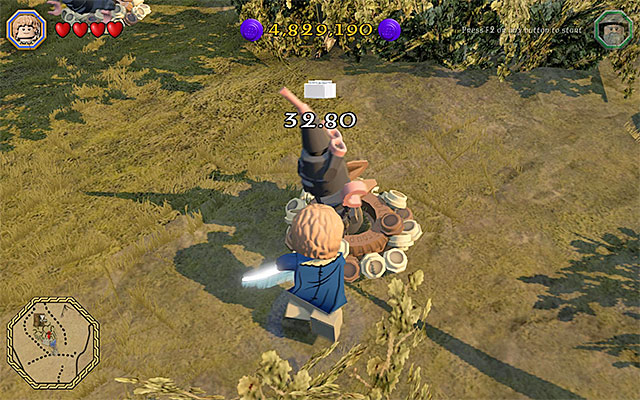 Attack the moles, one after another, quickly
Location: Troll Dwellings
Description: You should notice that around the spot, where there is the mithril brick, there are moles coming out of holes in the ground. Start attacking them. After you have eliminated the first mole, a countdown will start and, before the time is up, you need to kill a total of 9 moles. I recommend that you use here a good melee weapon and keep looking around (sometimes, a mole appears in the very spot in which you eliminated the previous one).

Location: Troll Dwellings
Description: The mithril brick in on a seemingly inaccessible island to the South of the main part of the Troll Dwellings and to the West of the Pass of Caradhras. You can reach the island in several different ways but I recommend that you reach it from the North. Take the upper path and reach the raised drawbridge. Switch to the character with slingshot and start shooting at the targets. The solution to this puzzle has been presented in the above screenshot - above the target on the left, there should be a green circle, a red circle above the middle one and a green circle above the one on the right.
 Jump towards the successive ledges
On the island, find the large boulders and walk onto the pressure plate. Switch to an elf now and walk through the first ring, which will start a race against time. Take well-aimed jumps towards the successive ledges, across the checkpoint gates. After you reach the top ledge, stop and jump. You will this way jump across the last checkpoint and grab the mithril brick, in mid-air.
Location: Troll Dwellings
Description: Start to the South-West of the marker for the mithril brick , at the bridge between the Troll Dwellings and the Eastern portion of the map. Here, you will find a boat (it is at the end of the trail of yellow studs) and after you jump onto it (the character swap key/button) you need to steer North-Eastwards. Remain close to the left side of the river. Your destination is the small harbor shown in the above screenshot.
 Bounce off the walls
Switch to the elf here. You need to take turns, use the bow to hit the "empty" interactive slots and take long jumps to grab on to the successive bars. Towards the end of the climbing, you will have to use another unique ability of the elves, which is bouncing off the brown walls. Keep performing all of these actions until the moment, in which you reach a ledge that is inaccessible in any other way. You can now smash the chest with the brick inside.
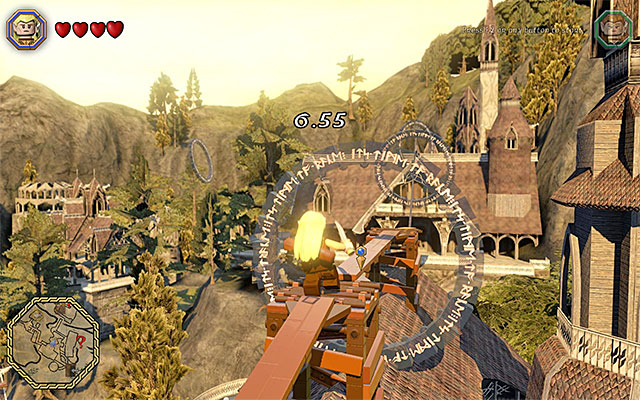 Make it over the ropes and the beams carefully
Location: Rivendell
Description: You need to start by making it over to the inaccessible ledge above. To do that, switch to an elf and start bouncing off the vertical walls. Unfortunately, you will not be allowed to collect the brick straight away, because you need to complete a quite difficult race, first. The time trial starts at the moment at which you cross the first ring. The track abounds in many moments where you need to be very precise (and lucky) and you are sure to need several attempts, before you finally learn it. You should be especially careful at the moments at which you need to walk over ropes and narrow ledges or take precise jumps onto the small platforms It is easy to make a mistake here and nearly all of the mistakes end in the necessity to start the race over.
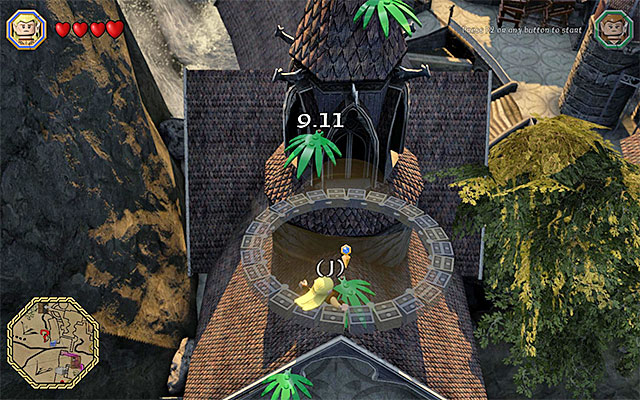 Jump over from flower to flower
Towards the end of the trail, you will probably have the most problems with the part of the track, where you need to bounce off green plants. Try to perform the bounces flawlessly, to reach the areas above. Also here you need to avoid any mistakes, because you may slip off a roof and fall into the waterfall, which may cost you lots of time, in the best case. Reaching the last ring before the time elapses, (it will be regenerating, gradually, at each checkpoint) will be rewarded with the mithril brick.
 This is where you use the flail
Location: Rivendell
Description: The mithril brick is on the balcony that is inaccessible, by default and reaching it requires you to explore the area more carefully. Start by searching out the interactive golden catch and rip it off with a character that uses flail (e.g. Dori). This will unlock access to the first manhole. Cross it and walk onto the pressure plate.
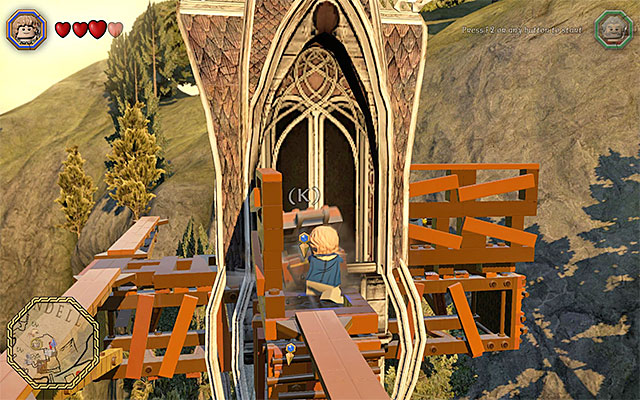 Collect the crank from the chest and approach the nearby mechanism
Switch to another character and take the other newly-unlocked manhole. After you reach the vicinity of the tower, start jumping over to the beams on the right. Thanks to this, you will reach the chest with the crank in it. Collect it and go towards the beams on the left. Also here, you need to take several well-aimed jumps. Reach the mechanism, click the crank into place and interact with it. You now only need to take the third manhole that has been unlocked. It will take you to the balcony with the collectible on it.
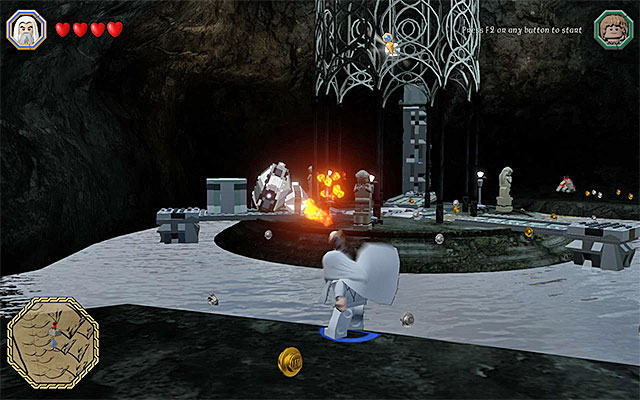 Use Saruman's staff to smash the mithril objects
Location: Rivendell
Description: You need to reach the cave behind the waterfall and the easiest way to do that is by following the trail of yellow studs. (of course, set your destination in the location, where the mithril brick is). Before you are able to collect the brick, you will have to solve another puzzle, which consists in pushing the three big blocks in the correct way. Start by switching to Saruman and smash the mithril obstacles at the central garden house. Then, switch to any character with warhammer (e.g. Dwalin) and give the first stone block a push. .
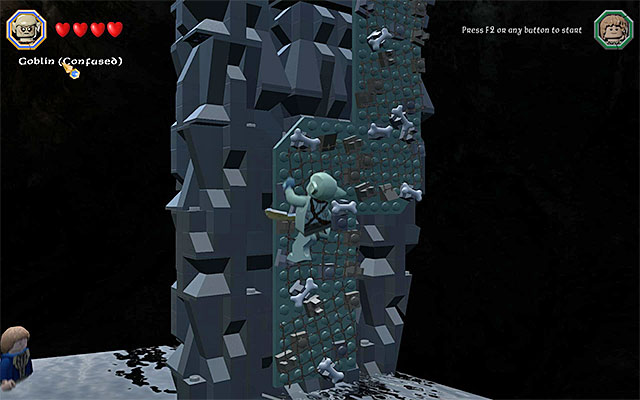 The wall that only the goblin can use
You now need to switch to the goblin and turn to the nearby tower, because that is where you can wall-climb. After you reach the very top of the tower, switch to the character with warhammer again. Push the stone block down and towards the next hole.
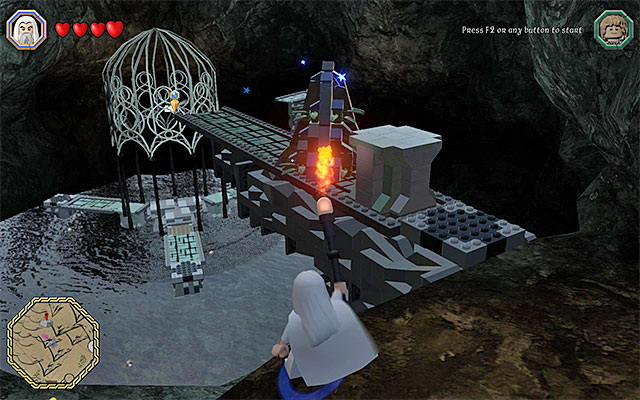 Smash the obstacle and push the last block
Finally, you need to take a side-path, which will take you to the upper part of the cave. Start here by using any wizard's staff, to smash the cluster of mithril bricks. For the last time, switch to the character with warhammer. Push the stone block down and over to the hole. Wait for new ledges to emerge from under the ground and take them to reach the mithril brick.

Location: Rivendell
Description: First of all, you need to reach the big platform above, where you also complete a side quest, connected with the elven blacksmith. Do not follow the suggestion of the yellow studs, because that way is incorrect. Start to the North-West of the marker for the mithril brick . Stand at the water, in the spot shown in the above screenshot. Switch to any of the elves and jump over to the first rope, hanging above the water. You need to jump towards the successive ropes now - first the horizontal, and then the slanting ones. If you have performed everything correctly, you will reach the upper platform.
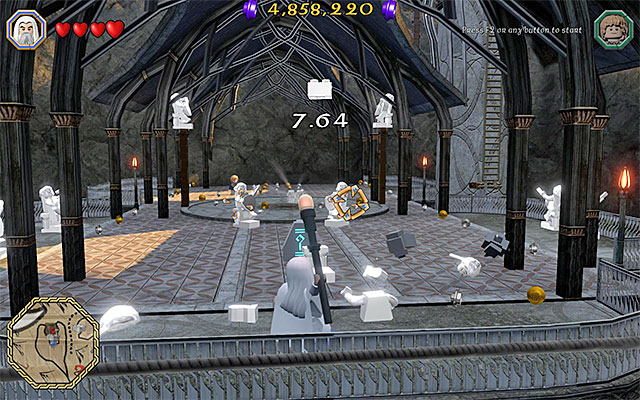 Target the successive statues
I recommend that you now spend some time to smash ALL of the interactive objects in this area, because this will make solving the puzzle much easier. The plan is that you smash ten mithril statues, which can be done only by Saruman. Right after you smash the first statue, the game starts counting down time. That is why I recommended that you smash all of the remaining elements of the surroundings, because this will spare you several seconds, while targeting the statues.
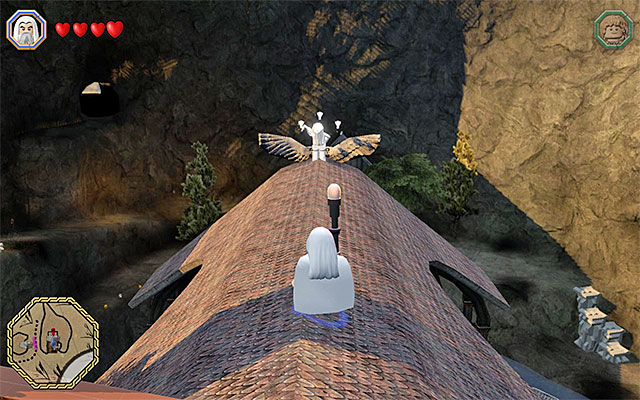
In total, you need to smash ten statues. Nine of them are on the main level. The last one is hidden on the rooftop of the building here (the above screenshot) and to reach it, you need to take the ladder on the side. After you have completed the puzzle, collect the mithril brick.
Location: Rivendell
Description: The mithril brick is in the cave that the gate, on the lowest level, at the water, leads to. You need to "reveal" three heads here. In the case of the two, out of the three, it is very easy, because you need to use the flail and the bow. As for the last one, you need to switch to a character with slingshot (e.g. Ori) and shoot the pebbles at the target. The solution has been presented in the above screenshot - above the target on the left, there needs to be a red circle and above the one on the right, a blue one. Finally, use a wizard's staff on the blue sphere. You can now smash the chest and collect the brick.
 The entrance to the cave is hidden behind a small waterfall
Location: Mountain Pass
Description: The mithril brick is in the cave behind the waterfall, which you pass on the Mountain Pass. After you enter the cave, jump over from platform to platform, carefully, and avoid the spikes at all costs (it is a good idea to play as an elf here). The obstacle course will take you to the place where the brick is.

Location: Mountain Pass
Description: You need to find a small gate inside the stone giant. You need to solve a puzzle here, which consists in pushing over the stone block correctly, as a character with warhammer (e.g. Dwalin). The correct path for the block has been shown in the above screenshot.
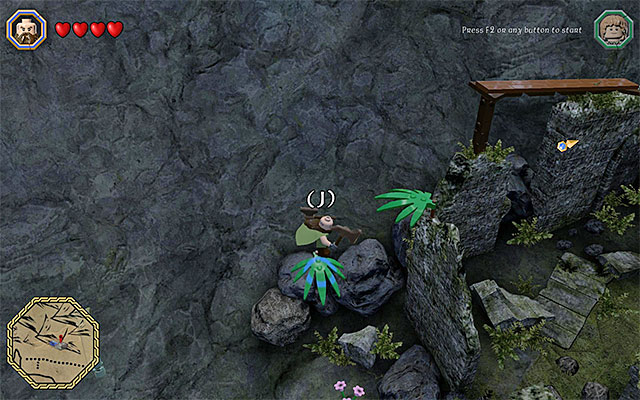 The first plant to the left of the ruins
Location: The Pass of Caradhras
Description: Reach small ruins in the mountains. I recommend that you switch to any elf and start bouncing off the green plants. This will allow you to reach to the upper level of the ruins and approach the mithril brick.
 Jump towards the successive catches
Location: The Pass of Caradhras
Description: Start on the ledge, where there is the brick, which is inaccessible for now. Switch to the character with flail (e.g. Dori) and reach out for the first interactive catch. You need to start swinging on the chain and let go at the right moment. In mid air-grab the next catch. Thanks to this, you will start another time trial, where the key to success is quick performance of a string of activities.
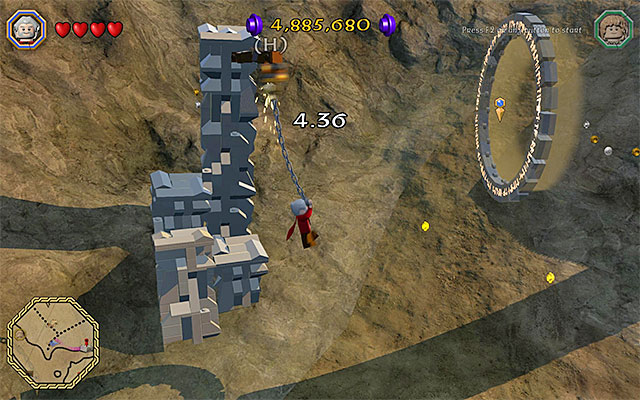 Turn in mid air and start jumping to the right
Jump towards the successive catches on the left side. After you fly through a smaller ring, you need to turn your character, in mid-air, and grab a catch on the right again. Continue taking the jumps. Towards the end, you will have to change directions again so, you need to be prepared for that and react quickly enough (any misstep will make you start over).
 The target
Location: Moria
Description: Stop near the pond that is surrounded by seven dwarven statues. First of all, locate a small target and shoot an arrow at it. Thanks to this, several platforms will emerge from the water (you will appreciate that, in a moment).
 It is best to smash the statues as an archer
You now need to start smashing the dwarven statues, best with the bow. There are two important limitations here. First of all, each statue needs to be hit several times. Secondly, after you destroy the first statue, a countdown will start so, you need to hurry. You can smash the statues in any order and from any position - I recommend that you stand at the water edge, or on the square floating platforms, which do not submerge after you stand on them. After you destroy all of the statues, within the allotted time, reach the floating platform with the brick on it.
 You need to time pressing the jump key well, to fly through the rings
Location: Moria
Description: The brick is in the cave behind the small gate. You will have to take another time trial here and it consists in completing the track in the mine cart. After you start the trial (you need to jump into the cart) focus entirely on pressing the jump key/button, at the appropriate moments. This is very important, because you will probably have to little time to start over, if you make a mistake. After several attempts and learning the entire track, you should be able to make it to the finish line.
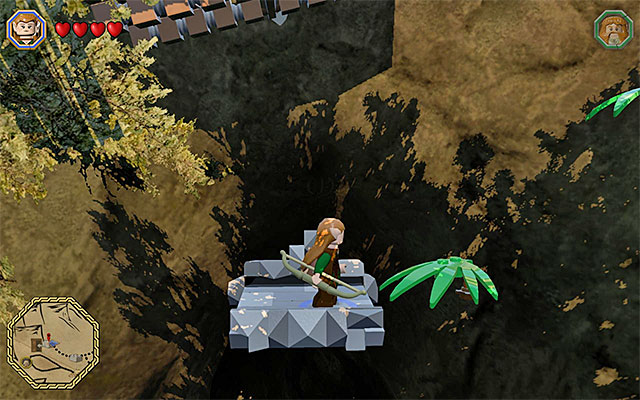 while climbing, time well the moments at which you run over the moving platforms
Location: Elven Forest
Description: reach the red blanket, switch to Bombur and lay down on the blanket. Switch to another character now, approach Bombur and feed him with three carrots. Start bouncing off Bombur's belly, as that character and reach the first green plant. Then, continue jumping. At the correct moment, you need to run over the platform that slides out of the wall and over a small balcony (wait until it is situated horizontally). Finally, grab on to the interactive edges and reach the ledge high above, on which there is the chest with the brick.
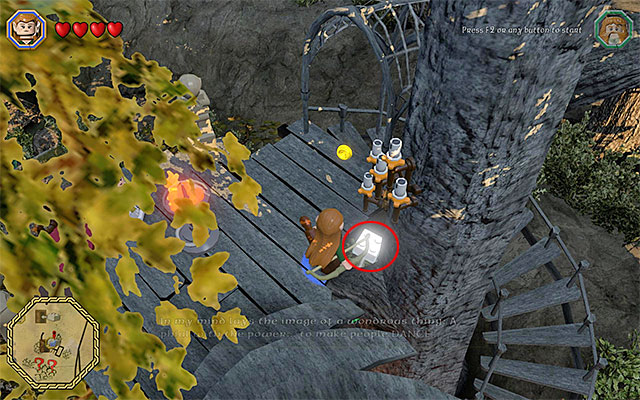
Location: Elven Forest
Description: After you reach the destination, climb over the stairs onto one of the wooden structures. The mithril brick is hidden under one of the larger ledges, in the spot shown in the above screenshot. You simply need to jump down off the ledge, in the correct spot, and grab the brick in mid-air.
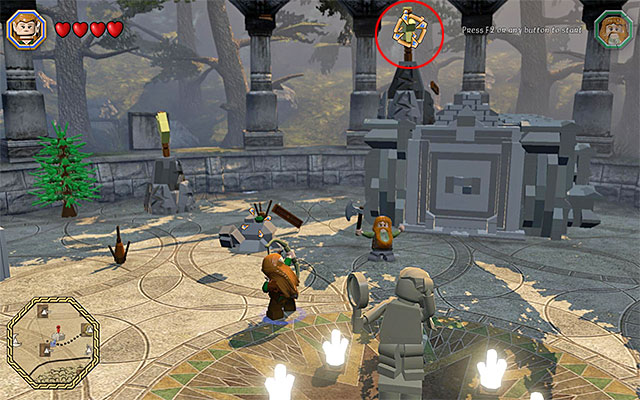 The arrow that is the best hidden
Location: Pine forest
Description: The mithril brick is in a separate area past a small gate. The assumption of the puzzle is that you turn the signs in this area, so that the arrows are pointing towards the central circle (hit the arrows with a melee weapon or use a ranged weapon). You may have some difficulties with four arrows - you need to use the rotary mechanism. flail (the golden catch), spade (the buried sign) and bow (the sign above the main "arena").
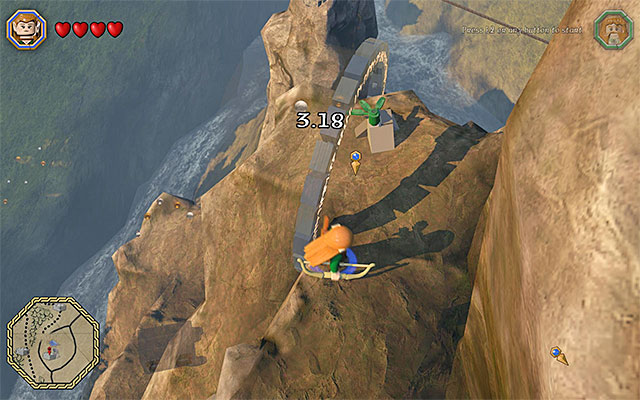 Carefully, climb down the Lonely Mountain
Location: Lonely Mountain
Description: Make it over to the very top of the Lonely Mountain, switch to an elf and jump (from the appropriate side!) to the first ring. Thanks to this, you will start a time trial, during which you need to reach successive checkpoints as quickly as possible (the time limit will increase at each one of the gates). At the beginning of the trial, you need to run down the slope of the Lonely Mountain.
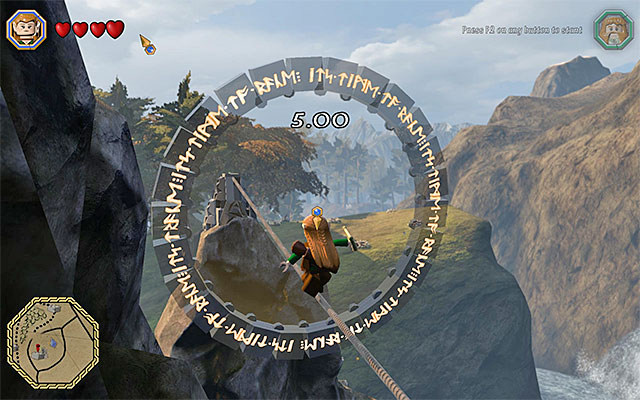 You need to walk over the successive tightropes
In the next part of the trial, you will have to walk over several tightropes. You should especially watch out at the ends of the ropes, because it is there that it is the easiest to fall down (almost always, this will mean the necessity to start the trial over). After you cross all the gates within the allotted time, you will receive the mithril brick.
Location: Lonely Mountain
Description: You should note that there are moles, emerging from under the ground, in the location where there is the inaccessible mithril brick. Start attacking them. After you have dealt with the first one, a countdown will start and you need to eliminate nine more, before the time is up. I recommend that you use a good, fast melee weapon and keep an eye out at all times )sometimes, the next mole appears in the hole, where you have just dealt with the previous one).
 The wounded owl
Location: Mirkwood Forest
Description: In the Mirkwood Forest, find a wounded owl. Switch to Radagast and use his ability to heal the bird.
Location: Mirkwood Forest
Description: The mithril brick is hanging high above the ground. Switch to any elf and start bouncing off the violet flowers, directly under the brick. After several jumps, you will be able to grab the brick.
Location: Lonely Mountain
Description: Near the Lonely Mountain, find a wounded mole and approach it. Switch to Radagast and use his ability to heal the mole.
Location: Thranduil's Kingdom
Description: Explore the Northern part of the Thranduil's Kingdom. To the North of the mithril brick's marker, there is a staircase to the balcony above. Stop after you have reached the spot shown in the above screenshot.
 You need to jump towards the successive birds and grab the catches with flail
You now need to switch to Dori and grab the first interactive catch, next to the owl. Start swinging, jump towards the next owl and press the key/button to use the flail again (you need to do that in mid-air!). Keep doing that with the following birds and grab the hovering mithril brick, at the end.
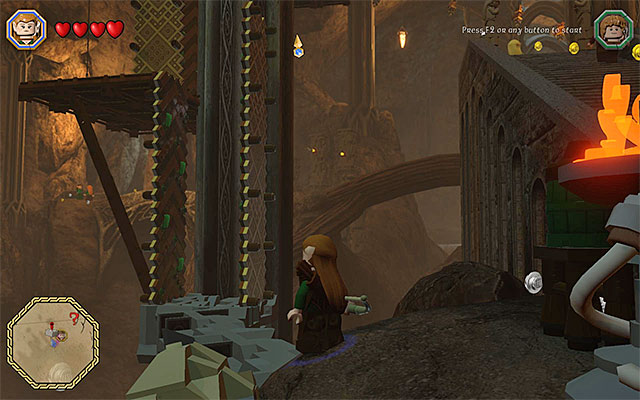 The spot, where you start climbing
Location: Thranduil's Kingdom
Description: Explore the are directly under the hovering brick, high above. There are brown walls here, which you can bounce off. However, the important piece of information is that you need to be playing as an elf, because only they are capable of that.
 Keep jumping and direct the character into the successive rings
Location: Mirkwood Forest
Description: The mithril brick is in a separate part of the forest, which a small gate leads to. After you walk into the new area, jump onto the mushrooms. Hold down the jump key/button here, in order to make the entire process automatic and allow the character to keep jumping. Reach the first ring to start the time trial. From now on, you will only have to direct your character towards the successive rings. At the same time, remember not to release the jump key. After you complete the entire trial, you will be rewarded with a brick.
 You need to smash two poles
Location: Mirkwood Forest
Description: The mithril brick is in a separate part of the forest, past the small gate. After you walk into the new area, locate the two orange catches, which you need to rip off. You can do that as one of the strong characters that you purchased, or by using one of the unique treasures with similar properties. An example of such a treasure would be the Stone-giant Gloves; the above screenshot, which you can obtain in the sixth main stage of the game. Regardless of your method, tap rhythmically the indicated key/button to destroy the two poles.
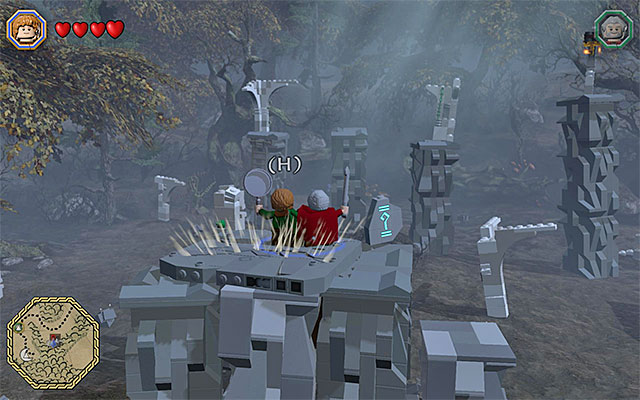 The spot where you need to Buddy-Up
After you have smashed the surroundings, switch to a character with flail (e.g. Dori) and start jumping towards the successive ledges above. Along your way, you need will also have to use the flail and walk over a narrow beam. Ultimately, you need to reach a pressure plate. You can now go left and smash the rocks. Walk onto the large cracked plate and Buddy-Up both of the available characters. You can now collect the brick.
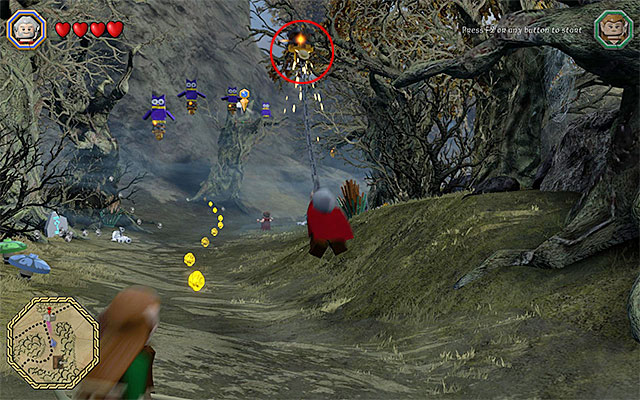
Location: Mirkwood Forest
Description: Explore the area to the South of the marker for the mithril brick . Switch to the character with flail (e.g. to Dori) and aim at the interactive catch shown in the above screenshot. Start swinging, jump towards the owl on the left and press the appropriate key/button again, while in mid-air, to grab the catch attached to the bird. Jump towards the successive owls and finally grab on to the ledge. Then, jump towards the brick.
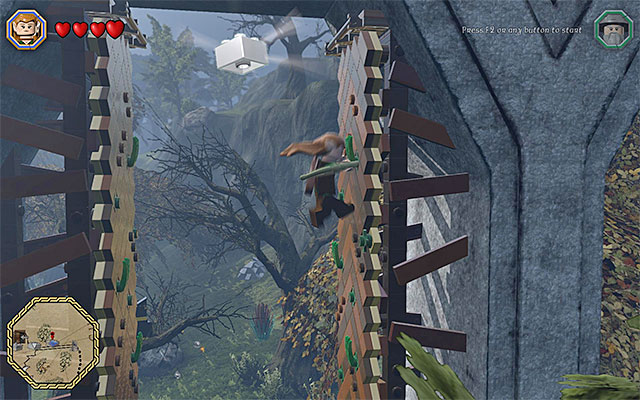 Bounce off the walls
Location: Dol Guldur
Description: Take a look around, under the bridge to the keep and locate the brown walls. Switch to any elf and start bouncing off the walls, thanks to which you will reach the place with the mithril brick.
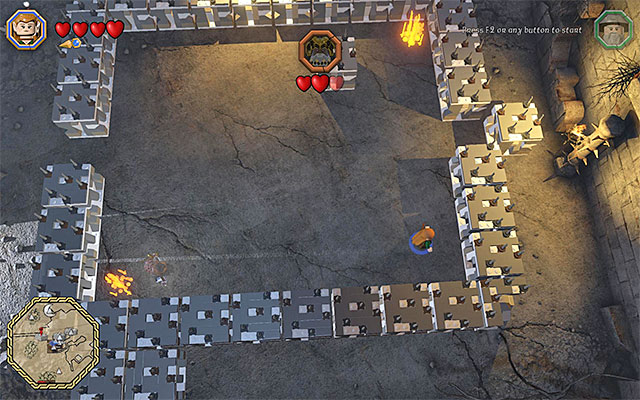 The spirit needs to reach one bonfire after another
Location: Dol Guldur
Description: The mithril brick is in a separate location of the keep, past a small gate. Here, you will encounter a spirit that is staying inside a big rectangular "arena". You should, first of all, avoid coming into contact with the ghost, because you will then lose all of your health hearts immediately. It is not that easy to understand the puzzle straight away - the ghost is always moving to the left and to the right, in the direction opposite to the direction, in which your character goes. For example, if you go right, the ghost will start going left. You need to use this relationship to your advantage and direct the ghost to three different fires in the arena. What makes things easier is the fact that your character can run, while next to the wall. After several attempts, you should be able to complete this puzzle and lead the ghost to all the required spots.
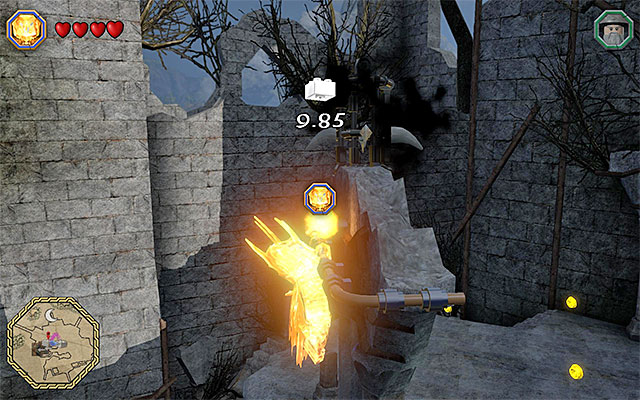
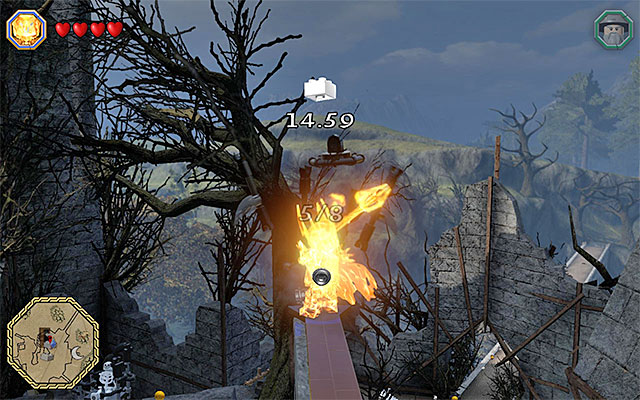 Two of the objects are more difficult to reach
Location: Dol Guldur
Description: The mithril brick is inaccessible, by default, which requires you to solve another puzzle. Start by switching to Sauron, because you are going to need his Morgul Blade. The plan is that you destroy eight elements in this area, which are under the possession of dark powers (the black smoke). You need to hurry here, because smashing the first object starts a countdown. You should especially watch out while attempting to reach the objects on the narrow ledges, because it is very easy to fall down, while grabbing the edges and walking over the wooden beams. If you beat the puzzle within the allotted time limit, you will receive the brick.
Location: Dol Guldur
Description: To reach the mithril brick above the keep, you need to switch to the goblin and climb onto the interactive wall. This should not be too difficult.
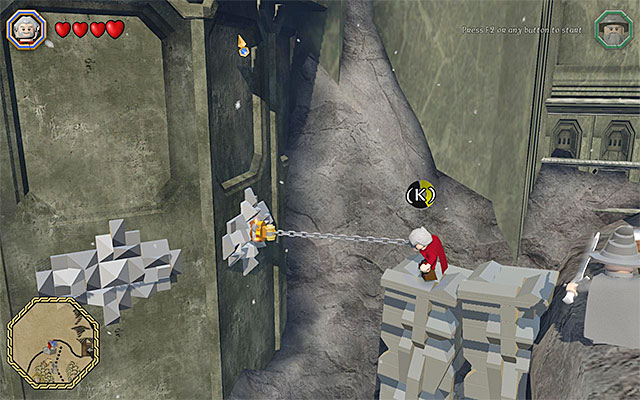 This is where you use the flail
Location: Erebor
Description: The mithril brick jest is close to the huge statue. Start at the foot of the statue, switch to a character with flail (e.g. Dori) and grab the interactive catch. Cause the platforms to slide out and use them immediately. Make it over to the first interactive manhole (walk through as hobbit or a dwarf).
 The second catch
After you reach the upper part of the statue, stand on the edge, jump and grab another interactive catch, in mid-flight. You now only need to swing up and grab the hovering item.
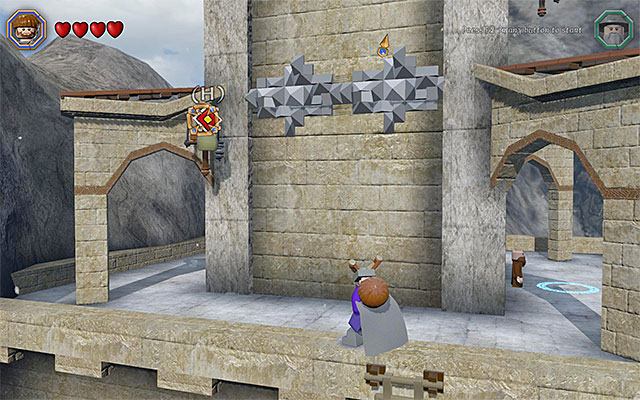 Shoot pebbles at the targets
Location: Erebor
Description: Start at the foot of the tower, at which there is the marker for the mithril brick . First of all, remove the several snowmen in your way, thanks to which you will unlock the ladder. Take the ladder and switch to any character with slingshot (e.g. to Ori). You need to walk around the tower and shoot at interactive targets, in two different spots. Thanks to this, small platforms will slide out of the tower.
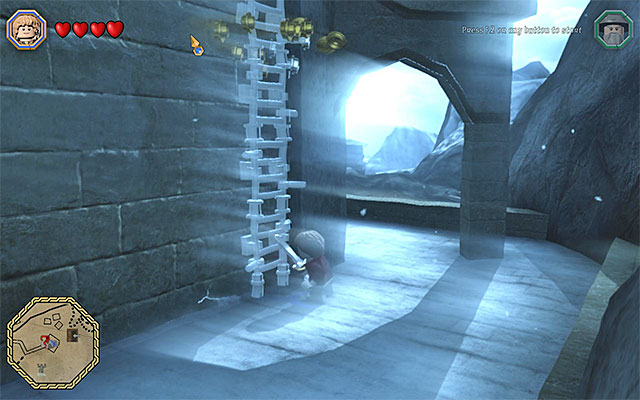 You need to use The Ring
Now, locate the hopping bricks that are inaccessible by default. Switch to Bilbo, put on The Ring and hold down the building key/button. wait for a ladder to be built and climb up, to the very top.
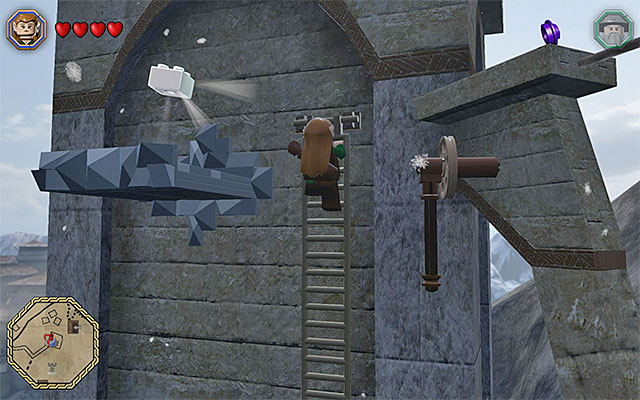 The place where you find the mithril brick
You now need to take well-aimed jumps. Jump over onto small planks and the platforms that slid out. You need to get around the tower in this way. Finally, use the slingshot again. After the last group of platforms slides out, reach the ladder. Climb up and jump over to the small ledge with the mithril brick on it.
 The place where you complete the building minigame
Location: Erebor
Description: The mithril brick is on an islet and to reach it, you first need to build a harbor. Stand in the appropriate spot and spend some of the supplies on the construction - 20 Wood, 10 Rope), 50 Stone and 10 Fish. Complete the building minigame and jump into the boat (the character swap key). You now only need to reach the islet and collect the brick.
Location: Dale
Description: Take a look around, near the marker and find the ladder. After you reach the higher level, locate the big cracked plate shown in the above screenshot. You need to Buddy-Up here and cut through the plate. Walk into the small room and switch to the character with long weapon (e.g. Bifur). Stand in the highlighted spot, switch to another playable character and climb onto the ally. Jump towards the room above and smash the objects here, thanks to which you will obtain the brick.
Location: Dale
Description: The mithril brick is in the basement of one of the buildings in Dale. After you reach the basement, you need to switch to the character that can start fire (e.g. to Sam). You need to start five fires here (the interactive plates) for which, you will be rewarded with a brick.
Location: Dale
Description: Take a look around, near the building, on whose roof there is a mithril brick. You need to locate the target shown in the above screenshot. First of all, use the bow to get rid of all the plants that cover the target. Then, use the slingshot to hit the target. After the bridge slides apart, reach it, over the ladder, and make it over to the rooftop. Smash the objects on the rooftop, switch to Radagast and heal the wounded owl.
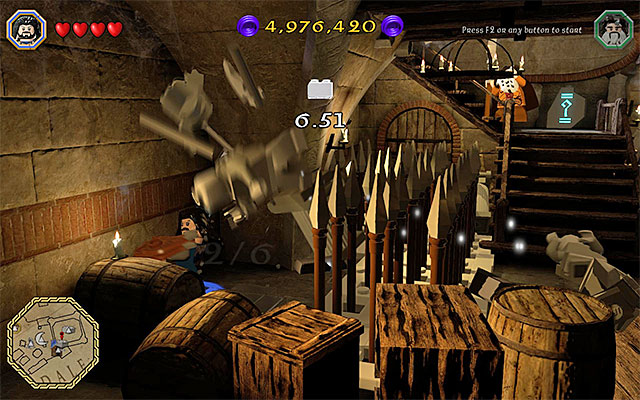 Quickly, run up to the statues, one after another, and stand in the safe spots
Location: Dale
Description: The mithril brick is in the basement of one of the buildings in Dale. After you access the basement, you need to smash the statues here. However, this is obstructed in two ways. First of all, after you smash the first statue, a countdown starts and secondly you need to avoid the spikes. Run up to the individual statues and ALWAYS, stand in the spots that you are safe in. IT does not necessarily mean that you lose, after you get stabbed with a spike, but it is always very difficult to return to the spot, where you used to be, within the allotted time limit.
 The ladder
Location: Dale
Description: The mithril brick is at the very top of one of the Eastern buildings in Dale. Start by locating a ladder on the side, thanks to which you will reach a lower fragment of the rooftop. After you get there, switch to Saruman and use his staff to smash the mithril statue. You can now switch to any hobbit or wizard and walk through the first interactive manhole.
 Also the second manhole is hidden behind a statue
After you reach the balcony, walk over to the left, as far as you can. Just like earlier, you need to switch to Saruman and smash one of the mithril statues that is obstructing the access to the manhole. Walk through that manhole and, after you get inside the upper tower, jump to reach the mithril brick.
 The mountain path towards the collectible
Location: Dale
Description: The place where the mithril brick has been hidden, needs to be approached from the North. Take the mountain path alongside the water, to the South. You need to reach the spot, where you will have to build a bridge. Start by selecting the supplies for the construction - 55 Wood, 25 Rope and 10 Stone. Then, complete the building minigame and walk onto the bridge to pick up the collectible.
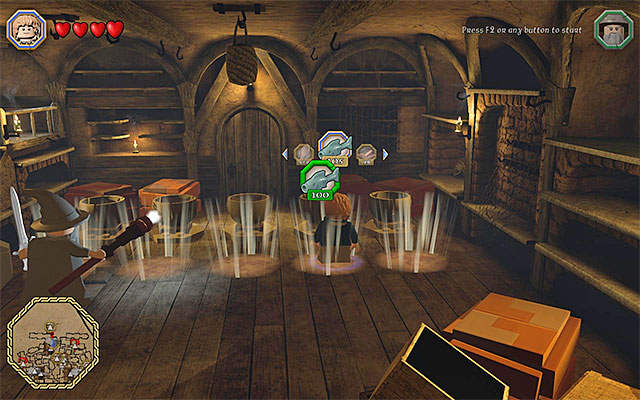
Location: Esgaroth
Description: Explore the Northern part of the Lake-town and locate the door to the basement of one of the buildings. You need to solve a puzzle here, which consists in making an offering in the correct bowl. The bowl that you should choose is the second one on the right (the above screenshot) and you need to put 100 Fish in it. Note - if you make a mistake, while choosing the bowl, you will irreversibly lose your supplies! The fish that you need to make the offering can be found in abundance in the city so, you do not have to look for them too far away.
Location: Esgaroth
Description: The mithril brick is in the Eastern part of the Lake-town. Explore the are a bit to the East of the marker for the mithril brick and locate the brown walls shown in the above screenshot. Switch to any elf here and start bouncing off the walls.
 The tower with the mithril brick
After you reach the balconies above. jump into the nearest clock tower and activate the pressure plate inside. You now need to walk over the rooftops and also, as is always the case, you need to watch out while walking over the tightropes and jumping towards the neighboring platforms. Your destination is the second clock tower. First, jump over to the ropes neighboring the tower and only then, jump into the tower.
 You need to reach the brick before the spikes slide out again
Location: Esgaroth
Description: Explore the Eastern side of the Lake-town and find the door into the basement of one of the buildings. Touch to the pressure plate, on the left side of the stairs, and flash towards the newly unlocked path on the right. You need to be really quick to reach the mithril brick, because the spikes slide out, from under the floor, in several seconds.
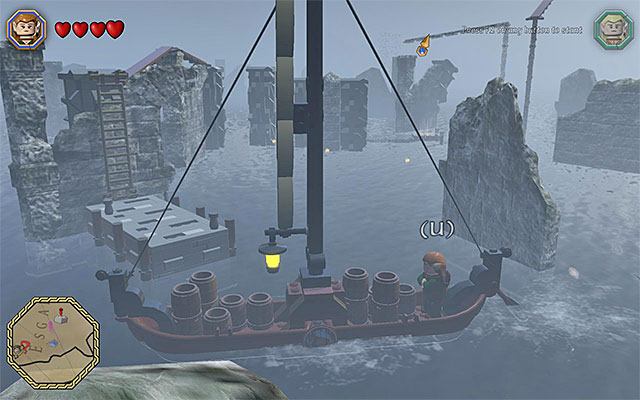 The spot where you need to moor the boat
Location: Esgaroth
Description: First of all, you need to get a boat and it can be found, e.g. in the Southern part of the Lake-town. Steer the boat to the South and moor it after you reach the interactive pier, located near the marker for the mithril brick. Climb up the ladder and walk over the narrow beams and small ledges. Stop where it is possible to start fishing. It is compulsory to complete the fishing minigame (e.g. as Bilbo) because, apart from standard loot, you will also catch a key.
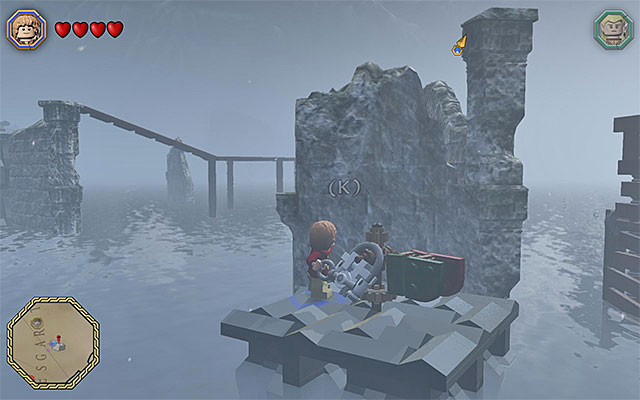 The rotary mechanism becomes available only after you use the key
Collect the key and resume your walk, jump over to the floating platforms carefully. After you reach the rotary mechanism, use the key to access it. Only then, interact with it. You can now complete the linear path towards the mithril brick.
 The spot where you need to moor
Location: Esgaroth
Description: First of all, you need to get a boat and it can be found, e.g. in the Southern part of the Lake-town. Steer the boat to the South and moor it after you reach a small pier. Switch to Saruman here and use his staff to smash the mithril chest. Collect the brick that falls off.
 The wall that the goblin can climb
Location: Bree
Description: In Bree, find the interactive wall, over which you can climb as goblin. This will allow you to reach the rope, which will take you to the first manhole, through which to pass as a hobbit or a dwarf.
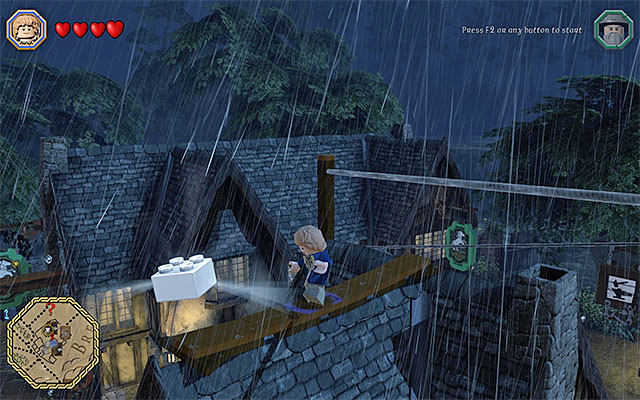 The brick that you are after
After you use the manhole, pull the nearby ever, which will gain you access to the ladder on the right. Climb up the ladder, take the several planks and another rope. All of these activities will allow you to find the mithril brick around.
Location: Elven Forest
Description: Find the object with the wreaths of black smoke around. Switch to Sauron here and use his Morgul Blade. This is not it, yet because you still need to switch to Radagast and use his unique ability to heal the wounded owl.
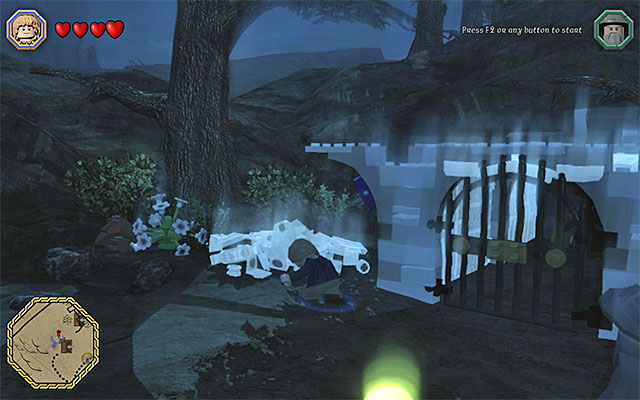 Put on The Ring and build a mechanism
Location: Elven Forest
Description: Note the hopping bricks to the left of the locked gate. You need to switch to Bilbo here and put on The Ring. Then, hold down the building key/button. After you have built the interactive mechanism, take off the ring and open the gate. Finally, you need to switch to Sauron and smash the objects past the gate, thanks to which you will obtain the mithril brick.
In LEGO The Hobbit there are, as many as, 98 various playable characters. Some of them become available automatically, as you progress in the storyline. As for the remaining playable characters, you need to unlock them on your own and I recommend against skipping this step. What speaks for that are two important factors. Firstly, unlocking all of the 98 characters is one of the requirements that need to be met, if you want to complete the game in 100%. Secondly, many of the additional characters that you unlock, have unique abilities (e.g. extraordinary strength), which are helpful, or even necessary to solve puzzles, obtain collectibles and reach the seemingly inaccessible places.
Note - do not worry if, even after you have unlocked all 98 playable characters, in the character selection window there are still some empty slots. These are saved up for the characters available in the DLC (e.g. Smaug) and the custom made characters. These characters DO NOT count as members of the main party and they are not required for the completion of the game in 100%. A complete list of the characters that count for that, has been provided further in this chapter.
 An example character icon in the game world
The mechanics of adding additional characters to the roster of the playable characters, is not too complicated, although its assumptions are worth knowing. As you progress in the game, on the world map, you should notice the icons of characters to appear. These icons stand for the characters that you can add to your "standing list", i.e. to the list of the characters that you can switch to, at any moment throughout the game (with the exception of the storyline missions).
Note - some of the character icons appear on the world map, only after you have met certain additional requirements, e.g. completed certain side quests.
Note- Just like in the case of the optional quests, some of the characters become available only during the day (the icon of the Sun on the world map), or at night (the icon of the Moon on the world map. The current time of the day can be changed by interacting with the bonfire, in one of the encampments.
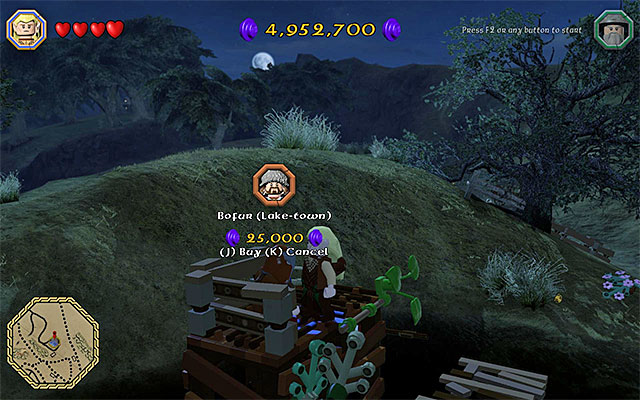 Before the individual character joins the roster of the playable characters, you first need to hire them
After you reach the staying place of the character that you choose, you additionally need to pay for their services. This mean the necessity of spending, at least, a dozen-or-so thousand of coins, where the most valuable characters can be, as expensive as, 100 thousand studs. Personally, I recommend that you start recruiting them after you have completed the storyline, because you should have on you, at least, several millions of spare studs.
CHARACTER NAME
THE WAY TO OBTAIN THE CHARACTER
Thorin (Young)
This character unlocks automatically, as you progress in the game's storyline.
This character unlocks automatically, as you progress in the game's storyline.
Thrain
This character unlocks automatically, as you progress in the game's storyline.
Balin (Young)
This character unlocks automatically, as you progress in the game's storyline.
Thror
This character unlocks automatically, as you progress in the game's storyline.
Armoured Dwarf Guard -
This character unlocks automatically, as you progress in the game's storyline.
Frodo
This character unlocks automatically, as you progress in the game's storyline.
Sam
This character unlocks automatically, as you progress in the game's storyline.
Bilbo (Hobbiton)
This character unlocks automatically, as you progress in the game's storyline.
Bilbo
This character unlocks automatically, as you progress in the game's storyline.
Gandalf
This character unlocks automatically, as you progress in the game's storyline.
Balin
This character unlocks automatically, as you progress in the game's storyline.
Bifur
This character unlocks automatically, as you progress in the game's storyline.
Bofur
This character unlocks automatically, as you progress in the game's storyline.
Bombur
This character unlocks automatically, as you progress in the game's storyline.
Dori
This character unlocks automatically, as you progress in the game's storyline.
Dwalin
This character unlocks automatically, as you progress in the game's storyline.
Fili
This character unlocks automatically, as you progress in the game's storyline.
Kili
This character unlocks automatically, as you progress in the game's storyline.
Gloin
This character unlocks automatically, as you progress in the game's storyline.
Nori
This character unlocks automatically, as you progress in the game's storyline.
Oin
This character unlocks automatically, as you progress in the game's storyline.
Ori
This character unlocks automatically, as you progress in the game's storyline.
Thorin
This character unlocks automatically, as you progress in the game's storyline.
Dori (Young)
This character unlocks automatically, as you progress in the game's storyline.
Dwalin (Young)
This character unlocks automatically, as you progress in the game's storyline.
Radagast
This character unlocks automatically, as you progress in the game's storyline.
Goblin (Confused)
This character unlocks automatically, as you progress in the game's storyline.
Legolas Greenleaf
This character unlocks automatically, as you progress in the game's storyline.
Tauriel
This character unlocks automatically, as you progress in the game's storyline.
Bombur (Barrel)
This character unlocks automatically, as you progress in the game's storyline.
Tauriel (Lake-town)
This character unlocks automatically, as you progress in the game's storyline.
Balin (Lake-town)
This character unlocks automatically, as you progress in the game's storyline.
Bilbo (Lake-town)
This character unlocks automatically, as you progress in the game's storyline.
Dwalin (Lake-town)
This character unlocks automatically, as you progress in the game's storyline.
Dori (Lake-town)
This character unlocks automatically, as you progress in the game's storyline.
Gloin (Lake-town)
This character unlocks automatically, as you progress in the game's storyline.
Nori (Lake-town)
This character unlocks automatically, as you progress in the game's storyline.
Ori (Lake-town)
This character unlocks automatically, as you progress in the game's storyline.
Thorin (Lake-town)
This character unlocks automatically, as you progress in the game's storyline.
Bifur (Lake-town)
This character unlocks automatically, as you progress in the game's storyline.
Bombur (Lake-town)
This character unlocks automatically, as you progress in the game's storyline.
Bard
This character unlocks automatically, as you progress in the game's storyline.
Bilbo (Old)
You need to hire this character, during the free exploration of the Middle Earth. He costs 15000 studs.
Tom Bombadil
You need to hire this character, during the free exploration of the Middle Earth. He costs 30000 studs, but he becomes available only after you have planted the plant and won the race.
Bombur (Young)
You need to hire this character, during the free exploration of the Middle Earth. He costs 20000 studs.
Thror (Armoured)
You need to hire this character, during the free exploration of the Middle Earth. He costs 45000 studs. If you have any problems reaching Thror, see the chapter concerned with finding the mithril brick number 13 (the Middle Earth - Mithril LEGO bricks chapter).
Gundabad Orc
You need to hire this character, during the free exploration of the Middle Earth. He costs 50000 studs and you first need to defeat him in combat.
Barrow-Wight
You need to hire this character, during the free exploration of the Middle Earth. He costs 100000 studs.
Saruman
You need to hire this character, during the free exploration of the Middle Earth. He costs 50000 studs. It is VERY IMPORTANT that you have Saruman among your active characters, because it is impossible, or more difficult, to reach some of the collectibles without him.
Elrond (Gown)
You need to hire this character, during the free exploration of the Middle Earth. He costs 30000 studs.
Lindir
You need to hire this character, during the free exploration of the Middle Earth. He costs 30000 studs.
Yazneg
You need to hire this character, during the free exploration of the Middle Earth. He costs 45000 studs and you first need to defeat him in combat.
Goblin (Scribe)
You need to hire this character, during the free exploration of the Middle Earth. He costs 30000 studs and you additionally need to spend 25 Gold.
Grinnah
You need to hire this character, during the free exploration of the Middle Earth. He costs 40000 studs.
Gollum
You need to hire this character, during the free exploration of the Middle Earth. He costs 50000 studs.
Barliman Butterbur
You need to hire this character, during the free exploration of the Middle Earth. He costs 15000 studs.
Beorn
You need to hire this character, during the free exploration of the Middle Earth. He costs 45000 studs.
Mirkwood Elf (Archer)
You need to hire this character, during the free exploration of the Middle Earth. He costs 30000 studs.
Mirkwood Elf (Guard)
You need to hire this character, during the free exploration of the Middle Earth. He costs 30000 studs.
Bolg
You need to hire this character, during the free exploration of the Middle Earth. He costs 45000 studs and you first need to defeat him in combat.
Mirkwood Elf
You need to hire this character, during the free exploration of the Middle Earth. He costs 35000 studs.
Elros
You need to hire this character, during the free exploration of the Middle Earth. He costs 25000 studs.
Thranduil
You need to hire this character, during the free exploration of the Middle Earth. He costs 35000 studs.
Narzug
You need to hire this character, during the free exploration of the Middle Earth. He costs 45000 studs and you first need to defeat him in combat.
Elf (Sentry)
You need to hire this character, during the free exploration of the Middle Earth. He costs 30000 studs.
Elf (Worker)
You need to hire this character, during the free exploration of the Middle Earth. He costs 35000 studs.
Master of Lake-town
You need to hire this character, during the free exploration of the Middle Earth. He costs 15000 studs.
Alfrid
You need to hire this character, during the free exploration of the Middle Earth. He costs 20000 studs.
Braga
You need to hire this character, during the free exploration of the Middle Earth. He costs 25000 studs.
Lake-town Man (Guard)
You need to hire this character, during the free exploration of the Middle Earth. He costs 15000 studs.
Lake-town Man (Archer)
You need to hire this character, during the free exploration of the Middle Earth. He costs 25000 studs and you first need to reach the tower in the high location, where he is staying.
Percy
You need to hire this character, during the free exploration of the Middle Earth. He costs 10000 studs.
Tilda
You need to hire this character, during the free exploration of the Middle Earth. He costs 15000 studs.
Sigrid
You need to hire this character, during the free exploration of the Middle Earth. He costs 10000 studs.
Bain
You need to hire this character, during the free exploration of the Middle Earth. He costs 15000 studs.
Fimbul
You need to hire this character, during the free exploration of the Middle Earth. He costs 30000 studs.
Witch-King
You need to hire this character, during the free exploration of the Middle Earth. He costs 80000 studs.
Azog (Claw)
You need to hire this character, during the free exploration of the Middle Earth. He costs 90000 studs and before he becomes available, you need to deal with a group of goblins.
Necromancer
You need to hire this character, during the free exploration of the Middle Earth. He costs 66666 studs.
Sauron
You need to hire this character, during the free exploration of the Middle Earth. He costs 70000 studs. It is VERY IMPORTANT that you have Sauron among your active characters, because it is impossible, or more difficult, to reach some of the collectibles without him.
Dale Soldier
You need to hire this character, during the free exploration of the Middle Earth. He costs 20000 studs.
Elrond (Armoured)
You need to hire this character, during the free exploration of the Middle Earth. He costs 40000 studs.
Galadriel
You need to hire this character, during the free exploration of the Middle Earth. He costs 40000 studs.
Roise Cotton
You need to hire this character, during the free exploration of the Middle Earth. He costs 35000 studs.
Fili (Lake-town)
You need to hire this character, during the free exploration of the Middle Earth. He costs 25000 studs and you need to reach him in the boat.
Kili (Lake-town)
You need to hire this character, during the free exploration of the Middle Earth. He costs 25000 studs and you can reach him using the flail.
Oin (Lake-town)
You need to hire this character, during the free exploration of the Middle Earth. He costs 25000 studs and you need to build a bridge to get to him.
Bofur (Lake-town)
You need to hire this character, during the free exploration of the Middle Earth. He costs 25000 studs and you need to use the archer to get to him.
Bree Peasant
You need to hire this character, during the free exploration of the Middle Earth. He costs 35000 studs and you, additionally, need to spend 500 Carrot.
Jimli the Blacksmith
You need to hire this character, during the free exploration of the Middle Earth. He costs 50000 studs and he becomes available only after you have forged all 32 mithril items in Bree.
Orc Berserker
You need to hire this character, during the free exploration of the Middle Earth. He costs 15000 studs and you first need to defeat him in combat.
The Great Goblin
You need to hire this character, during the free exploration of the Middle Earth. He costs 15000 studs.
Goblin Brute
You need to hire this character, during the free exploration of the Middle Earth. He costs 15000 studs.
Bert (Troll)
You need to hire this character, during the free exploration of the Middle Earth. He costs 15000 studs and you first need to defeat him in combat.
Tom (Troll)
You need to hire this character, during the free exploration of the Middle Earth. He costs 15000 studs.
William (Troll)
You need to hire this character, during the free exploration of the Middle Earth. He costs 15000 studs and you first need to defeat him in combat.
Mrs Troll
You need to hire this character, during the free exploration of the Middle Earth. He costs 15000 studs.
Troll Bouncer
You need to hire this character, during the free exploration of the Middle Earth. He costs 15000 studs and you first need to defeat him in combat.
On the above map, all of the locations of the virtual Middle Earth have been marked. You can visit them, and explore more thoroughly, between completing the main stages of the game:
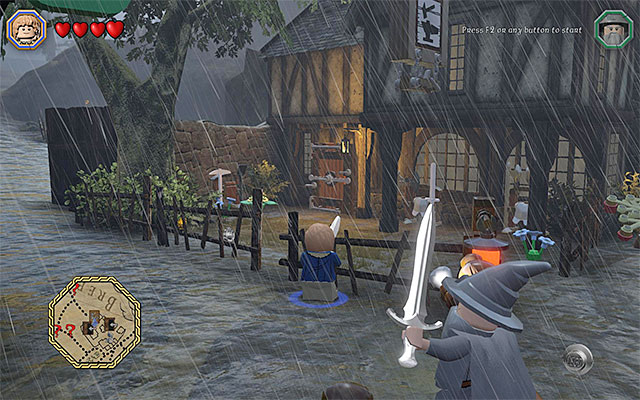 The blacksmith's house
The dwarven blacksmith lives in Bree, but his smithy is unavailable, at first. The only way to solve this problem is to complete the Smithy in Peril side quest (no. 19, white question mark), tasked to you by his wife. From the moment, at which you escort the smith to the village, you will be allowed to enter his house and use his forge.
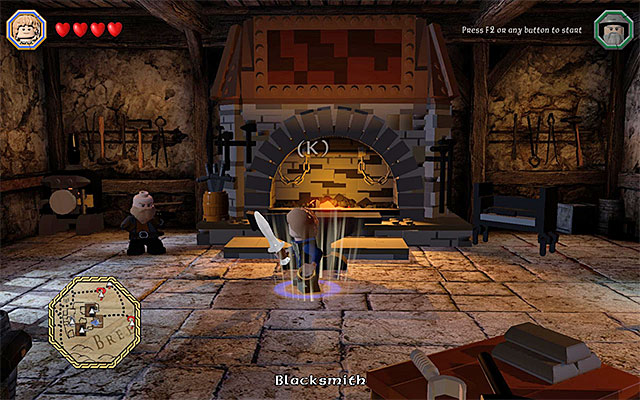 Interacting with the forge allows you to craft new mithril items
As it has been already mentioned, in the smith's house, there is the forge, which you can use, free of charge. Thanks to the forge, you will be able to craft mithril items but, for that to happen, you need to have appropriate schematics and supplies on you.
Note - the entire process of forging of mithril items has been described, in detail, in the chapter entitled red Question Marks, in Middle Earth - Side quests.
 The entrance to the chamber with minikits
The chamber with minikits is inside one of the buildings in Rivendell. You can visit it from the very beginning of the game. Personally, I recommend that you do that only after you have obtained all of the 160 minikits, i.e. after you have assembled all 16 objects.
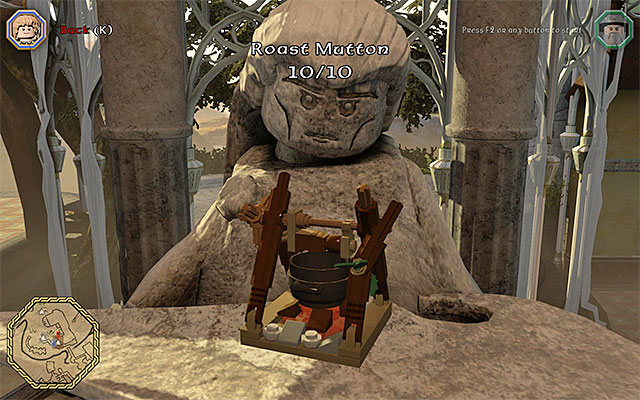 An example exhibit
After you enter the chamber, you can stand in the highlighted spot and start viewing your minikits. If you have collected all of the ten collectibles in an individual main stage, you will be able to view a complete object.
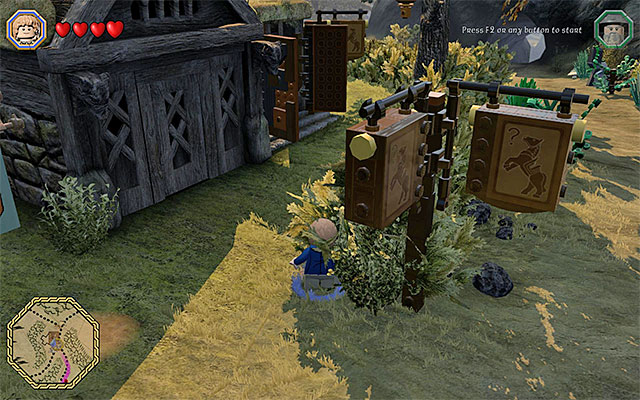 The stable entrance
The Creature Customizer is right next to the Beorn's Homestead, to the South-West of the Mirkwood Forest. You can use it for the first time after you have completed the ninth main mission of the game (Queer Lodgings).
 An example customized creature
Enter the stables and stand on one of the interactive plates. In this location, you can freely modify the looks of all of the mounts in the game. What is meant here are horses, foals, wargs and trolls. Customizing a given creature has no effect on the abilities of the creature.
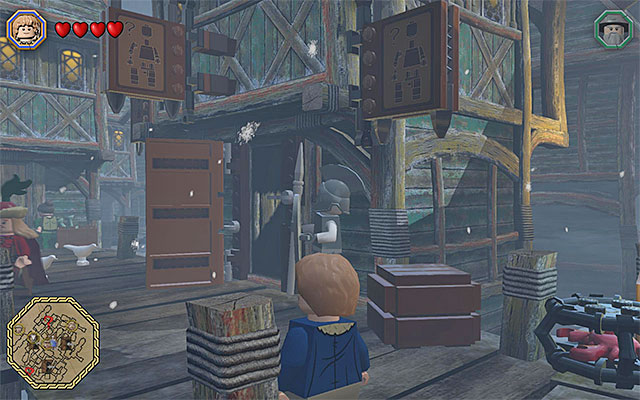 The building entrance
The Character Customizer is in the Lake-town, in Esgaroth. You visit the town for the first time, during the twelfth mission of the game.
 An example customized character
After you walk into the building, stand on one of the interactive plates. In here, you can modify, freely, the looks of the playable characters. The customization of a character has no practical use, although it is sometimes necessary to complete a side quest. Also, it is worth noting that some of the special elements of the looks (e.g. a hat that disguises the character as an orc) need to be bought. Fortunately, they are not too expensive.
In LEGO The Hobbit, there is a bonus level and completing it is required to complete the game in 100%. An additional incentive to play this stage is that you can make a quick cash here.
Note - The bonus level becomes available ONLY after you have complete d the entire storyline, i.e. all sixteen main stages of the game (the last one is the fight with Smaug). Only then, will the marker for this mission appear on the map.
 The entrance to the Thranduil's Kingdom
There are two different paths that you can Take, if you want to reach the starting point for the bonus level. Which path you choose does not matter, because what matters is the fact of reaching the flag that allows you to start this optional mission. The first variant is the path across the Thranduil's Kingdom. In this case, you need to fast travel to the eagle statue shown in the above screenshot, Southwards of the Kingdom's entrance. After you get there, go Northwards and cross the bridge to Thranduil's Kingdom.
Along your path across the Thranduil's Kingdom, you need to go in the North-Eastern direction and follow the quite linear path (it is best to set the marker for the bonus mission as your destination and follow the trail of yellow studs). Along your path, it is imperative that you Take the stairs on the right. This way, you will get to the exit from the Thranduil's Kingdom and you will immediately get to the mountain path, thanks to which you will get to your destination, without any problems.
The second variant assumes that you climb the short tower shown in the above screenshot, within close range of the marker for the bonus level (to the South-East of it). Approach the tower and find the snowmen, on top of the other, at the foot of the tower, which you need to smash. This will provide you with access to the ladder to the higher level of the structure.
 The Ring
Climb up the ladder and switch to any character with slingshot (e.g. to Ori). You need to walk around the tower and hit the interactive targets, in two spots. Thanks to this, interactive platforms will slide out of the tower. Locate the hopping bricks now, which are unavailable by default. Switch to Bilbo and put on the Ring. Hold down the building key/button. Wait for a ladder to be built here and climb up.
 The tightrope that you need to walk over
You now need to Take very precise jumps. Jump onto the small planks and onto the platforms that appeared earlier. You need to get around the tower in this way. Use the slingshot again. After the last group of platforms slides out, reach the ladder. Climb up the ladder and jump to the right, to reach the tightrope extended here. The only thing that you need to do now is walk over the rope and Take a jump, thanks to which you will reach your destination.
Regardless of the variant that you chose, you need to reach the flag shown in the above screenshot, interact with it and confirm that you want to start the bonus level.
 Stomp on the small objects and hammer-fist the bigger ones
Completing the bonus level is far less problematic than reaching it. In the mission, you Take control of a stone giant and your task is to demolish the area. As you complete this mission, you can, of course, tread on the smaller objects but, apart from that, it is also a good idea to rely on the other two types of attack (a standard one and a stronger one, which you land by holding down one of the keys/buttons for several seconds).
 Focus mainly on destroying cities and villages
In order to complete the bonus level, you need to collect one million studs (coins) within five minutes. This should not be too problematic to you and, with a bit of luck, you should be able to collect this amount within two minutes. I recommend that you reach the successive cities and villages, because this is where it is easiest to get the amount. The bonus level is completed at the moment at which you collect one million studs and they will be added to your overall result.
 The game displays the current, percentage, progress, among others, on the loading screen and after you stop the game, during the exploration of the main map.
Completing of LEGO The Hobbit in 100% is rewarded with an achievement (if you are playing on PC or Microsoft's console) or with a trophy (in the case of Sony's console). You can check on your current progress during the loading screen or by stopping the game, during free exploration of the Middle Earth.
The below list presents the things that are Taken into account, for the completion of the game in 100%:
1) Completion of all 16 main missions in the Story Mode
2) Obtaining the status of the Master Burglar in each of the story mode missions
each mission has a separate requirement, when it comes to the amount of points that need to be obtained (e.g. 100000 studs), which you need to face up to. The information on the requirements, for each of the stages, can be found in the chapter entitled Main Stages - Collectibles.
Note - After you obtain the Master Burglar status, it remains active until the end of the mission, even if you lose your studs, along the way (e.g. as a result of frequent falls into chasms) and you fall back below the required amount of coins.
Note - if you are experiencing any problems collecting the required amount of studs, in a given mission, you can use the "legal facilitations", i.e. the red LEGO bricks that multiply the number of the coins that you collect.
3) Finding all of the 160 Minikits
In each of the storyline missions, there are 10 minikits to collect and the information on how to obtain them can be found in the chapter Main Stages - Collectibles.
4) Finding all of the 32 Schematics
In each one of the 16 main stages of the game, there is one schematic to be obtained. As for the remaining 16, they have been hidden all around the game world. The information on how to obtain them can be found in chapters Main Stages - Collectibles and Middle Earth - Schematics.
5) Crafting of all the 32 Mithril Items, basing on the schematics that you obtain.
You craft mithril items at the blacksmith's in Bree, but this option becomes available only after you have completed the side mission connected with the smith (white question mark). In order to craft a new mithril item, apart from the schematic, you also need the mithril bricks and supplies.
6) Finding all of the Treasure Items
In each one of the missions, there are 4 unique treasures to obtain and the information on how to obtain them can be found in the chapter Main Stages - Collectibles.
7) Completing all of the 105 optional quests, marked with white question marks.
These usually require you to solve a simple puzzle, complete a minigame or defeat a group of monsters. All of the missions of this kind have been described in the chapter entitled Middle Earth - Side Quests.
8) Completing all of the 32 optional quests marked with red question marks
All of the "Red Quests" are identical in their premises - you need to supply the questgiver with a mithril item that you craft at the forge.
9) Buying all of the 32 Red LEGO Bricks
It becomes possible to buy the red LEGO bricks, thanks to completing the side missions marked with red question marks. After you complete such a quest, the red brick appears next to the questgiver.
10) Obtaining all of the 250 Mithril LEGO Bricks
80 mithril bricks can be obtained as a result of completing storyline missions. In each one of these missions, there are, at most, five bricks to obtain - one for completing the mission, one for obtaining the Master Burglar status, one for finding 10 minikits, one for finding the schematic and one for finding all 4 Treasure Items.
105 mithril bricks can be obtained for completing the optional missions marked with white question marks.
65 mithril bricks can be found during the free exploration of the game world. The information on their whereabouts have been provided in the chapter entitled Middle Earth - Mithril LEGO Bricks.
11) Completing of the bonus level
The Bonus Level is unlocked after you have completed the entire Story Mode of the game. The walkthrough for the level has been included in the page entitled Bonus Level.
12) Unlocking all of the 98 playable characters
Some of the characters are unlocked automatically, whereas you need to obtain the rest of them on your own. A full list of these has been included in the table on the page entitled Middle Earth - Playable characters.
Below, you can find a full list of the 39 Steam Achievements, available for the PC version of the LEGO The Hobbit game. They coincide with ones available for the console by Microsoft and with trophies for the Sony version. Next to each one of the achievements, there is a piece of information on how to obtain it, long with a commentary.
Way to unlock: You need to obtain 150000 studs, awarded for the completion of building minigames.
Commentary: This achievement is very easy to obtain, and you should be able to receive it without too much effort. This is so, because you complete many building minigames, throughout the game. The maximum reward for such a minigame is 20000 studs but, even if you are not doing that well, you should be able to obtain, at least, 10000 studs. As a result, you should be able to obtain this achievement after a dozen-or-so minigames of this type.
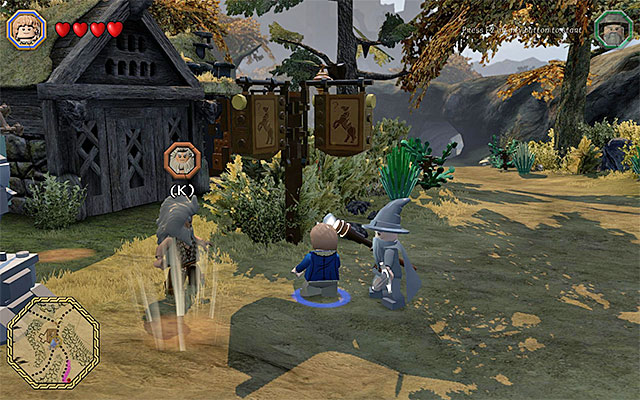 Beorn's staying place
Way to unlock: You need to buy Beorn and turn him into bear.
Commentary: Beorn is staying at Beorn's Homestead, which you visit for the first time, during the ninth stage of the game's storyline. Later into the game, you need to return to the homestead and buy Beorn for 45000 studs. Switch to that character and hold down the special action key/button to have him turn into bear.
Way to unlock: you need to complete a mining minigame perfectly, for 50 times.
Commentary: In order to flawlessly complete a mining minigame, you need to press the appropriate key/button, at the first attempt, at the moment at which the arrow points to the area of the semicircle, marked by the game. This will allow you to complete the minigame without the necessity to use the pickaxe anymore.
Way to unlock: You need to unlock all of the playable characters.
Commentary: A complete list of 98 available playable characters has been presented on the page entitled Middle Earth - Playable characters.
Way to unlock: You need to obtain all of the mithril bricks.
Commentary: The circumstances in which you obtain the mithril bricks (there are, as many as 250 of them, in total)have been presented on the page entitled How to complete the game in 100%?.
Way to unlock: You need to complete the game in 100 %.
Commentary: The list of the things that need to be done has been presented on the previous page of this guide.
Way to unlock: You need to compete the sixth stage of the storyline .
Commentary: -
 The Creature Customizer
Way to unlock: You need to create your own character.
Commentary: It is possible to create your own character in a special Creature Customizer building, in Esgaroth (Lake-Town). To learn more about that, see the page entitled Middle Earth - Important Locations.
Way to unlock: You need to complete the ninth stage of the game's storyline.
Commentary: -
Way to unlock: You need to find all of the minikits.
Commentary: The whereabouts of all of the minikits have been presented in the chapter entitled Main Stages - Collectibles.
Way to unlock: You need to complete the fourth stage of the game's storyline.
Commentary: -
Way to unlock: You need to perform 50 Buddy-Up attacks.
Commentary: The Buddy-Up attacks can be performed after you "combine "two of the playable characters. Since the mechanism is required to defeat the more powerful enemies, you should have already learned this.
Way to unlock: You need to complete the first stage of the game's storyline.
Commentary: -
Way to unlock: You need to complete the eighth stage of the game's storyline.
Commentary: -
Way to unlock: You need to obtain 10000000000 studs (coins).
Commentary: Try to unlock the red LEGO brick, as early into the game as possible, thanks to which you will be collecting 10x more suds. Apart from that, it is a good idea to automate this process by returning to the places, where there appear the violet and blue studs, on a regular basis.
Way to unlock: You need to complete all of the side quests.
Commentary: See the chapter entitled Middle Earth - Side quests - this is where you can find the walkthroughs for all the "white quests" and description of the premises of the "red missions".
Way to unlock: You need to forge all of the mithril items perfectly.
Commentary: First of all, you need to make sure that you have obtained all of the 32 schematics, whose whereabouts have been provided on pages Main Stages - Collectibles and Middle Earth - Schematics. apart from that, you need to unlock the smithy in Bree, as well as to have the required number of mithril bricks, and supplies, on you. When it comes to the flawlessness of the steps that you Take, you simply need to press the indicated keys/buttons at the ideal moments.
Way to unlock: You need to complete the thirteenth stage of the game's storyline..
Commentary: -
Way to unlock: You need to complete the tenth stage of the game's storyline.
Commentary: -
Way to unlock: You need to complete the fifteenth stage of the game's storyline.
Commentary: -
Way to unlock: You need to obtain the Master Burglar status in each one of the 16 stages of the game's storyline.
Commentary: The score requirements and hints, concerning the obtaining of the Master Burglar status, in the individual stages, have been presented in the chapter entitled Main Stages - Collectibles.
Way to unlock: You need to complete the twelfth stage of the game's storyline.
Commentary: -
Way to unlock: You need to find all of the schematics.
Commentary: The whereabouts of the schematics have been presented in chapters Main Stages - Collectibles and Middle Earth - Schematics.
Way to unlock: In the Buddy-Up attacks, you need to us each dwarf from Thorin's party.
Commentary: The dwarves meant here are Balin, Bifur, Bofur, Bombur, Dori, Dwalin, Fili, Gloin, Kili, Nori, Oin, Ori and Thorin. try to choose each one, at least once, for any of the Buddy-Up attacks.
Way to unlock: You need to complete the third stage of the game's storyline.
Commentary: -
Way to unlock: You need crown Thorin with the Mithril Mushroom Crown.
Commentary: The Mithril Mushroom Crown is one of the items that you need to craft at the forge, basing on the schematic that you find earlier. After you forge the crown, switch to Thorin and select the item from the inventory. Note - you need to switch to the "regular" Thorin. The achievement will not be complete if you select Thorin Young or Thorin Lake-town!
Way to unlock: You need to find all of the treasure items.
Commentary: The whereabouts of the Treasure Items have been presented in chapter Main Stages - Collectibles.
Way to unlock: You need to blind 50 enemies, using Gandalf's intimidating spell.
Commentary: You launch the intimidating spell by holding down the appropriate key/button. Do that whenever there are enemies around (you, of course, need to be playing as Gandalf).
Way to unlock: You need to put on the Dazzle Wig, the Mithril Rhythm Stick and the Mithril Dance Boots.
Commentary: The Dazzle Wig is one of the treasures of the tenth main stage of the game. The remaining two (Mithril Rhythm Stick, Mithril Dance Boots) need to be crafted at the forge, basing on the schematics that you find. After you have obtained all three, open the inventory and put on all of these.
Way to unlock: You need to complete the fourteenth stage of the game's storyline.
Commentary: -
Way to unlock: You need to complete the fifth stage of the game's storyline.
Commentary: -
Way to unlock: You need to complete the .
Commentary: The additional level of the game becomes available after you have completed the game's main storyline. The description of how to unlock it and the walkthrough have been provided on the page entitled Bonus Level.
Way to unlock: You need to complete the eleventh stage of the game's storyline.
Commentary: -
Way to unlock: You need to complete the second stage of the game's storyline
Commentary: -
Way to unlock: you need to craft all of the mithril items
Commentary: First of all, you should make sure that you have obtained all of the 32 schematics, whose whereabouts have been presented on pages Main Stages - Collectibles and Middle Earth - Schematics. Apart from that, you need to unlock your access to the forge in Bree, as well as to have the required number of mithril bricks, and supplies, on you.
Way to unlock: You need to play any of the Story Mode stages in co-op.
Commentary: Make sure that the second player joins in the game, still before the main stage starts, and not during it.
Way to unlock: You need to complete the sixteenth stage of the game's storyline
Commentary: -
Way to unlock: You need to complete the seventh stage of the game's storyline.
Commentary: -
Way to unlock: You need to collect 99 pieces of any Loot.
Commentary: This is a very simple achievement, which you should be able to obtain without any special intervention, on your part. This is so, because you obtain loot very quickly and without any pains and, towards the end of the game, you will even have as many as 1000 pieces, instead of the required 99.
LEGO The Hobbit, in the PC version, is not a game of steep system requirements, although it is worth noting that they are discernibly higher than those, in the case of LEGO The Lord of the Rings. If you want to enjoy high-res textures, or some of the more advanced graphical effects, you need to have a much better graphics processor, than the one specified in the minimum requirements. At the same time, it is worth adding that there are many bugs and glitches in LEGO The Hobbit which may make enjoying the game much more difficult. In extreme situations, what may happen, is damaging the information of the progress, which will have you start the entire campaign over. It is, therefore, recommended, that you install the most recent patch, still before you start the game. LEGO The Hobbit for PC does not require a stiff connection to the Internet, nor does it have any multiplayer modes. Just like in the case of the other games from Traveller's Tales there is a split screen co-op available in the game. However, it only works locally. Therefore, you need to play, with the other player, at one computer or at one console, and you cannot communicate with the other players over the Internet.
Singleplayer: Yes
Offline co-op (split screen/hot seat): Yes
Co-op over the Internet: No
Multiplayer: No
This guide has been drawn on the version for the PC of the following specifications:
On the computer of the above specs, the game ran smoothly, even after switching to the high resolution mode and with additional graphical effects switched on.
Yes, it is possible to play LEGO The Hobbit on laptop computers, although switching to lower graphics settings may prove necessary.


 Lord of the Rings Online: Traits Game Guide & Walkthrough
 LittleBigPlanet 2 Game Guide & Walkthrough
 LittleBigPlanet Game Guide & WalkthroughLegend of Grimrock II Game Guide & Walkthrough
 Lost Planet: Extreme Condition Game Guide & Walkthrough