Welcome to the unofficial guide to "Kane & Lynch: Dead Men" PC video game. This guide consists of a very detailed walkthrough of all sixteen missions of the singleplayer campaign. Sadly, "Kane & Lynch: Dead Men" is a game of a very linear structure. This means you will have to follow exact instructions for the most of the time. Your only freedom of choice will concern your allies, because you will be allowed to give them three types of orders (follow, attack and defend). These actions obviously have been pointed out in my game guide. You should also consider reading tutorial windows. They will pop up on your screen from time to time, especially while playing chapters one and two. As for the game itself, I wouldn't recommend choosing lower difficulty settings, because it'll be far too easy for you to finish most of the available missions. You won't be allowed to create autosaves, however checkpoints are quite frequent, so you don't need to worry about having to repeat larger sections of each level.
Have fun playing the game!
Stranger
Your main concern here will be to escape from a hazardous area. The main character (Kane) was being transported by bus along with other inmates. The police transport was attacked by members of The7 organization. You will have to follow your new allies and listen to their orders in order to survive.
New objective: Follow Lynch
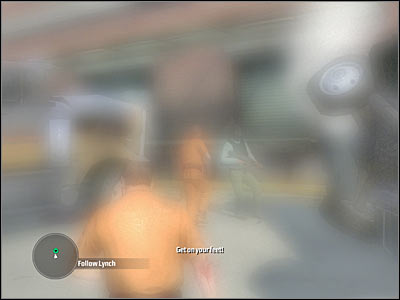
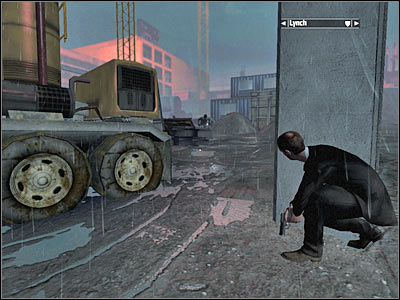
You'll start the game near a destroyed bus. Don't worry if everything around you seems fuzzy, because your main character has suffered some injuries and it'll take him a while to get back to full health. You can't run here, however it's not a big problem. Just make sure that you're following your new buddy Lynch. He's wearing a similar orange costume.
New objective: Flee Into Alley
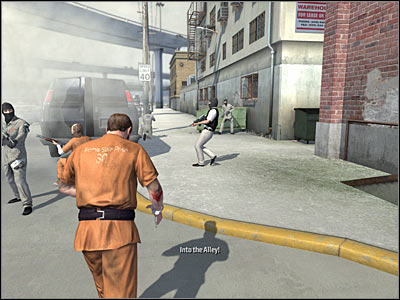
You will have to go around a large truck. You'll also come across a destroyed vehicle. Make sure that you're not stopping and you should be fine. Now you will have to flee towards a nearby alley. It's going to be located to your right (screen). You should see everything more clearly from now on, so it's going to be much easier to get there.
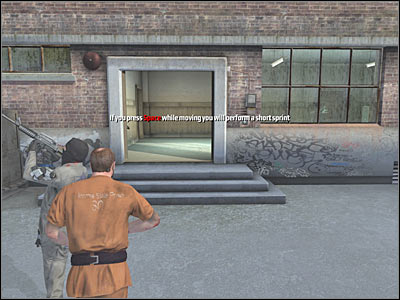
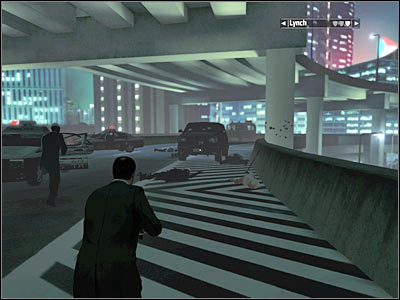
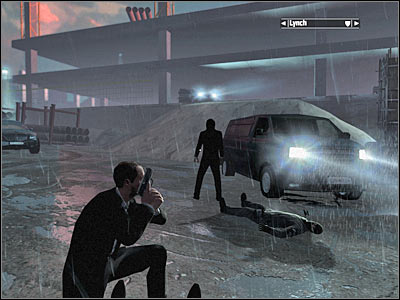
Make sure that you've entered this new area. As a result, you will be rewarded with a short cut-scene and you'll regain full strength. Start moving forward. You will come across a body of a dead cop. He was using a pistol, so make sure to pick it up (screen) by pressing the E key. Keep heading straight.
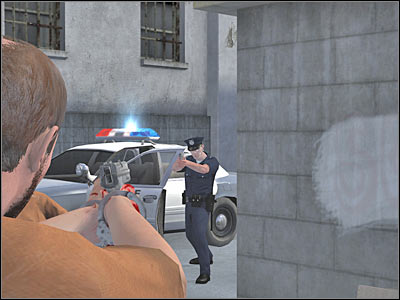
Be careful. A squad car will pull up to your right. This means you will have to deal with your first enemy. Kill the cop with your pistol. It would be a good idea to practice zooming the view on him. You can do this by pressing the right mouse button. I'd also recommend reading all tutorial windows. They will appear on your screen from time to time.
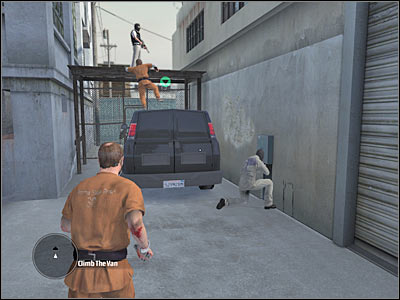
New objective: Climb The Van
Keep moving forward. You won't encounter any additional enemy units here. I would recommend following Lynch, so you won't get lost. Eventually you will come across a black van (screen). Approach the vehicle and press the E key in order to climb on top of it. Head on to the other side.
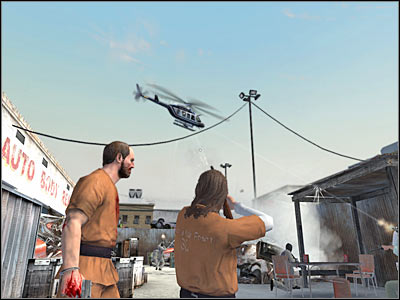
New objective: Run Into Junkyard
Keep following your new allies. You shouldn't encounter any new enemies for the time being. Instead, you will probably that an enemy helicopter has appeared in the area. Your allies will automatically attack it. You won't have to. Instead, try hiding somewhere in order to avoid receiving any injuries.
New objective: Enter Garage
You will have an opportunity to practice throwing back grenades here. They'll be landing near the junkyard. It's not necessary, but it won't cost you anything. You will have to wait patiently for one of your allies to open a door leading to a nearby garage. Head on to your left and enter the garage.
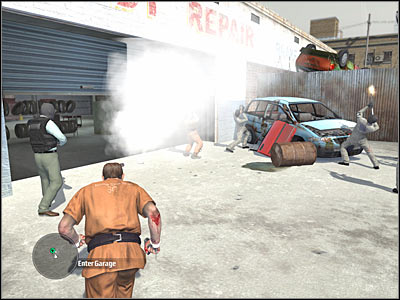
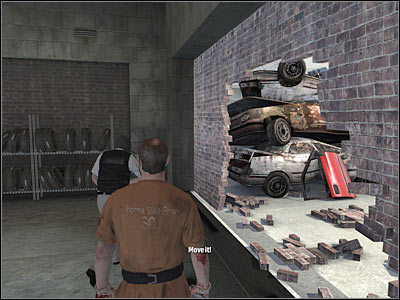
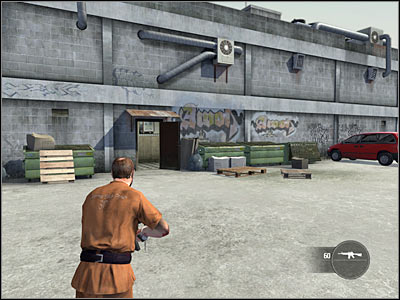
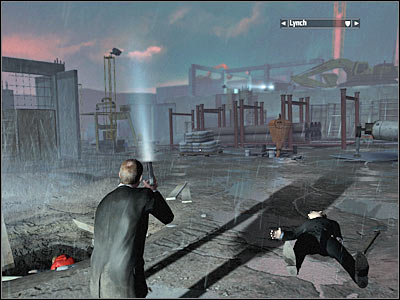
Head on to your left. You'll probably notice that there are a lot of propane canisters here. Make sure that you're not standing next to one of these objects, because an explosion would probably kill you. Eliminate a cop and wait for a squad car to destroy a nearby wall (screen). Obviously you will have to start shooting at your new enemies. Don't expose yourself too much to enemy fire.
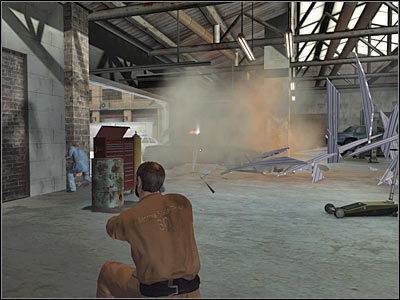
New objective: Escape Through Wall
Police officers will keep appearing to your left. Make sure that you're not standing too close to any of the propane tanks. Once you've received new orders, follow your teammates towards a destroyed section of the wall.
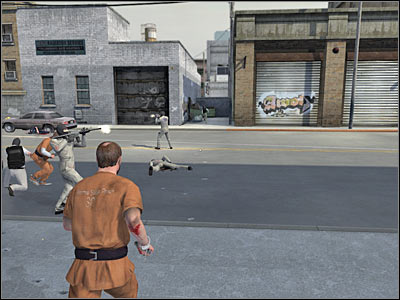
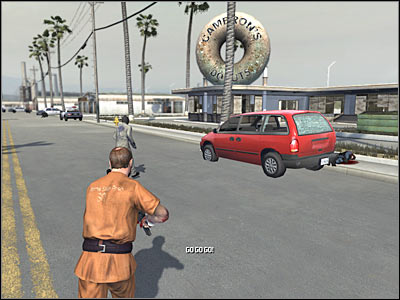
New objective: Cross The Street
Keep running forward, however you will have to turn left in just a few seconds. I'd strongly recommend avoiding any unnecessary gunfights, especially since your new colleagues are shooting at enemy units. You will have to cross one of the main streets of this district (screen). It would be a good idea to press a SPACE key here, so Kane will start moving even faster.
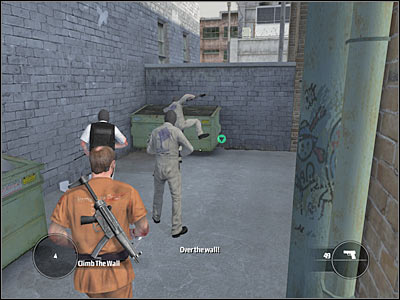
New objective: Climb The Wall
It's very important to pick up a SMG rifle left by one of your dead colleagues, because the pistol isn't powerful enough to take down your enemies. You will probably encounter a large brick wall. Thankfully, the solution to this problem is very simple. You must climb on top of the green container. After that, jump over the wall.
New objective: Get Into The Warehouse
Just as before, you must follow your allies, because they'll know where to go. You shouldn't have any difficulties tailing them. The warehouse can be found in front of the previously used brick wall. Obviously you will have to approach the main entrance to this building (screen).
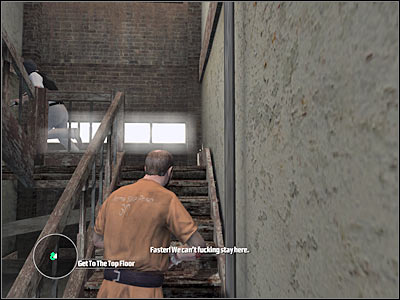
New objective: Get To The Top Floor
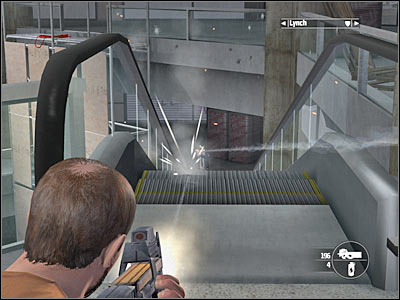
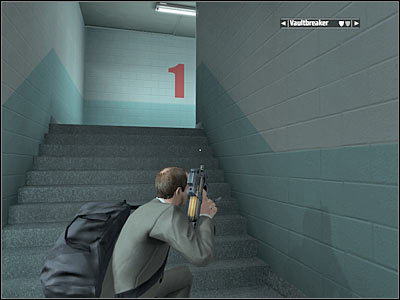
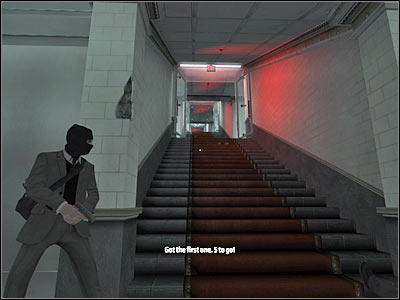
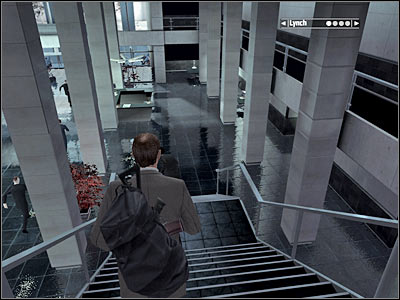
Once you're inside the building, you will have to turn left. This will allow you to approach a large staircase. Use the stairs to get to the top floor of the warehouse building. Once you're there, you may consider watching an interesting explosion, because one of your allies will use a grenade against your foes. If you don't want to waste any of your precious time here, proceed to a nearby room right away.
New objective: Get Outside The Building
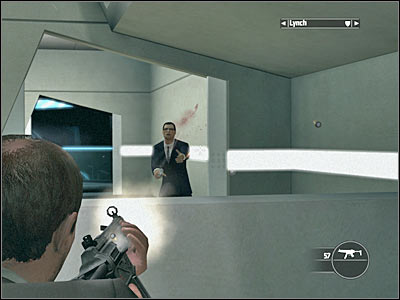
Now you will have to head on to the left room. You'll find yourself inside the main area of this warehouse. Start off by firing at some of the nearby cops. I assume you have a SMG rifle at your disposal, so you shouldn't waste too many bullets to kill them. It's not a necessary thing to do, however it'll make your life a lot easier.
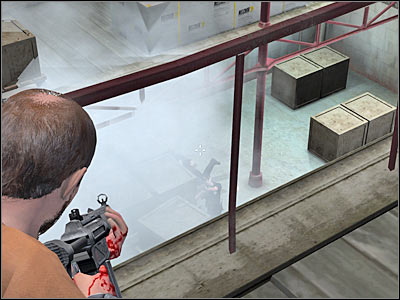
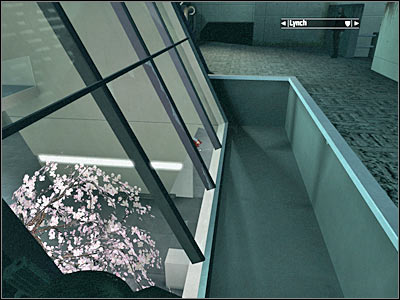
When you're ready, hide your gun and proceed to your left. There's a small balcony here and you will have to use it to reach a new area of the warehouse. Turn right and get down to the lower floor. You may consider killing other enemy units along the way.
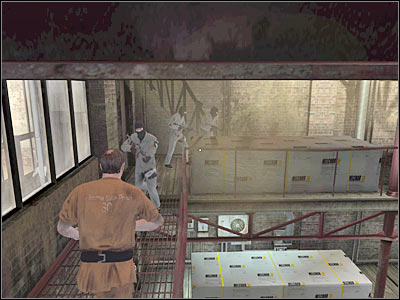
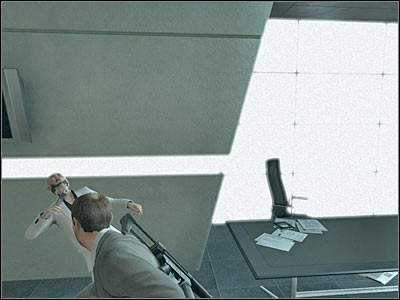
Now you will have to climb on top of some of the nearby crates. This will allow you to get to the second balcony. Make a few steps forward and turn right. After that, start moving forward. Climb on some other crates and approach a large window.

New objective: Hide In The Diner
Leave the warehouse by going through the window. You'll probably lose a lot of health points here, so you should remain here in order to regain full strength. Once this is done, proceed to the ground level.
You may finally go to a new area of the map. As you've probably suspected, it's going to be a diner. You shouldn't encounter any additional enemy units for the time being. Enter the diner through the back door and head on to a new room which is located to your right. You'll end up standing inside the main area of the diner.
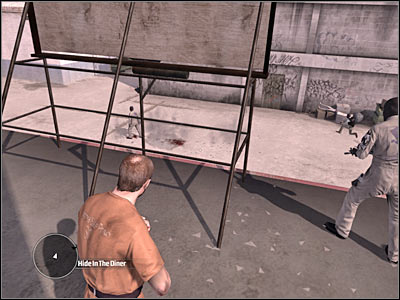
New objective: Get To The Donut Shop
Before you'll be able to take on this objective, you'll have to defend yourself against enemy attacks. Try moving closer to the main exit from the diner. One of your colleagues is going to be killed here. As a result, you will have to remain inside the diner for at least 15-20 seconds. Make sure that you're standing next to one of the windows, so you'll be able to cover a large area.
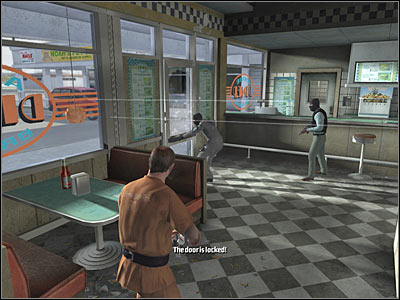
You won't have to do a lot of shooting here, because your colleagues are fine by themselves. You may only assist them by killing a few cops. Make sure that you're using a SMG rifle during these fights. You should also zoom in the view for better aim. Keep firing at the police officers. I would recommend choosing single shots here, because there's a large distance separating you from each other. Obviously you should also be crouching, so you won't get shot too often.
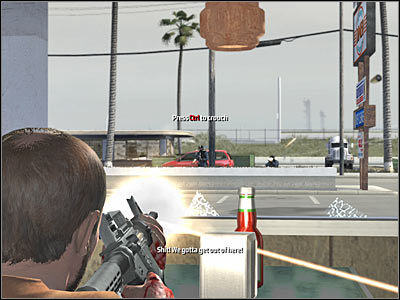
One of your teammates will decide it's time to leave the diner. Head on to the only exit. I would recommend moving forward here, instead of following your colleagues. There are some cops to your right and it's up to you to get rid of them. Meanwhile you should also be able to pick up an assault rifle. Start using it right away.
Once you've acquired the assault rifle, start RUNNING towards a nearby donut shop. Your colleagues will do the same thing, so you won't have to worry about being the only one to get there. The game will suggest to find an ally with a spare ammo clip. Look for a thug with a small icon hovering over him. Approach him to receive much needed supplies.
New objective: Hold Donut Shop Until Pickup Arrives
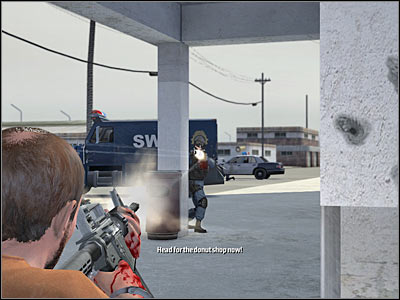
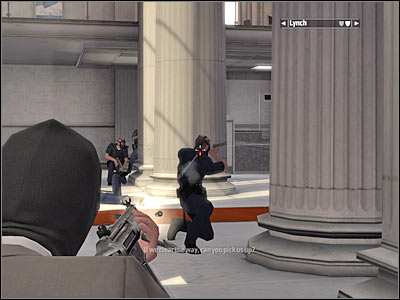
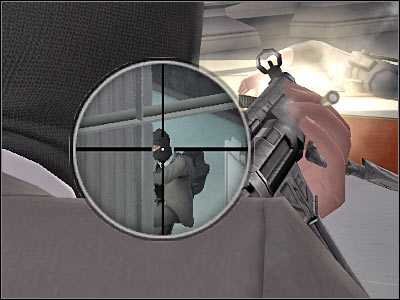
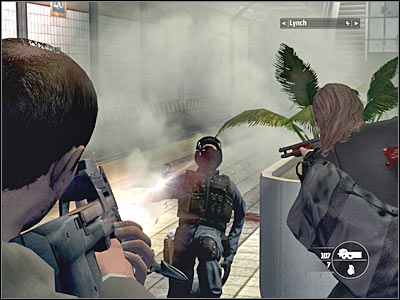
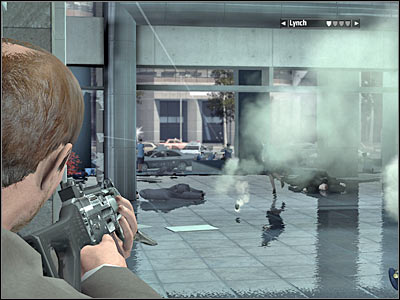
Obviously you must find cover near one of the windows. Also, make sure that you're facing the main street, because that's where you'll find most of the cops. You should also consider zooming in the view for a better view of the situation. Don't let anyone get closer and don't stand in the open, because there are enemy snipers in the area. Be on a look out for a view from their scope. It will appear in the lower left corner of the screen. Once this occurs, move back from the window in order to prevent main character from being killed.
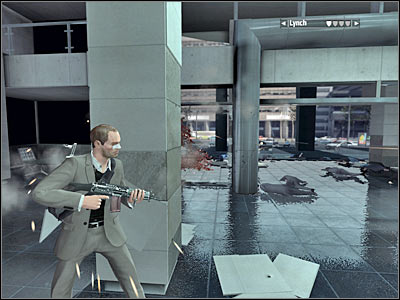
The next phase of this battle will also require you to inspect other areas of the donut shop. You will be attacked from many different sides. I'd also recommend guarding the back entrance to the donut shop, because one of the enemy units may appear there (screen). You would have to get rid of him as soon as possible. No matter what you do, don't exit the donut shop just yet.
New objective: Get To The Escape Van
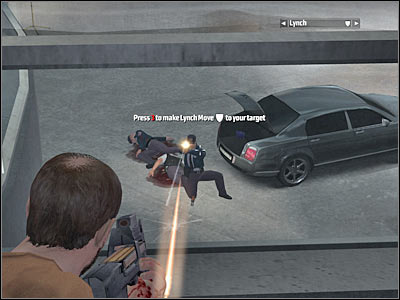
You will have to wait patiently for this objective to be added to your list. Head on to the back entrance and start running towards a black van (screen). Once you're close enough to this vehicle, the mission will come to an end.
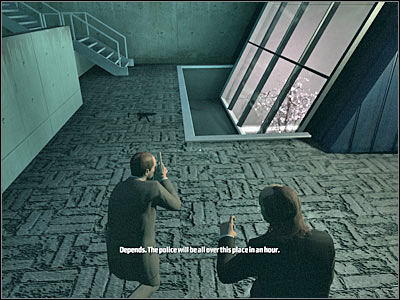
This is going to be mostly a tutorial mission. You'll be playing as Kane and your objective will be to teach Lynch some cool tricks, involving using objects for cover. The second part of this mission will require you to kill a few cops in order to safely escape from the warehouse.
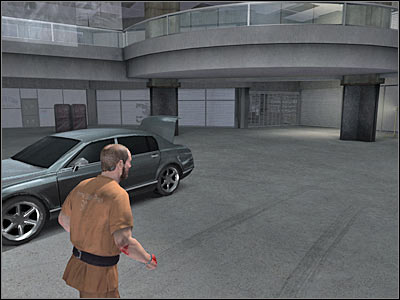
New objective: Pick Up Weapon In The Trunk
Like I've already mentioned, you should consider treating this mission as an interesting tutorial section. Your first objective will be to approach a car. Your main character should automatically pick up a new weapon.
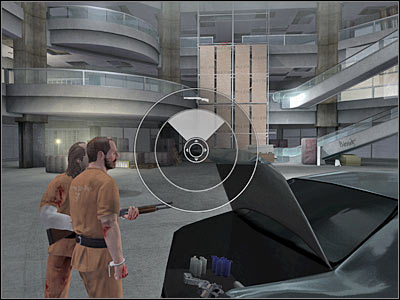
New objective: Give Lynch The Shotgun
Now you will have to give this new weapon to Lynch. Make sure that you've read all hints, so you'll know what to do. Start off by pressing the middle mouse button. Now you must press the W key twice in order to move the shotgun icon to the outer circle (screen). As a result, your new ally will automatically start using this weapon.
New objective: Pick Up The P900 From The Trunk
This is going to be Kane's weapon, so you must only press the E key in order to take it.
New objective: Pick Up The Magnum Handgun From The Trunk
Start off by pressing the E key. Make sure that you're standing next to the trunk.
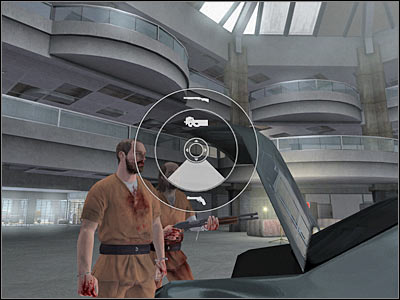
New objective: Give Lynch The Magnum Handgun
This is going to be a very similar task to one of the previous objectives. Press and hold the middle mouse button. After that, press the S key twice (screen).
New objective: Pick Up The SLP Handgun From The Trunk
Once again, you will only have to press the E key, because this is also a weapon designed for Kane.
New objective: Take Lynch To The Vending Machine
You may leave this area, because you won't have to take anything else from the trunk (for now). The vending machine can be found to your left. Make sure to listen to some hilarious dialogue lines on your way there.
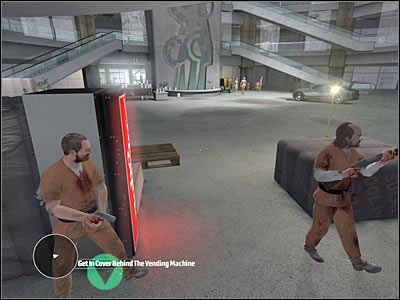
New objective: Get In Cover Behind The Vending Machine
The sole purpose of this mission objective is to teach Lynch some new moves. You will only have to approach the vending machine and your main character will automatically take cover behind it (screen). Lynch should follow your lead with his object.
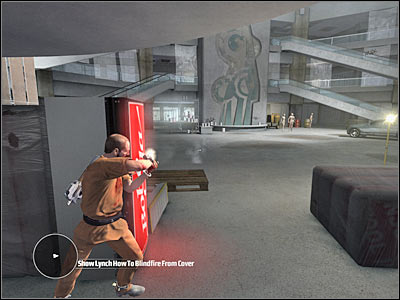
New objective: Show Lynch How To Blindfire From Cover
The game itself will instruct you how to behave in this type of a situation. You must be using a cover. Press the left mouse button a few times. These type of shots are very inaccurate, but you won't have to risk your life by exposing yourself to enemy fire.
New objective: Show Lynch How To Aim While In Cover
I'm sure that you've already tried to use this move during the course of the previous mission of the game. Once again, you must be using the vending machine for cover. Press the right mouse button in order to activate a zoom feature. Fire a few rounds and wait for Lynch to do the same thing. Be patient, because it's going to take him a few seconds.
New objective: Get Back To Car And Pick Up Grenades
You shouldn't encounter any major problems while trying to fulfill this mission objective. Start off by going back to the car and picking up a couple of grenades (press the E key). Now you'll be allowed to practice throwing them. You can do this by pressing the G key. Also, make sure that you've read all hints. You won't find out anything out of the ordinary, however you shouldn't ignore them. Listen to a new conversation between Kane and Lynch.

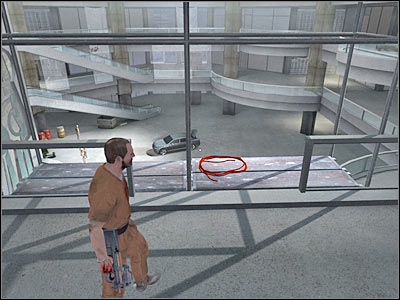
New objective: Go To Top Of The Scaffolding And Show Lynch How To Rappel
The purpose of this particular mission objective is to familiarize you with how to rappel. Start off by going towards the scaffolding. It would be a good idea to press a M key here in order to find this spot. Obviously you will have to use the stairs to get there. Try moving closer to the scaffolding. Sadly, you won't be allowed to rappel, because enemy units have appeared inside the warehouse.
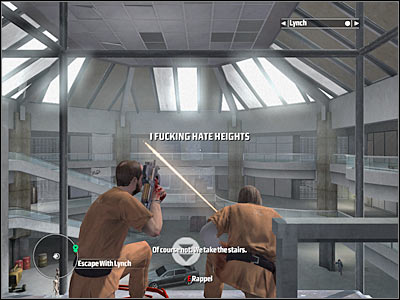
New objective: Escape With Lynch
You shouldn't have any major difficulties killing all enemy units, mostly because you'll find out how to issue orders to other members of your squad. Obviously you will have to instruct only Lynch here. You may choose between three different types of orders. 1 stands for follow and 2 allows your colleague to attack a specific target. It would be a good idea to order him to attack some of the nearby enemy units. As for the 3 key, you will be allowed to order your colleagues to guard a specific area of the map or just to stay away from the endangered zones.
Make sure to instruct Lynch to take out some of the nearby enemy units. They will be standing mostly next to the car. You should also consider killing them on your own. This warehouse is very big, so you'll have a lot of possibilities to get to them. Be careful near the stairs, because some of your enemies may try to use them or may hide somewhere nearby. Kill them as soon as possible.
Thankfully, most of the enemy units will remain on the ground floor of the building, near your car (screen). It would be a good idea to kill them with a machine gun, so you won't have to waste a lot of time here. Order Lynch to follow your lead and keep moving towards the ground level. Just as before, be careful near the stairs, so you won't get surprised by anyone.
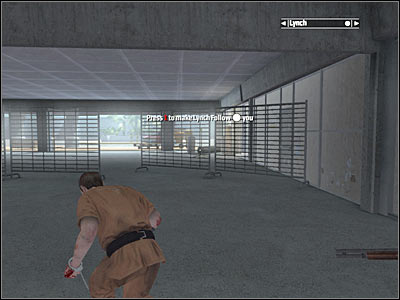
Make sure that all enemy units have been killed. Once again, you must order Lynch to follow your footsteps. You won't have to go to the car, because you'll leave it here. Instead, head on to the large exit from the underground structure. This is where the mission will end.
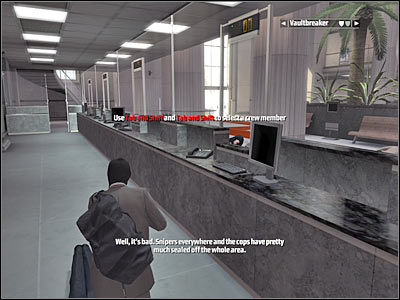
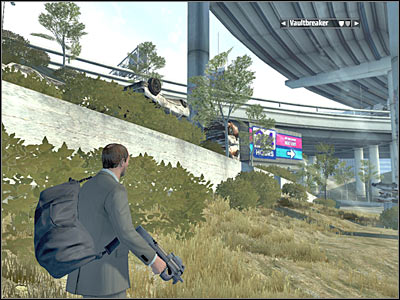
This is going to be your first serious mission. The main objective for this level will be to get inside the vault of a nearby bank in order to steal back a briefcase. The briefcase contains valuable objects and members of The7 organization want them back. You'll have to ask a professional vaultbreaker for help in order to get inside the vault. Once you've acquired everything you have needed, you will have to escape from the bank without being caught or killed.
New objective: Join Vaultbreaker
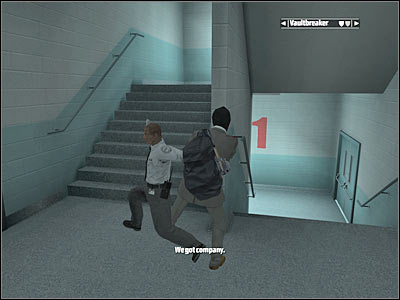
The first task of this mission will require you to team up with your new ally. The vaultbreaker will help you to achieve your main goal. You can find him near the bank. Proceed to the lower level, because that's where you'll have to look for him. Turn around and start moving towards a van (screen). He should automatically exit the vehicle. Once you're close enough to him, a short cut-scene is going to be displayed on your screen.
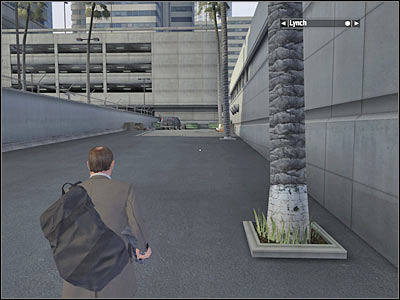
New objective: Get The Gas Into The Air Supply
Your main task here will be to reach the roof of the bank in order to be able to find an air supply unit. As you've probably noticed, you can issue orders to both Lynch as well as the vaultbreaker. You can switch between them by pressing the TAB key. I would recommend ordering them to stay here, because you'll have to perform some stealth maneuvers in order to get to the bank without raising an alarm. Start off by climbing on top of a nearby container (screen).
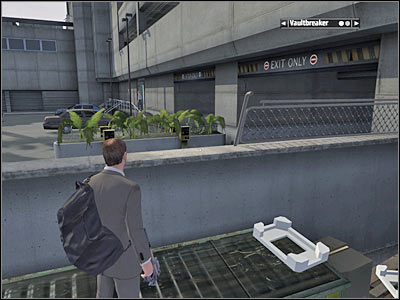
You should be crouching here, so you'll stay out of sight and you won't make too much noise. You'll probably notice that an enemy guard is standing near the back entrance. You will have to get closer to him. The easiest way to do that would be to jump over the plants (screen). Wait for him to look the other way.
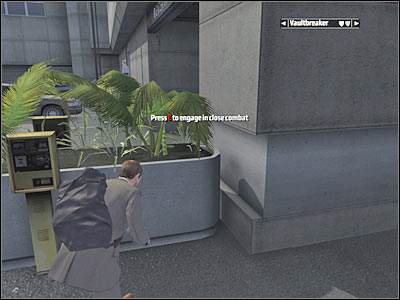
Now you will have to start moving towards him. Stay close to the wall in order to avoid being spotted by him. Approach the guard quickly and press the E key in order to neutralize him. This is all going to be executed automatically. It's not over yet, so you can't stay here forever.
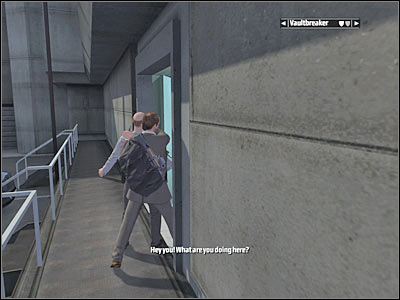
You will have to enter this building right away, because a nearby corridor is being guarded by a second guard. You must take him out as well. Don't use your gun, because this would result in raising an alarm. Instead, run over to him and press the E key to knock him unconscious. Thankfully, he won't use his gun to kill you. Order your team members to get here.

You may finally proceed towards the upper floors. There's a staircase nearby (screen), so you can't get lost. You are going to be rewarded with a short cut-scene. There's a third opponent in this area, so you should order your men to move back a little. They must wait for you there.
The easiest way to get rid of this guard would be to allow him to get here. You can't approach him earlier, because he won't hesitate to use his gun. Thankfully, a sound of a gunshot wouldn't raise any alarms, because other security guards are already neutralized. Either way, you will have to eliminate him (screen) with a melee move. Order your teammates to follow you to the highest floor.
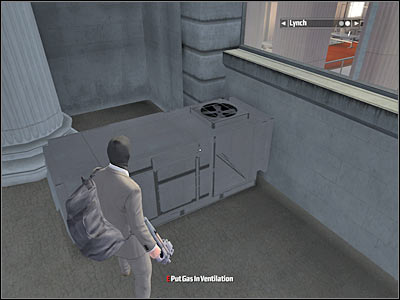
Eventually you should be able to reach the roof area of this building. Start running forward. You will have to jump over one of the obstacles along the way. You'll end up somewhere near a large glass wall (screen). Approach the air supply unit and press the E key to put gas in the ventilation system. You could wait for the gas to stun everyone in the bank, however I would recommend proceeding with the next objective right away.
New objective: Rappel Down To The Loading Bay
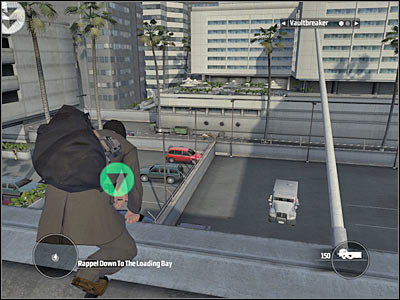
You shouldn't have any problems finding a green icon. That's where you'll be allowed to rappel down. Approach this spot and press the E key. Most of these actions are performed automatically. You'll probably notice that a security truck is heading this way. Get ready and approach the side entrance slowly.
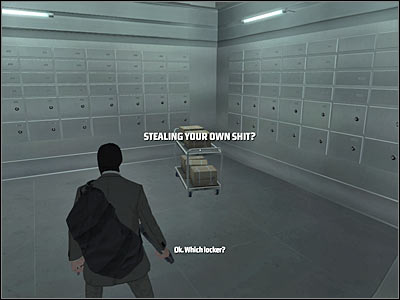
New objective: Retrieve The Briefcase From The Vault
Order your squadmates to attack enemies standing inside the loading dock. Thankfully, security guards are poorly equipped, so you shouldn't have any major problems killing them. Focus your efforts on securing a small checkpoint which can be found to your right. Once everyone's dead, approach a locked gate and wait for the vaultbreaker to get here.
Be careful! Enemy guards will probably attack you from the left. You must kill them as soon as possible. Don't worry about the glass wall, because you'll eventually brake through. It's very important that they die quickly, because they're attacking the vaultbreaker. Enter a new room and wait for a cut-scene to be displayed on your screen.
Now you're going to split into two groups. Lynch will try and secure the main lobby of the bank and you'll have to get to the vault with your other colleague. Be careful. You will encounter a new group of security guards very soon. Start shooting at them from a larger distance. You should also remember that you can always ask your team member for more ammunition.
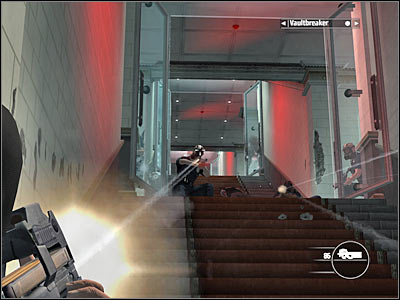
You will have to be moving towards the main vault area. Remember that you don't have to be in a lot of hurry. Hide behind pillars and walls in order to ensure your safety. You can also ask your team member to assist you if you can't kill someone by yourself. Eventually you will have to get closer to your goal. The vaultbreaker should automatically approach a nearby panel (screen). As you've probably suspected, your objective will be to protect him while he tries to get inside.
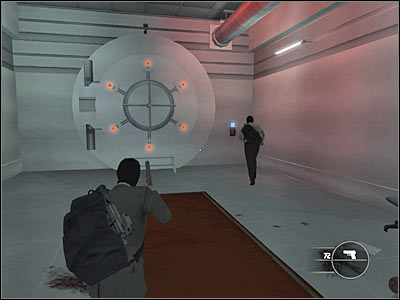
I would recommend hiding behind the left wall, near the stairs (screen). You should be able to neutralize incoming threats from there. At first you'll only be dealing with poorly equipped security guards, however make sure that no one gets close enough to attack the vaultbreaker.
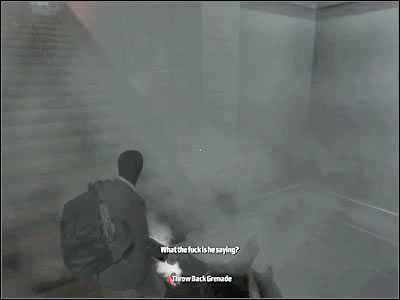
The vaultbreaker will have to disable a total of five mechanisms. Once he's dealt with 2-3 mechanisms, new enemy units will appear near your position. They're carrying assault rifles and bulletproof vests, so you will have to be extra careful. You will also notice that they're throwing gas grenades at you. Throw them back by approaching the grenades and pressing the E key. Just as before, prevent enemy units from getting too close to the vault.
It shouldn't take too long for the vault to be opened. Don't enter the vault area right away, because enemy units will proceed with the final assault. Order your teammate to hide behind the right wall or somewhere near your position. You're going to need his help to eliminate all security guards.
Make sure that no one else is heading your way. Order your team member to follow you and enter the opened vault. You will have to be standing in the central area of the vault. As a result, you will be rewarded with a new cut-scene.
Your current mission objective won't change, however you will have to perform an important task. Exit the vault and allow your teammate to place an explosive charge. Deal with a new group of enemy units in the meantime. Make sure that you're throwing back gas grenades, so nothing will obstruct your field of view. The vaultbreaker should warn you about an explosion. Start running towards the upper level and hide to your right (screen).
Some of the security guards are probably running towards the vault entrance. Ignore them, because they will die as a result of a huge explosion. Go back to the vault and enter it. Once again, you will have to watch a cut-scene.
New objective: Join Lynch In The Lobby
Order the vaultbreaker to follow your lead and start moving back to the highest floor. You'll probably encounter a larger group there, however security guards aren't heavily equipped, so they will die quickly. Proceed towards the right door. You weren't able to use it before, but now it'll lead you to a new area of the bank. That's where you'll be able to find Lynch.

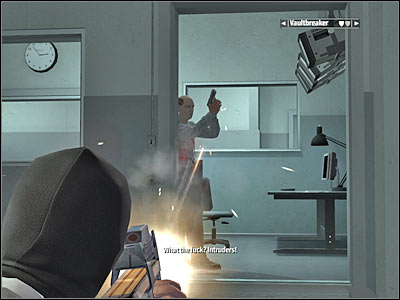
New objective: Clear The Way For The Driver
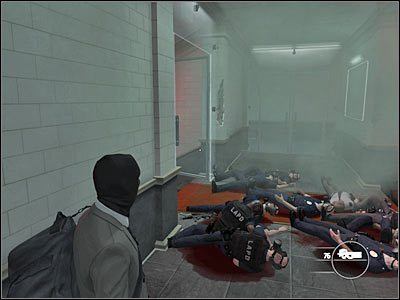
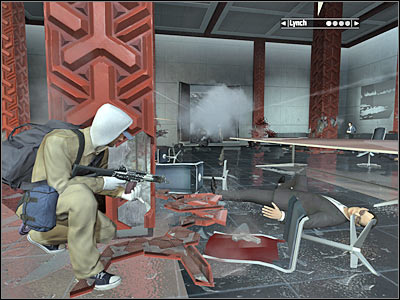
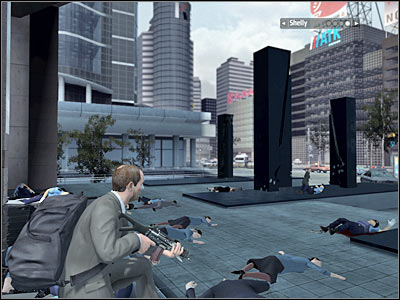
Once you've arrived at the main area of the bank, you will have to witness a very unusual event. Lynch is currently killing some of the hostages. Don't worry about that. Your main concern will be leaving the bank safely. You will have to defend this area until a van can pick you up. There are some grenades here. Pick them up (screen).
Start off by giving a few orders to your teammates. It would be a good idea to allow them to position themselves to the left and to the right of the main exit. Make sure that they aren't standing too close to the main door, because there are enemy snipers and SWAT units outside. Approach the exit carefully. There are some passageways nearby (screen) if you want to get closer to the central area of the lobby.
Your first task here will be to secure the inside of the bank (check the upper balconies!). Some of the enemy units will also try and enter this area. Make sure that you've killed all of them. Otherwise they may surprise you later on during the course of this mission.
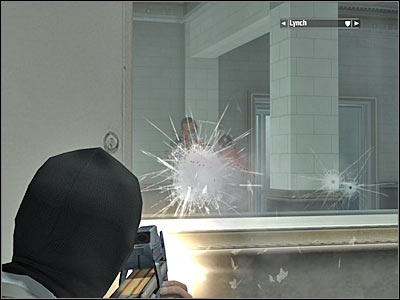
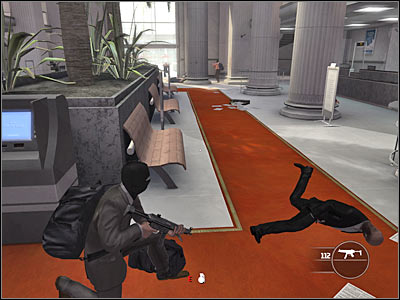
Once you've secured the bank, order your men to hide somewhere near the pillars. You should also be standing there. Keep firing at enemy units. You will have to be careful, though. Once you've noticed a sniper icon on your HUD (screen), move back before you'll lose your life. Seeing this icon means that an enemy sniper can take you out. Obviously you can't let him hit you, because that would be equal to an instant death.
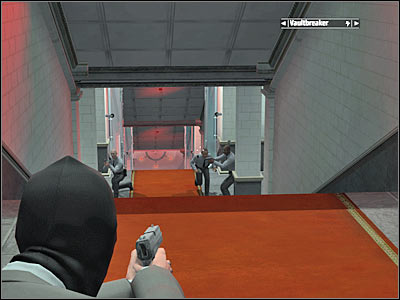
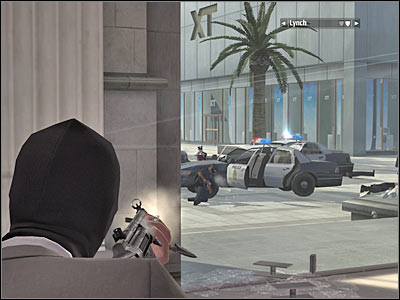
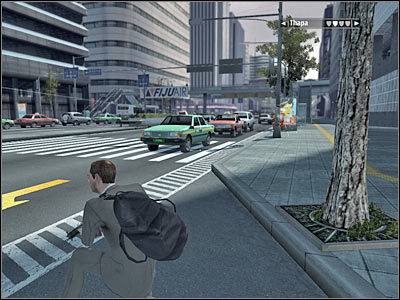
Try moving even closer to the exit. You will have to start shooting at the nearest police officers. They will be hiding behind cars (screen). It's very important to kill them. Otherwise your escape vehicle wouldn't be able to get here. Move back each time you notice a sniper has your character in his sight. Your men should stay behind some of the nearby pillars. You could also order them to move towards the stairs, so they'll take out anyone who manages to get there.
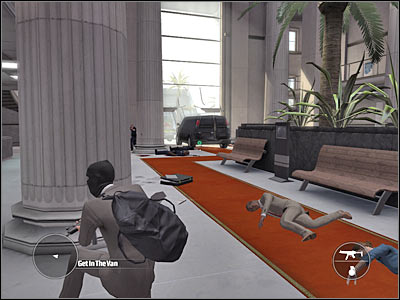
New objective: Get In The Van
You will have to kill a lot of police officers in order to allow an escape van to get here. The van will brake through the main entrance (screen). Order your men to follow your lead and start running towards the back of the truck. Once you're there, press the E key in order to take a seat inside. Watch out only for enemy snipers and ignore rest of the enemy units. Get ready for the next mission of the game.
You will have to use the van in order to escape from the place of the crime. Obviously you are going to be attacked by a lot of enemy units along the way. You will also have to neutralize a police blockade once you're inside the tunnel. The final part of this mission will require you to evade police forces using the metro.
New objective: Protect The Van
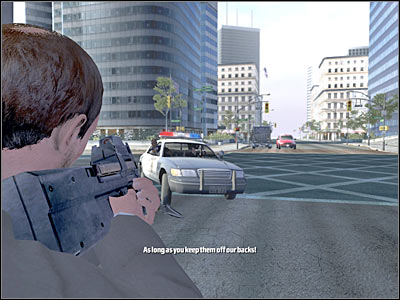
The first part of this mission is going to be quite boring, actually. I guess you won't be surprised by the fact that a lot of squad cars are following you. Getting rid of them isn't going to be easy, because you won't be allowed to focus your aim. Nevertheless, try zooming in on the driver in order to neutralize each car.
You should also consider using some of the carried grenades, especially since you'll be rewarded with more of these objects later on. Wait for each car to move closer before throwing a grenade. The objective here is that it'll explode near the police vehicle. You should be able to get a hang of it once you've thrown a couple of grenades.
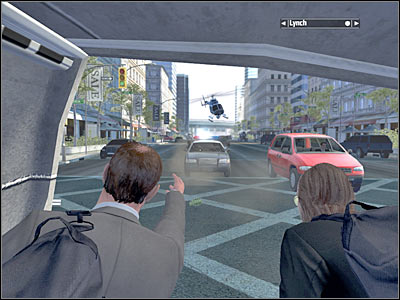
You should find yourself driving on a freeway in about one minute. Nothing will change here and it'll even get easier, because the van won't take too many turns. Keep shooting at the police vehicles. Use your main weapon, however you should also throw a grenade from time to time. Don't worry about a police helicopter, because it won't attack you.
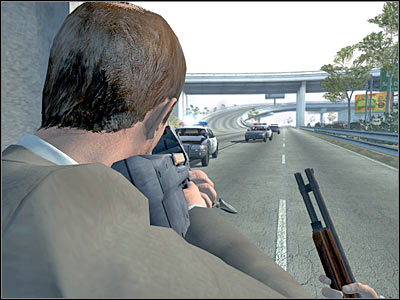
Keep firing at the police vehicles. You will have an opportunity to listen to a funny conversation between Kane and Lynch. You should be able to reach a tunnel in a few minutes. Once this is done, you will receive a warning that police forces have set up a blockade inside the tunnel. As a result, you will have to destroy it before being able to move forward.
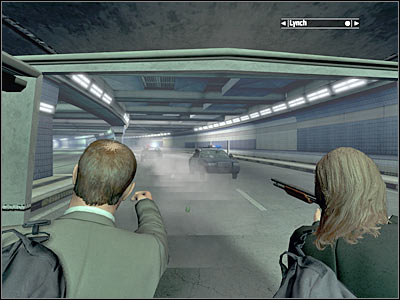
New objective: Clear The Roadblock
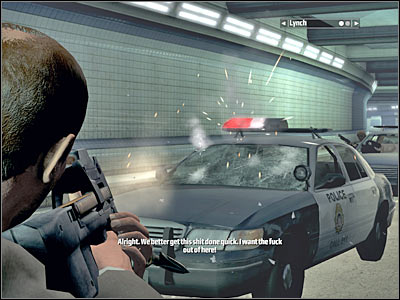
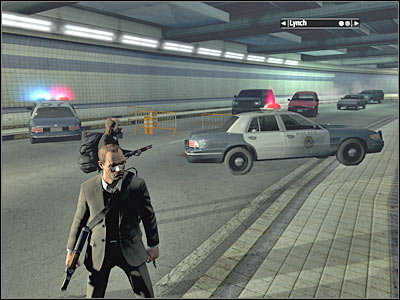
Exit the van by pressing the E key. Move to your right quickly, because at least two police vehicles will arrive here. Obviously you will have to get rid of all cops. Make sure that you've chosen longer bursts, instead of single shots. This should guarantee your safety.
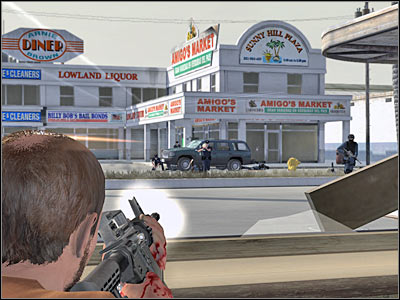
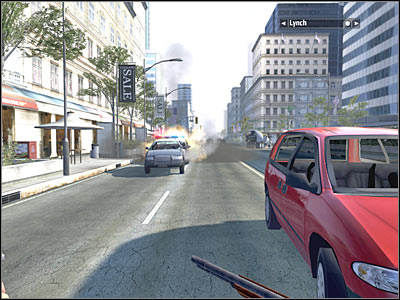
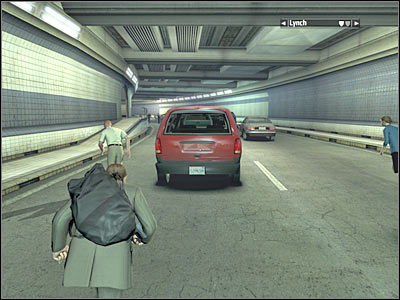
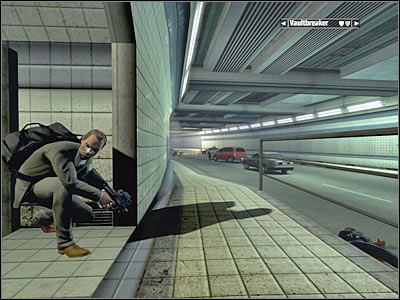
Now you will have to start moving the other way, because you'll have to clear a route for your van. Your men may stay somewhere in the back. I would recommend hiding behind a red van (screen). You should be able to kill all enemy units from here without exposing yourself too much. Order your teammates to hide behind some of the nearby cars and deal with the rest of police forces. DON'T move forward. Instead, try to take out all enemy units from here.
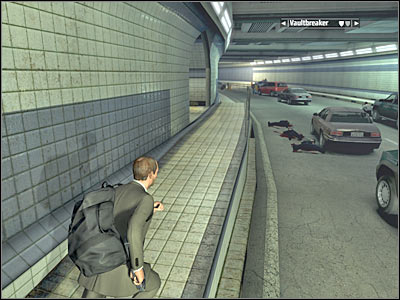
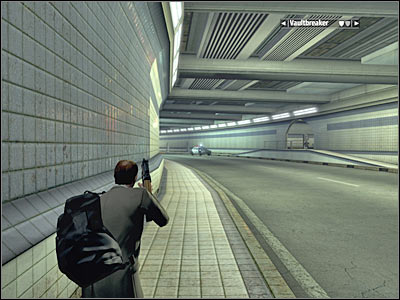
You should receive a warning that an enemy sniper is in the area. Killing him from here would be almost impossible. Instead, you will have to get closer to the left wall of the tunnel. Start moving forward (screen). I wouldn't recommend being in a lot of hurry. You should be able to turn left. Ignore the civilians.
Try moving closer to an opposite lane. There are a few cops to your left (screen). You can kill them on your own or you can order your teammates to get here and you may send them to deal with this threat. Thankfully, they should be able to avoid the sniper, so you won't have to babysit them the entire way.
Now you will have to go to your right. You will come across a new red van. Just as before, it would be a good idea to use it for much needed cover. Your teammates should follow you. Keep heading forward. You'll probably notice that a squad car is heading your way (screen). Use the grenades to take it out. You could also order your men to attack police officers.
Keep moving forward. Your next objective will be to attack an enemy blockade. It won't be difficult, especially since none of the police officers is using a sniper rifle. Once you've taken care of this group, head on to your right. You should able to find a similar passageway here (screen).
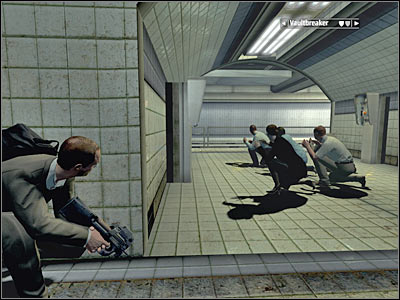
Make a few steps forward and lean out carefully in order to find out where you'll need to shoot. As you've probably noticed, you'll be able to surprise enemy soldiers from the back. Order your men to proceed with the assault. You will have to focus all your attention on the sniper (screen). Make sure that he's been killed and then deal with the rest.
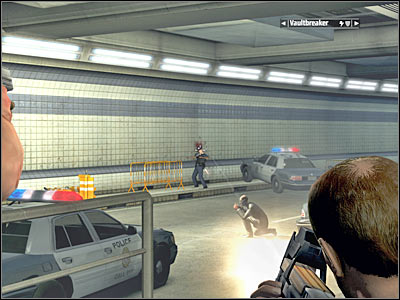
New objective: Get All Crew Members To The Van
You will have to kill all police officers before you'll be able to proceed with the next part of the mission. Wait for an allied van to break through the roadblock (screen). Proceed to the back and enter the van.
New objective: Protect The Van
Make sure that everyone's inside the van. Wait for it to start moving forward. As you've probably noticed, your ammo supplies have been refilled.
The next group of squad cars should attack you once you've left the tunnel and went back to the freeway. Just as before, you should consider using all available grenades. You'll find out that a much larger blockade has been set up on the freeway. As a result, your van will start backing up. Obviously you shouldn't use any grenades for the time being. Instead, keep firing at the squad cars (screen). You will have to take part in a vehicle accident. Sadly, you weren't able to prevent it. Don't worry about Kane. Even though he lost consciousness, he'll be fine.
New objective: Escort The Van
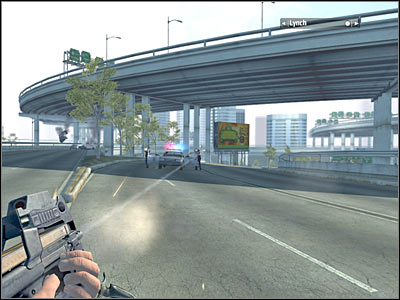
Get ready, because you are going to be attacked in just a few seconds. The first group will appear on top of a nearby hill (screen). Take them out quickly, because they're in a good position to harm you and your men. Your van should start moving. Gather your entire team around your position and accompany the van to a new area of the map.

Once again, you will have to be on a look out for police units. A second group will appear in front of you (screen). The easiest way to get rid of them would be to use grenades. After that, turn right and start shooting at the police officers. Order your men to hide behind the pillars, however they should be fine on their own.
New objective: Find The Lost Bag
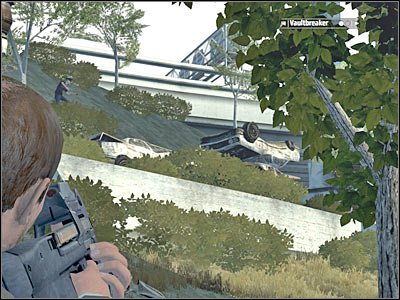
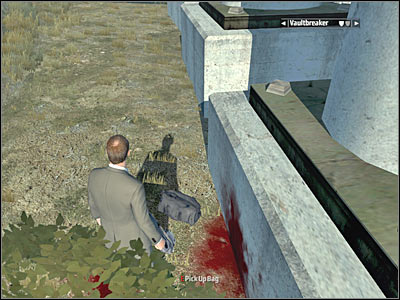
You won't receive this task right away. It's going to appear on your list once you've taken care of most of the police units. Order your men to stay near the truck. You will have to go back to where the accident took place. Look at the screen if you're having some difficulties finding the bag. Be careful, though. You are going to be attacked by a new group here. Kill the police officers, pick up the bag and start moving back towards the van.
New objective: Escort The Van
You will have to rejoin with the rest of your squad. A new group will appear on top of a nearby hill. I wouldn't recommend trying to kill them with an assault rifle. Instead, use some of the carried grenades. The van should go back to the main road, so you'll be able to use it again.
New objective: Get All Crew Members To The Van
I guess I won't have to explain you what has to be done here. Enter the van and wait for your colleagues to do the same thing.
New objective: Protect The Van
This is going to be the last driving segment for this mission. Thankfully, it won't be too long and you won't have to do anything out of the ordinary. You'll have an opportunity to listen some hilarious dialogues along the way. Keep firing at the police vehicles or try to destroy them with the grenades. Once again, you don't have to worry about the police helicopter. The van driver will decide to enter a subway station, so you'll have to get ready to be a part of a new accident.
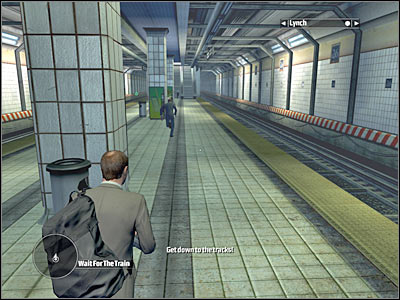
New objective: Get To The Subway Platform
I guess you might be surprised by the fact that it's going to be the most difficult section of this mission. You will have to leave this area as soon as possible, because SWAT units are heading your way (from all possible directions). Order Lynch to follow your lead. Start running forward. You will have to use the stairs to get to the subway platform. Make sure you're using one of the more powerful assault rifles.

New objective: Wait For The Train
You'll probably have a lot of problems defending yourself against SWAT units. You will have to be hiding near one of the pillars. Order Lynch to do the same thing, however you must face opposite directions. It's very important, because you are going to be attacked by two separate groups. Get ready, because cops will be here in just a few seconds.
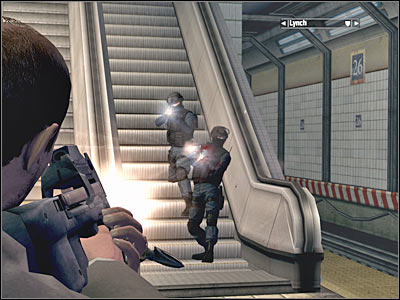
Wait for the enemy units to appear near the stairs. Start off by throwing a couple of grenades at them. After that, start using your primary weapon. I would recommend choosing longer bursts, instead of more precise headshots. Prevent SWAT units from getting closer to your position. You could try and stun enemy units with a melee move, however this would be very risky and you would lose too much time.
You will have to deal with your group quickly. Once this is done, turn around and go back to Lynch. He probably won't be able to defend himself without your assistance. Deal with the remaining enemy units. Also, watch out for gas grenades. Throw them back only if you have some free time. Keeping Lynch alive is more important.
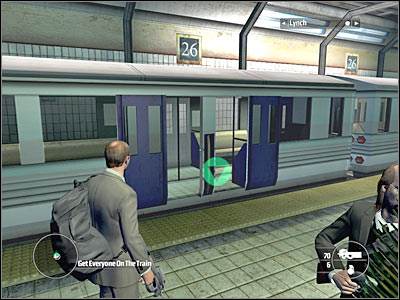
You will have to stay here only for a few more seconds. After that, the train will show up at the station (screen). Approach one of the carriages and wait for the game to display a new cut-scene. Get ready for the next mission.
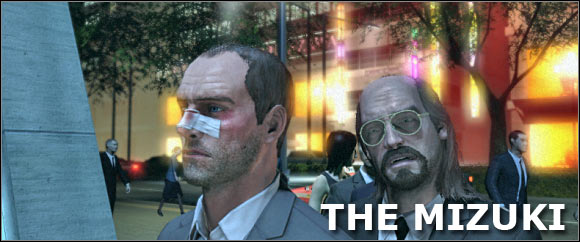
You will have to get inside a night club which is owned by Yoko Retomoto, daughter of one of the leaders of the infamous Yakuza organization. You must successfully capture Yoko and carry out her unconscious body. This will allow to you gain a bargaining chip against her father, especially since he is in possession of a very valuable briefcase.
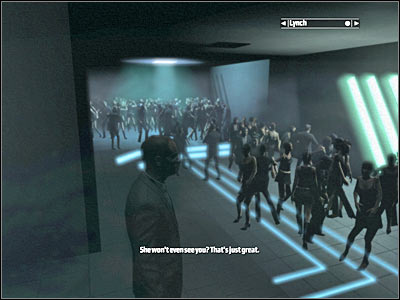
I'd strongly recommend that you increase the brightness of your screen before proceeding with the mission. Otherwise you may have some serious problems moving around the night club, especially at the beginning when it's much darker inside.
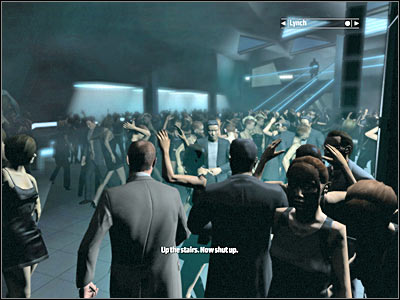
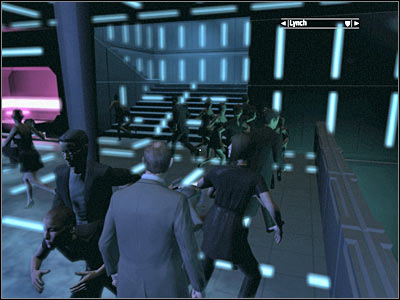
New objective: Go See Yoko In Her Office
This mission will begin with a short cut-scene. You'll start the game inside the night club, however you aren't carrying any guns. Don't worry, because you won't need any weapons here. Start moving towards your first target. I would also recommend that you familiarize yourself with the surroundings, because you'll be going back to previous areas in just a few minutes.
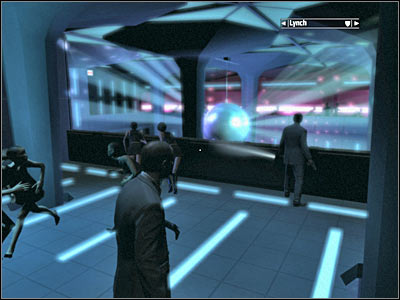
Keep heading forward. Ignore some of the guests present at the night club. You'll probably notice a minibar along the way. Eventually you'll have to get to the stairs. Make sure that Lynch is following your lead.
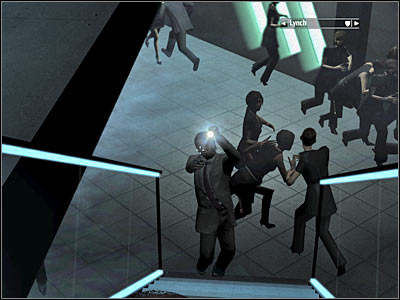
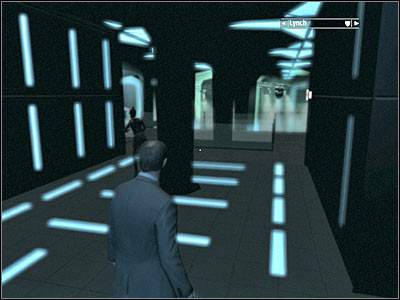
Use the stairs to get to the upper balcony. This area is being guarded by one of the guards. I would recommend disabling him quickly using a melee move. Obviously you must pick up his weapon, however I wouldn't recommend using it right away.
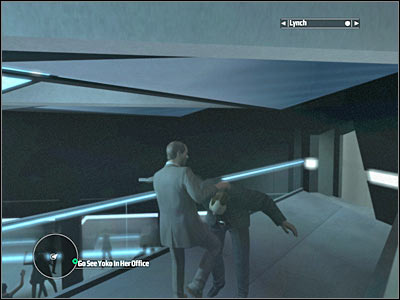
Head on towards a nearby door. It can be found behind the guard. I wouldn't recommend using any guns here. Instead, run over to the left guard and knock him unconscious. You should also order Lynch to attack the second guard (screen). If you've done everything according to the plan, you won't die here and you won't raise any alarms. Obviously you should collect weapons from the disabled guards. Enter a new room. You are going to be rewarded with an interesting cut-scene, involving the kidnapping of Yoko.
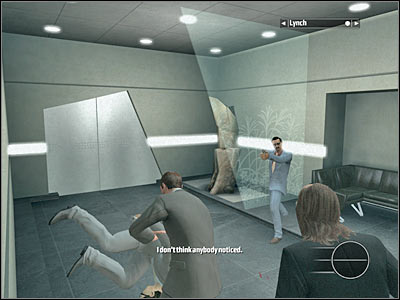
New objective: Get To The Exit
As you've probably suspected, you will have to protect Lynch while trying to get to the exit. He won't be able to fight back on his own and it won't take a lot of hits for him to die. Start off by ordering him to hide behind the nearest wall. You will have to kill one of the guards from here. A single bullet to the head should do the trick.
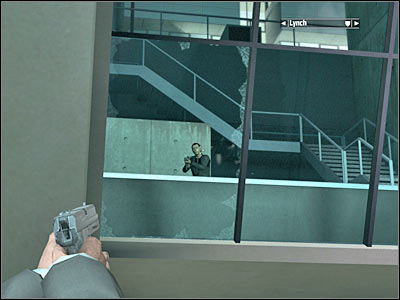
It would be wise to leave Lynch behind. This also includes some of the upcoming fights. As long as you secure new rooms of the night club, he should be fine, even if you're separated for a longer period of time. Head on towards the balcony. You've disabled one of the guards there before. Now you will come across new security guards. Take them out quickly (screen).
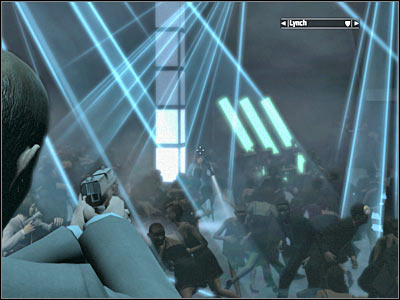
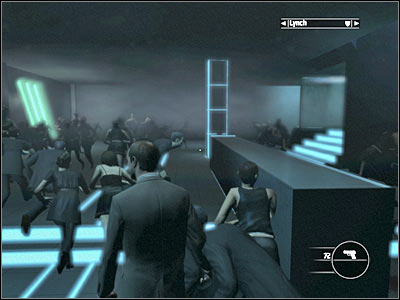
Going through the night club is going to be one of the most difficult sections of this mission. Once again, I urge you to increase the brightness of your screen, so you'll at least see where you're going. Thankfully, you won't receive any penalties for killing civilians. You will also be able to distinguish enemy guards from the rest of the crowd, because they'll be using flashlights (screen). Start off by moving towards the stairs. Kill anyone who decides to get here. Lynch may move forward a little, however I wouldn't recommend allowing him to enter the balcony area.
Your first objective will be to secure this room of the night club. Enemy units will probably appear to your left. You will have to be moving very slowly. Start shooting once you see someone carrying a flashlight. This is the only way to get rid of them, mostly because there are a lot of civilians in the night club and they won't leave this area right away.
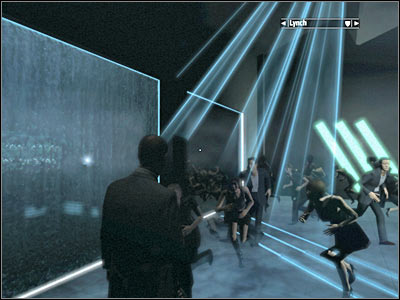
Lynch may proceed towards the upper balcony. You will have to get closer to a passageway which can be found near a large glass wall (screen). This will allow you to reach a new area of the night club. You'll probably have to deal with two-three guards here. Remember that you don't have to be in a lot of hurry. It's better to be thorough, rather than fail the mission by allowing Kane or Lynch to die.
You should be able to notice a minibar to your right. You've been here before, so you will have a basic understanding where go to next. You can also consider hiding near the minibar and eliminating enemy guards from there (screen). Once they're gone, allow Lynch to get closer, however don't risk exposing him too much.
You should be able to reach a new area of the nightclub very soon. Look at the stairs (screen). You will have to secure this entire section of the club before moving on to the upper floor. Allow Lynch to hide somewhere near the minibar.
Make a few steps forward. Some of the enemy units will probably appear near the stairs. There's going to be at least 4-5 of them. Once they're gone, go LEFT. You won't have to explore that area any further, however make sure that no one is hiding there at the moment. It's very important that you secure that corridor. Otherwise you would have been surprised by enemy guards while trying to get to the upper floor.
Proceed to the stairs once you've killed all nearby guards (screen). Lynch may join you here, because you've already secured a safe passage for him. Furthermore, you will be going to the upper level, so you won't get attacked from many different angles. You will receive an updated task here. Read it.

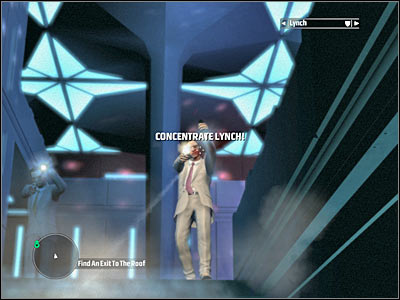
New objective: Find An Exit To The Roof
The area in front of you should be guarded by at least two enemy guards. You will have to take them out quickly. It shouldn't be too difficult, mostly because there aren't too many civilians out here. Make sure that Lynch is staying somewhere behind. Enter this new floor carefully and try to secure it. You will have to be thorough here, so you won't get surprised by anyone later during the course of this mission. Remember that Lynch is vulnerable to enemy attacks, so you can't let anyone get closer to him.
Now you will have to turn right. You should be able to find a new staircase (screen). Go there now in order to get closer to the highest level of the nightclub. You can also order Lynch to get here, however you must be sure that he'll be safe. Proceed to the highest floor (without Lynch).
There are only a few civilians out here, so you shouldn't have any problems locating the guards. One of your enemies should be standing in front of you, near the balustrade (screen). You can surprise him if you're very lucky. Once he's gone, proceed to your right. You will have to go around the lower room using the nearby balconies. Thankfully, it's not so dark out here, so you won't have to be moving very slowly.
Keep heading towards your current destination. You will encounter several guards along the way, however you shouldn't have any problems killing them. Lynch should be moving fairly close to you. Move him back once you've reached a new corridor (screen). It's very important, because you'll probably encounter three new guards here. Use the pillars and walls for much needed cover.
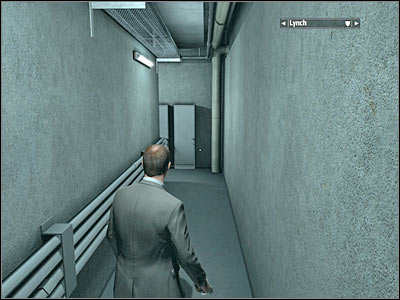
As you've probably noticed, there are some signs on the nearby walls. Use them to get to the exit. Remember that you don't have to be in a lot of hurry. Go to your right and then proceed straight ahead. You will have to approach a small door which can be found to your right. Lynch may follow you right away, because you won't encounter any new guards, so his life won't be in danger.

Proceed to the new corridor. It's going to be very narrow, but thankfully you won't encounter any hostile units. Instead, Yoko manages to escape your buddy Lynch. Sadly, you couldn't prevent that from happening. After watching the cut-scene exit this corridor through a new door, because you won't be allowed to go back to the nightclub the same way you've used before.
New objective: Recapture Yoko
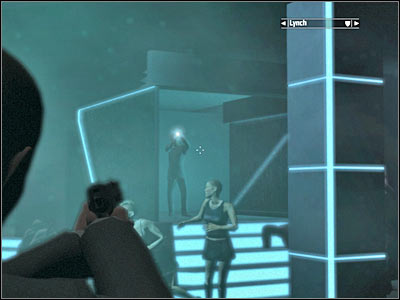
Your main task for the next few minutes will be to recapture Yoko. As a result, you will have to somehow go back to her office. Start off by moving forward. There's only one passageway leading to your current destination, so you can't get lost. Once you've close enough to her office (screen), order Lynch to hide somewhere to your right. Press the crouch key and make a few steps forward. Pick up a new weapon (SMG).
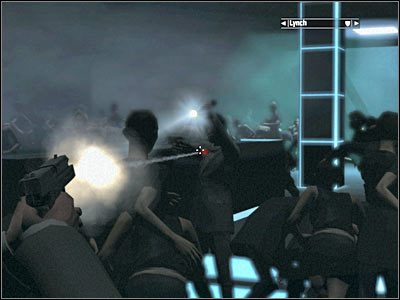
As you've probably noticed, Yoko is standing inside and there's at least one bodyguard near her. Start off by eliminating him. Obviously you can't shoot the girl, because you need her alive. Now you should consider moving to your left (screen). Hide behind the wall and get ready.
You will have to act quickly here if you want to recapture Yoko without risking your life. You could order Lynch to move closer, so he would attract the attention of nearby enemies. I wouldn't recommend risking losing him. Head down to the lower platform, so you'll end up inside Yoko's office. Hide near the tree and kill the second guard. He should be standing in front of you. Go there now, because you won't be safe behind the tree. The objective is to disappear from Yoko's field of view.
You can recapture Yoko using various approach methods. The easiest way to stun her would be to wait for Yoko to reload her weapon. You would have to approach her quickly in order to knock her unconscious (screen). Alternatively you could distract her by ordering Lynch to move somewhere to your left. Either way, you must neutralize her in order to proceed with a new task.
New objective: Get Back To The Roof Exit
Wait for Lynch to pick up Yoko's body. You will have to go back to the roof exit. As a result, head on to a nearby balcony. Obviously Lynch should stay somewhere behind, so he won't get shot. You'll notice a huge difference once you've returned to the main area of the nightclub. The guests have escaped, so you shouldn't have any problems locating enemy guards. The first group will be waiting for you on the balcony (screen). Be careful, because some of the enemy units will use machine guns against you. Eliminate them quickly, before they start firing at you.
I guess you will be fine on your own. Keep heading towards the stairs. Make sure that you're using some of the nearby pillars for cover. You will have to secure each room before moving on to the next one. Once you're near the stairs, order Lynch to get here. Proceed to the upper floor. There are at least two enemy guards on the upper balcony (screen). Kill them as soon as possible, so they won't be able to surprise you later.
Turn right and proceed towards the highest floor. Be careful, because you will encounter several guards here. Thankfully, locating them is going to be much easier this time. Don't run to the exit right away. There are probably more enemy guards beneath you. Kill them from here (screen). Otherwise they would have followed you to the roof. Make sure that Lynch is staying somewhere safe. Secure this entire area before moving on towards the exit. Go through a small corridor to get to the roof area of the nightclub.
New objective: Escape With Lynch
I guess you won't be surprised by the fact that you will encounter new soldiers on your way to the extraction zone. The first group will attack you in just a few seconds (screen). It's not safe here, so you should consider ordering Lynch to stay inside the corridor. Start shooting at the enemy guards. You will have to kill them from here.
Keep heading forward. Eventually you will have to return to the area located near Yoko's office. You will probably notice a new staircase to your left (screen). You weren't allowed to go there before, but now's your chance (Lynch should stay here). Hide somewhere to your right once you're at the top. More enemy guards will appear near the glass roof. Don't let anyone get closer and you should be fine. Kill them all before moving on any further.
You may proceed to the next section. Be careful, though. One of the guards may be hiding to your left. It's going to be an upper balcony (screen). Kill him quickly. Once he's gone, order Lynch to join you. Keep moving forward. Use the stairs in order to end this short mission. Get ready for a new assignment.
You are going to have to meet with Retomoto in order to trade his daughter for the briefcase. Sadly, the meeting isn't going to turn out as expected. As a result, you will have to escape from the endangered area and head towards a nearby section of the freeway.
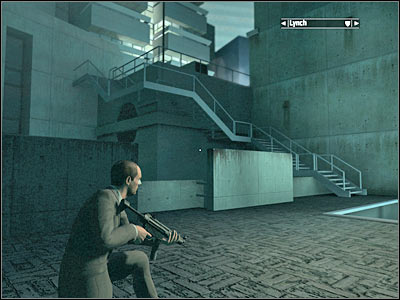
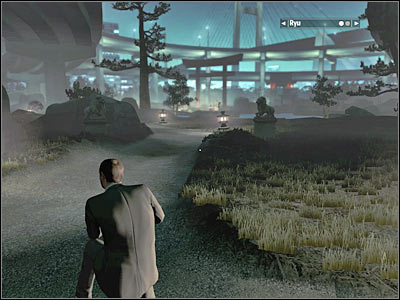
New objective: Meet Rotomoto At The Pagoda
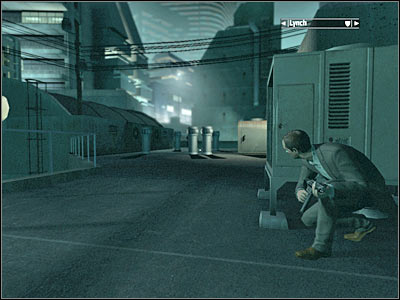
As you've probably noticed, you will be allowed to give orders to two allied mercenaries. You should be familiar with issuing commands by now, so you'll know what to do. You won't have to stay in the shadows, because you won't encounter any enemy units. Keep heading towards the pagoda. I would recommend choosing the main path. Memorize this route, because you'll be going back to the start area very soon.
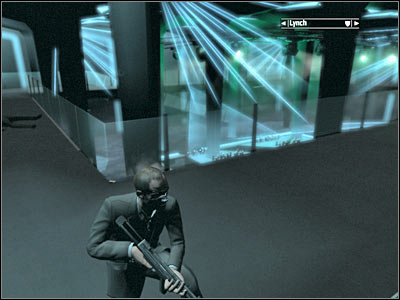
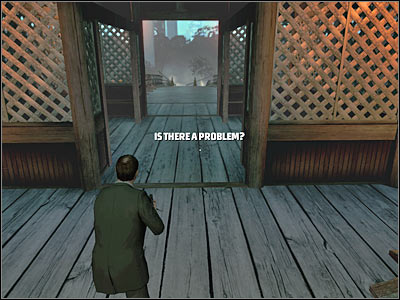
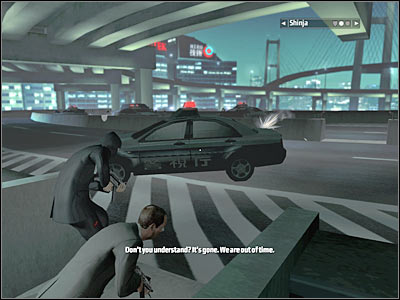
Keep heading towards the pagoda. Once you're close enough, you will probably notice that your bodyguards have stayed behind. Head on forward. You will have to enter this small building. Locate a cell phone and press the E action key in order to use it. You will have to watch a new cut-scene. Lynch will once again lose control over his actions and he'll shoot the hostage. As a result, you will have to go into defence, because you're going to be attacked by Retomoto's thugs.
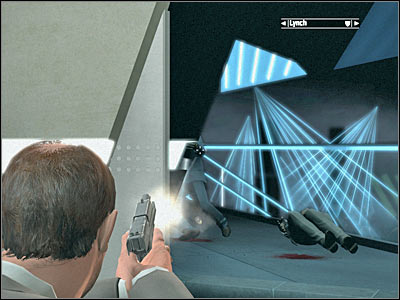
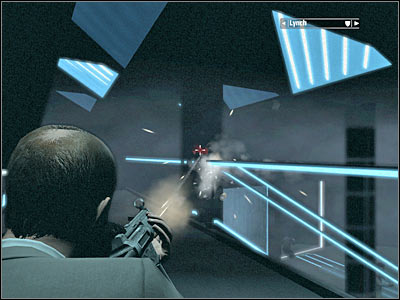
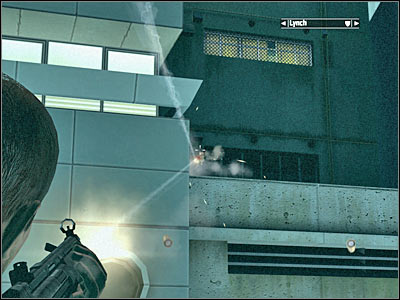
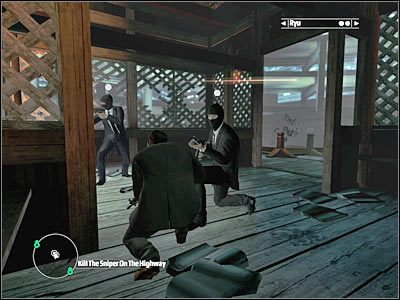
New objective: Kill The Sniper On The Highway
Start off by ordering your mercenaries to get here, so they won't have to stay in the open. You don't have to worry about losing them, because enemy snipers will try to target Kane. Nevertheless, it's good to have them at your side. Wait for Lynch's statement. He will say that he's ready to take out enemy snipers. Make sure that you're staying hidden inside the pagoda, so you won't attract too much attention.
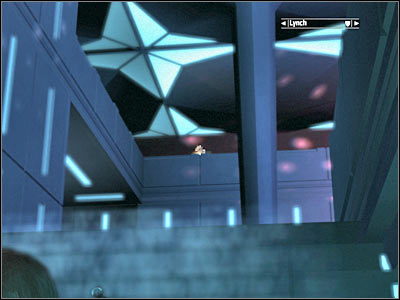
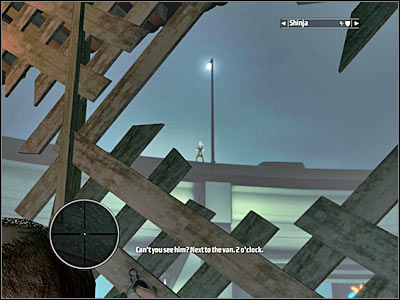
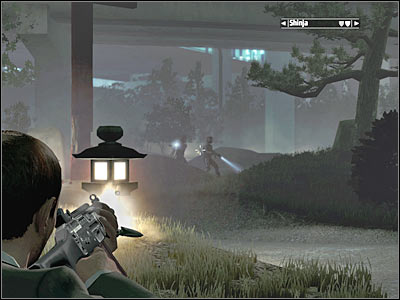
You should consider pressing the M key. This should allow you to add new icons to your compass. As a result, you will be able to assist Lynch in finding the snipers. Make sure you're facing one of the icons, so you won't have any problems locating your enemy (screen). Both snipers will be standing near the freeway. Once you've located each of them, press 2 in order to mark a target for Lynch. You will have to use these tactics to take out both snipers. Make sure it's done quickly, so you won't have to hide inside the pagoda for too long.
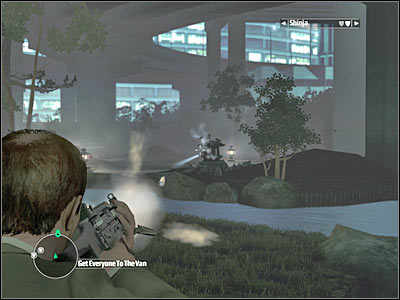
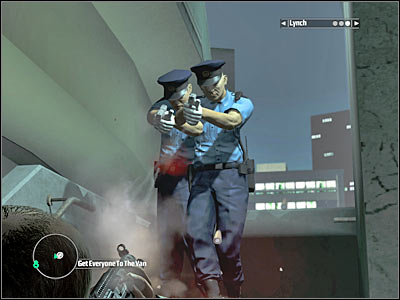
New objective: Get Everyone To The Van
The good news is that you won't encounter any other snipers, however you will have to go back to where you've started this mission. Make sure that your bodyguards are following your lead. You'll probably notice that an enemy patrol is heading your way. Order your men to find a good cover and start shooting at the enemy units.
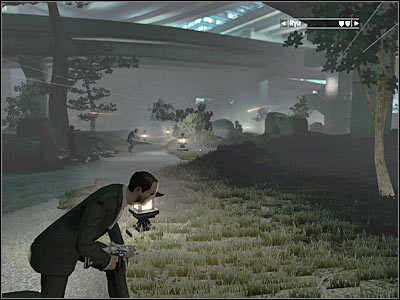
You will have to get closer to a small bridge. You've used it before, so you should know where to go. You will probably encounter a new group there. Once again, try maintaining a large distance and use nearby objects for much needed cover. Order your men to team up with you and start moving forward.
The third group will appear near the starting area. I would recommend sending your men to your left. You, on the other hand, should go right. If you stay out of sight, you will be able to surprise some of your opponents. It shouldn't be too difficult. Just make sure that you don't run into them. It's dark here, so you will have to be extra careful while exploring a new territory.
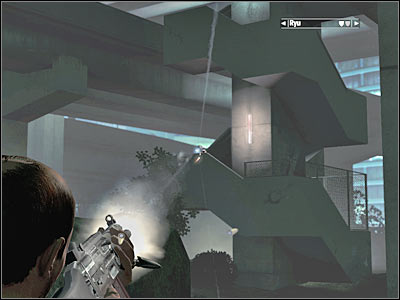
You will only have to watch out for one enemy guard. He will be standing near a large structure which leads directly to the freeway (screen). Neutralize this particular threat as soon as possible. Now you will only have to deal with the remaining enemy units. Once this is done, rejoin with the rest of your squad.
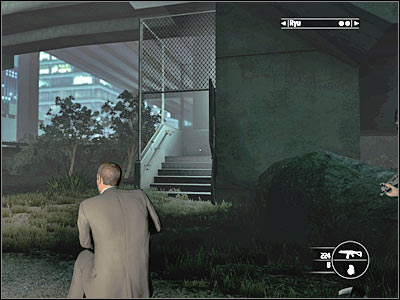
You may proceed towards the secured area of the map. Turn right and head on towards the stairs (screen). As you've probably suspected, you will have to proceed to the upper level. If you've already killed one of the enemy guards, you won't encounter any hostiles right away. Eventually you'll team up with Lynch. As you've probably noticed, he's carrying a sniper rifle. You will be able to use him and his gun to your advantage in a short while.
BE CAREFUL, because you're going to be attacked by at least two police officers just around the corner. Take them out quickly and order your teammates to follow you. Proceed to the highest level. Eventually you'll end up standing near the highway.
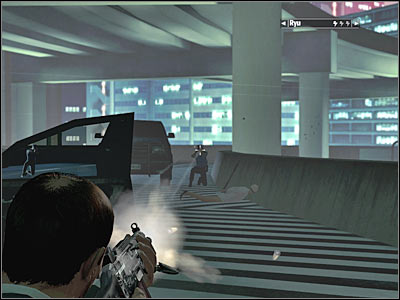
It would be a good idea to order your team members to hide behind a nearest squad car (screen). Focus only on issuing commands to Lynch. Mark at least a few targets for him. He shouldn't have any problems killing enemy units. I wouldn't recommend hiding behind a squad car for too long, because it may eventually explode.
Try moving towards the second lane. Hide your team behind other squad cars. You will have to eliminate all remaining enemy units from here. Don't worry about your personal bodyguards. Instead, focus on issuing orders to Lynch, because he's going to assist you a lot in securing this section of the freeway.
Leave the rest of your team behind. Try moving forward and you should see that an armored vehicle is heading your way. You will have to deal with a special unit of a local police. Move back, find a good cover and start shooting at your enemies. I would recommend choosing longer bursts, especially since your enemies are heavily equipped. You can also throw a couple of grenades at them.
You can still use Lynch's abilities to take out enemy units, however you will have to protect him against larger groups. Eventually you will have to secure this section of the freeway by killing all hostile units. Gather the rest of the squad around your position and proceed towards the van. Get ready for a new mission.
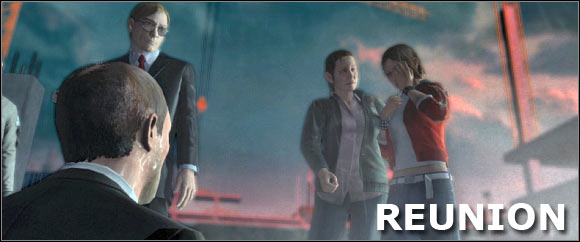
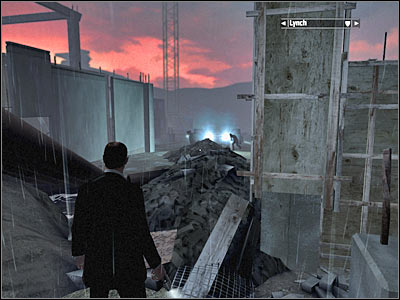
Kane wasn't able to retrieve necessary objects and as a result his wife is executed. Your main objective will be to protect Kane's daughter (Jenny) against enemy attacks. You will have to kill everyone who decides to get closer to her hideout. The final part of the mission will also require you to disable a large crane which will appear at the construction site.
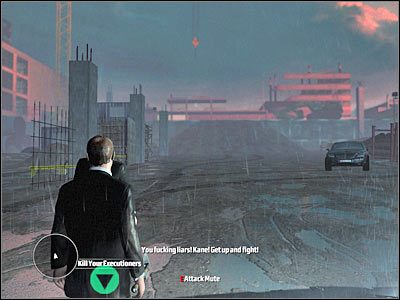
New objective: Kill Your Executioners
You will have to wait patiently and you'll finally regain full control over Kane. Leave the ditch and approach the guard who is standing to your left. Press the E key in order to brutally execute him. Once he's gone, make sure you have taken his weapon. Now you will have to wait for the game to display a new objective on your screen.
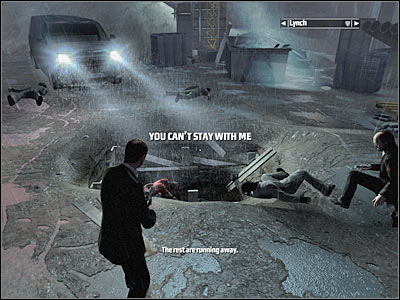
New objective: Protect Your Daughter
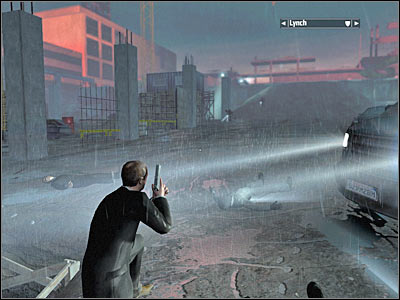
Your next enemy will appear near the van (screen). Take him out quickly. As you've probably noticed, Jenny is hiding in a small ditch. You will have to protect her at all costs. Your objective will be to repel several waves of enemy attacks. Each time you should check your compass in order to establish where you'll need to go or turn next.
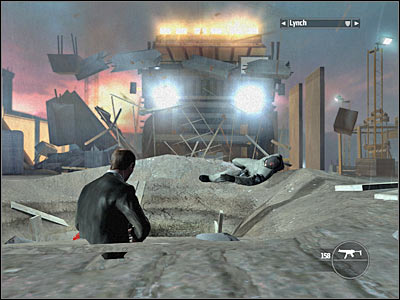
The first group will appear in front of you. The vehicle should stop at the top of a small hill (screen). As a result, it's going to be a very easy battle, because it's going to take a lot of time for enemy units to get here, so you'll be allowed to plan your each move.
Try hiding behind one of the nearby pillars (screen). This should allow you to take out all enemy units without risking your life. I would recommending ordering Lynch to stay near the van. You won't need his help here and he'll able to protect Jenny if anyone manages to get past you. I would recommend that you check bodies of fallen enemies in order to collect more ammunition for the pistol. Don't worry about other guns, because you'll find a SMG soon enough.
The second group will appear much closer to you and Jenny. Look at the screen if you want to be prepared for their attack (screen). You will have to be more careful here and you must prevent enemy units from getting too close to Jenny. I would recommend ordering Lynch to hide behind a van. You should be standing somewhere to his left.
Once you've dealt with this threat, you should consider running towards a central area of the construction site (screen), because that's where the third group will arrive. You may have some problems killing them, because you won't find a good cover. As a result, ask Lynch to help you take these guys out.
The final phase of the battle is going to be much more difficult, mostly because enemies will arrive in two separate vans. As a result, you will have to divide your duties with Lynch. He should be standing to the right (screen) and you must head on to your left. All of this must be done quickly, because you'll only have a few seconds to prepare for this attack.
Make sure that you're capable of attacking the second group (screen). You will have to be extra careful here, because some of your enemies are going to be equipped with SMG's. I'd strongly recommend taking one of these weapons, because you're going to need it very soon.
New objective: Go To Jenny
Go back to Lynch and assist him in getting rid of the second group. He probably took out a few thugs on his own, so it's going to be a much shorter battle. As instructed, you will have to go back to Jenny. Approach the ditch and you will be automatically rewarded with a new cut-scene sequence.
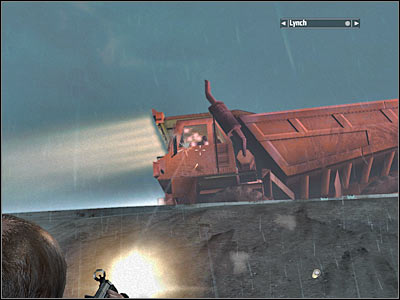
New objective: Stop The Truck - Kill The Driver
The conversation is going to be interrupted in just a few seconds. As you've probably noticed, a huge truck has appeared in the area. Don't leave this cover just yet, because you'll be safe here. Wait for the truck to swing above you. Turn around quickly and get ready for action.
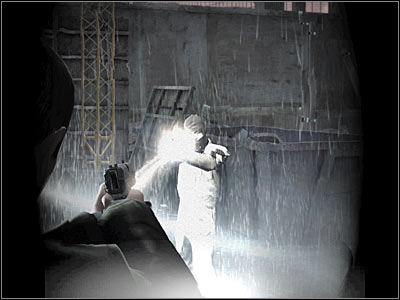
Start RUNNING towards the large truck. You will have to use the sprint button. I would also recommend killing one of the guards along the way (screen). Thankfully, his colleague will kill himself by an accident, so you don't have to worry about him. Keep running forward. Lynch may stay somewhere in the back, because you won't need his help.
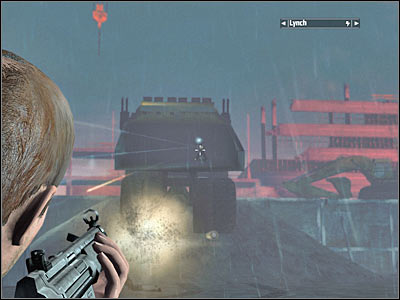
The truck will begin turning back, so you must act quickly. Your objective here will be to kill the driver. Obviously you will have to be standing in a correct spot (screen). Start shooting at the side window. Don't worry about the ammunition. Focus only on destroying the window. You can't allow the truck to move forward. It would make a second turn, however it'll be a lot more difficult to disable it there. As a result, you will have to make sure that it's neutralized right here and right now. Otherwise reload the last checkpoint and try again.
Don't stop shooting at the truck, even when the windows are destroyed. You will have to fire at the driver's cabin in order to get rid of your opponent. Allow Lynch to join you. Now you must hunt down one more enemy guard. He should also be sitting inside the truck, so go around it in order to find him. Once he's gone, this mission will come to an end.

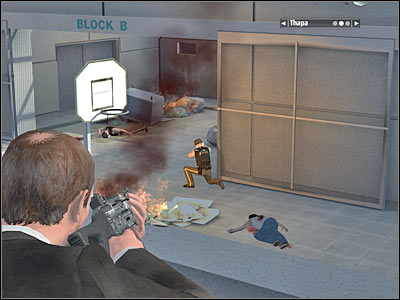
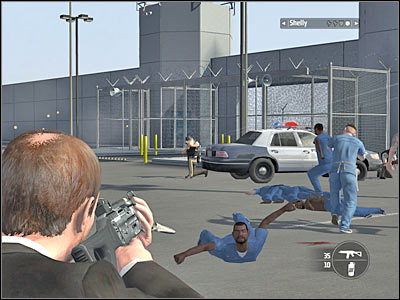
You will have to break into a high security prison facility. The sole purpose of this assault will be to free a couple of Kane's old friends. You will have to travel through several cellblocks in order to find them. Obviously you will kill a lot of prison guards. Once you've rescued all of your allies, you will have to ensure their safety by escaping from the prison in an armored truck.
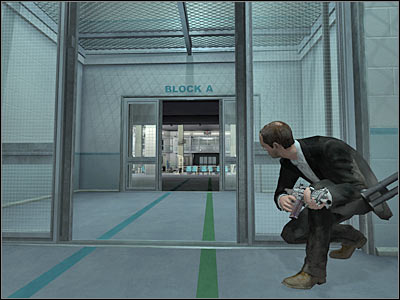
New objective: Find The Entrance To Cellblock A
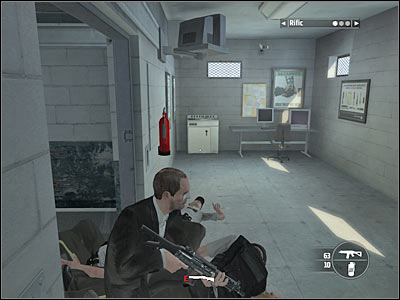
You'll start the mission near a destroyed wall of the prison. Thankfully, you won't have to worry about enemy snipers, well... not at the moment. The first part of the mission is going to be very simple. Turn left and eliminate the prison guard. You could also wait for Lynch to get rid of him. Enter the new area of the prison. The second guard will be standing to your right. Single shots are more than enough here, mostly because prison guards aren't carrying any heavier equipment.
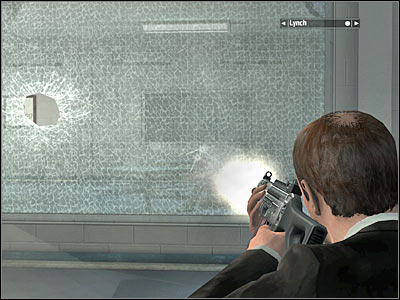
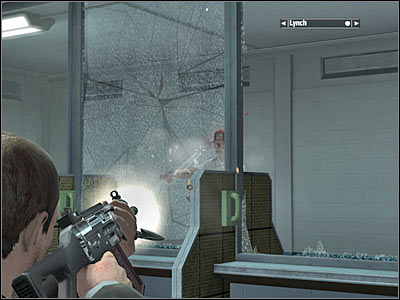
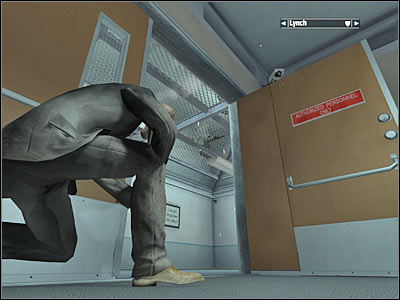
Keep moving forward. You will have to be careful, because one of the guards will appear near the reception desk. I wouldn't recommend moving too quickly. Head on to one of the side rooms. Destroy the nearest window and kill a new guard. Jump over to the other side. You should wait for Lynch to join you.
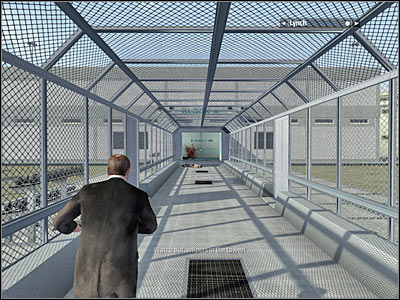
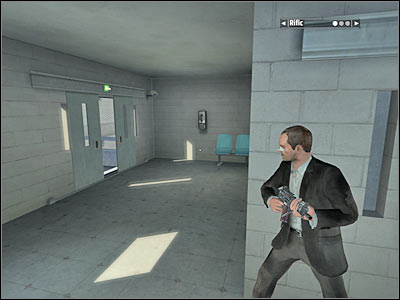
You should be able to reach a long tunnel in just a few seconds (screen). Don't enter it right away. Instead, kill a couple of security guards from here. It shouldn't be too difficult. Order Lynch to follow your lead.
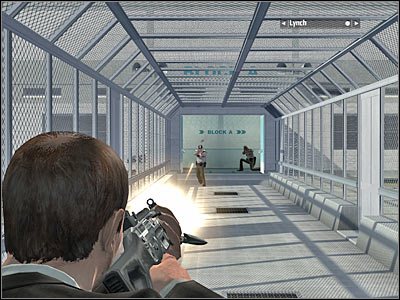
Stand up and start RUNNING using the sprint button. It's extremely important that you keep moving, because you will appear in a line of sight of several snipers. Thankfully, if you're quick enough, you will able to evade them. You could also stop at about half way through, however it won't be necessary. Wait for Lynch once you've reached the opposite end of the tunnel. You may proceed to the next section of the prison facility.
New objective: Open The Gates To Cellblock A
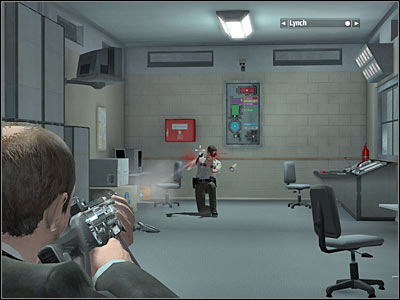
Head on to the right door. Once you're inside, immediately turn left, so you won't be attacked by guards occupying upper balconies. Alternatively you could try and kill them right away. Either way, you will have to enter a small room. Take care of a single guard. He's well equipped, so he must die quickly. Approach a nearby console. It can be found to your right. You will have press the red button by using the E key. This will allow you to unlock entrance leading to cellblock A.
New objective: Enter Cellblock A
You will have to be very careful from now on, because you'll be going against smarter and better equipped prison guards, so it'll be easier to die. Go back to the main door. More enemy soldiers have appeared on the upper balcony. Lean out carefully and take them out from here. Once they're gone, deal with a second group which can be found to your left.
Proceed to your left. You should be able to find an entrance here which leads to the first prison block. I wouldn't recommend being in a lot of hurry. Try and take out some of the visible prison guards from here. It's very important that you do this now, because you'll be trapped once you're inside the cellblock.
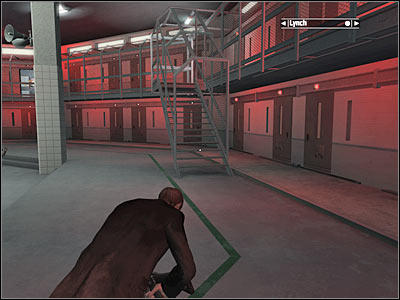
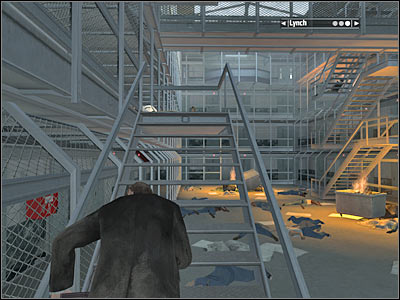
New objective: Get To The Control Room
You won't have to hide, because you won't be attacked by anyone right away. As a result, proceed to the upper balcony. Obviously you will have to use the stairs (screen). Once you're at the top, immediately turn left and eliminate two prison guards. I would recommend choosing longer bursts in order to ensure your safety. Lynch may follow you.
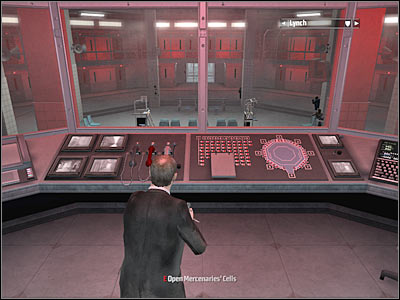
Proceed to a small room. As you've probably noticed, more enemy guards have appeared on the lower floor. It would be a good idea to take care of them right away, especially since you'll have to go back there anyway. Once they're gone, head on to the control room and approach a large console. Unlock a certain door by pressing the E key.
New objective: Eliminate All Guards In The Cellblock
I assume you've already dealt with the prison guards, so you won't have to worry about fulfilling this particular objective.
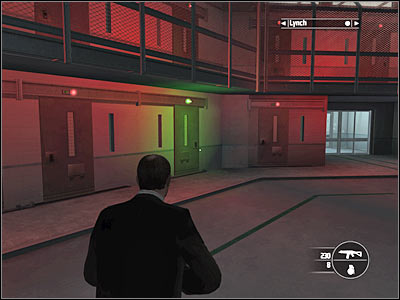
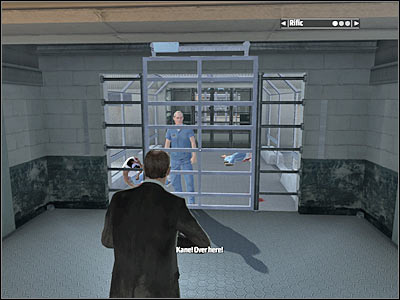
New objective: Locate Rific's Cell
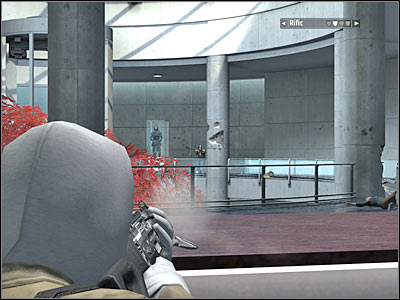
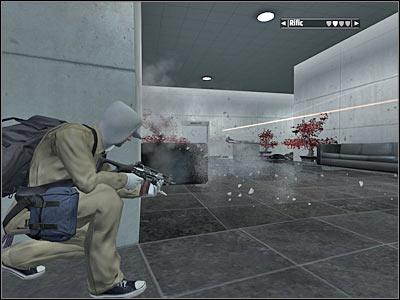
Rific's cell is located on the lower floor, so you will have to go back to the stairs. Look for a cell with a green lamp above the door (screen). Enter this cell and watch a short cut-scene.
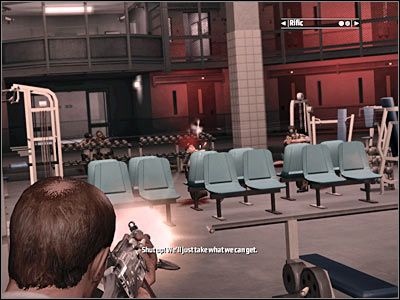
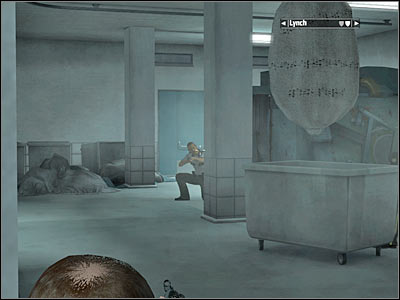
New objective: Get To The Prison Kitchen
Remember that you can give weapons to your colleagues, however it shouldn't be necessary here, because you won't encounter any stronger opponents at the moment. A small group of prison guards should arrive in this area. Order your men to attack them. It would also be a good idea to hide behind one of the nearby pillars.
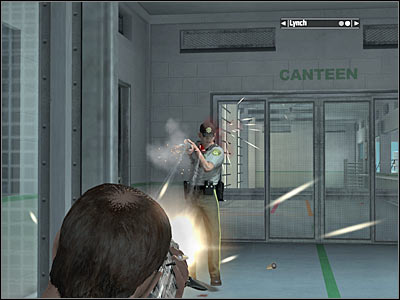
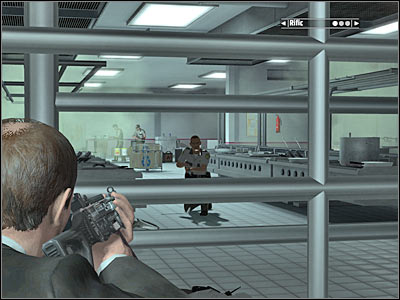
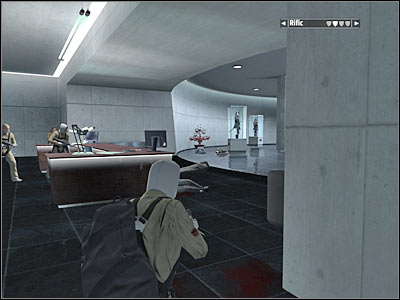
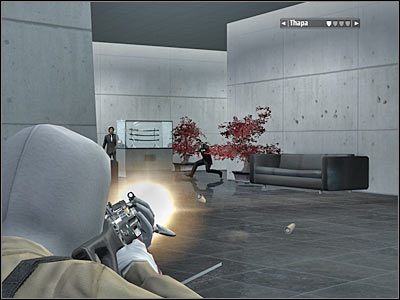
Make sure that all prison guards have been killed. Proceed towards a new corridor. You won't encounter any new opponents there, however you will have an opportunity to watch one of the prisoners attacking a guard. Head on to your right. You will probably encounter one enemy unit (screen). Kill the guard and enter a new room.
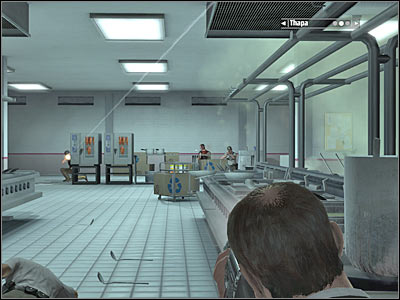
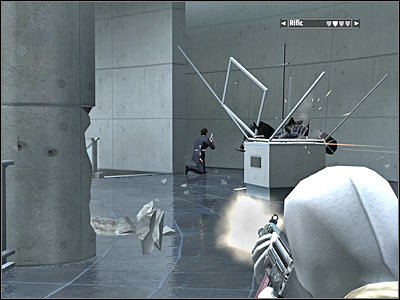
You are probably getting closer to a much larger area of the prison facility. I would recommend hiding to your left (screen). You should be able to take out all prison guards from here. Watch out, because some of them will be hiding on the upper balconies. You should also ask your team members to assist you during these fights.
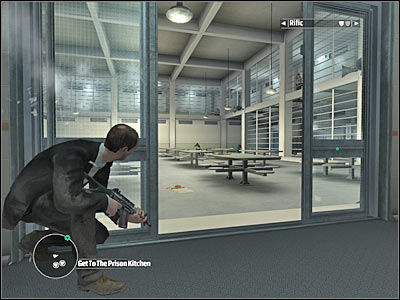
One of the prison guards will appear to your right. Kill him and go there now, because that's how you'll be able to get to the kitchen. As you've probably noticed, more prisoners are fighting here (screen). You don't have to assist them, so wait for a new objective to be displayed on your screen.
New objective: Find The Entrance To The Laundry
There's a staircase nearby. Use the stairs to get to the lower level. Eventually you'll end up standing somewhere under the kitchen.
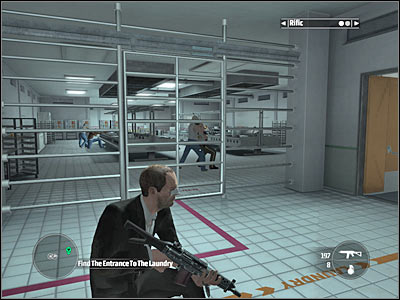
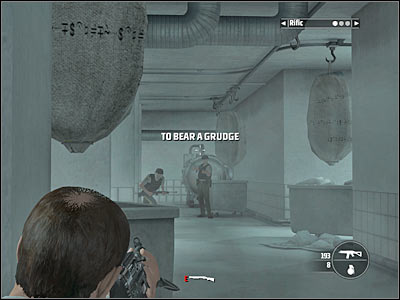
New objective: Locate Thapa In The Laundry
You won't encounter any guards near the entrance to the laundry. They will appear once you're close enough to your target area. Use some of the nearby objects for cover. Make sure that the guards have been killed. Approach a blue door and press the E key. You will be rewarded with a new cut-scene. Additionally, Thapa will automatically join your team.
New objective: Get To Cellblock B
Obviously you will be allowed to issue orders to Thapa. I would recommend being more careful from now on. You should also consider picking up more weapons in order to give them to your colleagues. Make a few steps forward. A new group of prison guards will appear in front of you. As you've noticed, they're heavily equipped. Use nearby objects for much needed cover. You will have to kill all of them in order to be able to leave the laundry area.
I would recommend leaving the rest of your team behind. Go back to the staircase. Once you're close enough to the stairs, you'll probably notice a grenade flying your way. Move back quickly and deal with the security guard (screen) who tried to surprise you. Once he's gone, order your men to get here. Proceed to the upper level.
Now you will have to go tour right. You weren't able to enter kitchen before, but know the gate has been opened. Obviously you will encounter some enemy units here. Try and take out most of them from the corridor area. Enter the kitchen and place your men behind some of the nearby objects. They can't stay in the open.
I guess you may have some problems throwing back all gas grenades, however you won't be going against a large group of enemy units, so you won't have to worry about losing your field of view so much. You will have to kill all enemy units. Once they're gone, order your men to stay put. Head on to the right corridor.
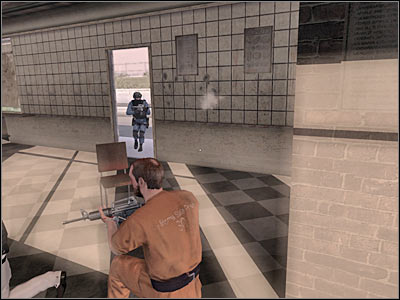
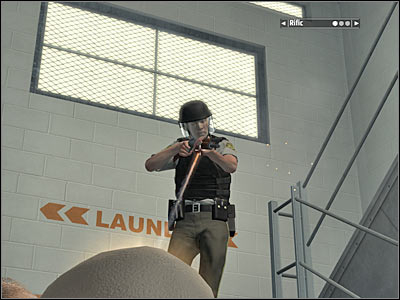
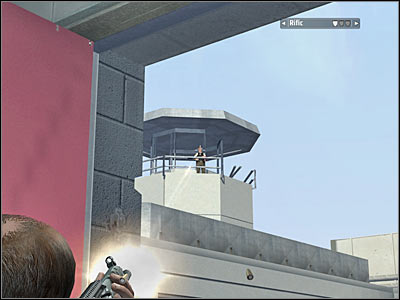
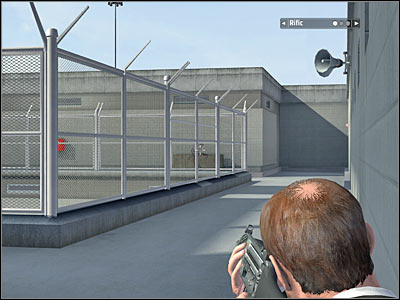
There's a door here which leads to a small courtyard. DON'T get too close to it, because the surrounding area is being guarded by the snipers. You will have to kill three of them. Start off by neutralizing two snipers guarding the left tower (screen). Lean out only for a few moments, so you won't end up in their field of view.
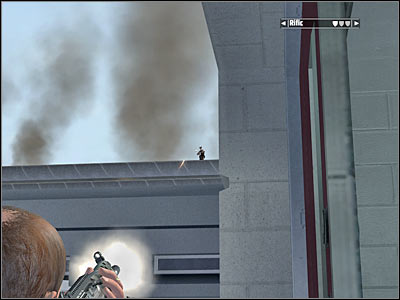
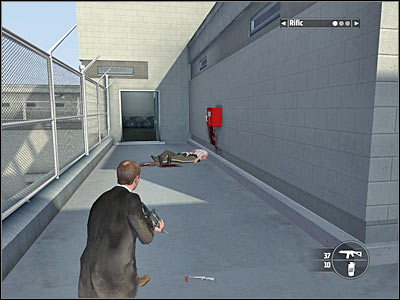
As for the third sniper, he will be standing on a roof of a nearby building. Turn right in order to find him (screen). You will have to kill him quickly. Make sure that all the snipers have been eliminated and rejoin with the rest of your squad. Proceed towards the new cellblock.
You won't find any doors or tunnels here, however it's not a big problem. All you have to do is to climb your way up to the top (screen). It'll only take you a few seconds. Ignore the police helicopter, because it won't attack you. Turn right and start moving forward.
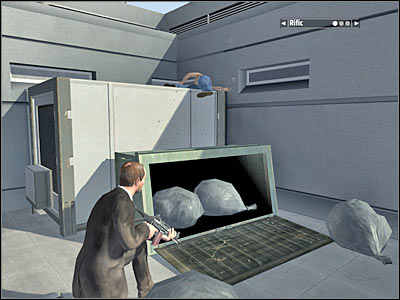
You'll notice a new group of heavier armored prison guards. I would recommend taking them out by a surprise, especially since they'll be focused on catching other prisoners. Be careful, though. One of the prison guards may decide to climb up to you. It's a very unexpected outcome, so make sure you're ready for his attack. Proceed to the ground level and start moving towards an opened gate.
Remember that it's often wise to collect new weapons from the security guards. Give them to your colleagues if you're carrying something better. Approach the gate.
New objective: Find Shelly In Cellblock B
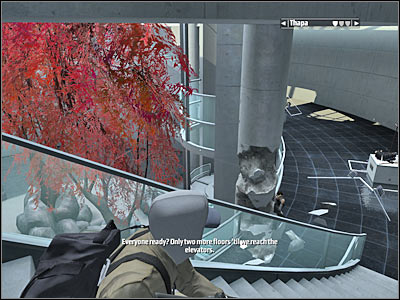
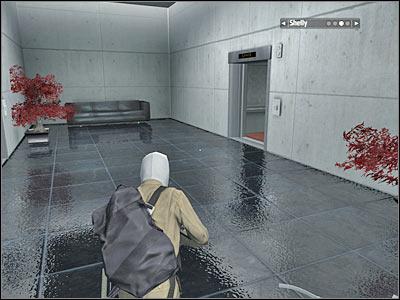
I wouldn't recommend staying too long in the open. Enter the new cellblock and start moving forward. You will have to turn right in order to get to a smaller closed gate. Shelly will be standing here (screen). Talk to him.
New objective: Lift The Lockdown In The Control Room
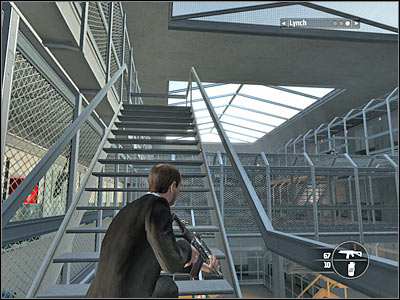
You will have to be very careful here, because the surrounding balconies of this cellblock are being guarded by a few enemy units. You should consider firing at them from a good cover. Once they're gone, use the stairs in order to get to the upper levels.
Your objective will be to get to the top level. Use the left staircase (screen) in order to get closer to the control room. You are probably going to be attacked by a small group of prison guards. They will leave the control room as soon as you're close to their position. Kill them and make a few steps forward. You should also wait for your teammates to get here.
You will have to be EXTREMELY careful here, because you're going to be attacked by several prison guards. They were hiding to your left (screen). You could consider throwing a grenade at them. If it doesn't kill them, at least they'll reveal their positions to you. Once they're gone, enter this room and approach a console. Use the control panel to open all cells and gates.
New objective: Get Outside
You won't have to go back the same way you came. Instead, head over to the left door. You weren't able to access it from the outside, but now's your chance. Head on towards a new corridor (screen). You'll end up standing on a small balcony. Your ally can be found to your right. Listen to what he's got to say to you.
New objective: Open The Yard Gate From The Tower
Start moving towards your new destination. You will have an opportunity to listen to a new conversation between Kane and Lynch. The main topic will be the mysterious death of Lynch's wife. Eventually you'll end up near the main tower. You'll probably notice a few guards. Killing them is going to be very easy. Keep heading towards the tower (with the rest of the team).
You will have to kill several other guards along the way. Neutralizing them is very simple, because they're not carrying heavier equipment. Eventually you'll come across a door leading directly to the guard tower (screen). Enter this new area and proceed towards the stairs.
New objective: Escape The Prison With All Your Men
Wait for the other prisoners to take down a fence. Once this is done, start following them. Now you will have to focus your attention on killing some of the remaining prison guards. I wouldn't recommend engaging them without any preparation, because they're heavily equipped. Thankfully, you can ask the rest of the team for help. Keep heading towards the main gate.
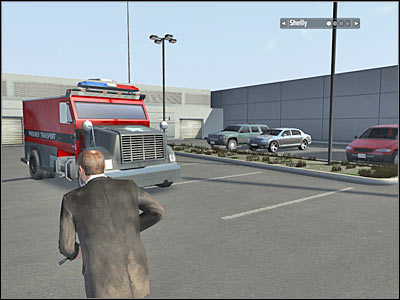
You will have to perform one more action in order to successfully escape the prison facility. There's an armored truck to your left. Approach this vehicle. Your teammates should automatically enter the truck. Get ready for the next mission.
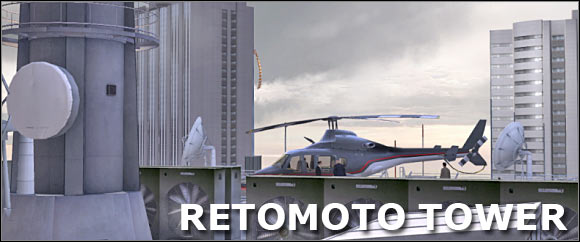
You will have to proceed with an assault on the Retomoto tower which also functions as his base of operations. You'll kill Retomoto in the process and you will also be able to retrieve his briefcase. The final phase of the mission will require you to escape from the tower using an elevator.
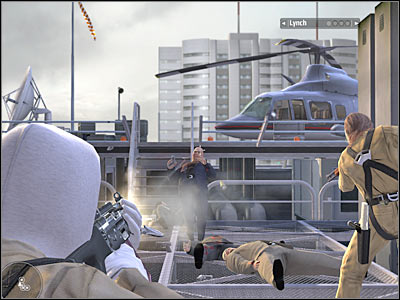
New objective: Clear The Roof
This is going to be an extremely easy mission, mostly because you'll be going in with four other team members. You'll start the mission on the roof of the tower. Obviously your first task will be to take out some of the nearby guards. Most of them are standing next to the helicopter. Attack them by a surprise. You should also consider aiming for their heads.
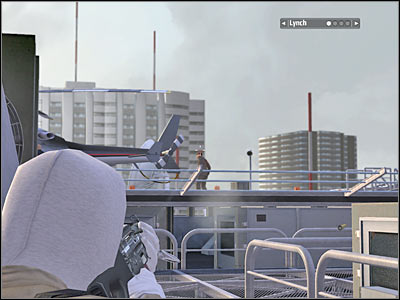
Now you should consider moving to your left. Take out some of the remaining enemy units. Be careful, because they may actually approach you (screen). Remember that you can always ask your team members for help.
New objective: Get To The Edge Of The Building
Start moving forward. You won't have to destroy the helicopter. Ignore it and approach the edge of the tower. You will have to wait for the game to display a short cut-scene.
New objective: Rappel Down
Get closer to a higher platform. You should be standing near the edge of the building. Press the E key to rappel down. Kane will automatically perform several jumps, but eventually you'll have to press and hold one of the movement keys in order to keep him moving.

You will be able to reach Retomoto's conference room in just a few seconds. Make sure that you've touched the ground. Kane should automatically plant an explosive device on the glass wall. Move over to your right in order to avoid receiving any injuries. Wait for an explosion to occur.
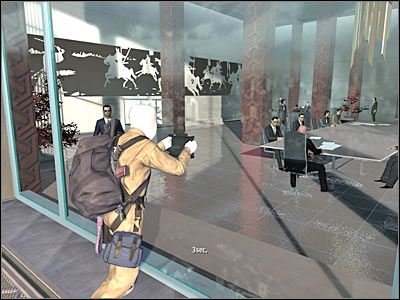
New objective: Suppress The Boardroom
Your teammates should arrive here in the meantime and they'll automatically proceed with the assault on the conference room. Obviously you will have to help them. Enter the conference room and start shooting at some of the closest enemy units. I would recommend choosing longer bursts, because you don't have to worry about running out of ammunition.
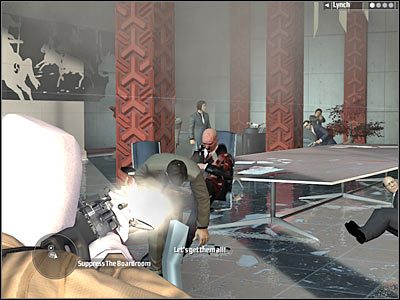
Make sure that you've killed some of the closest opponents. This will allow you to hide behind one of the red pillars (screen). You shouldn't have any problems getting rid of the remaining enemy units, especially since your colleagues probably took care of most of the guards.
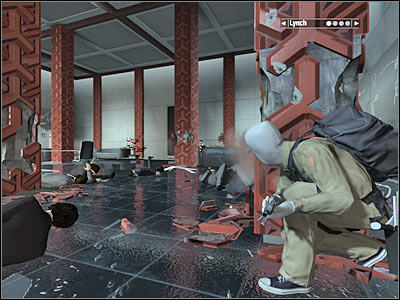
New objective: Pick Up The Briefcase From Retomoto
Retomoto was automatically killed during the attack, so you won't have to finish him off. His body can be found near a destroyed window (screen). Approach Retomoto and press the E key in order to pick up his briefcase (screen). Now you should go back to one of the red pillars. Order your men to do the same thing. Get ready for a massive counterattack.

New objective: Get To The Bottom Of The Atrium
Enemies will blow up the main door leading to the conference room. Start shooting at them, even if it means choosing a blindfire feature. Your main task here will be to prevent them from entering this room, because it would be more difficult to kill them. You should also consider using some of the carried grenades. Kill all enemy guards and gather the rest of the team around your position.
Proceed towards a new corridor. You shouldn't have any problems finding it. Choose one of the side corridors in order to reach a reception desk. A small group of thugs should be standing here. Kill the guards and order your men to hide BEHIND the reception desk. This is going to be an excellent cover. Your men will be able to kill most of the enemy guards from here.
You will have to spend a lot of time trying to get rid of enemy units. Remember that you don't have to be in a lot of hurry. Allow your teammates to do the dirty work. You won't have to move them. Reception desk is an excellent spot and they should remain there for at least a few minutes. Consider making a few steps forward. As a result, new guards will reveal their positions. Don't get too close to the balustrades. Instead, focus on securing this level of the atrium.
You can also go back to the reception desk if you're not feeling too comfortable standing in the open. Remember that you will have to secure this floor before moving on to the lower floor. It shouldn't be a problem. You should also know that you'll be allowed to destroy some of the nearby exhibits, especially since enemy guards tend to hide behind these objects.
Once you've secured this floor, order your men to get closer to the balustrades. This will allow them to focus their attention on lower levels. It's very important that they eliminate enemy guards from here. You may assist them if you want to.

Sooner or later you will have to give the order to proceed to the lower floor. Use one of the available staircases, HOWEVER make sure that they're not guarded. Some of your enemies may be hiding there and you can't let them surprise you. Get to lower floor and find a good cover for your men. It should be fairly obvious that you will have to secure this area. Once this is done, move your team members closer to the balustrades.
New objective: Get Everyone To The Elevators
Proceed with the rest of the team to the ground floor of the atrium. The last group of enemy guards will probably appear near a larger section of the corridor (screen). Order your men to hide behind pillars and other large objects. Remember that you don't have to be in a lot of hurry. Take your time and eliminate enemies from here. Also, prevent them from getting too close to your squad members.
Proceed towards the main corridor. I would recommend hiding behind the left wall (screen). Start leaning out carefully in order to take out enemy guards. You should also consider throwing a couple of grenades at them, especially since they'll remain there until the end. Once they're gone, order the rest of the team to join you.
Start moving forward. Make sure that it's safe. Turn left. You will have to find a small elevator (screen). Enter it. You are going to be rewarded with a new cut-scene sequence. Get ready for a new assignment.
Your first task will be to get out of the tower safely. Police officers and special forces units will try and stop you. As a result, you will have to eliminate them without endangering lives of the members of your team. Once you're outside, you will have to fight your way to the extraction zone which is going to be located next to a bus terminal.
New objective: Exit The Building
I wouldn't recommend using any guns right away, because you'll be allowed to take a few seconds to prepare for an attack. Exit the elevator. Turn right and use the stairs to get to the ground floor.
Consider choosing an assault rifle from your inventory once you've used the stairs. Order your men to hide somewhere nearby. Killing the first group is going to be very simple, because you will be going against police officers. Try and secure the ground floor of the tower.

Now you should focus your attention on neutralizing police forces stationed outside the tower. This is going to be a similar fight to the bank mission. Choose your targets carefully and use pillars for cover. Make sure your teammates are also firing at enemy units.
You must secure the area outside of the tower. If you're careful enough, you shouldn't have any problems getting rid of the enemy units. Make sure that everyone has been killed before moving closer to the exit. You should also consider throwing back gas grenades, however it won't be a serious problem. You will receive your first update from the van driver. Make sure to listen to what he's got to say, because eventually you will have to get to him.
New objective: Progress To Overpass Down The Street
You may exit the tower. Order your teammates to go to your right. Be careful, though. More enemy units may be stationed in that area. You'll be going against single opponents, so it shouldn't be a problem to kill them. I wouldn't recommend moving too quickly, because it's going to be very easy to die here.
Start off by ordering your colleagues to hide behind some of the nearby cars (screen). Make sure that they're using cover, because you can't expose them to enemy fire. Head on to your right, because you'll have to split up for a few minutes.
I would recommend hiding behind the wall of the right building. An enemy sniper is covering the surrounding area. He will appear on an upper platform (screen). Make sure that he dies quickly, because he would be considered as a serious threat to your safety. Two other soldiers should also arrive there, however they won't be using any sniper rifles.
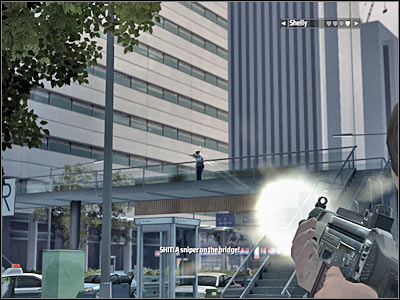
Now you should go back to your colleagues in order to issue them new orders. Position them behind a large bus (screen). Make sure that they stay there, because they can't move any further. You should also check the surrounding area for possible reinforcements. Don't let anyone surprise you and remember that you can plan your each move.
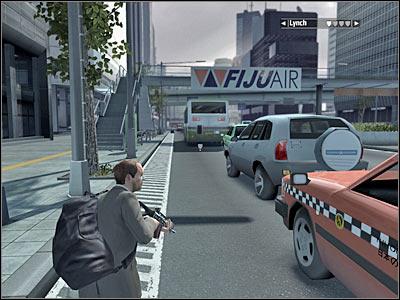
I would recommend heading up to the balcony. That's where you'll find a body of a dead sniper. Your main objective here will be to take his weapon. Once it's in your possession, move back to the ground level quickly, because this area is being monitored by a second sniper. Rejoin with the rest of your squad.
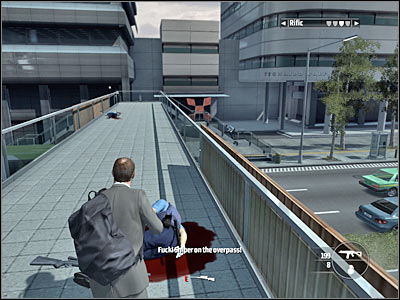
Obviously you will have to take out a new sniper. It's not going to be easy, because he's very good at what he's doing. Try hiding behind a bus or a car. You will have to lean out for a very short period of time. Kill him with your newly acquired sniper rifle. Look at the screen if you're having some difficulties finding him. Now you've got two choices. If you plan on using a sniper rifle, you will have to rely on your team members in order to take out some of the weaker enemies. Otherwise you should go back to the balcony in order to retrieve an assault rifle.
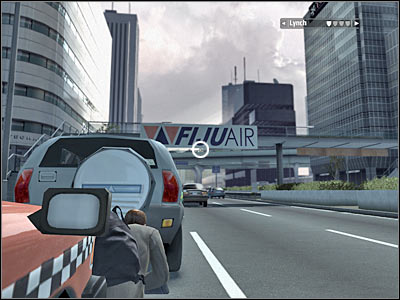
Start moving towards your current destination. You will probably encounter enemy units along the way. Use the sniper rifle to kill them and make sure your colleagues are using nearby objects for cover. You will have to be thorough, so you won't leave anyone behind. The van driver should contact you in order to set up a new place to meet. As a result, you will have to go to a bus terminal.
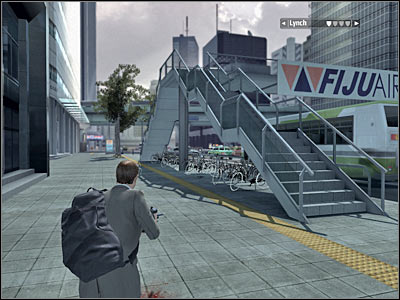
New objective: Get To The Bus Terminal
Order your men to follow you and start moving forward. I would recommend staying close to the left building. You will come across special forces units in just a few seconds (screen). Killing them is not going to be easy, because they're using helmets, bulletproof armors and riot shields. Hide your men and kill your opponents with a sniper rifle. Obviously you will have to be aiming for their heads.
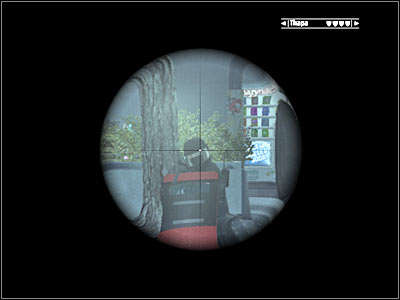
Keep heading towards your new destination. You shouldn't encounter any other units here, so you may proceed to a large junction. Turn left (screen). You will probably come across a few cops, however killing them is going to be much easier, especially since you'll be allowed to use nearby pillars for cover. The bus terminal which can be found to your right.
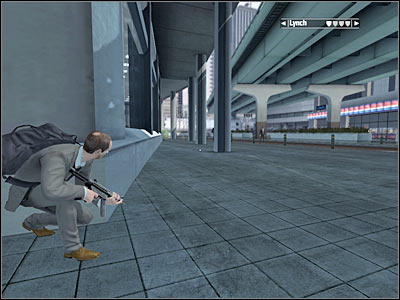
New objective: Get To The Street
Order your men to move forward. They should hide somewhere to your right, near the benches (screen). It's going to be risky, but they should fine and they'll be able to take out a lot of enemy units from there. Head on to your left. I wouldn't recommend using the stairs, however make sure that no one surprise your team. Find a good cover and start shooting at some of the well hidden targets.
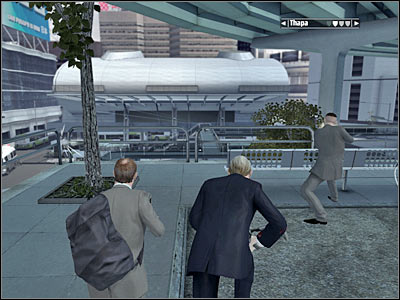
Now you should move a part of your team to the left (screen). Place them here and allow them to take out additional enemy troops. You will have to secure most of the terminal area, because you'll go down there very soon.
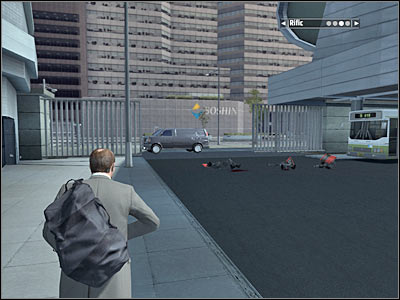
Make sure you've killed everyone you could find, because you'll have plenty of time to try and secure the bus terminal (as long as you don't go down there). It's important, because once you've decided to advance, you will have to act quickly. Order your colleagues to follow your lead and use the stairs to get to the bus terminal. Turn left and start moving forward. I would even recommend running, because SWAT units are heading your way.
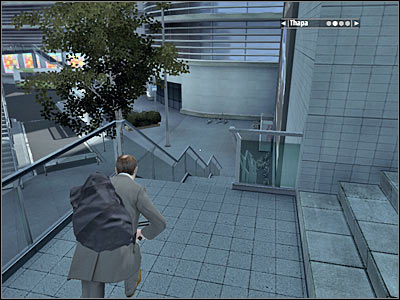
Keep running forward, however you will have to eventually turn right. You will probably notice that the exit is being guarded by three enemies equipped with riot shields. You must take them quickly, so you shouldn't use a sniper rifle. Instead, keep firing at them and order your colleagues to do the same thing. You will have to deal with them in less than 10-15 seconds. Grenades are also a good idea, however using an assault rifle is more important.
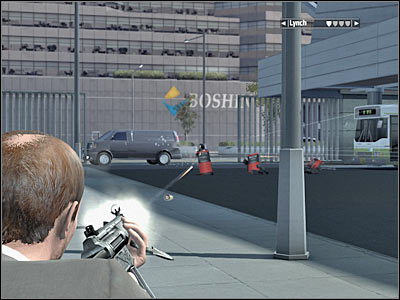
New objective: Get Everybody To The Van
This is going to be a formality. Start running towards the van. You can't stop, because you're being chased by police units. Make sure your colleagues are following your lead. You will only have to approach the vehicle in order to successfully end this mission.
You will have to travel through streets of Havana. Obviously it won't be safe out there, because a civil war has escalated in that region. Your first objective will be to rejoin with the squad and a small group of rebel soldiers. After that, you'll have to fight your way to get closer to the presidential palace.
New objective: Regroup With Your Men
This is going to be a difficult mission, however the first part of it is quite simple. You'll start the game inside a partially destroyed building. I would recommend hiding near the windows. Try and take out a few enemy soldiers from here. You'll find them by aiming at the red berets. Don't attack any of the rebel units.
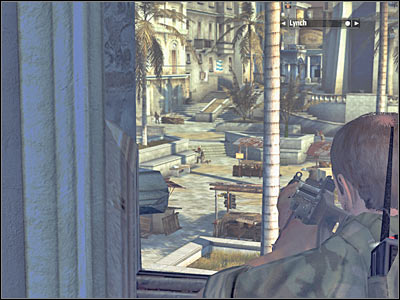
You will also have to neutralize two heavy machine gun nests from here, so you won't have to deal with them once you've left this building. A small group of soldiers will hide inside a small hut (screen). Prevent them from doing that, because you would only have to lose more time waiting for them to reveal their positions. Try to secure this entire area. It shouldn't be too hard, especially since enemy soldiers will more likely attack the rebels instead of you or Lynch.
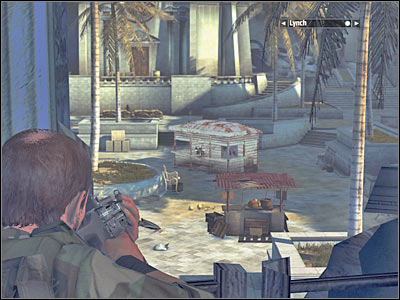
Move back from the windows and order Lynch to follow you. As you've probably noticed, you can't use the stairs. As a result, head on to the next room. You will have to find a large hole in the ground (screen). Use it to get to the ground floor. You'll have to watch a short-scene. Also, the good news is that you'll be able to issue commands to an entire team.
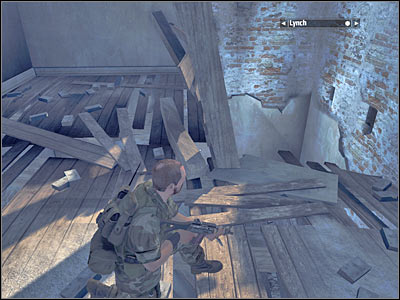
Try getting closer to a nearby street. You've already secured this square, however new soldiers will arrive in the area. If you're lucky, you should be able to surprise them. Don't leave this area right away, because a mortar strike will begin in a short while. It'll make your approach a lot more difficult, however if you're careful enough, you should be fine.
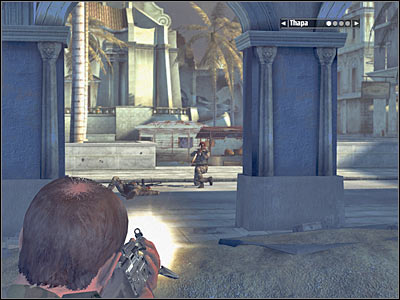
Start off by moving to your left. Don't leave the covered area, because you're perfectly safe there. Wait for the right moment to make a move. Start running towards the left building (screen). It's very important that you get there, because you'll be allowed to get closer to your current destination. Start moving forward. Just as before, don't get too close to the main square.
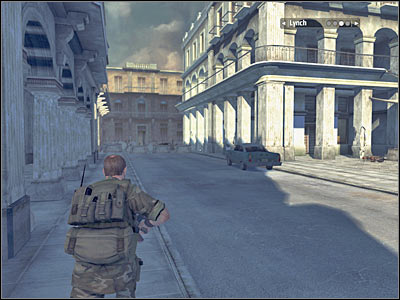
You will probably notice a small group of enemy soldiers. If your colleagues are somewhere nearby, they should be able to deal with this threat without your assistance. Otherwise you should hide behind the nearest pillar. Keep pushing forward. I would also recommend taking an assault rifle from one of the neutralized soldiers, especially since you won't have any problems finding the ammunition and you can't ask your colleagues for supplies infinitely.
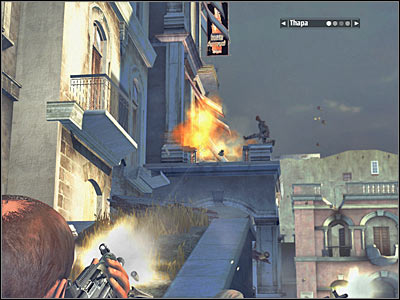
Your men should automatically find a good cover (screen) and they'll start shooting at the visible enemy units. Just make sure they won't move too far away from you. Enemy soldiers will appear to your right. Try and prevent them from using heavy machine gun nests. Otherwise you would have to be more focused on finding a good cover rather than neutralizing them.

Try moving closer to a large church. Obviously you should stay close to the left building, instead of choosing the main passageway. You still have to avoid sustaining injuries from a nearby mortar explosions. Get ready to proceed with the assault. Once a mortar strike has ended, start running towards the stairs. MAKE SURE your colleagues are following you.
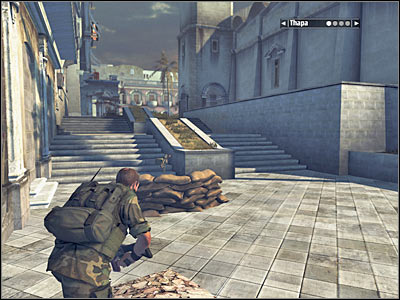
You will have to be ready to act quickly. You are going to be attacked by a larger group once you're close enough to the top of the stairs. Start off by securing an upper balcony. One of the enemy soldiers will be standing there. Kill him yourself or destroy a nearby explosive barrel. Once he's gone, focus your attention on other opponents. Obviously your team should take part in these fights.
If you don't want to risk sustaining major injuries, you may consider going back to the stairs. You would be able to hide behind a small brick wall (screen). Don't worry about your colleagues, because they should be fine on their own. Order them to stay here once they've successfully eliminated all enemy units.
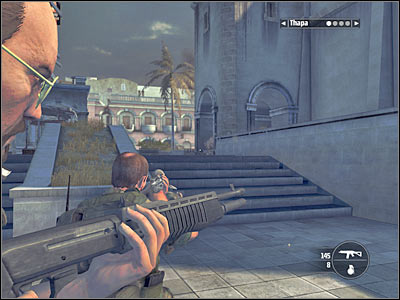
New objective: Meet Up With The Other Men
Now you will have to deal with a new type of problem. An armored vehicle is guarding a nearby street. As a result, you will have to destroy it in order to be able to proceed to a rebel hideout. It's very important that your men stay behind. Head on to your right and find a rocket launcher (screen). Take it.
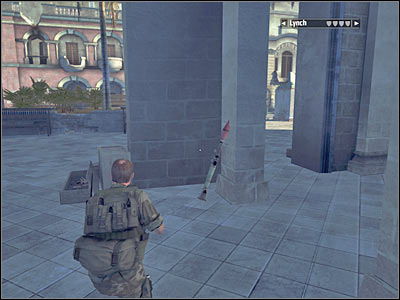
Don't go to your right, because it would be much more difficult to destroy the vehicle from there. Instead, start moving forward. Look at the screen, because that's where you should be hiding. One missile hit should be more than enough to destroy the vehicle. Go back to your team and pick up your original weapon while you're there.
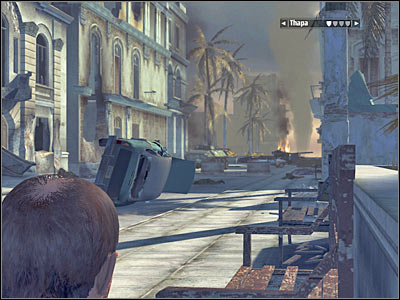
You may proceed to the new area of the map. Thankfully, there aren't any enemies out there, so you won't have any problems reaching a rebel hideout. It's going to be one of the left buildings. Rebel units will automatically join you. Each of your teammates will have three rebel soldier assigned to him, so you won't issue any orders directly.
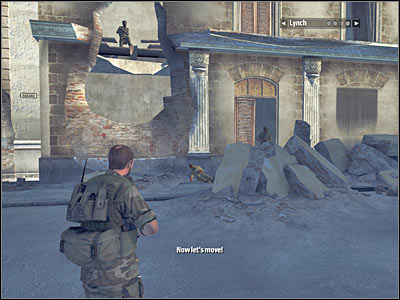
New objective: Proceed To El Capitolio
This is going to be the most difficult challenge of the mission. Before we'll go into details, there a few important things for you to know about:
1) Avoid the enemy gunship at all costs. You should be able to familiarize yourself with its flight route, so you'll know where and when to duck in order to avoid being hit. Thankfully, you will be allowed to destroy the helicopter, however you'll probably achieve this later on during the course of the battle.
2) I'd strongly recommend leaving the entire team behind, because your allies have a very bad tendency of leaving their original posts and going into battle when it's not needed. This mostly concerns rebel soldiers. Thankfully, you won't be punished in any way for losing them.
3) Don't even think about storming through this square quickly, because you'll die and you'll have to repeat everything from the beginning. Your each move should be thought out, so you won't risk lives of your teammates.
Like I've already said, you should order your men to stay near a destroyed armored vehicle (screen). They should be safe here, so you won't have to worry about them getting into trouble. Don't worry, because you will be able to secure the first section of the square by yourself.
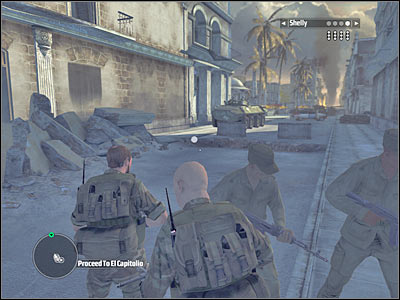
Start moving forward. You should consider hiding behind a small concrete wall. Once you're there, start shooting at the enemy soldiers. The main group will probably appear to your right. There's going to be at least two of them. Don't leave this cover, so you won't sustain any injuries and you won't get attacked by the helicopter.
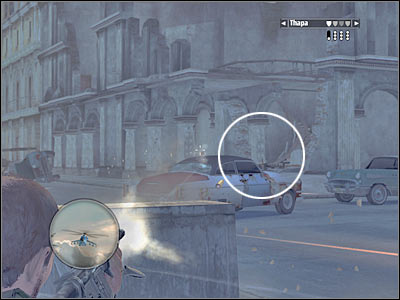
Now you should consider turning to your left, however you will have to remain near a small wall. Try and take as many enemy units as possible. Obviously your main target here will be a heavy machine gun post. Neutralize it as soon as possible. After that, deal with the remaining enemy units.
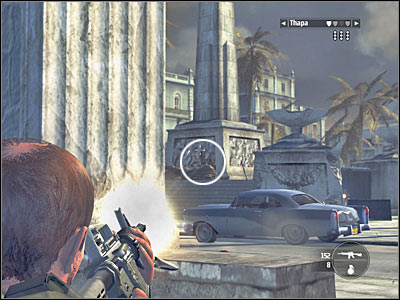
If you've followed my instructions, you've already secured the surrounding area. Don't worry about single enemy units. Start running towards the building on your right. That's where the first group has appeared. Look at the screen if you're having some problems figuring which one it's going to be. Make sure that the rest of the team is staying behind, near a rebel hideout and a destroyed armored vehicle.
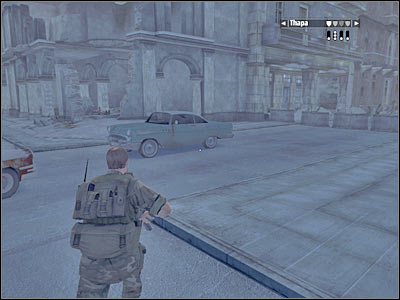
Enter the building and find the stairs. Obviously you will need to proceed to the first floor. Be careful, though. This area will be guarded by at least two enemy soldiers. One of them is hiding to your right (screen). Kill the soldiers. Now you should hide and wait for an allied gunship to leave this area. It's better than allowing the helicopter to surprise you.
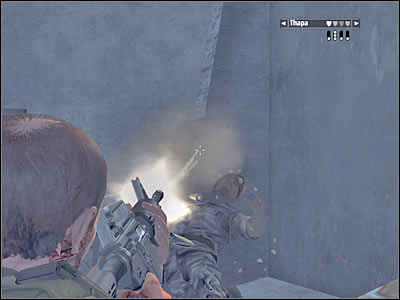
One of the enemy soldiers was probably using a heavy machine gun, so you should consider picking up his weapon. Start shooting at the visible enemy soldiers. I wouldn't recommend using a nearby heavy machine gun nest, because you would exposed to enemy fire. There are more enemy units to your right (screen). It's very important that you secure this area from here, because you'll want to clear a path for your team members.
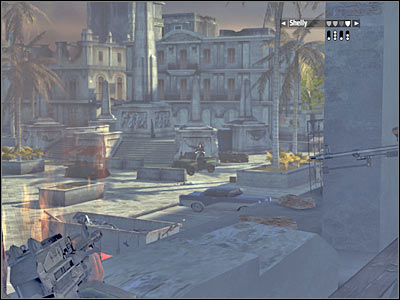
As for the enemy gunship, you could consider taking care of this problem right now. First of all, you will find two rocket launchers here, however you will have to practice firing them, so the missiles will actually hit the helicopter. Try performing several of these attacks. You won't destroy the gunship, but it's not a problem.
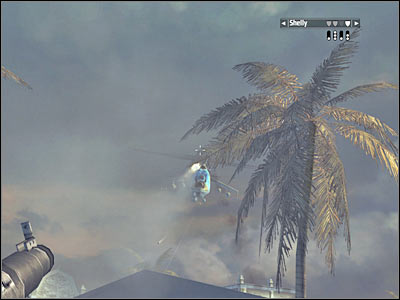
Now you will have to find a good cover in order to avoid being targeted by the helicopter, however you must still be able to attack it. Look at the screen, because that's where you'll be able to hide. Now you will have to wait for the gunship to get here. Use a weapon (preferably a heavy machine gun) to damage it. If you've done everything according to the plan, the gunship should finally leave this area, allowing you to proceed with the next part of the plan.
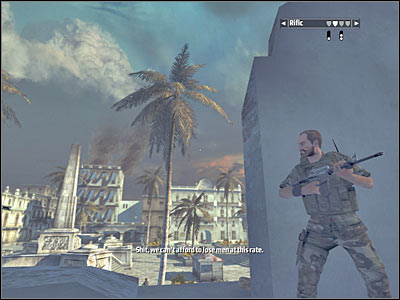
Make sure that you're standing somewhere to your left. You will have to move the allied units towards the square. Remember that you can issue orders to them from a larger distance. Look at my screen - it's the safest path for them. Your allies will probably come across only a few soldiers along the way, but they should be able to kill anyone who gets closer to them.
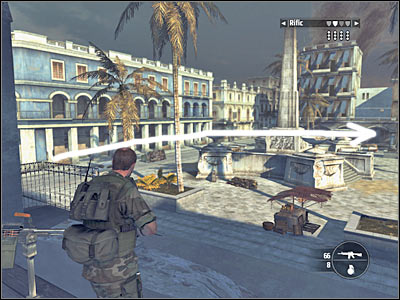
Now it's going to get even more difficult. Try ordering your men to hide behind one of the smaller huts (screen). As a result, a large group of enemy soldiers will arrive at the square. Order your teams to retreat. This has to be done IMMEDIATELY, before they suffer major injuries. Your team members should go back to the armored vehicle. Don't leave this balcony. Instead, wait for enemy units to show up.
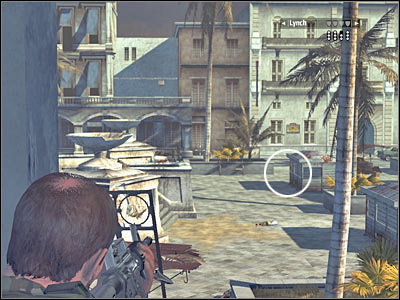
Now you will have to start shooting at the enemy soldiers. Kill anyone who's close enough to die. It's not going to be easy, because there's a lot of them out there. You will also have to lean out only for a short period of time. Additionally, observe nearby staircases, because someone may decide to pay you an unwanted visit. Don't let any of the soldiers surprise you.
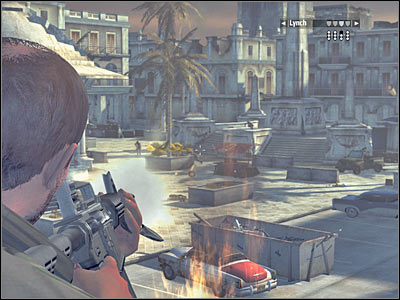
Alternatively you could go back to your allies and assault enemy positions from there (screen). I have to warn you, though. Going back to your colleagues would be very risky, especially near the stairs. As a result, it would be better to stay here, even if it means killing enemy soldiers one at a time.
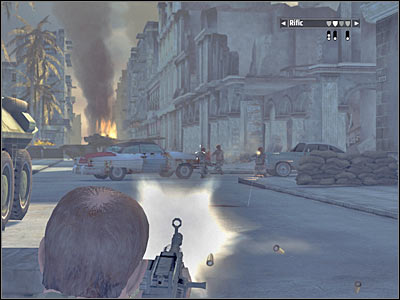
Eventually you will have to secure this entire area. Once you've killed all visible soldiers, order your team members to go back to some of the nearby huts (screen). It would be a good idea to join them. Use the stairs and start moving towards them.
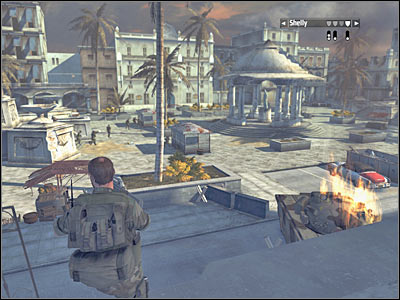
As you've probably noticed, the gunship has returned. This time it will circle the area around the huts, so you will have to shoot it down. It also has to be done as soon as possible, because the gunship will be returning to the main square more frequently. There are some rocket launchers to the left (screen).
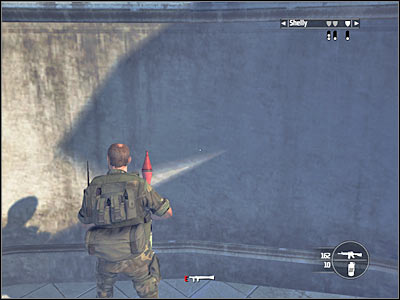
You could also hide near your men and wait for the gunship to arrive (screen). Either way, you will have to shoot it down. It's probably going to take you a lot of time, so focus on avoiding attacks of the gunship (especially missiles). Thankfully, the final part of this mission is going to be much easier.
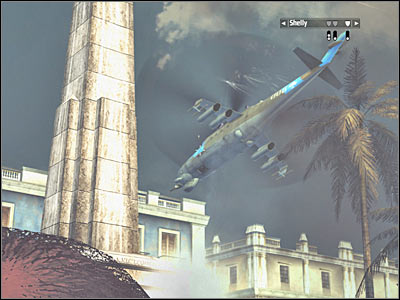
Gather the rest of the team around your position. Don't worry if you lost all rebel soldiers, because you won't need them in order to ensure your victory. Start moving towards your current target area (screen). I would recommend going somewhere to your left. Kill anyone who decides to appear near the square. Like I've already said, you won't be dealing with major threats, so you don't have to plan your each move very carefully.

Stay here for a few more seconds. Your main task will be to neutralize one of the heavy machine gun nests. It's located inside the left building (screen). Disable the nest as soon as possible. Once this is done, order your teammates to join you.
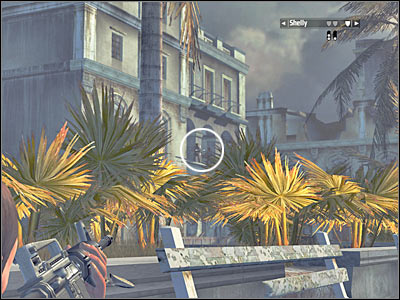
You may finally proceed towards the left street, because it leads directly to your current destination (screen). Just as before, you will have to deal with a few soldiers, but it shouldn't be a problem. Keep heading forward. Hide somewhere to your right and deal with a second group. That should be the last of them.
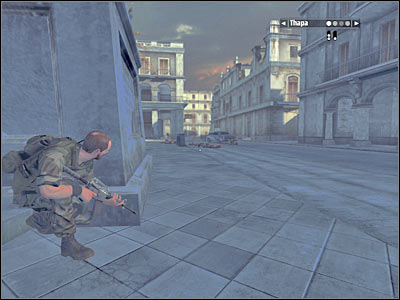
New objective: Get Inside The Building With All Men
You should be able to reach a gunship wreckage. Listen to a short conversation and ignore some of the nearby explosions. Make a few steps forward and turn right. You will have to enter this new building (screen). Wait for the game to begin loading a new mission.
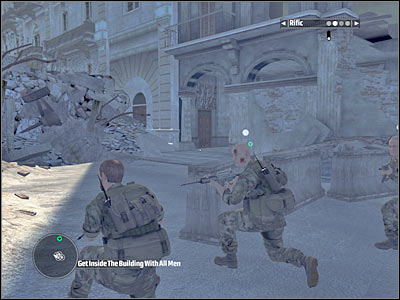
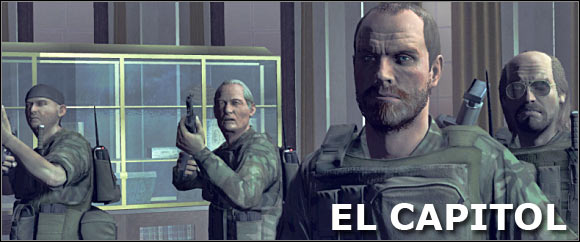
Your first task will be to reach a roof area of the building located near a presidential palace. You will have to take out two armored vehicles, as well as a new gunship. After that, you'll take part in an assault on the palace. You will have to find your way inside in order to hunt down and kill several members of The7 organization. Carlos will also tell you where to look for his friends.
New objective: Get To The Rooftop
This is also going to be a difficult mission, mostly because there won't be too many checkpoints for you to use. Thankfully, the first part of this assignment is very simple. You should be able to reach several balconies. Here's where you'll come across enemy soldiers. I would recommend surprising them.
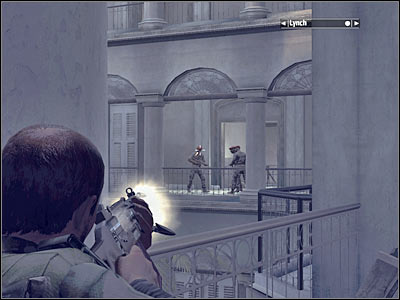
Allow Lynch to get here. He should automatically start firing at enemy units, including soldiers occupying lower levels of the building. You should focus on the upper floor (screen). There are at least two guards out there. Obviously you should be using pillars for better cover, however you won't sustain any major injuries here.

Keep going towards your current destination. You won't come across any opponents until you've reached a small corridor (screen). Neutralize one of the enemy soldiers and proceed to the staircase. You must head on to the upper floor.
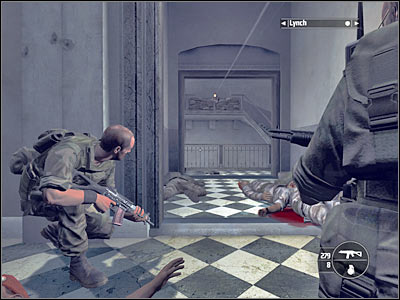
Once you've reached the higher floor, turn right and kill a single enemy unit. Now you should consider hiding behind a nearby wall. You should be able to take out several other hostiles from here (screen) and you won't have to fire too many bullets, because they aren't carrying any armors. I would recommend taking an assault rifle from one of them. Keep heading towards your current destination.
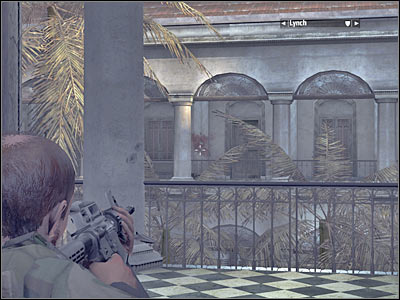
You will have to find a new passageway which is going to be located to your right (screen). Going there will allow you to get to the roof of this building. Start off by killing several guards. There should be three of them. Thankfully, you can ask Lynch to help you, however you will have to leave him once they're gone.
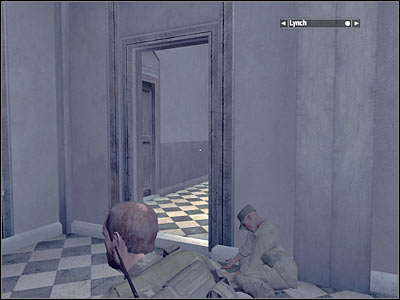
New objective: Take Out The BTRs
You will have to be crouching here in order to prevent Kane from losing a lot of health points and maybe even his life. Make sure that Lynch stayed somewhere behind, because he can't help you here. Head on towards one of the corners of the roof (screen). Pick up a rocket launcher along the way.
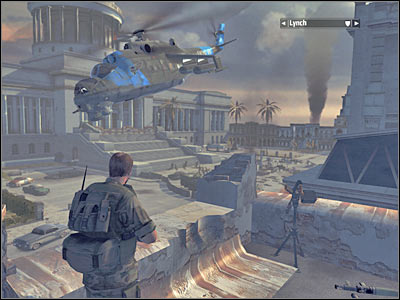
Look at the screen if you want to find out exactly where to search for armored vehicles. Start off by moving to your right, so you will only have to face off against the left BTR unit. The idea of winning this battle is very simple. Use your rocket launcher to fire missiles at each vehicle. Hide after successful shots. You will have to hit each of the BTR units at least three times. Black smoke means it's disabled, so you won't have to attack such a vehicle anymore.
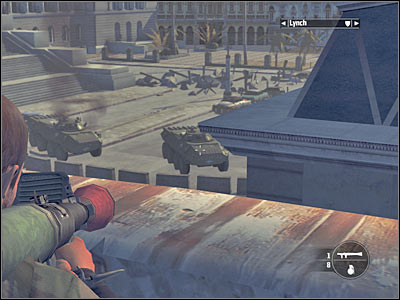
Make sure that both BTRs have been disabled. Pick up a new rocket launcher and try to memorize where to find other weapons of this kind. An enemy gunship will arrive here in a short while. I wouldn't recommend attacking it right away. Instead, wait for a new mission objective to be displayed on your screen. You will also have to find a good cover for Lynch, because he can't help you here and otherwise you'd probably lose him.
New objective: Take Out The Hind
You will have to be ready since the beginning, because even the first attack of the gunship will be extremely powerful. The pilot will probably use missiles against you, so make sure you're using a good cover to avoid injuries. Try and hit the gunship at least once (screen). You will also have to make sure that you have a fully loaded rocket launcher at your disposal. The gunship will probably attack you twice, so you'll have plenty of opportunities to damage it with more missiles.
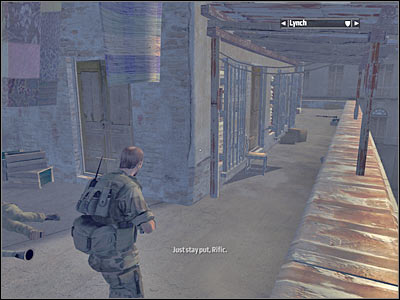
Don't forget about taking care of Lynch. Look at the screen - this seems to be the best possible hideout for him. I wouldn't recommend trying to give him a rocket launcher. You will also have to deal with a single sniper. He will appear on a roof of a nearby building. Wait for the helicopter to get back here.
The pilot will probably try a more direct approach. As a result, the helicopter will be hovering near your roof. I'd strongly recommend that you hide, because you will have to avoid being shattered by a powerful machine gun. Remember to have a rocket launcher ready to fire. If you have used up all available launchers, switch to a heavy machine gun.
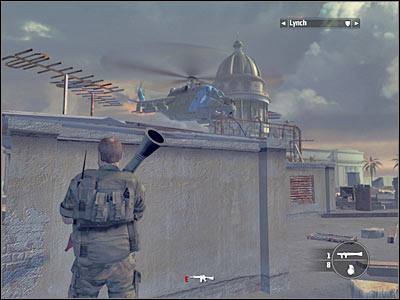
You will have to continue attacking the gunship until the pilot loses control over it (screen) and crashes. Remember to check Lynch's whereabouts from time to time, because he's dumb enough to leave his cover. Sadly, AI can't considered to be one of the stronger aspects of this game.
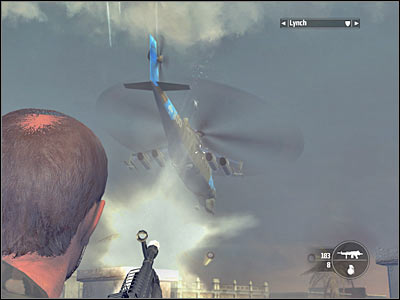
New objective: Take El Capitolio
Now you will have to act quickly in order to increase your chances for taking control over the presidential palace without having to risk too much. Pick up a standard machine gun, because you'll want a more precise weapon. Approach the edge of the roof and look for a place to rappel down. Use the rope and slide down as soon as possible. Make sure that Lynch is following your lead on this one.
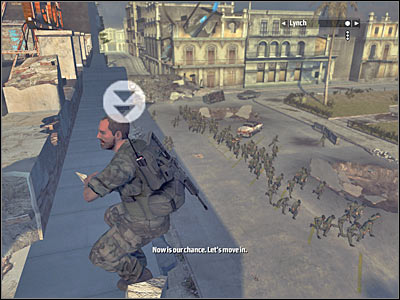
Don't follow the crowd, because you would have ended up under heavy fire from enemy soldiers. Instead, go to your right. You will have to take out an enemy equipped with a rocket launcher. It's very important that he dies quickly and before he's able to counterattack.
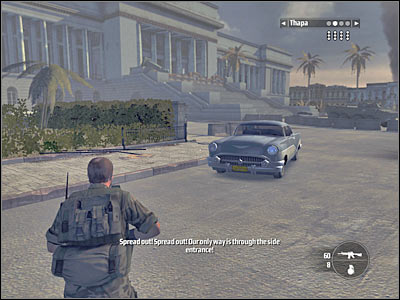
Now you should hide somewhere near the side entrance to the palace (screen). Make sure that your colleagues have stationed themselves in the area. Enemy soldiers will start running out of the palace. Use at least one grenade and then start shooting at them. Try to kill as many of them as possible, before they're able to regroup and take their positions. If you were quick enough, there should be only a few of them left.
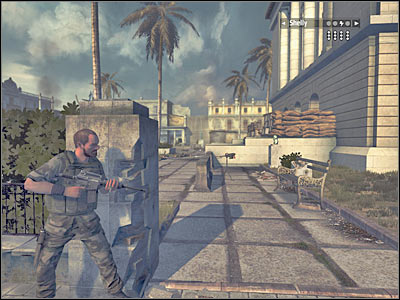
Watch out for the upper wall of the palace, because more enemy units may appear near to a dead RPG soldier. Thankfully, you won't have to stay here for too long. Gather everyone around you and start moving towards the side entrance. Like I've already said, you'll probably eliminate only a few soldiers here. Proceed to the stairs.
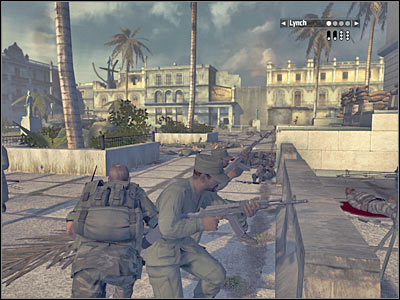
New objective: Get To Side Entrance Of El Capitolio
Be careful, because there's an active heavy machine gun nest to your right. If you're lucky, you should be able to avoid it or it's already neutralized. Secure the side entrance before you decide to enter the palace. You'll be going against small groups, so it shouldn't be too difficult to achieve.

Enter the palace through the side entrance. You shouldn't encounter any soldiers right away, so you may proceed towards the stairs. Head on to the upper level. Some of the enemy soldiers are hiding behind sandbags. Take them quickly. Be careful, because a second group will arrive from the left (screen). It would be wise to involve the entire team, however you should also be fine on your own.
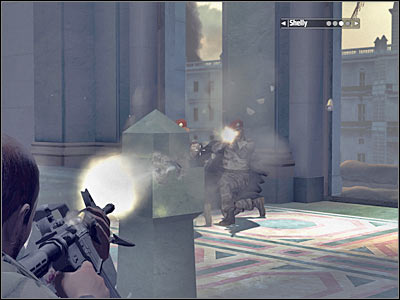
Head on towards a longer corridor, however you must be moving slowly. I would also recommend zooming in the view. Take out one of the enemy soldiers and prevent him from using a rocket launcher. Otherwise you would have to dodge a missile. Proceed to the next section.
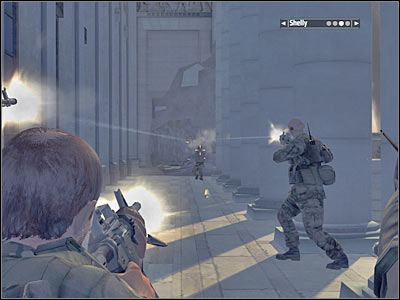
New objective: Get To Main Entrance Of El Capitolio
Remember that you don't have to be in a lot of hurry. Additionally, you can surprise some of the gunners if you're really lucky. You should take out all of the remaining enemy units while you're at it. Thankfully, you'll be going against smaller groups, so it shouldn't be difficult. Enter the palace if you feel you're ready for a final assault.
New objective: Take Out The7 Members
Head on to your right. You will have to kill two members of The7 organization. They're heavily fortified, so obviously it won't be easy to get rid of them. Don't worry about an unusual filter, because it won't interrupt your approach. Let's start by hiding Lynch. Order him to stand behind a large concrete object (screen).
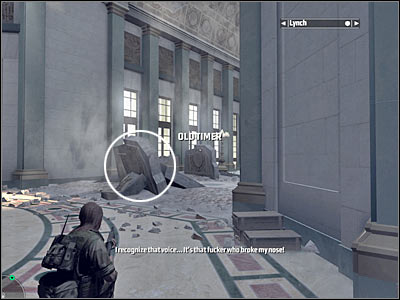
Make sure that you're standing close to the right wall. You won't be able to kill anyone from a larger distance, so you'll have to get closer to the bunkers. Start off by going towards an object which can be found to your right (screen). After that, proceed to the nearest cover. Obviously you should be using a sprint button in order to ensure your safety.
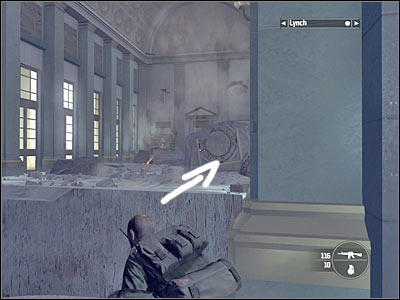
You should be able to neutralize the left bunker from here (screen). Start shooting at your opponent. Obviously you should choose longer bursts, instead of single shots. This will increase your chances of killing him quickly. Wait for your main character to reload his weapon.
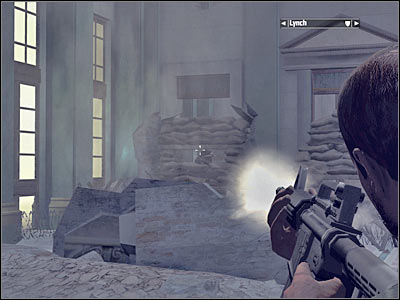
I would recommend running to your left, because you'll be able to hide behind a new object (screen). I have to warn you, though. You won't be fully safe there. You should be able to take out a second opponent. It's going to take a while, however he won't retreat, so you don't have to worry about anything else. Once he's gone, gather the rest of the team around your position.
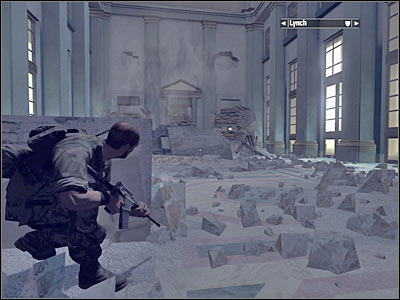
New objective: Proceed To End Hall With All Men
Start moving forward. You won't have to secure the bunkers where the members of The7 organization were hiding. One of the enemy soldiers is standing just around the corner (screen). You can take him out yourself or you can order your men to kill him. Keep heading towards your current destination.
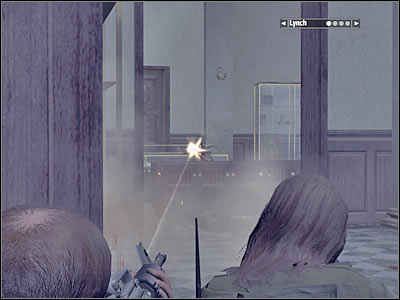
You will be rewarded with a short cut-scene. You'll also find out that there are three more members of The7 organization to hunt down. Head on to a new corridor. As you've probably noticed, the dictator has committed suicide. Get closer to this room. The first enemy soldier will be standing in front of you (screen). Additionally, there's one to the left and one to the right. Killing them will allow you to finish this mission. Get ready for a new assignment.
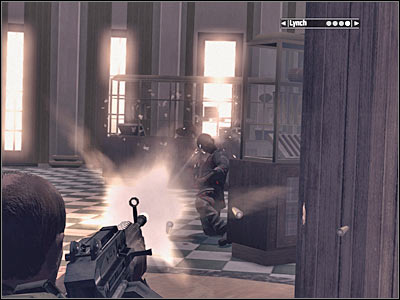

You will have to start off by meeting with some of the rebel units. Your main objective for this mission will be to get closer to a hacienda, because that's where the remaining members of The7 organization are currently hiding. The only safe road leads through the jungle. You will also have to prevent enemy units from using the flare guns. Otherwise they would be able to warn your main opponents about a planned assault.
New objective: Proceed To Clearing
Despite what you might think, you won't have to stay in the shadows, because you'll be following allied units. You can go past them if you want to, because you won't have to wait for them to get to a small encampment. Head on straight and then turn left. Approach one of the rebel soldiers (screen). Wait for a short cut-scene to be displayed on your screen.
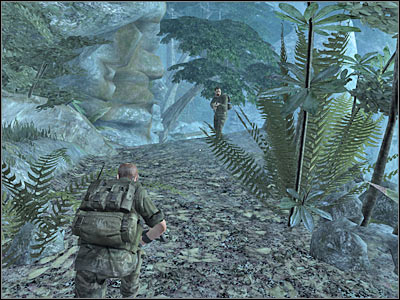
New objective: Get To The Hacienda Without Setting Off Flares
As you've probably noticed, you have been rewarded with a few rebel units. Just as before, you won't be allowed to issue them orders directly. Instead, they will follow your team members. Thankfully, you won't receive any penalties for letting them die. There's only one passageway leading to the hacienda (screen), so you can't get lost. You won't have to be moving slowly here, because the game will prevent you from falling down.
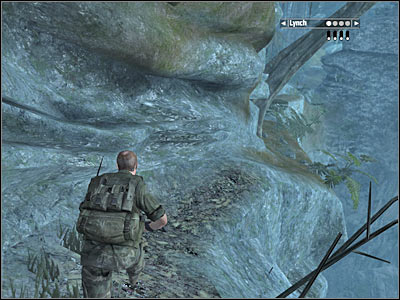
Keep heading forward. Look at my screen - that's where you should make a stop. Get ready to attack the first group of enemy soldiers. This battle is going to be quite challenging, mostly because enemy units will use better guns against you. Wait for an entire team to get here. It's important, because you'll need their help to succeed.
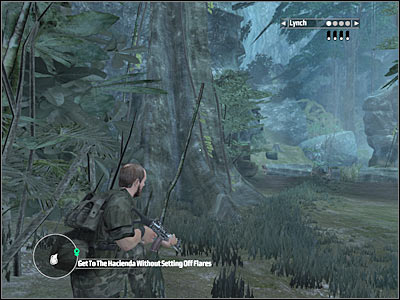
Try making a few steps forward. You'll probably notice that enemy soldiers have left the bushes. You will have to act quickly here in order to prevent one of the soldiers from using a flare gun. A small window will appear on your screen. This time it won't mean you've been targeted by a sniper. Instead, it'll show you the exact location of your main target. You will have to kill this guard in order to ensure your victory.
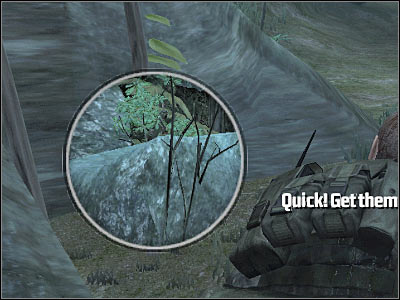
The soldier with a flare gun will start running towards a smaller hill (screen). Obviously you will have to kill him quickly, however his first shot will probably be unsuccessful, so you'll have more time to take him down. Make sure you aren't too exposed, because you will have to avoid being shot by other enemy soldiers at the same time.
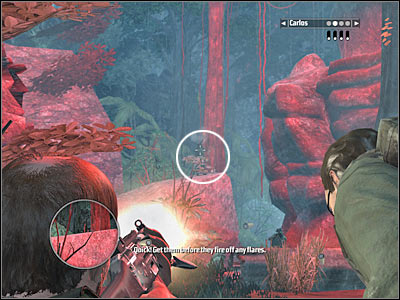
Like I've already said, the first flare will probably bounce off one of the nearby rocks. Once you've disabled the soldier with a flare gun, start shooting at his colleagues. There's going to be a lot of them. Don't worry if you see some of them retreating. They won't call for backup. Order your men to hide somewhere in front of you, preferably near a good cover.
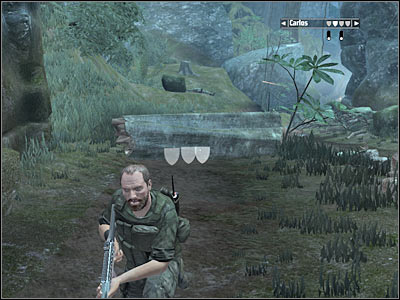
I would recommend proceeding towards the top of the hill. That's where you've neutralized the soldier equipped with a flare gun. You should be able to take out several other opponents from here (screen). Thankfully, shooting at them won't result in raising any alarms. Rejoin with the rest of your squad once you've been able to defeat all enemy units.
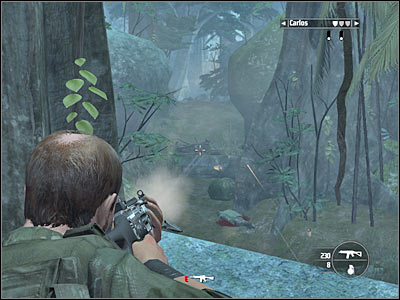
Keep heading towards the hacienda. You should be able to get to a much larger cleaning in just a few seconds. Order your men to stay put. Head over to the waterfall. You should be able to come across a well known icon (screen). This means you can rappel down. You could also go to your left, however I think that using a rope to get to the lower level is a better idea.

Make sure you've reached the lower section of the waterfall safely. Start moving towards a large tree. Hide there and wait for one of the enemy soldiers to show up. Get closer to him without being spotted. Obviously you will have to neutralize him with a melee move. Order your teammates to get here. You will have to remain unnoticed, so wait patiently for them to join you.
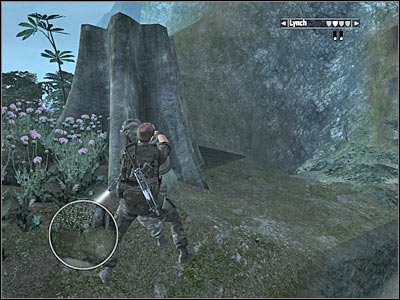
Don't attack soldiers from a nearby hut just yet. Instead, try moving closer to them without being spotted. I would recommend moving to your left. You should be able to find several larger objects there (screen). Use them for much needed cover. Order your men to position themselves nearby and prepare for an assault.
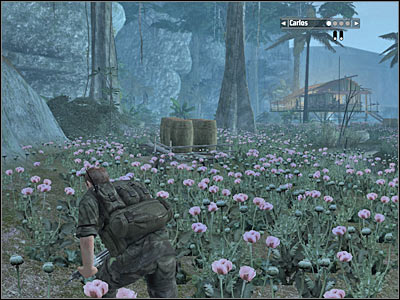
You will have to attack enemy units by a surprise. I would recommend neutralizing the heavy machine gun nest in the first place, because it would be a serious threat to your safety. Make sure that no one else decides to use the heavy machine gun post. You should be able to kill all enemy soldiers from here. Obviously your colleagues will help you to get rid of all enemy units.
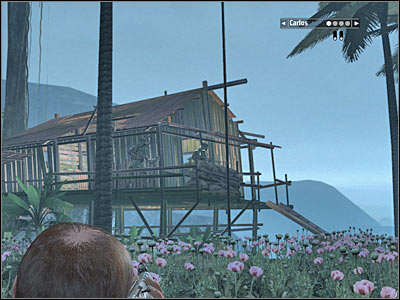
It would be a good idea to move closer to the hut. Use the stairs (screen) to get to a smaller balcony. You should also consider taking a rifle from one of the killed soldiers. Secure the hut by making sure no one's inside.
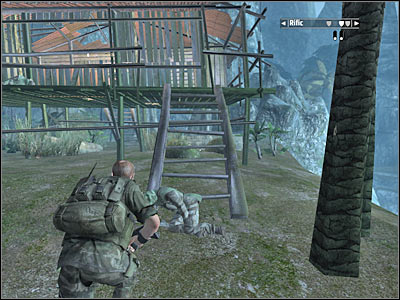
Now you will you have to proceed towards an opposite exit from the hut. A nearby field is being guarded by a larger group of enemy soldiers. They won't be able to use any flare guns, however you must kill them before being able to move forward. Choose longer bursts and rely on your team members. Proceed to the next section once enemy soldiers have been eliminated.
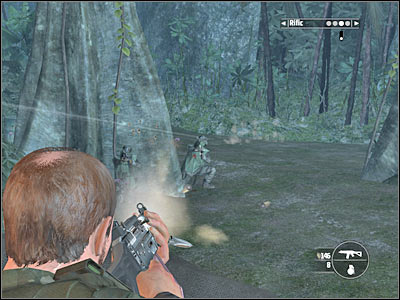
You should be able to reach a small junction after heading on towards a new area of the map (screen). Start off by going to the right. You should consider leaving the rest of the team behind. Take your time and familiarize yourself with the surroundings.
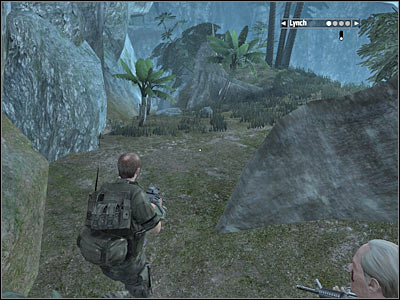
There's a narrow passageway to your left and it's probably guarded by a single enemy soldier. There are two ways for you to kill him. If you decide to use a silenced pistol, you will have to be very precise. Make sure that a single shot kills him. If you don't want to risk alarming a nearby camp, head down and approach him carefully. Perform a melee move in order to stun him (screen). Either way, you must neutralize this threat before moving on any further. Order your men to get here.
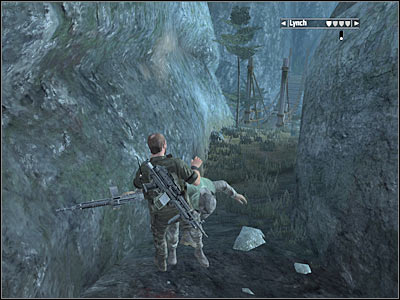
Try moving closer to the abyss. You should notice that there's a small enemy camp in front of you. Obviously you will have to neutralize all enemy soldiers. Your primary target is a soldier who is hiding inside a guard tower. You could try and kill him with a precise shot to the head, however destroying an explosive barrel (screen) seems like a better idea. Once he's gone, deal with the remaining enemy units. You will also have to take out possible reinforcements.
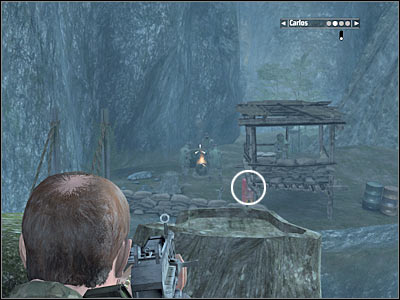
Go back to the lower passageway (that's where you've disabled a single guard). Proceed towards a small bridge. Head over to the other side and move on to the next section (you can also pick up ammunition from dead soldiers). Eventually you'll end up near a small village (screen). Slide down carefully and enter the left building.
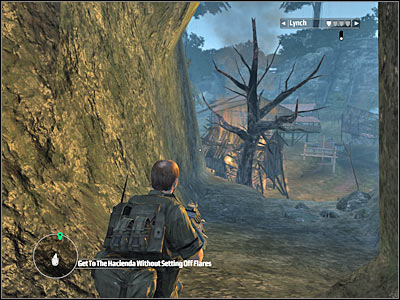
I would recommend proceeding to one of the nearby rooms in order to surprise a group of enemy soldiers (screen). You can fire directly at them or you can try to destroy a fuel tank in order to get rid of them more efficiently. The second group should be standing somewhere to your right, but your teammates will be able to secure that area without your immediate assistance.
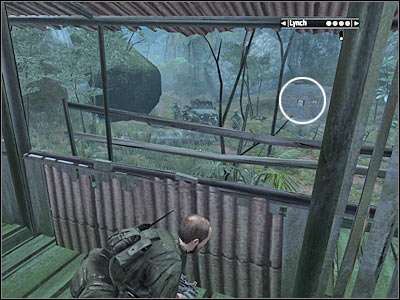
Try making a few steps forward. You will probably encounter an enemy jeep. Try to take out its crew from a larger distance and prevent anyone from using the heavy machine gun. You may proceed towards a destroyed bridge. The rest of the team should follow you there.
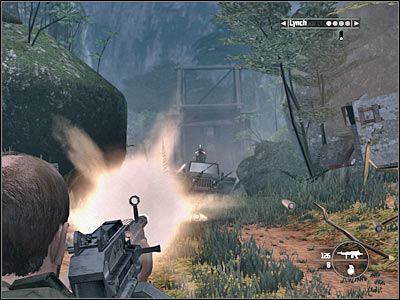
Don't leave this area just yet. Approach the destroyed bridge and turn right. As you've probably noticed, a second (hanging) bridge is being patrolled by one of the enemy soldiers. You will have to get rid of him right away. You can use a silenced pistol to get rid of him. Just make sure he doesn't have an opportunity to use his flare gun and you should be fine.
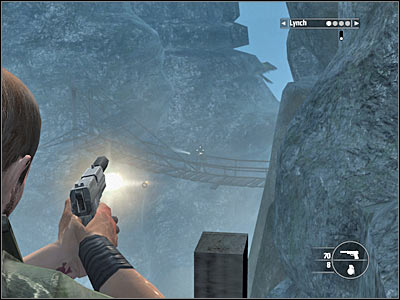
Approach the destroyed bridge and press the action key in order to attach a rope and rappel down. Once you've reached a new area of the map, wait for your colleagues to show up. Start moving towards your current destination. You should stay close to the river.
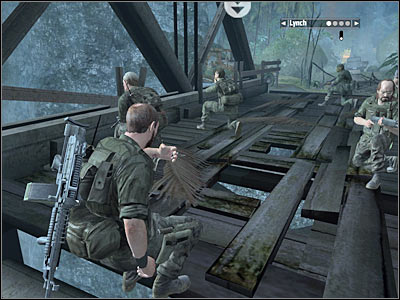
New objective: Clear The Village
Fulfilling this mission objective may not be that easy as it seems. Thankfully, you will be able to allowed to plan your approach from the top of a nearby hill. Once you've familiarized yourself with the surroundings, go to your right and find a new rappel icon (screen). Use the rope to get down to a lower level. Obviously you must wait for your squad members to join you.
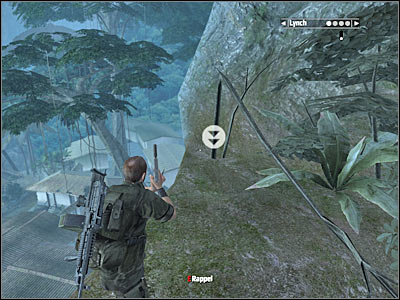
Your main concern will be to disable one of the enemy vehicles. You were able to locate it before you've decided to get down there (screen). You can't allow for anyone to use this vehicle, because enemy soldiers would probably decide to go back to the hacienda in order to warn their colleagues about an upcoming assault. Destroying the jeep seems to be the best possible solution, so we'll have to deal with this problem before securing the main area of the village.
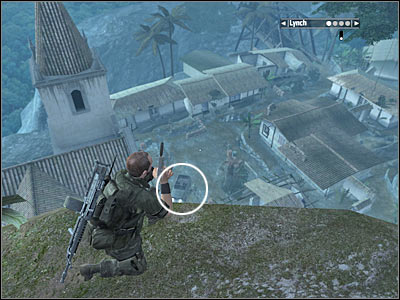
Go to your right. Order your men to stay somewhere near this small passageway, however make sure they're not standing too close to the village. Use one of the nearby walls for cover and throw a couple of grenades at the jeep (screen). This should allow you to destroy it. You may also kill a few other soldiers while you're there, however I would recommend going back to the start area (near the rope).
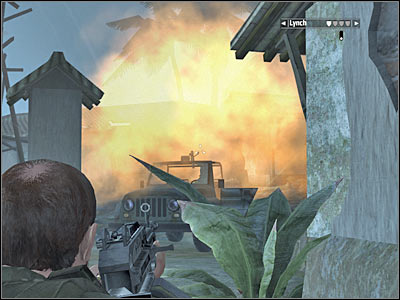
Proceed to your right. You should be able to notice that there's a large hole in the brick wall. I would recommend using it, however you should also secure the roof of the right building. There's a heavy machine gun nest there. Kill anyone who decides to use it.
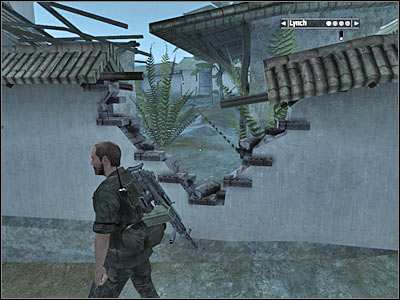
Going through a destroyed section of the wall will allow you to get closer to enemy positions. Hide behind the wall of the right building (screen). Enemy soldiers will be running towards a destroyed jeep. Attack them by a surprise. Obviously you won't kill everyone, however your teammates will have less problems to worry about.
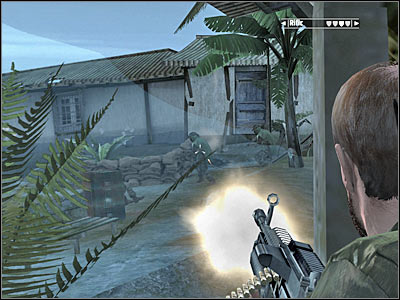
Now you've got two choices. You can go back to your team and try to advance towards enemy positions through the passageway located near the jeep or you can stay here a little while longer. You should consider disabling a heavy machine gun nest which can be found inside the nearest building (screen). Throw a grenade there or take out the gunner with your primary weapon.
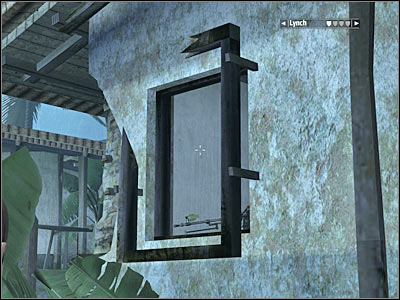
Now you will have to find a good cover. Your objective will be to secure a road which leads directly to a nearby bridge. As a result, you will have to take out one more heavy machine gun nest (screen). Hunting down other enemy soldiers won't be difficult and you should be able to receive your final objective.
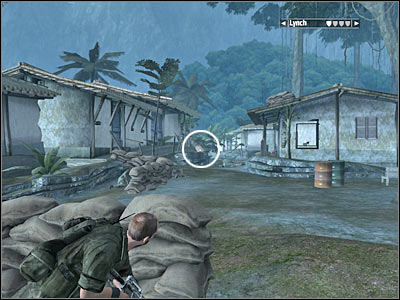
New objective: Get To The Bridge With All Your Men
You won't have to do anything out of the ordinary. Gather the rest of them around your position and proceed towards a new bridge (screen). You shouldn't encounter any additional troops along the way. Watch a short cut-scene and get ready to proceed with the next mission of the game.
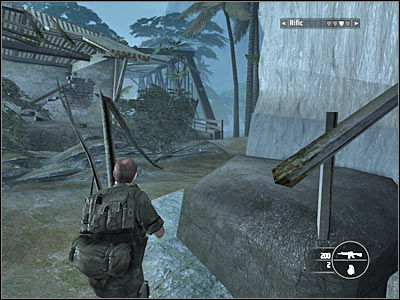
Your first objective will be to distract enemy guards by planting a mine near the entrance to the camp. Sadly, the original plan is going to change. As a result, you will have to go inside without receiving additional assistance. Your main task will be simple - you will have to find Jenny and hunt down her kidnappers.
New objective: Locate The Hacienda Compound
The first part of this mission will REQUIRE you to remain unnoticed. You will also be allowed to stay out of sight later during the course of the game. Start off by heading towards the first large area of the map. You won't be rewarded with any new cut-scenes. Instead, you will have to listen to a short conversation. This is all optional, so you may proceed to the target area right away if you don't want to waste more of your precious time.
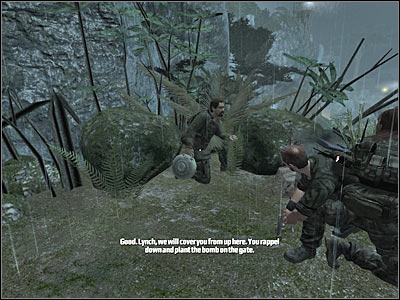
New objective: Get Carlos To Hacienda Gate
Head on to your right. There's a road there which leads directly to the hacienda. Don't worry about Carlos, because you won't have to issue him any orders (for at least a few minutes). Your main concern for the moment will be to clear a path for him. Lynch will automatically follow you, however you won't be allowed to give him any specific orders. Make sure you've decided to choose a silenced sniper rifle from your inventory.
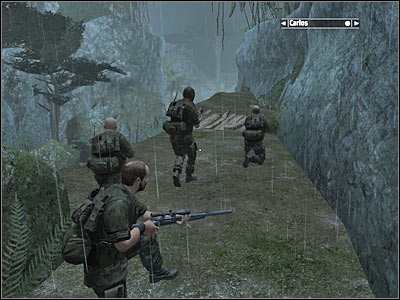
You should come across a sniper tower in just a few seconds. Use the scope in order to zoom in on the tower. You will have to take out a single enemy unit. Don't worry about the source of light. You don't have to destroy the lamp. The lower path is being patrolled by one of the enemy guards. Kill him. I wouldn't recommend using a silenced pistol against him, because there's a chance he may survive your attack or you can even miss with the shot.
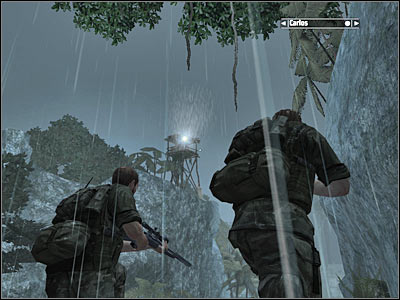
You will probably notice a fireplace in the distance. Try moving closer to it. You will have to be extremely careful here in order to ensure a safe approach. Start off by killing one of the soldiers standing next to the fireplace. Reload your weapon quickly. As you've noticed, one of the guards is running towards the gate. Stop him at all costs. Deal with all soldiers and proceed towards the next section of the map.
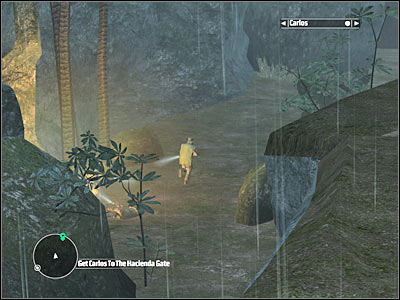
You should find a second sniper tower without any major difficulties (it'll be located in front of you). Zoom in on the tower and kill a sniper. It shouldn't be too hard. One of the guards is also standing next to the main gate. Take him out as well.
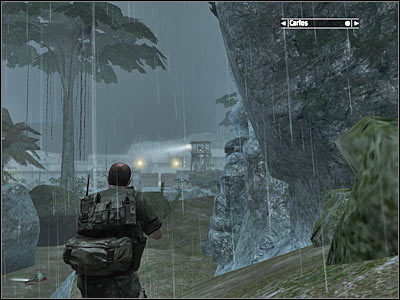
You can also take out a few other soldiers from here if you want to. Use the sniper rifle to find them. One of the soldiers will be standing inside the right building (screen). You won't have to kill them right now, but it'll make your second approach a lot easier.
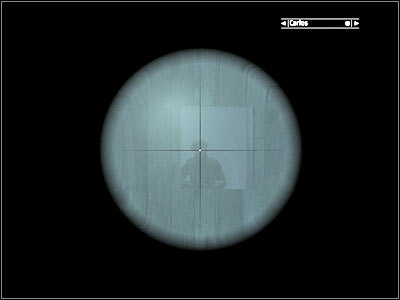
You may finally resolve the situation with Carlos and his mine. It shouldn't come as a big surprise that you must order him to get here. Click on an area near your position. After that, order him to proceed towards the main gate (screen). Wait patiently for him to get here. Sadly, the gate isn't going to be destroyed. You won't find out exactly what has happened. Instead, you will have to wait for the game to grant you with an updated challenge.
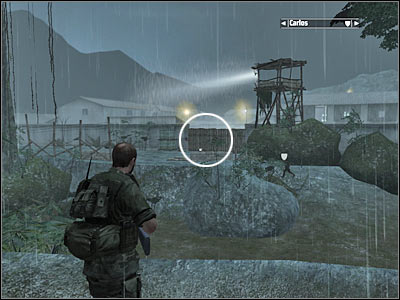
New objective: Move Around The Back Of The Hacienda
The road which leads to the back of the hacienda can be found to your right. You won't encounter any enemy troops there. You'll only have to climb up several times. Eventually you will end up standing on top of a large hill. You'll have an excellent view at the hacienda from here.
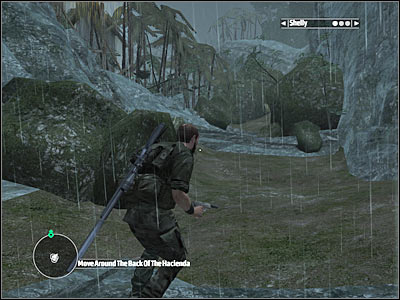
You've got two choices here. I've already said that you would be allowed to sneak your way into the hacienda. If you want to stay out of sight for as long as it takes, you will only have to kill a single enemy soldier. He will be standing beneath you (screen).
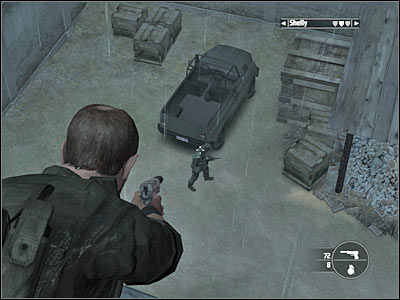
I wouldn't recommend choosing a silent approach, because eventually you would have to reveal your position to enemy soldiers. As a result, it would be better to kill most of them from here. This will raise an alarm, however you shouldn't have any problems neutralizing enemy units. Additionally, your colleagues may provide you with much needed assistance.
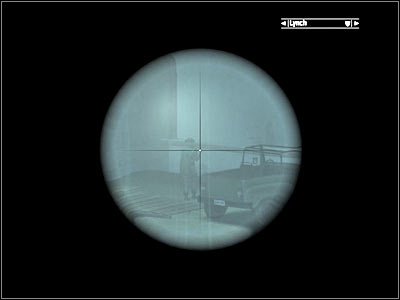
You should stay here a little while longer, especially if you've decided to take on a more direct approach. Keep firing at the enemy units. Make sure you've disabled all vehicles by shooting at the gunners. You should also notice that some of your opponents will use nearby objects for cover. Wait for them to reveal their positions, so you won't have to waste more bullets trying to kill them. Secure this entire area before moving on towards the compound.
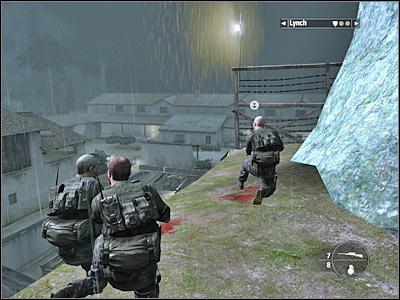
New objective: Infiltrate The Hacienda Compound
Once you're ready, approach the rappel icon and press the action key in order to slide down on the rope. Obviously you should wait for other members of your team to join you. Start moving towards your current destination.

Proceed to the upper level. If you've already secured this area from the top of the hill, you shouldn't encounter enemy units right away. Go ahead by making a few steps forward. I would recommend hiding somewhere to your right (screen), because you will be able to take out additional enemy forces from there.
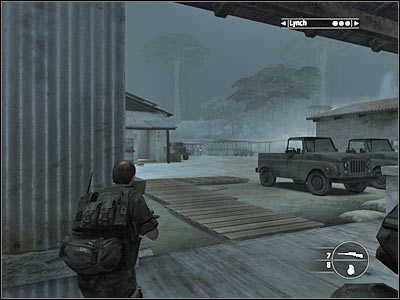
The first group of enemy soldiers is stationed inside the left building, however killing them isn't going to be a problem. Watch out for a second group, though. Enemy soldiers will arrive from the right. Thankfully, if you're using a good cover, you should be able to get rid of them without sustaining major injuries. Conserve the ammunition to your sniper rifle, because you'll have to use this weapon at least one more time.
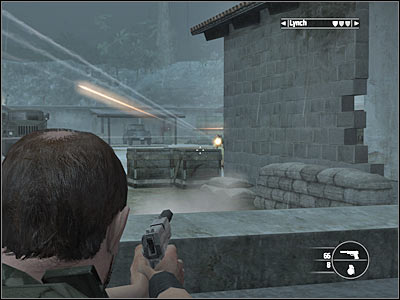
You will probably have to secure the sniper tower, because one of the enemy soldiers may be standing there. The guard tower can be found near the main gate leading to the rear section of the compound (screen). You should also secure the area to your left, however don't move too close to the gate.
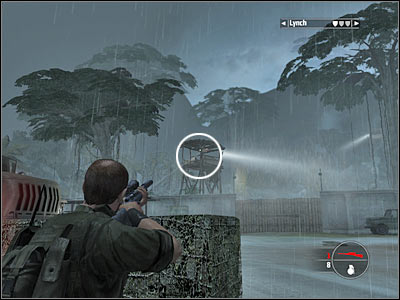
Your current target area is located to your right, however don't go there right away. Start off by ordering your men to stay behind. The route leading to the inner section of the compound is being guarded by an enemy sniper. You will have to use your sniper rifle to kill him (screen). If you don't have any bullets for this weapon, you would have to move closer to him, however this would be quite challenging to accomplish.
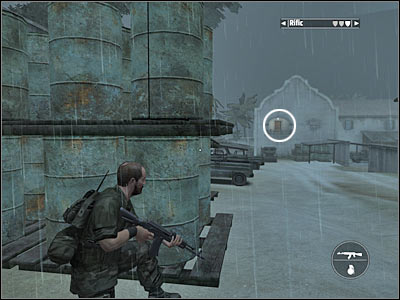
Make sure that the sniper has been eliminated. Order your teammates to get here and place them somewhere to your left, near parked vehicles. Don't move them too close to the inner section of the compound. Try making a few steps forward. A small group of soldiers will probably advance towards your position. Kill them without hesitation.
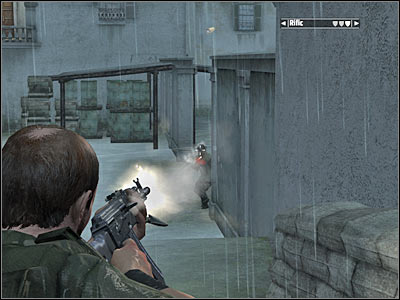
The inner section is probably guarded by at least two active vehicles with machine gun nests mounted on them. I guess you may have some problems neutralizing these threats. I would recommend that you start off by running forward, towards the crates (screen). You could try climbing on top of this structure, however you would be fully exposed to enemy fire. The only exception would be to use all of the remaining bullets to the sniper rifle. You should be carrying an assault rifle at the moment. You'll find a lot of these weapons near fallen enemies.
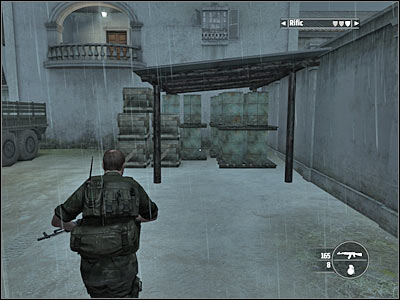
Try moving a little bit to your right, so you will be able to prevent enemy soldiers from getting too close to your current position (screen). It shouldn't be difficult to get rid of them, however you must be careful, so one actually surprises you. Thankfully, your teammates should kill anyone who gets closer to the exit. Watch out for some of the upper balconies. They're being guarded by a few soldiers.
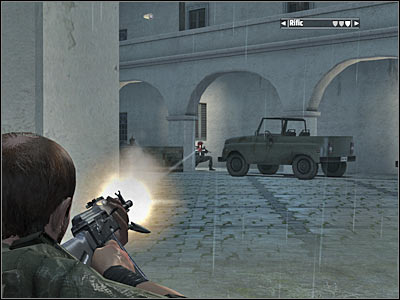
Kill everyone else before you decide to take on enemy jeeps. You will have plenty of options here. The easiest way to neutralize each vehicle would be to lean out for a second or two and eliminate the gunner with several shots. You could also try using the platform near the crates. Grenades can be quite helpful, but you'll have to be precise while throwing them. Make sure you've disable both cars and proceed to that area before someone else decides to use one of the mounted weapons.
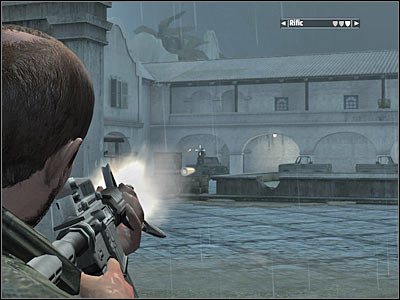
You will have to secure this entire area. Make sure to collect ammunition while you're there. Once you're ready, proceed towards a small tunnel (screen).
New objective: Confront The Brothers In The Hacienda
It's very important that your squad stays here, because you will have to take out several opponents on your own.
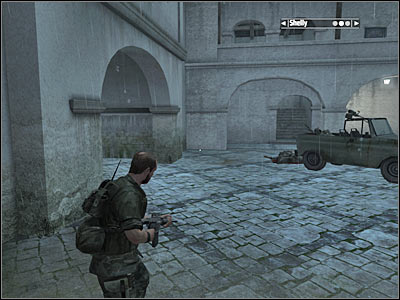
The most important thing for you to know about is that you don't have to be in a lot of hurry. Eliminate soldiers one by one and position yourself carefully, so you won't end up getting shot at from different angles. I would recommend moving forward, so you'll end up somewhere near the other end of this tunnel. Eliminate several enemy units from here (screen).
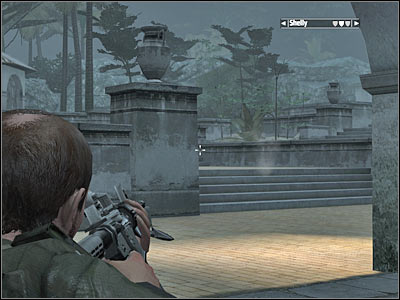
Most of the enemy soldiers are stationed near the entrance leading to the hacienda, so they'll be to your right (screen). I would recommend choosing more precise single shots, because there's a large distance separating from you each other. Don't exit the tunnel and move back to your colleagues each time it gets too dangerous for you to stay here.
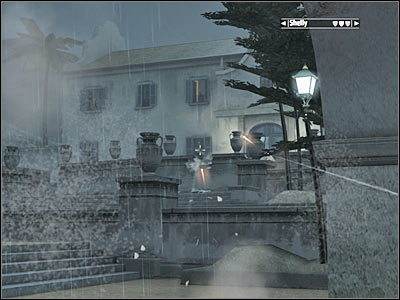
A large group is also stationed in front of the exit. You will have to eliminate from a larger distance. Remember that you can destroy some of the nearby vases in order to leave them without a good cover. It may also help you to flush them out into the open.
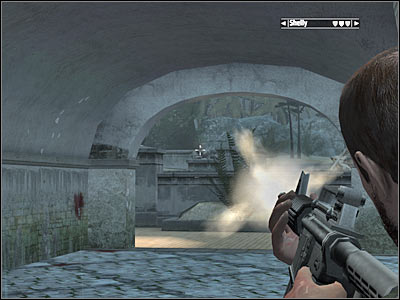
Some of the enemy guards will be hiding inside the hacienda. Be on a look out for opened windows and kill them as soon as possible. Sadly, you may have some problems finding them, so you will have to risk your safety from time to time in order to reveal their positions.
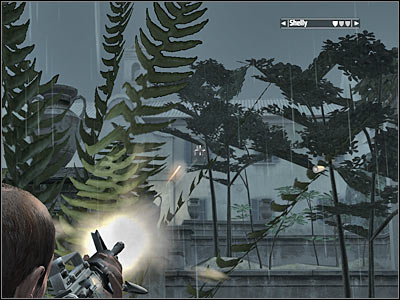
Be careful, because you may be surprised by at least two enemy guards. They will probably try to show up near the tunnel, so you must be prepared to repel their attacks. When you feel it's safe, order your men to follow you and head on to your left (screen). Kill one of the guards quickly. He should be hiding, so be careful. It's very important that he's been eliminated, because he was carrying a heavy machine gun. You won't have to pick up his weapon, because it's better to have a more precise assault rifle.
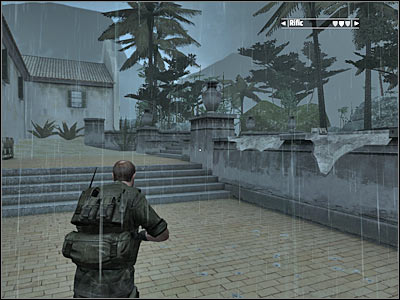
Make sure your colleagues have arrived here safely (screen). The worst part is already behind you, however still reaching the hacienda is not going to be simple. Order your men to hide behind the nearest brick wall. It's very important they stay there. You can't let them move forward and they should be able to take out a few thugs from this spot.
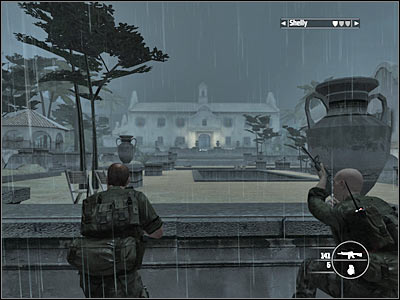
Obviously you can't stay here forever. Try making a few steps forward and hide behind one of the postuments. The last group should be standing somewhere to your left (screen). Try eliminating one guard at a time, so you won't have to constantly risk your life. You can also consider surprising this group from one of the flanks, however you would have to get closer.
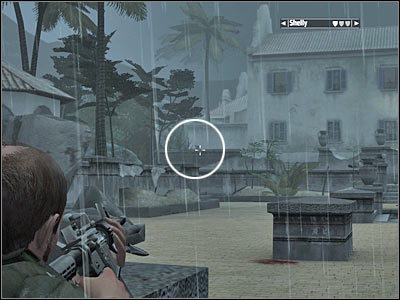
More enemy soldiers will appear near some of the windows of the hacienda. Thankfully, it's going to be much easier to get rid of them. You should also check the left structure, because you would find a lot of rocket launchers out there (screen). Go ahead and use these weapons right now, because you won't need them later on during the course of this mission.
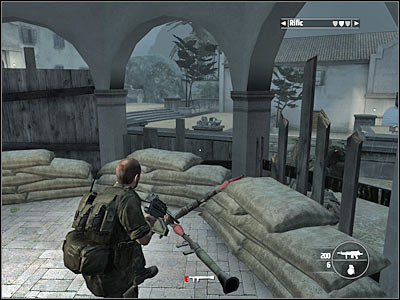
Obviously you will have to secure this entire area, leaving no one behind. Proceed to the main door which leads to the hacienda (screen). You shouldn't have any problems finding it. Head on forward and listen to a short dialogue.
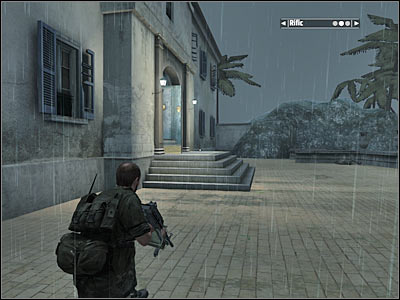
You'll find yourself standing inside the main corridor of the hacienda. You may take a look at the body of Carlos if you want to. Eventually you will have to approach Jenny. She is sitting near a fountain (screen). Obviously this will trigger a much longer cut-scene.
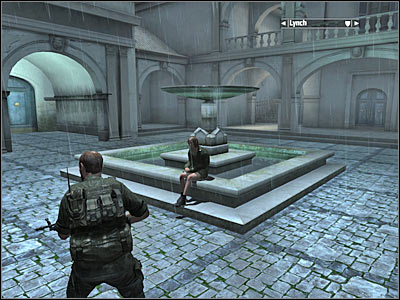
As you've probably noticed, you are totally surrounded, so you CAN'T move, because you wouldn't even be able to get to a good cover. Allow your opponents to proceed with this conversation. Stay put and you will be fine.
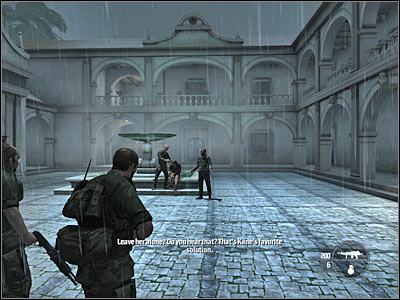
Get ready, because soon you'll have to act quickly. Lynch should notice that a mine is lying near Carlos. Turn right and find it (screen). Now you will have to wait for Kane to say the final sentence (No! No in front of her...). Fire a single bullet at the mine. As a result, there's going to be a huge explosion. You'll also be rewarded with a new cut-scene.
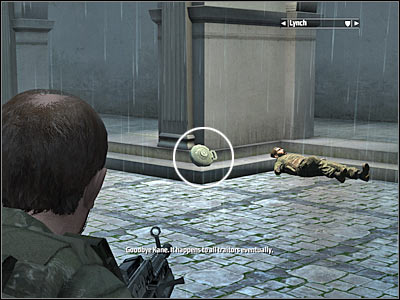
New objective: Get The Little Brother
Use the fact that most enemy guards are stunned by the explosion. Head over to a closest cover. Obviously you will have to hide behind one of the pillars (screen). Start shooting at enemy soldiers. There's not going to be too many of them, however you will have to kill all of them before moving on. Try securing all of the upper balconies.

Like I've already said, you must make sure that all guards have been eliminated. Thankfully, you won't have to worry about running out of ammunition. Once they're gone, head on towards the exit (screen). Watch a short cut-scene and get ready for a new mission.
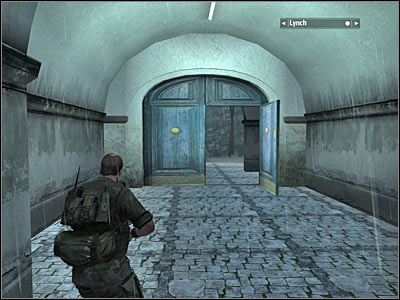
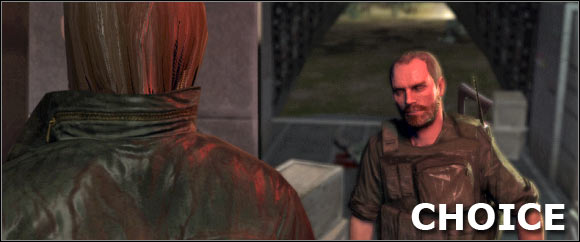
Your first objective will be to reach a nearby airfield. Obviously you will have to get rid of a lot of enemy units along the way, including the snipers. After arriving at the airfield you will be forced to stop an airplane from taking off. You will have to rescue Jenny by killing her kidnapper. Finally, you'll make an important choice concerning Jenny's safety and the well-being of your colleagues.
New objective: Get To The Airfield
You'll start the mission on board of a moving jeep. You will be using a heavy machine gun turret with an unlimited supply of bullets. Get ready, because you will come across the first group of enemy soldiers in a short while. Try killing all of them. You must also disable a jeep by blowing it up to pieces. Otherwise the jeep would probably start pursuing you and that would make your approach more difficult. Choose longer bursts, however make sure that your gun has a few seconds to cool down. Otherwise it'll probably overheat.
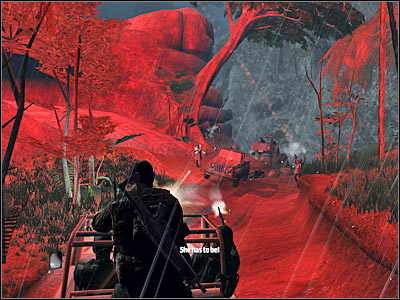
Stay focused, because one of the nearby enemy soldiers will be using a rocket launcher (screen). Kill him before he's able to fire a missile at you. Additionally, you should consider blowing up a second jeep.
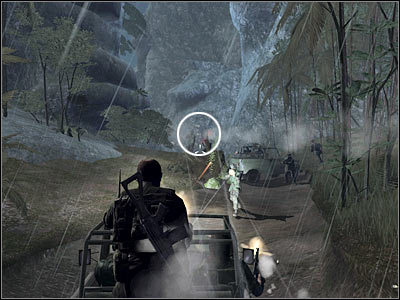
You should be safe for now. Once you've reached a new area of the map, you'll come across a blockade. As a result, you will have to wait for the jeep to back up. Start firing at new enemy soldiers in the meantime. You must be patient, because it's going to take a few seconds for the driver to find a new route.
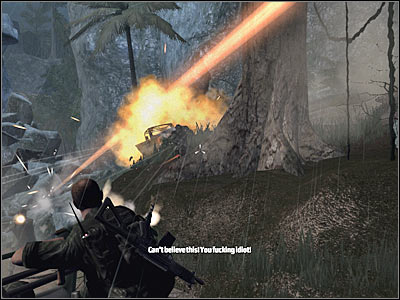
Wait for the jeep to go back to the previously explored area. Start off by eliminating some of the remaining enemy units. You should be getting close to an airfield. Your primary objective here will be to take out a sniper tower by shooting at the wooden structure (not the sniper). There are other enemies in this area. Eliminate them by aiming at the fuel tanks.
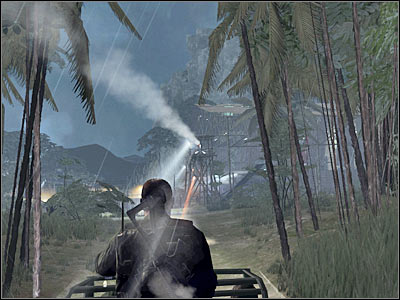
New objective: Take Out The Guard Towers
I guess I won't have to remind you what has to be done. Just make sure that you're shooting at the towers until they collapse. Don't waste your time trying to search for fuel tanks or other explosive objects. You can distinguish the towers easily by searching for the spotlights. You will have to take out a few towers along the way.
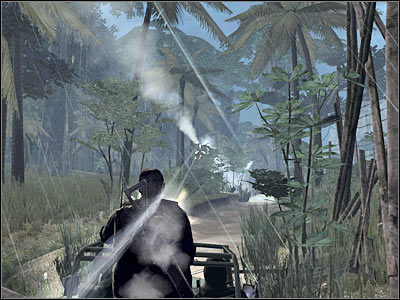
A military jeep should appear to your right. Find it quickly and start firing at it until it explodes. Destroying the jeep will make your life easier once you've reached the airfield.
New objective: Stop The Plane
Now you will start moving towards a plane. You must neutralize a second jeep (screen) or at least slow it down by waiting for it to catch on fire.
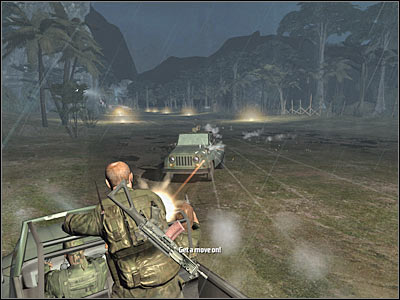
You will have to destroy two other sniper towers before proceeding to the plane. They are located to your left. Once you're close enough to the plane, start firing at the right engine (screen). You won't receive a specific goal just yet, but it'll make a second part of your approach a lot easier.
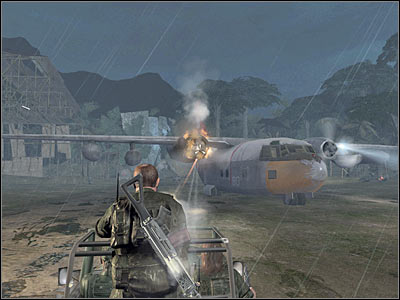
New objective: Shoot The Plane's Engines
You will have to be extremely careful here, because the jeep will make a sudden turn. The problem is that the area is being heavily defended. Consider shooting at the fuel tank (screen) in order to get rid of enemy units or at least to prevent them from fighting back.
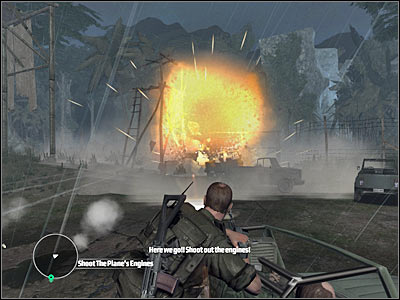
The jeep will begin the chase. The right engine of the plane should already be disabled, so you will have to destroy the left one (screen). Wait for it to catch on fire. You may stop using your turret. Wait for the plane to reach the opposite end of the runway. It won't fly away. Instead, it'll stop, allowing you to rescue Kane's daughter.
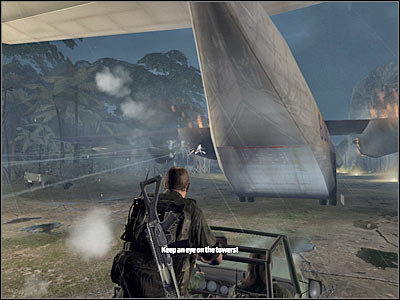
New objective: Get Your Daughter Out Of The Plane
Don't exit the jeep just yet. Instead, wait for two other vehicles to get here (screen). If you aren't able to destroy the vehicles, at least consider killing enemy soldiers. You are using a powerful turret, so it shouldn't be too difficult.
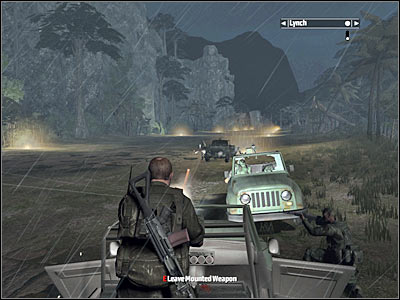
Proceeding towards the back of the plane. If you position yourself correctly (look at the screen), you will be able to take out the first group without risking your life. Just make sure you're aiming at their legs. You will have to get rid of three enemy soldiers.
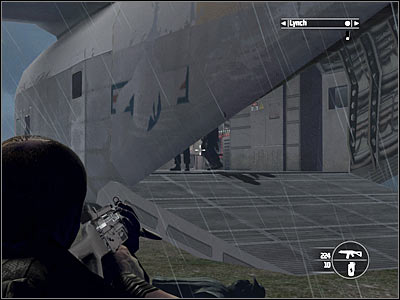
As for your main opponent, he's holding Jenny hostage inside the pilot's cabin. The girl is standing to the left, so make sure that you don't injure her by a mistake. Focus your efforts on killing the final member of The7 organization. It shouldn't be too difficult to eliminate him. Enter the plane and approach the pilot's cabin. This will trigger a longer cut-scene.
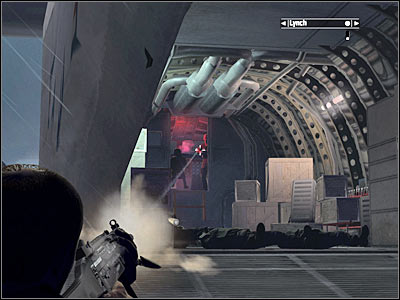
New objective: Decide Where To Go
Exit the plane and Jenny should automatically start following your lead. You won't encounter any additional enemy units, so you won't have to hide anywhere. Proceed towards the stairs, located near a landing pad (screen). Wait for a new cut-scene to be displayed on your screen.
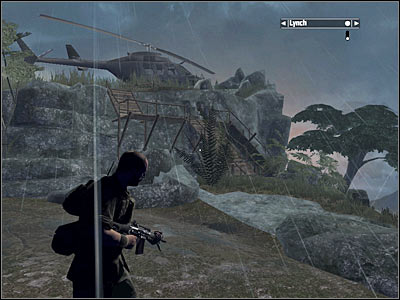
Now you will have to make a very important decision. Depending on how you'll decide to react, you will be allowed to get to one of two possible endings. Sadly, you will have to repeat this mission if you want to try again.
If you want to finish the game right away, proceed with Kane's daughter to the helicopter. Approach it and press the E key in order to take a seat inside. You will be rewarded with a final FMV sequence and the game will end.
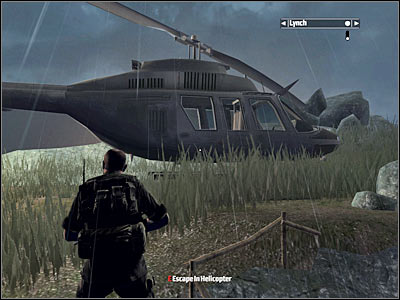
The second ending is more interesting, so you should consider repeating the entire mission in order to be able to unlock it. Approach Lynch. He should be standing to your right. After that, make a few steps forward and press the E key. This will allow you to proceed a completely new area. As a result, you will have an opportunity to participate in a new mission. Get ready!
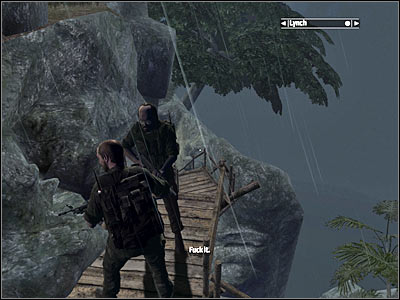
Your first objective will be to get on top of a nearby hill. There's a destroyed church there. You will have to assist your team members in defending against enemy attacks. After that, you will have to fight your way to the pier in order to find a boat. You'll use it to extract your team from the endangered zone.
IMPORTANT! This mission becomes available only if you've decided to choose a correct solution at the end of the previous level. Instead of using the helicopter to escape with Jenny you would have to agree to help some of the trapped allied units.
New objective: Rescue Your Men In The Church
You'll start the mission in a safe area, so you don't have to hide anywhere. This is going to be a unique mission, because Jenny will follow you all the time. Sadly, you can't leave her somewhere behind. As a result, you will have to be more careful while exploring the map and you'll rely on Lynch. Proceed to your right and use the stairs. Now you must go to your left.
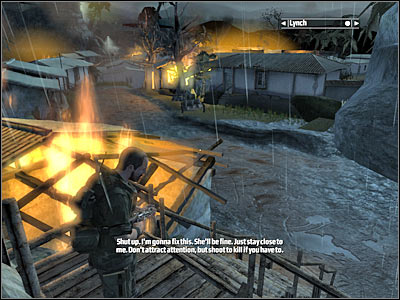
Keep heading forward. You've probably noticed that one of the enemy soldiers has just used a rocket launcher to attack the church. It shouldn't come as a surprise that you must eliminate him as soon as possible. You'll find him just around the corner. Neutralize the gunner on the jeep while you're there. Thankfully, he'll be shooting at the church, so you won't see you coming.
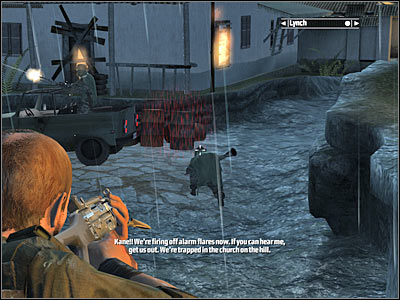
Now you will have to choose between using the turret on the jeep and eliminating enemy soldiers from a safer distance. The first large group will appear to your left. Make sure you observe this entrance, because more enemy units will arrive there in a short while. You will also have to watch out for Jenny, so she won't end up getting shot at. Protect her with your own body if it's necessary.
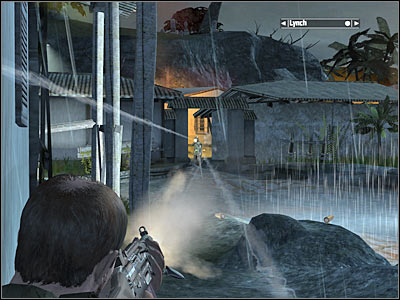
I would recommend moving forward and then turning left. This should allow you to arrive near a smaller entrance. Look at the screen if you're having some difficulties figuring out which one it's going to be. Hide behind the wall and eliminate a few other soldiers from here. It's very important that Jenny stays with you. If you see her doing something stupid, retreat immediately in order to prevent her from going into enemy territory.
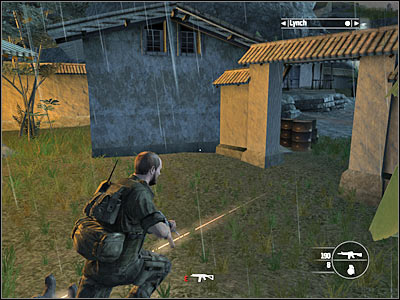
Keep heading towards the church. You will have to prevent enemy soldiers from harming you or someone from your team. Thankfully, you won't have to secure this entire area right now. Focus only on getting to your target. You will have to find an entrance which leads to the stairs (screen). Wait for Lynch and Jenny to arrive before moving on any further.
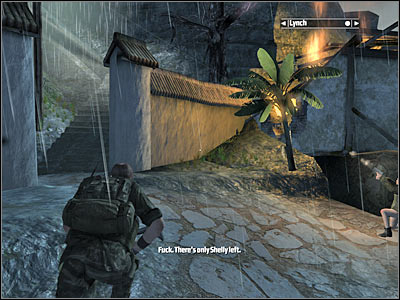
Be careful, because more enemy soldiers will appear near the stairs. Most of them will attack you right away, however a few soldiers will remain somewhere near the church. Use the stairs to get closer to your current destination. I wouldn't recommend stopping here, because you'll be exposed to enemy fire.
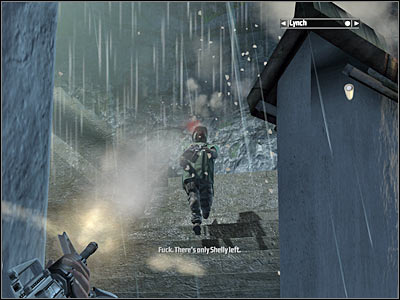
Keep heading forward. You will have to deal with several soldiers along the way. Look around a lot, so you won't leave someone behind. Head on to the second staircase which leads directly to the church (screen). You'll be rewarded with a new cut-scene there. It turns out that only one of your colleagues has survived.
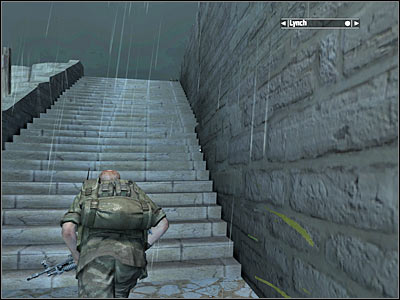
New objective: Get To The Boats
Start off by ordering everyone from your team to hide inside the church. I wouldn't recommend exposing them to enemy fire. Remain near the entrance and make sure you're facing the stairs. Wait for a few soldiers to get here (screen) and kill them before they're able to fight back. You should be using a heavy machine gun during these fights. You can pick up this weapon from one of the killed soldiers.
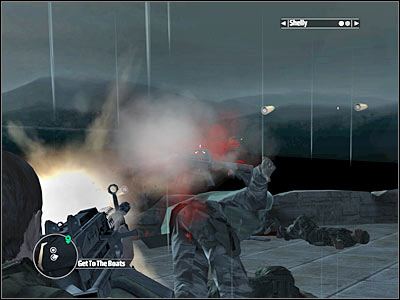
Approach the stairs carefully. You should consider using one of the nearby brick walls for much needed cover. Don't leave this area. Instead, start shooting at some of the visible enemy soldiers. They will be using tombstones and other large objects for cover, so you must wait for them to expose themselves to your fire. You should also take out a jeep and its crew. Use the grenades or a grenade launcher if you don't want to waste more bullets for your machine gun.
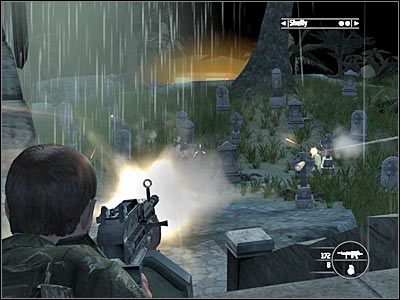
Consider moving to your right. Use an assault rifle and kill some of the visible enemy soldiers from here. There's a jeep near your area. Make sure you've neutralized its crew. You should also take a look at the lower section of the stairs leading to this church. A large group may have arrived there.
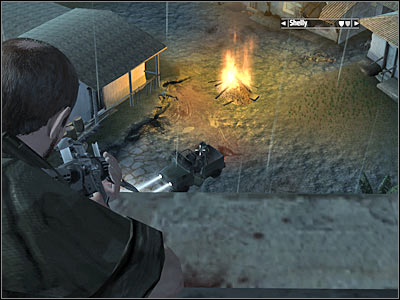
It would be a good idea to take a sniper rifle from one of the killed soldiers. Use this weapon to take out a few enemy units, however you should conserve the ammunition. As a result, focus only on neutralizing other vehicles and the road leading directly to the pier. You should have at least five more bullets once you've finished.
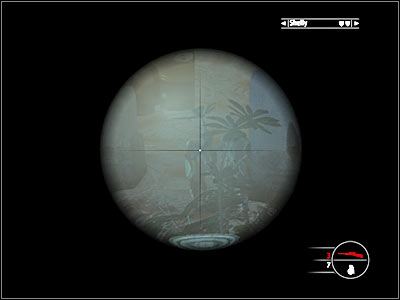
I would recommend staying here. Order your men to start moving towards the pier. Keep pressing the 3 key once you've targeted certain areas of the map. Look at the screen - it's one of the possible routes leading to your target zone. Obviously you could try and find an alternative route, however this one seems to be the safest one. Provide a covering fire for your men from the higher ground. Obviously you should be using a sniper rifle. Make sure they're moving slowly, so they'll kill everyone they encounter.
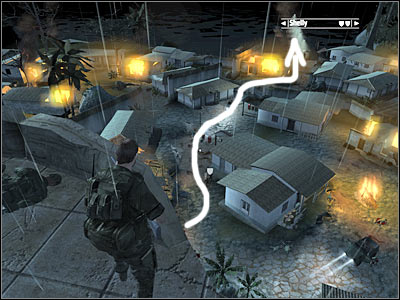
You will have to wait for your colleagues to get to the pier. Move back and pick up a standard assault rifle. Proceed to the ground level by using the stairs. Jenny will automatically follow you. This route has already been secured, so you shouldn't encounter any additional enemy units.
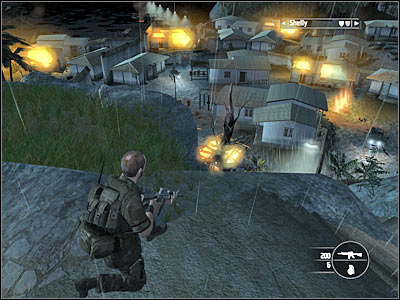
I wouldn't recommend making any unnecessary stops. Start off by moving towards one of the enemy vehicles (screen). You shouldn't have any major problems finding it. Just as before, you won't encounter any soldiers along the way.
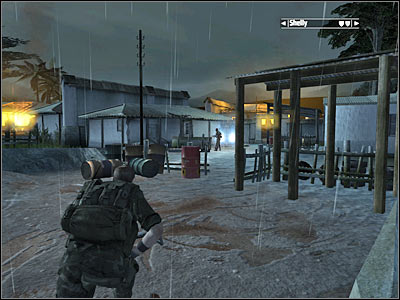
Keep heading forward. Turn right and then go left. As a result, you should get closer to the pier. Sadly, Jenny is going to get shot by one of the enemy soldiers. You weren't able to prevent this from happening. Kill the shooter and go back to Jenny. Finding her body should be easy.
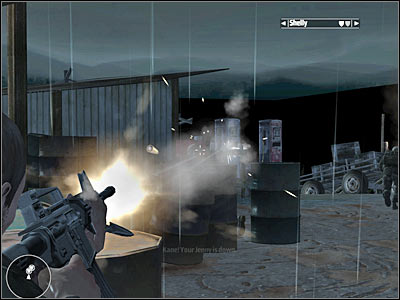
New objective: Heal Jenny
Approach Jenny's body. You will have to press the E key in order to allow Kane to give her a shot of adrenaline. Kane will also pick up the body of his daughter. He won't be helpless to enemy attacks, however you may only choose a pistol and you won't be allowed to zoom in the view. As a result, you will have to rely on your colleagues.
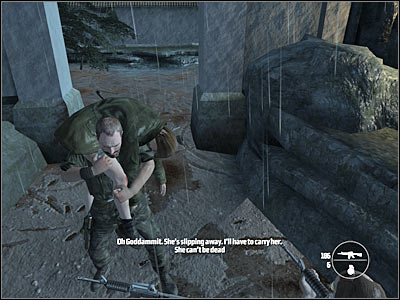
You will have to start moving right away. Keep heading towards the pier. Ignore some of the nearby explosions and the fact that the camp has been repopulated by enemy troops. As long as you'll keep moving, you should be fine.
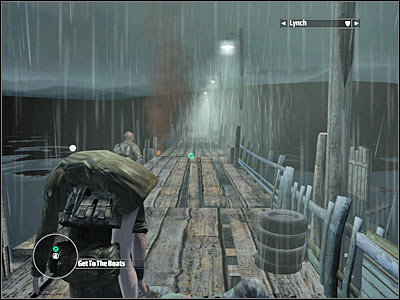
Your final task will be to reach an opposite end of the pier. Make sure Lynch is standing somewhere nearby. Approach a small boat which can be found to your right (screen). This will trigger the final FMV sequence.
Congratulations! You've just finished the game!! :-)
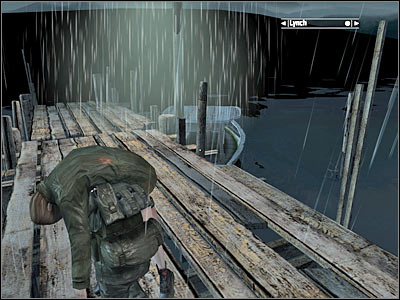
Stranger


 Killzone 3 Game Guide & WalkthroughKane & Lynch 2: Dog Days Game Guide & WalkthroughKings Quest Game Guide & Walkthrough
 Kingdoms of Amalur: Reckoning Game Guide & WalkthroughKane & Lynch: Dead Men Game Guide & Walkthrough