Heroes & Generals walkthrough is a compendium of information about all the main aspects of the gameplay, both the action and the real-time strategy ones. Inside you will find several dozens of tips & tricks concerning all the gameplay nuances, such as using different soldier classes, controlling and fighting with the help of various terrain and armored vehicles, tanks, and fighter planes, or some general hints on how to efficiently move around the map, eliminate enemies and complete various missions. Additionally, the guide contains detailed information about all the equipment available to all the parties of the conflict (America, Germany, Soviet Union), coupled with some tips on how to effectively use them in combat. Readers interested in unlocking all the equipment available in the game will find a thoroughly explained section about Ribbons and Combat Badges. Additionally, both the action and the real-time strategy game modes, as well as all the currencies (Credits, Battle Founds, Gold) were described in this very guide. Heroes & Generals is a multiplayer action game, set in the World War II era. The Danish Reto Moto studio came out with an unusual mix between an action game, played on the game's engine, with a real-time strategy one, which takes place solely inside the Internet browser.
The Heroes & Generals guide contains:
Jakub Bugielski ()
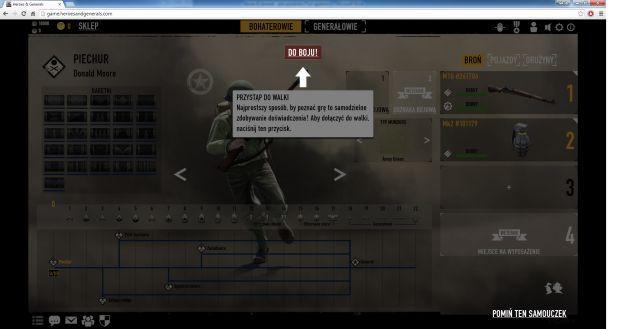
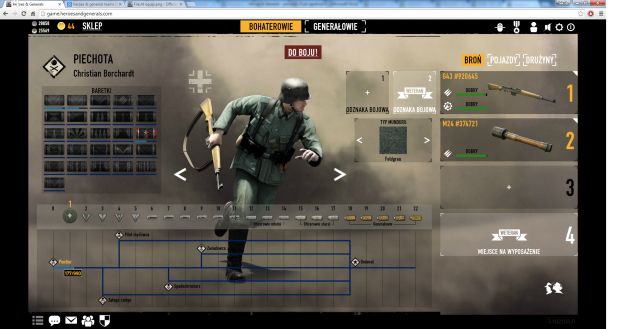
The gameplay interface in the main menu, thanks to the fact that there's really no action here, is scattered around the whole screen. Along the upper edge of the screen you will find the information about your currencies [1], as well as a button used to enter the store [2]. A little bit to the right are buttons responsible for changing the type of the game [3], and just below it [4] an option to start the game. At the end of the upper edge of the screen [5] there's the option sections, where you can set up things associated with both the game and the account.
Now let us move to the leftmost edge of the screen, where you can find the information about currently selected soldier [6] and the Ribbon progress [7]. At the center of the screen there are buttons [8] used to change your currently selected soldier. The right edge of the screen allows you to select Combat Badge [9], and if you have a Veteran status a second one [10]. Just below [11] you can set up your soldier's uniform type, check his currently equipped gear [12] and change it [13]. The bottom section of the screen lets you see the progress of your soldier's development [14], play with community options [15], allowing you to interact with other players, and see the current events [16] associated with your account.
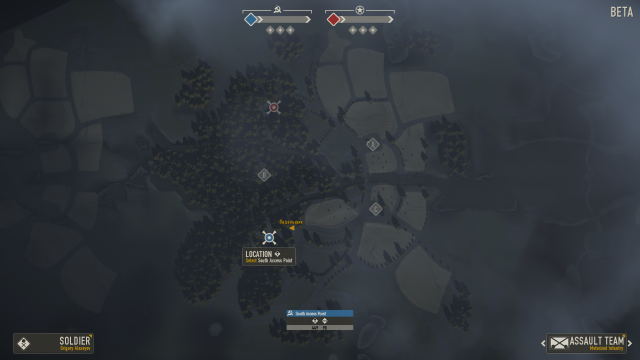
The interface just before you enter the combat, just like the previously described one, takes almost the whole surface of your screen, but at the same time contains very important information. In the middle of the upper edge of the screen you will find the information about both teams' task completion progress - the blue one [1] represents your team, while the red one [2] the enemy team. Stars shown below the bars represents the objective points the team managed to capture. Points with the number 1 [3] represent access points, which, after the defending team captures them, prevent the attacking side from using the whole line. Points with numbers other than 1 [4] are called control points, which are just fillers. Those with the Ox mark [5] are called objective points and are the most important points on the map.
Besides the information about various points, you will also find the information about your currently selected soldier [6], as well as the assault team, which your soldier is associated with [7].
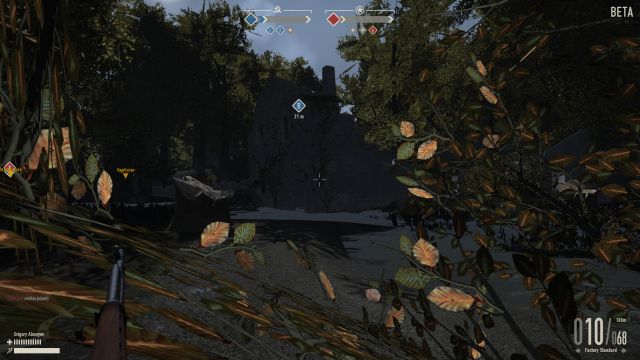
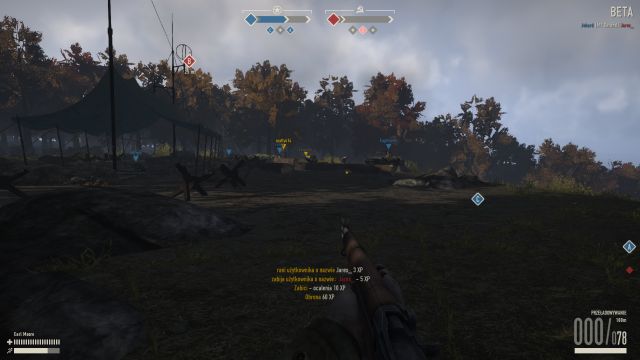
The battlefield interface differs severely from both previously described and it resembles the one you can find in other action games. Information are arranged at the edges of the screen, leaving the central area crystal clear, allowing you to have a better insight on what's happening.
The upper edge of the screen represents the one you've seen on the briefing. In the middle of it you will find information about the task completion progress of both teams - blue one [1] represents your team, while the red one [2] is the enemy's (stars below the progress bar inform you about the amount of objective points a team was able to capture). In the upper right corner of the screen [3] information about fallen solders can be found. In the bottom left corner of the screen [4] you will find a stamina (it allows you to sprint and jump), as well as health bar, and in the opposite corner [5] your currently equipped weapon, coupled with the amount of ammunition you have for it.

Character movement

Jump

Sprint

Crouch

Prone

Slow walk

Use

Whistle

Primary fire

Zoom / Iron Sights

Reload

Change Weapon
Weapon equipped in Slot 1

Weapon equipped in Slot 2

Weapon equipped in Slot 3

Weapon equipped in Slot 4

Weapon equipped in Slot 5

Auto Adjust Range / Elevation (on weapons with adjustable sights)

Adjust Range / Elevation UP

Adjust Range / Elevation DOWN

Accelerate

Turn Left

Brake / Reverse

Turn Right

Crouch (in open seat)

Fire Weapon

Change the ammunition type (inside a tank)

Change the ammunition type (inside a tank)

Change the ammunition type (inside a tank)

Auto Adjust Rangefinder / Elevation (on tank cannons and co-axial machineguns)

Adjust Rangefinder / Elevation UP

Adjust Rangefinder / Elevation DOWN

Enter / Exit Vehicle / ParaJump (from a Fighter Plane)

Change View

Change Seat

Accelerate

Roll Left

Decelerate

Roll Right

Auto-level
Fire Selected Weapon
Ammunition Select

Ammunition Select

Ammunition Select

Ammunition Select

Drop Bomb

Freelook in 3rd person

Change steering method
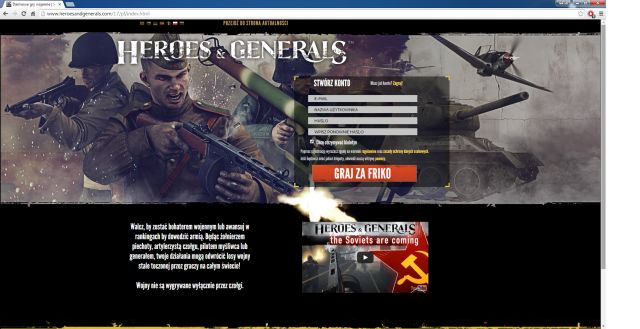 Fill in the gaps on the website, and then click on the "Play for Free" button to continue.
Your first thing to do is to go to the main Heroes & Generals website - all you have to do is to write the name of the game in the Google search, and then enter the first link on the list. After the website is loaded, find a button called "Create Account". Below it you will find 4 gaps to fill in your information - your in-game name, your email (which is your login), as well as password. Afterwards, click on the "Play for Free" button to continue.
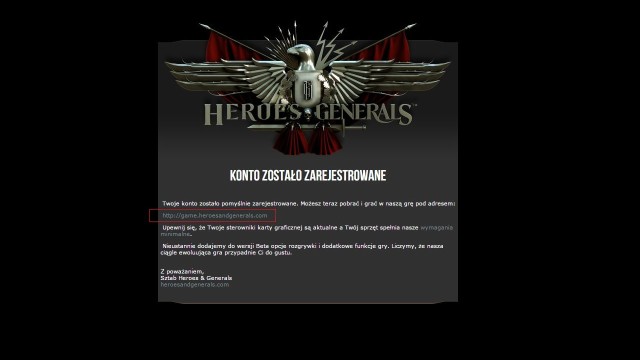 Click on the link provided on the next page to continue to download the game.
After the site is loaded, you will receive an information, that your account has been successfully created and you will now have to download the game client by clicking on the provided link. After you do this, you will automatically download the game installer - you now have to execute it. Before you jump into the game, you will also have to accept a browser add-on for the browser you are using at the moment - it's mandatory, as the game won't run without it. After you've completed all the steps, all you have to do is to go back to the main page and click on the "Play Now" button - you can also run the game from the shortcut on your desktop (if you've decided to make one).
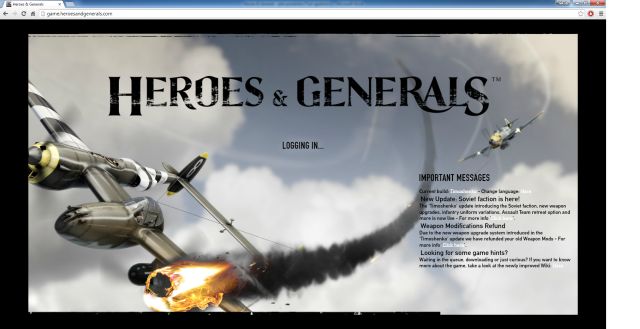 If you've done everything right, a loading screen should appear.
If you receive an error, stating that your game requires administrator rights, close the internet browser, as well as the H&G Sync application which starts up together with the game and reload the browser, but this time with administrator rights. To do so, right click on the browser's shortcut and select "Run as administrator" from the list. Now the game should be able to run flawlessly. All you have to do before you start your adventure, is to select the server (there's only one, called Julius, at the moment, so you can't really choose anything), accept it and wait for the game to load up the lobby screen.
 Whether you like it or not, you will have to play a single game as soon as you create your account..
After reaching the main menu (called Game Lobby), you will have to complete an automatic mission - it's an excellent introduction, because you will be given "a tour" through all the key mechanics. That is precisely why you should read ALL the tooltips appearing on the screen - they will certainly come in handy. At the end of the "tutorial" you will be given an order to enter combat - you will be thrown in at the deep, because you will have to face other (probably more experienced) players. No sweat though - you won't be punished in any way if your team loses.
You will play in the Skirmish game mode - the task of both teams is to fill the progress bars - blue (your team) and red (enemy team) - visible at the top of the screen before the enemy team can pull it off. To do so, your team will have to seize control over a greater amount of control points than your enemies - you will need one if the enemy has none, and two, if the enemy managed to capture one. The bigger the difference in the amount of captured points, the faster the progress bar will fill in.
 Your team has to capture and maintain control over a higher amount of control points than the enemy team.
There are three control points on this map, marked as A, B and C. The B point, given it location (it's directly in between both teams' bases) will have the most action going around it - this is the point you should move to, because you will learn the most out of it that way. After the mission starts, click on the only blue icon on the map, and after the view zooms in, click on the new icon that should have just appeared to deploy your soldier to the battlefield.
Locate the B point (all the available points are always visible on your screen) and get there as fast as possible - the first several seconds of the game is often a decisive factor, which is why you should capture as many points as soon as possible. To get there faster, you can either use one of the bicycles scattered around your spawning point, or hop into a car driver by one of your teammates.
Run straight to the building marked with the B icon to start capturing the control point - you can also stand near the building itself if you don't want to get inside. A circle-like progress bar should appear at the top of the screen - it will slowly fill up, depending on the amount of soldiers standing near the control point (the amount is represented by a blue digit next to the bar). If there are enemies near the control point, a red digit will appear near the progress circle - the point will be captured by the team with more soldiers standing near it.
 Use the foliage surrounding the point to get cover.
After the bar is completely filled, the point will be captured - as soon as it happens, run out of the building and blend with the environment. Your task for now is to maintain control over the control point by eliminating enemy soldiers trying to recapture it - try to prevent them from entering the ruins of the building where the radio is. If the enemy managed to get inside, use your grenades to flush (or blow) them out. Each time you kill an enemy, you should change your position slightly, as there's a Killcam mechanic in the game which will show your enemy your position - you can be sure that the enemy is certainly coming back for some revenge.
If your team managed to maintain control over the capture points for long enough, and the progress bar fills in completely, the mission will be over and you will be transferred back to the game lobby. More on this game mode can be found in the "Skirmish" and "Tips" sections of this guide.
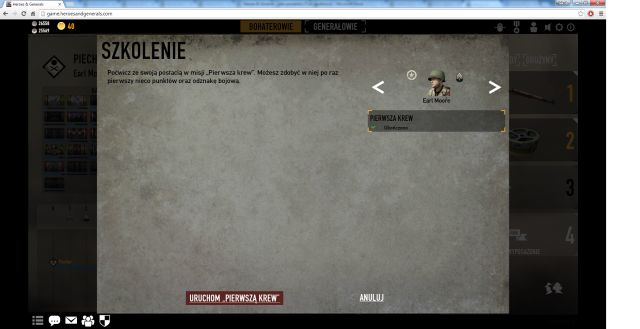 There's only a single tutorial available, called "First Blood".
After you're back at the main menu, you should start the real training - click on the "Training" button situated in the upper right corner of the screen (check the "Interface" section of this guide if you can't find it). You can't really change anything here, so just start the prepared mission by clicking on the "Start First Blood" button. You will be transferred to a map on which you will have to complete a series of simple, yet crucial tasks - they will be your bread and butter during most of your matches, so it's crucial to understand them as soon as possible. If you have any problems with completing this mission, check the "Tips" section of this guide for help.
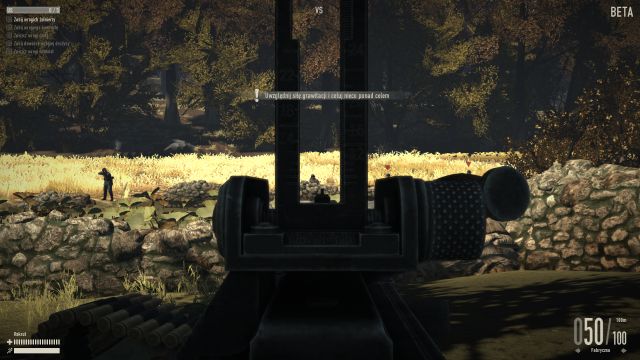 Kill three enemy soldiers hidden in the grass.
After you've regained control over your character, head towards and ammo-like icon - there you will find several different weapons. Pick up the one which suits you the most (it has no impact on the progress of the mission) and use it to eliminate a group of three soldiers, located to the North-East of your current position. As soon as you eliminate them, you will be given another task.
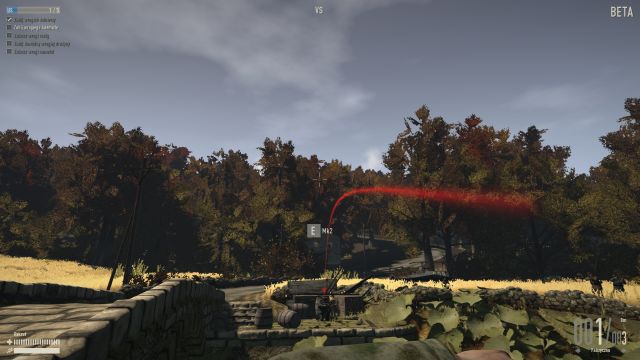 Use grenades to kill the enemy machinegunner.
You will have to get rid of an enemy operating a heavy machine gun, but not with the help of your firearm. Just as you did before, head towards the ammo icon, where you will find a grenade box. Pick them up and use them to eliminate the enemy HMG operator. To aim, click and hold the left mouse button - a red line indicating the flight path of the grenade should appear on the screen. Aim with it so that it ends near the enemy HMG operator and just release the left mouse button. If you've done everything right, the enemy should soon be flying out of his hideout.
 Use the rocket launcher to destroy the enemy tank.
Time for your third task. Again, head towards the ammo icon - there you will find a rocket launcher. Pick it up and use it to destroy the enemy tank which should appear to the North - to fire the weapon, you must first "aim" the rocket launcher, by pressing and holding the right mouse button. Depending on the place you hit the tank, you will have to fire either 2 or 3 rockets to destroy the enemy vehicle. After the tank blows up, you will be given your penultimate task.
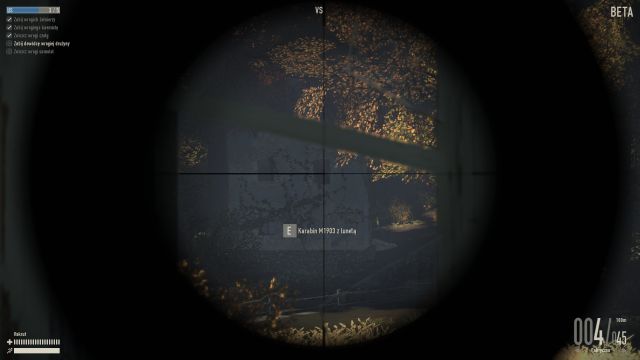 Use the sniper rifle to eliminate the enemy commander.
The time has come to use a sniper rifle. Get inside the building near your starting location (an ammo icon will lead you there) to pick up the mentioned rifle. Look through the window - directly in front of your (marked with a red dot), there should be your target, which you must now eliminate. Similar to the rocket launcher, use the right mouse button to aim, but before you give your shot, pay attention to the "100m" icon in the lower right corner of the screen. By using your mouse wheel you can change this value - it's used to adjust the distance of your shot.
The higher the value, the further the bullet will go - it does not change the power of the shot, but rather increases the crosshair a bit higher. It means, that setting the value to 100m and then shooting an enemy who is approximately about that distance from you, will (almost always) guarantee, that you will hit the intended body part. If the target is further then the value, the bullet will still hit, but a bit lower, but when the target is closer, there's a chance that you will overshot. The same mechanic can be found with rocket launchers. However, during this mission you don't have to change anything, so just take a shot and eliminate the enemy, after which you will receive your final task.
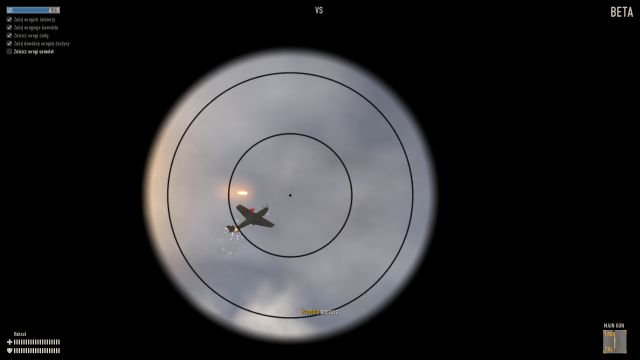 Bring down the enemy aircraft with the help of a stationary Anti-Aircraft gun.
Again, go to the place marked by an ammo icon - there you will find an AA gun. Take a seat at the gun and locate the enemy aircraft - your task is to, naturally, shoot it down. Remember about one thing - distance. If you plan to shoot down a plane, don't aim directly at it, because you will miss your shots. Instead, set your crosshair a little ahead, where the plane will be in a matter of a moment - it's not that easy at first, but with a little but of practice you should be able to efficiently bring down enemy planes. After the aircraft is destroyed, the mission will be completed and you will be transferred back to the game lobby.
Character creation does not work in the same way as with a typical MMORPG, where you make your own avatar, while selecting from a dozens of attributes, skills and elements of attire. Instead, there's a possibility (and after a short while a necessity) of buying, training, and in a way customizing new soldiers to your own needs.
 At the beginning you will be given three soldiers, one for each side.
After you've completed the "training" and the "first blood" missions, you will have three soldiers at your disposal, one for each side (America, Germany and Soviet Union). Each one starts with a zero rank - except for the one you used to complete the "First Blood", because he should be awarded to the first rank upon its completion. Soldiers in the game are called Heroes and they are used in the Action Game portion of the game, where you select your soldier and join a battlefield, playing in a first-person view (there's a separate game mode called "General" or "War", in which you are in charge of a group of assault teams, but this will be explained later on in this guide).
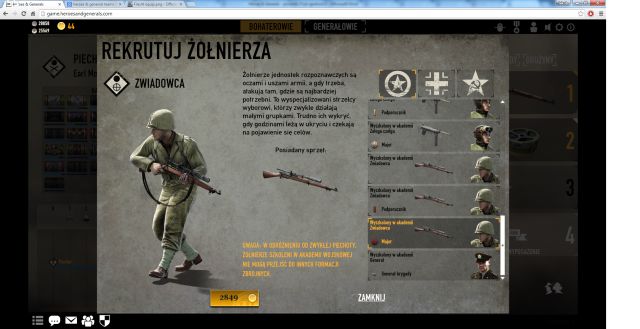
Besides the basic, available at the beginning soldiers, you will be able to buy additional ones. There are dozens of options and you can basically buy a soldier of any rank and class, starting with those who don't even have a rank yet (like your starting ones), to Generals of the Army. The whole purchasing system is, basically, divided into two separate parts. The first one allows you to buy rookie soldiers, with a zero rank - those can be purchased by using Credits, a currency received by taking part in missions. The second option gives you access to more experienced soldiers, but it requires you to spend Gold, which can (mostly) only be acquired by spending real money in the shop. If you, however, plan to have a longer adventure in Heroes & Generals, and at the same time you don't want to spend hundreds of hours of your time grinding for experience and/or Credits, it's worth to invest a couple of bucks (or euros) - getting a soldier to rank 12, so that he can gain access to "War" mode, will require you to play at least several hundreds games.
 Purchasing soldiers is rather mandatory as you rank up.
As it was mentioned in the introduction of this section, you can rely on a single soldier for some time, but you will soon notice some serious limitations, resulting from different class-related requirements for some equipment. You want to ride a tank? That's good, but you will first have to retrain your soldier so that he can be a Tanker, and when you decide to have a little adventure behind the "wheel" of an airplane, you will have to transform him into a Pilot. Of course, each and every transfer costs a lot of Credits (especially with the Tanker) and it's a lot more profitable to just buy a new soldier, rank him up and retrain him to become a class of your need - later on in the game you should have one soldier for each class.
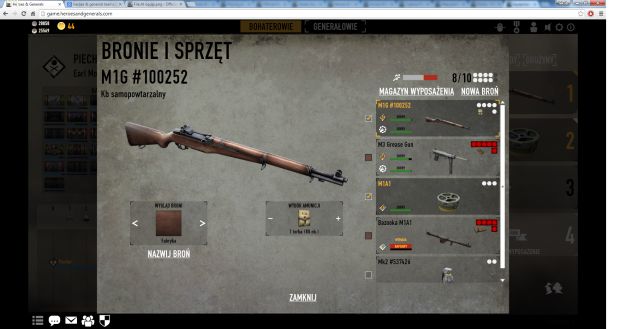
 There's a lot of different pieces of equipment in the game.
Selecting proper equipment for your soldier is without a doubt one of the most important things you should think about before entering the battlefield - without it, you will have a hard time playing on certain maps. You can't however, take the same amount of equipment like those fancy characters from FPP games from previous decade did - here the game imposes a strict limitations.
Those limitations come in a form of Equipment Points available to your soldier - the amount of those points differ between classes, as the Infantry can carry the most (10 points), while all the other classes have access to only 6 Equipment Points. Each and every piece of equipment in the game takes a certain amount of points, which are required so that your character can bring them to a battlefield - below you will find a table describing each piece of equipment, coupled with the amount of Equipment Points it requires you to have in order to use it.
Name
Icon
Equipment Points
Dienstglas / NK / M-3 6x30
1
M1910 / Schanzzeug / Vulkan

1
Combat Knife
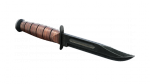
1
Adjustable Wrench
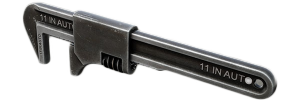
2
MK II
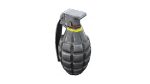
2
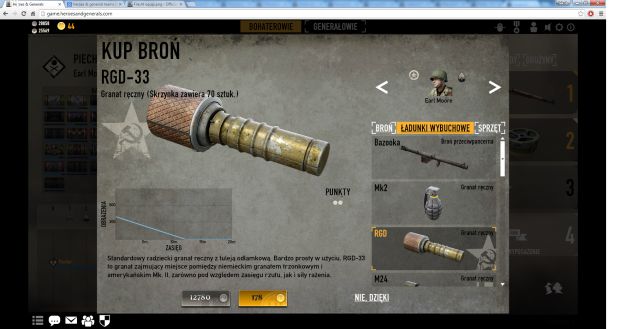
RGD-33
2
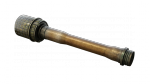
Stielhandgranate 24

2
PMK-40

2
TM-35
2
M2A3
2
S-Mine
2
No. 74
2
Hafthohlladung H3

2
M1911A1
2
M1917
2
Luger P-08

2
Mauser C96
2
TT-33

2
M1A1 Anti-Tank

3
Tellermine 42
3
Springfield M1903 Scoped
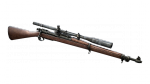
4
Kar98k Scoped
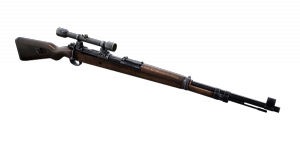
4
Mosin-Nagant M91/30 Scoped
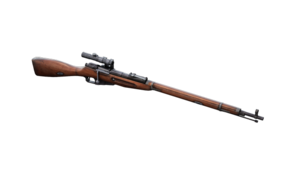
4
M1 Garand
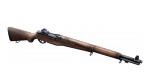
5
Springfield M1903
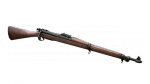
5
Gewehr 43
5
Kar98k
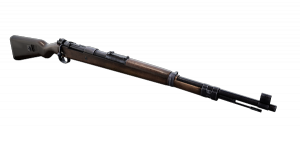
5
SVT-40

5
Mosin-Nagant M91/30

5
M1A1 Bazooka

5
Panzerschreck 54
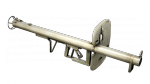
5
Panzerfaust 60
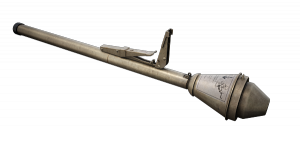
None
PTRD-41

6
M3 Grease Gun
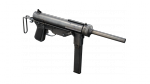
6
MP34

6
PPD-40
6
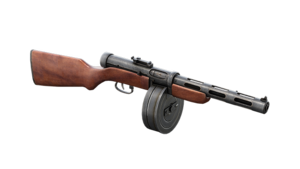
PPSh-41
6
M1 Rifle

6
M1918A2

7
M1919A4
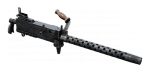
7
MG42

7
MG34
7
DP-28

7
As you can see, there's plenty of equipment for customization, but there's one "but" - it's almost certain that you won't be able to take more than one primary weapon on the battlefield, because you will run out of Equipment Points to do so. There are two additional mechanics closely associated with equipment - sprint and the amount of time it takes to deploy your soldier to the battlefield.
 Selecting the proper amount of equipment is crucial.
In the former case the rule is fairly simple - the more equipment your soldier takes (i.e. the more Equipment Points are taken) to the battlefield, the less he will be able to sprint. It means, that if you use up all your 10 points (if you are playing as an Infantryman), your soldier will be able to perform only a very short run before he runs out of steam and will have to rest. If you prefer a mobile approach and you are always on the move, running from one cover to another, you should use up to 7 Equipment Points at most, so that you will be able to perform rather decent runs. If you, however, prefer a more static approach, you can pack your soldier up to the limit. But...
That's right, the second mechanic - the amount of time it takes to deploy your soldier to the battlefield. It works exactly the same - the more equipment you decided to take to the battlefield, the longer it will take for your soldier to be deployed to the battlefield. You will learn very quickly how important a shorter deployment time can be - it comes in handy especially at the start of the game, when you want to get to an access point before your enemy can. Just as with the sprint, try to take up to 7 points only, meaning that your deployment time won't be that long.
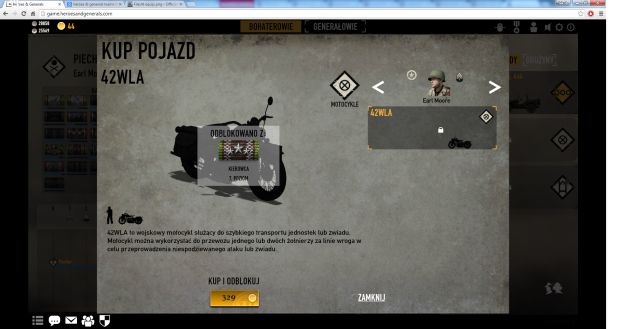 More vehicles will be unlocked by advancing appropriate Ribbons.
Two additional tabs remain - Vehicles and Teams. The first one allows you to customize the vehicles your soldier can spawn into and use during his time on the battlefield. After reaching the second rank with a soldier, he will be given access to a basic terrain vehicle: 1 ton Truck (America), Kubelwagen Type 82 (Germany) and GAZ-67 (Soviet Union). More vehicles can be unlocked with the help of Ribbons (click on the vehicle you're interested in to check what Ribbon is required to unlock it). Together with vehicle unlocks, additional slots for you to put those vehicles in will unlock as well. The Teams tab allows you to check on your Assault Teams, but this will be described in a separate section of this guide.
 Joining a game is fairly simple - a few clicks and you will be ready to go.
Joining a game is fairly simple, and the process itself is shown to everyone who just created their account - you surely remember the first, "training" mission, which must be completed, because all other functions of your account are blocked before you do so. The whole point of the game (aside from the "War" / "General" mode) looks almost the same - all you have to do is to click the "Enter Combat" button, and then get through a couple of windows, after which you will be placed in the queue for the battlefield.
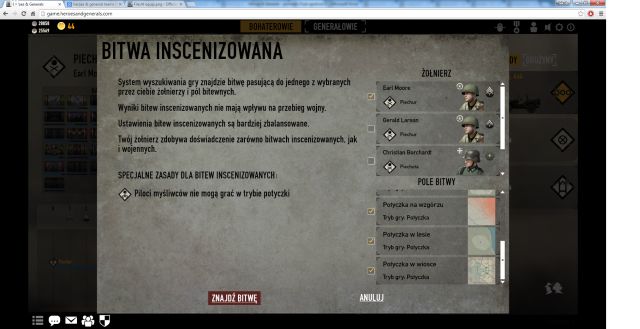
However, access to some of the options is restricted new players. During the first several missions (until you reach rank 3 with at least one soldier), you will have access only to the Skirmish game mode, and three maps associated with it, all part of a mode called "Random Mission". Random Mission is, basically, a map with predetermined conditions, with everything generated automatically, and the result of it have absolutely no effect on the events on the world map - comparing it with other games, you could call the "Random Mission" mode to a "normal" game, not to a "ranked" one.
After reaching the mentioned 3rd rank with at least one soldier, you will be given access to a second game mode called Assault (playing either in defense, or offense, depending on the team you are playing with), as well as to the mode simply called "War". The outcome of those battles have a direct influence on the events on the world map (they are directly related to the "General" mode), and the battles themselves are a lot more unpredictable.
Main differences between Random Mission and War modes:
Thanks to that, battles in the War mode are unpredictable, which in turn makes them a lot more thrilling, because not everything revolve around the equipment unlocked by players - even the worst battles, which are impossible to win at first glance, can be turned around and won, if, of course, the team is cooperating.
 Capturing control points is a lot more important than killing enemies.
What the whole game is about? To defeat the enemy, of course. This can be done using various methods, which turns every battle into something more than a simple bloodbath. The easiest, theoretically, way to win the game is to capture all the objective points. They differ from "normal" control points with the letter they are associated with(Ox - O1, O2, O3), and the symbol itself resembling a star. If the attacking team manages to do so, the game will be automatically finished with the victory of that team.
 However, killing enemies can give you some experience points as well!
Battles can also be won by using the "war of attrition" method - your team will have to reduce the amount of lives of the enemy team to zero, making sure that your own team has plenty of them. What are those lives all about? Each soldier respawning on the battlefield reduces the total amount of lives a team has by 1 - after the lives pool is reduced to zero, every killed enemy won't be able to respawn anymore and will have to simply leave the game. After that happens, your team will quickly gain a tremendous advantage over the enemy one - 3-4 people can't win against a full, 15-man team, no matter what they do.
There's also another, although rather indirect method of winning the game - exhaustion of the enemy equipment. Similar to the case with lives, each team is given a certain amount of resources, like vehicles / tanks / planes / etc. they can use on the battlefield. There are numerous types of those resources, such as:
Not all of them, of course, are present on every battlefield (especially in the case of missions played in the War mode). If one of the resource types is exhausted, the team won't be able to use this type of equipment, and the enemy will have a significant advantage. A good example is a sudden lack of Heavy Armor - you can, of course, destroy the enemy Heavy Tanks with mines and / or bazookas, but it's extremely difficult without direct support from your own Heavy Armor. The same applies to Fighter Planes - if one of the teams lacks them, the enemy team will be able to relentlessly drop bombs on the battlefield and you won't be able to do much to counter it.
Exhausting enemy resources won't guarantee your team a victory, but it sure makes defeating enemies a lot easier, because they won't be able to defend objective points as effective as with it, and they will be losing their lives a lot faster.
1. Never, ever should you run to the place in which the action takes place (i.e. "where they are shooting") through the shortest route, especially if it leads through an open, flat terrain, where you can't find cover - otherwise you will be quickly taken care off (dead). Try to select routes, which allow you to find good cover, or are passing through slightly more secure terrain (tall grass, for instance).
2. The same goes with deploying yourself to the battlefield. If there's action around point D3, which is under the enemy control, while your team has captured D4, avoid deploying yourself on the D4 point - it's way too close to the place of action and there's a high chance that as soon as you respawn, you will be killed again, or an enemy will blow up your vehicle. Deploy yourself a little further from the place of action and try to attack the enemy from the flank, not in the direct approach - an enemy you managed to trick will be an easier target than that which was able to prepare himself for your approach.
3. Do not rush. Sprinting is effective whenever you are in a situation, that an enemy is shooting at you and you have to quickly find yourself a cover. It's not a good idea to use it when you are getting close to a control point captured by the enemy. Sprinting, besides the obvious increase in your movement speed, does a lot of noise, which means that an enemy will be able to locate you, even though he still can't see you from behind your cover. You can, however, reduce the amount of noise your footsteps do by equipping the appropriate Combat Badge, and a lot of players either play without sound or they simply don't care what is happening around them, but you should still opt to move around crouching, which not only makes you silent, but also decreases the chances of enemy noticing you.
4. Cooperate with your team. Marking enemies for your teammates in tanks and / or planes, picking up someone from a wilderness while you are in a vehicle, or taking an enemy off your companions back - those are only a few things you can do to help your team, which, at the same time, won't cost you anything, but they will certainly make someone else's time more enjoyable, and will make your team a lot stronger.
5. Remember that you can mark the enemy. To do so, hold your crosshair for a few seconds on an enemy. Afterwards, a red icon will appear in the place where you've marked the enemy, allowing your allies to take care of the target.
6. Watch where you shoot, drive and throw grenades - without paying attention you can easily kill your own teammate, which will, certainly, end with him using foul language. Not to mention that he may want revenge.
7. Complete objectives. Heroes & Generals is not Quake, in which your main concern (except from a single game mode) was to just kill people and get as many frags as possible. Here completing the quests, which is taking control and / or defending various points, comes first, because in roughly 99% cases they affect the outcome of the fight. Not to mention that capturing and / or defending a capture point will reward you with several times more experience than a mere kill.
8. Find a good vantage point. If you aren't focused on securing control points at the moment, you can make the job a lot harder for the enemy team. To do so, find a good vantage point - it should intersect the enemy supply lines - and take cover there (remember to use various terrain obstacles, or even bushes or tall grass, in which you will be almost completely invisible to the passing enemies). If you are able to effectively eliminate the enemies, stalling their advance, you will be as important as a player who just focuses on capturing control points.
9. Try to change your position. After you've killed an enemy, a Killcam will kick in, meaning that the enemy will be able to see the place from which you've killed him. You can now expect that enemy to come for you to have his revenge - killing several enemies in quick succession only increases that risk. Whenever you kill someone, immediately change your position, even by a little, so that the enemy won't be able to surprise you.
10. Listen and observe. While moving through the "wilderness", far away from the place of action, you can often hear, or notice, an enemy sniper, or tank lurking in the shadows, which makes the lives of your teammates (or even you) a misery. The sound of gunfire, or a trail of bullet can lead you to the previously invisible enemy - all you have to do is to attack the enemy from the flank. Effectively responding to things going on around you will give you a bigger edge than even the best gun.
11. Refrain from shooting from a standing position. By doing so, not only that you decrease your overall accuracy, but you make an easy target for the enemy. Crouching, and especially using prone can increase the chances of survival, as the enemy will have a harder time shooting you, not to mention that you won't be so visible. Don't prone in front of an approaching car!
12. Think. If you can't get to the objective through a bridge, because it's protected by mines and snipers, try to get to the enemy from a flank, even though it requires you to walk around the whole map. Repeating the same ineffective tactic won't give you anything, only frustration.
13. Remember that you can change seat in a vehicle. By pressing the C button you can change the position in the vehicle you're actually travelling by (if it gives you such an option). It can come in handy in a situation, in which, for instance, a player who previously mounted the HMG got shot in the head and you want to take his place.
14. If you have been spotted by an enemy, hide and wait a few seconds. There's a high chance that the enemy was able to mark you - during the next several seconds you will be perfectly visible to every enemy on the battlefield. It's worth to wait for a short moment before you decide to come out off a cover - some of your enemies may have grown impatient and they simply don't care about you anymore.
15. Keep your head low. While you are travelling inside terrain vehicles, you can use the "Cover" option, making your character lower his head, which in turn makes you less vulnerable to enemy fire. It, however, is connected with some limitations, like restricted field vision, or the inability to use the HMG properly.
16. Don't get in your teammates way. Destroying anti-tank and anti-personal mines set up by your allies (remember - they are marked by an appropriate icon, while the enemy ones aren't) is a bad idea - they have been set there up for a reason. All you have to do is to just avoid them and continue your job.
17. Use anti-tank equipment. There are special boxes scattered around the map (and on vehicles, if the owner decided to install the box there) containing a "regenerating" rocket launcher. After picking it up, the weapon allows you to fire a single rocket at the enemy - it will allow you to be moderately effective against enemy armored vehicles and tanks, even though your soldier isn't really used to fight such foes.
1. Decide what you want to do. However trivial it may sound, it's one of your most important concerns, because the Infantry is the most versatile character class available in the game. He has the widest range of options when it comes to equipment and he can specialize in fighting against infantry (SMGs and machineguns, as well as sniper rifles) or he can devote himself to combat enemy tanks (rocket launchers, as well as anti-tank mines). You should decide about your purpose beforehand and focus on that single thing - you can't be effective at everything at the same time.
2. Capture control points. As the class, which isn't directly connected to any function (like controlling tanks and / or fighter planes), your main task will be to capture key control points, so that your teammates with other character classes can focus primarily on their roles, instead of wasting their time doing completing unnecessary tasks.
3. Use your large equipment points pool. As the only class in the game, the Infantryman has access to 10 equipment points. It will allow you to carry a lot of additional stuff, which are unavailable to the rest of character classes (as, for instance, most of light machine guns). You can either load your character up to the limit, making you a walking fortress, or decide to take slightly less equipment, becoming a lot faster than other character classes on the battlefield - there's a whole bunch of options to choose from.
4. Defend control points. Due to the fact, that there's a higher chance, that while playing as the Infantryman you will spend a lot of time inside of buildings (radios, which are connected with control points, are mostly located there), you are perfectly suited for the role of control points' defender. Your teammates won't be able to drive their tanks, or fly their planes inside of buildings, and a sniper won't be as effective at close range - you have to take care of the defenses.
5. Use transportation. While playing as the Infantryman, you won't have to get everywhere on foot. You can either use vehicles, which are controlled by your teammates (even tanks), or a vide spectrum of various types equipment available to the Infantryman, like terrain vehicles, or even bicycles.
6. Take your time to aim. If you managed to locate an enemy, who is lurking behind a cover, and you are certain that he didn't see you, don't just fire a volley at him, because there's always a chance that you will miss and the enemy will kill you in return. Instead, try to approach your target from a convenient position and fire a single, well-aimed shot at his head (if you are using an accurate weapon, like semi-automatic rifle or a sniper rifle), or get closer to him and fire at his back (if you, for instance, have an SMG).
7. Use sidearm and close-combat weapons. Pistols aren't the most effective weapons in the game, but they can (and certainly will) save your life - instead of wasting several precious seconds to reload your main gun, you can just flip your weapons, select the pistol and get rid of the enemy. The same goes with melee weapons (like a shovel or a wrench) - a single, well-aimed hit can send your enemy to the other side.
8. Try to eliminate silently. If you managed to get behind enemy lines, try to eliminate your foes silently, so that you won't give them your position away. You can use a shovel, or a wrench to kill your enemies silently - but remember to change your position after you've killed someone, as you can be sure that he is coming back for revenge.
9. Use terrain for cover. Shooting while standing in the middle of an open field will end up with you dying before you can even manage to harm, yet kill anyone - additionally, you are perfectly visible, meaning that every enemy can mark you. Hiding behind terrain obstacles, in buildings, in tall grass, or in places making you less exposed will make you harder to hit, and will increase your chances of survival exponentially.
10. Use grenades. This is an extremely effective weapon to flush out (or blow out) enemies hiding behind cover, sitting inside buildings, or using a HMG to shoot at you. Contrary to other similar games, there's no indication in Heroes & Generals that informs you, that a grenade just landed near your position - if the enemy didn't hear it, he won't even try to escape, and even if he tried, he still won't be able to deduce which direction is the safe one.
11. Fill up your ammo and restore health. There are chests (marked with an appropriate icon) scattered around the map, as well as some of the vehicles (if the user decided to buy the appropriate upgrade), which allows you to restore any type of ammo. An immense amount of people are oblivious to the second "application" of the said chests - they can restore missing health. It's true, that you will regenerate your health after you've sustained some injuries, but it will regenerate to a maximum of 1/3 of your total health - the only way to get it back to full is to use those chests.
1. Do not rush. Similar to playing the Infantryman, rushing to your destination while you are controlling a tank will almost always end up in the same way - your vehicle will explode and your soldier will be dead. Try to attack the enemies from their flank and focus on supporting your infantry teammates, rather then to solo enemy tanks.
2. Do not leave your tank. Leaving your tank may (and most probably will) result in your sudden death, because you can die from enemy sniper's hands, or even from an explosion from a projectile fired from an enemy tank. Leave the task of capturing control points to your teammates playing Infantryman, and just focus on eliminating enemies.
3. Watch out for your head. While controlling the tank, you must get used to the fact, that you will have a very limited visibility. You can remedy this by leaning out of your tank hatch, but you will be an extremely easy target for every enemy soldier on the battlefield - a single, well-aimed bullet and the tank will be left without the crew. If you want to use the option to lean out, you should first check your surroundings - do it for a quick moment and scan the area around the tank and then decide, if it's safe enough to stay like that (if there's no one aiming at you), or if you must immediately hide inside (if you are sure that someone is aiming at you). Remember about one thing - if you have to travel through a forest, with dense vegetation and very limited visibility, you should never use the option to lean out of the tank.
4. Listen. Aside from the tanks, enemy Infantrymen are also an extremely dangerous threat. Even if they aren't shooting rockets at you, they can still blow up your tank with the help of anti-tank mines. A common tactic is to approach the tank from the rear, set up the mine right next to it, quickly retreat to a safe distance and shoot the mine, so that the tank gets blown into pieces. The very moment of setting up the mine can be heard - if you managed to do so, immediately drive FORWARD (whatever you do, don't use reverse!).
5. Observe. Besides having a mine thrown under your tank, you can run into it almost everywhere on the map - a lot of players are using them because of their huge effectiveness and extremely low costs. In the case of mines hidden deep in a forest, you are doomed from the very beginning, as you won't be able to locate it either way, but mines are very easy to spot in the open (on roads, for instance) - you only have to shoot at them to blow them up. Remember about one thing - do not destroy mines set up by your teammates (those are marked with an appropriate icon, while the enemy ones aren't).
6. Evaluate your target before engaging it. If you are controlling a light tank, equipped with a HMG or a cannon with very little firepower, don't even think about engaging heavily armored vehicles - you won't be able to even scratch them, and you will reveal your position immediately. While controlling a light tank, focus on destroying similar targets, as well as enemy infantry and terrain vehicles, and when you are controlling a heavily armored monster, concentrate on fighting with enemy tanks.
7. Position accordingly. It is well known, that tanks' armor differs in thickness - the thickest one can be found on the front, weaker on the sides of the machine, while the weakest one is located at the rear and under the tank. This rule applies to Heroes & Generals as well. You can, hypothetically, destroy a heavily armored tank while using a weaker one, if you position your tank in a proper way - at the same time, using even the heaviest machines available to your team, you won't be able to do much if you allow your enemies to attack the rear of your machine.
8. Fire at targets. It may, at first, seem a little weird, but firing at a building, with an enemy inside, who is, for instance, trying to take over a control point, may be extremely effective - a single projectile, which manages to fly inside the room, will be easily able to kill an enemy infantryman (or a couple of them, if they are close to the explosion). However, remember to stop firing at the building if there are your allies inside - you may kill them instead of the enemy you were hoping to hit.
9. Use terrain to your advantage. Setting your vehicle at the top of a mountain will give you a huge height advantage over your foes, because they will have to adapt their attacks accordingly, because the gravity affects bullet / projectile trajectory (it changes with the distance - they will simply descend). Height advantage will also give you a better insight to the situation on the battlefield.
10. Sink into your surroundings. Placing your tank in a bush increases it's chances of survival, because you will be a lot harder to locate, and hence a lot less susceptible to attacks, especially from the air. There's nothing worse to do than setting up your tank in the middle of nowhere, in the open.
11. Remember about different ammo types. Most of the tanks in the game (excluding those, which are equipped only with HMG-like weaponry) gives you access to two types of ammo, marked with AP and HE sings. The former one is the armor-penetration round, used to fight against armored targets, but it's highly ineffective against infantry, as you have to hit with it perfectly to kill the enemy. The latter one is the infantry's nightmare - HE round will kill the enemy soldier, even if he is hiding behind a cover, or inside a building (it won't, however, be a good idea to use it against tanks, as those rounds are extremely expensive to resupply).
12. You can fire at the enemy planes. However strange it may seem, you can, with a little bit of practice, hit an enemy plane with a round fired from a tank - you can be sure that the enemy will notice that something big just hit him!
13. Keep your distance. Tanks, besides their extremely effective attacks, are known from another characteristic - they can attack from vast, unattainable for others ranges. Attacking from afar has a huge advantage, because you are practically immune to any counterattack from the enemy Infantry (unless an enemy managed to sneak up on you) - you can shoot across the whole map, while the enemy equipped with a rocket launcher will have huge problems with hitting you, if you are further than 100 meters away from him.
1. Play as a team. There are no other places on the battlefield, where precise teamwork is more important, than when you are playing as a fighter pilot. If you noticed an enemy chasing your teammate in a plane, it's important to react and try to take the foe out - not only that you will eliminate an enemy from the battlefield, decreasing the amount of lives / equipment in an assault team, but you will also make the job of the said ally a lot easier.
2. Pay attention to marks on the battlefield. If your team is competent and they know what they have to do, the whole battlefield will be flooded with red markers, which stand for enemy units. There are two types of markers: a smaller, triangle one, which is used for infantry, and slightly bigger, square one, which stands for enemy vehicles. You should mostly focus on the latter one - a bomb dropped on the roof of an enemy tank will severely damage, if not completely destroy it.
3. Pay attention to control points. Thanks to your bombs, you can kill off a whole group of enemies with a single strike. It's extremely effective when enemy forces are trying to capture an exposed control point - send a bomb in the middle of it and watch as enemies are blown in every direction. You should, however, avoid using your bombs when there are allied soldiers near your desired target, as you can easily kill them off too!
4. Watch where you drop your bombs. Bombs are lethal to your enemies, but they can just as easily affect your own allies. If you see a place in which fights take place, but there are players from your team in the vicinity of that place, refrain from dropping your bombs - you can do more harm than good.
5. Don't forget about enemy fighter planes. Besides dropping bomb on ground targets, it's crucial that you take care of the enemy airplanes, preventing them from doing their job, which, obviously, is to bombard your team.
6. Watch out for enemy anti-aircraft guns. If the enemy keeps on nagging you and is constantly shooting at you from an AA gun, you should take care of it as soon as possible, because the enemy can destroy your plane in a matter of seconds, even if you try to outmaneuver the bullets. There are two solutions to this problem. You can either take care of it by yourself, by dropping bombs and / or shooting your machine guns at the enemy, or simply ask someone from your team to kill the AA gun operator - an Infantryman controlling the gun is extremely vulnerable to attacks from close range.
7. Watch out when throwing bombs. Besides the possibility of sending an entire enemy squad to the other world, you can cause problems for yourself as well. Do not even drop your bombs when you are flying on a low altitude - there's a high chance that your own plane will be caught in the explosion, and the pilot (i.e. your soldier) will be send flying, but this time without the plane itself!
8. Do not do "barrel rolls" during flight. A plane is not a tank and it's not giving you the same amount of protection - the pilot is covered by a piece of glass, which offers zero protection from enemy attacks. If you have an enemy plane at your tail, rising your machine upright is a suicide - the enemy will have an easy time shooting at your cockpit, after which your pilot will be dropped out of the plane, and the machine itself will fall limply to the ground.
9. Select ammo accordingly. As with any type of equipment, you can personalize the type of ammunition available on the plane you are controlling. Thus, you can either select (only for the machine gun, unfortunately) armor piercing bullets (AP), or the one designated to combat the enemy infantry (HE). Using either of them does not exclude you from using it on other, "unplanned" targets, but HE bullets are ineffective against armored targets, while hitting enemy infantry with AP bullets is extremely difficult.
1. Deploy BEHIND the enemy lines. Playing a paratrooper allows you to surprise your enemies and to attack them from unexpected places (if, of course, you are not seen while you are falling to the ground). Try to deploy yourself in places with no enemies nearby and focus on attacking them from their flanks.
2. Deploy in the middle of the action. This point contradicts with the previous one in a way, but such a tactic can sometimes be quite effective. If the enemies are dug themselves up near a control point and your allies can't even get close to them, deploy yourself on the roof the building they are sitting in (or near) and surprise them with a unexpected attack "from the inside", or just simply jump in the middle of the enemy group to wreck some havoc.
3. Capture control points. Another merit of playing a paratrooper is the swiftness it gives you to travel around the map, which in turn allows you to get to control points a lot faster than anyone else. Thanks to the possibility of deploying yourself almost anywhere on the battlefield, you can get to key positions long before the enemy team, allowing you to capture the point without any resistance from their part.
4. Use the "free fall" mechanic. After achieving the second level with the "Parachute" ribbon, you will be given the "Free Fall" Combat Badge. After equipping it, it will allow you to open up your parachute whenever you feel to do so, instead of doing it automatically as soon as you jump off the plane. It means, that you can fall a great distance and then open the parachute at the "last second" - it will make shooting you down a lot harder for the enemy team. You can, as well, use a different combat badge called "Parachute Training". Similar to the previous one, the parachute won't be opened as soon as you jump off from the plane, but it will open automatically just before you make contact with the ground, allowing you to land in an effective, yet safe way.
5. Do not get involved in direct combat. You are not an Infantryman and you do not have access to his vast equipment. Your main task is to disturb the actions of the enemy team and to neutralize / capture control points.
6. Deploy ON THE enemy line of march. There's nothing more annoying than a sudden, "out of nowhere" attack coming from a paratrooper, hiding behind a tree, or running (or driving) into a mine set out in the middle of nowhere. Even if you won't be able to directly help your team (by capturing / defending control points), you will still be able to disrupt the movement of the enemy team, making the work of your allies a lot easier.
7. Adjust your equipment. As you have probably already noticed, besides the simple fact of having a smaller pool of equipment points (from 10 to 6), you will also be limited in terms of the equipment itself. As a paratrooper, you can't use sniper rifles, semi-automatic rifles and rocket launchers - you are limited to pistols, SMGs, melee weapons, explosives (grenades and mines, without Rocket Launchers) and a single, unique to paratrooper class LMG. If you, for instance, want to deploy on the enemy line of march to set up mines, you will have to resign from using any firearm (you can still use a pistol, or a melee weapon) so that you have enough space for explosives.
8. Do not deploy too far away from the place of action. Deploying in a place inaccessible to your enemies is important, that's true, but the necessity to walk for 10 minutes to a place in which there's anything happening is out of the question. As always, everything should be used in moderation.
 The character development bar can be seen in the bottom of the screen.
In contrast to most MMORPG games, Heroes & Generals won't be giving you access to several different character classes, hundreds of abilities and tech trees. It will, however, allow you to modify, to some extent, your soldiers.
After logging in the game, you will be redirected to the Game Lobby. Here you can find all the important information about available pieces of equipment, unlocked Ribbons (and their levels) and the solider development bar. As the name suggests, it's not account-bound, but rather soldier-bound - it means, that for every soldier you want to use on the battlefield, you will have to unlock every single piece of equipment, by leveling ribbons and accumulating experience points.
At the beginning (upon account creation), you will be given a couple of Infantrymen (a single one for each side of the conflict). With experience point acquisition, your soldier will advance to higher ranks, permitting him to use newer and newer equipment. Additionally, each rank is closely associated with your Soldier Salary - the higher the rank, the higher the salary. When will you get the money? For taking part in battles. There's only one condition to that - you have to spend at least 50% of total battle time on the battlefield to get the money. You won't get much for entering a battlefield which ends in the next 15 seconds.
Another mechanic associated with ranks is "command point". Those points allow you to command Assault Teams on the world map, during the "General" gameplay. You will be given your first points when you reach the 11th rank, and their number will systematically grow, together with your advancement in ranks.
Below you will find a table representing the amount of experience points (EXP) required to advance to a given rank (as well as the total amount of experience points needed to get there - Total EXP), as well as the things (classes, vehicles, pieces of equipment) unlocked along with them (Unlocks) - letters next to unlocked items represent the sides of the conflict, where A stands for America, G for Germany and SU for Soviet Union.
Rank
EXP
Total EXP
Salary
CP
Unlocks
1
10
10
1150
-
M3 Grease Gun (A) / MP34 (G) / PPD-40 (SU)
2
990
1000
1300
-
Truck 1 Ton 4x4 (A) / Kubelwagen Type 82 (G) / GAZ-67 (SU)
3
3000
4000
1450
-
Tank Crewman
4
11500
10500
1600
-
Fighter Pilot
5
22000
22000
1750
-
-
6
22000
44000
1900
-
-
7
22000
66000
2050
-
Paratrooper
8
22000
88000
2200
-
-
9
22000
110000
2350
-
Recon
10
22000
132000
2500
-
-
11
22000
154000
2650
-
-
12
44000
198000
3200
1
-
13
59000
257000
3350
1
-
14
59000
316000
3500
1
-
15
243000
559000
3650
2
-
16
1036000
1595000
3800
3
-
17
1036000
2631000
3950
4
-
18
2501000
5132000
none
5
The possibility to advance your soldier to the General rank
19
4001000
9133000
none
6
-
20
4001000
13134000
none
7
-
21
4001000
17135000
none
8
-
22
12002000
29137000
none
10
-
As you can see, if you want to unlock the General rank, you will have to spend a lot of time, even if you are getting over 1000 points of experience for every match you took part in. However, if someone is uninterested in the whole "General" (or "War") mode, he/she will have to develop the soldier up to 9th rank to unlock all rank-related unlockables (the rest is related with ribbons). You don't have to be a general in order to play on the world map, because a soldier with 12th rank is given 1 command point.
 Try to wait until the enemy starts capturing the point - killing him at that moment will yield a lot more experience points.
Advancing to higher ranks is associated with two things - wider access to various types of equipment (and most importantly - classes), as well as with higher Soldier Salary. You can, of course, use real money to buy gold, so that you can purchase a highly ranked soldier, unlocking a whole lot of items immediately, but not everyone can afford that. You can, however, speed up the whole process of experience points acquisition.
1. Complete mission objectives. Killing other players will give you satisfaction, that's true, but completing mission objectives (i.e. capturing / defending objective points on the map) will give you several times more experience points. A simple "defend" activity, which is killing the enemy who is trying to capture a control point, will give you an additional 60 experience points (aside from those earned for killing the enemy, obviously). It means, that it's worth to wait until the enemy starts capturing a control / objective point and then getting rid of him.
2. Level up your ribbons. You will be given bonus experience points for developing your ribbons. You can, for instance, try to "work" as a chauffeur and transport your teammates to different places on the battlefield, or focus on destroying enemy vehicles - there are dozens of possibilities.
3. Destroy enemy vehicles. Besides making the lives of your teammates a lot easier (and more miserable for your enemies), by destroying an enemy vehicle you will be able to earn immense amount of experience points. Suffice to say, that destroying a vehicle with several people inside (a common sight is a driver with 4-5 passengers), or a tank with two enemies inside will reward with you with the equivalent of several, if not tens of regular kills!
4. Shoot down planes. Use Anti-Aircraft guns and focus on shooting down enemy fighter planes. Your teammates, especially those controlling their own fighter planes, will thank you for that, and you will be able to get several hundred points of experience in the process.
5. Take enemies off your allies' backs. An enemy shooting at your ally will give you additional experience points if you manage to kill him.
6. Buy the Veteran account. Yup, if you want to play some more and achieve higher ranks, or to use the "General" mode, you will most probably have to invest some real money into the game in order to acquire gold. Buying the Veteran status for a month will cost you up to 15 bucks (which is the equivalent of a monthly subscription in most MMORPGs), and there's a whole bunch of profits coming along with it, such as 50% bonus experience gain (more on the Veteran status can be found in the appropriate section of this guide).
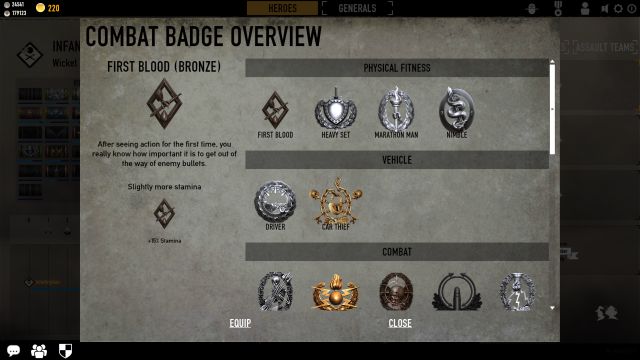 Developing your Ribbons allows you to unlock various Combat Badges.
Besides collecting experience points for your soldiers, the game allows you to acquire them in order to develop Ribbons. A Ribbon is, basically, a reward for doing particular, important activities in the game - from taking control over control points and travelling with the help of certain vehicles, to eliminating your enemies by using different weapons.
There's a total of 22 different Ribbons in the game, which are associated with practically every activity in the game. Ribbons, without the obvious satisfaction, serve the purpose of unlocking most of the pieces of equipment available in the game, as only a small portion of it will be unlocked upon advancing your soldiers in ranks.
While doing the said activities, you will develop Ribbons associated with them - you can develop each one of them up to a maximum 12th rank. Gaining experience to a given Ribbon is, unfortunately, not the same as with "regular" experience acquired through killing enemies and / or completing mission objectives - to get any experience points associated with a given Ribbon, you will have to complete activities strictly tied with them (more on that can be found in the next chapter).
Below you will find a table representing the amount of experience required to advance a Ribbon to a higher rank, as well as the total amount of experience points needed in order to get to a given rank.
Rank
Experience Points
Total Experience Points
Rank 1
500
500
Rank 2
1000
1500
Rank 3
2000
3500
Rank 4
4000
7500
Rank 5
8000
15500
Rank 6
4000
19500
Rank 7
10000
29500
Rank 8
12000
41500
Rank 9
32000
73500
Rank 10
17000
90500
Rank 11
42000
132500
Rank 12
62000
184500
As you can see, unlocking the last, twelfth rank will require you to accumulate vast amounts of experience, but the rate at which you are able to do so differs significantly between various Ribbons - for instance, points for the Chauffeur Ribbon are easily and quickly acquired, while the Tactical one is one of the hardest to advance.
By advancing to higher levels of given Ribbons, you will be able to unlock two types of things: additional types of equipment, such as vehicles and weapons, as well as Combat Badges. The former should be completely clear, while the latter are the equivalent of Perks from other games (like Call of Duty series) - you can select one (or two, if you have a Veteran status) such Badge which will give you a certain effect, such as increased sprinting distance, or allowing you to move quieter.
Below you will find a table representing all the Ribbons available in the game, coupled with the methods of experience acquisition, as well as items and / or Combat Badges unlocked upon achieving various ranks.
Icon
Ribbon Name
Activity
Unlocks (number = rank)
Physical Training
Running, sprinting and bicycle riding.
2: Marathon Man (Bronze)
4: Heavy Set (Bronze)
6: Marathon Man (Silver)
8: Heavy Set (Silver)
10: Marathon Man (Gold)
12: Heavy Set (Gold)
Combat Movement
Moving slowly, or moving while crouching.
2: Nimble (Bronze)
4: Quickdraw (Bronze)
6: Nimble (Silver)
8: Quickdraw (Silver)
10: Nimble (Gold)
12: Quickdraw (Gold)
Parachute
A successful landing with a parachute.
1: Free Fall
5: Para-Training
6: M1 Carbine (America)
9: FG42 (Germany)
Defense
Killing enemies trying to capture control points.
2: Scavenger (Bronze)
4: Hoarder (Bronze)
6: Scavenger (Silver)
8: Hoarder (Silver)
10: Scavenger (Gold)
12: Hoarder (Gold)
Tactical
Seizing control over control points, as well as killing the enemies that are defending them.
3: Binoculars
5: Sidearm
Recon
Penetrating through the enemy lines without them noticing, as well as killing enemies with sniper rifles.
2: Ghillie (Bronze)
5: M2A3 (America) / S-Mine (Germany) / PMK-40 (Soviet Union)
6: Ghillie (Silver)
10: Ghillie (Gold)
12: Camouflaged
Close Combat
Killing enemies with the help of melee weapons (knives, spades).
4: M1910 (America) / Schanzzeug (Germany) / Vulcan Stalin (Soviet Union)
5: Combat Knife (America) / Seitengewehr 98 (Germany) / NR-40 (Soviet Union)
Bolt Action Rifle Assault
Killing enemies with Bolt Action Rifles.
1: Ammo Modification
2: Fast Reload (Bronze)
3: Weapon Modification
4: Dead Eye (Bronze)
4: Weapon Modification
5: Weapon Modification
6: Fast Reload (Silver)
7: Weapon Modification
8: Dead Eye (Silver)
10: Fast Reload (Gold)
11: M1903 scoped (America) / Kar98k scoped (Germany) / Mosin-Nagant scoped (Soviet Union)
Handgun Assault
Killing enemies with Pistols.
1: Ammo Modification
2: Pointer Quick Fire (Bronze)
3: Weapon Modification
5: Weapon Modification
6: Pointer Quick Fire (Silver)
7: Weapon Modification
9: Weapon Modification
11: Pointer Quick Fire (Gold)
Sniper Assault
Killing enemies with Sniper Rifles.
1: Ammo Modification
3: Weapon Modification
5: Weapon Modification
7: Weapon Modification
9: Weapon Modification
Semi-Automatic Rifle Assault
Killing enemies with Semi-Automatic Rifles.
1: Ammo Modification
2: M1903 (America) / Kar98k (Germany) / Mosin-Nagant (Soviet Union)
3: Weapon Modification
4: Weapon Modification
5: Weapon Modification
6: M1918A2 (America) / MG34 (Germany)

SMG Assault
Killing enemies with SMGs.
1: Ammo Modification
3: Weapon Modification
5: M1A1 Thomson (America) / MP40 (Germany) / PPSh-40 (Soviet Union)
7: Weapon Modification
9: Weapon Modification
10: PPSh-41 (Soviet Union)
11: Weapon Modification
LMG Assault
Killing enemies with LMGs.
1: Ammo Modification
2: Weapon Modification
3: Tight Grip (Bronze)
4: Weapon Modification
5: Weapon Modification
6: M1919 MG (America)
7: Tight Grip (Silver)
8: MG42 (Germany)
9: Weapon Modification
10: DP-28 (Soviet Union)
11: Tight Grip (Gold)
Explosives
Killing enemies with grenades, mines and Rocket Launchers.
1: M1A1 Bazooka (America) / Panzerschreck RPzb 54 (Germany)
2: Grenadier (Bronze)
3: M24 (Germany)
4: Dynamite Lover (Bronze)
5: RGD-33 (Soviet Union)
6: Grenadier (Silver)
7: Grenade MKII (America)
8: Dynamite Lover (Silver)
10: Grenadier (Gold)
11: M2A3 (America) / S-Mine (Germany) / PMK-40 (Soviet Union)
12: Dynamite Lover (Gold)
Tank Destruction
Destroying enemy vehicles with Rocket Launchers, anti-tank grenades, as well as mines.
2: M1A1 (America) / Tellermine 42 (Germany)
5: TM-35
6: S.T. 74 (America) / Hafthohladung H3 (Germany) / RPG-43 (Soviet Union)
Chauffeur
Transporting allies with the help of terrain, as well as armored vehicles.
4: Iron Fist (Bronze)
5: M3 (America) / Sd.Kfz 250-3 (Germany) / M3 L-L (Soviet Union)
9: Iron Fist (Silver)
12: Iron Fist (Gold)

Driver
Travelling with the help of a terrain, as well as armored vehicle.
1: Car Thief (Bronze)
2: Driver (Bronze)
3: Car Thief (Silver)
4: Infantry Fist (Bronze)
5: Car Thief (Gold)
6: Driver (Silver)
7: 42WLA (America and Soviet Union) / R75 (Germany)
8: Infantry Fist (Silver)
9: Key
10: Driver (Gold)
12: Infantry Fist (Gold)
Dog Fight
Shooting down enemy planes while controlling a plane yourself.
1: Aircraft Thief (Bronze)
2: Airborne (Bronze)
5: Aircraft Thief (Silver)
6: Airborne (Silver)
9: Aircraft Thief (Gold)
10: Airborne (Gold)
Tactical Bomber
Killing enemies and destroying enemy vehicles with bombs dropped down from a plane.
4: Bombs Away (Bronze)
8: Bombs Away (Silver)
12: Bombs Away (Gold)
Ground Support
Killing enemy infantry, as well as destroying enemy vehicles.
4: Flak Jacket (Bronze)
8: Flak Jacket (Silver)
12: Flak Jacket (Gold)
Tank Driver
Driving with tanks.
4: Tanker (Bronze)
5: Key
8: Tanker (Silver)
12: Tanker (Gold)
Light Armor
Using Light Tanks to destroy enemy targets.
2: Panzerkampfwagen II Ausf. C (Germany)
3: M5A1 Stuart (America) / T-26 Model 1933 (Soviet Union)
5: Panzerkampfwagen 38 Ausf. E (Germany)
6: BT-7 Model 1937 (Soviet Union)
9: M3 Lee (America) / Panzerkampfwagen III Ausf. J (Germany)
11: M24 Chaffee (America) / T-34 Model 1942 (Soviet Union)
Medium Armor
Using Medium Tanks to destroy enemy targets.
3: M4A1 Sherman (America)
5: Panzerkampfwagen IV Ausf. H (Germany)
7: T-34 Model 1944 (Soviet Union)
9: M4A3E8 Sherman (America) / Panzerkampfwagen VI Tiger (Germany)
12: M26 Pershing (America) / IS-2 Model 1944 (Soviet Union)
Heavy Armor
Using Heavy Tanks to destroy enemy targets.
12: Panzer VI Tiger II (Germany)
Medium Tank Destroyer
Using Medium Tank Destroyers to destroy enemy targets.
5: Stug II Ausf. F (Germany)
Armor Damage
Using the tank's main cannon to penetrate through the enemy armor.
4: Gunner (Bronze)
8: Gunner (Silver)
9: M18 Hellcat (America) / Jagdpanzer 38 (Germany) / SU-85 (Soviet Union)
12: Gunner (Gold)
In this section you will find a table representing all the Combat Badges available in the game. It's divided into three different levels of Badges (Bronze, Silver and Gold), and contains the information about the effects of each and every of them on different ranks - some of the Combat Badges have only a single rank, which is why those will appear in the "Effect: Gold" column.
Name
Effect: Bronze
Effect: Silver
Effect: Gold
Marathon Man
15% Increase in sprinting time
30% Increase in sprinting time
45% Increase in sprinting time
Heavy Set
Decreases the amount of damage your soldier takes by 5%.
Decreases the amount of damage your soldier takes by 10%.
Decreases the amount of damage your soldier takes by 15%.
Nimble
25% reduction in sound made while on foot.
50% reduction in sound made while on foot.
75% reduction in sound made while on foot.
Quickdraw
Turn-Cone fire lowered by 10%
Turn-Cone fire lowered by 20%
Turn-Cone fire lowered by 30%
Free Fall
-
-
Allows the Paratrooper to open his parachute manually.
Para-Training
-
-
Automatically opens up the parachute before the soldier hits the ground.
Scavenger
The ability to regain 50% ammunition after walking over dead enemies with the same gun type.
The ability to regain 75% ammunition after walking over dead enemies with the same gun type.
The ability to regain 100% ammunition after walking over dead enemies with the same gun type.
Hoarder
+1 additional clip to the primary weapon.
+2 additional clip to the primary weapon.
+3 additional clip to the primary weapon.
Ghillie
Decreases the time an enemy marker stays on your soldier to 7 seconds.
Decreases the time an enemy marker stays on your soldier to 5 seconds.
Decreases the time an enemy marker stays on your soldier to 1 seconds.
Camouflaged
After killing the enemy, he won't see the standard killcam - the enemy won't be able to see from where the shot has taken.
Fast Reload
10% increased reload speed.
20% increases reload speed.
40% increased reload speed.
Dead-Eye
20% Reduction in time required in order to "focus" the crosshair.
33% Reduction in time required in order to "focus" the crosshair.
50% Reduction in time required in order to "focus" the crosshair.
Pointer Quick Fire
+25% hip-fire accuracy.
+50% hip-fire accuracy.
+75% hip-fire accuracy.
Tight Grip
Decreases weapon recoil by 25%.
Decreases weapon recoil by 50%.
Decreases weapon recoil by 75%.
Grenadier
+5% additional damage from explosives.
+10% additional damage from explosives.
+15% additional damage from explosives.
Dynamite Lover
+1 Grenade / Mine.
+2 Grenades / Mines.
+3 Grenades / Mines.
Iron Fist
+7.5% additional damage when fighting against enemy armored vehicles.
+15% additional damage when fighting against enemy armored vehicles.
+25% additional damage when fighting against enemy armored vehicles.
Car Thief
25% faster unlock of cars.
50% faster unlock of cars.
75% faster unlock of cars.
Driver
25% faster start up on vehicles.
50% faster start up on vehicles.
75% faster start up on vehicles.
Infantry Fist
+7.5% additional damage when fighting terrain vehicles. .
+15% additional damage when fighting terrain vehicles. .
+25% additional damage when fighting terrain vehicles. .
Aircraft Thief
25% faster unlock of enemy airplanes.
50% faster unlock of enemy airplanes.
75% faster unlock of enemy airplanes.
Airborne
25% faster start up of planes.
50% faster start up of planes.
75% faster start up of planes.
Bombs Away
+1 additional bomb carried by a fighter plane.
+2 additional bombs carried by a fighter plane.
+3 additional bombs carried by a fighter plane.
Flak Jacket
10% reduction of damage done to a fighter pilot from an Anti-Aircraft gun.
20% reduction of damage done to a fighter pilot from an Anti-Aircraft gun.
30% reduction of damage done to a fighter pilot from an Anti-Aircraft gun.
Tanker
10% faster start up of enemy tanks.
20% faster start up of enemy tanks.
30% faster start up of enemy tanks.
Gunner
10% reduced time required in order to reload a tank cannon.
20% reduced time required in order to reload a tank cannon.
30% reduced time required in order to reload a tank cannon.
As you can see, there's certainly a lot of things to consider. You have to find something for yourself, as there are no "the best of the best" Combat Badges - each and every one of them is crucial in a way. The Camouflage ribbon deserves special attention. Upon activation, it disables the Killcam mechanic whenever you kill an enemy, which is extremely crucial for classes focusing on stealth and attacking enemies from the flank (Recon is perfectly suited for that), or a different one called Flak Jacked, which increases the amount of damage a fighter pilot takes by 30%.
It's worth to try out every possible combination and select those, which are going to be effective for you - remember, restrain from using, for instance, the Aircraft Thief Combat Badge when you aren't even using a fighter pilot.
At the very beginning, you will be given three basic soldiers, each one for every side of the conflict. They will have an Infantryman character class, as well as a 0 rank. As you are collecting experience, the soldier you are using can be "retrained" to another character class, allowing him to gain access to additional equipment. Below you will find a table representing each class, coupled with total conversion costs, as well as the required level.
Class
Required Level
Price
Infantryman
0
2500 Credits / 99 Gold
Tank Crewman
3
22500 Credits / 299 Gold
Fighter Pilot
4
18750 Credits / 299 Gold
Paratrooper
7
19500 Credits / 299 Gold
Recon
9
17500 Credits / 299 Gold
He can use the highest amount of different pieces of equipment. The Infantryman is the only one, besides the Recon, who can use sniper rifles. Additionally, as the only class in the whole game, he has a 10-point pool of equipment points, allowing him to bring a lot more stuff into the battlefield. The main task of the Infantryman is to capture and defend control / objective points.
The only flaw of the Infantryman is the lack of any "specialized" equipment, such as tanks, fighter planes, or the ability to deploy anywhere on the battlefield via a parachute.
A soldier who is the only one capable of controlling all types of tanks. It's also the most expensive character class in the game, both in the upgrade itself, as well as with buying equipment. He has a 6-point pool of equipment points, and his main task is to neutralize enemy (armored) vehicles.
The main drawback of the Tank Crewman is the limited access to equipment - he can't use Light Machine Guns, bolt-action and sniper rifles, as well as rocket launchers.
As the name implies, this soldier focuses solely on using fighter planes. The main task of this character class is to neutralize enemy planes, as well as to eliminate ground targets, be it with the help of the on-board machine gun, or extremely powerful bombs. Just like the Tank Crewman, this soldier also has a 6-point pool of equipment points.
He has the same flaw as the Tank Crewman - limited access to equipment, such as Light Machine Guns, bolt-action and sniper rifles, as well as rocket launchers.
The most mobile character class in the game. Aside from a LMG, it has no access to any paratrooper-only equipment, but he can deploy anywhere on the battlefield. Soldiers with this character class should focus on causing confusion in the ranks of the enemy thanks to their ability to appear literally anywhere on the battlefield. Like the rest of the classes (besides Infantryman), they have access to a 6-point pool of equipment points. Their main role is to capture distant, unprotected control points, as well as securing key positions on the map at the beginning of each battle.
The last, except the General, character class in the game. Together with Infantryman, it's the only class with the access to Sniper Rifles. Recon is a class perfectly suited for combat over immense distances, and it's also the living nightmare for every enemy infantryman. Recons have access to a 6-point pool of equipment points, and as the only class in the game they can use special recon vehicles.
Their major flaw is the inability to fight at close ranges - they are practically useless against enemies equipped with SMGs / LMGs. Additionally, their attacks are completely ineffective against enemy armored vehicles.
This section contains information about pieces of equipment available to the Germans. Below you will find a description of every weapon, coupled with the purchase price, clip size, class entitled to use it, as well as suggested methods of usage.
Icon
Name
Description

Gewehr 43
Class: Infantryman, Recon
Price: 10650 Credits/ 139 Gold
Clip Size: 10 bullets
Usage: perfect for combat on medium and long range, slightly less effective in close range.
Fallschirmjagergewehr 42
Class: Paratrooper
Price: 298200 Credits/ 2699 Gold
Clip Size: 20 bullets
Usage: an extremely powerful weapon, although restricted to the Paratrooper class. Fairly effective at any range. Unfortunately, it's probably the most expensive one as well.

MP-34
Class: any
Price: 11200 Credits/ 179 Gold
Clip Size: 20 bullets
Usage: this weapon is effective only at close range - if the enemy is more than several dozen meters away from you, it becomes completely useless.
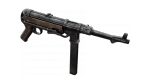
MP-40
Class: any
Price: 113600 Credits/ 1149 Gold
Clip Size: 32 bullets
Usage: basically, it's an improved version of MP-34 - stronger, more accurate, but still not very effective at medium and long range.

Kar98k
Class: Infantryman, Recon
Price: 56800 Credits/ 599 Gold
Clip Size: 5 bullets
Usage: a weapon perfectly suited for medium and long range combat, because it deals huge amounts of damage (able to kill in a single shot) and has high accuracy. Unfortunately, it's not very effective at close range.

Kar98k scoped
Class: Infantryman, Recon
Price: 205900 Credits/ 1949 Gold
Clip Size: 5 bullets
Usage: the scope makes this weapon even more deadly at medium and long range, but because of the zoomed-in view it's completely useless at close range, unless you decide to use it without the zoom.
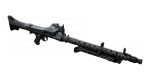
MG-34
Class: Infantryman
Price: 92300 Credits/ 919 Gold
Clip Size: 50 bullets
Usage: a weapon which deals high damage and has a huge, 50-bullet clip. Effective at close and medium range, a little less at long range.
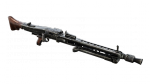
Mg-42
Class: Infantryman
Price: 156200 Credits/ 1549 Gold
Clip Size: 50 bullets
Usage: a weapon almost identical to the previously listed one - it has the same range, amount of bullets in the clip, as well as damage dealt. The only difference is the higher price.

Mauser C96
Class: any
Price: 78100 Credits/ 789 Gold
Clip Size: 10 bullets
Usage: a weapon useful only when you suddenly run out of bullets in your primary gun, and there's an enemy nearby. Not effective if the enemy is further than 50-60 meters away from you.
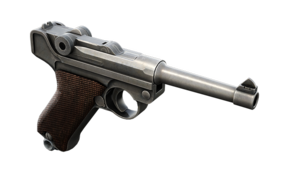
Luger P-08
Class: any
Price: 127800 Credits/ 1299 Gold
Clip Size: 8 bullets
Usage: paradoxically, a weaker version of Mauser C96. Fewer bullets in the clip, higher cost and the same overall effectiveness. Like the C96, it's only effective at close range.

Panzerschreck 54
Class: Infantryman
Price: 35500 Credits/ 399 Gold
Clip Size: 1
Usage: the only rocket launcher available to the German side. It's effective at dealing with any target, but it's less effective when used against heavy tanks. The only downside of this weapon is the astronomical renewal price - if you empty the ammo, refilling it will cost you as much as a new rocket launcher!

Tellermine 42
Class: any
Price: 2130 Credits/ 31 Gold
Clip Size: 2
Usage: an extremely cheap way of dealing with enemy vehicles. The mine deals extreme damage - it's able to blow up every single vehicle in the game with a single strike. Not effective when used against infantry - it simply won't detonate.

Hafthohlladung H3
Class: any
Price: 14910 Credits/ 189 Gold
Clip Size: 3
Usage: an effective weapon to use against enemy vehicles, because it can be thrown at a certain distance, eliminating the risk of being ran over by the enemy vehicle. It deals less damage than the Tellermine 42, which makes it less effective against heavy tanks.
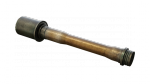
Stielhandgranate 24
Class: any
Price: 8520 Credits/ 119 Gold
Clip Size: 4
Usage: your primary means of fighting the enemy infantry, as well as unarmored vehicles. Ineffective against tanks.

S-Mine
Class: Recon
Price: 14200 Credits/ 179 Gold
Clip Size: 2
Usage: the equivalent of the Tellermine 42, but this time to be used against enemy infantry. Extremely effective - a single one will kill every soldier in the range, be it foe or an ally. Additionally, it's a little cheaper than the American mine.
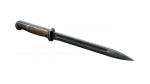
Seitengewehr 98
Class: any
Price: 7100 Credits/ 90 Gold
Clip Size: -
Usage: a hand-to-hand weapon. A single, well-aimed strike can kill an enemy soldier. Ineffective against other targets.
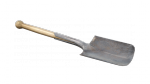
Schanzzeug Spade
Class: any
Price: 3550 Credits/ 49 Gold
Clip Size: -
Usage: cheaper and sooner available melee weapon. The equivalent of the Combat Knife, with the same flaws: effective only against infantry.

Wrench
Class: any
Price: 28401 Credits/ 330 Gold
Clip Size: -
Usage: this piece of equipment is used mainly to repair vehicles. Additionally, it can be used as a makeshift melee weapon. In combat, ineffective against anything that's not infantry.
This section contains information about pieces of equipment available to the America. Below you will find a description of every weapon, coupled with the purchase price, clip size, class entitled to use it, as well as suggested methods of usage.
Icon
Name
Description

M1 Garand
Class: Infantryman, Recon
Price: 10650 Credits/ 139 Gold
Clip Size: 8 bullets
Usage: perfect for combat on medium and long range, slightly less effective in close range.

M1 Carbine
Class: Paratrooper
Price: 42600 Credits/ 469 Gold
Clip Size: 30 bullets
Usage: an extremely powerful weapon, although restricted to the Paratrooper class. Fairly effective at any range. Unfortunately, it's probably the most expensive one as well.

M3 Grease Gun
Class: any
Price: 11200 Credits/ 179 Gold
Clip Size: 30 bullets
Usage: this weapon is effective only at close range - if the enemy is more than several dozen meters away from you, it becomes completely useless.

M1A1 Thompson
Class: any
Price: 142000 Credits/ 1399 Gold
Clip Size: 30 bullets
Usage: a very expensive weapon. Basically, it's an improved version of M3 Grease Gun - stronger, more accurate, but still not very effective at medium and long range.

Springfield M1903
Class: Infantryman, Recon
Price: 56800 Credits/ 599 Gold
Clip Size: 5 bullets
Usage: a weapon perfectly suited for medium and long range combat, because it deals huge amounts of damage (able to kill in a single shot) and has high accuracy. Unfortunately, it's not very effective at close range.
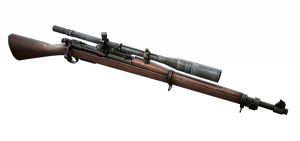
Springfield M1903 scoped
Class: Infantryman, Recon
Price: 220100 Credits/ 2049 Gold
Clip Size: 5 bullets
Usage: the scope makes this weapon even more deadly at medium and long range, but because of the zoomed-in view it's completely useless at close range, unless you decide to use it without the zoom.
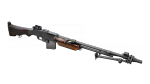
BAR
Class: Infantryman
Price: 127800 Credits/ 1299 Gold
Clip Size: 20 bullets
Usage: an almost ideal weapon. It deals extremely high damage (equivalent to M1 Garand, but faster), has high rate of fire and is effective at almost any distance. The only flaw is the huge amount of equipment points required to use it (7), making it available only to the Infantryman.

M1919 Browning
Class: Infantryman
Price: 177500 Credits/ 1699 Gold
Clip Size: 50 bullets
Usage: it's basically an empowered version of the previously described one. The clip size is almost tripled, while the rate of fire is the same as of BAR's. Yet again, it's a weapon restricted to the Infantryman.

M1911A1
Class: any
Price: 71000 Credits/ 729 Gold
Clip Size: 8 bullets
Usage: a weapon useful only when you suddenly run out of bullets in your primary gun, and there's an enemy nearby. Not effective if the enemy is further than 50-60 meters away from you.

M1917
Class: any
Price: 106500 Credits/ 1099 Gold
Clip Size: 6 bullets
Usage: an improved version of M1911A1. It deals a lot higher amount of damage, coupled with longer range, but it's still only a sidearm, effective only as a last resort. Unfortunately, it's a rather expensive piece of equipment.
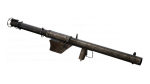
M1A1 Bazooka
Class: Infantryman
Price: 35500 Credits/ 399 Gold
Clip Size: 1
Usage: the only rocket launcher available to the American side. It's effective at dealing with any target, but it's less effective when used against heavy tanks. The only downside of this weapon is the astronomical renewal price - if you empty the ammo, refilling it will cost you as much as a new rocket launcher!
M1A1 mine
Class: any
Price: 2130 Credits/ 31 Gold
Clip Size: 2
Usage: an extremely cheap way of dealing with enemy vehicles. The mine deals extreme damage - it's able to blow up every single vehicle in the game with a single strike. Not effective when used against infantry - it simply won't detonate.

No. 74
Class: any
Price: 18460 Credits/ 229 Gold
Clip Size: 3
Usage: an effective weapon to use against enemy vehicles, because it can be thrown at a certain distance, eliminating the risk of being ran over by the enemy vehicle. It deals less damage than the M1A1, which makes it less effective against heavy tanks.

MK II Grenade
Class: any
Price: 8520 Credits/ 119 Gold
Clip Size: 4
Usage: your primary means of fighting the enemy infantry, as well as unarmored vehicles. Ineffective against tanks.

M2A3
Class: Recon
Price: 21300 Credits/ 259 Gold
Clip Size: 2
Usage: the equivalent of the M1A1 mine, but this time to be used against enemy infantry. Extremely effective - a single one will kill every soldier in the range, be it foe or an ally.

Combat Knife
Class: any
Price: 7100 Credits/ 90 Gold
Clip Size: -
Usage: a hand-to-hand weapon. A single, well-aimed strike can kill an enemy soldier. Ineffective against other targets.

Spade
Class: any
Price: 3550 Credits/ 49 Gold
Clip Size: -
Usage: cheaper and sooner available melee weapon. The equivalent of the Combat Knife, with the same flaws: effective only against infantry.

Wrench
Class: any
Price: 28401 Credits/ 330 Gold
Clip Size: -
Usage: this piece of equipment is used mainly to repair vehicles. Additionally, it can be used as a makeshift melee weapon. In combat, ineffective against anything that's not infantry.
This section contains information about pieces of equipment available to the Soviet Union. Below you will find a description of every weapon, coupled with the purchase price, clip size, class entitled to use it, as well as suggested methods of usage.
Icon
Name
Description
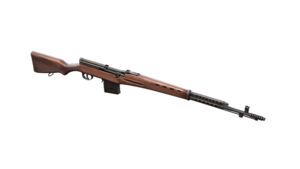
SVT-40
Class: Infantryman, Recon
Price: 10650 Credits/ 139 Gold
Clip Size: 10 bullets
Usage: perfect for combat on medium and long range, slightly less effective in close range.
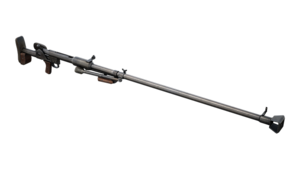
PTRD-41
Class: Infantryman
Price: 234300 Credits/ 2149 Gold
Clip Size: 1 bullets
Usage: a weapon completely unique to the Soviet Union. This semi-automatic armor-penetration rifle is an extremely expensive, yet immensely effective and versatile weapon - it's effective against any target, be it infantry, or tanks. It has insanely long range and accuracy. The only flaw is the low effectiveness at close range.

PPD-40
Class: any
Price: 11200 Credits/ 179 Gold
Clip Size: 71 bullets
Usage: a weapon effective only at very close range. The thing that makes it stand out so much is the huge, 71-bullet clip, making it very unlikely to run out of bullets when fighting. It's extremely effective at close range.

PPSh-41
Class: any
Price: 170400 Credits/ 1649 Gold
Clip Size: 71 bullets
Usage: the improved version of PPD-40. However, immense clip size and increased damage dealt won't make it effective at any other but close range. Additionally, it's relatively expensive. .
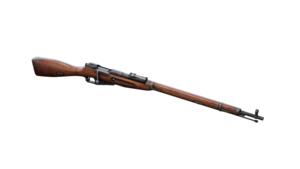
Mosin-Nagant M91/30
Class: Infantryman, Recon
Price: 56800 Credits/ 599 Gold
Clip Size: 5 bullets
Usage: a weapon perfectly suited for medium and long range combat, because it deals huge amounts of damage (able to kill in a single shot) and has high accuracy. Unfortunately, it's not very effective at close range.

Mosin-Nagant M91/30 scoped
Class: Infantryman, Recon
Price: 205900 Credits/ 1949 Gold
Clip Size: 5 bullets
Usage: the scope makes this weapon even more deadly at medium and long range, but because of the zoomed-in view it's completely useless at close range, unless you decide to use it without the zoom.
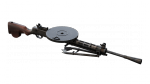
DP-28
Class: Infantryman
Price: 142000 Credits/ 1358 Gold
Clip Size: 47 bullets
Usage: the cheapest from all the LMGs in the game, and at the same time the only one available to the Soviet Union. Effective at any range, but it's best used for close and medium ones. The only flaw is the huge amount of equipment points required to use it (7), making it available only to the Infantryman.
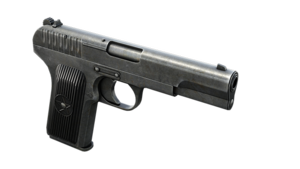
TT-33
Class: any
Price: 56800 Credits/ 599 Gold
Clip Size: 8 bullets
Usage: a weapon useful only when you suddenly run out of bullets in your primary gun, and there's an enemy nearby. Not effective if the enemy is further than 50-60 meters away from you. The only pistol available to the Soviet Union.

TM-35
Class: any
Price: 2130 Credits/ 31 Gold
Clip Size: 2
Usage: an extremely cheap way of dealing with enemy vehicles. The mine deals extreme damage - it's able to blow up every single vehicle in the game with a single strike. Not effective when used against infantry - it simply won't detonate.
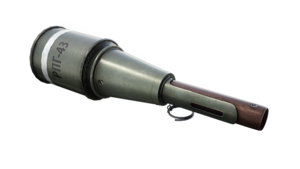
RPG-43
Class: any
Price: 19880 Credits/ 239 Gold
Clip Size: 3
Usage: an effective weapon to use against enemy vehicles, because it can be thrown at a certain distance, eliminating the risk of being ran over by the enemy vehicle. It deals less damage than the TM-35, which makes it less effective against heavy tanks.
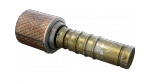
RGD-33 Grenade
Class: any
Price: 9230 Credits/ 129 Gold
Clip Size: 4
Usage: your primary means of fighting the enemy infantry, as well as unarmored vehicles. Ineffective against tanks.
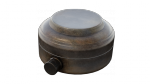
PMK-40
Class: Recon
Price: 17750 Credits/ 338 Gold
Clip Size: 2
Usage: the equivalent of the Tellermine 42, but this time to be used against enemy infantry. Extremely effective - a single one will kill every soldier in the range, be it foe or an ally. Additionally, it's a little cheaper than the American mine.
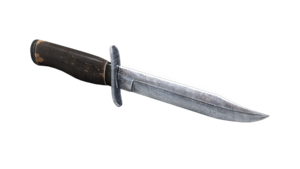
Combat Knife
Class: any
Price: 7100 Credits/ 90 Gold
Clip Size: -
Usage: a hand-to-hand weapon. A single, well-aimed strike can kill an enemy soldier. Ineffective against other targets.
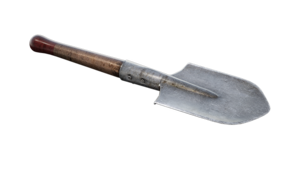
Vulcan Stalin
Class: any
Price: 3550 Credits/ 49 Gold
Clip Size: -
Usage: cheaper and sooner available melee weapon. The equivalent of the Combat Knife, with the same flaws: effective only against infantry.
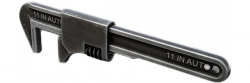
Wrench
Class: any
Price: 28401 Credits/ 330 Gold
Clip Size: -
Usage: this piece of equipment is used mainly to repair vehicles. Additionally, it can be used as a makeshift melee weapon. In combat, ineffective against anything that's not infantry.
This section contains information about tanks available to the Germans. Below you will find a description of every single tank, coupled with the purchase price, thickness of armor, armaments, as well as suggested methods of usage.
Name
Armor Thickness
Description
Panzerkampfwagen I Ausf A
Front Upper: 13 mm
Front Lower: 13 mm
Sides Upper: 13 mm
Sides Lower: 13 mm
Rear: 13 mm
Top: 6 mm
Bottom: 6 mm
Purchase Price: 35000 Credits / 399 Gold
Health Points: 1500
Seats: 1
Armament: MG-13
Armor Penetration: up to 13mm
Additional armaments: MG-13
Available Upgrades: A vehicle-mounted chest, containing ammo, or rocket launchers.
Usage: this tank can only be used against enemy infantry, as well as unarmored vehicles because of its equipment (only a machinegun, the tank lacks any real cannon). Furthermore, it has a very thin armor, making it extremely vulnerable to enemy fire.
Panzerkampfwagen II Ausf C
Front Upper: 15 mm
Front Lower: 15 mm
Sides Upper: 15 mm
Sides Lower: 15 mm
Rear: 10 mm
Top: 10 mm
Bottom: 5 mm
Purchase Price: 42600 Credits / 469 Gold
Health Points: 1500
Seats: 1
Armament: 20mm cannon
Armor Penetration: up to 20mm (50mm with AP rounds).
Additional armaments: MG-13
Available Upgrades: A vehicle-mounted chest, containing ammo, or rocket launchers.
Usage: the second German light tank, thanks to its 20 mm cannon, can put up a decent fight against enemy light armor. The 20 mm cannon is also extremely dangerous to the enemy infantry - a single bullet is more than enough to exterminate the enemy soldier. Unfortunately, this tank's armor is almost the same as the previous one, which makes it vulnerable to enemy fire.
Panzerkampfwagen 38(t) Ausf E
Front Upper: 50 mm
Front Lower: 50 mm
Sides Upper: 30 mm
Sides Lower: 15 mm
Rear: 15 mm
Top: 8 mm
Bottom: 8 mm
Purchase Price: 71000 Credits / 729 Gold
Health Points: 1500
Seats: 2
Armament: 37mm cannon
Armor Penetration: up to 36mm (64mm with AP rounds).
Additional armaments: MG-34
Passenger Armaments: MG-34
Available Upgrades: A vehicle-mounted chest, containing ammo, or rocket launchers.
Usage: the last light tank from the German side is a huge improvement when compared to the previous models. Its armor is several times thicker, meaning that only medium and heavy tanks are able to penetrate it (provided that you won't let the enemy shoot at your rear). Additionally, the 37mm cannon is a lot more powerful, allowing the tank to penetrate the armor of medium tanks with ease. Unfortunately, the rear armor of the tank is still extremely thin.
Name
Armor Thickness
Description
Panzerkampfwagen III Ausf J
Front Upper: 50 mm
Front Lower: 50 mm
Sides Upper: 30 mm
Sides Lower: 30 mm
Rear: 50 mm
Top: 17 mm
Bottom: 17 mm
Purchase Price: 92300 Credits / 919 Gold
Health Points: 2000
Seats: 2
Armament: 50mm cannon
Armor Penetration: up to 53mm
Additional armaments: MG-34
Passenger Armaments: MG-34
Available Upgrades: A vehicle-mounted chest, containing ammo, or rocket launchers.
Usage: the first German medium tank is a decent one. It has quite thick front, and, which is somehow a surprise, rear armor, but the sides are still vulnerable. The 50mm cannon will allow you to keep up with other medium tanks on the battlefield and will make a short work of all light tanks.
Panzerkampfwagen IV Ausf H
Front Upper: 80 mm
Front Lower: 80 mm
Sides Upper: 30 mm
Sides Lower: 30 mm
Rear: 20 mm
Top: 12 mm
Bottom: 10 mm
Purchase Price: 127800 Credits / 1299 Gold
Health Points: 2000
Seats: 2
Armament: 75mm cannon
Armor Penetration: up to 36mm (96mm with AP rounds).
Additional armaments: MG-34
Passenger Armaments: MG-34
Available Upgrades: A vehicle-mounted chest, containing ammo, or rocket launchers.
Usage: the second medium tank causes mixed feelings. It has a powerful, 75mm cannon and very thick frontal armor, but the rear of the vehicle is extremely weak - aside from medium tanks, some of the light tanks will be able to penetrate it with ease. However, when you are able to prevent the enemy from firing at your rear, this vehicle is one of the best on the battlefield.
Name
Armor Thickness
Description
Jagdpanzer 38(t) Hetzer
Front Upper: 60 mm
Front Lower: 60 mm
Sides Upper: 20 mm
Sides Lower: 20 mm
Rear: 20 mm
Top: 10 mm
Bottom: 8 mm
Purchase Price: 63900 Credits / 699 Gold
Health Points: 1500
Seats: 2
Armament: 75mm cannon
Armor Penetration: up to 150mm
Additional armaments: MG-34
Passenger Armaments: -
Available Upgrades: A vehicle-mounted chest, containing ammo, or rocket launchers.
Usage: this tank combines the effectiveness of the heavy tank (attack power) and a weak armor of the medium tank. This makes it extremely effective at destroying all, even the heaviest tanks, while still being very vulnerable to enemy attacks. You should be careful to not let the enemy attack you from the sides, as well as from the rear.
StuG III Ausf F
Front Upper: 80 mm
Front Lower: 80 mm
Sides Upper: 30 mm
Sides Lower: 30 mm
Rear: 30 mm
Top: 17 mm
Bottom: 17 mm
Purchase Price: 99400 Credits / 979 Gold
Health Points: 1500
Seats: 2
Armament: 75mm cannon
Armor Penetration: up to 150mm (180mm with AP rounds).
Additional armaments: MG-34
Passenger Armaments: MG-34
Available Upgrades: A vehicle-mounted chest, containing ammo, or rocket launchers.
Usage: this tank destroyer, with the help of AP rounds, can destroy the heaviest tanks present on the battlefield, even when firing at their thickest, frontal armor. Unfortunately, it has below average side and rear armor itself.
Name
Armor Thickness
Description
Panzerkampfwagen VI Tiger
Front Upper: 100 mm
Front Lower: 100 mm
Sides Upper: 80 mm
Sides Lower: 60 mm
Rear: 80 mm
Top: 25 mm
Bottom: 25 mm
Purchase Price: 163300 Credits / 1599 Gold
Health Points: 2500
Seats: 2
Armament: 88mm cannon
Armor Penetration: up to 110mm
Additional armaments: MG-34
Passenger Armaments: MG-34
Available Upgrades: A vehicle-mounted chest, containing ammo, or rocket launchers.
Usage: the first heavy tank is a very decent vehicle. It has very thick frontal, as well as side and rear armor and a powerful, 88 cannon, capable of penetrating almost every type of armor. The only threat comes from other heavy tanks, as well as tank destroyers (and mines, of course).
Panzerkampfwagen VI Tiger II
Front Upper: 150 mm
Front Lower: 100 mm
Sides Upper: 80 mm
Sides Lower: 80 mm
Rear: 80 mm
Top: 40 mm
Bottom: 25 mm
Purchase Price: 262700 Credits / 2399 Gold
Health Points: 2500
Seats: 2
Armament: 88mm gun
Armor Penetration: up to 110mm
Additional armaments: MG-34
Passenger Armaments: MG-34
Available Upgrades: A vehicle-mounted chest, containing ammo, or rocket launchers.
Usage: Tiger II is, basically, an empowered version of the predecessor. It has the very same cannon, but the frontal armor is 50% thicker - only a tank destroyer will be capable of penetrating it.
This section contains information about tanks available to the America. Below you will find a description of every single tank, coupled with the purchase price, thickness of armor, armaments, as well as suggested methods of usage.
Name
Armor Thickness
Description
M2A2
Front Upper: 16 mm
Front Lower: 16 mm
Sides Upper: 13 mm
Sides Lower: 13 mm
Rear: 7 mm
Top: 7 mm
Bottom: 7 mm
Purchase Price: 35500 Credits / 399 Gold
Health Points: 1500
Seats: 2
Armament: M2HB cannon
Additional armaments: M1919A4 rifle
Available Upgrades: A vehicle-mounted chest, containing ammo, or rocket launchers.
Usage: the first American light tank. Unfortunately, its effectiveness is very limited, because the cannon is incapable of penetrating any armor, thus making the M2A2 effective only against enemy infantry, as well as unarmored vehicles.
M5A1 Stuart
Front Upper: 29 mm
Front Lower: 38 mm
Sides Upper: 29 mm
Sides Lower: 25 mm
Rear: 25 mm
Top: 13 mm
Bottom: 13 mm
Purchase Price: 56800 Credits / 599 Gold
Health Points: 1500
Seats: 2
Armament: 37 mm cannon
Armor Penetration: up to 36mm (60mm with AP rounds).
Additional armaments: M1919A4
Passenger Armaments: M1919A4
Available Upgrades: A vehicle-mounted chest, containing ammo, or rocket launchers.
Usage: the M5A1 Stuart is an extremely good light tank. It has a powerful 37mm cannon, which can easily break through a medium tank's armor (provided that you use AP rounds). The tank's armor is almost doubled when compared to the M2A2, which makes is less vulnerable to enemy attacks.
M24 Chaffee
Front Upper: 30 mm
Front Lower: 22 mm
Sides Upper: 13 mm
Sides Lower: 13 mm
Rear: 13 mm
Top: 10 mm
Bottom: 10 mm
Purchase Price: 149000 Credits / 1449 Gold
Health Points: 1500
Seats: 2
Armament: 75 mm cannon
Additional armaments: M1919A4
Passenger Armaments: M1919A4
Available Upgrades: A vehicle-mounted chest, containing ammo, or rocket launchers.
Usage: the M24 Chaffee can be simply described as a "light tank destroyer". It has a very powerful cannon, which makes short work of every light tank (and is capable of penetrating some heavy tanks). Unfortunately, the armor, aside from the frontal one, is very thin, thus the tank is very vulnerable to enemy fire.
Name
Armor Thickness
Description
M3 Lee
Front Upper: 38 mm
Front Lower: 51 mm
Sides Upper: 38 mm
Sides Lower: 38 mm
Rear: 38 mm
Top: 25 mm
Bottom: 13 mm
Purchase Price: 92300 Credits / 919 Gold
Health Points: 2000
Seats: 2
Armament: 75mm cannon
Armor Penetration: up to 76mm
Additional armaments: 37mm cannon
Passenger Armaments: M1919A4
Available Upgrades: A vehicle-mounted chest, containing ammo, or rocket launchers.
Usage: an interesting medium tank, equipped with two cannons. The smaller one (37mm) should easily take care of enemy light tanks, while the 75mm monster will be more than enough for every enemy vehicle (excluding some of the heaviest tanks). Additionally, the M3 Lee is equipped with a decent armor.
M4A1 Sherman
Front Upper: 51 mm
Front Lower: 51 mm
Sides Upper: 38 mm
Sides Lower: 38 mm
Rear: 38 mm
Top: 13 mm
Bottom: 19 mm
Purchase Price: 113600 Credits / 1149 Gold
Health Points: 2000
Seats: 2
Armament: 75mm cannon
Armor Penetration: up to 76mm
Additional armaments: M1919A4
Passenger Armaments: M1919A4
Available Upgrades: A vehicle-mounted chest, containing ammo, or rocket launchers.
Usage: M4A1 Sherman is, basically, an upgraded version of M3 Lee. It has better frontal armor, and the same 75mm cannon. It's one of the most balanced tanks in the game. It is, unfortunately, not that effective against enemy heavy tanks.
M4A3E8
Front Upper: 64 mm
Front Lower: 51 mm
Sides Upper: 38 mm
Sides Lower: 38 mm
Rear: 38 mm
Top: 19 mm
Bottom: 13 mm
Purchase Price: 156200 Credits / 1549 Gold
Health Points: 2000
Seats: 2
Armament: 76mm cannon
Additional armaments: M1919A4
Passenger Armaments: M1919A4
Available Upgrades: A vehicle-mounted chest, containing ammo, or rocket launchers.
Usage: the M4A3E8 is the best medium tank available to the America. Bigger, 76mm cannon allows the tank to put up a fight against enemy heavy tanks, provided that you will be firing at less durable sides of armor, such as rear or sides. Additionally, it has slightly improved frontal armor.
Name
Armor Thickness
Description
M18 Hellcat
Front Upper: 13 mm
Front Lower: 13 mm
Sides Upper: 13 mm
Sides Lower: 13 mm
Rear: 13 mm
Top: 8 mm
Bottom: 5 mm
Purchase Price: 120700 Credits / 1249 Gold
Health Points: 1500
Seats: 2
Armament: 76mm cannon
Armor Penetration: up to 150mm
Additional armaments: M2 Browning
Passenger Armaments: -
Available Upgrades: A vehicle-mounted chest, containing ammo, or rocket launchers.
Usage: if you would only look at the charts, this tank would seem as a bad joke. The armor is comparable to a weak light tank, but the biggest virtue of the M18 Hellcat is speed - it's the fastest tank available in the game. Whichever deficiencies this tank has, it more than makes up for it with the sheer speed - if the enemy won't be able to land a hit at you, your armor won't really matter at all.
Name
Armor Thickness
Description
M26 Pershing
Front Upper: 102 mm
Front Lower: 76 mm
Sides Upper: 76 mm
Sides Lower: 76 mm
Rear: 51 mm
Top: 22 mm
Bottom: 22 mm
Purchase Price: 213000 Credits / 1999 Gold
Health Points: 2500
Seats: 2
Armament: 90mm cannon
Armor Penetration: up to 110mm
Additional armaments: M1919A4
Passenger Armaments: M1919A4
Available Upgrades: A vehicle-mounted chest, containing ammo, or rocket launchers.
Usage: the only heavy tank available to the Americans. The M26 Pershing is excellent against all vehicles in the game - thanks to the powerful, 90mm cannon, it can easily rip through almost every armor. The only tank capable of withstanding a direct hit (to the frontal armor only) from it, is the German Tiger II - when you encounter one at the battlefield, try to attack it from the sides / rear.
This section contains information about tanks available to the Soviet Union. Below you will find a description of every single tank, coupled with the purchase price, thickness of armor, armaments, as well as suggested methods of usage.
Name
Armor Thickness
Description
T-38 Model 1937
Front Upper: 9 mm
Front Lower: 9 mm
Sides Upper: 9 mm
Sides Lower: 9 mm
Rear: 9 mm
Top: 4 mm
Bottom: 4 mm
Purchase Price: 21300 Credits / 259 Gold
Health Points: 1500
Seats: 1
Armament: 7.62mm MG
Additional armaments: -
Available Upgrades: A vehicle-mounted chest, containing ammo, or rocket launchers.
Usage: the weakest tank in the game - it can't be used to fight off any light tank in the game, because it only uses a 7.62mm MG. It is, however, extremely effective against enemy infantry - and it should be used for that very reason.
T-26 Model 1933
Front Upper: 15 mm
Front Lower: 15 mm
Sides Upper: 15 mm
Sides Lower: 15 mm
Rear: 15 mm
Top: 6 mm
Bottom: 6 mm
Purchase Price: 63900 Credits / 669 Gold
Health Points: 1500
Seats: 2
Armament: 45 mm cannon
Armor Penetration: up to 42mm (80mm with AP rounds).
Additional armaments: 7.62mm MG
Passenger Armaments: 7.62mm MG
Available Upgrades: A vehicle-mounted chest, containing ammo, or rocket launchers.
Usage: the T-26 is several times stronger than the earlier model. It has a decent, 45mm cannon, which, with the help of AP rounds, should be able to easily defeat enemy medium tanks. The biggest flaw of this tank is very thin armor.
BT-7 Model 1937
Front Upper: 30 mm
Front Lower: 22 mm
Sides Upper: 13 mm
Sides Lower: 13 mm
Rear: 13 mm
Top: 10 mm
Bottom: 6 mm
Purchase Price: 85200 Credits / 859 Gold
Health Points: 1500
Seats: 1
Armament: 45 mm cannon
Additional armaments: 7.62mm MG
Available Upgrades: A vehicle-mounted chest, containing ammo, or rocket launchers.
Usage: the BT-7 has good armor, and a decent 45mm cannon, allowing it to easily eliminate enemy light (and some of the medium) tanks.
Name
Armor Thickness
Description
T-34 Model 1942
Front Upper: 45 mm
Front Lower: 45 mm
Sides Upper: 45 mm
Sides Lower: 45 mm
Rear: 45 mm
Top: 20 mm
Bottom: 20 mm
Purchase Price: 99400 Credits / 979 Gold
Health Points: 2000
Seats: 1
Armament: 76,2mm cannon
Armor Penetration: up to80mm
Additional armaments: 7,62mm MG
Available Upgrades: A vehicle-mounted chest, containing ammo, or rocket launchers.
Usage: a very powerful medium tank. It has good armor, allowing it to fight against enemy medium tanks quite evenly, and a powerful 76,2mm cannon, which can easily rip through the armor of a heavy tank (with the proper angle, as well as side from which you attack).
T-34 Model 1944
Front Upper: 45 mm
Front Lower: 45 mm
Sides Upper: 45 mm
Sides Lower: 45 mm
Rear: 45 mm
Top: 20 mm
Bottom: 20 mm
Purchase Price: 198800 Credits / 1899 Gold
Health Points: 2000
Seats: 2
Armament: 85mm cannon
Armor Penetration: up to 100mm
Additional armaments: 7,62mm MG
Passenger Armaments: 7,62mm MG
Available Upgrades: A vehicle-mounted chest, containing ammo, or rocket launchers.
Usage: the T-34 has the strongest medium tank cannon in the game, which allows it to easily break through almost every armor - only heavy tanks, positioned frontally are able to withstand attacks from the T-34. Unfortunately, it has the very same armor as the previously described, earlier model.
Name
Armor Thickness
Description
SU-85
Front Upper: 45 mm
Front Lower: 45 mm
Sides Upper: 45 mm
Sides Lower: 45 mm
Rear: 45 mm
Top: 20 mm
Bottom: 20 mm
Purchase Price: 184600 Credits / 1749 Gold
Health Points: 2000
Seats: 1
Armament: 76mm cannon
Armor Penetration: up to 100mm
Additional armaments: -
Passenger Armaments: -
Available Upgrades: A vehicle-mounted chest, containing ammo, or rocket launchers.
Usage: theoretically, it's the same tank as the T-34, because it has the very same cannon, as well as armor values. Unfortunately, it's a lot more vulnerable than the American / German tank destroyers.
Name
Armor Thickness
Description
IS-2 Model 1944
Front Upper: 120 mm
Front Lower: 120 mm
Sides Upper: 90 mm
Sides Lower: 90 mm
Rear: 60 mm
Top: 20 mm
Bottom: 20 mm
Purchase Price: 319500 Credits / 2849 Gold
Health Points: 2500
Seats: 2
Armament: 122mm cannon
Armor Penetration: up to 150mm
Additional armaments: 7,62mm MG
Passenger Armaments: 7,62mm MG
Available Upgrades: A vehicle-mounted chest, containing ammo, or rocket launchers.
Usage: a heavily armored tank, equipped with an immensely powerful cannon - in theory, every enemy tank, even the Tiger II won't be able to stand a chance. It's without a doubt one of the best tanks on the battlefield.
During your adventure with Heroes & Generals, your account will have a "basic" status (it's not mentioned anywhere like that, but let's just take it for granted). You won't be getting any additional profits for this, obviously. You can, however, purchase (for real money - or to be more exact, gold) a Veteran status, gaining a great deal of various bonuses. They do not make your game easier (it's not Pay 2 Win), as they will wont make you stronger of anything, but they will surely speed up the process of developing your soldiers.
The Veteran status gives the following profits:
As you can see, the Veteran status does not give (aside from a slight advantage with the possibility of equipping two Combat Badges) any advantage in combat. It, however, boosts the growth of everything - it means, that you will have to spend less time in the game to get the desired amount of Credits, Warfunds, or the experience points for your soldier.
The Veteran status can only be purchased with Gold. There are three options to choose from: 24 hours, 30 days or 90 days. You should be aware of the fact, that the time is counted from the moment you've bought the Veteran status and your total time elapses even when you are not logged in (the timer is blocked during server downtimes).
Is it worth to invest in the Veteran status? If you are an occasional player and you do not spend a lot of time in the game, there is really no point in investing any money in it. If, however, you are a regular player, spending long hours in the game, purchasing it will sooner or later be a necessity for you, as higher ranks require immense amounts of experience to achieve, and some of the weapons' costs are astronomical.
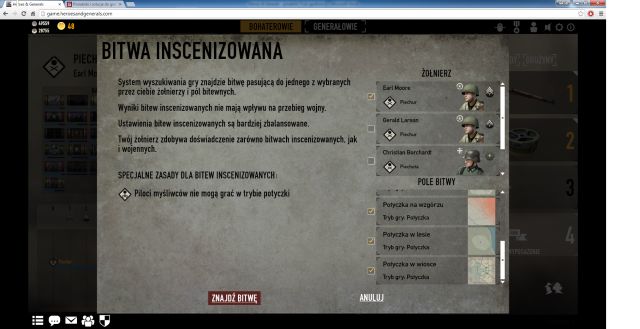 Skirmish map selection screen.
Skirmish is the game mode you start your adventure in the game with - the first "training" mission is a Skirmish one. You will spend your first few hours in this very game mode, because until you reach the 3rd rank with at least one soldier, this one mode will be the only one available to you. Skirmish's battles take place on three different maps, called Forest Skirmish, Hill Skirmish and Village Skirmish.
The task of each team in this game mode is to fill in the progress bar visible at the top of the screen - blue one for your team, and the red one for the enemy team. In order to fill the progress bar, one of the team has to capture and hold more control points than the opposing team - one, if the enemy lacks any control points, and two, if the enemy has a single control point captured. The bigger the difference in the number of captured control points, the faster the progress bar will fill. Unlike the Assault game mode, the progress bar can't shrink or be depleted - it can only be filled.
Things that differentiate the Skirmish game mode from the Assault one are:
Given the fact, that Skirmish encounters take place on smaller maps, as well as the fact that there are only three, equally important control points, most of the action takes place near those very points. Unlike the Assault mode, the defense plays a key role here - capturing a control point is nothing spectacular, but defending it long enough for the progress bar to be filled is another story.
 Maps in the Skirmish mode are a lot more intense.
Points are arranged in such a way, so that two of them are relatively close to the bases of both sides, and the last, third one is located directly in the middle of the map. Thanks to that, most of the action takes place exactly there, and most (if not) players tend to concentrate solely on them. If most players are going to that single control point, doesn't it mean that the remaining two will be left unprotected? Exactly. It's worth to concentrate on them (especially the one located near your base, so that if anything goes wrong you can quickly respawn and try again) instead of rushing to the center of the action.
It's almost guaranteed that most of your (and the enemy's as well) team will rush to the central point, so just select one of the remaining two. Capture it and take a good defensive position, preferably with a vantage point so that you are able to protect it. A good place to hide is to use the environment, like brushes, tall grass, a fallen tree, or any other environmental obstacle, which will provide at least basic cover from the enemy fire. Do not stand near the radio (associated with control points), as the approaching enemies will simply flood you with grenades, killing you instantly. Additionally, it's worth (if you can do that) to set up a couple of mines in case a tank wanted to join the fray - remember to set them in such a way so that the enemy won't be able to notice (and safely detonate) them.
While defending a control point, you have a huge firing advantage over the enemy. First things first, there's a bigger chance that you will be able to notice the enemy before he is able to do so, allowing you to make a couple of easy shots. Remember, that after killing an enemy, you should change your position slightly, or use environment to hide - the enemy will surely come back for some revenge and he will be looking in the same place. Finally, while defending the control point, try to let the enemy start the "capturing process" and then shoot him - each enemy you kill, that tried to capture a point belonging to your team will give you additional 60 experience points.
To sum things up, here's a couple of hits I might have for you:
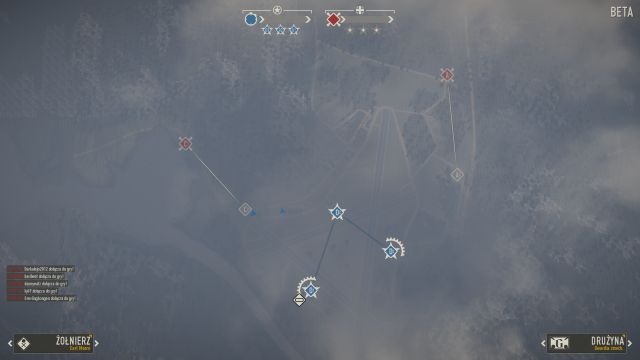 Assault maps are several times bigger.
The Assault game mode is the second available in the game. The rules are fairly the same as those from the Skirmish, but the battles themselves are a lot more complicated. Assault missions are played on four different maps: Airfield, Town, Mountain Town and Factory. You will gain access to this game mode by advancing at least one of your soldiers to the 3rd rank.
The objectives for both teams are radically different. One of the two (or three, if there are three sides present on the battlefield) is given the objective to protect several control points marked as "objective points" (the icon of the control point differs from the rest, as it is given an O symbol, coupled with a number, like O1, O2 and so on) for a given amount of time (as the game goes on, the progress bar of the defending team will slowly fill up).
At the same time, the second team (or the remaining two, if there are three sides on the battlefield) is given the task to capture those objective points. The total time in which the team must seize control over those points is represented by the progress bar of the defending team. If the defending team manages to hold at least one objective point for a given amount if time, it will emerge victorious. If, however, the attacking team is able to capture all objective points, they will be the winners - in a situation, in which there are two attacking teams, the one which manages to capture all objective points will be the victor.
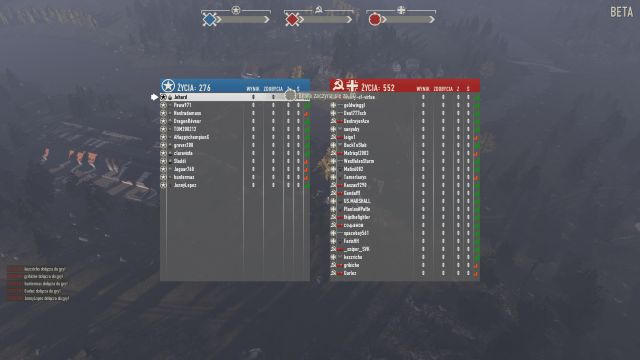 Seeing all three sides of conflict on the battlefield is quite an often sight.
Things that differentiate the Assault game mode from the Skirmish one are:
The defending team can win in three different ways:
As you can see, the defending team isn't restricted to defending only. Although it is a priority, it's equally important to capture other control points on the map, which should be enough to slow down the enemy advancement.
A couple of hints that may come in handy while you are playing as a defender:
Playing on the attacking team is, paradoxically, a lot easier than on the defending one, especially at the very beginning of each mission, when you want to "go wild" instead of struggling for every point. The attacking team can win by doing two things:
The main task of the attacking team is to seize control over the objective points - you don't have to take control over every single control point on the map like the defending team has to do in order to win. Here's a few hints that can prove to be useful when playing on the attacking team:
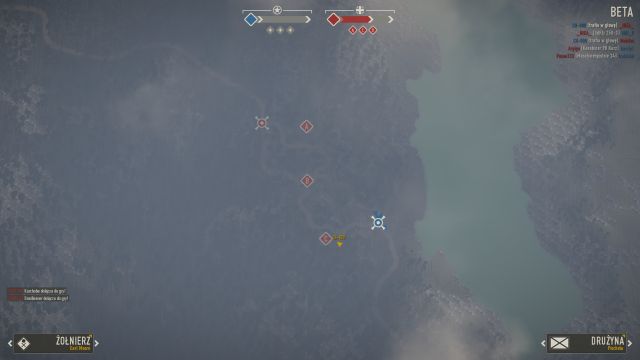 Forest Skirmish map.
One of the three maps designed exclusively for the Skirmish game mode. Points A and C are located near the two teams' bases, while the B point is located directly in between those two bases, meaning that the most intense fights will be taking place right there. The whole map, as the name implies, takes place in the forest, which means that terrains with open sight are scarce here - this map is perfectly suited for infantry. Still, vehicles are doing exceptionally good here - you must, however, avoid going through dense vegetation, because those places are the perfect spots for enemy mines.
Additionally, there are semi-automatic rifles, as well as boxes with rocket launchers at the spawning points of both teams.
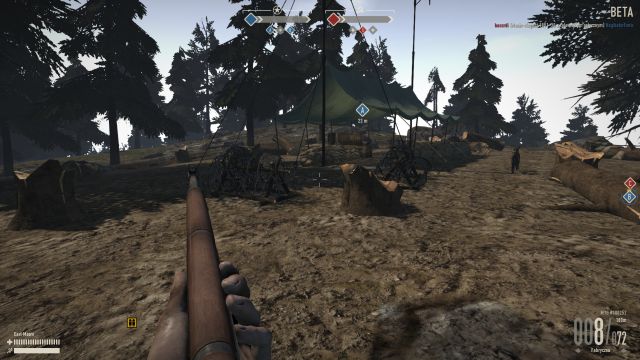 Control point A.
Without a doubt the most exposed part of the map, despite the fact that there are trees literally everywhere around. It's the perfect spot for snipers - the control point is located on an elevation, meaning that sharpshooters located at the control point A will have a very good visibility on other parts of the map. This place is a nightmare for tanks, as you will be exposed to attacks from every single direction.
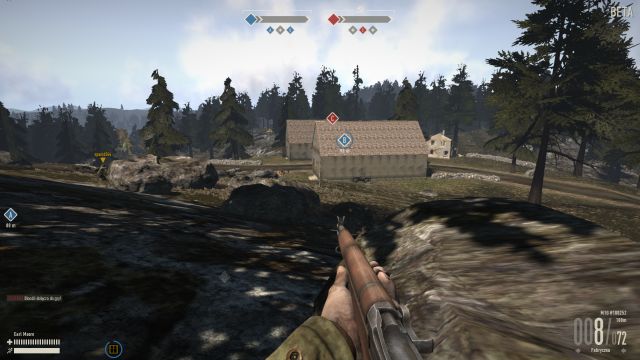 Control point B - the center of action on this map.
The center of action on this map. There are two barns located around the control point, inside which the infantry will find a very good shelter from enemy attacks. Additionally, you can use a pair of windows located below the ceiling, which will give a huge height advantage to a proficient sniper. The barns itself make this place a dangerous one for tanks - don't even think about driving there with one such a vehicle, because you won't be able to protect yourself from anti-tank grenades and rocket launchers (not to mention about the possibility of getting shot - don't try looking through the tank hatch!). If you still want to "visit" this place with a tank, try to keep your distance and fire at it from afar, while leaving the task of capturing the point to your allies from the infantry.
Pay attention to the elevation leading to the control point A. Almost always there will be a sniper, as well as armored vehicles (including tanks) there, allowing them to effectively fire at the area near the control point B. The last thing worth mentioning here is a pair of boxes containing ammunition, which you can replenish your supplies at - both are located inside the previously mentioned barns.
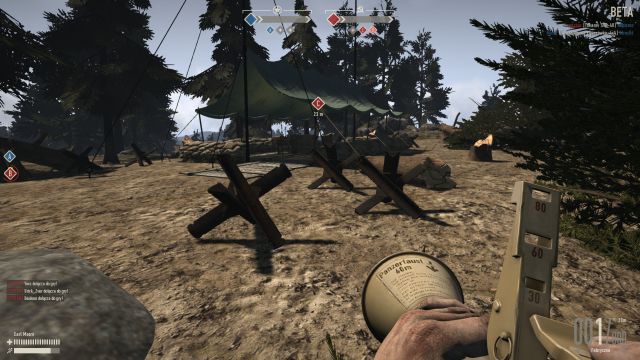 Control point C.
Control point C looks a lot like the A point - there's a lot of hiding places for infantry, and numerous tank traps and sandbags, aside from providing cover for foot soldiers, will keep every vehicle from coming near it. A good spot to hide is a pair of felled trees - you can get underneath them and the enemy won't be able to see you unless you fire at him.
After capturing the point don't just sit near the radio, because the enemies will soon send a rain of bullets and grenades upon it - especially the second one is dangerous, as sandbags, nor trenches will protect you from them.
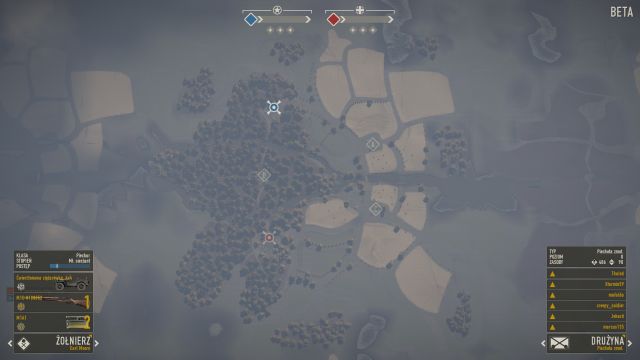 Village Skirmish map.
A very interesting map, which combines two different approaches. Point B, located in between the bases of the teams is covered in thick vegetation and separated from the sides by two rivers, while the A and C points are located in a vast, open space, which makes them perfect for bigger skirmishes, with the help of various types of equipment.
Additionally, there are semi-automatic rifles, as well as boxes with rocket launchers at the spawning points of both teams.
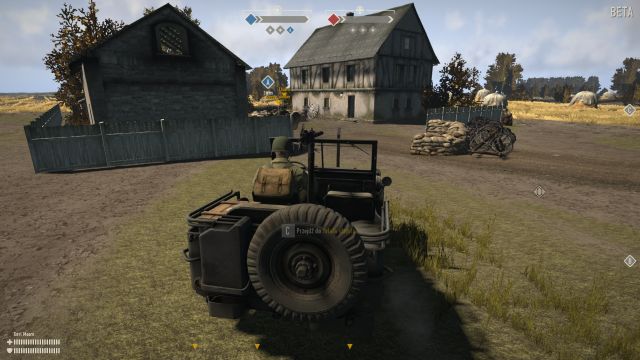 Points A and C are very similar - thanks to the open space surrounding them, majority of the action takes place right there.
Both of those points are very similar. Both have buildings in which the infantry may find cover, and the control points itself can be captured without leaving the vehicles, which is a rare sight.
A very distinct characteristic of those locations is vast, open terrain surrounding them. It's a perfect battleground for both snipers, who can easily take out targets from the other side of the map, as well various vehicles, as the drivers won't have to worry about a sudden, "out of nowhere" attack.
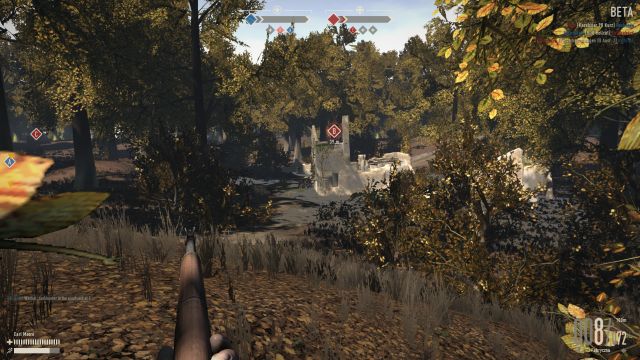 Point B is nothing like the remaining ones, as it is covered in thick vegetation.
A very unique place, even amongst all the other maps in the game. The control point itself is located in the ruins of a building, therefore it is covered by walls from every side. The ruins, in turn, are covered by extremely thick vegetation and numerous terrain obstacles. This makes this place a heavy infantry-oriented one, because most of the encounters are fought on close, medium at most distance - both snipers and tanks don't have anything to look for here, as the former group won't be able to see anyone from all those trees, while the latter one will be constantly attacked "from nowhere" by infantry equipped with rocket launchers (if they won't drive into a mine before that).
An interesting aspect of this place is the fact, that the control point can be captured without the need to enter the ruins itself - you don't have to risk yourself getting shot by an enemy waiting for you inside. The enemy, however, can be easily driven out of the cover provided by the ruins - the control point is surrounded by walls, but it lacks the roof, making it extremely easy to just throw a grenade inside and watch as the enemy either runs away, or is blown away.
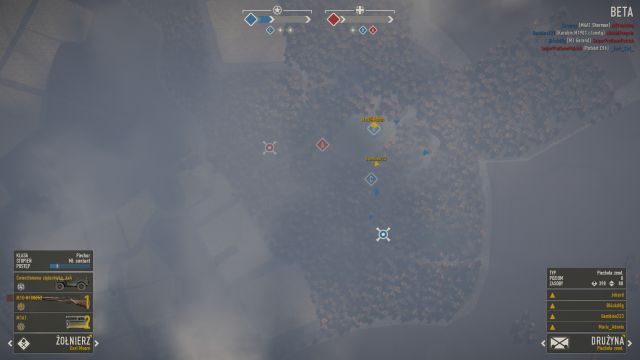 Mountain Skirmish map.
The last map available for the Skirmish game mode. Similar to the one taking place in the village, this one also has two different sections. The first one is the battlefield near the point B, which is a vast, open area. The second one focuses on the fight between the infantry - both A and C points are covered by thick vegetation and the surrounding terrains are flooded with numerous hiding spots.
Additionally, there are semi-automatic rifles, as well as boxes with rocket launchers at the spawning points of both teams.
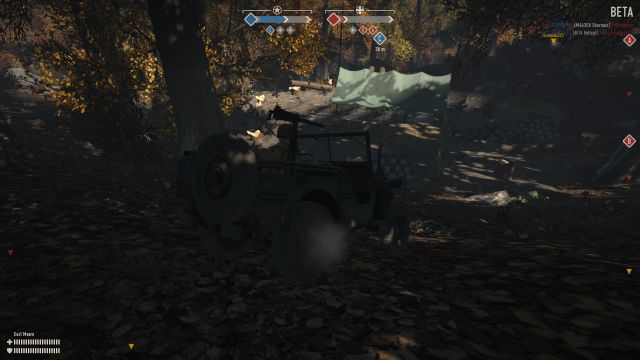 Points A and C are covered by thick vegetation.
Both of those points are located deep inside the forest, full of trees, bushes and stones - basically numerous places in which the infantry can easily find cover from the enemy fire. The control itself are fairly visible, making them extremely difficult to capture, as you can be shot from literally every direction. Defending them is a completely different story - thanks to numerous natural hiding places, the enemy will have an extremely hard time retaking it from the hands of your team.
Thanks to the thick vegetation, as well as the overall terrain surrounding the control point (numerous elevations and stones preventing the vehicles from passing) the place isn't suited to "visit" it while driving a tank - you won't be able to see anyone from the viewfinder, and sticking your head out of the tank hatch is a suicide, as you will be killed a second later. If you want to go to either of those points, it's better to just support your infantry allies from afar with the help of HE rounds.
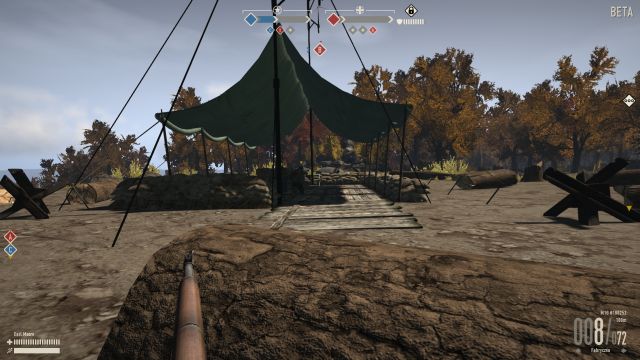 Point B is located on an open terrain.
Here the situation is completely different. The terrain surrounding the control point is a sort of a glade - several dozen of meters around the point is an empty, open and flat space. Further away from the point you will find a thick forest, which is a dream come true for any sniper - you will have perfect visibility on the control point, while your enemy won't have a safe place to use for cover. The control point itself, aside from getting shot by a sniper, gives plenty of opportunities for cover and only grenades and HE rounds shot from a tank can flush the infantry out from behind the cover.
As it was mentioned, this place is ideal for snipers, as well as tanks - both of those units will be able to use their tremendous attack range. Thanks to that, this place is the center of the action on this map - bullets, tank rounds and rockets are flying everywhere here.
If there are tanks equipped with HE rounds on the battlefield, retaking this control point is an extremely difficult task - that is precisely why your team should capture it as quickly as possible.
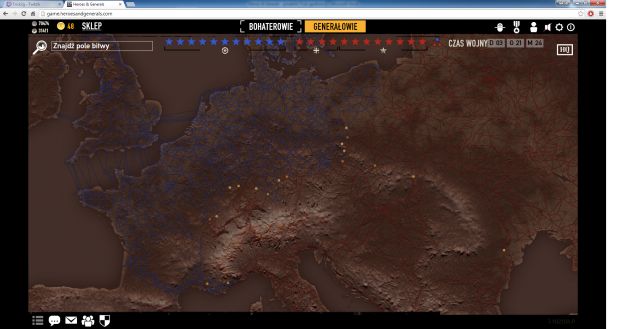 A view on the map available in the War mode - it's quite impressive!
The War mode (or called General mode several times in this guide) is, like the name implies, the war taking place on the world map. This game mode is played exclusively from your internet browser, and not like the "normal" game on the engine of the game. It works based on different, but at the same time somehow similar rules. To put it simply:
Generally, each dozen or so hours (those real hours, of course) a new war starts on the world map, in which all three sides of the conflict take part: America, Germany and Soviet Union. Each of the sides are given a pair of capital cities at the beginning. Those are:
The task of each side is to capture all 12 capital cities - after one of the sides manages to do so, the war ends and the one team which did it is called the victor. Afterwards, the whole process is reset and the next war is started.
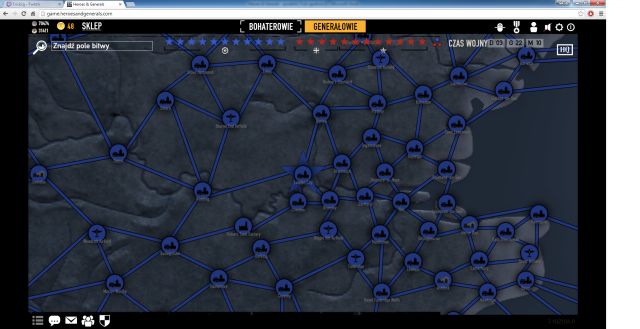 A zoomed-in view, in which you can see the battlefields.
To make it a "a little" more complicated, you can't just capture the capital cities right away. The world map is divided into hundreds of points, which serve the purpose of "cannon fodder". After a team managed to capture all the points leading to a capital city, only then it can launch an attack to capture the capital city itself. Naturally, all three sides of the conflict can take part in a single battle - if that happens, all of them are present on the battlefield.
War mode is tightly associated with the "normal" gameplay, in which the soldiers take part - yes, that is precisely the same mode, which you can select from the "To Battle" and then "War" menus. It is also the reason why battles in this mode are so much different than those "scripted" ones - the number, as well as the type of equipment a team can use on the battlefield depends on the Assault Teams sent there by the commanders.
Assault Teams (AT for short - this is an abbreviation you will surely stumble upon numerous time during your adventure with the game) are basically the resources, type of equipment sent to the battlefield taking place on a specific point on the map. They allow the players to use various vehicles, as well as planes during the encounter - without team there would be no fighting.
There's a total of 16 Assault Teams in the game, which differentiate from themselves in every possible aspect - from the amount of lives (yup, they define how much lives a team has during the battle) to the type of equipment they bring onto the battlefield.
 The Assault Team purchase screen.
Assault Teams must first be bought before you can use them in combat. This is, however, done by using a different currency than Credits - War Funds. War Funds can be either accumulated during the "normal" game (but in small quantities), as well as by sending your already bought Assault Teams to various battlegrounds - each time they "come home", they will bring a specific amount of War Funds with them.
With the help of War Funds, you can buy five different Assault Teams: Guard, Infantry, Light Armor, Pathfinders and Fighter Squadrons. By sending them into combat, they will gain a specific amount of experience - after leveling up, you can upgrade them to their stronger "form" (you can read about it in the next section). This way, with time, you will transform your weak, insignificant Assault Teams into powerful support for your allies on the battlefield. At the beginning you will be able to use only a few Assault Teams, but do not falter, as you will either have to advance in ranks with your soldiers in order to be able to use more of them.
The last thing to remember about, is the necessity to resupply any losses in your Assault Teams. During combat, your Assault Team will suffer some losses and it should be resupplied immediately upon return (in the same way you resupply your weapons, or repair vehicles) - you can rest assured, as the resupplying uses War Funds as well, however it costs several times less to resupply than to buy a new team.
Remember, that the type of soldier you use (or to be more specific, his character class) impacts the type of Assault Teams you will be able to command. It looks like this:
The only exception to this rule is the General class, to which you can "turn" one of your soldiers after you've reached the required rank. The General can't be used in "normal" maps anymore, but he can command every type of Assault Team.
As it was mentioned in the previous section, there's a total of 16 Assault Teams, 5 "basic" and 11 which can be purchased through the upgrade system. Below you will find a table representing the basic information about each Assault Team: the level, costs of recruitment and resupplying, as well as the number of Command Points required to use them.
Icon
Name
Level
Purchase price
Refill price
CP

Guard
0
28500
1620
1

Recon
0
28500
1600
1

Light Armor
0
44500
3900
1

Fighter Recon
0
60500
17710
1

Pathfinders
0
60500
10850
1

Motorized Guard
1
24000
2076
1

Infantry
1
14000
4050
2

Mechanized Recon
1
24000
2832
1
Tank Destroyer
1
24000
21670
2
Medium Armor
1
30000
18920
2

Fighter Squadron
1
46000
35420
2

Paratroopers
1
46000
24800
2

Motorized Infantry
2
30000
5400
2

Mechanized Recon
2
24000
3064
1

Heavy Armor
2
30000
23560
2

Mechanized Infantry
3
30000
5400
2
As you can see, there's plenty to choose from and everyone should be able to find something himself / herself. The most important thing is to keep the balance - before sending an Assault Team to the battlefield, you can see what resources are scarce and you can send them in order to aid your allies. There's no point in sending additional infantry when there's plenty of it already there, or heavy tanks, if the enemy team has a whole bunch of planes, while your team has none.
In the next section you will find the more accurate information about the available Assault Teams: the requirements for the commanding soldier, the amount of lives, available equipment, possible upgrades, as well as their brief characteristic (merits and flaws). They are categorized in the same order as the "basic" units : Guard, Recon, Light Armor, Fighter Recon and Pathfinders.

Requirements: Infantry rank 12 or General.
Number of lives: 36
Number of Vehicles: 0
Type of vehicles: -
Possible upgrades: Motorized Guard, Infantry
Characteristic: an extremely cheap to buy, resupply, and in the number of Command Points required Assault Team. The main flaw of the team is the small amount of lives, as well as the complete lack of any vehicles.

Requirements: Infantry rank 12 or General.
Number of lives: 36
Number of Vehicles: 12
Type of vehicles: 42WLA (America) / R75 (Germany) / 42WLA L-L (Soviet Union)
Possible upgrades: Motorized Infantry
Characteristic: an extremely cheap to buy, resupply, and in the number of Command Points required Assault Team. Eliminates the lack of vehicles from the Guard Assault Team - this time the players will have access to motorcycles. However, the small amount of lives is still present.

Requirements: Infantry rank 15 or General.
Number of lives: 90
Number of Vehicles: 0
Type of vehicles: -
Possible upgrades: Motorized Infantry
Characteristic: a cheap to buy and resupply Assault Team. It has almost triple the amount of lives than the Guard, but it shares its biggest flaw - the lack of any vehicles. The amount of Command Points required to use it was almost increased.

Requirements: Infantry rank 15 or General.
Number of lives: 90
Number of Vehicles: 30
Type of vehicles: Truck 1 ton 4x4 (America) / Kubelwagen Type 82 (Germany) / GAZ-67 (Soviet Union)
Possible upgrades: Mechanized Infantry
Characteristic: this group combines the merits of Motorized Guard and Infantry - a huge amount of lives, as well as the access to vehicles (this time to terrain vehicles) will allow the players to efficiently move around the map.

Requirements: Infantry rank 15 or General.
Number of lives: 100
Number of Vehicles: 10
Type of vehicles: M3 Half-track (America) / SSdKfz 250 (Germany) / M Half-track L-L (Soviet Union)
Possible upgrades: none
Characteristic: the upgraded version of the Motorized Infantry. A slightly increased amount of lives, as well as the access to armored vehicles will allow the players in this team to be even more effective on the battlefield. The only flaws of this Assault Team is the small amount of vehicles, as well as the inability to use the terrain vehicles from the Motorized Infantry. Additionally, it's the only Assault Team in the game requiring 3 Command Points.

Requirements: Recon rank 12 or General.
Number of lives: 20
Number of Vehicles: 0
Type of vehicles: -
Possible upgrades: Motorized Recon
Characteristic: an effective Assault Team, as it allows the players in it to deploy as Recon soldiers. The biggest flaw of this team is the extremely small amount of lives, as well as the lack of any vehicles.

Requirements: Recon rank 12 or General.
Number of lives: 24
Number of Vehicles: 24
Type of vehicles: 42WLA (America) / R75 (Germany) / 42WLA L-L (Soviet Union)
Possible upgrades: Mechanized Recon
Characteristic: a very good upgrade to the previous Assault Team. A slightly increased amount of lives, as well as the access to a large (given the pool of lives) number of motorcycles will allow the players in this group to operate even more efficiently. Additionally, it still requires a single Command Point.

Requirements: Recon rank 12 or General.
Number of lives: 28
Number of Vehicles: 14
Type of vehicles: M8 Greyhound (America) / SdKfz 222 (Germany) / GAZ BA-64 (Soviet Union)
Possible upgrades: none
Characteristic: another good upgrade. It gives a small improvement to the amount of lives, but the main point of it, is to give the players access to powerful, lightly armored trucks, capable of destroying enemy light tanks (not to mention that they are extremely lethal to enemy infantry). Additionally, the Assault Team still requires a single Command Point, and the costs of resupplying are one of the lowest from all the teams.

Requirements: Tank Crew rank 12 or General.
Number of lives: 20
Number of Vehicles: 16
Type of vehicles for America: M2A2, M5A1 Stuart, M24 Chaffee
Type of vehicles for Germany: Panzer I Ausf. A, Panzer II, Panzer 38(t)
Type of vehicles for Soviet Union: T38 Model 1937, T-26 Model 1933, BT-7 Model 1937
Possible upgrades: Medium Armor, Medium Tank Destroyer
Characteristic: this group is characterized by requiring a single Command Point, but is one of the most expensive in the whole game. Another flaw is the small amount of lives, as well as the number of vehicles, considering that those are only light tanks.

Requirements: Tank Crew rank 15 or General.
Number of lives: 16
Number of Vehicles: 14
Type of vehicles for America: M18 Hellcat
Type of vehicles for Germany: Hetzer, Stug III
Type of vehicles for Soviet Union: SU-85
Possible upgrades: none
Characteristic: players are given quite a high amount of tank destroyers, which are extremely effective against all enemy vehicles. The biggest flaws are the increased amount of Command Points, immense costs of resupplying, as well as a small pool of lives.
Requirements: Z Tank Crew rank 15 or General.
Number of lives: 20
Number of Vehicles: 18
Type of vehicles for America: M3 Lee, M4A1 Sherman, M4A3E8 Sherman
Type of vehicles for Germany: Panzer III Ausf. J, Panzer IV Ausf. H
Type of vehicles for Soviet Union: T-34 1942, T-34 1944
Possible upgrades: Heavy Armor
Characteristic: a very good upgrade to the Light Armor Assault Team. Instead of light tanks, the players gain access to medium tanks, which are a lot more effective on the battlefield. A slight increase in the amount of lives and vehicles is a nice addition as well. Once again, the main flaw are the immense resupplying costs.

Requirements: Tank Crew rank 15 or General.
Number of lives: 16
Number of Vehicles: 14
Type of vehicles for America: M26 Pershing
Type of vehicles for Germany: Panzer VI Tiger, Panzer VI Tiger II
Type of vehicles for Soviet Union: IS-2 Model 1944
Possible upgrades: none
Characteristic: the last upgrade to the tank group. It gives access to the heaviest tanks in the game, and while their number isn't all that great, their overall effectiveness is more than worth it. As with all the tank Assault Teams, the costs of resupplying are astronomical.

Requirements: Pilot rank 12 or General.
Number of lives: 10
Number of Vehicles: 10
Type of vehicles: P-38 Lightning (America) / Bf-109E4 (Germany) / Yakovlev Yak-9B (Soviet Union)
Possible upgrades: Fighter Squadron
Characteristic: a very effective Assault Team, especially when the enemy team lacks the means for an effective counterattack. The main flaws of this Assault Team are the huge purchase, as well as resupplying costs, and the small amount of lives and vehicles.

Requirements: Pilot rank 15 or General.
Number of lives: 20
Number of Vehicles: 20
Type of vehicles: P-38 Lightning (America) / Bf-109E4 (Germany) / Yakovlev Yak-9B (Soviet Union)
Possible upgrades: none
Characteristic: basically, it's an upgrade that give twice as much everything than the Fighter Recon Assault Team. Unfortunately, coupled with the increase in the amount of lives and vehicles, the resupplying costs are also doubled, making this group the most expensive in the game.

Requirements: Paratrooper rank 12 or General.
Number of lives: 28
Number of Vehicles: 7
Type of vehicles: C47 Skytrain (America) / Junkers Ju 52/3m (Germany) / C47 Skytrain L-L (Soviet Union)
Possible upgrades: Paratroopers
Characteristic: a very effective assault team, given the fact, that it can move around the map uncrestrictedly. Large amount of lives comes together with extreme costs.

Requirements: Paratrooper rank 15 or General.
Number of lives: 64
Number of Vehicles: 16
Type of vehicles: C47 Skytrain (America) / Junkers Ju 52/3m (Germany) / C47 Skytrain L-L (Soviet Union)
Possible upgrades: none
Characteristic: similar to the Fighter Recon upgrade, this one increases the effectiveness of the Assault Team, instead of giving access to new stuff. More than a double amount of lives comes with a price - high costs of resupplying.
First things first, you should gain access to the appropriate soldier, who will be able to command Assault Teams. To even think about your adventure on the world map, you will have to develop your soldier to at least 12th rank, so that he gets a single Command Point. As it can be easily guessed, you won't be able to do much with it, so it's worth to get at least a 15th rank soldier, so that you will be given an additional Command Point, which can be used to upgrade your Assault Team.
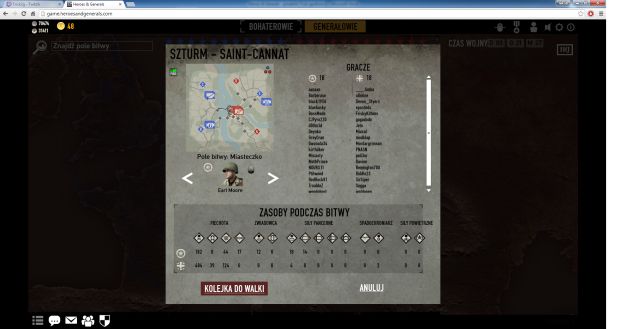 Before you send your Assault Team to battle, check what resources are needed on the battlefield.
The best option would be to have a soldier with the General rank - the lowest tier General has access to 5 Command Points, where the highest one gives you 10. If you, however, want to play with the General, you will either have to spend horrendous amount of time (dozens, if not hundreds of hours) in order to accumulate the astronomical amount of experience points required to upgrade your soldier to the General rank. The micro transaction system won't really make it easier for you, because buying enough Gold to purchase a General ranked soldier would cost you about 40-50$.
Your task as the Commander on the world map is to simply send your Assault Teams on various battlefields to support your allies, providing them with the necessary equipment. Do not send them thoughtlessly, as you will gain nothing from it.
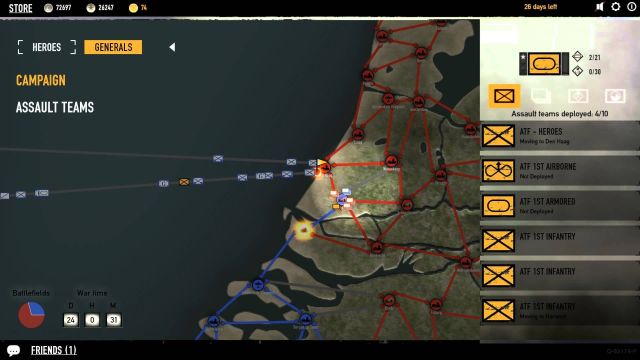 Assault Team movement screen.
By going to the World Map, you can check the battles that are currently in progress - the dots that are flashing intensively are the ones you are interested in. After selecting such a battle, a new window will appear, and there you will be able to see the amount of resources each side has at its disposal. If you noticed that your team lacks in any field, for instance it has no heavy tanks, while the enemy team has plenty, you can send your own Heavy Armor Assault Team to support your allies.
Here's a couple of hints that may come in handy while you are "playing" in the War:
1. Try to have a mix of different Assault Teams. Swarming your enemy with several Heavy Armor Assault Teams may be tempting, but it's a very bad idea - the tanks won't be able to handle infantry equipped with rocket launchers, not to mention the bombardment from the enemy planes. If you decide to send an Assault Team into combat, check there's plenty of other resources as well.
2. Remember to resupply your Assault Team before sending it to the battlefield. The same rule as with the equipment applies - like there, you should take care of your teams and avoid sending them without resupplying their previous losses.
3. Avoid sending your Assault Teams into battles that are impossible to win. You've found a battlefield in which the enemy team has over 2000 lives, while your has less than 100? Sending a group of Heavy Tanks or Paratroopers may be all great and patriotic, but your forces will be quickly dealt with and you lose a lot of War Funds because you will have to resupply their losses without much of a gain.
4. Upgrade your Assault Teams. Each upgraded Assault Team is basically better than the previous one. It's true that the resupplying costs are rising as well, but the increase in the overall combat effectiveness is more than worth it.
 Halo 3 Game Guide & WalkthroughHeroes VI - Pirates of the Savage Sea Game Guide & WalkthroughHarry Potter and the Half-Blood Prince Game Guide & WalkthroughHeroes of Might & Magic III: HD Edition Game Guide & Walkthrough
 Harry Potter and the Goblet of Fire Game Guide & Walkthrough