
This guide to Harry Potter and the Deathly Hollows - Part 2 contains:
Throughout the guide you will find fragments of text marked orange. They correspond to the situation presented on the screen above them.
In the collectibles chapter you will find the locations of all the hidden items with characters and music. You can view them from the main menu. In some of the bonus orbs you will also find challenges. They activate a bonus gameplay mode, involving time-attacking given chapters in return for medals. The score can be influenced by the variety of spells you use and accuracy. Additional seconds are added for failed battles.
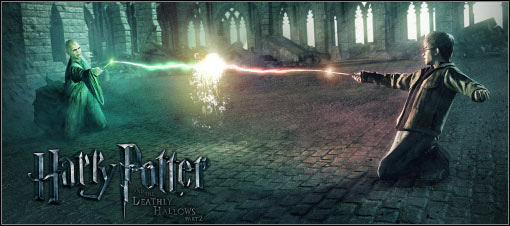
Experience the last part of the Harry Potter series while having this guide - containing over 100 screens showing the most important moment of the game - to your help.
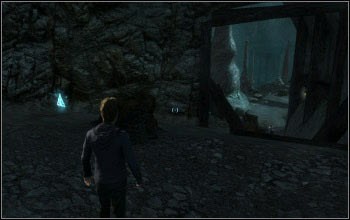
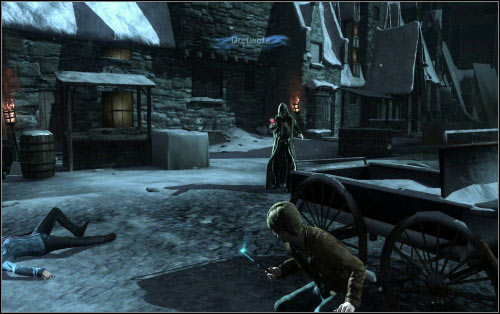
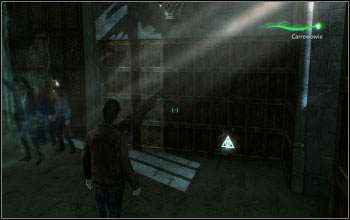
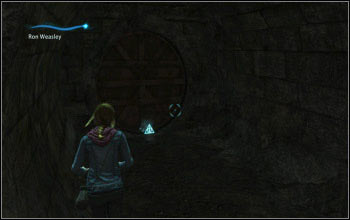
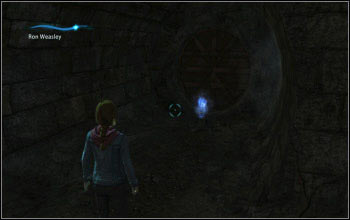
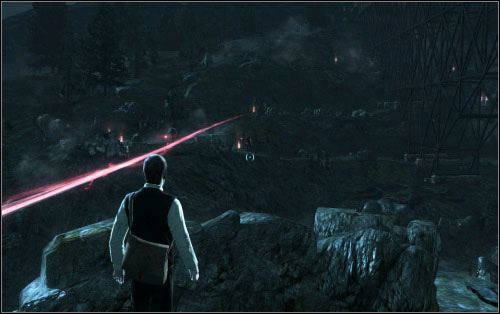
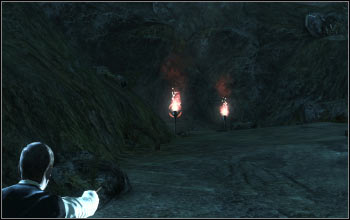
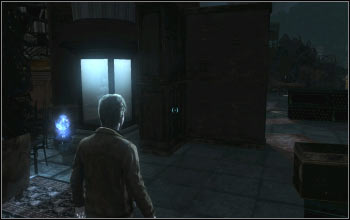
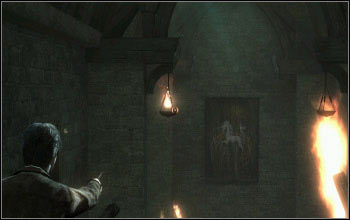
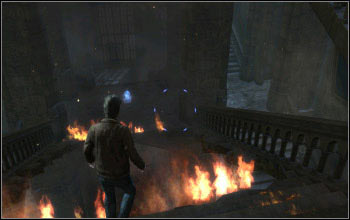
You begin your adventure in the basements of Gringotts. The path to the Lestrange vault and the horcrux stored inside is long and dangerous. Luckily you can always count on Ron and Hermione. However don't start off by following them, instead head onto the ledge on the right and behind the waterfall you will find your first blue orb. Hidden inside there's a piece of the soundtrack - one of the collectibles available in the game.

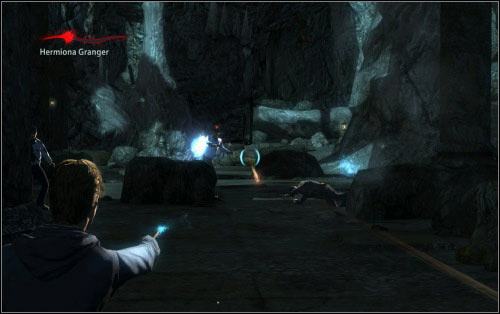
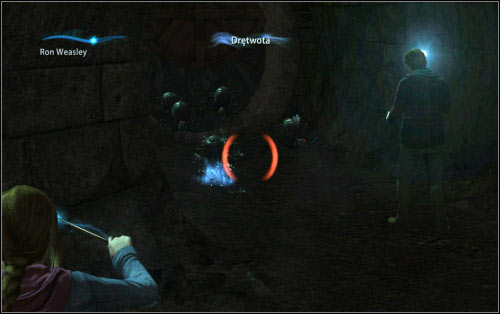
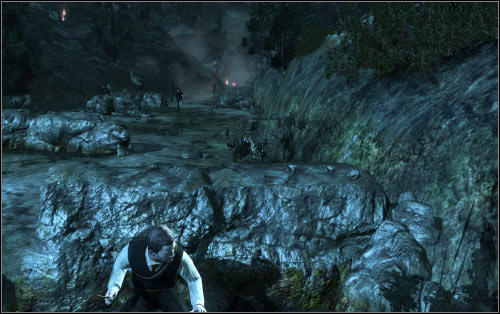
Following the main path, you will reach a door and the corridor behind will lead you to a cave. On the left the game will suggest hiding behind a rock, but before you do that turn right for another orb. Once you're behind the cover, wait for the guests to visit the vault and attack the guards by using the newly unlocked Stupefy spell. It's an very general purpose spell and is very good for eliminating enemies, especially at close distance. Don't forget that you can aim better by pressing the right mouse button. Afterwards follow Hermione to the next door.
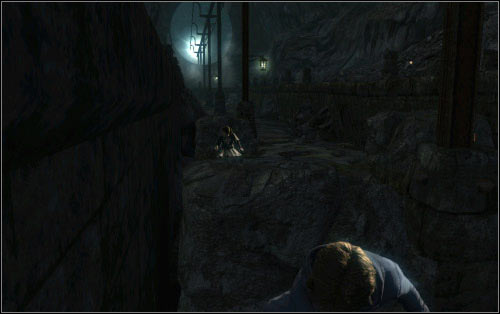
You will reach a cave with guards riding in a mine cart. Once you see them in the distance (the cart's lights to be precise), hide and wait for them to pass. Afterwards run quickly (sprint is activated by default with the spacebar) to the exit. If you are noticed, the bank workers will attack you.
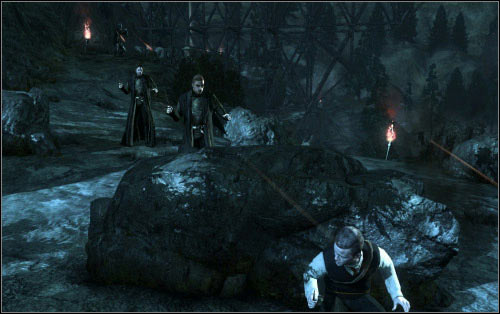
Eventually you will reach a gulf and notice strange smoke coming from below. However for now go to the right and kneel down behind a cover when you learn of incoming guards. Confronting them however cannot be avoided.
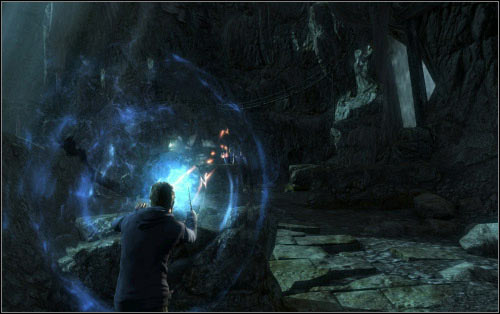
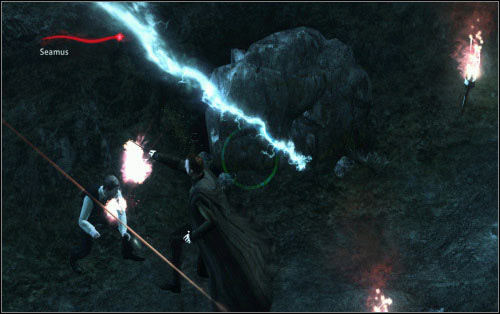
In the next location you will hear a terrifying roar which will also activate the Protego spell. Using it you can create a magical barrier that absorbs damage, great for protecting against enemy spells. It can also deflect, thanks to which you can knock down an enemy on contact. Unfortunately it has limited strength and will disappear after absorbing too much damage
Protego will come in handy at once, as a quickly attacking guard (the Crucio spell) will attack the party. He will be aided by him buddies, so prepare for a rather tough battle. Eventually you will reach a stones bridge which will unfortunately crumble under Ron and Hermione.
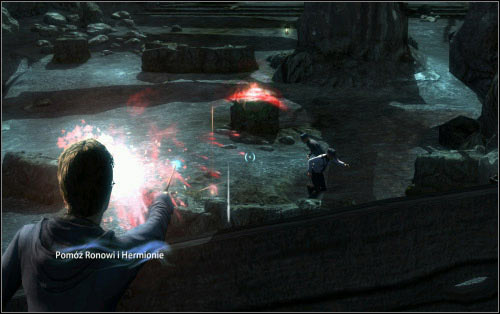
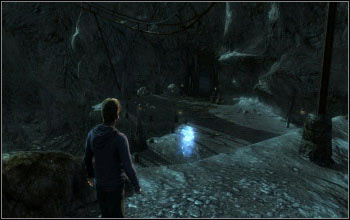
You will be separated from your friends, but not for long. Go up the indicated wooden bridge and fight off enemy attack. You can ignore them for a moment and visit the nearby cave for the third bonus orb. Eventually one of the guards will destroy the bridge and Harry will fall down. The three friends will now have to face the bank guards.
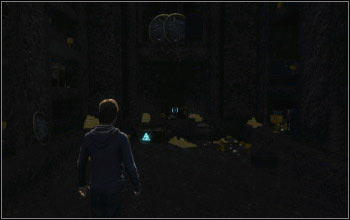
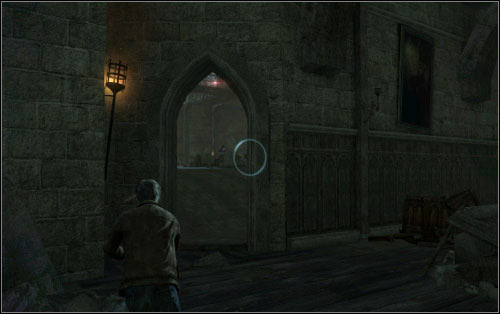
After numerous fights you will reach a magical door and Hermione will have some problems with opening it. You have to protect her from attack and keep an eye on her health level displayed in the upper left corner of the screen. Afterwards you will enter a wide room with treasures (inside one of them there's a collectible) protected by guards.
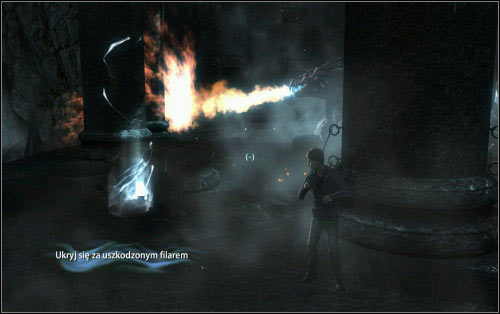
You're nearing the end now. The rock ledge will lead to you a... dragon trapped inside a large cage. Its fiery breath will turn Harry to dust if only he gets near him, so use the pillars as cover. The beast breaths from side to side and you have to sense the right moment to run to the next pillar. Eventually the dragon will destroy one of them and afterwards focus on you. Just like the game encourages you to, shoot to distract it and run forward. Eventually you will meet Griphook which will end the first chapter.
Pretty much the starting location. Instead of following Ron and Hermione, head right, up the hill.. the orb is behind the waterfall.
Prize (music):
Wandering Part 1 - Sorrow
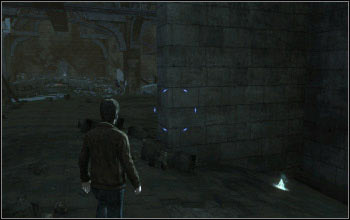
After you go through the first door, the corridor will lead to a cave with rail tracks. Instead of hiding behind the rock - as the game suggest - go the other way. The collectible is well visible from afar.
Prize (challenge):
Gringotts
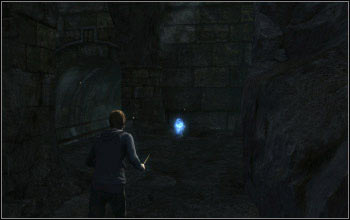
After the stone bridge crumbles below Ron and Hermione, the game will suggest going to the wooden bridge. Instead of attacking the enemies, go a bit further.
Prize (character):
Ron Weasley
Having the Hermione protecting sequence behind, you will go down into a big room with mine carts. One of the vaults is open......
Prize (character):
Scabior
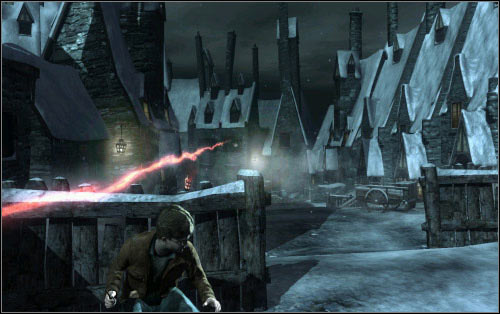
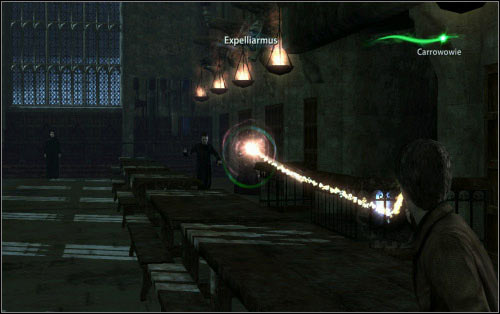
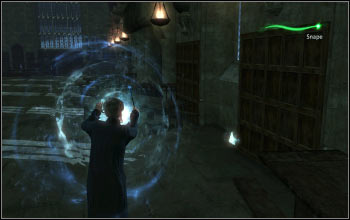
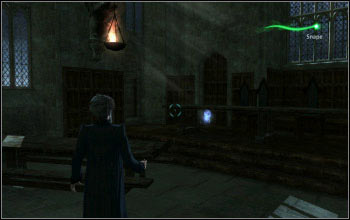
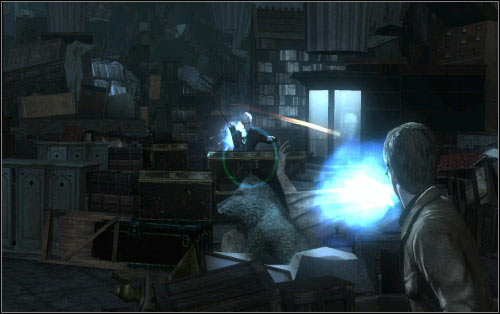
You will find yourself inside the village of Hogsmeade, in which you will get to the Honeydukes and through it into Hogwarts. After just a few steps you will learn that Harry Potter isn't welcomed here. Deal with the enemies (look out, as they're more resistant than those from the bank) and in return you will receive a new spell - Expelliarmus.

This spell is capable of breaking through an enemy Protego - the most simple magic defence - and will prove very useful during this level. You will have the chance use it in the next location, where Voldemort's servants will attack you once again. One of them will activate the shield, so respond with Expelliarmus. During the fight you have to look out for the enemies not to flank you.
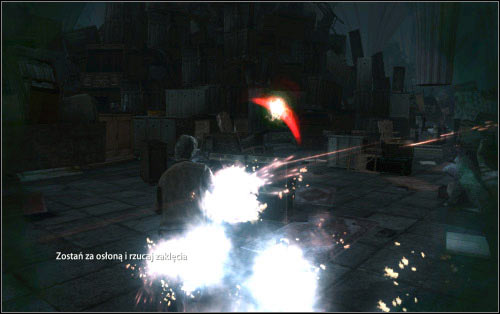
Continue the journey. After Hermione opens the second door, you will fall into big trouble, as wizards will start attacking your party from afar. Getting hit even once can cause some significant damage, so using Protego is the only way out of this situation. Note that the shield sustain only one hit and has to regenerate afterwards. Therefore you must be very careful and maybe use sprint. You need to get closer to the enemies for Stupefy to work. The bonus found inside the building can be collected only after... finishing the game.
After eliminating the threat, yet another one will show up - the courtyard will be attacked by Death Eaters. Defend from their attacks and remember about the properties of your new spell. Afterwards more problems will start on the other side of the street, so there's a lot of fighting waiting for you.
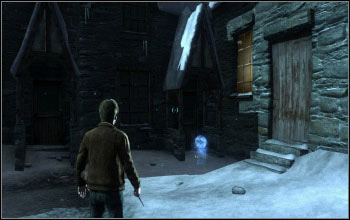
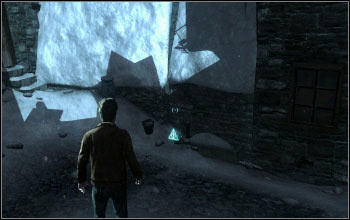
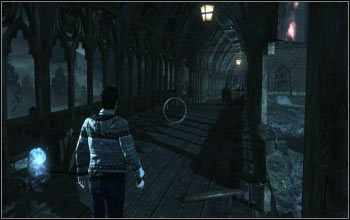
The road will lead you to a building with a highlighted entrance. Once you get near it enemies will run out. Before going inside you can turn left and collect the collectible hidden there.
As you have probably guessed, the square you reached will soon be attacked by enemies. They are no different from the ones you already know, so clear the area carefully. You can hide behind the wall, which gives you perfect conditions for counterattacking. Afterwards move closer to the marked passage. Just like last time, Death Eaters will come out of it, through in larger numbers.

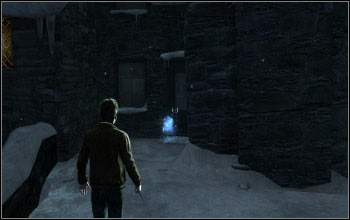
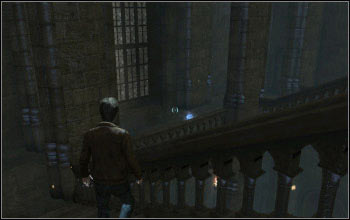
You will be able to pass through the next location without being bothered by enemies. Hermione will take care of the door as always, but this time she will need some more time and you will have to protect her from the enemies. Afterwards take a look behind the corner to collect a prize orb.
Behind the door (on the right there's one of the Collectibles) awaits you the last fight in Hogsmeade - Death Eaters will attack the market twice. Especially look out for those quickly casting Crucio (the hooded ones) - they're considerably dangerous. also don't let them surround you. The chapter will end once Dementors appear in the distance.
This house is occupied by two enemy wizards. A collectible has been hidden inside, but the problem is that you can't get inside in any ordinary way. What to do? By the end of the game you will acquire the ability to teleport. Play this level in challenge mode and fly through the barrels.
Prize (character):
Professor Snape
At some point the road will lead you to a building from which Death Eaters will suddenly attacks you. On the left there's a street with the collectible.
Prize (character):
Death Eater
Once Hermione finishes with the door don't go through it but head forwards. The collectible is at the end of the road.
Prize (music):
Wandering Part 2 - Determination
It's the last location in the level, with the market. Before heading towards it, go the other way.
Prize (challenge):
The Streets of Hogsmeade
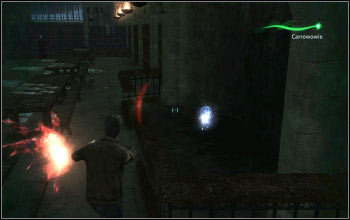
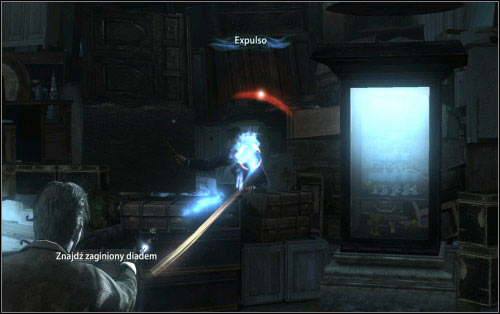
The first boss fight. You will have to battle against professor Snape, the current headmaster of Hogwarts. His reign must finally come to an end. First however you will have to deal with Amycus and Alecto Carrow - two Death Eaters standing beside Snape
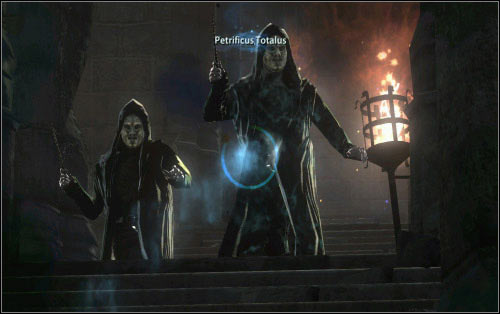
The fights isn't much different from any other ones, apart from the fact that the enemies are now much more resistant. It doesn't matter who you attack, the health bar is common for both enemies. When Carrows use Protego break their shield and keep attacking. You can use the benches as cover. You can also take a look around the room - two collectibles can be found here.
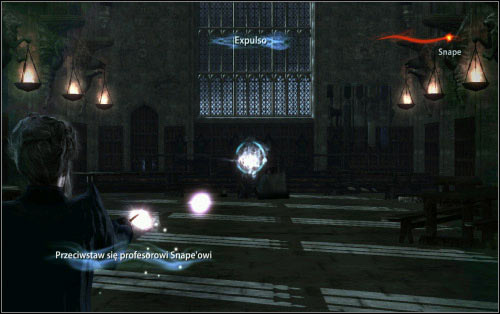
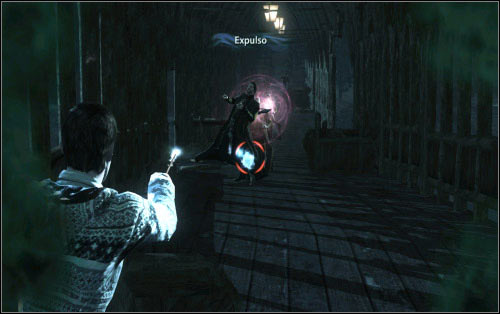
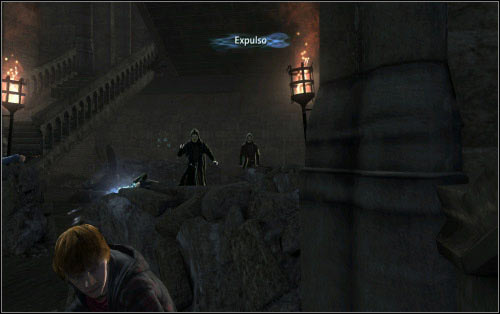
Eventually Minerva will make an entrance (you will be able to control her). You will also learn a new spell - Expulso. This offensive spell (hold down the mouse button) can cause significant damage, but its power fades away rather quickly. I'd suggest alternating between it and Stupefy. Note that the teacher is very slow and cannot run, but on the other hand uses magic protection. There are also two new collectibles nearby.
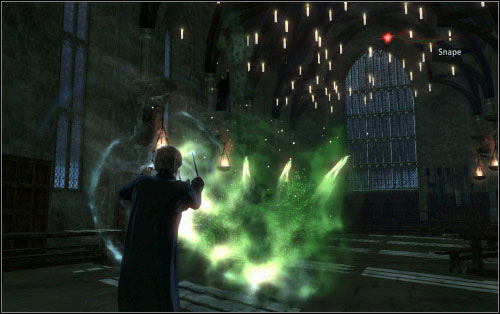
The headmaster loves attacking with series of spells. Keep attacking him and breaking through his shields so he doesn't have time for that. Around the middle of the battle he will pick up one of the benches and throw it at you. Start mashing 1 and the item will be returned with a crash. The weakened headmaster will eventually start teleporting, throwing down magic bombs and attacking harder. Keep strafing and don't stop attacking him. The offensive attitude will surely pay off.
The orb is in the middle of the room, behind small barriers.
Prize (music):
Wandering Part 3 - Mystery
The collectible has been hidden by the room entrance where students are cheering for Harry, meaning you have to backtrack a bit.
Prize (character):
Amycus Carrow
After taking control over Minerva, take a look to the right.
Prize (character):
Alecto Carrow
A hard to reach spot behind the headmaster. Remember about using Protego as you slowly move there.
Prize (challenge):
A Problem of Security
The friends will split up, with only Ron and Hermione looking for the fang. The first one is terrified of the local tunnels, filled with spiders. Therefore he'll serve mainly as a source of light and a locksmith, leaving the fight to use. All the collectibles hidden in this level can be found at dead ends of the various tunnel branches. They're not really hidden, all you have to do is search all the branches.
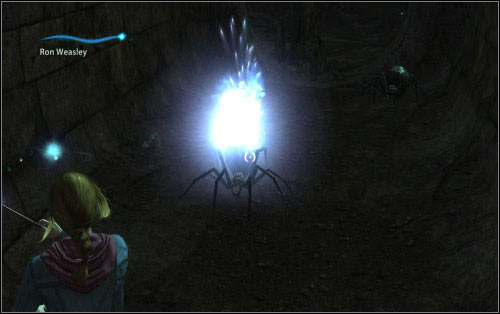
Follow Ron who knows which branch to take. Unfortunately he will eventually trip over and fall down which will draw in spiders. In accordance with what the game suggests, the Expulso spells is by far the best for eliminating them, however you can also use Stupefy if you want.

Soon afterwards you will enter a room inhabited by a couple insects. Later on you will come across a locked door and Ron will take care of them. You on the other hand will have to provide him protection. If you can't deal with the overwhelming amount of spiders, keep in mind the destructive properties of Protego. Just walk into an enemy with it activate to shred him to pieces.

The situation will soon repeat itself. In the next cave you will come across insects attacking from a distance. The best way of fighting them is to use Protego and attack after aiming at them. In the next room there's another door and you will once again have to protect Ron. This time however the spiders will attack from two sides - from behind his back and from above.
You will have to repeat this in the last (empty) room. As only Ron starts to open the door, start fighting off the enemies (they attack from below). The passage won't however close after you enter the tunnel and the insects will be able to systematically attack. Defend yourself and Ron and use Protego on large groups. Eventually you will notice a large spider, but the door will luckily close this time.
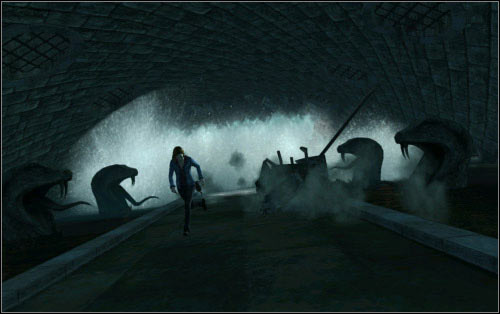
Eventually you will reach the Chamber of Secrets. Hermione will pierce the Horcrux with the Basilisk fang, which will unfortunately cause a small cataclysm. Water will start pouring inside the room and the only reasonable thing to do is run away. You control the heroin using directional buttons and have to avoid the falling debris. Obstacles will be appearing (in order): left, right, left, right, left, middle, right, left.
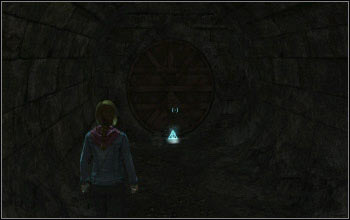
Every collectible in this level is easily noticeable. The one presented can be found at the second tunnel branching. Instead of going right, look to the left.
Prize (character):
Aberforth Dumbledore
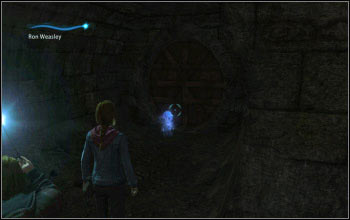
After Ron opens the first door, check the second tunnel crossroads.
Prize (music):
Wandering Part 4 - Serenity
After going through the cave with shooting spiders, pay attention to the second crossroads.
Prize (character):
Professor McGonagall
Open the next door and take a look at the second crossroads.
Prize (challenge):
The Basilisk Fang
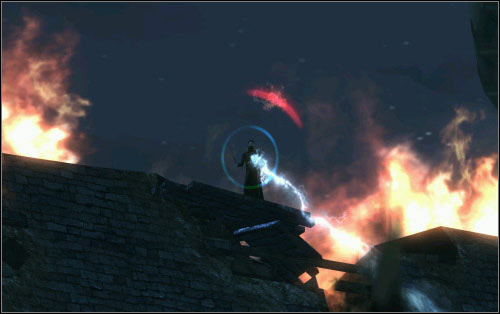
The forces of evil have attacked Hogwarts. The enemies will surely try to get across the bridge and it's your task to stop them. Neville, Ginny and Seamus have been chosen to blow up the structure. You will take control of the last one, at least for at the beginning.
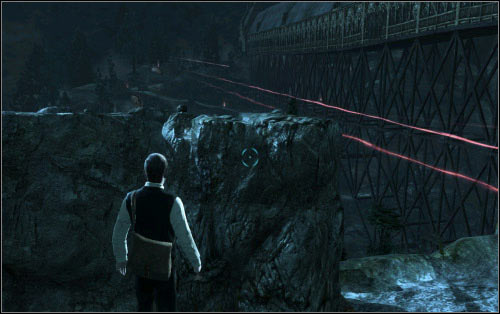
Go through the chamber and gather two collectibles on your way (the corridor on the left and the fountain). Outside you will be attacked from a distance, but luckily you have two friends there to help you. Neville, apart from using some powerful magic, will also tell you the best moment to move to the next cover. Listen to his advice and nothing should happen to you. That way you will reach the first of six spots where you need to plant explosives.
Move forwards and you will learn a new spell. Confringo is a powerful magical missile that can even strike down groups of enemies. Unfortunately it takes a while to charge and is rather slow. You will be able to test its power right away, as Seamus will be attacked by a group of Death Eaters. After dealing with the threat you will notice that Hogwarts' protective barrier has disappeared and a second wave of enemies will attack. Defeat them and plant the second charge.
The road to the third bridge element is dangerous as well. At first you will have to look out for wizard shooting magic beams. Neville will tell you of their presence. Hide behind the rock and follow his suggestion of using Confringo on them. A bit further you will have to fight some more Death Eaters.
After you plant the third charge, the enemies will carry out a real assault. Take care of them and artillery will fire at the bridge. Enemies will attack once again afterwards. eventually you will reach (take the collectible on your way) to a valley overflowing with enemies, where you should primarily focus on those who pose the biggest threat, that is the wizards shooting purple projectiles. You will plant the fourth magic C4 unbothered by anyone. You will note two beacons on the road to the hill. Shoot them for a blue collectible.
Move further and Neville will eventually tell you that enemies are attacking from behind. The problem is that enemies will come from the other side as well and you don't want to be caught is a cross-fire. That's why I'd suggest quickly running to the corner and hiding behind the rock. Clear the area of Death Eaters and plant the last charge.
The situation will repeat itself soon enough, with the only difference being that you will be attacked from above and from the side of the main road. Especially look out for the mages using rapid fire.
Once all the charges are planted, you will switch to Neville. Your task now will be protecting Seamus, who has to return to Hogwarts. The Death Easters however are far from giving up and he needs your help. You have a new spell at your disposal - Petrificus Totalus, capable of knocking down smaller enemies in one hit (two are needed for the bigger ones). Seamus is quite tough, so you don't have to worry about his health too much (it regenerates).
During this part of the level you will visit four locations. You have to clear each of them of enemies, but starting from the third they will attack you as well. They, meaning the distinctive wizards using exploding projectiles. They are very dangerous, so it'd good to eliminate them right at the beginning. There will be two of them in the third locations and four in the last one.
This however isn't the end, as now the Death Eaters will reach the bridge and start attacking Neville. Note that the corridor is very narrow, so Confringo will be very useful here. The fight is very exhausting, mainly because of the sheer number of enemies, so it's best you hide behind a cover right away and attack from there.
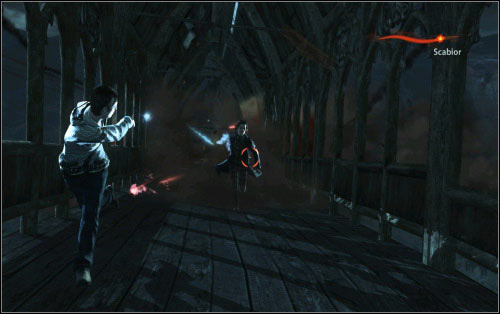
The final part of the bridge operation will be very dynamic. The construction will start to crumble and Neville will have to start running, however Scabior will appear right behind him. In order to survive you have keep running forward (there are no obstacles to avoid here) and attack the enemy from time to time. Keep in mind that Expulso needs a couple seconds to recharge.
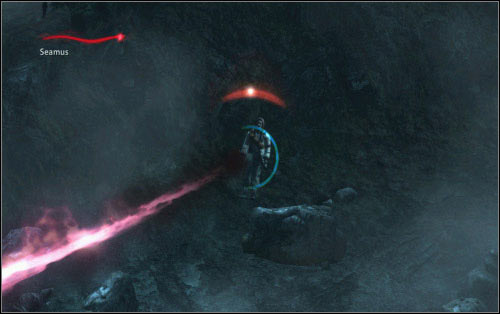
Turn left at the very beginning of the level. The collectible can be found right behind the corner.
Prize (music):
Wandering Part 5 - Dark Magic

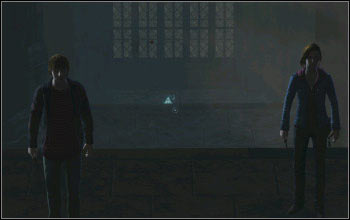
The characteristic character triangle has been hidden behind the fountain. You can see it once the level loads.
Prize (character):
Seamus Finnigan
After planting the third charge, turn left as the road leads. The prize is right behind the bridge basis.
Prize (character):
Neville Longbottom
Having planted four charges, you will go down into a valley. You will notice two beacons on the road leading to the other side of the hill. Destroy them and a musical present will fall down.
Prize (music):
Wandering Part 6 - Tension
After you successfully protect Neville, don't go to the exit but walk along the bridge. The collectible has been hidden behind one of the obstacles.
Prize (challenge):
A Job to Do
Hogwarts has problems from the front as well. Enemy forces are marching through the bridge, aided by a powerful giant. The already well-known Minerva stands against the Dark Lord's army. This will be a real David and Goliath battle.

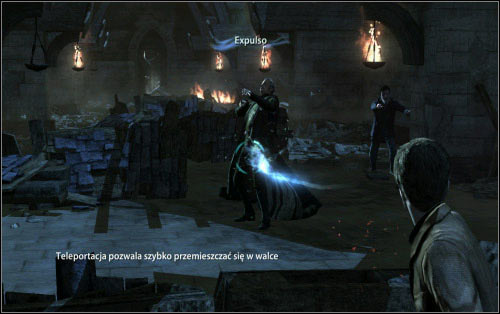
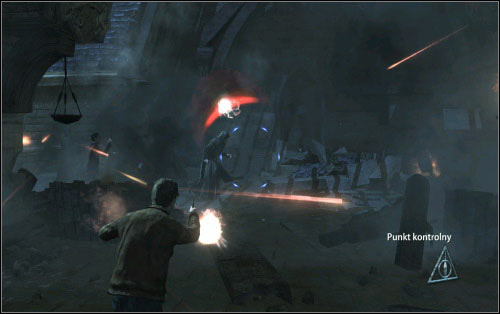
The mission unlock the last of the offensive spells - Impedimento. It can damage a couple enemies at once and will come in very handy now. The mission is to kill the giant, for which you can use the mentioned spell as well as others (for example Confringo). Luckily the powerful enemy will be blocked by stone knights, so you won't have to engage in a direct fight. The biggest problem will the teleporting Death Eaters. Focus on them and shoot the giant in the meantime. Use Protego for defence if needed.
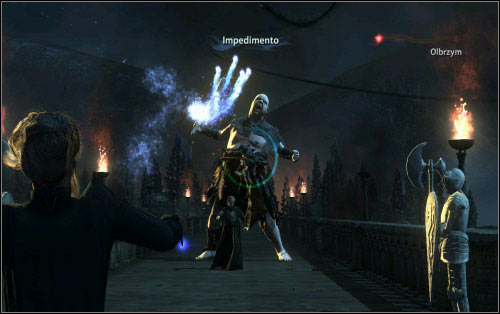
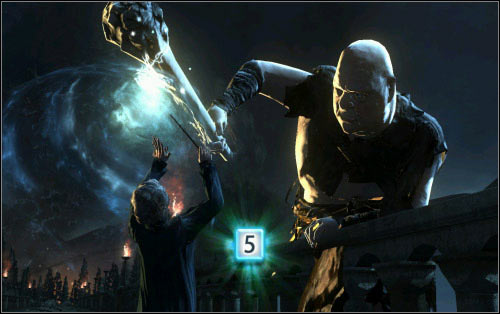
Your comrades won't last too long and the giant will try to attack Minerva sooner or later. When he does, move back until new knights take place of the fallen ones. In the final part of the battle you will have to treat the giant with Impedimento to knock him down from the bridge. Before you can do that however, you will have to drain almost all of his health.

You won't be able to celebrate victory for too long, as yet another giant will appear. Use an identical tactic against him, that is shoot with various spells from a distance and look out for the teleporting Death Eaters. Notice that the new giant will also hurl rocks at Minerva - avoid them by strafing. The second giant will have to be treated with Impedimento in the end as well.
Afterwards you will have to fight the other wizards and... one of the giants, who managed to climb back up. To finish him off, you will have to press 2 at the right moment, afterward mash 5 and eventually press 2 again.
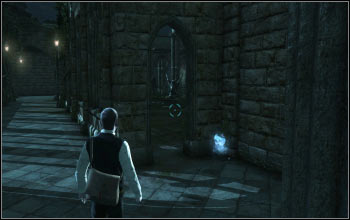
We're going back to the search for Horcruxes. Another one can be found in the Room of Requirements, in the form of Rowena Ravenclaw's diadem. Unfortunately, Draco Malfoy - Harry's arch-enemy - is also here with his friends and you will have to face him. All three of them have hidden themselves and you can't really know when and from where they will attack.
Collect the first of six collectibles nearby the starting point and move forward. In the next location, Potter's old friends will attack for the first time, so hide behind the first cover you find and counterattack from there. Eventually the enemies will give up and retreat. Wait for Hermione to open the door.
Inside the next room (there's a shining character triangle here as well) your task will prove to be a bit more difficult. One of Draco's allies has barricaded himself in a makeshift bunker and is shooting dangerous series of projectiles. He however takes a break every now and then, so use that gap to cast your own spells. I'd especially suggest using Confringo, as your target remains still.

Go forward until you are once again attacked by Malfoy's friends. Fight off the attacks and go to the left to gather the collectible hidden there. Hermione will move the junk which will let you move further (after you go down, there's a blue orb on the right side). soon you will be warned of another "bunker". Run to the nearest barricade and begin the fight.
The situation will soon repeat itself. Inside the new location you will be shot at with a series of Crucio. After you deal with the aggressor, take a look around the area to find the fifth collectible. The sixth one can be found where Draco will appear. Hurt him a bit and the young wizard will call in his friends, so you will have to deal with all three of them. Afterwards you will reach the destination point.
Unfortunately acquiring the diadem will bring a whole lot of trouble onto you and your friends. The whole room will start burning and the only reasonable thing to do will be running away. It's not much different from the other sections of such type that you had already played. Use the directional buttons to move and aim at the obstacles with the left mouse button, this time debris. Time will slow down at crucial moment, giving you time to locate the obstacles. After they are highlighted, you have to cast the spell. Repeat five times.
The starting area, just take a look around. The area isn't big.
Prize (music):
Wandering Part 7 - Surrender
He collectible can be easily found where one of Draco's friends will attack you from the bunker for the first time.
Prize (character):
Gregory Goyle
During the next attack, go round the enemy barricade from the left side.
Prize (character):
Draco Malfoy
The fourth collectible can be found nearby the third one. Go through the door opened by Hermione and head to the cache on the right.
Prize (challenge):
A Giant Problem
After destroying the third bunker, take a walk around the location. You will find the orb between the junk.
Prize (challenge):
The Lost Diadem
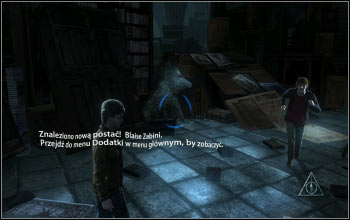
A collectible that pretty much collects itself on your way to the final fight with Draco.
Prize (character):
Blaise Zabini
A very long level divided into four sections. You have to find Voldemort's snake - the last of the horcruxes. You begin the mission in a relatively quiet place. However a real war with Death Eaters will begin very soon.
Run forwards along the path (you can turn left to find one of the collectibles). The seemingly empty corridor will be soon attacked by enemies. Then you will also learn the very useful skill of teleportation. By default you jump by pressing left Ctrl and a directional button (for example forward). Note that the barricades are placed so that you can freely teleport to them.
As you're getting closer to the destination, Death Eaters on the left will break through the wall and attack furiously. It's very likely that you will have to retreat (remember about teleportation). Aim primarily at the charging hooded enemies.
Afterwards you will enter the walls surrounding the courtyard, controlled by Voldemort's men (I'd suggest using Impedimento and/or Petrificus Totalus). At this part of the level you should especially look out for masked bandits standing on the roof, attacking with a single but very powerful projectile. Harry's weak body won't be able to sustain many such hits. Look out at the beginning, when you get near the first corner and after the explosion on the path. At some points you will come across a gap in the ground. More bombardiers are waiting below, so it's best to avoid this place by teleporting to the other side.
The target door will take Hermione some more time and that means she will need help. Stand left of her and protect your beautiful friend. There will be four snipers on the roof in total, taking them out should be your priority.
Be fast about it, as the enemy will soon attack from the other side. There's very little space for manoeuvring, so try to aim well an above all don't get out of the cover.
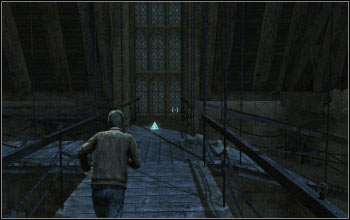
Hermione will eventually open the door which will give you some time to catch your breath. As you will be going down the stairs, note the lamp on the left - shoot it for some bonus music. Listen how Harry's enemies behind the wall are preparing for his arrival and head inside.
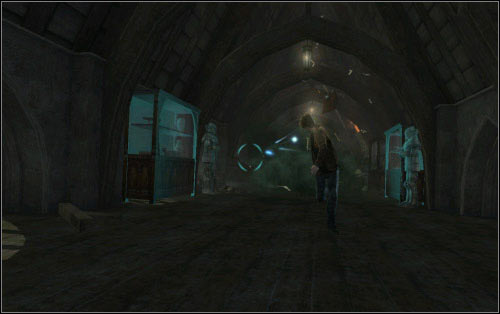
Inside there are three fights waiting for you and afterwards the path will lead you to a large hall filled with Death Eaters. It's good to eliminate some of them from the entrance level, as inside you would be attacked by multiple foes at the same time. Clear the room, defeat another enemy wave and head to the door. However before you go further, you can take a look around the room - there's a collectible to be found here.

Hermione will step in once again and you will have to classically protect her. Once you're done with that, the second part of the level will load.
The three friends will arrive at the staircase, with no need of a detailed description. You will be going down all the time and each level won't be that much different from the other. You pretty much can't get lost, as the game itself won't allow it. After a few steps harry will be separated from his friends, but it won't influence the gameplay too much. You will all reunite at the ground floor. Afterwards you will just have to fight your way to the exit.
On the way, keep your eyes opened for hooded thugs. Their magical Crucio series is lethal and there's not much place to hide. Instead, you can use your teleportation skill while not forgetting to avoid the snipers' sight. There are three easily accessible collectibles on the staircase, closing the list for this chapter.
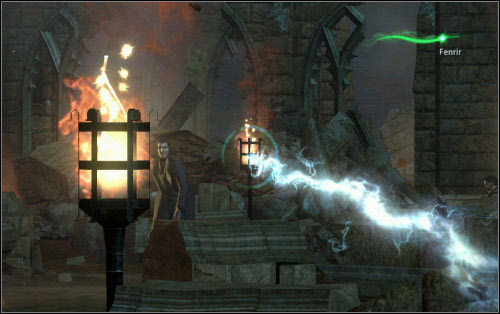
After leaving the location, you will have to fight a boss. Hermione couldn't walk past the harm being done to the little girl and challenged the aggressor to a fight. Your enemy will be the werewolf Fenrir, aided by Voldemort's men. Take them out first for easier access to the main enemy.
Fenrir shoots green beams and throws kind of bombs, resembling those used by Snape (third chapter). Nothing should happen to you if only you keep stay behind the closest obstacle. From time to time check whether Hermione is behind a cover (she has a tendency to leave it occasionally).
As for the fight itself, it's based on very simple rules. You just need to shoot at the werewolf, Petrificus Totalus should be best for that. Impedimento also works fairly well. Fenrir is very quick and very often uses a magical shield, so you have to be determined in your attacks. Also note that there are many lanterns around - when the opponent approaches one of them, cause an explosion with one precise shot - his health will take a considerable hit.
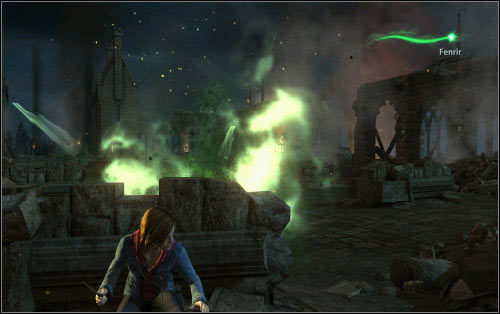
Fenrir will regenerate his health twice throughout the fight (though not completely) and will systematically keep on calling reinforcements. Once he's also out of health, you will have to face him directly. Just a few more hits will take him down for good.
In the last part of the battle of Hogwarts, you will be back into Harry's skin. The path here is rather short and filled with Death Eaters. The battles here won't surprise you with anything and you will only meet well-known enemies. Remember that the lanterns found here and there can be used to your advantage.
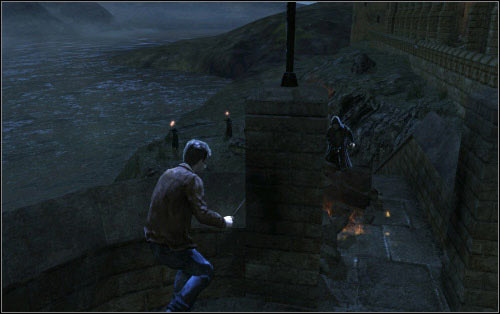
You can get Fenrir at the beginning of the level. Go through the wooden bridge and keep looking left until you notice the triangle.
Prize (character):
Fenrir Greyback
After Hermione opens the first door, you will enter a room with lanterns. Shoot one of them.
Prize (music):
Combat Part 1 - Courage
Inside the big ruined room, stick to the left side and you will bump into the third collectible.
Prize (character):
Bellatrix Lestrange
The second part of the chapter. Follow Ron and Hermione, however go forward instead of turning right like them.
Prize (music):
Combat Part 2 - Fear at Hogwarts
You can easily spot the fifth collectible from where the fourth one was hidden.
Prize (character):
Hermione Granger
The orb can be found more or less in the middle of the downward road. It's hard to miss.
Prize (challenge):
The Battle of Hogwarts
A very short chapter without any collectibles. Potter has realized his fate and is heading towards the Forbidden Forest to meet with Lord Voldemort. His minions however don't know that yet and will attack you.

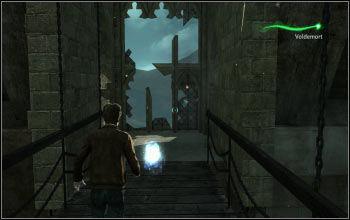
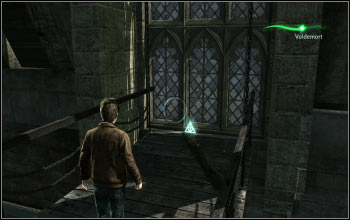
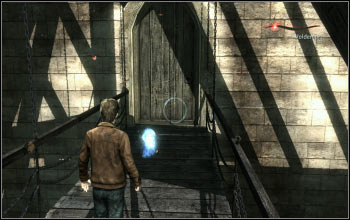
Before going onto the bridge you will be able to defend normally, using natural covers. Problems will start further, as there will be no more covers around and you will have to use Protego. In order to survive, use a variety of spells. When one is recharging, switch to another one and keep on attacking. There's little space on the bridge, so using Confingro might be a good idea. Impedimento will also prove useful, though use other offensive spells from time to time as well.
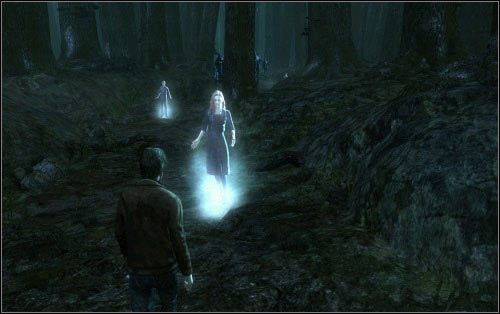
Once you cross the bridge, the Death Eaters will note that Harry is willing to give up and will stop attacking. Listen out to what the ghosts have to say and go to Voldemort.
Lord Voldemort triumphs. He demands the Hogwarts student to pay him homage, however in an unexpected turn of events, Harry return to life and the battle between him and the Dark Lord begins.
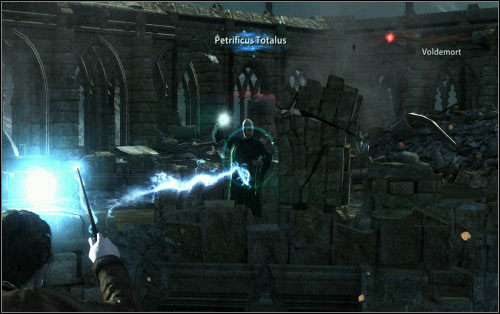
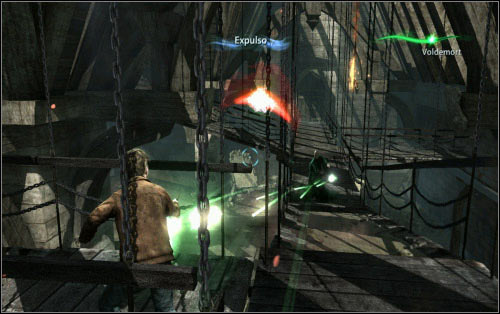
Despite the appearance, the fight isn't really hard. Voldemort will be using similar spells throughout the whole battle and even though they're very powerful, you can easily dodge them. Above all try strafe at all times, hide behind covers and activate teleport in dire moments. The opponent will eventually start moving throughout the courtyard. Keep an eye on the black trace to know where he's going to appear. Attack him relentlessly, as by waiting you only create danger for yourself.
The defeated Voldemort will start chasing Harry, which will be presented in the form of the well-known sequence. The challenge is not only controlling the hero, but also shooting the slightly highlighted objects. Destroying them will slow down the cloud chasing Harry. Note that the fragile objects can be found on both sides. If you're not doing well with hitting them, try focusing on one side only.
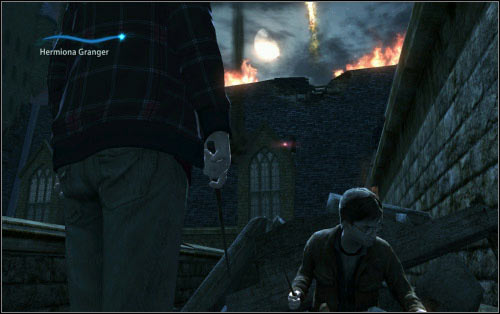
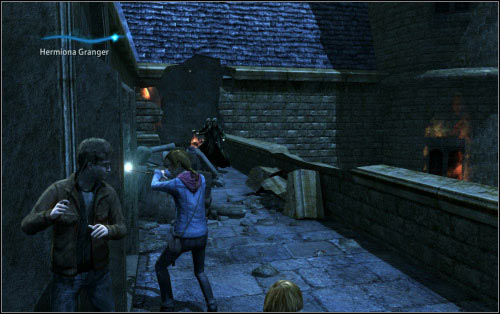
For now, we put the main plot aside and focus on Ron and Hermione who are looking for Voldemort's snake. The problem is, the whole area is crawling with Death Eaters. The dark wizards will attack you once you set foot on the stairs. The second attack, this time much more serious, will take place at the ground floor. Inside you will also find a blue orb and yet another one on the upper floor.
Nothing shall trouble you on your way to the next savepoint. Afterwards however, the Death Eaters will carry out a massive attack. You will learn of it from Hermione, who will notice the incoming enemies (go right for a collectible). The biggest threat will be probably the hooded ones. They will attack from both sides and large in numbers, which will make things even more difficult. There will be quite a lot of fighting now overall. Voldermort's men will start coming down from above and hide behind pillars. Luckily they will prove to be less demanding with time. A bit higher there's the fourth shining collectible - the character of Harry Potter himself (accessible from the menu). Once the fighting is over, you can head towards the marker.
All collectibles are placed in the Ron and Hermione level. The first one can be found under the stairs at the very beginning.
Prize (music):
Combat Part 3 - Battle to the Vault
Go up one floor from the previous collectible. The orb is behind the pillar.
Prize (challenge):
Surrender
After you reach the savepoint, go up the stairs and head right.
Prize (challenge):
A Turn of Events
The highest-placed collectible. Keep checking the niches on the right as you're going up.
Prize (character):
Harry Potter
Harry, Ron and Hermione are all fighting their battles, but other Hogwarts students are defending their school as well. Ginny, in order to help her loved one, wants to stop the Death Eaters' march. It won't be easy, as they're very determined to achieve their goal.
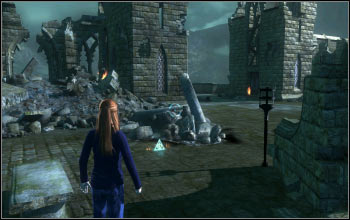
The whole action takes place between the debris at the school's courtyard. The enemies will attack in three waves. There will be an automatic save after the first two, but it's still a lots of fighting before you reach that point. I'd suggest retreating from the starting location and going a bit to the back, as otherwise the enemies could flank you. Shoot the appearing mages and check the sides from time to time, as some of them will try to surround you. Use a wide variety of spells, so that you don't have to wait for only one of them to recharge.
In the second wave, you will have to face the dangerous hooded Death Eaters and those attacking with exploding projectiles. With the third group you will probably have to fall back a bit, as enemy units will appear a bit closer to the school than before. Throughout the fights, try to move around the courtyard and find all the collectibles. After you win, the enemies will start bombarding the school, forcing the students to retreat inside.
Inside, Ginny will bump into Bellatrix, who will try to change the young witch into a shooting range. Her mother will try to defend her, ending up in a fight between the two ladies.
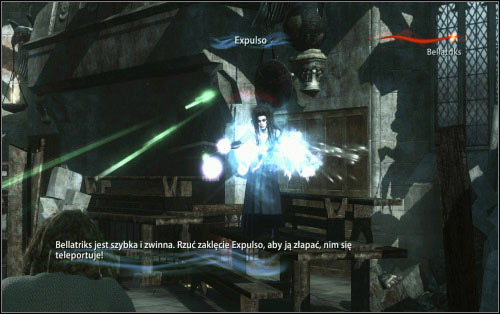
The enemy's main advantage is definitely her speed, she won't stay in one place even for a couple second. She will try to teleport all the time, shooting projectiles in the meantime. Even through Molly is much slower, you should be able to dodge most of her attacks by just strafing. If need be, you can also hide behind some covers. Stay in motion and attacks (in accordance with the hint, use Expulso) and Bellatrix should quickly lose her confidence.
Once the Death Eater's health bar is reduced considerably, she will pick up some debris and throw it at Molly. At that moment, keep quickly pressing 2 to eliminate the threat. Afterwards end the fight using the previous tactic.
Looking at the bridge, go left from the starting location.
Prize (music):
Combat Part 4 - Securing the Bridge
By the courtyard entrance, on the left side.
Prize (character):
Ginny Weasley

By the courtyard entrance, on the right side.
Prize (character):
Molly Weasley
At the back, on the right side.
Prize (challenge):
Not My Daughter
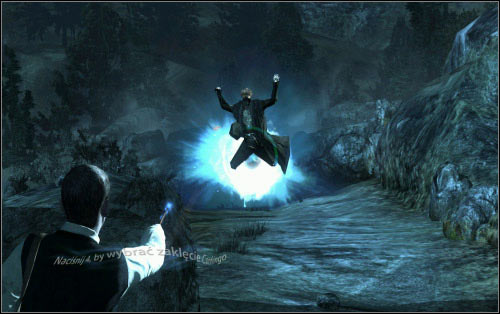
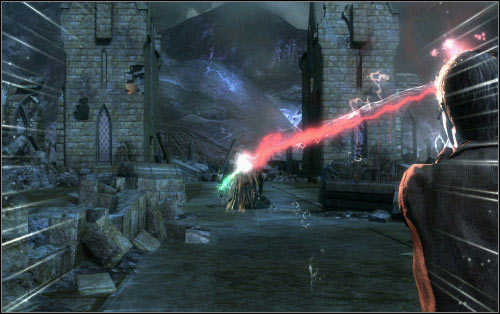
It's time for the final confrontation with Voldemort. The battle isn't much different from the others you came across during the game, through it has been divided into two parts. In the first one, you will be fighting the Dark Lord on a hanging bridge. The talkative enemy will be throwing powerful offensive spells at you, through you can reduce the potential damage by strafing. It's best to attack yourself when the enemy is charging up between attacks.
The first part of the fight is divided into four segments. They aren't really any different, apart from the fact that you will be moving throughout the bridge. There are also three collectibles to be found in this location, check out the further part of the guide for more details.
Once Voldemort's health is depleted, the decisive part of the battle will begin, during which you will have to duel the Dark Lord. The key to success is keeping the orb at the enemy's height which can be done by using the directional buttons (by default WSAD). The screen will start getting closer. Your enemy will push back the spell once, but will be helpless during your second attempt.
After the start of the battle, turn around to see the orb.
Prize (challenge):
Voldemort's Last Stand
After the first teleportation, head right.
Prize (character):
Lord Voldemort
The last collectible can be found during the fourth stage of the battle. Once again you have to turn around and walk a bit.
Prize (music):
Combat Part 5 - The Final Duel


 Half-Life 2: Episode One Game Guide & Walkthrough
 Heroes of Might & Magic III: HD Edition Game Guide & Walkthrough
 Hearthstone: Curse of Naxxramas Game Guide & Walkthrough
 Hatred Game Guide & WalkthroughHarry Potter and the Deathly Hallows Part 2 Game Guide & Walkthrough