Welcome in game guide for Enemy Territory: Quake Wars. This article includes descriptions of 12 maps prepared by Splash Damage, presentations of all weapons, vehicles and deployables. This game guide is written mainly for new players, who are not acquainted with this type of games and especially with productions named ET. This article will help them understand game rules before they start fighting in multiplayer mode.
For experienced players, the guide won't be as helpful as for the beginners, but a few facts, hints and clever tricks will probably be interesting even for those, who already spent with the game a lot of hours. The most important and difficult to understand issues are presented not only in a form of text, but also shown in screenshots.
I wish you good, useful reading and many successes during fights against GDF and the Strogg!
Maps in ETQW and the way of executing operations are the most debatable issues in the whole game. The descriptions you'll find on next pages - except listing main and secondary objectives - are written to show the most common players' behaviours and how to react to them.
Moreover, map presentations say about the recommended class structure of the team. It would surely help in choosing own functions. If we assume that the best combination is 7 soldiers / 7 medics / 2 spies, then our own function should bring the general proportion of classes in the team closer to the one presented above.
There are a few typical actions, which just should be performed to improve the way the team works. These are, for example, deploying radars and anti-artillery systems each time the frontline moves. Descriptions of maps remind of such actions in cases when they're particularly important and necessary.
70% of success is the ability of working with other players and doing own job scrupulously. 15% of success is the accuracy (including shots fired from vehicles), 10% of success is the speed with which we move and the remaining 5% is a thorough acquaintance of maps, particularly these complicated systems of corridors, in which we can usually see the last objective of the whole operation.
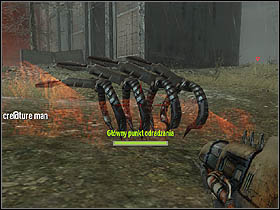
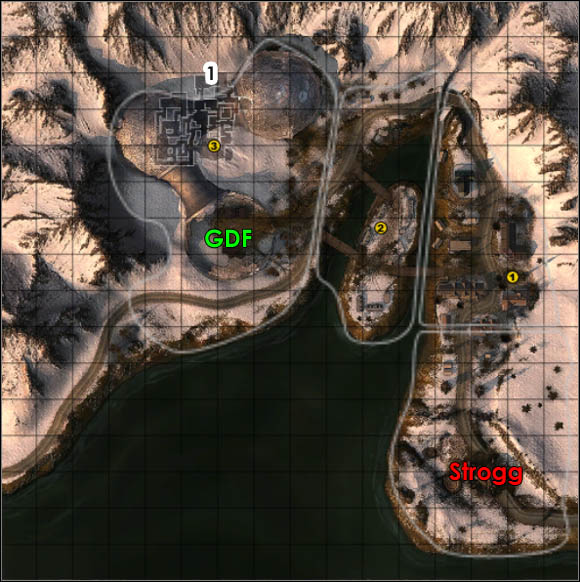
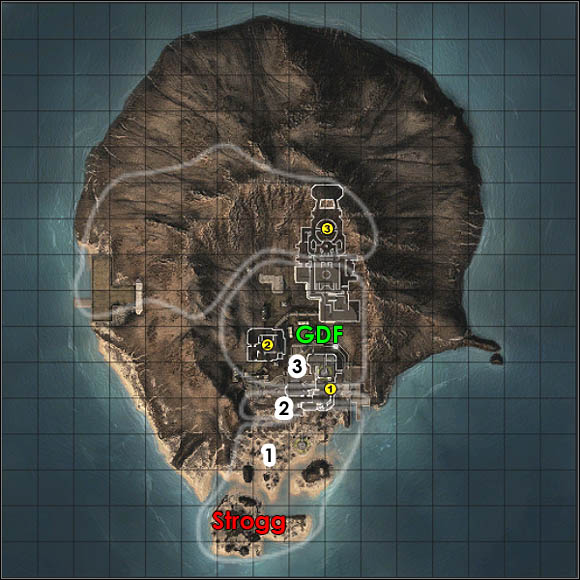
Attackers: Strogg
Defenders: GDF
Primary objectives:
1. Strogg aggressor must destroy the jamming generator;
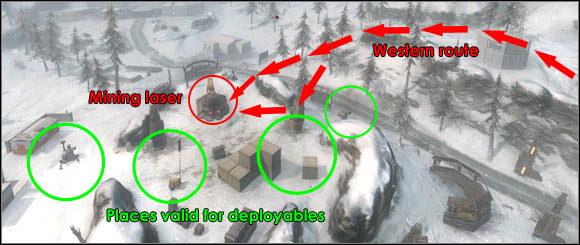
2. Constructor must build the mining laser;
3. Aggressors have to blow up the portal with their plasma charges.
Secondary objectives:
1. Capture Warehouse Spawn Point;
2. Liberate Comms Building Spawn Point;
3. Capture Compound Spawn Point;
4. Capture Admin Bunker Spawn Point;
Description:
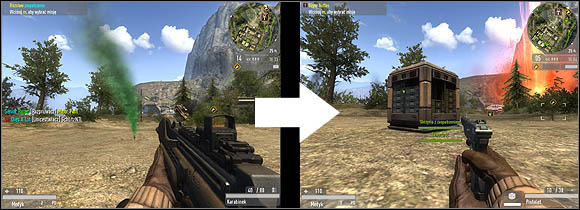
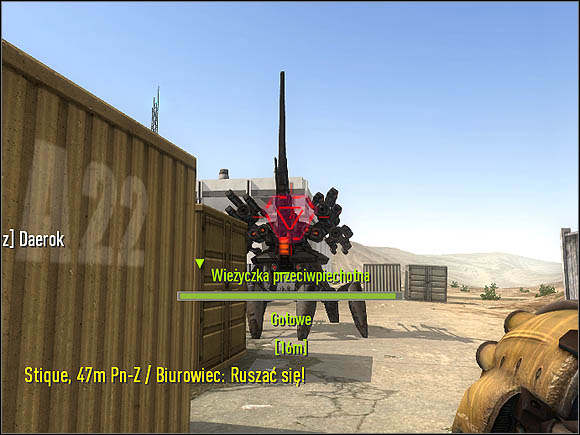
GDF: The Strogg will have to get through a lot of surprises made by GDF on their way to the generator. Deploy 4-5 anti-personnel and anti-vehicle turrets, put some mines in the vicinity of the generator and, of course, the infantry (consisting of engineers, medics and soldiers with rocket launchers) should ready their rifles. 1-2 field ops soldiers should call artillery strikes on enemy vehicles if the enemy will use them in offence. Moreover, GDF cannot lose their spawn point in comms building. The Strogg can deactivate it (secondary objective 2). Mines in the room and checking the spawn point from time to time should discourage enemies, so they'll leave the comms building alone.
The next Strogg objective is building the mining laser. Be aware of the fact that the enemy will probably attack from the captured compound. The defence force (made of infantry) should be concentrated on their way. In the direct vicinity of the mining laser, GDF engineers should deploy turrets - anti-vehicle ones are as essential as anti-personnel hardware. Getting the tank on the battlefield should be quite helpful too. Naturally, don't forget about mines - the best places for them are on the sides of the mining laser, because constructors have stand beside the laser to construct it. Useful classes in this part of operation doesn't differ from these used in the beginning.
If the enemies will manage to build the mining laser and destroy bunker doors, you'll have to fall back and prepare new defence line. The most important are the mines - engineers should install them on the portal's core. It would be also a nice (and nasty) idea to call an anti-personnel turret at the bunker entrance. This should stop enemy infantry, at least for a while. Portal should be defended by engineers and medics. 2 or 3 snipers on top of the scaffolding should be quite useful too.
Strogg: The fastest units (like infantry using Icarus gravpacks) should take care of secondary objective 1. It is always better to attack the target from a closer spawn point. However, the enemy can easily get to that spawn and liberate it (if your team is having problems with that, constructors can place a few turrets to keep GDF men away). Other units, like Cyclops, should distract enemies by intercepting them. Thanks to that, friendly infantry (aggressors, technicians) will have an easier job with attacking the generator. If GDF doesn't install mines near its spawn point, the team may try to liberate it, but concentrating on this task is strongly dissuaded. The main objective is the generator. Note that it can be attacked also from the upper floors - Icarus gravpacks give the ability to land on the rooftop and assault the GDF forces inside the building from the gallery. That form of attack is possible only if the enemy don't have anti-aircraft weapons, able to take gravpacks down.
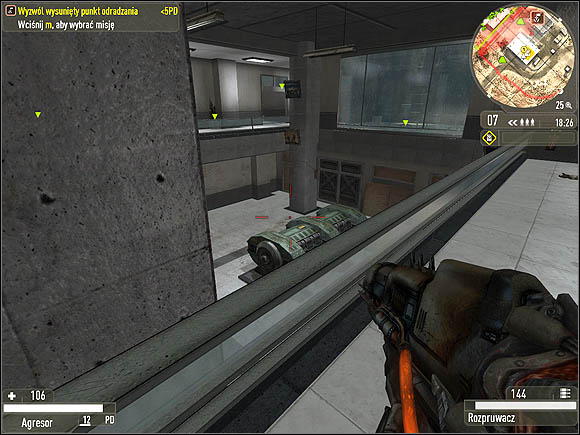
When the team will install charges, it would be a nice idea to hide somewhere near and wait for all those daredevils willing to disarm bombs planted by Strogg. The best hiding places are behind the pillars or behind a pile of boxes located to the west of the generator.
Next task in this operation is to assemble the mining laser. The construction site is located in the southern part of the map and it is necessary to capture the compound spawn point (secondary objective 3) in order to complete this mission. Heavy machinery would help here too. Desecrator, Cyclops and Tormentor will be very useful. If for some reasons (e. g. lack of organisation and discipline) using vehicles will become impossible, aggressors with obliterators will have to substitute them. You see, someone must destroy these turrets deployed by enemy. Remaining infantry (technicians and constructors) should shoot at GDF men and concentrate on the laser. The team should attack the construction yard from the west - the defence often is weaker right there. And beware of mines, of course.
The next objective after assembling the mining laser is a secondary one - team must capture spawn point in the bunker (secondary objective 4). Gravpacks, which you'll find near that spawn, won't be quite useful in the corridors of the GDF complex, where the Strogg portal is hidden. Put an anti-personnel turret near the bunker doors, so the enemy infantry won't liberate the spawn point so easily. Attack the portal from the west. Regardless of the direction, keep an eye on the whole room with the portal - there's a lot of hiding spots here, especially right beneath the ceiling.
Attackers: Strogg
Defenders: GDF
Primary objectives:
1. Aggressors must destroy the jamming generator;
2. Constructors have to assemble the mining laser;
3. Strogg Aggressors must blow up the bioscanner with their plasma charges.
Secondary objectives:
1. Capture the biodome entrance spawn point;
Description:
GDF: The first step is the defence of jamming generator. Anti-personnel turrets will be especially useful here, but one anti-vehicle deployable should be installed too, preferably to the east of the generator, so it'll be able to defend the eastern, inbuilt passage. Moreover, the team should get some heavy vehicles to the battle and the generator itself should be surrounded by mines. Infantry with rocket launchers and assault rifles can snipe enemy soldiers and vehicles from a damaged house located to the north to the generator. The team must move fast in order to give Strogg no chances to win this one. Apart from medics, soldiers and engineers, a few spies-snipers should find something to do here too, for example liquidating Strogg oppressors trying to call an artillery strike. Moreover, snipers will find some targets in buildings' windows and on the rooftops.
The next part of the operation takes place on a small island, where the Strogg want to build their mining laser. Once again, mines will come in handy. Install them on both sides of the laser and on the bridges connecting the island with the eastern part of the map. Turrets will be useful too - anti-personnel ones are the most desired here, however 1-2 anti-vehicle won't be a bad idea. The team should be composed of medics, engineers, soldier (assault rifles, GMPGs and - from time to time - rocket launchers).
In the end, the GDF team will have to defend the bioscanner itself. Everything takes place under the domes. Not only the Strogg target is placed among the corridors; spawn points of both team are there as well. First of all - mines. These should be lying almost everywhere in the room with bioscanner. 1 or 2 soldiers with GMPGs in front of the most often used entrance should stop at least a few enemy aggressors.
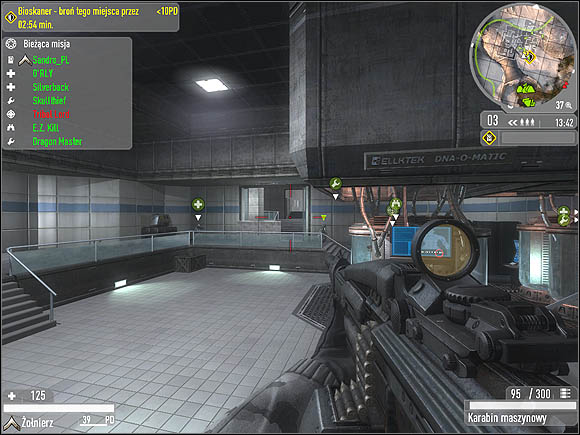
The rest of the team should concentrate on disarming Strogg plasma charges and healing/reviving teammates. The best situation occurs when the team is able to liberate enemy spawn point and defend it. That divides the Stroggs in two groups - the first one tries to get back their spawn point, while the second goes directly to the bioscanner. If holding the Strogg spawn point for longer is impossible, better fall back, leaving behind you a few little mines.
Strogg: We're starting with an attack on the jamming generator. Rapid aggressor assault with the usage of fast vehicles like Icarus or Hog can give fantastic results. However, if GDF forces will manage to get to the generator faster, the Strogg will have to get to more traditional methods of fighting. Armoured vehicles should support infantry in its attack by destroying enemy tanks, amphibious transports and turrets. One anti-personnel deployable placed as close to generator as possible wouldn't be a bad idea too. 2-3 oppressors can call air-strikes and artillery barrages. One of the best vantage points for that kind of job is an empty space, east of the buildings and the target. Moreover, infantry can attack GDF from windows of the house placed to the south of the generator. Entrances to the building are placed on the Strogg side as well as on the GDF side. Oppressors can call artillery strikes from these windows as well.
The next step is the construction of the mining laser. It is placed on an island in the middle of the map. This is the next time, when a fast attack can allow the team to complete the objective instantly. Tormentors and other fast vehicles can make that kind of assault quite real. If the team will meet with some heavy GDF defence, tanks sent into the battle should solve the problem (note that Desecrators can hover over water - that allows you to use rivers as roads, and that means you get behind the frontline and get on enemy's six). The objective should be completed by constructors with support provided by technicians. Aggressors with obliterators could be useful, if the GDF forces will bring their heavy machinery (this includes turrets) to the battlefield.
The last target is the bioscanner. First of all, the team must get to the biodome through the hole made by mining laser and capture the spawn point located in there (secondary objective 1). Better put some mines on it, so the enemy will have problems with liberating it. From that spawn point, the team must attack the bioscanner, preferably with groups of a few aggressors and technicians. 1 or 2 constructors could be useful too, as the can put some mines on the bioscanner, preventing GDF engineers from disarming the plasma charges. Naturally, before getting close to the target, throw some grenades to liquidate enemy mines.
Attackers: GDF
Defenders: Strogg
Primary objectives:
1. GDF engineer must build a bridge on the way to the central outpost;
2. Escort the MCP to the central outpost;
3. GDF spies must hack the enemy shield generator;
4. The last target is the stroggifier placed inside the bunker. GDF soldiers have to destroy it with their explosives.
Secondary objectives:
1. Capture the domed building spawn point;
2. Capture the ruined building spawn point;
3. Capture the hut spawn point;
4. Construct guard tower.
Description:
GDF: This is a long and difficult operation. First of all, find some wheels and get to the south-eastern part of the map and capture the spawn point located in there (secondary objective 1). Forget about constructing the guard tower, unless you're an engineer looking for XP. Next thing the team should do is constructing the bridge. Unfortunately, this action has two parts and takes a lot of time. That is why engineers must be supported by soldiers and medics. The enemy will attack with tanks and infantry, so GDF must get some heavy machinery (like Titan) on the battlefield too.
Next objective is escorting the MCP to the central outpost. In order to do it fast, the team must divide into three groups. The largest, consisted of soldiers with rocket launchers, must find some place on tops of the hills surrounding the outpost and attack every single enemy vehicle and turret. The second one, consisting of engineers, have to drive the MCP and constantly repair it. The last group must support the two others. I think it is easy to figure these guys must choose the medical class. It also would be nice to capture the spawn point nearby (secondary objective 2). No matter which route the MCP will choose, it will face have Strogg defence.
The third target is the shield generator. Frontal attack is incredibly difficult and brings a lot of casualties, but it is necessary to attract the enemy's attention. Thanks to that, disguised spies can easier get to the generator. There's a nice way to the target, it is located to the northwest of the Strogg facility. Against your enemy, use your artillery and as much heavy machinery as you can get. The infantry performing a frontal attack should choose functions like soldier (with a rocket launcher), field ops and - traditionally - medic. Spy's disguise could be quite useful, as the way through the mountains to the target is quite long and there is a probability of spotting some enemy snipers in that area. Stabbing them should make regular infantry's job at least a bit easier. Moreover, don't forget that the enemy could put some mines on the generator.
The last task here is to blow up the stroggifier placed inside the bunker. It is a typical objective for soldiers armed with assault rifles. They should be supported by medics and the best spawn point for that part of the mission is located in front of the bunker (secondary objective 3). The last task won't be as easy as it may seem. The most important things here are accuracy and rapid movement. But try to be careful - during entering the room with stroggifier, it is a necessity to check if there's someone in corners of the room or behind walls placed around the target. Moreover, expect some mines on these walls.
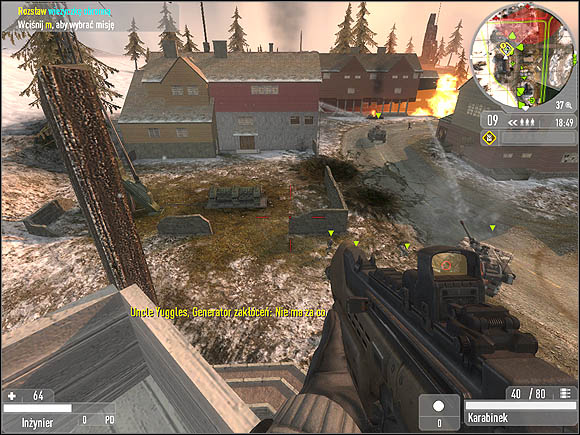
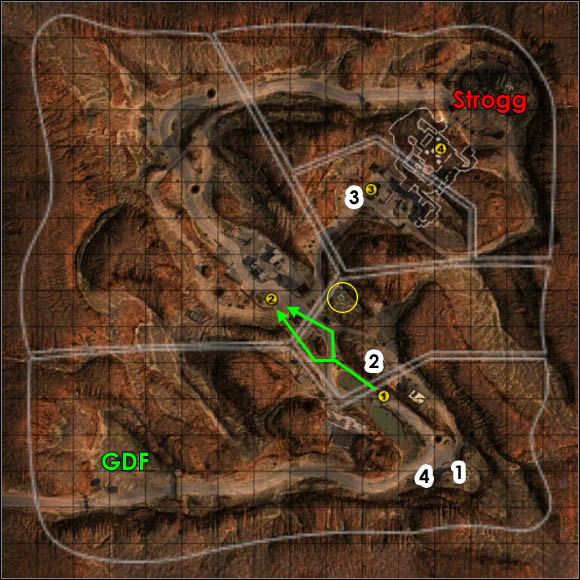
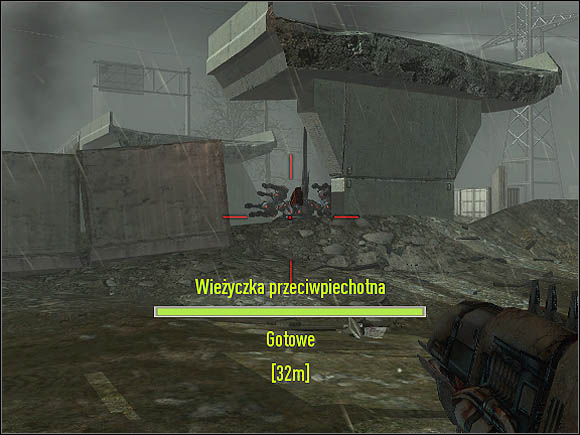
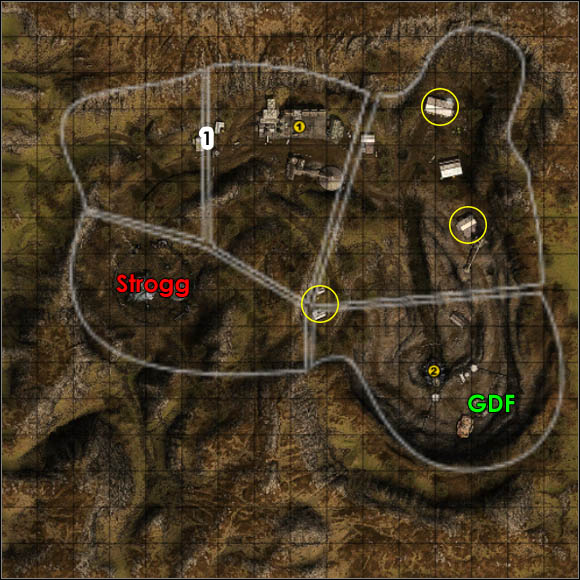
Strogg: We have to work fast. Tops of the hills are perfect vantage points for infiltrators with railguns; they can eliminate engineers attempting to build the bridge. Apart from snipers, the team must have some aggressors and technicians. The spawn point in the ruined building (marked with a yellow circle on the map above) can be quite useful, especially for those who want to attack enemy engineers through the tunnel. I advise you to check the picture below. It shows how Strogg can use the tunnel to defend the bridge construction site.
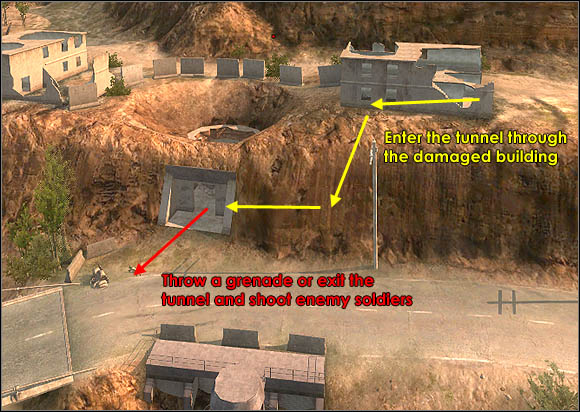
However, you must expect enemy soldiers at the damaged building presented above. Desecrator on the northern side of the bridge should intercept enemy tank, so the driver won't concentrate on protecting GDF engineers. Oppressors with their artillery should take a part in the battle when the enemy brings some heavy vehicles to the fight or when the will be nobody to protect the bridge construction site.
If the GDF will manage to build the bridge, prepare yourself for a struggle with MCP. Because MCP's crossroad is located near the place it is going to, anti-vehicle turrets deployed in the vicinity of that place will be able to guard both ways. The team must be now composed of constructors and technicians - to replenish Stroyent, repair turrets and to liquidate enemy engineers. Oppressor can use his artillery to disable incoming GDF armoured vehicles.
Now the team must defend the shield generator. First of all, put some mines on that target. Besides, I advise you to deploy at least two turrets - one anti-vehicle and one anti-personnel. Constructors are essential here, as they can repair their deployables. If the enemy will become weak, try to get closer to his spawn point and install a few mines on the road connecting your base with the enemy. Moreover, the team could use some technicians and infiltrators with railguns - jus as before, this time the can also get on tops of the hills and aim at enemy infantry. And watch your teammates' behaviour - you never know which one is a GDF spy in disguise!
In the end, the Strogg must defend the stroggifier itself. Beside mines (which should be deployed everywhere in the complex), remember that defenders can hide in corners of the room with the device the GDF wants to blow up. Defence should be established by technicians and constructors. Aggressors with their hyperblasters can wait for enemies in long and narrows corridors, but I don't think they'll last there for long. Of the players may try to get the Cyclops and stand in the space between the building with stroggifier and the GDF spawn point. This should stop enemy troops for a while.

Attackers: GDF
Defenders: Strogg
Primary objectives:
1. GDF engineers must build the generator to open the gate;
2. GDF soldier must blow up the door and open a way to the DataDisc;
3. Any GDF trooper must take the DataDisc and transmit the data through the transmitter's dish.
Secondary objectives:
1. Capture bunker spawn point;
2. Destroy bunker hatch;
3. Capture outpost spawn point;
4. Construct guard tower.
Description:
GDF: First of all, the team should capture the spawn point inside the bunker (secondary objective 1). From there you can attack faster all those Stroggs who protect the damaged generator. Better assault as fast as possible, because the enemy will probably call some anti-personnel turrets to slow GDF down. Soldiers with rocket launchers can easily destroy them. Inside the bunker with the construction site, medics (together with engineers) should fight Strogg defenders. Enemy mines are the biggest problem here. Bunker layout is well-presented on the minimap, so there's no chance of getting lost here. Note that there is an entrance above the bunker. Soldier can blow the door with an explosive charge. Behind that door, there's a ladder leading to a gallery, from which you'll see the generator construction site. However, spotting enemies (standing near the walls of the room) from there can be a bit problematic.
The next target is located in the eastern part of the map. Once again, the team will have to go through bunker corridors to get to doors, which must be blown up with explosive charges. Strogg will deploy some turrets in front of the bunker for sure, but air-strikes, tank and soldiers with rocket launchers should easily get rid of them. Some crazy players may try to get a small, fast vehicle (Armadillo seems to fit that description) and drive right into the bunker as fast as possible. After exiting the vehicle, the driver should go deeper inside the bunker. Independently of the way team is getting through enemy turrets, watch out for mines. Assaults should be performed by soldiers, supported by medics. One engineer should go to the battle too, as he is able to put his own mines near the explosives planted by soldiers.
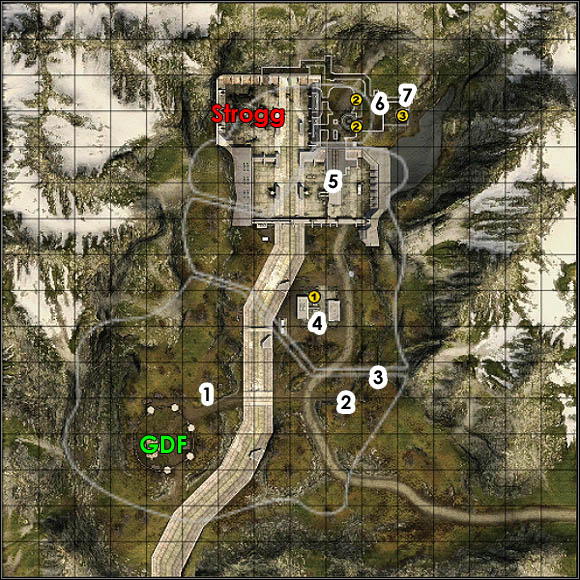
DataDisc located behind these doors should be recovered and transported to the transmitter's dish. This can be done by any GDF unit. We've got three ways to get to the dish. The first one is the road, which can be used by land armoured vehicles, like Titan. If the team is well organized, try to use that route, by generally I don't recommend that method. The second one leads through very little forest located on the bridge, with the primary objective 1. Getting through it on feet seems to be the only option. Unfortunately, enemy turrets and infantry can easily block that way to the transmitter's dish. The most interesting route is the naval one. Check the map above - yellow arrows show the way of a Platypus. In fact, there's a way connecting the bunker with objective 2 and a jetty with a boat. Use it to get on a narrow path located behind enemy's back. It leads to the transmitter's dish. The disadvantage of this solution is the fact that only two players cat sit in the Platypus. This is why the guy with DataDisc should be supported by other boats (you'll find additional two in GDF main base) and Trojan amphibious transport vehicles. They're very important here, as they are able to destroy incoming enemy Tormentors. Player with the DataDisc must get inside the transmitter and use the console to successfully finish the operation.
Strogg: Two first targets can defended in the same way, I mean deploying turrets, planting mines and grouping infantry in the vicinity of targets. The place, in which GDF wants to build the generator, must be defended by a large group of technicians and constructors. Oppressors and aggressors should fight enemy forces outside. It would be difficult to prevent GDF from capturing the spawn point in the bunker, so leave it for them and concentrate on defending the target. Defending the hatch should be problematic. Probably the enemy will forget about that secondary objective.
As I said, defending the room with DataDisc is almost a replay from the first objective, but this time you don't have to worry the enemies will open some additional way to their target. The main difference is that at least one anti-vehicle turret deployed in front of the bunker is necessary. GDF will send a tank and something must destroy it, right? However, if the turret won't manage to disable the Titan, Desecrator and Tormentor should provide here some firepower. That doesn't change the fact that most of the team should stay inside the bunker and keep the DataDisc safe. The best defenders here are constructors (they can not only plant mines, but also disarm enemy explosive charges) and technicians.
If GDF will manage to blow up the doors, the whole will have to fall back prepare defence of the transmitter's dish. Mines and a turret in the vicinity of the transmitter should be enough. One constructor should check the narrow path in the east from time to time. There's a possibility that the enemy will come right from there. The rest of the team should concentrate on the space between the dish and the bunker w DataDisc. Preventing GDF from using the shortest way is a duty of Desecrator, artillery and infantry armed with lacerators. Moreover, deploy there some anti-personnel turrets - this should make GDF work much more difficult. There's one more way to slow down the enemy. Choose the constructor class and - when an enemy carries the DataDisc - get to the bunker and put some mines in the room where the disc appears after recapturing it. GDF soldier running for the DataDisc will die even before they reach the suitcase :)
Attackers: GDF
Defenders: Strogg
Primary objectives:
1. GDF soldiers must blow up the barricade;
2. Any GDF unit have to drive the MCP to the central outpost;
3. GDF spy must hack the enemy shield generator;
4. Any unit must recover and transmit the DataBrain.
Secondary objectives:
1. Capture the office spawn point;
2. Capture the hilltop spawn point;
Description:
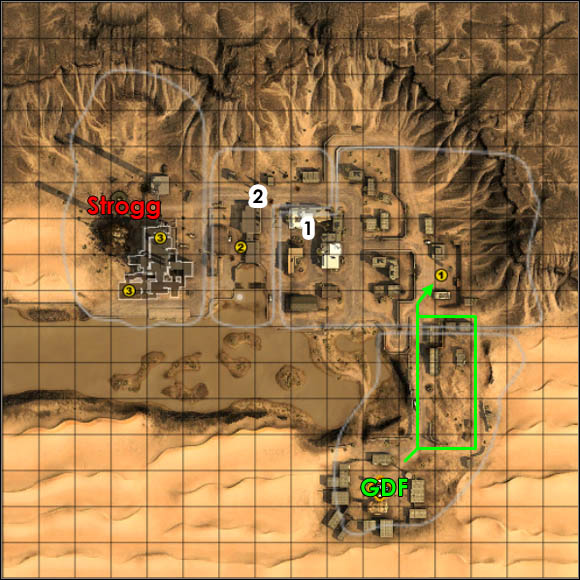
GDF: We're starting with an attack on the barricade. In this part of operation, the team must be consisting of soldiers, medics and a few spies with sniper rifles. A field ops or two could participate too. If it is possible, soldiers (armed mainly with assault rifles, but a few rocket launchers could come in handy as well) should take the fastest vehicles, get to the barricade and plant explosive charges. This manoeuvre can be done successfully, but it must be performed rapidly. Bombs should be protected by soldiers (concrete obstacles located along the way leading to the barrier should provide nice cover) and sniper spies. They can aim at Strogg constructors trying to defuse explosives from a building marked with a yellow circle (check the map above). Field ops can use his artillery to destroy incoming enemy armoured vehicles.
Now it is the time to complete secondary objective 1. After that, escort the MCP to the central outpost. In this part of operation, spies must be replaced with engineers. The rest doesn't differ - soldiers (preferably with rocket launchers), field ops and medics are still fighting. Enemy anti-vehicle turrets deployed on MCP's way must be destroyed at all cost in order to get the vehicle to the central outpost. Most of them you'll find just right in front of the outpost. Field ops can hide behind the fence, north of the MCP's deployment area. From there, they can mark enemy turrets as targets for their artillery. Moreover, there are some heavy vehicles, ready to use against the enemy, but be careful - drive to a place, which is out of opponent's range, but close enough to aim and shoot at Strogg deployables and any other enemy units.
Now let's disable Strogg shield generator located in the southern part of the map. Spies must participate in the fight once again. Their job is to find a disguise and get close to the generator. It is a nice idea to use the passage in the building located to the east of the target. The rest of the team are - traditionally - medics, field ops and soldiers. The fights are taking place near Strogg main base, where the enemy keeps a lot of heavy machinery. He'll surely make use of it, so expect some vehicles guarding the target. GDF reaction on it may be sending not only own heavy machines, but also soldiers with rocket launchers. Artillery strikes should work here too. Moreover, lots of firepower should distract Strogg forces, so they won't be able to fight spies attacking the generator. Meanwhile, try to capture another spawn point located in this area (secondary objective 2).
The last target is recovering the DataBrain and transmitting its data via the transmitter. DataBrain is located in the place marked with a suitcase in the map above. The building, where Strogg hid it is quite complicated, just as the one with the transmitter. Thorough analyze of these structures (in a single player mode) is really helpful here. Mines and shooters sitting in corners of rooms are the biggest threat here. The infantry must keep an eye on the guy with the DataBrain, while one tank should patrol the area between the building with DataBrain and the one with the transmitter. You never know when the enemy will send vehicles against the guy with suitcase.
Strogg: Barrier defence must be establish as fast as possible. Unfortunately, deploying turrets may be troublesome here, as there's lack of acceptable surface here. The only option here is deploying on anti-personnel installation to the south-east of the barricade. Try to aim its barrels at the barricade so the turret will shoot every soldier trying to place explosives. Unfortunately, that setting of barrels makes the whole deployable an easy target for enemy soldier, who may get close to the turret and install a bomb on it or damage it with grenades/rockets.
The team must be consisting of constructors, technicians and literally 2-3 infiltrators-snipers. To prepare better defence, get some vehicles on the battlefield, preferably with experienced players behind the wheels. Don't forget about planting mines on the barricade. The main Strogg bastion is located in the ruined building, to which the barricade is connected. Snipers can use it as a vantage point and constructors can jump through its windows in order to get close to GDF charges in a short time.
Next part of the operation is the fight with the MCP. Surprisingly, there's no alternative route, co we can put on it some mines, preferably 10-20 meters behind the barrier. Deploy as many anti-vehicle turrets in the vicinity of central outpost as possible. There's a lot of space, so deploying 3 or4 installations shouldn't be a trouble. However, they must be supported by infantry, preferably aggressors (with obliterators), technicians and - of course, constructors. 1-2 oppressors should use the artillery to disable enemy vehicles and turrets. If it is possible, try to liberate GDF office spawn point.
If GDF will manage to deploy the MCP in the central outpost, immediately fall back and put few mines on the shield generator and in the vicinity of hilltop spawn point (enemies will surely try to capture it). If Strogg constructors are moving fast, they should find some time to mine also the road connecting the central outpost with urbanized area in the southern part of the map. Some turrets should be useful too, anti-personnel as well as anti-vehicle ones. Moreover, get some heavy machinery on the battlefield. A few aggressors (obliterators are not necessary here) should get on the rooftops, which are great vantage points, especially for eliminating incoming spies.
Defending the DataBrain and transmitter is a regular drill. Deploy mines and hide in a corner of a room. What is more, try to get a heavy vehicle to the space between buildings with DataBrain and transmitter and kill those who try to transport the package. Remember that transmitting the data takes some time, so if one of GDF men will manage to get through the whole defence with DataBrain intact, you'll still have some time to get him. Technicians and constructors should prepare the defence. A few aggressors with hyperblasters should do something good for the team too.
Attackers: Strogg
Defenders: GDF
Primary objectives:
1. Strogg aggressors must destroy the jamming generator;
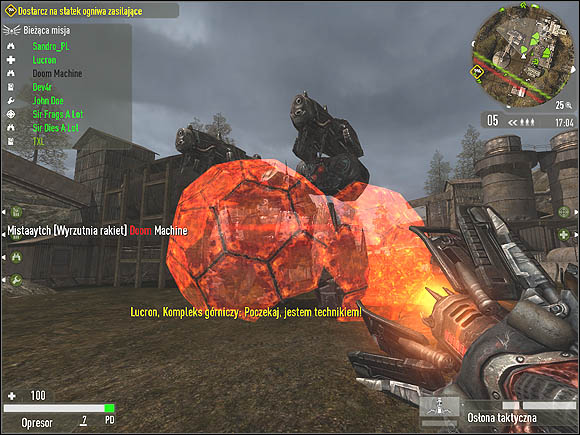
2. The Strogg must gather three energy cells and place them inside the spaceship. Check the map above - their location is marked with yellow circles.
Secondary objectives:
1. Capture the railyard spawn point.
Description:
GDF: The first part of the operation (defending the generator) is as regular as possible, so use regular methods - mines, anti-personnel and -vehicle turrets. The team must be composed of classes like medic or engineer. If someone likes to play as a soldier or spy (a sniper spy, not in disguise!), should find job to do too. Moreover, somebody must get some heavy vehicles to provide additional firepower. The enemy will probably try to capture the railyard spawn point, placed near the generator. Attack and liberate it when you see that the Strogg soldiers cannot fight at all. Snipers and soldiers armed with rocket launchers should hide among buildings located to the south of the generator or on top of the structure positioned to the west of the target (this is definitely the most risky, as it is connected with getting close to enemy spawn point. Moreover, the opponent will probably use the same rooftop as a vantage point, so expect some guests). Artillery may be quite useful too, especially against enemy vehicles.
If the Strogg will manage to destroy the generator, the GDF forces have to fall back and establish new defence, this time in the vicinity of the spaceship. Once again, you'll need mines and heavy machinery (skilled pilots in both Anansis can inflict a lot of damage). If you're patient, you may hide inside the spaceship and wait for incoming Strogg forces, with energy cells in their hands (or whatever they have instead of hands...). There's a nice hiding place behind the panel with slots for cells. A field ops would find some job here too - their artillery is quite effective against vehicles (like Cyclops) supporting the infantry. Assaults and defence of these places, where energy cells are located is almost impossible. Team should focus on the spaceship. Note that installing a cell in the panel takes less than a second, so if a Strogg troop with a call will manage to get through all defences, nothing will stop him.
Strogg: The first target is dependent of the way the oppressors, technicians and aggressors work together. The first ones should use the artillery to liquidate everything with a GDF logo. Infiltrators can participate in the fight too, but their role here isn't as big as these classes mentioned above. Railyard spawn point allows to shorten the way to the generator. The whole team must be aware of the fact that the enemy has some turrets in the area (vehicles and aggressors with obliterators should take care of them). Also, don't forget about the mines. If someone wants to become a sniper, he should check a nice vantage point located on top of the mountain chain to the south of the target.
The next isn't easier at all. Collecting the energy cells is actually a piece of cake, but delivering them to the spaceship doesn't go so smoothly. First of all, we have to get rid of enemy anti-personnel turrets. Heavy vehicles and aggressors with obliterators should take care of it without much problem. However, to let the machines fight the enemy, anti-vehicle turrets must be disabled too. Actually, vehicles can handle that too, but they have to shoot from a distance, so they'd be out of enemy's range. The valley, in which the spaceship is lying, is huge and with only few trees, so attacking the turrets without getting damaged by them is quite possible. The biggest problem here may become enemy vehicles like Titan and infantry (soldiers with rocket launchers), but concentrating fire on them for a moment should solve the problem. Friendly infantry - supported by Desecrator and Cyclops - should get into the space ship and install energy cells in the panel with special slots. Note that there's some free space behind it, which may be use by GDF troops as a hiding spot. What is more, don't forget about the mines. Before you go into the spaceship, clear it with grenades, preferably throw every three.
Attackers: GDF
Defenders: Strogg
Primary objectives:
1. Any GDF unit must get into the MCP and driver it to the central outpost;
2. GDF spy must hack the shield generator;
3. GDF soldiers have to destroy two Stroyent filters.
Secondary objectives:
1. Capture hotel spawn point;
2. Destroy the barricade.
Description:
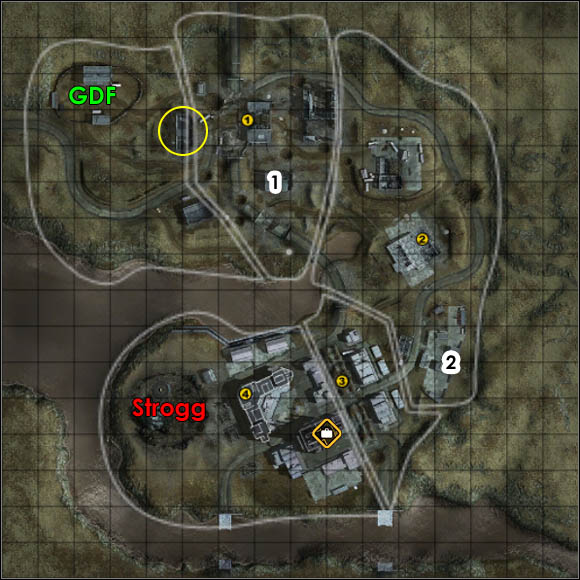
GDF: First of all, a spy and a field ops should call a radar and an artillery. One of the players must get into the MCP and take one of two possible routes. Check the map above to see how these ways are planned. In the rectangle between two MCP routes, you'll find two constructable objects. These are: GMPG emplacement and a watch tower. They don't have a big strategic meaning (unless The Strogg turn out to be strong and begin some offensive actions), but will provide engineers with some XP. The MCP should be supported by soldiers equipped with rocket launchers - eliminating enemy turrets and vehicles is necessary in this part of operation. Some sniper spies, medics and engineers should find a lot of some here too.
Note that if you take the eastern route while driving the MCP, after the second turn you can turn right, fall from a little height and get to the deployment area through the buildings. You'll have enough time to do it, but some server admins may treat it like a cheat.
Well, no matter how you get the MCP to the central outpost. When you'll do it, most of the team should attack the hotel and capture the spawn point located inside (secondary objective 1). This shouldn't be troublesome, as the Strogg will probably concentrate on establishing their defence. 1 or 2 soldiers have to get to the barricade and install some explosive charges on it (secondary objective 2). Without it, tanks and other vehicles will have a way of attack. South of the generator, you'll find a footbridge - engineers should construct it and thus open another way of attack for infantry. If the opponent has some anti-artillery systems, soldiers with rocket launchers should get through the front line (preferably using the footbridge) and destroy them. Vehicles may try to perform that task too, but enemy Cyclops will probably stand in their way. However, vehicle attacks are necessary, because they distract troops guarding the generator. If the Strogg don't have (or lose) anti-artillery system, a field ops or two should call an artillery strike on the generator and its vicinity (where you'll surely find not only infantry, but also an anti-personnel turret). A spy in disguise has almost no chance to complete this objective - there's too many enemies patrolling the generator, ready to shoot everyone trying to hack the device. Attacking the target with big groups from different directions should do the trick. Except mentioned soldiers' and field ops' attacks, the main force should be consisting of medics and spies.
The third phase of this mission takes place indoors. Who should attack? Soldiers and medics, of course. The key to success here is rapid movement of medium-sized groups of infantry. Expect mines and aggressors with hyperblasters on your way to the target. The refinery's layout is a bit complicated, so bet acquainted with it by playing with bots.
Strogg: First of all, establish the central outpost defences. Deploy near it at least two anti-vehicle turrets. One anti-personnel and a psi radar should be quite useful too. Constructors - after calling all these defence installations - should take their guns and shoot at incoming enemy infantry. Aggressors with obliterators are significant here, as they easily turn enemy vehicles into a pile of rubbish, including the MCP. A few snipers may find someone to kill too. One of the least important issues here is the oppressor's artillery. Choose it if you really like this class, but I recommend choosing a soldier or constructor - they're just more useful here.
If the GDF manages to get the MCP to the deployment area, the Strogg forces will have to fall back and prepare new defences in the vicinity of the shield generator. Leaving a few mines in the hotel should bring additional frags and experience, as the enemy will try to capture the hotel spawn point. Generator defence must be consisting of turrets (the more you have them, the longer you'll prevent GDF from hacking the device), 1-2 anti-artillery systems and infantry, with one or two infiltrators armed with some long-range weapons (quite useful in defending the footbridge construction site). Moreover, remember about mines - placing them on the barricade and inside the building, through which the GDF sends a frontal attack, is a great idea. Generally, the busiest here are constructors, as they must remember about repairing turrets and Cyclops, which firepower should be a great help in defending the generator. Technicians must support teammates by delivering Stroyent.
When the GDF breaks through and turns of the generator, the team should instantly fall back and organize the defence in the refinery building. Cyclops and anti-personnel turrets can be still useful, as damaging enemy troops outside surely relieves defenders inside the complex. Don't forget about mines and aggressors with hyperblasters lying in the longest corridors of the building. The worst thing is that the opponent has a comparable access to both targets, so the team will have to split up into two groups instead of concentrate on defence of only one object. Spawn hosts will be useful here for sure, just like Stroyent cells lying everywhere in the refinery building.
Attackers: Strogg
Defenders: GDF
Primary objectives:
1. Aggressors must destroy the jamming generator with a plasma charge;
2. Constructors have to build the mining laser;
3. Aggressors must blow up the hardware gathered by GDF.
Secondary objectives:
1. Capture the research building spawn point;
2. Capture the square spawn point.
Description:
GDF: In the beginning put some anti-personnel turrets in the vicinity of the jamming generator. Engineers and medics should take care of defending the target. Mines are worth placing not only on the generator itself, but also along all the ways leading to it (this also includes rooftops). A few soldiers can hide on the roofs of buildings located to the south of the generator. From there, they can easily throw grenades at enemy aggressors trying to plant their explosives. The disadvantage of this form of fighting is being a sitting duck for infiltrators-snipers.
The next objective is to prevent Strogg from building the mining laser. Check the picture added to the description for Strogg - you can see there that it is possible to deploy several turrets around the construction site, but they all can be surrounded by the enemy. That's why it is a nice idea to turn two of these turrets backwards, so they'll be able to shoot constructors assembling the mining laser. Medics and engineers are still the majority of the team. A few spies should be fighting too - not only will they deploy radars, but also finish enemy constructors and oppressors, trying to call an artillery strike.
In the end, the team will have to defend the hardware gathered during the war for the Earth. This'll take some time before the enemy gets into the complex. Use it and deploy as many mines as you can, not only in the vicinity of the target, but also on every stairs and in each corridor, including the damaged building, in which there's an underground way to the complex. Moreover, put some mines inside the structure with capturable Strogg spawn point. They'll surely try to activate it, this can be used to eliminate a few opponents. Beside engineers, medics should take a participation in the final struggle on this map.
Strogg: Lack of vehicles could be a bit frustrating here, but we'll deal with it. The team must split up into two groups. The first one (consisting of only one player) should take care of the secondary objective 1, while the second part have to go directly to the primary objective 1. Rapid attack performed by aggressors and technicians may easily execute the task and buy the team some time. However, if the team cannot do such thing, we'll need to use other methods. Generator is placed on a little square. GDF can organize there a great defence, as there's enough place to drop 2-3 turrets in the vicinity of the target. The square is surrounded by walls and buildings, co aggressors with obliterators may have some problems with eliminating enemy defences (one of the best vantage points for them is a building complex located west of the generator, next to the road, marked with a yellow circle in the map above). Air-strike called by oppressors should do some damage here too.
The next objective is about building the mining laser. This task should be taken care of by - of course - constructors and technicians. Once again, speed is very important. The best situation occurs when a few players chooses the constructor class just before completing the primary objective 1 - this way they'd be able to start assembling the laser immediately. Independently of the team's organization, there's a few threats in this part of operation. First of all - anti-personnel turrets. After that, there are mines and snipers. Mining laser is baldy placed, as the enemy standing in the vicinity of the primary objective 3 can see if there's somebody constructing the laser, and that means they can be easily eliminated by spies-snipers. Turrets can be avoided (what presents the picture below), but getting to the target via the western route is connected with crossing the road, which is under almost constant GDF surveillance.
If the enemy will manage to establish incredibly strong defence, call some air and artillery strikes. Oppressor can use his tools to mark enemy turrets as targets from hilltops located next to the western route presented in the picture above.
After completion of the second primary task, we'll have to rip a hole in GDF fortifications. Check the map above - two yellow circles in the south marks the weakest parts of the wall surrounding enemy base. Aggressor can place on them plasma charges. Their explosions will open a way to the square spawn point (secondary objective 2). Next part of the task is technicians' and aggressors' job. Layout of GDF complex is quite complicated and I advise you to get acquainted with it. Get to the target through rooms located in the north. This lowers the chance of meeting enemy forces. In front of the main entrance to the building there is a hole, through which GDF soldiers may attack incoming Strogg fighters. To prevent it, simply place an anti-personnel turret in front of the entrance or use another way (there's an underground passage located in a small damaged building located near the main entrance). I think you know it, but I'll repeat it - beware of the mines.
Attackers: GDF
Defenders: Strogg
Primary objectives:
1. GDF engineer must build the EMP generator;
2. GDF soldiers have to destroy northern or southern entrance with explosive charges;
3. Spies must hack into the sewer controls.
Secondary objectives:
1. Construct the guard tower;
2. Construct the guard tower;
3. Capture the hilltop spawn point;
4. Destroy the substation barricade;
5. Capture the spillway spawn point;
6. Destroy the overflow hatch;
7. Destroy the maintenance hatch;
Description:
GDF: The team must split up into two groups. The first one (consisting of vehicles, soldiers, engineers, field ops and medics) should go to the substation and attempt to execute primary objective 1. Nobody should even think about the first secondary objective. The second group consisting of field ops and engineers should complete secondary objectives 2 and 3. Mechanics should capture the spawn point and call in a turret drop (preferably anti-personnel) and others will call the artillery, etc. The fight for the EMP generator construction yard is quite difficult, but destroying the barricade (secondary objective 4) should make the job a bit easier, just like often artillery strikes. When the job is done, immediately push forward and capture the spillway spawn point.
The next part of the mission requires abandoning vehicles. Artillery becomes useless too. It's an infantry fight, so the team should base on accuracy of all members. There are several ways leading to the target, try to follow larger groups of players, because a big, mighty force can complete this objective faster. The best class to choose here is the soldier, but medics have here a lot of job too. When the team manages to plant explosives and organize quite good defence of these charges, a few players should switch their classes and become spies.
Once the bombs goes off, run to the sewer controls and start hacking it. If for some reasons that kind of attack is impossible, try to open additional routes (secondary objectives 6 and 7) and use them to get closer to sewer controls. I advise you to find and use disguise during this part of operation. And watch out for mines!
Strogg: Call a Dark Matter Cannon and artillery strike as fast as possible. Place an anti-personnel turret next to the EMP generator construction site. It is also important to send a few guys to defend the hill, on top of which the GDF can build a spawn point; this point gives them the ability to make their attacks more constant and to call accurate artillery strikes. The group responsible for the defence of the hilltop must use the fastest vehicles to get to the battlefield. Heavy machinery should defend the construction site. If the enemy manages to build the generator, fall back and prepare another defence line.
Now it is the time to set some traps. Mines will surely finish a lot of enemy soldiers. Aggressors with hyperblasters may settle themselves in corridors and wait for opponents. The rest of the team must just shoot accurately and don't let GDF forces wander in all corridors of the complex. Spawn hosts are useful here too.
Let's assume that the enemy blows up one of the gates, opening the way to the last objective. In that case, constructors must deploy their mines. In fact, they're worth deploying everywhere, especially near the primary and secondary targets. The general tactic doesn't change - still, the key to success is accurate shooting. And don't trust anyone, as you may meet some enemies in disguise.
Attackers: GDF
Defenders: Strogg
Primary objectives:
1. The first target here is the slipgate itself. Spies must hack it;
2. Any GDF unit must drive the MCP through the portal;
3. Any GDF unit must drive the MCP to the deployment area;
4. GDF soldier must gain access to the Nexus tower and destroy its core with explosives.
Secondary objectives:
1. Capture the garrison spawn point;
2. Capture the Antarctica-side spawn point.
Description:
GDF: We're starting in Africa. Spies may attack the portal immediately, going through narrow passages between buildings located to the south of the target. If it is possible, soldiers (with rocket launchers) and medics support them. In order to attack the enemy with vehicles, soldiers must blow up one of the barricades. Infantry can get through them using, for example, holes in the wall. Don't forget about capturing the garrison spawn point (secondary objective 1). Turrets and GMPG emplacement doesn't have a bigger strategic meaning, they can be build mainly for experience points. Spies attacking the portal must be extremely careful, as the slipgate is being defended not only by infantry, but also by turrets and mines. Looking for a disguise here is quite senseless. It is useful only when it is a problem to get through the village with a normal look. Don't forget about the fact that you can use the rooftops to get to the portal.
With the slipgate's security is hacked, the MCP may get through it to the Antarctica. The vehicle is being dropped near the garrison spawn point. Spies won't be useful anymore, but the meaning of artillery strikes and soldiers with anti-vehicle weapons will rise. MCP must get through the slipgate and that means the team must not only finish enemy infantry, but also destroy Strogg anti-vehicle turrets. Once again, you may use the rooftops to eliminate them. A small group of players must choose the engineer class and repair MCP every time it gets damaged.
On the other side, the first you should do is capturing the spawn point nearby. New radars and artillery guns would be quite useful too. The way of escorting the MCP and classes used by team don't change. In fact, it doesn't even matter which route the MCP driver will choose. Buildings, from roofs of which it was possible to shoot enemies in Africa, are here replaced with mountains, which hills are excellent vantage points. You'll meet here more enemy heavy machinery, so soldiers with rocket launchers should have a lot of job to do.
Once the MCP gets to the deployment area, soldiers with medics' support must attack the Nexus tower in order to destroy its core. Layout of this building is not quite complicated, excluding the room with the core, in which you'll find a few interesting hiding spots. Corners of this room lets the infantry to hide and defend charges set by soldiers. Be aware of the fact that the enemy may use these places to keep core safe, so always check them before you run to the target with a bomb in your hands. And beware of Strogg mines. I'd like to remind you that mines can be neutralized with grenades.
Strogg: Mines on the portal, usage of all vehicles, anti-personnel vehicles and control of all routes to the target, including the one leading through rooftops of the village - this is how a perfect defence should look like. The most important classes here are technician and constructor. 1 or 2 infiltrators with railguns should find a few targets here too, especially on those rooftops and the watch tower. Defending barricades is a bit difficult, as there's too many of them. Better leave the gates for GDF and prepare a good defence.
If the enemy manages to hack the portal, concentrate on preparing defences able to stop the MCP. Turrets, Desecrator and aggressors with obliterators are essential here. Mines can be quite useful here too. It would be really nice if 1 or 2 constructors went to the Antarctica side and build two anti-vehicle turrets, just to make sure the MCP won't go far if it reach the slipgate. The most important matter is the localization of these turrets. They cannot be placed close to the portal, just as it shows picture below.

It is not recommended, because when the MCP goes through the slipgate, Strogg automatically lose that terrain, so the turrets would blow up before they'd attack the GDF vehicle. Better place these installations near the MCP's crossroad.
In the next part of operation you'll have to watch the MCP and rapidly react on what the driver is doing. The team must deploy turrets along the way chosen by the GDF guy sitting in the MCP. Moreover, it would be a sin not to use the Cyclops or other vehicles. Classes in team shouldn't differ from the one I proposed during the last phase of African part of operation.
The last objective is the defence of Nexus tower's core. Standard - constructors plant mines and shoot at incoming enemies, while technicians support teammates with Stroyent and also shoot at opponents coming into the tower. It would be nice idea to place 2-3 anti-personnel turrets in front of the tower entrances.
Attackers: GDF
Defenders: Strogg
Primary objectives:
1. GDF engineer must build a bridge to let the MCP get to the central outpost;
2. Any GDF unit must drive the MCP to the central outpost;
3. GDF spy must hack the Strogg shield generator;
4. The fourth target is the contaminator. GDF soldiers must destroy it with explosives.
Secondary objectives:
1. Capture the tunnel spawn point;
2. Destroy the tunnel gate;
3. Capture the reservoir spawn point;
4. Construct the guard tower;
5. Construct the guard tower;
Description:
GDF: This is a tough one. There are four targets, all of them difficult to complete. First of all, we need to construct the bridge, so the MCP will be able to get to the next part of the map. Engineers should do it, but they must supported by medics, vehicles and artillery - just throw at the enemies everything you've got. The opponents will try to get on your side of the bridge on foot, so be prepared for Stroggs popping from the forest. The Tormentor may be a trouble too, but Trojan with full crew should solve that problem. The enemy will deploy turrets on his side of the bridge and, in fact, the construction site is in their range, so engineers working there cannot feel safe. Vehicles and artillery should fight those installations. Soldiers with rocket launchers may attack them too.
Once the MCP is delivered to the battlefield, one of the players must drive it to the central outpost. Complete the secondary objective 2 on your way, so you won't have to march far. Once again, the enemy will set some turrets, a few vehicles and infantry to stop you and your teammates. Everyone armed with anti-vehicle weapons (especially soldiers) should take care of turrets and vehicles. Medics should do a fine job eliminating enemy infantry. And don't forget about calling air-strikes!
The next step here is the shield generator. In order to shorten the way to it, capture the spawn point (secondary objective 3). You can also open an extra route, through the tunnel (secondary objective 2). The enemy will probably set some mines, deploy turrets and send the Cyclops to battle. That is why the team must be consisting of many soldiers armed with anti-vehicle weapons. They can not only destroy defences, but also keep Strogg distracted. The rest of the team must choose a medic or a spy class. Spies may use a disguise to get close to the generator.
The last target is the contaminator itself. Building's layout, in which the device is places, isn't complicated, but better get acquainted with it. In this phase, tanks and artillery don't participate. Only infantry of two classes - soldiers, armed with assault rifles, and medics. However, if the enemy manages to deploy a turret in front of the building, one of the players should get a tank and destroy that defence.
Strogg: Turrets are the key to success here. In the beginning, deploy at least one anti-personnel and one anti-vehicle. A sniper between these installations should get a few frags too (engineers trying to construct the bridge are really easy targets). The main force should be consisting of Technicians and Oppressors, both armed with lacerators. Be ready to call in an air-strike or artillery strike.
If the GDF manages to build the bridge, better immediately leave the tunnel spawn point and focus on organizing the defence - two anti-vehicle turrets, radar and artillery deeply behind the frontline. MCP cannot drive into the base, so constructors must constantly repair these two turrets. Aggressors with obliterators will have a lot of job here too. However, don't forget about repelling enemy infantry attacks - about half of the team must use tanks or go on foot and concentrate on killing incoming enemies.
If the MCP get to the deployment area, quickly move into the vicinity of the shield generator. You need to establish heavy defences, consisting of mines (put them not only on the generator, but also inside the building with the tunnel entrance), turrets and Cyclops. Snipers will probably find a few targets too. Pay attention to these Stroggs who run towards the generator - kill all spies trying to complete the task in disguise.
The fourth phase of this operation takes place in the building with contaminator. Defending it is based on deploying mines and hiding inside the structure. If the enemy gets close to the target, kill him with grenades and firearms. Moreover, don't forget about defusing explosive charges set by enemy soldiers. The defending team must be consisting of constructors and technicians. Operation is extremely long, so GDF chances to complete all objectives are very low, even if the Stroggs don't show teamplay.
Attackers: Strogg
Defenders: GDF
Primary objectives:
1. Strogg infiltrator must hack the security system to open the way to the transformer;
2. Aggressor must destroy the transformer with plasma charges;
3. In the last phase of the operation, infiltrators must destroy the geothermal core using drones.
Secondary objectives:
1. Capture the beach spawn point;
2. Breach the forward bunker, sea wall, or east bunker;
3. Capture the bunker spawn point.
Description:
GDF: Besides deploying the radar and the artillery, build GMPG emplacements located inside the bunkers (that's a task for engineers). Every shooter using GMPG must be supported by at least one medic. Moreover, a few soldiers should constantly patrol the bunker door, which the Strogg will surely try to blow up. Window located near the door should provide a nice vantage point. The group defending that entrance must be consisting of engineers, as only this class is able to defuse enemy plasma charges. Mines located in the vicinity of the security system panel should be quite useful too.
After breaching the defence line, the Strogg will surely try to destroy all installations deployed at the beginning of the fight (e. g. radar), so call in new deployables, in a new area. The transformer defence should be organized just as many other defences have to be done - medics and soldiers (some of them armed with GMPGs) should have an eye on every single route leading to the target. Once again, deploy some mines. I advise you to get acquainted with the transformer building's layout.
The last objective may become extremely difficult. First of all, you gotta be fast. The room, in which enemy infiltrators must turn on their drones should be literally full of mines. What is more, team members can hide inside this room in order to take incoming opponents by surprise. Not only you must be fast; accuracy is also essential here, if you want to stop Strogg warriors efficiently.
Strogg: At the beginning, infiltrators must hack the security system panel. The straightest way to it leads through bunker door, which is unfortunately locked. However, Strogg aggressors can use their plasma charges to open it. This is why I advise you to go to fight as an infiltrator or aggressor. That second class should not only concentrate on destroying the door but also on blowing up enemy deployables, like anti-personnel turrets, which the GDF team will place on the battlefield for sure. Infiltrators armed with sniper weapons should take care of soldiers at GMPG emplacements in the first place, and after that, they have to defend the plasma charge on the door - of course if it is possible. When the bomb goes off, infiltrators should - preferably in disguise - attack the security system. And don't forget about completing secondary objective 1.
In the next phase of operation, the team must be consisting of aggressors and technicians. The enemy has here a few good defence conditions, but rapid attacks performed by outstanding shooters combined with the technicians' support should do the trick.
When you capture the spawn point (secondary objective 3), go to the last GDF bastion on this island. A hole in the wall is a perfect way for infantry. In order to complete this target without trouble, the team must divide into two squads. The first one should intercept incoming enemy forces - that'll keep them distracted. The second group, made of infiltrators, must go directly to the room, where the ventilation system starts. You don't even need a disguise - it is possible to get through in the chaos made by the first group. Once you're in the room, find a hiding spot, start your drone, steer it through the ventilation, get next to the core and detonate it.
Soldier (aggressor for Strogg) is a unit specialized in using various types of heavy weaponry and explosive charges. This class has more health points than other ones. Soldiers/aggressors are the only who can execute orders like: "blow up object x". Thanks to the equipment assigned to this class, soldiers/aggressors are the best in destroying enemy vehicles (including the flying ones) and defending narrow passages.
This class doesn't help the team directly; its main task is to eliminate unfriendly warriors. Soldier/aggressor have been prepared for those, who have high accuracy.
Weapons:
Equipment:
Explosives located in soldiers'/aggressors' backpacks stick to every surface and have time fuses. Once the bomb is installed, it must be armed with a proper tool. The charge goes off after 40 seconds. Enemy engineer/constructor can defuse it, so the team must keep an eye on the bomb before it blows up.
Rewards
Class/skill
Level 1
Level 2
Level 3
Level 4
Soldier
Faster locking-on for Rocket Launcher
More ammunition for heavy weapon
Faster charges arming
Faster moving
Aggressor
Faster locking-on for Annihilator
More ammunition for heavy weapon
Faster charges arming
faster moving
The name (At least in case of the GDF class) speaks for itself - player choosing this class is responsible for healing (or supporting with Stroyent) his teammates. His weapon list is short - there are only two guns, from which one of them is quite useless. Medic/technician is a guy who stays behind the main force and gets into the action when somebody gets seriously injured. However, player with this class can be a tremendous enemy in a firefight, as he can heal himself. His unique abilities should be in use as often as possible.
Weaponry:
Equipment:
Only GDF medic carries first-aid kits. The amount of kits possible to use at a moment is represented with a bar, which slowly loads up, letting the medic to drop more and more bags with medicines. A teammate gets healed when he touches a first-aid kit (so he must for example step on it).
Only Strogg technician carries Stroyent cells. It is a mixture, which can be not only turned into health points, but it also may be used as an ammunition. So, if you're running out of ammo, you can sacrifice some of you HP in order to reload your gun. But when you get low on health, you may (paradoxically) use your ammo to keep you on your feet. The amount of Stroyent cells possible to use at a moment is represented with a bar, just like in case of GDF first-aid kits.
Owned by GDF medics. When one of your teammates loses all his health points and falls to the ground, you may run to him with shock paddles and give him electroshocks. He'll immediately stand up, but his HP won't be fully restored (this can be done only when a level 4 medic revives someone).
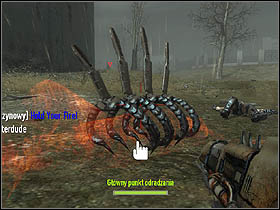
Owned by Strogg technicians. It saves teammates just like GDF defibrillator, but is takes definitely more, more time to revive a fallen friend (about 2-3 seconds). Beside it, the tool has also one another function. It is the possibility of creating spawn hosts. If you find a dead enemy, you can use your Stroyent tool on him in order to establish a place, which can be used as a spawn point for only one soldier. It can be seen on the picture below. However, spawn hosts can be destroyed by GDF medics armed with defibrillators.
GDF medic can call an airdrop of an ammo & medicine crate. In order to do so, simply drop the marker to an open area and wait for the crate. It can be used by every teammates, and it can be destroyed even with the use of firearms.
Rewards
Class/skill
Level 1
Level 2
Level 3
Level 4
Medic
Larger first-aid kit
Additional supply drop
Additional health
Full health after reviving
Technician
Larger Stroyent
Spike enhancement
Faster reanimation
Full health after reviving
Soldiers of this class perform a lot of tasks and have some cool abilities. Engineer/constructor can repair friendly vehicles, turrets and artillery guns, defuse enemy bombs and mines, construct bridges, GMPG emplacements, watch towers, etc. Besides, he can deploy antipersonnel and antivehicle turrets.
Weaponry:
Equipment:
The most commonly used tool. Thanks to this little baby, engineer/constructor can repair, build and defuse bombs. In order to perform one of these actions, get close to an object, which interests us (bomb, damaged vehicle, etc.) and when a hand symbol will appear, press the action button start using the tool.
Only for Strogg constructors, who gained experience level 2 in their speciality. The characteristic thing about the flying drone is the fact that if you want to repair a certain object, you need to aim at it first, and then wait until the drone gets locked-on it (red marker in the picture below informs about the status of the tool). When it does, launch the drone by clicking the fire button. The flying drone will reach the damaged object, repair it and go back to its owner. The biggest disadvantage of this tool is its radius - only dew meters. The picture below shows the max. distance.
Equipped by warriors of both sides. Enables to call defence turrets to the battlefield. You can find more about it the Turrets, artillery, radars chapter.
Engineer/constructor can install at most three mines. Deploying more will make the oldest ones disappear. Mines work in two ways. To use the first one, click fire button to plant a charge and then arm it. The mine will just react when an enemy gets nearby. The second one (triggered with alt. fire button) turns on a laser - if someone gets through it, the bomb goes off. Laser mines can be installed only on walls.
Rewards
Class/skill
Level 1
Level 2
Level 3
Level 4
Engineer
Grenade Launcher
Quicker repairs
Faster building/disarming
Automatic mine arming
Constructor
Plasma launcher
Flying repair drone
Faster building/disarming
Automatic mine arming
Field Ops'/Oppressors' task is to support the team with air and artillery strikes on enemies' positions. He's able to use only one kind of a rifle, but that doesn't make his meaning on the battlefield smaller.
Weaponry:
Equipment:
Equipped only by GDF troops. The amount of packs possible to use at a moment is represented with a bar, which slowly loads up, letting the field ops to drop more and more bags with bullets. A teammate resupplies when he touches an ammo pack (so he must for example step on it).
You use the marker/violator in the same way as a grenade. Throw it and after a while a bunch of bombs will attack the marker position, devastating everything located near the marker/violator.
Looks like binoculars, enables to drop an artillery gun. You'll find more about in the Turrets, artillery, radars section of the guide.
A tool allowing to call in an artillery barrage fired by guns deployed before.
Equipped only by Strogg troops. The characteristic thing about the tactical shield is the fact that it cannot be penetrated by bullets, but infantry can walk through it, a it refers to friends and enemies alike. The shield can not only be dropped on a ground but also stuck to a wall or even a vehicle.
Rewards
Class/skill
Level 1
Level 2
Level 3
Level 4
Field ops
Scoped assault rifle
Bigger ammunition reserve
Faster target aiming
Faster support force renovation
Oppressor
Improved lacerator
Improved tactical shield
Faster target aiming
Faster support force renovation
This is the only class equipped with a hacking tool, which is necessary when a spy/infiltrator wants to disable enemy security systems. Moreover, this function has some unique weapon types and abilities, so a spy/infiltrator can perform two main tasks on the battlefield - getting through the frontline in disguise and also killing enemy troops with a sniper rifle.
He has also one another interesting feature - backstabbing results in an instant kill.
When we change the appearance to an enemy's, we must not use almost all pieces of our equipment. The only weapon, which usage doesn't end with demascation, is knife/spikes. If we decide to use a firearm, the character will automatically change the gun to his own (despite the fact that the spy/infiltrator in disguise carries opponent's weapon) and also switch the appearance to the real one. This takes a lot of time, so it is extremely dangerous to pull out a gun in front of an enemy.
Once you're in disguise, remember that you may (even accidentally) give some clues to the enemy, from which he may be able to deduct that you're from the opposite team. First of all, when you get tired, you start to breathe loudly, so everyone in your vicinity can hear you. Note that humans and Stroggs puff in different ways. Moreover, keep in mind that a soldier running towards the main base instead of the battlefield looks highly suspiciously. What is more, avoid enemy medics/field ops/technicians - if they attempt to give you a first aid kit/ammo bag/Stroyent cell, you won't receive it (probably due to race differences) and that will be the signal for enemy that you're... an unexpected guest.
One additional advantage of a disguise is the ability to walk in front of enemy antipersonnel turrets without being hurt by them.
Spy/infiltrator is also armed with EMP/scrambler grenades, which turn off all electronic devices. They can be used to get pass through enemy turrets and to destroy mines installed by the enemy without being hurt. Unfortunately, the amount of grenades is extremely limited, so it is almost impossible to complete an objective without help of other players.
Weaponry:
Equipment:
Looks like binoculars, enables to drop a radar. You'll find more about in the Turrets, artillery, radars section of the guide.
This device enables the player to complete some of the objectives prepared by Splash Damage, e. g. hacking the portal gate on Slipgate.
Very interesting tool equipped only by Strogg infiltrators. It is a remote-guided, flying bomb with a camera and short-range radar attached. With this little thing, the infiltrator can, for example, check if there are enemies inside a building (but a stationary radar works better here) and if there are, kill them in an explosion. On some maps it is necessary to complete a few tasks - Volcano map is a good example here.
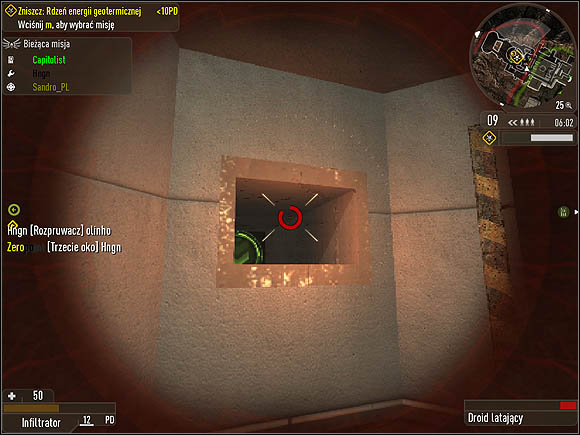
Equipped only by GDF forces. "Third eye" is a bomb with a camera. Unfortunately, in contrary to Strogg drone, it doesn't fly. You can place this device in any direction, hide somewhere and turn on the camera view. If an enemy gets close to the "Third eye", you may detonate it. This tool is not so practical, as it doesn't move. Moreover, using mines is much more efficient when you want to kill enemies coming to a certain place.
Doesn't inflict damage, but it may hide you and your buddies in a difficult situation. Moreover, there is a possibility, that the smoke will work as a decoy, which may give the ability to lure enemy forces into a trap. WARNING! Smoke doesn't make the turrets blind.
Used only by Strogg. It enables an infiltrator to reach hard-to-reach places like rooftops. It may also serve as a kind of an escape route. Just launch the transmitter and press the fire button to teleport to the transmitter's location. If it doesn't land in a desired place, simply use the alt. fire button to get the transmitter back to the launcher.
Rewards
Class/skill
Level 1
Level 2
Level 3
Level 4
Spy
Machinegun with silencer
Improved radar
Faster breaking
Personal radar jammer
Infiltrator
Silent walk
Improved radar
Faster hacking
Faster disguise obtaining
Assault rifle
Used by:
Clip size: 40 bullets
GDF main firearm. It is really good on short and very good on medium distance. It is a fully automatic firing mode and it never overheats. Turning the zoom on is rapid, so GDF forces may quickly start shooting after zooming in. The main disadvantage of assault rifle is the necessity to change clips.
Scoped assault rifle
Used by:
Clip size: 40 bullets
This weapon is mainly used by spies. As you may conclude from the name it has much better zoom. The most characteristic feature of this weapon is the fact that in the zoom mode it fires only 3-round bursts. This is why the scoped assault rifle is useful only during fights on short or long distances. Medium ones required zooming in, but with short bursts a spy becomes an easy target for enemies equipped with lacerators.
Assault rifle w/ grenade launcher
Used by:
Clip size: 40 bullets (5 grenades)
This gun is an engineer reward for performing duties on the battlefield. It shoots a bit slower than a standard rifle, but in exchange in has a nice grenade launcher attachment. Works quite well against groups of infantry. It is worth adding that the grenades doesn't explode when they hit the target, but they bounce a while, so it is possible to attack even those enemies, who are hiding, for example behind a corner of a corridor.
Snipe rifle
Used by:
Clip size: 10 bullets
One good sniper shot (doesn't need to be headshot) can eliminate the target. Maybe it is not a good as Strogg railgun, but it is also efficient tool in right hands. What is more, one shot at Icarus gravpack takes about 80-90% of its health, so it becomes an easy target for any other teammates.
Shotgun
Used by:
Clip size: 10 bullets
A weapon useful mainly in a close-quarter combats. Although it has a low rate of fire, a single shotgun shot takes a lot of health points. I don't recommend it - a shotgun isn't a practical weapon, better use an assault rifle.
GMPG
Used by:
Clip size: 100 bullets
This weapon is often being installed on vehicles. A trooper with this gun should be aware of the fact that with a hand cannon he can't run through the battlefield. He should instead find a long and narrow passage and wait for enemies.
Rocket launcher
Used by:
Clip size: 10 rockets
There are many weapons useful in destroying even the heaviest vehicles, but the rocket launcher is definitely the best one. It shoots in two modes - the first on is based on simple launching a projectile (be aware of its parabolic flight trajectory). The second one is much more interesting - turn on the zoom mode, aim at a target and wait until the weapons locks-on it. When it is done, launch the rocket and watch how the homing missile follows the target. The biggest disadvantage of that type of shooting is the fact that the driver sitting in a vehicle knows when someone tries to lock-on his machine.
Frag grenade
Used by:
Amount: 2
Quite good, but requiring precision, anti-personnel and anti-vehicle weapon. Just as in many other games, we can throw it as far as possible by clicking left mouse button. With the right mouse button we can decide how far we throw the grenade. The max. time between pulling the safety-pin and detonation is 4 seconds. Grenades can destroy enemy mines.
EMP grenade
Used by:
Amount: 3
This grenade turns of all electronic devices located near the place of explosion - it disables vehicles, turrets, radars, artillery guns, etc. EMP grenade may also kill enemy troops, but its explosion isn't as strong as in the case of a frag grenade. EMP bombs can destroy enemy mines.
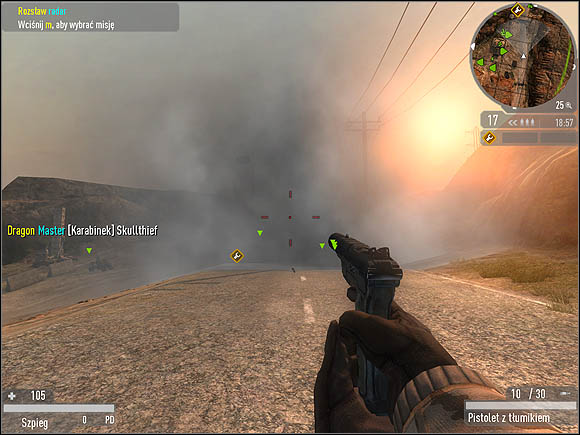
Machine pistol
Used by:
Clip size: 20 bullets
This weapon is something between a pistol and an assault rifle. It has only twenty bullets in a clip and its small firepower and range is compensated with high rate of fire. This is why machine pistol is the best during fights on short distance.
Pistol
Used by:
Clip size: 10 bullets
Weak weapon, use only when you're waiting for other weapon to lower its heat or when the enemy attacks you during a reload. Spies are equipped with a silenced weapon. The silencer doesn't have an influence on pistol's parameters.
Knife
Used by:
A weapon pulled out, when you completely run out of ammunition or when you have an occasion to backstab an enemy. Usually you need to perform a few stabs in order to kill an opponent. However, a spy need only one backstab hit to eliminate his target. Knife can be used during sprint.
Lacerator
Used by:
Clip size: N/A
The lacerator is an equivalent of GDF assault rifle. The main feature of this weapon is the fact it has theoretically unlimited ammo, it overheats after a 30-bullet burst. This is why I advise you to press and hold the fire button carefully to keep an optimal rate of fire, which provides effective power and which doesn't let the lacerator overheat. The biggest con of this gun is undoubtedly the way in which its zoom is being activated. You see, when you want to use it, you need to wait after clicking the alt. fire button to let the view stabilize. That takes definitely too much time. As you can figure, this disadvantage may lead to a tragedy on the battlefield. Keep in mind that lacerator is a good weapon on short distance. On a medium one too... if you have time to zoom in.
Improved lacerator
Used by:
Clip size: N/A
Just like the scoped assault rifle, improved lacerator offers better zoom, but if you turn it on, you can shoot only 3-round burst. If you decide to fire from it without using the scope, you will experience no difference between this firearm and the standard lacerator.
Lacerator w/ plasma launcher
Used by:
Clip size: N/A (5 plasma rounds)
The plasma launcher works just like a typical grenade launcher - it allows to eliminate even whole groups of infantry, including those who are hiding (plasma bounces from the surfaces before inflicting damage, so if you fire it in the right direction, it may go towards even a hidden enemy).
Railgun
Used by:
Clip size: N/A
Great sniper weapon. It doesn't require reloading and has a little bit higher firepower than a GDF sniper rifle. Of course, it is a long-range gun.
Nailgun
Used by:
Clip size: N/A
The nailgun works like shotgun. With this little thing you can coat walls with enemies and their blood. However, it has high dispersion, so better use on short distance. The nailgun is useless in any other conditions.
Hyperblaster
Used by:
Clip size: N/A
It is a GDF GMPG equivalent. Firing from a hyperblaster in motion is the least effective way of shooting, so better find a good vantage point (or narrow passage), go prone and wait for enemies. Moreover, remember that before the hyperblaster starts a bursts, it needs some time to get a proper angular velocity. It takes about 1 second.
Obliterator
Used by:
Clip size: 10
The obliterator - just like GDF rocket launcher - shoots in two ways. The first one is based on a standard projectile launch (be aware of the parabolic trajectory). The second one is much more interesting - turn on the zoom mode, aim at a target and wait until the weapons locks-on it. When it is done, launch the rocket and watch how the homing missile follows the target. The biggest disadvantage of that type of shooting is the fact that the driver sitting in a vehicle knows when someone tries to lock-on his machine.
Shrapnel grenade
Used by:
Amount: 3
Quite good weapon against infantry and vehicles. You can throw in two ways. The first one is a traditional throw. The second one (performed by clicking alt. fire button) activates grenade's special function - sticking to the surface it hits, for example - an enemy tank's armour. However, sticky grenade's range is shorter than a standard grenade's one by half. Grenade blow up after five seconds. Disarms enemy mines.
Scrambler grenade
Used by:
Amount: 3
It isn't as powerful as a shrapnel grenade, but in exchange it temporarily disables all enemy vehicles, turrets and artillery guns. It also sticks to various surfaces, in the same way as the shrapnel grenade does. Disarms enemy mines.
Lightning pistol
Used by:
Clip size: N/A
Additional firearm for aggressor, supporting his main weapon, which can be a hyperblaster or obliterator. It's a weak gun, but because it shoots with a power beam, it is a bit more accurate than GDF machine pistol. In exchange, it has extremely low firepower. And be careful - it overheats very fast.
Blaster
Used by:
Clip size: N/A
The weakest firearm in Strogg arsenal. Use it only when you run out of Stroyent ammo points (blaster doesn't require Stroyent to work).
Spikes
Used by:
Because Strogg can use their blasters without worrying about Stroyent, spikes are in use very, very rarely. If you get to enemy trooper's six, you can have some fun and try to stab him to death. A backstabbing performed by an infiltrator results in an instant death. Spikes can be used even during sprint.
WARNING!
Strogg doesn't use typical guns with traditional magazines, but it doesn't mean that their firearms shoot air. Their guns are supplied with limited amounts of Stroyent. It is a mixture, which can be not only used as ammunition; it can be also used to restore health. If you're low on ammo, you may sacrifice some of your health point in order to supply your gun. But when you're almost dead, turn some of your ammunition to heal yourself. Technicians can supply teammates with additional portions of Stroyent.
Engineers/constructors, field ops/oppressors and spies/infiltrators can deploy various kinds of weapons and devices - turrets, artillery guns, radars, etc.
Engineer/constructor deployables
These deployables have 4000 health points:
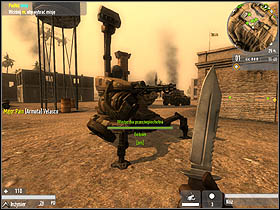
Antipersonnel turret
It has a 170 degree field of vision, but can rotate if you attack it. Shoots only at enemy infantry. Turns off when is loses 1/3 of energy (2 grenades should do the job). Remember that even if a Husky (with driver uncovered) will drive in front of the turret, it won't be attacked.
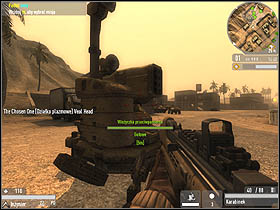
Antivehicle turret
Similarly to the antipersonnel turret, antivehicle deployable has a 170 degree field of vision, but it can turn around if attacked. Shoots only at enemy vehicles (including flying ones), even those with no crew inside. It turns off when loses 1/3 of energy.
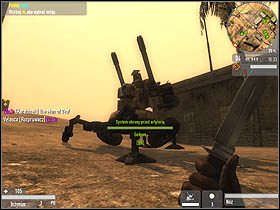
Artillery interceptor/shield generator
It sees everything around and it is able to stop artillery barrage called by enemy field ops/oppressor. Just like deployables above, the artillery interceptor/shield generator turns off when it loses 1/3 of energy.
Field ops/oppressor deployables
These deployables have 3000 health points:
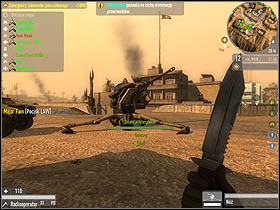
Artillery gun/rail howitzer
This gun launches ten shells in one barrage and its reload time is 30 seconds. Quite useful against enemy infantry. Turns off when it has only 2/3 of energy or when it causes 1000 health points damage to the enemy.
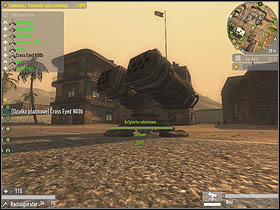
Rocket artillery/plasma mortar
Weapon effective against enemy vehicles and stationary objects. Launches 6 missiles in one barrage, and its reload time is 35 seconds. This weapon gets inactive when it has only 2/3 of energy or when it causes 1000 health points damage to the enemy.
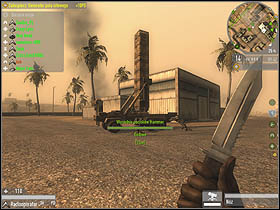
"Hammer" launcher/dark matter cannon
The heaviest type of artillery. It has the biggest lethal radius, destroy stationary objects as well as vehicles and infantry. Hammer reloads in 40 seconds while the dark matter cannon requires 55 seconds. Both get inactive when they lose 1/3 of energy or when the cause 1000 health point damage to the enemy.
Spy/infiltrator deployables
These deployables have 3000 health points:
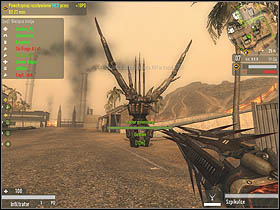
Radar/psi radar
It scans the territory in a radius presented below. Shows enemies' positions on the command map. Turn off when it loses 1/3 of energy.
 Radar scanning radius.
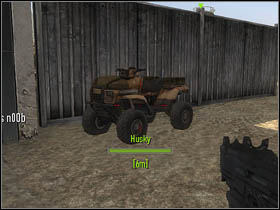
Husky
Quad used by GDF forces. It is very fast and has almost no armour. There's only room for the driver. What is more, he has no shield, so even a firearm can kill him. Husky is being used as a very fast mean of transport, thanks to it special functions like boost or handbrake turns.
Those who reached first vehicle experience level can call in a vehicle (Husky/Icarus) airdrop. This can be done in the context menu.
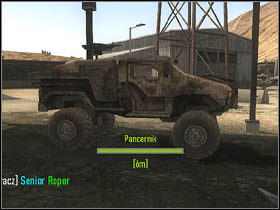
Armadillo
Fast vehicle with enough space for five players. The first one drives, the second controls the GMPG, others use their own weapons against enemies. Armadillo is quite a weak vehicle, so in a fight against heavy vehicles or antivehicle turrets it has almost no chance to win.
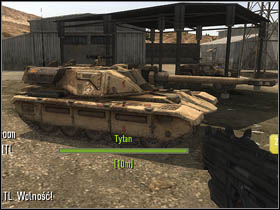
Titan
This tank is the toughest GDF land vehicle. Although it is not as powerful and armoured as Cyclops, but it is definitely faster than the Strogg mech. It is also better armoured than Desecrator. One of the most important feature of Titan is the fact that its range is longer than antivehicle turret ones, so the tank can eliminate enemy defences without being hurt by them.
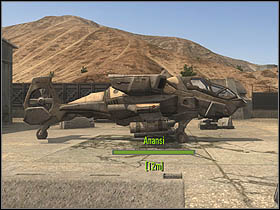
Anansi
Anansi attack helicopter is a Tormentor equivalent. Just as the Strogg flying vehicle, Anansi is a vertical start machine, armed with the same weapons (one type of homing missiles and the second type - unguided ones). It seems that vehicles are the same, but Anansi has a little advantage - you can easily stop it in the air, which allows to aim accurately with homing missiles.
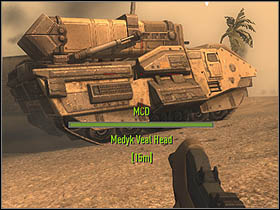
Mobile Command Post (MCP)
This vehicle is strongly connected with some objectives GDF must complete in the game. The task is to drive the MCP to a designated location and to deploy it. That's not a simple mission, although the MCP has a thick armour, mounted minigun and a built-in machine gun. Moreover, MCP is a mobile radar. After deploying, becomes invulnerable to bullets, missiles, air and artillery strikes. MCP is available to use on Canyon, Slipgate, Outskirts, Valley and Refinery maps.
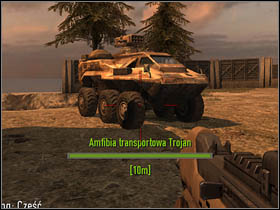
Trojan
This is an amphibious vehicle, able to carry up to six people. The driver not only steers, but also uses the GMPG installed on the roof. One of the passengers shoots from an anti-aircraft missile launcher, which can be used even against ground objects, but don't expect much damage inflicted. Its main advantage is the range - thanks to it, you can attack such deployables like antivehicle turrets. The rest of the passengers can only sit in the vehicle, as there is no possibility for them to shoot at enemies from inside of the Trojan. The vehicle isn't well armoured, but it is doing its AA and transport job really good.
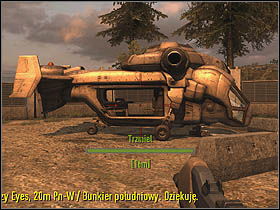
Bumblebee
It is the toughest flying machine in the game, but on the other hand it is unbelievably slow. Pilot can use a machine gun to eliminate enemy units. Two additional passengers operate guns installed on the Bumblebee's sides. Only with these two additional guys, the vehicle is worth something on the battlefield. Thanks to its low max. velocity, flying the Bumblebee is quite easy.
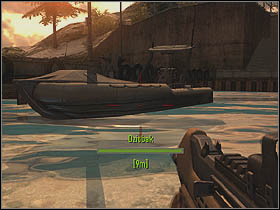
Platypus
Platypus is the only floating vehicle in the game. Simultaneously, it is the most rarely used one. It's light armoured, with placed for only two crewmembers - the driver and the shooter, operating a GMPG installed on the front part of the boat.
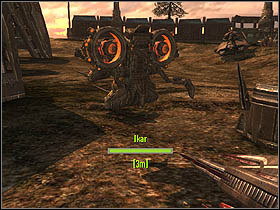
Icarus
Icarus is a gravpack/jetpack allowing single troopers to fly. Icarus is able to lift its user for only few seconds. After that, its engines have to regenerate. Although that disadvantage, jetpack is a great mean of transport. Icarus is armed with stroybombs, which are similar to grenades. They work fine against infantry, turrets and light vehicles. Their disadvantage is the long period of time between launching a stroybomb and its explosion. Because of that, enemy infantry and machines may run away from the lethal radius. Moreover, don't forget that the Icarus can be attacked by an antivehicle turret. The biggest Icarus' con is its armour (or the lack of it). Players who achieve first vehicle experience level may call for an Icarus airdrop.
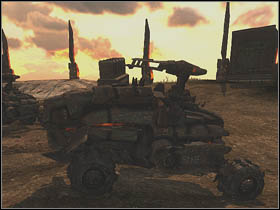
Hog
This vehicle has two seats - one for the driver, and the second for gunner, operating the hyperblaster installed on the vehicle's roof. The Hog has quite thin armour, but its speed compensates that con. Remember that when you turn on the boost, the machine generates a special shield on the front bumper. It doesn't stop enemy bullets or missiles, but it allows to hit opponent's vehicles and turrets (and so damaging them) without destroying the Hog. For example, a head-on crash with an MCP takes about 1/3 of its energy. The Hog ends even without a scratch.
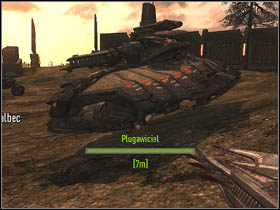
Desecrator
Strogg tank. It is quite tough, but it still hasn't as thick armour as GDF Titan. Desecrator hovers over the ground, and that means it can strafe and move even over water. What is more, by clicking the 'crouch' button, you can turn off the vehicles engines. As a result, it'll land on the ground and improve its reload time. Beside the driver, there is also a place for a shooter, operating a hyperblaster installed on the turret.
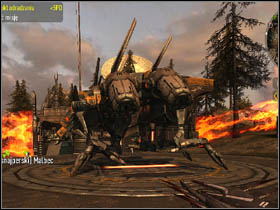
Tormentor
Very interesting flying machine. The pilot - besides steering - uses the Strocket launcher (great against enemy vehicles) and a plasma gun (works nice against any other types of units). The Tormentor is a vertical start machine and maximum amount of its crewmembers is 2. There's also a gunner, operating a hyperblaster.
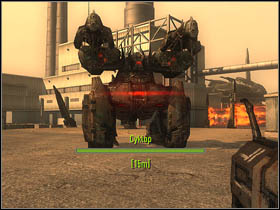
Cyclops
The highest, the toughest, and the most devastating vehicle in the game. It is equipped with plasma weapon, effective against enemy land vehicles, infantry and turrets. Just like Desecrator, after clicking the 'crouch' button, the Cyclops goes into a siege mode, which disables its walking ability, but improves the reload time. If we (in the walking mode) press the 'jump' button, the Cyclops will perform a powerful stomp, killing all troopers near the vehicle. Cyclops has a one big disadvantage - it is extremely slow, too big (easy target for enemies armed with rocket launchers) and its respawn time is probably the longest in the game. There's enough room for only one crewmember.
GDF rewards
Class/skill
Level 1
Level 2
Level 3
Level 4
Soldier
Faster locking-on for Rocket Launcher
More ammunition for heavy weapon
Faster charges arming
Faster moving
Medic
Larger first-aid kit
Additional supply drop
Additional health
Full health after reviving
Engineer
Grenade Launcher
Quicker repairs
Faster building/disarming
Automatic mine arming
Field ops
Scoped assault rifle
Bigger ammunition reserve
Faster target aiming
Faster support force renovation
Spy
Machinegun with silencer
Improved radar
Faster breaking
Personal radar jammer
Light weaponry
Additional magazine
Additional grenade
Minimised weapon dispersion
Two pistols
Battle sense
Fast run
Bullet-proof vest
Mine detection
Health regeneration
Vehicles
Vehicle drop
Faster decoy loading
faster weapon reloading
Better armour
Strogg rewards
Class/skill
Level 1
Level 2
Level 3
Level 4
Aggressor
Faster locking-on for Annihilator
More ammunition for heavy weapon
Faster charges arming
faster moving
Technician
Larger Stroyent
Spike enhancement
Faster reanimation
Full health after reviving
Constructor
Plasma launcher
Flying repair drone
Faster building/disarming
Automatic mine arming
Oppressor
Improved lacerator
Improved tactical shield
Faster target aiming
Faster support force renovation
Infiltrator
Silent walk
Improved radar
Faster hacking
Faster disguise obtaining
Light weaponry
Additional Stroyent
Additional grenade
Minimised weapon dispersion
Thrower enhancement
Battle sense
Fast run
Health bonus
Mine detection
Stroyent regeneration
Vehicles
Vehicle drop
Faster decoy loading
Faster mine loading
Better armour
Achieving experience levels is possible only when you get experience points (XP). These are given for every actions that are positive for your team - shooting at enemies, completing tasks, calling in turrets, resupplying and healing teammates, disarming enemy bombs, and even just avoiding being killed, not only by enemy, but also by friends and... yourself.
The amounts of XP required to gain experience levels connected with classes and vehicles are listed below:
In case of the light weaponry and battle sense, the amounts of XP are just as follows:


 Enemy Territory: Quake Wars Game Guide & Walkthrough
 Empire: Total War Game Guide & WalkthroughEVE Online Game Guide & Walkthrough
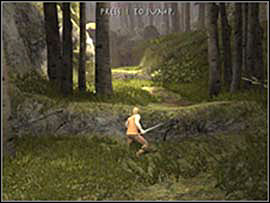 Eragon Game Guide & Walkthrough
 Eador: Masters of the Broken World Game Guide & Walkthrough