This guide for the Enemy Front includes a comprehensive walkthrough, which encompasses the entire single player campaign mode, and also includes a considerable handful of hints for every situation. Apart from they, it ensures you with the opportunity to learn about the controls, listed here in the form of a comprehensible table and provides you with the detailed system requirements listing for PC version of the game. Enemy Front is a first-person shooter (the FPS) developed by the Poland-based CI Games that takes place at the time of World War II. It takes place in the Europe ravaged by war - in countries such as Germany, France or Poland and it revolves around an American war correspondent Robert Hawkins. The game does not differ, considerably, from many classics of the genre, such as the Call of Duty series or the Medal of Honor, because it is based on similar proprieties. It is mainly based on completing, more or less, complicated missions, killing successive waves of enemies so, in short, on the personal crusade to save the World. Enemy Front is powered by the CryEngine 3 technology known from the Crysis series. The title, however, does not look as beautiful as the German shooter, as it is developed primarily for Xbox 360 and PlayStation 3.
The guide to the Enemy Front includes:
Kuba "Zaan" Zgierski ()

Movement

Jump

Crouch
Sprint/Hold breath

Shoot

Aim

Previous/next weapon

Reload

The most recently used weapon

Silent takedown/knife

Incendiary bottle

Grenade

Action (interact)

Binoculars

Stone

Map

Pick up items

General chat (multiplayer mode)

Team chat (multiplayer mode)

Score
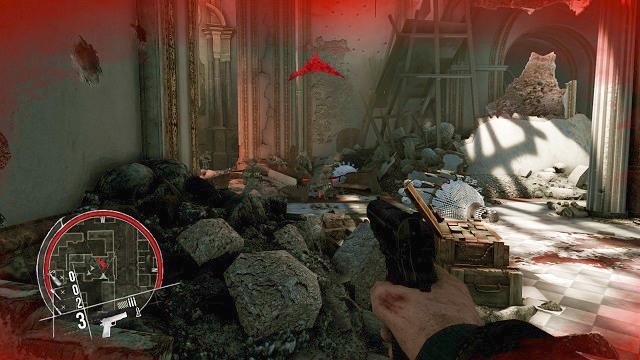
In this chapter, you can take a closer look at the game interface in the Enemy Front. Each of its elements has been marked with an appropriate symbol and described in a comprehensible way. This way, no beginner will be locked out from starting the fun with this game.
 Stick to our hints and you will live.
1. Fighting the enemies in the Enemy Front is not too demanding. You need to remember that it is not the actual players that you are fighting here (with the exception of the multiplayer mode) and with the AI-controlled units. By the way, the developers have not tried too hard, because the enemy AI is not too high.
2. As much as elimination of the enemy units, in open battle, is very much enjoyable, in some situations, confronting too many, at a time, may have grave consequences. With this in mind, sometimes it is better to sneak and eliminate the enemies silently (by hitting them with the rifle butt from behind, or stabbing them), or to avoid encountering them altogether. In the case of the former, it may prove necessary to pick up the corpses to hide them in secluded spots, thanks to which you make sure that the alarm is not raised, all around the place.
3. Another good idea, to avoid getting killed, is to make an extensive use of the covers that effectively protect you from enemy fire. The exchange of fire, with a heavy machine gun, while out in the open, is not too good a move but, against a single privateer is nothing to be really avoided.
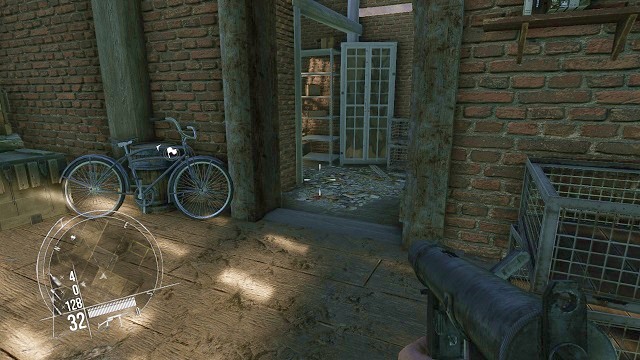
4. A very interesting option is to throw a stone in any direction that you want, which makes noise and attracts the attention of the opponents. Thanks to this, you can eliminate the enemies from behind, or to shoot them all like ducks, when they are distracted.
5. A thing as innovative, as the above, is the noise meter, which appears on the screen after you approach a source of considerable noise. For example in a situation, in which a flight of planes flies above the city, you get the opportunity to eliminate the nearby enemies silently, with the guarantee that all of the shots that you take, within the next few moments, will not be heard by the enemies.
6. Also, it is good to remember about the old, good elements of the equipment, i.e. the grenades and the other tools of destruction - incendiary bottles and explosives. Using these, during the fighting in the frontline, allows you to eliminate several opponents, within a short time, or even more, if you are lucky.
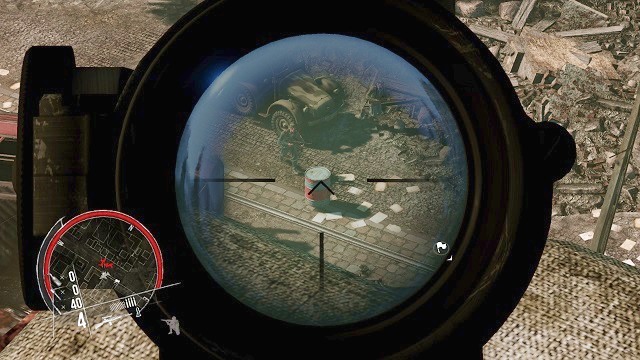
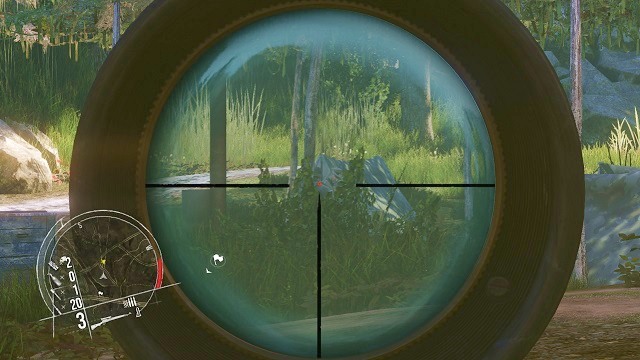
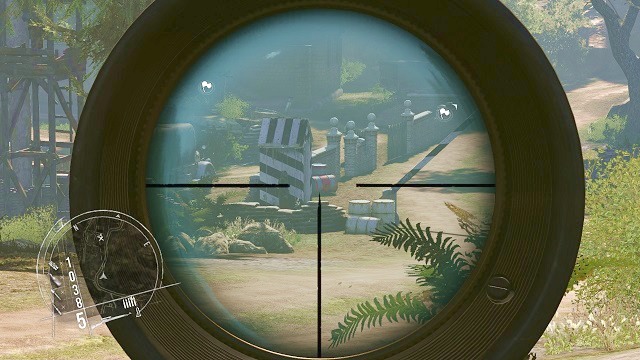
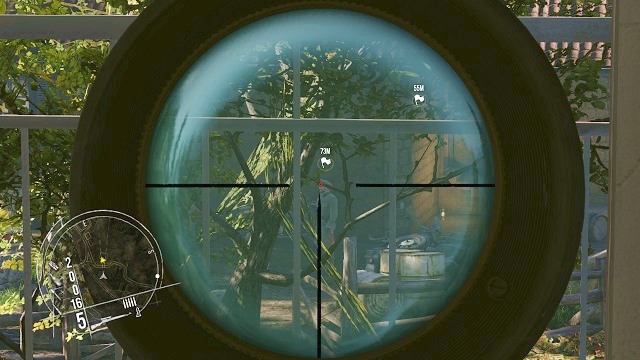
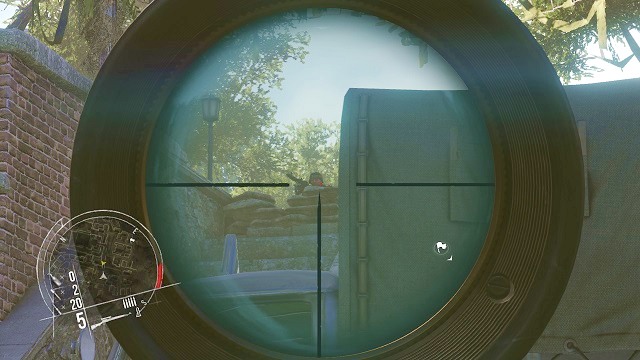
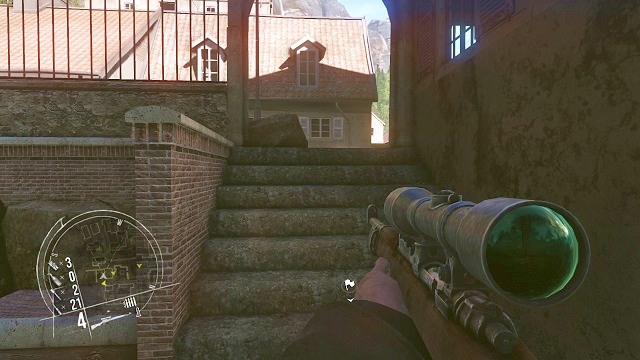
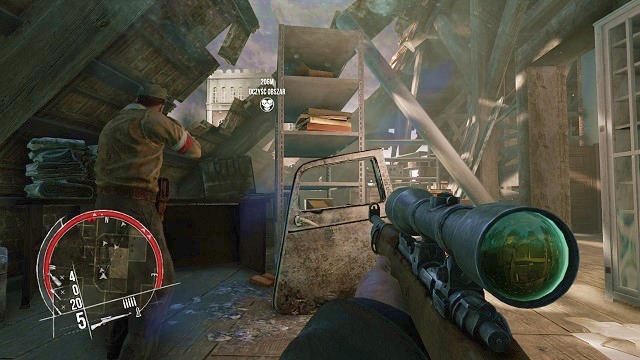
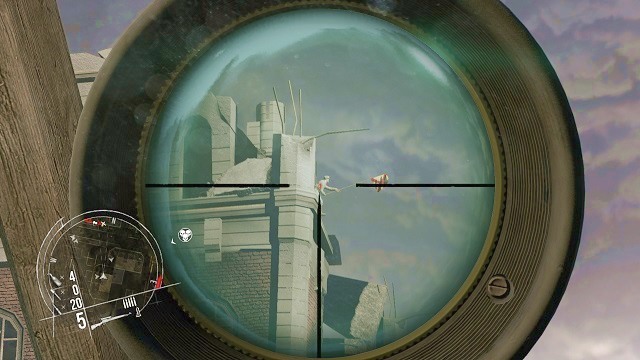
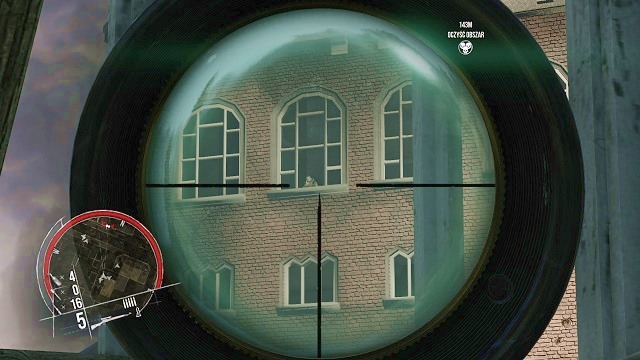
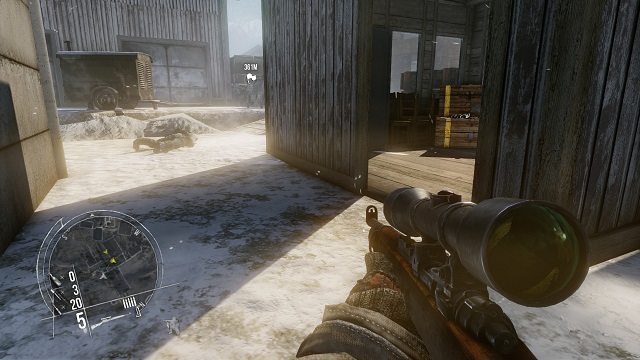
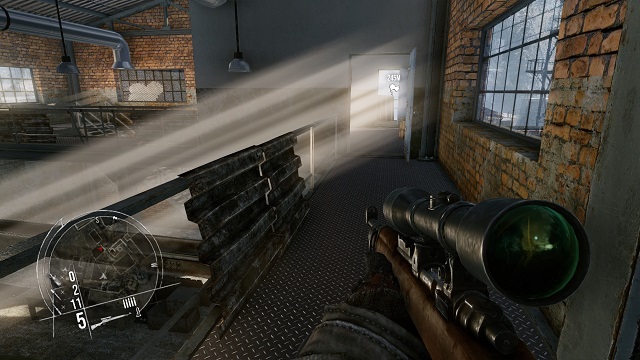
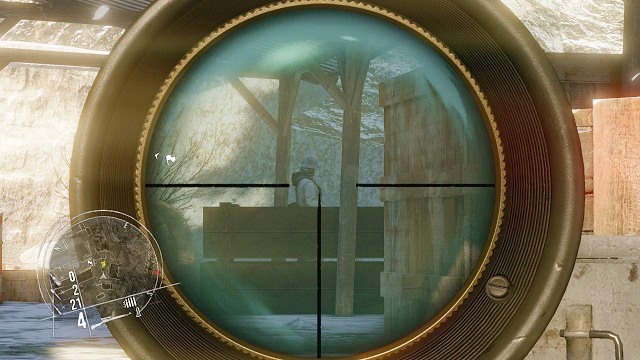
7. If you get the hold of the sniper rifle, it is a good idea to learn about the option to hold breath, temporarily. For a few seconds, it stabilizes the screen, stops the swaying of the scope and makes the view more acute. Thanks to this, placing a bullet between the eyes of the enemy becomes child's play. To strengthen the effect, sometimes, after you take such a shot, you can see a cinematic, where you first see your character squeeze the trigger and then, follow the bullet that makes an impact on the enemy.
8. In a situation, in which you want to eliminate all of the enemy soldiers, in a given area, silently, e.g. in a camp, you can use the binoculars. It allows you to take a careful look at the entire area, where you are going to operate, in order to locate all of the enemy units and, more importantly, to mark them on the minimap.
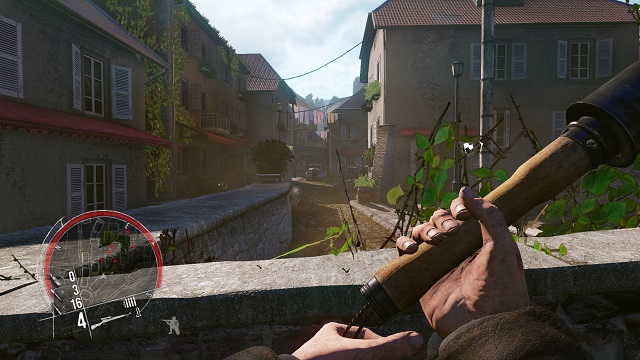
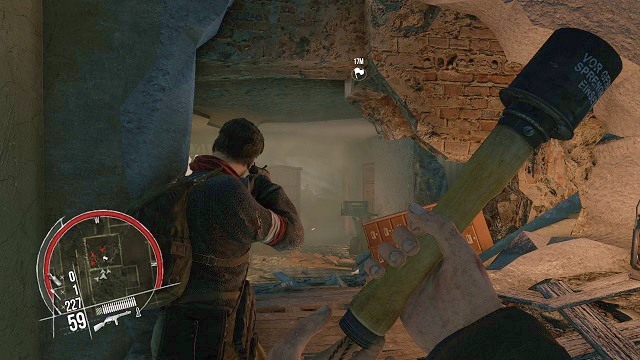
9. While fighting armored vehicles or, God forbid, tanks, while armed with an automatic rifle or a shotgun, you stand no chance. To destroy enemy vehicles, you need to use either grenades (in most cases you will have to throw several of these) or some heavier equipment, i.e. bazookas (one shot usually gets the job done).
10. The last nice element, prepared by the developers, is the option to use an opponent as a human shield. To do that, you need to sneak up to the selected enemy from behind and press the appropriate key. The enemy that you grab, in this way, is an excellent object that for intercepting the enemy bullets which, in extreme situations, can save your life.
 In this situation, congratulations on your making it out in one piece.
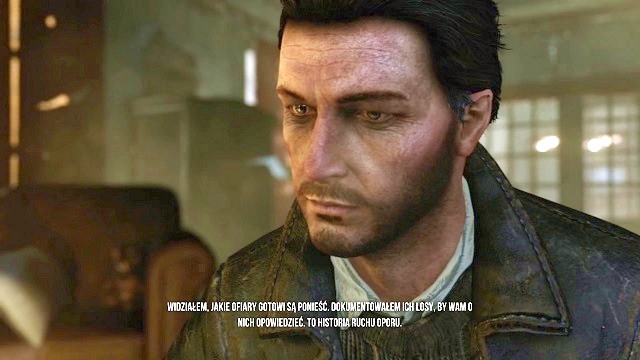
You start the single player campaign with an cinematic intro, where you get to meet the protagonist - an American war correspondent Robert Hawkins - and you are introduced to the plot.
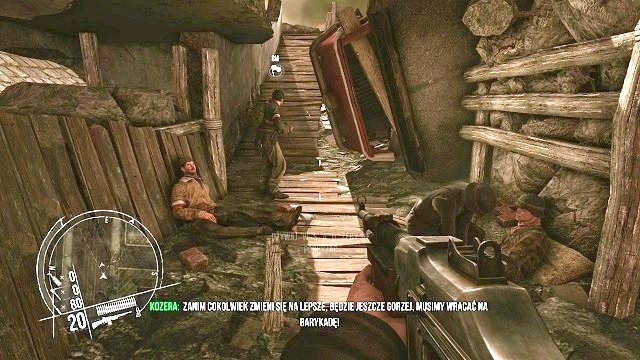
The wounded are to be left alone. They will make it somehow.At the moment, at which you take control of your character, you are in the part of the barricade complex, which is meant for the wounded. One of the brothers in arms, who is still standing (Kozera) tells you to follow him to continue the battle on the frontline.
 So good I am not all alone here.
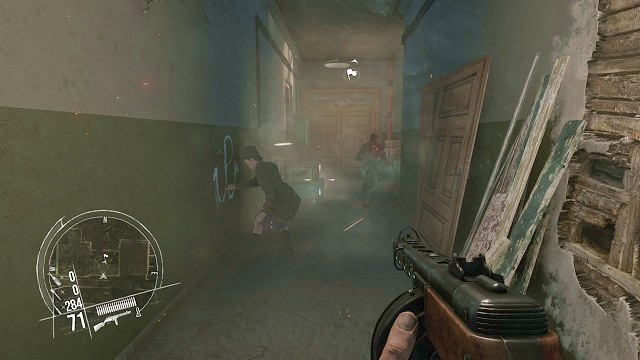
After you take several steps, you will reach the covers with the allied soldiers defending behind. Your mission is to lend a hand to them. In order to help them, you need to kill the approaching German soldiers and, at the same time, avoid taking a bullet to the head.
 No complaining. Get in!
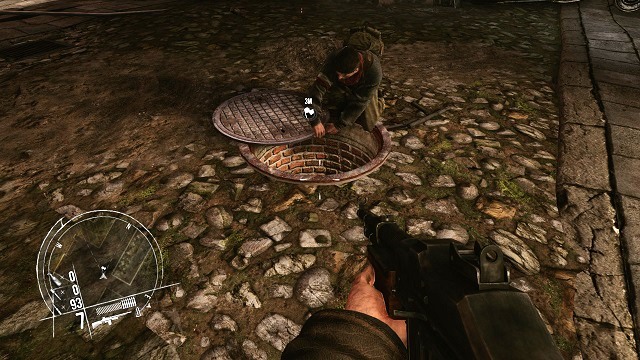
After several moments, you will receive an order to escape. Once that happens, you need to follow your buddy, climb over the wall, by pressing the default jump key, and use the manhole to descend to the sewers and evacuate from the danger zone.
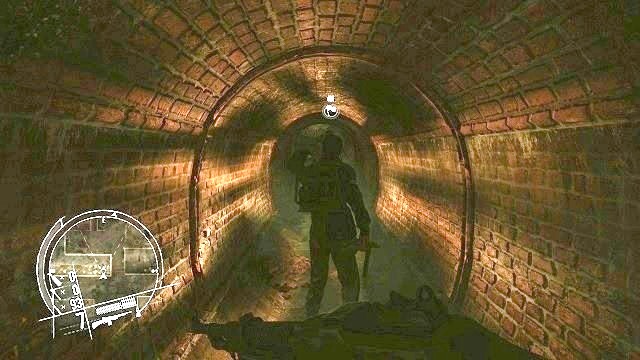 It is a good thing that it is not the apocalyptic universe
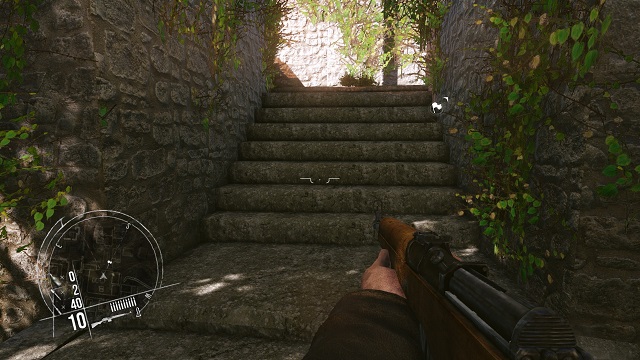
Once you climb down the ladder, you will have to follow your pal who, apart from the knowledge of the city plan, also has the lamp with him. It is best to stick close to him and not go astray, because there is nothing of interest in the side corridors. The only exception is the 1st of the 3 collectibles available in this mission, which is a figurine that you find at the first fork.
 Which is going to be a better tool of exterminating the Germans? Well...
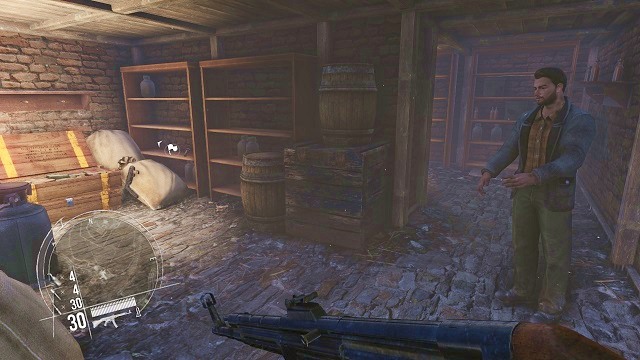
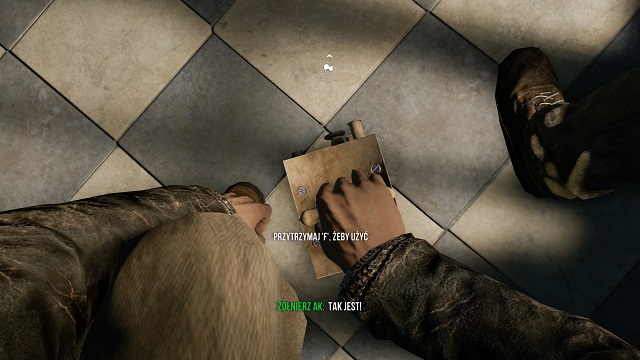
After the short walk is over, you will get to the underground encampment of the resistance and start the conversation with your superior officer. You will receive a mission to perform but, before you are on your way, you will still need to approach one of the older soldiers and select the equipment (you will have to choose one of the two primary weapons).
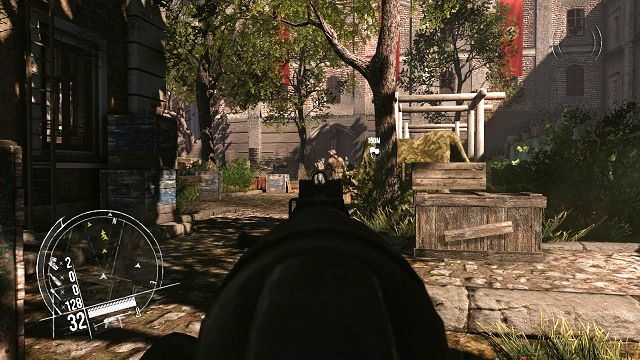
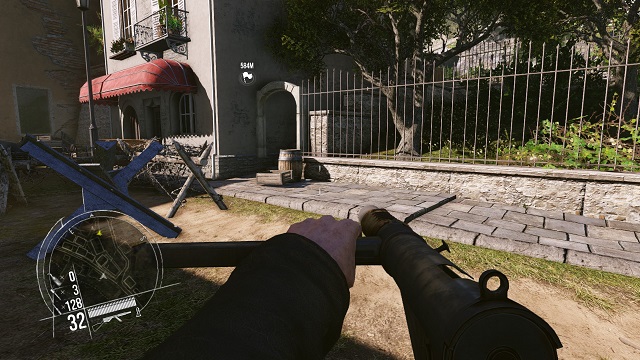
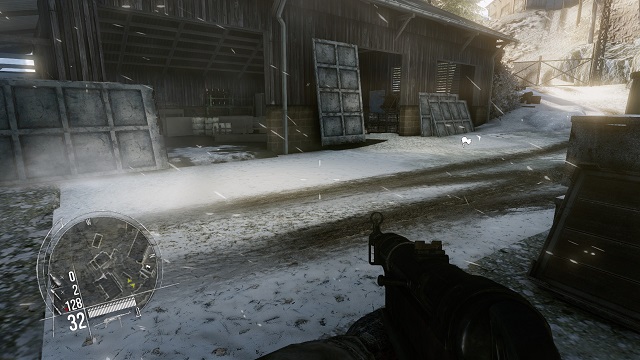
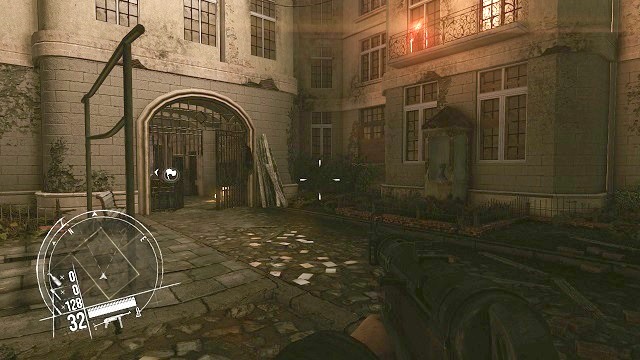 The heart of the enemy forces. Excellent!
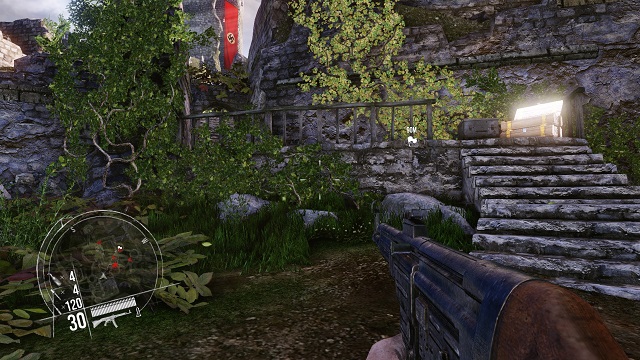
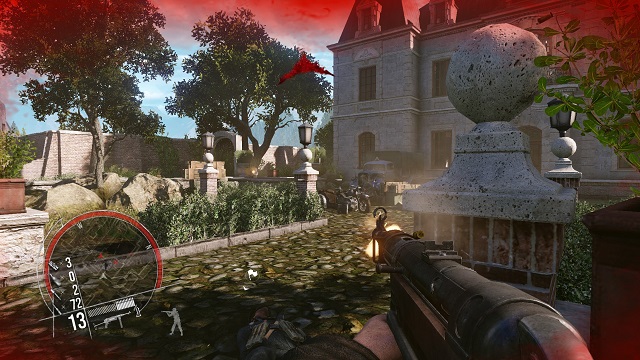
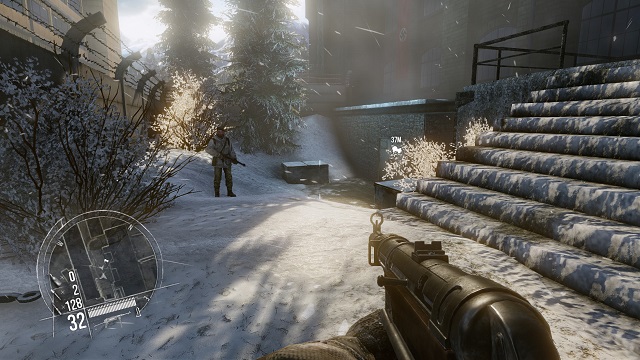
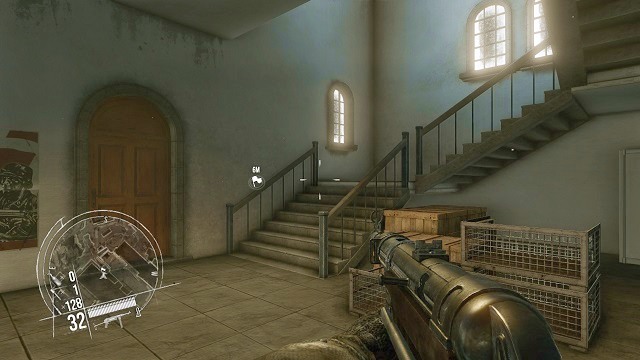
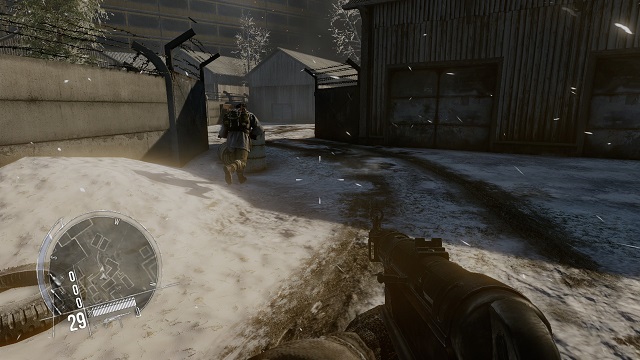
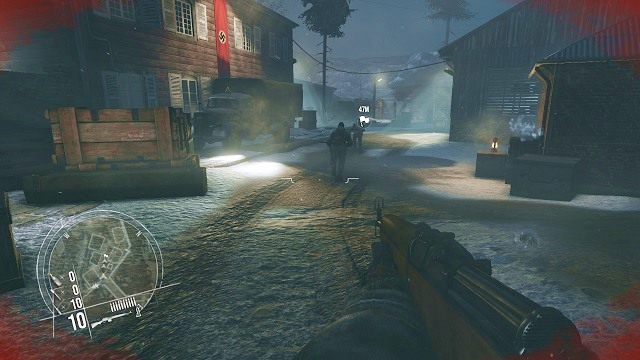
Take the main tunnel here and take several steps ahead to emerge right next to one of tenements. You head towards the gate to reach the German weapon depot, where you collect explosives. Right past the depot, there is an enemy patrol but, at first, they will not notice you. A good idea is to wait until you see planes flying above, which will drown out the noise of the gunfire (a characteristic symbol will appear on the screen), which will allow you to remain unspotted for several seconds more, and eliminate another enemy.
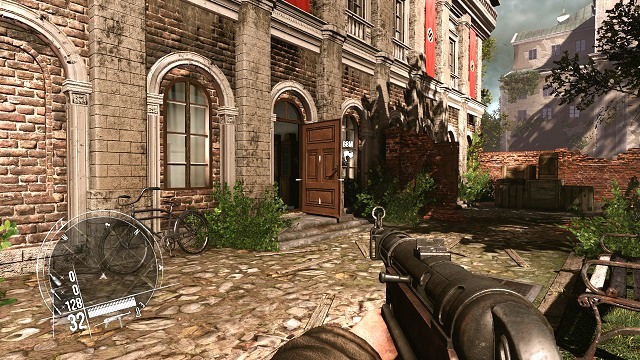 Ready or not, here I come!
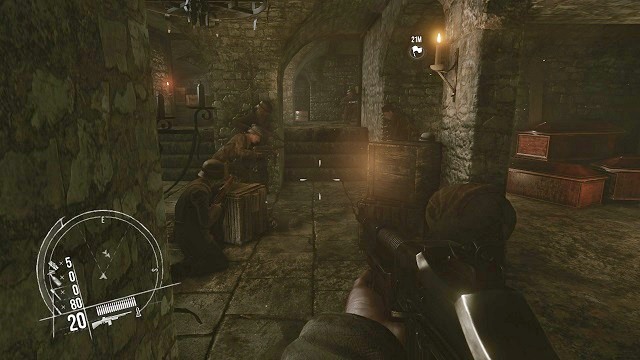
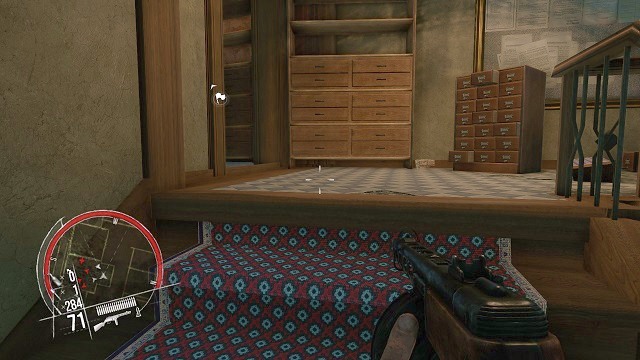
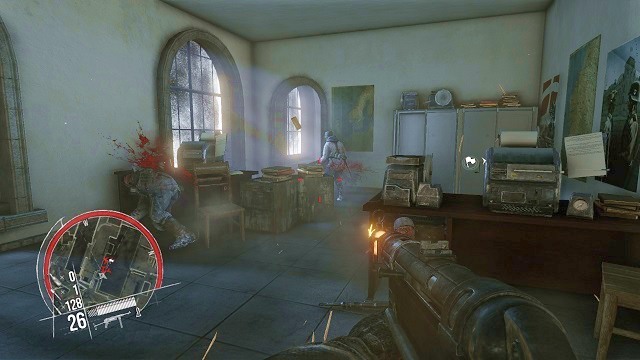
After you have killed all of the Germans on the yard, it is time to walk into the building, adorned with swastikas on all sides, and continue doing your job. At first, you will encounter no enemies in the initial rooms.
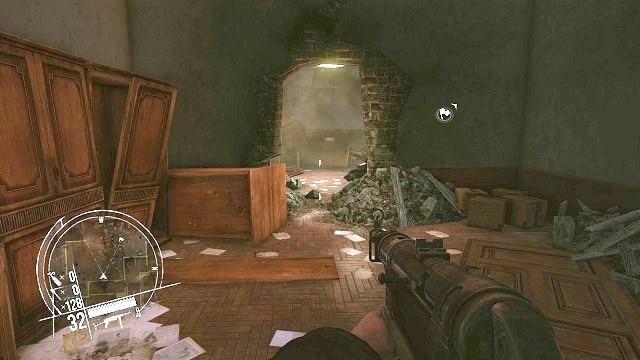
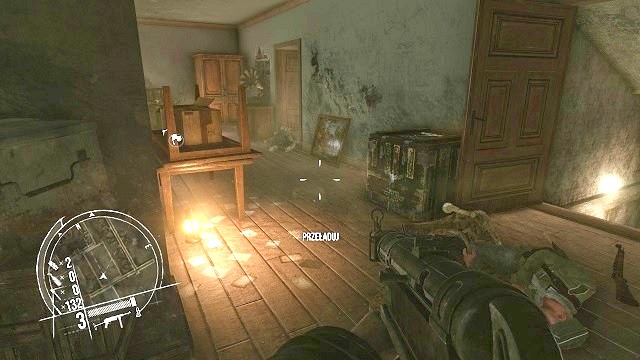
Someone must have really been bent on escaping
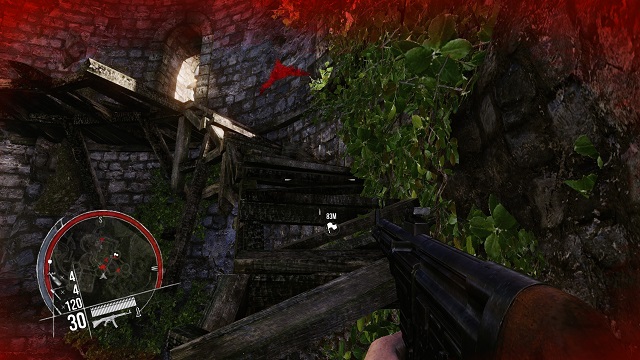
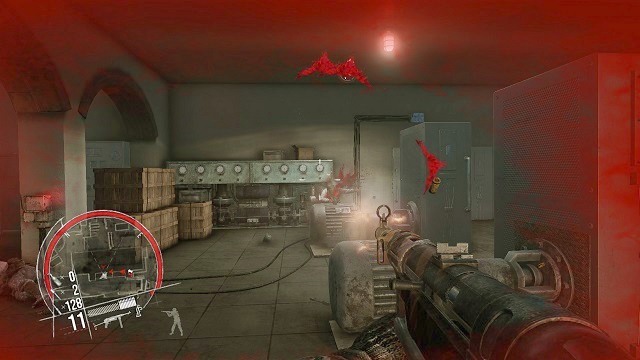
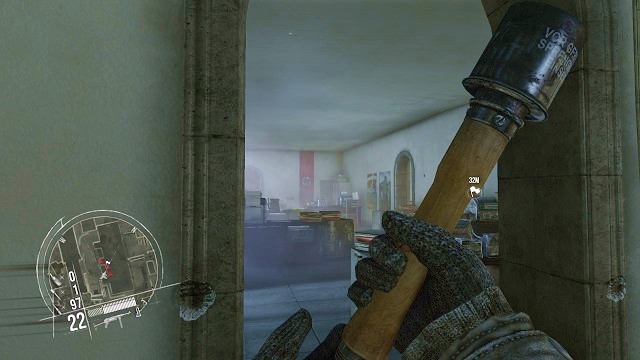
After you walk past the room full of shelves and cardboard boxes (you can find the 2nd collectible of the 3) you will approach a wall with the hole, which you can hear Germans talking behind. At this point, it is a good idea to throw a stone and distract the enemies above. Then, kill them unawares.
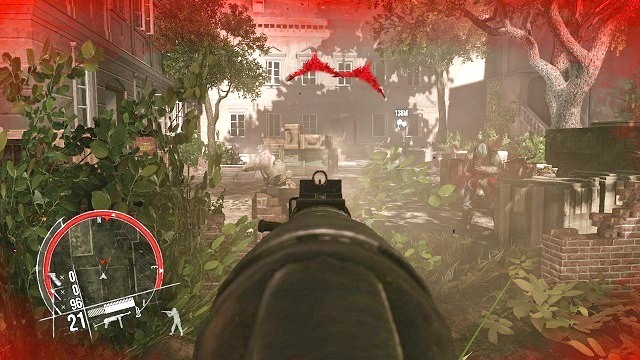
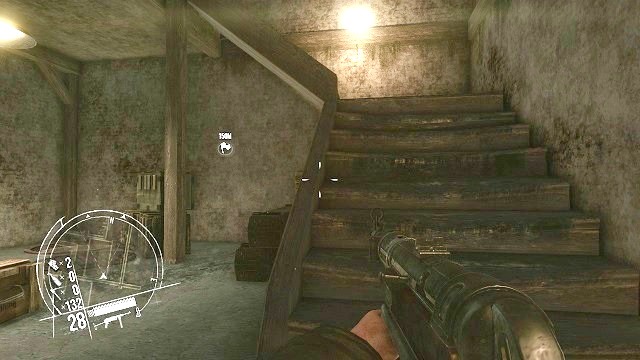
 Another wave to massacre
Once you dispose of all the enemies on the upper floor, you need to head towards the end of the corridor and climb down the stairs, to the ground floor. Then, after you exit, you will walk into a square full of Germans.
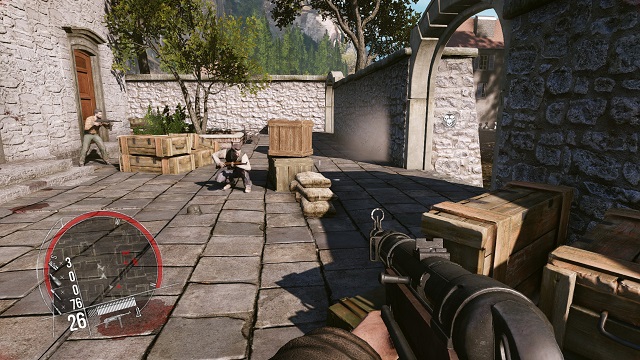
 Sixteen, or sixty - what difference does that make, anyways?
Fighting all of the soldiers may have grave consequences so, it is recommended that you watch out here and make an extensive use of covers. After you have killed the last Nazi, walk into the next building, where there are several soldiers more (right next to the entrance).
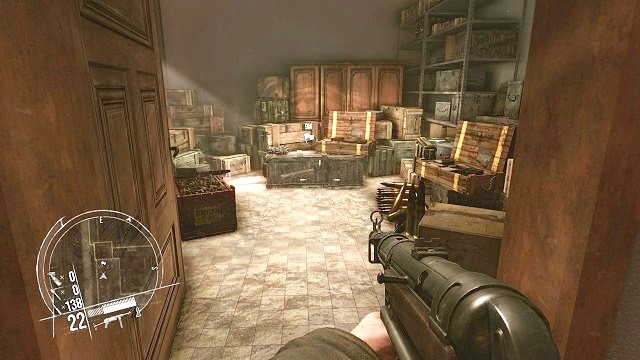 Gotcha!
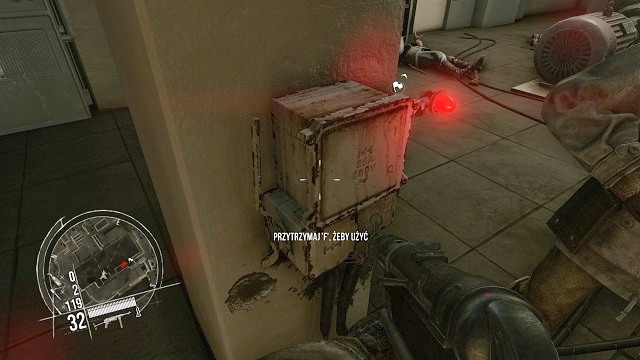
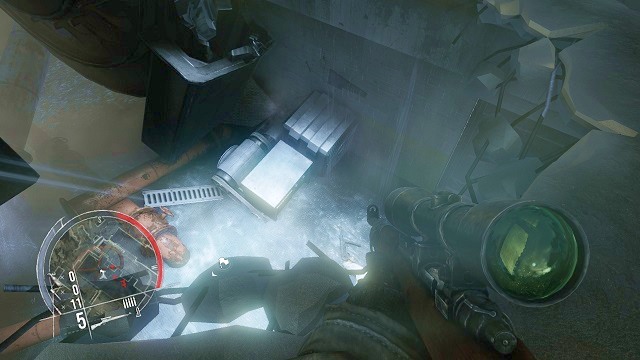
In the room on the upper floor, you will find explosives, which you need to take back to your command. Before you continue along your path, however, you can complete a side mission, i.e. blow up the entire ammo depot.
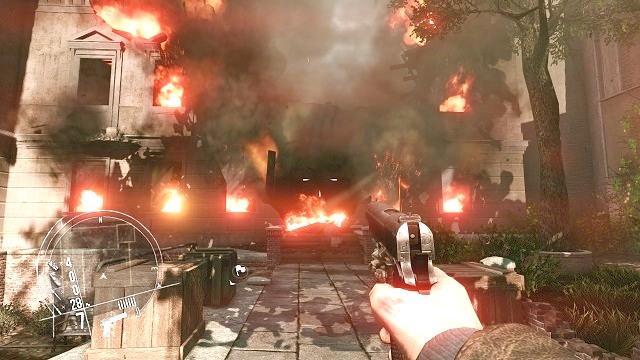 I love riotous parties like that!
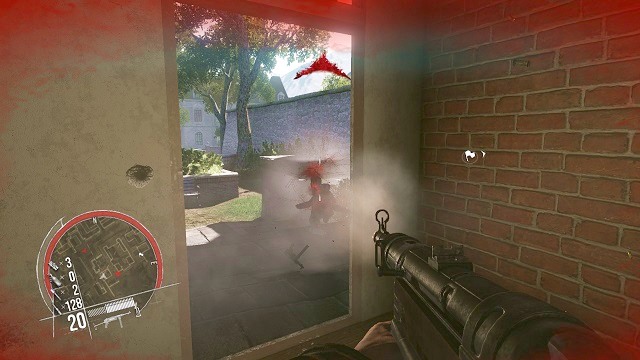
To cause the explosion, you need to plant explosives inside the building, somewhere on the floor and escape to the yard. The effect can be clearly seen.
 The charms of the guerilla life.
This part of the mission can be considered done. It is high time to return to the headquarters. The sewers manhole is out in the yard, in front of the ammo depot, i.e. what's left of it.
 The silent assassin...
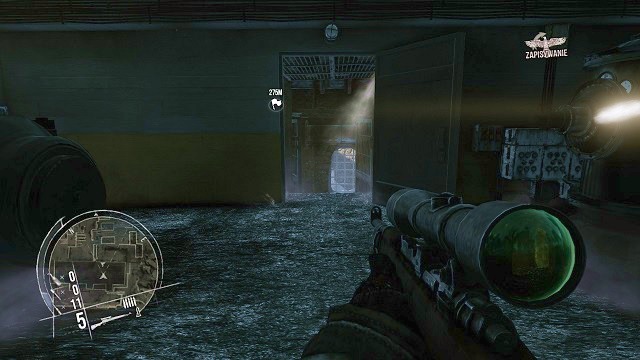
After the you return to the officer, you receive more objectives. This time , take the tunnel at the end of the room and, this way, after a while, you will walk out of the sewers, into the ground floor of an unknown building. There are two paths that you can choose from. After you take the stairs, you reach the higher floor.
 Down!
Down!This place is swarming with the German soldiers. They are both in the corridor and in front of the building entrance. The quick extermination should not be any problem for you, because the soldiers there are turned with their backs at you and, the ones outside cannot enter in any way so, the only thing they can do is shoot through the windows.
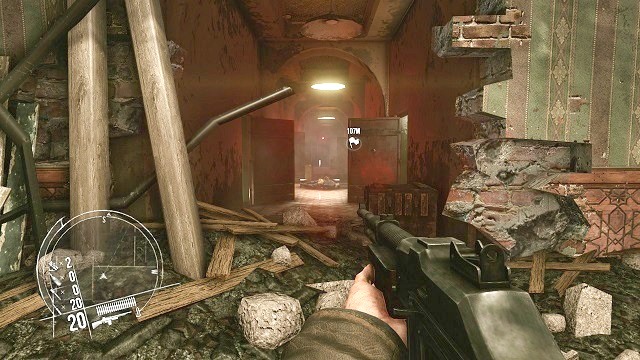
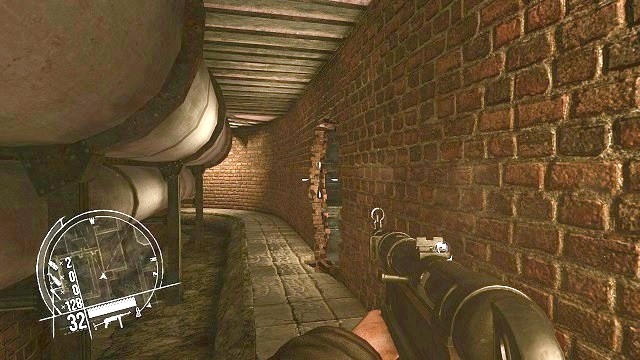 There are many ways to sneak past unnoticed.
After you take the hole in the wall, you will walk into the tunnel with holes that appear in the walls, here and there. Across these holes, you can get into the square, in front of the building. Crossing a hole is your decision and depends only on the adopted tactic.
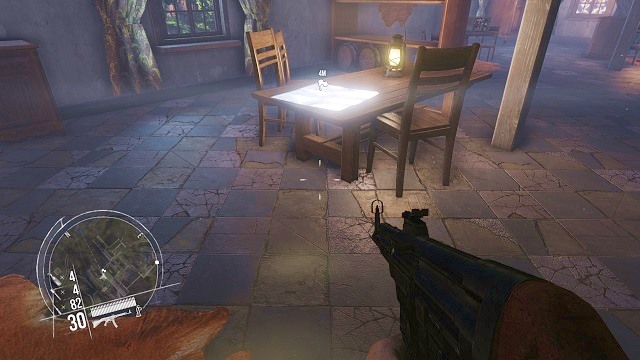
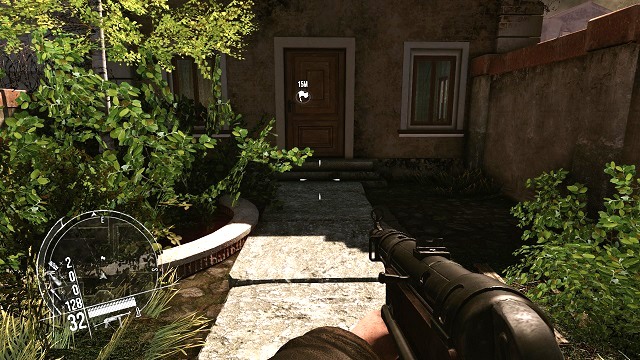 Knock, knock. Anybody home?
Follow the marker on the minimap and cross the entire yard to reach a small building. Walk inside, there is nobody inside (at the very beginning, at least). In one of the rooms, on the table, there is the 3rd of the 3 collectibles in this mission.
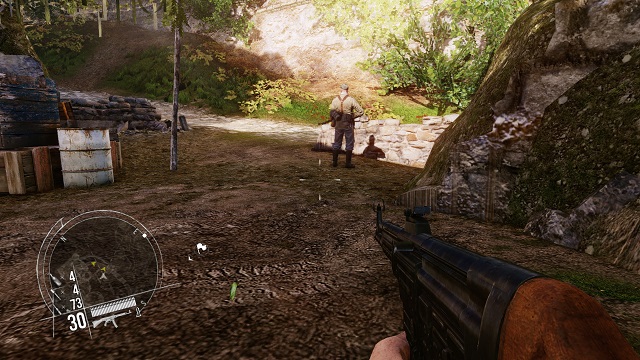
 One salvo and they all fall like flies.
After you exit, at the other side of the building, you will reach the training yard for the Germans. The circumstances are on your side, because you can eliminate all of them with, literally, one salvo, if you position yourself well.
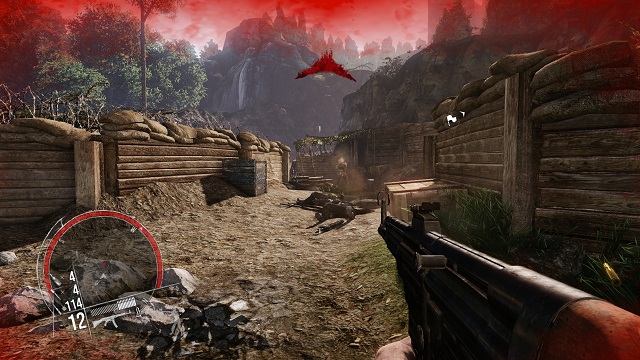
 Heavy equipment is nothing to trifle with.
However, this is not enough. After you kill all of the exercising soldiers, a new wave arrives who dash out of the building, after being alarmed by the gunfire. Also, this will activate the heavy machine gun. As much as the fight with the regular privates is nothing demanding, the encounter with the HMG may result in your death. To kill the operator, you need to put a bullet between his eyes, quickly, or walk around him and shoot him in the back. Either way, after you have eliminated this threat, walk into the neighboring building.
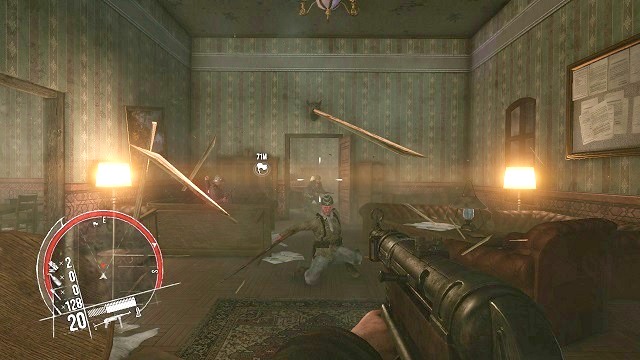 Surprise, surprise!
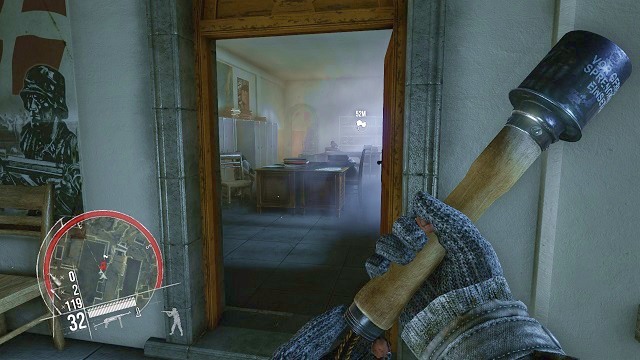
Once inside, you can only cross the door on the right. After you force it open, time will slow down and, as a result, you will gain several additional seconds to kill all of the enemy soldiers within sight.
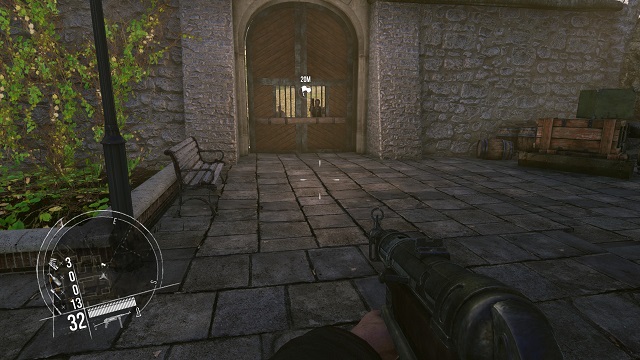
 Too bad that all of the prisoners are pushing up the daisies.
As you follow the corridor, kill all of the enemy soldiers and, after a while, you will reach a bigger group of them, at the beginning of the prison block. After you win this fight, push ahead, without even peaking into the holding cells, because corpses is all you find there.
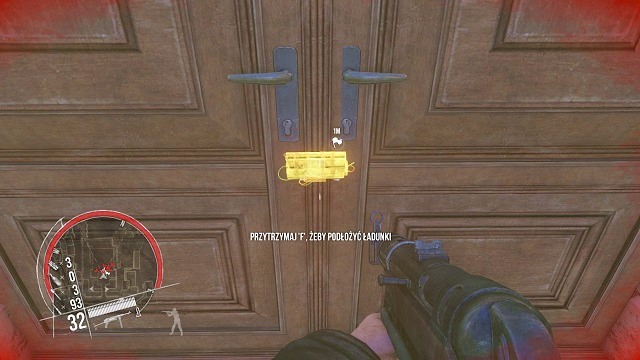
 Headshot!
At the end of the path, there is a door with an enemy officer behind, and the priest that you are looking for. After you force the door open, just like earlier, time slows down. Your task is to kill the enemy (shooting him on the head would be best) and not to shoot the priest, who is standing next to him.
 The escape worthy of the hero.
After you have a conversation with the old man, you receive instructions to return to the HQ. To do that, you need to cross the nearby door and take the nearby manhole. Mission 1 has been completed.
 Well buddy, let's go.
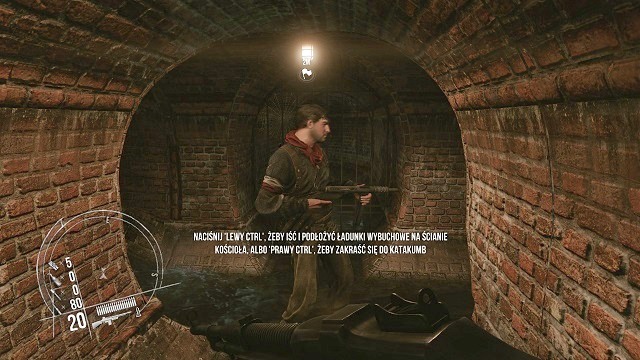
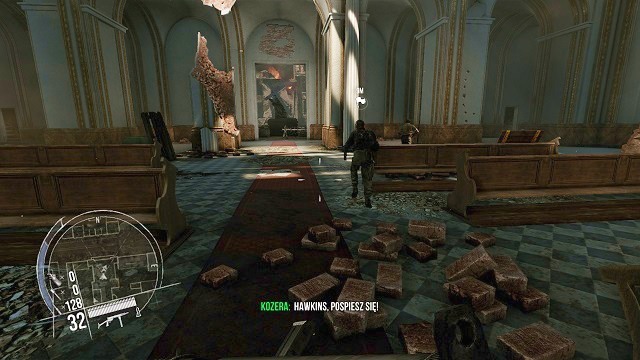
The second mission of the campaign starts with receiving instructions from the officer, who tells you to follow Kozera and join the resistance. The guerillas are planning on attacking the Church of St Cross.
Left, right, left, right.After you take several steps in the tunnels, your ally stops and asks you where you want to go. There are two options to choose from. The first one is planting explosives on the wall of the church and the other is entering the church, silently, from the side of the catacombs. You can choose only one method here.
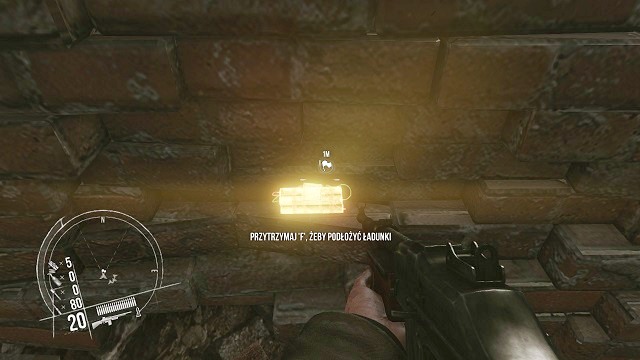 A big BOOM is about to happen.
After you choose the path to the left, the screen goes dark and you appear next to the wall of the church, where you can clearly see the spots in which you need to plant the explosives. Do your bidding and retreat to your allies (to Kozera and two other soldiers). After the explosion, dash inside and start the unbalanced fight with the enemy forces.
 Quite a few of us have gathered here.
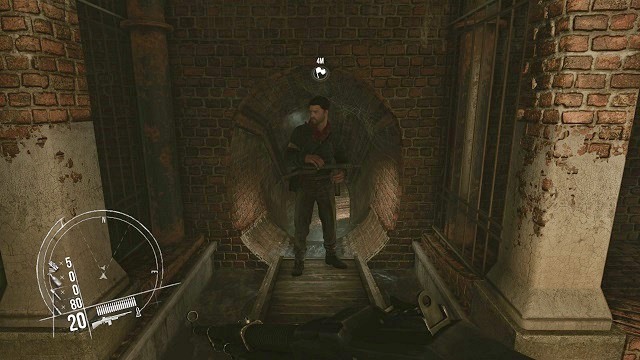
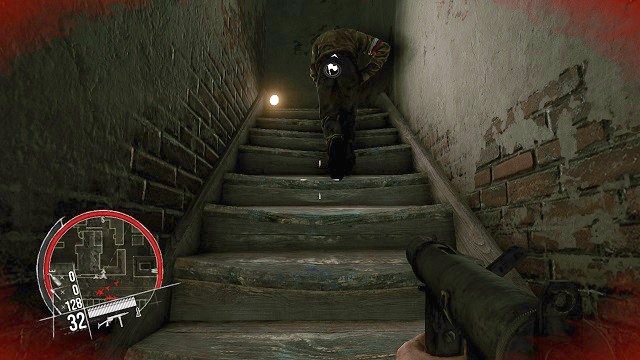
IN the case, in which you go right, right after a moment, you will cut to catacombs under the church, where you encounter quite a number of rebels. Without wasting time, climb up the stairs, following Kozera.
 Open up quickly, I need absolution!
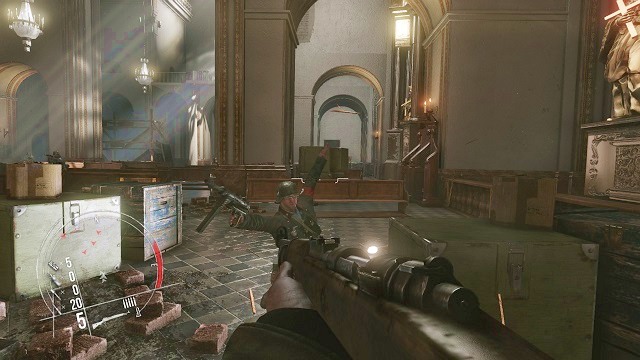
After a short walk, you will reach the door that you need to force open. Again, you need to do the same thing as earlier so, hold down the appropriate interaction button and, with your weapon prepared, barge in, to fire several shots, quickly, at the nearby opponents.
 God will forgive me.
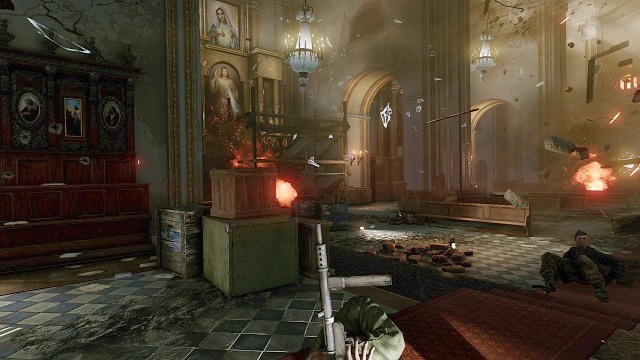
Your objective is to eliminate all of the enemies in the church. You should especially watch out for the HMG on the balcony, which may prove problematic. Fortunately enough, several allied soldiers will provide you with support, who are replaced with new men, in the case of dying. Right next to the lectern, on the ornate table, there is collectible 1 of 1 of this map.
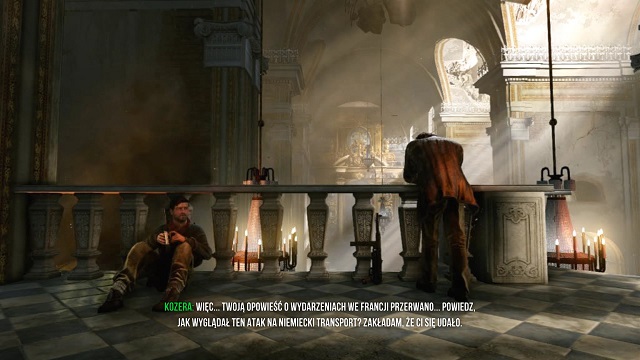
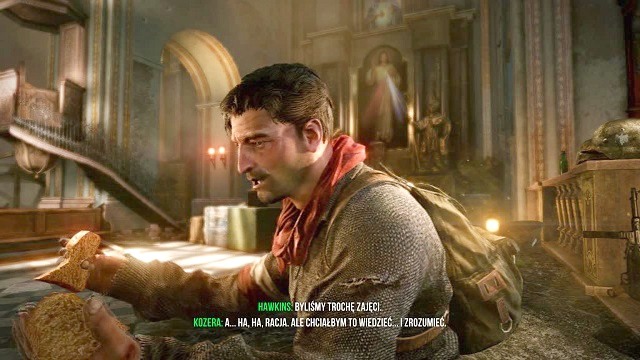 Yep... A sandwich.
After you win the fight, it is time to eat the sandwiches and talk about the good old times. When in the conversation, in the cutscene, the topic of the resistance in France is raised, chapter three of the campaign mode will start. Mission 2 will be completed.
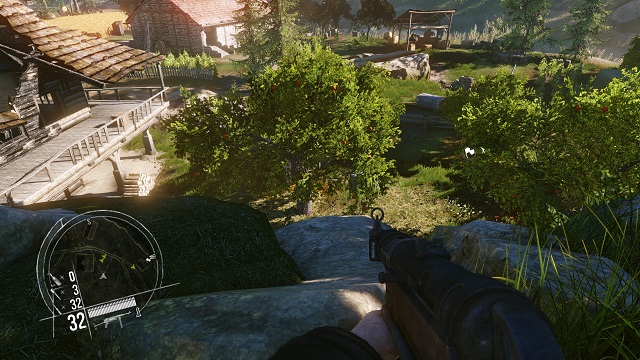
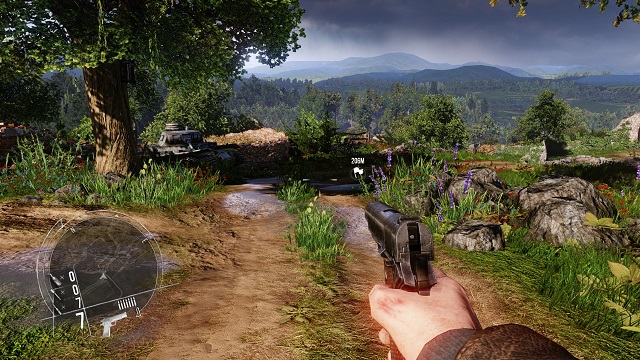 What a beautiful landscape. Spoiled by the big tank
After you watch the interesting cutscene, which introduces Hawkins's story in France to you, you gain control of your character and receive a clear objective - find your friend. Since your companion from the introduction, remained in hiding, you need to act alone, armed only with the pistol.
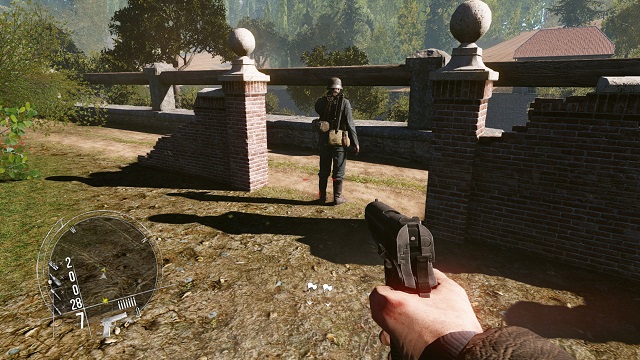
 Very nice soldiers. They queue up for a bullet from me
After you take several steps, you will reach a stone wall to hide behind, because there are two Germans, walking around, here. Kill them at a distance, with the pistol and collect their weapons. You can choose between an automatic rifle and a shotgun.
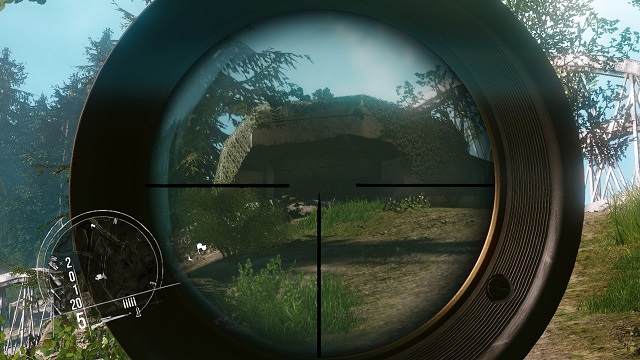
 Marked for death.
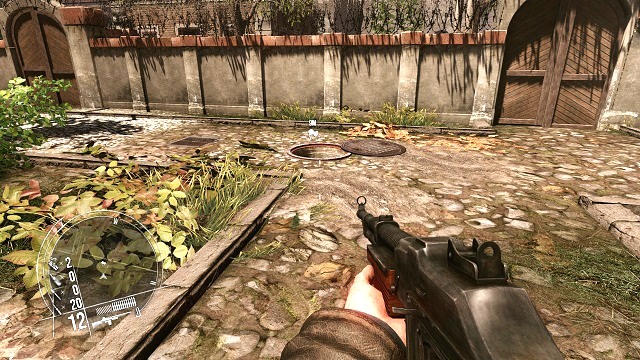
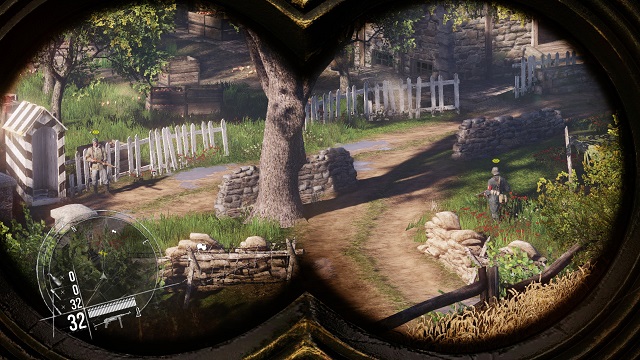
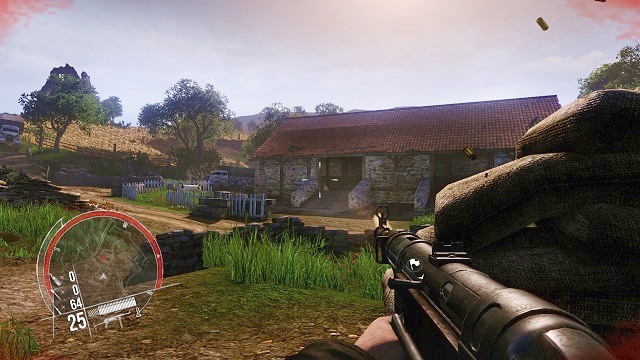
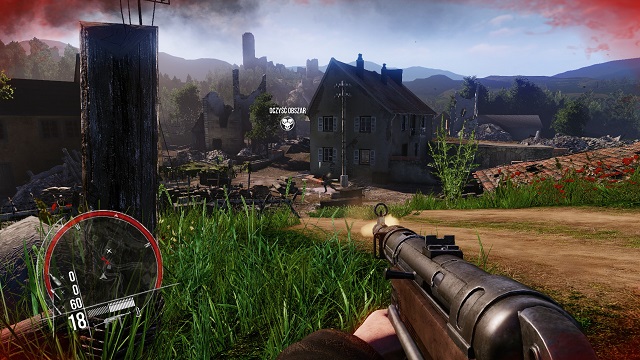
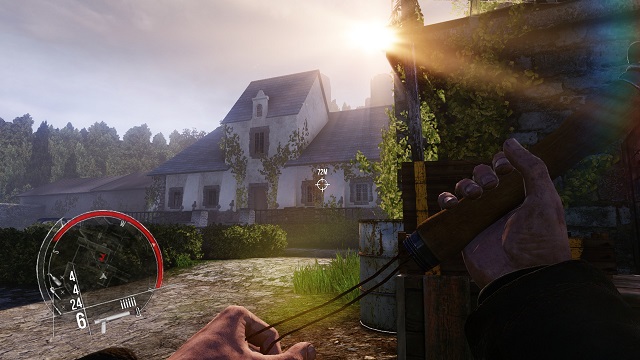
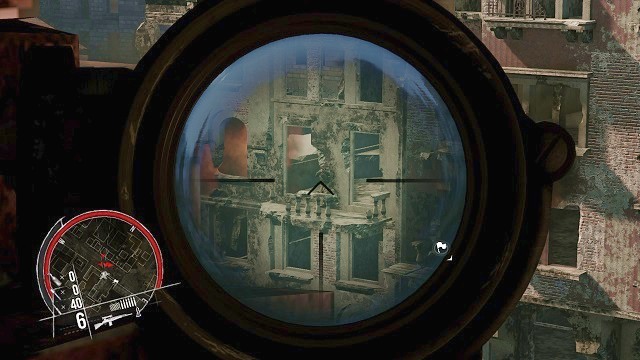
As you head down the path, you will see a French town in the distance, with the German troops stationed. Use the binoculars to find the enemy soldiers, among the buildings and mark them, so they are visible on the minimap. Now, you need to sneak up into the enemy camp.
 Cruising like Hitman.
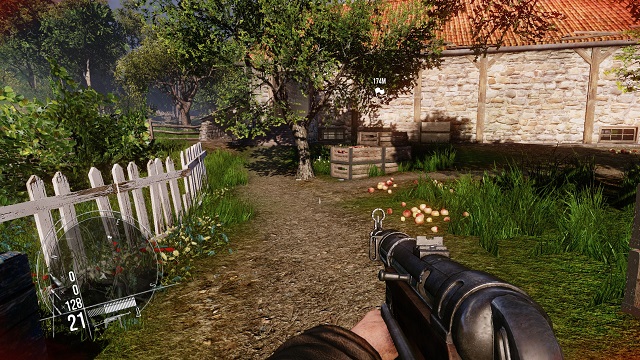
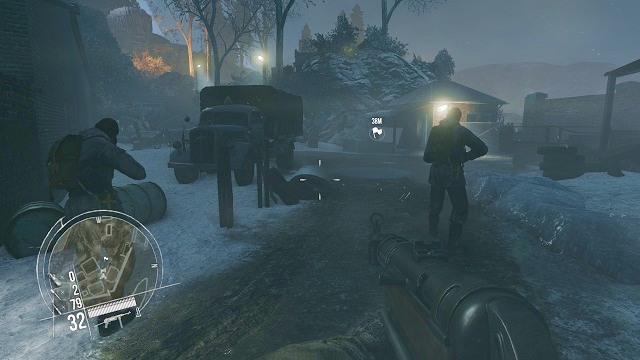
On the enemy ground, you can spend some time to play an assassin and silently, eliminate all of the guards (picking up the bodies may come in handy here) or to enter, guns blazing, and kill them all Rambo style. However, all in all, you need to cross the apple orchard and enter the building near the river and the watermill.
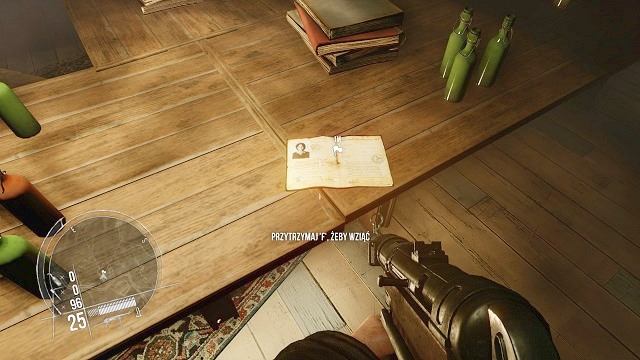 Yep, nice photo.
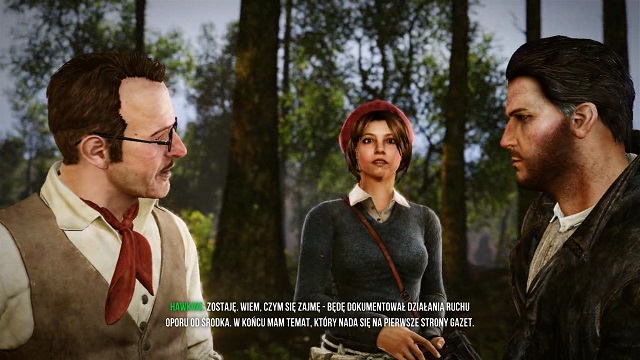
After you exit at the other side, you will see the local Nazi headquarters, where the remnants are defending. Of course, kill every last of them and, finally, climb to the upper floor to find the documents of the woman that you are looking for, on the table.
 Reinforcements? A bit too late.
After you climb down to the ground floor, you will hear a motor running and notice several Germans, who have just arrived to the rescue. After you kill all of them, follow the marker on the minimap, along the path.
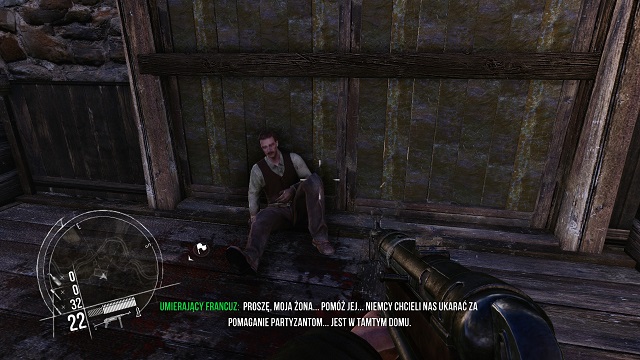 Rest in peace, dude.
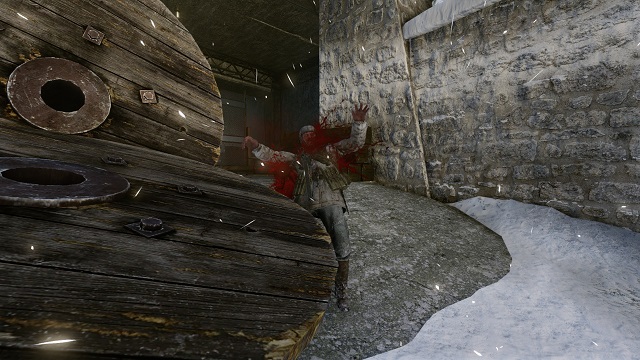
After a while, you will reach a house with a dying Frenchman in. The wounded man asks you for help rescuing his wife, who is being held prisoner by the Germans, somewhere around. However, he then dies, with the wounds.
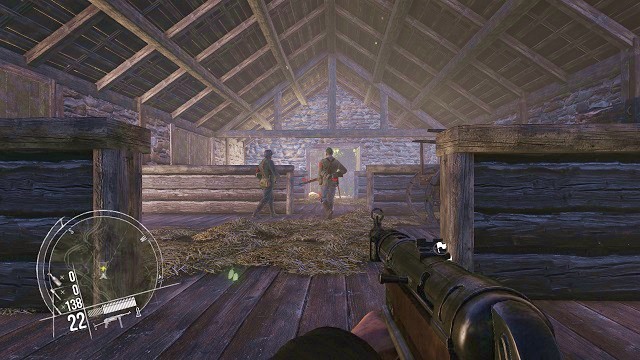 You didn't see that coming, did you?
After you listen to his speech, you need to hide behind the wooden wall, as quickly as possible, right next to the other exit, because two soldiers will soon walk in. With them, turned with their backs at you, you only need to fire a burst at them and your job is done here. After that, exit the house.
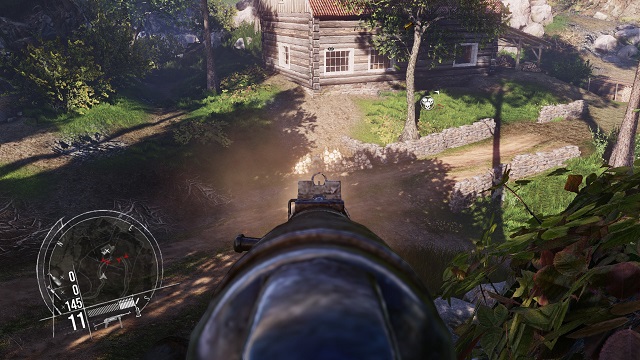 Reinforcements have arrived!
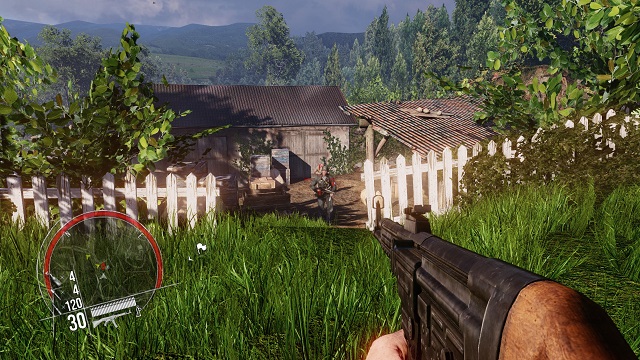
After you cover another stretch of road, you will reach a house that is being fired upon, on all sides, by the German privates. Of course, kill all of them and enter the house to talk to the partisans. This way, you will complete the side mission in the chapter. Inside, apart from two rebels, there is the wife of the dead man and collectible 1 of 4, in the attic.
 This way, you will liberate any township.
After you follow the marker, on your path, you will reach a town, where there are the enemy soldiers stationed. Killing them out should not be too much of a challenge to you. The tactic is up to you - either Hitman or Rambo.
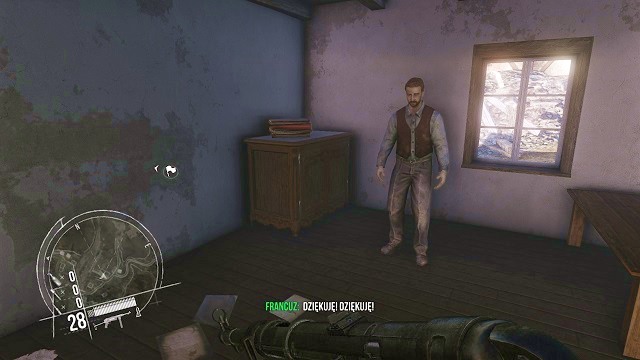 Yeah, sure, everyone says that.
Once you get rid of the enemies, you need to approach the surviving member of the resistance, inside one of the buildings in the town. After he thanks you for the help, the Frenchman will give you a bit of information about the woman that you are looking for.
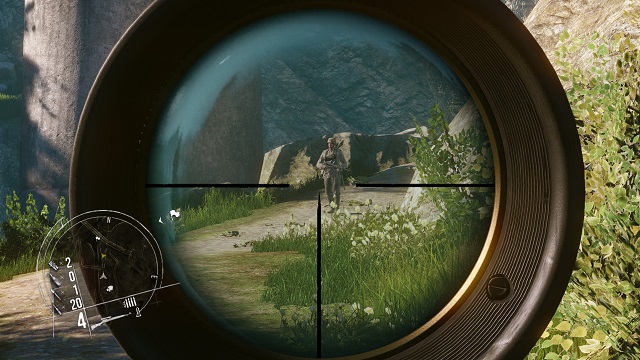
 It is rude to assault the armless civilians, like that.
As you go deeper into the town, you will soon reach a river, across which you can see a group of soldiers that are about to kill a defenseless Frenchman. Of course, you will thwart their plans and eliminate all of them. Then, follow the marker on the map, towards the rescued man.
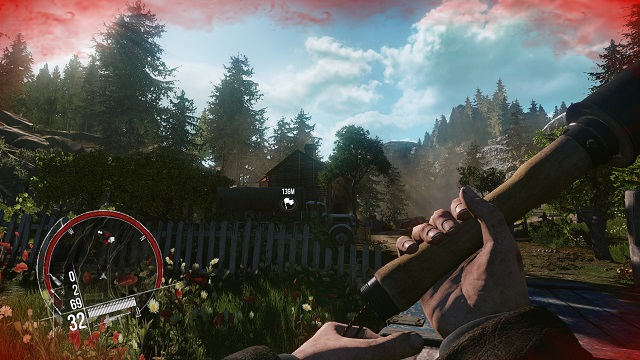
 Wanna play hard? Gonna play hard!
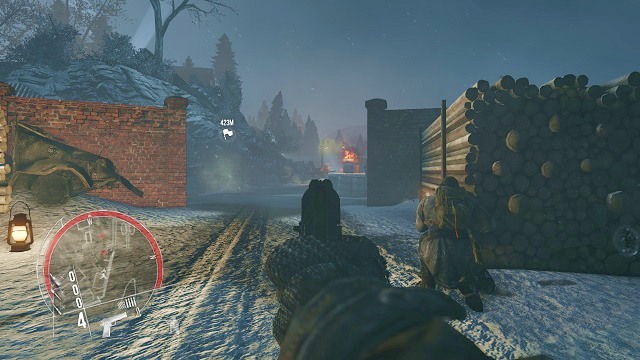
Unfortunately, your path will be crossed by several enemy privates but, this time, accompanied by a tank. This will make hide away from the vehicle's fire and look around for a weapon of higher caliber that you can deal with the tank with. Around, you can find a bazooka, as well as two grenades, which you need to throw not at the vehicle itself (they bounce off the armor) but next to it.
 Secret weapons depot. Awesome!
After you win the fight, in which it was easy to die, you will have to find the surviving partisan, who hid away somewhere in the buildings. Follow the marker to find the man and follow him into the secret depot, in the basement.
 Help yourself.
Below, he has organized quite an arsenal and, what is even better, as a form of thanks, he offers to share with you. In such a situation, take what's best, including grenades and a better rifle, and be on your way. Before you do, however, take a look into the neighboring room, because you will find collectible 2 of 4 in this mission.
 Peek-a-boo!
Along your path, you will find a small house and several quarreling Germans. It is a good opportunity to sneak up to them and gun them down with a rifle burst. And the job's done.
 Or from the front side...
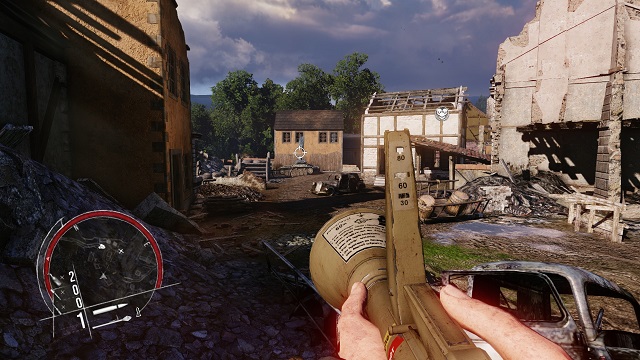
Right next to here, there is a bigger estate which (could it be any different?) is being occupied by the German forces. To make it over there, you can either take the main entrance, or take a less conventional approach.
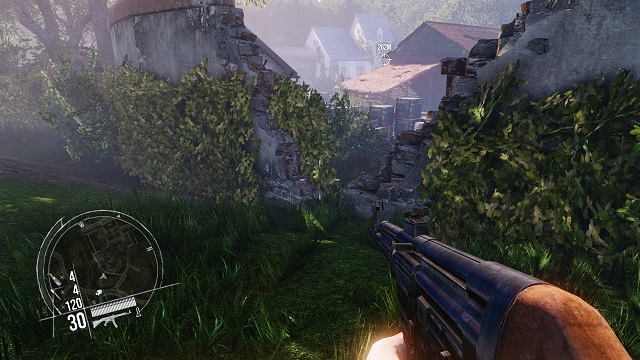 Or from the side...
What is meant here is the quite big hole in the wall that separates the entire plot from the access road. Objectively speaking, taking it is a bit better idea, than through the front entrance but, whichever you like.
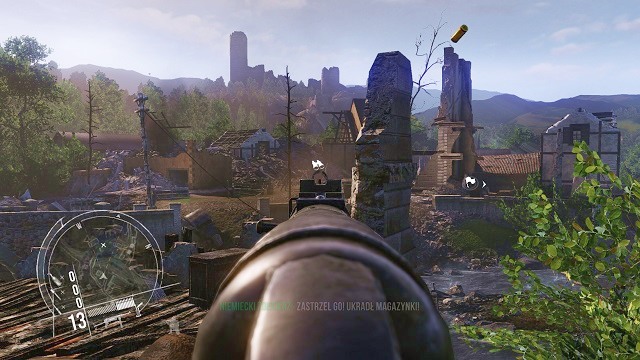
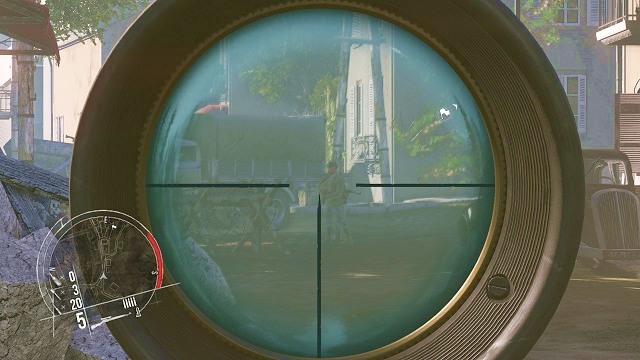
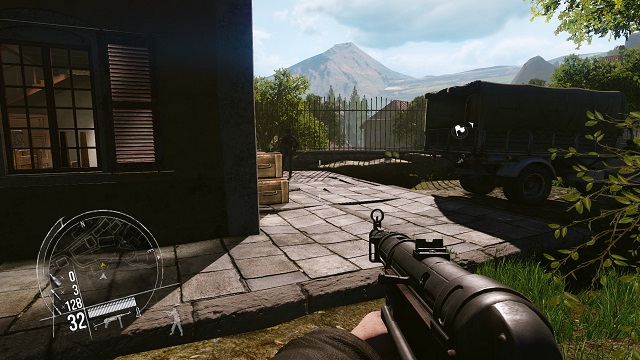
 Throw a stone? Sorry, but a grenade is all I have on me. Catch!
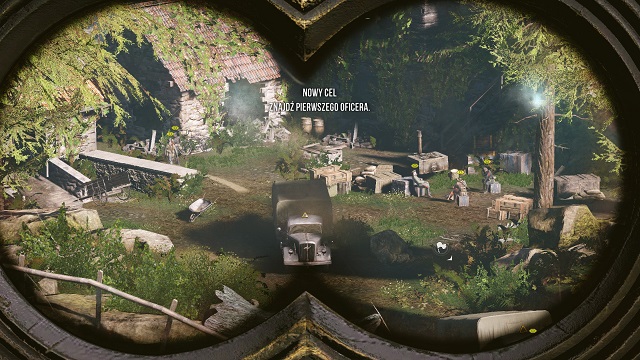
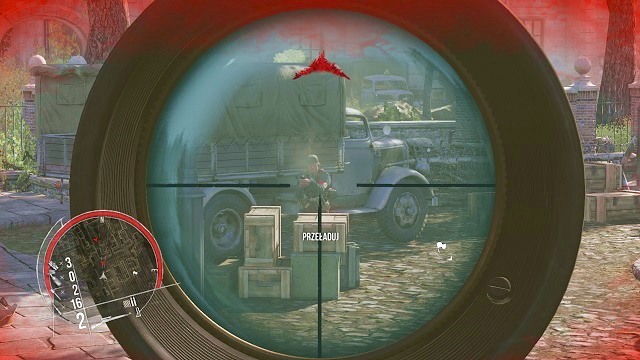
Regardless of what your decision was, some time afterwards, an open fight will ensue. You will have to botch out the entire group on the front yard and blow up the approaching truck. Then, you will have to do away with the occupants of the entire building, including the German officer - the last man standing here.
 I wonder what interesting things I am going to learn from this map.
On one of the tables, next to the radio, there is a map, thanks to which you will learn about where the woman, who you are looking for, is being kept. It is time to be on your way but, before that, it is a good idea to take a look into the basement, where there is collectible 3 of 4 on this map.
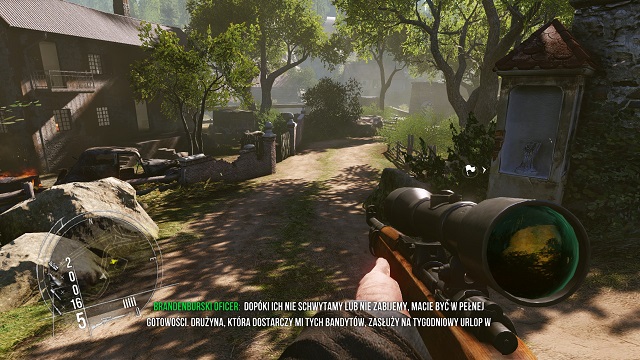
 You were supposed to stand your ground? Well...
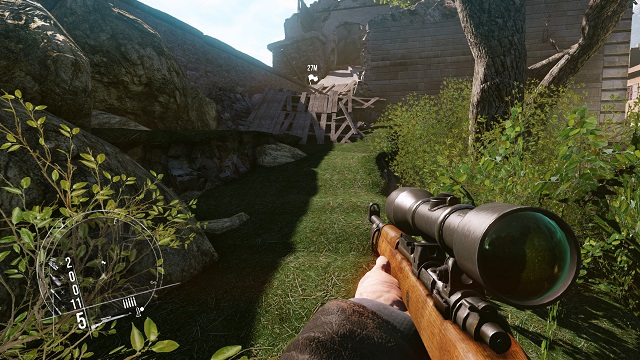
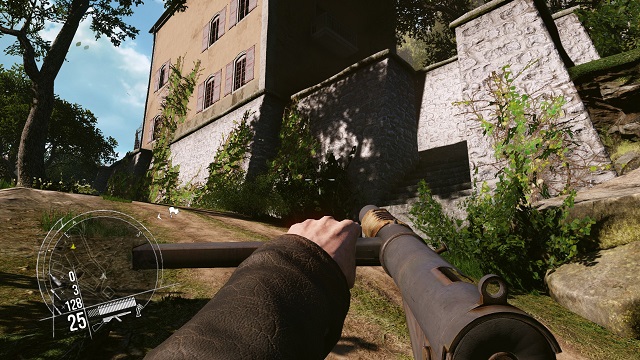
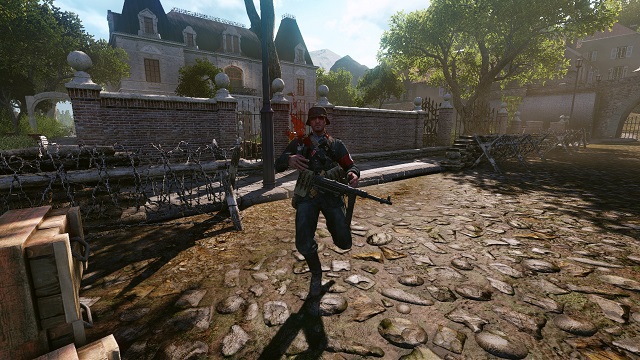
Head up the slope and, after a while, you will reach the barricaded outpost with several of the enemy soldiers. Unfortunately, they will not carry out the orders given to them, because they will quickly die by your hand.
 Do not turn back, buddy. Ever!
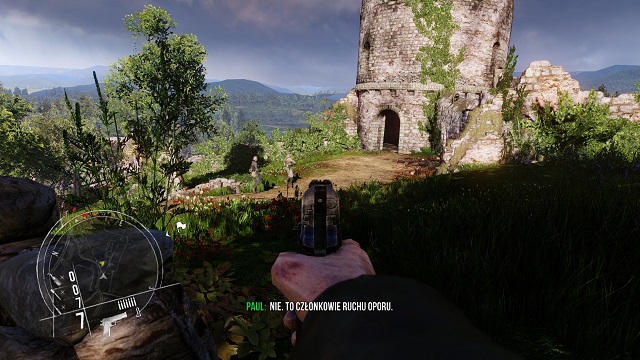
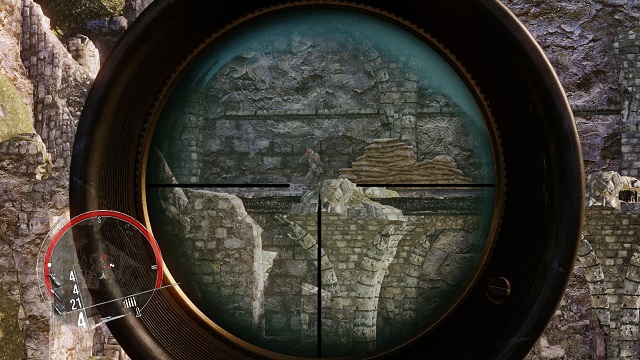
Then, you will see the ruins of an old castle, where the enemy soldiers are stationed. The first opponent that you meet is turned with his back at you so, you can easily kill him, without causing any noise. Still, you need to pay attention to two things. First of all, nearby, there is another soldier patrolling, who may spot you (you need to conceal the corpse of the first Nazi or quickly, and just as quietly, deal with him too). Secondly, from the castle windows, there are enemy snipers watching, who usually are very dangerous. Once you are shot by one, you are down!
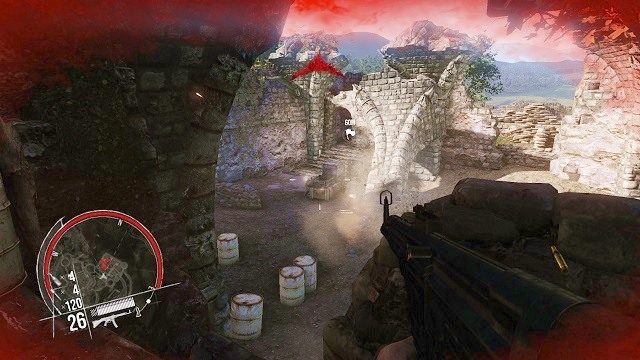 This is your last stand!
In nearly 100% of cases, entering the castle's yard is equal to being spotted by one of the enemy soldiers so, in this case, there is not much chance that you will avoid any fight. In such a situation, kill out everything that moves and keep a keen eye on the mission marker. Before you set out towards the last fragment of the buildings, it is a good idea to take a peek into one of the dilapidating towers, where you can find collectible 4 of 4 in the mission.
 The worse path...
Finally, you will have to choose, again, the path again that you want to access the German officer's staying place with. You can take the regular path and meet up with the German soldiers, or take an alternative route.
 And the not too appealing one...
Around, you will notice a tall tower with dilapidating stairs, which it is a good idea to take, if you want to get near the place covered with the wall - a good vantage point.
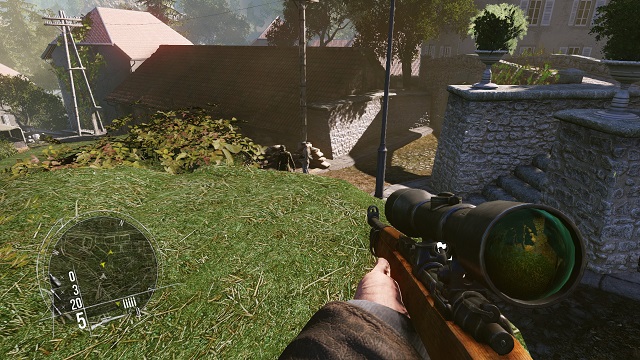
 I too have a sniper rifle. How about that?
Regardless of your method, you will face the last group of Germans in this area, including snipers, who it is best to eliminate in the first place, if you do not want to take a bullet to the head.
 Spare no one.
After you have cleared the yard, dart towards the small room and force the locked door open. Right after that, take well-aimed shots at the two enemies in the middle, thanks to which you will save your friend who is, as a matter of fact, the leader of the French resistance.
 The four-eyes is alive. Phew...
Finally, sit back and watch the final cutscene, which lays out the protagonist's further actions and what happens to his friends. Mission 3 is over.
 Take up in arms!
You start the fourth mission of the single player campaign with the introductory cutscene, where you learn that the church that you have just taken over, has just been attacked. After you cut back to the protagonist, follow your allies to start the defense of the building.
 Stand your ground!
Once you reach the HMG, its operator dies in a not-too-pleasant way so, you will have to take the position behind this piece of art. For several moments, you will have to massacre the Germans that keep coming from all sides, which should not be too problematic to you. Still, you need to watch out for the bazookas that the enemies are armed with, because one, well-aimed, shot can take you out in the blink of an eye. What is important, in the corner of this room, there is collectible 1 of 4 collectibles in this mission.
 First the back, now the front.
Once the enemies start retreating, Kozera calls for you to follow him - now it is time to defend the next section of the church. Follow in his stead, accompanied by the rest of the partisans, until you reach the next position.
 I hate climbing up the stairs...
The officer-in-chief tells you to follow one of the allies, to the tower, to eliminate the enemies effectively, with the sniper rifle,. Follow the man, who will take you to your positions. However, before you climb up, it is a good idea to take a look onto one of the balconies, where there are the church organs, because that is where collectible 2 of 4, next to one of the barriers, is.
 Straight between the eyes!
After you get to the very top, pick up the sniper rifle and start killing out all of the enemy soldiers across the street - both the regular privateers and snipers. At the same time, you need to watch out because, if you get hit by one of them, in the majority of cases you will die a quick death.
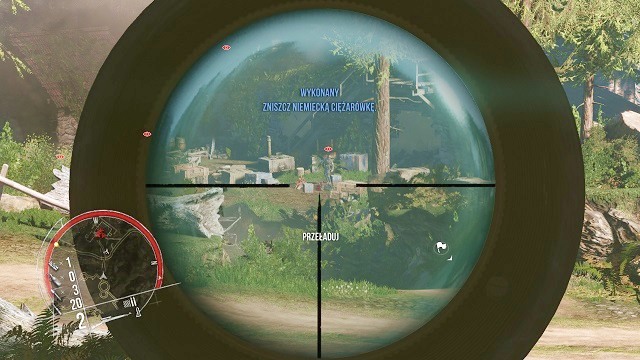
 Bye, bye.
At some point, you will notice a truck, full of soldiers, arrive. Fortunately for you, it will park near the barrels that explode, after you take a shot at them. You need to act fast and blow up the armored vehicle quickly, if you do not want to have to fight an sizeable wave of privates. After you have killed all of the shooters in the buildings (to do that you will have to walk over to the other tower, to be able to aim at a different angle), leave your positions to avoid being brought under fire from the enemy tanks.
 Go on, I am covering you!
Descend back into the main hall in the church and go towards the front exit from the building. It is being defended by your allies, including Kozera, who tells you to grab the bazooka in the streets and use it against the nearby tank. Do that and shoot at the Germans covering near the tank, while avoiding being killed by the tank itself. The entire action takes place on the right side of the defense lines and, after you walk over to its right side, towards the end of it, you will notice collectible 3 of 4 on the stairs.
 Prepare to be devoured by the Divine Fire!
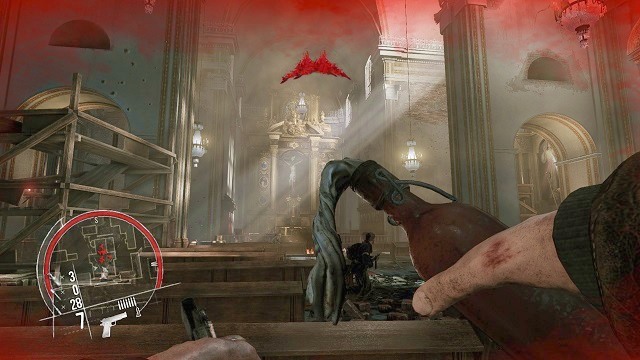
The final round assumes killing out the rest of the attackers in the main hall of the church. A great majority of them have gathered right next to the altar so, it is a good idea to throw Molotovs there. After you have eliminated all of the survivors, it is time to take on the final battle. However, before you clear the church completely (with the mass attack following), it is a good idea to walk over to the small room on the left, right next to the lectern, because there is collectible 4 of 4 in one of the cupboards.
 A close shave!
During the cutscene,, which only seemingly ends this chapter, there is an unexpected explosion, which crumbles a sizeable portion of the ceiling. After that, you will have to grab your weapon and lead the defense. Now you will have to fight a dozen-or-so enemy soldiers.
 Attack from behind!
It may prove a bit difficult to counter-attack the enemy soldiers, especially if you are short of ammo. A very good move here is to walk around the enemy soldiers, near one of the side walls of the church, and attack them from behind. The oblivious enemies may not have even a moment to react to that, if you play your cards well. And that is what you are expecting to do.
 Back in my times...
Ending the siege of the church is rewarded with a follow up to the story of the protagonist, about the fights for the French resistance. So, listen to what happens next. Mission 4 is over.
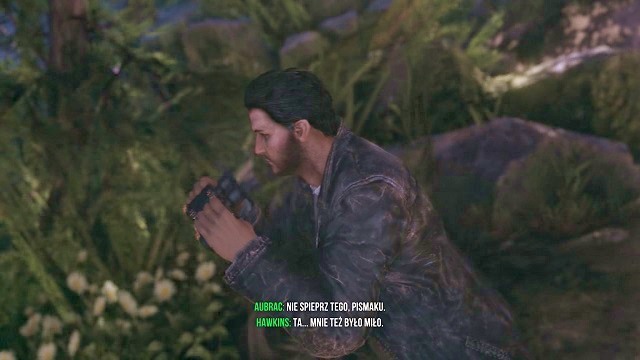 It's been a pleasure to me too.
As always, mission five starts with a cutscene where you will have to set out for a single-man sojourn behind the enemy lines. After you bid farewell to your friends, It is time to take up in arms and refuse to obey the Germans.
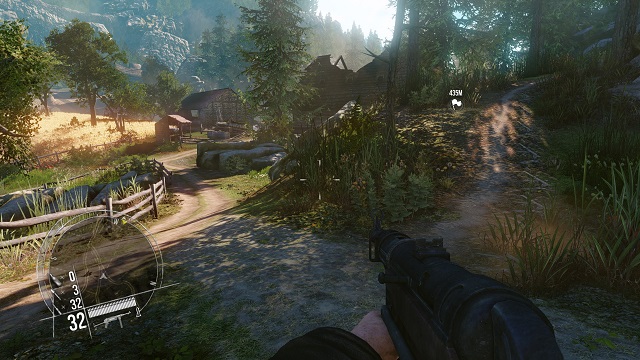 From the front or from the back?
After you gain control of your character, you will have to pick your approach. You can either take the conventional path through the city, which will immediately lead you up to the enemy outpost, or take the path across the forest, thanks to which you will walk around it and which will boost your chances at sneaking up on the soldiers.
 Is he peeing under that tree?
If you decide on the latter, at the end of the path, you will be able to descend over a steep slope, right next to one of the buildings. Around, there are two privateers who, with a bit of luck, you can eliminate quietly, which is not going to be noted by anyone.
 I love throwing grenades everywhere I can.
Your next step is rather bound to fail so, you are up for an open battle against the defenders of the positions here. Still, you can easily kill out all of them. What proves useful here are the grenades, thanks to which you will eliminate the Germans, hiding behind trucks and cars, quickly. What is important, is the fact that in the first building that you come across (the one with the big balcony), you can find collectible 1 of 4 in this mission.
 Now I'm gonna have some fun.
After you have eliminated the threat, you need to follow the marker on the minimap, which takes you to the small building, which serves as a weapon depot for the enemy soldiers. You will find explosives there, which you will soon need to use in the just cause.
 I can see you, you can't see me.
You can complete the next part of the mission in a very pleasant, assassin-like way - with the sniper rifle, which you have been armed with, since the beginning of this chapter. First of all, kill the HMG operator, on the nearby hill. Aim, fire!
 Sorry, I need to kill you.
The next one to pop is the private patrolling the nearby path. After you have shot him dead, you need to head towards the other bank of the river.
 Two crows with one stone.
After you cross the river (either over the bridge or the shallow) it is best to head along the right side and walk around the two Germans talking at the table. If you position yourself in the correct spot, you can take them both out, with one shot. Do that and approach the camp, where you find collectible 2 of 4 on the table.
 Get ready for a big BOOM!
After you have taken out all of the soldiers in the area, you will have to approach one of the pillars, which is supporting the bridge, and plant explosives there.
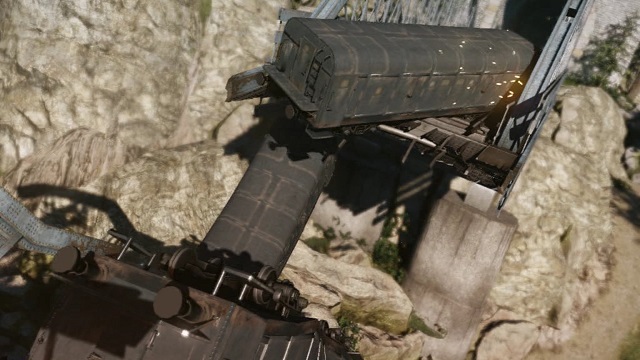 Oops...
During the cutscene, you are going to see the destructive, yet beautiful effects of your actions. Once the train derails and it is incapable of further functioning, you will be transferred towards its cars.
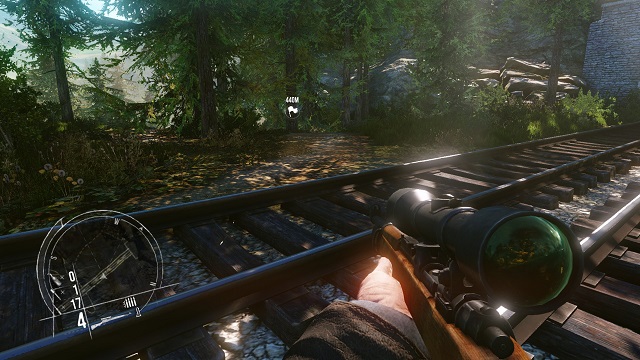 The hunt for the follow-up.
After several meters, along the tracks, you need to go towards the forest and find a good shooting position for yourself. Your task now is to kill out all of the enemies in the nearby camp.
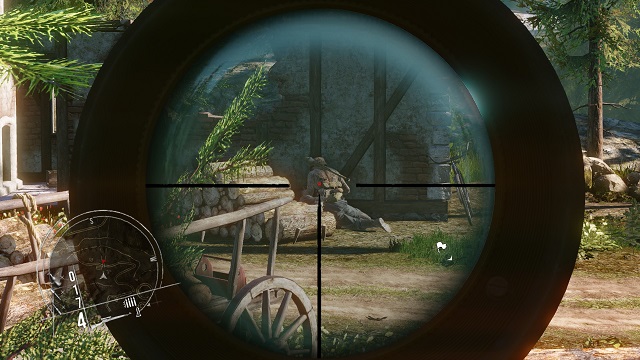 I'm here!
The extermination of all the soldiers, with the use of the sniper rifle, is really quick and enjoyable. The distracted enemies will be at your mercy from the very beginning. After you have eliminated all of them, you follow the marker n the map. In the ruin, on the wooden crate right next to the watchtower, there is collectible 3 of 4 of this map.
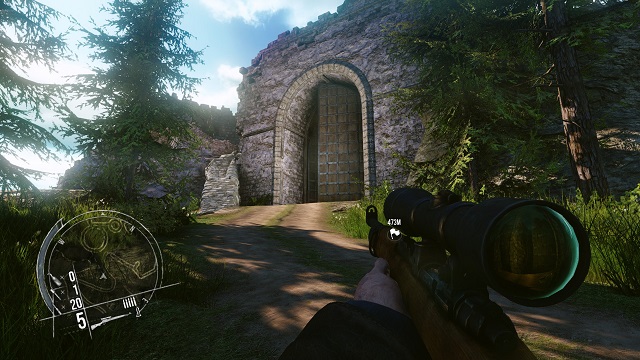 A castle again? This will not aid you in any way, anyways.
After a short walk, you will approach a huge gate into the castle - fortunately, it is open. You can take it and walk straight into the enemy outpost, or take a bit different approach.
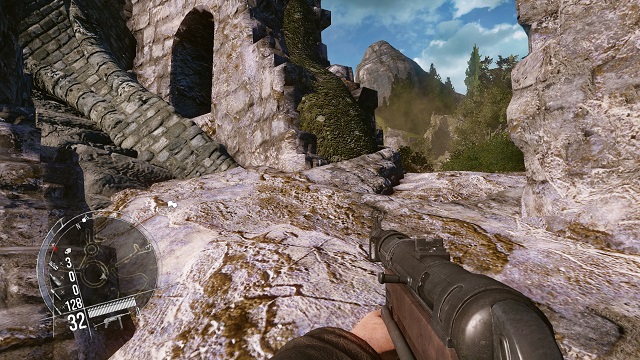 The end justifies the means!
Nearby, there is a slanting column, over which you climb onto the destroyed fragments of the walls, from which you can eliminate the enemy soldiers easily, using the sniper rifle.
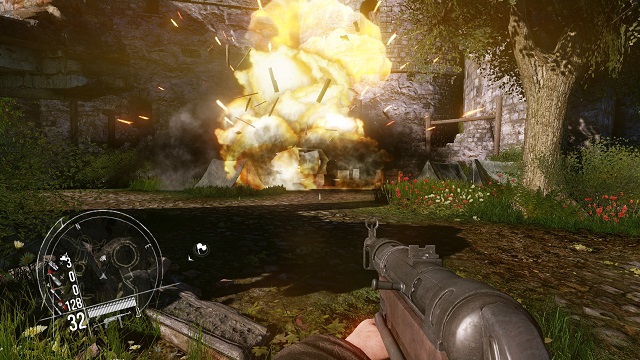 Pyrotechnics is my trade.
After you have eliminated all of the guards, you will have the opportunity to complete the side mission, without any problems, i.e. destroying the enemy armored vehicles and tanks, in the nearest area. Do your bidding, either with the grenades, or with explosives (only in some spots).
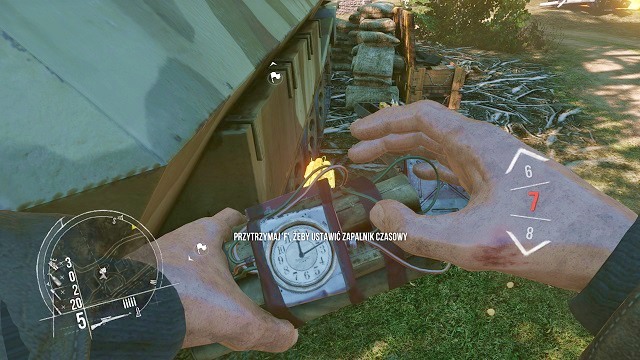
 Just do not set the clock to 1 second!
After you have destroyed two more vehicles, which are located behind the stone arch, you only need to perform the final part of the mission. You are close to the main target of the mission.
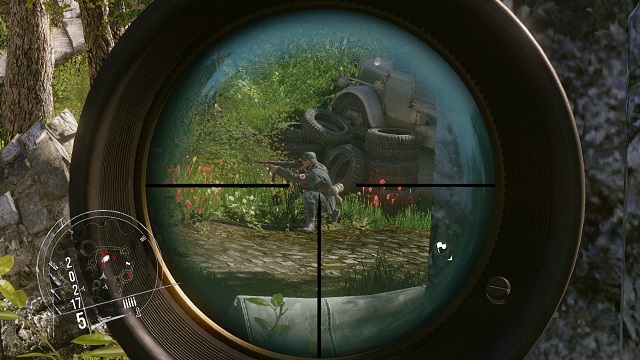 You are doing it wrong, man.
At the foot of the hill, there still are several more defenders of the camp, who you should take out with the sniper rifle. There also are some vehicles to destroy. After you have taken care of that, you can consider the mission done. Still, it is a good idea to take a look around the place, to find collectible 4 of 4, inside the navy-blue officer tent, on the crate.
 I expected the final battle to be more exciting.
At the end of the path, which is being blocked out by a locked gate, the marker on the map will change its position and point to the castle tower, as your next destination. After you enter its premises, you will be attacked by a single soldiers, who is not a boss at all and falls as quickly as the rest of the opponents. After you climb to the very top, the mission ends but, this time, you see no cutscene. Mission 5 is over.
 The best of assassins started their missions in this way.
The mission starts not with an introductory cutscene, but with the view from the binoculars, onto the German camp. Right after a moment, you return to the regular vision and you gain control over your character. At the moment, you are where the previous mission left off, i.e. atop the castle tower. Jump off, onto the tall rocks, as quickly as possible, and onto the ground.
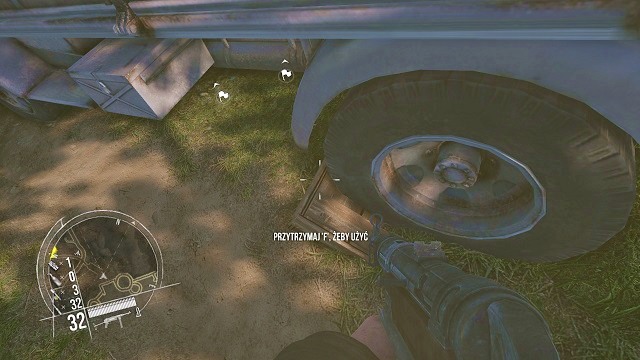 Who, in the right mind, blocks the wheel with a crate?
Approach the truck and press the appropriate key to remove the crate from under its wheel. Thanks to this, the vehicle gains momentum and rolls down into the Nazi camp.
 Have I spoiled your lunch? Sorry, so sorry...
Do not wait for the results and equip your sniper rifle. Take out all of the Germans within sight. Thanks to your quick intervention, you should be able to deal with all of the guards immediately, before they manage to escape from the truck rolling down. Once the area is clear, follow the marker on the map and take a look into the derelict building with stairs, where you find collectible 1 of 2 of this mission.
 One bullet, many corpses.
After a short walk, you approach the next location, where the enemy units are stationed so, of course, use the sniper rifle again. In the first place, fire at the barrel between the blockade and the watchtower, which results in a commotion, and eliminate all of the guards.
 You will not drive anymore.
After you have cleared the area, start completing the next side mission, i.e. destroy the armored vehicle near the road. Right nearby, there is a quite sizeable ammo depot, which you exploit to your needs, of course, and several explosives that you are going to use to blow up the enemy vehicle. Do your bidding and walk into the building in the center, where you find collectible 2 of 2 in this mission.
 Let's see who dies today...
After a while, the road ends and you will see another big outpost of the enemy soldiers, on this map. The marker changes positions to the right and points now to a group of privates, with an officer among them, who is your main target. I recommend that you go left here and sneak into the tall building.
 What's up? Smoking, aren't you? It is a very bad moment to smoke.
To shoot the officer, and the guards, you need to climb to the second floor, but it is a good idea to walk into the back of the building itself and kill silently the guard there. Now, without any fear, you can climb the stairs.
 Goodbye.
After you climb to the balcony, position yourself to take the shot and target your opponents. Now, you can act in either of two ways. You can either take a shot at the nearby barrel and kill everyone in sight, or deal with the general yourself. As for the latter, you will also have to deal with the rest of the soldiers quickly, before they manage to take cover.
 Time off.
After you succeed, climb down and go towards the last-but-one destination of this mission, i.e. the wooden gate at the end of the road.
 Yep, The next part of the city to clear, that is
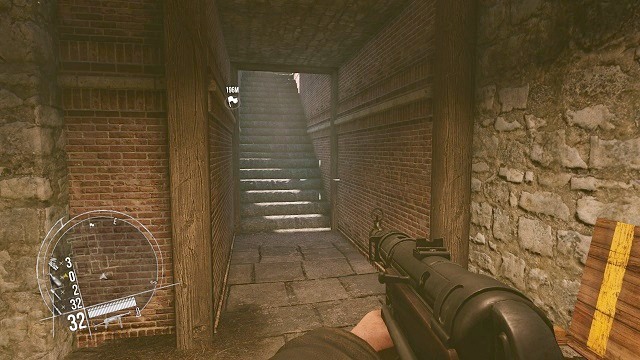
After you open it, the marker will change its position to the very top of the buildings, which you can get to over the small hill, then over the wooden plank and finally over the stone steps. After you climb to the top, the mission ends but, just like earlier, you will not get to see any cutscene. Mission 6 is over.
 Smile for the camera!
Mission seven starts right next to the entrance into the city which you will need to clear off the Nazis, within the next several minutes. In the first place, take out the two soldiers patrolling nearby (it is best to fire a single shot that pierces both of them, when they stand in convenient positions), and then several more, who come around after they hear the bang.
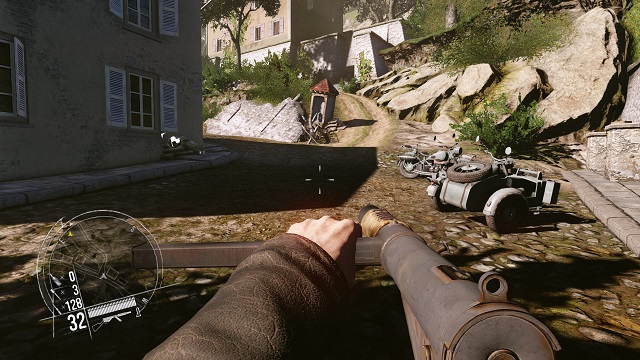 It is too bad that you cannot use these bikes.
After you have eliminated the threat, you can take either of the two paths although, the map has been designed to give much freedom to you so, there are plenty passages and side streets here to pass through. If you turn right, you will get to the main road and the path to a small hill.
 I will take you by surprise, assholes!
If you decide to go ahead, you will reach small stairs that will take you to the same place, i.e. to the street. Taking the path is, as a matter of fact, up to the player and the strategy. Rambo or Hitman? The choice is yours.
 The freedom of choice is crucial.
If you decide for the first variant, I recommend that you climb up the enclosed stairs, to the hill, and walk around the building, across the yard. Finally, you need to start sneaking because, there is an enemy soldier next to the truck.
 Just do not turn back, now...
When he is standing with his back turned at you, approach as quickly as possible and kill him silently. Now, it is time to deal with the rest of them, out in the street.
 A sniper shot from the distance of 5 meters. That's new.
At the end of the street, there are two soldiers standing at the HMG that you need to walk around and shoot from atop the hill. Unfortunately, playing the assassin ends here, because the nearest positions are manned with Germans. Time for an open fight.
 Achtung, Granate!
After you have killed the nearest guards, run towards the nearby bridge and defend against several, or more, privates, who have heard the results of your actions. Fire the sniper rifle at the heads and pepper the enemy with grenades, anything that helps you survive. After the fighting ends, follow he marker on the map, to the main destination, i.e. the place where there is the second officer to kill hiding. When it comes to the path ahead, it is up o you which way you go, there are no rules here because, as it has been mentioned above in this city you can really get lost in the maze of corridors and paths.
 Well, with one exception.
Only the several few steps should better be taken in accordance with the description, in order to find a collectible available on this map. After you cross the bridge and follow the straight path, you will reach a right turn where, up the stairs, you will reach a small fork.
 This must be one of the collectibles that are the most difficult to find.
Turn left there and virtually immediately, you will notice a small ammo depot, under a roofing. Apart from grenades, you can find there collectible 1 of 2 of this mission.
Down, off your feet!After you replenish your supplies, continue along your path and kill the ones that want to stop you. With determination, keep pushing forward. As of now, you will not notice anything that could seriously threaten you.
 And this is my argument!
After a while, you will reach a city square where several soldiers are playing a game of poker, or something. Regardless of what they are doing, equip the grenade and throw it in, straight onto the table. Then, fire at the barrel and finish out the survivors that managed to escape from the blast area.
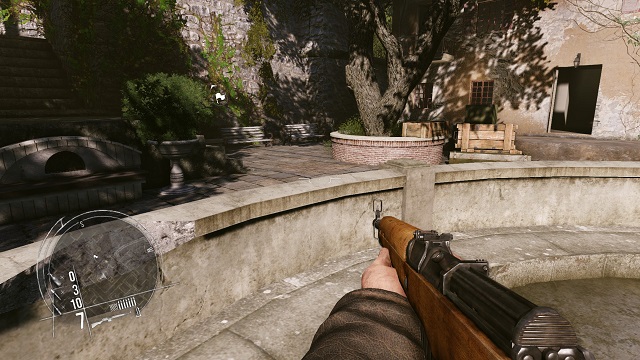
The water ran dry. Too bad.Once you are done clearing the area, run towards the dried out fountain, get past and turn into the narrow passage between the wall and the building.
 Sorry to interrupt.
Once you notice the two Germans busy with a conversation, take another grenade and blow up the guys, before they find out who you are.
 I hope there is nobody lurking around the corner.
Return, then to the exit point, i.e. to the fountain and climb up the stairs leading up to the passage in the wall. Since the passage on the left is blocked off, turn right and walk into a quite big yard. At this point, more or less, the next mission activates, which is to clear the entire city for the rebels, who want to arrive here. There is not going to be too much problems with that.
 This guy must be blond.
Keep going ahead, but you need to watch out for the HMG operator atop the stairs, right past the truck. Fire your sniper rifle at him and continue along your path.
 A wine stash?
At the end of the wall, you will find an underground passage to the other side. Take that passage. It is not necessary to sneak in there, because there are few Germans only and the tunnel itself is not too long.
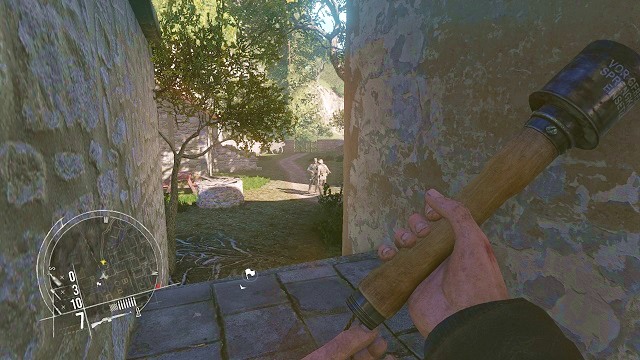
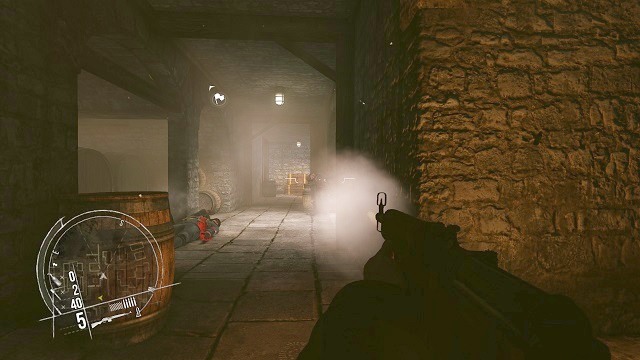 You should have keep sober on duty!
Virtually, at the very beginning of your path, you will notice two soldiers that have taken their positions between the barrels. First of all, eliminate the one that is standing, because his companion is completely drunk and does not spring to counter-attack that quickly. After you have eliminated the threat, head to the end of the corridor.
This has been long, by any means.Climb up the stairs, to the other side of the city, where the enemy officer that you need to kill, is hiding.
 Let's clear the area.
After you get outside, turn back and climb up the stairs. It is now the time to eliminate all of the guards in the area. Definitely, it is the safest to use the sniper rifle. To use grenades is the most fun. Whichever you prefer.
 Utter bloodshed.
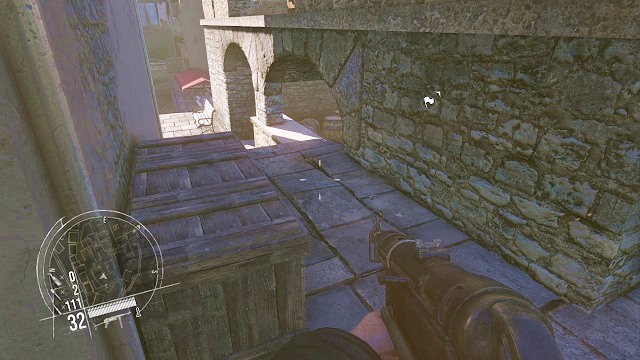
First of all, kill the guard next to the nearest building. Fire your gun at him and get prepared for a mass attack of all the nearby enemy forces. Hide behind the wall, near the dead man, and equip the sniper rifle that you are going to need in the nearest future. Before that, however, you need to take a peek at the second floor of the building, where there is collectible 2 of 2 of this mission.
 Boom!
Boom!With the sniper rifle, eliminate the successive opponents and take out anyone that approaches. There are going to be, nearly, fifty guards (or even more) so, you need to act fast and efficiently.
 That must have hurt.
As the soldiers will be falling like flies, you should not get too happy and watch closely the ammo supply, because you will, probably, soon run out of all rounds.
 Why do they keep respawning?
After you run out of ammo, climb over your cover and start fighting out in the open, with the machine gun. After you have killed out the next wave of enemies, you will find out that behind the estate, which you can see in front of you, the Germans simply keep respawning. The fight with the waves of incoming Germans simply makes no sense because, most probably, it never ends. It is better to turn around and head towards the marker, i.e. your main objective.
 Yep, just a moment.
You will reach a locked gate with three French rebels behind. Open the passage and join them. In such a company, you can return to the estate to deal with the German officer and his bodyguards.
 Fight, gentlemen!
With the rebels, push though the yard and kill all the Germans that you encounter. The allies provide you with sufficient fire support so, you should have little problems with winning this fight.
 I'm coming, you *****.
Clear the way to the front door, take the explosives from the crate and use them to make the way for yourself.
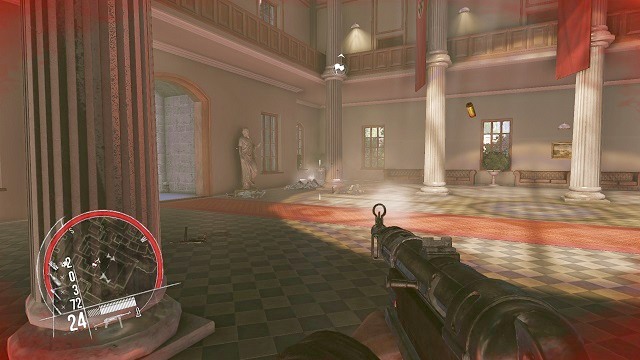 The death toll is high.
Inside, you are up for the last ordeal in this chapter, i.e. fighting the considerable number of enemies, who are conducting fire against you, while hiding behind the columns in the room. After you kill all of them, climb to the upper floor.
 watch out, I'm coming!
After you reach the door to the officer's room, force it open and deal with the three opponents inside - privates and the officer himself. This is it.
 Self-reflecting
Finally, you get to watch the cutscene and, after a while, you return to the events in Poland, in Warsaw. Mission 7 is complete.
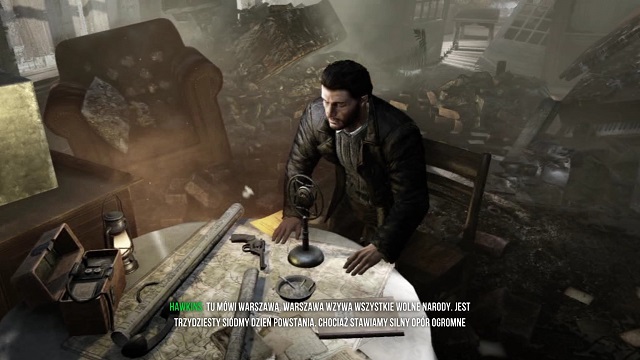 We don't have any chances either way.
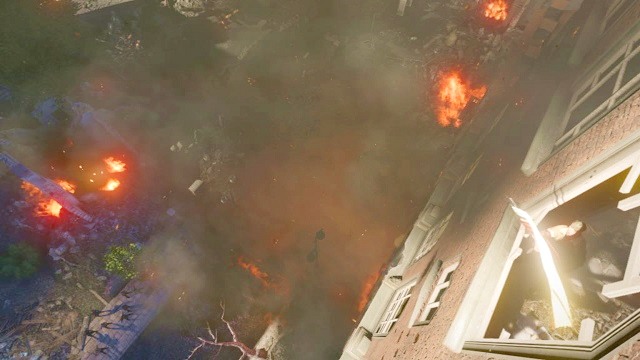
You begin the 8th mission with a movie, which serves the purpose of an extension of some sort to the introduction of the game. As your character delivers an exalted speech, suddenly, the roof of the building collapses due to a bomb falling from the sky. Fortunately, you get out of that without a scratch and you can begin with the actual part of the gameplay.
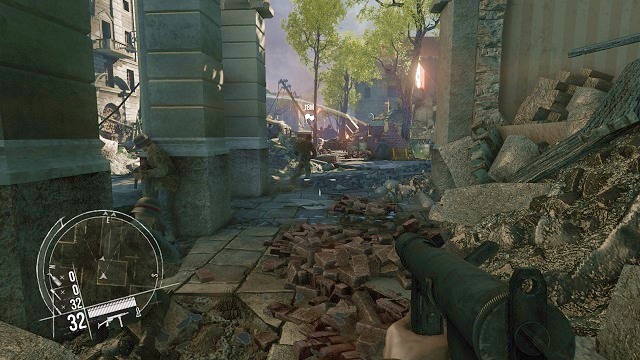 To the rescue!
The moment you regain your control, you find yourself on the streets of combat-immersed Warsaw, in the company of other members of resistance. According to the Kozera's order, you must follow him immediately, until you reach the proper position.
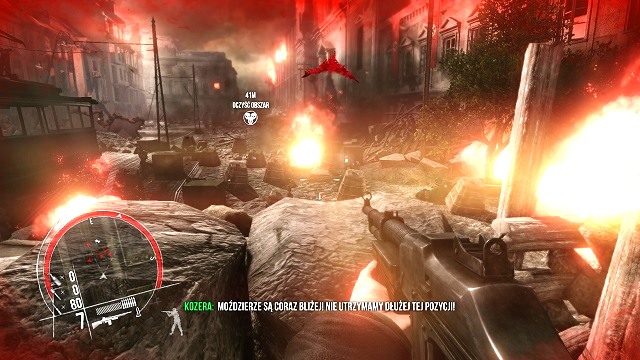
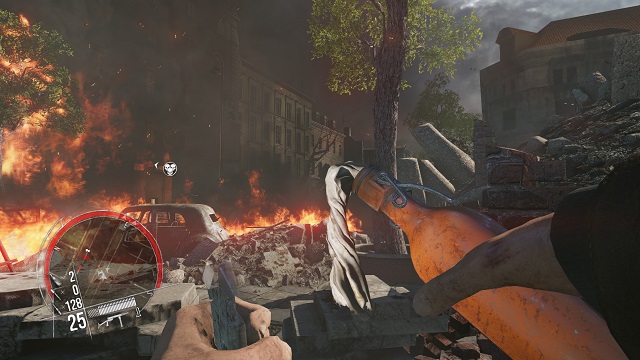 Burn, scoundrels!
As soon as you arrive, you should collect the molotovs standing on the crates, and take a convenient position, by the nearby barricades. Wait for an order and begin your assault, bombarding the incoming Germans, awaiting for the fire to consume them completely. At some point you will have to use a machine gun, as some of the grunts will appear on the balconies and by the windows of neighboring buildings.
 Kotwica, an emblem of Armia Krajowa.
After dealing with the enemy, you must move on after your friend. While moving through the clearance, you should check the room on the left side, where you will find the first secret (1 of 2) available in this chapter. After several steps, you will arrive at the gate, which you must jump over by pressing the interaction button.
 Wait for me!
After a short while, you will notice a building, which the resistance have chosen as one of their main bases of operations. Without wasting any time, follow Kozera and enter the building as fast as possible.
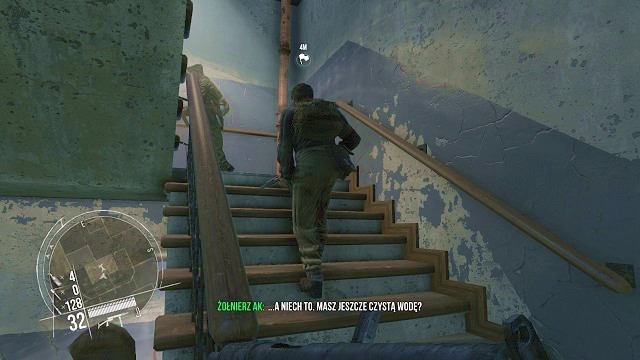 No, I don't have any fresh water.
Inside, you will meet Kozera's colleague, who will guide you to the upper floor of the officer's seat, where you will get your next orders, and learn about the plan to liberate Warsaw.
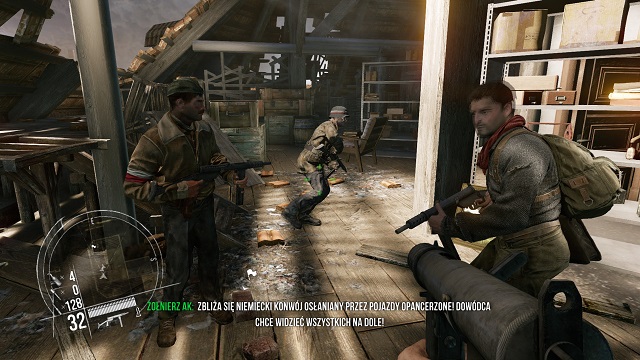
 It's our last chance, lads.
From the conversation with an AK higher-up, you will learn about an arranged attack on the PAST, a mini-skyscraper in the capital, which serves a significant logistical and propaganda function.
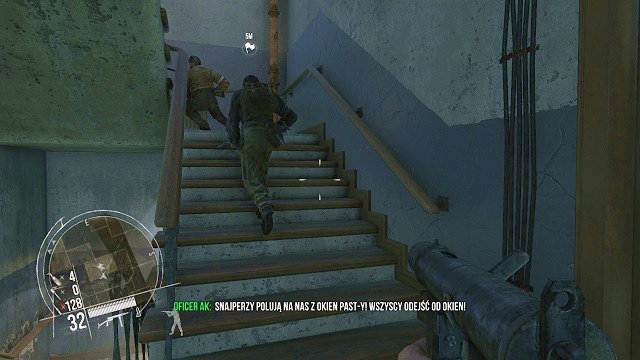 Watch your heads!
At some point the conversation will be interrupted, as one of the nearby soldiers falls to the ground from a sniper bullet. You must immediately crouch and leave the room, to avoid getting shot as well. Continue after Kozyra to the attic, to get rid of the German sharpshooters.
 Keep a low profile!
After arriving at the top of the building, take a suitable firing position, and engage your "colleagues" in combat. You should keep a low profile, to avoid getting yourself killed.
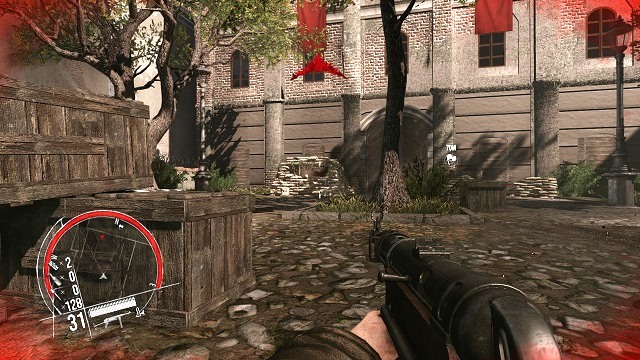
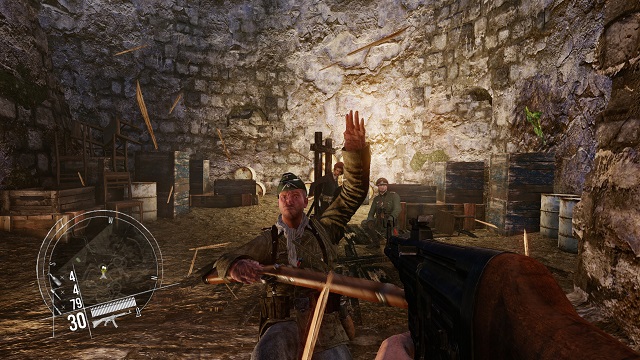
 Calling reinforcements? Too late!
The first bullet should be reserved for a soldier connected to a task, which should appear on your screen just about now. He's standing on top of the building, weaving his flag, requesting reinforcements from his allies, but it's to no avail. Take him out as soon as possible, preventing him from achieving his task.
 First come, first served!
Afterwards, you need to take care of the remaining enemy snipers - there are a total of six of them, hiding behind the windows. It should be noted, however, that the enemies won't be stationary, as they will change their positions.
 Where did everybody go?
After finishing your job, leave the attic by using the side door - rejoin Kozyra, and, according to mission plan, talk to him.
 Never a dull moment...
During your conversation, a resistance soldier will arrive at your position, chasing all the others downstairs. A final part of this mission is about to happen, which is the ambush on an armored German convoy. Before you run with your allies downstairs, you should pick up the secret located near a red couch - with this, you should have all the secrets in this mission unlocked (2 of 2).
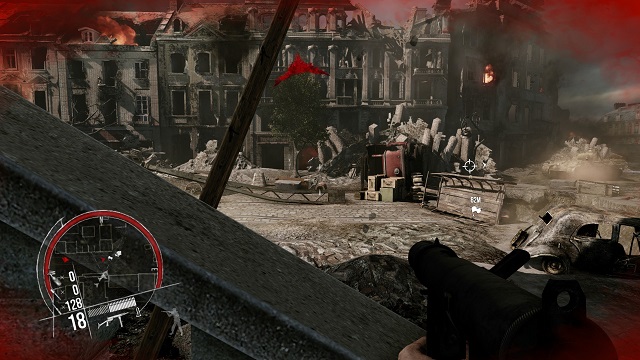
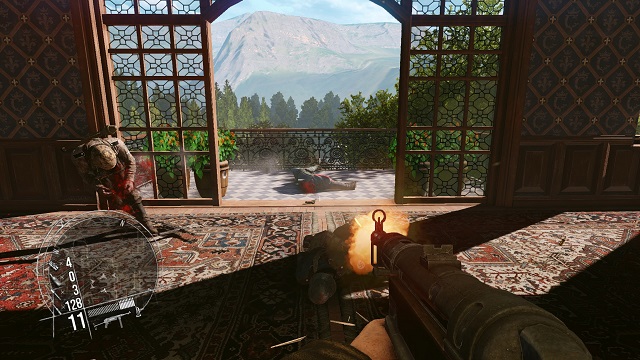
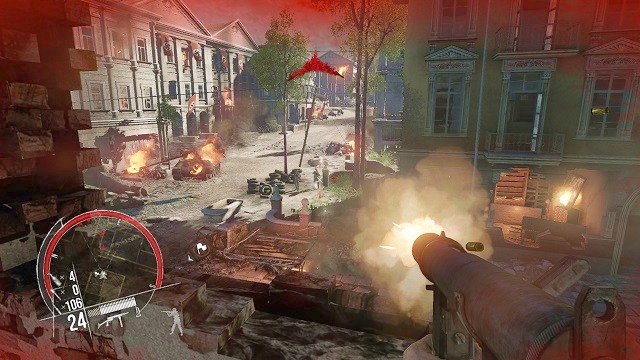 You won't get through!
After arriving at the breach in the wall, a fierce defense against the German soldiers will commence. You are able to use a standard rifle during this encounter, but it is highly advised that you draw your sniper rifle instead, allowing you to easily get rid of all the grunts hiding in the ruins - if you have problems with that, you can use your molotovs.
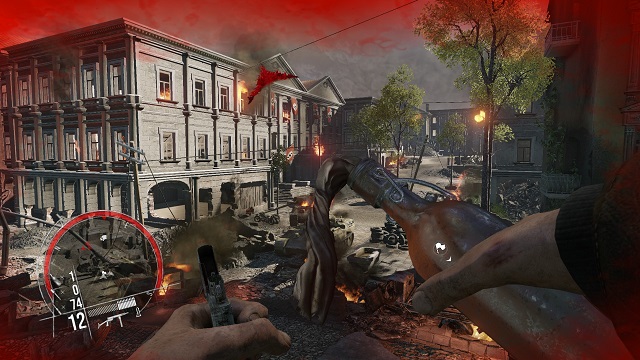 This should do the trick!
As soon as a German tank appears on the horizon, draw out your molotovs and throw as many of them as possible at the vehicle, to avoid getting hit by its turret. When the tank bursts into flames, the chapter will be completed, but you won't get any cutscene afterwards. Mission 8 accomplished.
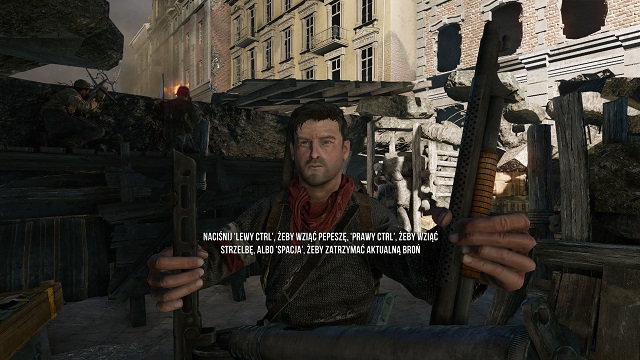 Fast or an effective death? Everyone chooses whatever he likes.
The 9th mission of single player campaign in the AK entrenchment, in the company of your old friend - Kozera. The command is planning to attack the PAST, the German mini-skyscraper located in Warsaw, which was mentioned in the previous chapter. By using the proper buttons chose your preferred weapon, which will be used to face the Nazis in this mission. You can either choose a rapid-firing PPSh, or the powerful Winchester 1912 rifle. After gearing yourself up, depart with your friend to the mission destination.
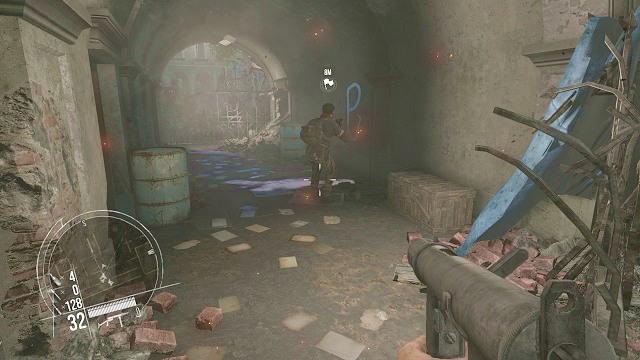
 The origins of Polish graffiti.
After a short while you will arrive at the building - enter it immediately. Go through the corridor (on the right side there's a small room, inside of which you will find a piano, with 1 of the 2 of this mission secrets) and climb up the stairs to the upper floor, where your allies await you.
 Detonation!
After you've arrived, the commanding officer will serve you an encouraging speech, finished with a rousing cheers from the rest of the AK soldiers. Soon, you should receive a detonator - all you have to do now is to activate it, destroying a nearby wall to smithereens.
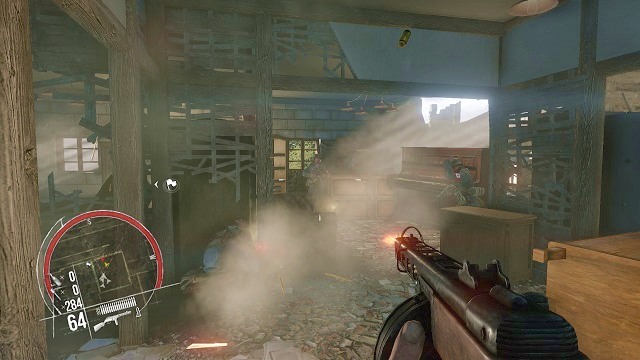
 A massacre...
After clearing the passageway, you run into a group of rooms and corridors, where, with the help of your weapon of choice, you should massacre the Germans. Rip everything that moves to shreds, while constantly moving in the direction of your mission.
 Each floor welcomes you with practically the same things.
After a while, you will arrive at the stairway leading to the upper floor. Use the door on the left side and continue on with your bloody activity on this new territory.
 This party needs to be dispersed!
If you have any problems with getting through to the further parts of the building, you can use your grenades, which will make short work of the German guards.
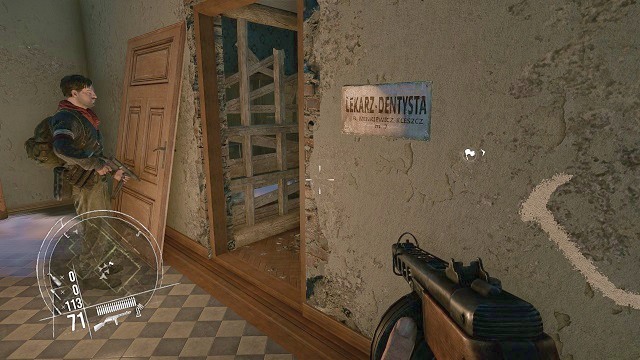 A dentist? I'd rather fight an entire platoon of Nazis!
Scan through the next floor and enter the room via the door, with a dentist signboard next to it. Truth to be told, a surgeon would be far more useful, although not for you.
The shredder.
You should soon arrive at the closed door, which, as usual, should be slammed open, allowing you to shred any Germans in sight with lead from your weapon.
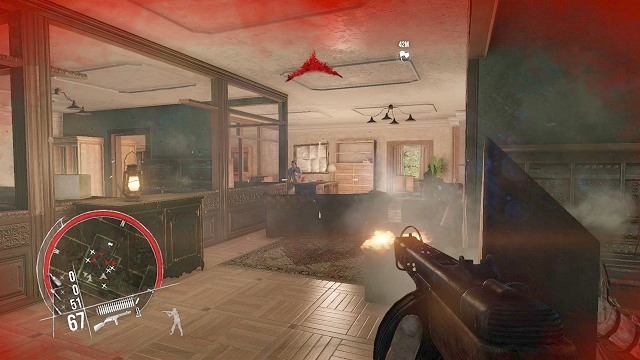 Each step brings you closer to your main objective of this mission.
Charge through the succeeding rooms without mercy, murdering enemies on your way. You're going like a storm, and your actions are complemented by your fellows from the resistance.
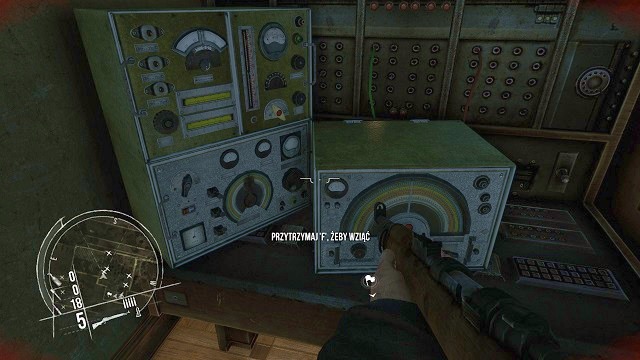 What? I must carry all those boxes?
While being in one of the bigger rooms, the mark on your map will lead you to a radio station lying on the table - you can remove a vacuum tube out of it as a little side-quest.
 What are you sitting there for? Move it!
After collecting one of those, all you have to do now is to find the other one to form a pair. Go through the long stairway to the upper floor, to clean the remaining floors of the Germans. A the first mezzanine, on the left side, there's a tiny room, where you can collect the second secret of this mission (2 out of 2).
I will not leave you alone.During your race to the top, you can stop for a while at a small breach in the wall, through which you can shoot several Germans standing in the open - it will make your further journey a lot easier, as you will enter the room in which they were standing, although from the other, less advantageous (to you) position.
 You don't joke with me!
Just before arriving at the very top, you will have to enter a room with severely damaged flooring - afterwards, take care of the enemies coming from the opposite direction, as well as those firing at you from below. Before finishing the last Nazi off, you should get to the nearby radio station, from which you can extract the second vacuum tube, accomplishing the side-quest in the process. This cannot be done otherwise, as the second you kill the last enemy, the chapter will end, preventing you from taking any action.
 Hurray!
During a short cut-scene, you will see the resistance soldiers hanging the Polish flag atop the PAST building, proclaiming their small victory. Mission 9 accomplished.
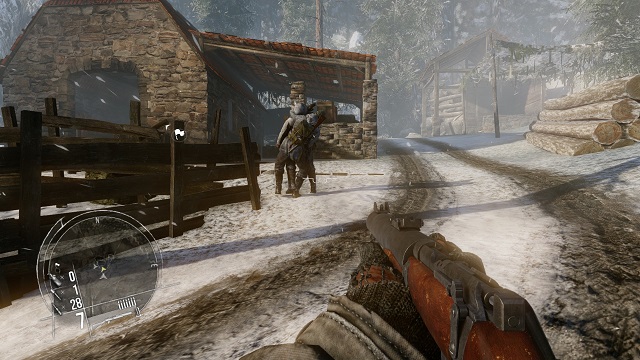
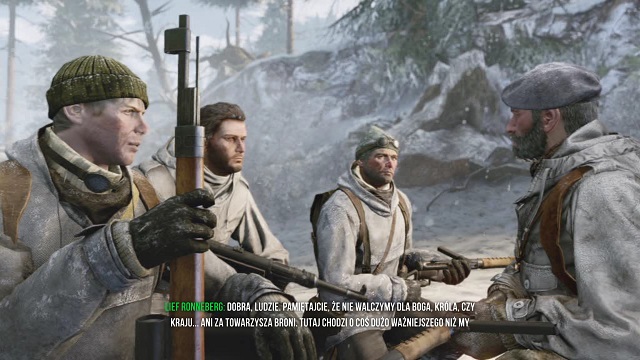 So, we're fighting for money then?
Two of the following missions, starting with the one marked with the 10th number, will be played on the winter terrains of Norway, fighting for their resistance. As the mission starts, you will have to listen to Hawkins' monologue, as well as the goals of this mission. It's time to depart.
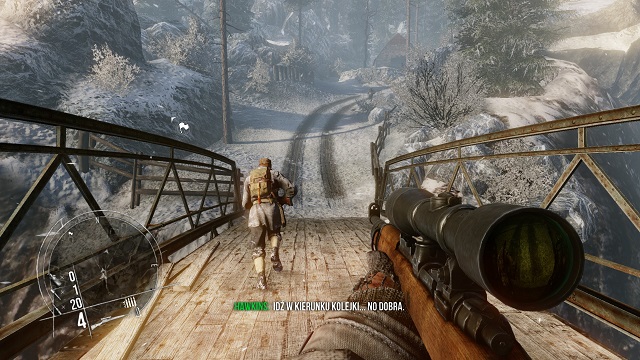
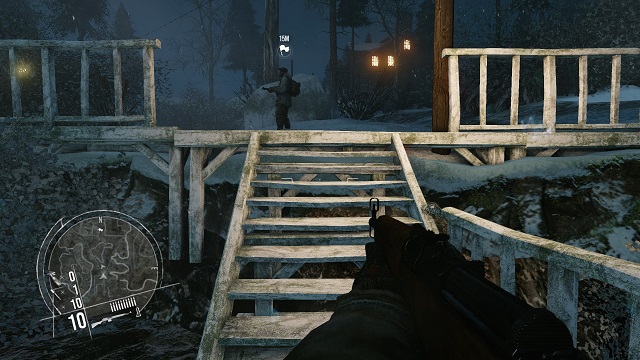
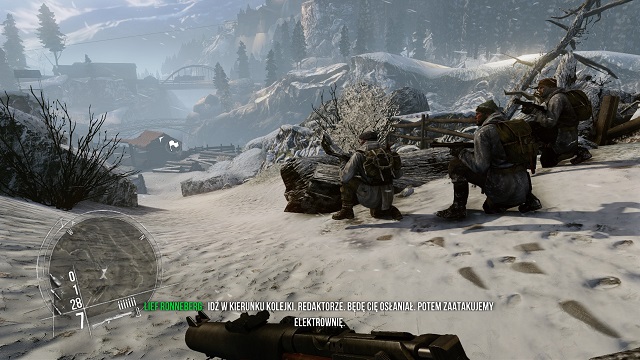 I'll hold you to it, mate.
Your next task is to conduct a series of diversion operations on the neighboring territory, but first things first, you must get to the funicular station. Along with your commanding officer, as well as two other soldiers from the resistance, head to the destination marked on your minimap.
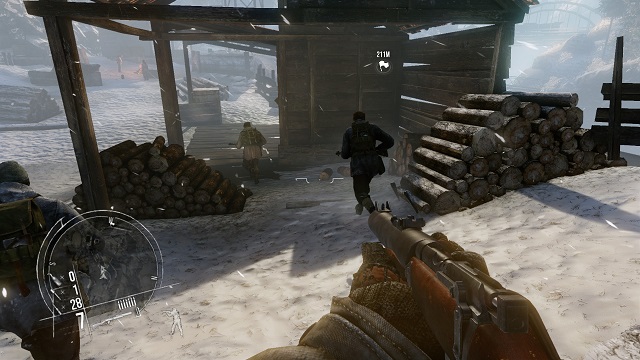 How could they not notice us?
After a short while of free running, you will arrive at the first buildings, where you should stop, as there's a German patrol, consisting of a few soldiers just ahead of you. You should crouch, equip your best friend, which is a sniper rifle and find a suitable firing position for yourself.
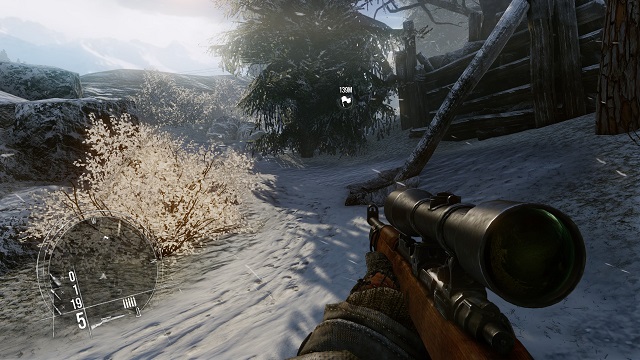
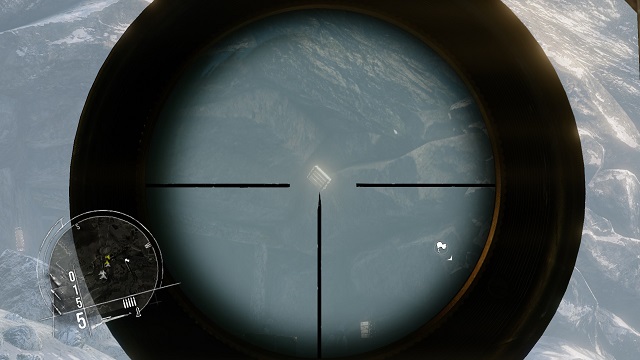 Well, accidents happen...
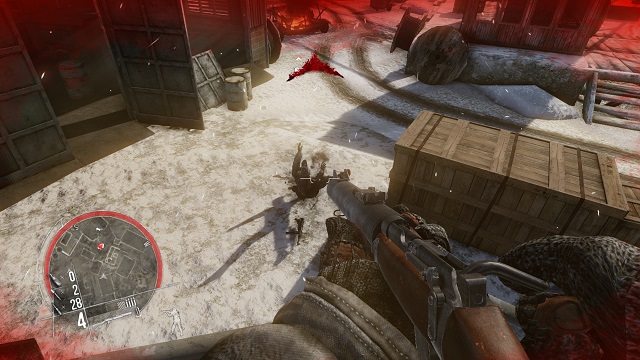
By using your sniper rifle scope, you should be able to notice an entrance to a giant complex or a mine of some sort. On the rocks surrounding the entrance, there are brown square-like points, which, from time to time, emit a bright light (those are explosives). Shooting at one of those objects will result with a chain-reaction of a series of gigantic explosions, killing off any surrounding enemies in the process.
 My bullet shall reach any target.
As soon as the explosion occurs, zoom in your scope and take out any German soldiers on the horizon - those who are standing out in the open, as well as the ones, who should soon be arriving, alarmed by all the ruckus. Your fellow crewmembers will support you in this fight, so you shouldn't worry about anything.
 It's quite obvious that some secrets may be lurking inside.
After clearing the surrounding terrain from the Germans, get inside the building near a truck, because inside, laying on one of the boxes, you will find one the secrets available to you in this mission (1 of a total of 4).
 Your squad is less numerous, but still quite deadly.
Afterwards, with a less numerous squad - as one of your fellows have left the company and went on in a different direction, to support you from afar with his sniper rifle - go through the bridge to the other side, to continue on with your mission.
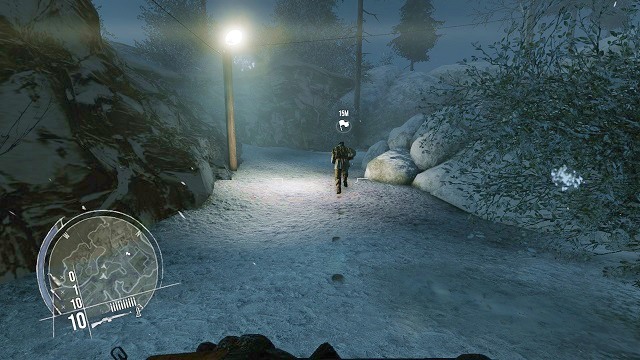
 Hey, he was mine!
After a short while your group should reach a building, guarded by two German watchmen. Leave them, as your allies will silently get rid of them, after which they will disconnect from the rest of the group, heading in a different direction, leaving you alone. There's nothing else for you to do than to continue on with your journey, in the direction of the mission marker.
 Without the marker you wouldn't be able to find the route.
After reaching a hut, turn to the left, and go through the trees and bushes. Afterwards, you should immediately crouch and draw out your best friend - your sniper rifle.
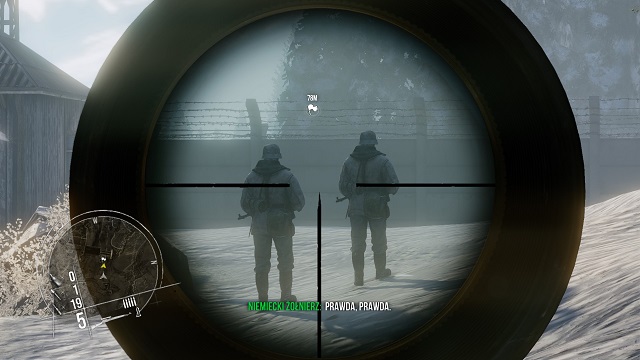 Right, right, you are dead...
A group of two German watchmen should now be before your eyes, patrolling the area, whom you must take them out professionally, from afar, while they are still outside, or wait for a bit, until they enter a nearby room, where - which is quite crucial - there's a third watchman awaiting. If you decide to take them out all at once, equip your grenade and send them an explosive surprise through the door or the window. A positive effect is guaranteed.
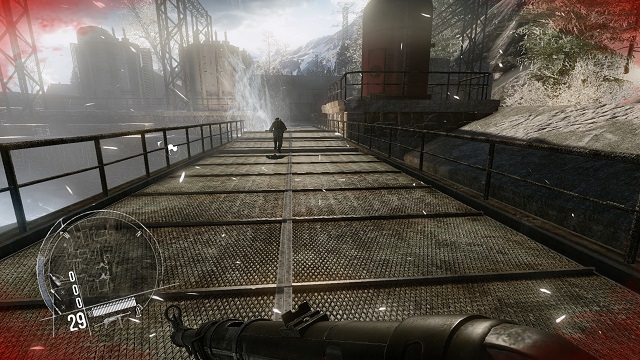
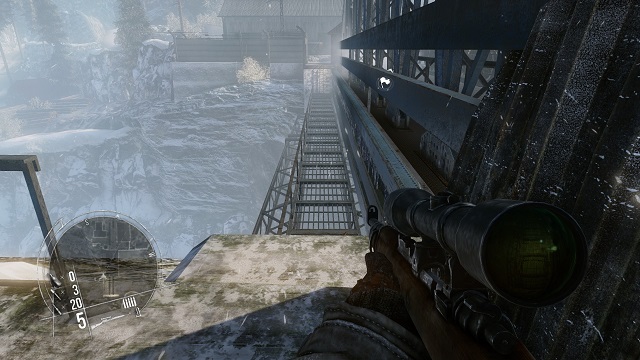 Let's hope it won't collapse.
Behind the mentioned building, you will find a bridge, build right next to an enormous dam, which, obviously, you need to cross. Climb up the ladder located at its end to get to the enemy encampment.
 Thanks, captain!
As soon as you emerge on the top, a nearby watchman gets shot in the head by your ally (the one who disconnected from the group a while ago), so all you can do now is to thank him, and enter a nearby building, with an ammo box inside.
 I love grenades!
After resupplying, leave the building, and, preferably by using your grenades, take out a group of German watchmen standing behind the railing. After making such a ruckus it's guaranteed that a swarm of enemy soldiers is incoming - there's nothing else to do as to take them out all alone.
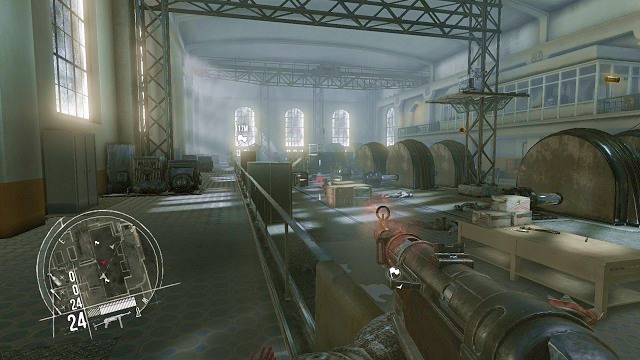
 I can warm myself up, at least for a while...
After the encounter, enter the factory and immediately head out to the stairway, to get to the upper floor, which is also the further part of the German base. Eventually, you can also circle around the whole construction, turning left from the entrance, but this route is a little bit more difficult, as well as leads you to a confrontation with all of the enemy watchmen, on a single floor, without the height advantage (the top of the stairway).
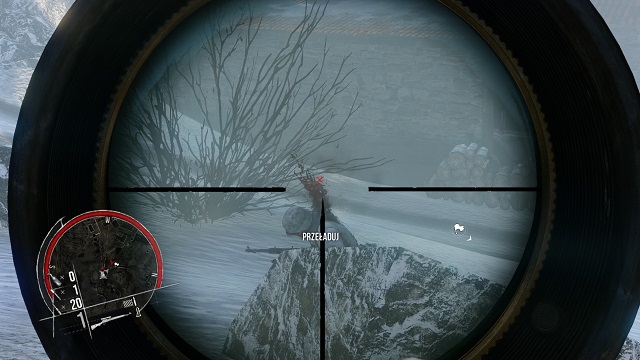
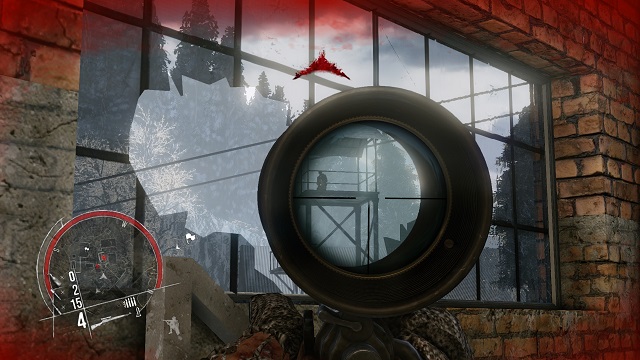 Those stationed on watchtowers are always screwed.
After reaching the elevation, there's a high chance that a sharpshooter from the neighboring tower breaks one of the windows, while trying to shoot you down. You should reply with your own gun, killing the adversary before a bullet can reach you.
 Some sort of wild afterglow.
Go through the entire floor and get inside a room, from where you can take the stairs down, leading you back on a stable ground.
 Lie down!
While being on the stairs, hide behind the railing, because a difficult passage awaits you - you will be attacked by a group of enemy soldiers, as well as an armored car, which must be taken out immediately with the help of your grenades (you can also take it out by shooting the fuel barrels standing near its route).
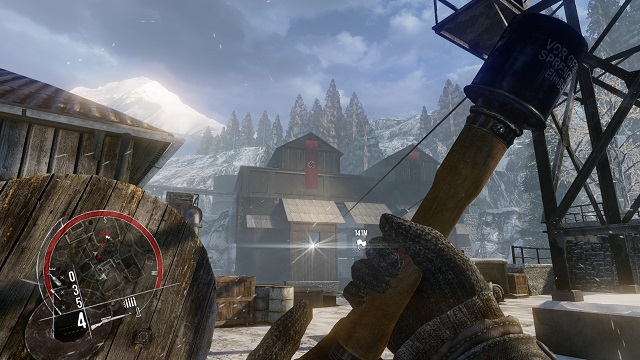 A little flash indicates the window you should throw your grenade through.
After arriving at the base of an enormous, swastika-decorated building - regardless of the route you decided to take - you will have to kill a group of watchmen, who should soon commence their massive assault from the windows. You can either use your reliable sniper rifle, or throw one of your grades inside, to let the enemy "erupt with joy". Both of the approaches are equally effective. After dealing with the defenders, you can boldly enter the building - before you do so, however, you should head out to a small hut, located near the watchtower, where a secret awaits you. (2 of a total of 4).
 Besides, where's the rest of your squad?
As soon as you enter the building, you should waste no time and go upstairs. Soon, you should hear the voice of your commanding officer, who left his firing position and decided to join you.
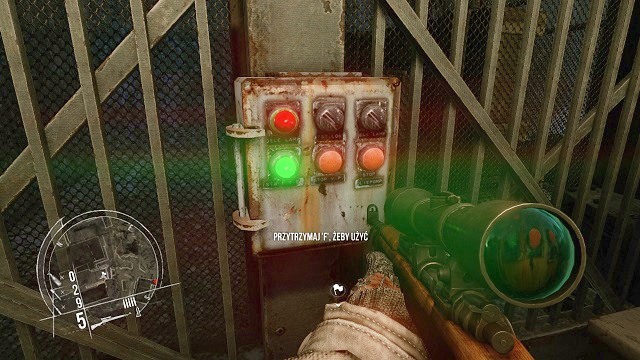
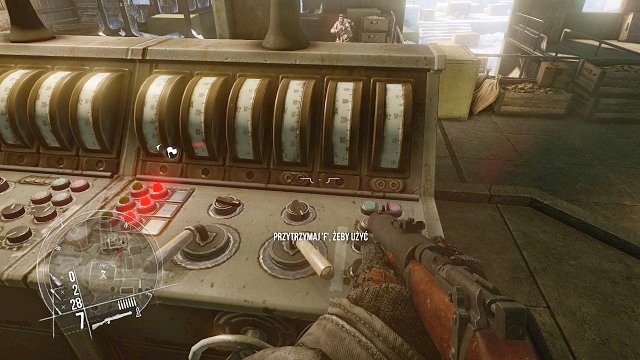 I'm turning it on, mate!
After a brief conversation with your commander, you receive a new task. It's time to start the funicular railway and get to the main Nazi factory. Approach the machinery and do as you were instructed.
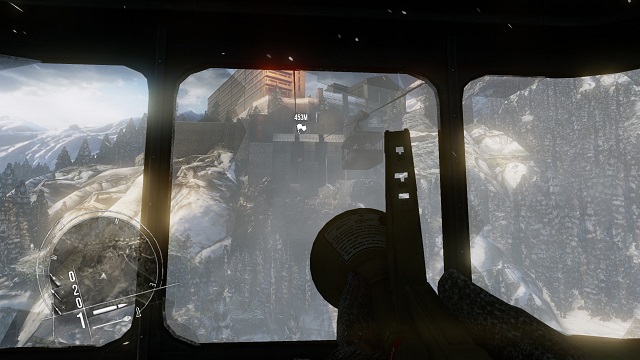 They are approaching!
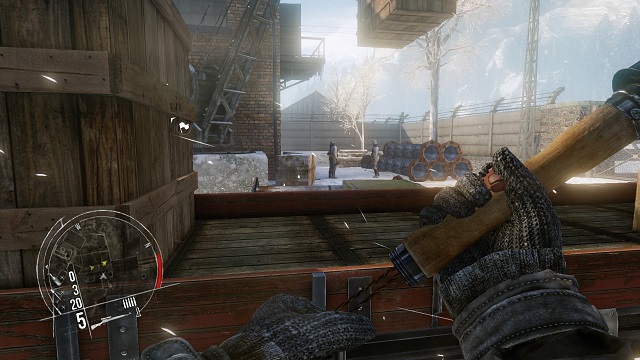
As soon as the trolley starts moving, you will be scolded by the officer, which will create a rather unpleasant atmosphere, but after a short while the quarrel will have to be moved to the background, as there's a trolley full of German troops approaching you from the other side. Pick up a bazooka laying nearby and take them out before they are able to do anything.
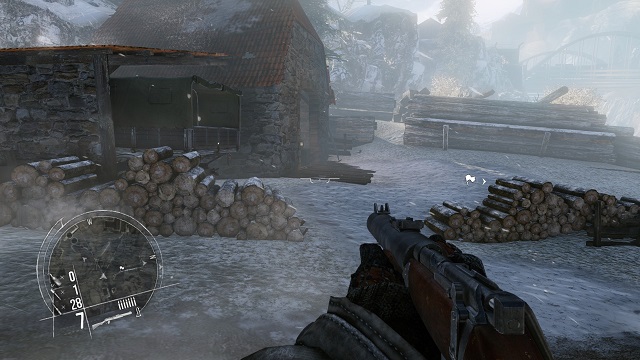
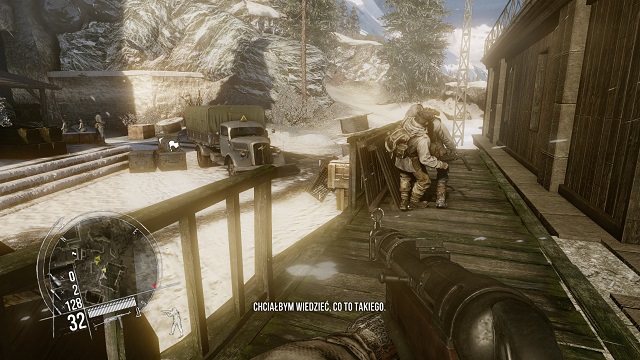
 Surprise!
After reaching the other side, at first the German troops won't recognize your group as enemies. It's a good opportunity to shoot all the enemies standing near the trolley. Afterwards, leave the vehicle and get rid of the rest of the watchmen in the building.
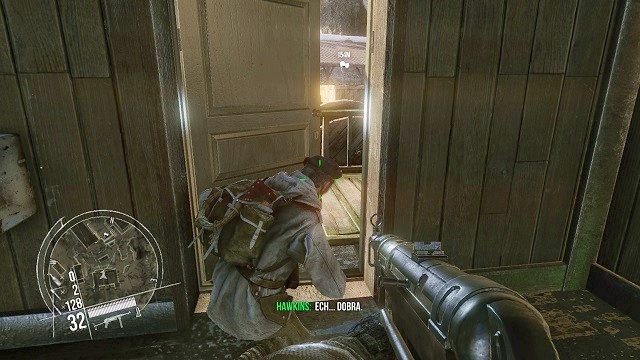 A surprise headshot.
After clearing out the building, your commanding officer will lead you. After climbing up the stairs and reaching the upper floor, approach the door, which will be silently opened by your comrade after giving out the appropriate order.
 And the throat has been cut...
As soon as you emerge outside, your fellow will cut the throat of a nearby enemy soldier, after which he will try to sneak into the factory. All there's left for you to do, is to follow the orders and move out in the direction of the marker on your map.
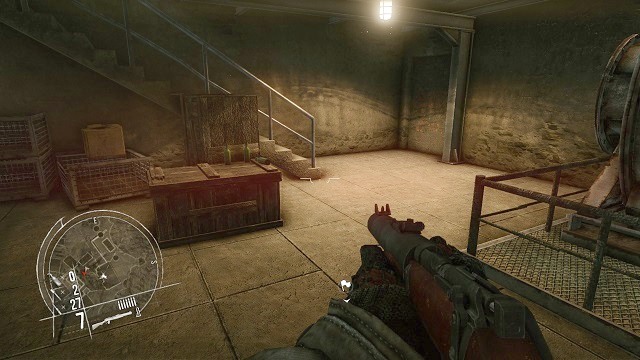
 I smell some secrets.
There should be quite a large warehouse located on your left side - inside, lying on one of the tall lockers, you will find a secret. (3 of a total of 4).
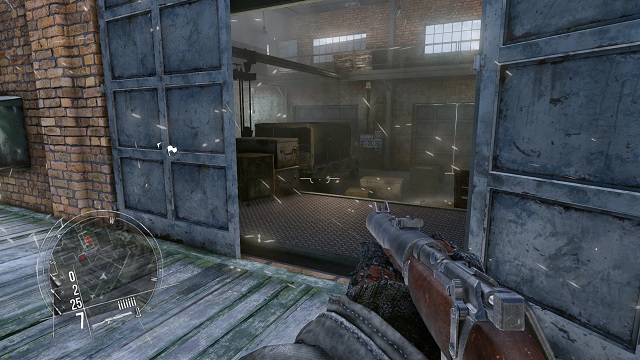
 Say "goodnight".
A time has come to get inside of the factory. First things first, take out the two enemies standing near the crates (which should, preferably, be done with your sniper rifle), and after that take care of a group of grunts, which should certainly be approaching, alarmed by the noise. After dealing with the threat, travel below the roofing and continue on in the direction of the marker on the map.
 What a massacre.
After a short while, you will arrive at a recess in the ground, at the end of which there's an elevator. Get rid of all the enemies and get inside.
 Let's go!
After entering the elevator, push the appropriate button and travel to the uppermost floor, to deal with the remaining defenders of the complex. Remember to reload your weapon and you should be ready to confront your last challenge.
 What do you say? The final demolition?
After emerging from the elevator, your commanding officer, standing between buildings, you took out all the nearby enemy forces by himself, should be awaiting your arrival. Now it's your turn to take the initiative and lead your teammate. Follow the marker on your map and go through the door, to get to the target location.
 Here we go!
After entering the building, you will notice that all the enemies are facing the other way, with their backs exposed to you - because of that, you don't have to start firing at them from the very beginning. First, you should sneak to the right side of the room, where, lying on one of the tables, you will find a secret (4 out of a total of 4). After collecting it, there's nothing else for you to do than to draw your gun out and get rid of the opposition.
 It's a shame that there isn't a single lever to blow the whole factory up.
After the area is relatively safe, move to the box attached to the wall and pull on the lever, to turn some kind of a device on, which is essential to the further part of the operation.
 Special delivery!
After climbing up the stairs, you should reach a long hallway, which should be thoroughly cleared, so that no Nazi troops remain in the area. Grenades are especially effective while completing the task.
 Dear God, how many steps are there?
At the end of the corridor, there's another stairway awaiting you, which leads to the upper floor. You are almost at your destination.
 Make a short work of the enemy.
On the next floor, you will arrive at a closed door - you mush bash through them, after which a short slow-motion sequence commences. During the slow-mo scene, you can easily and without much effort shred all the enemies in the room with your bullets.
 And another delivery.
Afterwards, you should arrive at the next room - this is the last area before the actual production hall. Without further ado, equip your grenades and get rid of all the enemies hiding behind furniture.
 The shift is over!
You should now be at the factory, surrounded by various machinery - jump from the elevation and engage a group of several dozens of Nazis. It will be a difficult task, as the enemies will frequently swarm you with grenades, not to mention that they significantly outnumber you. The presence of your commanding officer doesn't change much at all, because all he does is hiding behind cover, rarely supporting you with fire.
 Let's blow this piece of junk up!
After eliminating the guard, get closer to the marked machine and turn the valve, which will result in a series of explosions throughout the production hall. Afterwards, immediately run to the next valve and to the same thing. You must, at all costs, stay away from the middle zone of the room, as it's precisely where the most dangerous explosions occur - if you want to save your neck, avoid that place.
 An emergency exit at your service!
After executing the whole operation correctly, a piece of floor on the left side of the hall (looking from the valves' perspective) will collapse, revealing a perfect emergency exit for your (and your companion's) disposal. Immediately jump into the opening and run after your commanding officer as fast as possible.
 Run straight ahead, without worrying about the enemies!
First things first, run across the first room and through the wide open door. Don't stop even for a moment and push forward. You shouldn't be worrying about the ubiquitous German soldiers, as all of them will be blow away by a series of explosions inside of the facility as you run past them.
 I'm coming, I'm coming!
After emerging outside, don't slow the pace and continue to push forward - stopping, even for a slight moment, equals death, as you will be buried alive by the falling debris.
 This doesn't look good...
After a short while you will arrive at the stairs - climb them up as soon as possible. Afterwards, a short trip through the bridge and you are almost at your destination. Do not worry about the building suddenly collapsing on your head, as in a miraculous manner you will survive the event, and soon be able to join your friend, via a different route (under the bridge).
 And you are safe...
All you have to do now is to run in between buildings and the screen will fade out. There's nothing else to be afraid of now - the mission is complete!
 Unfortunately, he didn't survive...
During the cutscene you will be meeting with a dying Norwegian (the second one was probably killed in action), who was able to steal valuable information. According to retrieved intel, your next mission is to attack a German stronghold. Mission 10 accomplished!
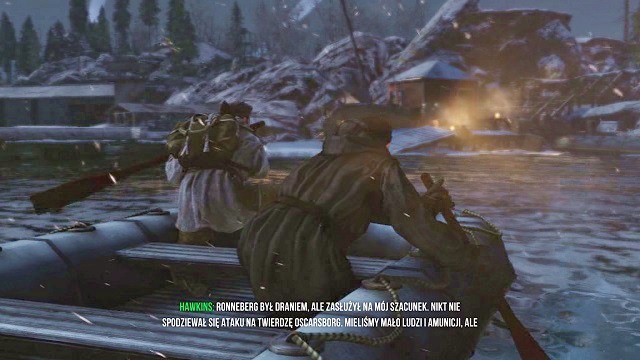 Paddle faster!
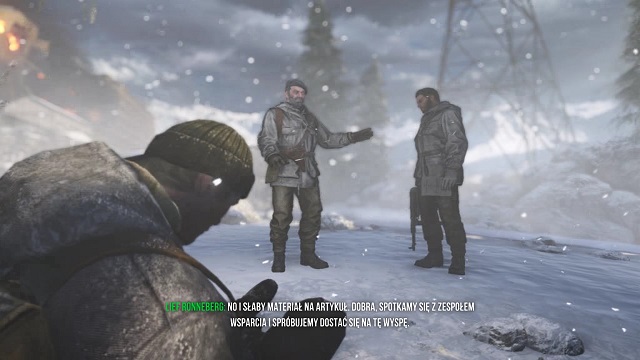
The 11th mission starts with a short introductory cutscene, during which your hero, in the accompany of the commanding officer from the previous chapter, reaches a harbor in a close vicinity to a German fortress.
 Courageous plans.
The main goal of this mission is to destroy a valuable German cargo, which is currently loaded on a huge Nazi Battleship. Before you do so, you have to establish a connection with the Norwegian resistance, because without their help you can't even dream about surviving this operation.
 Get ready for a demanding clash.
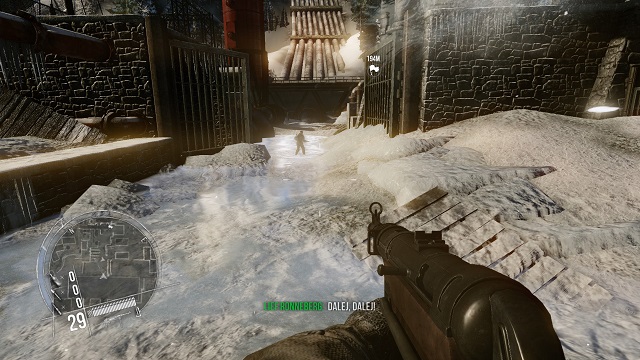
Move out by following your companion. There's no point in stopping and ransacking the area, as there's nothing of interest to be found here - the same goes for a small hut located near the coastline. Quickly climb up the stairs and, arm in arm, run with your commanding officer.
 Something is fishy...
During your sprint along the snowy path, you will hear the sounds of gunfire and machineguns. It seems that a fight is taking place nearby. Don't slow your march and keep pushing forward, to aid your allies from the resistance in battle.
 Someone seems to have a lot of fun here...
After reaching the rendezvous point, you will notice a squad of several Norwegian soldiers, fiercely storming the enemy. Unfortunately, the Germans have a fortified line of defense, with a powerful, long-range gun at their disposal. Take out our sniper rifle immediately and get rid of the artillery crew (consisting of 2 soldiers). Soon afterwards, an armored vehicle will join the fun, emerging near the bridge - of course, there's no point in shooting your bullets towards the car, but you can at least take out the infantry mounting the machine gun on top of the vehicle, which, in fact, is one of the goals of the mission.
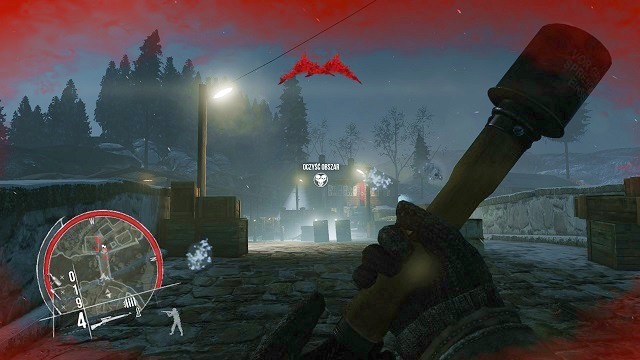 It's my turn now!
After the enemy force has dwindled, leave your position and run in the direction of the bridge. As soon as you are halfway through the bridge, take out your grenades and throw them towards the barricades. If you are lucky, the grenades will reach the armored car, causing a rather large explosion, killing off most of the enemy stationed nearby. Kill any survivors and proceed.
 Listen to me and you may survive.
After clearing the surroundings from the enemy, your company will divide into two groups. One of them will depart in their own direction, the other one - in which there are two ordinary combatants - will have to march in the direction of the mission marker. You should follow them. Before you venture into the deeper parts of the enemy base, you should enter the first building after you've crossed the bridge, the one with the swastika flag on top of it - inside one of its rooms you will find a secret (1 of a total of 4) lying on the table, close to a typewriter.
 Where's the welcoming committee?
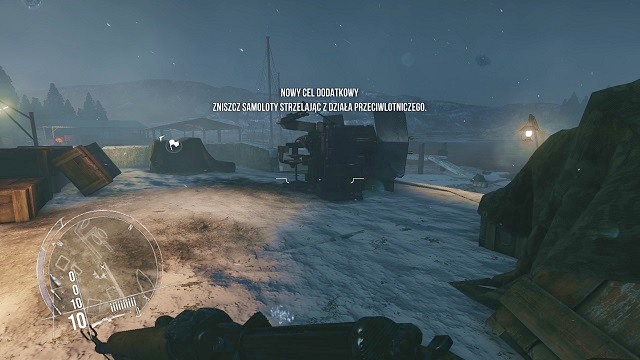
Join the combatants awaiting you and, together, cross the gate to the other side of the wall, and, after a short while, rush to the airport grounds. Quite an exciting challenge awaits you, so prepare yourself!
No gameplay element could have been missed in this game.Immediately go the antiaircraft gun, which is marked by the marker on the map and mount it, to fight off an entire squadron of enemy airplanes. In the meantime, your companions will be defending themselves against the storm of German troops.
 Come to daddy!
While being at the controls of the antiaircraft gun, begin your assault on the enemy airplanes. There are two things you have to do during this stage - first, and the most obvious, is to fight off the numerous airplanes closing on your position, and the second one is to take care of German watchman, who, despite the presence of your companions, may try to get rid of you, especially by using grenades (whenever a grenade icon appears on your screen, immediately jump out of the AA gun and run to a safe location - after the grenade explodes, get back to the AA gun).
 Damn, we lost him!
As soon as you are informed of a completed task, dismount the antiaircraft gun and immediately, without much thought, hide in some safe place, as the area is literally swarmed with German troops. One of your companions has been shot, thus you are left alone with the other one. Kill all the enemies in your closest vicinity, and as the situation calms down you should reload your weapon (an ammunition box is located inside of a small hut, at the entrance to the airport grounds). After you've done it, continue your march towards the marker on the map.
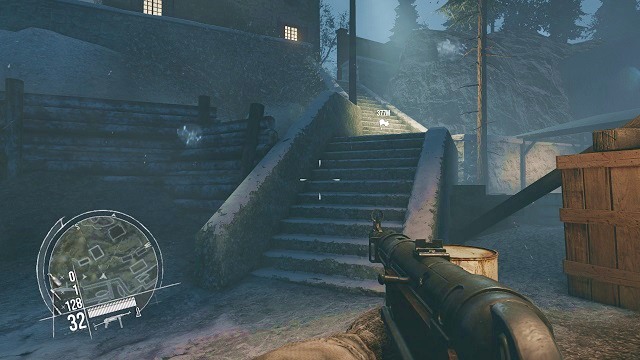 With each step you are closer to your goal.
At the end of the passageway, the game orders you to turn to the left, in the direction of the stairs, which lead to the upper part of the hill. Do as you are commanded, to arrive at the main settlement inside the fortress. What's important, your companion will take a position on the airport grounds, refusing to tag along with you, meaning that the further part of the journey must be done individually. Try not to get into the water, as well as wander around the ice floes, as you can easily get stuck and bugged.
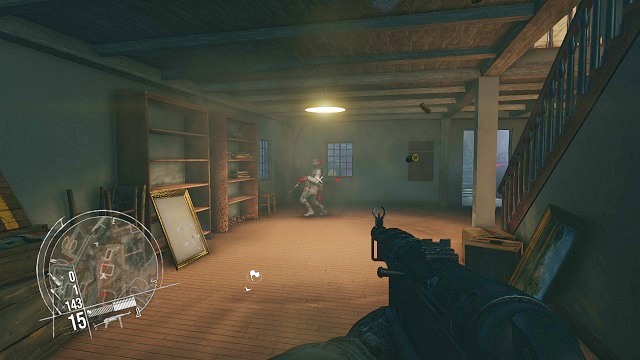 Those contortions...
After reaching the first elevation, enter the nearby building and get rid of the watchman standing in the middle of the room. Afterwards, wait for the rest of the defenders - they should be nearby. After you have defeated them and the area is clear, it is recommended that you go to the second floor of the building - you can find a secret there (2 of a total of 4), lying on one of the soldier's beds.
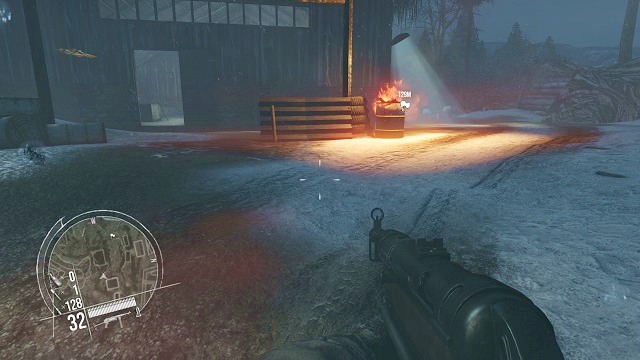 Not a single living soul...
After clearing the surrounding area, you must continue your march in the direction of the marker on the map, towards the next buildings. Ignore the unexplored passage, directed in the opposite direction - by going there, you will get to the starting point, which is the gate leading to the airport grounds.
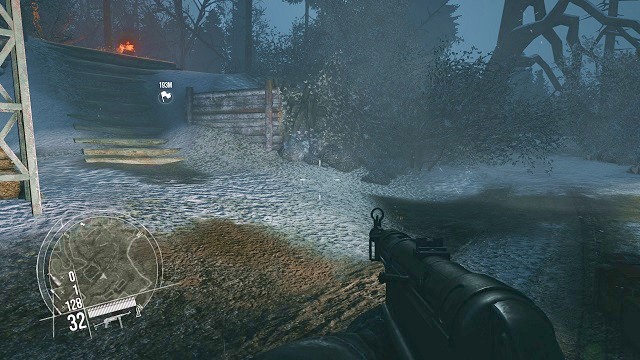 All roads lead to Oscarsborg...
After the "urban" area starts to diminish, you will be given an opportunity to choose one of the roads. Regardless of your choice (the stairway or the forest passageway), you will, as a matter of fact, arrive at the exact same spot, so the decision is yours to make.
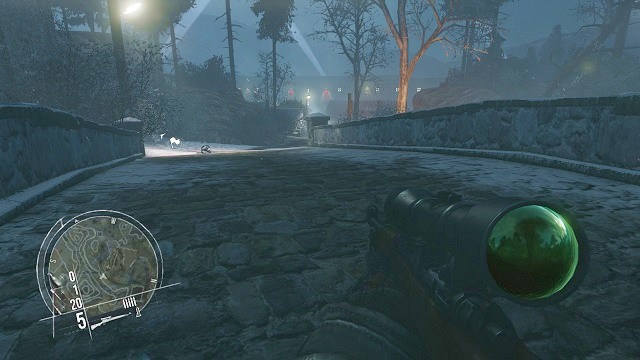 It's going to be a jump of a century...
After some time, on the horizon, you will be able to see an enormous, formidable fortress of Oscarsborg, heavily defended from every side - you should be able to notice two, heavily outlined roads as well. One of them is a paved path, leading to a bridge, and the other one, similar to the previous one, is an "unofficial" passageway through the forest, between numerous trees and bushes.
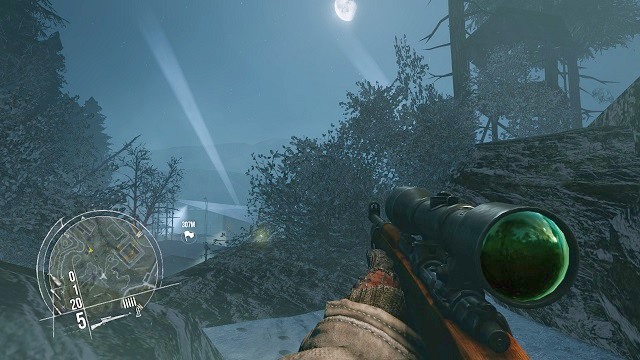 A base without a watchman on top of a watchtower? That's weird...
The latter option is heavily recommended, because by sneaking by to the enemy settlement from the side of the hill, you will have all the nearby enemy watchmen served on a silver plate. Take advantage of the situation and draw out your sniper rifle, and do the thing you should be now accustomed with - exterminate all the resistance.
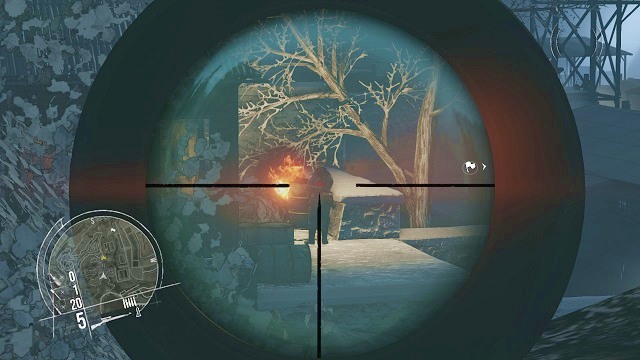 Let's hope they won't hear your corpse sliding down the stairs...
Start of by taking care of the enemy standing on the left side, as he is the closest to your current position, and you, obviously, do not want to engage the enemy defenders in the direct combat. It's best to wait for the moment, when a specific volume symbol in the right top corner of the screen indicates you that the shot can be made without the other enemy hearing anything.
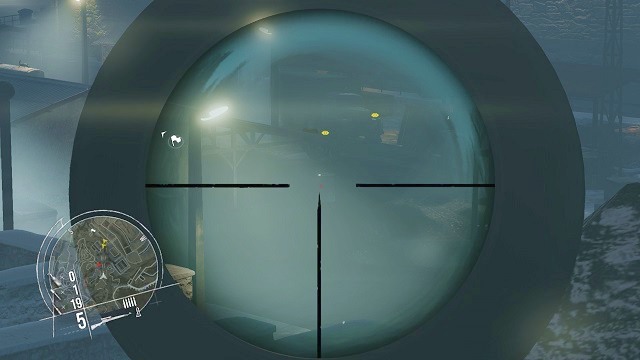 Get closer to the barrel... Oh yes, perfect...
Your next target won't be an alive one, but rather a very useful element of the environment - an explosive barrel. Locate, with the help of your rifle scope, the three watchmen patrolling near the truck, and focus on the mentioned barrel. Shoot at the object as soon as the enemies are near it. After the explosion gets rid of the pesky Nazis, take care of some additional troops, who should by now arrive on the scene, alarmed by all the ruckus. Kill them all and jump down by using the boxes, until you reach the stable ground.

You can hear the gunshots. Could it be...
Rush forward, ignoring the nearby buildings, because there's nothing of any value to you inside of them. The only building you should enter is the long barrack, located closest to the defensive wall - inside of it you will find a secret (3 out of a total of 4), hidden inside one of the closets.
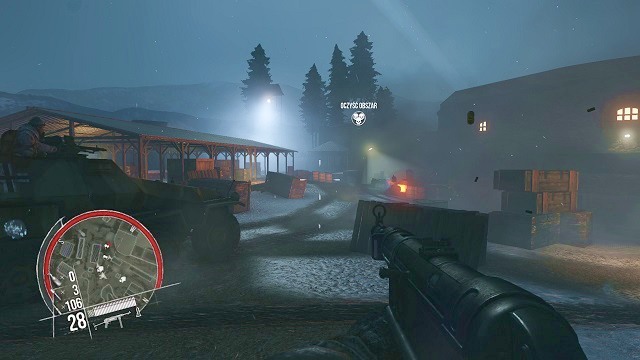 Where did you find that beast?
At some point, you should be able to hear the sounds of quite a brawl in the distance. It's your company, who, somehow, took possession of an armored car and started to wreak havoc. By using the armored vehicle, you must get past succeeding enemy lines of defense, until you reach the primary point of interest on the island.
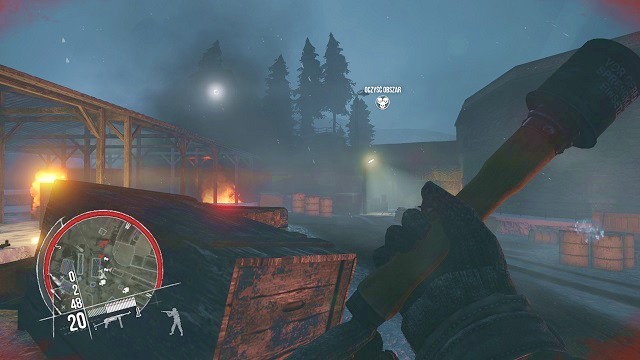 It's not far away. Assault!
Kill off the last watchmen before you enter the fortress and get close to a giant iron gate - unfortunately, you can't open, or break it down in any way. In this situation, you have to climb the stairs on your left side and use the door to enter the bunker.
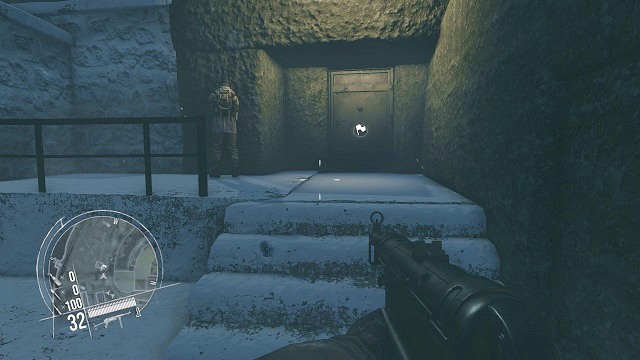 Hey, don't be mad!
The two soldiers accompanying your commanding officer will scatter around the area, to prevent any type of counterattack from the Germans. You, along with your commander, have to push forward and destroy the cursed bunker once and for all.
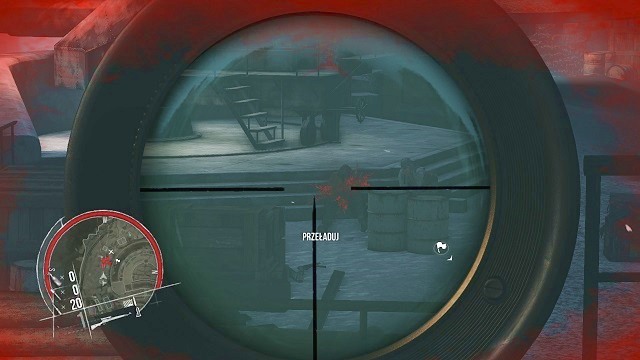
Calm down, I have enough bullets for each of them...
After crossing the threshold and closing the behind, you will notice, that without a word, your commanding officer decided to stay outside. This means that there's only one thing for you to do - climb up the stairs and take out your reliable sniper rifle. Clear out the surroundings, sending a bullet to each of the watchmen, paving your path to the additional task that can be done in this place
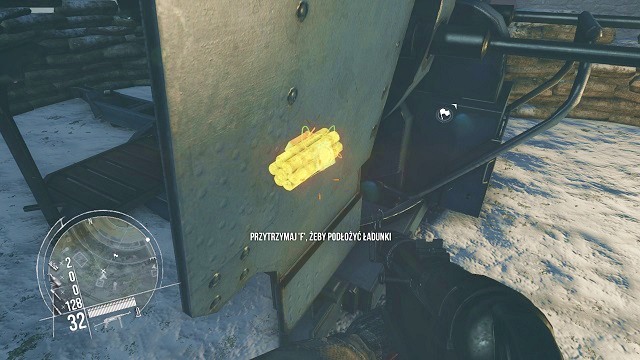 Say goodbye to your precious equipment.
As can easily be guessed, it's about destroying the cannons, or to be more precise a cannon - because you have to destroy a single one. To do so, you have to climb down the stairs from the platform on which the whole equipment is installed, and get inside an open storeroom beneath it, where you will find the required explosives. Now, all you have to do is to simply press and hold the designated key and run for your life, to a safe distance, before everything blows up.
 You can feel the ultimate showdown incoming.
After you are sure, that the cannon won't do any harm to anyone anymore, embark on to continue your journey in the direction of the marker on the map. You should arrive at a huge breach in the wall, through which you can enter the construction. Your main goal is close.
 What a backflip!
During the next few moments, you will have to deal with a number of watchmen, hiding behind the ubiquitous barrels and crates. Get rid of them, while constantly pushing forward.
 Never enough of blowing things up!
After you see a giant gate ahead, an additional task will be appointed to you. It will be - which is quite obvious - about blowing up the gate, to pave the further way inside of the bunker. To complete the task, collect the explosives from one of the crates located under the roofing.
 Nothing will save them.
Afterwards, get close to the gate and stick a bomb to it. Set the timer, run to a safe distance and voila, you've made yourself a passage inside the further parts of the German base.
 Ah, so I do all the dirty work for you to appear at the very end? How cute...
After descending the sloping floor, your commanding officer will rejoin you (shame that he did that after all the dirty work you had to do). You have to get to the end of the hallway and turn to the right, according to the marker on the map. Before you do so, it's recommended to look inside the room on the left side - you can find a secret there (4 of a total of 4), lying on the table.
 Are we there yet?
Together with your commanding officer, clear the Nazi ranks and push forward, through the intricate corridors, further inside the bunker. After a short while you will arrive at the stairway leading to the lower parts, where, besides a few more German grunts, you will encounter a yet another closed doors.
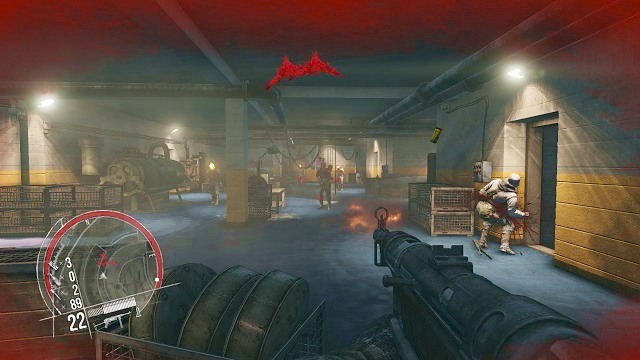 The last defenders of the settlement.
Bash through the door and violently rush inside the room. During the slow motion sequence, try to take out as many of the enemies as you can (which are, de facto, the last defenders of the settlement) - unfortunately, you probably won't be able to take out all of them, because there's lots of them inside this room. Before they can answer with their own gunfire, immediately hide behind some cover and continue with your assault from a safe place. After dealing with them, do as you are told by your commanding officer.
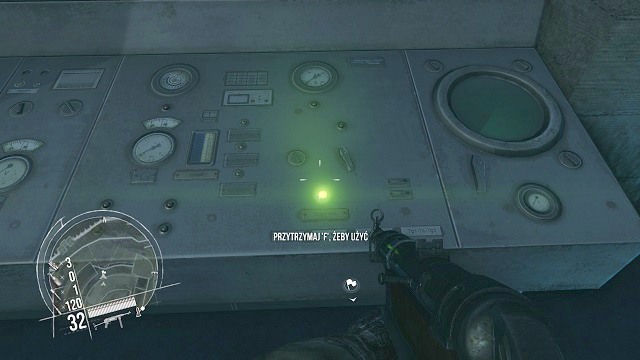 Let's have some fun!
On your commanding officer's mark, get closer to the complicated machinery, indicated by the marker on your map and press the adequate button, to load torpedoes inside the chambers. It's time to have some fun!
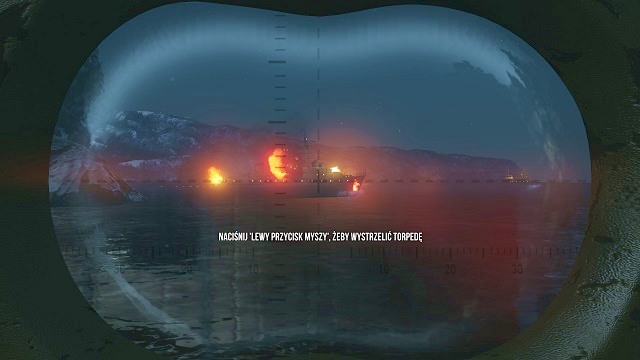 Let the sea devour you!
Rush to the glassed part in the middle of the room and proceed on to fire torpedoes at the ship, transporting the precious cargo, mentioned in the beginning of this mission. Send succeeding projectiles towards the ship with your mouse button responsible for fire, until the whole ship bursts into flames. Don't even bother with the smaller vessels - their destruction is neither required, nor in any way rewarded.
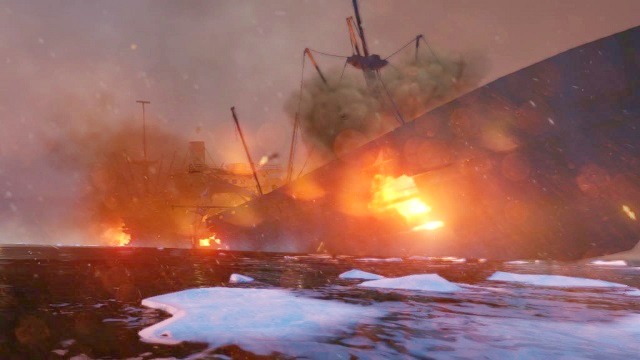 Sink already!
After a successful action, you can ease your arm from the mouse and take a deep breath, as it's the end of task given to you. All you have to do now is to enjoy the cutscene, during which the powerful German vessel sinks underwater. Marvelous!
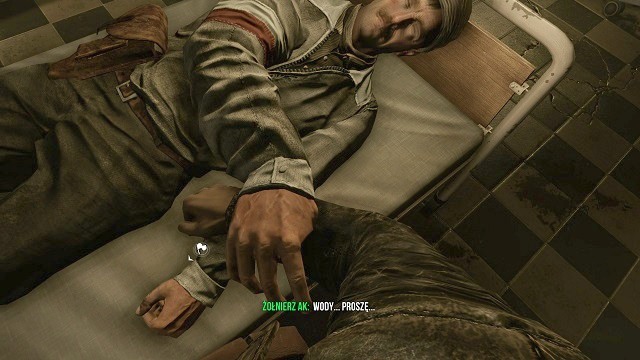 You're not as bad as you look, Hawkins!
Finally, a manly handshake between you and your companion, followed by a compliment by your commanding officer, that you're not as bad as it could have been expected at the beginning. Nice. Mission 11 accomplished!
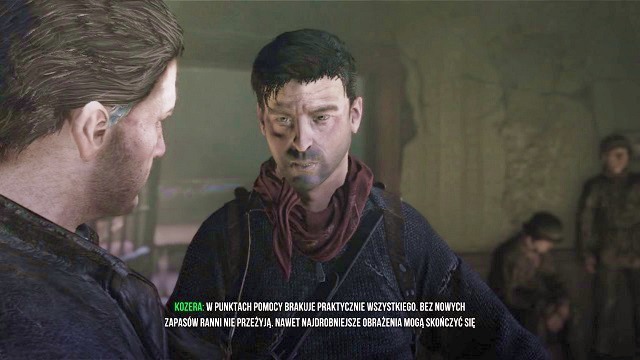 This doesn't look good...
The next mission, as always, starts with a short cutscene, during which Hawkins yet again calls forth to the citizen of Warsaw for support to the uprising, and solemnly informs about the recent events. After the audition ends, you can hear a short conversation with Kozera. It seems that the action of your next mission takes place mainly in the interior of a local hospital.
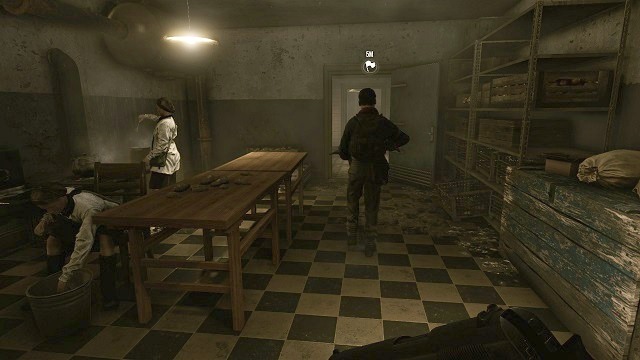 A grim hospital..
After regaining control over your character, you should find yourself inside the mentioned hospital. According to the guidelines of the mission, go with Kozera to meet a certain, high-ranking officer. However, before you put a single step forward, turn to the right side - inside of the room, in which you currently are, there's a secret (1 of a total of 4), lying in between two boxes.
Where do you want me to get the water from?During your march along the corridor, you will run past a hospital bed, with a wounded soldier lying on top of it. The soldier will grab your hand and will beg for water, but you shouldn't get distracted, as shortly afterwards one of the nurses will take care of him.
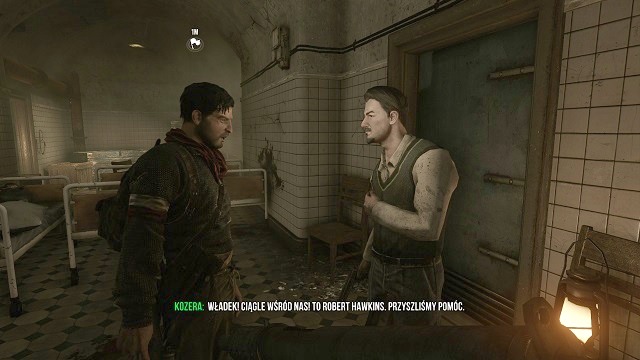 Still among us? Let's see what happens in a week's time...
Afterwards, listen to the conversation between Kozera, and his old friend - Wladek. It doesn't bring anything crucial to the gameplay, but it's always worthwhile to listen to those kind of stories.
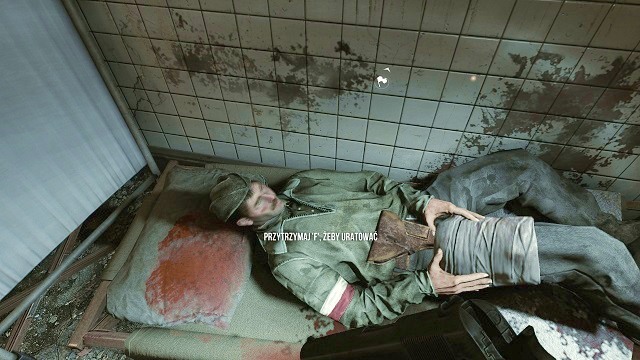 Help him! He's dying!
Further along your path, you will stumble upon a dying patient, with a profusely bleeding knee. By holding down the interaction button (two times in a row), you can save his live, but it's not recommended for anything, nor does it award you with any points for doing so.
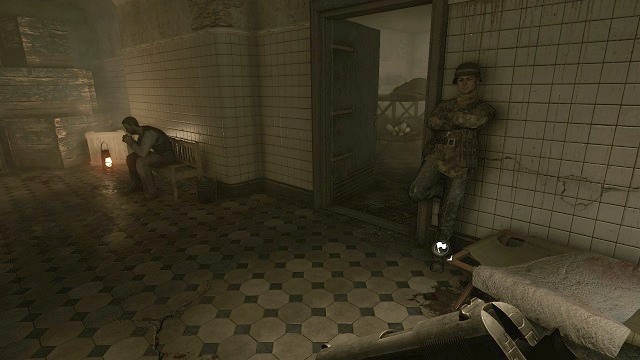 What's with the gloomy faces? Ah...there's mortuary there...
In the very same corridor, in which you save (or not) the wounded vigilante, you will find an open door, leading to the hospital's mortuary. It's worthwhile to get inside for a short while, as in the left top corner, on the edge of one of the beds (looking from the bird's perspective), you will find a secret (2 out of a total of 4) available for you in this chapter.
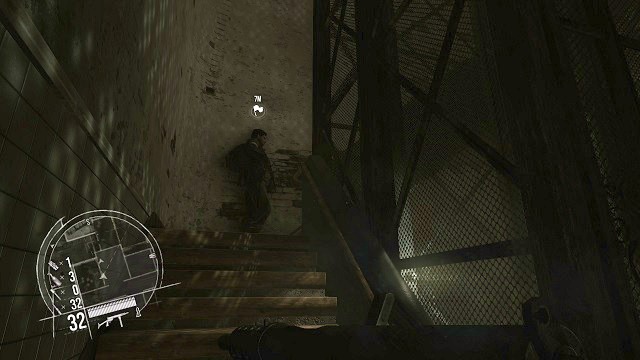 Let's get outside...
After dealing with all the hospital matters, head towards the stairway, which is, in fact, the exit from the underground medical facility. Climb them up and soon you should arrive at a destroyed housing. Fresh air, what a relief...
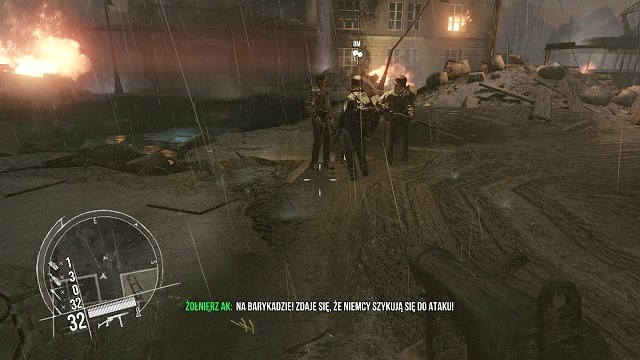 Again?
After taking a few steps forward, you will stumble upon a pair of AK soldiers, to which your commanding officer should speak in a second. Kozera, from a brief conversation, will learn about the planned attack of the German troops. In that case, all there's left for you to do is to simply run towards the barricade, where the officer you're supposed to find will be waiting.
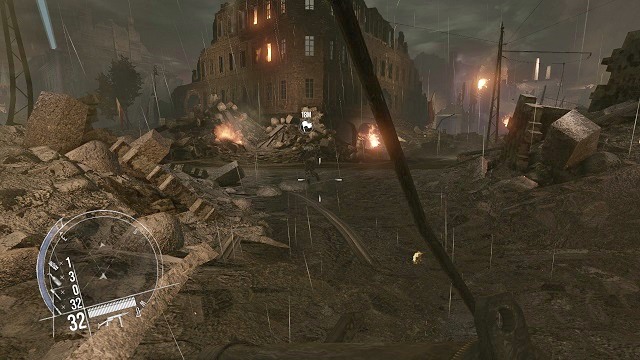 Move it!
Take the shortest route by going towards the marker on the map - don't forget to sprint. You should be able to hear the sounds of battle in the distance - prepare for the worst.
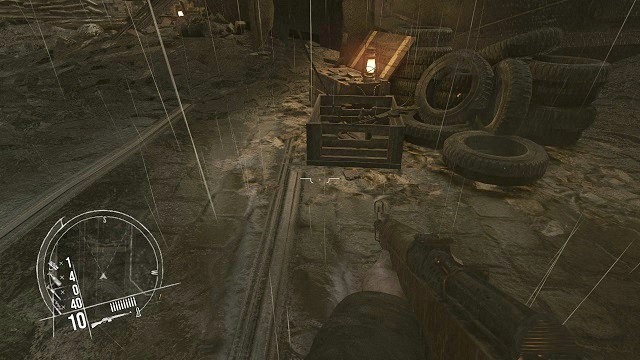 Supplies for a dark hour!
During your run along the road, it's recommended to stray from the designated path and reach a barricade consisting of boxes with ammo and weaponry. You should load yourself out before departing further into the mission, because a tough fight awaits you very soon.
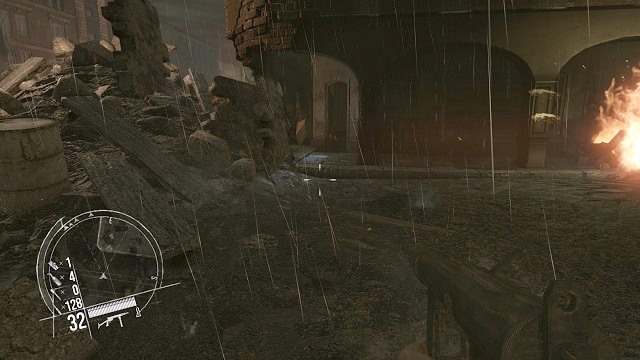 Hmm I smell a secret...
Nearby, you will find a building with a visible entrance. You should get inside through the open doors, as there you can collect a secret (3 out of a total of 4), lying on one of the tables.
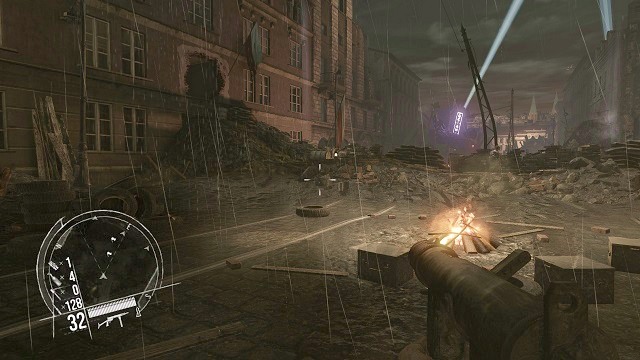 To the barricades!
Continuing your march towards the marker on the map, you will arrive at the line of defense, organized by the Warsaw resistance. On the horizon you should be able to see the German troops. Run to the hole in the wall as soon as possible (you can get there through the rubble), and afterwards enter the building.
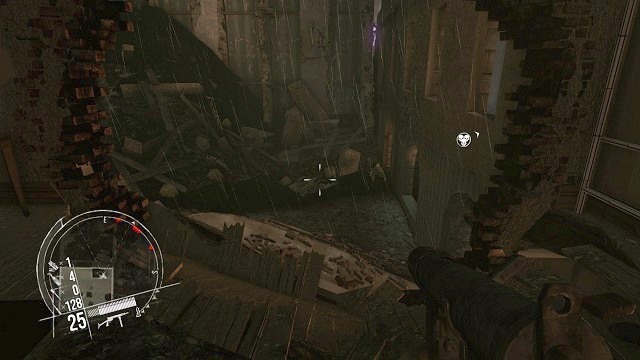 It's best to get them from the side.
Inside, go along the corridor, and get down the sloping footbridge, to the lower room, through which you can on a broad street, just in front of the barricade. It's time to flank the enemy from the side, and shoot them all up, as they will be sitting ducks.
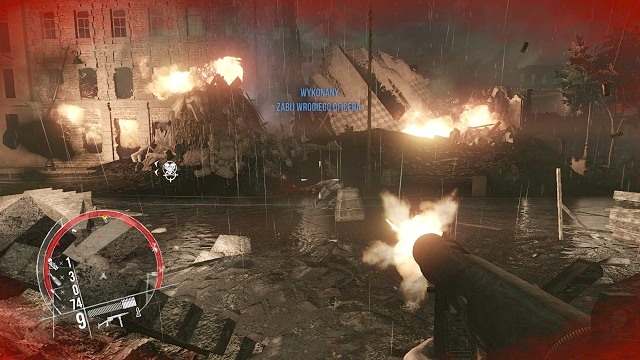 Done!
Done!First things first, you must take care of the German officer, who, along with his forces at his command, storms your barricades. Get rid of him, as well as the German privates, who, with vast numbers, should be arriving from the direction of the main street.
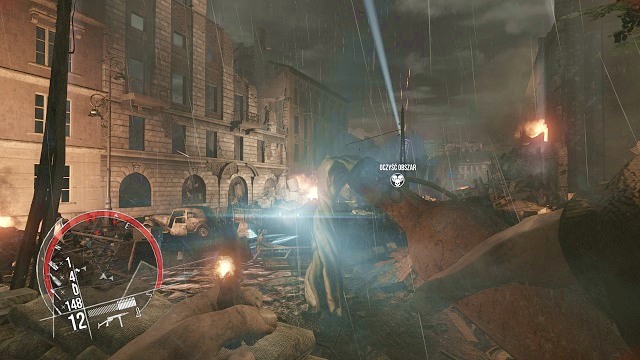 You shall not pass!
Afterwards, a group of two armored vehicles will arrive near the line of defense - both of them can be a major threat to you, as well as to your allies. Destroy them as soon as possible, by using Molotov cocktails, to prevent them from shooting at your position.
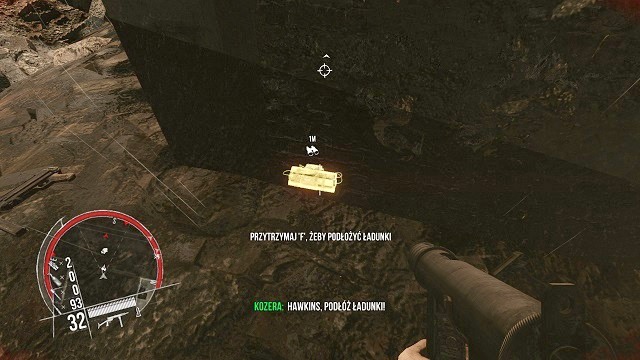 Explosives on the wall? Wouldn't it be better to plant them on the tank instead?
Unfortunately, your intervention will be met with an instantaneous counterattack from the enemy. This time, however, a powerful tank will enter the battlefield - it will stop near the building, from where you were firing at the German officer a short while ago. Go back to the room, in which you've found the 4th secret, and plant an explosive on the marked place on the wall (the explosives can be found near the ammo boxes).
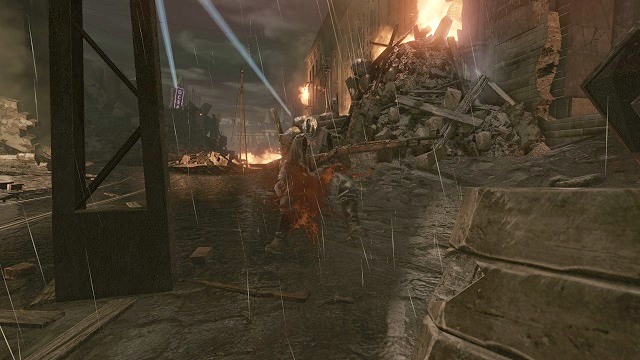 Sniper Rifle - the best friend of every soldier.
After dealing with all the heavy artillery, all you have to do now is to get rid of several "normal" opponents, which can be shot by using the sniper rifle. After killing most of the enemies hidden between barricades and terrain obstacles, the Germans will order a retreat. It means that you've won. However, you shouldn't be celebrating just yet, as another attack on the second barricade should commence shortly. Go in the direction of the marker on the map, to take a position on the second line of defense.
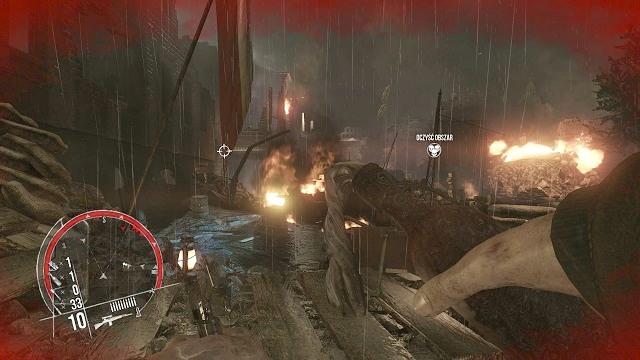 Several birds with one stone.
After reaching the place, there's no time to analyze - grab Molotov cocktails as soon as possible, to destroy the armored vehicles of the enemy, which should be closing on your position. Explosions, which you will cause with the Molotov, are certain to kill at least a few of the nearby enemies, as well as an officer (who is a target of a secondary quest). If the enemy commander survive, finish him off with a more conventional means (by using your machinegun or a sniper rifle).
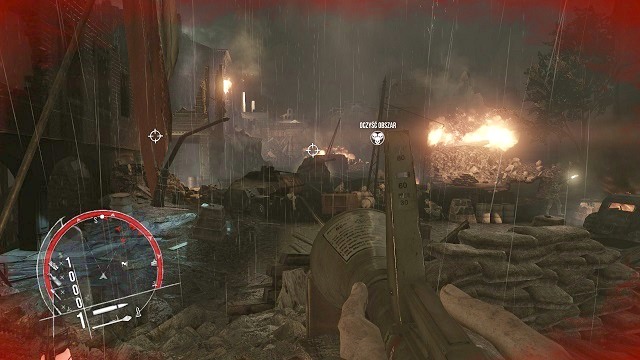 Hit the tanks with everything you have!
After a tank appears on the horizon, pick up the bazooka, lying in a nearby ammo box - afterwards, shoot at the tank to destroy it before it's able to shoot back.
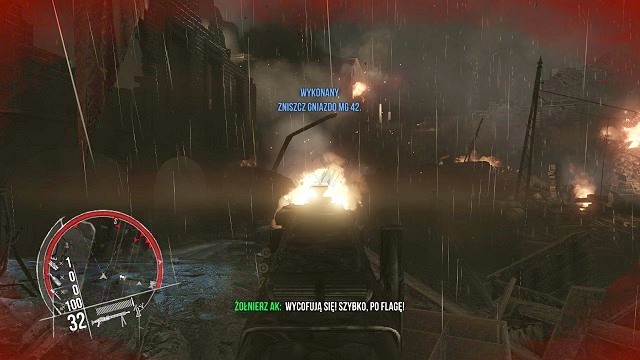 Yes, run! Cowards!
At the very end, mount the powerful heavy machinegun and take care of any German survivors, who should be shooting on your position, hidden behind terrain obstacles and the wreckages of the vehicles. The last goal of this mission, is to destroy a heavy machinegun emplacement, installed on the floor of the building, located on the left side of the street. To do so, shoot at the barrel, located at the very entrance to the building. Doing so, the whole construction will blow up, and the Germans will retreat.
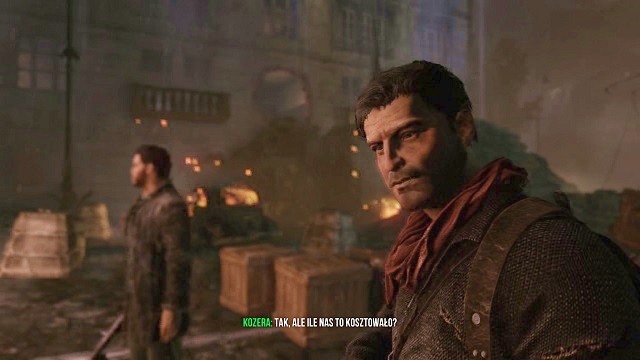 Pyrrhic victory...
During the cutscene, you will hear some bitter grievances from the main characters, which announce an inevitable fall of the Warsaw Uprising. Regardless of a successful mission, which ended a just a while ago, defeat hangs in the air. This encounter surely wasn't the last one, in which you will take part.
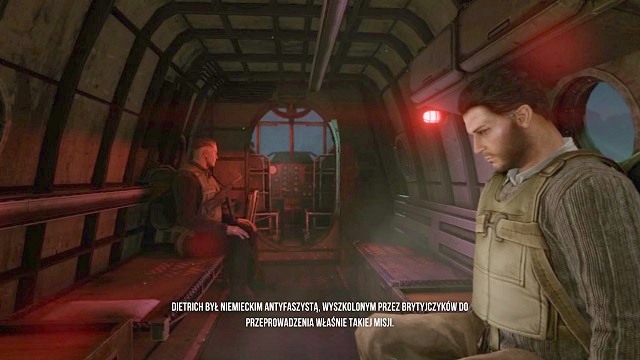 My, Hawkins. You're like a globetrotter!
The 13th mission starts, as always, with a cutscene, during which together with your new comrade-in-arms - Dietrich - you are preparing for a top secret operation on the territory of Germany. At the very end, you jump out on parachutes, to land practically in the middle of a Nazi's base.
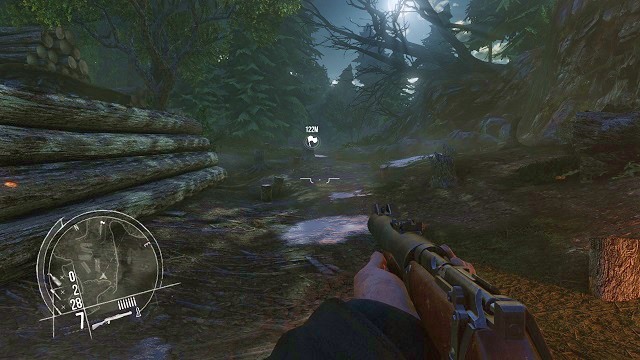 Dietrich? Dietrich!?
You regain control over your character a few minutes after landing. Your character is standing on the beginning of a passageway in the forest, and there's no sight of a parachute landing. Equipped with a rifle and a shotgun (no sniper rifle for you, at the moment) you will have to move towards the marker on the map, to find your lost companion.
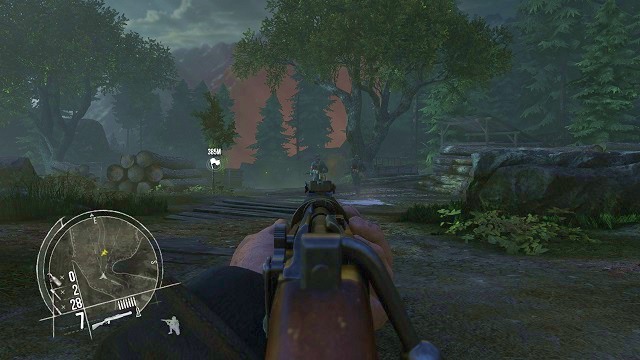 Where's the second paratrooper?
After a short journey, you will stumble upon two German grunts, talking about a certain commando caught and transported inside the base for an interrogation. When they finish they chit-chat, they will turn their backs on you and depart to their post. At this moment, by using your shotgun, eliminate both of them swiftly - no one should be able to hear what just happened.
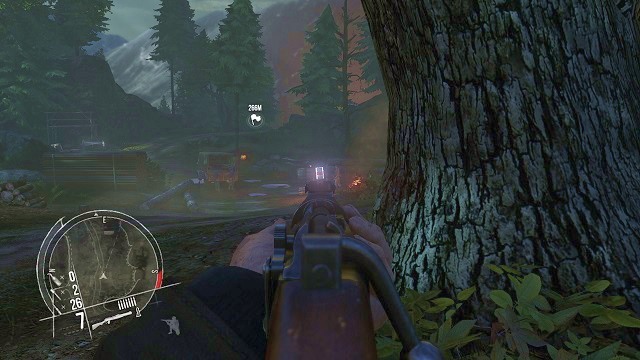 Are they setting up those explosive barrels in the middle of a camp purposely?
Shortly afterwards, you should arrive at a small German encampment. By the campfire and near the truck, you will find a few of the enemy soldiers. The moment all of them are close to an explosive barrel, shoot at it, causing a gigantic explosion, killing everyone caught in the blast, as well as destroying the vehicle. By doing so, you should be able to eliminate the whole squad stationed in this area.
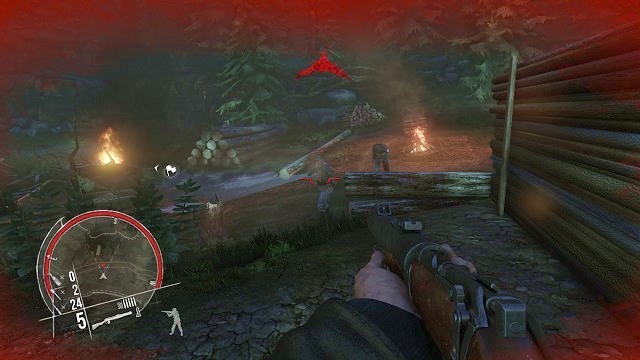 I'm here!
After you've dealt with them, get closer to the encampment, and hide behind an enormous composition of wooden logs. Shortly afterwards, two German soldiers will run from the further regions of the road. As soon as they come closer to the campfire, jump out of your hideout and kill both of them before they can even react.
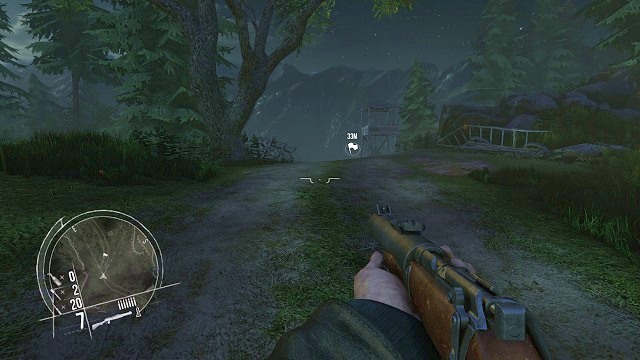 Another watchtower without a watchman? This army...
After clearing the immediate surroundings from the enemy troops, move along the pathway towards the marker on the map. After a short while, you will get to a watchtower - fortunately, it's empty.
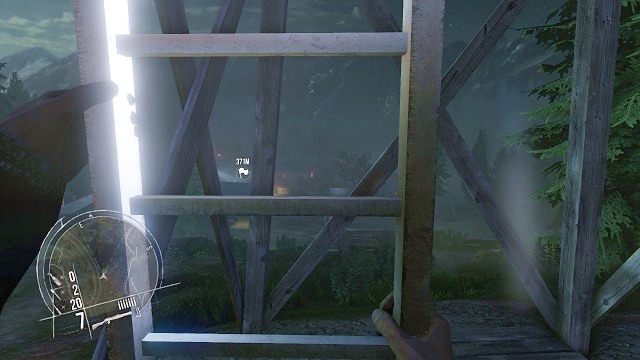 There's going to be an enormous view on the enemy camp from here.
Climb up the ladder as soon as possible, because from there, you will have a perfect firing position to take out a couple of enemy troops. Pick up the sniper rifle which should be lying there and begin searching for your targets. Note, that lying on the floor, in the corner of the watchtower, there's one of the secrets (1 out of 4).
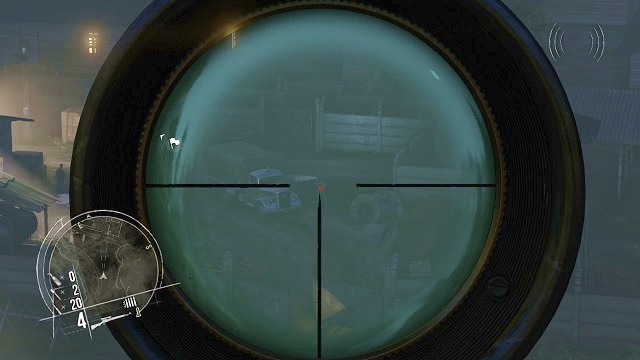 Quietly...
Fortunately for you, the moment you grab the sniper rifle, some field testing connected with the V2 Rockets will begin in the German base, that is why, at some intervals, an icon of will appear in the upper right corner of the screen, representing how well audible your shots are. If you don't want to expose yourself, wait for the symbol to appear, and during that time shoot all you want at the watchmen patrolling the area. However, hiding and making your shots inaudible isn't all that important, because sooner or later you will have to wreck havoc in the enemy base, so all that effort to say undercover will go to waste. Given that you have a huge advantage - you are on a top of a watchtower, having all the enemies in sight, yet they don't expect you to be there - you should just eliminate those enemies you can locate, and wait for reinforcements to arrive and kill those troops as well. With this method, you are able to get rid of a large quantity of enemy soldiers in one go, to prevent more annoying exchange of fire between buildings.
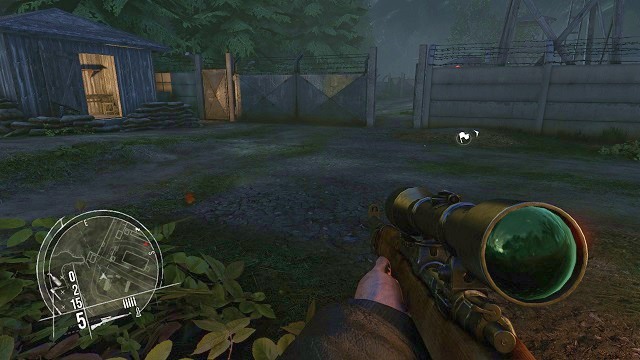 Where are all the watchmen? :>
After all the enemy watchmen are cold, get down from the tower and move towards the entrance to the encampment. As a matter of fact, you have two entrances through the holes in the wall, through which you can enter the camp, but they don't really differ that much. Your goal is the same in both - go towards the marker on the map all the time.
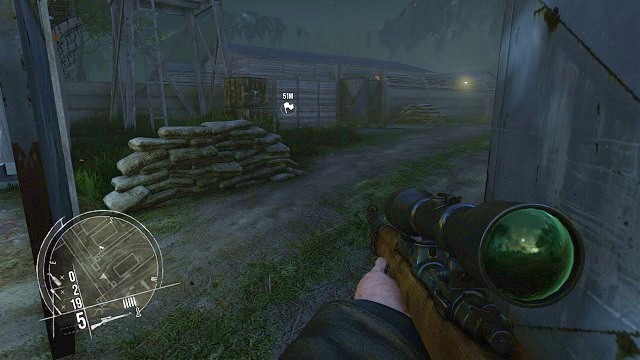 Still empty...
While you are finally inside of the camp, shift between buildings, to get to the destination of your journey, where your companion is held captive. Depending on the method you've chosen while being on the watchtower, you will be able to easily pass through the next several dozen meters, or you will have to fight your way through the enemy forces.
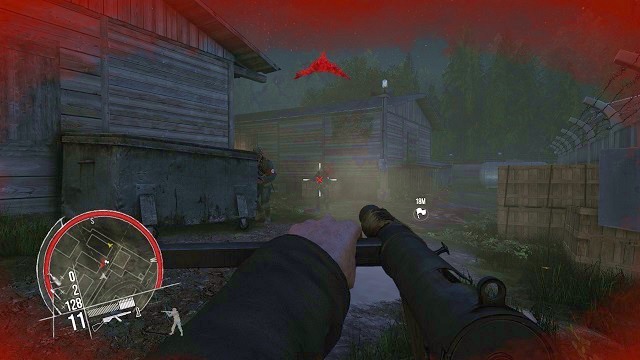 On the ground! Now!
After you've reached the part of the encampment, which was invisible to you from the watchtower, you will have to be prepared for some serious enemy resistance on an open field. Start with eliminating a few German soldiers near the prison barracks.
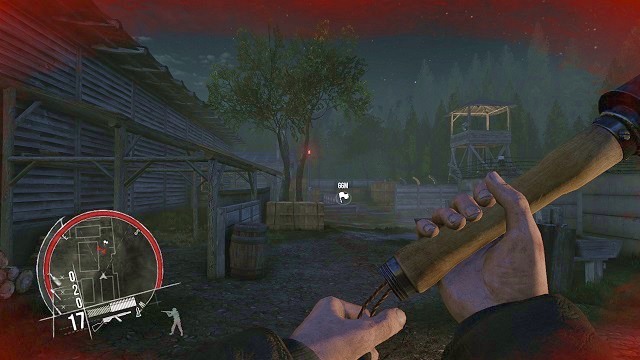 I will smoke you out of the building with a grenade!
Further parts are only worse. Fight off the overwhelming enemy numbers, and kill every one of those who are trying to prevent you from reaching your goal.
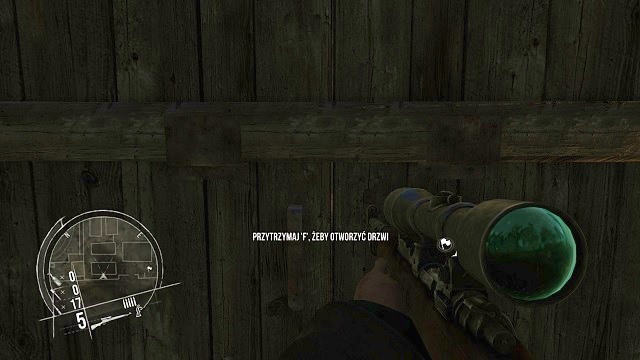 Ok boys. Time to get out!
After ensuring yourself a relative peace in the surrounding area, close in on one of the long prison barracks (the one closest to the wall) and set free a couple of captives, who are willing to get out of this camp. Inside, on one of the tables, just next to a frying pan, you will find a secret (2 out of 4).
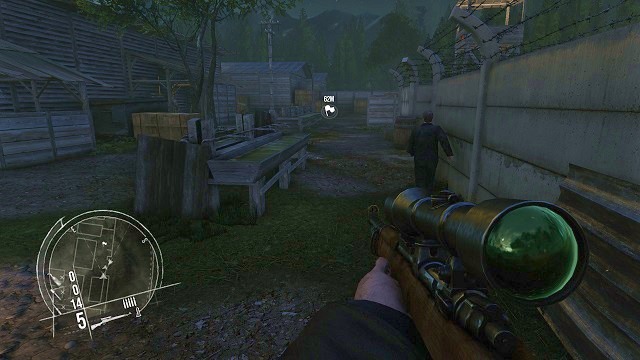 Run!
Run!After opening the door, and a short conversation, all the captives will exit the building and hide behind environmental obstacles, waiting for you to pave the way further for them. After killing of all the watchmen in the area, the men will thank you, just before jumping over the wall. It's nice to be helpful.
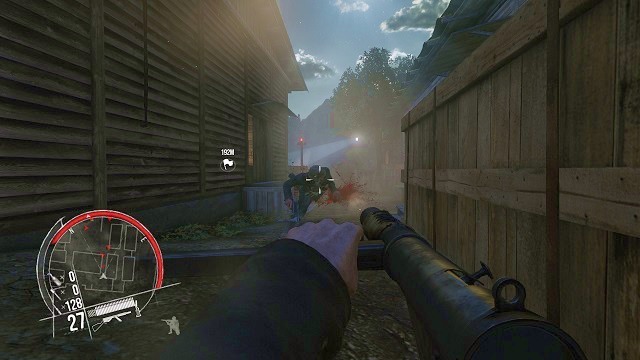 Get down!
Continuing your journey towards the marker on the map, you will get to another sector of the encampment, where a fresh group of enemies to massacre await you. Kill all the enemies standing on your way.
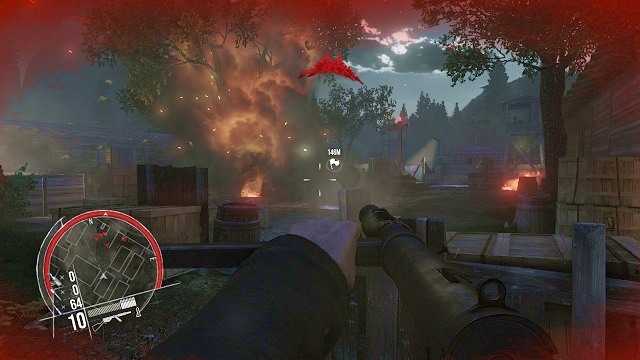 Oops, I unfortunately ignited a tree...
Explosive barrels may prove extreme useful in the elimination of the enemies - you should shoot at them in the first place.
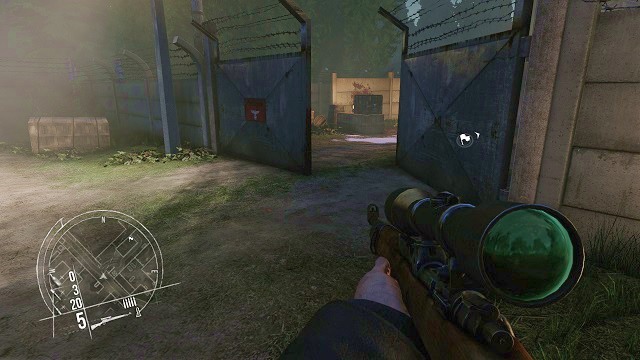 Dietrich, I'm coming for you!
At some point in time, you will reach a gate - go through it and all there's left for you is to go along a straight road, leading to a special type of prison holding your companion. As there's no time to waste, run there as fast as possible.
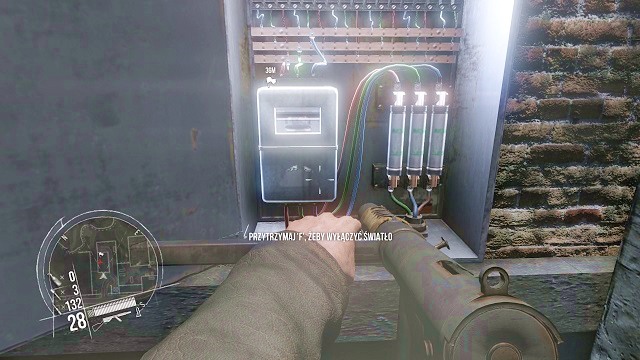 What's the point in doing that? Wouldn't it be better to just kill the guard?
On the other side of the gate, you will notice a rather small building, with a wide open doors, through which you will be able to see a German officer interrogating Dietrich in his cell. If you want to take a more stealthy approach, get out of sight immediately and sneak on the entrance. Just next to it, you will find a power panel, which you must simply damage, to make the lights go out. After the German officer becomes disoriented, sneak on his back and slit his throat.
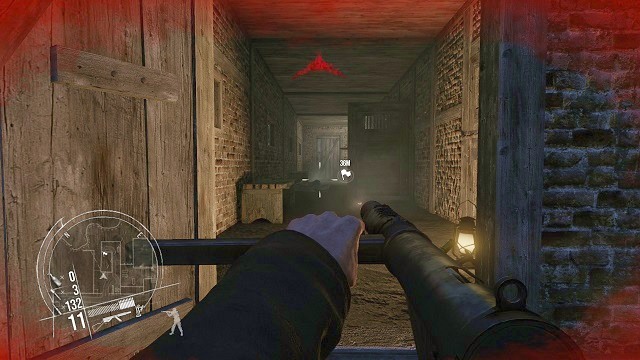 Die!
Die!If, however, you don't want to be sneaky and don't want to waste time on stalking your enemy, charge inside of the room and kill him with a series of your machinegun bullets.
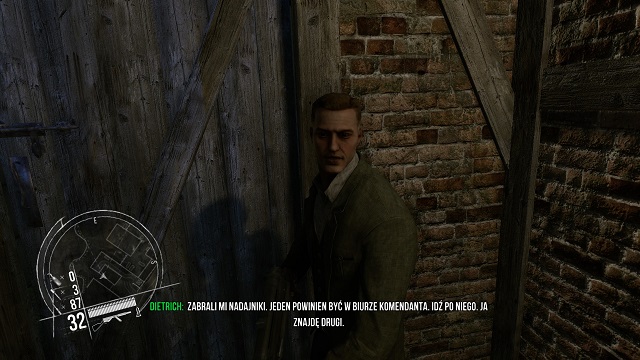 Will do.
Afterwards, approach the last prison cell and set your companion free. After a short conversation, you will receive a new order. It's time to set off to the office of the encampment's commanding officer, in order to retrieve one of the confiscated transmitters.
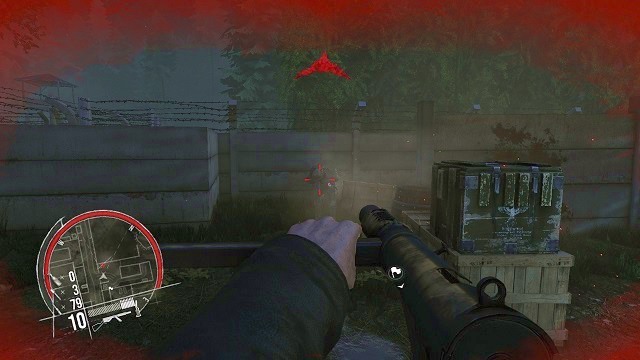 Reinforcements? A little too late for that...
Just as you leave the building through the same doors you went in, you will be attacked by a small German squad. You should easily be able to get rid of them. Afterwards, continue your journey in the direction of the marker on the map.
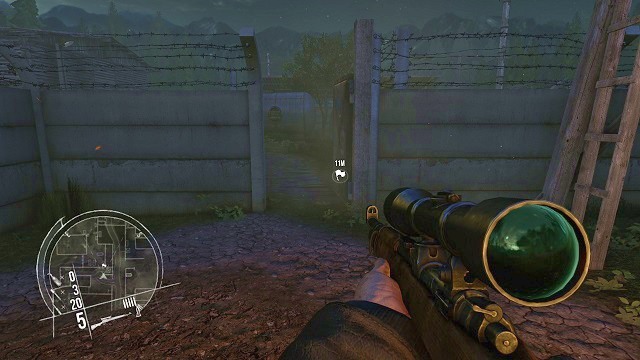 The road to the last part of the encampment.
After all the enemies are dead, transition to the last part of the enemy encampment, by using another passageway, located on the wall surrounding the prison building.
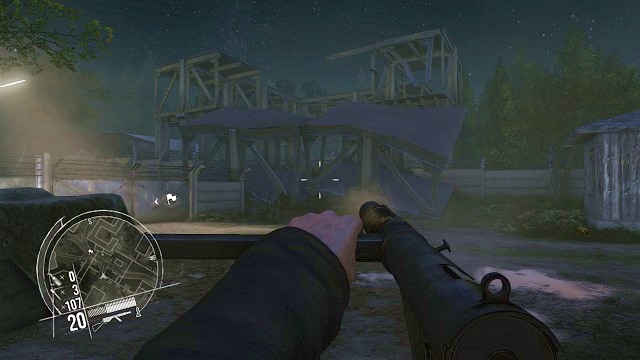 If there's no entrance, you have to make it yourself!
After a short while, you will arrive at the feet of a tall construction, from which enemy soldier will fire at your position. Just below the building, there's an explosive barrel - shooting at it will blow up the fundaments of the unfinished construction, bringing death on the watchmen located inside of it.
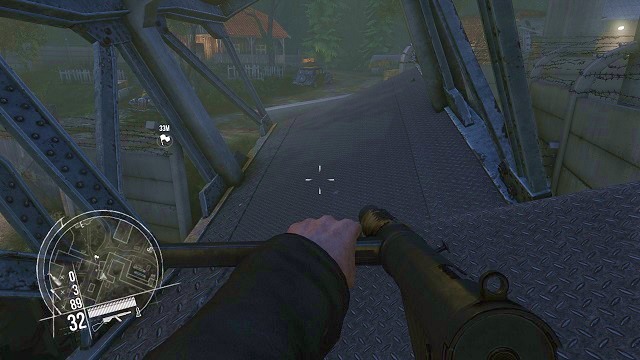 Perfect.
The falling fragments of building will somehow create a type of platform, through which you will be easily able to get to the other side of the wall, which gates are already locked by the clever Nazis.
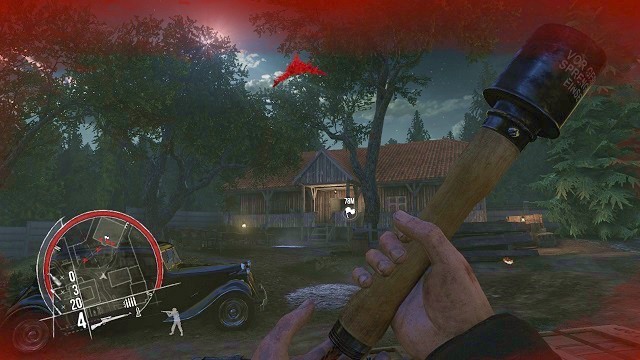 Chief, we're coming for you!
After getting on the stable ground once more, you should be able to notice an enormous house of the enemy commanding officer. Take out your grenades and flood the enemy's chief headquarters with them, killing numerous enemy soldiers in the process as well. If that didn't make the trick, use your sniper rifle / machine gun to finish the job.
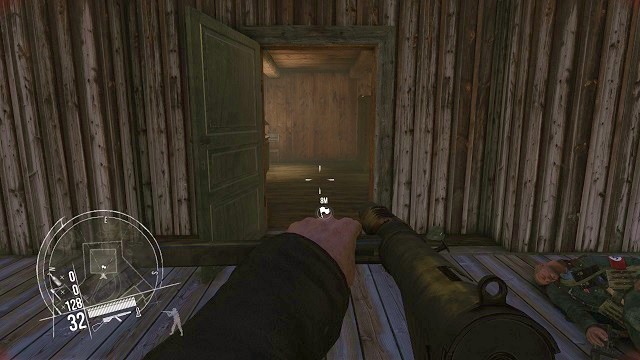 Attention, I'm coming in!
After dealing with the soldiers located outside, it's time to charge inside of the building, to personally send a bullet in the officers head.
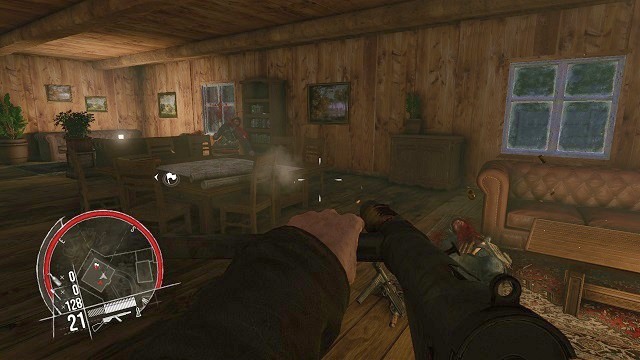 A quick burst and the job is done.
Unfortunately, as you will find out soon, the doors to the main room were sealed shut. However, it won't really matter - bash the door, charge your way inside, and by using the slow-motion kill of the nearest German soldiers by using your machinegun.
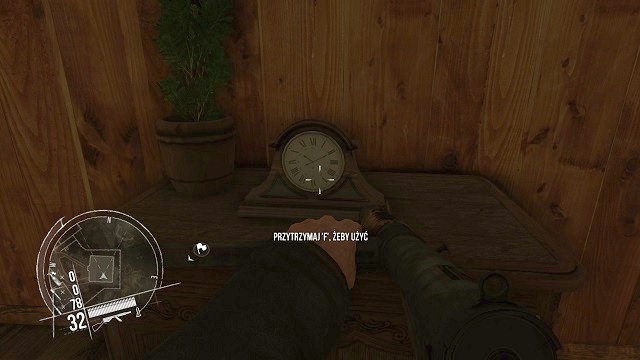 Quite clever, indeed...
In the very same room, to which you just barged in, located on one of the shelves, there's an innocent-looking clock (to be more precise, it's against the wall, on which the doors you just bashed were located) - the clock is in reality a secret switch, allowing you to open a hidden passage. Hold the interaction button to use it, and a passageway should open on a nearby wall, revealing a small room - inside, you will find a secret (4 out of 4).
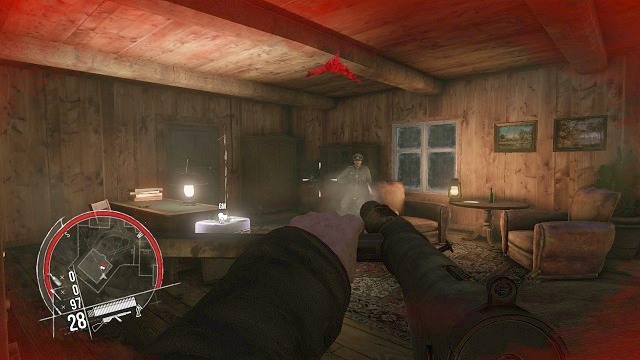 A duel! The first one to shoot gets to live!
Continue your journey and get rid of a few remaining soldiers guarding the officer, to face the target himself at the end. It's not a difficult enemy, as all of the German troops are.
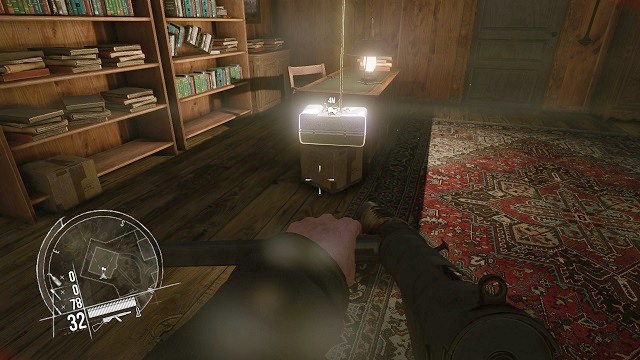 That's what I was looking for!
After everyone is "humbly" lying on the ground, approach the transmitter located on the desk - hold the interaction button to pick it up to your inventory. Afterwards, leave the building by using the second entrance.
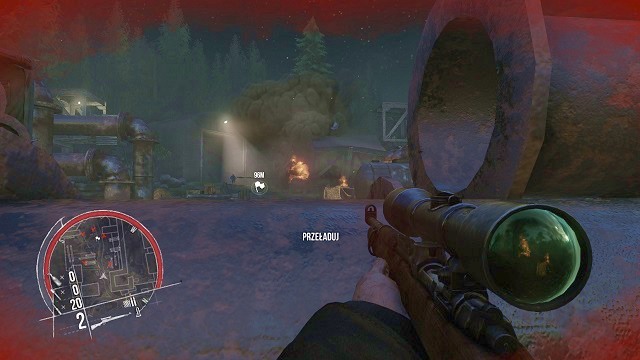 It's your last attempt.
After leaving the building, continue on in the direction of the marker on the map. After crossing the gate, you will get to the encampment peripherals, where a last squad of German troops await you. Kill them all, to pave yourself a path to the rocket facility. There's a lot of explosive barrels in the surrounding area, which can be used in a variety of ways.
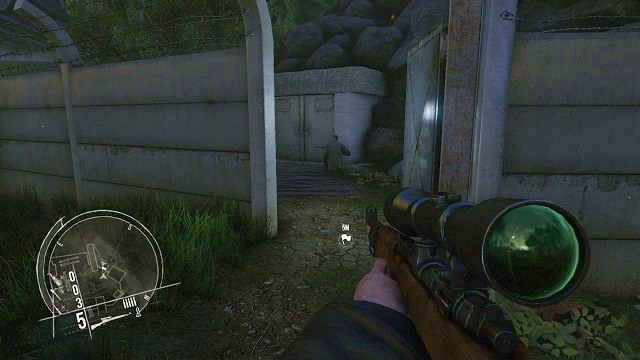 Finally, together.
After dealing with everyone standing on your way, approach the exit from the facility. At the last gate, Dietrich will be awaiting you. It's time to proceed to the next task on the enemy territory.
 Let's get this started.
The 14th mission of single player campaign begins behind the gate you managed to reach before the end of the previous chapter. Together with Dietrich, embark in the direction of the marker on the map, to soon be able to see a vast terrain around the rocket facility, where the rockets sought by you are located.
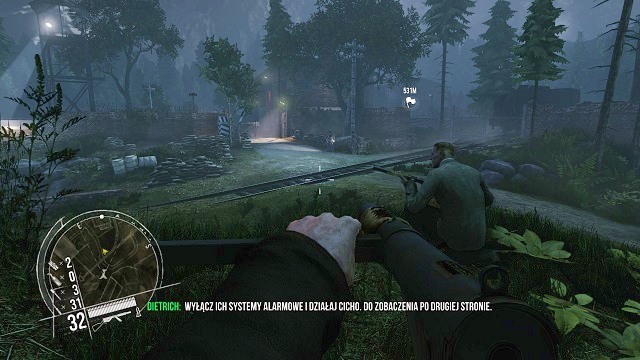 Okay.
Okay.After arriving on a small elevation on a hill, near the entrance to the complex, get your orders from you companion before you split up, so that you can get inside the facility from two different sides.
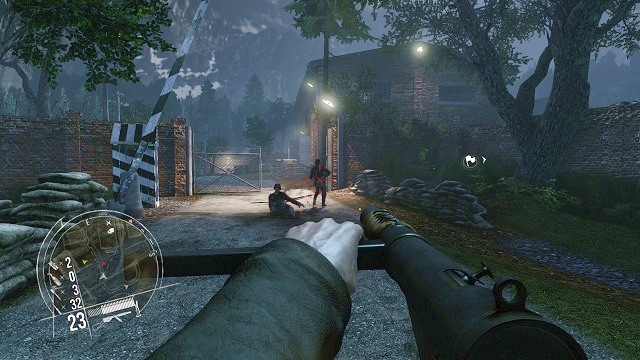 It's good that you didn't hear my footsteps behind you...
First things first, get down from the hill and carefully, from a safe distance, close on the two watchmen near the gate. Due to the loud sounds in the surrounding area, you should have no problems with executing them from behind - do so quickly, however, as they can still scream and attract reinforcements if you're not quick enough.
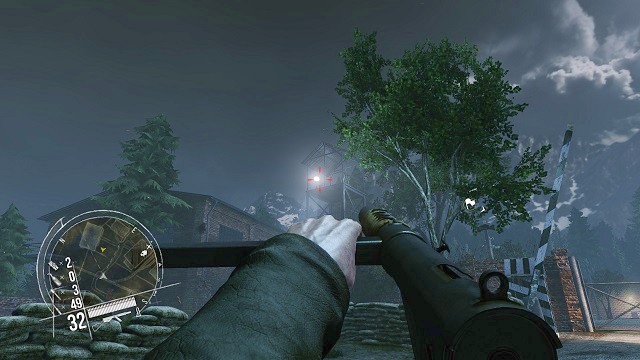 Is he blind or what?
Afterwards, do the same thing with the delinquent located on the watchtower, who didn't hear or see your previous assassination. It seems that there's no difference if the watchtower is manned or not...
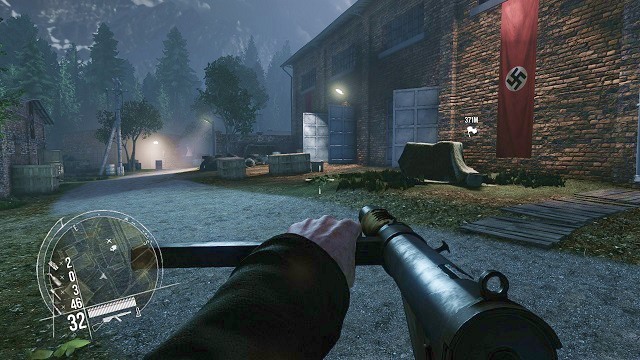 It went swimmingly.
After the three watchmen are already dead, enter the facility grounds, and immediately head towards the first building in the area (the one with the flags with a swastika on it).
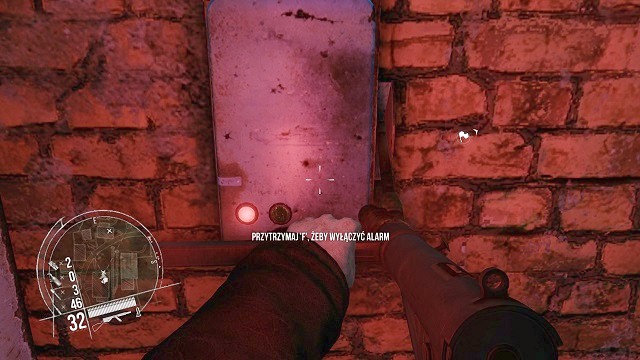 He won't call any reinforcements anymore.
Go towards the second exit from the building, near which an alarm system of the facility is located. Turn it off as soon as possible (by pressing and holding the interaction button), to ease yourself further in the future, as well as do an additional task of the mission. There's a supply of bazookas nearby - it would be wise to swap out one of your weapons (shotgun or a machinegun) for one of those wonders, as it may come in handy.
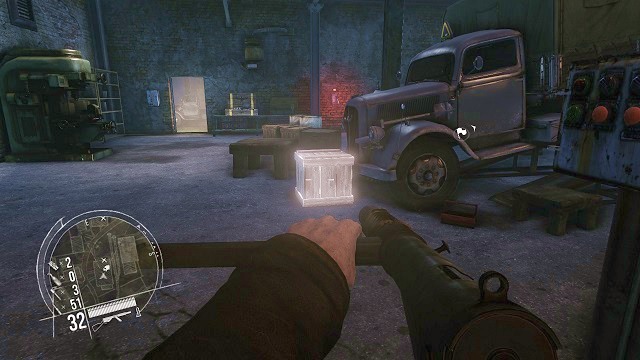 Let's have some fun.
Afterwards, approach a blocked truck, which can be released by shooting and destroying the box standing in front of the vehicle. After doing that, the truck will automatically drive out of the building, hitting the wall of a nearby building in the process. This happening will attract the attention of a few guards located outside, diverting them from you. After that run as quickly as possible to the second floor of the building, and approach the stairs with a metal railing, which leads to the facility.
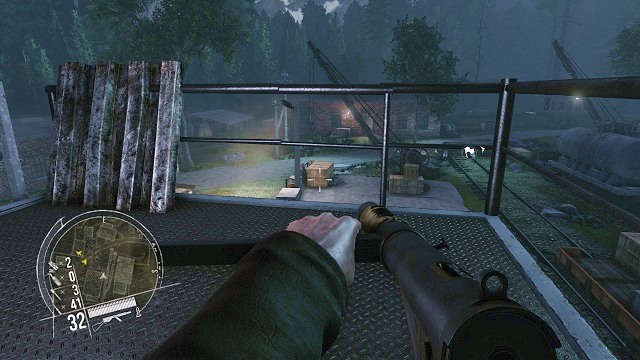 An accident at work. It happens.
Careful stand on the platform near the descent and pay attention to the crane, located in front of you. Shoot at the hook holding a huge box in midair - do so when a nearby guard will be located just below it. Doing so, you will eliminate another enemy without anyone noticing what happened. It's time to leave the construction for good and take care of the rest of the soldiers in the area. Before you do so, however, you should visit a small room on the same floor you're currently on - inside one of the lockers, you will find a secret (1 out of 4).
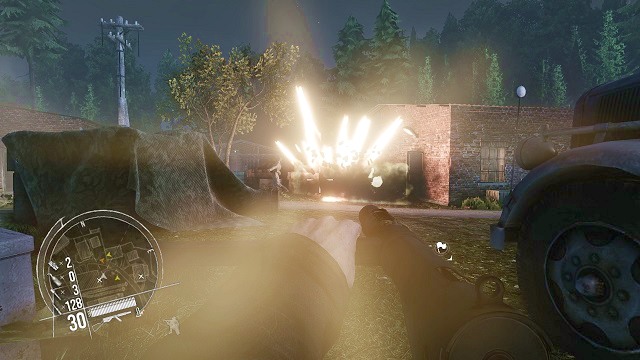 Wow!
Wow!Go in the direction of the building, which was hit by the truck a little while ago, to find a few confused watchmen near it. Don't waste any time and eliminate them. An explosive barrel located nearby can also be used to do the job.
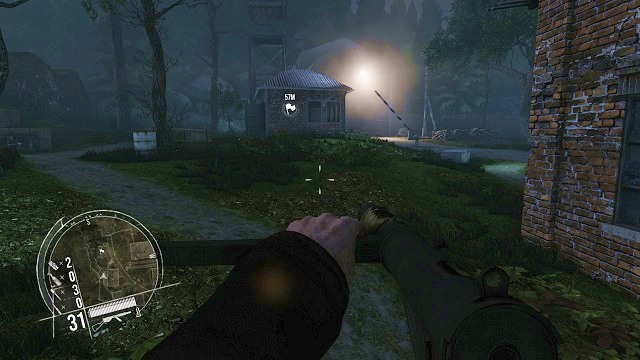 And here it is - the main factory.
After dealing with all of the factory guards, continue towards the marker on the map. After a short journey, you will arrive at a small building, inside of which there's a switch controlling the main gate of the main facility complex. Unfortunately, there's an machinegun emplacement located near that entrance - if you want to get inside, you will first have to deal with the MG crew.
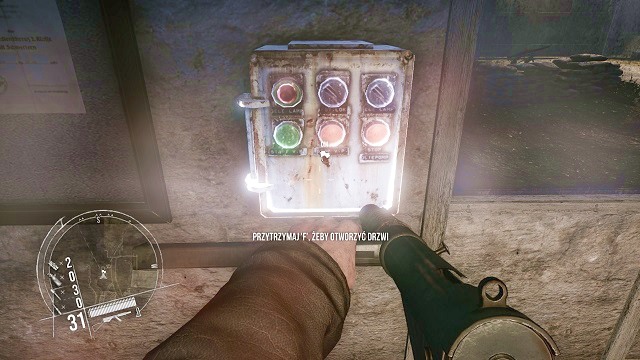 And it's done.
While being inside of the small hut, approach the highlighted panel and hold the appropriate button (interaction button). It's done. It's time to enter the very heart of the German base.
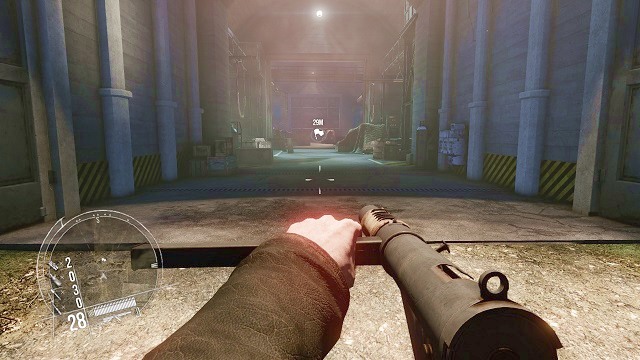 Let's enter then!
Move further in the facility, without worrying about any enemy resistance, as you won't meet any German soldiers on your way, at least for a couple of moments.
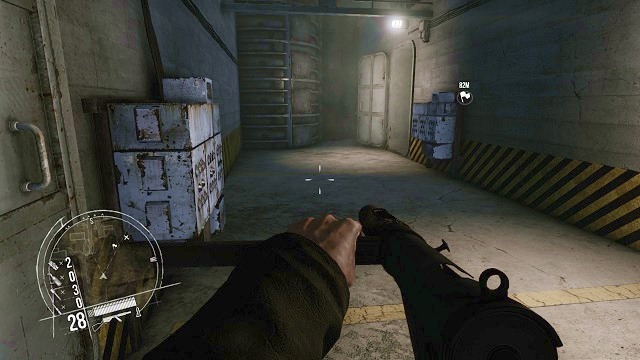 What are those weird sounds?
After you've arrived at a broad corridor, turn to the right, to get past a pair of closed doors - after then there's another pair of doors, behind which a clear sounds of rocket testing can be heard.
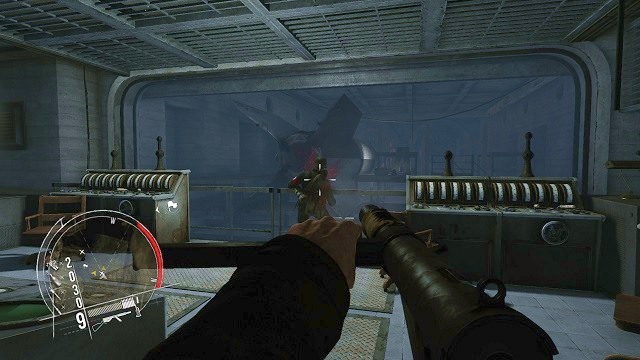 He's so busy that he lost contact with reality.
Get inside, where you will encounter a small group of enemy soldiers, testing the efficiency of the rockets produced at the facility. Kill them all without much effort, because will all the ruckus no one will hear a thing, not even you shooting all over the place
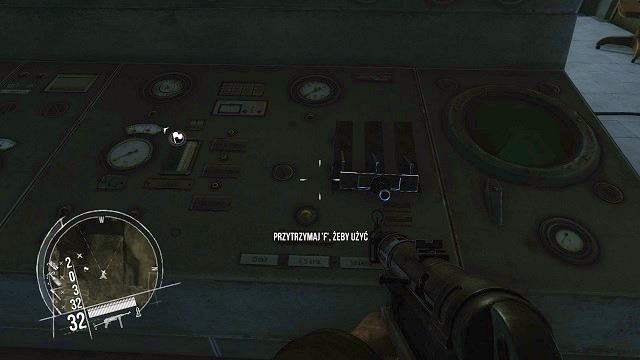 All this work will go to waste...
After dealing with the Nazis, approach the control panel and hold the interaction button, to blow up the whole machinery, completing an additional task in the process as well. Afterwards, continue with your journey, by going through the next doors.
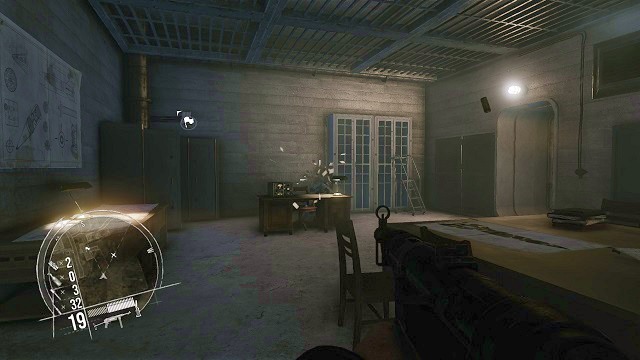 It's a bad time to check on your notes...
In the next room get rid of an officer occupied with checking on his notes. There's nothing of interest in this room, so all you can do now is to follow the marker on your map.
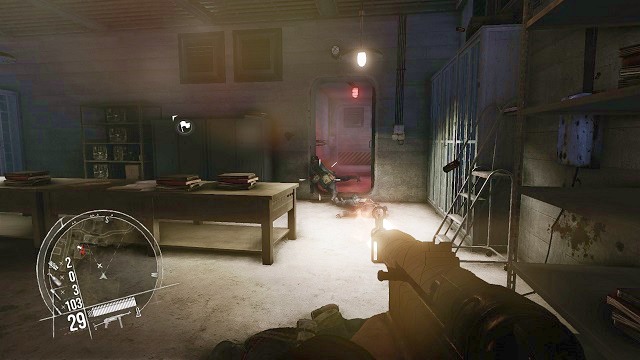 Don't lean out!
In the further part, you will stumble upon a few more enemy soldiers. Kill them all and continue your journey in the deeper parts of the bunker.
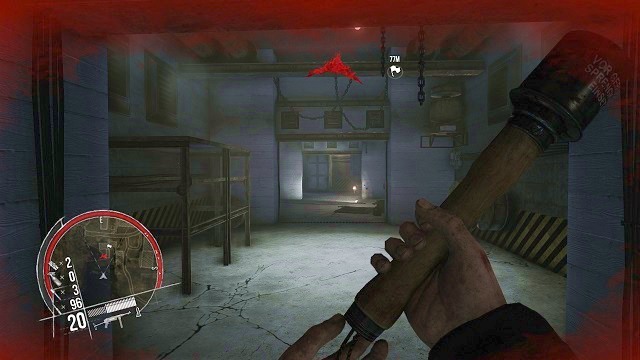 Catch!
There are two enemy soldiers hiding at the very end of a long corridor, who, as soon as you get closer to them, will start flooding you with bullets. The easiest way to smoke them out of their safe positions is to use grenades. One accurate throw will be enough to get stupid ideas like opposing a stronger opponent out of their heads.
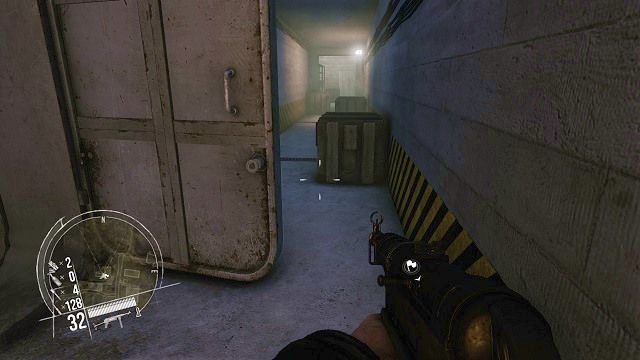 Do I smell another secret?
After eliminating the threat, you will arrive at the crossing of roads. Start with the left one, to get to a dead end - there's a secret (2 out of 4) lying on one of the boxes there.
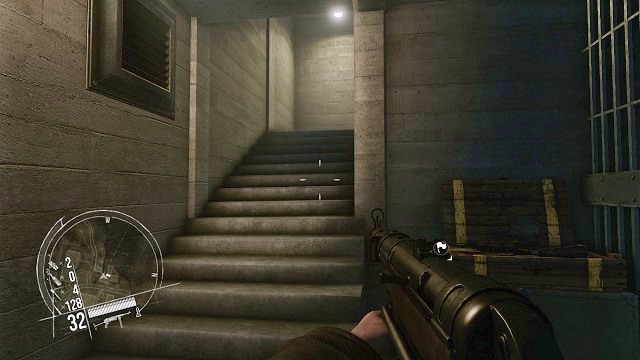 Is that the exit?
After collecting the secret, get back to the crossing and go along the right route this time - soon you will see stairs leading to the surface. And that's how you crossed the whole bunker.
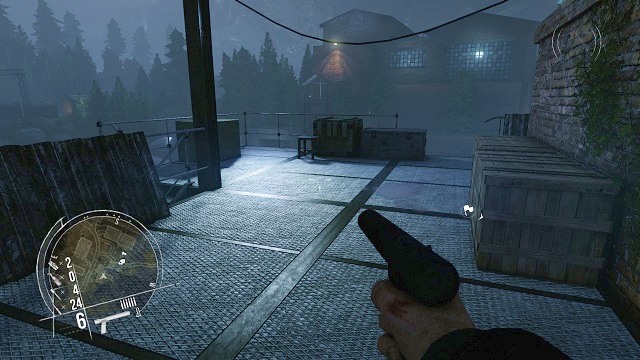 Ah, finally, some fresh air.
After emerging outside, you will see a vast number of buildings all around your current position. Approach carefully to the edge of the railing and pick the sniper rifle, leaning on one of the boxes. At the very same moment you pick up the weapon, a short cutscene should start, during which Hawkins, by using binoculars, notices Dietrich entering the further part of the enemy factory.
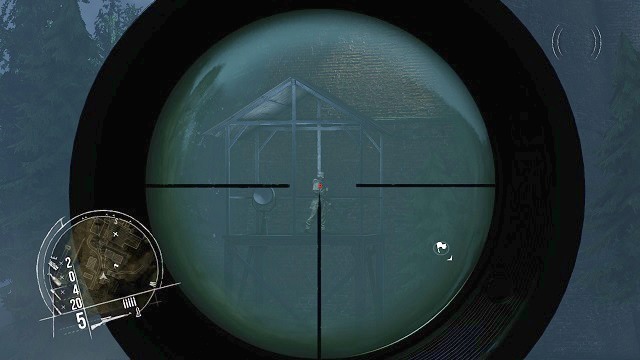 No one will hear your screams...
Take up a convenient firing position and look for all the targets in the area by using your rifle scope. There are several enemy soldiers patrolling the encampment, as well as two watchmen on top of watchtowers. You should only make your shots when a volume icon appears in the upper right corner of the screens (the noises are made by a truck).
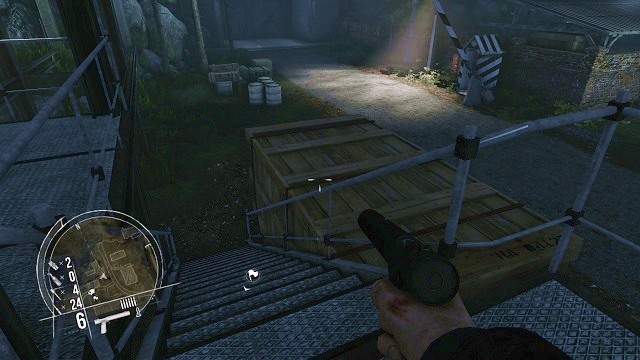 Well, not at least no one will disturb us...
After finishing all the enemies off, run down the stairs and head in the direction of the mission mark - in this case, the huge reservoirs, to which you must attach the transmitter you recovered earlier.
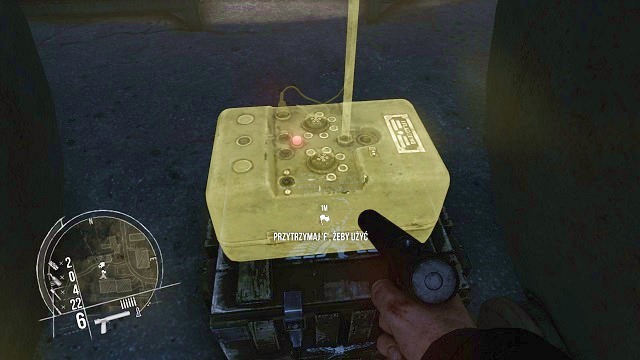 Done, chief!
When you reach the containers, press and hold the interaction button in the specified place and it should do the trick. Now it's time to find where Dietrich is. You better hope that he didn't get himself into some trouble again.
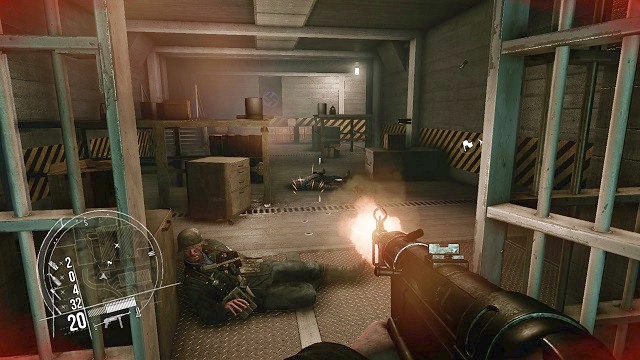 You shouldn't have opened the gate at all...
According to the guidelines, you should arrive at a passage, which was just opened by the German soldiers. Cross the gate as quickly as possible and kill of the unfortunate Nazis, who weren't aware of what they are doing.
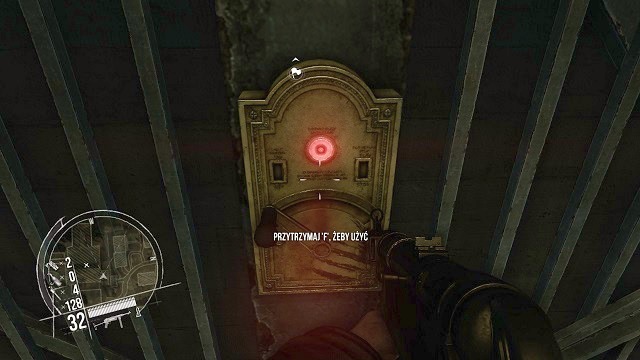 Just you wait till I get there, scoundrels.
At the end of the room there's an elevator, which can get you to the upper floor of the facility. After getting inside, your character will automatically close the doors. All you have to do now is to use the interaction button on the panel located on the wall. to make the elevator move.
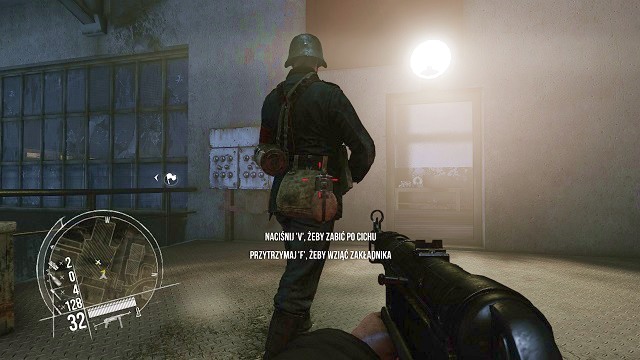 Both decisions will end up with you dying - which one would you choose?
After reaching the top, the doors of the elevator will open - sneak on the enemy standing with his back turned on you. Slit his throat and continue on with your journey.
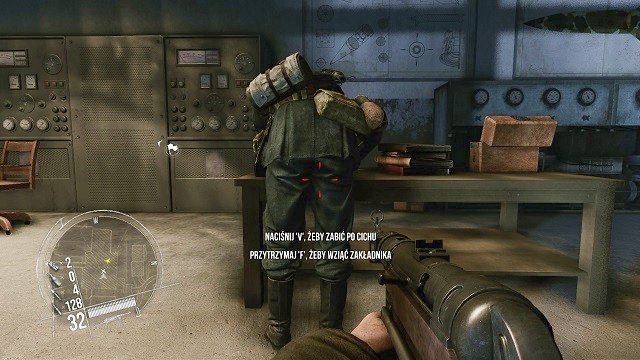 And where's the option "kick his ass" ?
In the room, in which you enter by going towards the marker on the map, you will notice another soldier, bending down near the table. Just like you did before - sneak up on him and eliminate him quietly.
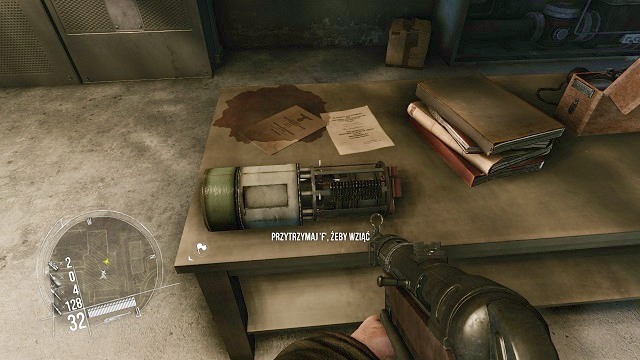 The second part of the riddle. You need to find the third and the last one.
As it turns out in a moment (or, to be more exact, as the Nazi's body disappears from the desk) he was tempering with the second part of the device you are looking for - finding it determines the completion of the additional task in this chapter. After you've collected the item to your inventory, go to the end of the room, where, lying by a chest of drawers, a secret is located (3 out of 4).
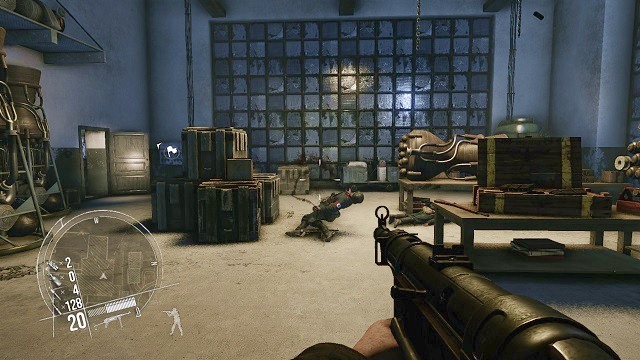 Enough playing the "assassin and the victim" with you guys.
In the next room you don't have to be playing a stealthy assassin role anymore - because there's really no point in doing this at the moment - so take up your machinegun and eliminate all the resistance.
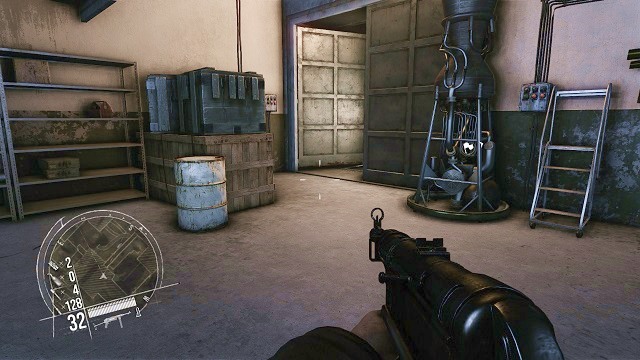 How long is this factory?
Afterwards, exit through the door to the long corridor - after a short while you will witness an unexpected cutscene.
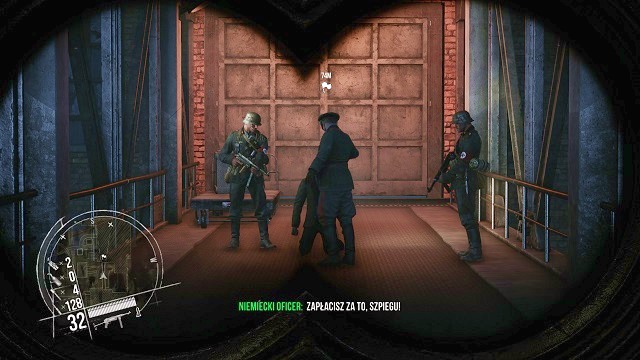 You got caught again? What a hopeless commando you are...
Before your eyes a German officer will be interrogating your companion, and after a short while, will hit him and command his soldiers to drag him into prison. This Dietrich is really unfortunate. He got himself caught again, like some greenhorn...
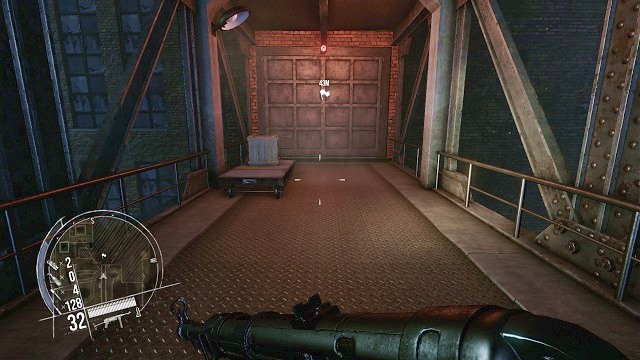 I'm coming (again) bud!
After regaining control over your character, immediately head to the part of the complex, in which the German patrol took your companion.
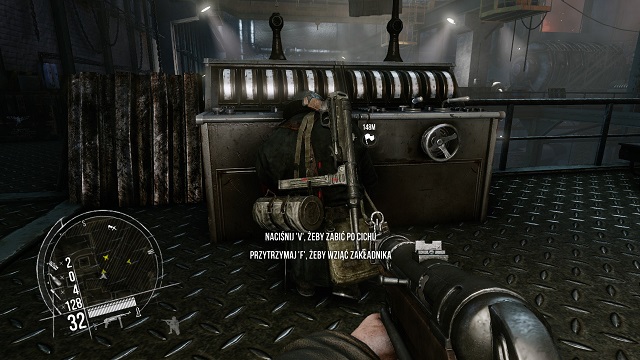 I can't wait to see your face when you turn around.
Crouch immediately after opening the door, as there's the first watchman standing there. Sneak on him and take him out silently.
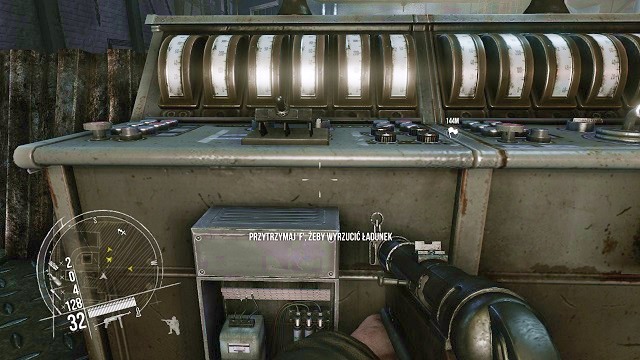
I wouldn't want to be the one to be hit by this huge load...
Afterwards, approach the machinery the soldier was tempering with and press and hold the interaction button, to drop the heavy load on the heads of German soldiers, located below your position. By doing this, you will take care of several enemy soldiers, but you will make some ruckus and attract attention all the soldiers on the production hall.
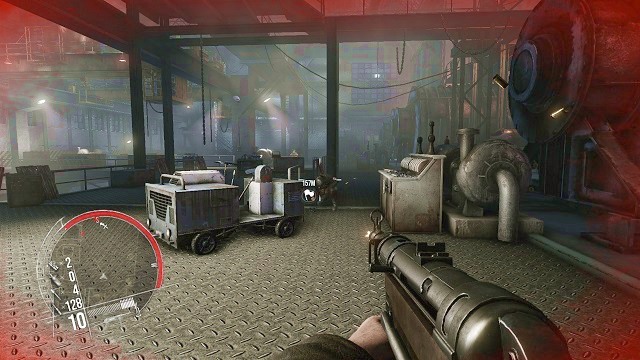 Let's see how is going to survive this encounter.
This means, that you have to jump out of your hiding spot and immediately take out the soldiers standing the closest to you - after a short while you will be fighting with practically the whole enemy garrison. Kill a group of enemies located on the floor - after that, go down the stairs and eliminate the enemies standing on the ground floor. Note, that on the ground floor, near the stairs located by the entrance to the complex, there's a table with a secret on it (4 out of 4).
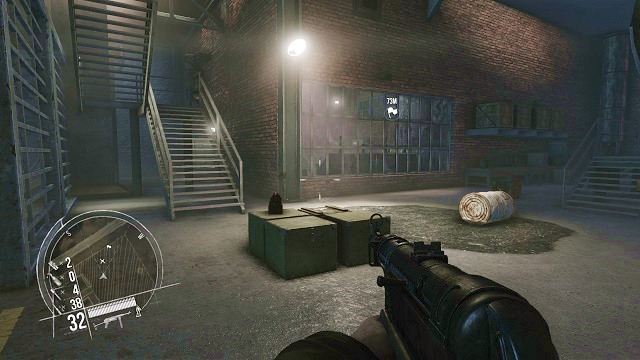 Hold on, Dietrich!
After eliminating all the enemies in the whole engine room, go down, in the direction of the marker on the map, to finally arrive near a small building. Get inside as soon as possible, as that's the place in which your companion is held.
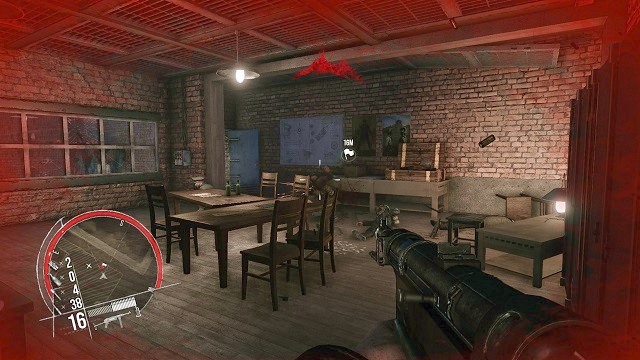 Tell me where he is. Now!
First things first, direct your steps to the upper floor of the building - charge inside, killing several of the enemy grunts and their commander. Kill all of them and wait for a cutscene which should soon appear.
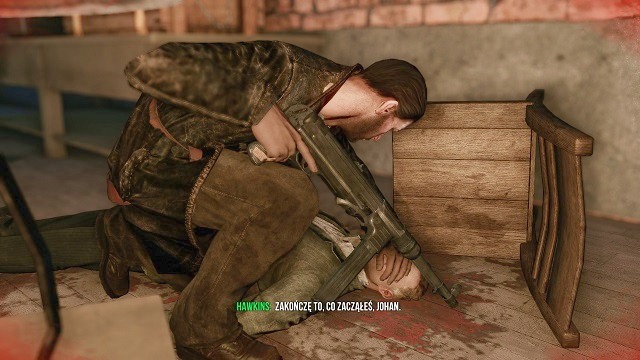 Rest in peace, friend.
Unfortunately, Dietrich was killed in action, that's why, after a short farewell, you have to continue with your mission, so that his sacrifice wasn't in vain.
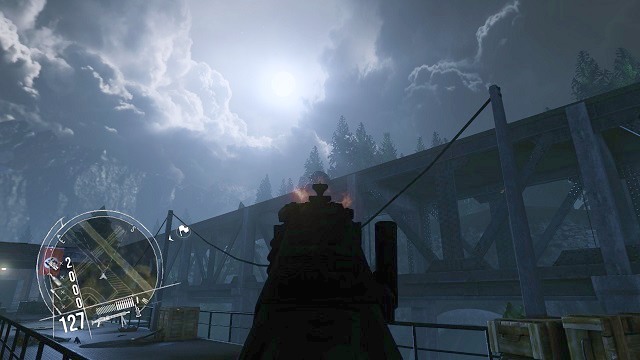
I'll take that transmitter - you won't have any use of it anymore.
Before you leave the building, however, you must take care of two things. The first one is the transmitter of the deceased, located on one of the tables in the same room, which will be used in the further part of this chapter.
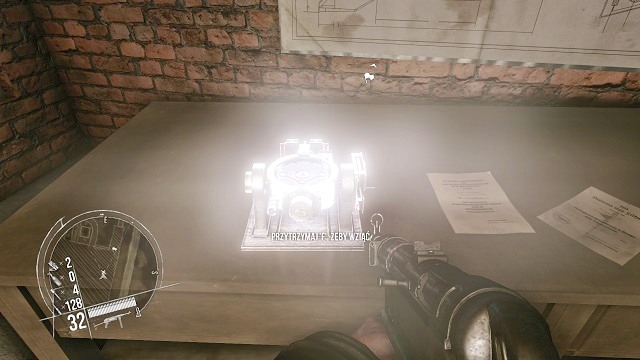 The final part of the riddle.
Next, on the ground floor, look for the third and the final part of the machinery, which you must take into your inventory, so that the additional task is completed. This item can also be found on a table.
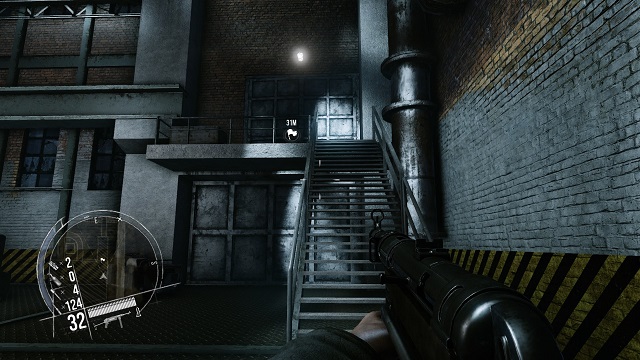 It's time to get out of there.
After completing all your tasks, go towards the marker on your map, which will guide you to the stairs, leading to the surface. Finally!
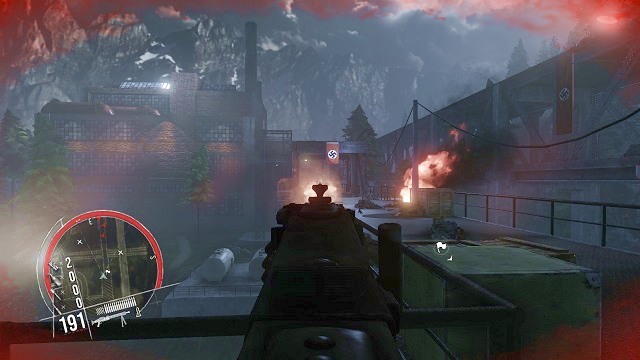 You won't pass! I'll make sure of that!
Immediately after emerging on the surface, you will notice a very long bridge - from its other side, a large squad of German soldiers is closing on your position. Immediately grab your grenades and throw them on your enemies - after that, mount a powerful machine gun which is located nearby. With its help, take out all the enemies trying to get through, towards your position - finally, finish of the survivors hiding behind crates and boxes by using your sniper rifle.
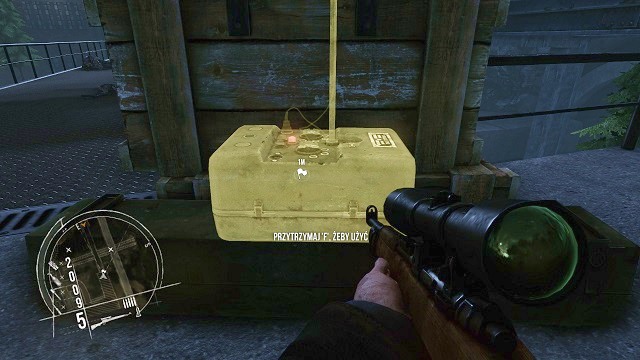 This is for you, Dietrich.
After the situation calms down, approach the highlighter place, near the MG turret and install the transmitter of your deceased companion on it.
The first spotlight...After embarking on a further journey, it's good to complete a secondary objective, which should activate just now. You have to destroy two enemy spotlights located in the area. It's best to do it with the help of your machinegun. The first spotlight is located on the right side, on top of an iron construction.
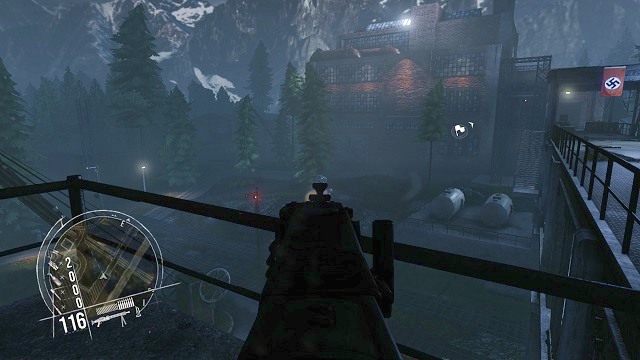 And the second one...
The second one is located on the left side, on a small elevation. There are two rather large containers and a couple of trees near the spotlight.
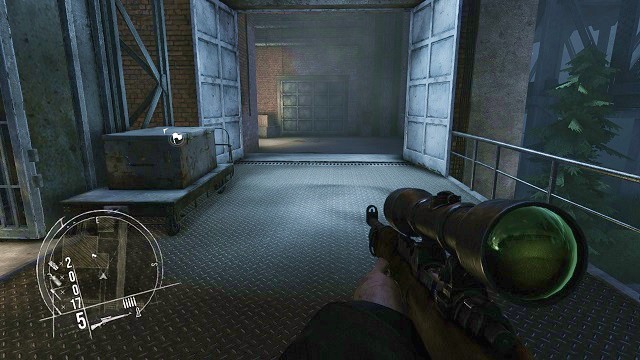 How do I get out of here?
Cross the whole bridge and enter the opposite building. You can move around without fear, as there will be no enemies for a while - all of them died during the encounter with your MG.
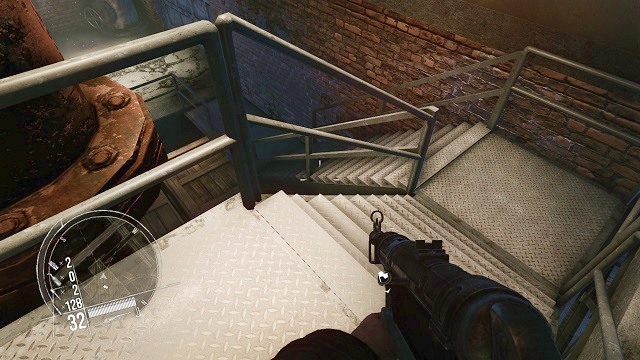 Are we there yet?
After going through the corridor, you will arrive at the stairs - use them to get to the ground floor and exit via the doors to the outside.
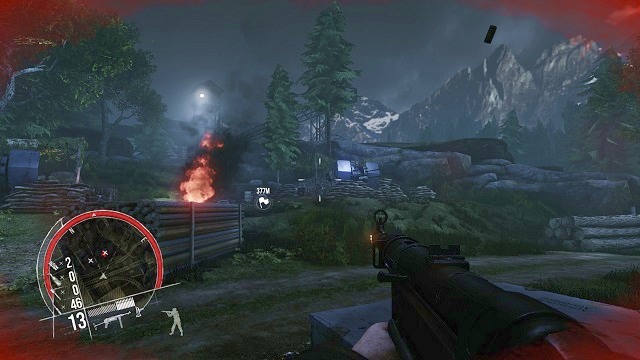 You wanted to shoot down the allied planes?
After reaching the surface, you will be immediately dragged into fight. You should be able to see the German anti-aircraft emplacements. Yup, you guessed it - another additional task requires you to kill of their crew and blow up the emplacements with explosives. Nothing as simple as that. First things first, you should, obviously, get rid of the AA crew.
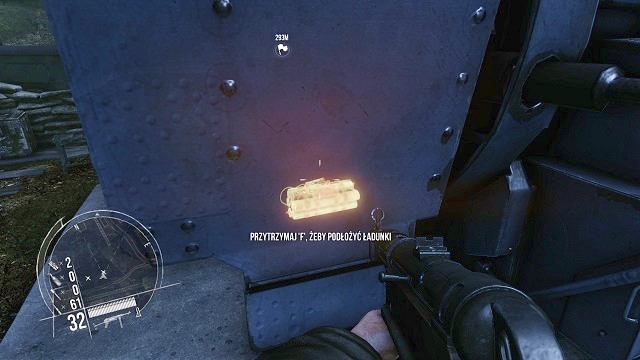 Hey pilots, you will thank me later.
After clearing the AA of its crew, approach it and stick an explosive to it. After setting the timer, get away immediately from the place of a potential explosion and head towards the second gun, doing the same things as with the first one.
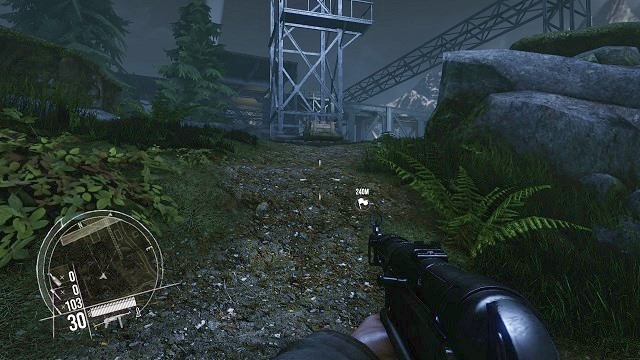 It's time for a final reckoning.
After the objective was marked in your journal as completed, it's time to continue with your journey. Head towards the marker on your map, running up the hill - shortly after you will arrive at a gigantic test square.
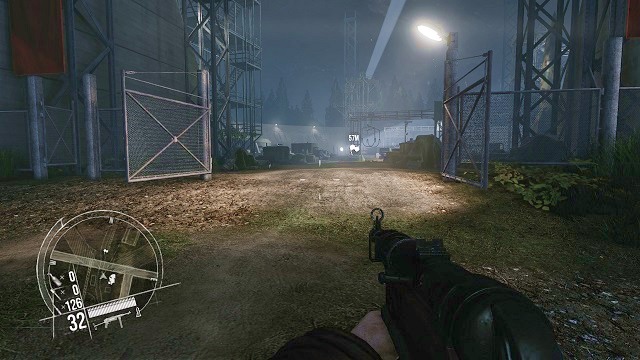 So it's like that?
The Germans are preparing to launch rockets of immense power, and only you can prevent them from doing it. Without further ado, barge in on the terrain of the facility.
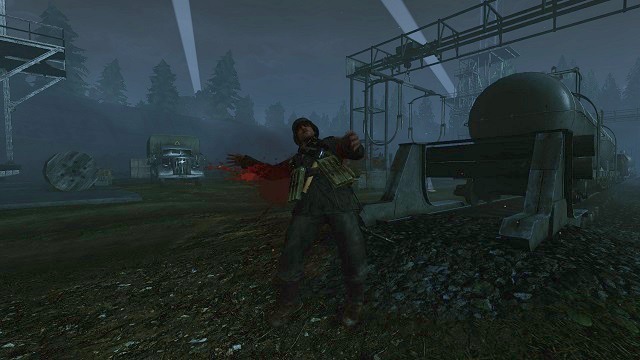 Your plan came to nothing!
Carefully aim with your sniper rifle - as this weapon is recommended here - and eliminate the watchmen within the facility. There's a lot of them, and that's precisely why you should keep your distance, instead of charging on them with your shotgun.
 You dirtied the machinery!
At the very end, it's time to take care of the enemy officer, who was responsible with the task of overseeing the launch of that deadly rocket. Get to him in a small building, which serves the purpose of a control center.
 It's going to be flashy!
When the surrounding area is rather safe, approach a huge rocket and stick your explosives in a clearly visible place, by pressing and holding your interaction button.
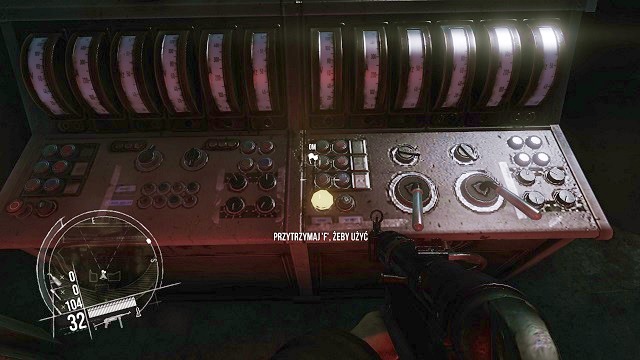 The further destiny of the world conflict depend on this tiny button.
Go back to the place in which you've murdered the German officer. Inside of the building, you will find machinery, or more specifically, a single button - pressing it will bury the whole Nazis plans for the war.
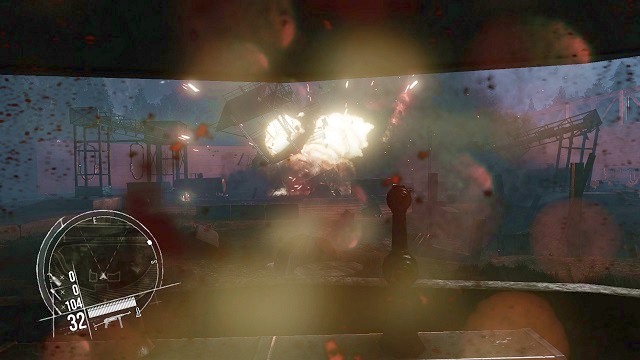 Art.
Art.After pressing and holding the interaction button, there's nothing left for you to do as to let go of your keyboard and mouse and sit back in your chair. Just like that you changed the fate of the Second World War. Congratulations!
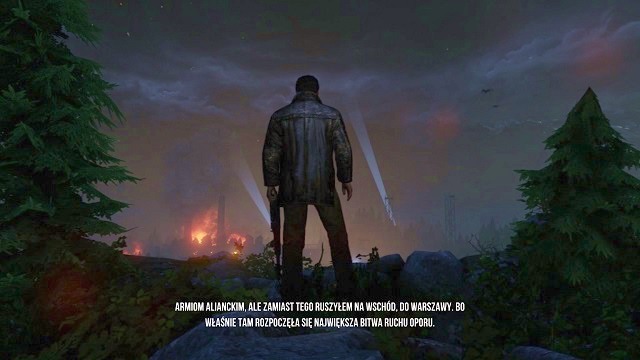 Can you feel that?
Afterwards, a short cutscene will start. It's time to get back to Warsaw, where the last two chapters of the single player campaign take place.
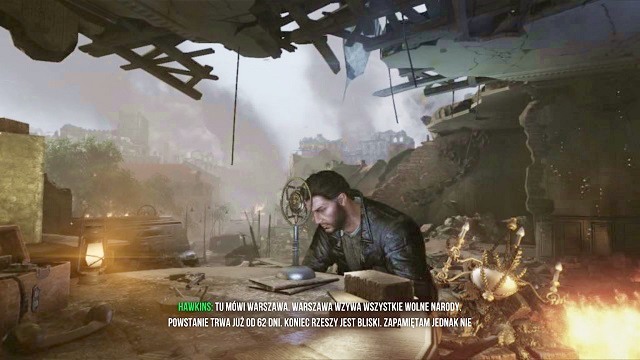 The final call...
The penultimate mission of the single player campaign starts with a cutscene, during which Hawkins calls again to all of the citizen of Warsaw, but at the very moment, it's a completely pointless action, as the uprising is nearing its downfall.
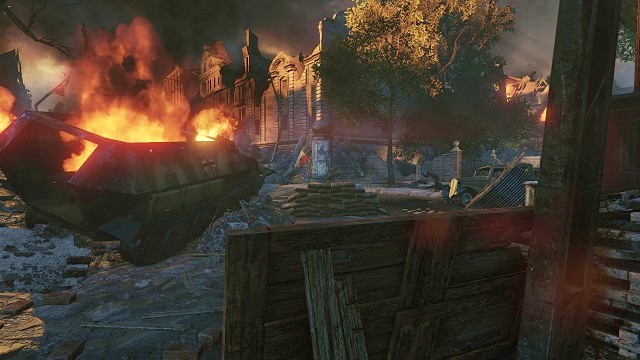 The bastards are killing unarmed civilians...
After the cutscene ends, your character will emerge from the sewers, and as he does it, he witnesses a murder on a civilian by a German squad. Draw out your gun and, in revenge for the poor massacred, kill all the Nazi grunts in the area.
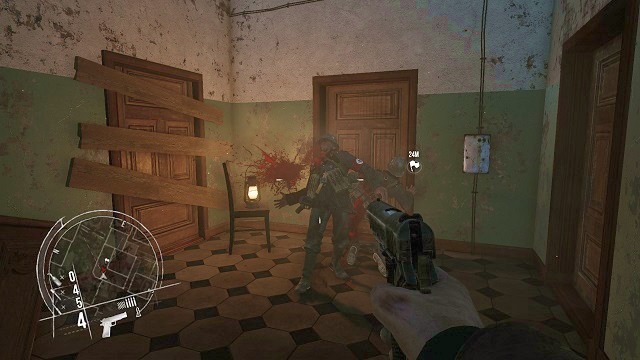 It's time to run from the falling Warsaw...
After clearing the terrain from the enemy, get close to a breach in the pavement as you are instructed and jump in the hole - you will be able to get to the city sewers.
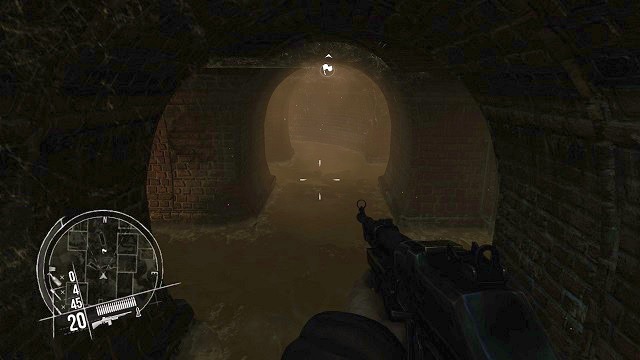 I hope that they won't be able to trace me here.
After you went down, immediately go along the straight path. In the first dead end, on the left side, you will find a secret (1 out of 2) lying on a pile of rubble.
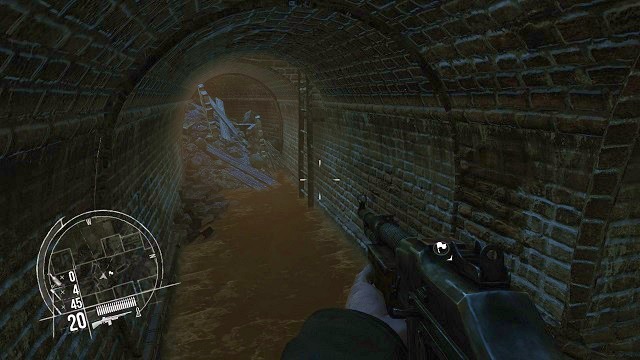 I wouldn't be able to stand the smell another minute.
After crawling through the whole tunnel, you will arrive near a ladder, leading to a completely different part of the Warsaw. Press and hold the interaction button and climb up the ladder, to reach the surface.
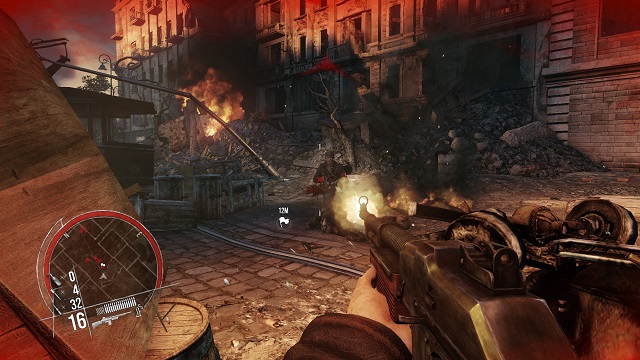 Let me go!
You will emerge on a street, which is in complete control of Germans. At first, none of the enemy soldiers will notice your presence. Thanks to that, you will be able to get rid of a couple of closest enemies and hide behind a cover, before the enemy can even react. A short, but intense encounter, with over a dozen soldiers, awaits you. If you don't plan your actions correctly, there's a high chance that you will die here - forcing you to start the whole chapter from the very beginning.
 Getting closer to the target...
After the neighborhood is relatively safe, continue your journey towards the marker on the map. Go through a clearance in one of the apartments.
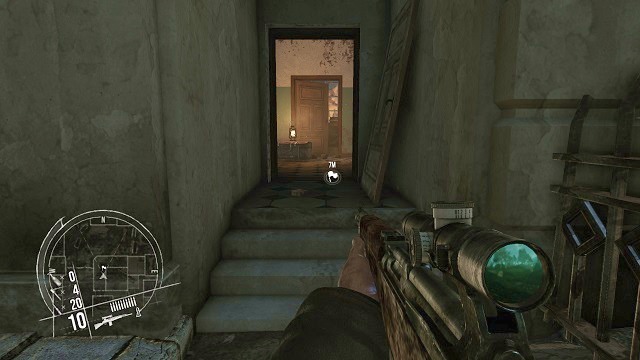 Quickly!
At its end you will find an open door, leading to a staircase. Enter the building and climb up the stairs immediately after.
If someone isn't opening the doors, it means that you're not welcome.You will encounter a pair of Nazis on the upper floor, trying to forcibly enter one of the flats. Thanks to the element of surprise, you should be able to kill them both before they can even notice you.
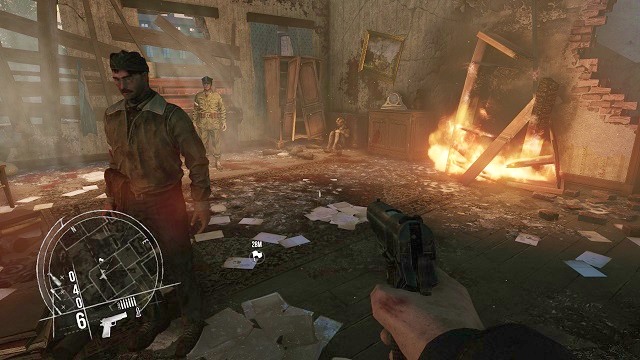 You want to stay here? Your choice.
After eliminating the enemies, your character will automatically ask the allies to let him into the flat. After entering the room, with three Poles inside, immediately head towards the hole in the wall, to get out of the building from the other side.
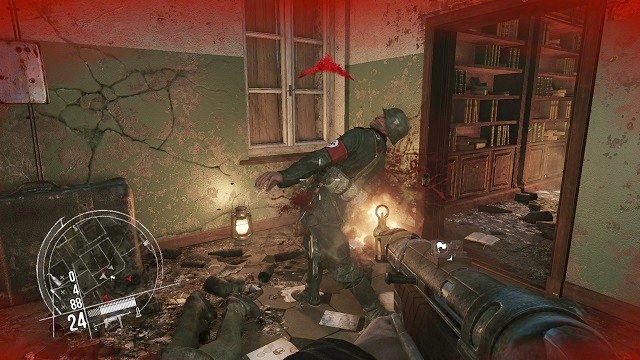 You weren't expecting that, huh?
Go down the stairs, and on the ground floor you will be a witness to another act of bestiality of the German soldiers. A fleeing civilian will drop dead on the ground, and an enemy will run into the room you are in. Kill him before he is able to draw out his weapon on you.
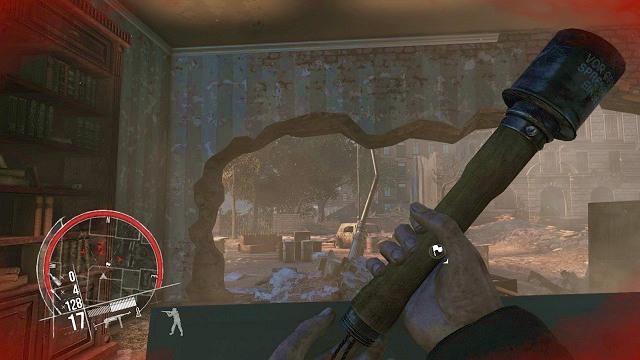 You won't get me so easily!
Afterwards, leave the apartment through the exact same route, that the previous soldier came in. Unfortunately, the streets before your eyes are literally flooded with enemy forces. It's advised to hide behind some good cover and begin flooding the enemies with your grenades. Survivors should be dealt with by using the sniper rifle.
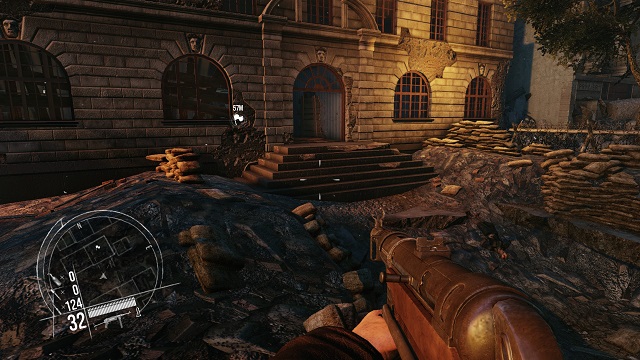 Finally, you arrived at your destination.
After the neighborhood is thoroughly cleared, run towards a huge building, indicated by the marker on your map.
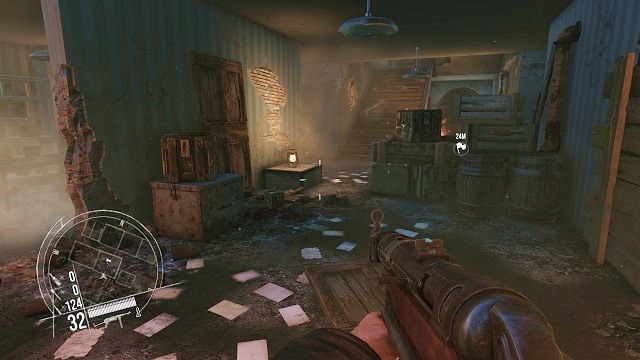 Kozera? Where are you?!
While being inside, you can immediately run towards the stairs, to end this short chapter already, or you can also turn to the left, enter the room, and pick up the secret (2 out of 2), located on one of the lockers.
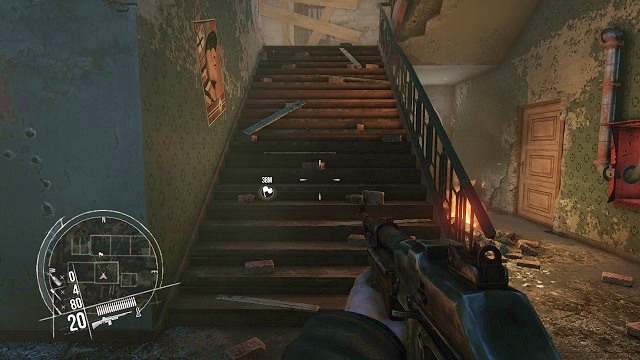 Maybe I'll find him upstairs?
The last chapter of the single player campaign begins in the same place where - near the stairs - where you've finished the previous one. To not waste a moment, climb up the stairs, to meet with your old friend.
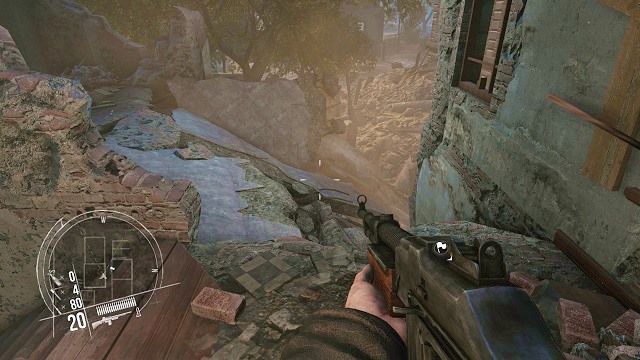 Quite a brothel you've made here.
The upper floors of the building were almost completely destroyed. Exit the construction through a hole in the wall, and by using the rubble get on a stable ground.
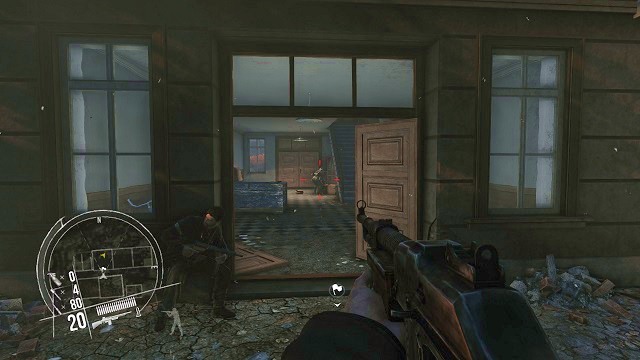 Here you are!
By going towards the marker on the map, you will soon arrive at the entrance to one of the buildings, where Kozera awaits you. Inside there are two German soldiers, but fortunately for you, they are turned in the opposite direction.
 Without any mercy!
Quietly sneak on the back of one of the soldiers and assassinate him. During your takedown, your companion will do the same to the second target.
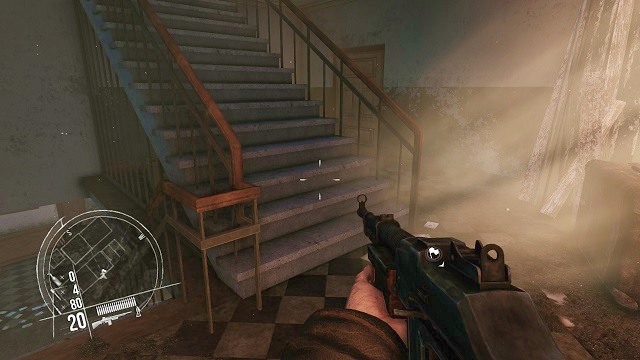 It's time to scan the area.
Afterwards, together with your companion. run to the top of the apartment, in which you currently are. It's time to scan the area and decide on what to do next.
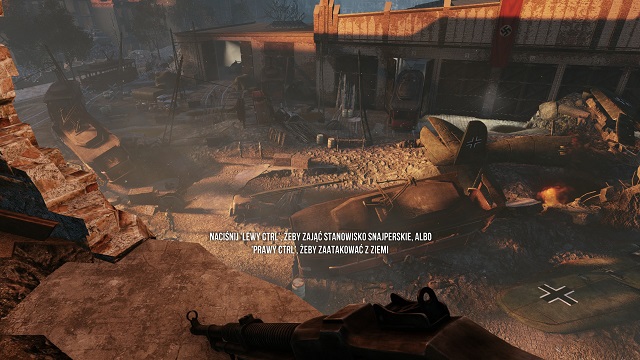 This decision is bad, the other one doesn't look so promising either...
After reaching the hole in the wall, you will witness a very brutal execution of a couple of Warsaw's citizens. A short conversation with Kozera will result in a question appearing on the screen. You must decide if you want to support your companion as a sniper, or to get down and storm on the enemy equipped with a machine gun.
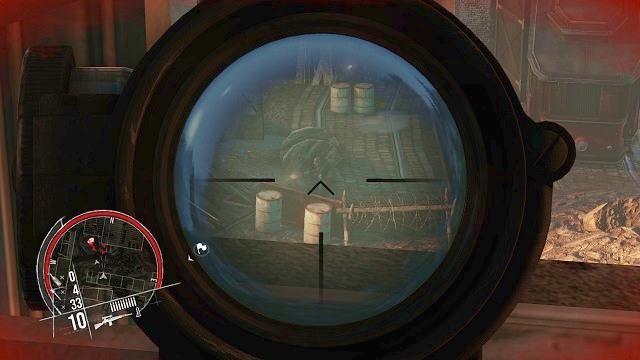 The death arrives unexpected...
By deciding on the first option, you will have to take out your sniper rifle and scan the area for enemies. After Kozera appears below you, on the streets, near the overturned tram, you must begin your assault. The whole supporting part is extremely difficult and burdensome, as he can easily get killed, if you won't be fast enough with your shooting. Because of that fact, you must concentrate and take out all the soldiers located within the streets - after that, take out a few of German grunts, who will run out from a nearby production hall. As a matter of fact, this task can be completed with a more stealthy approach, shooting only when a volume icon appears on the screen, but there's no point in doing so, as you will still have to face the whole facility guard.
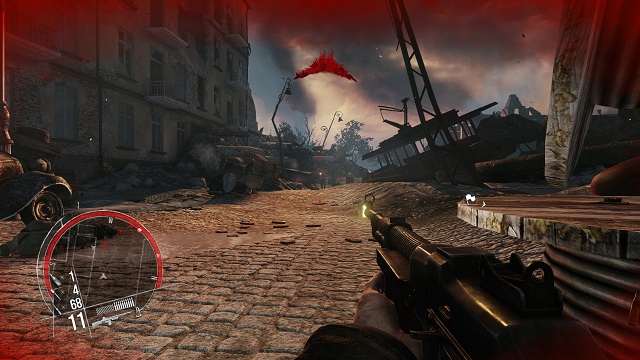 Cover me, damn nit!
By choosing the second approach, you will appear near the entrance to the apartment, with over a dozen of enemy troops patrolling the streets. Take out a few of the closest one and hide behind some good cover. You will have to spend a little more time here to take out all the enemies in the neighborhood. Fortunately, you have your sniper companion, who will manage, from time to time, to sniper a single enemy.
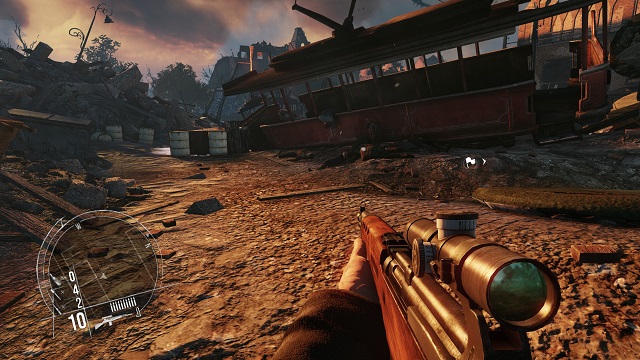 Yup, you're going back to tunnels.
At the end of the route, regardless of your decision, you will arrive at a street which was already set free, near a destroyed tram. Inside of it, you will find a secret (1 out of 2) lying on the ground.
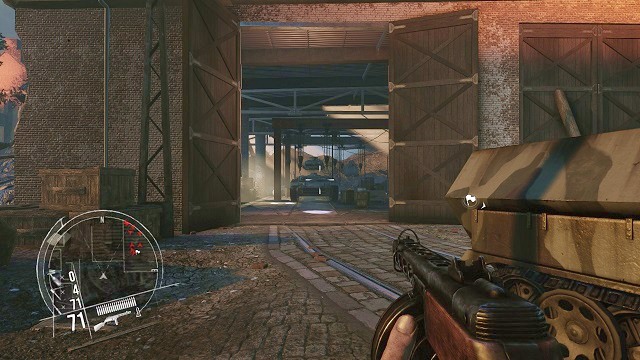 What do you say for a little sabotage before leaving the town?
First things first - regardless of the marker on the map - set your steps inside of the production hall, with German tanks inside.
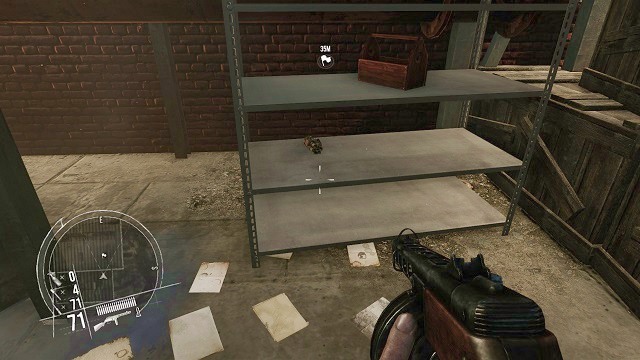 And here we go, the first load.
Inside, on one of the closets, on the right side of the room (looking from the entrance), there's the first explosive. Collect it to your inventory, as you will have to use it very soon.
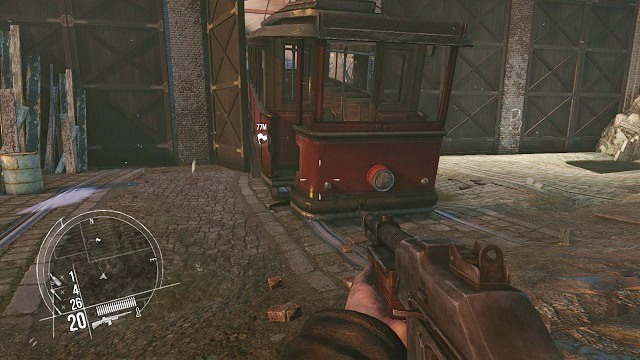 The tram got stuck. Shame...
Afterwards, head towards the red tram, which is blocked inside of the entrance gate. By going through it, you will be able to enter the building.
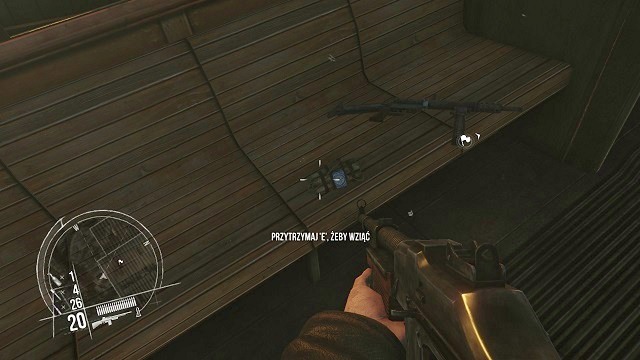 One more and you're ready to go.
On one of its seats, the second explosive is located. Collect the wanted item.
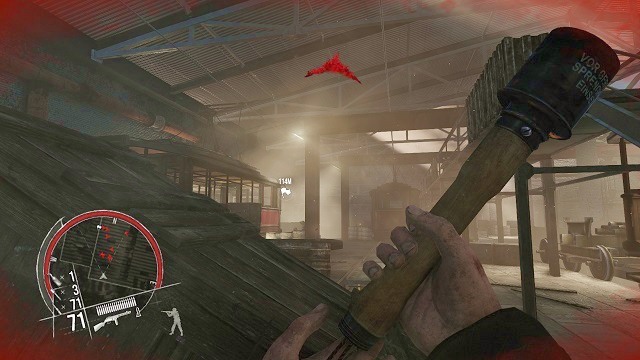 Special delivery!
After entering the building, find a suitable firing position behind one of the boxes and prepare your grenades, because the enemies are approaching. Throw all of your grenades in the direction of enemy soldiers' position - by doing so, you will eliminate most of them. The survivors should be dealt with by using a firearm - a sniper rifle is recommended.
 It's time for the demolition!
When the factory is relatively safe, approach one of the tables located in the back of the hall and pick up the last sought explosive. Now you must get back to the building, in which the tanks are held - before you do so, however, its recommended to look inside of a small room, underneath the depot (entrance can be found inside of the flooring) - lying near one of the corpses, there's a secret to collect (2 out of 2).
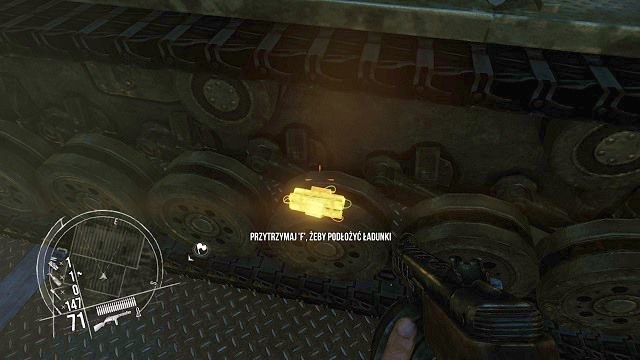 Swim.
Swim.Attach the explosives to the three tanks, in the highlighted places. Afterwards, continue on with your journey, in the direction of the marker - the optional quest can be officially called done.
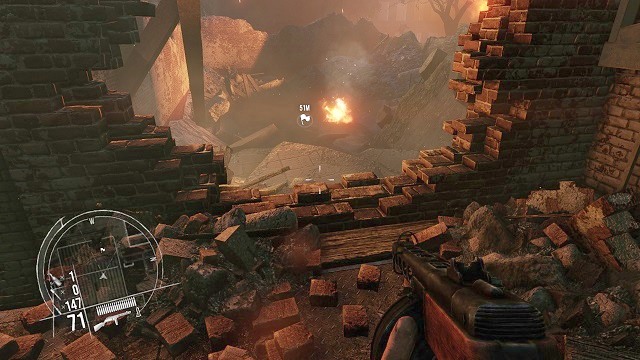 The exit? At last!
Run according to the guidelines on the minimap, to reach an exit from the sewers, where Kozera awaits you. To get there, you must leave the depot building through a hole in the wall, to which a staircase leads.
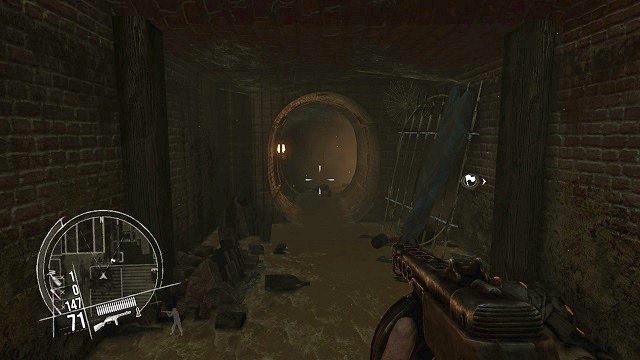 It's not far away.
After jumping inside of the breach in the flooring, you will fall down all the way down to the bottom of the sewers, bumping yourself quite hard in the process. After you're back on your feet. go in the only possible direction - forward.
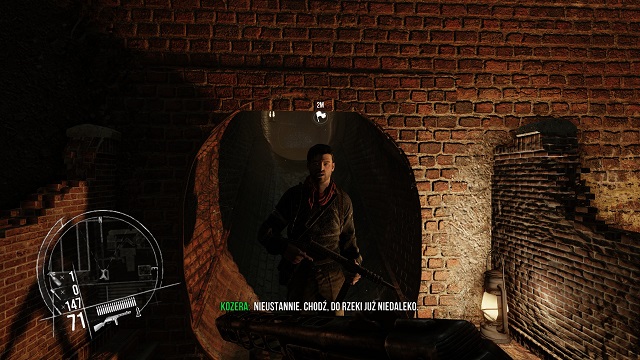 It's good to see you, friend.
You will meet Kozera in the further part of the tunnel, who fought that you've died. Your conversation will be unexpectedly interrupted, because a lethal gas was let into the canals. You have to run for your life!
 Run as fast as you can!
Afterwards, you will have to run through a couple of sewers sections, sprinting all the time - don't stop even for a moment, because the lethal poison will catch up to you and you will die. You can't afford yourself to lose your path, because a moment of hesitation can be as lethal. It's recommended to just concentrate thoroughly and don't lose Kozera from sight. An orientation, to some degree, is provided by the marker on the map.
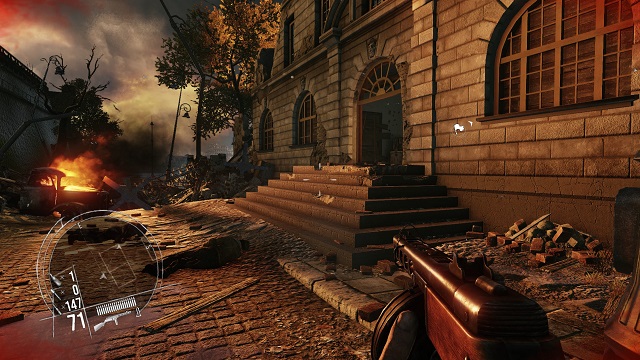 Dead bodies everywhere. What a massacre...
After leaving the undergrounds, continue running towards your friend. First, get inside of the first spot building.
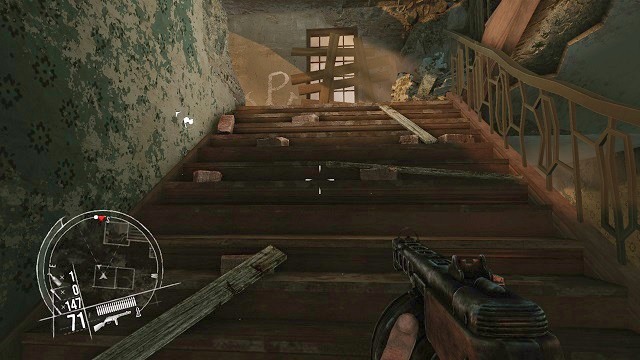 Keep up the pace!
Inside, go towards the stairs - climb them up and get to the upper floor of the building.
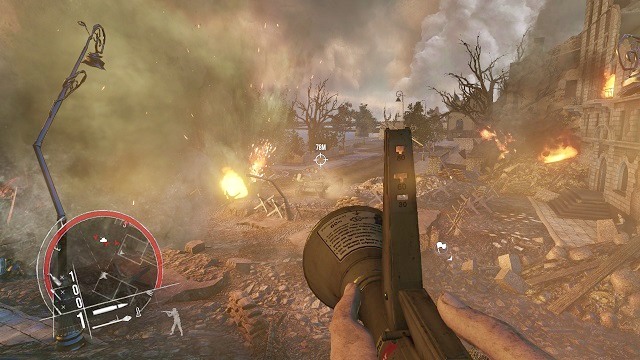 Destroy the goddamn tank!
While you are at the top, you should soon arrive at a huge breach in the wall. Your companion orders you to pick up a nearby bazooka as soon as possible and fire it at a tank closing on your position.
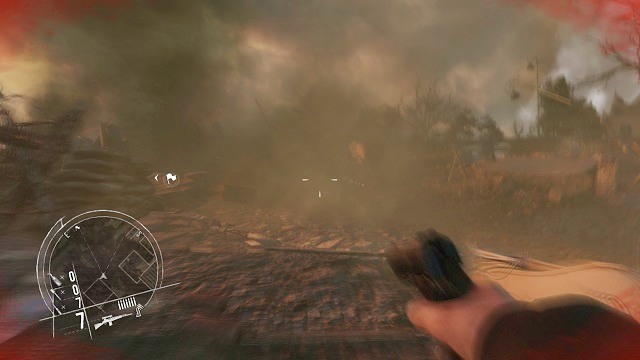 Wait for me!
After completing the given task, your position will be hit by a bomb. You will miraculously survive the explosion and you will soon be standing on your legs. Equipped with a pistol only, set your feeble steps towards the evacuation boats. During your journey there, you will be jumped by two German soldiers, so be prepared for that.
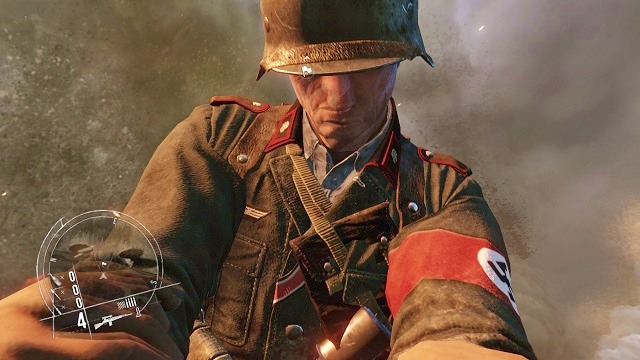 Let me go, scumbag!
After you've reached the beach with that last ounce of strength, you will be knocked down to the ground by a German soldier and you will be strangled. Kozera will rescue you soon, by shooting the aggressor in the head.
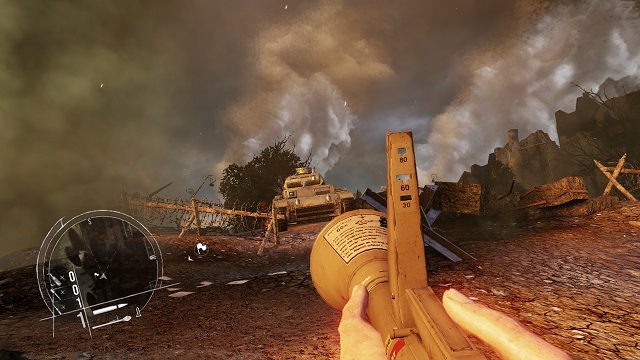 Eat it!
After getting up on your legs once again, you will immediately be blown down to the ground again, this time because of a missile shot by an enemy tank. During a short cutscene, Hawkins, regardless of your actions, will take up a bazooka and aim at the tank. All you have to do now is to carefully aim the weapon and blow it up to pieces.
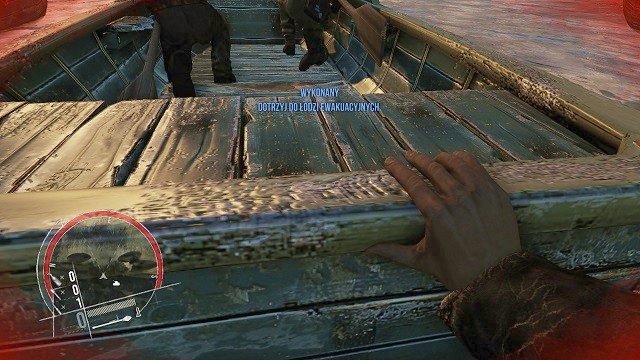 Let's go!
At the very end approach the lifeboat, on which Kozera and someone else from resistance is, and you will automatically push it further from the coast.
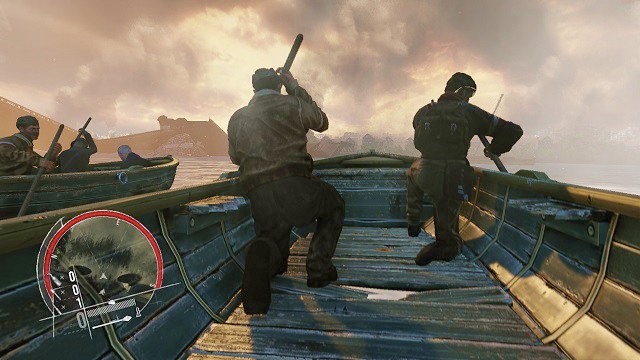 A close one, lads.
Congratulations! You've managed to get away from the siege safely. All you can do now is to simply watch a short cutscene, during which you, along with the survivors, depart via the lifeboats from the burning Warsaw.
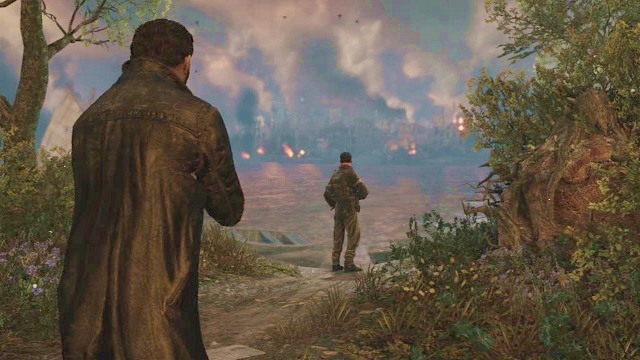 That uprising didn't go well...
The single player campaign of Enemy Front complete!
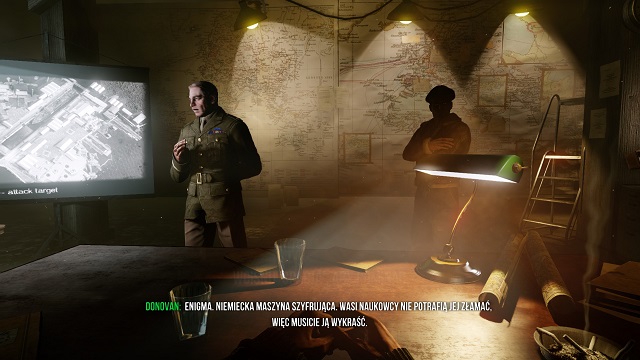 Operation Enigma. Sounds oddly familiar.
The additional mission of Enemy Front, called "Saint-Nazaire" begins, as always, with a cutscene, which introduces you to the current events. Playing as a fellow called Griffin, in all seriousness hear the commanding officer's guidelines, and you will be given a special task to complete. You will have to steal the Enigma, a majestic ciphering machine, from the German base
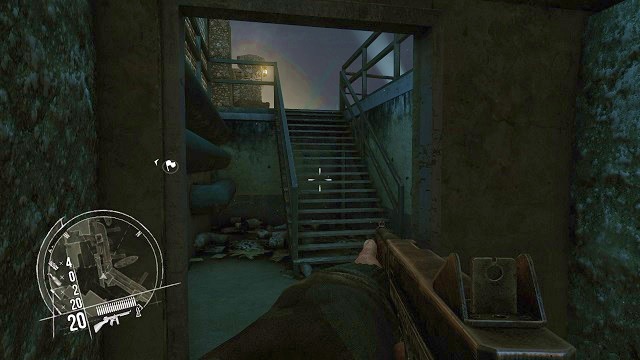 You come, you take, you leave.
You will regain control over your character within the Saint-Nazaire harbor. First, go straight ahead, and then climb up the stairs.
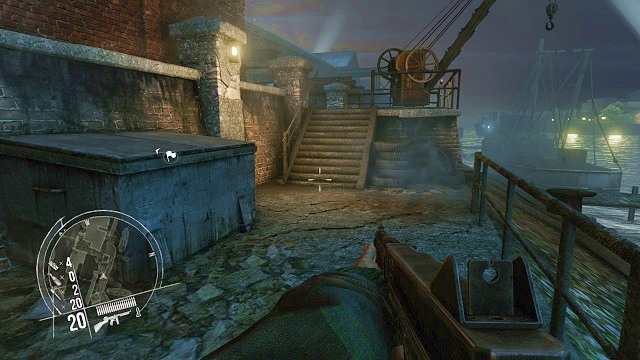 You're already on the enemy frontlines. Be quiet...
Turn to the left and continue on towards the marker on the map.
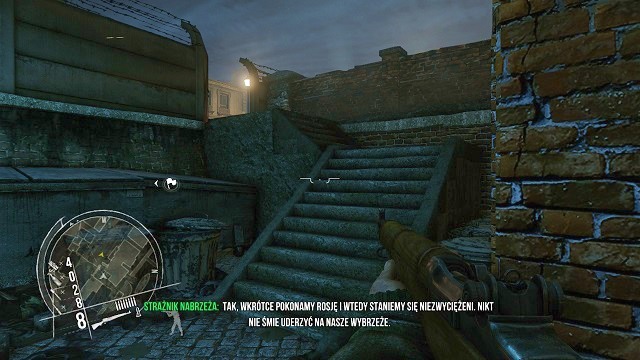 But before that, let me defeat you first!
After a short journey, you will arrive at a passageway to the main street, on which a pair of two German soldiers walk. Sneak up on them and take them out from a safe distance.
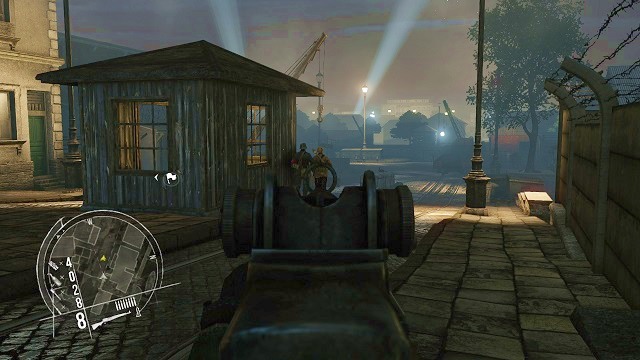 Relax, it will be a quick death!
Change your weapon to a shotgun and make two clean shots at the enemy. This should do the trick and the two grunts should be cold.
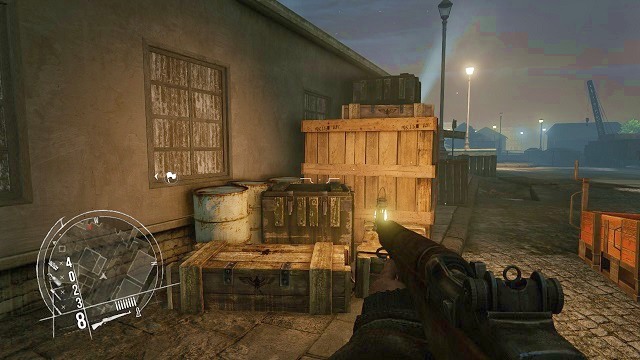 You will have a perfect firing position from the rooftop.
Go past a small building and go to the other side of the street, where a series of boxes are aligned in a way that you can climb up a building. You should do so.
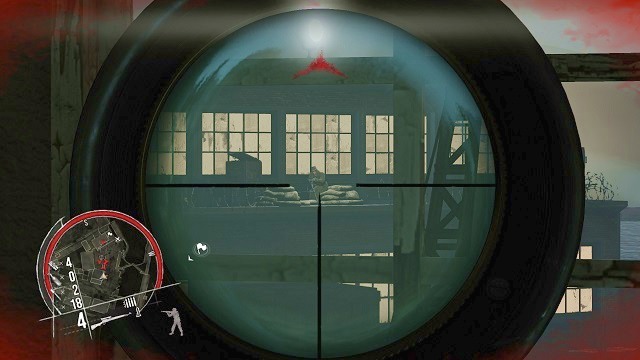 And I've done it...
While being on the top of the building, you should be able to see a bunker, and a MG emplacement inside of it. Take the crew out by using your sniper rifle, which, unfortunately, will result in an alarm in the facility. You don't have to worry too much about it, though, because you will have to open fire in a moment, and the alarm would be raised either way.
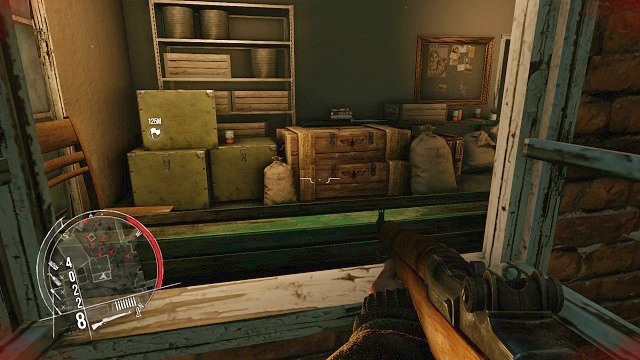 Quickly, get inside!
After taking out the soldier from the MG emplacement, immediately get inside of the building through an open window - on the table there should be a sniper rifle.
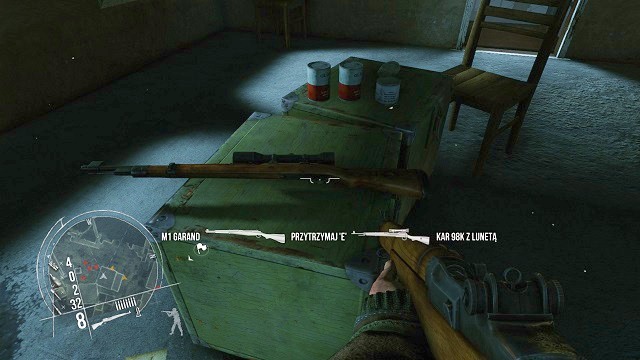 You should take it, obviously.
Swap out one of your previous weapons for a sniper rifle and approach the windows, to kill the whole enemy squad, which just surrounded the building you're in.
Fortunately, my bullets reach their target.Take out all the watchmen, who hide behind the environmental obstacles, but you should focus your attention on a MG emplacement operator, located on top of the building.
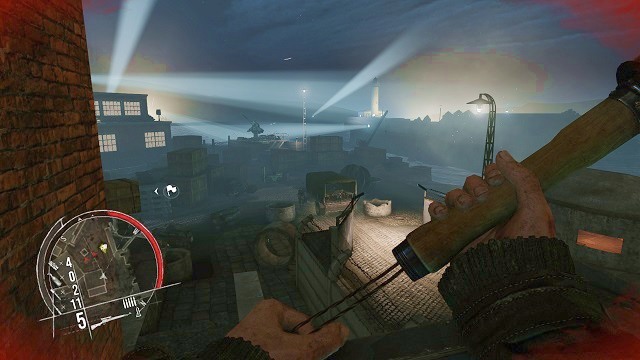 I will blow you all in pieces!
After a short while, a transport truck will arrive on a plaza in front of you - immediately take out your grenades, and throw a few of them at it as soon as the vehicle stops. This way you will be able to take care of the whole enemy reinforcements.
 It was easier than I thought.
After clearing the neighboring terrain and making it relatively safe, run down the stairs and go towards the place of slaughter. If there are any survivors near the destroyed truck, you must now take care of them.
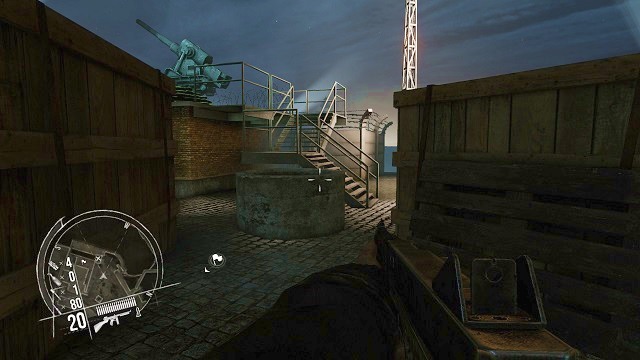 The first element of your little sabotage mission.
To complete one of the additional tasks, you must destroy two of the enemy's anti-aircraft guns in the area. The first one is located near your actual position (its marked with a cross on a map), so you should now go there.
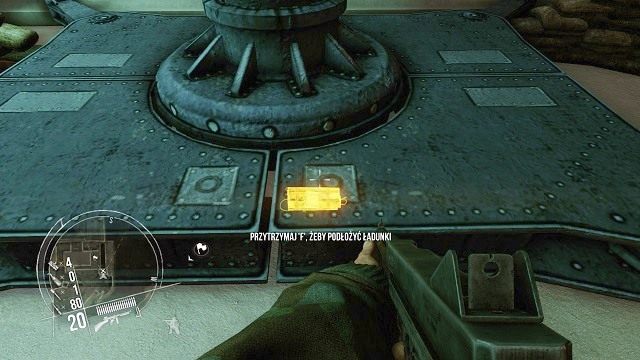 Set up the clock and run!
Climb up the stairs to get to the elevation, and, not wasting any more time, attach explosives to a highlighted area. Set up the clock and immediately run away.
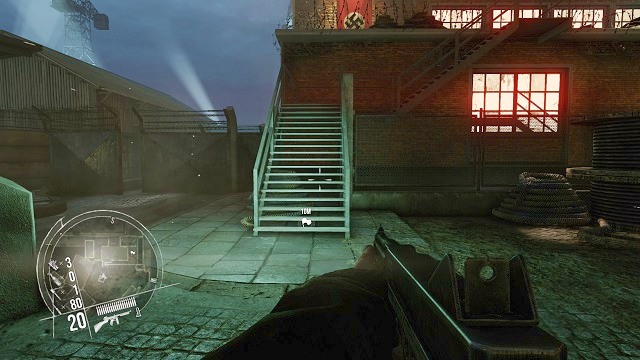 You're practically halfway through.
After taking out the AA gun, continue your journey towards the marker on the map. Climb up the stairs to get on a terrace and get to its other end. A semi-open gate, close to the building, should just be ignored, as there's only a dead end there, without anything to collect.
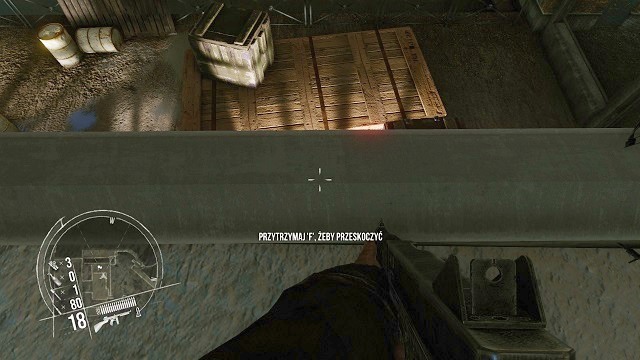 Don't slip!
At the edge of the balcony, stand before the low barrier and press and hold the interaction button, to jump across it and land on the boxes below it.
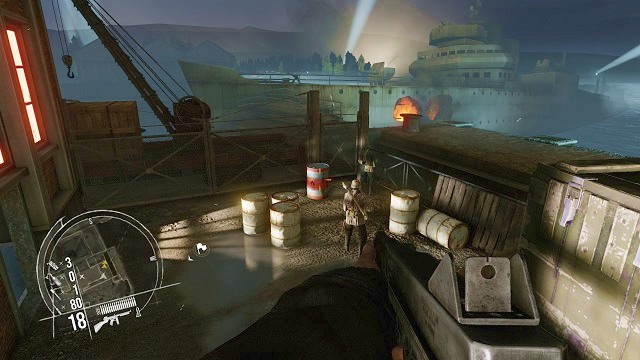 If I were you, I would get away from those barrels.
After you've done it, the screen will fade out, and a short cutscene will commence, during which a huge ship will hit the coast head-on, damaging the surrounding area a little. The noise resulting from it will lure out two watchmen outside. Unfortunately for them, they will be standing with their backs turned on you, and near an explosive barrel. Do your duty and blow them up.
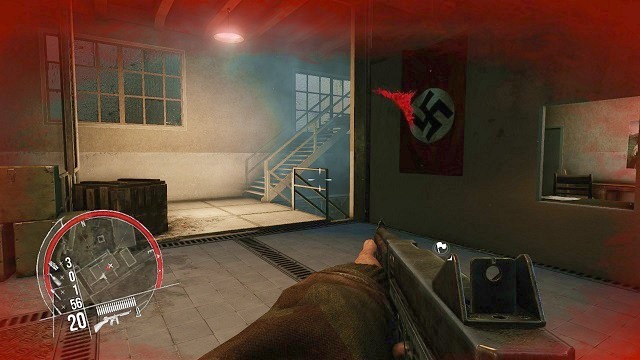 Gosh, another watchman on the upper floor!
After taking both of them out, a few additional soldiers will run out of building - take them out as well, before they can even respond. After you've entered the building, you will notice a final watchman awaiting you in the building, who will start shooting at you from behind a railing, from the upper floor. Get rid of the nuisance, and enter a small room near the stairs.
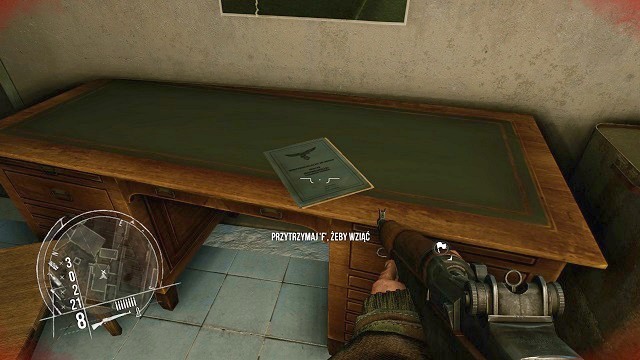 Secret documents. A serious matter.
Inside, you will find secret documents lying on the table. They are connected with another additional task you can complete during this mission. Take them with you, naturally.
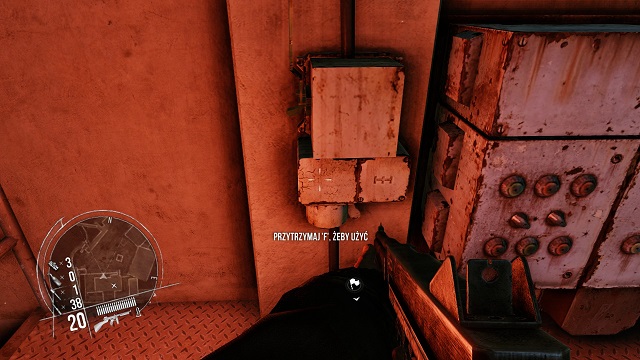 Attention! The water is electrified!
Go through a staircase to the bottom of the building, with a completely flooded floor. If you don't want to die in a flash from being electrified, you must carefully jump around the boxes, until you reach the stairs on the right side.
And another problem resolved.After reaching the platform, approach the control box attached on the wall and press and hold the interaction button, to turn off the power. By doing so, you got rid of the danger and you can move on your journey without worrying about it anymore.
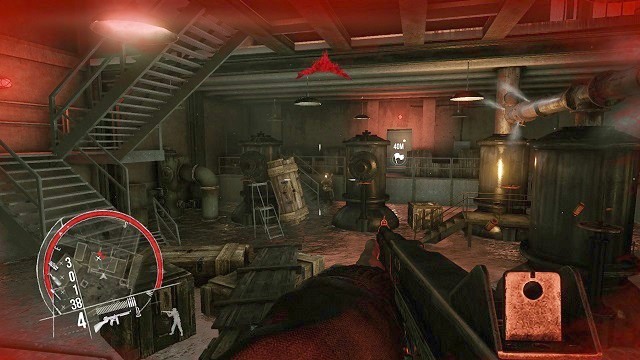 And it was supposed to be so easy...
Unfortunately, before you were even able to move, you are attacked by a group of Nazis, who will storm the building from a second entrance. Immediately hide behind some solid cover, so that you're not killed instantaneously, and after that take care of all the enemies. You can also turn the power back on, resulting in a death of those soldiers who are standing in the water. If you decided to do so, don't forget to flip the switch again, so that you won't die in a stupid way.
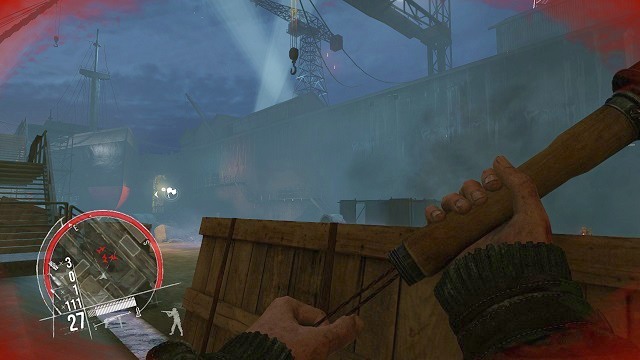 And here's our ship.
After leaving the room through the second passageway, you will arrive at the harbor, in which the boat you are looking for is docked. What you need to do now, is to get inside of it and find the mysterious Enigma. Unfortunately, your way will be blocked by a substantial amount of enemy soldiers, who you must first get rid of. Because of the fact, that they are relatively close to each other, it would be a good idea to throw a couple of grenades at their position, which should do the trick.
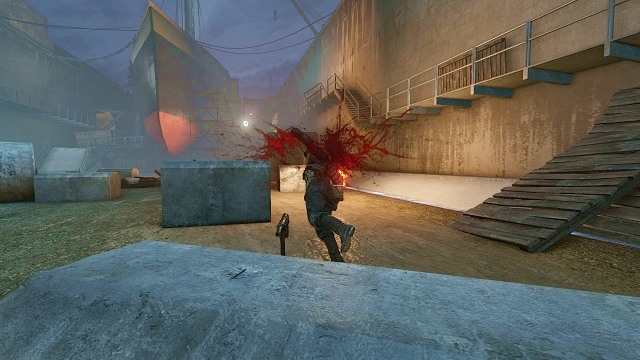 Headshot.
Those, who somehow avoid getting ripped to shreds by your grenades, must be taken out with the sniper rifle. It's not that hard, as you might have guessed.
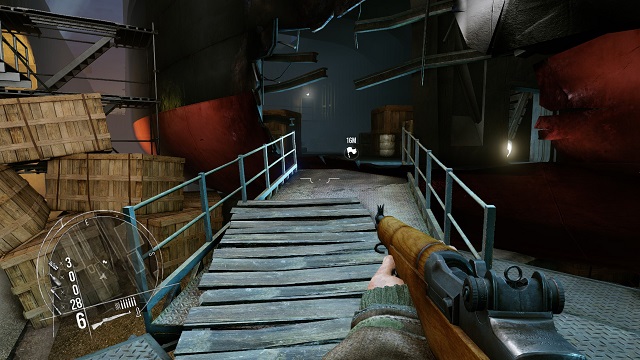 Goal: Enigma.
After clearing the surroundings, journey towards a breach in the body of the ship - go through there to enter the ship.
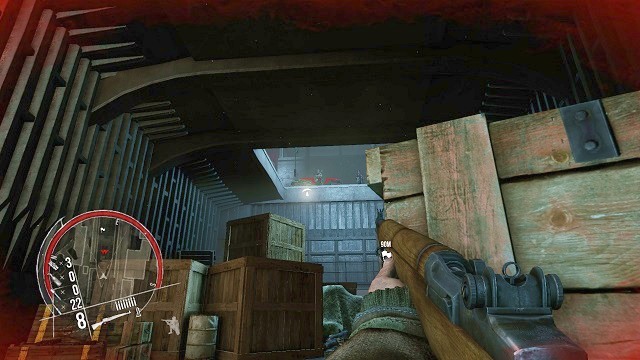 You won't stop me!
As soon as you enter the ship, you are attacked by two enemies occupying positions high above the boat. Take them out as soon as possible, and marvel how they fall to the ground.
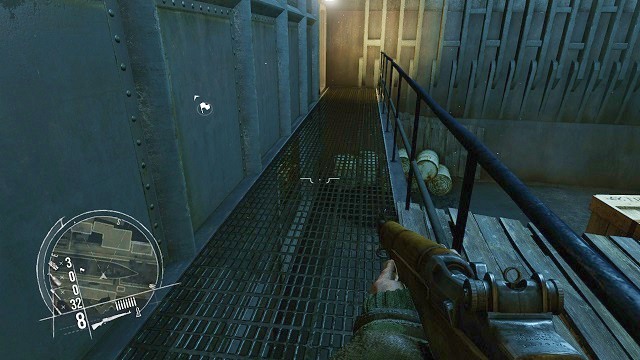 You're closing on the heart of the ship.
Continue running towards the marker on the map, until you reach a series of boxes - use them to get to the elevation (first you need to jump over a railing).
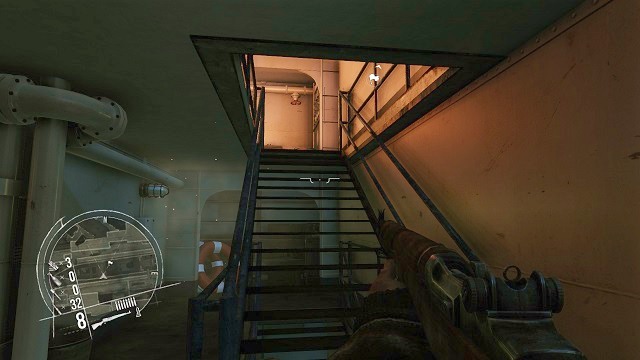 All that effort to retrieve a single typewriter...
After going through the door, you will arrive at a staircase, through which you must get to the upper parts of the ship.
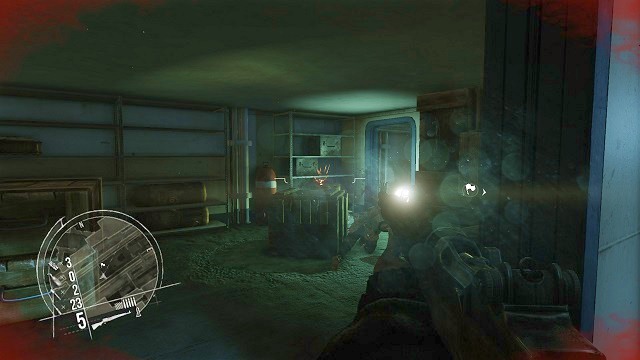 Respect, bro.
While being on the hallway, you will have to deal with a pair of enemy soldiers. Afterwards, run straight ahead through the stairs, to reach the uppermost floor.
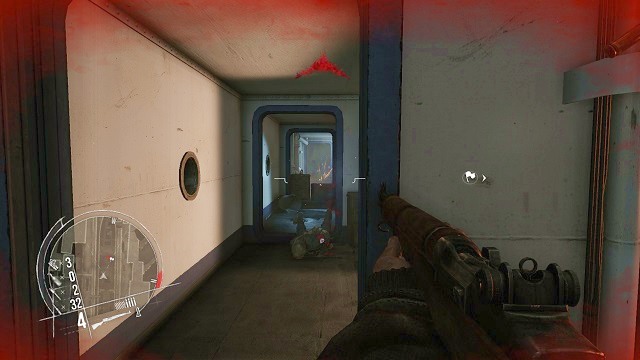 I only want to take that goddamn typewriter!
You should be at the destination. Inside one of the cabins, on the right side of the corridor, Enigma is stored. To put your hands on it, you will need to get rid of all the watchmen hiding behind the boxes.
 Another secret files. Let's take it!
In the first room you will stumble upon another pile of secret documents. Collecting them will result in completion of the additional task.
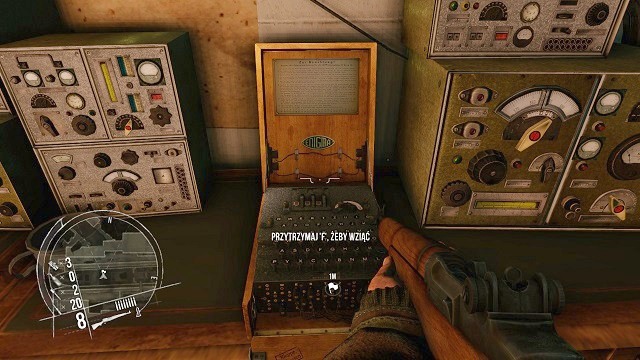 Take Enigma and run!
In one of the following rooms, you will find the mysterious ciphering machine - Enigma. Press and hold the interaction button to collect it in your inventory. Now you have to get away from the German base.
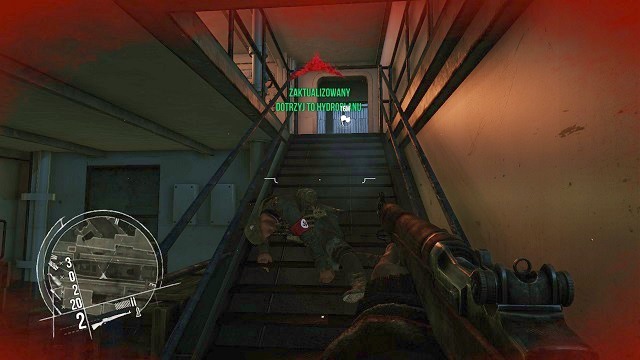 You failed, dude.
Going towards the marker on the map, you will arrive near the exit from the ship. On the staircase, you will be attacked by a desperate member of the crew, but you should have no problems in eliminating him.
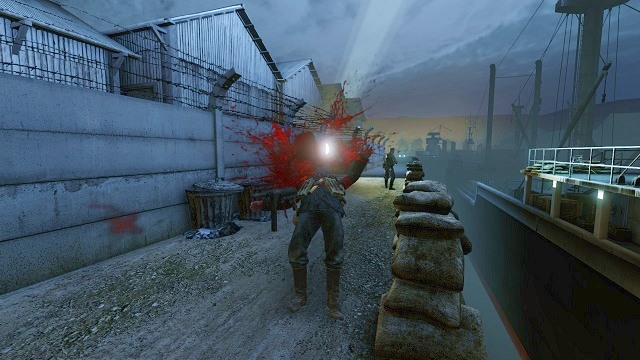 You shouldn't have been standing in the open.
After emerging outside, sneak up behind one of the boxes and take out your sniper rifle. On the outskirts of the harbor, there are a few of German grunts patrolling the area. Take them out with a few shots of your sniper rifle.
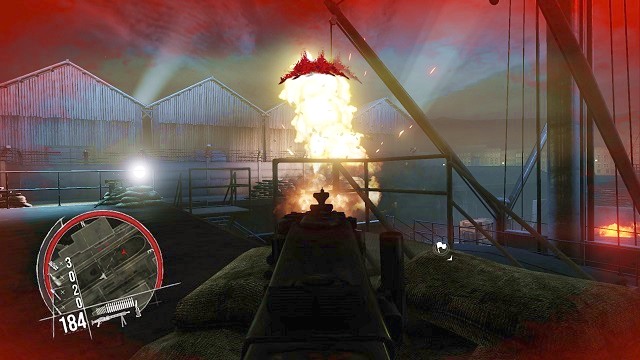 Whoah!
After the opponents are cold, continue onwards, in the direction of the center of the ship - mount the heavy machine gun and eliminate all the resistance, massacring each and everyone who gets on your crosshair.
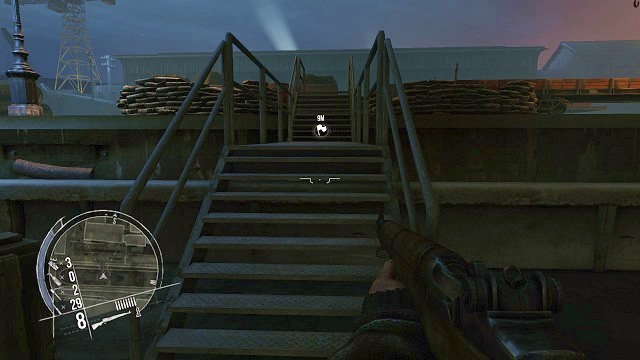 Where's the exit?
As soon as there's not a living soul near the ship, do as you are told in the guidelines and use the stairs leading all the way back to the harbor (but this time to the other side). This way you will leave the deck of the ship.
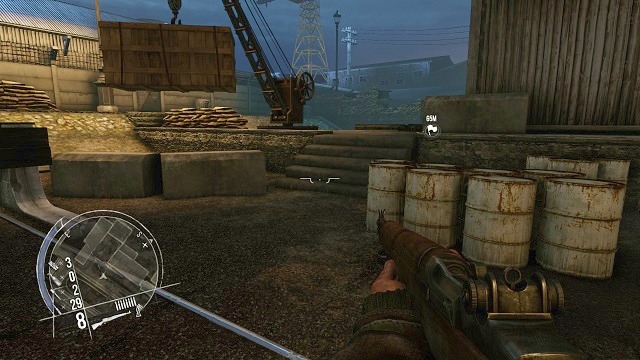 There should be a plane awaiting you here somewhere..
There's nothing of interest here, so just continue towards the marker on the map.
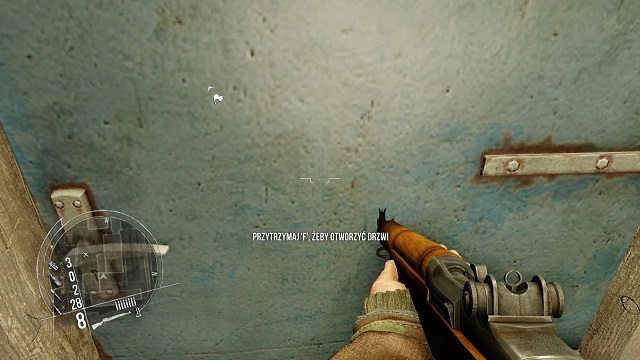 Open them, don't knock on them.
At some point you arrive at a pair of doors, which you can quietly open. Do so, by pressing and holding the interaction button.
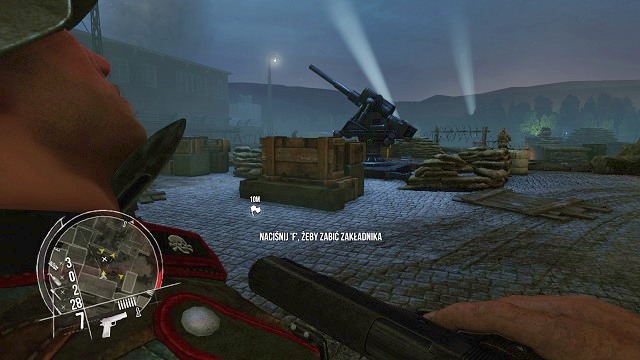 You first.
Inside, you will stumble upon several enemy soldiers, who, unfortunately for them, are standing with their backs towards you and are unaware of your existence. Sneak up on the first and one take him out quietly.
 A funny situation - you can do whatever you want with them.
Afterwards, do the same thing with the other delinquent, standing in the room.
Who's the winner now?The game forces you to take the last Nazi as a hostage. Now, along with your living shield, go towards the opponents standing near an anti-aircraft gun - immediately kill them all, as they will be confused what is happening. Finally, get rid of your hostage, in a commonly known way.
 Mission complete!
Before you depart from there, it's worth to install an explosive on the previously mentioned anti-aircraft gun, to complete additional task in this chapter.
 The final issue.
While being on the coast, the marker on the maps will indicate two separate bunkers, which you must now blow up, so that you can leave the German base without any regrets.
 It's going to be a souvenir of me.
Place the explosives in the highlighted places - first on the one bunker, then on the second one.
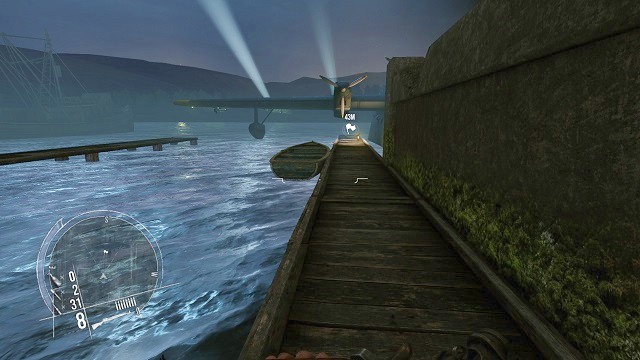 Take off, bud!
After the bunkers are destroyed, sprint towards a British airplane, which location is indicated by the marker on the map.
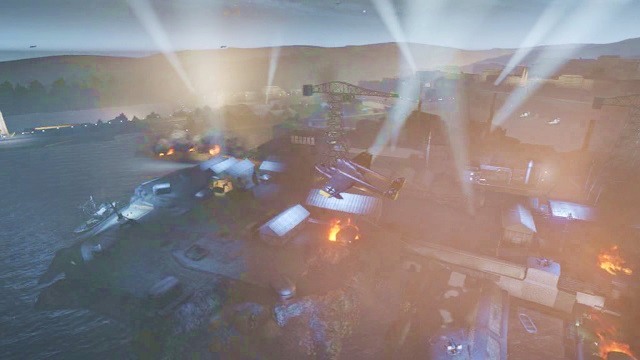 Job is done.
Mission completed. The additional chapter called "Saint-Nazaire" is now officially done.
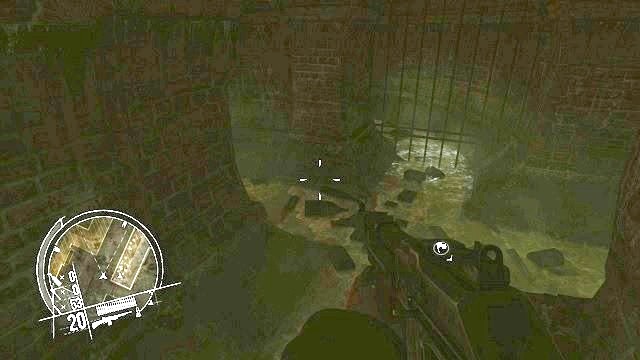 The location of the first collectible.
The first collectible is next to the first fork in the sewers (right after you descend into the sewers).
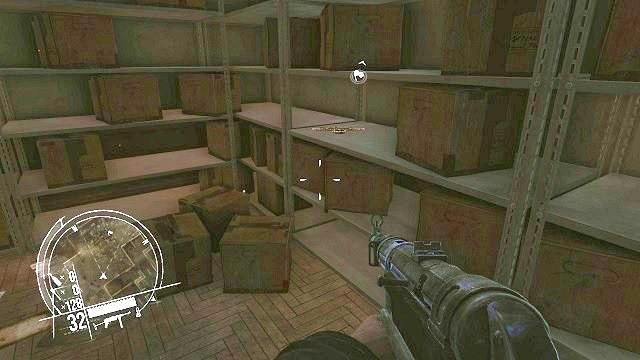 The location of the second collectible.
The second collectible is inside the German building in the room full of cardboard boxes, on one of the shelves
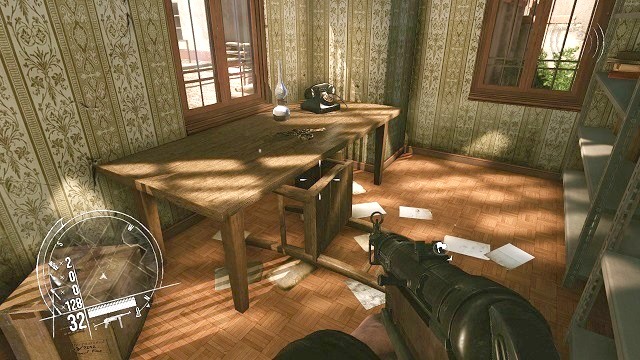 The location of the third collectible.
The third collectible is in one of the rooms in the small building, on the yard in the second stage of the mission (after you exit the sewers, climb up the stairs, to the higher floor, or across the hole).
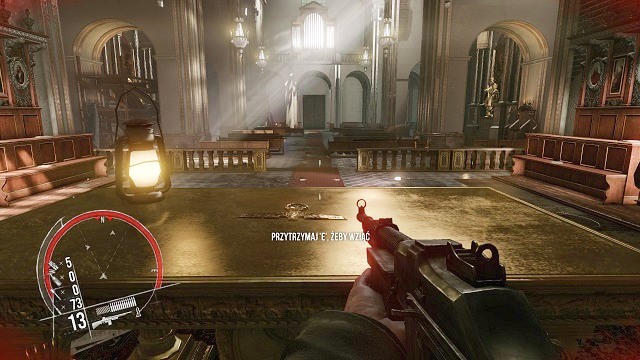 The location of collectible 1.
The 1st collectible is on the ornate table, next to the lectern, in the church.
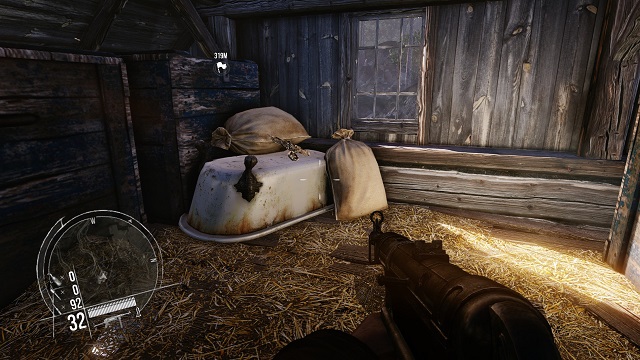 The location of the 1st collectible
The 1st collectible is in the attic of the building that is being defended by the rebels from the resistance.
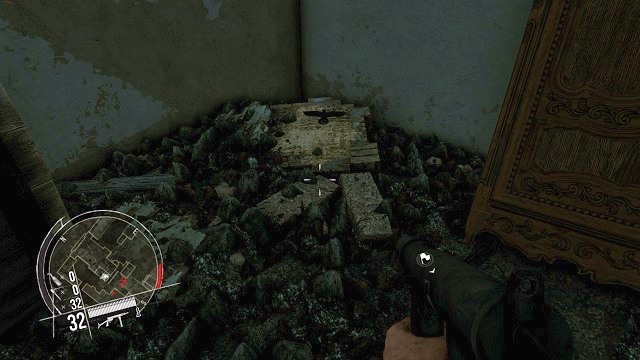 The location of the 2 collectible.
The 2nd collectible is on the shelf of the secret weapon depot of one of the surviving groups of the resistance.
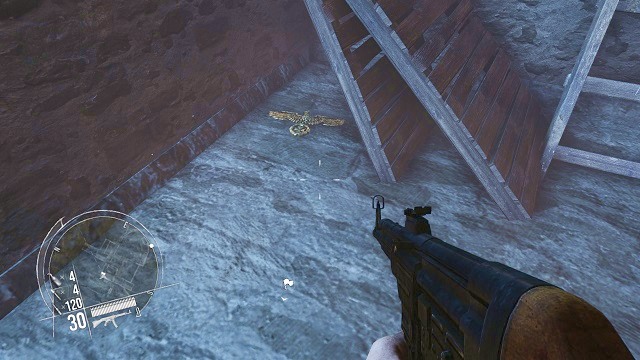 The location of the 3rd collectible.
The 3rd collectible is in the basement of the manor house, where you find the map with the whereabouts of the friend that you are looking for.
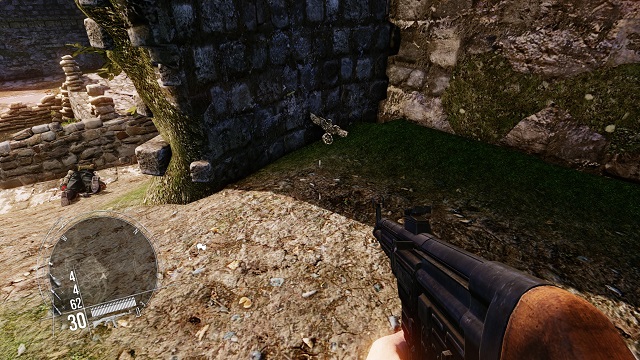 The location of the 4 collectible.
The 4th collectible is inside the ruins of one of the towers, which belongs to the castle complex, in the last location of this mission.
The location of the 1 collectible.The 1st collectible is in the corner of the room, where you defend against the Nazis, at the first stage of the mission.
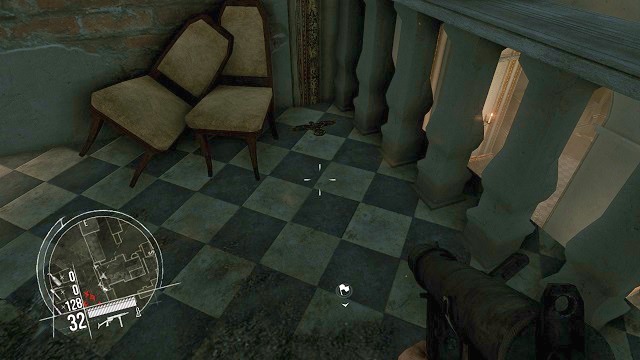 The location of the 2 collectible.
The 2nd collectible is next to the barrier, on the balcony, which you pass by while climbing onto the church tower.
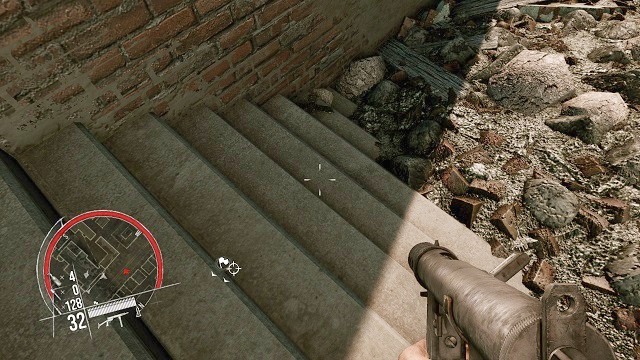 The location of the 3 collectible.
The 3rd collectible is at the left end of the frontline, in front of the church's main entrance.
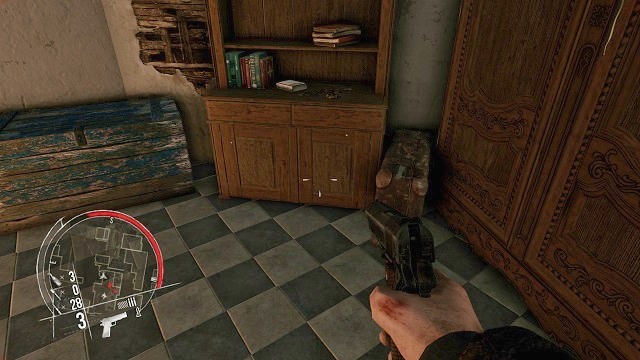 The location of the 4 collectible.
The 4th collectible is on one of the unit, in a small room on the left of the altar, in the church (from the perspective of the building's entrance).
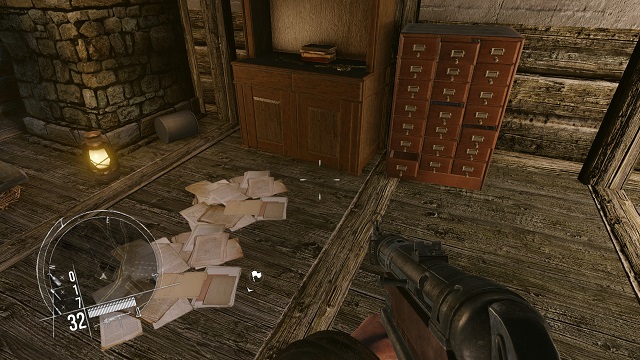 The location of the 1 collectible.
The 1st collectible is on the unit, at the upper floor of the building with the wide balcony (the first one that you encounter along your path).
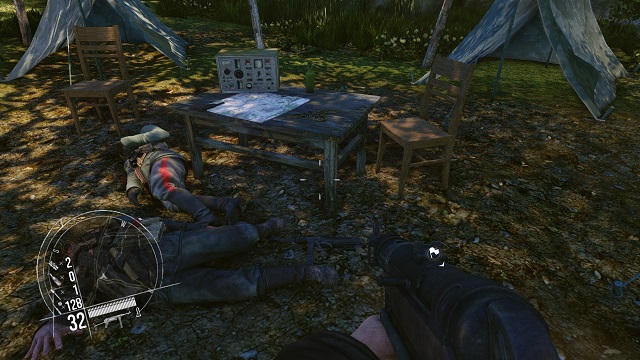 The location of the 2 collectible.
The 2nd collectible is on the table in the camp across the river, where there are two Germans talking (a private and an officer).
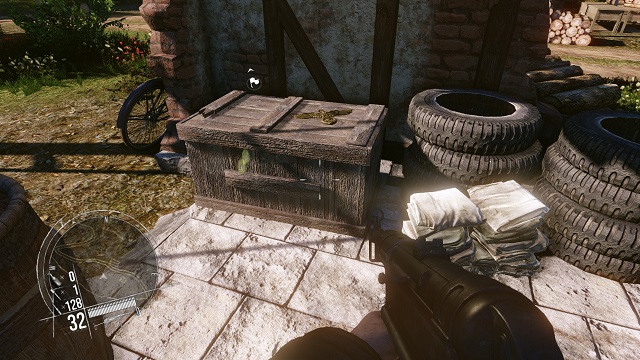 The location of the 3 collectible.
The 3rd collectible is on the wooden crate in the ruins in the German encampment, right next to the crane and the observation tower.
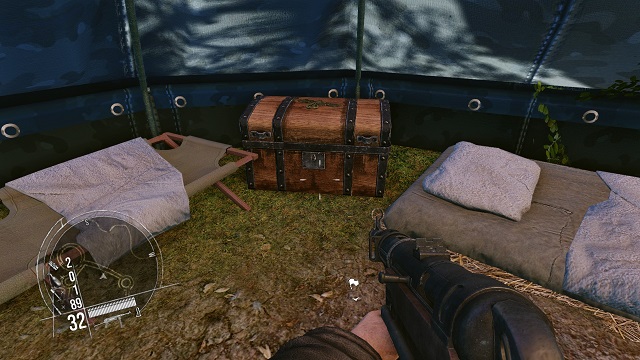 The location of the 4 collectible
The 4th collectible is on the wooden chests in the German encampment, in the tent at the end of the camp in the castle.
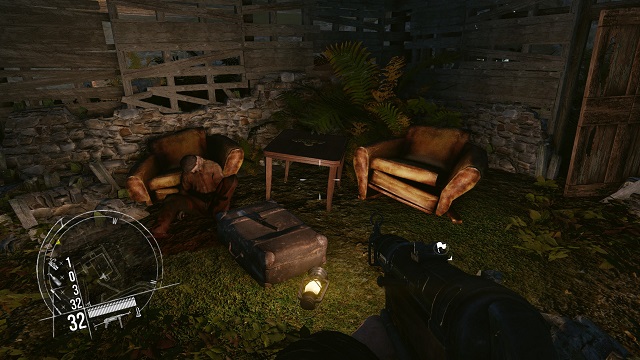 The location of the 1 collectible.
The 1st collectible is on the table inside the slightly ruined two-storey building, on the ground floor, in the first German encampment that you walk into.
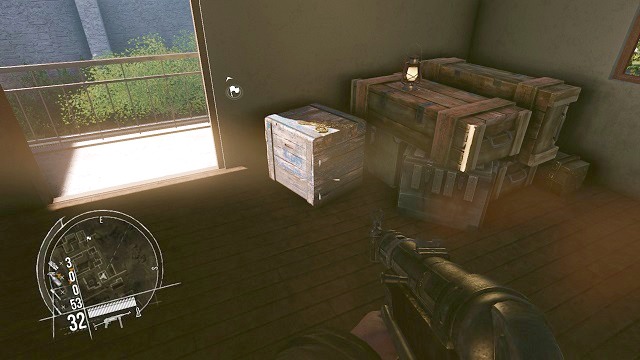 The location of the 2 collectible.
The 2nd collectible is on the officer table in the building in the center, in the second Nazi camp.
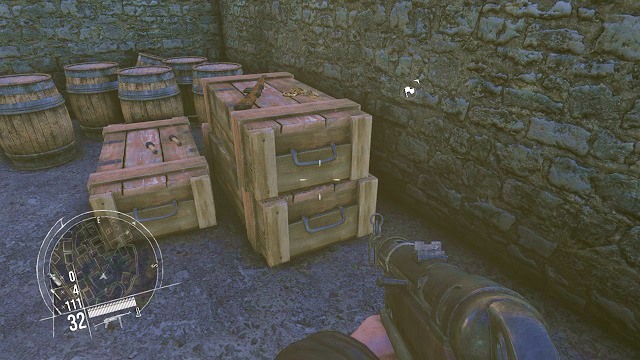 The location of the 1 collectible.
The 1st collectible is on the wooden crate in the small weapon depot, under the roofing. You can get to the depot by climbing the stairs next to the stone bridge and by turning left at the fork.
The location of the 2 collectible.The 2nd collectible is on the wooden crate at the second floor of the building near the undergrounds exit (there is a single guard standing in front of it).
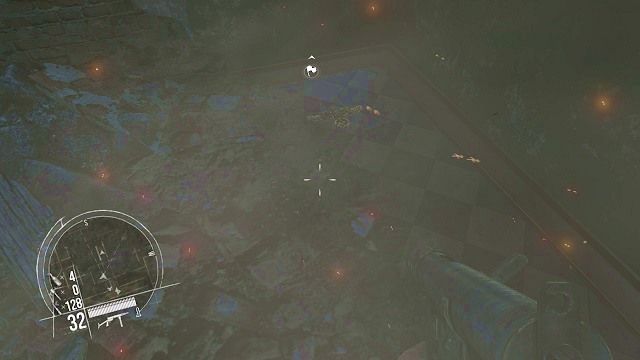 The location of the 1st secret.
The first secret is located on the ground, in the room of the building on the left side, which you pass after the initial fights on the streets, at the very beginning of the chapter.
 The location of the 2nd secret.
The second secret is located on a wooden crate, right next to a red couch, in the second part of the attic.
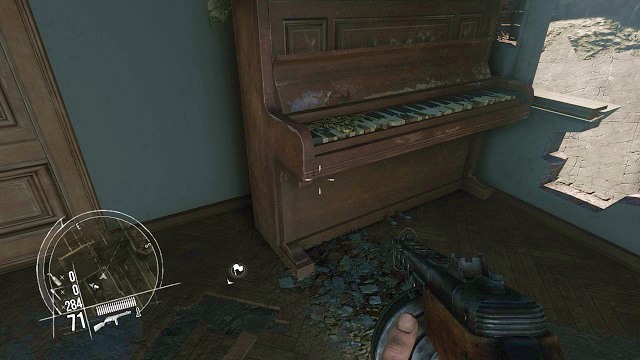 The location of the 1st secret.
The first secret is located on the piano, in the room on the right side of the corridor, in the building you enter at the very beginning of the chapter.
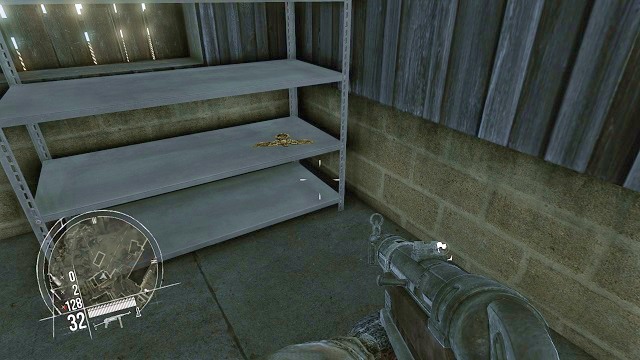 The location of the 2nd secret.
The second secret is located on a brown cupboard, in a small room on the left side of the mezzanine, which you pass by climbing up a long stairs.
 The location of the 1st secret.
The first secret is located on a box, in the building next to a truck, near the long bridge.
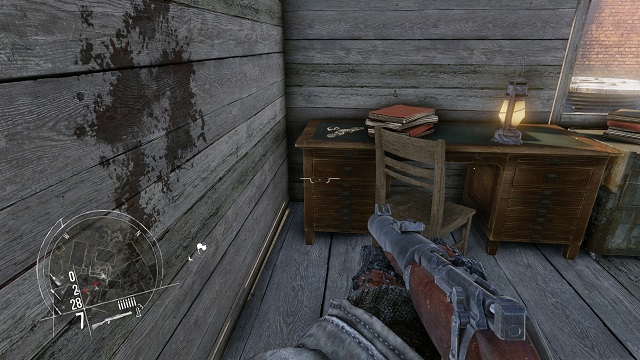 The location of the 2nd secret.
The second secret can be found lying on a table, in a small hut, next to a tall watchtower, opposite the huge building with swastikas on it.
The location of the 3rd secret.The third secret is located on one of the tall cupboards, in a large warehouse, on the left side of the ropeway, which you reach along with your commanding officer.
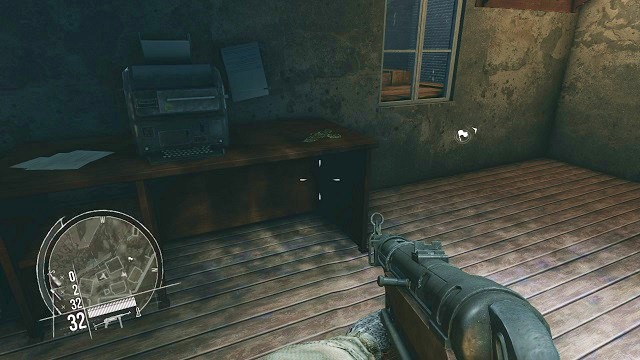 The location of the 4th secret.
The fourth secret can be found lying on a table, in the right corner of the first room in the main factory.
The location of the 1st secret.The first secret can be found lying on a table, next to a typewriter, in one of the rooms in the first encountered building behind the bridge (with swastikas on it).
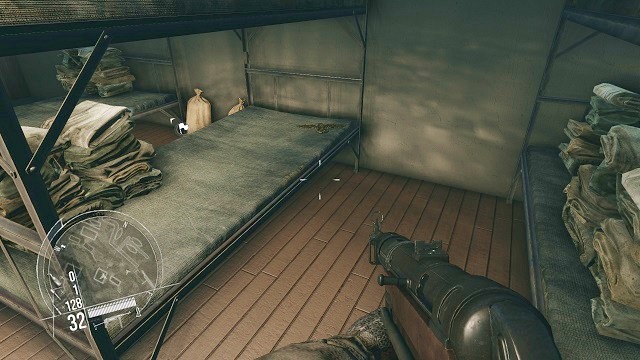 The location of the 2nd secret.
The second secret is located on one of the soldiers' beds, on the second floor of the building, which you enter by going through a staircase.
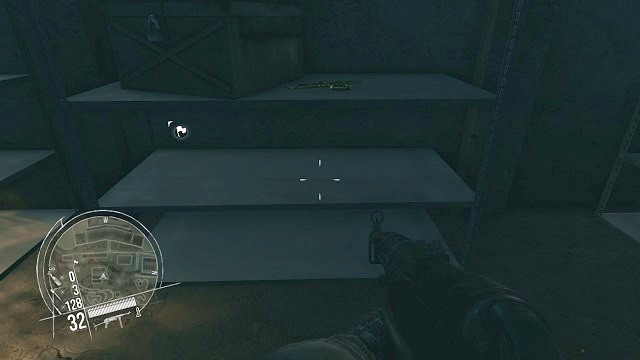 The location of the 3rd secret.
The third secret is located on one of the lockers, in the second barracks, located the closest to the defensive wall in the main part of the Oscarsborg Fortress.
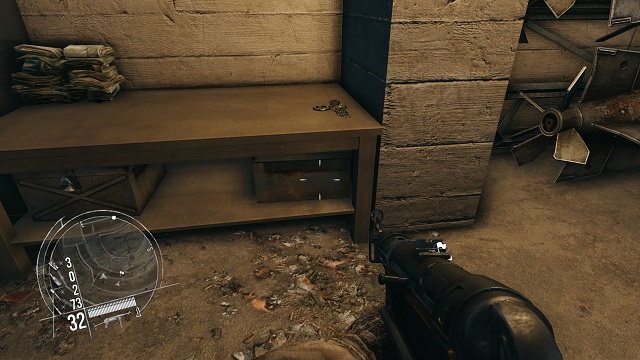 The location of the 4th secret.
The fourth secret is located on a table, in a room on the left side of the corridor, which you enter after going down the sloping platform.
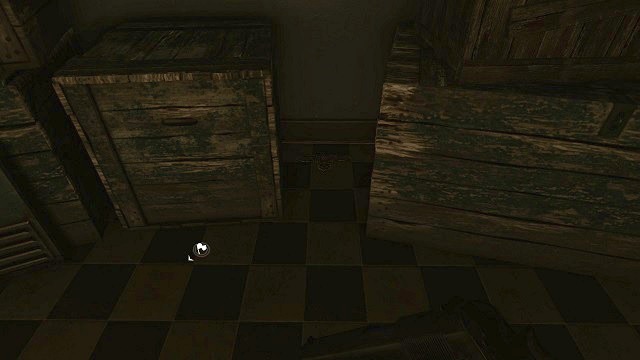 The location of the 1st secret.
The first secret is located between the two boxes, on the right side of the room, in which you begin this chapter.
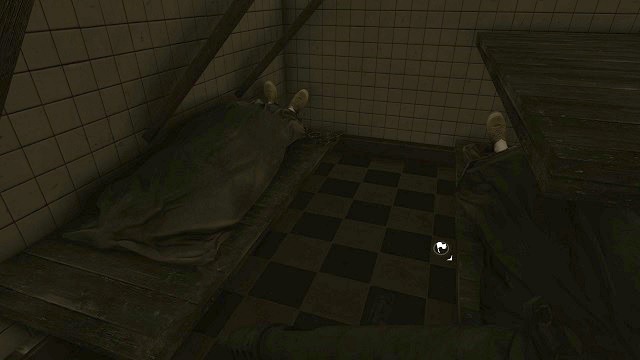 The location of the 2nd secret.
The second secret is located on the edge of a hospital bed, on the upper left corner of the mortuary (from the bird's perspective).
 The location of the 3rd secret.
The third secret is located on one of the tables in the building, which is located near the barricade and ammo supply.
 The location of the 4th secret.
The fourth secret is located on the floor, between the rubble, in the room you enter by going through a sloping footbridge, after previously entering the building through a breach in the wall.
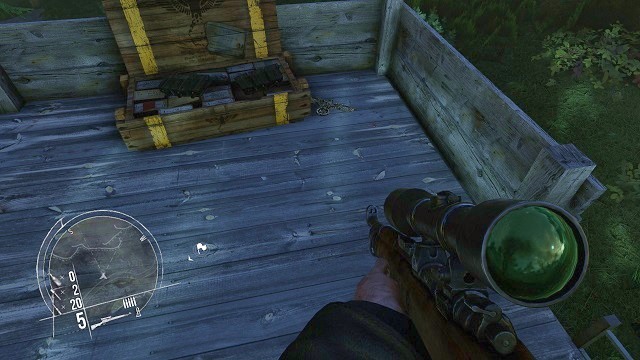 The location of the 1st secret.
The first secret is lying on the floor, in the corner of the watchtower, which you enter at the very beginning of the chapter.
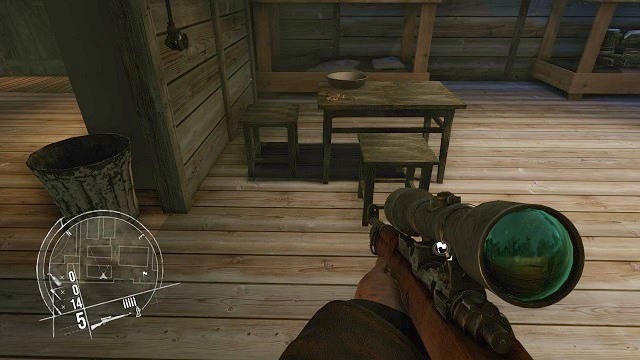 The location of the 2nd secret.
The second secret is located on a table, next to a frying pan, in a room in the second barracks, from which you rescue a couple of prisoners.
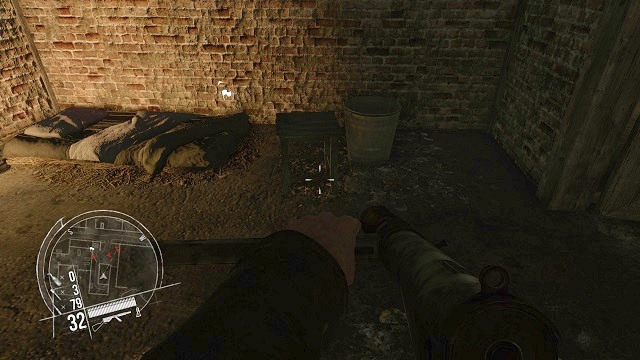 The location of the 3rd secret.
The third secret is located on a stool, in one of the prison cells, in which you find Dietrich.
 The location of the 4th secret.
The fourth secret is located on the table, near the pile of notes and reports, in a secret room, in the commanding officer room - the entrance is hidden, and you must interact with a clock on a bookstand to get there.
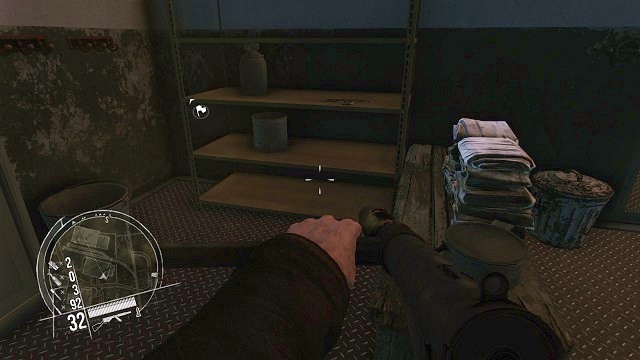 The location of the 1st secret.
The first secret is located on a cupboard, in a small room, on the second floor of a building, which you enter at the very beginning of the chapter.
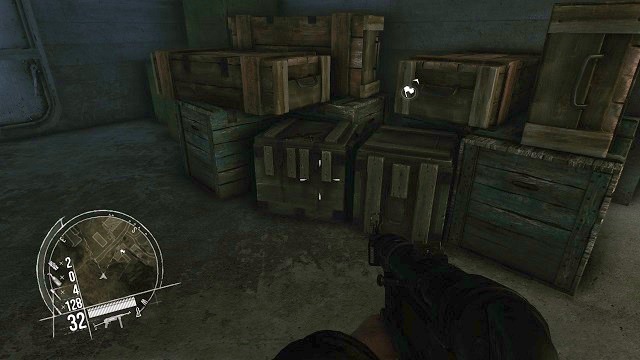 The location of the 2nd secret.
The second secret can be found lying on one of the boxes in a warehouse, to which you can go by choosing the left road on the crossing.
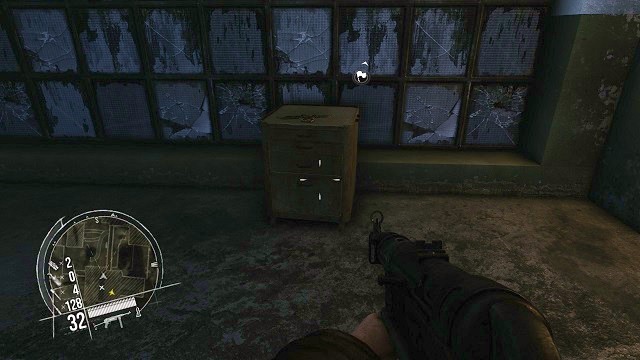 The location of the 3rd secret.
The third secret is located on a chest of drawers, near the window, in a room in which you can find the second part of the device needed for the additional task.
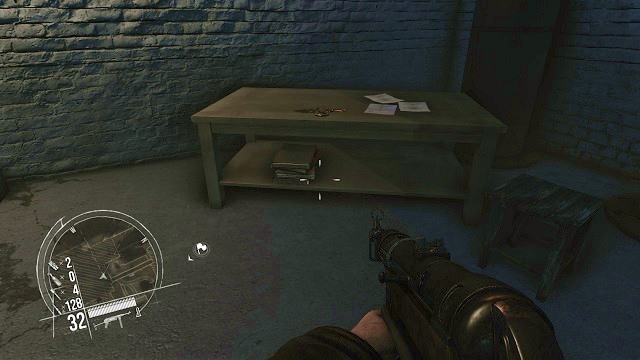 The location of the 4th secret.
The fourth secret is located on the table, on the ground level of the main factory.
 The location of the 1st secret.
The first secret is located on the pile of rubble, in the first dead end, on the left side, after entering the city sewers.
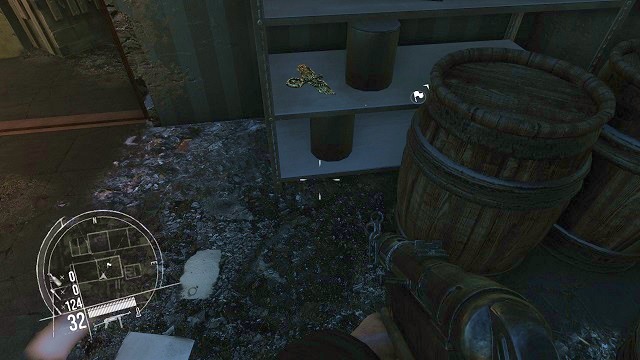 The location of the 2nd secret.
The second secret is located on a cupboard, inside of a room on the left side of the corridor, of the last building you enter in that mission.
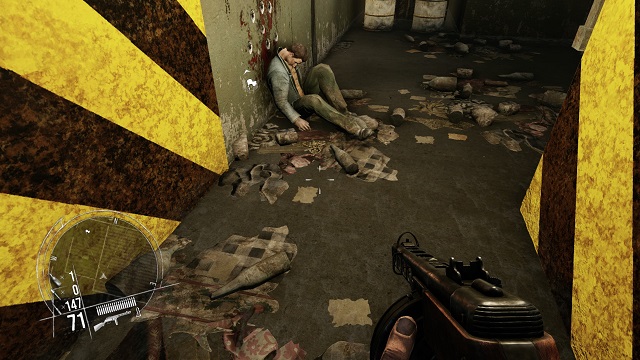 The location of the 1st secret.
The first secret is located inside of a destroyed tram, located in the middle of the street.
The location of the 2nd secret.The second secret is located on the floor, next to one of the corpses in the underground of the depot.
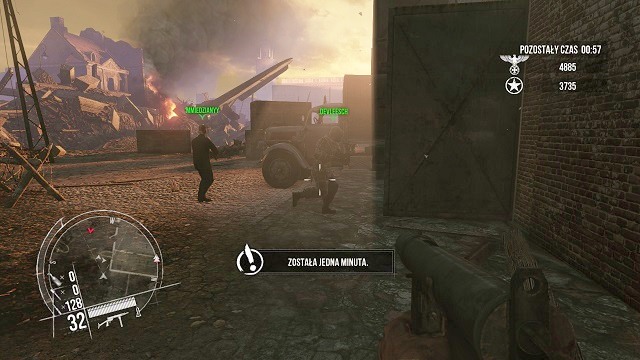 More people, more fun.
Enemy Front, besides an extended single player campaign, and an additional story, offers the players the a rather humble multiplayer gameplay, consisting of a three different game modes (one server can hold up to 12 players).
1. Deathmatch is the traditional game mode, in which all the players fight each other, until a set timer expires. Each kill on the enemy is scored, and the player with the most frags wins the whole match.
2. Team Deathmatch is the second possible game mode in the game, in which two teams struggle gain more points than the enemy team (the points are awarded for kills done on the enemy), before the set timer expires.
3. Radio transmission is the last and at the same time a rather original game mode, in which two teams try to maintain radio connection between two receivers, for a set amount of time. The team who is able to hold both of those receivers and prevent them from recapturing wins the game.
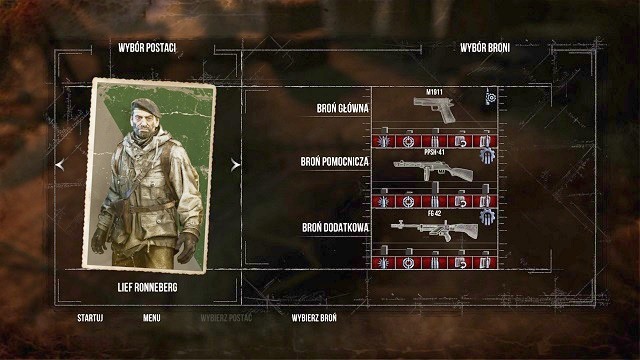 I always wanted to play the old Norwegian.
In Enemy Front, regardless of the set game mode, you will be faced with the choice of a character you want to be playing with during the game, as well as the equipment you will be using to exterminate the enemies. What's crucial, all the characters differ between themselves only in terms of aesthetics - they don't offer any different offensive characteristics, or predispositions. You can choose from Kozera, Dietrich, Ronneberg, as well as from more common units, like German soldiers or even a Polish messenger.
As far as the equipment goes, the differences are more noticeable. Each weapon in the game differs from the other in some aspects, and belongs to one of the three main groups. You can distinguish the main weapon category (pistols of all sorts), auxiliary (which is used most of the time) and additional weapon category (for special occasions). To equip your character with a carefully chosen item, you don't have to unlock anything at all, or collect virtual (or real) money. All the equipment available in the game is unlocked from the very beginning.
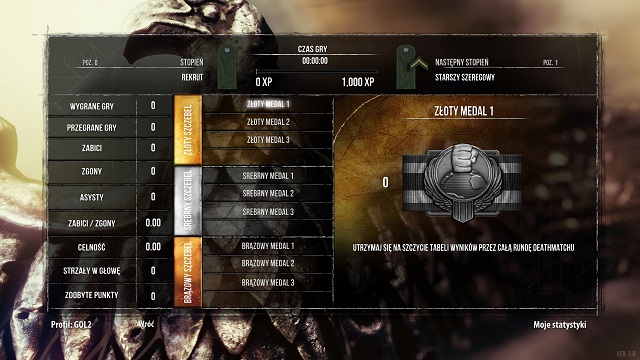 A gold medal - that's what you should aim for.
In Enemy Front there's a substitute of a character development - or, to be more exact, of user's profile - but it's targeted solely on the prestige and unlocking higher and higher achievements, medals and military ranks. Gaining higher ranks, and hence new experience levels, doesn't determine your overall strength, or endurance of the characters you decide to play with. All of the achievements, awards and saved stats are only used to certify the time you spent in the game playing with other players.
The system requirements for the Enemy Front can be considered as the average. The guide was made on a PC, equipped with Intel DualCore i5-660, 4GB RAM, ATi Radeon HD 5850. The specified configuration significantly exceeds the requirements specified in the "Recommended system requirements" section, and allows for a smooth gameplay on the highest graphics settings.
Singleplayer: Yes
Offline Cooperation (split screen/hot seat): No
LAN / Internet Cooperation: No
Multiplayer: Yes
The guide was created on the PC version of the game, with this configuration:
The above configuration a allowed for a ideally smooth gameplay, even on the highest graphics settings. By having a similar PC configuration, you can run Enemy Front without worrying about the decrease in performance at any point in the game, or any stuttering during the key moments of the story.


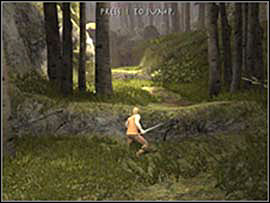 Eragon Game Guide & Walkthrough
 Endless Legend Game Guide & WalkthroughEnemy Front Game Guide & Walkthrough
 Elite: Dangerous Game Guide & Walkthrough
 Euro Truck Simulator 2 Game Guide & Walkthrough