One of the things that you need to understand is not to jump into holes across the location which will deal quite a great deal of damage. Do note that remaining in these holes can also result in your death.
Our guide details the Sullust including Sorosuub Centroplex, Sulphur Fields, and the Imperial Hangar.
Supremacy
The central point is located in the middle of the Centroplex near the water. This is a large enough area which can house multiple players. Note that you need to be aggressive in order to capture it.
During the Rebels’ push forward, the point shifts to the Imperial Hanger which has some structures and objects – use the Jump Pack in order to get there. You should consider viewing all corridors to avoid getting flanked.
As for the Imperials’ push forward, the capture point is located inside the intelligence room which can be accessed from three different areas; use computers and cargo as cover.
In the Empire’s base, controlling and defending the area requires accurate precision and timing. A couple of structures on the sides provide cover fire and a turret can be placed there to defend the area.
In the Rebels’ base, you need to use cover to your advantage and get the best angle. You need to make sure that you head inside together to render things relatively easier.
Walker Assault
The first 2 uplinks are located on the either side of the walkers’ path; one inside the Imperial Hangar and one near the water tanks. It’s a good idea to deploy squad shields, personal shields, or Leia’s abilities to sustain in the area.
You should also try to gain an upper ground and eliminate enemies from a distance. The next couple of uplinks provide distinct advantage to both the Rebels and the Imperials, depending upon how one approaches them.
Since vehicles are no threat inside the structure, do not worry about them and use cover as much as possible as there are many cross-fire opportunities. If possible, deploy Infantry Turrets and the Blaster Cannon to your benefit.
Second to last uplink is located in the middle of cargo station area where you should setup a perimeter with your fireteam and do not let anyone head in – also have some Ion Grenades and Ion Torpedoes at your disposal.
The final uplink is inside the outpost leading to mountain where you can use computers as cover. This area has 3 distinct entrances and you should always be on your toes.
Fighter Squadron
The smoke and cloud in this map render your visibility vastly. Other than this, the game mode plays almost same as on other maps, but you should be aware of the visibility factor while getting power-ups and repairing material.
Blast
The Sorosuum Centroplex is divided into 3 areas, an elevation level, and terrain which can be used to escape enemies. The outer rim of the map near the crashed TIE provides decent cover and encourages mid-ranged engagements.
The area where the Imperial ship is located is the most action-centered; use the Jump Pack to reach the hull and get a wider vision of the location. The final area where the Imperial ship remains are has some decent cover and connects the two areas, but is not action-centered.
In the Imperial hangar, you can expect chaos to break out early because of the tightness of the map. The center area is small and the landing pad outside connects it with the other portions of the map.
Most of the action happens in the corridors; however, you should closely monitor the changes and select your SCs and blasters carefully.
Drop Zone and Cargo
Those of you who have played Drop Zone will know that this mode can essentially be considered as TDM with a slight twist.
Since there is no information where a drop pod might fall, the best idea is to always be on the run along the outer edges of the map and you will have higher chances of finding the drop pod.
When we talk about Cargo, remember that the Jump Pack is exceptionally useful in getting to cargo, but not after the cargo is acquired. Both cargo stations are located in fairly simple locations and you will instantly remember all the pathways leading in and out of the area.
Hero Hunt
In the Imperial Hangar, since there are both close-quarter and long-range engagements, it all comes to positioning of your character. As Vader, you should confine yourself to intelligence room and inside corridors.
Boba Fett, on the other hand, can freely travel using the Jump Pack and catch enemies off-guard. Lastly, Palpatine really shines in this map and can wipe out an entire team in a single corridor.
In the Sulphur Fields, Boba Fett is extremely hard to pin down due to his Jump Pack. In addition to this, his blaster deals significant amount of damage, but lacks in range which is why Cycler Rifle and Pulse Cannon are the best things to bring him down.
As for dealing with Vader and Palpatine, you should primarily rely on Proximity Mines, mid-range blasters, and Smart Rockets.
Heroes vs. Villains
In the Sulphur Fields, Boba Fett can be used to scan the entire area and find enemies.
Both Han Solo and Leia have decent blasters and shields which can protect them both from Vader and Palpatine. As for Luke, Vader, and Palpatine; all of these characters have slight disadvantage on this map because of the openness of the map.
In the Imperial Hanger, narrow corridors and smaller areas are ideal for Palpatine and Vader who can easily deal with Leia and Han Solo using deflection.
While playing as Boba Fett, you need to ensure that you keep a safe distance and always stay in the open unless you have a good opportunity to eliminate one of the characters.
Finally, as Palpatine, you need to stick close to other characters as much as possible in order to help them survive longer and eliminate enemies in narrow corridors.
This is all we have on Star Wars: Battlefront multiplayer map Sullust. If there is something else you would like to know, make sure to let us know in the comments section below!

 Star Wars Battlefront Hero Hunt Tips and Strategy Guide
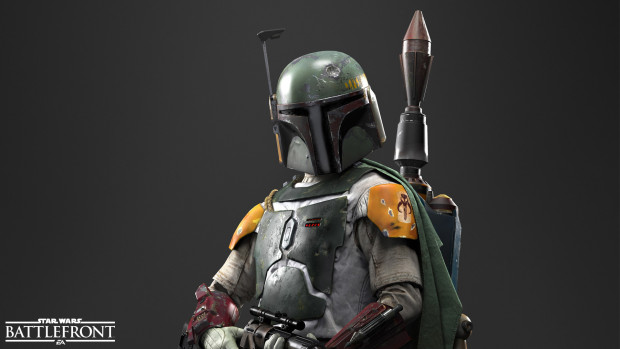 Star Wars Battlefront Heroes vs Villains Tips and Strategy GuideStar Wars Battlefront Droid Run Tips and Strategy Guide
 Star Wars Battlefront Supremacy Tips and Strategy GuideStar Wars Battlefront Cargo Tips and Strategy Guide