

Now that we have completed the Skyview Temple there are a couple of new goodies for us over in Skyloft. First and foremost though, let’s take care of that Ruby Tablet that we got from the Skyview Temple. Return to the Sky and fly with your bird to land on Skyloft.
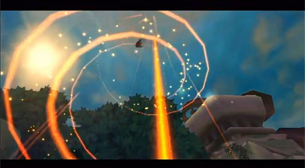

Make your way over to the Goddess Statue and head inside. Walk on over and place the Ruby Tablet just aside the Emerald Tablet we’ve already placed. This will cause a red beam to appear from the sky leading to the next region, the Eldin Volcano.
At this point you have the option of completing some side quests right now or jumping straight into the Eldin Volcano region. If you’d like to continue with the main plot, just jump on over to section 4.2. However, I would suggest at least heading to the Bazaar and purchasing an Iron Shield.
Once you exit the Goddess Statue, run straight ahead as if you wanted to reach the main part of town. You’ll immediately be confronted by Kukiel’s mother Wryna and she is worried because Kukiel is missing. Kukiel is a five-year-old girl and she is apparently been recently seen with a monster. Her mother asks you to find her precious daughter, so of course we will.
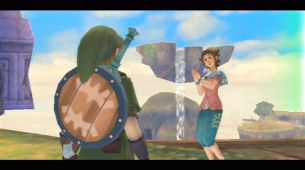
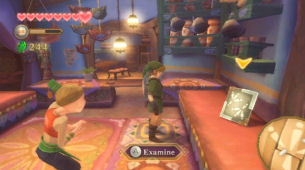 Bazaar Goodies
Before embarking on a side quest journey, your wallet might have more than 300 rupees. Since we are about to be getting a bunch of rupees and we don’t want to fill up our wallet, it might be a smart move to purchase a few items for now. Run on over to the Bazaar and speak with the Gear Shop owner Rupin. He now has for sale a brand new Iron Shield. Since the next area that we will be traveling to is the Eldin Volcano, we will need a non-flammable shield. Go ahead and purchase the Iron Shield for 100 rupees. Additionally, the shop owner has a small seed satchel for sale that will hold 10 additional seeds. You can purchase it for 100 rupees. Overall, these are all the items he now has for sale.
Small Seed Satchel – 100 Rupees
10 Deku Seeds – 20 Rupees
Arrows – (Not Available)
Bombs – (Not Available)
Wooden Shield – 50 Rupees
Iron Shield – 100 Rupees
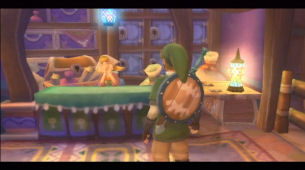
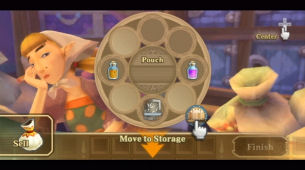
Afterwords, you should head on over and speak with Peatrice, the Item Check Teller. It is a good idea to drop off your Wooden or Banded Shield here as we won’t be using it during our time in the Eldin Volcano. In general, you want to try to interact with Peatrice as much as possible throughout this part of the game as constant interaction will lead to a sidequest later on. You can also speak with Peatrice and her father at nighttime.
Find KukielIf you run around town and speak with the various townsfolk, some of them will mention that Kukiel was recently playing by the graveyard. Run on over to the graveyard at the east end of town. One of the villagers near the Graveyard will ask you if you really think that a monster could have taken Kukiel. She then mentions that an old man is always ranting about hidden monsters in Skyloft. She mentions that this man can be found over at the Lumpy Pumpkin.
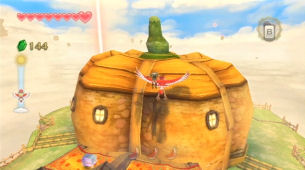

Jump back on your Loftwing and ride on over to the Lumpy Pumpkin. If you check your map, you’ll notice that the Goddess Cube that we activated at the Skyview Spring activated another Goddess Chest at the Pumpkin Landing. This Goddess treasure is located on top of the small roof near the front door. You’ll have to fly on over and land on it with your Loftwing. Open up the treasure chest to get a Gold Rupee, which is worth 300 rupees!
Enter the Lumpy Pumpkin and you can speak to some of the folks that are wandering around. In particular one of the guys at the table will have a bubble over his head. Speak to him and he talks about the Skyloft monster. He gives you a clue that there is a great big tree in the cemetary. He walked by the tree in the middle of the night and saw the monster. He saw the gravestone light up and he moved it, causing the storage shed to open all by itself. The demon then closed the door behind himself.
The man clearly says to stay clear of the cemetery in the middle of the night… Thus, our next stop is back at Skyloft at the cemetery in the middle of the night. Jump back on your Loftwing and fly back to Skyloft. Walk into any of the nearby houses and jump on one of the beds. Take a nap until it is nighttime and then head back outside.

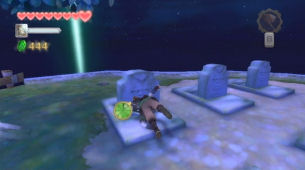
If you haven’t been in Skyloft at night time yet, there are a few notable changes. One, the town now has green chuchu, keese, and enemy remlits running around. Additionally, the town Bazaar is now closed, with the residents returning to their homes for the night. With that in mind, let’s run on over to the cemetery. Walk over to the gravestone near the tree at the top-left part of the graves. The stone will light up, just as the old man stated, so push it and the nearby storage shed will open up. Enter the storage shed and climb down the staircases. Follow down the pathway and enter the door at the end of the path.
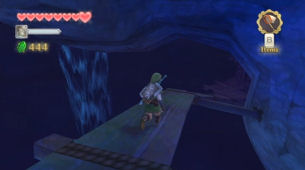
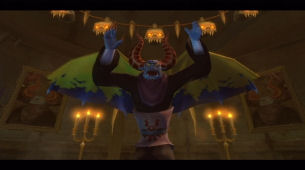
Inside you will meet with the demon Batreaux. If you try to slash at him with your sword, Batreaux will plead for you not to hurt him. It turns out that Kukiel has been visiting Batreaux and that this demon just wants to become friendly with the people of Skyloft. Batreaux will talk about Gratitude Crystals and how they are produced when humans make other humans happy. Agree to gather Gratitude Crystals for Batreaux. If you speak to him again, he asks for you to first bring him five crystals.
10 Individual Gratitude CrystalsThere are 80 Gratitude Crystals in total throughout the game, 15 of which can be found individually, while the rest are found through various side quests. Fortunately, there are a handful of them we can find right now. Note, these individual crystals can only be found at nighttime. Of the 15 individual ones, you can collect 10 of them right now in Skyloft, as well as 3 more elsewhere in the Sky. Since we get rewards for gathering 5 crystals and 10 crystals, we’ll cover 10 of them for now. The locations of the first 10 can be seen below.


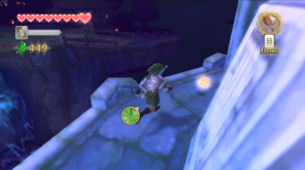

Once you have acquired 5 of these Gratitude Crystals, head over to Batreaux and speak with him and you’ll earn yourself a reward of the Medium Wallet, which can hold up to 500 Rupees. Once you have reached 10 Gratitude Crystals, return once again and you’ll get Piece of Heart #5. Note, you don’t need to make two separate trips to Batreaux. You can collect both goodies when you arrive with 10 Gratitude Crystals.
There is not much for us to do at night time anymore, but there are still a few Gratitude Crystals we can collect elsewhere at other islands in Skyloft. For now, run back to any of the houses and take a nap to make it daytime.

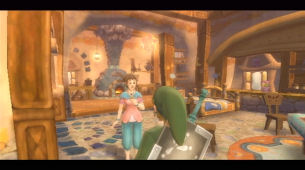
Let’s share the good news about Kukiel’s whereabouts, so run on over to her house. Enter the building and speak with her mother. She thanks you for safely bringing Kukiel home and in return, Link will be rewarded with 5 Gratitude Crystals!
Parrow and Orielle’s SidequestNow that we have helped Kukiel’s mother, this sets into motion a couple of other side quests that we can do now to collect more Gratitude Crystals. The first of which is just nearby. Run on over to the Plaza in Skyloft, near where the Light Tower is located. Here you will find Parrow patrolling the area. He is wondering where his little sister Orielle is. She had gone out for a quick flight, but she hasn’t returned. Parrow tells you that she was heading for the colorful island in the southwestern sky.
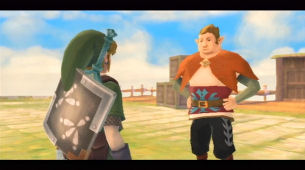
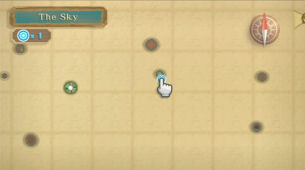
Jump off the nearby ledge and call your Loftwing. If you look at the southwestern part of the map you will see a small colorful island here. If you’ve been to this island already you’ll know that it is referred to as Fun Fun Island. Just to the east of this colorful island is where you will find a small circular island. You can place a beacon here as this is our destination.
Fly on over to this small circular island and you will find Parrow’s younger sister, Orielle. You will find that Orielle is stranded on this island since her Loftwing got hurt and cannot fly. Orielle is in need of bird medicine to help out her Loftwing and asks Link to bring her some. Orielle’s older brother Parrow has the bird medicine that she needs, so jump back on your Loftwing and return to Skyloft.
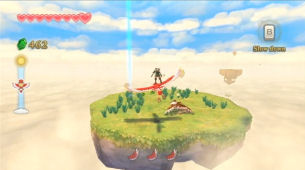
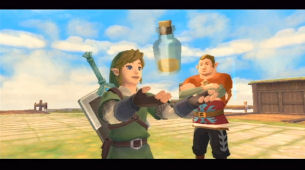
Once you arrive at the Plaza in Skyloft, speak with Parrow and let him know what is going on. He will give you some Mushroom Spores to heal Orielle’s bird. In addition to the Mushroom Spores that he gives you, Parrow will allow you to keep the Empty Bottle! Sweet!
Jump back on your Loftwing and return to Orielle at the small island in the Southwestern Sky. Once you arrive, give Orielle the Mushroom Spores and her Loftwing will be up in no time. In return for helping out Orielle and her Loftwing, Link will rewarded with 5 Gratitude Crystals!


Jump back on your Loftwing once again and return to the Plaza in Skyloft. You can run on over and speak with Parrow here. He will also thank you for your help and rewards you with 5 additional Gratitude Crystals!
Beedle’s AirshopOur next stop is at Beedle’s Airshop, so find the shop, hit the bell with the slingshot. If you’ve been following along with the walkthrough, you should have already purchased the Bug Net and the Extra Wallet. Thus, there should be four items for sale.
Bug Medal – 1,000 Rupees
Extra Wallet – 100 Rupees
Life Medal – 800 Rupees
Adventure Pouch Slot – 300 Rupees
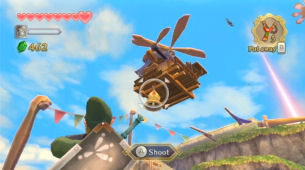
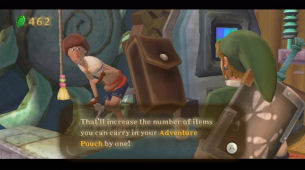
If you have the rupees, I’d suggest purchasing another Extra Wallet and an Adventure Pouch Slot. With the Medium Wallet and two Extra Wallets, you will now be able to hold up to 1100 Rupees! This should also be your second extra Adventure Pouch Slot, meaning you can now hold 6 items! Afterwords, exit Beedle’s Airshop. Note, you can fall asleep on the Airshop to reach Beedle’s Island, where you can get a Gratitude Crystal. However, we will be covering this later when we can get another goody as well.
Once you are ready, jump on your bird and fly towards the red beam of light. Descend to the mountainous region known as the Eldin Volcano. Fi will warn you ahead of time that this is a fire filled region and thus, wooden things are flammable. I’d suggest unequipping your wooden shield by selecting it and press the – button. If you haven’t purchased an Iron Shield yet from the Bazaar, it might be a good idea to do so.

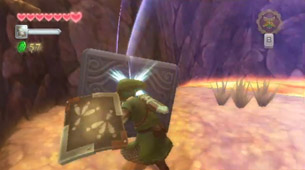
Walk forward and you’ll immediately run into a new variety of enemy and that is the Red Chuchu. These are nearly identical to the Green Chuchu that we saw already, except they are flammable due to their volcanic nature. Defeat them with a few sword slashes.
Drop off the ledge to the left and you’ll find a Goddess Cube. Deliver a Skyward Strike to activate it. This pathway leads to a roadblock for now, so climb back up and take the other pathway.
Run forward and take the right pathway. Make a few jumps and you’ll run into two members of the Mogma tribe. These underground dwellers dig their way around and they live in the Volcanic region. After hearing some information, keep progressing down the path, defeating any Chuchu that get in your way.
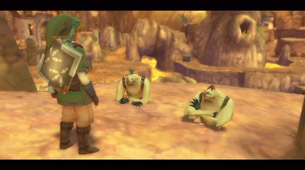

You’ll eventually come across some Fire Keese. Much like Red Chuchu, Fire Keese are identical to their regular Keese counterparts except they have fire capabilities. They can burn your shield if you have a wooden one, so be careful. Additionally, if these fire folks hit you, Link will temporarily become on fire, so roll or do a spin attack to relieve the fire.
You’ll reach an area with some volcanic magma on the ground. It will slowly rise and fall over time. Wait until it lowers and take the pathway to the left where you will meet with another Mogma. If you talk to this Mogma, he’ll teach you how to use Bomb Flowers. These can placed, rolled, or tossed depending on how you use the Wiimote. There are three sets of large blocks in this area, so use bombs to blow up all three of these blocks. The higher block will require you to toss a bomb overheard, so fling the wiimote to do so. There is also a small hole that you can roll a bomb into which leads to a blue rupee. Lastly, there are two tent like sections here, one of which has a small stool. You can sit on it to recover some health.

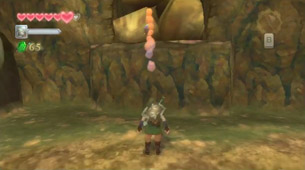
Continue along the passage until it breaks into three sections. You can jump down on the left side and then roll one of the nearby bombs into the small hole. Crawl through the hole and open up the treasure chest here to get a red rupee.
Return to the split in the road and this time take the path that goes straight ahead and it will lead to Goddess Cube #5. Perform a Skyward Strike and a treasure chest will become available somewhere in the sky.
Now take the other pathway at the split and speak with the nearby Mogma. He mentions that a funny-dressed character went this way. We cannot do anything about it just yet, so continue progressing past the Mogma.
Drop down to the area below and you’ll find a new enemy referred to as a Pyrup. These creatures will hide in small caverns or underneath hard shells. If Link draws near, they will shoot a breath of fire in his direction. The key to defeating them is to use precision bomb throws. This particular Pyrup crawls into a nearby hole. Keep your distance and pick up one of the nearby bomb flowers. Roll it into the small hole and the Pyrup will be defeated.
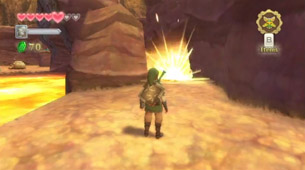
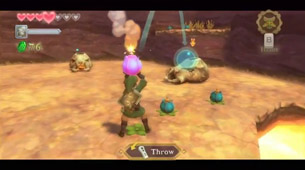
Continue along the pathway and you’ll face off with a herd of Red Bokoblin, including a Bokoblin Leader. Defeat them and keep going down the pathway. Here you will find two more Pyrups, but these particular ones hide underneath hard shells. Link will need to make precision tosses to land the bombs inside of the shells of the Pyrup in order to defeat them.
You’ll see a stamina fruit along with a weak bridge nearby. We’ll return here in just a moment. For now just head north and climb the rocks. Keep climbing and head down this rather linear road, defeating the chuchu along the way. You’ll find another armored Pyrup here, but this one doesn’t have a hole atop its shell. In order to defeat this Pyrup, you’ll have to roll a bomb into the front of its shell. Run past the defeated pyrup and pick up the piece of heart that is waiting for you by the cliff.
Now backtrack to that stamina fruit near the weak bridge that we passed by. If you sprint across the bridge you’ll run into a Mogma that you can speak with. He gives you a small clue on what you need to do. There is a boulder that is plugging the lava from escaping. There are no nearby bombs so we’ll have to run back across the bridge. Unfortunately we cannot carry a bomb across the bridge, so in order to blow up the boulder you’ll have to make a precise roll of a bomb. Do so and the lava will come flowing out, leaving a pathway for you to walk right behind.


Run back across the bridge and climb onto the higher ledge. You can now walk along this lower area. Walk around to the left and you’ll find a gust of wind that will blow you upwards. Allow it to do so and then fall down the hole found here.
As you are falling down, you can glide to the various ledges found here. At the left side you will find a treasure chest that contains a random piece of treasure. More importantly, you will find Goddess Cube #6 just to the right. Since this pillar is in the center of the area, it could be hard to land on it properly. If you fail the first time, don’t worry, as you’ll be able to try again once we reach the surface. If you successfully land on it, use a Skyward Strike to activate the Goddess Cube.
Follow the pathway and you’ll bump into a Mogma. He’s upset because the volcano is overrun by bokoblin and wishes somebody would take care of the problem. Continue straight ahead and you’ll fight a batch of bokoblin. There a bunch of bokoblin here, but more importantly there are a few bokoblin leaders. In particular there is one hiding away on the higher wooden platform. You have to run on over, climb the wooden area, and defeat this bokoblin. Otherwise it will just keep summoning bokoblin for you to fight. With all the leaders defeated, get rid of the rest of the bokoblin as well and then head back over to that Mogma.
The Mogma will thank you for your work and reword you with the Digging Mitts. These Mitts will allow you to dig some soft soil and uncover secrets. Dig the nearby softsoil and a gust of wind will send you to the higher platform.
You can optionally take the pathway to the left and it leads to a number of soil spots that you can dig for goodies. Additionally, this pathway leads you to an enemy bokoblin nearby. There are three large holes that Link can slide down. Looking at your map, you want to slide down the one in the middle. Do so and it will lead you to a treasure chest that contains an Eldin Ore, a type of treasure that you can use to upgrade items. There are also soft soil spots in this area where you previously fought Bokoblin. Be sure to dig them up to find some Eldin Ore and some extra rupees.
Go back to the Mogma that gave you the digging mitts and once again get to the higher ledge. This time take the pathway along the right side and you’ll come across a number of Pyrups. You should be able to dodge past the Pyrup to the southeast part of the room where you will find some bomb flowers. The key here is the pyrup located at the northeast corner of the room as that is the one that is blocking your path. The key is to use a bomb flower from the southeast corner, run over near the northeast pyrup, and roll it into the hole. However, you have to be careful as you don’t want to get close enough where the pyrup will shoot fire. So you’ll have to keep your distance and make a precision roll with the bomb.
Once the pathway has been cleared, head through the passage. Dig at the soft soil spot to get a burst of window blowing you upward. Then step into the large wind gust, sending you out of this underground cavern.
Back outside, follow the pathway and you’ll run into another Mogma. Take the pathway to the right and use a bomb to blow up the nearby boulder. This will allow quick access to this part of the Volcano. Now walk over to the broken bridge and a strange looking character will help you cross the bridge. There is a nearby statue that is found here, so it is a good idea to save your game.
From the bridge within the Eldin Volcano, head up the pathway and defeat the fire keese that are lingering around. Jump across the gap and you’ll see a rather steep incline. If you look above you’ll see several bokoblins just waiting around for you. Use the dash to charge up this incline, landing on the level platform.
Quickly defeat the bokoblin nearby or just slash at him to see him tumble off the ledge. Run over to the other nearby platform where there is a bomb flower. Lift the bomb flower and toss it down the hill, causing the boulder below to break. With that large boulder out of the way, this makes for quick navigation to the first entrance of Eldin Volcano region. Be sure to dig up the soil spots to collect some slingshot ammo.
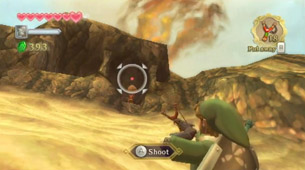
Run back over to the platform where the Bokoblin was and pull out your slingshot. Aim carefully up the hill and you’ll spot a bokoblin. Aim just above him due to the long distance, and you’ll hit him with a slingshot seed, causing the boulder to fall on top of him and defeat him in the process. Now you can safely dash up the hill.
There is a bokoblin leader atop the watchtower. Pick up one of the nearby bomb flowers and toss it at the structure, causing it to come crashing down below and creating a bridge in the process.
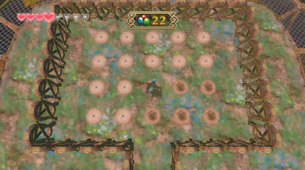
Also, if you go near the bomb flowers, you can toss a bomb to blow up one of the nearby boulders. You can enter this cave to reach a digging mini-game that is completely optional. This minigame works much like the game Minesweeper. Regardless of the level you are playing on, you can use your digging mitts to dig up soft soil spots. The more expensive rupees are usually surrounded by a bomb or multiple bombs. Thus, if you dig up a green rupee, all of the adjacent soft soil spots will be safe. The higher levels have negative rupees known as rupoor, as well as silver rupees which are worth 100. It’s a classic case of risk and reward, as the higher levels require more rupees to play and there are more bombs. After having some fun, go back outside.
After blowing up the large structure, a bridge of sorts has been created, so climb across it and continue scaling the mountain. There are some vines here, so climb up this wall. Continue along this pathway and defeat the chuchu that appears. You’ll eventually reach another steep incline filled with bokoblins.
Run up right in the middle of this area and stop at the level platforms. There are two bokoblins nearby, so defeat them now so they don’t cause you trouble. Look up and you’ll find a bokoblin carrying a rock above his head as well as another bokoblin patrolling the platform. Sprint up to this higher platform and defeat the bokoblins found here.
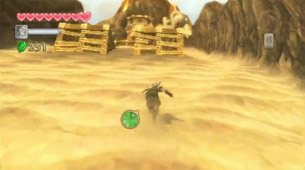
If you look up again you’ll see three bokoblins all tossing rocks down at you. The key here is to shoot the bokoblins while they are holding a rock over their head, causing the boulder to kill them. With all three bokoblins out of the way, sprint up to the top of the hill here.
You’ll find yourself just outside the entrance to the Earth Temple. Run on over and speak with the nearby Mogma to find out that the key to the Temple has been busted into smaller fragments. Fi will be able to register the fragments of the key as a dowsing mechanism, so you should be able to find the key chunks that way.
Use the dowsing mechanic and you’ll find that one of the key shards is just to the left of the entrance to the Temple. Follow the dowsing to a soft soil spot nearby and get the first piece of the key.
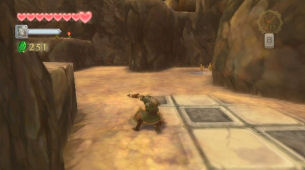
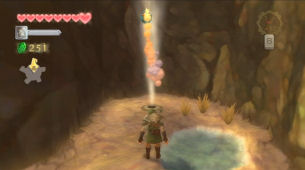
If you look around this area you will find several other soft soil locations. One of these is found at the northwest corner of this area and it will open up an air geyser. If you ride the air geyser up, you’ll find that there is a large boulder here. What you need to do is pick up one of the nearby bomb flowers and toss it into the air geyser. It will be blown upwards, causing the boulder to explode. Run on over and activate Goddess Cube #7.
 ~ Second Piece of the Key ~
Right near the first key, follow the pathway of bomb flowers to come to another hill. You’ll see a watchtower down below and you need to knock it down. In order to do so lift up one of the nearby bomb flowers and carefully toss it down the hill. It might take a few tries but the goal is to have it explode near the tower, causing it to tumble to the ground. Once it has done so, run down and using the digging mitts by the nearby soft soil spot to get the second piece of the key.
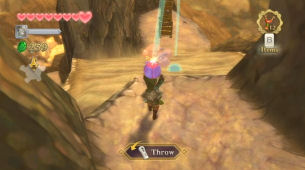

On a side note, if you glance just next to the fallen tower, you’ll see strange wheel like item. Keep note of it as this will come in use much later in the quest.
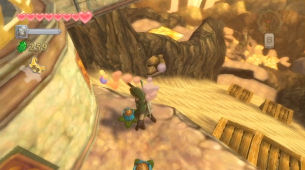
~ Third Piece of the Key ~Run back up to the locked temple door and just in front of where the Mogma were chatting, you’ll see two bomb flowers. If you use your dowsing mechanic right here, you’ll see that there appears to be a piece of the key behind a boulder along the hill. You need to lift up one of the bombs and roll it down the hill in the direction of the boulders on the side. If done properly, the boulder will blow up, revealing a soft soil location. Sprint on over and dig up the third piece of the key.
 ~ Fourth Piece of the Key ~
Run back up to the temple entrance and this time take a right. There are a bunch of bokoblins along with a bokoblin leader, so take your time to get rid of these pesky enemies. The leader is atop the tower once again, so use one of the nearby bomb flowers to knock it down. Just to the right of the pathway there is a small downway slope that leads to Goddess Cube #8. Run on over and deliver a skyward strike.


Cross the fallen tower and head up this pathway. Defeat the fire keese and chuchu that are nearby and progress further along this pathway. There is a bridge in this area, but it does not extend across. If you turn just to the left of the bridge, you’ll see there is a narrow ledge that Link can hang down from. Hang down and make your way across this narrow ledge. Climb up the nearby wall and then jump across the gap to get to the highest platform. Run over near the ledge and look at the vines against the wall. Make a running jump to latch onto the vines. Make your way around the vines, collecting the stamina fruit along the way. Land on the bridge and press the floor switch to extend the bridge across.
Follow the pathway here and you’ll notice it’s very hot. You cannot progress to the left because of the extensive heat. So instead, run to the right and jump off the ledge, sliding down the platform. Right away you’ll see two air geysers. Slide down and try to slide over the wind gust on the right. Doing so will land you on a pillar in this area and you can use your dowsing mechanic to location the fourth key. It’s still a distance away, but if you look further down the hill, you’ll see that on the far right pathway, there is a ledge that you can land on. Jump off this pillar and slide down to this ledge.
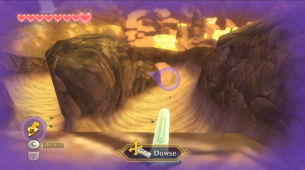
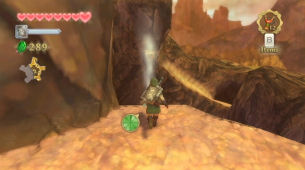
There are two air geysers nearby and you’ll have to time your jump properly in order to hit both of the wind gusts. Wait until the first air geyser blows and count to 6 before jumping. If you time it right it will automatically take you to the second air geyser, and then to the higher platform. Use the dowsing mechanic to pick up the fourth piece of the key.
~ Fifth Piece of the Key ~Jump down and ride the slide all the way to the bottom. Run over and jump to the first platform and then make a right. You’ll find a bomb flower just sitting here but the rest of this area is filled with lava. If you turn around and look along the wall just outside of this cavern, you’ll find a boulder that is slowing the flow of lava. You need to pick up that bomb flower and toss it towards the boulder, causing the lava to flow out from the cavern.

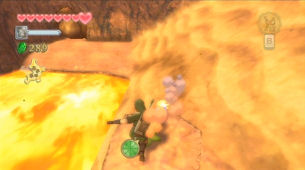
Return to the cavern and you’ll notice part of the ground is now clear. There is a larger boulder at the end of the room. What you need to do is pick up the bomb flower and roll it over the flowing sand so that it rolls over to the boulder to blow it up. After the boulder has blown up, run on over and dig up the fifth piece of the key from the soft soil spot.
Return to the bomb flower and exit this small area. Take the pathway to the right and you’ll find some more bomb flowers. Lift one up, enter this small cavern, and blow up the boulder to the left. This will make for easier navigation around this area. Afterwards use the large air geyser to return to the top of the summit near the bridge.
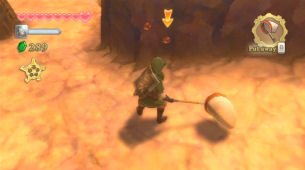
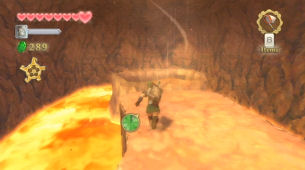
You can go straight to the temple at this point, but there is an extra goddess cube we can get at this point. Run back over to the slide area and this time when you start heading down the hill, slide over to the air geyser on the left side. This will bring you to a pillar and just below, you will find Goddess Cube #9. Jump down towards the cube and deliver a skyward strike. Afterwards, backtrack to get back to the top of the summit once again.

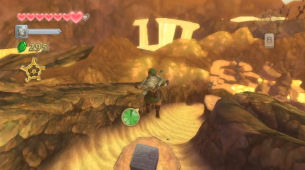
Run back across the bridge and make your way to the temple entrance. You can save your game just outside the temple, but once you are prepared use the key and dive right in to the second dungeon of the game, the Earth Temple.

 Watch Dogs – Missing Persons Guide
 Skyward Sword Walkthrough – Isle of Songs –
  Feature: Behind The Elemental Abilities Of Spirit Hunters Inc.
 Guide: Getting Started in Mario Kart 8
 Batman: Arkham Origins - Achievements & Trophies Guide