

Now that Link has acquired the Power Glove, there are several new goodies for us to collect, including a pair of Heart Pieces and the Zora’s Flippers. You will need to have acquired 500 rupees in order to purchase the Flippers, so if you haven’t found all the secret rupee locations, be sure to check back to the previous chapter. We first want to exit the Desert to the southeast, and then continue all the way back to Link’s House.
From Link’s House, head east and then north, across the bridge. Continue walking north for two more screens and then head east to reach the Potion Shop once again. To the east of the Potion Shop, there is a large boulder that Link can now pickup since he has the Power Glove. Toss it out of the way and then head eastward.


Use your Pegasus Shoes to ram into the rocks, clearing the path. Defeat or avoid the Buzz Blobs and head up along the right side. There are an assortment of enemies here, but you can just avoid them all as you head northward, entering Zora’s Waterfall.


Here you will find tons of River Zora, but some of them will land on top of shallow water and will then walk towards Link. You can stun them with a sword slash, but for the most part, you just want to avoid them. Walk up the pathway, heading to the northwest. You’ll see a Piece of Heart on the higher ledge to the right, but we cannot quite get it just yet.
Once you start heading eastward, the water pathway will split. Take the southern-most pathway and head eastward. Make your way to the northeast corner of the Waterfall and you will meet with King Zora. Ask him for some Flippers and he will offer to sell them to you for 500 rupees. The Flippers are a required item and they will allow Link to swim in deeper water. Additionally, Link can now use the various Zora Waterways found throughout Hyrule.


From King Zora, walk directly southward to find a waterfall. Swim towards it to jump down to the lower area. Walk down and to the left to find an area of land. Keep walking over and collect Piece of Heart #9. Jump down another waterfall and exit Zora’s Waterfall at the southwest portion of the screen.


Walk to the left side of this screen and you will find a waterfall. Hop into the water and swim into the waterfall to find a secret cave. Inside, Link will find a Mysterious Pond where he can throw certain objects into the water. After throwing in an item, a fairy will appear, asking Link if he dropped the item. Say yes and the fairy will give Link back his weapon. There are a few upgrades Link can get via this pond. Link can toss in his Boomerang and get the Magical Boomerang. Link can also throw in his Fighter’s Shield and get the Red Shield. Lastly, Link can throw in an Empty Bottle and get the bottle back, this time filled with the Medicine of Magic.


Just south of the Mysterious Pond, Link will find one of the Zora’s Waterways, located in the water. The portal looks like a mark where a River Zora will pop out from, but this one never disappears. Swim into it and it will take Link to Lake Hylia, located at the southeast corner of the Overworld.


After going through the Whirlpool Waterway, swim northward to a small island within the lake. Enter the cave here to find yourself at the Pond of Happiness. At the north end of this cave, Link will find a pond and if he walks up to it, he will be given the option to toss rupees into the pond. Initially, Link can throw either 5 or 20 rupees. After tossing in some rupees, you can walk a few steps away from the pond and then walk back to it to toss more rupees.
Repeatedly throw rupees into the pond until you have thrown 100 rupees in total. Venus, the Queen of Fairies will appear, asking Link if he’d like to carry more bombs or arrows. Choosing to carry more bombs increases Link’s capacity to 15 Bombs. Choosing to carry more arrows increases Link’s capacity to 35 arrows.


After a few moments, Link can walk back up to the pond once again and is given the option to throw more rupees in. This time he can throw them in quicker, throwing in 25 or 50 rupees at a time. Each time Link hits the 100 rupee mark, Venus will appear and offer to upgrade Link’s Bombs or Arrows. Link can upgrade his Bombs or Arrows by increments of 5 each time. The final upgrade for both the Bombs and Arrows is a 10-capacity upgrade, giving Link a maximum of 50 Bombs and 70 Arrows. Just to the right of the Pond of Happiness, Link can bomb a wall to find some loose fairies to store in a bottle.
Just outside of the Pond of Happiness, jump into the water and swim to the northeast. Follow the narrow water pathway up a screen and left a screen to reach the bridge. Swim towards it and Link will be taken to an area underneath the bridge. Speak to the Camper found here and he will give you the 3rd Empty Bottle!


Swim back right and down a screen to return to Lake Hylia. Use the nearby staircase to the right to resurface back on land. Walk up a screen, left a screen, and then up two screens. Cross the bridge and then head up a screen along the left side. Walk left a screen to reach the Hyrulian Cemetery.
Enter the actual Cemetery area and make your way to the northwest corner. Lift up the two small rocks that block the grave and then push the grave open, creating a secret hole. Fall down to find yourself back in the sewers of Hyrule Castle.


Now that you have some bombs and/or the Pegasus Shoes, you can blast open the walls on the west side of the screen. In this secret room you will find a trio of treasure chests, one containing 300 Rupees and the others containing some bombs and arrows. Exit back to the right and then head up a screen. Go through the series of rooms to get back to the Sanctuary and then exit to get back to the Overworld.
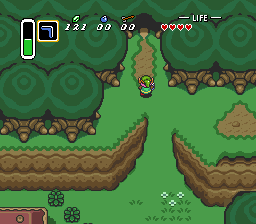
From just outside the Sanctuary, head left one screen and up one screen. Near the top portion of this screen, Link can read a sign that says not to enter Death Mountain. Just to the right of this sign, Link can lift up a large rock and enter the cave, which happens to lead to Death Mountain.

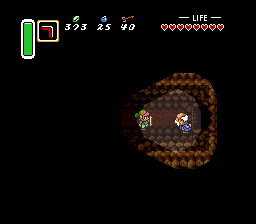
Hop off the ledge and head right at the first turn. Take the south path at the next turn and walk to the wall on the right. There is a narrow pathway heading northward, so go ahead and take it. Just to the right, Link will find the lost Old Man. Speak to him and then continue right to the next screen.
Avoid the pitfalls in this cave and walk to the far right side of the room. At the end of the path, the Old Man tells Link to turn right, heading downward. Continue down this pathway and exit the cave, reaching Death Mountain.
The area here is filled with Deadrocks and falling Boulders. A Deadrock will turn into stone if Link swipes at it with his sword. This become troublesome as they can block Link’s pathway. After a few moments, they will come back alive and move around. Avoid the enemies and Boulders and continue walking to the right.


Once Link and the Old Man walk by the next cave, the Old Man will thank Link and give him the Magic Mirror! This item will come into use shortly. The Old Man will then walk inside of this small cave. At any point in the quest, Link can return to this cave and speak with the Old Man, who will replenish Link’s health.
After the Old Man walks into the cave, walk to the right and climb the first set of stairs that Link finds. Walk to the right and then up, where Link will find a cave. Ignore it and instead, walk all the way to the left side of the screen. Ignore the cave here and instead climb up the rather large staircase.


To the right of the large staircase, Link will find a cave that he can enter. Directly south of this cave, Link can see part of another cave that is along the cliff. Jump down to this cave and enter it. Walk up the staircase at the north end of the room and then walk around to collect Piece of Heart #10. Fall down the hole just below the heart piece and collect some fairies on the right if you’d like. Walk left a screen and then exit this cave to the south.
Jump off the ledge and walk to the left once again. Climb the long stairs and then head all the way to the right. Link will find a trio of boulders in the middle of this area. Right in the center, Link will find a blue warp portal. This portal will take Link to the Dark World.


Once Link arrives in the Dark World, he will change form, turning into a helpless rabbit. Walk directly to the west and Link will find an area on the ground that has two distinct diamond shape patterns. Stand on the one to the right and use the Magic Mirror that we just got from the Old Man. This will transport Link back to the Light World.
Grab Piece of Heart #11 that is nearby and then jump off the ledge to the north. Walk to the right and enter the building here, finally reaching the next dungeon, the Tower of Hera.


From the start of the dungeon, slash at the crystal switch to lower the blue blocks. Walk down the steps located on the left side of the room. There is a pair of Stalfos, as well as a Mini-Moldorm enemy found here. You can defeat the enemies if you’d like, but you really just need to get the small key. Either hit the crystal block or just snatch it up with the Boomerang. Walk back up the staircase.


Stand just north of the lowered blue blocks near the dungeon entrance. Use the Boomerang to hit the crystal switch, causing the orange blocks to lower. At the north end of the room, you can open the treasure chest found here to get the Dungeon Map. Avoid the Red Kodongos that shoot fire at you and use the small key to unlock the locked door at the northwest part of the room.


There is a series of flying tiles found within this room. Break them with your sword as they fly by until all of them have been revealed. Slash the crystal switch to lower the blue blocks and then head right a screen.


Hit the crystal switch to lower the orange blocks and then head down a screen. Defeat the enemies in this room if you’d like to make things easier. Pull out your Lamp and light the four torches in this room, causing a treasure chest to appear. Open it up to get the Big Key!
Walk back up a screen and make sure the orange blocks are raised before heading left. Hit the switch to raise the blue blocks and then head up the staircase. Make your way to the southeast corner of the room and head up the staircase found here.


Be careful not to fall down the holes here, as they will take you back to the previous floor. Defeat the three Hardhat Beetles and head left through the door that opens. This room will be slightly different, depending on which blocks are lowered. In either case, step on the stars on the floor to change where the holes are in the room. When you have a clear path, head up through the locked door.
Make your way through this room, stepping on stars if need be. On the right side, be sure that the crystal switch is red and the blue blocks are up before heading up the staircase.


Lift the pots here and defeat the Mini-Moldorms that are in your way. In the center of the room, open up the treasure chest to get the Compass. Make your way to the northwest corner of the room and head up the staircase.
Step on the floor star that is on the left side of the room to change the orientation of the holes. A small isolated hole will appear near the north-central portion of the room. Stand directly north of this hole and fall down to drop to the floor below. Walk up and open the treasure chest to get the dungeon item, the Moon Pearl! Walk down and make your way back to the northwest corner of the room, heading back up the stairs.
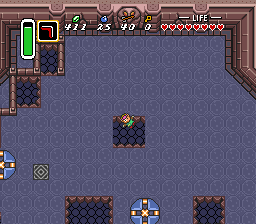
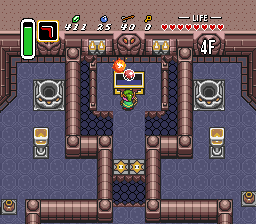
Walk to the northwest corner of the room and you’ll find a series of holes. If you fall down the northern most hole, Link will fall down a number of rooms, falling into the large pots located on each floor. At the very bottom, Link will find himself in a small fairy pond, so be sure to capture any fairies if you need to. Step into the warp portal to return to the higher floor.


At the east end of the room, there is a series of pots surrounded by the lowered orange blocks. Each of these blocks has a recovery heart underneath and can be useful for recovering health if you have trouble during the boss battle. Once you are ready, climb the steps at the northeast corner of the room to reach the boss chamber.
The dungeon boss comes in the form of Moldorm. Once you are ready to battle it, leap off the ledge at the south end of the room to enter the arena. Moldorm is a large worm-like creature that moves rapidly along the floor. While Moldorm itself is not much of a threat to Link, the surrounding ledges are what can cause Link the most trouble. If Moldorm bumps Link off the edge of the platform, Link will fall down to the previous floor.


Moldorms weakness is its tail. When Link gets an open shot, he should strike Moldorm with a sword slash. Link can use the southern wall as somewhat of a safety net, as if Moldorm bumps Link into that wall, he will not fall of the ledge. Another good strategy is that Link can use the Pegasus Boots to dash right through Moldorm, striking its tail along the way. After five sword slashes, Moldorm will start moving significantly faster around the room. One more sword slash, and Moldorm will be defeated.


After Moldorm has been defeated, collect the Heart Container to increase your health to nine full heart containers. Grab the Pendant of Wisdom and you’ll soon be transported outside of the dungeon.


 Madden NFL 13 Achievements / Trophies Guide
 Guide: Training The Ultimate Pokémon In Omega Ruby & Alpha Sapphire
 Majora’s Mask Walkthrough – Collection –
  World of Tanks and Wargaming in 2016
 A Link to the Past Walkthrough – Eastern Palace –