After completing the Forbidden Woods, there are a few goodies for us to collect here at the Forest Haven, as well as TONS of new stuff we can find along the Great Sea. Nothing in section 8.1 is required at all, so if you’d like to skip ahead in the main quest, just jump to section 8.2. If you’d like to follow along, we will be getting SEVEN pieces of heart, FOUR treasure charts, the magic meter upgrade, the submarine chart, and other minor goodies.
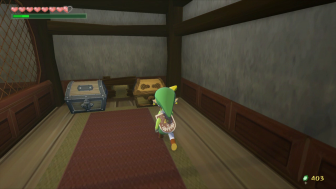
Back inside of the Forest Haven, Link can enter Hollo’s Potion Shop. Inside, Link will meet Hollo, one of the few Korok’s that did not leave the forest. Link can speak with Hollo and if he shows him some Boko Baba Seeds, Hollo will jump over to his mixing pot and give Link some blue potion! Link will need to have an empty bottle in order to get this potion. Blue potion replenishes both life and energy.

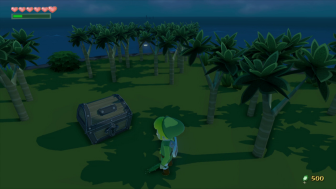
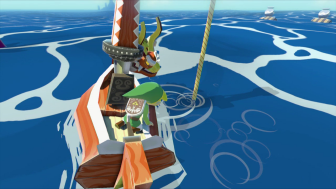
Back near the Deku Tree, use the boko bulbs to climb near the top of the Forest Haven. Exit the Forest Haven in the same direction as if you were heading back to the Forbidden Woods. Play the Wind’s Requiem and shift the wind so that it is blowing to the southeast. Use the Deku Leaf and soar over to the distant island. Open the treasure chest here to get Treasure Chart # 3.
Return to Beedle’s shop near the entrance to the Forest Haven. We will need at least two Hyoi Pears in order to get some optional items in this section. It’s a good idea to buy at least two of them, and perhaps a third one just in case. If you’d like to have the Fishman mark your map, you should also buy a handful of All-Purpose Bait.
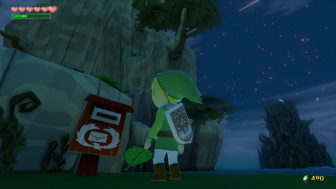
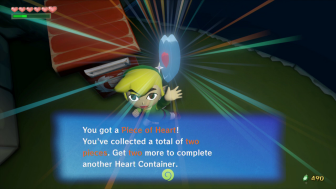
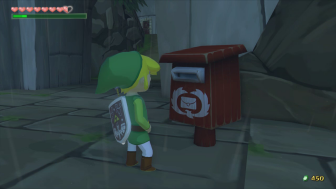
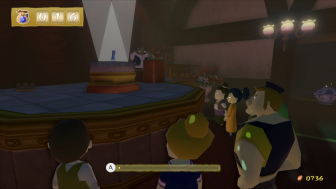
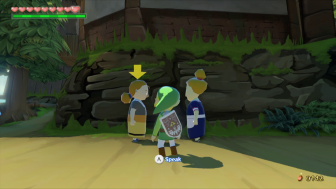
Nearby at the landing spot of the Forest Haven there is a Red Mailbox. It will be bouncing back and forth, signifying there is a letter. The letter is from Prince Komali’s father and he wants to thank Link for his deeds back at Dragon Roost Island. He explains how the postbox system works and will reward link with Piece of Heart #6.
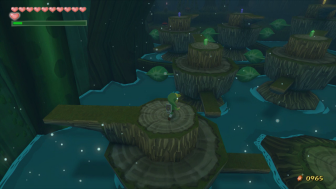
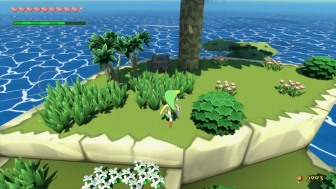
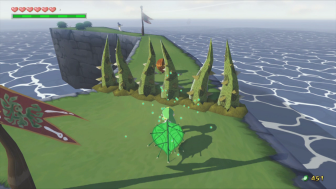
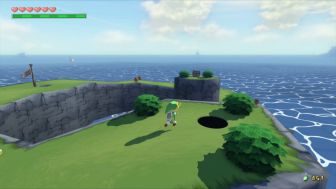
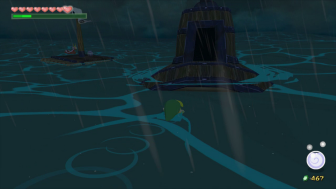
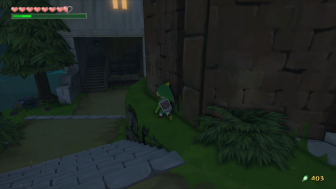
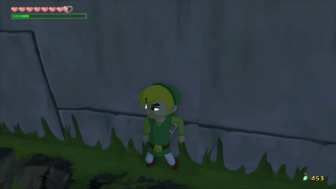
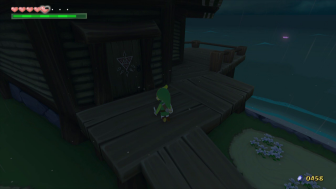
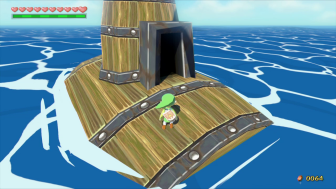
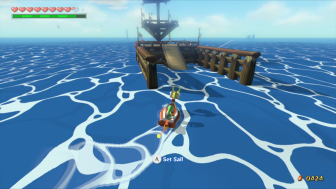
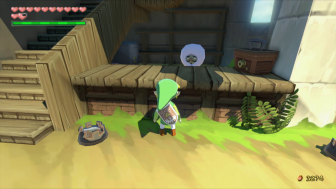
Our next destination is one screen to the east of the Forest Haven, over at the Cliff Plateau Isles. Sail on over to the smaller set of islands. Link can climb up the islands and jump from one to the next. At the last island, Link will find a small cavern, so go ahead and drop inside.
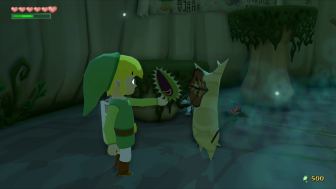
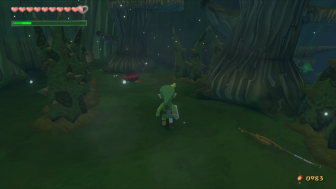
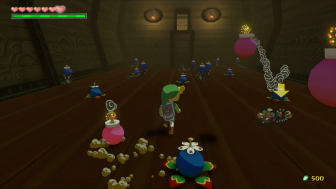
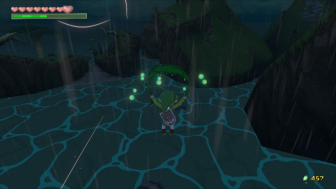
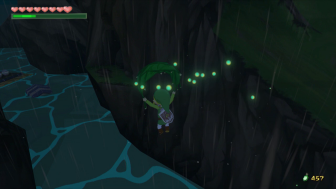
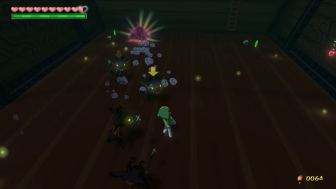
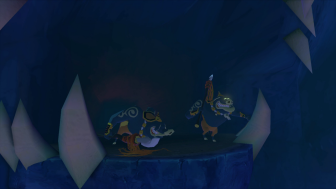
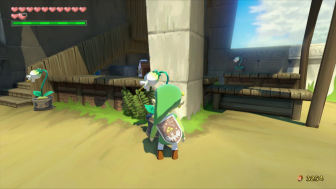
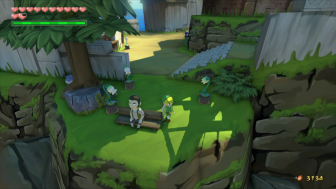
The first portion of this cavern has a series of platforms above the water, which each holding some rupees. Go ahead and gather up the rupees as you’d like. Once you reach the land area, be careful of all the vines that sprout up from the ground. Walk around and defeat all of the boka babas that are found here.
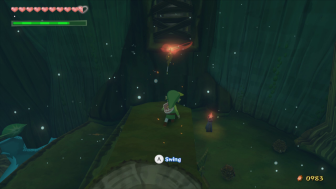
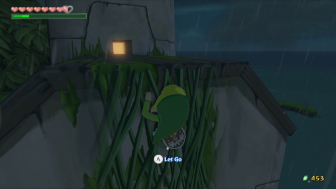
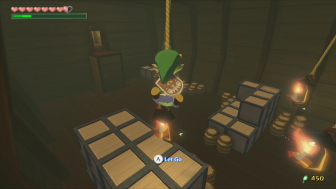
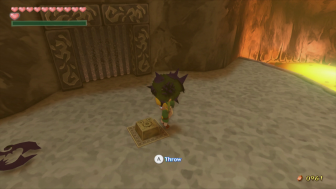
The last of the boko babas will leave a bulb that Link can use to shoot himself up to the higher platform. Before stepping into the bulb, grab one of the Boko Sticks that was left by a boko baba. Use the torch to light it on fire and then jump into the boko bulb. On the higher ledge, jump over to the next ledge and you’ll see some wooden planks in the distance. Toss the flaming boko stick at the sticks to light them on fire, revealing the pathway.

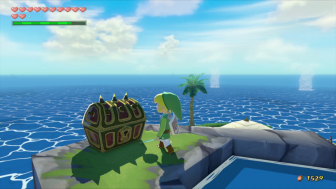
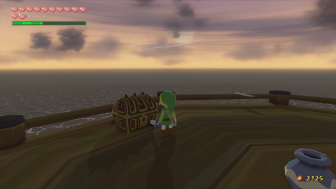
Before jumping on over, there is a treasure chest on the ground floor just below you that is surrounded by vines. You can fall right on top of the treasure chest and open it to get a Joy Pendant. Once you open the treasure chest, the vines will disappear.
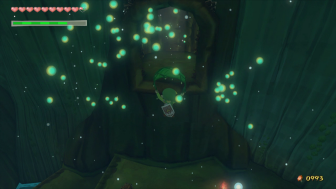
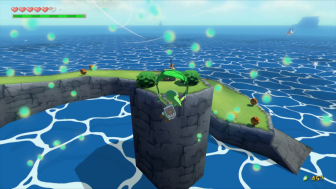
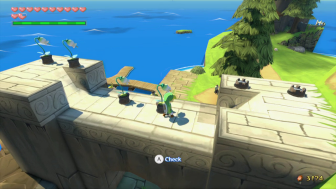
Get back up to the higher platform and soar on over using the Deku Leaf. Step into the portal to head back outside, now on top of the larger of the two islands. Climb even higher and open the treasure chest here to get Treasure Chart #25.
There is also a Blue ChuChu nearby, so be sure to snatch away the Blue Chu Jelly. These ChuChu can electrocute Link if he comes near, so keep your distance and stun him with your boomerang. Blue ChuChu leave behind rare Blue Chu Jelly, which later can be used at Windfall Island as another means of making Blue Potion.
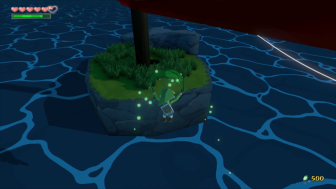
Our next destination is one square to the southeast of the Forest Haven. This area is known as the Five-Star Isles, and as its name suggests, there are five islands. Previously, we acquired Treasure Chart #33 and its corresponding Sunken Treasure is located here at Five-Star Isle. If you’ve opened the chart, you will see the glowing spot just southeast of Five-Star Isle. Sail on over and salvage the treasure chest to get Piece of Heart #7.
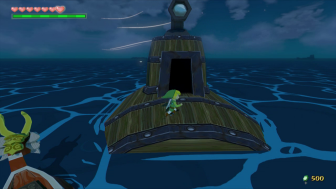
Link’s next destination is at a Submarine at the far southeastern corner of the region. As with most of the submarine locations, there are several Bokoblin just outside. You can use your grappling hook to steal Joy Pendant spoils from them.
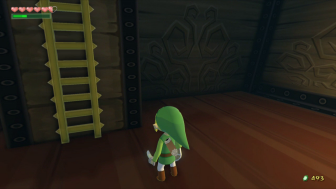
Walk inside the submarine and you’ll find a bunch of Keese and Bokoblin. Defeat them and a ladder will fall down. Climb up the ladder and open the treasure chest here to get Piece of Heart #8.
Jump back on the King of Red Lions and change the wind so that it is blowing to the west. One square region over, Link will find the Boating Course. Climb onto the larger island and climb to the very top. Change the wind direction so that it is blowing to the north and then use your Deku Leaf to soar over tot he other smaller island. Drop down the hole that is found here.

Inside you’ll be confronted by an endless amount of miniblins that occupy this area. Use your boomerang to hit the three switches that are in the room, causing a treasure chest to appear. Open up the chest to get the Submarine Chart. As its name suggests the submarine chart will allow Link to see the locations of all the submarines in the Overworld.
Change the wind direction to the west once again and sail over to the next square region. Here you will find the Angular Isles. During the Forbidden Woods, we acquired Treasure Chart #15. If you open up this treasure chart, a treasure is revealed just to the southwest of the larger Angular Isle. It is clearly seen by the glowing light that is emanating from the sea. Sail on over and use the Salvage Arm directly above the glowing light and Link will pull up a sunken treasure. Inside, Link will find Piece of Heart #9.
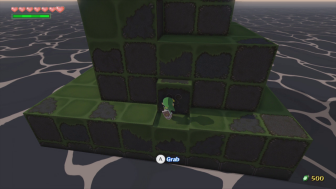
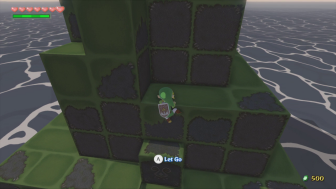
Jump off the boat and climb up the larger of the two islands. The island is made up of a series of blocks. From where you initially climb up, walk to the other side of the island and you’ll find a block that Link can pull out from the rest of the formation. Do so and then use it to climb up. Continue walking around the blocks and you’ll find a moveable block sticking out. Push it and it will fall to the area below. You can then pull it over two blocks so that you can use it to climb even higher. Climb up and pull one more moveable block.
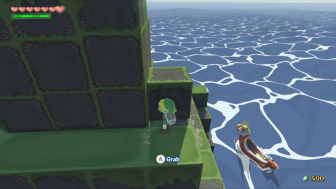
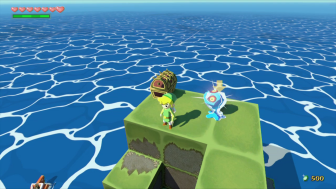
You’ll now be able to reach the top of this island, where a treasure chest can be found that contains Piece of Heart #10. However, we need to be careful as there is a rare Blue ChuChu found at the top of the island.
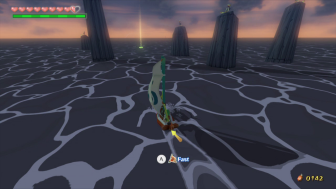
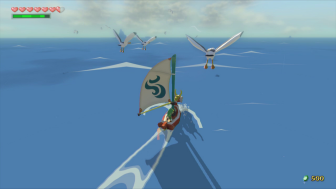
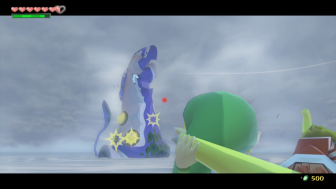
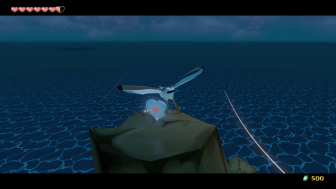
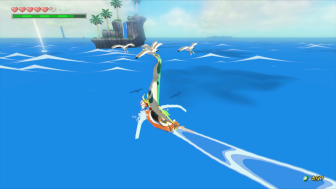
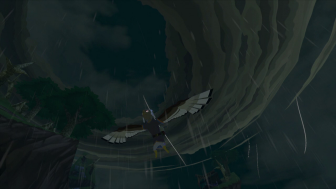
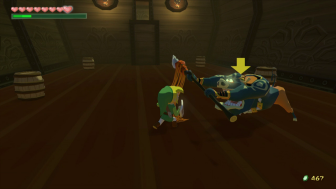
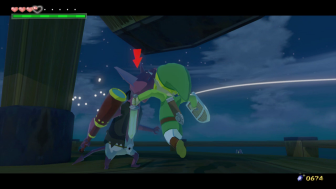
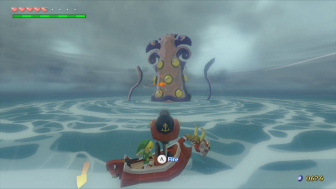
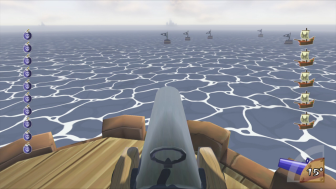
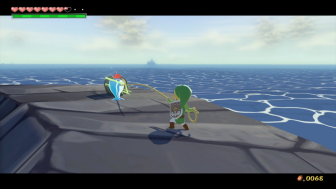
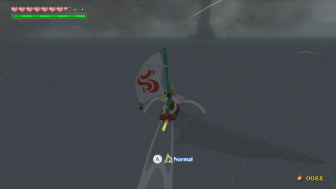
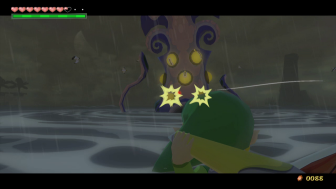
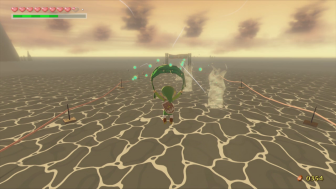
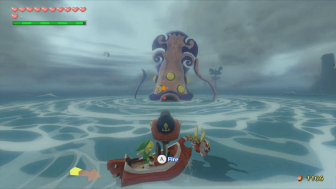
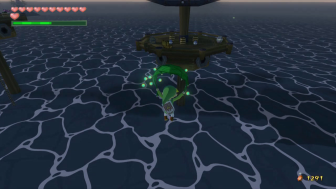
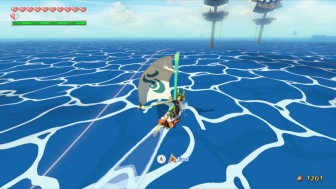
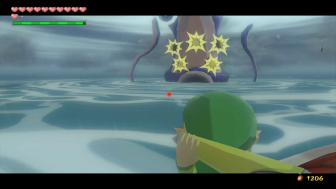
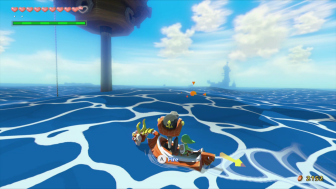
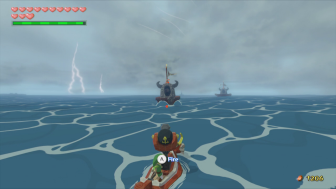
Jump back onto the King of Red Lions and sail westward one more screen. Sail towards the flock of seagulls that you see in the distance. Once you draw closer, a huge Big Octo will appear from the water. These massive creatures have large eyes attached to their bodies. Throughout the Great Sea, Link will encounter 4-eyed, 8-eyed, and 12-eyed Big Octos. This one, having only 4 eyes, is much easier to to defeat.
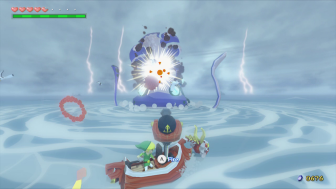
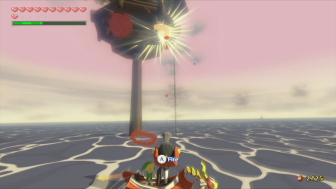
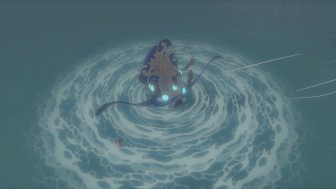
The boat will automatically move around the Big Octo. Use the boomerang to target the eyes and then hit them. With the boomerang, each eye will take three hits to kill. Once Link has hit all four eyes three times a piece, the Big Octo will be defeated.
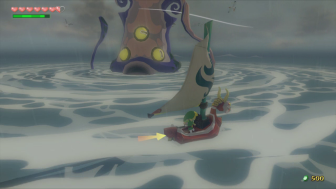
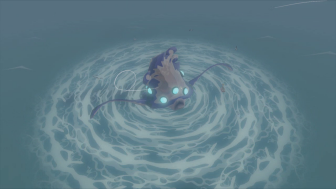
After defeating the Big Octo, a Great Fairy will appear and thanks you for defeating the Big Octo. As a reward for your work, the Great Fairy will award Link with the Magic Meter Upgrade. This will double the amount of magic that Link can hold at a given time.

Jump back on the boat and sail westward one more square region, this time arriving at Headstone Island. Before landing on the actual island, sail to the north where Link will find another submarine. Inside, Link will find a large amount of Rats that will carry bombs. Additionally, there are bombs on the ground, making for a rather unstable environment. Using the boomerang to hit the rats until all of them have been defeated. Climb the ladder that appears and open the treasure chest here to acquire Treasure Chart #14.
Now ride the King of Red Lions over to the main land of Headstone Islane. Use a Hyoi Pear to summon a seagull. Use the seagull to fly up to the top of Headstone Island where you will find the heart piece. Fly right into it and then cancel flight, in which Piece of Heart #11 will be delivered to Link.
Our next destination is two square regions to the west at the very southwest corner of the map. You’ll pass right by Outset Island, and it is a good spot to stock back up on All-Purpose Bait and Hyoi Pears if you need to. Continue sailing west until you reach Horseshoe Island.
The island is almost like a mini-golf course. When you climb onto the land, there are vines that appear, preventing you from continuing onward. There are large nuts just before the vines and if you look carefully, you will see holes in the distance beyond the vines. Link needs to pickup a nut and toss it at the hole in the distance. If it doesn’t land perfectly, Link can use the Deku Leaf to blow it further. If it completely misses, don’t worry, as the nut will regenerate after a few moments.
There are three holes all together and the first two are fairly straight forward. The third one is a bit trickier as the nut is set beyond the vines. Link will need to use his Deku Leaf to get it perfectly into the hole. Once all three have been completed, a treasure chest will appear on the tall island in the middle of this area. We’ll get this in just a moment.
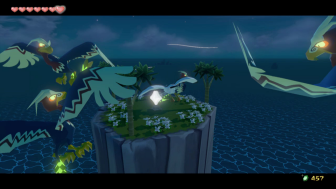
Continue walking to the top of this island and drop down the hole that is found here. Inside you will find a large winged Mothula, along with a pair of wingless mothulas. Defeat them and a treasure chest will appear that contains Treasure Chart #8.

Back outside, play the Wind’s Requiem and blow the wind to the east. Use the Deku Leaf and soar on over to the large island in the center of this region. Open the chest to acquire Treasure Chart #28.
Our next stop is one square region north over at Diamond Steppe Island. If you have beaten Salvatore’s Sinking Ships mini-game in less than 20 cannon shots, you will have acquired Treasure Chart #23. The sunken treasure is located just to the west of Diamond Steppe Island. Sail on over to the glowing spot in the sea and pull up the treasure to get Piece of Heart #12.
Continue northward along the sea to arrive at Needle Rock Isle. Walk onto the land and use a Hyoi Pear to summon a seagull. There is a switch that the seagull needs to hit at the very top of the island. However it is heavily guarded by kargaroks. The trick is to keep pressing ‘A’ and that usually will keep you safe from the kargaroks. Once the seagull hits the switch, flames that were surrounding a nearby treasure chest will disappear. Run on over and open the treasure chest to get Piece of Heart #13.

That now concludes all the optional quests for now. While there are still others near the northern portion of the Great Sea, Greatfish Isle is our next major destination and it is nearby.
After completing the Forest Haven, the next major destination is over at Greatfish Isle, near the western portion of the Great Sea. From the Forest Haven, Greatfish Isle is located squares to the west, and two squares north. (If you’ve been following the side quests from section 8.1, Greatfish Isle is located one screen north and one screen east of Needle Rock Isle). Once you draw near, you’ll see a huge cloud hanging over Greatfish Isle. Jabun is nowhere to be found, but Link and the King of Red Lions will get a surprise visit from Quill. After some chitchat, Quill will guide Link as to where his next destinations are: Windfall Island, followed by Outset Island.
Before leaving Greatfish, there is a Piece of Heart that we can collect. Jump into the water and swim over to the tall spirally piece of land located just to the southeast. Climb to the top of the island and then use the Wind’s Requiem to blow the wind to the northwest.
Use the Deku Leaf and fly towards the two major pieces of land to the northwest in which Link can land on. Just to the right of the two pieces of land, there is a small cove that Link can land on. Within this cove, there is a treasure chest that contains Piece of Heart #14.
Before making our way back to Windfall Island, there is one last pit stop to make. Jump onto the King of Red Lions and sail east for two square regions. You’ll reach the Six-Eye Reef square. To the southwest, Link will find another Submarine. Head inside and Link will do battle with three Moblins, one at a time. After all three have been defeated, climb the ladder that appears and open the treasure chest to get Piece of Heart #15.
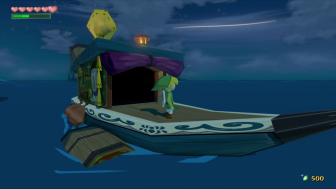
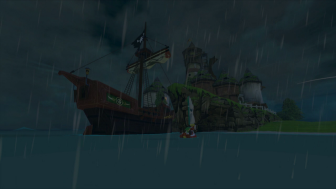
It’s now time to set sail for Windfall Island, which is located two screens to the north. Be sure to stay clear of the massive cyclone that is located just south of Windfall Island as that will throw you way off course. Swim onward to Windfall and you’ll find Tetra’s Pirate Ship.
On Windfall Island, there are a few optional things that we can accomplish at this point. Right away you should notice that the mailbox is jumping around. Walk on over and you’ll get a letter from Orca on Outset Island, which contains a red rupee attached.

Just past the archway near the mailbox, Link can enter the first house on the right to find the Chu Jelly Juice Shop. The potion shop owner is Doc Bandam and he’ll sell you some Red Potion for 20 rupees. Alternatively, Link can trade in 5 Red Chu Jelly and get a potion for free. Link can also trade in 15 Green Chu Jelly, and later 15 Blue Chu Jelly here, which will then make those potions available for 10 and 60 rupees, respectively.
Now that we have the Wind Waker and the Wind’s Requiem, there is another Treasure Chart for us to get here on the island. Walk up to near Salvatore’s Ship Shop. Instead of walking inside, walk around the shop, just to the left, and it will lead to a ladder. Climb the ladder and pull out the Wind Waker. Blow the wind to the north and then step on the switch, which will cause the large Windmill to start spinning.
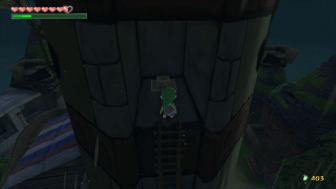
Jump back down and head inside of Salvatore’s mini-game building. Climb the steps on the left on the inside of the building and they’ll eventually lead to a door. Back outside, follow the pathway until you reach the windmill. Jump onto the Windmill and ride it until it is at its peak. Stay on it as it is coming back down and straight ahead you will see a isolated door on a higher ledge. Carefully jump on over to this door and head inside.
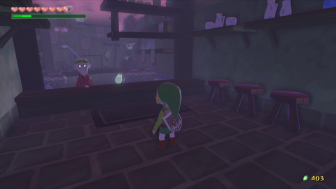
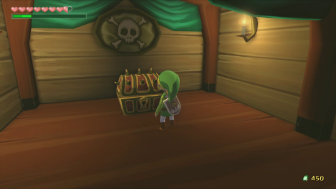
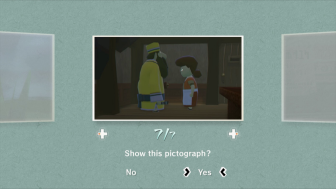
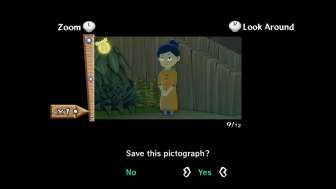
Inside Link will find two treasure chests. One of them contains a purple rupee, while the other contains Treasure Chart #29. Afterwards, crawl through the small hole to drop down into Lenzo’s shop. Lenzo is talking to a women here and if you get too close, they’ll notice you. Keep your distance and use your Pictobox to snap a picture of the two. This will be useful for a side quest in the future.
(Primarily GameCube Version). Leave Lenzo’s shop and then re-enter it. Link can walk up to Lenzo and show him the Forest Firefly that he caught at the Forest Haven. Lenzo will use this Firefly to upgrade Link’s Picto Box to the Deluxe Picto Box, which gives him the ability to take pictures in color. This is a requirement to complete the Nintendo Gallery. (In the Nintendo Wii U remake, this step is not necessary, as Link will automatically acquire the Deluxe Picto Box. Link can still give Lenzo the Firefly and it results in some humorous text, but Link also acquires a Joy Butterfly).
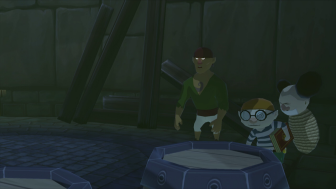
Our next destination is the only required thing we needed to do at Windfall Island. Make your way over to the Bomb Shop, located at the southwest portion of the island. It is the lone building on the higher land region. The front door is locked, so you’ll have to sneak around the back, to the left. Sidle against the wall to make your behind the shop. Once you are behind climb the vines on the wall and then crawl through the small passageway.
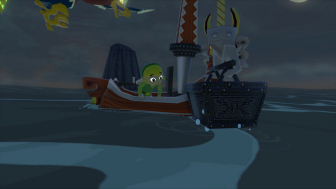
Inside, a cut-scene will take place showcasing the Pirates tying up the bomb shop owner and stealing some of his bombs. Pay careful attention to the conversation as towards the end, the group of Pirates will reveal their secret password. Note, the password is constantly changing and will differ from game to game. There are only a set amount of passwords, including ‘Treasure’ and ‘Schooner’.
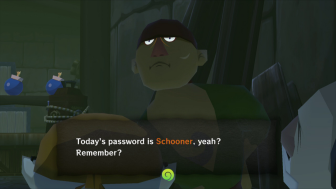
After the Pirates leave, exit the Bomb Shop. Make your way to the north end of the island, near the lone gravestone where the large Pirate Ship can be seen. Jump onto the pirate ship and try to enter the door. You will need to enter the password that was just given to you in the Bomb Shop. After properly doing so, go ahead and enter the ship.
Run downstairs and you’ll find Niko here once again. You’ll have to play another one of his games but there are a few differences this time. Link will need to swing from rope to rope, without landing on a platform. Furthermore, some of the ropes will move after a period of time. Lastly, there is a time limit that Link has to completing this quest. That all being said, it isn’t too difficult. Just swing from rope to the rope, starting on the right side, then to the left side, and back to the right, before making it across. Open the treasure chest on the other end of the room to get some Bombs!
After acquiring the bombs, Link will be contacted by Tetra via the Pirate’s Charm. Afterwards, exit the Pirate Ship and then jump back over to Windfall Island. You can run on over to the Mailbox and get another letter from Beedle. He mentions that he now has Bombs available for purchase and he also attaches Beedle’s Chart! This chart allows Link to see the location of all his ship locations. Run back over to the King of Red Lions. Our next destination is all the way back at Outset Island. Unfortunately, there is no quicker way to get there at this point, so take the long journey. If you’d like, you can give some All-Purpose Bait to the Fishman along the way to have your Great Sea Chart mapped out.
After making the long journey to Outset Island, the King of Red Lions suggests that you stop at the island and check up with your Grandma. There are actually a few goodies for us to get on the island as well. Before heading to Grandma’s House, there is a goody for us to collect at the Forest of Fairies.
Make your way up to the Forest of Fairies, just as you did at the very early portion of the game. Since the bridge had broken earlier in the quest, Link will need to use his Deku Lead to float over to the other side. First play the Wind’s Requiem and change the wind so that it is blowing to the west. Then climb up one of the nearby rocks and soar across the large gap using the Deku Leaf. Continue onward to enter the Forest of Fairies.
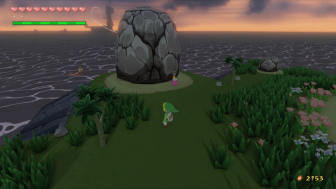
Inside the Forest of Fairies, some new enemies can now be found, including a Moblin and a Mothula. Defeat or ignore the enemies and make your way to the opposite side of the Forest where Link will find a large boulder next to a sign. Drop a bomb right next to the boulder to blow it up and then head down the hole.
Walk up to the Fairy Fountain and Link will meet up with the Great Fairy. After chatting with the Fairy, the fairy will reward Link with a wallet upgrade, now allowing Link to carry up to 500 rupees! After the Great Fairy disappear, be sure to use a bottle to snatch a fairy from the fairy pond as we’ll need that momentarily. Exit the fairy fountain and then continue out of the Forest of Fairies.
Our next destination is back at Grandma’s house, so head on over. On the way you will have gotten a letter in the Postbox from Beedle, signifying the opening of the special shop ship located at Rock Spire Island. This ship has rare items that we can now afford since we have just gotten the rupee upgrade.
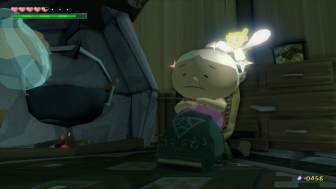
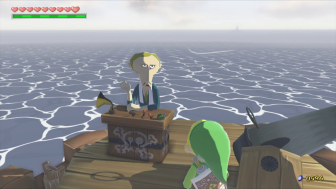
Make your way over to Grandma’s House and head inside. Here you will find Grandma sick and sitting next to the fireplace. Walk up to her and give her the fairy that you have stored in your bottle. This will heal her and she will reward link with some Elixir Soup. This soup works just like Blue Potion, restoring your life and magic, but it also doubles your attack power momentarily. The bottle has two full uses in it as well.
Our next stop is right next door at Orca’s house. You can speak with Orca and take part in his training game. Link will need to hit Orca at least 100 times without taking 3 hits. Doing so will grant Link with a Purple Rupee, worth 50 rupees. If Link hits Orca over 300 times, he will get an Orange Rupee, worth 100 rupees. The main prize though is if Link hits Orca over 500 times, which will result in Link acquiring Piece of Heart #16! Even after acquiring this item, Link can hit Orca an astounding 999 times to earn a Silver Rupee.
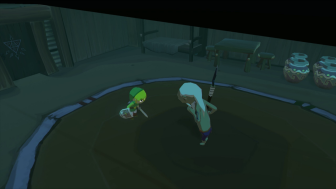
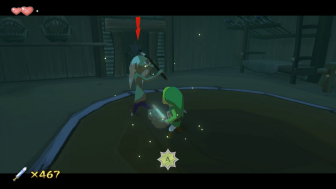
Orca’s sword training game is one of the most tedious heart pieces to get in the whole Zelda series. It’s not really worth getting the other prizes, so just stick with trying to get 500 hits and then stop. The trick here is don’t be too aggressive. Be patient and be sure to parry whenever Orca is about to attack. Link shouldn’t try to corner Orca, as this may lead to Link trying to Parry an attack and running into a wall on accident.
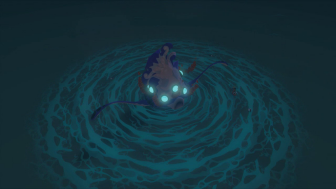
That is all the optional material we can do on the island, so head back to the King of Red Lions. Use the sail to make your way to the southwest part of the island where you will find a massive whirlwind. Use your cannon to shoot the rock against the wall. The trick to blowing up this rock is to start at the top of it and work your way down. Piece by piece it will begin to crumble and eventually, Link will be able to enter the cave that forms. You’ll have to do this within the given time limit as your boat will steadily get sucked into the water.
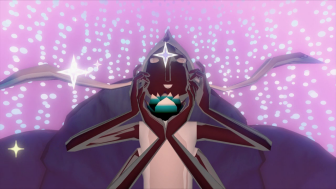
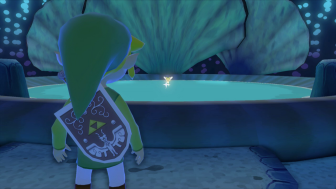
After crumbling the wall, the whirlwind that is sucking in the King of Red Lions will disappear and Link will sail right into the cave. Inside, Link will meet up with Jabun where he will collect the third and final pearl, Nayru’s Pearl!
With all three Pearl’s, Link is now ready to find the entrance to the next dungeon in the game. However, there are still tons of goodies to collect in the overworld. For more side quest material check out seciton 8.5, or to continue with the main quest, jump to section 8.6.
Nothing in this section is required and if you’d like to continue onward in the main quest, jump over to section 8.6. Additionally, we will be getting the Swift Sail in this chapter from Windfall Island. This makes traversing the Great Sea a lot faster and easier. You may choose to get that item first. As we journey back to Windfall Island, there are a ton of things we can do along the way.
The first stop is one square region north of Outset Island, located at Five-Eye Reef. To the east of Five-Eye Reef, there is a Platform sticking out of the water. These platforms can be found throughout the Great Sea and they give a variety of rewards. Most of them usually have turrets along the outside, as does this one. Link can use his bomb canon to shoot down these turrets. Sometimes Link will get rewards for defeating all the turrets. For this particular platform, that is not the case. Link can just climb on board where he’ll find a series of Bokoblins, which is a good place to snatch Joy Pendants. There is a small treasure chest, but it just contains a Golden Feather.

From Five-Eye Reef, Link can travel one screen north and one screen east to reach Stone Watcher Island. While there is nothing in particular to do at the actual island, just east of the island there is another Platform. This one however has a series of turrets surrounding it. Sail around the Platform and shoot down all of the turrets, using the canon. Once all have been defeated, a treasure chest will appear on the platform. Climb on up and you’ll find two treasure chests, one containing a red rupee, and the one that just appeared containing Piece of Heart #17.


Two square regions east of Stone Watcher Island is the Private Oasis where we can collected a Treasure Chart. Sail on over and then climb up towards the building. At the southeast part of the platform, there is a higher ledge nearby. It’s just a tad bit too far too jump to. So play the Wind’s Requiem and shift the wind to the southeast. Jump and use your Deku Leaf to reach the higher ledge. Run over and open the chets to get Treasure Chart #27.
Return back west two square regions. One screen to the north of Stone Watcher Island, Link will find Cyclops Reef. Just to the west of the island, another Platform can be seen in the water. This one is identical to the first one, consisting of a group of Bokoblins that when defeated, cause a treasure chest to appear with a Golden Feather.
Continue sailing north one more region and you’ll arrive at the area known as Tingle Island. At this location a giant 12-eyed Big Octo can be found by sailing towards the Seagulls, located at the northend end of the square region. When fighting the Big Octo, Link can use the canon to knock out an eye with a single bomb. Alternatively, he can use the Boomerang, in which it will take three hits to each eye to defeat the Big Octo.
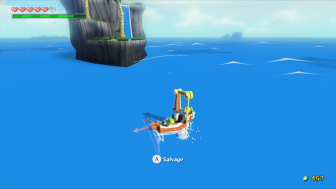
Once the Big Octo has been defeated, sail on over to the shining mark in the Great Sea. Ue your Salvage Arm to pull up the treasure containing Piece of Heart #18.
Continue sailing northward one square region to Spectacle Island. On the island, you will see the red mailbox bouncing around. Examine it to get a letter from Grandma containing a red rupee.
Climb to the top of the island and you’ll find Salvatore here. Speak to him and pay 50 rupees to play Salvatore’s Barrel Shoot mini-game. In this game Link must lineup the cannon and change the angle in which it shoots. The trick here is to always uses degrees in multiples of ‘5’ such as 15, 20, 25, 30, etc… Each time you play the game, the barrels are in different locations. After playing a few times, you should be able to recognize the actual distance of the canons.
For winning the first round Salvatore will reward Link with Piece of Heart #19. After winning, Link can play a second time to win Treasure Chart #17. Every subsequent time Link wins the game, he will be rewarded with an orange rupee.
Our next destination is one screen north over at Northern Fairy Island. Before going to the actual island, sail to the western portion of the square region where you will find a submarine. Defeat the bokoblins if you’d like for some joy pendants and then head inside. Drop down below and defeat all of the moblins. Once they are all defeated, climb back up and use the ropes to swing across to get to the the side of the room. It is very reminiscent of Niko’s second mini-game on the Pirate Ship. Once you reach the other side, open the treasure chest to get Treasure Chart #22.
Sail on over to Northern Fairy Island, located in the south central portion of the square region. Drop down into the fairy fountain located at the center of the island. Walk over to the Fairy and the Great Fairy will upgrade your wallet to the largest wallet, now capable of holding 5000 rupees!
We now want to set sail for Windfall Island, one square region southeast of Northern Fairy Island.
On Windfall Island there are a number of things we can do. Our first stop is over at the lone gravestone near where the Pirate Ship was located. Run on over and you’ll find a man dancing next to the gravestone. Speak to him and then pull out the Wind Waker. This will trigger him to remember the proper rhythm. Use the Wind Waker and play the song, Right Left, and Down. Successfully doing so will allow Link to learn the Song of Passing! This song allows Link to change Day to Night and vice versa almost whenever he pleases.
Our next stop is here at the Auction House. Run over to the mailbox and then right by the archway. The Auction House is the second building on the right. However, the auction is only available at night time, so play the Song of Passing before entering.
Inside of the auction house walk over and speak with Zunari to trigger the start of the auction. You will likely need oveer 800 rupees in order to get all the notable items at the auction. If you don’t have enough rupees at the moment, no worries as we’ll be getting tons of rupees later in this chapter. However, we want to get the Swift Sail now if at all possible to make things easier later in the chapter.
The room quickly fills with residents of Windfall Island. There are five total items that will be for auction but only four of them are worthwhile. Treasure Chart #18, which starts at 5 Treasure Chart #38, which starts at 60 rupees, Piece of Heart #20, which starts at 80 rupees, and the Swift Sail, which starts at 100 rupees. The fifth auction item is a Joy Pendant, which starts off at 40 rupees.
The amount of rupees that each item sells for is a bit random. However there are strategies to assure that Link comes away with the winning bid. During the auction, there is a meter at the bottom of the screen. It moves slowly, but you can tap ‘A’ to speed it up. Once the meter is full, Link can submit a bid amount. The trick is not too bid too early in the auction. The auction runs for 1 full minute and there will two notes stating that the auction is almost over, followed by a 5-second warning.
You shouldn’t press ‘A’ to advance your meter until late in the auction. After the second warning, build it up, and near the 5-second warning, max it out so that you can place a bid. Whatever the bid price is at, if Link bids an amount that is over 10% of the current bid, all of the other participants in the auction will be stunned for almost 15 seconds. If Link bids 20% more than the top auction price, they will be stunned even longer. Towards the end of the auction, make such a bid and it will assure that Link wins.
After each auction, you can leave the building and re-enter to trigger a new auction. It will likely take more than 800 rupees to win all four of the notable prizes. It’s not worth spending rupees on the Joy Pendant, so if that item comes up, you can just exit the auction.
At this point in the quest it is not essential to get all the items from the Auction House. However, the Swift Sail in particular will make travel on the Great Sea a lot easier. We’ll be getting a ton of rupees later in this section, so if you don’t have the rupees, you can come back to the Auction House shortly.
Play the Song of Passing to make it daylight once again. Walk to the area of Windfall near Zunari’s Shop where we first got the Sail. There are two women gossiping to one another here. Speak to them twice and they’ll mention that they think Lenzo might have a girlfriend. After hearing that, pull out the Deluxe Picto Box and show them the photo of Lenzo that we took earlier in section 8.3. After hearing that the rumors aren’t true, they’ll thank Link and give him Treasure Chart #24.
We can also use the Deluxe Pictograph to obtain another Piece of Heart on Windfall Island. Walk over to Linda in front of Salvatore’s Game Shop and speak to Linda a few times. She will ask you to take a pictograph of her and to include her whole body. Take the pictograph and find Anton, one of the guys walking around Windfall Island. He starts off each day walking down the ramp near the Gravestone, then walks through the archway, up the stairs, and turns and heads towards Linda. He is dressed in a green shirt with a striped blue and white shirt underneath. Show him this pictograph and he will talk about asking Linda out on a date. Play the song of passing two times to skip to the next day.
Head over to Zunari’s shop and walk up the stairs next to it to enter the Cafe. Speak with Linda and she will give you Piece of Heart #21, mentioning that they are now seeing each other.

Another optional quest takes place on Windfall Island during the night time. Play the Song of Passing a number of times and each time, glance towards the sky. You may need to use the Deluxe Picto Box in order to look directly above you, because of the camera angles. When it is a full moon outside, use the Deluxe Picto Box to snap a picture of the moon.
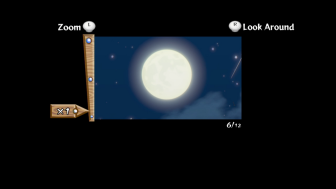
Play the Song of Passing to return to daytime. Walk passed the archway and you’ll see a man sitting on the steps next to the auction house. Speak to him a few times and say that you completely understand him. He tasks you with getting a picture of a pale, perfectly round thing. Luckily, we just did that. Show him the picture of the full moon that you just captured. As a reward, he will give Link Treasure Chart #31.
Our next stop is over at Mrs. Marie’s classroom, located at the top of Windfall Island, directly across of Salvatore’s mini-game. Walk up to Mrs. Marie and show her a Joy Pendant. She loves jewelry and will reward Link with 1 rupee. Speak with her again and show her some more Joy Pendants. If Link has 20 Joy Pendants, Mrs. Marie will give Link the Cabana Deed, allowing Link to access to the Cabana at the Private Oasis. If Link shows her a total of 40 Joy Pendants, she will award him with Treasure Chart #45. (In the GameCube version, she awards Link with the Hero’s Charm.)
We now need to get some additional rupees along the Great Sea, as well as a ton of other goodies. Return to the King of Red Lions and sale northeast one square region. Here you will arrive at Crescent Moon Island. Just to the southwest of Crescent Moon Island, there is a Sunken Treasure that corresponds to Treasure Chart #11. Be sure to open it and then sale on over. Salvage the sunken treasure to get Piece of Heart #22.
Sail over to the actual island and make your way over to the treasure chest. Be sure to snatch the blue chu jelly from the two Blue ChuChus that appears. Open the treasure chest to acquire Treasure Chart #10.

Continuing sailing to the northeast, where you will find a Submarine. Inside you will find a miniblin on the ground level. Jump down and defeat the miniblin and a ton of other miniblins will attack you. Defeat them and the various torches in the room will light up. Once all torches have lit up, climb the ladder and open the treasure chest to get Treasure Chest #9.
Our next destination is just to the east at Seven-Star Isles. At the southwest portion of this region, there is a group of seagulls. Sail on over and this will trigger a battle with a 12-eyed Big Octo. Battle the Big Octo just as before and Link will be rewarded with Piece of Heart #23.
While we are in the area, we can pickup a nearby Sunken Treasure here on Seven-Star Isles. (Note: this Sunken Treasure is only available in the Nintendo Wii U version).
-Treasure Chart #45 – Seven-Star Isles (North of Dragon Roost Island) – 200 Rupees
For this next quest, you will need to have acquired 20 Golden Feathers. These were abundant in the Forbidden Woods as both Peahats and Mothulas always have these as spoils. If you don’t quite have 20, you can return there at a later time, or you can snatch them from Kargaroks that are nearby. Sail on over and land back at Dragon Roost Island. Climb back up to where most of the Rito reside.

Climb to the second floor and speak with the Rito guard that is standing in front of the Chieftains room. He wants Golden Feathers so he can give them to his girlfriend. Offer to give him 20 of them and the Rito will reward Link with an Orange Rupee. Furthermore, in the near future, Link will be getting a letter in the mail from the guards girlfriend that contains Piece of Heart #24.

Return to the King of Red Lions and sail to the east. Our next destination is over at the Flight Control Platform located right in the middle of the square region. Climb onto the platform and speak with the Rito that is in front of the ladder. Pay the 10 rupees to get on top of the platform.
Before you begin, play the Wind’s Requiem and blow the wind to the northwest. You want to run and jump off the platform, using your Deku Leaf to soar across the sea. Use the cyclones that are in the water to shoot yourself higher up. If Link can successfully make it to the distant flag, he will be rewarded with with a Piece of Heart #25. Don’t mind the first cyclone as it is too close. The second cyclone is the one that matters most. You want to leap off the ledge just when that cyclone starts to move from left to right. Just hold straight and don’t stray from left to right. Hitting the one cyclone should give Link enough momentum to make it across the flag.
Next, travel just southeast of Dragon Roost Island to Star Belt Archipelago. Sail on over and to the east of the actual islands there is a platform for Link to climb. Defeat the enemies and open the treasure chest here to get Treasure Chart #44.
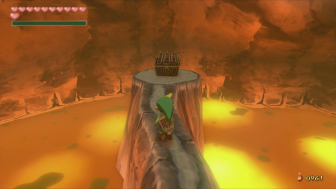
Next, travel just south of Dragon Roost Island to Fire Mountain. While we cannot do anything at the actually island yet, there is a Big Octo location southeast of the Island. Sail on over to the seagulls and you can battle against the 8-eyed Big Octo. After defeating the Big Octo, Link can salvage the treasure to get an Orange Rupee.ward is an Orange Rupee.
Our next point of interest is at Eastern Fairy Island, located one square region southwest of Dragon Roost Island. Sail on over to the island and use a bomb to blowup the boulder that blocks the cavern. Drop down and speak with the Great Fairy. She will give Link the first bomb upgrade, which allows Link to hold up to 60 bombs.

Our next stop is at Bomb Island, located three square regions south of Dragon Roost Island. However, there are a few Sunken Treasures in the area that we can collect along the way.
-Treasure Chart #03 – Eastern Fairy Island (Southwest of Dragon Roost Island) – 200 Rupees
-Treasure Chart #14 – Tower of the Gods (South of Eastern Fairy Island) – 200 Rupees
-Treasure Chart #27 – Star Belt Archipelago (Southeast of Dragon Roost Island) – 200 Rupees
-Treasure Chart #34 – Eastern Triangle Island (Two South of Dragon Roost Island) – 200 Rupees
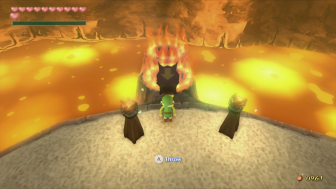
Once you arrive at Bomb Island, use a Bomb to blow up the large boulder, revealing an underground cavern. Drop down into the cavern and you’ll find a locked door. If you step on the switch nearby it will open, but it will close as soon as you step off. Defeat the nearby Magtail and then place its body on the switch to hold it on. Walk on through to the next room.
To the right, flames block your pathway. Instead, run to the left and step on the switch here to lower the flames. Run back to the right and make your way to the large center platform.
There are two more Magtails that will appear in this area, along with two platforms on the sides that are covered with fire. The second fired covered platform on the right side, along with the fire covered platform on the left have switches that can be pressed down. Link will need to defeat the Magtails so they curl up in a ball. Then Link can throw the Magtails body onto the switches. Once both switches have been pressed, flames in the entire room will go out.
Run on over to the treasure chest that is in the distance and open it up to get Piece of Heart #26. Exit the cave and return to the King of Red Lions.
After completing the Bomb Island Cavern, there are several more sunken treasure we want to get. Most notably, the sunken treasure just south at the Forest Haven contains Piece of Heart #27. The other nearby sunken treasure contain extra rupees.
-Treasure Chart #31 – Forest Haven – Piece of Heart
-Treasure Chart #01 – Private Oasis (Northwest of Forest Haven) – 200 Rupees
-Treasure Chart #44 – Southern Triangle Island (West of Private Oasis) – 100 Rupees
-Treasure Chart #17 – Ice Ring Isle (West of Forest Haven) – 200 Rupees
Also at the Private Oasis, there is a Big Octo located to the northwest of the actual island. Sail on over to the seagulls and you can battle against the 8-eyed Big Octo. Link’s reward is an Orange Rupee.
Our next place of interest is two square regions west of the Forest Haven. This area is known as Southern Fairy Island. Before reaching the island there are a trio of platforms raised out from the Great Sea. Each of them have turrets around them that will shoot cannonballs towards Link. Use your bombs to blow up the turrets. In particular, if you blowup all the turrets on the southern platform and the northwestern platforms, two treasure chests will appear on the adjacent platform.
Climb up the southern platform and play the Wind’s requiem to shift the wind to the north. Use the Deku Lead to soar on over. Open the treasure chests here to get a skull necklace and Treasure Chart #40!
Jump back on the King of Red Lions and sail over to the main island. There are wooden planks blocking the entrance to the fairy fountain. Blow them up with a bomb and drop down to the cavern below. The Great Fairy found here will give Link his second Bomb upgrade, which now allows Link to carry 99 Bombs.

Our next destination is near Horseshoe Island. Along the way you’ll pass by Headstone Island and there is a Sunken Treasure for you to uncover, containing 200 rupees.
-Treasure Chart #40 – Headstone Island (East of Outset Island) – 200 Rupees
Just south of Horseshoe Island there are a pair of platforms. Use your bombs to eliminate the turrets and then climb either of the platforms. Defeat all the enemies and step on the floor switch to cause a treasure chest to appear on the opposite platform. Head on over and defeat the enemies on the other platform and step on another floor switch, causing a treasure chest to appear on the opposite platform.
The two treasure chests contain Treasure Chart #43 and a Golden Feather. Treasure Chart #43 corresponds to a sunken treasure located just to the east, over at Outset Island. This is one of many sunken treasure that we can collect as we head towards the northwest corner of the Great Sea. Most notably at the far western portion of the Great Sea at Three-Eye Reef, Link can salvage the sunken treasure from Treasure Chart #32, which contains Piece of Heart #28. This is one of the treasure charts won at the auction, so you may have yet to get this from Windfall Island. Also at Three-Eye Reef, there are five shiny locations just southeast of the island where Link can salvage five treasures, each containing a Purple Rupee.
Also at Diamond Steppe Island, there is a Big Octo located to the northwest of the actual island. Sail on over to the seagulls and you can battle against the 8-eyed Big Octo. Link’s reward is an Orange Rupee.
-Treasure Chart #09 – Horseshoe Island (West of Outset Island) – 200 Rupees
-Treasure Chart #43 – Outset Island – 100 Rupees
-Treasure Chart #28 – Needle Rock Isle (Two North of Horseshoe Island) – 200 Rupees
-Treasure Chart #32 – Three-Eye Reef (Three South of Forsaken Fortress) – Piece of Heart
-Treasure Chart #08 – Western Fairy Island (Two South of Forsaken Fortress) – 200 Rupees
Also along the way just to the east of Western Fairy Island, located two square regions south of the Forsaken Fortress, Link will find another platform. This one has a bunch of Bokoblins on it and contains a treasure chest that holds a Skull Necklace.
Treasure Chart #25 is located at the Forsaken Fortress, but the King of Red Lions won’t let you sail to that area quite yet. Our next destination is just east of the Forsaken Fortress, located at Star Island. On your way, you’ll see a platform within the Star Island region. There are some bokoblin on top and a treasure chest that contains a Golden Feather.
Once you arrive at Star Island, use a bomb to blowup the large boulder at the southwest part of the island. Inside you will face off with three Magtails. Defeat them and then a pair of Bokoblins will appear. After these guys are done away, a pair of Green Bokoblin will appear. Finally, a pair of Moblin will appear. Once you’ve completed the enemy gauntlet, a treasure chest will appear containing Piece of Heart #29.
There are even more Sunken Treasure Charts to collect in this area, so be sure to pick them up along your way. Now that we have quite a few rupees on hand, there are a few lingering things for us to do on Windfall Island, so sail on over.
-Treasure Chart #07 – Star Island (East of Forsaken Fortress) – 200 Rupees
-Treasure Chart #24 – Northern Fairy Island (Two East of Forsaken Fortress) – 200 Rupees
-Treasure Chart #29 – Mother and Child Isles (Southeast of Forsaken Fortress) – 200 Rupees
-Treasure Chart #22 – Spectacle Island (West of Windfall Island) – 200 Rupees
-Treasure Chart #10 – Tingle Island (Southwest of Windfall Island) – 200 Rupees
-Treasure Chart #18 – Windfall Island – 50 Rupees
Back on Windfall Island there is one quest we want to do. However, if you haven’t won all the items from the Auction House, we now have plenty of rupees to do so, so go on over and get those items. Play the Song of Passing to make it day time and make your way over to Zunari’s Shop.
Speak to Zunari and he talks about how his general store is struggling and asks you to be his partner in acquiring new merchandise. Keep talking to him and agree to do so, in which he will reward you with a Town Flower. This is actually the beginning of the Trading Sequence, but we’ll cover that at a later time period.
After getting the first Town Flower, Zunari will now sell items at his actual booth right next to where you are talking to him. Walk up and purchase two more Town Flowers. You will need to get a total of 14 of these flowers for this quest, but you can only hold three at a time. Right in front of Zunari’s Shop, there is a small pot holder. Select the Town Flower and place it in this location. You will need to keep buying Town Flowers and planting them throughout Windfall. Here are the 14 locations.
-In front of Zunari’s Shop x2
-Near the bench at the north end of town, next to Zunari’s Shop x3
-On top of the archway above the mailbox x6
-On the higher ledge just across from the Auction House x2
-Between the Auction House and the Potion Shop x1
Once you have planted all 14 of the Town Flowers listed above, walk over and speak to the man sitting on the bench near Zunari’s Stall. After talking to him a second time, he will thank you for decorating the island and he will present you with Piece of Heart #30.
Jump back onto the King of Red Lions and sail west two square regions and down one to reach Rock Spire Isle. Once you arrive at Rock Spire, climb onto the piece of land that slopes upward. There are a series of boulders that block your way. You’ll have to pull out a Bomb and time your throw so that it explodes right when it is near the boulder. After blowing up all three boulders, fall down into the cavern at the other end of the island.

Break the pot on the right side and pickup one of the Boko Sticks. Use the torch to light it on fire and then light up the two unlit torches in the room. This will trigger a bunch of Keese to come attacking you. Defeat all the nearby Keese, as well as all of the ones that are still hanging from the ceiling. Once all the keese are defeated open the treasure chest that appears to acquire Treasure Chart #37.
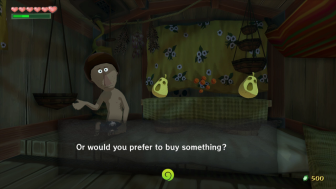
Back outside, sail around the island until you find Beedle’s Shop Ship. This particular shop ship is different and it is immediately indicated by the Helmet that Beedle wears. Inside there are three items for sale, an Empty Bottle for 500 Rupees, a Piece of Heart for 950 Rupees, and a Treasure Chart for 900 Rupees.

Since we just sailed around got a ton of Sunken Treasure, you should have enough rupees to get all three items. If not, you should at least pickup Piece of Heart #31 and Treasure Chart #4.
We have one last item to acquire here at Rock Spire Isle. Just south of the actual island, there are two ships sailing around the water. Use your bomb canon to hit each of the ships three times each. After three hits, both ships will sink, leaving a reward for you. Use the salvage arm to collect the two rewards, an orange rupee, and Piece of Heart #32.
Now that we just acquired two additional Treasure Charts, we can get their corresponding Sunken Treasure. The chart acquired from Beedle’s Shop Ship does lead to Piece of Heart #33.
-Treasure Chart #04 – Southern Fairy Island (Two West of Forest Haven) – Piece of Heart
-Treasure Chart #37 – Fire Mountain (South of Dragon Roost Island) – 200 Rupees
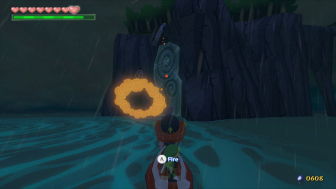
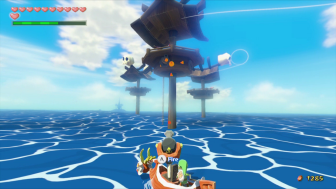
Now that we have all three Pearls it is time to make our way to the next dungeon. There are three locations marked on your map, Northern, Southern, and Eastern Triangle Islands. Link must sail over to each of the three islands, where he will find a statue.
At Northern Triangle Island, Link can place Din’s Pearl. At Eastern Triangle Island, Link can place Farore’s Pearl. At Southern Triangle Island, Link can place Nayru’s Pearl. Once all three pearls have been put in place, they will shoot a beam out at each other, raising the Tower of the Gods.

The King of Red Lions will sail over and pickup Link, just outside of the Tower. Once you are ready to tackle the next dungeon, sail onward and enter the Tower of the Gods.
 Skyward Sword Walkthrough – Skyview Temple –
  Skyward Sword Walkthrough – Ancient Cistern –
  Twilight Princess Walkthrough – In Search of the Sky –
 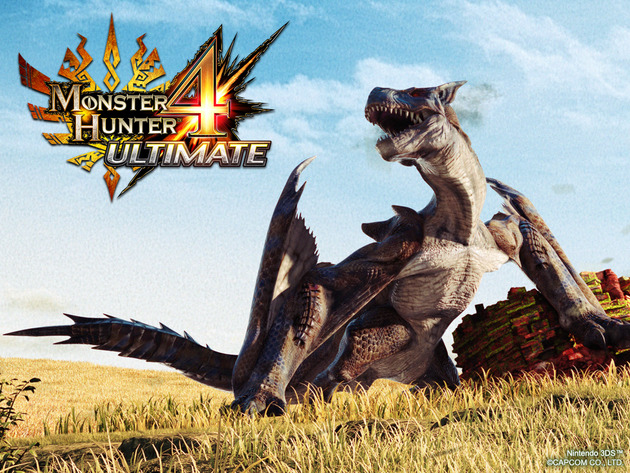 Guide: Getting The Most Out of Monster Hunter 4 Ultimate
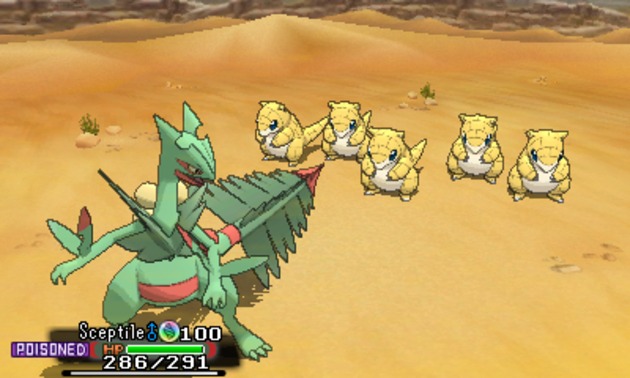 Guide: Training The Ultimate Pokémon In Omega Ruby & Alpha Sapphire