Enjoying music or movies via Netflix or YouTube is great, but what about when the Internet is down? Well if you set up a VLC media server, you’ll never have to go without entertainment again.
VLC Media Player, a program we’ve played around with and covered frequently here at MakeUseOf, is a powerful media server for a number of reasons. It allows you to host a large collection of videos or music files on one PC, and stream out that content to any PC or mobile device in your home.
After you’ve set up a streaming VLC media server using the guide below, you’ll be able to sit back and watch your favorite movies, music or even home videos from any device in the home that can accept streaming content.
Before I get into the approach I took to stream media from a VLC “server”, I want to make sure you’re aware of the many ways it’s possible to actually stream media using VLC. The option you choose really depends upon your tolerance for complexity.
– Using HTTP allows you to use a remote interface, but doesn’t always work unless you know precise protocol settings to use.
– Using VLC’s “stream” command from the file menu is the simplest approach, but requires configuring individual computer IP addresses you can stream to.
– Using VLM (VideoLAN Manager) and Video on Demand (VOD) via command line code is the fastest and simplest way to launch shared streams on a home network.
For the setup below, I chose VLM running on a Linux PC running Ubuntu, because it is ridiculously simple to set up on the server side with just a couple of quick command lines, and it’s similarly simple to set up on any client in the house, so long as you keep a note of the names of the media streams (see below).
If you don’t yet have a Linux PC to use as a “server” for streaming media, I highly recommend it. We have simple guides on how to set up such a PC running Linux. It’s worth your while because these PCs are lighter, faster, and stream much more seamlessly and reliably than anything else.
To make use of the VLM tool, you’ll need to access it using the VLC GUI. If your VLC installation doesn’t show the VLM tool like the screenshots below, then it may be time for you to upgrade your version of VLC to the latest one.
Open up VLC and select Tools, and then VLM Configuration.
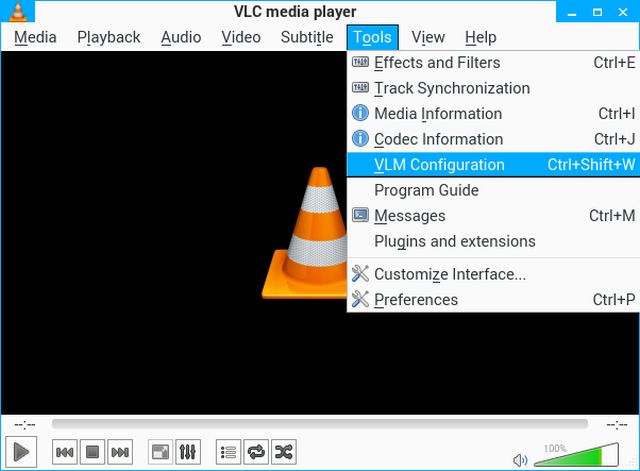
The VLM Configurator tool you see here makes it really simple to stream content. All you have to do is add “Input” media (MP4 video or MP3 audio files, for example), and add them to the Media Manager List with a specific name.
The name you give these streams is important, because it’s how you’re going to identify the stream when you set up your clients, so keep a record of the names you choose (and don’t include spaces when you create them!)
So, first select Video On Demand (VOD) from the first dropdown list. Then, assign this video or audio stream a simple name.
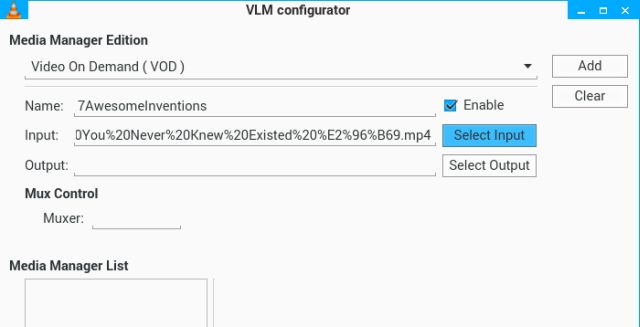
Finally, click on Input and choose the media file that you want to stream. Leave the Output and Muxer fields blank.
Click on Add, and you’ll see the stream with the assigned name show up in the Media Manager List.
When done adding all of them, you should have a list of media as shown here (ignore the Bcast items – I was messing around! They should all be VOD).
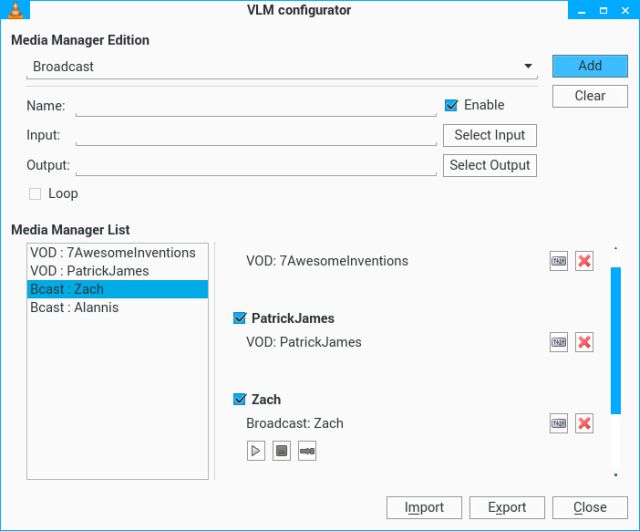
The idea here is to build up a substantial library of content. These could be video files that you downloaded off the Internet, your DVD movies you’ve saved to a hard drive, or any other video or audio file in any of the formats that VLC can handle (which is a LOT, by the way).
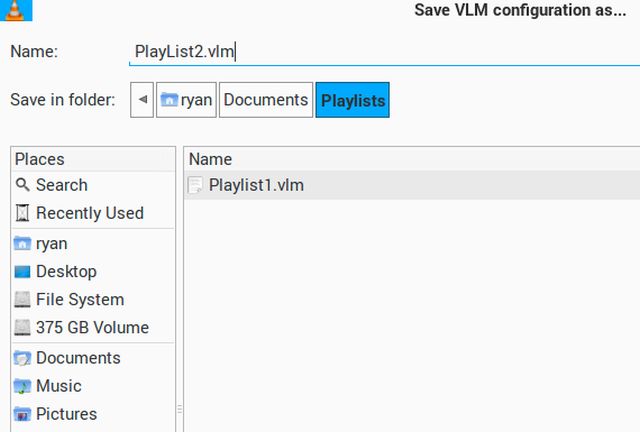
Once you’re done setting up your media library, it’s time to export the VLM configuration to file. This will allow you to launch your streaming service in the steps below – the .VLM file needs to exist.
Click on Export, and give the exported file a name you’ll remember. Save it to any directory, but I recommend something easy to remember like “Videos” or “Documents”.
Believe it or not, that’s all there is to setting up things in the VLC GUI.
You don’t have to worry about clicking on “Stream” for every single file you’ll be streaming, because in the commands below, you’ll be launching all of the media files you configured in VLM at once, saving lots of time.
Now we’re getting to the good part. The “Video on Demand” streams you just set up in the video manager will allow any PC to connect to any of those available streams at any time.
But first you need to launch all of those streams. Open up the command window by typing Ctrl-Alt-T.
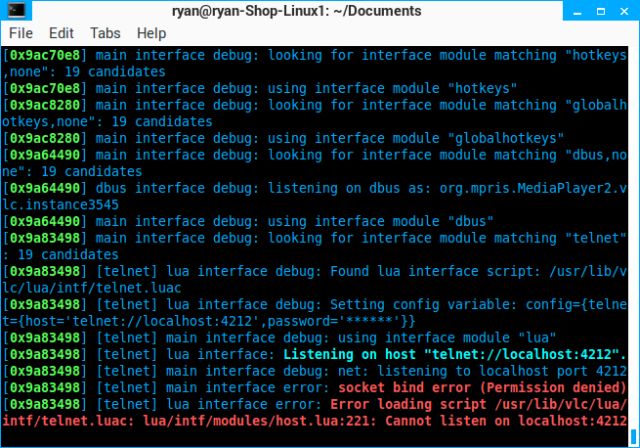
Start VLC with the following command line. Type it very, very carefully so that every space and every dash is exactly copied.
vlc -vvv --color -I telnet --telnet-password <password> --rtsp-host 0.0.0.0 --rtsp-port 5554 Replace <password>
This will scroll a whole bunch of text across the command window. And don’t worry too much about any errors (it might mean you clicked some settings in VLC that don’t quite work – the important pieces are set up correctly by the command you just launched.
This command enables telnet, but now you need to load the VLM configuration file you just created in order to properly launch the network streaming of all of the media files.
Open a new Terminal window using Ctrl-Alt-T, and navigate to the folder where your media files are stored (in my case it was my Documents folder). Once there, connect to your newly created telnet server on port 4212 (telnet default) using the command:
telnet localhost 4212Type in the password you created above to log in.
Then type:
load .vlmReplace
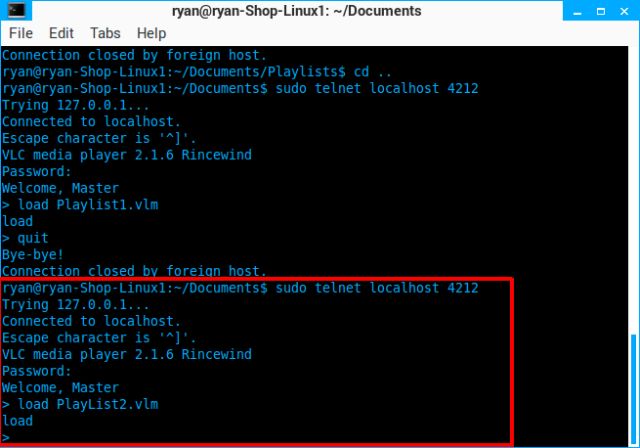
You should see the response of “load”.
That’s it, your media server is now fully configured with the entire list of media files you’ve loaded, now available for streaming using any client on the same network.
Let’s take a look at how you set those up the first time.
On each of your clients, whether it’s a Windows, Mac, or Linux PC, or even a mobile device, you will open the streams from your new VLC streaming server the same way.
You’ll only need to build up your client library of available media one time. After that, the GUI maintains a library of all of them, and you can watch them whenever you like.
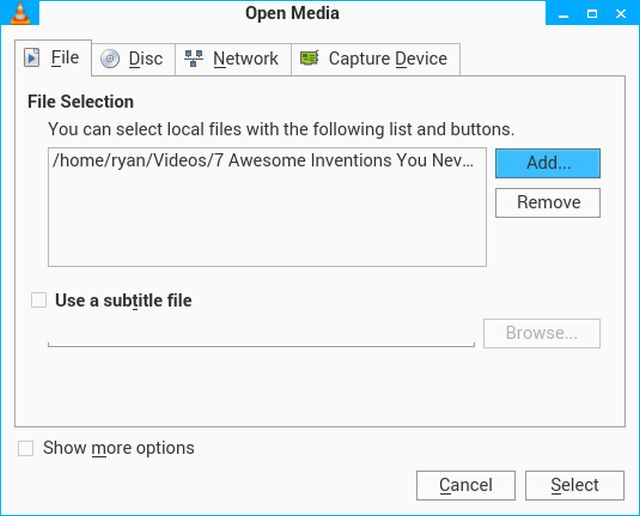
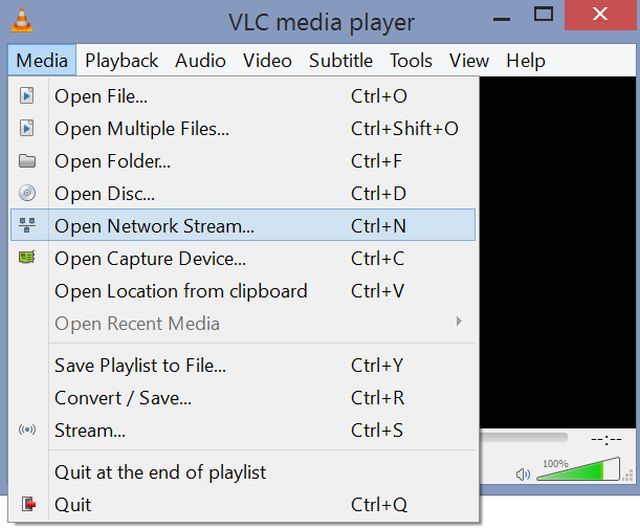
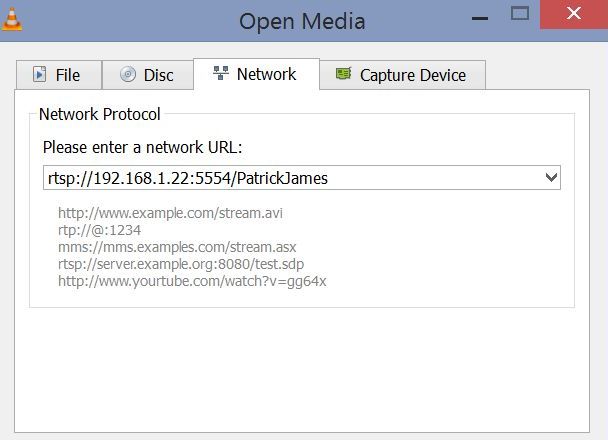
First, open the VLC GUI on the client device. Then, click on Media in the menu, and choose Open Network Stream…
In the Open Media window, fill in the field Please enter a network URL with the IP address of the server, including port 5554, and prefaced with “rtsp://”.
End the string with another slash and the name of the media (the name you gave it when you created your media streaming list above). So, for example, for the music video by Patrick James that I added a stream for, my string would look like this:
rtsp://192.168.1.22:5554/PatrickJames…where the name of the media that I gave it was “PatrickJames”.
If you don’t know the IP of your server, go back to your Linux machine, open a command prompt (Ctrl-Alt-T), and type “ifconfig”. That will provide the current IP address.
If your Linux server is not yet static, you may want to consider assigning a static IP address. Or, if that’s a bit too complicated, just use DynDNS like Justin does – it’s a very smart, simple solution that would actually let you even stream the media outside of your own home network.
This will launch the video or audio stream immediatly. To add more streams to your library, just go back to the VNC GUI, open another stream, and type the same URL with the new media name at the end. Repeat until you’ve loaded them all into that client’s library.
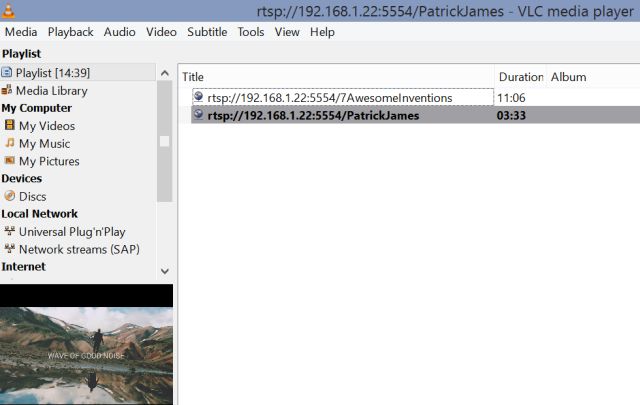
To view the library, just click the menu from the navigation bar at the bottom of the video player window, and a navigation panel will open to the left. The “Playlist” will show you all of the videos you’ve loaded to stream.
As you can see, the VLC player looks awesome, and many media streaming boxes, many of which we’ve discussed before here at MakeUseOf, used for watching Internet content on their TV these days also usually include a VLC streaming option. Just use the same URL there and you’re good to go.
Here’s the content from my Linux VLC streaming server playing on my Android using VLC for Android.
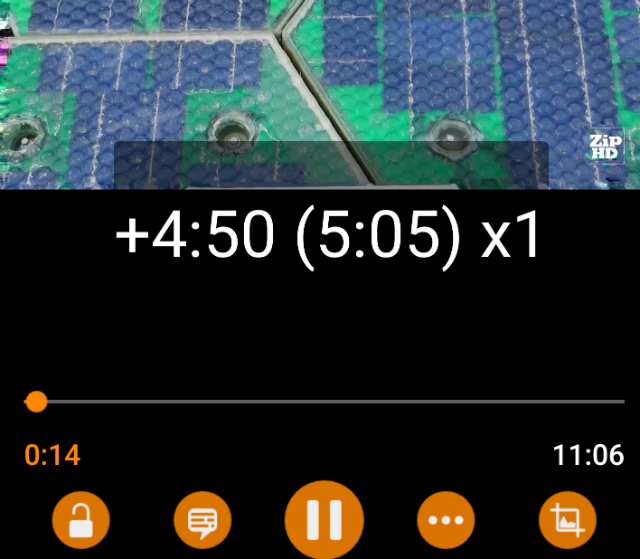
Since VLC is so commonplace across a variety of devices, you’re sure to have access to your growing library of media no matter what device you use, and from anywhere at all.
There area lot of media center solutions out there, like Plex and even your PS3. But few of them have such a powerful command-based solution that lets you stream all your personal, locally saved media in so few, simple steps.
Do you use VLC for your streaming needs? What features of VLC do you like the most? Share your own experiences and views in the comments section below. Let’s discuss streaming media on local networks!

 The London Heist Wiki – Everything you need to know about the game .
 MGS V: The Phantom Pain Legendary Gunsmiths Tips: Here's Why You Must Get Them As Early As Possible
 Win a Game of Your Choice for PS4 or Xbox One!
 Assassin's Creed Syndicate All Perks Guide: How To Unlock Them For Jacob and Evie
 The Best Vehicles in Watch Dogs