Fancy a $30 computer but not sure you want to take the risk? You’re not a cheapskate, you’re just being wise. And getting a good preview look at what you’re going to buy is pretty simple. Rather than buy a Raspberry Pi and be disappointed, why not try the QEMU emulator to get a feel for it first?
You’ve probably heard of emulation. It essentially enables us to run software on systems where it would otherwise be incompatible. Windows itself has emulation built in, in the form of compatibility mode.
Virtual machines are the default option these days for anyone wanting to try out a new operating system without upsetting their delicate digital life. VMware and VirtualBox are often recommended to anyone wanting to try Linux for the first time (our VirtualBox guide is particularly useful), for instance, or with a desire to access an older version of Windows. It’s even possible to run some older versions of Mac OS X in a virtual machine.
What virtual machines like VMware Player and VirtualBox have in common is that they create a virtualized hardware environment based on the 32-bit and 64-bit architecture. While this makes them ideal for other forms of OS emulation/virtualization, it means that any operating system that runs on ARM chipsets cannot be installed and tested.
This is where QEMU comes in. Because Quick EMUlator emulates ARM chipsets – such as that found in the Raspberry Pi – we can use it to create a virtualized Pi on our PC.
We have a couple of options open to us if we want to use QEMU. The first is by far away the easiest, and requires us to download this single QEMU package, which features everything we need to launch Raspbian in Windows.
If you fancy getting your fingers dirty, however, and have no qualms about digging out older versions of Raspbian (as you probably know, the latest version of Raspbian is Jessie), you might take a look at this guide, which shows you how to configure QEMU manually for emulation of Raspbian Wheezy (this solution also requires the ARM build of the Linux kernel). Note that this is a long, drawn out, error-prone method, and features several changes to configuration files. If this is your cup of tea, carry on!
For simplicity’s sake, we’re going to use the QEMU Raspbian package from Sourceforge, which you will find at sourceforge.net/projects/rpiqemuwindows. Once downloaded, unzip QEMU.zip to your HDD – perhaps to C:/QEMU – and open. Inside the qemu subfolder, you’ll find three files.
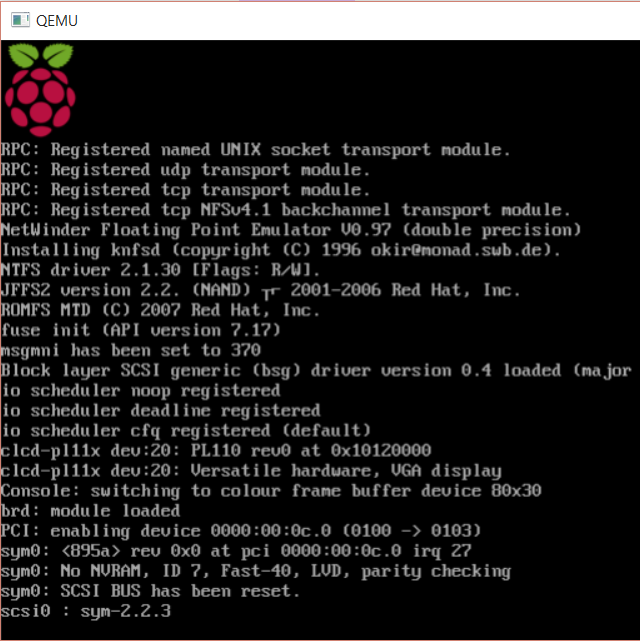
Double-click run.bat to get started. A virtualized Raspberry Pi will appear, with Raspbian Wheezy booting up. This may take a while to complete, but should go pretty much as illustrated in this video.
Once complete, Raspbian will boot straight into raspi-config, a configuration tool for the Raspberry Pi. It isn’t advisable to go over the top with the options on offer here, as this can lead to stability problems. In particular, avoid using the update option or using any of the usual Raspberry Pi update or upgrade instructions where possible.
Note that this configuration tool can be relaunched at any point from a command prompt using
sudo raspi-config
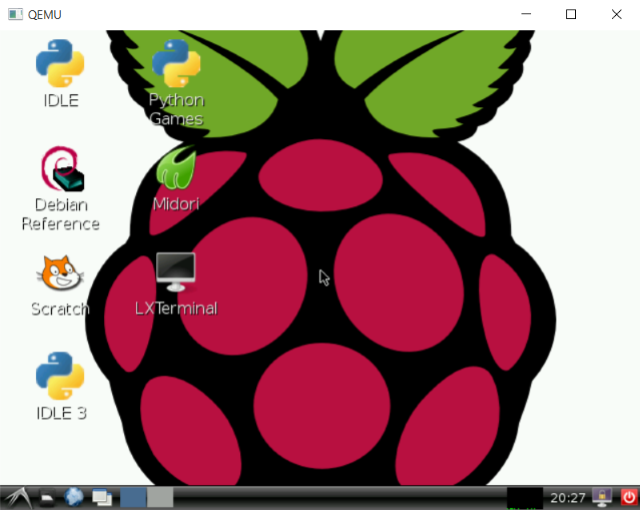
When you’re done, use the arrow keys to select Finish, then tap Enter. From here, you’ll be sent to the command line, where you can either try out some basic Linux commands (try ls to list the items in the current directory, for instance) or enter startx to launch the GUI.
Now you’re in control of the Raspbian desktop interface, where you’ll be able to gain familiarity with the various tools that come packaged with the Pi’s favored operating system, such as the basic building-block development tool for children, Scratch.
It’s time to have a play!
Raspberry Pi’s are extremely affordable, so why would anyone want to spend their time using an emulator?
Well, several reasons spring to mind. First, using QEMU to run a virtualized Raspberry Pi environment lets you try out Raspbian without all of the messing around that is involved with writing a disk image to SD. While NOOBs is a better approach, neither is a fast setup, so virtualization gives anyone wanting to dip a toe in the pie, as it were, a quick chance to do so.
Second, a virtual Raspberry Pi offers the chance to gauge how the various apps will run, as well as enable debugging and troubleshooting on your standard PC. This might be useful to children using Scratch or other development tools. Making screenshots on the Raspberry Pi is simple enough, but exporting them can be tricky – virtualization circumvents that. It’s also good practice to test a new operating system in a virtualized environment.
Finally, why do we do anything on a computer? Raspberry Pi fans love to play, and tinker, and this is just another way of looking at things. It may not feature a physical computer, but it can be a time saver, and a bit of a game changer in some scenarios. If you’re a Raspberry Pi owner, it’s certainly worth having access to QEMU – you never know when you might need a virtual Raspberry Pi running.
Have you tried a virtualized Raspberry Pi with QEMU? Did you run into any trouble with it? Tell us in the comments.


 Starbound Ultimate Survival Guide
 10 Ways Social Media Can Boost Your Career
 Piper - Fallout 4: recruit her as a Companion / Romance guide
 Destiny Guide: Engram Farming, Best Legendary and Rare Runs, and More
 2 Ways to Play Civilization On Android